
Dean Salmon 40077459. Mid-shaft fractures of the Femur Used in the emergency department to support...
14
THOMAS SPLINT Dean Salmon 40077459
-
Upload
grace-blankenship -
Category
Documents
-
view
213 -
download
0
Transcript of Dean Salmon 40077459. Mid-shaft fractures of the Femur Used in the emergency department to support...

THOMAS SPLINT
Dean Salmon40077459

Mid-shaft fractures of the Femur
Used in the emergency department to support the fracture and allow for easier mobilisation of the patient until surgery is performed
Used to realign the limb and reduce pain
Indications for use

Contraindications for the use of traction splint: Injury is close to the knee Injury to the knee Injury to the hip Injury to the pelvis Partial amputation or avulsion with bone separationDistal limb is connected only by marginal tissue. Lower leg or ankle injury
Contraindications
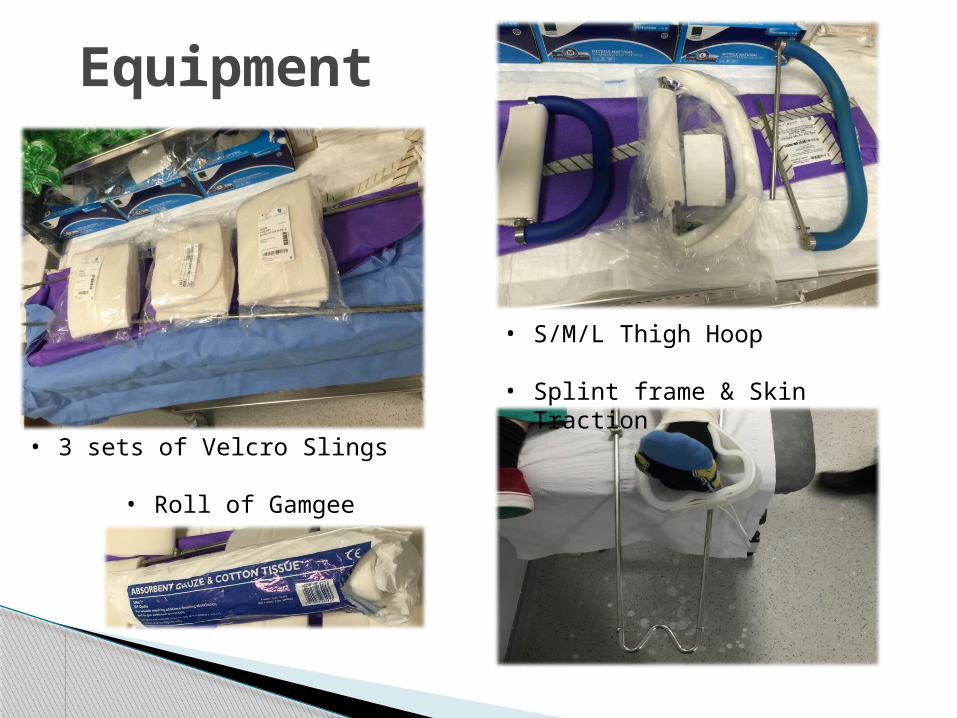
Equipment
• 3 sets of Velcro Slings
• Roll of Gamgee
• S/M/L Thigh Hoop
• Splint frame & Skin Traction
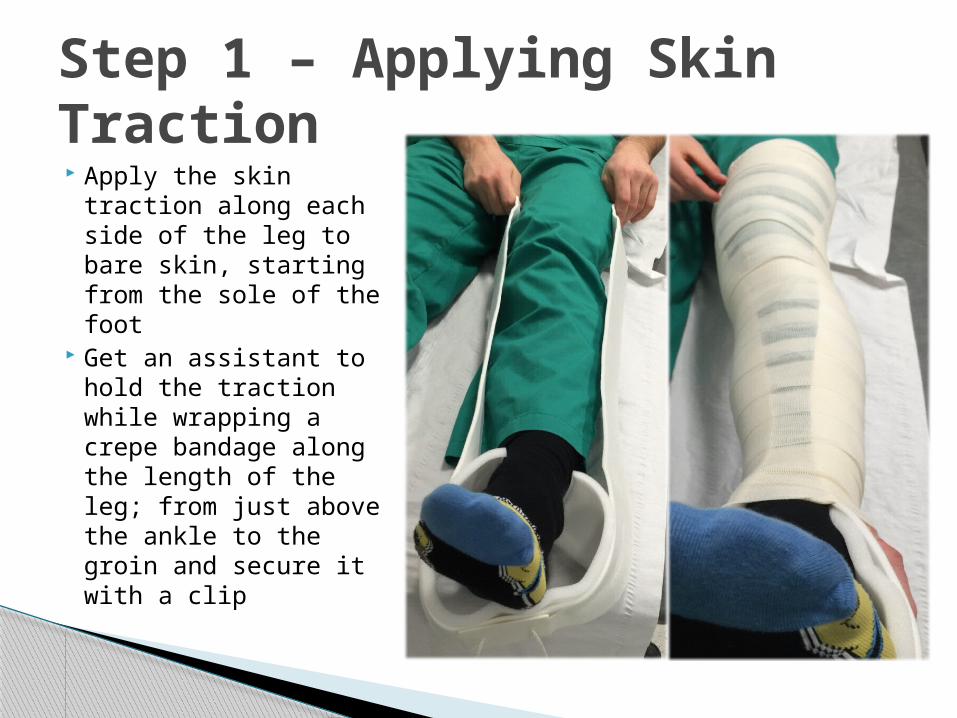
Apply the skin traction along each side of the leg to bare skin, starting from the sole of the foot
Get an assistant to hold the traction while wrapping a crepe bandage along the length of the leg; from just above the ankle to the groin and secure it with a clip
Step 1 – Applying Skin Traction
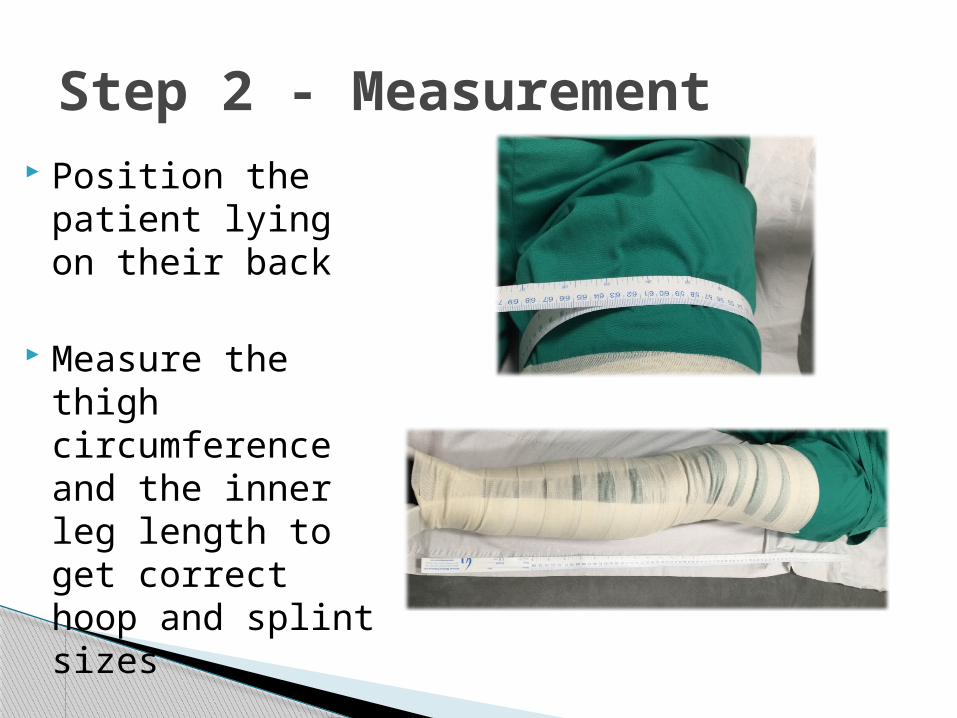
Position the patient lying on their back
Measure the thigh circumference and the inner leg length to get correct hoop and splint sizes
Step 2 - Measurement
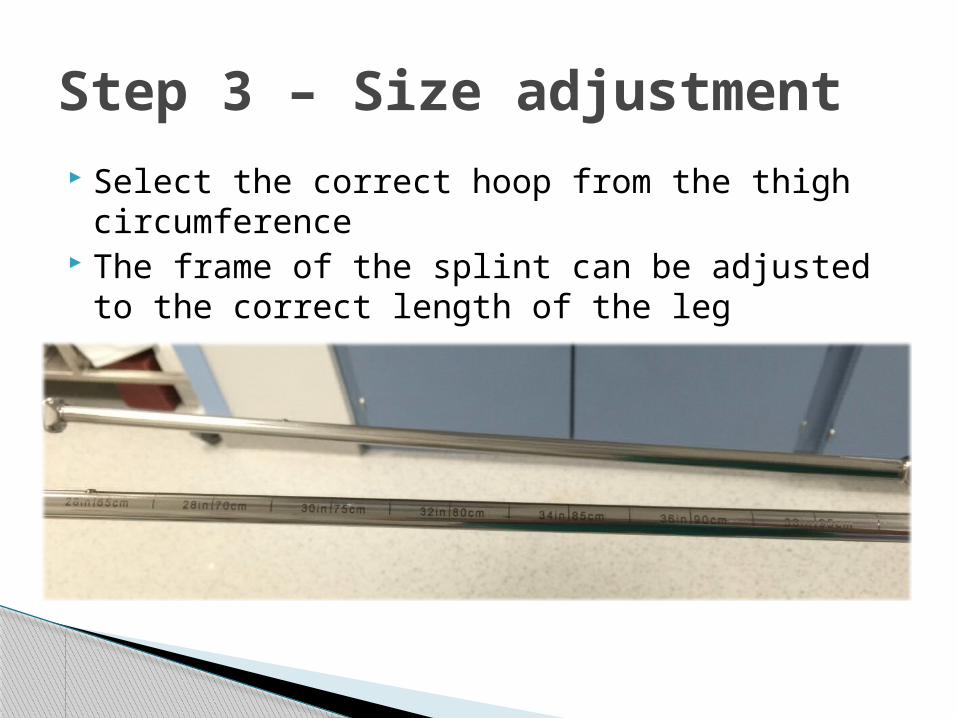
Select the correct hoop from the thigh circumference
The frame of the splint can be adjusted to the correct length of the leg
Step 3 – Size adjustment

When this is done attach the hoop to the frame by inserting the rods into the housings on each end of the tubes until a click is heard
The splint can then be adjusted for the right or left leg by extending the appropriate side to make an angle of 20-30 degrees
Step 3 – Size Adjustment
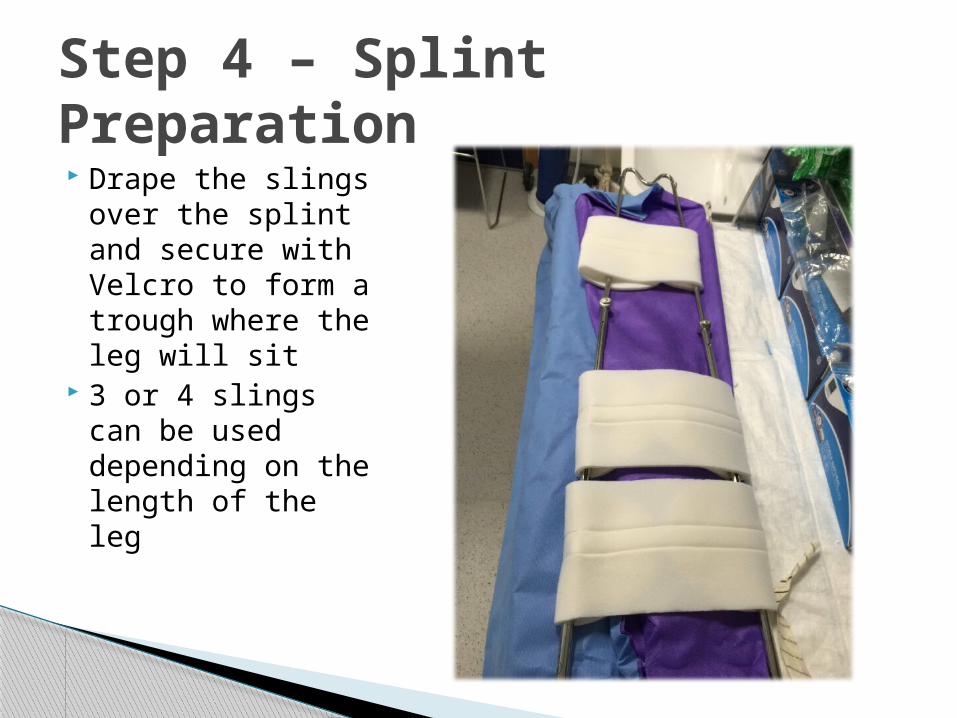
Drape the slings over the splint and secure with Velcro to form a trough where the leg will sit
3 or 4 slings can be used depending on the length of the leg
Step 4 – Splint Preparation
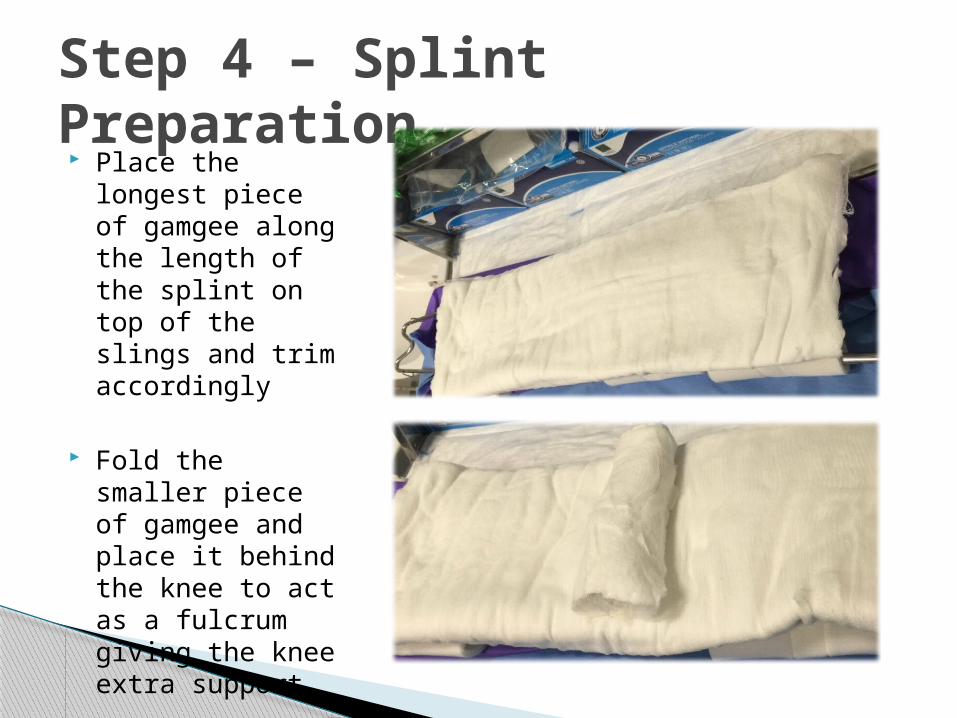
Place the longest piece of gamgee along the length of the splint on top of the slings and trim accordingly
Fold the smaller piece of gamgee and place it behind the knee to act as a fulcrum giving the knee extra support
Step 4 – Splint Preparation

Lift the leg and place the splint underneath with the hoop and strap reaching as far up as the ischeal tuberosity
Make sure there is adequate room beneath the foot in the splint to apply the traction system
Step 5 – Positioning the leg

The strings at the bottom should be tied into a reef knot and the excess slack should be taken up by the use of a windlass (using 3-4 lollipop sticks taped together)
Step 6 – Applying Traction

Raise the leg with a pillow whilst fully encasing the splint with a final layer of crepe bandages to secure the splint
A number of different pulley systems may then be considered to elevate the leg whilst lying in bed
Step 7 – Securing the Splint

There are a number of different pulley and cord systems which can be built over the bed to raise the leg up off the bed for additional support.
2 examples of these are shown
Additional Attachments