#DCSJ255 Deluxe Compact Cold press power juicer
17
Deluxe Compact Cold press power juicer Instruction Manual | Recipe Guide r e c i p e s i n s i d e ! #DCSJ255
Transcript of #DCSJ255 Deluxe Compact Cold press power juicer

Deluxe Compact Cold press power juicerInstruction Manual | Recipe Guide
recipesinside!
#DCSJ255
Dash
Deluxe Compact cold press power juicerImportant Safeguards..............................................................................4
Parts & Features.....................................................................................5-6
Setting Up Your Deluxe Cold Press Power Juicer.............................7-9
Using Your Deluxe Cold Press Power Juicer...................................11-13
Using Your Frozen Attachment..............................................................14
Cleaning & Maintenance...................................................................16-18
Tips & Tricks...............................................................................................19
Recipes.................................................................................................21-28
Customer Support..................................................................................30
Warranty....................................................................................................31
the das
h team!

IMPORTANT SAFEGUARDS
IMPORTANT SAFEGUARDS: PLEASE READ AND SAVE THIS INSTRUCTION AND CARE MANUAL.When using electrical appliances, basic safety precautions should be followed, including:
• Read all instructions before use.• Remove all bags and packaging from appliance
before use. • Only use the appliance on a stable, dry surface. • This appliance is not for use by children under
the age of 8, or by persons with a physical or sensory limitation, as well as mentally limited persons or persons with a lack of experience and knowledge. These persons should not operate the appliance without additional guidance and supervision.
• Children should not use or play with the appliance. Children should not be involved in cleaning and maintenance of the appliance unless they are older than 8 years old and are under adult supervision. Keep the appliance out of reach of children younger than 8 years old.
• This appliance is suitable to be used in a household environment such as: -Home or office kitchen. -Hotel or motel rooms and other residential settings. -Guest rooms or similar.
• ATTENTION: This appliance cannot be used with an external timer or a separate remote control.
• Before use, check if the voltage indicated on the appliance corresponds with the voltage of your power net.
• Do not let the cord hang on a hot surface or over the edge of a table or counter top.
• Never use the appliance when the cord or plug is damaged, after malfunction or when the appliance is damaged. In that case, take the appliance to the nearest qualified service center for check-up and repair.
• For maintenance other than cleaning, please contact StoreBound directly at 1-800-898-6970 from 7AM-7PM PT Monday-Friday or by email at [email protected].
• Close supervision is necessary when the appliance is used by or near children.
• StoreBound shall not accept liability for damages caused by improper use of the appliance.
• Improper use of the appliance can result in property damage or even in personal injury.
• Turn the appliance OFF, then unplug from the outlet when not in use, before assembling or disassembling parts and before cleaning. To unplug, grasp the plug and pull from the outlet. Never pull from the power cord.
• Never let the machine work for longer than 30 minutes at a time.
∙ 4 ∙ ∙ 5 ∙
Feed Tube
Cover with Opening and Sieve
PusherHopper
Axle
Juice Spout with Stopper
On/Off Switch
Motor Block
Juice Bowl
Auger
parts & features
Frozen Attachment (See page 14)
Pulp SpoutBack
Silicone Pressure Valve
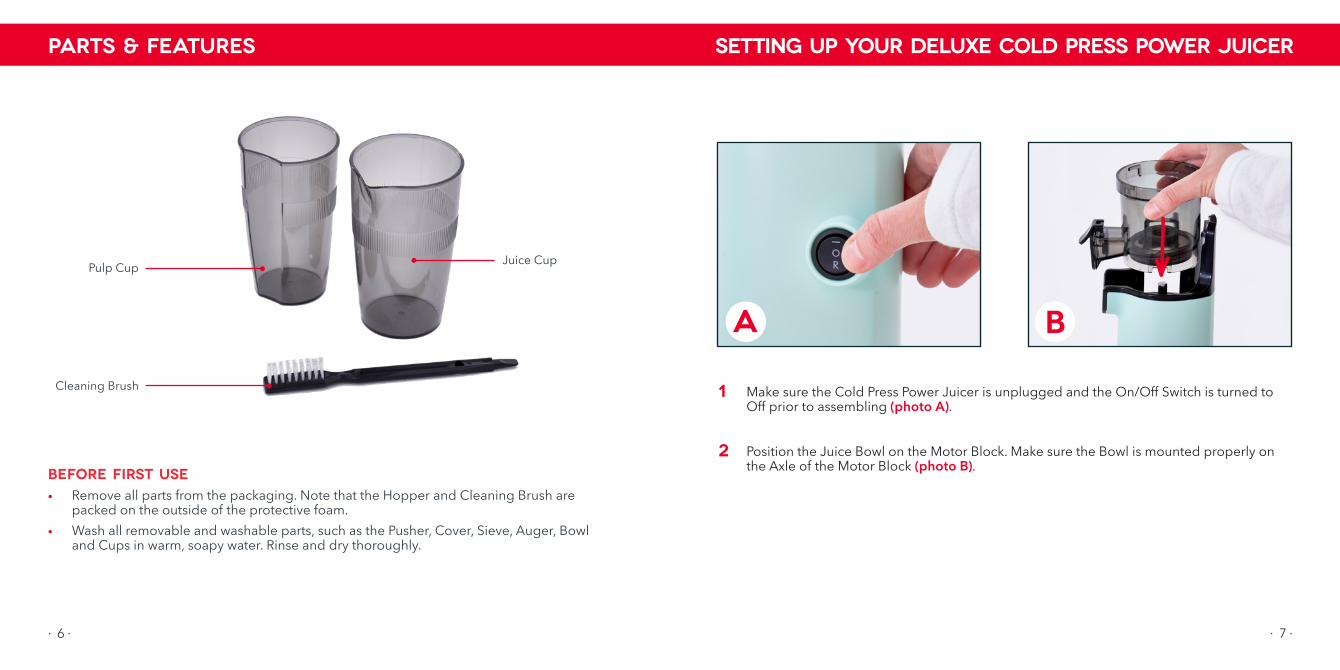
Cleaning Brush
Pulp Cup Juice Cup
parts & features Setting Up Your deluxe Cold Press Power Juicer
∙ 7 ∙
Position the Juice Bowl on the Motor Block. Make sure the Bowl is mounted properly on the Axle of the Motor Block (photo B).
2before first use• Remove all parts from the packaging. Note that the Hopper and Cleaning Brush are
packed on the outside of the protective foam.• Wash all removable and washable parts, such as the Pusher, Cover, Sieve, Auger, Bowl
and Cups in warm, soapy water. Rinse and dry thoroughly.
∙ 6 ∙
Make sure the Cold Press Power Juicer is unplugged and the On/Off Switch is turned to Off prior to assembling (photo A).
B
1
A

Using Your Compact Cold Pressed Juicer
Position the Cover on the Bowl and twist until the cover clicks shut. Make sure the arrow on the Cover aligns with the Lock icon on the lid (photo D). Note that the unit will not power on if the Cover is not locked into place.
4
Setting up Your deluxe Cold Press Power Juicer Setting Up Your deluxe Cold Press Power Juicer
∙ 8 ∙ ∙ 9 ∙
Push the Auger firmly into the center of the Bowl, making sure that it rests on the bottom (photo C).
C D
3 Position one cup under the Juice Spout and one cup under the Pulp Spout. The Juicer is now ready to use (photo E). The Hopper can be added to the tube of the Cover to hold more ingredients, if you wish (photo F).
E
5
F

∙ 10 ∙
veggie d
elight juice
on page 23!
CAUTION: Remove hard pits or seeds prior to pressing to prevent possible damage to the Auger. The peel and pits/seeds must be removed from oranges, lemons, grapefruit, and melons before use.
!
using Your deluxe Cold Press Power Juicer
∙ 11 ∙
Before using, make sure that the Juicer is turned Off and plug it in. Position the Cups underneath the Spouts (photo B). Clean fruit and vegetables you wish to juice. For best results, cut ingredients into 1-1.5” segments.
2
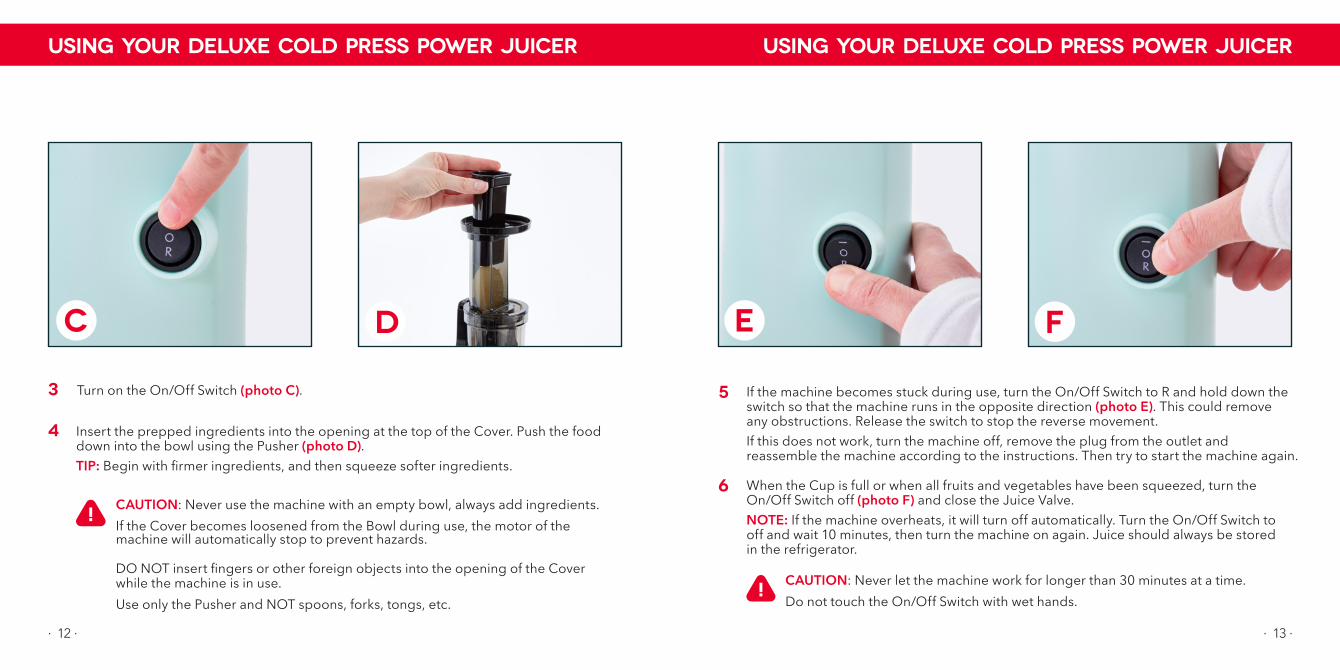
The On/Off Switch has 3 positions: On (I), Off (O), and Reverse (R) (photo A).
B
1
A
CAUTION: Never use the machine with an empty bowl, always add ingredients.If the Cover becomes loosened from the Bowl during use, the motor of the machine will automatically stop to prevent hazards.
DO NOT insert fingers or other foreign objects into the opening of the Cover while the machine is in use. Use only the Pusher and NOT spoons, forks, tongs, etc.
Using Your deluxe Cold Press Power Juicer using Your deluxe Cold Press Power Juicer
!
If the machine becomes stuck during use, turn the On/Off Switch to R and hold down the switch so that the machine runs in the opposite direction (photo E). This could remove any obstructions. Release the switch to stop the reverse movement. If this does not work, turn the machine off, remove the plug from the outlet and reassemble the machine according to the instructions. Then try to start the machine again.
When the Cup is full or when all fruits and vegetables have been squeezed, turn the On/Off Switch off (photo F) and close the Juice Valve.NOTE: If the machine overheats, it will turn off automatically. Turn the On/Off Switch to off and wait 10 minutes, then turn the machine on again. Juice should always be stored in the refrigerator.
CAUTION: Never let the machine work for longer than 30 minutes at a time. Do not touch the On/Off Switch with wet hands.
5
6
!
∙ 12 ∙ ∙ 13 ∙
Insert the prepped ingredients into the opening at the top of the Cover. Push the food down into the bowl using the Pusher (photo D).TIP: Begin with firmer ingredients, and then squeeze softer ingredients.
4
Turn on the On/Off Switch (photo C).
C D
3
E F
∙ 14 ∙ ∙ 15 ∙
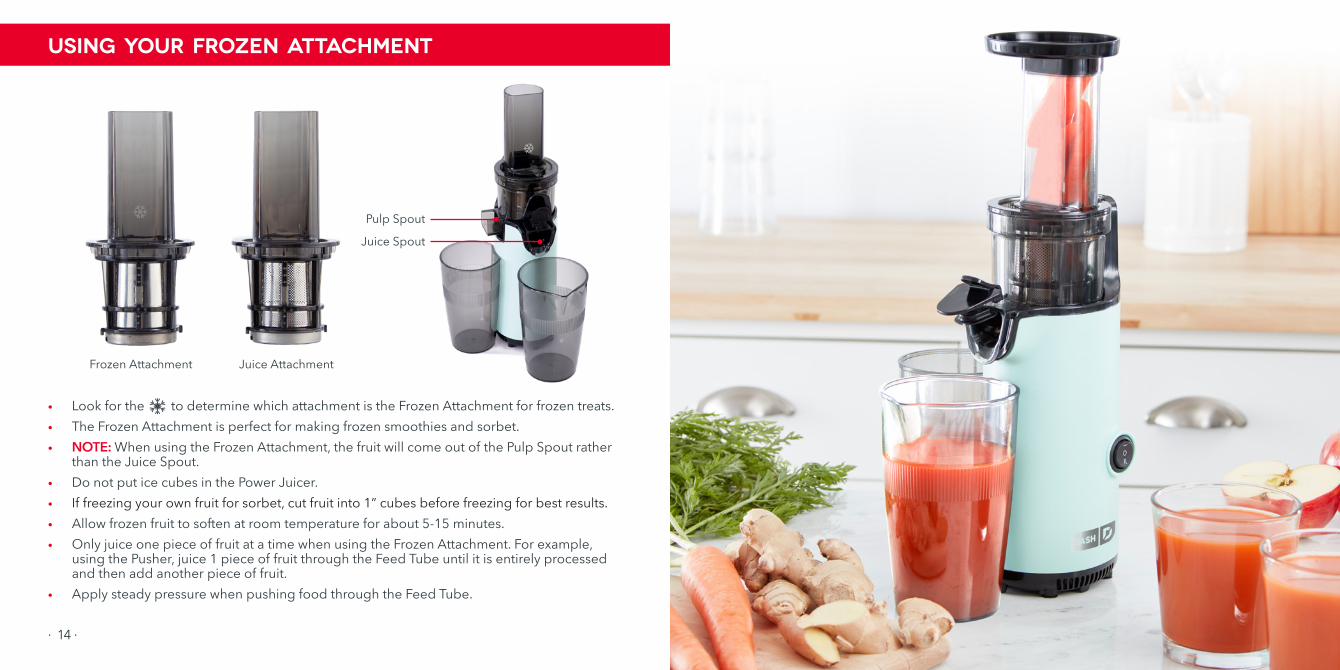
using your frozen attachment
• Look for the to determine which attachment is the Frozen Attachment for frozen treats.• The Frozen Attachment is perfect for making frozen smoothies and sorbet. • NOTE: When using the Frozen Attachment, the fruit will come out of the Pulp Spout rather
than the Juice Spout.• Do not put ice cubes in the Power Juicer. • If freezing your own fruit for sorbet, cut fruit into 1” cubes before freezing for best results. • Allow frozen fruit to soften at room temperature for about 5-15 minutes. • Only juice one piece of fruit at a time when using the Frozen Attachment. For example,
using the Pusher, juice 1 piece of fruit through the Feed Tube until it is entirely processed and then add another piece of fruit.
• Apply steady pressure when pushing food through the Feed Tube.
Frozen Attachment Juice Attachment
Pulp Spout
Juice Spout

∙ 16 ∙
CLEANING & MAINTENANCE
∙ 17 ∙
CLEANING & MAINTENANCE
Use the included Cleaning Brush to clean the Sieve properly (photo D). Be careful when cleaning the Sieve.
TIP: It is recommended to clean the Sieve with the Cleaning Brush for safety as the Sieve is sharp.
4
Remove the Juice Bowl (photo C). Empty the Cups and clean the Cover, the Pusher, Sieve, Bowl, and Auger and Cups under running water.
C D
3
2
Turn the On/Off Switch to off. Close the Juice Valve and remove the Cups. Unplug the Juicer and allow it to cool completely before cleaning.
Remove the Cover by twisting counterclockwise (photo A) and then lifting. Remove Auger from Bowl (photo B) and clean underneath. If the Auger is stuck, try rotating and then removing.
A
1
B
∙ 18 ∙
CLEANING & MAINTENANCE
∙ 19 ∙
• Starchy fruits and vegetables, such as sugarcane, avocado, banana, fig, mango, papaya, dragon fruit, kiwi and grapes, are not suitable for juicing as they will easily clog the Sieve.
• Fruits and vegetables should be cut into pieces 1-1.5” long before juicing, especially fibrous foods like celery and pineapple.
• Seeds and pits should be removed from fruits like citrus and melon before processing.• Very seedy fruits like strawberries and raspberries might clog the Sieve. Be sure to go
slowly and limit these types of fruits to small quantities to avoid clogging.
Tips & Tricks
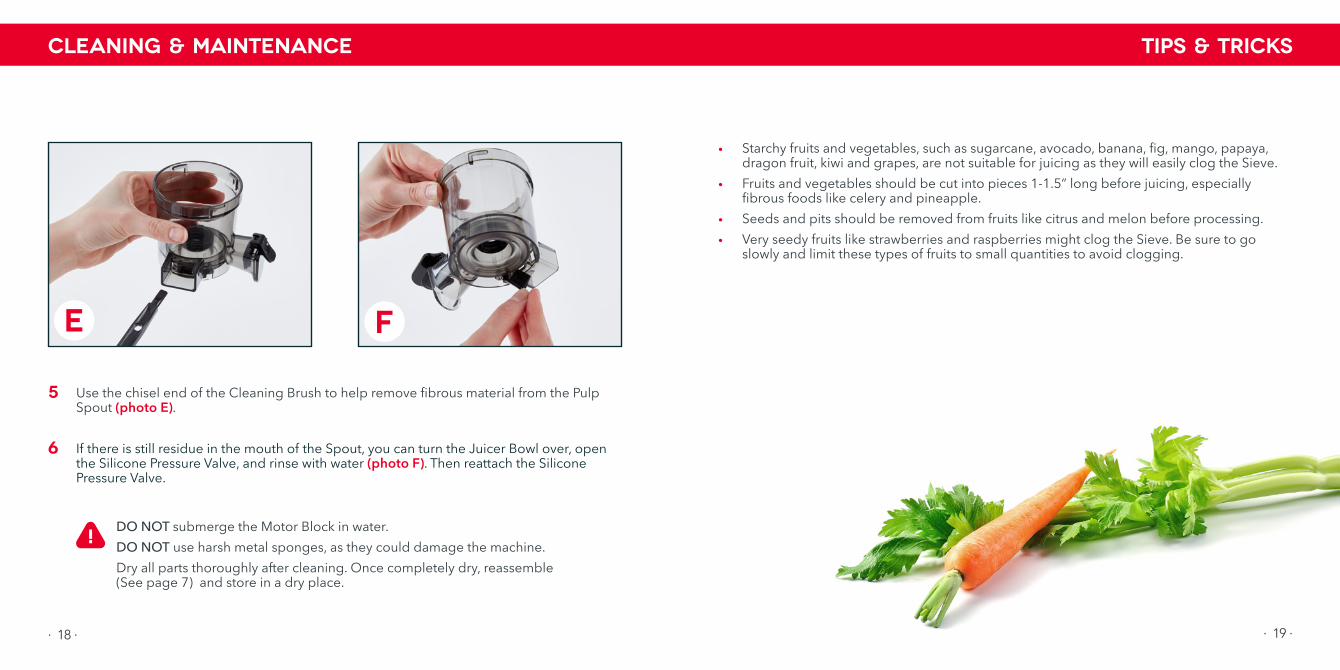
If there is still residue in the mouth of the Spout, you can turn the Juicer Bowl over, open the Silicone Pressure Valve, and rinse with water (photo F). Then reattach the Silicone Pressure Valve.
6
Use the chisel end of the Cleaning Brush to help remove fibrous material from the Pulp Spout (photo E).
E
5
F
DO NOT submerge the Motor Block in water.DO NOT use harsh metal sponges, as they could damage the machine.Dry all parts thoroughly after cleaning. Once completely dry, reassemble (See page 7) and store in a dry place.
!
∙ 19 ∙

20 ∙ page title page title ∙ 21
RECIPEGUIDE
Follow us!@bydash | recipes, videos, & inspiration@unprocessyourfood | veg & vegan-friendly meals
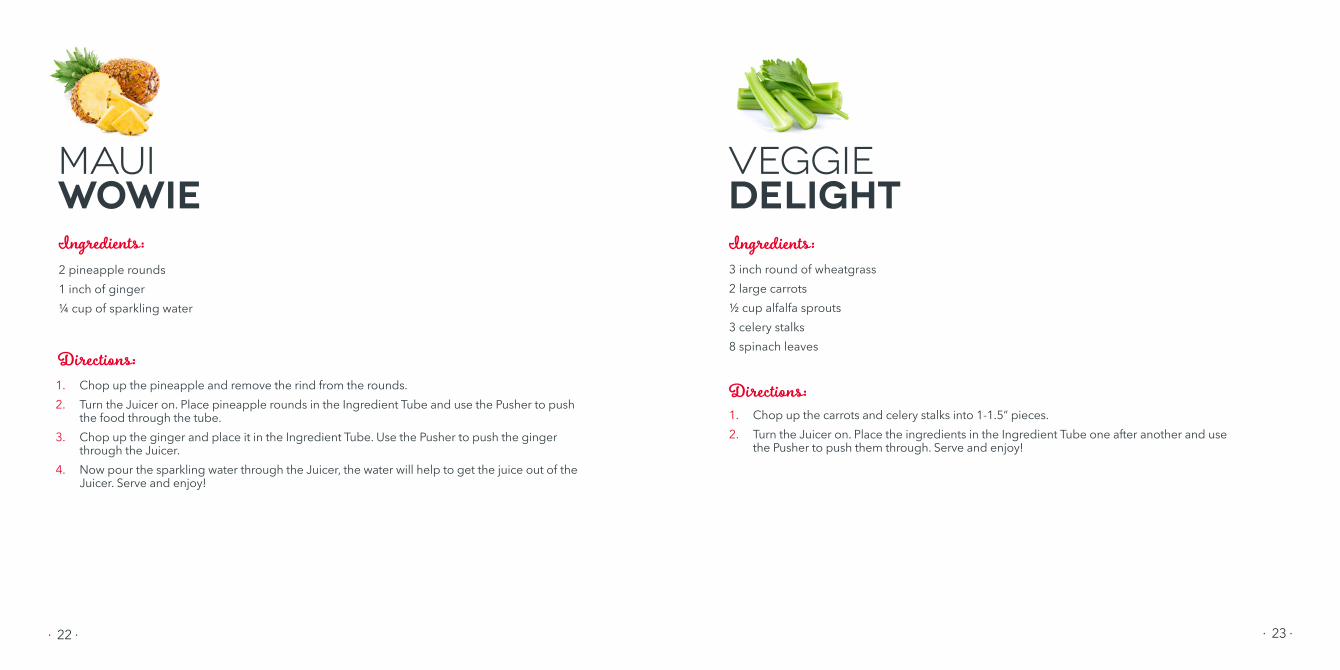
2 pineapple rounds1 inch of ginger¼ cup of sparkling water
1. Chop up the pineapple and remove the rind from the rounds. 2. Turn the Juicer on. Place pineapple rounds in the Ingredient Tube and use the Pusher to push
the food through the tube. 3. Chop up the ginger and place it in the Ingredient Tube. Use the Pusher to push the ginger
through the Juicer. 4. Now pour the sparkling water through the Juicer, the water will help to get the juice out of the
Juicer. Serve and enjoy!
MauiwowieIngredients:
Directions:
3 inch round of wheatgrass2 large carrots½ cup alfalfa sprouts3 celery stalks8 spinach leaves
1. Chop up the carrots and celery stalks into 1-1.5” pieces. 2. Turn the Juicer on. Place the ingredients in the Ingredient Tube one after another and use
the Pusher to push them through. Serve and enjoy!
Veggie delightIngredients:
Directions:
∙ 22 ∙ ∙ 23 ∙
∙ 25 ∙
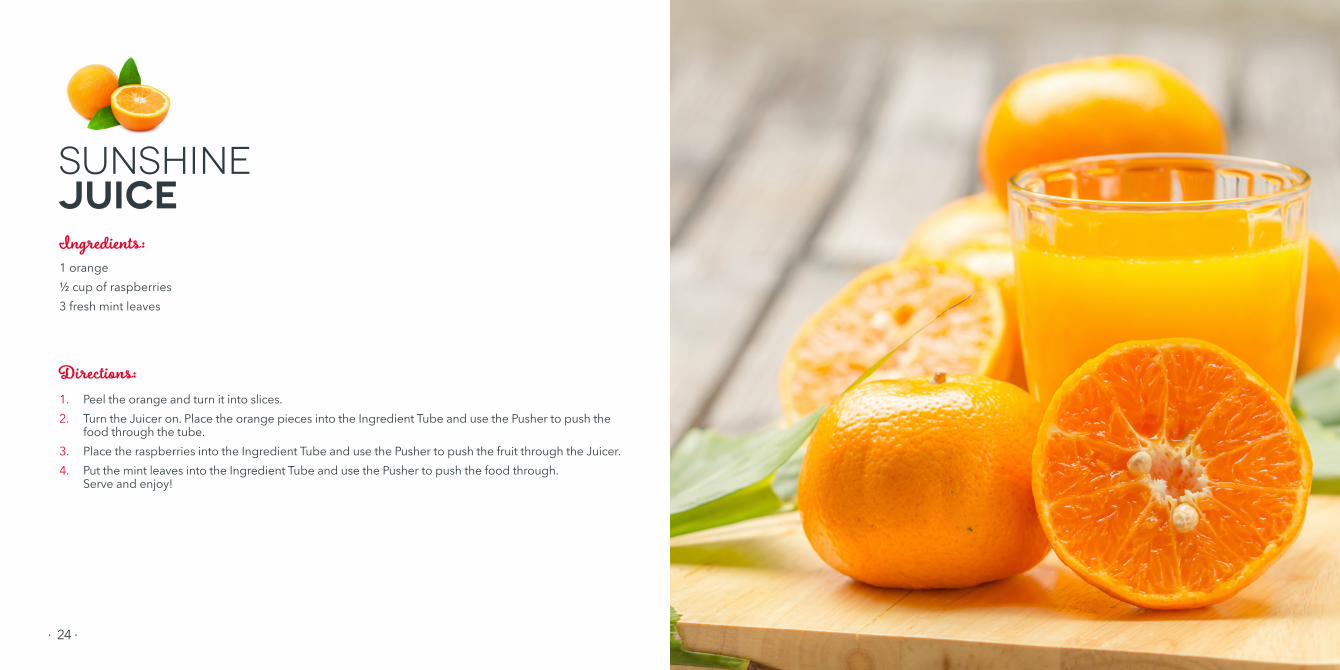
1 orange½ cup of raspberries3 fresh mint leaves
1. Peel the orange and turn it into slices. 2. Turn the Juicer on. Place the orange pieces into the Ingredient Tube and use the Pusher to push the
food through the tube. 3. Place the raspberries into the Ingredient Tube and use the Pusher to push the fruit through the Juicer. 4. Put the mint leaves into the Ingredient Tube and use the Pusher to push the food through.
Serve and enjoy!
Sunshine juiceIngredients:
Directions:
∙ 24 ∙

∙ 27 ∙∙ 26 ∙
6 kale leaves1 cucumber4 celery stalks2 green apples½ inch lemon
1. Chop up the kale leaves. 2. Turn the Juicer on. Place the kale into the Ingredient Tube and use the Pusher to push the kale
leaves through the Juicer. 3. Chop up the cucumber and place in the Ingredient Tube. Use the Pusher to push the cucumber
through the Juicer. 4. Chop up the celery stalks into 1-1.5” pieces and place in the Ingredient Tube. Use the Pusher to
push the celery through the Juicer. 5. Slice the apples and remove the seeds. Place the apple slices in the Ingredient Tube and push
through with the Pusher. 6. Remove the peel and rind from the lemon. Place the lemon piece in the Ingredient Tube and
use the Pusher to push the lemon through the Juicer. Serve and enjoy!
Mean greenIngredients:
Directions:
¼ watermelon½ lemon2 oranges¼ pineapple
1. Remove the rind from the watermelon and chop up into small pieces. 2. Turn the Juicer on. Place the watermelon pieces into the Ingredient Tube and use the Pusher to
push through the Juicer. 3. Remove the peel and rind from the lemon. Chop the lemon into smaller pieces and put in the
Ingredient Tube. Use the Pusher to push the lemon through the Juicer. 4. Peel the oranges and turn into slices. Place the orange slices into the Ingredient Tube and use the
Pusher to push the orange through the Juicer. 5. Chop up and remove the peel from the pineapple. Put the pineapple pieces into the Ingredient
Tube and use the Pusher to push the pineapple through the Juicer. Serve and enjoy!
Watermelon punchIngredients:
Directions:

∙ 29 ∙∙ 28 ∙
1 cup almonds1/3 cup waterHoney, agave, cane sugar or maple sugar, to taste
1. Soak one cup of almonds in a large bowl of water approximately 8-12 hours. Rinse the almonds in a strainer.
2. Turn on the Juicer. Measure out 2/3 cup almonds and 1/3 cup water then pour into the Juicer.3. Flavor the almond milk with honey, agave, nectar, cane sugar or maple sugar to taste.
almondMilkIngredients:
Directions:

∙ 30 ∙
7am – 7pm
Our customer support teams in the US and Canada are at your service Monday - Friday during the times below.
Reach us at 1 (800) 898-6970 or [email protected]
Dash values quality and workmanship and stands behind this product with our Feel Good Guarantee™. To learn more about our commitment to quality, visit bydash.com/feelgood.
8am – 8pm 9am –
9pm
10am – 10pm
Hey Hawaii! You can reach our customer service team from 5AM to 5PM.And also, Alaska, feel free to reach out from 6AM to 6PM.
feel good guarantee™
customer support
∙ 31 ∙
This product has passed food safety testing in accordance with FDA guidelines.
FOODSAFE
STOREBOUND, LLC – 1 YEAR LIMITED WARRANTYYour StoreBound product is warranted to be free from defects in material and workmanship for a period of one (1) year from the date of the original purchase when utilized for normal and intended household use. Should any defect covered by the terms of the limited warranty be discovered within one (1) year, StoreBound, LLC will repair or replace the defective part. To process a warranty claim, contact Customer Support at 1-800-898-6970 for further assistance and instruction. A Customer Support agent will assist you by troubleshooting minor problems. If troubleshooting fails to fix the problem, a return authorization will be issued. Proof of purchase indicating the date and place of purchase is required and should accompany the return. You must also include your full name, shipping address, and telephone number. We are unable to ship returns to a PO box. StoreBound will not be responsible for delays or unprocessed claims resulting from a purchaser’s failure to provide any or all of the necessary information. Freight costs must be prepaid by the purchaser.Send all inquiries to [email protected]. There are no express warranties except as listed above.REPAIR OR REPLACEMENT AS PROVIDED UNDER THIS WARRANTY IS THE EXCLUSIVE REMEDY OF THE CUSTOMER. STOREBOUND SHALL NOT BE LIABLE FOR ANY INCIDENTAL OR CONSEQUENTIAL DAMAGES OR FOR BREACH OF ANY EXPRESS OR IMPLIED WARRANTY ON THIS PRODUCT EXCEPT TO THE EXTENT REQUIRED BY APPLICABLE LAW. ANY IMPLIED WARRANTY OF MERCHANTABILITY OR FITNESS FOR A PARTICULAR PURPOSE ON THIS PRODUCT IS LIMITED IN DURATION TO THE DURATION OF THIS WARRANTY.Some states do not allow the exclusion or limitation of incidental or consequential damages, or limitations on how long an implied warranty lasts. Therefore, the above exclusions or limitations may not apply to you. This warranty gives you specific legal rights and you may also have other rights, which vary from state to state.
REPAIRSDANGER! Risk of electric shock! The Dash Deluxe Cold Press Power Juicer is an electrical appliance. Do not attempt to repair the appliance yourself under any circumstances. Contact Customer Support regarding repairs to the appliance. TECHNICAL SPECIFICATIONSVoltage 120V~60Hz Power Rating 130W Stock#: DCSJ255_20210405_V6Made in China
BPA-FREE
WARRANTYwarranty

Using Your Compact Cold Pressed JuicerSetting up Your Compact Centrifugal Juicer
1-800-898-6970 | @bydash | bydash.com