Dave's Cookbook 04102009
148
Dave Stiles My Favorite Recipes Former Seattle Chef 2 nd Edition
-
Upload
dave-stiles -
Category
Documents
-
view
1.614 -
download
4
description
As a former Seattle Chef I have assembled some great recipes for your enjoyment. Here are 30 years of favorite dishes.
Transcript of Dave's Cookbook 04102009

Dave Stiles
My Favorite Recipes
Former Seattle Chef
2nd Edition

2
About the Author
From 1975 to 1984 Dave Stiles cooked professionally both in St. Louis MO and in Seattle. He opened the 13
Coins at SeaTac and became their Sous Chef, eventually becoming Head Chef. While Head Chef of the Seattle
Trade Center Dave catered to the rich and famous throughout the Seattle area, including former Governor Dixie
Lee Ray, Senator Scoop Jackson, Senator Walter Mondale, former President Richard Nixon, Congressman Jack
Kemp, The Seattle Sonics, Seahawks, Mariners and many others. Dave finished his cooking career as Head
Chef of the now defunct Broadway Restaurant. In 1984 Dave began working for Kraft Foods selling to Seattle
area restaurants before going to work for Microsoft.
Dave Stiles is now a Digital Mobility Specialist with over 15 years experience working in Business
Development, marketing, and wireless consulting. Mr. Stiles managed the Consultant Relations Program for
Microsoft during the early 90‘s then operated his own software training company. In 1996 he joined ASIX, a
specialized consulting firm in Bellevue WA. In 1999 David joined DMR/Fujitsu Consulting where he managed
the telecommunications practice for the NW. While at Fujitsu Dave managed the design, implementation, and
maintenance of a complete, enterprise-wide, wireless Field Service Automation solution for Fluor
Telecommunications. Since that time Mr. Stiles has spoken and written about the Mobile Wireless revolution in
North America and Europe. He continues to cook and write about food and cooking from his home in Shoreline
WA.
Note: most of these recipes were written in isolation, not intended to be part of a larger book. Some of the
recipes contain some sub recipes that are repeated in more than one entry and differ slightly. Chose the ones you
like best. An overall book editing would benefit the flow of the recipes but no time for that these days. I hope
you enjoy the entries and eating the results. Send me email at [email protected] if you have questions.
Dave Stiles
The Front cover picture: circa 1977 while chef at 13 Coins

3
Forward
I have known Dave for almost 30 years. He came to the 13 Coins as an energetic student of the culinary arts,
with little real world restaurant experience. I was the executive chef at Ward Enterprises. Somehow Dave
managed to impress me with his intelligence and passion for cooking. In a matter of a few months he was
holding down a position as a line cook, making all the soups and sauces for both 13 Coins and the El Gaucho.
He joined the Washington State Chef‘s Association, making him one of the youngest members of the
association at the time. Gradually he rose up through the ranks, as a working chef in several restaurants around
town. I remember him most from his days as chef of the Trade Center in downtown Seattle. The Trade Center
was in the old American Can factory and had been converted to a large atrium, the clothing mart, and a major
banquet and catering facility. Dave took this small operation and turned it into one of the largest catering
operations in the city. It seemed like every week he would be telling me about some big shot dignitary he had
cooked for.
Dave always had great stories to tell about cooking here in Seattle or in St. Louis, before he arrived in Seattle.
One of the funniest stories he related was when then Governor Dixie Lee Ray visited the original 13 Coins in
downtown. Some of the waiters and cooks thought it would be a great gag to place a Band-Aid into half-eaten
manicotti which had been served the governor. They made a bid deal about how horrified she supposedly was
after finding the old Band-Aid in her lunch. Dave, being a very excitable guy anyway nearly went nuts. He
jumped and fidgeted in fear, trying to figure out what to do to make it up to the sickened Governor. Finally
when they had played it out as long as they could they all busted out laughing; the jig was up and Dave had
been completely taken in.
Another time at the 13 Coins SeaTac, when Dave was the Sous Chef, the cooks were busy on New Year‘s
evening waiting for the strike of midnight. It has always been a tradition to put oil in the pans on the burners,
get them smoking hot, then throw in a handful of ice. The resulting flames reached high into the air creating
their own little fireworks celebrating the New Year. I had instructed everyone not to participate because it was a
new kitchen and no one knew what would happen with the new fire retardant system.
Needless to say, my warnings were ignored. At the stroke of midnight the pans were sufficiently heated and the
ice cubes were tossed into the pans. The flames reached up five feet or more. Then, absolute silence; the hood
system, sensing the high heat, shut down and the fire retardant system kicked in. While most of the jets were
pointed towards the cook tops and fan, several were pointed out towards the counter, packed with guests. A
thick layer of blue powered foam covered everything in sight, including some of the customers. The restaurant
had to shut down for the evening and refund everyone‘s money.
For some reason, I didn‘t fire anyone, although threats were numerous.
The cooks spent the entire night until late in the morning cleaning blue powder from everything. Tiny remnants
of the foam remained tucked away in nooks and crannies for month – a reminder of the disastrous New Year‘s
debacle.
There were so many other stories that Dave could relate, if you ask him. He relishes in telling those old
restaurant stories. The 70‘s were the hay days in Seattle restaurant growth. Many of Seattle‘s great chefs got
their start at the 13 Coins.
I have always enjoyed Dave‘s cooking and notes about food. It seemed like he would come into the kitchen
with a new recipe every day. He‘d try it out and we would serve it up as a daily special. Most were big hits. He
is a true culinary pioneer, always ahead of his time, always trying something different, and thrilled when the
customer is satisfied. You will enjoy cooking these recipes and sharing them with your friends.
Earl Owens – retired Seattle Executive Chef

4
*Earl Owens died on February 7
th, 2006 at the age of 69. He was a culinary giant and did more to influence my
cooking than anyone else. I will always remember him as tough but fair.

5
Introduction
I come from a cooking family. My Grandmother Gratto and my Grandmother Stiles both were excellent
cooks. My mom learned the art of entertainment from the wife of my Dad‘s boss. I grew up watching the lavish
dinner parties, the fine crystal, and multi-course meals that my Mom served on Friday and Saturday nights.
Entertainment was her gift and she acquired superior skills from a variety of people who wanted to play the
socialite in central Massachusetts.
When my parents went off each evening to work on the new house they were building I was expected to
prepare dinner. At first I followed directions and made what I was told. After a while I began to experiment on
my own and those late night dinners were enjoyed by all. During college I helped pay the bills by working in
kitchens at school. When my new wife and I went to St. Louis for graduate work I ended up running the food
service at a Catholic girls school, cooking for the nuns. Finally I convinced Phil Karos, who owned Boucair‘s
Restaurant, to let me work at his kitchen. Boucair‘s was a fancy French restaurant in a St. Louis suburb.
That year constituted an incredible transformation from simply liking to cook to understanding the
entire process of preparing food for hundreds. I had to un-learn almost everything I knew about cooking. I was
fortunate to be able to work under that tutelage of an excellent chef who understood fine soups and sauces.
Cooking got into my blood so we decided to return to Seattle. I started working at the 13 Coins Restaurant,
which had just opened up near the Airport. I quickly rose up through the ranks to become chef.
Cooking is both and art and a craft. You have to love the process of combining various ingredients into
something that is both delicious and appealing. Once you begin to understand spices, proportions, and
combining ingredients you can make just about anything. Experimentation is critical to becoming a successful
cook. You must be willing to fail in order to eventually succeed. You must always be willing to veer from the
standard recipe. No offense but I don‘t think accountants make good chefs – cooking is not for the anal-
retentive.
Eating is for everyone. The most enjoyable aspect of cooking is watching friends and family enjoy your
creations. Seeing the smiles on the faces of people you cook for is very rewarding. I invite you all to cook more
often cook with gusto and delight. To do otherwise would be a disservice to the art and craft.
I want to thank some of the giants in this profession that have greatly influenced me.
Julia Child – as a kid, watching her cooking shows on that old black & white TV fascinated me.
Lorraine Stiles – my mom, she taught me how to entertain and got a kick out of seeing me progress. I don‘t
think she could believe it when I actually became a chef.
Earl Owens – This irascible and cantankerous culinary master was my mentor while at the 13 Coins. He saw
something in me and pushed me to the limit.
Chris Sarvis – Chris had more fun cooking and entertaining customers than anybody I ever met. He was raised
in the business and everything he did seemed automatic. He never missed a beat, never broke a sweat, always
enjoying cooking his way through life.
Tony Duffy – for the past 4 years Tony and I have carpooled to Microsoft and back, sharing great recipes and
eating our way to high cholesterol. Tony reviews the document and he always get‘s the first copy.

6
Table of Contents ABOUT THE AUTHOR 2 FORWARD 3 INTRODUCTION 5 TABLE OF CONTENTS 6 COOKING TIPS AND TRICKS 8 POTS, PANS, AND OTHER COOKING INSTRUMENTS 9 SAUCES – A BRIEF COURSE 12 GUIDE TO PERFECT PAN SAUCES 14 BASIC BREAD RECIPE 17 FRENCH BREAD 18 REGARDING YEASTS 19 COOKING MEATS IN BRINE 21 MEAT INJECTOR NEEDLE AND GOOD GRAVY 22 SEAFOOD 23 ARGENTINE RED SHRIMP 24 CRAB BOIL 25 CLAM CHOWDER 26 COQUILLES ST. JACQUES 28 BRANDY OR COGNAC 28 CRAB BISQUE 30 CRAWFISH ETOUFFEÉ 31 GRAVAD LOX 33 SALMON SPREAD 34 MUSSELS IN SAFFRON SAUCE 35 OYSTER STUFFING 36 QUICK NORTHWEST BOUILLABAISSE 37 FISH STOCK – COURT BOUILLON (PRONOUNCED QUAH – BOO YAWN) 39 GARLIC AIOLI 39 ROUILLE 39 PAELLA 40 SALMON EN PAPILLOTE 42 MORNAY SAUCE 42 SAUTÉED LOBSTER – GREAT VALENTINES DAY DINNER 43 SEAFOOD LASAGNA 47 WHITEFISH – CAJUN STYLE 48 BEEF 49 STEAK DIANE 50 BEEF BURGUNDY 51 BEEF GRILLIADES 53 BEEF STEW 55 QUICK BEEF GRAVY 56 SOUTHWEST POT ROAST 58 BEEF STOCK – THE REAL THING 60 SUMMERTIME MEANS BURGERS ON THE GRILL 61 PASTRAMI 64 SAUERBRATEN 65 POTATO PANCAKES 66 SWEET & SOUR CABBAGE 66 SWEETBREADS 13 COINS STYLE 68 JERKED PORK 69 RICE AND PIGEON PEAS 69 BRAISED LAMB SHANKS 71 SAUCE FOR GYROS – TZATSIKI 72 POULTRY & GAME 73 COQ AU VIN 74 ROAST CHICKEN WITH ROASTED VEGETABLES 75

7
DAVE‘S SPECIAL SPICE MIX 76 CHICKEN TIKA 77 HOMEMADE CURRY SPICE MIX – GARAM MASALA 78 DAVE‘S POULTRY SEASONING MIXTURE 79 WILD TURKEY 81 STUFFED BREAST OF CHICKEN (OR ANY GAME BIRD) 83 HOMEMADE ROASTED TOMATOES. 84 PERFECT RICE 84 CHICKEN PARMESAN 85 MOROCCAN CHICKEN TAGINE 86 PRESERVED LEMONS 87 SOUPS 88 CRAB BISQUE 89 GUMBO 90 CINCINNATI CHILI 92 TEXAS STYLE HOT CHILI – LOWER CALORIE VERSION 93 QUICK PEPPER TABLE 94 CHICKEN CHILI 95 CREAM OF CHICKEN BARLEY SOUP 96 PEANUT SOUP 97 CREAM OF TOMATO SOUP 98 TURKEY RICE SOUP 99 MINESTRONE SOUP 100 BEEF BARLEY SOUP 101 POTATO LEEK SOUP 102 CREAM OF ASPARAGUS SOUP 103 SPÉCIALITÉ DE LA MAISON 104 PASTA AND WILD MUSHROOMS 105 MUSHROOM STEAK SAUCE 107 LOW FAT RANCH DRESSING 108 GUACAMOLE 109 NORTH COUNTRY BOILED DINNER 110 CLASSIC BLUE CHEESE DRESSING 111 MAYONNAISE 111 PIZZA – DAVE‘S FAMOUS 113 PEPPER SAUCE 116 SAUCE BOLOGNESE 117 SPAGHETTI WITH CLAM SAUCE 119 CREAMY PASTA WITH BASIL, SAUSAGE, MUSHROOMS, AND SALAMI 120 FETTUCCINI ALFREDO 121 QUICK & EASY PASTA SAUCE 122 MEATBALLS 124 MARINARA 124 MANICOTTI 125 DINNER CREPES 126 THE $.10 CENT COOK. 127 BASIC ASIAN INGREDIENTS EVERY KITCHEN NEEDS 129 BAKED BEANS 131 MAKING BEER AND SPIRITS 132 DESERTS 133 CRÈME BRULEE 134 HOMEMADE ICE CREAM 136 DAVE‘S FAMOUS HOT FUDGE SAUCE 137 PATÉ CHOUX (CREAM PUFFS) 138 BAKED ALASKA 140 WHAT‘S IN MY COOKING LIBRARY? 141 GLOSSARY OF COOKING TERMS 143

8
Cooking Tips and Tricks

9
Pots, Pans, and other Cooking instruments
People are always asking me, ―What‘s the best type of pan to cook with?‖ It depends on what you are cooking
and what type of cooking you are doing. There are
basically six types of cooking; sautéing (pan frying),
deep fat frying, roasting, grilling, boiling, and
steaming.
Sautéing: For sautéing you want a pan that will
transfer the heat to your food quickly, ideally non-
stick, and light enough to handle easily. In addition,
you want a handle that will allow you to put the
sauté pan into a hot oven without burning or
melting.
Coated, Aluminum: For this I prefer either an aluminum pan with a non-stick lining, such as Teflon or
a CalphalonTM
anodized coating.
Cast Iron: cast iron pots and pans are great to sauté in once they become seasoned. Cast iron pans are
inexpensive, conduct heat well, and last a lifetime. The seasoning process is involved and essential.
Heat the pan in a hot oven for about ½ hour. Add vegetable oil to the pan and rub it into the pan. Then
add coarse salt to the pan and rub the salt into the pan – this acts like an abrasive. Wipe the pan clean
and store it covered until you are ready to use it. Repeat the process as necessary. Soon the pan will
blacken and become very shiny.
Cold Rolled Steel: The cold rolled steel pan transfers heat extremely well, is light enough to be moved
easily, can be seasoned to become virtually non-stick, and is inexpensive. These pans take a beating and
never show their wear. Eventually they will take on a copper-brown patina and are great for eggs,
making quick sauces, braising, and sautéing.
Copper: Copper sauté pans with a tin or steel lining are great as well. They transfer heat better than any
other material but are very expensive, tarnish quickly, and when lined with tin, wear out quickly and
eventually need to be re-tinned – a very expensive process.
Boiling: Boiling food is one of the oldest cooking methods, probably second only to roasting. At Sea Level
water boils at 212o Fahrenheit. Placing a lid on the pot will raise the temperature a few degrees and shortens the
cooking time.
Aluminum: large aluminum boiling pots are inexpensive, conduct heat well, and are great for boiling
most foods. The only exception is foods that are high-acid, such as tomato sauce. You can still cook
high acid sauces in aluminum pots but the foods should be removed from the pot as soon as you are
finished cooking it. If the aluminum pot is coated with either Teflon or CalphalonTM you need not
worry about the acid content.
Enameled cast iron: Cast iron pots are great to cook with but they should be enameled. The only
drawback is that enameled pots can chip over time. With hard use the enamel will eventually wear out
and will rust if not kept oiled. While enameled cast iron pots are beautiful they are expensive.
Steel (stainless): large stainless steel pots are great for boiling. They will not react to any foods and last
a lifetime. However they can be expensive. Be sure to buy a stainless boiling pan that has a heavy
bottom, which will not warp and holds the heat.
Copper: Copper pots are wonderful to boil in because they conduct heat so evenly. However, copper
10
pots are extremely expensive and once again, must be lined with steel or tin or they will react with
many foods.
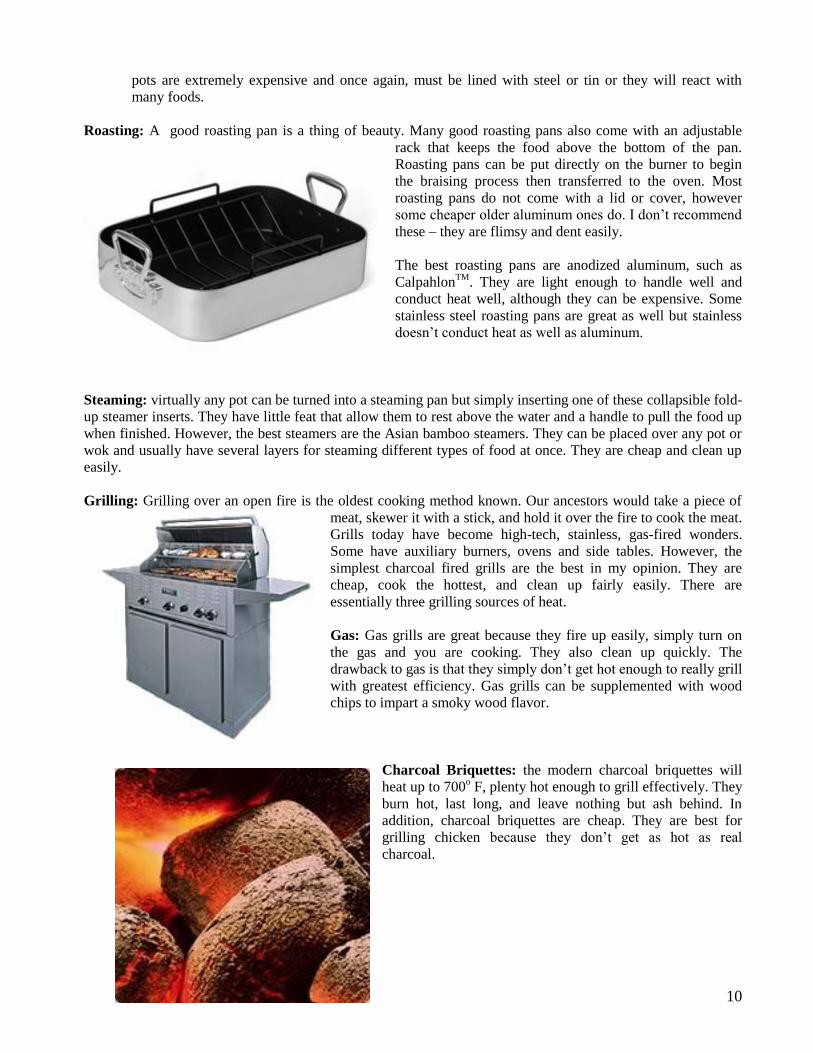
Roasting: A good roasting pan is a thing of beauty. Many good roasting pans also come with an adjustable
rack that keeps the food above the bottom of the pan.
Roasting pans can be put directly on the burner to begin
the braising process then transferred to the oven. Most
roasting pans do not come with a lid or cover, however
some cheaper older aluminum ones do. I don‘t recommend
these – they are flimsy and dent easily.
The best roasting pans are anodized aluminum, such as
CalpahlonTM
. They are light enough to handle well and
conduct heat well, although they can be expensive. Some
stainless steel roasting pans are great as well but stainless
doesn‘t conduct heat as well as aluminum.
Steaming: virtually any pot can be turned into a steaming pan but simply inserting one of these collapsible fold-
up steamer inserts. They have little feat that allow them to rest above the water and a handle to pull the food up
when finished. However, the best steamers are the Asian bamboo steamers. They can be placed over any pot or
wok and usually have several layers for steaming different types of food at once. They are cheap and clean up
easily.
Grilling: Grilling over an open fire is the oldest cooking method known. Our ancestors would take a piece of
meat, skewer it with a stick, and hold it over the fire to cook the meat.
Grills today have become high-tech, stainless, gas-fired wonders.
Some have auxiliary burners, ovens and side tables. However, the
simplest charcoal fired grills are the best in my opinion. They are
cheap, cook the hottest, and clean up fairly easily. There are
essentially three grilling sources of heat.
Gas: Gas grills are great because they fire up easily, simply turn on
the gas and you are cooking. They also clean up quickly. The
drawback to gas is that they simply don‘t get hot enough to really grill
with greatest efficiency. Gas grills can be supplemented with wood
chips to impart a smoky wood flavor.
Charcoal Briquettes: the modern charcoal briquettes will
heat up to 700o F, plenty hot enough to grill effectively. They
burn hot, last long, and leave nothing but ash behind. In
addition, charcoal briquettes are cheap. They are best for
grilling chicken because they don‘t get as hot as real
charcoal.

11
Lump Charcoal (Mesquite): real mesquite charcoal is the best for grilling steaks, meats, and fish. It
burns to 1,000o F. Real charcoal
doesn‘t burn as long as briquettes
and are a bit more uneven due to
the random size of the pieces.
However, there is nothing better
for cooking the perfect steak.
Lump Charcoal is also a little
more expensive than briquettes.
It can be ordered online or
obtained at the Warehouse Stores
for much less, sometimes in 50
lb. bags.

12
Sauces – a brief course
Most of the great cooks in the world learn to make a few classic sauces
and vary them according to what they are cooking. If you can learn to
make a good beef stock, chicken stock, and fish stock you can learn to
make hundreds of other sauces based on those three basic sauce starters.
Raymond Sokolof‘s book – The Saucier‘s Apprentice is the best single
source for all the great classic sauces. Buy it, master a few simple
sauces and you will be a good cook. I want to highlight a few simple
sauces – called Mother sauces and a few of their daughters.
Beef Sauces: Beef sauces begin with a good beef stock; the real thing.
The recipe is on page 61. Once you complete the beef stock you can
reduce it to make a thickened sauce called Demi Glace or half sauce. It
is half as thick as a full reduction called a Glace de Viande. Glace de
Viande reduced to such an extent it will hardly pour out. Once you have
made your beef stock, strain it carefully through a fine strainer or
through cheese cloth. I recommend the latter. Begin reducing this stock
until it forms a dark, thick syrupy sauce, about the consistency of a thick
soup. It should be clear but rich dark in color, about the color of a
chestnut. Now you are ready to make other sauces from this basic Mother sauce. Below is a chart of the primary
Mother Sauces, beef, fish, and chicken. There are hundreds more but this is a starter.

13
Other basic French sauces
Check out the article on pan sauces, which was printed in the Seattle Times a few years ago – it is an excellent
primer. The sauces listed below are crucial elements of all cuisines especially French cuisine. The French cook
can recreate the canon of sauces from a limited set of techniques and ingredients. Here's a quick rundown of
some very basic sauce-stuff:
Béarnaise:
A relative of hollandaise, béarnaise is a reduction of vinegar, tarragon and shallots that is finished with egg
yolks and butter.
Béchamel:
Add milk or cream to a white roux and voila! it becomes a béchamel.
Hollandaise:
A hollandaise uses butter and egg-yolk as its liaisons. It is served hot with vegetables, fish and eggs -- like on
eggs Benedict.
Liaison:
A liaison, or binding agent, is the base of any French sauce. Sometimes called a binder, egg yolks, butter, flour,
and puréed vegetables, are all liaisons.
Reduction:
A reduction is the mixture that results from rapidly boiling a liquid (like stock, wine, or a sauce)and causing
evaporation -- "reducing" the sauce. The reduction is thicker and has a more intense flavor than the original
liquid.
Rémoulade:
This classic sauce mixes mayonnaise, mustard, capers, chopped gherkins, herbs, and anchovies.
Roux:
Roux, a combination of flour and a fat, often butter, is perhaps the best known liaison. A roux can be white,
blond, or brown, depending on ingredients and cooking time. It is used to thicken soups and sauces.
Velouté:
Mix a white roux with white stock (light chicken or veal stock) and it becomes a Velouté.

14
Guide to perfect pan sauces
By CeCe Sullivan Seattle Times home economist
(note, these are great instructions found in the Food section of the Seattle Times a few months ago. I couldn’t have said it
better myself. The Italics are mine)
Pan sauces, unlike the emulsified branch of the sauce family, have a
forgiving nature. If the sauce is too thin, it can either be reduced further or
thickened with a starch. Or maybe the sauce has been reduced so much, it
needs loosening up. Just correct the consistency with a tablespoon or two
of water or other liquid.
The foundation of pan sauces are the crusty juices that form on the bottom
of the pan when food is browned, sautéed or roasted (called Fonds). Here's
how to construct an elegant sauce, step by step.
1) Sauté: Meats should first be patted with paper towels to absorb excess
moisture. Choose a heavy-bottomed sauté or frying pan. In "Sauces:
Classical and Contemporary Sauce Making," author James Peterson
advises paying attention to the size of the pan: "When meats are sautéed,"
he writes, "they should fit neatly into the sauté pan with no extra room. If
the pan is too large, so that part of its surface is exposed during sautéing,
the meat juices, which are essential to pan-deglazed sauces, will burn. An
overcrowded pan, on the other hand, will prevent the meat from browning
evenly and may even cause it to release its juices too quickly, so that it
simmers in its own juices, rather than browns." (make sure when browning
meats not to overcrowd the pan or the meat will only boil in juices, not
brown at all. Separate the meat in batches and brown a little at a time)
Heat the pan over medium to medium-high heat. (Some burners are hotter than others, so adjust the heat
accordingly.) Add the oil or other fat called for in the recipe. When hot, add food and cook without moving
until a crust is formed, which should release easily from the pan. Then turn and finish cooking. The food should
be a rich brown, but should not blacken.

15
2) Degrease: After sautéing and removing meat from pan, pour off the fat.
(If aromatics are going to be added, a thin glaze of fat can be left on the
bottom of the pan.)
3) Deglaze: After degreasing pan, put it back on the heat. Now add
aromatics such as minced garlic and shallot, or a mirepoix — a tiny dice of
carrot, celery and onion. Sauté about 30 seconds. Pour liquid into the pan; it
should come to a boil quickly. Use a spatula to loosen the browned juices,
which become the bridge between the meat and sauce, adding lots of flavor
and rich color.
Deglazing liquids can be wine, broth or stock, or even water, which can be
used in combination or alone. For instance, add a small amount of wine to
deglaze the pan, then add stock or another liquid.
Use a good stock or broth, preferably homemade. But even canned broth
can be made richer and more flavorful by simmering for 30 to 45 minutes
with aromatics such as onion, garlic, carrot and celery.
4) Reduce: The deglazing liquid is cooked down by at least half, which
concentrates the flavor and thickens the sauce. As the liquid cooks down, it
will become saltier, so season the sauce after it has reduced.
Get a jump on the process by preparing reductions in advance — a time-
saver for quick-to-fix dishes. Reduce stock or wine by half, or cream by
about a third, and store in the refrigerator until ready to use.
5) Bind or thicken: Pan sauces are thickened most often by reduction. But
when a lot of liquid is added, as for the gravy made from the drippings of
turkey, one of the following binders may help:
Beurre manié: With a fork, blend until smooth 1 tablespoon each of
softened, unsalted butter and flour for each cup liquid. Add slowly to the
simmering sauce, whisking until smooth, and simmer about 5 minutes.
Slurries, made with a starch and cold water, are sauce savers that have
differing qualities and cooking times.

16
Flour paste: Whisk together about 3 times the amount of cold water to
flour until smooth. Then pour a little at a time into the sauce, whisking
constantly. Add just enough to thicken the liquid. Simmer 3 to 5 minutes.
Cornstarch: Transparent sauces, much like those used in Chinese cooking,
are the result when cornstarch is used. For every cup of sauce, dissolve
about 1 to 2 teaspoons in twice the amount of cold water. Add to the hot,
simmering liquid in pan, whisking constantly to avoid lumps. Cook about 2
minutes.
Arrowroot: Dissolve 1 to 2 teaspoons in twice the amount of cold water to
thicken a cup of liquid. Arrowroot does not need to be cooked to remove its
raw flavor and will begin to thicken immediately. Simmer about 1 minute.
You may be taking a chance with arrowroot, or any starch, that's been
pushed to the back of your cupboard for several years, as its thickening
ability will weaken with age. It's a good idea to date the packaging when
purchased so you'll have a fresh batch on hand when needed.
Sauces can be strained after reducing and thickening for smooth, elegant
preparations. But many benefit from the texture given by aromatics, vegetables and herbs. In fact, vegetable or
even fruit purées can also be used to thicken sauces. These purees "also contribute flavor, whereas plain starch
does not," writes Peterson. "Some purees, such as those made with tomato or green vegetables, contain so little
starch that they thicken a sauce simply by adding a large bulk of fine solid particles to a liquid medium," he
continues. When left to sit, the sauces may separate, but can be pulled back
together by whisking.
6) Finishes: Some wonderful demi-glaces, which are stocks that have been
reduced to a concentrated gel-like paste, are available in many
supermarkets. A teaspoon added to the finished sauce can add color, flavor
and richness. The juices that have gathered around the cooked meat can
also be put into the sauce and simmered briefly to thicken.
For a glossy sheen and velvety finish, about 1 tablespoon cold, unsalted
butter can be swirled into 1 cup sauce. On medium-low heat, whisk in
small pieces at a time, swirling the pan in a circular motion. When melted,
add another bit of butter. Remove pan from heat before the last piece of
butter has melted completely.
Sources: "Sauces: Classical and Contemporary Sauce Making," by James
Peterson; "A Fresh Look at Saucing Foods" by Deirdre Davis; "Joy of
Cooking" by Irma S. Rombauer and Marion Rombauer Becker.

17
Basic Bread Recipe
This bread recipe is standard bread, not
French or Italian bread. It can be made into an
artisan dough simply by leaving out the wheat
flour, using standard dry yeast or starter,
extending the rise time, and baking on a bread
stone in a hot oven, misting the inside of the
oven with water a few times before and
during the baking process. This is bread your
kids will love to eat. It‘s soft, hearty, and
flavorful. It is similar to what would have
been found baking in country kitchens in
America 100 years ago.
Ingredients
5 cups of Bread flour (high gluten flour – found in all supermarkets)
2 cups of whole wheat flour
1 cup of 7 grain blend. Usually found in health food sections of the market
(optional)
3 TBS. brown sugar
1 TBS salt
2 pkg. quick rise yeast
3 to 4 cups warm water (90 to 100 degrees F)
Mixing phase – 5 to 8 minutes
Blend all dry ingredients together, including yeast, in a large mixing bowl or
Kitchen Aid mixing bowl. Add the warm water and mix well with a large spoon
until blended. If you have a Kitchen Aid, mix at low speed for about 5 minutes
using the dough hook. If you are blending by hand, work with the spoon for a
few minutes then transfer to a well floured board and work by hand for about 10
minutes. The texture of the dough should be smooth and elastic. It should not
cling to the side of the bowl. It should form a ball but not be too dry. This will
take some practice. It it‘s too wet, add more flour – too dry, add a little warm
water.
Rising phase – one hour
Cover the dough with a piece of plastic wrap. You may want to spray a little Pam
on the plastic so that the rising bread won‘t stick to the plastic. Let rise for at
least 1 hour or until the dough is pushing the plastic wrap up. This is where most
people make mistakes – they don‘t let the bread rise long enough. Make sure the
rising place is slightly warm, draft free, but not too hot. On top of the fridge is a
good place because the air near the ceiling is warmer.
Proofing phase – 35 minutes
Roll the dough out onto a floured breadboard. Divide the dough into 2 pieces. Knead each piece for a few
minutes removing the air out of the loaf. Form into a bread pan sized loaf and place into a loaf pan. I use glass

18
bread pans because they won‘t impart any metallic taste to the loaf (I also spray the inside of the pans with Pam
spray). Once both loaves have been kneaded and put into the loaf pans and let rise again for 30 minutes.
Baking phase – 25 minutes
Preheat your oven to 400 degrees F. The rack should be in the middle of the oven. Just before you place the
loaves in the oven, use a razor blade to make a slice down the length of the bread. This lets the steam escape
and ensures you won‘t have a blowout hole on the side of the bread, which is not pretty. Once the loaves are
done, invert the pans onto a cooling rack and let the loaves cool for at least 30 minutes before cutting.
Analysis phase – 3 minutes
The first time you make bread using this recipe will tell you a lot. Was the dough too dry, too wet, was the oven
too hot or cool, was it baked all the way through. If there is a doughy spot in the center of the loaf you need to
either use a little less water or bake a little longer. The color should be a nice brown, a little darker than the
typical golden color.
Eating phase – as long as you like You can use all white flour if you want and vary the recipe as you like. Sometimes I add a cup or two of
shredded cheddar for great cheese bread. Sometimes I add some herbs for delicious herb bread. It‘s also great
with Parmesan cheese and Calamata olives. The sky‘s the limit. Have fun, especially with the eating part.
French Bread The wonderful long airy loves, called baguettes, are the envy of every bread baker. How do you achieve this
quality bread in your home kitchen? It‘s not easy and
requires attention to detail. However, by taking some
simple steps you can produce remarkably good French
bread in your home kitchen
First, use high quality high gluten bread flour. This can
be found in most supermarkets. Power Flour is the
brand I like and it can be found in bakery supply
houses. Additionally, the rise time is significantly
increased. Here is my recipe.
Mixing Phase
On the evening before baking, Combine 7 cups of high
gluten flour with 1 cup of rye flour. Add 2 pkg. of
standard dry yeast and 1 TBS of salt. Mix together
with a spoon. Add 3 to 4 cup of warm water and begin
mixing. Use a Kitchen Aid mixer with a dough hook or
knead by hand until the dough forms a ball and leaves
the side of the bowl. Continue kneading for about 8 to
10 minutes. The dough should be moist and elastic,
hold its shape and not stick to your hands. If you are
going to make bread every day or every other day, reserve a fist sized portion of the dough to use as a starter for
the next batch. This will insure consistency in the bread.
Rising phase Place the dough in a warm place for about 30 minutes, or until the dough begins to rise. Transfer the dough to a
refrigerator and let it rise slowly overnight. In the morning, remove the dough from the Fridge and let rise for
another hour. When the dough has doubled in size, place it on a floured board.

19
Forming phase
Separate the dough into two balls and knead each one separately. Roll out the dough into two long bread loaves.
Place a floured towel over the loaves and let rise again for about 1 hour.
Baking phase
Just prior to placing the loaves into the oven, make 5 angled slices along the length of the loaf. Use a razor for a
very fine deep cut. When the oven is at 450, spray the inside of the oven with a water mist and immediately
slide the loaves onto an unglazed baking tile. After a minute or so, when the oven has returned to 450, open the
door a little and spray-mist again. The oven interior should be steamy. This will give you a nice crusty crust.
Bake for about 20 minutes or until you achieve the color you like. Classic French bread is usually a golden
color.
Evaluation Phase
Let the loaves cool on a rack before cutting into. There should be some fine holes and possibly some larger
ones. The bread should have a crusty exterior but soft and somewhat chewy, with an extremely fine crumb.
There may be small blisters on the bottom crust which contribute to the overall texture. Once again, if the bread
is a little doughy, use a little less water, too dry, add a little more water. Keep in mind, it‘s unlikely you will
over knead the bread and remember to let it rise fully. The slow rise will have the greatest impact on the texture
and flavor.
One Last Item – For the Purist
The best breads in the world are made in wood fired brick ovens. These ovens can be purchased, in home
versions, for under $2,000. The ovens usually come in several large pieces and needs to be mounted on a brick
platform to raise the oven entrance to waist level. Most ovens are then covered over with brick and mortar to
make them look pretty. While they can be installed in an inside kitchen, many are designed to be installed
outside on a patio. A hardwood fire is started in the baking cavity and allowed to burn down to a few coals, with
the oven door closed. The inside of the oven reaches temperatures over 600 degrees Fahrenheit. The oven door
is opened, the coals and ash are swept away and the oven is ready to receive its first dough. Several loaves of
bread can be placed in the oven at the same time. Within 20 minutes they are ready to remove, using a wooden
peel. The large ovens can accommodate several batches of bread before cooling off below 400 degrees
Fahrenheit. You can also bake great pizza in brick ovens. The thin crust and the hot bricks cause the dough to
blister and bake almost immediately.
Some ovens also have a lower chamber where a fire can be started and a Grate can be added to accommodate
the baking of roasts, chickens, or just about anything. While the brick oven is expensive, requires lots of work,
requires considerable maintenance, wood purchasing and care, it is an amazing way to cook foods and the fire
imparts a flavor and heat that cannot be duplicated in the home oven.
Regarding Yeasts
Yeast comes in several varieties. Dry packaged yeast comes in two types, quick rise and standard. The
difference is that the quick rise yeast has been milled into much finer pieces, almost a powder. This allows the
yeast to react and begin rising very quickly. The quality and type of yeast in both packaged versions is the same.
Yeast can also be purchased in a moist yeast cake. This yeast also begins rising almost immediately but has a
shorter shelf-life than dry yeast. Some contend that cake yeast is more foolproof. This has not been proven and I
have not proven it. Natural yeasts are those yeasts which are found in the world around us. Grapes have a
natural yeast coating on their skins, which is why crushed grapes begins turning into wine immediately. Many
bread experts suggest trying to capture natural yeasts and using them in breads. You can do this by placing your
dough outside on a warm sunny day covered with a layer of cheese cloth. After a few hours, you should see
some leavening activity. Once the yeasts have been captured and mixed with flour and water they form a starter
which can be kept for years if properly cared for. Natural bread starters, sometimes referred to as sourdough,
have a strong aroma and produce bread that is chewy in texture. If you are going to bake bread every day or
every other day, a natural starter may be your best bet. If you keep everything equal, your bread made with a

20
natural starter will acquire a flavor profile unlike anyone else‘s in the world. Your unique kitchen bacteria,
fungus, yeasts, and oven characteristics will give your starter based bread individual character.

21
Cooking meats in Brine
Brine cooking has been used for hundreds of years, primarily because it helped preserve meats where
refrigeration was at a premium. I have been brining
meats for a few years now and regard it as a rustic but
flavorful method of preparing meats, especially fowl.
This is a two step process, soaking in brine, then
discarding the brine and roasting, grilling or smoking.
While the method is usually reserved for whole birds
or pork roasts, you can use cut up pieces of fowl as
well. Just leave them in the brine for less time. You
will notice that the resulting meat is very plump, well
flavored, and juicier than any meat you have ever
cooked. The chemistry involved allows the meat to
hold more moisture and retain its juiciness. Moisture
loss can be reduced from the typical 30% loss to
around 15% moisture loss. Here is a classic chicken
dish, prepared using a brine as a first step.
Brine recipe
2 quarts of water
1/3 rd cup salt
3 TBS. brown sugar
2 TBS. apple cider vinegar (or lemon juice)
2 bay leaves
2 whole cloves garlic
1 TBS. fresh ground pepper
1 whole fryer or roasting chicken
Procedure
Prepare your brine in a large stainless steel or ceramic bowl. Plunge the chicken, game hen, duck, goose, or
pork roast into the brine. You may also brine a turkey but make considerably more brine and use a large plastic
bucket to brine the bird. Make sure the meat is covered completely. Add a little more water to cover if
necessary. Cover the bowl with plastic wrap and place in the refrigerator for 12 hours or overnight. Next
morning, take the bird out and discard the brine.
Roast the bird in the normal way, with any herbs or seasonings you like. You won‘t need any additional salt. If
using cut up pieces, you can flour them, sauté first, then finish off in an oven.
I served the whole roast chicken with garlic mashed potatoes and glazed carrots. Rather than making traditional
gravy, I simply poured off the excess fat, then use the pan juices. I deglaze that pan with white wine and a little
chicken stock, reduced it down, and poured it over the mashed potatoes. It was already well seasoned

22
Meat Injector Needle and Good Gravy
One cooking tool that has really made a big hit recently is the
large cooking hypodermic needle, used for injecting
everything from meats to watermelons with a flavorful
solution. Here‘s what I use the injector for
Chickens/Fowl/Turkeys – great with game birds. The meat of
the injected turkey or chicken will very moist and juicy. It‘s
my favorite new technique.
Make some chicken broth. If you have any chicken bones in
the freezer you can make your own stock. If you have to use
prepared chicken stock it‘s OK but a bit salty. I make a
chicken broth tea by adding a few fresh sage leaves, fresh
garlic, pepper, and bay leaf to the broth and steeping it for
about 20 minutes. Strain the stock and add about 3 TBS of
butter to 2 cups of stock or stock and wine. Mix it well with a
wire whip, suck it up into the syringe and inject into the
thickest parts of the chicken, turkey, or game bird – legs,
breast, etc. You will see the bird visibly swell at the point of injection, when the juice begins to leak out the
entry whole move to another spot. Use up all 2 cups for a turkey, a little less on a chicken, etc. I usually make 3
cups of injector broth for my turkey and put the rest in the pan after removing the foil from the bird. Roast the
bird in the normal way.
For turkeys, I cover with foil for the first couple of hours, then remove the foil to really brown the bird. I baste
the skin every 20 minutes using a bulb baster, after removing the foil. Some suggest placing the bird on a rack,
above the juices. I don‘t do that. I like the bird right on the pan to really super flavor the bird and add to the
leave behind skin bits and pan drippings. I also add a quart of water, or a little more, to the pan once I take the
foil off. I also place the neck and other giblets to the pan from the very beginning of the roasting process. The
liver and neck meat can be chopped fine and added to the gravy. Once the turkey is done (and I mean really
done) remove from the pan and place on the platter. Remove most of the turkey fat. Deglaze the pan with a little
extra water or stock over high heat. When it comes to a boil and most of the residue has been scraped off the
ban bottom, strain into a 4 quart pan.
To thicken the gravy I like to make a roux. Roux is a mixture of equal parts of fat and flour (by weight), cooked
for several minutes to get the starchy flavor out of the flour. I like to use the skimmed turkey fat off the stock
you just made when you deglazed the pan. The general rule to avoid lumps is to use ―cold roux-hot stock or
cold stock-hot roux.‖ I like to pour the cool stock over the hot roux (you can quick cool by adding a few ice
cubes to the stock), a little at a time until the desired thickness has been achieved. Some people like a really
thick gravy but I prefer one a little lighter, it should just coat the bottom of a spoon.
You may want to enrich the stock with a little of high quality paste-style chicken base. I also add a little
Worcestershire sauce, dry sherry, and kitchen bouquet caramel color to achieve the desired gravy color. Finally,
adjust the salt and pepper at the very end. This is also where I add the finely chopped giblets. This same gravy
making process works well with beef dishes as well, especially those with meat with bones in it, such as pork
roasts, rib roasts, or lamb roasts. For Turkey, I try to make as much gravy as possible so that you can have some
on Friday after Thanksgiving for turkey sandwiches, etc.
I like to carve the turkey completely and let people come through the buffet line and select their own meat. I
carve the meat right to the bone, taking the meat from every conceivable location, top and bottom. I divide the
meat into light and dark on the serving platter. I always reserve all bones for turkey soup, which I make on
Saturday after Thanksgiving. I also like to put a little of the turkey gravy in the soup. Enjoy.

23
Seafood

24
Argentine Red Shrimp
We went to Trader Joe‘s because they were advertising these Argentine Red Shrimp (Pleoticus), also called a
Langoustine, that taste like Lobster. They are a little sweeter than regular shrimp, don‘t taste quite like lobster,
but are very good. They come already
peeled and de-veined. Occasionally you
can get them whole, head-on, at the fish
market. You can also get the small
Slipper Lobsters (Scyllarides), which
are a true species of lobster, but smaller
than their northern Maine cousins
(homarus) and have a greenish, bumpy
shell. Here‘s how I prepared them.
Ingredients
1.5 lbs. of large shrimp (if you are using
shell-on shrimp peel and deveined)
3 TBS butter
2 TBS vegetable oil
½ cup flour for dusting the shrimp
1 tsp. Dijon Mustard
3 cloves garlic – smashed to a paste
1 cup white wine
1 pint of heavy cream
Directions
Make sure the shrimp are very dry. Season with salt and pepper. Lightly flour the shrimp and dust off excess.
Melt about 1 TBS. butter in the oil. When the butter/oil is hot, gently drop in the sauté pan to cook. Add a little
of the fresh garlic to the pan. Turn the shrimp when golden brown on one side. Don‘t overcook or they will be
rubbery. Remove from the pan when done and place on a warm plate with a paper towel on it to absorb excess
oil.
Beurre Blanc (white wine butter sauce)
Pour the remaining oil from the pan. Return to high heat and deglaze the pan with the white wine. Add the
remaining garlic. Reduce the wine to a syrup and add the cream. Continue cooking until the cream reduces by
½. It will take on a pale yellow color and will coat a spoon. Remove from the heat and add the remaining butter
whisking in until fully incorporated. Add the Dijon Mustard. Place the shrimp on the plate and drizzle the sauce
over the shrimp. Serve with a nice rice pilaf or fresh pasta and colorful vegetables.

25
Crab Boil
The Crab Boil is a great American feast, often
prepared right on the seashore. However you can
fix a great crab boil in your backyard with the right
tools and ingredients. Here‘s what you need. One
large free standing gas burner. A big pot to hold
the cooking liquid. A big strainer that fits into the
pot. Add plenty of good ingredients. OK, here's
how I would do the clam/crab boil thing.
Ingredients
5 lbs clams
5 lbs mussels
3 lbs. shrimp, shells on (you may substitute
Lobsters or crawfish)
7 or 8 large crabs
5 lbs. smoked Louisiana sausage
2 pkg. Old bay seasoning
4 oz. liquid crab boil
Two lemons, cut in half
2 TBS salt
2 tsp. cayenne pepper
5 bay leaves
15 large yellow skinned potatoes
10 ears of corn, husked
2 medium whole onions
5 cloves garlic
1 qt. cocktail sauce - for dipping - 3 dollars
2 cups melted butter - for dipping - 4 dollars
Procedure
In a large kettle, over a free standing gas burner, bring water to a boil.
Add all seasonings and let simmer for 5 minutes. In the large strainer that comes with the kettle place the
potatoes, corn, crabs, clams, shrimp, and mussels in that order. Carefully drop the strainer into the kettle being
careful not to splash the boiling water over the edge of the kettle or on yourself. Cover the kettle and cook for
about 15 minutes or until the potatoes are just tender.
Strain all the liquid back into the kettle. When most of the dripping has subsided, throw the ingredients onto a
red checkered plastic table cloth, being careful not to spill any of the goodies over the side. Give everyone paper
plates and something to crush or crack the crabs. Serve with melted butter for the clams, mussels, crab, and
corn, along with cocktail sauce for the crabs. You may also serve lots of crusty bread to sop up all the juices.
Dive in; make sure you have bibs for everyone – it‘s a mess but yummy.
This could get pretty expensive so distribute the costs among your guests. This should serve about 10 to 12
people.

26
Clam Chowder
Go to this site to view the various Washington State Clams that are found on our sandy and rocky beaches
during a low tide. http://dnr.metrokc.gov/wlr/waterres/beaches/clam/clamid.htm
Always check for Red Tide warnings. Clams are affected by Red Tide and are poisonous. Red Tide will make
you deathly ill. The large horse clams are
great for Chowder. They should be washed
several times in cold water from the tap.
You may put a little corn meal into the
water to get the clams to purge themselves
of any sand. Virtually any clam can be used
in chowder, cockles, horse clams, sand
clams, and butter clams. This picture
features them all. The horse clam is in the
center, sand clam on the lower rt. Corner,
butter clam on the upper left corner, cockle
is at the bottom center.
My Favorite Clam Chowder recipe - makes
about five
1 cup servings I have made 100's of gallons of Clam Chowder over
the years. But recently, I have been making, a fresher, less thick chowder
that I like real well. I usually make it in small batches, fresh, from scratch, and it is well received. Recently we
went to Edmonds beach when the tide was -2.1 or something and dug a bunch of fresh clams. They are big, a
little chewy, and very flavorful - definitely the best.
Ingredients
1 lb. fresh clams shelled (about 3 lbs. in shell
2 to 3 cups of fresh clam liquor (made from scratch,
see below)
1 medium carrot cut very fine julienne (long thin
strips)
2 stalks celery cut fine julienne
1 medium onion, diced fine
1/2 red bell pepper, chopped fine
2 medium potatoes, peeled and diced into 1/4 inch
cubes
1 bay leaf
1 small sprig of fresh thyme
1 tsp. Worcestershire sauce
1 clove of fresh garlic, chopped fine
fresh ground pepper
salt
1/4 cup, fresh chopped parsley
1 cup 1/2 and 1/2 (you can use heavy cream if you want -
extra rich)
2 TBS unsalted butter
2 TBS flour

27
Directions
Wash and soak the clams in the sink for at least 1 hour, so that they pump out most of their sand; less time if
you buy them fresh at the store. Steam clams in a large sauce pan in either a cup of water or white wine. When
the clams are fully open, remove from the liquid to cool. Remove from the shells. Save the steaming liquor (it‘s
called it liquor for some reason). Sauté the chopped vegetables in 2 TBS of butter until the onions are just
tender. Add the flour and work it into the vegetables. Cook the starchy taste out of the flour for about 3 minutes.
Add the clam liquor. You might want to strain it through a clean towel just to remove any sand. The chowder
will thicken slightly. Add the seasonings except for the parsley. Continue cooking until the potatoes are tender.
Add the cream and parsley and the clams. You may chop the clams if you want. If they are small leave them
whole. If they are the ones you dig yourself, they are likely to be very large and a bit tough so you will want to
chop them into more manageable chunks. Allow the chowder to simmer for a couple of minutes more.* Adjust
seasoning. Serve with good oyster crackers and crusty French bread and either a good cold beer or good
chardonnay.
*The larger muscle pieces of the horse clam can be pounded a bit to make tender. Don‘t pound the stomach, it
will mash all over the place. To eat the stomach or not, is often asked. I have no problem with the large
stomachs. The contents tend to be a greenish-gray. The stomach is more flavorful than other parts of the clam
but great in chowder. Some people don‘t like the soft texture. It‘s a matter of personal taste.

28
Coquilles St. Jacques
Sea scallops (Placopecten magellanicus) are a favorite of just about everyone. This recipe was a hit in French
restaurants during the 60‘s and 70‘s. Large sea scallops
have gotten expensive but it remains a special treat. If you
can find the whole scallops in the shell you can also add
the pink roe to the recipe, which makes it extra rich. I have
added the mushrooms which gives the recipe a smoother
character. I can usually find the large sea scallops at
Costco at a reasonable price. This recipe serves four.
Ingredients
20 large sea scallops (5 per person)
2 cloves fresh garlic, chopped fine
1 lb. sliced mushrooms (any kind, but portabella‘s are too strong)
1 shallot, chopped fine (green onions can also be used)
1 and ½ pint of heavy cream
5TBS unsalted butter
¼ cup good brandy*
Pinch of nutmeg
Pinch of cayenne pepper
Salt and white pepper to taste.
Directions
Soak the scallops in the cream for 3 hours. Strain the scallops well and reserve the cream. Melt 3 TBS of the
butter in a sauté pan, being careful not to not burn. Add the shallots and garlic and cook until the shallots begin
to get translucent. Dry the scallops on paper towels. Season the drained scallops, with salt and pepper. Add the
scallops to the pan, one or two at a time. You don‘t want the scallops to steam, but brown slightly. Cook for
about a minute on each side, removing each one as they are browned, to a warm plate. Add the mushrooms and
cook thoroughly. Season them with a little salt. Remove the mushrooms from the pan. Add the brandy and
flame. Then add the cream to the pan. Reduce the cream by ½. It should take on a pale yellow color, thicken
slightly and coat a spoon. Add the nutmeg and cayenne. Adjust the seasoning with salt and pepper. Finish the
sauce with 2 TBS of the unsalted butter, whisking it in off the heat. Return the scallops and mushrooms to the
sauce. Coquille St. Jacques should be presented in a small round baking dish or gratin dish. Ideally, you should
sprinkle a little ground French bread crumbs on top of the scallops and mushrooms, and brown slightly under a
broiler. Garnish with fresh chives.
Brandy or Cognac Cognac is made exclusively from grapes. It comes from a clearly defined region of France, around the town of
Cognac. Its outstanding environment is unique in the world. With its chalky, stony soil and sunny temperate
climate the region is perfect for vine growing.

29
The traditional vineyard of the Cognac region is divided into six growing areas (crus in French), each with its
different characteristics. To ensure the exceptional quality of its cognacs, The best varieties of cognac uses only
eaux-de-vie from the first four crus, those which have the best topsoil and very chalky subsoil. The grape
variety covering most of the vineyard for the production of cognac is called Ugni Blanc which produces a
fruity, light white wine ideal for distillation.
Cognac is not just a spirit but an eau-de-vie which keeps the essence of the initial wine, losing none of its
pleasant, much sought-after aromas.
Distillers in the Cognac region have been using the double distillation method since the sixteenth century.
Throughout the winter, until the end of March, the copper alambics (pot-stills) work continuously to turn the
wine into eau-de-vie.
The first distillation yields a distillate called brouillis, which concentrates the richest floral aromas. The
brouillis is then distilled. This second distillation gives a more refined and stronger alcohol named the coeur or
heart. It takes nine liters of wine to produce one liter of eau-de-vie de coeur. This coeur .
is a crystal clear eau-de-vie, which will become cognac after a long and natural maturing process. The slow and
natural ageing in oak casks develops the aromas, flavors and colors of Hennessy cognacs.
While ageing, the eaux-de-vie lose some of their strength and volume. Each year, about 2 % evaporates from
the barrels. In Cognac this is dubbed 'the Angels‘ Share'. Evaporation eliminates the very volatile substances,
leaving those that give the eaux-de-vie their bouquet. A great cognac is the result of many eaux-de-vie of
different origins and ages, and with various characteristics, that are assembled over time by our master blender.

30
Crab Bisque
Bisque is a chowder that has all the chunky vegetable pieces strained out. It is a rich, thick, smooth soup that is
very flavorful with the primary ingredient standing out
from the flavors.
Ingredients
1 to 2 lbs. fresh crab meat, depending on the number of
people you are serving. I suggest using whole crabs and
remove the meat from every nook and cranny – save the
shells for stock. If you can find fresh live Dungeness
crabs, all the better. Then you can steam yourself, cool,
remove the crab meat, and save the cooking liquid for the
stock. This basic recipe can be used for lobster bisque,
shrimp, crawfish, etc.
½ medium onion, rough chopped
2 stalks celery, rough chopped
1 medium carrot, rough chopped
1 quart fish stock, shrimp stock, or shrimp stock enriched
with crab shells
1 pint whipping cream
6 TBS unsalted butter
1 TBS tomato paste
½ tsp thyme
2 tsp. paprika
1 tsp. fresh ground pepper
½ tsp. cayenne pepper (or more if you like)
2 cloves garlic, smashed fine
¼ cup sherry
1 tsp. Worcestershire sauce
Procedure
In a quart of shrimp or fish stock, add the shells from two or three crabs, preferably from the crabs you just
removed the crab meat from. Simmer for 20 minutes and strain into a sauce pan.
Sauté the chopped the vegetables in 3 TBS butter until just clear. Add flour to the sautéing vegetables to form a
roux. Pour the stock over the vegetable/flour mix and cook until the soup thickens. Add the tomato paste,
thyme, and garlic to the soup. Add the cream and simmer until the sauce reduces a little and the sauce thickens
again slightly. Add the sherry and Worcestershire sauce. Adjust the seasoning with salt and pepper. Finally add
the crabmeat and simmer for a few minutes more.
Serve with oyster crackers or toast points. Garnish the bisque with a teaspoon of fresh crab meat right in the
center of the soup. Some also garnish with a dollop of sour cream, or both. Bisque can be served with either a
rich oaken chardonnay or even a full bodied red, such as a Cabernet or Syrah. Enjoy.

31
Crawfish Etouffeé
Etouffeé means ―smothered,‖ which refers to the sauce and seafood smothering the rice below, although in this
picture, the scoop of rice sits on top of the etouffeé. Etouffeé is another one of those peasant dishes, made
popular by restaurants in New Orleans, although it is
certainly popular among the Cajuns in all of South
Louisiana. Like its cousin Gumbo, etouffeé is a poor-
man‘s dish. Whatever was hanging around the house
was thrown into the gumbo or etouffeé to make it taste
good while the farmers were out in the fields. The wet
swampy areas they worked in were full of mud-bugs
or crawfish. Crawfish taste a little like lobster but are a
bit more earthy, since they are a fresh water
crustacean. Here is one recipe that I especially like.
Today they are mostly farm raised and cooked by the
hundreds for their tail meat. It takes a lot of crawdads
to make one pound of tail meat.
Ingredients
Shrimp, Crawfish, crab, - about 1.5 lbs of
shrimp or crawfish tails, shells removed (use
the shells to make the stock)
Celery – two stalks, - chopped fine
Green peppers – 1 medium, chopped fine
Onions – 1 medium, chopped fine
Green onions – 3 green onions (scallions)
chopped fine
Garlic – 8 cloves, chopped fine
Bay leaves – 1 bay leaf
Cumin – 1 tsp
Filé powder – 1 tsp
Chili powder – ½ tsp.
Salt – to taste
Cayenne pepper – ¼ tsp or more if you like
HOT!
Worcestershire sauce – 1 tbs.
Tabasco sauce – several good splashes
Brown roux – about 3 oz. of each, oil and flour, perhaps a little more
Chicken or shrimp stock (crawfish if you are using crayfish instead of shrimp) – 2 cups
Dark beer – 1 bottle
Parsley – ¼ cup, chopped fine
Tasso, Andoullie, - 8 oz. chopped fine (Tasso is a delicious, heavily smoked ham with a peppery rind, found in
Louisiana; Andoullie is a smoked garlic sausage from the same. Either can be used, Andoullie is easier to find
than Tasso. You can substitute a good dry cured ham for Tasso)
Make a brown roux by mixing equal parts, by weight, of flour and peanut oil. Cook over medium high heat,
watching carefully, and stirring constantly with a wooden spoon or wire whisk. Gradually the roux will begin to
turn golden brown, light brown, and eventually get the color of dark peanut butter. That is the color you want.
Immediately add the vegetables and continue sautéing for about 5 more minutes. Add the chopped Tasso or
Andoullie. Add the stock, seasonings, and chopped parsley. When the sauce begins to thicken, add the beer and
Worcestershire. Continue cooking for 10 minutes more. Finally add the fish and simmer for about 10 more
minutes. Adjust the seasoning. This is a spicy dish so don‘t be afraid to use plenty of Tabasco or cayenne. A

32
good shrimp or crawfish stock makes the dish. Serve over white rice with plenty of crusty French bread, cold
beer, or a nice red wine.
Shrimp stock
Shrimp shells
½ lemon
Celery
Onion
Carrot
Bay leaf
Whole pepper corns
Old Bay Crab Boil
In 2 quarts of cold water, add shrimp shells, fish bones, crawfish shells, lobster shells, whatever you have. Add
all the seasonings including the Crab Boil. Bring to a boil, skim the scum which will rise to the top. Continue
simmering for 45 minutes. Remove from heat and allow to cool slightly. Strain the stock in a fine sieve or even
through two layers of cheese cloth. Return the stock to a boil and reduce by ½. You can freeze the stock or use
it right away.

33
Gravad Lox
The question has come up, ―Can you eat raw Salmon?‖
Many cultures do, especially with Native Americans
from Alaska and the Arctic Circle. Also Hawaiian‘s
have a recipe for raw salmon that is pickled. The reality
is that the flavor and fat content of most salmon makes it
less of a candidate for eating raw, as in a sushi recipe.
However, whenever you eat Lox, you are essentially
eating cured (but not cooked with heat) salmon. This
Scandinavian recipe for cured salmon (lox) is
surprisingly simple to make. Don‘t be intimidated by the
idea of making your own Lox. It is easy and delicious. I
made some over the weekend and had it on Sunday. The
dish takes 48 hours to cure so if you are planning on
having it on Saturday you should start on a Thursday
afternoon. The curing process pulls the moisture out of
the fish, increases the density, and darkens the flesh slightly. The combined flavor of salt, sugar, dill, and pepper
is great.
Ingredients
1 whole salmon, separated into two fillets with skin and pin bones removed.
½ cup sugar
½ cup salt
½ cup fresh dill, chopped fine with stems removed. Just use the fine leafy tops.
1 TBS fresh ground pepper
Procedure
In a large stainless steel, enameled, or glass baking dish (9‖ by 12‖ Pyrex works fine) sprinkle ½ the cure mix
on the bottom of the pan. Place the salmon fillets, skin side down, on the mixture (remember, the skin should be
removed). Then sprinkle the remainder of the cure mix on the top sides. Grind the pepper on the fish. Cover
with plastic wrap as tightly as possible, directly over the fish. Find a weighted object that is just smaller than the
inside dimensions of the pan. I used a ½ case of soda, where the full box was just the right size to fit into my
glass Pyrex baking dish. After 24 hours, turn the salmon fillets over. Re-cover with the plastic wrap and weight
again. You will notice quite a bit of liquid (brine) has leached out. This is
good. Don‘t get rid of the brine until the 48 hours are up.
After the 48 hours is up, remove the fillets from the pan and place on a
cutting board. Rub the peppery, cure mix off the salmon fillets. Then
carefully slice the salmon fillets with a sharp slicing knife. Try to make
the slices as thin as possible, ideally around 1/8th inch. Slice at an angle
so that the slices are as broad as possible. Practice the thin slice on the
first fillet and by the time you are on the second you should be an expert.
Serving Suggestions
Use the Lox as you would any Lox. Top bagels with cream cheese and Lox. You may also garnish with capers,
thin sliced red onions, and tomato slices. Or you may want to use the traditional Scandinavian mustard sauce.
This is a mixture of ¼ cup Dijon Mustard, red wine 2 TBS. vinegar, 3 TBS. sugar, 1 tsp. dry mustard, 2 TBS
salad oil, and 3 TBS. finely chopped fresh dill. The Scandinavian method is to serve with their thin dry
crackers, the Lox and the mustard-dill sauce.

34
You can make an entire meal featuring the Lox. Serve with dill pickles, an assortment of olives, pickled herring,
an assortment of breads and crackers, as well as cheeses. The Gravad Lox will keep for a week or so in the
fridge, tightly wrapped. Another tradition is to serve the Lox with icy cold shots of good Vodka. It is also great
with champagne.
Salmon Spread
Smoked Salmon Spread (sort of )
10 oz of cooked salmon
4 oz cream cheese or Neufchatel
1 TBS mayonnaise
1 tsp. Worcestershire sauce
1 tsp. Tabasco sauce (more if you like it hotter)
1 clove chopped garlic
3 or 4 drops Wrights Liquid Smoke
Salt and pepper to taste.
Blend all ingredients in a food processor or mixer. It should be fairly smooth. Serve with toasted bagels, toast,
crackers, or as a filling in hollowed out cherry tomatoes, on celery sticks, or in mushroom caps. Its also great
garnished with finely chopped red onions and capers.

35
Mussels in Saffron Sauce
The Pacific Mussel (mytilus edulis) is the queen of
the anchored shellfish. The small blue bivalves can
be found tightly clustered on rocks and pilings all
over the Pacific Northwest in the intertidal
regions. Do not eat mussels taken from creosote
coated pilings as they will be toxic. Cut the
mussels from their base and scrape the beard off
just prior to cooking. Mussels are free from sand
as they do not grow in sandy areas. This recipe
should serve 4 adults as an appetizer
Ingredients
4 lbs of fresh Pacific Mussels, cleaned and scraped
of their beard.
1 shallot finely chopped (sweet onions or green onions can be substituted for shallots)
1 cup of white wine
¼ cup brandy
1 pint of whipping cream
1 pinch (10 to 15 strands) of saffron
Fresh ground pepper to taste
2 TBS chopped parsley
3 TBS unsalted butter (room temp)
Directions
Steam the mussels in the white wine. When the mussels are opened (discard any that don‘t open) place on a
heated platter and cover with a piece of foil. Save the cooking
liquor. In a sauté pan, brown the chopped shallots in a little
butter. Add the brandy and flame. Add the cooking liquor,
about 3 cups, and reduce to about a cup. Add the cream and
reduce by ½, whisking often. Add the saffron and the ground
pepper. Remove from the heat and finish (whisk in) the sauce
with the remaining 2 TBS of butter. Pour the sauce over the
mussels and garnish with a little chopped parsley. Serve with
toasted, buttered French bread rounds and a good Chardonnay.

36
Oyster Stuffing
Oyster stuffing is a great Thanksgiving tradition that I serve every
year. Most people don‘t like Oyster stuffing but it has a devoted
following. Here‘s my recipe:
Ingredients
1 jar of large oysters
½ cup finely chopped onions, or green onions
¼ cup finely chopped celery
¼ cup finely chopped carrot.
1 cup chicken stock
3 cups dried bread, chopped fine
Pepper
Pinch Sage
Directions
Sauté oysters in a little butter, white wine and the chopped vegs.
Chop them up coarsely. Mix with all other ingredients until
stuffing is moist but not gummy. Adjust seasoning. Stuff the neck
cavity of a large turkey immediately prior to placing in oven to
roast. Cook turkey until timer pops or until thickest part of bird
reaches 160 F. Remove stuffing immediately and reserve in a warm serving bowl. Simple but delicious.

37
Quick Northwest Bouillabaisse
I enjoy a good fish stew, especially on cold winter evenings. So, last night I went to the fish counter at my local
Fred Meyer and got just enough fish for our
family of four. I bought a pound of steamer
clams, a pound of mussels, a pound of prawns –
shell on, some white fish, cod and snapper and I
had some scallops in the freezer. You can make
this dish in about 25 minutes, not including the
fish stock, and be eating fresh Northwest Fish
Stew with the family on those cold winter
evenings. It‘s not quite like the Bouillabaisse
from Marseilles France, but pretty good. The
whole meal was less than $20 dollars, not
including the wine.
Ingredients
Two bunches of green onions, chopped or two
leeks, washed well and chopped fine
4 Italian plum tomatoes chopped rough
1 medium red pepper, chopped rough
6 small red or white Finnish potatoes. Feel free
to leave them out if you want to be more
authentic; I kind of like them.
¼ cup of Extra Virgin olive oil
2 TBS. Pernod (a licorice flavored liqueur)
1 ½ quart of fish stock
1 whole bay leaf
½ tsp saffron (if you don‘t have saffron or don‘t like it use a TBS. of paprika and a pinch of sugar – I like to add
some paprika anyway)
½ tsp. red pepper flakes
1 to 2 lbs. steamer clams
1 or 2 lbs. of white fish, cut into 4 pieces
1 lb. of large prawns (save shells)
1 lb. scallops
Any other fish you want to add to the stew.
4 cloves of garlic, chopped fine
1 cup white wine
Directions
In a large pot heat up some very good olive oil. Add the chopped onions or leeks, chopped red pepper, Italian
tomatoes, and any other vegetables you want. When the onions begin to get clear, add your fish stock. Season
the stock with the chopped garlic, bay leaf, saffron, and fresh ground pepper. Add the whitefish at this point and
sauté the pieces a bit. At this point you may also want to add the small red potatoes to cook. Or, you can cook
them separately and add them later, or not serve with potatoes at all.

38
When the soup has begun to boil and the vegetables are cooked, add the rest of the fish and the clams. Cover the
dish for a few minutes or until the clams have opened up and the prawns are pink. Adjust the seasoning with salt
and pepper (you won‘t need much salt).
Serve in a big broad soup bowl with crusty French bread, Garlic Aioli*, or Rouille* and either a sturdy red wine
or flavorful beer. Make sure everyone gets equal portions of the clams, mussels, scallops, and prawns, but save
a few extra mussels for yourself – you are the cook after all.

39
Fish Stock – Court Bouillon (pronounced quah – boo yawn)
Boil the prawn shells and any fish bones you have in about a three quarts of water. Add 1 stalk of rough
chopped celery, an onion – rough chopped, a rough chopped carrot, a couple of bay leaves, a whole lemon, cut
in half, some whole peppercorns, 1 cup white wine, and any other fish scraps you happen to have stored in the
freezer or your fishmonger will part with. Unless you go to a real Fishmonger it‘s unlikely that you will find
any fish bones. You can also add about 2 cups of chicken stock if you don‘t have enough fish bones. Bring the
stock to a boil and skim off the scum. If you have any good clam juice, add it in at this point. I always save the
clam juice from the last time we had steamed clams and put it into a plastic bag and freeze. Then I can use it
whenever I am making a fish sauce. Reduce the heat to a simmer and cook for another 30 minutes. Strain the
stock into another saucepan and reduce to about 2 quarts.
Garlic aioli
3 garlic cloves, chopped
1 large egg
1 TBS freshly squeezed lemon juice
1 TBS chopped fresh parsley
1/2 tsp. salt
2 turns freshly ground black pepper
1/2 cup olive oil
Combine the garlic, egg, lemon juice, parsley, salt and pepper in
a food processor or blender and puree. Add the oil in a slow
stream and continue to process until the mixture has formed a
thick emulsion. Some recipes also call for bread crumbs added at
the end to thicken the paste.
Serve with toasted French bread slices. I like to spread the aioli
on my bread slice and then dip in the bouillabaisse juices – umm!
Rouille 1 red pepper, roasted and peeled
2 cloves garlic
1 pieces of white bread torn into pieces
1 egg yolk
1 tablespoon Dijon mustard
Juice of one lemon
1/2 cup olive oil
Salt and pepper
In a food processor, combine all the ingredients, except for the oil. Puree until smooth. With the machine
running, slowly add the olive oil. Season the emulsion with salt and pepper.
Garlic Painting by Tami Oyler

40
Paella
Paella is one of those amazing indigenous, traditional
rice dishes, that in many ways, helps define the culture
itself. These dishes are peasant dishes and grew out of
a need to use up what they had on hand, or could find
quickly, mostly inexpensive ingredients, and rice,
which would extend almost any meal. For the most
part, they were costal dishes, hence the prodigious use
of seafood.
Virtually every culture has a traditional rice dish of
some sort. In Louisiana it‘s Jambalaya. In Italy, it‘s
risotto. In China, it‘s fried rice. In Morocco, it‘s
chicken Tagine. AND, in Spain, it‘s Paella. All the
dishes work basically the same way, except for
Risotto. You sauté vegetables and meat in hot oil, add
seasonings and rice, some richly flavored stock, and
seafood at the very end. The difference between the
various examples is in the spices and the types of
seafood. Traditionally, Paella used chorizo, the hot
sausage of Spain and the Basque region, Jamon Sorrano – the dry cured mountain ham that Spain is famous for,
Shrimp, heads and all, whitefish of some sort, clams, mussels, and squid. The spices for Paella rely on paprika,
saffron, pepper, bay leaves, and a richly flavored stock, usually made from seafood shells and bones, chicken or
turkey bones, and some tomato flavoring. This is probably not a recipe you want to try at home for you and
your husband. It is best made in a party situation, outside over a burner, in a large Paella pan, for 10 or more.
Each person can bring ingredients and can toss them in the pan at the precise moment. All this contributes to the
event and it just taste‘s better that way.
Now that you know what makes up a good Paella here‘s the recipe:
Ingredients
Rice – enough for 8 people, 1 cup will do. I like long grain because it holds its shape better
Stock – must be homemade, a recipe follows, about 6 cups
Red pepper – chopped fine
Onion – one medium, yellow sweet, chopped fine
Garlic – about 10 cloves, chopped fine
Green onions – on bunch, sliced fine
Chorizo – about 1/2 lb, sliced into ¼ inch thick slices
Linguisa – same or leave out especially if the Chorizo is very fine.
Jamon – about ½ lb. You probably can‘t find any in Seattle so you can use prosciutto instead.
Chicken – use thighs or chicken breasts. Cut boneless chicken breasts into 2 oz. pieces
Olive oil – about ¼ cup of very good, extra virgin
Cayenne pepper – ¼ tsp.
Saffron – a good size pinch, between the thumb and forefingers. It‘s expensive but essential, there is no
substitute
Salt - to taste
Black pepper – fresh ground to taste
Bay leaf – two whole leaves, remove when done.
Clams – 1/2 lb in shell
Mussels – 1/2 lb in shell
Squid – about ½ lb
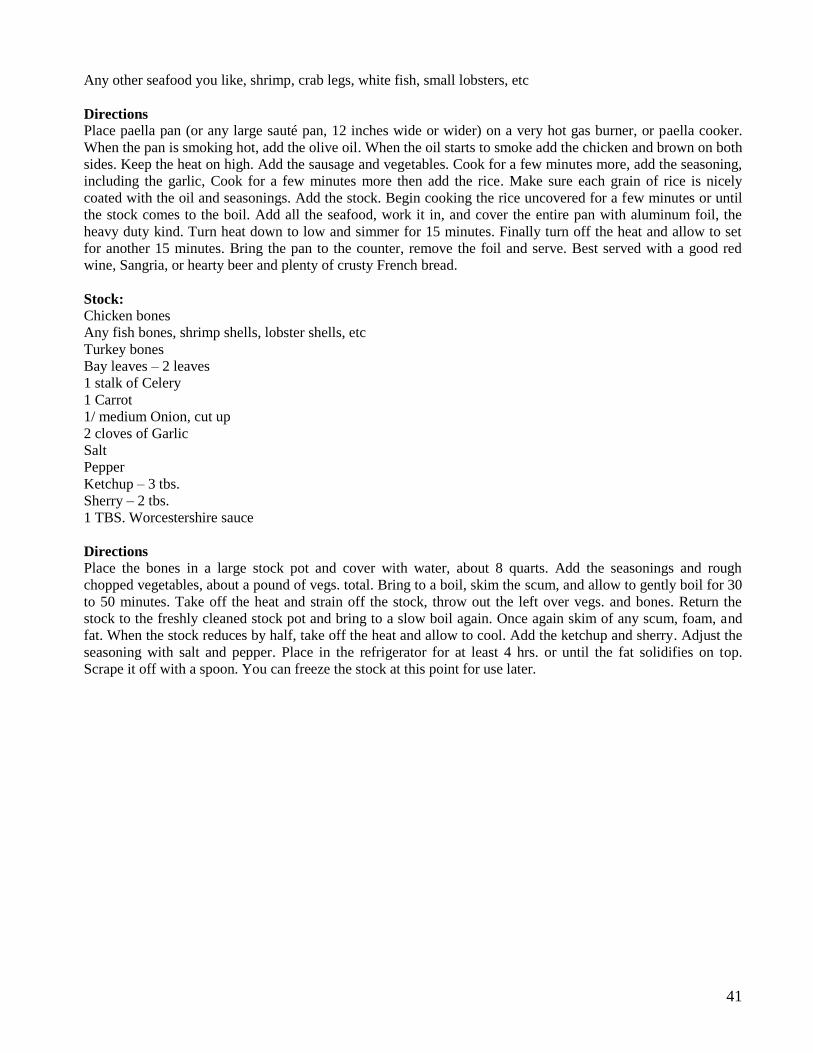
41
Any other seafood you like, shrimp, crab legs, white fish, small lobsters, etc
Directions
Place paella pan (or any large sauté pan, 12 inches wide or wider) on a very hot gas burner, or paella cooker.
When the pan is smoking hot, add the olive oil. When the oil starts to smoke add the chicken and brown on both
sides. Keep the heat on high. Add the sausage and vegetables. Cook for a few minutes more, add the seasoning,
including the garlic, Cook for a few minutes more then add the rice. Make sure each grain of rice is nicely
coated with the oil and seasonings. Add the stock. Begin cooking the rice uncovered for a few minutes or until
the stock comes to the boil. Add all the seafood, work it in, and cover the entire pan with aluminum foil, the
heavy duty kind. Turn heat down to low and simmer for 15 minutes. Finally turn off the heat and allow to set
for another 15 minutes. Bring the pan to the counter, remove the foil and serve. Best served with a good red
wine, Sangria, or hearty beer and plenty of crusty French bread.
Stock:
Chicken bones
Any fish bones, shrimp shells, lobster shells, etc
Turkey bones
Bay leaves – 2 leaves
1 stalk of Celery
1 Carrot
1/ medium Onion, cut up
2 cloves of Garlic
Salt
Pepper
Ketchup – 3 tbs.
Sherry – 2 tbs.
1 TBS. Worcestershire sauce
Directions
Place the bones in a large stock pot and cover with water, about 8 quarts. Add the seasonings and rough
chopped vegetables, about a pound of vegs. total. Bring to a boil, skim the scum, and allow to gently boil for 30
to 50 minutes. Take off the heat and strain off the stock, throw out the left over vegs. and bones. Return the
stock to the freshly cleaned stock pot and bring to a slow boil again. Once again skim of any scum, foam, and
fat. When the stock reduces by half, take off the heat and allow to cool. Add the ketchup and sherry. Adjust the
seasoning with salt and pepper. Place in the refrigerator for at least 4 hrs. or until the fat solidifies on top.
Scrape it off with a spoon. You can freeze the stock at this point for use later.

42
Salmon en Papillote
A great way to prepare salmon is to cook it in a parchment wrapper, in the oven. Any salmon will work with
King being my favorite due to its intense flavor. For that
matter, any cold water finned fish will work. I have made the
dish with swordfish, halibut, and sturgeon. The little
parchment bag traps in all the flavors and steams the salmon
along with anything else sealed in the parchment bag. I start
out with a fairly large circle of cooking parchment, about 12 to
14 inches in diameter. Here‘s the rest of the recipe. It should
serve 4.
Ingredients
4 14‖ circle of parchment paper
1 fresh salmon fillet, pin bones removed, cut into 8 oz.
portions.
2 cups Mornay sauce
6 to 8 oz. of Julienne vegetables, carrots, celery, onions (Julienne means cut in long thin strips, like little match
sticks, the thinner the better)
2 TBS. unsalted butter
Procedure
Butter the parchment pieces on one side. Butter side up, form a bed of Julienne vegetables just below the widest
(diameter) of the parchment. Gently place the salmon piece on top of the vegetables. Lightly season the salmon
with salt and fresh ground pepper. Top with a rounded tablespoon of Mornay sauce. Fold over the buttered
parchment making a half moon shape. Crimp both edges all along the edge of the parchment, forming a sealed
half moon bag with the salmon et all inside. Carefully place on a baking sheet and bake in the oven for about 15
minutes at 360 degrees Fahrenheit. The parchment sac will expand – balloon if you will and be brown around
the edges. Be careful when you open the parchment up as the steam can burn you. The salmon can be eaten
right out of its little baking sac or carefully removed onto a plate. Serve with a rice pilaf or pasta, French bread,
and the wine of your choice.
Mornay sauce
1 cup chicken stock
2 cup ½ & ½ or whole milk
3 to 4 TBS roux (butter & flour)
2 cups shredded gruyere cheese
1 pinch cayenne pepper
1 tsp. Worcestershire sauce
Salt to taste
Make a roux, slowly add the chicken stock and milk or cream. When the sauce has thickened add the shredded
gruyere cheese and blend in evenly. Adjust the seasoning.
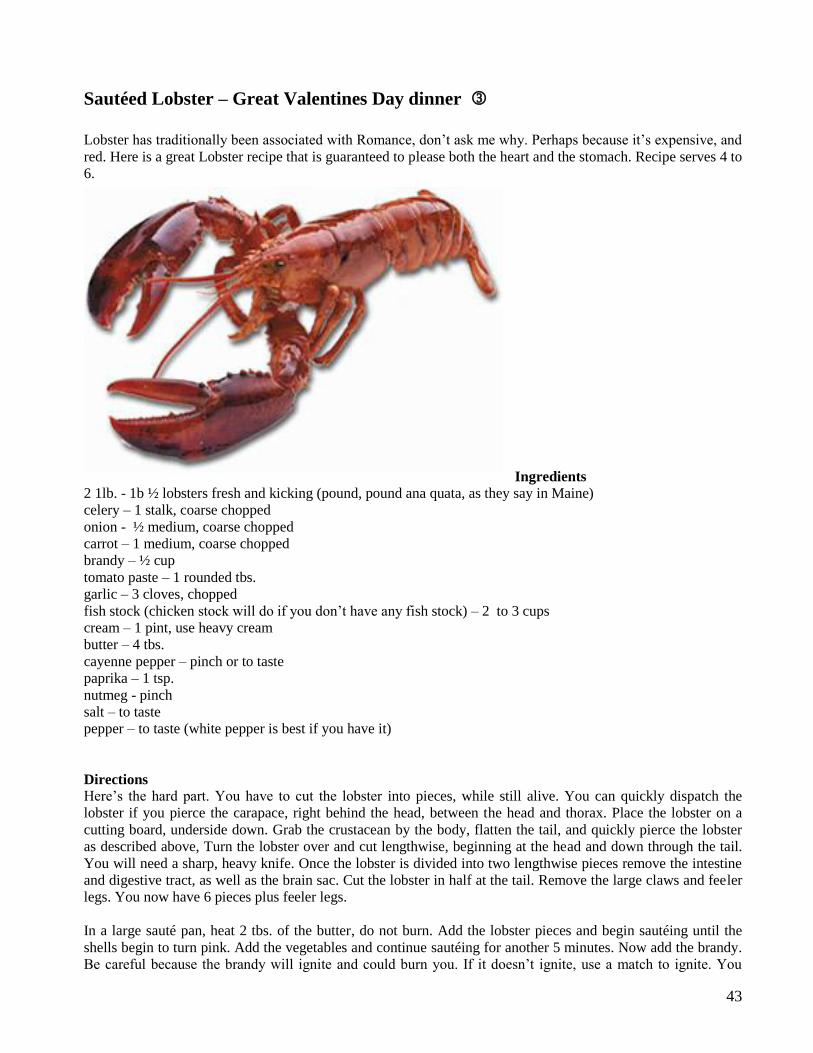
43
Sautéed Lobster – Great Valentines Day dinner
Lobster has traditionally been associated with Romance, don‘t ask me why. Perhaps because it‘s expensive, and
red. Here is a great Lobster recipe that is guaranteed to please both the heart and the stomach. Recipe serves 4 to
6.
Ingredients
2 1lb. - 1b ½ lobsters fresh and kicking (pound, pound ana quata, as they say in Maine)
celery – 1 stalk, coarse chopped
onion - ½ medium, coarse chopped
carrot – 1 medium, coarse chopped
brandy – ½ cup
tomato paste – 1 rounded tbs.
garlic – 3 cloves, chopped
fish stock (chicken stock will do if you don‘t have any fish stock) – 2 to 3 cups
cream – 1 pint, use heavy cream
butter – 4 tbs.
cayenne pepper – pinch or to taste
paprika – 1 tsp.
nutmeg - pinch
salt – to taste
pepper – to taste (white pepper is best if you have it)
Directions
Here‘s the hard part. You have to cut the lobster into pieces, while still alive. You can quickly dispatch the
lobster if you pierce the carapace, right behind the head, between the head and thorax. Place the lobster on a
cutting board, underside down. Grab the crustacean by the body, flatten the tail, and quickly pierce the lobster
as described above, Turn the lobster over and cut lengthwise, beginning at the head and down through the tail.
You will need a sharp, heavy knife. Once the lobster is divided into two lengthwise pieces remove the intestine
and digestive tract, as well as the brain sac. Cut the lobster in half at the tail. Remove the large claws and feeler
legs. You now have 6 pieces plus feeler legs.
In a large sauté pan, heat 2 tbs. of the butter, do not burn. Add the lobster pieces and begin sautéing until the
shells begin to turn pink. Add the vegetables and continue sautéing for another 5 minutes. Now add the brandy.
Be careful because the brandy will ignite and could burn you. If it doesn‘t ignite, use a match to ignite. You

44
want to burn off the alcohol. Simmer for a couple of minutes more, add the stock and seasonings, and tomato
paste. When the stock has reduced somewhat remove the cooked lobster pieces from the pan and place on a
platter. You can go two ways here. Serve the sauce over the lobster pieces on the platter, lobster carefully
arranged, OR, remove the meat from the lobster shells and add to the finished sauce. I prefer the latter.
If you chose the latter, put the empty lobster shells
back into the sauce and cook for a few more minutes.
To finish: Add the cream to the sauce, reduce the
sauce over high heat, until the cream begins to form
small bubbles and the sauce is somewhat reduced.
Strain the sauce through a fine sieve. Whisk in the
remaining butter, and adjust the seasoning. Add the
lobster pieces, which were removed from the shells
(remember that there is a great deal of lobster in the
legs, feelers (little legs), and in the body cavity – get it
all since the lobsters likely cost a fortune). The best
way to get the claw and knuckle pieces out is to use an
extra heavy pair of kitchen shears and cut the knuckles
lengthwise. Use a rolling pin to roll out the tiny feeler
leg pieces. They are sweet and tender. Don‘t waste a
single speck.
The sauce with the lobster pieces can now be served over pasta, rice, toast points, puffed pastry (very nice
touch), or as a soup, garnished with parsley and chives. Serve with an nice buttery, oaken Chardonnay, a Pouilly
Fuisse, or even a medium bodied red, and crusty French bread.

45
Baked Stuffed Lobster Lobster is great served almost any way
you can imagine. One of my favorite
recipes is Baked Stuffed. Split the
Lobster in half, lengthwise, then top
with a lobster/crumb topping, and
bake. In this way you can get two
complete servings out of one lobster.
The presentation is also beautiful and
the flavor is delicious. Here‘s the
process. This recipe serves 4 people
Ingredients
2 Live Maine Lobsters, approximately
2 lb each. One lobster serves two
3 TBS softened Butter
Bread crumbs
¼ cup chopped Leafy or curly Parsley
1 clove, smashed Garlic
1 small onion – chopped fine
1 stalk celery – chopped fine
1 medium carrot – chopped fine
¼ tsp. ground thyme
1 to 2 cups cooked chopped lobster meat (from the claws, knuckles, and pincers of the above lobsters
Salt & pepper to taste.
Directions:
Split the lobsters in half, lengthwise. If you are squeamish about dispatching a live lobster this way, here‘s a
trick. Put the lobster in the freezer for a few minutes. This puts them into a state of suspended animation – they
won‘t feel a thing.
Cutting the lobster lengthwise is a fairly difficult process requiring good hand strength and a very sharp, hefty
knife. Don‘t try this with one of the cheap knives from Ron Popeil.
With the lobster on its back, head pointing towards your belt, insert the tip of the knife into the end of the tail
and begin cutting down straight through the lobster, finishing with the head. Remove the leg pincers and the
claws, with knuckles attached. Remove any innards from the body cavity, saving the tamale if possible. This
can be added to the stuffing.
Steam or boil the claws, knuckles, and pincer/legs for about 8 minutes or until they are bright red and begin to
ooze the telltale white foam from the joints. Allow them to cool. Crack them open with a nutcracker and remove
all the meat. Use a rolling pin to extract the meat from the little leg/pincers. It takes a while but is worth it. Chop
the meat into small pieces.
Sauté the chopped vegetables in a bit of butter until the onions are clear. Mix the breadcrumbs, parsley,
seasonings, vegetables, and lobster meat in a bowl. Add the butter and mix well.
Lightly butter the exposed lobster meat. Pack the stuffing into the body cavity and along the tail, covering the
lobster from head to tail. Place on a sheet pan or cookie sheet and bake in a 400 degree F oven for 15 to 20
minutes or until the tail meat is cooked – it will have a white, opaque look. Serve with drawn butter, a crisp

46
green salad, and crusty French bread. Lobster stands up to both white and red wines. Less dry white wines are
especially good.

47
Seafood Lasagna
This is not a traditional Italian dish because Italians don‘t combine seafood and cheese. It is an American
version of an Italian idea. However, it is
delicious and I have made it many times.
It‘s great as a starter or as a main course.
This is a very rich dish so I recommend
you try it first as an appetizer.
Ingredients
One box of wide Lasagna noodles, par-
cooked and drained
4 cups béchamel sauce
1 cup ricotta cheese
1 lb. sliced mozzarella cheese
½ lb. fresh spinach, lightly cooked and
drained
20 – 30 fresh Basil leaves
½ cup bread crumbs
3 cloves fresh garlic, sliced
2 TBS extra virgin olive oil
8 large scallops – sliced into 12‖ slices
10 large prawns, peeled and deveined
1 large lobster tail, pulled from shell, cut into chunks.
Directions
Prepare a classic béchamel sauce (white sauce). Melt 2 TBS. unsalted butter in a sauce pan, add 4 TBS flour
and blend, This is called a roux (pronounced roo). The exact proportions are equal amounts of butter and flour
by weight. So, four oz. of butter and 4 oz. of flour by weight. Cook the roux for a few minutes, whisking
constantly with a wire whisk. Add 2 cups chicken stock and blend in thoroughly until the sauce thickens. Add a
quart of cream or ½ & ½ and blend in until the sauce re-thickens. Add ½ cup of finely shredded parmesan
cheese, whisking constantly or it will clump. Add 1 tsp. Worcestershire sauce and a pinch of cayenne pepper
and a pinch of nutmeg. Adjust the seasoning with pepper and salt. Set off to the side, but keep warm.
Cook the lasagna noodles to 75% done, not too floppy. The noodles will cook the rest of the way during baking.
Butter a 9‖ by 9‖ glass baking dish. Layer the noodles on the bottom of the dish. Add little spoonfuls of ricotta
cheese, topped with a little spinach and some basil leaves. Drop in a few pieces of the seafood and then pour 1/3
rd of the white sauce over the fish. Top with some mozzarella slices and repeat the process. The final layer
should be topped with the lasagna noodles. Drizzle a little olive oil over the noodles and drizzle the remaining
white sauce on top of that. Top with the bread crumbs. Place the dish in the refrigerator to set for1 to 2 hours. If
you like, you can also make this the night before and take it out about 1 hour before cooking. Bake in a 350
degree Fahrenheit oven for 45 minutes. You should see the sides bubbling and the edges of the noodles should
crisp a little. Allow the lasagna to sit for at least 20 minutes. Cut into small squares if you are using as an
appetizer or large rectangles for dinner size portion. Serve with a Caesar salad and a good white wine.
Feel free to experiment with this dish, using many different seafood types. I‘ve even seen it prepared using
oysters. You can also use sun dried tomatoes instead of the spinach. You can leave the spinach out altogether if
you like and other leafy herbs can be used instead of basil. This will get you started and you can experiment as
you wish. Enjoy.

48
Whitefish – Cajun style
The people of South Louisiana; the
various bayou town, festivals and in local
eateries cook seafood more than any other
type of food. There are plentiful supplies
of oysters, shrimp (pronounced ‗srimp‘)
crabs, catfish, crawfish, trout, and redfish.
Redfish, snapper, pompano, and trout are
often prepared in this saucy manner with
tomatoes, trinity (celery, onions, peppers –
sautéed), and fish stock. This dish is
technically an etouffeé, because the fish is
―smothered‖ with the sauce. The dish can
be made with a brown roux or without a
roux. It was originally a peasant dish, relying on the plentiful and inexpensive bounty of seafood in the waters
all around the fisherman and farmers of the bayou country. It is simple, quick, and very delicious. This dish
feeds 2 hungry people or 4 in need of a snack.
Ingredients
Four large fish fillets (such as from the Red Snapper above)
1 ½ cup trinity (equal parts celery, onions, peppers – chopped medium fine)
½ cup good quality canned plum tomatoes in juice – rough chopped
1 TBS butter or peanut oil
½ tsp. ground bay leaves
½ tsp. cayenne pepper
Dash or Tabasco
1 sprig fresh thyme
½ to 1 cup fish stock
½ lb. shrimp, peeled and deveined
Directions
Lightly season and flour a few fish fillets or a whole trout. Sauté in a bit of butter or peanut oil until just brown
on each side. Remove the fish from the pan and add the vegetables and a ½ cup of whole tomatoes in juice,
rough chopped. Add the shrimp and cook just until pink. Season the fish with salt, pepper, cayenne pepper, a
pinch of ground bay leaves, a sprig of thyme, and a ½ to one cup of fish stock or shrimp stock. You can quickly
make some shrimp stock from the shrimp shells, a little onion, 1 TBS tomato paste, a TBS of Old Bay
seasoning, and water or white wine. Cook it for about 10 minutes and strain it out. If you don‘t have any fish
stock you can use some canned or homemade chicken stock. Let the sauce simmer for a few minutes and return
the fish to the sauce for a minute or two more. Place the fish fillets on a warm plate and top with the sauce and
the shrimp. Serve with fluffy white rice, and crusty French bread. The dish should be flavorful, a bit spicy, and
aromatic.

49
Beef

50
Steak Diane
Steak Diane is a real crowd pleaser. It
was a favorite of my wife and I and was
the dish served on our first anniversary,
many years ago in St. Louis. The dish is
often prepared at your table by a
competent waiter. It is difficult to
prepare for more than four people since
it takes a very large sauté pan.
Ingredients
4 thin (1 inch) thick New York steaks,
pounded flat
3 TBS shallots chopped fine
1 clove garlic chopped fine
1 TBS olive oil
2 TBS butter
1 TBS fresh squeezed lemon juice
¼ cup whipping cream (or heavy cream)
2 oz of good brandy or cognac
2 TBS green peppercorns, drained
2 TBS chopped parsley, broadleaf works best
2 tsp Dijon mustard
¼ tsp cayenne pepper
Pinch of coarse Kosher salt
A few grinds of black pepper
Procedure
Flatten your steaks slightly, to just under ½ inch
thick. Season the steaks with salt and black pepper. If
you can find a sauté burner like the one to the right it
really makes a great presentation to prepare the dish
tableside.
Add the olive oil and 1 TBS butter to a hot sauté pan. When the butter begins to bubble add the steaks and sauté
them for one minute on each side. Add the shallots, garlic, lemon juice, pepper corns, and Dijon mustard and
simmer for another minute. Add the brandy and flambé until the flames subside. Add the heavy cream and
reduce slightly. Remove the steaks and place one steak on each warmed plate. Reduce the sauce for one more
minute and finish with the butter, whisking it in quickly. Turn off the heat and spoon the sauce over each steak.
Garnish with the chopped parsley. Server with a good red wine, crusty French bread, and rice pilaf or sautéed
noodles.

51
Beef Burgundy
Of all the great French Bistro food, Beef Burgundy is perhaps the most comforting. Lying somewhere between
a stew and a pot roast, it has a level of sophistication and appeal
beyond either. First of all, Beef Burgundy is traditionally made with
tenderloin so it‘s tender beyond compare. Secondly, the combination
of flavors give it a uniqueness that is a hit with just about everyone.
Here‘s my favorite way to prepare it.
Ingredients
1.5 lbs beef tenderloin, cut into 1‖ cubes
½ cup flour
3 cups beef stock
1 cup good red wine, preferably a highly drinkable Cabernet
Sauvignon
½ lb. baby carrots
½ lb. baby onions or small boiling onions
1 lbs. button mushrooms
2 bay leaves
2 cloves garlic, chopped fine
1 sprig fresh thyme
4 TBS. unsalted butter
Salt and pepper to taste
Egg noodles for 4 people
Procedure
Brown the onions in butter over medium heat. When the onions are about 50% done, add the carrots and
mushrooms. Continue browning until the onions are about 75% done. Remove from the pan and add the
remaining butter to the pan. Dredge the cubed tenderloin in the flour, coating completely, and knocking off the
excess. Sauté in 2 TBS. of the butter, until just browned. Return the vegetables to the pan and add the red wine.
Allow the wine to burn off its alcohol. Add the beef stock. The sauce should thicken a little due to the flour in
the pan. Season with the bay leaves, garlic, and thyme. Simmer for about 5 minutes or until the whole onions
are tender all the way through. Adjust the seasoning with salt and pepper.
Serving suggestions
Serve the beef burgundy over the cooked egg noodles and garnish with chopped parsley. You may also serve
with little potatoes or even rice. I have also seen the dish served with garlic mashed potatoes on the side. A
sturdy red wine and French bread is the perfect accompaniment.

52
What about Beef Stroganoff?
Beef stroganoff is basically the same dish, but prepared in a German style. White wine is substituted for red
wine. The carrots are left out and just before serving sour cream is added and blended into the dish. Serve the
carrots on the side if you like. The seasonings remain the same. It is also served over egg noodles, garnished
with chopped parsley and a dollop of sour cream.
What about Hungarian Goulash?
Goulash is very similar to Beef Stroganoff and Beef Burgundy. Everything remains the same except you leave
out the carrots. The dish starts out the same way, with red wine being used instead of white, as in stroganoff.
Sauté the onions and mushrooms in butter or olive oil until the onions are almost tender.
Remove from the pan and add the floured meat, browning thoroughly.
When browned add the stock and seasonings.
At the point you add the wine and beef stock, add 3 generous tablespoons of good Hungarian or Spanish
paprika. This gives the sauce its characteristic dark red color.
Finally, add the vegetables back into the pan when the beef is tender. Continue to simmer until the onions are
tender.
Serve over egg noodles. Once again, garnish with chopped parsley and a dollop of sour cream. Goulash is
traditionally not made with tenderloin. It is a peasant dish so less tender cuts of meat are used. I have
successfully used top round and sliced it thin. It needs to cook a little longer in its sauce, so add the onions and
mushrooms back into the dish once the meat is almost tender. You may also use what‘s called, Mock Tender.
That‘s the center cut large round piece which is included in a Chuck roast. If you have a large Chuck roast and
you can feed everyone in your family with the remaining pieces of the chuck, hold out the Mock Tender and
pop it in the freezer. When you get a couple of them, thaw and use for Goulash. Both goulash and stroganoff are
great served with cold beer or a good red wine.

53
Beef Grilliades
A great way to stretch your budget is to use
cheaper cuts of meats, slice the beef into thin
pieces and pound them thin between plastic. The
pounding with a beef mallet is a good way to
tenderize the meat. It also allows the meat to
absorb any flavors and to hold on to sauces well. I
usually start out with a top round roast, eye of
round, or even chuck roast. I remove the fat and
sinew with a sharp knife, leaving the large lean
beef pieces behind.
Ingredients
2 to 3 lbs of beef roast – trimmed of fat and
sinew.
2 stalks of celery, diced medium fine
1 carrot, diced medium fine
1 medium onion, diced medium fine
1 green pepper, diced medium fine
3 Roma tomatoes, diced medium fine
2 lbs. mushrooms, quartered
8 cloves of garlic, chopped fine
1 TBS Worcestershire sauce
3 bay leaves
4 fresh sage leaves
1 tsp. thyme leaves
1 tsp. cayenne pepper
1 TBS. paprika
2 cups good red wine
8 cups of beef stock
4 TBS. butter
4 TBS. vegetable oil
Directions
Slice the beef, against the grain into thin slices, often called escallops in French. Pound the beef thin with a
meat mallet, in between sheets of clear plastic bag material (take a thick freezer bag and cut the sides out so you
can open it up like a book to receive the meat)
Set the pounded meat slices aside.
Heat the oil and butter in a large casserole pot or large soup pot. Season the meat on both sides with salt and
pepper. Dredge the beef escallops in flour, dust off lightly and brown the meat in the pan over high heat. Put
only a few slices in the pan at a time so the meat doesn‘t steam. The meat needs to brown up nicely before
removing from the pan. Use more oil if needed. Set the slices on a platter.
Add the chopped vegetables and seasonings to the pan and sauté for about 5 minutes or until the onions become
somewhat clear. Add the mushrooms to that pan at this point and cook for a few more minutes. The mushrooms
will absorb any remaining oil so you might want to add a little bit of butter to the sautéing vegetables before
you add the mushrooms.
Add the red wine and cook for a minute or so to cook off some of the alcohol. Add the beef stock and return the
meat to the pan. Push the meat down into the stock. Cover the large pot and place into an oven at 360 degrees F.
Cook for 1 hour.

54
Remove the meat from the pot and place a few pieces on each dinner plate. Adjust the seasoning of the sauce
with salt and pepper Cover each serving of meat with the cooked vegetables and sauce. It should be slightly
thick, aromatic, and very delicious.
Serve over cooked rice, pasta, grits, or with little red potatoes and plenty of good crusty bread and red wine.
This is a hearty dish, great for cold winter nights.
Note: painting, ―Grillades‖ by Jorg Hermle
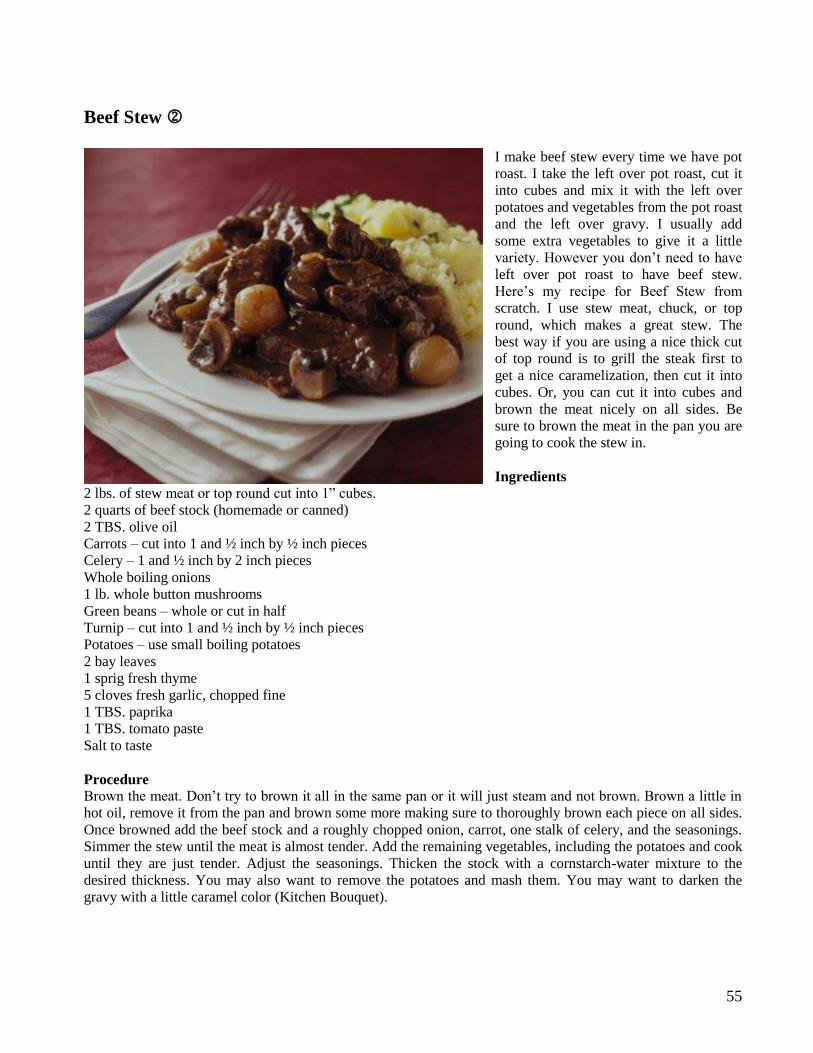
55
Beef Stew
I make beef stew every time we have pot
roast. I take the left over pot roast, cut it
into cubes and mix it with the left over
potatoes and vegetables from the pot roast
and the left over gravy. I usually add
some extra vegetables to give it a little
variety. However you don‘t need to have
left over pot roast to have beef stew.
Here‘s my recipe for Beef Stew from
scratch. I use stew meat, chuck, or top
round, which makes a great stew. The
best way if you are using a nice thick cut
of top round is to grill the steak first to
get a nice caramelization, then cut it into
cubes. Or, you can cut it into cubes and
brown the meat nicely on all sides. Be
sure to brown the meat in the pan you are
going to cook the stew in.
Ingredients
2 lbs. of stew meat or top round cut into 1‖ cubes.
2 quarts of beef stock (homemade or canned)
2 TBS. olive oil
Carrots – cut into 1 and ½ inch by ½ inch pieces
Celery – 1 and ½ inch by 2 inch pieces
Whole boiling onions
1 lb. whole button mushrooms
Green beans – whole or cut in half
Turnip – cut into 1 and ½ inch by ½ inch pieces
Potatoes – use small boiling potatoes
2 bay leaves
1 sprig fresh thyme
5 cloves fresh garlic, chopped fine
1 TBS. paprika
1 TBS. tomato paste
Salt to taste
Procedure
Brown the meat. Don‘t try to brown it all in the same pan or it will just steam and not brown. Brown a little in
hot oil, remove it from the pan and brown some more making sure to thoroughly brown each piece on all sides.
Once browned add the beef stock and a roughly chopped onion, carrot, one stalk of celery, and the seasonings.
Simmer the stew until the meat is almost tender. Add the remaining vegetables, including the potatoes and cook
until they are just tender. Adjust the seasonings. Thicken the stock with a cornstarch-water mixture to the
desired thickness. You may also want to remove the potatoes and mash them. You may want to darken the
gravy with a little caramel color (Kitchen Bouquet).

56
Quick Beef Gravy
How to make beef gravy when you don‘t have any beef stock and you
don‘t want to use any of those foul tasting packaged gravy mixes. The
best sauces are made from homemade stocks, which can take hours,
sometimes even a day to make. Those classic stocks require the
browning of bones and vegetables, then boiling the bones in a large stock
pot overnight, skimming the residue which rises to the top, straining,
reducing, clarifying, and finally reducing again to a naturally thick sauce
called a demi glace. These days, who has time for that? There are plenty
of packaged gravy mixes on the market but they don‘t taste like
homemade gravy, the kind that grandma used to make.
However, there are some things you can do to cheat, and get a gravy
or sauce that approximates the real thing. Here are a couple of recipes for
making acceptable gravy in minutes. It doesn‘t taste quite like the real stuff, but works well enough for most
folks, all except those with the most discriminating pallets.
1. If you are roasting a piece of beef, you will undoubtedly have some stock to work with. Remove the
roast from the roasting pan and deglaze the pan. This means adding some liquid to the pan, while on
high heat, to dislodge those browned bits of crisp and caramelized juices accumulated. To make a better
stock, start out with placing some celery, onions, and carrots into the roasting pan from the very
beginning. As the vegetables brown they will impart great flavor to the sauce as the pan is deglazed.
You can use plain water to deglaze but I recommend a little red wine. Once the bottom and sides of the
roasting pan are cleaned of particles, add some water that has been enriched with some prepared beef
paste. You can buy jars of beef paste at Costco or other good food markets. Stir the water and beef paste
into the deglazing liquid. In a separate pan, make a brown roux. A roux is a mixture of equal parts by
weight of oil and flour that is cooked for a time to make the flour particles most receptive to thicken a
liquid. When the roux is further browned to the color of peanut butter by slowly cooking the mixture,
stirring constantly, over medium high heat until the correct color is reached. The roux is extremely hot
at its final state and will burn you badly if you are not careful. When the correct color is achieved,
remove from the heat and gradually stir the roux into the simmering liquid in the roasting pan. When
the gravy has achieved the right thickness (your choice) don‘t add any more. You can final season the
gravy by adjusting the salt and pepper, and adding a little fresh chopped garlic. Then add a tsp. of
Worcestershire sauce. You can further darken the gravy by adding a little Kitchen Bouquet, which is
nothing more than caramel color. Whisk in a Tbs. of butter just before serving. This gravy will have a
nice flavor and will compliment any beef or veal dish. This also works for chicken, but no need to
brown the roux when making chicken gravy As I mentioned earlier, it‘s not quite as good as the real
stuff, but works well in a pinch.. But, there is an even quicker method.
2. If you don‘t have any roast with its juices to rely on, you can make a quick gravy that works OK. Start
out by sautéing rough chopped onions, celery, 1 TBS tomato paste, and carrots in a pan with a bit of
butter or margarine. When the veg‘s. have browned, deglaze the pan with a little red wine or just water.
Stir for a minute or two, then add some prepared stock. Once again I use some beef paste and 1 can of
beef consommé. Season the mixture with a bay leaf, pepper, and fresh chopped garlic. Let the mixture
simmer for 3 or 4 minutes. In the meantime, make a brown roux, just as we did in the earlier recipe.
Thicken the gravy with the brown roux to the desired thickness. Adjust the seasoning and darken with a
little Kitchen Bouquet. You may also add a Tbs. of ketchup at this point. It will give the gravy a little
extra zip, sheen, and better color. Finish the sauce with a Tbs. of butter, whisking it in just before
serving.
Both of these gravy recipes will never substitute for the real thing, but are fine if you are in a hurry. Go
ahead and experiment with them to your heart‘s content. The cost of the ingredients is low so if you make a
mistake and have to throw it away you have not lost much. You can do the same thing with chicken just

57
substitute chicken paste. There are some very good prepared chicken pastes on the market made with real
chicken bones, etc. If you are cooking a pork roast, use chicken paste, since you probably won‘t find any
pork base. Nearly every professional kitchen in the world uses some kind of prepared beef or chicken paste
at some point, regardless of what the chef will try to tell you. There are some very good ones on the market,
with Minor‘s and Schreiber‘s being two of the better brands. Knorr also makes a good professional stock
enhancer. I also frequently use Swanson‘s Chicken stock and Campbell‘s Beef Consommé, which is quite
good.

58
Southwest Pot Roast
Recently I had the Southwest style Post Roast from Desert
Fire restaurant. It was delicious. I think I have duplicated the
rich, southwest flavors in both their pot roast and in their
tasty mashed potatoes. Warning - THIS IS NOT A LOW-
CAL DISH, AND NOT FOR THE TIMID. Make sure you
use real butter, if you don't have it, go get it.
Ingredients
1 3 to 5 LB thick chuck blade roast (or any good piece of beef suitable for two stage or braising, moist cooking
method will work)
8 - 10 cups of beef stock or enough to cover the
beef (natural is best, but canned or paste will work)
6 cloves garlic, smashed and chopped fine
1 medium onion, coarse chopped
2 medium carrots, coarse chopped
2 small zucchini, cut in thick rounds
2 stalks celery, coarse chopped
1 bay leaf
4 to 6 sprigs of fresh oregano
2 TBS. of tomato paste
1 small jalapeño pepper, seeds removed, chopped fine
1 large red mild pepper (or any other combination of mild southwest
peppers)
3 or 4 dark dried poblano peppers. You see them hanging in
specialty food shops all the time) peppers, re-hydrated and
pureed.
1 small hot pepper, of your choice, remove seeds, chopped
fine - add as
much as you want, don't overdo it. (don't get it in your eyes)
1/2 fresh ground black pepper
Directions
Soak the poblano peppers in boiling water. Remove peppers,
puree in a blender, add peppers and soaking water to pot
roast cooking liquid. In a large cast iron Dutch oven (you
may also use a roasting pan), over high heat, with a 1/4 cup
of olive oil, thoroughly brown (almost
black to get good caramelizing) the roast on all sides, add
the vegetables and the liquid to just cover the roast. Add
liquid as necessary. Season with the salt and black pepper.
Cook the roast in a 325 degree oven, covered or cook on the

59
top of the stove. After a couple of hours, check for tenderness.
When the meat is almost tender, add the garlic and other seasonings. At this point, add fresh carrots, small baby
onions, zucchini, potatoes (as many as you need for 6 to 8 people) and any other vegetable you want to
accompany the pot roast. Cook the meat until it shreds easily. When the vegetables are done, remove them to a
warm platter. Put the drained potatoes and some of the drained vegetable bits from the sauce into a mixing
bowl, crush with a potato masher, add 2 cloves garlic, a bit of the chopped pepper, 3 TBS real butter, ¼ cup
heavy cream, and 1 cup shredded sharp cheddar cheese. Whip the potatoes to a mash and season to taste. They
should have a distinct garlic/peppery flavor.
The sauce should be made from the cooking liquid. Whatever vegetable bits remain in the stock, puree using a
blender or electric mixing wand. Make a brown roux by cooking equal parts (by weight) of peanut oil and flour
in a thick bottomed pan over med-high heat. Stir constantly until the roux attains a peanut butter color. Do not
blacken or burn the flour, if you do, throw it away and start over. Thicken the sauce with the roux to your
desired consistency. Finish the sauce with a TBS or 2 of real butter, and adjust seasoning. Serve the pot roast on
a large plate with the mashed potatoes, cooked vegetables, a healthy serving of the sauce, good thick crusty
Italian bread, and a heady red wine. It should be spicy, but not fiery HOT! The sauce should be redolent of
peppers and have a rich smooth character.
Hot bread spread:
combine 1/4 stick of butter, 1 clove of smashed, finely chopped garlic, a tsp. of Dijon mustard, a TBS of extra
virgin olive oil, and a dash or two or three of cayenne pepper. Blend in a bowl with a fork until it is a smooth
mixture. This is great on the bread with the pot roast, or anytime. It's also good on vegetables.
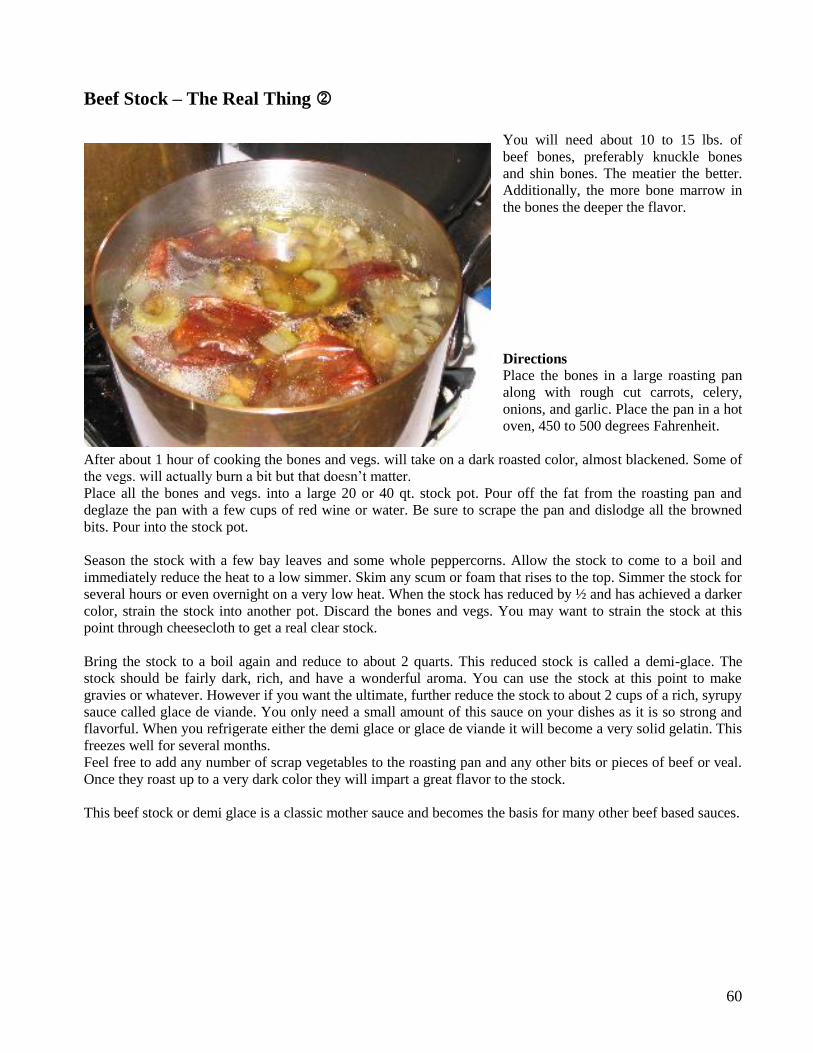
60
Beef Stock – The Real Thing
You will need about 10 to 15 lbs. of
beef bones, preferably knuckle bones
and shin bones. The meatier the better.
Additionally, the more bone marrow in
the bones the deeper the flavor.
Directions
Place the bones in a large roasting pan
along with rough cut carrots, celery,
onions, and garlic. Place the pan in a hot
oven, 450 to 500 degrees Fahrenheit.
After about 1 hour of cooking the bones and vegs. will take on a dark roasted color, almost blackened. Some of
the vegs. will actually burn a bit but that doesn‘t matter.
Place all the bones and vegs. into a large 20 or 40 qt. stock pot. Pour off the fat from the roasting pan and
deglaze the pan with a few cups of red wine or water. Be sure to scrape the pan and dislodge all the browned
bits. Pour into the stock pot.
Season the stock with a few bay leaves and some whole peppercorns. Allow the stock to come to a boil and
immediately reduce the heat to a low simmer. Skim any scum or foam that rises to the top. Simmer the stock for
several hours or even overnight on a very low heat. When the stock has reduced by ½ and has achieved a darker
color, strain the stock into another pot. Discard the bones and vegs. You may want to strain the stock at this
point through cheesecloth to get a real clear stock.
Bring the stock to a boil again and reduce to about 2 quarts. This reduced stock is called a demi-glace. The
stock should be fairly dark, rich, and have a wonderful aroma. You can use the stock at this point to make
gravies or whatever. However if you want the ultimate, further reduce the stock to about 2 cups of a rich, syrupy
sauce called glace de viande. You only need a small amount of this sauce on your dishes as it is so strong and
flavorful. When you refrigerate either the demi glace or glace de viande it will become a very solid gelatin. This
freezes well for several months.
Feel free to add any number of scrap vegetables to the roasting pan and any other bits or pieces of beef or veal.
Once they roast up to a very dark color they will impart a great flavor to the stock.
This beef stock or demi glace is a classic mother sauce and becomes the basis for many other beef based sauces.

61
Copyright 2002, Dave Stiles
Summertime means Burgers on the Grill
The other day someone asked me, ―Dave, do you ever
eat regular food and not all that gourmet stuff all the
time?‖ So I thought I would give you my thoughts on
Hamburgers. I believe that a good hamburger is one of
the best foods ever created. Burgers are a religious thing
for some people, so these are my preferences. Obviously
its not ham - it‘s beef. So treat it like beef. Here‘s some
thoughts.
1. Don‘t use extra lean beef, it‘s too dry and
doesn‘t hold together well. Use at least 20% fat
content, most of it will drip away in the cooking
process anyway, but during the cooking, the fat
transfers flavors to the meat and makes for a
better hamburger. It‘s the same principle in
Prime steak vs. Choice. The more fat marbling
the better the flavor. If you are worried about
calories, cholesterol and all, grill some fish.
2. Don‘t fry burgers on a griddle or in a frying pan.
First of all, the burger doesn‘t taste as good (although there are some grilled burger aficionados that
disagree, I think they are wrong). Secondly, the burger sits in its own fat and the meat absorbs more fat
than necessary for good taste. Burgers are best when broiled, over a real flame, charcoal is even better.
The heat of charcoal is hotter than any other type of broiling. If you have any apple, cherry, or hickory
wood chips available, throw them on the hot coals just before placing the burgers on the grate. The taste
is even better. Just remember how good the burgers tasted when you went camping as a kid, cooked
over an open flame. I cooked burgers this winter on the grill outside. It was cold and actually snowing
once. I had a thick coat on and my son held an umbrella. They were great. Don‘t be a wimp – go
outside and cook.
3. The Grate. The broiling grate should be as thick and sturdy as you can find. There are some thick cast
iron grills that work best. They hold the heat, make good markings on the burger, and cook the burger
quickly. The thin wire ones just don‘t make the grade. You will spend a little more for a thick, heavy
cast iron grate but it‘s worth it. Make sure you pre-heat the grate. If you are using a gas grill allow the
grate to heat up to smoking temperature. Many grills can be retrofitted with good cast iron grates. Home
Depot and other hardware stores sell them.
4. On cleaning the grill. Yah, whatever. If you use a heavy cast iron grate, don‘t use soap and water, it will
destroy the ―seasoning‖ that will take place over time. Let the high heat sterilize the grate, then simply
brush off the charred bits with a fine wire brush and then oil the grate for use the next time. If you are
using a porcelain or chromed grate you will need to clean it more thoroughly, using soap and water.
This is another good reason for using cast iron – I hate to clean the grill, but even I can brush it down
while it‘s still hot and rub it with a little vegetable oil.
5. Burgers should be well seasoned. Most cuts of beef that make up burgers are inferior cuts. As Emeril
says, ―I don‘t know where you get your meet, but where I come from the meat does not come pre-
seasoned.‖ Beef will take a good deal of seasoning without adversely affecting the flavor. Season well
with salt, pepper, and garlic just prior to placing on the broiling grate. You may even want to mix the
seasonings into the meat in a mixing bowl. This really can enhance the flavor. I like to add
Worcestershire sauce, garlic powder, onion powder, salt and pepper. Mix the burger well before
forming into patties.

62
6. Burgers should be fairly thin. I see people making burgers that are so thick they can‘t possibly be
cooked evenly. They look more like a meatball than a burger. Nothing is worse than a crusty black
burger on the outside and red on the inside. If the burger patty is formed thin, about ½ inch thick or
even less, it cooks evenly and quickly. More of the burger absorbs the smoky flavor from the charcoals.
If you want more meat, use two patties.
7. Use a good quality bun, but even better, use French bread, hollowed out a bit to remove some of the
excess bread, buttered lightly, and toasted on the grill. The taste is great. If it‘s fresh, it‘s a little crusty
on the outside, soft and chewy below the crust. Besides the inner curved, carved out area of the French
bread holds the burger better. You should make the thin meat patty a little longer than wide when using
French bread. Hoagie bread works well also. If you do use a standard bun, make sure you toast it. That
way the bread doesn‘t get too soggy and it adds to the texture of the entire burger eating experience.
8. I‘m not a big fan of too much on the burger besides dressing, tomato, and lettuce. However bacon and
avocado is great. I have also put Blue Cheese on my burgers, which is a great taste combination. Some
of the other things I see people put on burgers, well I have to ask myself, ―what are they thinking.‖
9. Cheese. I‘m an American Cheese fan. Cheddar is good, but high quality American cheese is the best
because it melts so quickly and permeates the burger for a great flavor combination. Swiss will not
stand up to broiled meat and doesn‘t melt well. The best American cheese is ―Old English‖ from Kraft.
It‘s a little hard to find but has a great cheddar flavor and all the texture of American cheese.
10. Special sauce. I like a combination sauce, much like the McDonalds special sauce. I slather it on
generously. Here‘s the recipe
½ cup mayonnaise
½ cup ketchup
1 tsp Worcestershire sauce
1 tsp salt
1 tsp fine ground black pepper
1 tsp granulated garlic (not garlic salt)
1 tsp granulated onion
2 TBS yellow table mustard
2 TBS dill pickle relish, or chopped dill pickles
3 dashes of Tabasco sauce
Mix well. Some like more ketchup, some more mustard, you decide. I like it a bit spicy so I use more
Tabasco. Use liberally on both top and bottom of bread. Makes enough for about 10 burgers.
11. Doneness – burgers should be cooked medium to medium well. Even though the likelihood of getting
food poison from ground beef is remote, it‘s best to be careful. Don‘t overcook to well done, the burger
is dry and the flavor is gone.
12. Burgers should be a little sloppy, that‘s part of the fun of eating a burger. They should definitely not be
dry. What fun is that, and besides, you want a good combination of texture, flavor, moistness, and color.
All these things contribute to the perfect burger.
13. Shredded lettuce vs. lettuce pieces. I am a fan of whole lettuce pieces. The shredded lettuce can turn
very quickly and bleeds water into the bun. The whole lettuce piece has good flavor, texture, and better
color. The best lettuce for burgers is bib lettuce. It‘s soft, flavorful and fits on the bun well. Green leaf
works well too. Don‘t bother with head lettuce, it has zero flavor and no nutrients (what a joke,
discussing nutrition and burgers in the same paragraph).
14. Tomatoes from the supermarket are usually lousy. Go to a fruit market and buy local if you can. Or
better yet, grow you own. If you have to use store bought tomatoes use the Italian plum tomato. They
have more flavor. Slice the tomato thin. A thick tomato refuses to stay on the bun.
15. Onions. I like sliced onions on my burger but many people don‘t because onions have a pretty strong
flavor and it sometimes overpowers the burger. Use a sweet onion like the Walla Walla Sweet or the
Vidalia. I prefer the thin sliced vs. thick sliced. However, a nice touch is to thin slice a medium onion
and sauté it in a bit of butter or olive oil until the onion is caramelized. Then just top the burger with a
dollop of caramelized onion – great taste.

63
16. What to serve with burgers. I like French fries, but they are sometimes a hassle to make at home, unless
you have one of those cool new fangled frying machines with the shortening stored in the fryer and the
filter and all. The oil can go rancid pretty quickly so be careful. Baked frozen fries are OK but not as
good as the deep fried ones. Chips are good, so is potato salad (cooking good French fries is a whole
nother lesson).
17. What to drink with burgers. I‘ve tried all combinations. Beer is a little too overpowering. I usually say,
―Beer before, Beer after, Beer between burgers, just don‘t wash down your burger with Beer.‖ Coke is
good, with 7-UP a close second. Red wine is a little too overpowering, and white wine can not stand up
to burgers. Iced tea is an excellent choice and the flavor compliments the burger well. It‘s not heavy,
not too strong. Lemonade is too tart and is not a good combination with Burgers
Well, that‘s my burger story and I‘m sticking to it. Any thoughts drop me an email. Summer‘s almost here, now
go out there and broil that burger.

64
Pastrami
You can easily make your own
pastrami and it‘s delicious. The
recipe is so simple you won‘t
believe it. I start out with a
brisket of beef, corned if you
like.
Ingredients
1 large corned beef brisket,
spices removed and dried
2 cups soy sauce
1 TBS Wrights Liquid Smoke
½ cup cracked black pepper
Directions
Find a nice corned beef brisket
and wash away the pickling
spices, etc. Dry it off and roll it
in rough cracked black pepper. Place it in a pan and carefully pour in a marinade made from it a mixture of soy
sauce and Wrights Liquid Smoke. Once the meat is covered leave it for at least 12 hours and carefully turn it for
another 12 hours. Remove from the marinade and roast on a rack in a slow oven – 275o F for about 3 hours,
covered with aluminum foil. Allow to cool and slice very thin, across the grain.

65
Sauerbraten
Every October for many years our family has celebrated the
Oktoberfest by cooking Sauerbraten, potato pancakes, and
sweet & sour cabbage. The recipe is one that I served many
times as a special at the 13 Coins. It was always quite
popular. Since my wife is German there is an added reason to
prepare the dish. Her Father really enjoyed the Sauerbraten
and felt as though I was catering to his German heritage by
preparing it for him. Here‘s the recipe.
Ingredients
3 to 5 lb. Beef roast, bottom round, eye of round, or even a
chuck roast
Marinade
1 bottle good red wine
½ cup red wine vinegar
1 TBS. juniper berries
6 cloves garlic
3 bay leaves
1 large sprig of fresh thyme or 1 tsp. of dried thyme
1 TBS. whole peppercorns
1 cinnamon stick, crushed
3 or 4 whole cloves
1 small onion, rough cut
Directions
Place the beef in a large plastic, glass, or stainless bowl. Pour the marinade over the beef to cover it. If you
don‘t have enough, add more wine. Reserve the marinade because it will be your cooking liquid and the base
for the sauce.
After 3 or 4 days of marinating (turn the beef each day) drain the beef but save the strained marinade. Season
with salt and pepper and brown on all sides in a roasting pan or in a sauté pan. Since this is a braised dish it
requires two steps in cooking – browning then finishing the cooking in liquid. Place the browned roast in a
roasting pan and add about two quarts of the strained marinating liquid. Cook the beef until tender. Reserve on a
platter and make the sauce.
Sauce
1 TBS. Worcestershire sauce
2 quarts of the cooking liquid
3 TBS brown sugar
8 to 10 oz. brown roux
Make a brown roux by mixing equal parts of flour and butter (or oil) in a heavy bottomed sauce pan. Cook the
roux over medium high heat stirring continuously with a wooden spoon or wire whip until it achieves the color
of dark peanut butter. Gradually add spoonfuls of the roux to the boiling stock that the beef has just cooked in.

66
When you achieve the desired thickness adjust the seasoning with the Worcestershire sauce and some prepared
beef paste if necessary. Adjust for salt and pepper. You may also want to add a little brown sugar at this point to
make the sauce slightly sweet.
Serve the sliced meat with the sauce covering it. Serve with potato pancakes and sweet & sour cabbage.
Potato pancakes
Ingredients
3 medium Russet potatoes, peeled
1 green onion, chopped fine
1 egg
1 TBS. salad oil or melted butter
1 tsp. baking soda
1 tsp. salt
¼ cup flour
Directions
Shred the potatoes using a rotary shredder, food processor, or box grater. Place the shredded potatoes into a
bowl and add the other ingredients. Mix well. Spread the pancake batter onto a pancake griddle, making about 3
inch irregular pancakes. Top with homemade apple sauce. The pancakes should be crisp, more like a thin hash-
brown than a traditional pancake.
Sweet & Sour Cabbage
Ingredients
1 small head of white cabbage, trimmed, cored, and shredded
½ head of red cabbage, trimmed, cored, and shredded
One medium onion, sliced fine
Two apples, peeled, cored, and sliced
2 heads garlic, smashed fine
½ lb chopped bacon
1 cup brown sugar
1 cup apple cider vinegar
Salt and pepper
Directions
Sauté the chopped bacon until it just begins to brown, not crisp. Save most of the bacon fat in the pan. Add the
onions, garlic, apples, and cabbage to the bacon. Begin cooking slowly in a large covered pot until the cabbage
begins to cook down. Continue cooking for another 15 minutes before adding the sugar and vinegar. Cook for
another 25 minutes over low heat until the cabbage is very tender and caramelized. Adjust the seasoning with
salt and pepper. If too sweet add a little more vinegar. If not sour enough add a little more vinegar. Taste several
times in the cooking process to check and adjust the flavors. It should be mellow with a tang and round
sweetness.
Variations
You may substitute a good dark German beer for the wine if you like, although I don‘t think it is as good. You
may also use beer in the cabbage recipe. If you use a chuck roast you may want to skim off the fat from the
sauce after the cooking process. You can garnish the Sauerbraten with a dollop or two of sour cream. The sauce
should be pungent, slightly sweet, rich. This is not a dish for the faint of heart; it‘s caloric, rich, and robust.

67
Server with big hearty red wines or cold German beer. Sauerbraten is also served with baked apples, dumplings,
or egg noodles instead of the pancakes.

68
Sweetbreads 13 Coins Style
Prized by gourmets throughout the world, sweetbreads are the thymus
glands of veal, young beef, lamb and pork. There are two glands — an
elongated lobe in the throat and a larger, rounder gland near the heart.
These glands are connected by a tube, which is often removed before
sweetbreads are marketed. The heart sweetbread is considered the
more delectable (and is therefore more expensive) of the two because
of its delicate flavor and firmer, creamy-smooth texture. Sweetbreads
from milk-fed veal or young calves are considered the best.
Sweetbreads are highly perishable and must be prepared within 24
hours after purchasing.
The first step in preparing sweetbreads is to gently simmer them in
acidulated water (water with a little salt and vinegar added) for about
10 minutes to firm them. Then shock-cool in ice water to stop the
cooking. Remove the outer membranes leaving only the gray-white nodules for eating. This particular recipe is
an improvement on the Creamed sweetbreads recipe I used to serve at the 13 Coins back in the late 70‘s.
Ingredients
1 to 2 lbs fresh sweetbreads, blanched and cleaned
½ cup chopped onions
½ lb. sliced mushrooms, any combination of button, shitake, porcini, but not portabella.
¼ cup good brandy
1 clove fresh garlic, chopped fine
¼ cup fresh chicken stock
4 TBS. unsalted butter
½ pint of whipping cream
2 TBS sour cream
Salt and pepper to taste
Chopped parsley for garnish
Procedure
Melt 2 TBS. butter in a large sauté pan. Add the onions and sauté for about 1 minute over high heat. Add the
mushrooms and continue cooking for 2 minutes more. Add the sweet breads and cook for about 2 minutes. Add
the brandy and flame. Then add the garlic (always add fresh garlic after flaming so as to not burn). Add the
chicken stocks and reduce for a minute, then add the cream and allow the sauce to reduce and thicken slightly.
Season with salt and pepper. Pour out onto a heated platter and garnish with the sour cream and chopped
parsley. Serve with egg noodles or in a puff pastry shell.
Warning: Organ meats are extremely high in cholesterol. This is a high fat, high cholesterol dish and should not
be eaten by those on a cholesterol restricted diet or under medical treatment for high cholesterol.

69
Jerked pork
Jerk spices are a Jamaican specialty. The jerk spices were originally used with wild boar and had a preserving
quality. Jerk is a mixture of spices. It is the Indian curry of
the Caribbean Islands. You can buy prepared jerk spice
mixes but it is better if you make your own. Jerk spice is
good over pork, chicken, fish, and beef. It is best served
with the traditional rice dish of Jamaica. Jerked meats are
served with a good Jamaican rice and cabbage slaw.
Jerk Spices
All spice - 1 TBS, whole and ground fresh (called pimento
berries in Jamaica)
½ cinnamon stick -
2 cloves sliced Garlic
Salt
2 TBS oil
1 tsp. Sage – fresh if you have it, otherwise dried.
1 Habanera pepper (other hot peppers can be substituted)
½ cup dark raisins
3 TBS Brown sugar
2 TBS Vinegar (I like using malt vinegar, but apple cider
works well, as does rice wine vinegar)
Procedure
Chop or puree the peppers until quite finely minced. Grind
the fresh spices and the raisins. Mix the spices, oil, vinegar and peppers together to form a paste. Be careful
when handling the bright yellow or orange habanera pepper as they are extremely hot and dangerous if you get
some in your eye. I recommend using rubber gloves, remove the seeds and veins, which is where the highest
concentrations of capsicum is located. You may use the green jalapeño if you like or a combination of several
peppers, both mild and hot. I like using three or 4 different peppers, including the scotch bonnet (habanera).
Rub the jerk spices all over the pork roast (you may also use on chicken or fish). Allow the meat to marinate for
at least 12 hours or overnight. Grill the meat over hot charcoal, or on a gas grill on high. The hotter the better.
You want to sear the meat and have it tender and juicy on the inside. You can finish it off in a slow oven once
the Pork roast has been seared. Don‘t be afraid to cook pork a slight pink, for all same reasons you cook beef on
the pink side – its more tender and juicer. Pork is now farm raised and can no longer be served garbage. There
has not been a single case of Trichinosis in this country since the early 1940‘s and that was from bear meat.
Rice and Pigeon peas
1 cup long grain white rice
½ cup pigeon peas or black beans
4 cups chicken stock
1 TSB paprika
1 medium onion, chopped fine
1 red bell pepper, chopped fine
1 stalk celery, chopped fine

70
2 cloves garlic, sliced
2 TBS olive oil
yellow food coloring (optional)
Procedure
Heat the olive oil in a heavy bottomed sauce pan. I like to use a tall sided cast iron pan. Add the vegetables and
sauté for a few minutes. Add the rice and seasonings. Coat the rice in the oil. Add the chicken stock and cover
the rice by 1 inch. Place a cover on the rice and allow to come to a boil, tightly covered. Reduce heat to low and
cook for 15 minutes. Turn off the heat and allow to set for an additional 15 minutes. Take the cover off and fluff
with a fork. Serve immediately.

71
Braised Lamb Shanks
There is perhaps no earthier, aromatic, and flavorful Fall and Winter
dish than braised lamb shanks. The meat is tough and stringy but when
browned and cooked in a flavorful liquid for 2 hours or more all sinew
disappears and the meat becomes tender and juicy. Lamb shanks, like
Ox tails require this long cooking process but give up incredible
flavors in the process, especially when married with garden herbs, and
aromatic vegetables. I first began cooking Lamb Shanks at the 13
Coins; it was the Sunday special there. After 3 hours of cooking the
cooking stock with strained, the fat skimmed and made into a roux,
and the final sauce was finished with a little mint jelly – typical of the
1970‘s. Here‘s the recipe. Allow two shanks per person, since they
tend to be small these days and contain little meat.
Ingredients
6 lamb shanks
8 or more garlic cloves, peeled and rough chopped
1 large yellow onion, rough chopped
2 carrots, rough chopped
2 stalks celery, rough chopped
2 tomatoes, rough chopped
1 cup red wine
3 bay leaves
1 sprig fresh thyme
1 sprig fresh rosemary
4 cups of chicken stock
Water to just barely cover the shanks.
Directions
Season the shanks and brown them in a heavy bottomed roasting pan. Allow the shanks to brown completely,
even blackening a bit towards the edges. Remove from the pan, drain most of the fat, and brown the vegetables.
When the aromatic vegetables are also well browned, return the shanks to the roasting pan. Add the garlic and
the herbs. Add some additional coarse salt and freshly ground pepper. Cover the pan and cook in a 350o F oven.
After one hour turn the shanks and continue covering for 1.5 hours longer or until the shanks are very tender,
falling off the bone.
Remove from the pot and place on a warmed platter. Using a submersible blender (boat-motor) puree the stock
and thicken slightly with a little cornstarch slurry. Adjust the seasoning and add the Worcestershire sauce and
Tabasco.
Serve with steamed turnips, parsnips, rutabagas, carrots, or a combination of all. Wide egg noodles are a good
accompaniment. This dish will stand up to the sturdiest red wine such as a Barbara.

72
Greek Gyros (pronounced year-ro)
I‘m sure everyone has had the delicious Greek
lamb dish, wrapped in those soft pita bread like
rolls. Here‘s how you make them at home. Most
recently I was advised of the most authentic way
to make Gyros. My son and his buddies spent a
week in Greece and had these delicious Gyros
several times a day! I asked the proprietor of a
Greek grocery store how he would prepare
gyros if he was using a whole leg of lamb. Here
are his instructions.
Ingredients
Boneless leg of lamb
2 bottles of beer, not light beer
¼ cup extra virgin olive oil
2 TBS fresh oregano, chopped fine
2 tsp black pepper
6 cloves garlic, 4 of them chopped fine
1 cup white wine
1 lb Feta cheese crumbles
3 TBS coarse kosher salt
Procedure
Marinate the lamb in the beer for 2 or 3 hours.
Remove from the marinade and reserve. Dry the
lamb off and rub with olive oil and the spices.
Stab the meat in several places and insert cloves
of garlic deep in the lamb. Place in a roasting
pan and roast slowly at 325 F for 2 hours. Remove from the roasting pan and slice the lamb very thinly. Add the
beer and white wine to the lamb cooking liquid and reduce slightly. Thicken the sauce slightly with a little
cornstarch slurry. Place the sliced lamb back into the cooking liquid.
Sauce for Gyros – Tzatsiki
1 cucumber, peeled and seeded, patted dry in paper towels, chopped very fine
1 cup low fat plain yogurt
2 cloves garlic, chopped and crushed into paste
salt and pepper to taste
1 TBS. fresh mint
2 tbs. good extra virgin olive oil
1 tbs. fresh lemon juice
allow the sauce to sit in the refrigerator for at least one hour, preferably overnight.
Cook up some home-made shoe string French fries or buy some from your local hamburger joint. Place the
grilled gyros lamb on a large, fresh soft pita bread, If you have a Greek market nearby you can find the specially
made Gyros bread, which is softer and larger than pita bread. Top the lamb with chopped tomatoes, Tzatsiki
sauce, Feta cheese, and the French Fries. Place a little ketchup and yellow mustard on the fries (believe me, this
is the way they are served in Greece). Wrap tightly in parchment paper so nothing fall out. Eat vigorously with
plenty of Greek olives, more Feta, and cold beer or white wine.

73
Poultry & Game

74
Coq au Vin
This is the famous French bistro food, chicken in red wine sauce. It was very popular in French restaurants
during the 70‘s when French food was all the rage. When thin French cuisine became the rage, it fell from
grace. Now that comfort food is in again,
it has experienced resurgence in
popularity. I have made it many times and
still enjoy it on a fall or winter evening. It
can also be made with game birds. This
recipe serves 8 people.
Ingredients
2 whole fryer chickens, cut up into 4
wings, 4 breasts, 4 thighs, 4 drumsticks.
To keep the fat content down you can
remove the skin from the thighs, breasts,
and drumsticks.
10 small boiling onions, peeled
2 cups flour
3 tsp butter
8 whole cloves of garlic
2 cups of baby carrots
2 lbs small button mushrooms, whole
4 cups (or enough to cover the chicken pieces in the pan) of beef stock or a mixture of beef and chicken stock (I
prefer beef stock. If you can‘t get homemade stock, canned beef stock works fine).
1 cup good brandy
2 cups good red wine
½ cup rough chopped pancetta bacon. If you use American bacon, simmer it for a few minutes to take out some
of the smoky flavor
1 TBS Worcestershire sauce
1 tsp. caramel coloring (kitchen Bouquet works fine)
2 bay leaves
3 sprigs of fresh thyme
Salt and pepper to taste
Procedure
Sauté the bacon until almost crisp. Add the onions and begin browning until they are well caramelized. Remove
the onions from the pan. Add two TBS butter to the pan. Flour the chicken pieces and brown them well on all
sides. When they are browned add the carrots, mushrooms, and onions back into the pan. Add the brandy and
flame. Be careful not to burn yourself. Sometimes the flames will reach up a foot or two. Add the red wine and
seasonings and continue cooking for two minutes. Add the beef stock and cook the dish for another 35 minutes
or until the chicken is tender. The sauce will have thickened a little and darkened some.
Remove the chicken pieces and vegetables from the pan using a slotted spoon. Bring the sauce to a boil and add
the Worcestershire sauce and caramel color. Strain through a wire mesh strainer. Finish the sauce with a TBS of
butter, whisking it in. Adjust the seasonings with salt and pepper.
Arrange the chicken pieces and vegetables on a dinner plate and ladle the dark brown sauce over the chicken
and vegetables. Serve with a quality, sturdy red wine and crusty French bread.

75
Roast Chicken with Roasted Vegetables
I love simple meals and comfort food. The roasted whole
chicken is one of my all time favorites, but it must be seasoned
correctly or it will be bland. I like to serve the roasted chicken
with a mélange of pan roasted vegetables as the perfect
accompaniment but garlic mashed potatoes are great as well.
There are several seasoning combinations but here‘s my
favorite. This recipe easily serves 4 adults with plenty of great
leftovers for the next day. You can also vary the seasoning by
using a more Italian blend of fresh rosemary, thyme, and sage.
The roast chicken is infinitely variable. Another trick is to use a
kitchen injector needle to inject a broth into the meaty parts of
the chicken to make it extra juicy and tender. A previous recipe
explained that process.
Ingredients
2 whole fryer chickens, washed and dried, giblets removed
2 TBS. extra virgin olive oil
1 stalk of celery, rough chopped
½ small onion, rough chopped
1 carrot, rough chopped
1 cup of white wine
1 tsp. Worcestershire sauce
6 cloves of fresh garlic, chopped and smashed
3 TBS Dave‘s special spice mix*
Procedure
Rub the chickens all over with the olive oil. Rub the chickens with the smashed garlic, including some inside.
Now rub the chickens with the spice mix, getting it into all the nooks and crannies. Place the chickens on a
broiler pan, not on a rack. Arrange the chopped vegetables around the chicken and place into a 400 degree oven.
Cook for 1.5 hrs or until the chicken is thoroughly cooked and the wings and legs wobble freely. After about 1
hour, add 2 cups of water to the pan. Remove the chickens from the pan and pour off most of the fat saving all
the liquid that remains.
After the chickens have rested a bit, cut the chicken up into its most prominent parts, two breasts, two legs, two
wings, two thighs, and two sets of wings. I like to remove all the chicken from the bones, being careful to get
every little piece of chicken and arrange on a serving platter.
The Sauce
Deglaze the pan with water or white wine or a mixture of both. As the pan sits on the burner, set on high,
dislodge any bits that remain stuck to the pan. The secret of deglazing is to get all he browned bits to give up
their flavor. Then strain the juices into a sauce pan. Bring to a rolling boil. Mix two TBS. of cornstarch with
about ¼ cup of water. Make sure all the cornstarch lumps are well blended. When the stock has come to a boil
slowly add the cornstarch slurry and whisk it in. The sauce will thicken almost immediately. Remove from the
heat or turn it down very low. Adjust the seasoning with salt, and add a tsp. of Worcestershire sauce.
Roasted Vegetables
4 medium baking or yellow potatoes, cut lengthwise into quarters or eights

76
1 large whole onion, cut into large pieces
4 whole carrots, cut into large long pieces
2 sweet potatoes, cut lengthwise and into quarters
1 lb. of whole mushrooms
¼ cup good extra virgin olive oil
1 TBS. Worcestershire sauce
1 TBS fresh ground pepper
2 tsp. coarse kosher salt
One or two fresh thyme sprigs
One fresh rosemary sprig
1 tsp. oregano
Procedure
Place all the vegetables into a large mixing bowl. Pour the olive oil and Worcestershire sauce over the
vegetables and mix well. Spread out onto a large baking dish. Do not crowd the vegetables or pile them up upon
each other. They need room to brown all over. Try to get the potatoes to rest, skin side down. Sprinkle with the
pepper and salt, liberally all over. Add the herbs. Roast in a hot 400 degree F oven until the potatoes are tender.
Serve arranged around the chicken in the middle of the plate and drizzle the sauce over both the chicken and
vegetables. Serve with good crusty French or Italian bread and plenty of good white wine or cold beer.
Dave’s Special Spice Mix In a bowl mix the following seasonings. Store in a jar with a lid and use liberally on chicken, fish, and whatever
you like
½ cup of salt
¼ cup ground pepper
¼ cup garlic powder
¼ cup onion powder
1 TBS chili powder
3 TBS paprika
2 tsp. cayenne pepper
1 tsp. cumin
1 tsp. ground thyme

77
Chicken Tika
Chicken Tika is a classic Indian chicken
dish is one of my favorites. It is a tomato
based, creamy sauce strongly flavored with
real curry or Indian Garam Masala. The
recipe of Garam Masala on the next page.
Ingredients
4 boneless chicken breasts
4 TBS Garam Masala paste
4 cloves garlic, chopped fine
2 TBS vegetable oil or clarified butter (ghee)
1 large can tomato sauce
3 TBS plain yogurt
½ pint heavy cream
1 cup chicken stock
1 TBS red chili paste
1 TBS sugar
Salt and pepper to taste.
Procedure
Grill the chicken breasts over very hot coals until they are browned but not thoroughly cooked. Reserve until
the sauce is ready.
Heat the butter or ghee in a large saucepan. Add the Garam Masala paste and the chopped garlic. Simmer for a
minute or so. Add the tomato sauce and begin reducing for about 5 minutes over medium heat. Add the cream
and yogurt and continue to reduce until the sauce thickens slightly. Add the chili
paste, sugar, and adjust the seasoning with salt, pepper, and sugar. Return the chicken breasts to the pan and
allow the dish to simmer for another 5 minutes. Serve over or with Jasmine rice with Indian Naan flat bread.

78
Homemade Curry Spice Mix – Garam Masala
Curry powders of India and other parts
of Asia are not a single spice but a blend
of many spices. If you have never made
your own curry spices you should try it;
it‘s so much better than store-bought
curry powders. Here‘s a standard recipe
for classis Indian Curry. This recipe
goes well with any mean, chicken, or
lamb. I like to marinate chicken in the
spices and then braise them. Or, mix the
spices with plain yogurt and marinate
the chicken, beef, shrimp, or pork. Then
braise. The Indian name for this curry is
Garam Masala.
Ingredients
20 Whole Cumin seed
40 Cardamom seed – break them out of the little pods
1 Whole cinnamon bark stick
4 Whole Cloves
20 Whole peppercorns
20 Whole coriander leaves
2 whole Red chili peppers
1 tsp. Turmeric powder
3 to 4 TBS. Ghee (clarified butter)
Directions
Toast the seeds in a heavy bottom sauté pan until the seeds start to pop and give off a great aroma. Grind the
warm seeds and cinnamon bark pieces in a clean electric grinder or mash into a powder using a mortar and
pestle. Mix with chopped coriander, finely chopped red chili peppers and a little ghee to make into a paste. The
turmeric will give it a golden yellow color. It will keep for weeks in the refrigerator stored in a sealed jar. The
taste and aroma is fantastic.
Marinate chicken, beef, lamb, or fish in the spice mixture. Broil, or braise. The flavors are great. There are other
spice combinations that can be added or deleted but this is the basic curry mix. I like to marinate lamb chunks
for a few hours or even overnight, brown the lamb, then slow cook with a stock over the lamb. Sauté celery,
onions, carrots, tomatoes in the pot with the lamb, cover with the stock and cook for about 2 hours until the
lamb is very tender and the vegetables are cooked to a puree. Adjust the seasonings with salt and pepper. It
should be spicy. Serve the mixture over Basmati rice. Server with homemade Nan bread and steamed
vegetables. A good chardonnay is great with Indian food, or a hearth red wine like a syrah.

79
Wild Grouse with Wild Mushrooms Grouse is one of the most popular game birds in America.
It can be found almost everywhere. Its habitat is usually in
heavily wooded areas. Grouse nest on the ground and their
camouflage is extremely effective – they are nearly
impossible to see when sitting on their nest. Grouse live on
seeds and small insects. Grouse tastes very similar to
chicken and its size is similar to a small frying chicken.
The only difference is that Grouse is a bit tougher. It is
best to use a two step cooking process, called braising.
This will insure a tender and delicious bird. I also
recommend soaking the Grouse breasts in brine for about
three hours prior to cooking (see procedure for brining
meats). This recipe and process works well for pheasant
and partridge (chucker) as well. Happy hunting.
Ingredients
4 whole Grouse breasts, split into two and deboned
1 cup flour
1 cups white wine
2 cups chicken stock
1 ½ ounce of brandy
1 medium onion chopped fine
1 small carrot chopped fine
1 lb. wild mushrooms, shitake will work fine.
2 tsp. chopped garlic
3 TBS butter
3 TBS olive oil
Dave‘s Seasoning Mix
Directions:
Remove the Grouse breasts from the brine and pat dry. Split the Grouse breasts and remove the bones and rib
cage. Season the breasts with the seasoning mixture. Lightly flour the breasts and sauté in a mixture of olive oil
and butter. Reserve 2 TBS. of the butter. When the breasts are lightly browned, remove from the pan and
reserve on a warm plate. Add the vegetables and sauté until the onions are clear. Add the mushrooms and cook
for 1 minute. Return the Grouse to the pan and, over high heat, add the brandy and flame. Add the white wine
and the chicken stock. Cook, covered in a 375 degree F oven for about 15 minutes. Add the garlic
Remove the pan from the oven and remove the breasts. Reduce the sauce over high heat. Adjust the seasoning.
You may thicken the sauce slightly with corn starch-water slurry.
Serve the breasts with the sauce covering. I recommend accompanying the Grouse with garlic mashed potatoes,
egg noodles, or wild rice. Serve with a sturdy white wine and crusty French bread.
Dave’s Poultry Seasoning Mixture
5 parts coarse salt
1 part coarse ground black pepper
1 part granulated garlic
1 part granulated onion

80
1 part ground paprika
¼ part ground thyme

81
Wild Turkey Recently I hunted wild Turkey in Eastern
Washington (that‘s me on the right). It
was great fun; the hunt took almost 3
hours before I finally had a decent shot at
a young Tom. Wild turkeys have
incredible eyesight and are much smarter
than given credit for.
As soon as the turkey was cleaned I
popped it in the freezer for cooking the
next week. Wild turkey is extremely lean
meat, as are most game birds.
They are flavorful but can be a bit dry if
not prepared correctly. The most
important step is brining the turkey. Refer
to my recipe for brining chickens. A large
wild turkey should sit in the brine
overnight.
When the turkey is initially prepped it
should be skinned. This makes the cleaning process much easier but removes the skin. As a result you need to
provide some fat or the bird will be too dry.
Ingredients Wild turkey, skin on or skinned
1 stick of butter
½ lb salt pork
Meat injector
2 cups chicken stock
½ onion, rough chopped
1 carrot, rough chopped
1 stalk celery, rough chopped
Large roasting pan
Heavy duty aluminum foil
¼ cup Seasoning mix
Preparation
After thawing the bird slowly in the refrigerator wash it off in cold water and plunge it into a brine solution of
salt, vinegar, sugar, and water to completely cover the bird. Brine overnight. Remove the bird from the brine
and wash in cold water again. Check carefully for any shot entry spots and feel around for shot. Carefully pry
out any shot if you find it.
Place the bird in a roasting pan, directly on the pan, not in a rack. Add the cut vegetables. Melt the butter. Begin
injecting the bird in various locations using up all the butter. Pour any remaining butter all over the cold bird.
The butter should solidify almost immediately. Season the bird with the seasoning mix inside and out,
especially on the bottom of the bird. Slice the salt pork into very thin slices and drape them over the bird,
including over the legs. You can substitute bacon for the salt pork but blanch the bacon first to remove some of
the smoke flavor.

82
Tightly cover the bird and roasting pan with aluminum foil. Roast in a 335 degree F oven. Roast for about 4
hours. Check occasionally and add some chicken stock about ½ way through the cooking process. Remove the
foil for the last few minutes.
Turkey gravy
Make a blond roux (equal parts of flour and fat by weight, cooked over medium-high heat for about 5 minutes.
Do not burn)
Add the strained stock form the roasting pan whisking continuously. Remember the rule for no lumps, cold
stock to hot roux – hot stock to cold roux. Thicken the gravy. Add 1 TBS sherry. Season to taste. Darken with a
little kitchen bouquet if you like.

83
Stuffed Breast of Chicken (or any game bird)
This is a great stuffed poultry dish with rich
Northern Italian flavors that lends itself to
Upland Game Birds as well as domestic
fowl. Serves 4 adults.
Chicken Breasts
4 large boneless chicken breasts or ½ game
birds, bone in. Slit the chicken breasts to
form a pocket that can easily be resealed.
You may also use the hanging chicken
tender to keep the stuffing from falling out.
Stuffing
1 ½ cup ricotta cheese
8 to 10 sun dried tomatoes – chopped fine.
If you want to make your own, see
directions below. I often use the ones that
come in the jars because they are packed in olive oil, which can be reserved for cooking the chicken breasts.
1 or 2 whole red peppers, roasted with blackened skin and seeds removed – chopped fine (roast the peppers over
direct flame until all the skin is blackened, finish in a hot oven for about 10 minutes, place into a paper bag,
which is closed tightly. Allow to rest for about 20 minutes or until cool. Remove the skin and seeds)
¼ cup parmesan cheese
2 TBS of softened butter
2 cloves garlic, smashed and chopped fine
1 bunch fresh basil leaves, chopped in chiffonnade style (Stack the leaves one on top of the other and roll tightly
into a cylinder, like a cigar. Slice the cylinders of leaves crosswise into thin strips)
Salt and pepper (stuffing should be well seasoned)
¼ tsp red pepper flakes
Mix well with a spoon, making sure the chopped vegetables are well blended into the cheese mixture. Adjust
seasoning
Process
Using a tablespoon, place a large dollop of stuffing into the slit in the chicken breasts or into the cavity of the
halved Cornish game hens or game birds (remove rib bones for easier eating).
Place the stuffed birds into the freezer for about 10 minutes or until they hold their shape. You don‘t want any
of the stuffing to ooze out while cooking. Brush with the oil from the sun dried tomatoes (if you don‘t have
enough, add a little good Extra Virgin Olive Oil) and season with salt and pepper. I use coarse Kosher salt
because it will keep some of its texture while cooking. When it hits the tongue it gives a mini blast of saltiness,
which really accentuates the flavor of the food. Bake in a hot oven, 420 degrees F for about 20 minutes or until
done. Don‘t over cook the chicken – nothing worse than a dry chicken breast.
Sauce
In a heavy bottomed sauce pan, make a roux of equal parts of flour and butter (about ¼ cup total). Cook the
roux for about 3 minutes over high heat to remove the floury flavor. Add 1 cup of cold chicken stock and white
wine (homemade stock is best but canned works well also) and begin whisking in rapidly to work out any
lumps. When the sauce is very thick, add milk or cream to complete the béchamel (fancy word for white sauce).
The sauce should just coat a spoon (not too thick). Adjust the seasoning with salt and pepper (white pepper is

84
nice because it doesn‘t leave black specs in the sauce). Add 1 tsp of Worcestershire sauce and a pinch of
nutmeg. I also whisk in a ½ cup of parmesan cheese, whisking all the while to avoid any lumps or strings of
cheese.
Serving
Place the stuffed chicken breasts on a plate, top with a nap of the white sauce and accompany with wild rice or
fresh pasta, and a nice green vegetable. Fresh asparagus is excellent, steamed and seasoned with salt, pepper, a
drizzle of olive oil, and balsamic vinegar. Serve with crusty French bread and a Chardonnay or Pinot Grigio.
Enjoy.
Homemade roasted tomatoes.
To mimic a good sun dried tomato use Italian plum tomatoes and slice them lengthwise and place on a baking
pan. Season the tomatoes with salt, pepper, and good Ex Virgin Olive Oil. Bake in the oven slowly at 250
degrees F for about 4 to 5 hours, or until the tomatoes shrink, wrinkle, and appear somewhat dry and leathery.
Allow the tomatoes to cool and loosely pack in a mason jar. Cover the tomatoes with olive oil and store in the
fridge. The oil will become cloudy and thick. To use, let the tomatoes come to room temperature and use just
like a sun dried tomatoes. They are great in sauces, pizza, and for stuffing‘s.
Perfect Rice
More people have trouble cooking rice to perfection than any other common food item. There is a simple
formula to remember when cooking rice and it applies to any rice dish except Risotto - one part rice to two parts
liquid. I never rinse my rice, unless I am making a pilaf and I want to make sure the rice grains are separate.
Procedure Place 1 cup white rice in a two quart sauce pan. Add two parts of liquid, it can be either stock, or a mixture of
stock, water, wine, etc. Season with 1 TBS of butter and a tsp. of salt. Cover the pan. Bring to a boil and
immediately reduce the heat to a simmer or lowest setting for your burner. Leave the pan alone for 20 minutes.
When you are ready to serve remove the cover and fluff the rice with a fork. You are ready to serve.
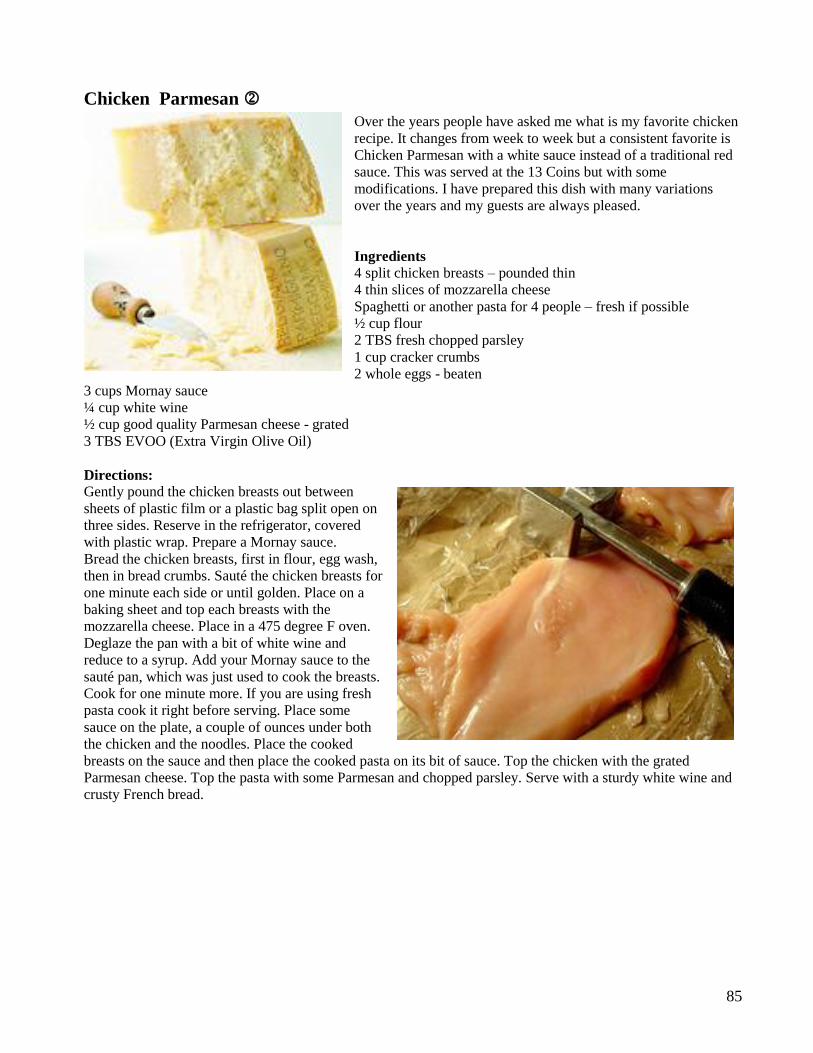
85
Chicken Parmesan
Over the years people have asked me what is my favorite chicken
recipe. It changes from week to week but a consistent favorite is
Chicken Parmesan with a white sauce instead of a traditional red
sauce. This was served at the 13 Coins but with some
modifications. I have prepared this dish with many variations
over the years and my guests are always pleased.
Ingredients
4 split chicken breasts – pounded thin
4 thin slices of mozzarella cheese
Spaghetti or another pasta for 4 people – fresh if possible
½ cup flour
2 TBS fresh chopped parsley
1 cup cracker crumbs
2 whole eggs - beaten
3 cups Mornay sauce
¼ cup white wine
½ cup good quality Parmesan cheese - grated
3 TBS EVOO (Extra Virgin Olive Oil)
Directions:
Gently pound the chicken breasts out between
sheets of plastic film or a plastic bag split open on
three sides. Reserve in the refrigerator, covered
with plastic wrap. Prepare a Mornay sauce.
Bread the chicken breasts, first in flour, egg wash,
then in bread crumbs. Sauté the chicken breasts for
one minute each side or until golden. Place on a
baking sheet and top each breasts with the
mozzarella cheese. Place in a 475 degree F oven.
Deglaze the pan with a bit of white wine and
reduce to a syrup. Add your Mornay sauce to the
sauté pan, which was just used to cook the breasts.
Cook for one minute more. If you are using fresh
pasta cook it right before serving. Place some
sauce on the plate, a couple of ounces under both
the chicken and the noodles. Place the cooked
breasts on the sauce and then place the cooked pasta on its bit of sauce. Top the chicken with the grated
Parmesan cheese. Top the pasta with some Parmesan and chopped parsley. Serve with a sturdy white wine and
crusty French bread.

86
Moroccan Chicken Tagine
Moroccan recipes are intensely flavorful, bright, and exotic. The
Tagine clay cooking pot (also spelled Tajine) is unique to North
African cooking and to the south border of the Mediterranean
Sea. The Tagine is usually placed right on the hot coals and the
dish is cooked slowly for about 1 hour or more. The most unique
flavor of tagine chicken comes from the preserved lemons. You
can buy preserved lemons over the internet but you can also make
your own. There is a recipe for them at the bottom of the page. If
you don‘t want to go out and buy a tagine, simply use a large cast
iron Dutch oven or some other type of pottery cookware with a
large cover. Some crock pots allow you to remove the crockery
from the metal heating element that that will work well also. Do
not put the pottery directly on the flame or electric burner; it will
crack the pottery. If using a gas range, use a flame spreader to
disperse the heat, or cook in the oven. There is usually no
problem when using hot coals and the direct heat method.
Ingredients
8 chicken parts; legs, thighs, and breasts, or any combination
1 onion, chopped fine
¼ cup chopped cilantro
¼ cup chopped Italian broadleaf parsley
2 cups high quality Greek green olives, pitted if possible
4 cloves of fresh garlic, chopped fine
2 tsp. paprika
1 tsp. ground cumin
1 tsp. fresh ginger, chopped fine
1 or two whole preserved lemon, cut into quarters
3 TBS. juice from the preserved lemon jar
Salt and pepper to taste
Procedure
Arrange the chicken pieces on the tagine pot or in a Dutch oven. Spread the onions, garlic, and chopped greens
and spices over the vegetables and chicken. Arrange the preserved lemons and olives around the chicken. Add
two or three cups of water to the pan. Season with pepper and a little salt and cover the dish with the tagine
cover. Either place directly on hot coals or in a hot over for about 40 minutes, or until the chicken is tender. The
idea is not to open the lid of the Dutch oven or tagine until serving time. When the lid comes off, the aroma hits
you like a Moroccan night, taking you on a evening with Humphrey Bogart and Ingrid Bergman. Serve with
warmed pita bread, couscous, and a light white wine.
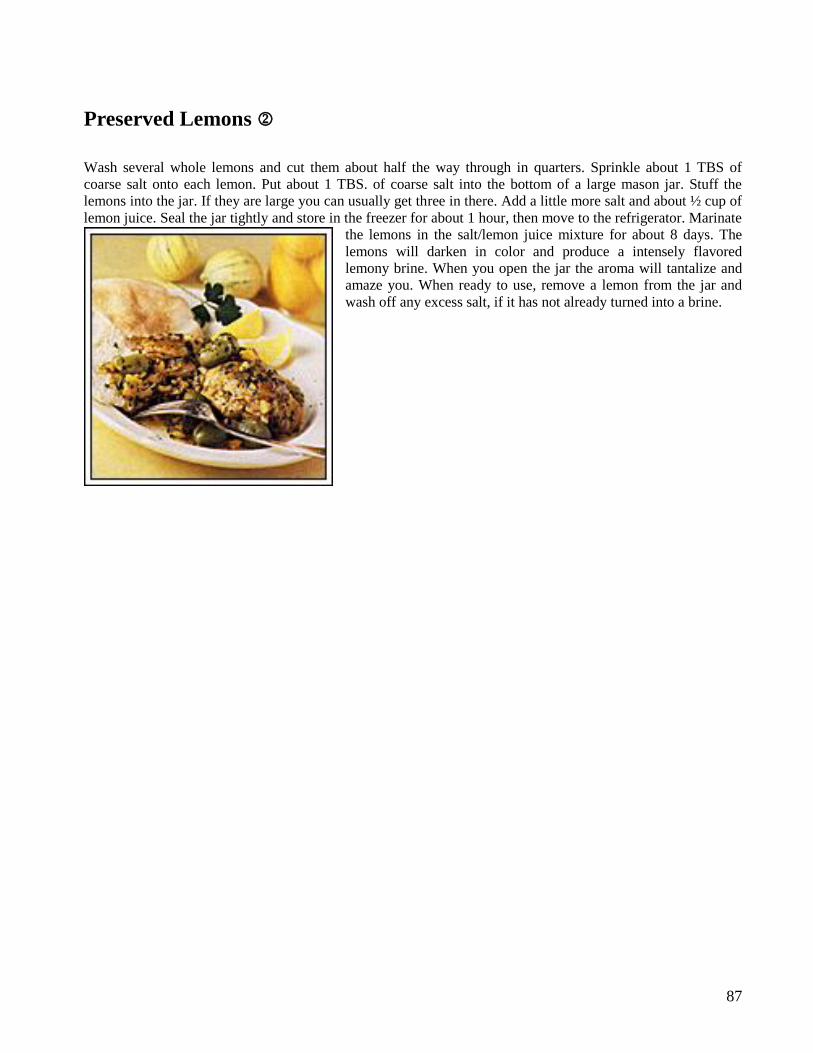
87
Preserved Lemons
Wash several whole lemons and cut them about half the way through in quarters. Sprinkle about 1 TBS of
coarse salt onto each lemon. Put about 1 TBS. of coarse salt into the bottom of a large mason jar. Stuff the
lemons into the jar. If they are large you can usually get three in there. Add a little more salt and about ½ cup of
lemon juice. Seal the jar tightly and store in the freezer for about 1 hour, then move to the refrigerator. Marinate
the lemons in the salt/lemon juice mixture for about 8 days. The
lemons will darken in color and produce a intensely flavored
lemony brine. When you open the jar the aroma will tantalize and
amaze you. When ready to use, remove a lemon from the jar and
wash off any excess salt, if it has not already turned into a brine.
88
Soups

89
Crab Bisque
Bisque is a chowder that has all the chunky vegetable pieces
strained out. It is a rich, thick, smooth soup that is very
flavorful with the primary ingredient standing out from the
flavors.
Ingredients
1 to 2 lbs. fresh crab meat, depending on the number of
people you are serving. I suggest using whole crabs and
remove the meat from every nook and cranny – save the
shells for stock. If you can find fresh live Dungeness crabs,
all the better. Then you can steam yourself, cool, remove the
crab meat, and save the cooking liquid for the stock. This
basic recipe can be used for lobster bisque, shrimp, crawfish,
etc.
Ingredients
½ medium onion, rough chopped
2 stalks celery, rough chopped
1 medium carrot, rough chopped
1 quart fish stock, shrimp stock, or shrimp stock enriched
with crab shells
1 pint whipping cream
6 TBS unsalted butter
1 TBS tomato paste
¼ tsp thyme
2 tsp. paprika
1 tsp. fresh ground pepper
¼ tsp. cayenne pepper (or more if you like)
2 cloves garlic, smashed fine
¼ cup sherry
1 tsp. Worcestershire sauce
Procedure
In a quart of shrimp or fish stock, add the shells from two or three crabs, preferably from the crabs you just
removed the crab meat from. Simmer for 20 minutes and strain into a sauce pan.
Sauté the chopped the vegetables in 3 TBS butter until just clear. Add flour to the sautéing vegetables to form a
roux. Pour the stock over the vegetable/flour mix and cook until the soup thickens. Add the tomato paste,
thyme, and garlic to the soup. Add the cream and simmer until the sauce reduces a little and the sauce thickens
again slightly. Add the sherry and Worcestershire sauce. Adjust the seasoning with salt and pepper. Finally add
the crabmeat and simmer for a few minutes more.
Serve with oyster crackers or toast points. Garnish the bisque with a teaspoon of fresh crab meat right in the
center of the soup. Some also garnish with a dollop of sour cream, or both. Bisque can be served with either a
rich oaken chardonnay or even a full bodied red, such as a Cabernet or Syrah. Enjoy

90
Gumbo
The word gumbo (combo) is an African word for soup. This highlights the many influences that make up South
Louisiana food. The influences are from black plantation
workers, Native Americans, Spanish settlers, and the
French speaking Acadian settlers who became the Cajuns.
The Cajuns were unique farmers and fishermen of the
Louisiana bayous. Cajun food is one of the very few truly
indigenous forms of American cooking. Gumbo is usually
flavored with filé powder (fee-lay), which comes from
ground sassafras leaves. It was used by the Native
Americans to thicken their soups and was picked up by the
African Americans who settled in the bayous. Gumbo, like
so many other Cajun dishes, was a poor man‘s dish. It was
set on the stove early in the day and whatever was caught
was thrown into the pot. Okra was also used frequently, as
it was a common vegetable and gave the soup a slightly
slimy texture. If you want to make chicken gumbo only,
leave out the seafood and use only chicken stock.
Ingredients
1 to 2 cups brown roux
2 stalks of Celery – chopped fine
1 medium onion – chopped fine
1 bunch of green onions – chopped fine
1 green pepper – chopped fine
1 red pepper – chopped fine
¼ cup chopped parsley
3 Italian plum tomatoes, chopped fine
8 cups chicken or fish stock, depending on the kind of gumbo you are making (see recipe below)
3 whole bay leaves
½ tsp. chili powder
2 TBS. filé powder
½ tsp. cumin
1 tsp. thyme
1 tsp. ground black pepper
1 tsp. cayenne pepper (or more if you want it really hot)
1 to 2 tsp. Tabasco sauce
1 TBS. of Worcestershire sauce
10 to 20 cloves of garlic, chopped fine, or more if you want it really garlicky
1 lb. Louisiana Andouille sausage, sliced (a good Italian or polish Kielbasa sausage will work fine if you can‘t
find Andouille)
1 lb. chicken thighs or breasts, cut in half. You can use boneless chicken breasts for ease of eating but it‘s not
authentic.
Any combination of shucked oysters, clams, shrimp, redfish (red snapper), turtle meat, crab, crayfish
(crawdads) or any other seafood you like.
Procedure
In a large pot, make a brown roux by combining equal parts by weight of peanut oil and flour. 1 to 2 cups
should be enough. Cook the roux over medium-high heat stirring constantly until the roux reaches the color of
peanut butter. Don‘t let it burn or its useless and will give a burned flavor to the gumbo.

91
When the roux is done, add the vegetables and cook them in the roux for about 5 minutes.
Brown the sausage and chicken in a separate sauté pan until the chicken is about 1/3 done. Add to the roux and
vegetables.
Add the stock to the pot and stir until it thickens a bit
add the seasonings except for the garlic
Cook the gumbo for about 20 minutes over medium heat to meld the flavors
add the garlic and cook for about 5 minutes more
begin adding the fish, the white fish first, shell fish, peeled and deveined shrimp last. When the shrimp are
tender the soup is ready to serve. It should be only slightly thick and have a greenish-brown color. The aroma is
fantastic.
Serve Gumbo over steamed white rice with plenty of crusty French bread and cold beer.
Stock for Gumbo While you may use canned chicken stock if you want, I like to take chicken bones, cover with about 10 cups of
water and bring to a boil. Add a bay leaf, a rough cut onion, carrot and stalk of celery to the stock. Add the peels
from the shrimp and any other fish bones you have around. When it comes to a boil skim the brown foam that
rises to the top and let simmer for about 30 minutes. Strain the stock and adjust the seasonings. Bring the
strained stock to a boil again and reduce to about 8 cups. For chicken gumbo, leave out the fish parts.

92
Cincinnati Chili
Cincinnati chili is rarely found in
recipe books these days. It is
essentially a meat sauce served in the
style of the great Cincinnati chili
houses and diners in the mid-west. It‘s
usually not found anywhere else in the
US. It‘s characteristic flavor is
cinnamon. It‘s not hot chili but very
flavorful. It‘s served one way, two
way, three way, etc. One way is just
the sauce. Two way is over spaghetti
noodles. Three way is with a mountain
of shredded cheddar on top. You get
the idea.
Ingredients
1 large onion chopped
1.5 pound extra-lean ground beef
2 cloves garlic, minced
1 tablespoon chili powder
1 teaspoon ground allspice
1 teaspoon ground cinnamon
1 teaspoon ground cumin
1/2 teaspoon red (cayenne) pepper, more if you like it hotter.
1/2 teaspoon salt
1 1/2 TBS unsweetened cocoa or 1/2 ounce grated unsweetened chocolate
1 (15-ounce) can tomato sauce
1 tablespoon Worcestershire sauce
1 tablespoon cider vinegar
1/2 cup water
Directions
Sauté the hamburger and onions until the burger is completely browned. Add all other ingredients except the
garlic. Simmer for 1 hour. Add the garlic and simmer for an additional 5 minutes. Adjust the seasoning for salt
and pepper. The amount of cayenne is up to your individual tastes.

93
Texas Style Hot Chili – Lower Calorie Version Southwest chili is an American institution. It is the subject of all the Chili cook-off‘s held in the US and around
the world. This chili has no beans, it is purely a meat chili in a rich,
fiery sauce. Generally it is served with condiments on the side, such
as beans, cheese, onions, cottage cheese, crackers, even pasta. It is
made like the famous Cincinnati Chili, but without the cocoa powder
and much hotter. My current version is made with lean meat and no
added fat, so it has all the flavors but much less fat. It is made from
chipotle peppers, which come canned in adobo sauce. The chipotle is
nothing but a ripe jalapeno pepper which has been smoked and
packed in the rich reddish brown adobo sauce. They are very hot so
use cautiously, starting out with one or two first. I generally use three
but some in the family can‘t eat the chili because its too hot.
Ingredients
1 lbs. pork shoulder or butt, trimmed of all fat and sinew, chopped into small ¼ inch cubes
1 lb. ground turkey breast
1 lb. ground beef – extra lean
1 red bell pepper
1 jalapeño pepper, green or ripe
3 banana peppers – ripe
1 jar whole roasted red peppers and juice
2 - 3 chipotle peppers – canned in adobo sauce.
1 large whole onion – chopped fine
8 cloves fresh garlic – chopped fine
1 medium can whole Italian plum tomatoes, chopped
1 small can tomato paste
1.5 quarts of water or canned beef stock
2 tsp. prepared beef base (paste type)
1 TBS. peanut oil or canola oil
1 TBS. Worcestershire sauce
2 TBS. maze or white corn flower
1 TBS. brown sugar or dark molasses
6 or 75 drops Wrights Liquid Smoke
2 TBS. cumin
2 TBS mild chili powder
2 TBS Mexican oregano
Salt to taste
Directions:
Roast the fresh peppers in a hot (450 degree F) oven for about 15 minutes or until the skins begin to blacken.
You may also achieve a similar effect by scorching them with propane torch or over the gas burner. Make sure
to blister and blacken every nook and cranny of the pepper. Place the scorched or baked peppers in a paper bag
for about ½ hour. When cool, remove from the bag and peel most of the skins. Don‘t worry if you can‘t get it
all. Chop the peppers coarsely.
Heat the oil in a large sauce pan. Add the chopped onions and brown to a rich caramelized state. Remove from
the pan.
Add the meat to the pan, a little at a time to brown. If you put it all in you will simply steam the meat and it
won‘t get browned. Once it is all browned, return the onions and all other vegetables to the pan. Cook for about
5 more minutes. Add the tomato products and about 1.5 quarts of water. Add the seasonings except for the
garlic. Cook the chili for one or two hours. It will cook down, darken in color and thicken slightly. Add the

94
garlic and cook for another 10 minutes. Add the corn flour by sprinkling it in and stirring at the same time so it
doesn‘t form lumps. Adjust the seasoning with salt. Feel free to adjust any of the ingredients to your personal
tastes.
This is a dark, richly flavored chili with the intense heat and smoke of the chipotle and roasted peppers. The
more roasted peppers you use the richer the flavor. If it‘s summer time and you want to actually smoke these
peppers yourself over mesquite wood on a BBQ grill, all the better. Serve with grated cheddar or monetary jack
cheese, chopped red onions, crackers, thick slices of homemade bread, grilled flour tortillas, cooked pinto
beans, or corn chips – and plenty of cold Corona beer. If you are watching calories skip the condiments and
drink light beer. This chili can easily stand on its own.
Quick Pepper Table Pepper Heat index Use
Arbol Extremely hot – always seen ripe
and red
Used in Mexican dishes and
Asian cuisine
Anaheim Mild – green or yellow when ripe Great roasted, sweet and mild,
used in Chiles Rellanos,
Poblano Mild – dark red Sweet and mild, used in soups
and chilies. Very flavorful.
Ancho Mild This is the poblano which has
been dried, flavorful and mild,
great in sauces
Chipotle Hot Smoked jalapeño peppers, usually
served in abodo sauce. Great in
chilies and sauces
Habanero (scotch bonnet) Extremely Hot Small red pepper 10 times hotter
than the Jalapeno. Be careful!
Serrano Hot Hotter than jalapeno, used in
pickling, and in many Mexican or
SW dishes
Pasilla Mild Long and dark red. Dried used in
Mexican moles and sauces
Jalapeño Hot Used green or ripe. Used in all
kinds of dips, deep fried, etc.

95
Chicken Chili
Occasionally I like to make a healthier chili, one that
everyone in the household will eat. You can use
either chicken or turkey. Don‘t use ground meat, it
doesn‘t have the right texture. Here is a great recipe
for chicken chili that has plenty of flavor and heat.
Ingredients
2 whole boneless chicken breasts
2 TBS. olive oil
2 medium onions – chopped fine
1 large can of diced tomatoes in juice
1 can beef consume
1 small can of diced green chilies
2 cans of white beans
2 cups water
2 TBS chili powder
1 TBS ground cumin
2 TBS corn meal
2 tsp. sugar
4 cloves garlic, chopped fine
1TBS Worcestershire sauce
1 tsp. red pepper flakes – more if you like
½ tsp. cinnamon
Salt to taste
Directions:
Dice the chicken breasts, chop the onions to a fine dice. Sauté the onions in the olive oil until translucent and
add the diced chicken breasts. Cook covered for about 10 minutes. Add the tomatoes, stock, water, chilies,
beans, and all seasonings except garlic for about 1 hour over medium heat. Add the garlic and continue cooking
for 10 minutes. Adjust the seasoning and stir in the corn meal. Continue cooking for an additional 10 minutes.
I like to serve the chili in small bread bowls, with grated cheddar and cottage cheese.

96
Cream of Chicken Barley soup
On these colder rainy days, a bowl of soup and a slice of bread for dinner is
just the ticket. For years at the 13 Coins, on Wednesdays I would make
Creamy Chicken Barley soup. It was by far our most popular, next to the
minestrone. Barley takes a while to cook since it is a tough rubbery grain so
it requires patience.
Ingredients
1 one lb. bag of pearl barley
3 quarts chicken stock, either homemade or canned (you may want to enrich your homemade stock with a little
paste type chicken base)
½ cup each of finely diced - carrot, celery, onion, and white turnip
1 pint ½ & ½ or whole milk if you think the cream is too heavy
¼ cup chopped parsley
1 to 2 lbs. of cooked boneless chicken breast meat, cooked ahead, cooled and diced fine
1 bay leaf
2 garlic cloves, chopped fine
½ tsp. Tabasco sauce
2 TBS. unsalted butter
¼ cup flour
White pepper
1 TBS. Worcestershire sauce
Salt to taste
Directions
Bring the chicken stock to a boil and add the barley. Cover the pot. Cook the barley until tender. You may need
to add a little more stock about half way through the process. The barley should soften in about 35 to 40
minutes. When the barley is cooked, add the vegetables, reserving the parsley until last. Allow the vegetables to
cook for about 5 minutes. Make a roux out of the butter and flour. Cook the roux for a few minutes to cook out
the flour taste. Whisk it into the soup a little at a time until the soup thickens to gravy consistency. Allow the
soup to cook for about 3 minutes more. Add the chicken, cream, seasonings, and blend well. Adjust the
seasoning for salt and pepper. Add the parsley at the last minute.

97
Peanut Soup
Peanut soup is one of those dishes that you either like or don‘t. It‘s
rich and creamy with a down-south taste that reminds you of
Georgia at Thanksgiving time. I like to serve it as a starter before
meat dishes. It‘s filling so it could also be a meal by itself. One note
of caution – do not use the bland Skippy or Jiff types as they are full
of saturated fat (shortening) used to stabilize them on the shelf. Use
an extra premium natural brand, such as Adams
Ingredients
1 cup natural creamy peanut butter
4 cups of chicken stock
¼ cup chopped celery
¼ cup chopped carrot
¼ cup chopped onion
3 TBS unsalted butter
1 TBS dark brown sugar
½ pint of heavy cream
¼ cup finely chopped peanuts
¼ tsp. cayenne pepper
Salt & Pepper to taste
Directions:
Sauté the Mirepoix in 1 TBS. butter (chopped celery, onion, carrot) until tender. Add the chicken stock and
simmer for about 10 minutes. Strain the vegetables out of the stock and return the stock to the sauce pan. Add
the peanut butter, cream, and seasonings to the soup. Simmer for another 5 minutes and adjust the seasonings
with salt & pepper. Garnish each bowl with the chopped peanuts and a little chopped parsley.

98
Cream of Tomato Soup
On a cold fall day there is nothing like homemade cream of
tomato soup, redolent with the subtle flavor of sherry and
fresh basil. I like to make mine by using homemade chicken
stock that I keep in the freezer for just such times. However
if you don‘t have any in the freezer make some. I‘ve
included the recipe. You can use canned chicken stock,
enriched with a little quality chicken paste, but it isn‘t nearly
as good. Don‘t scrimp on the cream, it is what makes the
soup so rich and flavorful. The mouth-feel of a real cream
soup is part of the overall experience. You will never buy
Campbell‘s again.
Ingredients
2 Quarts of homemade chicken stock
1 pint of whipping cream
1 large or two regular size cans of diced plum tomatoes in juice
3 TBS tomato paste
¼ cup each of finely diced carrots, celery, onion
2 tsp. paprika
1 TBS. Worcestershire Sauce
½ tsp. cayenne pepper
4 TBS dry sherry
2 TBS butter
Two cloves garlic, smashed and chopped fine
½ cup finely chopped fresh Basil (chiffonnade style of cut)
Salt to taste
Directions
Prepare a quality chicken stock starting with about a gallon of cold water, 2 lbs. of chicken bones, a rough cut
onion, stalk of celery, and rough cut carrot. Add a bay leaf and a few whole peppercorns. Bring to a simmer and
skim off any scum which will rise to the surface. Simmer for about 40 minutes and allow to cool slightly. Strain
the stock through a strainer or double layer of cheesecloth. Reduce the stock further to 2 quarts and strain again
if needed. Place the stock in the refrigerator overnight. When ready to use skim the solidified chicken fat from
the surface. I save the chicken fat to sauté fresh vegetables or to make a roux for chicken based cream soups.
There is nothing better.
Bring the stock to a boil and add the finely diced vegetables. After about 5 minutes of simmering add the
tomatoes and tomato paste. Simmer for another 5 minutes and add the cream, sherry, and seasonings. Adjust the
seasonings and finish by whisking in the butter. Top with homemade croutons, a dollop of sour cream, or a
some more shredded fresh basil. Serve with a crusty French bread and a big chardonnay.

99
Turkey Rice Soup
Every Thanksgiving, after we have had our fill of
Thanksgiving day leftovers I make Turkey Rice soup.
I make sure that the day after Thanksgiving I remove
all the meat from the turkey carcass and save all the
turkey bones, skin, and gelatin that forms on the
bottom of the turkey platter. All these bones go into a
stock pot and will make a delicious turkey soup.
There are so many variations to this soup. Use
noodles instead of rice. Add any variety of aromatic
vegetables you like. Make it a turkey cream soup if
you wish - the possibilities are endless.
Ingredients
4 to 6 quarts of rich turkey stock
1 cup white rice
1 cup chopped celery
1 cup chopped onion
1 cup chopped celery
2 cups chopped white cabbage
¼ cup chopped parsley
1 lb. coarse chipped leftover Thanksgiving turkey
1 cups leftover turkey gravy
2 bay leaves
1 tsp. oregano
Directions
Place all your turkey bones into a stock pot. Cover with water and bring to a boil. Reduce heat to a simmer and
carefully skim off any scum that rises to the tip. After about 2 hours of simmering, turn the heat off. Allow the
stock to cool and strain through a fine strainer into a large bowl. Place in the refrigerator overnight (or at least
12 hours). Carefully scrape off the fat which has risen to the top of the bowl. Place the gelatinized stock, bay
leaves, and oregano in to a large soup pot and bring the stock to a rapid boil. Reduce by ¼th. Add the rice and
simmer for 10 minutes more. Add the chopped vegetables, except the parsley. Simmer until the rice is cooked.
Add the parsley, turkey gravy, and turkey meat. Adjust the seasoning with salt and ground black pepper.
Serve with tossed salad, dinner rolls or crusty French bread, and a good turkey wine; such as Riesling,
Gewürztraminer, or champagne.

100
Minestrone Soup One of the most popular traditional Italian
soups is Minestrone. There are dozens of
recipes but here is the one that I have used
for years. I vary the ingredients all the time
using up what I have leftover in the fridge.
Feel free to add whatever you like
remembering to keep it in the Italian vein.
Use fresh basil if you like or any fresh
Italian spice. Use fresh whole tomatoes and
chop them yourself. You get the idea.
Ingredients
Chicken stock – 4 cups
Beef consume – 1 can
2 stalks Celery – diced
1 cup shredded cabbage
1 medium Onion - diced
1 large Carrot - diced
4 oz. Chopped spinach – thoroughly drained
1 medium, sliced Zucchini
¼ cup Orzo, Tubetini, stars, or some other small soup pasta
1 TBS Italian Seasoning
3 cloves, crushed Garlic
Crushed Red pepper
1 can Garbanzo beans - drained
1 can white beans - drained
1 can diced tomato in juice
Olive oil
Cooked Italian sausage, sliced (optional)
Shredded parmesan cheese
Directions
In a soup pot heat the olive oil. Sauté the vegetables until just tender. Add the stock, tomatoes in juice,
and seasonings. Bring to a boil and add the pasta and the beans. Cook until the pasta is tender. Add the
chopped, drained, spinach and sausage. Cook for 5 minutes more. Adjust the seasoning. Serve with a
TBS of parmesan cheese and crusty Italian bread.

101
Beef Barley soup This is one of the greatest barley soups, popular in the UK, Ireland, and throughout central and eastern Europe.
Barley has long been the grain of choice in
ancient soups. Often the barley is cooked and
the barley water is used for making beer. Early
recipes for beer didn‘t use hops as it is a more
recent beer making phenomenon. Barley soup is
a peasant soup, using what bits and scraps of
beef you could find. It‘s a great way to use up
leftover pot roast.
Ingredients
1 one lb. bag of pearl barley
2 quarts beef stock, either homemade or canned (you may want to enrich your homemade stock with
Campbell‘s Beef Consommé
½ cup each of finely diced - carrot, celery, onion, and red bell pepper
¼ cup chopped parsley
1 to 2 lbs. of cooked beef, cooked ahead, cooled and diced fine
1 bay leaf
2 garlic cloves, chopped fine
½ tsp. Tabasco sauce
1 TBS. unsalted butter
Pepper
1 TBS. Worcestershire sauce
Salt to taste
Procedure
Bring the beef stock to a boil and add the barley. Cover the pot. Cook the barley until tender. You may need to
add a little more stock about half way through the process. The barley should soften in about 35 to 40 minutes.
When the barley is cooked, sauté the vegetables and add them to the soup, reserving the parsley until last. Allow
the vegetables to cook for about 5 minutes. The barley will thicken the soup to the proper consistency. Allow
the soup to cook for about 3 minutes more. Add the beef, seasonings, and blend well – cook for an additional 5
minutes. Adjust the seasoning for salt and pepper. Add the parsley at the last minute.

102
Potato Leek Soup
Every great cookbook has a recipe
for potato leek soup. This is a
simple one to make and very
delicious, especially on cold winter
days. If no leeks are available use
good white onions and green
onions. Since I usually make this
soup the day after I serve a roast,
which has been accompanied by
mashed potatoes, I usually make a
little more mashed potatoes than
necessary. If you don‘t have
leftover mashed potatoes don‘t
worry about it.
Ingredients
3 large Russet potatoes, peeled and cut into cubes
1 cup of leftover mashed potatoes if you have them.
4 cups chicken stock (homemade, canned, or use a good quality chicken paste)
1 cup heavy cream
1 or two leeks, trimmed, sliced into thin strips, and washed
¼ lb butter
¼ cup flour
1 bay leaf
¼ tsp. thyme
2 tsp. Worcestershire sauce
½ tsp. Cracked black pepper
½ tsp. cayenne pepper
Salt to taste
Procedure
Cut the potatoes into ½ inch cubes. Melt half the butter in a soup pot. Add the leeks and sauté for 5 minutes or
until the leeks become somewhat translucent. Add the flour and make a little roux. Add the chicken stock. Bring
to a boil and add the potatoes and mashed potatoes. Simmer until the cubed potatoes are tender. Add the cream
and seasonings. Adjust to your desired level of seasoning. Creamy potato leek soup is hearty but sophisticated.
It can be served with a dollop of sour cream and some chopped chives. If accompanies by a crusty bread and a
good white wine it is a meal in itself.

103
Cream of Asparagus Soup Several restaurants in Seattle have offered Asparagus soup from time to time. I made it a couple of
weeks ago and it was delicious.
It‘s not something you want all the
time because it‘s rich but it makes
a great starter for a special dinner.
Ingredients
1 medium yellow onion, rough
chopped
1 stalk celery, rough chopped
1 bunch fresh asparagus, rough
chopped.
3 cups chicken stock
3 TBS unsalted butter
1 pint heavy cream
3 oz. high quality blue cheese
Sprig of fresh thyme
2 cloves garlic, smashed
Salt and pepper to taste
Procedure
Sauté the vegetables in 1 TBS
butter for a few minutes until the
onions are sweated. Add the
chicken stock and thyme; simmer until the vegetables are tender. Pour the stock and vegetables into a
blender and blend until completely pureed. You may need to do this in three batches so you don‘t blow
the lid off the blender and scald yourself with hot stock. Return the soup to the sauce pan and bring to
a boil. Add the cream and reduce slightly. Add the blue cheese and finish the soup with the remaining
butter. Adjust the seasoning with salt and pepper.

104
Spécialité de la Maison

105
Pasta and Wild Mushrooms
In the fall as the wild mushrooms begin appearing in specialty markets it‘s a great time to make homemade
pasta with a variety of mushrooms in a Marsala cream sauce. Here‘s a recipe I‘ve prepared many times and
enjoy serving to friends and family. Marsala wine is characterized by its fairly intense amber color, and its
complex aroma that shows hints of strong alcohol flavor, perhaps due to Marsala's relatively high alcohol
content of 16% to 20%
Ingredients
1 to 2 lbs fresh made pasta
1 shallot
1 lb fresh wild mushrooms
½ cup Marsala wine
½ pint heavy cream
¼ lb unsalted butter
6 to 8 oz freshly grated, high quality Parmesan cheese
Salt and pepper to taste
Procedure
Make fresh pasta by combining 1 lb all purpose flour (semolina can be used if you have it) and 4 egg yolks.
Place the flour on a cutting board and make a little well or depression in the center. Drop the yolks into the
indentation and beginning mixing the flour and egg yolk with a fork or with your hands. You may need to add a
little water if it is too dry. Once the pasta dough is completely mixed cut in half, wrap in plastic wrap and
refrigerate for one hour.
Unwrap the pasta dough. Divide each piece into two smaller pieces and begin running each piece through the
past machine at the widest setting. Fold the past in 3rds
and run it through the machine at each successively
thinner setting. You may need to sprinkle a little flour between runs to keep it from sticking to the rollers. Allow
the long sheets to dry for 10 minutes on a clean broom handle between two chair backs.

106
You may use any pasta variety you wish although I prefer to lay the long sheets out and cut them into random
pieces, generally 1‖ by 2‖ in size.
Drop the pasta into boiling salted water. Use a good handful of salt to a large pot of water. The pasta will float
to the top after a minute or so. Take it out and drop it right into the sauté pan with the rest of the ingredients.
Chop a shallot fine and sauté in 3 TBS butter. Slice the wild mushrooms into thick slices and drop into the pan;
sauté until just soft. Add the Marsala wine and reduce for a minute or two over high heat. Add the cream and
allow to reduce until the buttery sauce begins to thicken. Remove from the heat and whisk in the remaining
butter. Add ½ of the grated Parmesan cheese and carefully blend in. Add the cooked pasta and stir carefully.
Adjust the seasoning.
Place in large pasta bowls and top with a generous portion of the grated parmesan cheese. Serve with crusty
Italian bread and a crisp white wine.

107
Mushroom Steak Sauce A classic Champignon Sauce is a wonderful
combination of mushrooms, brown stock, red wine,
and aromatics. A quicker but very delicious version
can easily be made using a good canned beef
consommé. This sauce is great on meats, chicken,
and on hearty vegetables. You can either leave the
mushrooms in the sauce or strain the sauce. I like
the strained version over large grilled mushrooms or
with game. Recently I grilled a thick rib eye and
large mushrooms over a very hot mesquite coals.
The sauce was great on both. I added the meat
juices as the beef rested and the juice from the
grilled mushroom caps.
Ingredients
1 lb mushrooms, either button, shitake, portabella, wild varieties, or a combination of all – chopped
1 tsp flour
1 shallot, chopped fine
2 cloves garlic, chopped fine and smashed
1 small carrot, chopped fine
1 can beef consommé
1 cup red wine
1 tsp balsamic vinegar
1 tsp raspberry, blackberry, or grape jam
2 tsp. Dijon mustard
1 TBS canola oil
3 TBS unsalted butter
Salt and pepper to taste
Procedure
Sauté the onions and finely chopped carrot in canola oil, in a medium sized sauté pan until just barely clear.
Add the mushrooms and garlic. Sauté for 3 or 4 minutes over medium heat. Sprinkle the flour over the
mushrooms until completely absorbed. Add the beef consommé (use real beef stock if you wish) and the red
wine.
Reduce the sauce by half and strain through a fine sieve. Add the Dijon mustard, balsamic vinegar, and jam.
Return to the pan and whisk in the butter, in chunks, over low heat a little at a time. When the butter is fully
incorporated keep the sauce in a heavy bottomed sauce pan over very low heat until ready to use.

108
Low fat Ranch Dressing
Ingredients
1 container (8 oz) non-fat sour cream
2 heaping TBS low-fat mayo
1 pkg. fat free ranch dressing seasoning mix (Good Seasons, Original
Ranch)
1 tsp. Garlic powder
1 tsp. Onion powder
2 tsp. Worcestershire sauce
1 tsp. Tabasco sauce
2 tsp. Lemon juice or balsamic vinegar
Salt – to taste
Pepper – to taste
Directions
Mix well, allow to sit for a few hours or overnight. It will keep in the fridge for a couple of weeks. You can also
add blue cheese crumbles for a great Blue Cheese dressing. Last night I had this salad and dressing with baby
shrimp. It was great.
For a more traditional Ranch Dressing use regular mayonnaise, and sour cream.

109
Guacamole Guacamole is a great summertime dip or any other time for that matter. Most Guacamole recipes are too
complex and use ingredients that no self respecting
Mexican cook would ever think of using. Guacamole
should be chunky not homogenized. Here‘s my favorite
recipe.
Ingredients
Wooden salad bowl
3 ripe avocados
2 cloves garlic
3 TBS highest quality Salsa, without corn (make your own if you can)
Juice from 1 lime
1 tsp Worcestershire Sauce
Kosher salt
Mexican hot sauce or Tabasco sauce
Procedure
Cut the avocados in half, running a sharp French knife all around the avocado deep to the pit. Twist the two
halves in opposite directions. The avocado will split into two parts – one half holding the large pit. Carefully
slam the knife into the pit and twist. The pit should easily come out. Using one of your garlic cloves, thoroughly
rub the inside of a wooden bowl until you have nearly saturated the bowl with garlic. There should be little left
of the garlic clove after this process. Using a large spoon scoop the avocado into the garlic rubbed bowl. Chop
the avocado coarsely with a fork. Add all the other ingredients, including the other garlic clove, which has been
smashed to a paste, and gently mix, being careful not to make avocado mush. Adjust the flavor for salt and hot
sauce. I like a fairly zippy guacamole.
Cover the guacamole with plastic wrap, pushing the wrap right down on the surface of the dip to prevent any air
from oxidizing the dip. Air is the enemy of the avocado – it will turn it brown in a matter of minutes. Placing
the pit into the dip to keep it from turning brown is a myth; it doesn‘t work.
Serve the guacamole either in the wooden bowl or in one of those cool Mexican stone bowls. Serve with good
quality corn chips that have been deep fried in corn oil. It‘s easy to make your own. Also serve with plenty of
cold beer.

110
North Country Boiled Dinner Recently, during a visit to the North Country
(Plattsburg, Dannemora New York area), I had a
great family ham dinner. The next day my Uncle
made a Boiled Dinner from the left over ham. I‘m
sure that most places in America have reasonable
facsimiles to the Boiled Dinner. This is simply a
variation on Corned Beef & Cabbage. However,
it is usually made with the ham dinner left over
from Easter or some other special occasion.
Upper New York state, just east of Lake
Champlain has some of the best ham in the
country – not sure why. The North Country folks
save the ham stock from the original cooking and
of course, the left over ham and ham bone. It‘s
country comfort food at its best.
Ingredients
Left over ham with bone in
1 to 2 quarts of ham stock from the original cooking process
1 quart of chicken stock
6 to 8 small boiling onions
4 to 5 medium sized carrots
1 medium turnip – cut in quarters
6 to 8 small red or yellow potatoes
1 stalk of celery
½ head of white cabbage
1 bay leaf
Freshly ground black pepper
Procedure
Trim the remaining meat from the ham, leaving the bone with little meat on it. You should have about 1 to 2 lbs
of sliced ham pieces. Bring the ham stock and chicken stock to a boil. Add the bay leaf, carrots, celery, peeled
turnips, peeled boiling onions, and thick slices of cabbage to the stock. Add the potatoes – the little fingerlings
work well in this dish. Other vegetables such as turnips, rutabagas, and parsnips can also be added. Continue
cooking until the potatoes and carrots are tender.
The remaining ham stock can be strained and thickened slightly with a little roux to make delicious, reddish-
brown gravy. There is no need to salt this dish as the ham stock and ham have plenty of salt already. Serve in a
large bowl with a little of each vegetable, some good crusty bread, and cold beer.

111
Classic Blue Cheese Dressing
This is similar to the Blue Cheese salad dressing I used to make at the 13 Coins. It is thick, rich, redolent of
Blue cheese, and delicious. The secret is in the mayonnaise and in the quality of the Blue cheese. It‘s even
better if you can use real Roquefort
Cheese. The difference is that
Roquefort is only made from sheep‘s
milk in caves in Roquefort France,
nowhere else. The identifying mark is
the little red sheep in the oval circle
found only on true Roquefort cheese.
Ingredients
1 cup of high quality Blue cheese – more if you like
2 cups Mayonnaise – either Best Foods, Kraft, or make your own. If you make your own use salad oil
1 cup Sour cream
3 TBS. Finely chopped onion – must be extremely fine dice
2 TBS. Finely chopped celery – must be extremely fine dice
2 cloves Finely chopped garlic
1 TBS. Worcestershire sauce
1 tsp. Tabasco sauce
Salt
Fresh ground black pepper
Directions
Chop the vegetables. Add the mayonnaise and sour cream. Add all other ingredients and blend well but be
careful not to break up the chunks of Blue Cheese. There should be lots of Blue Cheese. Make sure your lettuce
and salad vegetables are very dry when you toss with the dressing.
Mayonnaise
3 Egg yolks
2 cups of good Salad oil (for mayonnaise only you may use olive oil, otherwise use salad oil)
1 TBS. Rice Wine Vinegar
Salt to taste (remember, you need enough salt to act as a preservative)
Pepper (for a mayonnaise without specks use finely ground white pepper)
2 tsp. Dijon mustard
½ tsp. Tabasco sauce
1 tsp. Worcestershire sauce

112
Directions
Using either a blender or a food processor blend the egg yolks and very gradually pour the oil into the eggs, in a
fine stream. It will take a while for all the oil to form the emulsion which is mayonnaise. Don‘t try to rush this
process, you don‘t want the emulsion to break or separate.
Add all the other ingredients and blend well. Store in a bowl or large mouthed jar in the refrigerator. I like to
use canola oil although cottonseed oil is fine also. For a mayonnaise to be used as a topping, not as a salad
dressing you may also use olive oil. However, EVOO (Extra Virgin Olive Oil) is too strong for plain
mayonnaise.

113
Pizza – Dave’s Famous
What‘s the best pizza in the world? Well, I‘ll tell you
one thing, it isn‘t found in Italy or Chicago. It‘s found
in New York City at Lombardi‘s in Little Italy, in
Manhattan. The reason is simple. The pizza is baked in
old brick ovens fired by coal. The temperature is
unbelievably hot and the gases given off by the coal
fire flavors the pizza in a way which simply can‘t be
duplicated anywhere else in the world.
I have making pizza for many years. I started out in St.
Louis, where I learned to toss the dough in the air as is
done in the pizzerias of my youth in Massachusetts. I
have perfected my pizza dough and sauce in the years
since. While you can‘t exactly duplicate the
Lombardi‘s experience you can com pretty close. The
key to great homemade pizza is a very hot oven and a
pizza stone. If you don‘t have a pizza stone or a large unglazed quarry tile, forget about it. It‘s not worth the
effort. Pizza must be cooked in a very hot oven, the highest setting you have, or about 550 degrees Fahrenheit.
The best way to cook pizza is in a wood or coal fired brick oven. The pizza is cooked directly on the floor of the
oven with the burning coals or wood just inches away. The pizza blisters immediately and cooks extremely
quickly. The resulting texture and taste is amazing. The crust is crusty on the outside and elastic in the middle.
The other key is to use high gluten bread flower for your dough. This will allow you to achieve the elastic
texture you desire. One of the most important things to remember in making good pizza dough is to allow it to
rise very slowly in the refrigerator, overnight at least. It won‘t hurt the dough to let it rise a couple of days in the
refrigerator. This vastly improves the texture of the dough.
The sauce is less important to the overall
pizza experience. I use a very simple
tomato sauce right from the can. I try to
use imported Italian plum tomato sauce
with nothing else added to the can. If
you want to peel, seed, and core your
own plum tomatoes be my guest.
However the added effort is really not
worth the effort.
Finally, we must discuss the cheese. It is
quite fashionable these days to use fresh
mozzarella cheese, cut into thin slices.
While fresh mozzarella is very flavorful
it doesn‘t melt very well. Consequently,
I recommend the aged mozzarella found
in your super markets. Whole milk
mozzarella is best as it is creamier and
very delicious. I also use some grated
parmesan cheese. I use a blend of 4 parts mozzarella to 1 part parmesan.
Ingredients
6 cups Bread Flower
2 cups Water
1 package dry Yeast
1 TBS. Salt

114
Directions
Blend the flour, salt, yeast and water in a Kitchen Aid mixer using the dough hook. If you don‘t have a Kitchen
Aid then mix by hand. It will wear you out but it‘s better than any other mixer. I have used a Cuisenart Food
processor before but the texture just isn‘t the same and you can only make it in small batches. Add the water
slowly allowing the dough to form a ball. The dough mixture should be neither too moist or dry. This may take
some experience and practice. Knead in the mixer for about 5 minutes. Allow to rise in the mixing bowl,
covered with plastic wrap, for about 1 hour. Remove from the bowl, punch down, divide into two pieces and
place into zip lock plastic bags. Store in the refrigerator overnight or until ready to use (no more than two days).
When ready to use, take out of the bag and place on a floured board. Cover with a T-towel and let rise for at
least one hour. Divide the dough into two pieces (so that‘s 4 pieces for the entire batch).
Flatten each round pizza dough ball into a 5 inch round. Gradually use your fingers to increase the size of the
pie. If you want to ―throw‖ the pizza dough be my guest. Toss it in the air on the backs of your hands, spinning
it to allow centrifugal force to flatten it and catch it the same way. If you can‘t bring yourself to do this, just
stretch it by hand but don‘t roll it out. That will destroy the elastic nature of the dough. Once the dough is about
8 or 10 inches in diameter and about ¼ inch thick or even thinner, you are ready to top it.
The Sauce
1 large can of Italian plum tomato sauce
1 bunch of fresh basil chopped fine
4 cloves of fresh garlic, crushed and chopped fine
¼ cup finely chopped Calamata olives
1 tsp. Crushed Red pepper flakes
¼ cup Extra Virgin Olive Oil (EVOO)
Salt
Fresh ground black pepper
Directions
Heat the sauce in a saucepan almost to a boil. Add all the other ingredients and simmer for a few more minutes
and allow to cool. Place a ladle of sauce in the center of the dough and move the ladle around in circles ever
expanding the sauce on the dough. You should not over sauce the pizza, a thin layer of sauce is sufficient.
Baking your pizza pie
Don‘t over top your pizza. A simple pie of cheese and salami or pepperoni is the best. Place your toppings on
the pizza, sliced mozzarella first, vegetables, meats with parmesan cheese on top. Drizzle a little EVOO on top
of the pizza just before sliding it onto the pizza stone.
Make the pizza directly on a pizza peel. A peel
is a large, thin wooden spatula. I usually sprinkle
a little fine ground white corn meal on the peel
so the pizza will slide off easily. Once it‘s
positioned above the back end of the pizza stone,
give it a little jerk towards you to ease the pizza
off the peel and onto the stone. Bake for about 8
minutes in a HOT oven.
On thick crust pizza – Chicago Style
Don‘t get me started. I‘m sure it‘s great stuff.
I‘ve eaten it many times while in Chicago. I‘ve
even made it a couple of times. It‘s not pizza, at
least not authentic Italian or Sicilian style. It just
doesn‘t have the right texture, flavor

115
combination to qualify as pizza. Call it what you like but don‘t call it pizza because that‘s not what authentic
pizza is.

116
Pepper Sauce
This is a great pepper sauce that can be served as a condiment to
many dishes. It is bright, spicy, and flavorful and can be served hot
or room temp.
Ingredients
2 red bell pepper
1 yellow bell pepper
2 mild banana peppers
1 jalapeño or other hot red chili
3 cloves garlic, crushed
3 TBS Extra Virgin olive oil
1 TBS balsamic vinegar
salt
black pepper
Directions
Roast the peppers over high heat or on the grill. You may also use a blow torch to blacken the skins. I prefer to
bake them at 500 degrees F. When the skin is well scorched remove from the heat and place into a large paper
bag to cool for 20 minutes. Then carefully remove the paper like skin and seeds. Rough chop the peppers.
In a Cuisenart or other food processor, puree the peppers and add the oil, vinegar, and seasonings. Scrape the
pepper mixture into a sauce pan with a rubber spatula. Cook the mixture over medium heat for about 20 minutes
or until it begins to darken in color and thicken slightly. Much of the water will evaporate and both the color
and flavor will intensify. Allow to cool to room temp and adjust the seasoning. Spread on grilled bread, on
cooked chicken, grilled meats including fish, or use in pizza.
Variations
You may want to blend parmesan cheese into the warm pepper sauce, after it has cooked. Add anchovies to the
cooked sauce for added zip. This is especially good on salads and pizza or baked into focacia bread.

117
Sauce Bolognese
While Mick Batali (yes, cousin of the famous Mario Batali on Food TV), my Italian friend probably knows this
recipe by heart, many of you may not. It is the
most wonderful of all Italian sauces, rich,
flavorful, filling, great over meat, pasta, and
chicken. Obviously it is from the region of
Bologna where pork sausages, salami, and
prosciutto is famous. This sauce will give your
kitchen a wonderful aroma all day. Our bland,
ubiquitous version of Baloney originated in
Bologna along with many other cured meats.
The true Italian version of Bologna is actually
very good.
Ingredients
1 lb ground beef
1 lb ground Italian pork sausage
1 lb ground veal (chicken or turkey may be substituted if you
can't bring yourself to use veal)
3 small cans of tomato sauce, you may use fresh peeled, seeded plum tomatoes if you want, but the recipe will
take much longer
1 can diced tomatoes in juice
1/4 c olive oil
15 cloves garlic, chopped fine
1 bay leaf
2 sprigs of fresh sage
1 small sprig of fresh rosemary, chopped fine
8 leaves of fresh basil, chopped fine fresh ground pepper
pinch nutmeg
2 to 4 cups good chicken stock
1 pt whole milk or 1/2 and 1/2
1 cup fresh grated parmesan cheese (the higher quality the better - don't use Kraft saw dust stuff)
3 TBS butter
Directions
Sauté the ground meats in olive oil for 1/2 hour or more, until browned. Add the tomato products and the stock
(add the stock a little at a time over the course of cooking so it does not get
too thick) and simmer for about 40 minutes more, stirring occasionally. Add all the seasonings and continue
simmering for 30 minutes more. Finally, when the sauce is thick and has taken a dark red color, add the milk or
cream. Simmer for 20 minutes more. Don't be afraid to cook the sauce a long time, the flavors only intensify.
Add the butter and quickly stir in the parmesan cheese so it does not clump up. Adjust the seasoning. This sauce
should be very flavorful and highly seasoned. You may add crushed red pepper if you like, but the sauce
traditionally is not spicy hot. Serve the sauce over fresh cooked pasta. Cook the pasta - tortellini, fresh made

118
ravioli, or rigatoni in chicken stock. When the pasta is cooked, spoon it into a sauté pan with a spoon of the
cooking stock and a tablespoon of butter in it. The pasta will absorb the stock, this adds greatly to the overall
flavor. Add the
Bolognese sauce, as much as you like. Serve in a platter, heavily garnished with parmesan cheese. A good
sturdy red wine is best and crusty Italian bread. It is also good over sautéed mushrooms, as a
lasagna sauce, or even as a pizza sauce. I usually make a large batch, put some in freezer bags and freeze for
those times when I don't have time to cook. Thaw it out in a pan of boiling water or in the microwave, serve
over quick cooked pasta with a nice salad. I made Bolognese this weekend served over homemade ravioli -
stuffed with sausage, spinach, and ricotta cheese. Homemade bread, and a bottle of Valpolicella - there is
nothing better.

119
Spaghetti with Clam Sauce Simple and Delicious Spaghetti with clam sauce
This dish can be made in about 12 minutes, including the time to cook the pasta.
Ingredients
2 or 3 cans of minced clams and juice (use frozen or fresh if you have them but canned works great)
3 TBS olive oil
¼ cup chopped parsley
¼ cup fresh basil, shred the leaves
2 cloves, fresh garlic, sliced thin
fresh ground pepper
salt to taste
1 box spaghetti or linguini
½ pint cream (optional)
Directions
In a large sauté pan heat the oil. Add the garlic and sauté for 30 seconds. add the clams and juice, and simmer
for 1 minute. Add the cooked pasta and season with pepper, parsley, basil and salt. Toss together until the sauce
and pasta is well blended. If you want a creamy sauce, add the cream and allow to thicken slightly before
adding the pasta. Place on a platter, serve with a salad, French bread, and a good white wine. Traditionally, the
Italians do not top seafood dishes with parmesan cheese, you may if you like.

120
Creamy Pasta with Basil, Sausage, Mushrooms, and Salami
I have prepared this dish many times for my family, making
changes along the way, accommodating it to what was in my
refrigerator or what was fresh in my herb garden. However,
it usually takes on the same basic form and taste pattern.
You may find it works great with your family. It can be
prepared in about 30 minutes, unless you make the pasta
fresh. I have a little chrome pasta machine, which has been
hanging around for about 25 years. It will probably last for
another 30. Fresh pasta is so simple to make and with a food
processor and pasta machine it is very simple. I usually dry
the pasta for about 15 minutes on a broom handle across two
dining room chairs. Then drop the fresh pasta into boiling
salted water for a few minutes. I use a large Chinese strainer
with a bamboo handle to remove the pasta from the water in
one big scoop, along with a bit of the pasta water itself. It
goes right into the sauce; a handful of Parmesan cheese, a
little French bread, and a glass of good white wine – life is
good.
Ingredients
3 TBS. Extra Virgin Olive Oil (EVOO)
4 cloves fresh garlic, sliced or chopped fine
1 medium onion, sliced fine
1 lb. fresh mushrooms, quartered
1 medium or two small canned whole Italian tomatoes
1/3 lb. sliced hard salami – cut into one inch pieces
1 lb. bulk Italian sausage – cut into small cubes
1 bunch of basil leaves, rough chopped
½ tsp. red pepper flakes, more or less depending on how hot you like it
1 TBS. tomato paste
½ pt. heavy cream
2 cups freshly grated Parmesan cheese, one in the sauce, one for garnishing
Procedure
Sauté the sausage cubes until browned but not completely cooked. Drain the excess fat. Heat the EVOO in a
large sauté pan. Sauté the salami for a minute or two. Add the sliced onions and ½ of the chopped garlic. Sauté
for a few minutes and add the mushrooms. Add the sausage. Sauté for a couple of minutes more and add the
canned tomatoes (you can use fresh Italian plum tomatoes if you want to go through the process of peeling and
seeding). Simmer the sauce for about 10 minutes or until the sauce begins to reduce. Add the seasonings
including the fresh basil and the heavy cream. Simmer the sauce for about 5 minutes more. The creamy sauce
will reduce somewhat. Add the cheese and mix in well. Simmer the sauce for a minute more.
Roll out the fresh pasta into long sheets and randomly cut into wide pasta rectangles of no particular shape. Toss
into boiling salted water and cook for about two minutes or until the pasta floats on the surface. Remove the
pasta and place directly into the sauce. Toss the entire pasta/sauce mixture and serve in large pasta bowls. You
may also use dried pasta; any kind that will hold sauce. Garnish with parmesan cheese and chopped fresh basil.

121
Fettuccini Alfredo
There is probably more discussion about
what Fettuccini Alfredo is than any other
dish I know. There are multiple versions of
the famous creamy pasta dish and many
theories as to its origin.
Alfredo di Lelio, was an inspired Italian cook
who proposed this new exciting dish in the
restaurant he opened in Rome in 1914. It was
a high gourmet preparation in the Roman
tradition of simplicity. Apparently he created
his Fettuccine all‘Alfredo when his wife lost
her appetite during her pregnancy. To bring
back her appetite he prepared for her a
nutritious dish of egg fettuccine with
Parmigianino cheese and butter. That
probably gave him the idea for his ―triple butter‖ fettuccine. Triple butter is a much richer, denser butter than
we can usually get in the States.
The quality and taste of the ingredients is the key to success with fettuccine Alfredo. The fettuccine should
either be freshly made and as thin as possible, or, if store bought, the best fresh (not dry), thinnest pasta you can
buy. The reason is because fresh pasta holds more starch and is softer than dried pasta. As a result, it holds the
melted butter/cheese mixture much better than dried pasta.
So, forget the heavy cream, the parsley, the garlic, and all the other stuff suggested in the hundreds of Alfredo
recipes that circulate around. Take down from the shelf that pasta machine, prepare your fresh fettuccine, and
enjoy the simple Fettuccine al Triplo Burro the way Alfredo himself would do them.
The key to good Fettuccini Alfredo is in the technique and in the butter. It takes a bit of practice so don‘t be
alarmed if the first time you try it the dish isn‘t quite right.
Ingredients
12 oz of fresh pasta (if you can make yourself all the better)
½ lb of premium quality unsalted butter (if you can find real Italian Double Butter get it)
½ lb of freshly grated Parmigianino
Several TBS. of the pasta water your pasta was cooked in
Procedure
Cook the pasta in plenty of salted water – do not overcook it, the noodles have to be sturdy enough to withstand
the tossing. Do not add oil to the pasta water – this will prevent the pasta from absorbing the butter/cheese
mixture. Cut the softened butter into chunks and place in a warm but not hot sauté pan (you really don‘t need a
pan at all, just a warm serving bowl). Place the pasta over the top of the butter along with a few TBS. of the
steaming, salted pasta water. Begin to gently work the pasta and butter together for 30 seconds or so. Add the
freshly grated Parmigianino cheese and continue gently (don‘t break the pasta) working it together with two
forks until it comes together in one creamy mixture. If it appears to be a little dry add more pasta water. Garnish
with additional Parmigianino cheese and serve immediately. The only thing you need to accompany this dish is
some fresh crusty Italian bread and a glass of good white wine.

122
Quick & Easy Pasta Sauce
There are those times when you can‘t do the real thing, you don‘t have the more expensive ingredients or you
just don‘t want to focus on the technique needed to make genuine Alfredo. Here‘s a foolproof creamy pasta
sauce that tastes great and is easy to make and store on a warm burner for hours or make ahead and put in the
fridge and serve the next day.
Ingredients
2 TBS. butter
2 TBS flour
1 cup chicken stock
½ pint heavy cream
2 cups good grated Parmesan cheese
1 clove garlic, smashed into a paste
Freshly grated black pepper
Salt to taste
Procedure
Make a roux in a saucepan out of the butter and the flour. Stir it for a minute to cook the flour taste out. Add the
chicken stock and whisk until it thickens. Add the cream and work it in. gradually add the grated Parmesan
cheese whisking all the while. Add the garlic and seasonings. Keep the sauce warm for use at any time or
refrigerate for later use. Simply heat the sauce up and pour it over freshly cooked pasta. Once again, reserve a
little of the pasta water to help the pasta/sauce mixture cohere.

123
Sunday Gravy – Italian Tomato Sauce Italian Americans have been adapting
American ingredients to their culture for
nearly 200 years. Italians brought with them
old world recipes that were hard to duplicate
in the New World because the basic
ingredients simply didn‘t exist. Over time
Italian Americans developed those
ingredients in America or found suitable
substitutes.
Basic marinara sauce, which is a simple
tomato sauce with no meat in it is fine for
most pasta, fish, and chicken dishes.
However, on Sunday afternoons, after Mass,
the whole family would gather at
Grandma‘s house for Sunday dinner. This
richer, meat based sauce is called Sunday
Gravy instead of simply meat sauce. While
many dishes would be served at dinner time,
Sunday Gravy is the mainstay and is served
over pasta and other meat dishes. Here‘s my
recipe for Sunday Gravy, even though I‘m not Italian.
Ingredients
1 lb meaty pork bones or spareribs
1 lb veal stew meat or breast of veal
1 lb Italian sausages
1 medium onion, chopped fine
One whole carrot - peeled
3 TBS olive oil
3 large cans of diced tomatoes in juice
1 small can of tomato puree
8 garlic cloves, chopped and mashed
2 cups water
One bunch basil leaves, chopped chiffonade style
1 tsp. red pepper flakes
2 tsp. dried oregano flakes
2 cups red wine
Procedure
In a large sauce pan or stock pot, sauté the finely chopped onion in
the olive oil until clear. Add the meat and brown in batches; the
pork, veal, and sausages until well browned. Transfer the meat to a plate. Pour off most of the fat. Return the
meat to the saucepan. Add the red wine and simmer for 5 minutes. Add all the tomato products, carrot, half the
garlic, and water. Simmer for one hour over medium heat. Add the rest of the seasonings and continue to
simmer for 30 minutes more. Adjust the seasonings with salt, ground pepper, and red pepper flakes.

124
Meatballs
Even though the Sunday Gravy sauce is quite meaty you still need meatballs or the spaghetti. Here‘s my recipe
for good Italian/American meatballs. If the sauce is mild make the meatballs more spicy; if the sauce is spicy
make the meatballs more mild.
Ingredients
1 lb ground pork
1 lb ground beef
½ cup parmesan cheese
½ cup ground cracker mean or bread crumbs
1 8oz. ladle of Sunday Gravy sauce
1 egg
2 tsp. fresh chopped garlic
2 TBS chopped fresh Italian parsley
1 tsp. dried oregano
1 tsp. dried basil
1 tsp. Worcestershire sauce
2 tsp. salt
1 tsp. red pepper flakes
1 tsp. ground black pepper
Procedure
Mix all the ingredients in a large mixing bowl or in a Kitchen Aid mixing bowl. Mix on medium speed until
well blended. Using your hands form into medium sized, 1 inch diameter meatballs. Place on a greased cookie
sheet. When the sheet is covered, bake in a 360o F. oven for 25 minutes. Drain the fat and liquid off from the
meatballs and put the meatballs into the Sunday Gravy sauce to cook for a few minutes more. Serve over pasta
and top with freshly grated parmesan cheese, garlic bread, and plenty of fruity red wine.
This sauce is also good on pizza, with pot roast, roast veal, and ribs.
Marinara
We‘re almost at the end of the book so you should have a feel for
amounts of ingredients now. I‘ll let you decide on the amounts
for this one.
Tomatoes, peeled and seeded, processed in a food processor.
Heat good olive oil in a sauce pan, sauté thinly sliced garlic until
just golden. Add the pureed tomatoes and cook for 30 minutes or
until the sauce begins to darken in color and thicken slightly.
Season with salt, fresh chopped basil, and red pepper flakes.
Simmer for a few more minutes. That is as simple as it gets.
Marinara sauce is bright, fresh, spicy, and ubiquitous. Use it on pizza, broiled chicken and fish, roasts
of beef, vegetables, pasta, or as a base for other sauces.

125
Manicotti
For many years I assumed that
manicotti was served in the large
manicotti noodles store. One of
my first jobs at the 13 Coins was
to make crepes for the Manicotti;
probably the most popular
special we served. Standing in
front of a large Montague, six
burner range, with six shiny
black crepe pans, making one
crepe after another was an
exhausting task. Three hundred
crepes later the job was done.
Every restaurant needs a dish
like Manicotti, one that can use
up all the left over scraps of
meats and vegetables; one that
generates huge profits. The 13
Coins version of Manicotti was
just such a dish. I have made
this dish many times at home
over the years; everyone loves it. This recipe will serve six easily.
Ingredients
½ LB. ground pork
1 LB ground beef
1 large carrot
1 large stalk of celery
1 medium onion, rough chopped
4 cloves garlic, finely chopped
1 small box frozen spinach, thawed and drained
3 eggs
2 tsp. Worcestershire sauce
1 cup grated Parmesan cheese
2 TBS. chopped broadleaf parsley
1 tsp. ground oregano
1 tsp. fresh basil (dried works fine)
6 oz. canned tomato sauce or prepared spaghetti sauce (homemade if you have it)
1 ½ tsp. sale
1 tsp. red pepper flakes
½ tsp. ground black pepper
12 dinner crepes
1 quart of Mornay sauce
1 ½ quart of good tomato sauce (homemade marinara or meat sauce (spaghetti) is preferred)
Procedure
Cook the ground pork and ground beef until browned – drain the fat. Combine the meat, all seasonings, ½ cup
of the Parmesan cheese, parsley, tomato sauce, and spinach in a mixing bowl. Process the vegetables in a food

126
processor until finely chopped. Mix the vegetables and other ingredients well. I recommend using a Kitchen Aid
mixer and the paddle for this job. Refrigerate or three hours or until well chilled.
Make the dinner crepes and allow to cool. Form the stuffing mixture into small logs, six inches long and one
and ½ inch diameter. Roll the crepes around the stuffing mixture and place the filled crepes into a well greased
9 x 12 Pyrex baking dish. Cover with aluminum foil and bake in 350o F oven or 20 minutes.
When the manicotti is hot place one or two filled crepes on each plate. First dress with a ladle of the Mornay
sauce, then top with a ladle of the spaghetti sauce. Garnish with freshly grated Parmesan cheese.
Dinner Crepes
1 cup Flour
3 TBS. vegetable oil (other than Extra Virgin may be used for this dish)
4 whole large Eggs
1 cup Water
Pinch Salt
Procedure Mix the eggs in a mixing bowl. Add the oil, flour, and salt. Gradually blend in the water until a smooth, runny
crepe batter results. Strain the batter through a fine strainer to remove any lumps. Allow the batter to sit in the
refrigerator for at least 1 hour.
Heat your crepe pan. I recommend using a non-stick egg pan or specially designed crepe pan. For the first
couple of crepes you will need to spray the pan with PAM spray. Pour about 2 oz. of batter into the pan and
move the pan in a circular fashion to coat the entire pan extending ½ inch up on all sides. Place the pan back on
the medium heat. When the crepe begins to bubble slightly and dry a bit on the sides it‘s time to turn the crepe.
If you feel comfortable you may flip it manually. Otherwise you will need to insert a heat resistant rubber
spatula and flip it with the spatula. Let it cook for 20 seconds more then transfer each crepe to a cookie sheet
covered with wax paper. Dinner crepes should not be browned. Layer a sheet of wax paper or parchment
between each crepe. Crepes may be refrigerated for up to one day but no longer.
For desert crepes, substitute melted butter for the oil, milk for the water, and reduce the salt. You also may add
a tsp. of sugar. The procedure is the same although you may want the desert crepe to be a bit browner around
the edges.
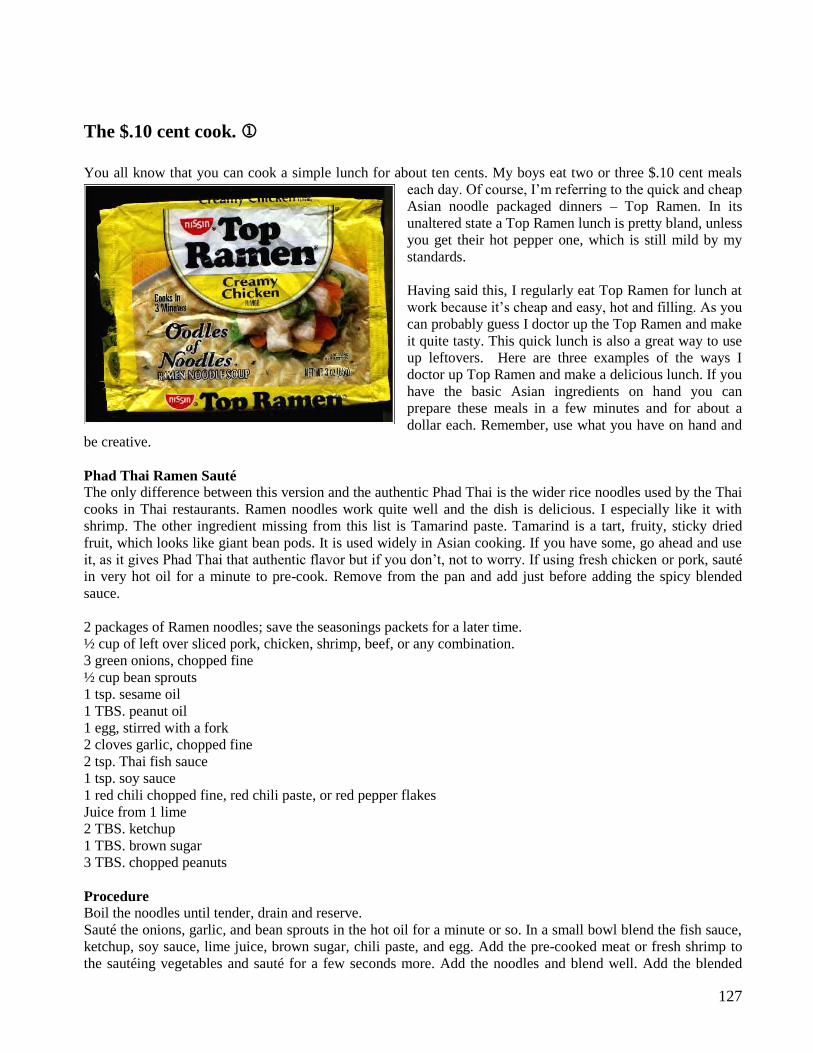
127
The $.10 cent cook.
You all know that you can cook a simple lunch for about ten cents. My boys eat two or three $.10 cent meals
each day. Of course, I‘m referring to the quick and cheap
Asian noodle packaged dinners – Top Ramen. In its
unaltered state a Top Ramen lunch is pretty bland, unless
you get their hot pepper one, which is still mild by my
standards.
Having said this, I regularly eat Top Ramen for lunch at
work because it‘s cheap and easy, hot and filling. As you
can probably guess I doctor up the Top Ramen and make
it quite tasty. This quick lunch is also a great way to use
up leftovers. Here are three examples of the ways I
doctor up Top Ramen and make a delicious lunch. If you
have the basic Asian ingredients on hand you can
prepare these meals in a few minutes and for about a
dollar each. Remember, use what you have on hand and
be creative.
Phad Thai Ramen Sauté
The only difference between this version and the authentic Phad Thai is the wider rice noodles used by the Thai
cooks in Thai restaurants. Ramen noodles work quite well and the dish is delicious. I especially like it with
shrimp. The other ingredient missing from this list is Tamarind paste. Tamarind is a tart, fruity, sticky dried
fruit, which looks like giant bean pods. It is used widely in Asian cooking. If you have some, go ahead and use
it, as it gives Phad Thai that authentic flavor but if you don‘t, not to worry. If using fresh chicken or pork, sauté
in very hot oil for a minute to pre-cook. Remove from the pan and add just before adding the spicy blended
sauce.
2 packages of Ramen noodles; save the seasonings packets for a later time.
½ cup of left over sliced pork, chicken, shrimp, beef, or any combination.
3 green onions, chopped fine
½ cup bean sprouts
1 tsp. sesame oil
1 TBS. peanut oil
1 egg, stirred with a fork
2 cloves garlic, chopped fine
2 tsp. Thai fish sauce
1 tsp. soy sauce
1 red chili chopped fine, red chili paste, or red pepper flakes
Juice from 1 lime
2 TBS. ketchup
1 TBS. brown sugar
3 TBS. chopped peanuts
Procedure
Boil the noodles until tender, drain and reserve.
Sauté the onions, garlic, and bean sprouts in the hot oil for a minute or so. In a small bowl blend the fish sauce,
ketchup, soy sauce, lime juice, brown sugar, chili paste, and egg. Add the pre-cooked meat or fresh shrimp to
the sautéing vegetables and sauté for a few seconds more. Add the noodles and blend well. Add the blended

128
spicy liquid to the sauté pan and stir around for a minute until the egg cooks. The noodles will absorb some of
the liquid so serve almost immediately after the egg cooks. Garnish with finely chopped green onion tops and
the chopped peanuts.
Chinese Ramen Soup
One package of chicken or pork or shrimp Ramen Noodles, depending on the meat you use in the soup
2 green onions chopped fine
1 clove garlic, chopped
Other chopped vegetables – zucchini, Napa Cabbage, carrot, bean sprouts, whatever you want or have hanging
around
1 tsp. garlic black bean paste – bought commercially at any Asian market
1 tsp. red chili paste, more if you like it hot
1 tsp. sesame oil.
1 tsp. soy sauce
Procedure
Put all the ingredients into the sauce pan including the noodles. Cook the noodles according to directions, using
the seasoning packet. When the noodles are tender pour into a bowl and enjoy.
Thai Curry Noodle soup
Two packages of Ramen noodles and one seasoning package
3 green onions, rough chopped
5 fresh basil leaves
1 TBS. Thai fish sauce
2 tsp. Thai curry paste, green or red (red is usually more mild than green)
1 TBS. brown sugar
1/2 cup of coconut milk – canned is fine. What you don‘t use, save in a glass bowl and have it the next day in
another dish.
½ cup chicken, pork, beef, or shrimp, depending on what you want.
Procedure
Mix all ingredients together but use ½ cup less water than usual. Bring to a boil, including the noodles and 1
packet of Ramen seasoning. Adjust the seasoning and serve. Garnish with finely chopped green onion tops.

129
Basic Asian Ingredients Every Kitchen Needs
Fresh Garlic
Fresh Ginger
Fish Sauce – bottled liquid, usually from Thailand or Vietnam
Hoisin Sauce – sweet plum sauce used in Peking Duck and
Oyster Sauce – thick, salty sauce used in Chinese cooking dishes such as Kung Pao Chicken and Oyster Sauce
Beef
Black Bean Paste – comes in jars, can be found in most supermarkets or at Asian grocery stores
Red Chili Paste – more than just hot, it has a slightly sweet, vinegary taste. It‘s easier to control the heat with
the paste than with cayenne or ground chili pepper. Some chili sauces also have garlic in them.

130
Quiche
I‘m not a big quiche guy, ―real men don‘t eat
quiche,‖ but I enjoy making quiche and most of the
people I cook for love eating good quiche. Most of
the effort in making quiche is in the crust. I solve
that problem by purchasing pre-made crusts; the
Marie Calendar brand is the best I have found.
However, any pie crust recipe will work fine for
quiche. Quiche is great at brunch buffets, along with
fruit platters, sliced ham or prosciutto, various
breads and rolls, and cheeses. Here‘s my very
simple quiche recipe.
Ingredients
Two large pre-formed pie crusts
8 large eggs
1 and ½ cups ½ & ½
½ lb. shredded Swiss cheese
½ cup chopped spinach, drained
½ onion, chopped fine
4 strips of bacon, chopped
Pinch nutmeg
Salt & pepper to taste
Procedure
Thaw the pie crusts and coat them with an egg wash, sides and bottom. Place into a 400o F oven for about 10
minutes or just until the crust begins to crisp and loose its waxy consistency. Let the crusts cool. In a large
mixing bowl, mix the eggs, cream, and nutmeg. Sauté the bacon, draining the fat. Add the onions, chopped
spinach, and any other vegetables you like. I like to add sliced mushrooms, zucchini, eggplant, sun dried
tomatoes, etc. or any combination of all. It‘s really up to you so be creative.
Grate the Swiss cheese. Place the cooked vegetable and bacon mixture in the bottom of the crust. Top with the
Swiss cheese. Season with salt and freshly ground black pepper. Ladle the egg-cream mixture into the crusts
until the mixture comes just below the top edge of the crust, about ¼ inch from the top. Place the two quiches
on a cookie sheet with an edge, to catch any mixture that might ooze over. Bake the quiches in a 350o F oven for
30 minutes or until the mixture barely jiggles in the middle, turns light golden brown, and puffs up a little.
Don‘t overcook the quiche, the mixture should still be a little wet in the middle.
Allow the quiche to warm but not cool. Quiche should be served warm not hot. Quiche is great with melon
slices, grapes, or any variety of fruit, or other vegetables. Champagne is a great accompaniment with Quiche as
is medium dry white wines.

131
Baked Beans Growing up near Boston Massachusetts the family would often have baked beans, hot-dogs, and brown bread.
Brown bread is a quick bread, rich
in molasses, baked in an old baked
bean can. If you were lucky you
could invert the can and knock it out
onto a plate. Otherwise you had to
spoon it out. My grandmother made
great baked beans so my Mom
learned the recipe from her. I
learned it from my Mom. On
Saturday nights we would have a
dinner of Baked Beans, hot dogs,
black olives, cottage cheese,
coleslaw, and brown bread. I always
looked forward to those dinners.
Ingredients
1 bag Great Northern dry beans
(three to four cups)
3 slices of smoky bacon
1 cup dark brown sugar
4 TBS dark molasses
1/3 cup ketchup
3 TBS real maple syrup
3 TBS yellow mustard
Salt – to taste
Black pepper to taste
Procedure
Scan the beans for any little rocks. Soak the beans in cold water in the refrigerator for at least 24 hours. Drain
off the soaking water and cover the beans with cold water about 1‖ above the beans. Chop the bacon. Add half
of the sugar, molasses, mustard, bacon, and salt. Simmer the beans on top of the stove on medium heat, just so
they gently bubble. Boil from 45 minutes to one hour or until the beans are just getting soft. Place the beans in a
350 degree Fahrenheit oven and bake for about 3 hours. After 1.5 hours stir in ¼ lb butter; the beans will form
a dark skin on the top. Occasionally stir this skin into the beans and resume baking until the beans form another
skin. The beans should be bubbling and ready to serve. Baked beans are traditionally served with BBQ, baked
ham, as well as hot dogs that have been baked into the beans for the last hour of cooking.

132
Making beer and spirits The earliest and simplest recipes for beer are found in
Mesopotamia first made by the Sumerians as far back as
10,000 BC – at the dawn of history. They would harvest
grain and soak it in water. Then they would scrape off
some yeast-rich foam from the previous day‘s beer or add
a little diluted bread dough and the barley or grain soup
would begin to bubble up.
After a simple straining the beer was ready to drink. If
you were lucky the alcohol content was near 3%, just
enough to make it last a few days. Since there were no
refrigeration systems it was kept cool by plunging the
earthen container in a river or dropping it down into a
pool. This little picture is of Egyptians making beer over 3,000 years ago.
Some of the early beer makers figured out that if you let the grains begin to sprout and then stop the sprouting
by heating or roasting the grains a beneficial enzyme is created. This enzyme converts the starches in grains to
sugars giving something for the yeast to eat and grow – giving off two substances: alcohol and carbon dioxide.
This process is called malting. Beer can be made without malting the grain but it is a much more difficult and
hit-or-miss process.
Early brewers had no idea what made the liquid become alcoholic. All they knew was that when they added the
beer foam or partially baked bread chunks to the barley water alcohol resulted. They called this magical
ingredient they added to the beer ―God‘s stuff‖ because it worked in a mysterious way.
Eventually the next step was taken. The fermented beer was put into an iron pot and the steam was captured
with a long wooden or clay tube. The tube would cool the steam and the condensed semi-clear liquid would drip
down into a collecting pot. Now the alcohol content had risen to about 20%.
The process of aging the liquor in wooden casks wouldn‘t happen for hundreds of years. However, the liquid
would take on the flavor of whatever container it was stored in. Somewhere along the line a piece of partially
charred wood probably fell into the container and after a few months the liquor had taken on a slightly amber
and smoky taste – similar to today‘s scotch.
Next step for the ancients was the discovery that you could also distil wine. Using the same process of bringing
the wine to a boil and capturing the vapors, a highly alcoholic grape flavored liquor was produced. The resulting
spirit was similar to our brandy and of course, would keep for months.
Anyone can make this simple distilled beverage in their own home. Allow a large kettle of water, cracked corn,
and sugar to form a mash. Bring it to a boil and allow it to cool. Add some brewer‘s yeast and let it bubble
away. Within a day or two the mash (actually beer) will have become alcoholic – about 3.2%. Cap the mixture
tightly and connect it to a coiled copper tube, which empties into a collecting pan. The clear alcohol is called
moonshine or white lightning. It can be as high as 50% alcohol. If you have access to a genuine oak barrel you
can char the inside of the barrel over a wooden fire (hickory works best). The barrel should only take about a
1/16‖ char. Pour your clear moonshine into the barrel. Cap it tightly and let it age for three to five years. Roll it
over once and a while. Your moonshine will have turned into corn whisky.
There are plenty of great books you can order on making beer and spirits. Making beer is much more complex
than making wine. I encourage everyone to try their hand at beer making at least once in their life. Beer making
is allowed by law hence the explosion of micro breweries. Regarding spirits, obviously, the whole process is
illegal. Federal taxes are supposed to be collected on any distilled spirits. But a few gallons of corn whisky for
―medicinal‖ purposes will never be noticed by the Feds. Just don‘t try to sell it or you‘re sure to be caught.

133
Deserts
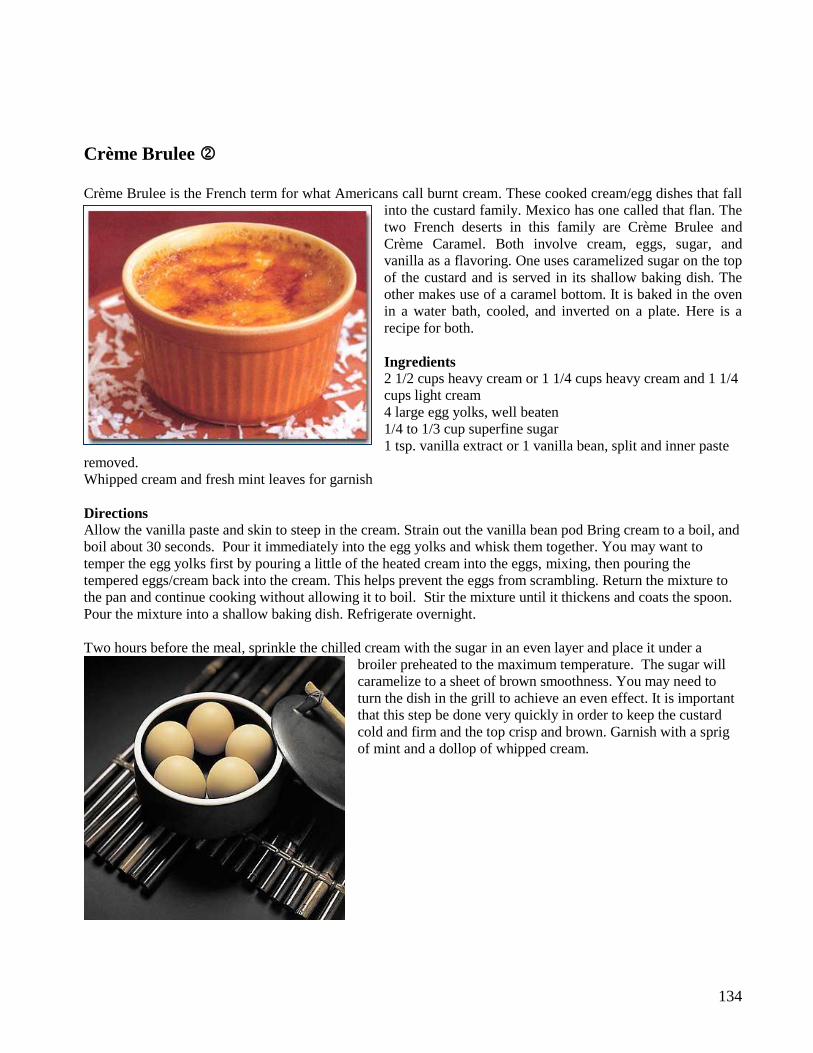
134
Crème Brulee
Crème Brulee is the French term for what Americans call burnt cream. These cooked cream/egg dishes that fall
into the custard family. Mexico has one called that flan. The
two French deserts in this family are Crème Brulee and
Crème Caramel. Both involve cream, eggs, sugar, and
vanilla as a flavoring. One uses caramelized sugar on the top
of the custard and is served in its shallow baking dish. The
other makes use of a caramel bottom. It is baked in the oven
in a water bath, cooled, and inverted on a plate. Here is a
recipe for both.
Ingredients 2 1/2 cups heavy cream or 1 1/4 cups heavy cream and 1 1/4
cups light cream
4 large egg yolks, well beaten
1/4 to 1/3 cup superfine sugar
1 tsp. vanilla extract or 1 vanilla bean, split and inner paste
removed.
Whipped cream and fresh mint leaves for garnish
Directions Allow the vanilla paste and skin to steep in the cream. Strain out the vanilla bean pod Bring cream to a boil, and
boil about 30 seconds. Pour it immediately into the egg yolks and whisk them together. You may want to
temper the egg yolks first by pouring a little of the heated cream into the eggs, mixing, then pouring the
tempered eggs/cream back into the cream. This helps prevent the eggs from scrambling. Return the mixture to
the pan and continue cooking without allowing it to boil. Stir the mixture until it thickens and coats the spoon.
Pour the mixture into a shallow baking dish. Refrigerate overnight.
Two hours before the meal, sprinkle the chilled cream with the sugar in an even layer and place it under a
broiler preheated to the maximum temperature. The sugar will
caramelize to a sheet of brown smoothness. You may need to
turn the dish in the grill to achieve an even effect. It is important
that this step be done very quickly in order to keep the custard
cold and firm and the top crisp and brown. Garnish with a sprig
of mint and a dollop of whipped cream.

135
Crème Caramel.
Ingredients
2 ½ cups heavy cream or 1 ¼ cup heavy cream
and 1 ¼ cups light cream.
4 large egg yolks, well beaten
1/3 cup sugar for the custard
1 tsp. vanilla extract or 1 vanilla bean, split and
the inner paste removed
2 cups sugar for the caramel
Whipped cream for topping
Procedure
Use the same cream, egg, sugar, vanilla mixture but don‘t cook the cream mixture. Make a caramel by placing
the sugar in a heavy bottomed stainless steel or copper pan. Heat the sugar over high heat. It will gradually take
on a caramel color. Stir it occasionally so it caramelizes evenly. Remove it from the heat. Be careful, it is very
hot and if it gets on your skin you can‘t shake it off. It will cause a very painful burn. Quickly pour about a ¼‖
layer into small custard cups that have been lightly buttered. Allow the caramel to cool. Pour your custard
cream into the custard cups, about ½‖ from the top. Place in a cake pan with a water bath, which extends about
1/4th of the way up. Bake in a 325 degree oven for about 40 minutes. Wrap the custard cups with plastic wrap
and chill in the refrigerator. Invert on a desert plate. Some of the runny caramel sauce will ooze onto the plate.
The effect is a nice layering of the custard with the caramel on the top. Garnish with a dollop of whipped cream.
This particular example in the picture above also has a very nice spun caramel nest. Using the same caramel you
made for the bottom of the custard bowls can be made into a beautiful decoration. It‘s not hard. Take an old fine
wire whip and cut the wire loops off, just leaving the wires sticking out of the handle, about 4 to 5 inches long,
depending on the size of the wire whip. Take a stainless steel bowl and set down on a flattened paper bag,
upside down – bottom of the bowl facing up. Spray the outside of the bowl with some pan release (Pam). Dip
the wires from the wire whisk into the hot caramel and fling it over the bowl. This will require a little practice
but will create lacy thin caramel sugar strings that will form into a pattern after several flings. Give it a minute
to cool and carefully pry the nest off the bowl. Carefully rest it over the serving plate that you have inverted the
cream caramel on. The size of the stainless steel bowl should be about the same size as the outside diameter of
the serving plate.

136
Homemade Ice Cream
No, there is no better desert than homemade ice cream. When you
have a good ice cream freezer it‘s even better. Recently I purchased
one of those Krupp‘s freezers; the kind where you put the freezing
container in the freezer overnight and then pour the mixture into it
and it freezes up in about 20 minutes. It only makes about one
quart but you can use it over and over so you can freeze a few
quarts in one 24 hour period. It‘s important to heat the cream
mixture up to almost a boil then chill completely, at least 12 hours.
If you skip this step, your ice cream will be grainy. Here‘s my basic
and special recipe.
Ingredients
My recipe: Vanilla
2 cups heavy cream (whipping)
1 cup whole milk
1 cup sugar (more or less depending on how sweet you want it)
2 tsp. (or a little more – you can also use the vanilla bean as well)
Pinch salt
Procedure
Heat cream, milk, sugar, vanilla, salt in a heavy bottomed pan until almost to the boil, do not let boil. Pour into
a bowl, cover, and let set in the fridge overnight. This is an important step and greatly improves the texture of
the ice cream. Pour into the freezer container of your Krupp‘s ice cream freezer and freeze according to
directions. I let that freezer component stay in the freezer for a full day before trying to freeze ice cream. Keep
it in a plastic bag.
When the ice cream gets thick, about 20 minutes or a little more, turn it off and get all the ice cream out of the
container. Place the ice cream in a sealed plastic container and cure in the freezer for at least 2 hours before
serving. More curing time is even better.
For strawberry, puree 2 cups of fresh ripe strawberries and pour into the mixture, just before the freezing step.
The same holds true for raspberry (strain out the seeds), and with peaches. You will need a little more sugar and
a little less milk for the fresh fruit varieties.
Top the vanilla with my homemade Hot Fudge topping. It‘s an unbelievable combination.

137
Dave’s Famous Hot Fudge Sauce
This is the best hot fudge sauce I have ever made. It is thick,
rich, and chocolaty. It‘s simple to make and keeps for
weeks in the refrigerator. You can also very the ingredients
to make it more milk-chocolate or thicker.
Ingredients
1 cup sugar
¼ lb. butter
½ tsp. salt
4 heaping TBS. of cocoa powder
1 small can of evaporated milk (or cream if you like)
1 tsp. quality vanilla
Directions
Melt the butter, salt, sugar, and cocoa powder in a heavy
bottomed sauce pan. Do not burn the chocolate, mix
continuously. When thoroughly melted and smooth, add the
milk in a stream, stirring constantly. Bring to a slight boil
and remove from heat. Add the vanilla. Allow to cool
slightly and pour over ice cream or anything you want.
For a more chocolate style sauce use bitter sweet chocolate
squares or chips. For a harder sauce use ½ cane syrup and ½
granulated sugar.

138
Paté Choux (Cream Puffs)
This is the classic choux paste used to make
profiteroles, cream puffs, éclairs, and any number
of appetizers. This is a large batch, which will
make a couple dozen silver dollar size puffs. For
desert puffs use the vanilla; for dinner appetizer
puffs, leave it out. Remember to leave the puffs in
the oven with the oven turned off for a few
minutes to dry out the puffs. Otherwise they will
quickly fall and you won‘t achieve the desired
effect. You may easily halve this recipe for a
smaller batch. However, they freeze very well in a
plastic freezer bag.
Ingredients
1 lb. butter
25 oz. water
1 tsp. vanilla
16 oz of flour (by weight)
12 to 14 whole eggs
Directions
Melt the butter in the water. When melted add the
flour and salt and whisk constantly over medium high
heat. As soon as the mixture begins to leave the side of
the pan, place into a Kitchen Aid mixer. Add one egg
at a time until the mixture becomes somewhat glassy
in texture. This may be at 12 eggs or at 14.
Immediately place the mixture into a large pastry bag
with a straight tip. Pipe the paste onto a sheet pan
lined with parchment paper or a Silpad. For large
cream puffs, start in the center and spiral out. For little
puffs just make a tight swirl. For éclairs, start in a
straight line then quickly flip the tip back to break off
the piping. You may also use choux paste as a topping
for seafood, such as Salmon en Crouté.
Cream Filling
Ingredients
3 cups whole milk or ½ and ½
1 cup sugar
½ tsp. salt
1 tsp. vanilla

139
4 egg yolks
3 TBS corn starch
2 TBS butter
Directions
Bring the milk, egg yolks, sugar, and corn starch to a boil over medium high heat until it begins to thicken.
Remove from the heat and stir in the vanilla and butter. Transfer to a bowl and place a piece of wax paper or
plastic wrap directly on the cream so that a skin does not form. Refrigerate for at least 4 hours or until
completely cool. Pipe into cream puffs or éclairs. Make sure you pipe into the puff from the bottom so the entry
hole does not show. Top with hot fudge sauce. For a thinner cream eliminate the corn starch. This will be more
like an English Cream.

140
Baked Alaska
I have been making Baked Alaska for years in various
restaurants and catering events. It is a glamorous
desert, popular in the 1950‘ and 60‘s. Although it‘s a
bit dated today it is still a crowd pleaser if presented
correctly. Presentation is the key to its success.
Ingredients
1 quart high-quality ice cream (Chocolate, Neapolitan, coffee, vanilla, strawberry, or any ice cream you like)
1 loaf pound cake (store bought works fine)
8 egg whites
½ tsp. cream of tartar
1 cup sugar
¼ cup Grand Mariner or good quality brandy
2 cups Dave‘s Famous Hot Fudge Sauce.
Directions
Slice the pound cake lengthwise into three equal long slices
Soften the ice cream so that it will spread but not too soft so it melts all over
Whip the egg whites, sugar, and cream of tartar into a meringue that forms soft peaks. Fill a large pastry bag
with the meringue. Layer the pound cake with the ice cream between each layer – pound cake, ice cream, pound
cake, ice cream, and finally pound cake. Some recipes also call for raspberry jam spread on the pound cake but I
have never gravitated to this – it‘s up to you.
Using a metal offset spatula spread ½ of the meringue on the cake, completely sealing it to about ½ inch thick.
Lavishly decorate the meringue covered cake with the rest of the meringue using the pastry bag. Be creative!
Place the baked Alaska back in the freezer for 15 minutes to re-freeze the ice cream.

141
What’s in my cooking library?
There are several classic cooking books that are essentials in any good cookbook library. Some are out of print
and hard to find but well worth the effort to hunt for them.
1. Batali, Mario – Simple Italian Food: One of my favorites on Italian cooking. Not complete but very
good recipes. Amazon for $22.75
2. Beard, James – The James Beard Cookbook: Essential techniques of cooking, a cooking class in one
book from a great Oregon chef. $12 from Amazon.
3. Bocuse, Paul – My Classic Cuisine: one of the great modern cookbooks by the greatest modern chef.
Not essential but certainly a great book to have. Out of print but available from Amazon for $45.
4. Child, Julia – Mastering the Art of French Cooking: The first book from Julia and the best. Still
great in many respects although somewhat dated. Available from Amazon for $28.
5. Collins, Richard & Rima – The New Orleans Cookbook: My favorite Cajun cookbook. Many great
authentic recipes from New Orleans plus great pictures and stories from early Cajun times. Available
from Amazon for $12.
6. Escoffier, August – Ma Cuisine: Also, The Complete Guide to the Art of Modern Cookery. Escoffier
was the greatest chef ever to live. He worked for Cesar Ritz at the Ritz Carlton in London. There he
created many famous dishes including Peach Melba (after singer Neli Melba), Bananas Foster, Melba
Toast, etc. There was no one who could compete with his culinary brilliance. Available from Amazon
for $49.
7. Fisher, M.F.K. – The Art of Eating: essays on eating in America. Great historical anecdotal musings
on food preparation. Collaborated with Julia Child on many books. One of the greatest American chefs.
Out of print but Available on Amazon for $28.
8. Garde Manger: The Art and Craft of the Cold Kitchen: Food decoration to the extreme. Beautiful
color plates. From the Culinary Institute of America. $42 at Amazon
9. Jacobs, Jay – Gastronomy: Out of print but now available at Amazon.com. The best short history of
cuisine by one of the greatest food writers ever. If you can‘t find it buy Food in History, later on the list.
10. Larousse – Gastronomique: The greatest collection of classical cooking terms and recipes ever
assembled. Recently updated with many new color pictures and modern techniques, measurements, and
terms. Absolutely essential. $52 dollars at Amazon
11. Lenotre, Gaston – Deserts and Pastries: Out of print but the best you will ever find. A bit complex
but beautiful. Available from Amazon for around $13, if they have one.
12. Pepin, Jacques – The Art of Cooking: classis great work by this master French chef. Rich in
illustrations and techniques. Available from Amazon for $78 dollars
13. Reinhart, Peter – The Bread Baker’s Apprentice: Great classic bread baking recipes, ovens, tips and
tricks, etc. $25 from Amazon

142
14. Rombauer, Erma - Joy of Cooking: If I could only buy one cookbook this would be the one. How to
cook everything. Not very inventive but a good recipe for just about everything. No library should be
without it. Available at Amazon for $24.
15. Saulnier,Louis - La Repetoire De La Cuisine: A small collection of classical recipes in their simplest
form with no measurements, temps. or time of cooking (you‘re supposed to know that). Essential
classic text of the greatest French recipes ever. Available again after many years out of print from
Amazon for $13.95
16. Sokolov, Raymond - The Saucier’s Apprentice: This is the best one source on how to make the great
French sauces, from scratch and, their resulting daughter sauces that can be used with everything. $18
from Amazon. Well written and easy to follow.
17. Stephen, Wendy – The Essential Seafood Cookbook: A great seafood cookbook with lots of color
plates, wonderful historical settings and history of the dishes. Available from Amazon for $20.
18. Tannahill, Reay – Food in History: Not as lively as The History of Gastronomy but more complete.
Reay goes back to the most ancient times and traces the history and interdependentcies of food. Food in
History: Available from Amazon for $12.

143
Glossary of Cooking terms
Andouille (ahn-do-ee) Plump and spicy country sausages used in Red Beans & Rice and other Creole delicacies.
Bain Marie
A double boiler, used for carefully cooking egg based sauces or keeping sauces warm before serving
Beignet (bin-yay) A delicious sweet doughnut, but square-shaped and minus the hole, lavishly sprinkled with powdered sugar.
Boudin (boo-dan) Hot, spicy, ground pork mixed with onions, cooked rice, herbs, and stuffed in sausage casing.
Bouquet Garni
A combination of fresh herbs, tied together into a small bundle with string, left to flavor a stock or stew. Once
the bouquet garni has yielded up its flavor it is easily discarded.
Braise
Braising is a two step cooking process. The first step is to brown the meat or vegetables in a pan in a small
amount of oil then add a cooking liquid to partially cover the meat. The dish is cooked, covered, slowly until its
flavors concentrate and the meat is tender and flavorful.
Cafe brulot (caf-ay broo-loh) This dramatic after-dinner brew is a blend of hot coffee, spices, orange peel, and liqueuers. It is blended in a
chafing dish, ignited and served in special cups.
Cajun (cay-jun) Slang for Acadian, the term for the French speaking people who migrated to South Louisiana from Nova Scotia
in the 18th Century. The term now applies to the people, culture and the cooking.
Chiffonnade
Leafy herbs or vegetables rolled up tightly and sliced very thin for use in soups, sauces, or as a garnish
Courtbouillon (coo-boo-yon) A rich, spicy soup, or stew, made with fish fillets, tomatoes, onions, and sometimes mixed vegetables. The
French call this Fume de Poisson.
Crawfish Resembling toy lobsters, these little critters are known as "mudbugs" because they live in the mud of freshwater
streams. They are served in a variety of different ways, including simply boiled. (And how do you address a
boiled crawfish which is placed before you, whole, head and legs still attached? Grasp the head between the
thumb and forefinger of one hand, and the tail between thumb and forefinger of the other hand. Slightly twist
and pull firmly until head and tail are separated. Discard the head. Squeeze tail between thumb and forefinger
until the shell cracks. Lift and loosen the three shell segments and pull around the meat. Now take the tail fin
and last shell segment between thumb and forefinger of one hand, and the meat with the other. Gently separate
the meat from the shell and pull the vein free. Discard shell and vein and pop the meat into your mouth!)

144
Creole (cree-ole) The word originally described those people of mixed French and Spanish blood who were born in South
Louisiana, and now embraces a cuisine and style of architecture.
De Glace
Once the meat or fish has been sautéed and removed from the pan a small amount of wine or cooking liquid is
added to the pan, over high heat, to dislodge and dissolve any crusty or caramelized bits that stick to the bottom
of the pan. There are intense flavors in those bits and de glazing removes them and adds the flavors to the sauce.
Dirty Rice Pan fried leftover cooked rice sautéed with green peppers, celery, stock and giblets.
Duxelles
Finely chopped onions and mushrooms, sautéed until dry.
Escalloper
To cut meat or fish in thin slices before cooking, such as Veal scaloppini.
Etouffeé (ay-too-fay) A succulent tangy tomato-based sauce. Crawfish etouffeé and shrimp etouffeé are delicious New Orleans
specialties.
File (fee-lay) Ground sassafras leaves used to season, among other things, gumbo.
Fricassee
This is also a two step process involving browning the meat first then cooking completely covered in a flavorful
cooking liquid until the meat is tender. Often the meat is floured so that the sauce thickens by itself during the
cooking process.
Grilliades (gree-yads) Squares of broiled beef or veal. Grilliades and grits is a popular local breakfast.
Grits Coursely ground hominy grain. Somewhat similar in appearance to mashed potatoes, but the taste is closer to
corn.
Gumbo A thick, robust soup with thousands of variations, only a few of which are Shrimp Gumbo, Okra Gumbo and
File Gumbo.
Jambalaya (jum-bo-lie-yah) Another many splendored thing. Louisiana chefs "sweep up the kitchen" and toss just about everything into the
pot. Tomatoes and cooked rice, plus ham, shrimp, chicken, celery, onions, and a whole shelf full of seasonings.
Julienne
Vegetables cut into match stick shaped pieces, usually 1 to 4 inches long
Liquid Volume
To measure the liquid volume of a container or pot simply multiply 3.14 x the radius x height, divided by 57.75.
This will equal the liquid volume in quarts
Mirepoix

145
Finely chopped vegetables consisting of celery, carrots, and onions. The Cajun version is celery, onions, and
peppers – sometimes called the Trinity.
Mirliton A hard-shelled, pear-shaped vegetable with edible innards, it is cooked like squash and stuffed with either ham
or shrimp and spicy dressing.
Muffuletta To say that this is a "sandwich" is like saying Buckingham Palace is a house. Yes, it is a sandwich, a fat and
sassy concoction of Italian meats, cheeses, and olive salad, all stuffed inside plate-sized loaves of tasty Italian
bread.
Plantain Think of it as sort of a vegetable/banana side dish. It may be prepared like candied yams, or simmered in sherry,
and it is a delicious meat accompaniment.
Po-boy Another sandwich extravaganza; this one some folks say began as a five cent lunch for, what else, poor boys.
There are fried oyster po-boys, roast beef and gravy po-boys, fried shrimp po-boys, softshell crab po-boys (even
fried potato po-boys!) all served up on crispy-crusted French bread.
Praline (praw-leen) The sweetest of sweets, this New Orleans tradition is a candy patty, the essential ingredients of which are sugar,
butter, water and pecans. There are many variations on that theme in French Quarter candy and gift shops.
Red beans & rice Kidney beans mixed with rice, seasonings, spices and big, fat chunks of sausage. This is one of the staples of
New Orleans cooking, and is traditionally eaten on Monday (and any other day you get a hankering for it).
Reduce
Boiling away a cooking liquid, such as wine or cream, to concentrate its flavors is called reduction. This is a
basic step in making burre blanc or other wine based sauces. Once the sauce has reduced and thickened slightly,
usually to the point in which a spoon is coated, the sauce is finished with butter to enrich it.
Again, quoting Joe Cahn, "In South Louisiana, food is not looked upon as nourishment, but as a wonderful way
of life. We want to say "wow" with every bite; to clap and cheer and make noises. With food, nobody is ever
wrong, for it is the only thing in the world which everybody is allowed to have a personal taste. To us, food is
not only on the plate; it is also in the heart."

146
Index
Alaska, 34, 141
alcohol, 30, 45, 52, 54
Aluminum, 10
American Cheese, 63
Andoullie, 32
Argentine Red Shrimp, 25
Arrowroot, 17
bacon, 63, 67, 75
barley, 97
basil, 48, 84, 99, 115, 118, 120, 121, 129
Bay leaf, 33, 41
bay leaves, 22, 40, 41, 52, 54, 56, 61, 66, 75,
91
Béarnaise, 14
Béchamel, 14
beef stock, 52, 53, 54, 56, 57, 59, 61, 75, 94
beer, 28, 32, 39, 42, 53, 67, 73, 77, 92, 95
Beer, 64
bisque, 31
blisters, 20, 114
Blue Cheese, 63, 109, 112
Boiling, 10, 146
Bouillabaisse, 38
brandy, 29, 36, 44, 69, 75
bread, 18, 19, 20, 26, 37, 40, 47, 48, 49, 51, 55,
60, 63, 73, 77, 78, 79, 80, 86, 87, 95, 97,
100, 103, 114, 117, 119, 121, 142, 146
brick ovens, 20
brine, 22, 34, 88
Brine, 22
brown sugar, 98
Burgers, 62, 63, 64
Burgundy, 52, 53
Burre Blanc, 25
butter, 16, 17, 23, 25, 27, 28, 29, 31, 32, 36, 43,
44, 45, 48, 52, 53, 54, 57, 59, 60, 63, 66, 67,
69, 75, 79, 84, 91, 97, 99, 118
Cabernet Sauvignon, 52
Cajuns, 32, 91 Calpahlon
, 11
Caramel, 135, 136
Carrot, 33, 42
cayenne, 29, 31, 32, 43, 44, 48, 54, 60, 77, 91,
93, 99, 130
cheese, 19, 20, 33, 34, 35, 43, 48, 60, 63, 84,
85, 94, 95, 109, 112, 114, 115, 117, 118,
119, 120
chicken, 11, 13, 14, 22, 23, 37, 40, 41, 42, 43,
44, 48, 49, 57, 69, 70, 71, 72, 75, 76, 77, 78,
79, 80, 84, 85, 86, 87, 91, 92, 97, 98, 99,
103, 117, 118, 119, 128, 129, 145
chiffonade, 84, 99
chili, 77, 78, 79, 91, 93, 94, 95, 117, 128, 129,
130
Chorizo, 41
chowder, 27, 28, 31
Chowder, 27
Cincinnati, 93, 94
cinnamon, 66, 70, 79, 93
clams, 26, 27, 28, 38, 39, 40, 41, 91, 120
Clams, 27, 41
Cognac, 29, 30
Copper, 10
corned beef, 65
Cornstarch, 17
Court Bouillon, 40
Crab, 26, 31, 33, 90
cream, 14, 16, 25, 27, 28, 29, 31, 34, 35, 36,
43, 44, 45, 48, 51, 53, 60, 67, 69, 78, 84, 90,
97, 98, 99, 100, 103, 109, 112, 118, 120,
121, 135, 136, 137, 138, 139, 140, 141, 146
crustacean, 32, 44
Cumin, 32, 79
curry, 70, 79, 129
deglaze, 16, 25, 57, 61
Deglaze, 16, 23, 76
Degrease, 16
demi glace, 57, 61
demi-glace, 61
de-veined, 25
Diane, 51
Dijon, 25, 34, 40, 51, 60, 112
dill, 34, 35, 63
Dredge, 52, 54
Dungeness, 31, 90
Egg noodles, 52
etouffeé, 32
Etouffeé, 32, 145
EVOO, 113, 115
filé, 91
fish stock, 13, 31, 38, 44, 49, 90, 91
flour, 14, 16, 17, 18, 19, 20, 22, 23, 25, 27, 28,
31, 32, 43, 48, 49, 52, 54, 57, 60, 66, 67, 75,
80, 84, 86, 90, 91, 95, 97, 103, 115, 139
France, 29, 38, 112

147
French, 5, 14, 18, 19, 20, 28, 29, 30, 33, 36, 39,
40, 42, 43, 45, 47, 49, 51, 52, 54, 63, 64, 75,
77, 80, 85, 86, 91, 92, 99, 100, 120, 121,
135, 142, 143, 144, 145, 146
French bread, 19, 20, 28, 29, 33, 36, 39, 40, 42,
43, 45, 52, 63, 75, 85, 92, 99, 120
French fries, 64
Garam Masala, 78, 79
garlic, 16, 22, 23, 25, 27, 29, 31, 32, 35, 38, 40,
42, 44, 48, 52, 54, 56, 57, 59, 60, 61, 62, 63,
66, 67, 69, 71, 73, 75, 76, 77, 84, 87, 91, 92,
93, 94, 97, 99, 112, 115, 117, 118, 120, 128,
129, 130
Garlic, 32, 39, 40, 41, 42, 46, 70, 109, 130
Garlic aioli, 40
Ghee, 79
glace de viande, 61
Goulash, 53
Green beans, 56
grill, 56, 62, 63, 70, 95, 117, 135
Grillades, 55, 145
Grilling, 11
Grouse, 80
Gumbo, 32, 91, 92
habanera, 70
hamburger, 62
Hollandaise, 14
homarus, 25
Indian, 70, 79
jalapeño, 59, 70, 94, 95, 117
Jamon, 41
Jerk, 70
julienne, 27
Kitchen Aid, 18, 19, 115
Knead, 18, 115
lamb, 23, 69, 73, 79
Lamb, 72
Langostino, 25
Lasagna, 48
leeks, 38, 103
lemons, 87, 88
Linguisa, 41
lobster, 25, 31, 32, 33, 42, 44, 45, 46, 48, 90
Lobster, 25, 44, 46, 47
Louisiana, 26, 32, 41, 49, 91, 144, 145, 146
Lox, 34, 35
mesquite, 12
mushrooms, 29, 52, 53, 54, 56, 69, 75, 77, 80,
119, 121, 145
mussels, 26, 36, 38, 39, 41
Mussels, 36, 41
mustard, 34, 40, 60, 63, 112
New York, 51, 114
noodles, 48, 51, 52, 53, 68, 69, 72, 80, 86, 93,
100, 128, 129
Okra, 91, 145
Old bay seasoning, 26
olive oil, 38, 40, 42, 48, 53, 56, 59, 60, 63, 71,
73, 76, 77, 84, 85, 112, 113, 117, 118, 120
Olive oil, 41
olives, 19, 35, 73, 87, 115
onion, 16, 27, 31, 40, 44, 54, 56, 59, 62, 63, 66,
67, 70, 76, 77, 87, 91, 92, 93, 94, 97, 99,
112, 129
onions, 26, 28, 29, 32, 34, 35, 36, 37, 38, 41,
43, 46, 49, 52, 53, 54, 56, 57, 60, 61, 63, 67,
69, 75, 79, 80, 87, 91, 94, 95, 103, 121, 128,
129, 144, 145, 146
oregano, 59, 73, 77, 94
Oyster, 37, 130
oysters, 37, 48, 49, 91
Paella, 41
pancakes, 66, 67, 68
paprika, 31, 38, 41, 44, 53, 54, 56, 70, 77, 87,
99
Parmesan, 19, 86, 121
parsley, 27, 28, 32, 36, 40, 45, 52, 53, 69, 87,
91, 97, 120
pastrami, 65
peanut butter, 66, 98
pepper, 22, 23, 25, 27, 29, 31, 32, 33, 34, 35,
36, 38, 39, 40, 41, 42, 43, 44, 48, 52, 54, 55,
57, 59, 60, 62, 63, 66, 67, 69, 70, 73, 75, 77,
79, 84, 85, 87, 91, 93, 94, 95, 97, 99, 112,
115, 117, 118, 120, 128, 130
peppercorns, 40, 51, 61, 66, 79, 99
Pernod, 38
Phad Thai, 128
pizza, 20, 85, 114, 115, 117, 119
pork, 22, 23, 58, 69, 70, 79, 94, 118, 128, 129
potatoes, 22, 26, 27, 28, 38, 52, 55, 56, 59, 60,
67, 76, 77, 80, 103, 145
Power Flour, 19
puree, 40, 59, 60, 70, 72, 79, 117, 137
Ranch, 109
Red Snapper, 49
red wine, 33, 34, 39, 42, 52, 53, 54, 55, 57, 60,
61, 66, 75, 79, 119

148
Reduce, 16, 25, 29, 40, 71, 99
Rémoulade, 14
rice, 25, 32, 33, 41, 42, 43, 45, 49, 51, 52, 55,
70, 71, 78, 79, 80, 85, 92, 100, 128, 144,
145, 146
Rouille, 39, 40
roux, 23, 31, 32, 43, 48, 57, 60, 66, 84, 91, 92,
97, 99
Roux, 14, 23
rye flour, 19
saffron, 36, 38, 41
salmon, 34, 35, 43
Sauerbraten, 66, 67
sausage, 26, 32, 41, 42, 91, 92, 118, 119, 121,
144, 146
Sauté, 15, 16, 28, 31, 37, 46, 49, 52, 53, 67,
75, 79, 86, 90, 98, 118, 121, 128
Sautéing, 10
scallops, 29, 38, 39, 48
sherry, 23, 31, 42, 99
shrimp, 25, 26, 31, 32, 33, 42, 49, 79, 90, 91,
92, 109, 128, 129, 145, 146
Slipper Lobsters, 25
soup, 23, 31, 39, 45, 54, 91, 92, 97, 99, 129
Spaghetti, 86, 120
Steak, 51
stew, 38, 52, 56
Stroganoff, 53
sugar, 18, 22, 34, 38, 66, 67, 70, 94, 128, 129,
135, 136
sweetbreads, 69
Tabasco sauce, 63, 91, 97, 112
tagine, 87
Tagine, 41, 87
Tasso, 32
tenderloin, 52, 53
thyme, 27, 31, 52, 54, 56, 66, 75, 76, 77, 91
Tika, 78
tomato paste, 31, 44, 45, 56, 59, 94, 99
tomatoes, 35, 38, 48, 49, 54, 63, 72, 73, 79, 84,
85, 91, 94, 99, 114, 118, 121, 144
turkey, 16, 22, 23, 37, 41, 94, 100, 118
Turkey, 23, 42, 100
Turnip, 56
vanilla, 135, 136
Velouté, 14
vinegar, 22, 34, 66, 67, 69, 70, 85, 93, 109, 117
Worcestershire, 23, 27, 31, 32, 35, 42, 43, 48,
54, 57, 62, 63, 66, 67, 75, 76, 77, 85, 91, 93,
94, 97, 99, 109, 112
yeast, 18, 19, 20, 115