
Cassandra Day Chicago 2015: The Synergy Between Apache Cassandra and DataStax Enterprise
DataStax Distribution of ApacheCassandra™
Updated: 2018-12-13-08:00

© 2018 DataStax, Inc. All rights reserved. DataStax, Titan, and TitanDB are registered trademark of DataStax,Inc. and its subsidiaries in the United States and/or other countries.
Apache Cassandra, Apache, Tomcat, Lucene, Solr, Hadoop, Spark,TinkerPop, and Cassandra are trademarks of the Apache Software Foundation
or its subsidiaries in Canada, the United States and/or other countries.
DataStax Distribution of Apache Cassandra
Table of Contents
Welcome................................................................................................................................... 5
Installing or uninstalling DDAC.................................................................................................6
Install DDAC from the binary tarball................................................................................. 6
Uninstall DDAC..................................................................................................................9
Default file locations........................................................................................................ 10
Securing DDAC...................................................................................................................... 12
Securing the database.................................................................................................... 12
Internal authentication..................................................................................................... 13
About Internal authentication................................................................................... 13
Configuring authentication........................................................................................15
Using cqlsh with authentication................................................................................18
Internal authorization....................................................................................................... 19
Object permissions...................................................................................................19
Configuring internal authorization............................................................................ 20
JMX authentication and authorization............................................................................. 20
JMX Authentication and Authorization..................................................................... 21
Enabling JMX authentication and authorization.......................................................21
Using nodetool with authentication.......................................................................... 25
Using jconsole with authentication...........................................................................25
SSL encryption................................................................................................................ 26
Encrypting database connections with SSL.............................................................26
Installing Java Cryptography Extension (JCE) Files................................................ 27
Preparing server certificates for development......................................................... 28
Preparing SSL certificates for production................................................................ 29
Node-to-node encryption..........................................................................................38
Client-to-node encryption......................................................................................... 40
Using cqlsh with SSL............................................................................................... 42

DataStax Distribution of Apache Cassandra
Using nodetool (JMX) with SSL encryption............................................................. 43
Using jconsole (JMX) with SSL encryption..............................................................45
Welcome
WelcomeAbout the DataStax Distribution of Apache Cassandra
DataStax Distribution of Apache Cassandra (DDAC) is based on DataStax Enterprise (DSE)5.1 and Apache Cassandra™ 3.11. Patch releases for DDAC and maintenance longevity willcorrespond to the DSE 5.1 patches and maintenance schedule.
DDAC supports the DataStax drivers for Apache Cassandra and DataStax Bulk Loader(dsbulk).
The following DSE 5.1 features are not available:
• DataStax drivers for DataStax Enterprise• DataStax Studio• DSE OpsCenter• DSE Search• DSE Analytics, including Analytics Solo• DSE Graph• DSE Advanced Security• DSE Advanced Replication• DSE Tiered Storage• DSE Multi-Instance• DSE In-Memory• DSE Management Services
Documentation
This document provides information on installing (page 6) and securing (page 12)DDAC. Other than the unsupported features mentioned above, you can use the DSE 5.1documentation for developing, configuring, and operating DDAC:
• DSE 5.1 Administrator Guide• DSE 5.1 Developer Guide• DSE 5.1 Architecture Guide• CQL for DataStax Enterprise 5.1• DataStax Bulk Loader (dsbulk)• DataStax drivers for Apache Cassandra
Note: Configuration, property, and other file paths vary from DataStax Enterprise. SeeDDAC default file locations (page 10).
Some DSE tool commands, such as dse client-tool spark, will not function andmight display an error when used.
DataStax Distribution of Apache Cassandra Page 5

Installing or uninstalling the DataStax Distribution of Apache Cassandra
Installing or uninstalling the DataStaxDistribution of Apache CassandraSteps to install or uninstall the DataStax Distribution of Apache Cassandra™
Installing DataStax Distribution of Apache Cassandrausing the binary tarballUse these instructions for installing the DataStax Distribution of Apache Cassandra™ (DDAC)on any Linux-based platform using a binary tarball.
Some things to know about DDAC
• DDAC is based on DataStax Enterprise (DSE) 5.1 and Apache Cassandra 3.11.• DDAC runs as a stand-alone process.
Warning: When DDAC is installed, it creates a cassandra user in the database.Do not use the cassandra user in production. Failing to do so is a security risk. SeeCreating superuser accounts.
Prerequisites:
• A supported platform. DDAC supports the same platforms as listed in the DSE 5.1(x86_64) column.
• Your DataStax Academy registration email address and Downloads Key or Profile Nameand password.
• Configure your operating system to use the latest version of Java 8:
# Recommended. OpenJDK 8 (Earlier or later versions are not supported.)# Supported. Oracle Java SE 8 (JRE or JDK) (1.8u151 minimum)
Tip: Although Oracle JRE/JDK 8 is supported, DataStax does more extensivetesting on OpenJDK8. This change is due to the end of public updates forOracle JRE/JDK 8. See Oracle Java SE Support Roadmap.
• RedHat-compatible distributions require EPEL (Extra Packages for Enterprise Linux).• Python 2.7.x
For older RHEL distributions, see Installing Python 2.7 on older RHEL-based packageinstallations.
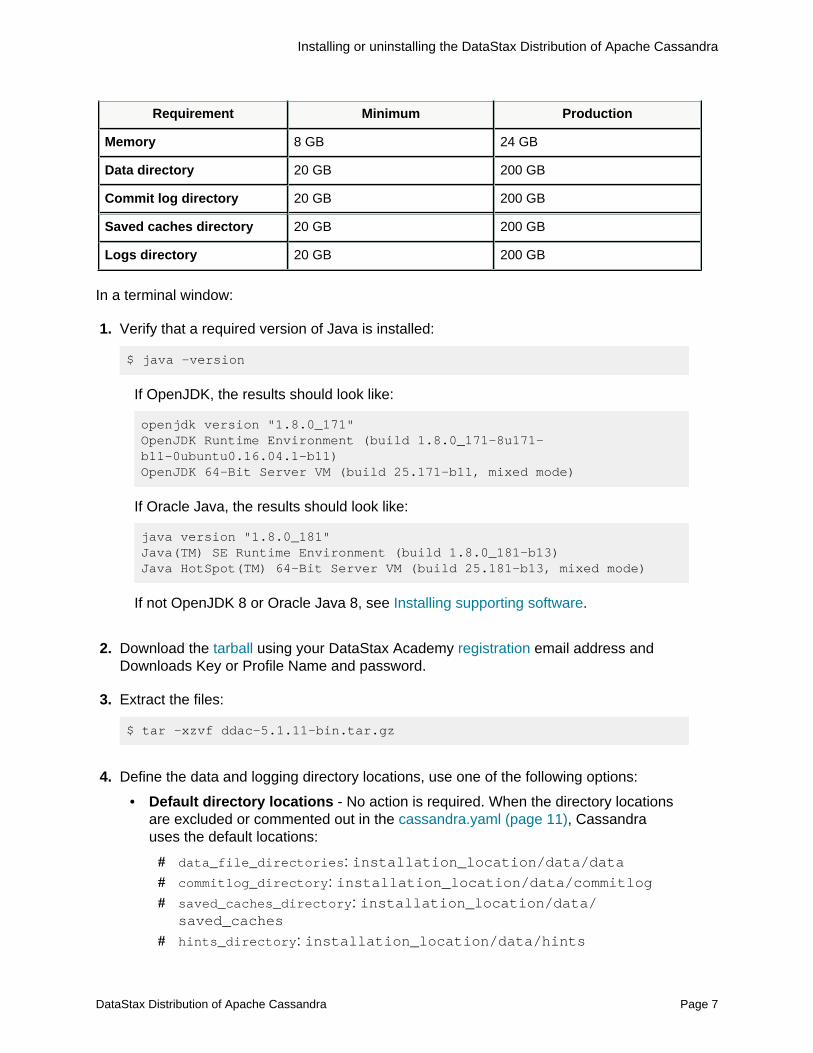
Table 1: Hardware requirements
Requirement Minimum Production
CPUs 2 16
Page 6 DataStax Distribution of Apache Cassandra
Installing or uninstalling the DataStax Distribution of Apache Cassandra
Requirement Minimum Production
Memory 8 GB 24 GB
Data directory 20 GB 200 GB
Commit log directory 20 GB 200 GB
Saved caches directory 20 GB 200 GB
Logs directory 20 GB 200 GB
In a terminal window:
1. Verify that a required version of Java is installed:
$ java -version
If OpenJDK, the results should look like:
openjdk version "1.8.0_171"OpenJDK Runtime Environment (build 1.8.0_171-8u171-b11-0ubuntu0.16.04.1-b11)OpenJDK 64-Bit Server VM (build 25.171-b11, mixed mode)
If Oracle Java, the results should look like:
java version "1.8.0_181"Java(TM) SE Runtime Environment (build 1.8.0_181-b13)Java HotSpot(TM) 64-Bit Server VM (build 25.181-b13, mixed mode)
If not OpenJDK 8 or Oracle Java 8, see Installing supporting software.
2. Download the tarball using your DataStax Academy registration email address andDownloads Key or Profile Name and password.
3. Extract the files:
$ tar -xzvf ddac-5.1.11-bin.tar.gz
4. Define the data and logging directory locations, use one of the following options:
• Default directory locations - No action is required. When the directory locationsare excluded or commented out in the cassandra.yaml (page 11), Cassandrauses the default locations:
# data_file_directories: installation_location/data/data# commitlog_directory: installation_location/data/commitlog# saved_caches_directory: installation_location/data/
saved_caches
# hints_directory: installation_location/data/hints
DataStax Distribution of Apache Cassandra Page 7
Installing or uninstalling the DataStax Distribution of Apache Cassandra
# cdc_raw_directoryinstallation_location/data/cdc_raw
• Recommended directory locations - Most production deployments store data andlogs in /var/lib/cassandra. To use the recommended location:
a. Create and change owners for the /var/lib/cassandra directory:
$ sudo mkdir -p /var/lib/cassandra; sudo chown -R \ $USER:$GROUP /var/lib/cassandra
Tip: Ensure that the account that runs cassandra has write access todirectory for data and logs. The subdirectories are automatically created.
b. Go the directory containing the cassandra.yaml file:
$ cd installation_location/conf
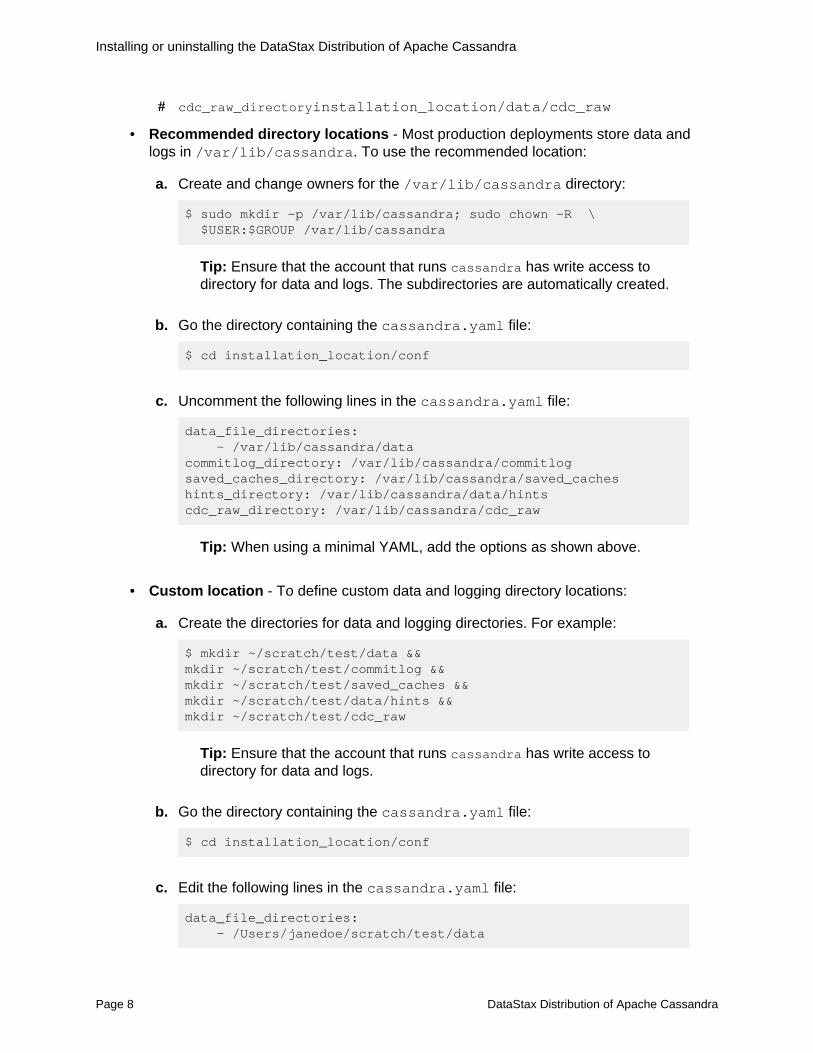
c. Uncomment the following lines in the cassandra.yaml file:
data_file_directories: - /var/lib/cassandra/datacommitlog_directory: /var/lib/cassandra/commitlogsaved_caches_directory: /var/lib/cassandra/saved_cacheshints_directory: /var/lib/cassandra/data/hintscdc_raw_directory: /var/lib/cassandra/cdc_raw
Tip: When using a minimal YAML, add the options as shown above.
• Custom location - To define custom data and logging directory locations:
a. Create the directories for data and logging directories. For example:
$ mkdir ~/scratch/test/data && mkdir ~/scratch/test/commitlog &&mkdir ~/scratch/test/saved_caches && mkdir ~/scratch/test/data/hints &&mkdir ~/scratch/test/cdc_raw
Tip: Ensure that the account that runs cassandra has write access todirectory for data and logs.
b. Go the directory containing the cassandra.yaml file:
$ cd installation_location/conf
c. Edit the following lines in the cassandra.yaml file:
data_file_directories: - /Users/janedoe/scratch/test/data
Page 8 DataStax Distribution of Apache Cassandra
Installing or uninstalling the DataStax Distribution of Apache Cassandra
commitlog_directory: /Users/janedoe/scratch/test/commitlogsaved_caches_directory: /Users/janedoe/scratch/test/saved_cacheshints_directory: /Users/janedoe/scratch/test/data/hintscdc_raw_directory: /Users/janedoe/scratch/test/cdc_raw
5. Single-node cluster installations only.
a. Start DDAC from the installation directory:
$ bin/cassandra
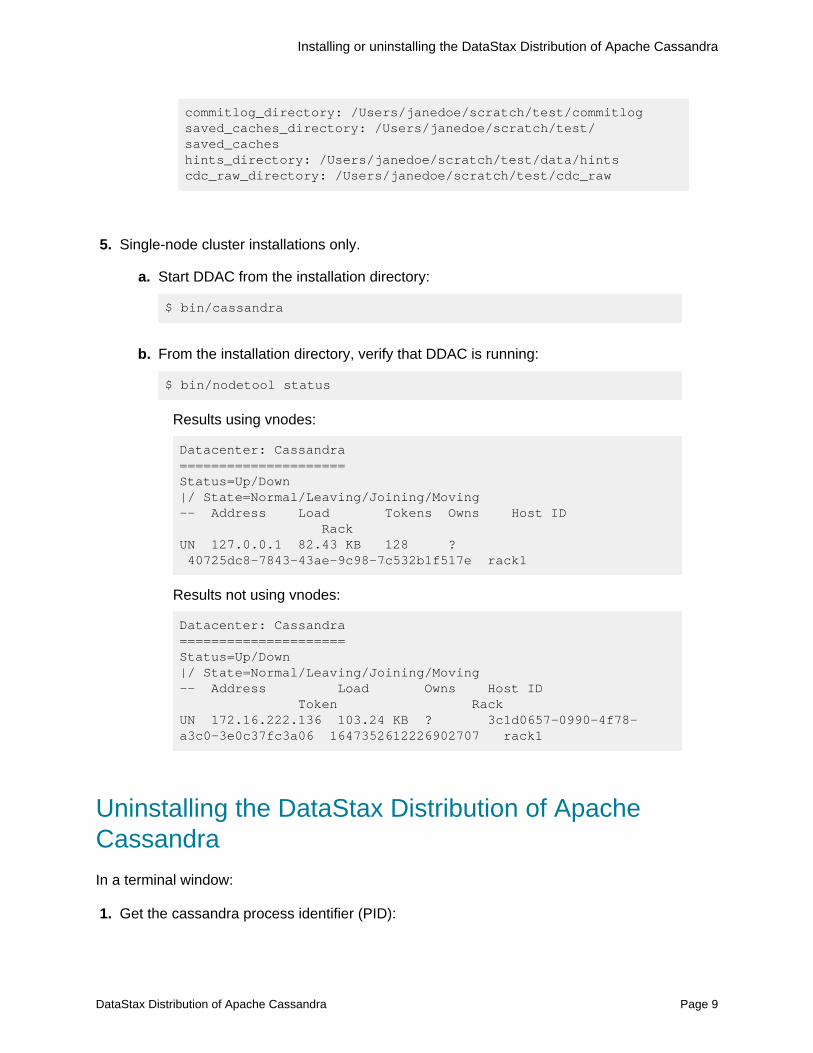
b. From the installation directory, verify that DDAC is running:
$ bin/nodetool status
Results using vnodes:
Datacenter: Cassandra=====================Status=Up/Down|/ State=Normal/Leaving/Joining/Moving-- Address Load Tokens Owns Host ID RackUN 127.0.0.1 82.43 KB 128 ? 40725dc8-7843-43ae-9c98-7c532b1f517e rack1
Results not using vnodes:
Datacenter: Cassandra=====================Status=Up/Down|/ State=Normal/Leaving/Joining/Moving-- Address Load Owns Host ID Token RackUN 172.16.222.136 103.24 KB ? 3c1d0657-0990-4f78-a3c0-3e0c37fc3a06 1647352612226902707 rack1
Uninstalling the DataStax Distribution of ApacheCassandra
In a terminal window:
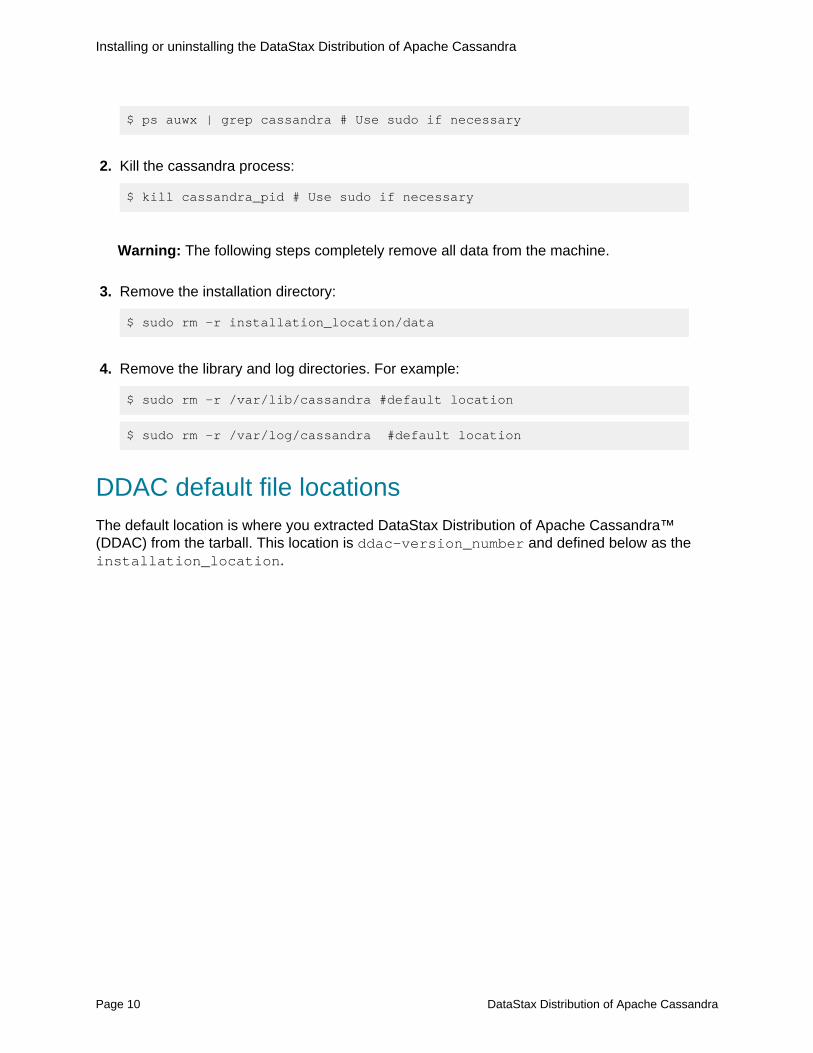
1. Get the cassandra process identifier (PID):
DataStax Distribution of Apache Cassandra Page 9
Installing or uninstalling the DataStax Distribution of Apache Cassandra
$ ps auwx | grep cassandra # Use sudo if necessary
2. Kill the cassandra process:
$ kill cassandra_pid # Use sudo if necessary
Warning: The following steps completely remove all data from the machine.
3. Remove the installation directory:
$ sudo rm -r installation_location/data
4. Remove the library and log directories. For example:
$ sudo rm -r /var/lib/cassandra #default location
$ sudo rm -r /var/log/cassandra #default location
DDAC default file locationsThe default location is where you extracted DataStax Distribution of Apache Cassandra™(DDAC) from the tarball. This location is ddac-version_number and defined below as theinstallation_location.
Page 10 DataStax Distribution of Apache Cassandra

Installing or uninstalling the DataStax Distribution of Apache Cassandra
Default directories
Table 2: Default directories for cassanda.yaml, configuration files, and other databasefiles
Directories Description
installation_location/conf Property files and cqlshrc samples including:
• cassandra.yaml
• cassandra-env.sh
• cassandra-rackdc.properties
• cassandra-topology.properties
• cassandra-topology.yaml
• commitlog_archiving.properties
• cqlshrc.sample
• logback-tools.xml
• logback.xml
• hotspot_compiler
• jvm.options
• metrics-reporter-config-sample.yaml
• /triggers
installation_location/data If not set in cassandra.yaml:
• /cdc_raw
• /commitlog
• /data
• /hints
• /saved_caches
installation_location/logs • debug.log
• system.log
/var/lib/cassandra When set in cassandra.yaml:
• /cdc_raw
• /commitlog
• /data
• /hints
• /saved_caches
DataStax Distribution of Apache Cassandra Page 11

Securing DDAC
Securing DDACSetting up SSL and authentication and authorization.
Securing the databaseDatabase security features:
• Authentication based on internally controlled rolename/passwords (page 13)
Authentication is roles-based and stored internally in tables. Administrators can create,alter, drop, or list roles using CQL commands. Roles have superuser, login, andpassword properties.
• Authorization based on object permission management (page 19)
Authorization provides access control on database resources to authenticated roles.Authorization can grant permission to access the entire database or restrict a role toindividual table access. Roles can be granted to roles to create a permissions hierarchyand separate login roles from sets of permissions. Use the CQL GRANT and REVOKEcommands to manage authorization.
• Authentication and authorization based on JMX username/passwords (page 20)
JMX (Java Management Extensions) technology provides a simple and standard wayof managing and monitoring resources related to an instance of a Java Virtual Machine(JVM). This is achieved by instrumenting resources with Java objects known as ManagedBeans (MBeans) that are registered with an MBean server. JMX authentication storesusername and associated passwords in two files, one for passwords and one for access.JMX authentication is used by nodetool and external monitoring tools such as jconsole.
• SSL encryption (page 26)
Secure communication between a client and a database cluster, and between nodes ina cluster. Enabling SSL encryption ensures that data in flight is not compromised andis transferred securely. Client-to-node and node-to-node encryption are independently
Page 12 DataStax Distribution of Apache Cassandra

Securing DDAC
configured. Tools (cqlsh, nodetool) can be configured to use SSL encryption. TheDataStax drivers can be configured to secure traffic between the driver and the database.
Internal authenticationThe database authentication uses login roles and stores the passwords internally.Administrators can create, alter, drop, or list roles using CQL commands. Roles havesuperuser, login, and password properties.
About Internal authentication
Internal authentication provides the following types of roles:
• Login roles: Validate a user's identity (password) and control access to databaseresources
• Permission set (non-login) roles: Allows assignment of the same privileges to one ormore users (login roles). A role access permissions are inherited but the role options(superuser, login and password) are not. The database supports nesting roles to createa permission hierarchy.
The diagram below shows four login accounts with four group roles.
Figure 1: Roles assigned to individuals and functions
DataStax Distribution of Apache Cassandra Page 13

Securing DDAC
Setting up the administrator accounts
Use the following steps to set up user logins alice and fred and grant them administratoraccess to the cycling keyspace.
1. Create login accounts for each user. For example, alice is created with the ability to loginand given a password:
CREATE ROLE alice WITH PASSWORD = 'enjoyLife' AND LOGIN = true;
CREATE ROLE fred WITH PASSWORD = 'enjoyLife' AND LOGIN = true;
The user enters the role name and password to log into the database. However at thispoint the role only has default access to some system tables.
Tip: Roles options include superuser, login, and password options. A superusercan perform any database operations.
2. Create a role with access to all the functionality for the cycling keyspace. The firstcommand creates the role and the second assigns the privileges:
CREATE ROLE cycling_admin WITH PASSWORD = '1234abcd';
GRANT ALL PERMISSIONS ON KEYSPACE cycling TO cycling_admin;
When the cycling_admin role is assigned to a login role, all the permissions are inherited.This gives any user that is a member of the cycling_admin role full access to the cyclingkeyspace.
3. Assign the cycling_admin role to alice and fred:
GRANT cycling_admin TO alice;GRANT cycling_admin TO fred;
When alice is granted the role cycling_admin, alice is now granted all permissions onthe keyspace cycling. Individual user can be granted any number of roles, just as anyfunctional role can be granted another role's permissions.
In this example, the role cycling_analyst has the ability to select data, and then gains theability to select data in the another table hockey when the role hockey_analyst is granted.
CREATE ROLE cycling_analyst WITH PASSWORD = 'zyxw9876';GRANT SELECT ON TABLE cycling.analysis TO cycling_analyst;CREATE ROLE hockey_analyst WITH PASSWORD = 'Iget2seeAll';GRANT SELECT ON TABLE hockey.analysis TO hockey_analyst;GRANT hockey_analyst TO cycling_analyst;
Page 14 DataStax Distribution of Apache Cassandra
Securing DDAC
GRANT cyclist_analyst TO jane;
If a user then is granted the role of cycling_analyst role, that user is able to select data in theadditional table hockey.
Note: Permissions and SUPERUSER status are inherited, but the LOGIN privilege is not.
An important change that roles-based access control also introduces is that the need forSUPERUSER privileges in order to perform user/role management operations is removed. Arole can be authorized to create roles or be authorized to grant and revoke permissions:
// Give cycling_accounts the right to create rolesGRANT CREATE ON ALL ROLES TO cycling_accounts;// Give cycling_accounts the right to grant or revoke permissionsGRANT AUTHORIZE ON KEYSPACE cycling TO cycling_accounts;GRANT cyclist_accounts TO jane;GRANT cyclist_accounts TO john;
Internal authentication and authorization information is stored in the following tables:
system_auth.rolesTable that stores the role name, whether the role can be used for login, whetherthe role is a superuser, what other roles the role may be a member of, and a bcryptsalted hash password for the role.
system_auth.role_membersTable that stores the roles and role members.
system_auth.role_permissionsTable that stores the role, a resource (keyspace, table), and the permission that therole has to access the resource.
system_auth.role_permissons_indexTable that stores the role and a resource that the role has a set permission.
The database has a default superuser role and password pair of cassandra/cassandra bydefault. Only use this role to create your own superuser account because all request fromthe default account run with a consistency level of QUORUM. To secure the system, delete thedefault account after creating a superuser account.
Once roles and passwords have been set, the database can be configured to useauthentication (page 15) in the cassandra.yaml file.
After authentication is enabled, specify a username and password when using databasetools and drivers. For details refer to the following sections:
• Using cqlsh with authentication (page 18)• Using nodetool with authentication (page 25)• Using jconsole with authentication (page 25)• DataStax drivers - produced and certified by DataStax to work with DDAC.
Configuring authenticationSteps for configuring authentication.
DataStax Distribution of Apache Cassandra Page 15

Securing DDAC
1. Change the authenticator option in the cassandra.yaml file toPasswordAuthenticator:
authenticator: PasswordAuthenticator
Note: By default, the authenticator option is set to AllowAllAuthenticator.
2. Restart the database.
3. Start cqlsh using the default superuser name and password:
$ cqlsh -u cassandra -p cassandra
4. To ensure that the keyspace is always available, increase the replication factor for thesystem_auth keyspace to 3 to 5 nodes per datacenter (recommended):
ALTER KEYSPACE "system_auth" WITH REPLICATION = {'class' : 'NetworkTopologyStrategy', 'dc1' : 3, 'dc2' : 4};
The system_auth keyspace uses a QUORUM consistency level when checkingauthentication for the default cassandra user. For all other users created, superuser orotherwise, a LOCAL_ONE consistency level is used for authenticating.
Note: Datacenter names are case sensitive. Verify the case of the using utility,such as nodetool status.
Caution: If the single replica of the keyspace goes down, using the defaultreplication factor of 1 set for the system_auth keyspace results in denial ofaccess to the cluster. For multiple datacenters, be sure to set the replicationclass to NetworkTopologyStrategy.
5. After increasing the replication factor of a keyspace, run nodetool repair to makecertain the change is propagated:
$ nodetool repair system_auth
6. Restart the database.
7. Start cqlsh using the superuser name and password:
$ cqlsh -u cassandra -p cassandra
8. To prevent security breaches, replace the default superuser, cassandra, with anothersuperuser with a different name:
Page 16 DataStax Distribution of Apache Cassandra

Securing DDAC
CREATE ROLE <new_super_user> WITH PASSWORD = '<some_secure_password>' AND SUPERUSER = true AND LOGIN = true;
The default user cassandra reads with a consistency level of QUORUM by default,whereas another superuser reads with a consistency level of LOCAL_ONE.
9. Log in as the newly created superuser:
$ cqlsh -u <new_super_user> -p <some_secure_password>
10. To neutralize or delete the default account:
• Neutralize the account by changing the password to something long andincomprehensible, and alter the user's status to NOSUPERUSER:
ALTER ROLE cassandra WITH PASSWORD='SomeNonsenseThatNoOneWillThinkOf' AND SUPERUSER=false;
• Delete the account by logging in with the new super account created in theprevious step and then running DROP ROLE.
DROP ROLE cassandra;
11. Once you create some new roles, you can authorize those roles (page 19) to accessdatabase objects.
12. Fetching role authentication can be a costly operation. To decrease the burden,adjust the validity period for role caching with the roles_validity_in_ms option in thecassandra.yaml file (default 2000 milliseconds):
roles_validity_in_ms: 2000
To disable, set this option to 0. This setting is automatically disabled when theauthenticator is set to AllowAllAuthenticator.
13. Configure the refresh interval for role caches by setting the roles_update_interval_in_msoption in the cassandra.yaml file (default 2000 ms):
roles_update_interval_in_ms: 2000
If roles_validity_in_ms is non-zero, this setting must be set.
Note: The credentials are cached in their encrypted form.
DataStax Distribution of Apache Cassandra Page 17

Securing DDAC
14. Fetching credentials authentication can be a costly operation. To decrease the burden,adjust the validity period for credential caching with the credentials_validity_in_ms optionin the cassandra.yaml file (default 2000 ms):
credentials_validity_in_ms: 2000
To disable, set this option to 0. This setting is automatically disabled when theauthenticator is set to AllowAllAuthenticator.
15. To set the refresh interval for credentials caches, use thecredentials_update_interval_in_ms option (default 2000 ms):
credentials_update_interval_in_ms: 2000
If credentials_validity_in_ms is non-zero, this setting must be set.
16. To disable configuration of authentication and authorization caches (credentials, roles,and permissions) via JMX, uncomment the following line in the jvm.options file:
#-Dcassandra.disable_auth_caches_remote_configuration=true
After setting this option, cache options can only be set in the cassandra.yaml file. Tomake the new setting take effect, restart the database.
Using cqlsh with authentication
Typically, after configuring authentication, logging into cqlsh requires the -u and -p optionsto the cqlsh command. To set credentials for use when launching cqlsh, create or modifythe .cassandra/cqlshrc file. When present, this file passes default login information tocqlsh. The cqlshrc.sample (page 11) file provides an example.
1. Create or modify the cqlshrc file that specifies a role name and password.
[authentication]username = fredpassword = !!bang!!$
Note: Additional settings in the cqlshrc file are described in Creating and usingthe cqlshrc file.
2. Save the file in home/.cassandra directory and name it cqlshrc.
3. Set permissions on the file to prevent unauthorized access, as the password is stored inplain text. The file must be readable by the user that starts cassandra.
Page 18 DataStax Distribution of Apache Cassandra
Securing DDAC
$ chmod 440 home/.cassandra/cqlshrc
4. Check the permissions on home/.cassandra/cqlshrc_history to ensure that plaintext passwords are not compromised.
Internal authorizationAuthorization provide access control to database resources to authenticated roles.Authorization can grant permission to access the entire database or restrict a role to individualtable access. Roles can be granted to roles to create a permissions hierarchy and separatelogin roles from sets of permissions. Use the CQL GRANT and REVOKE commands tomanage authorization.
Object permissions
Object permissions may be assigned using the authorization mechanism for the followingobjects:
• keyspace• table• function• aggregate• roles• MBeans
Authenticated roles with passwords stored in the database are authorized selective access.The permissions are stored in tables (page 15).
Permission is configurable for CQL commands CREATE, ALTER, DROP, SELECT, MODIFY,and DESCRIBE, which are used to interact with the database. The EXECUTE command maybe used to grant permission to a role for the SELECT, INSERT, and UPDATE commands. Inaddition, the AUTHORIZE command may be used to grant permission for a role to GRANT,REVOKE, or AUTHORIZE another role's permissions.
Read access to these system tables is implicitly given to every authenticated user or rolebecause the tables are used by most tools:
• system_schema.keyspaces• system_schema.columns• system_schema.tables• system.local
DataStax Distribution of Apache Cassandra Page 19
Securing DDAC
• system.peers
Configuring internal authorization
CassandraAuthorizer is one of many possible IAuthorizer implementations. Its advantageis that it stores permissions in the system_auth.permissions table to support allauthorization-related CQL statements.
Note: To configure authentication, see Internal authentication (page 13).
1. In the cassandra.yaml file, change the authorizer setting to CassandraAuthorizer.
authorizer: CassandraAuthorizer
You can use any authenticator except AllowAll.
2. Increase the replication factor (page 16) for the system_auth keyspace if not alreadyconfigured.
3. Fetching role permissions can be a costly operation. Role permissions can be cachedto decrease the burden. Adjust the validity period for permission caching by setting thepermissions_validity_in_ms option in the cassandra.yaml file. The default value is2000 milliseconds. The caching can be disabled by setting the option to 0. This setting isdisabled automatically if the authorizer is set to AllowAllAuthorizer
permissions_validity_in_ms: 2000
4. A refresh interval for role caches can also be configured by setting thepermissions_update_interval_in_ms option in the cassandra.yaml file. Thedefault value is the same value as the permissions_validity_in_ms setting. Ifpermissions_validity_in_ms is non-zero, this setting must be set.
permissions_update_interval_in_ms: 2000
CQL supports these authorization statements:
• GRANT• LIST PERMISSIONS• REVOKE
JMX authentication and authorizationJMX (Java Management Extensions) technology provides a simple and standard way ofmanaging and monitoring resources related to an instance of a Java Virtual Machine (JVM).This is achieved by instrumenting resources with Java objects known as Managed Beans(MBeans) that are registered with an MBean server. JMX authentication stores username and
Page 20 DataStax Distribution of Apache Cassandra
Securing DDAC
associated passwords in two files, one for passwords and one for access. JMX authenticationis used by nodetool and external monitoring tools such as jconsole.
JMX Authentication and Authorization
JMX authentication and authorization allows selective users to access JMX tools and JMXmetrics.
If usernames and passwords exist and the database is configured to use authentication andauthorization, JMX tools must be executed with authentication and authorization options.
• nodetool with authentication (page 25)• jconsole with authentication (page 25)
Enabling JMX authentication and authorization
By default, JMX security is disabled and accessible only from localhost withoutauthentication as shown in the following lines from the cassandra-env.sh (page 11) file:
if [ "$LOCAL_JMX" = "yes" ]; then JVM_OPTS="$JVM_OPTS -Dcassandra.jmx.local.port=$JMX_PORT -XX:+DisableExplicitGC"
Configuring JMX authentication and authorization can be accomplished using localpassword and access files to set the usernames, passwords and access permissions.
These two methods work for remote authentication and authorization; the difference isjust the location of the configuration settings in the cassandra-env.sh (page 11) file. Localconfiguration is placed within the if ["$LOCAL_JMX" = "yes']; then block in the file,whereas remote configuration is placed with the else block.
Authentication and authorization using local files
• By default, JMX security is disabled and accessible only from localhost as shown in thefollowing lines from the cassandra-env.sh (page 11) file:
if [ "$LOCAL_JMX" = "yes" ]; then JVM_OPTS="$JVM_OPTS -Dcassandra.jmx.local.port=$JMX_PORT -XX:+DisableExplicitGC"
Authentication and authorization with an internal login role
• By default, JMX security is disabled and accessible only from localhost as shown in thefollowing lines from the cassandra-env.sh (page 11) file:
if [ "$LOCAL_JMX" = "yes" ]; then JVM_OPTS="$JVM_OPTS -Dcassandra.jmx.local.port=$JMX_PORT -XX:+DisableExplicitGC"
DataStax Distribution of Apache Cassandra Page 21
Securing DDAC
• Comment out the existing line and add or uncomment the following lines in either thelocal or remote block in the cassandra-env.sh (page 11)cassandra-env.sh (page 11) file:
JVM_OPTS="$JVM_OPTS -Dcom.sun.management.jmxremote.authenticate=true"JVM_OPTS="$JVM_OPTS -Dcassandra.jmx.remote.login.config=CassandraLogin"'JVM_OPTS="$JVM_OPTS -Djava.security.auth.login.config=$CASSANDRA_HOME/conf/cassandra-jaas.config"JVM_OPTS="$JVM_OPTS -Dcassandra.jmx.authorizer=org.apache.cassandra.auth.jmx.AuthorizationProxy"
• And comment out the following lines in the cassandra-env.sh (page 11) file:
JVM_OPTS="$JVM_OPTS -Dcom.sun.management.jmxremote.password.file=/etc/cassandra/jmxremote.password"JVM_OPTS="$JVM_OPTS -Dcom.sun.management.jmxremote.access.file=/etc/cassandra/jmxremote.access"
• Change authentication in the cassandra.yaml file to PasswordAuthenticator.
authenticator: PasswordAuthenticator
• Change authorization in the cassandra.yaml file to CassandraAuthorizer.
authorizer: CassandraAuthorizer
• Restart the database to make the change effective.• Check that nodetool status requires the username and password in order to execute.
The command should fail without authentication if everything is configured correctly.
$ nodetool -u cassandra -pw cassandra status
• Configure Authorization (page 20) to grant and revoke permissions to databaseobjects, including MBeans.
• Change $LOCAL_JMX to no. Add the following lines in the remote block in the cassandra-env.sh (page 11) file:
JVM_OPTS="$JVM_OPTS -Dcom.sun.management.jmxremote.authenticate=true" JVM_OPTS="$JVM_OPTS -Dcom.sun.management.jmxremote.password.file=/etc/cassandra/jmxremote.password"JVM_OPTS="$JVM_OPTS -Dcom.sun.management.jmxremote.access.file=/etc/cassandra/jmxremote.access"
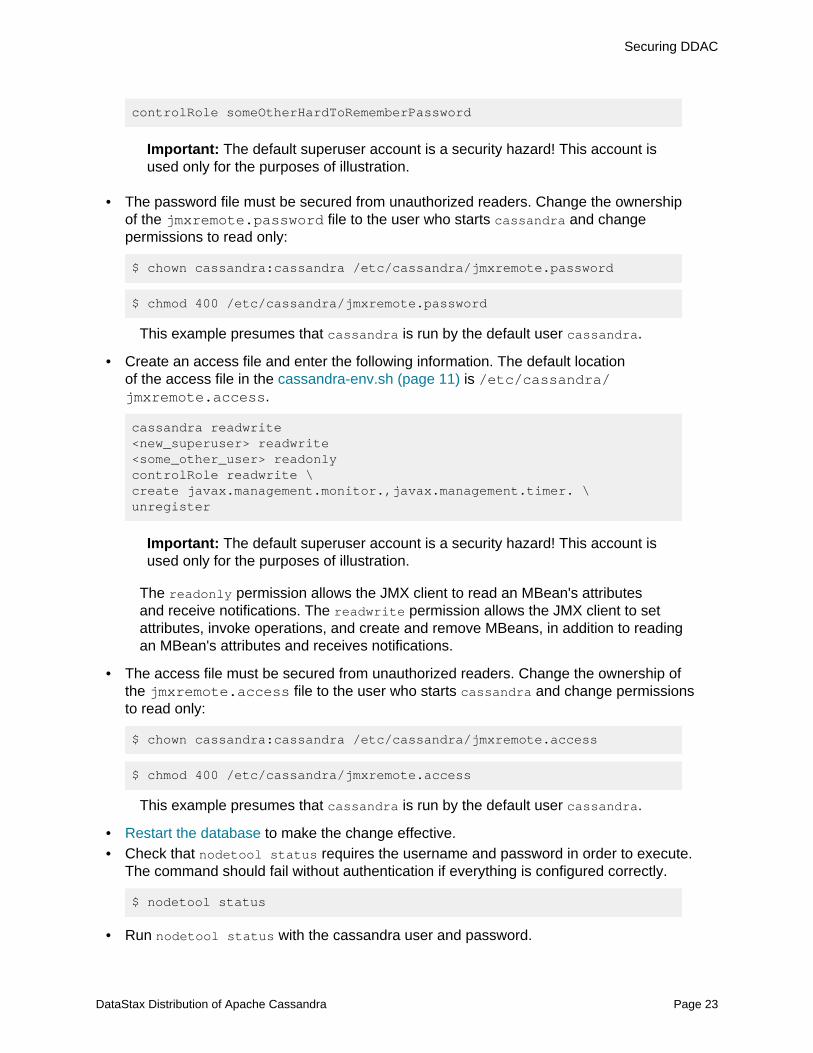
• Create a password file and add the user and password for JMX-compliant utilities,specifying the credentials for your environment. The default location of the password filein the cassandra-env.sh (page 11) is /etc/cassandra/jmxremote.password.
cassandra cassandra<new_superuser> <new_superuser_password><some_other_user> <some_other_user_password>
Page 22 DataStax Distribution of Apache Cassandra
Securing DDAC
controlRole someOtherHardToRememberPassword
Important: The default superuser account is a security hazard! This account isused only for the purposes of illustration.
• The password file must be secured from unauthorized readers. Change the ownershipof the jmxremote.password file to the user who starts cassandra and changepermissions to read only:
$ chown cassandra:cassandra /etc/cassandra/jmxremote.password
$ chmod 400 /etc/cassandra/jmxremote.password
This example presumes that cassandra is run by the default user cassandra.
• Create an access file and enter the following information. The default locationof the access file in the cassandra-env.sh (page 11) is /etc/cassandra/jmxremote.access.
cassandra readwrite<new_superuser> readwrite<some_other_user> readonlycontrolRole readwrite \create javax.management.monitor.,javax.management.timer. \unregister
Important: The default superuser account is a security hazard! This account isused only for the purposes of illustration.
The readonly permission allows the JMX client to read an MBean's attributesand receive notifications. The readwrite permission allows the JMX client to setattributes, invoke operations, and create and remove MBeans, in addition to readingan MBean's attributes and receives notifications.
• The access file must be secured from unauthorized readers. Change the ownership ofthe jmxremote.access file to the user who starts cassandra and change permissionsto read only:
$ chown cassandra:cassandra /etc/cassandra/jmxremote.access
$ chmod 400 /etc/cassandra/jmxremote.access
This example presumes that cassandra is run by the default user cassandra.
• Restart the database to make the change effective.• Check that nodetool status requires the username and password in order to execute.
The command should fail without authentication if everything is configured correctly.
$ nodetool status
• Run nodetool status with the cassandra user and password.
DataStax Distribution of Apache Cassandra Page 23
Securing DDAC
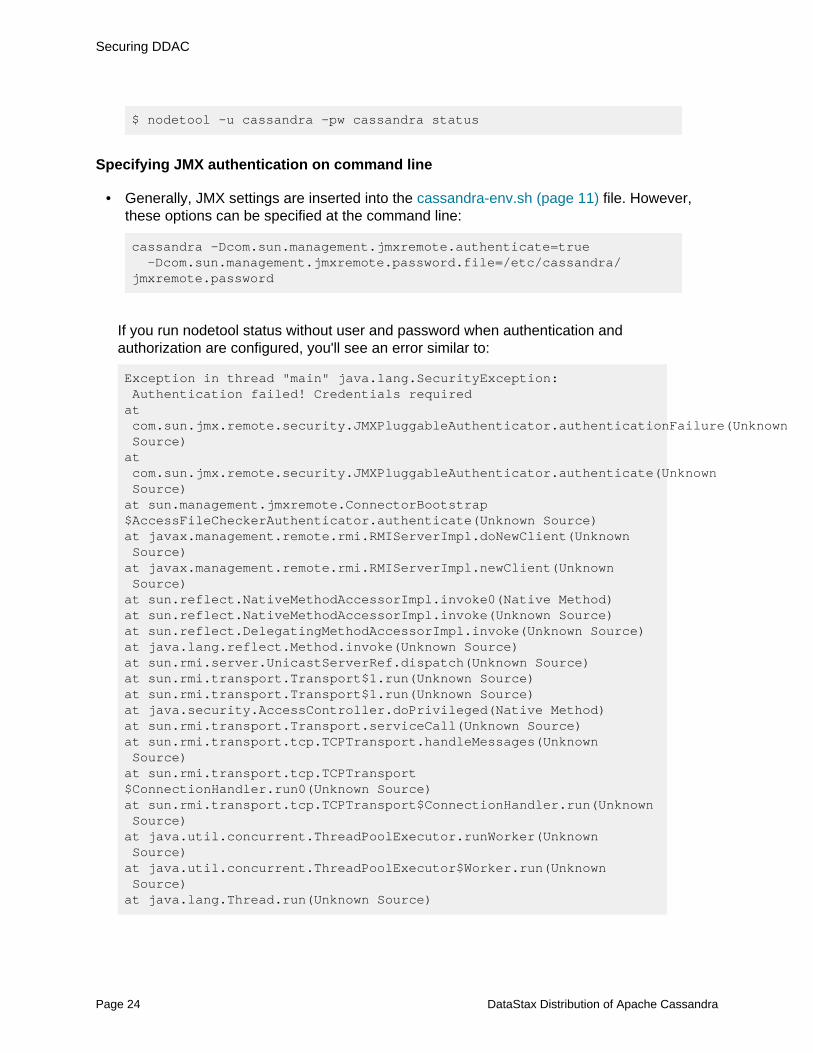
$ nodetool -u cassandra -pw cassandra status
Specifying JMX authentication on command line
• Generally, JMX settings are inserted into the cassandra-env.sh (page 11) file. However,these options can be specified at the command line:
cassandra -Dcom.sun.management.jmxremote.authenticate=true -Dcom.sun.management.jmxremote.password.file=/etc/cassandra/jmxremote.password
If you run nodetool status without user and password when authentication andauthorization are configured, you'll see an error similar to:
Exception in thread "main" java.lang.SecurityException: Authentication failed! Credentials requiredat com.sun.jmx.remote.security.JMXPluggableAuthenticator.authenticationFailure(Unknown Source)at com.sun.jmx.remote.security.JMXPluggableAuthenticator.authenticate(Unknown Source)at sun.management.jmxremote.ConnectorBootstrap$AccessFileCheckerAuthenticator.authenticate(Unknown Source)at javax.management.remote.rmi.RMIServerImpl.doNewClient(Unknown Source)at javax.management.remote.rmi.RMIServerImpl.newClient(Unknown Source)at sun.reflect.NativeMethodAccessorImpl.invoke0(Native Method)at sun.reflect.NativeMethodAccessorImpl.invoke(Unknown Source)at sun.reflect.DelegatingMethodAccessorImpl.invoke(Unknown Source)at java.lang.reflect.Method.invoke(Unknown Source)at sun.rmi.server.UnicastServerRef.dispatch(Unknown Source)at sun.rmi.transport.Transport$1.run(Unknown Source)at sun.rmi.transport.Transport$1.run(Unknown Source)at java.security.AccessController.doPrivileged(Native Method)at sun.rmi.transport.Transport.serviceCall(Unknown Source)at sun.rmi.transport.tcp.TCPTransport.handleMessages(Unknown Source)at sun.rmi.transport.tcp.TCPTransport$ConnectionHandler.run0(Unknown Source)at sun.rmi.transport.tcp.TCPTransport$ConnectionHandler.run(Unknown Source)at java.util.concurrent.ThreadPoolExecutor.runWorker(Unknown Source)at java.util.concurrent.ThreadPoolExecutor$Worker.run(Unknown Source)at java.lang.Thread.run(Unknown Source)
Page 24 DataStax Distribution of Apache Cassandra

Securing DDAC
at sun.rmi.transport.StreamRemoteCall.exceptionReceivedFromServer(Unknown Source)at sun.rmi.transport.StreamRemoteCall.executeCall(Unknown Source)at sun.rmi.server.UnicastRef.invoke(Unknown Source)at javax.management.remote.rmi.RMIServerImpl_Stub.newClient(Unknown Source)at javax.management.remote.rmi.RMIConnector.getConnection(Unknown Source)at javax.management.remote.rmi.RMIConnector.connect(Unknown Source)at javax.management.remote.JMXConnectorFactory.connect(Unknown Source)at org.apache.cassandra.tools.NodeProbe.connect(NodeProbe.java:146)at org.apache.cassandra.tools.NodeProbe.<init>(NodeProbe.java:116)at org.apache.cassandra.tools.NodeCmd.main(NodeCmd.java:1099)
Using nodetool with authentication
After configuring JMX authentication, using nodetool requires the -u and -p options to thenodetool commands.
1. Run nodetool using a pre-configured JMX username and password for <username> and<password>:
$ nodetool -u <username> -pw <password>
Using jconsole with authentication
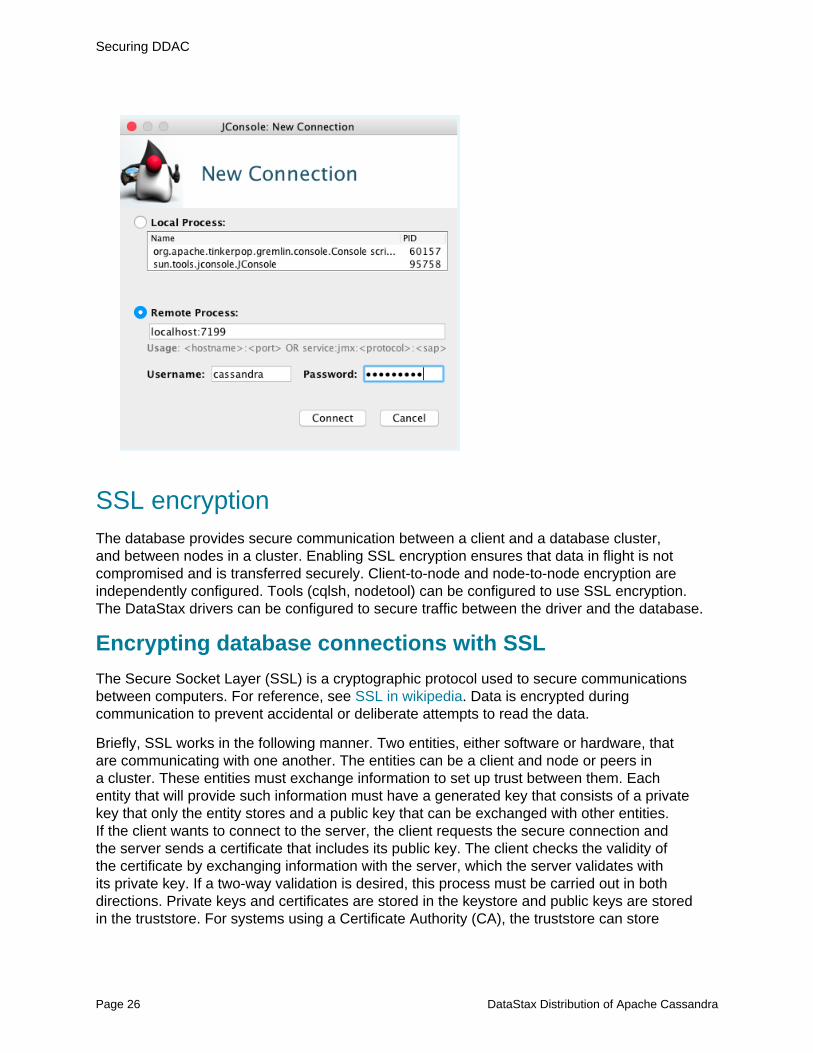
After configuring JMX authentication, using jconsole requires a username and passwordto complete the remote connection to the cluster. Use an appropriate username/passwordcombination.
1. Start jconsole using a pre-configured JMX username and password for <username>and <password>:
DataStax Distribution of Apache Cassandra Page 25
Securing DDAC
SSL encryptionThe database provides secure communication between a client and a database cluster,and between nodes in a cluster. Enabling SSL encryption ensures that data in flight is notcompromised and is transferred securely. Client-to-node and node-to-node encryption areindependently configured. Tools (cqlsh, nodetool) can be configured to use SSL encryption.The DataStax drivers can be configured to secure traffic between the driver and the database.
Encrypting database connections with SSL
The Secure Socket Layer (SSL) is a cryptographic protocol used to secure communicationsbetween computers. For reference, see SSL in wikipedia. Data is encrypted duringcommunication to prevent accidental or deliberate attempts to read the data.
Briefly, SSL works in the following manner. Two entities, either software or hardware, thatare communicating with one another. The entities can be a client and node or peers ina cluster. These entities must exchange information to set up trust between them. Eachentity that will provide such information must have a generated key that consists of a privatekey that only the entity stores and a public key that can be exchanged with other entities.If the client wants to connect to the server, the client requests the secure connection andthe server sends a certificate that includes its public key. The client checks the validity ofthe certificate by exchanging information with the server, which the server validates withits private key. If a two-way validation is desired, this process must be carried out in bothdirections. Private keys and certificates are stored in the keystore and public keys are storedin the truststore. For systems using a Certificate Authority (CA), the truststore can store
Page 26 DataStax Distribution of Apache Cassandra

Securing DDAC
certificates signed by the CA for verification. Both keystores and truststores have passwordsassigned, referred to as the keypass and storepass.
Use SSL encryption for:
• Node-to-node encrypted communication (page 38)
Secures data passed between nodes in a cluster.
• Client-to-node encrypted communication (page 40)
Secures data passed between a client program, such as cqlsh (page 42) andnodetool (page 43), and the nodes in the cluster.
Installing Java Cryptography Extension (JCE) Files
Installing the JCE Unlimited Strength Jurisdiction Policy Files can ensure support for allencryption algorithms when using Oracle Java with SSL on Apache Cassandra, and it highlyrecommended. The files must be installed on every node in the cluster.
Some of the cipher suites in the default cassandra.yaml are included only in the JavaCryptography Extension (JCE) Unlimited Strength Jurisdiction Policy Files. To ensuresupport for all encryption algorithms, install the JCE Unlimited Strength Jurisdiction PolicyFiles.
Install the JCE files using the appropriate method for your database installation:
Installing the JCE on RHEL-based systems
1. If necessary, install the EPEL repository:
$ sudo yum install epel-release
2. Installing the JCE using the Oracle JAR files:
a. Download the Cryptography Extension (JCE) Unlimited Strength Jurisdiction PolicyFiles from Oracle Java SE download page under Additional Resources.
b. Unzip the downloaded file.
c. Copy local_policy.jar and US_export_policy.jar to the $JAVA_HOME/jre/lib/security directory to overwrite the existing jar files.
Installing the JCE on Debian-based systems
Install JCE using webupd8 PPA repository:
DataStax Distribution of Apache Cassandra Page 27
Securing DDAC
$ sudo apt-get install oracle-java8-unlimited-jce-policy
Preparing server certificates for development
To use SSL encryption for client-to-node encryption or node-to-node encryption, SSLcertificates must be generated using keytool. If you generate the certificates for one typeof encryption, you do not need to generate them again for the other; the same certificatesare used for both. All nodes must have all the relevant SSL certificates on all nodes. Akeystore contains private keys. The truststore contains SSL certificates for each node.The certificates in the truststore don't require signing by a trusted and recognized publiccertification authority.
• Generate a private and public key pair on each node of the cluster. Use an alias thatidentifies the node. After executing the following command, you are prompted for thekeystore password, dname (first and last name, organizational unit, organization, city,state, country), and key password. The dname should be generated with the CN valueas the IP address or FQDN for the node.
$ keytool -genkey -keyalg RSA -alias node0 -validity 36500 -keystore keystore.node0
Note: In this example, the value for --validity gives this key pair a validityperiod of 100 years. The default validity value for a key pair is 90 days.
• The generation command can also include all prompted-for information in the commandline. This example uses an alias of node0, a keystore name of keystore.node0, usesthe same password of cassandra for both the keystore and the key, and a dname thatidentifies the IP address of node0 as 172.31.10.22.
$ keytool -genkey -keyalg RSA -alias node0 -keystore keystore.node0 -storepass cassandra -keypass cassandra -dname "CN=172.31.10.22, OU=None, O=None, L=None, C=None"
• Export the public part of the certificate to a separate file.
$ keytool -export -alias cassandra -file node0.cer -keystore .keystore
• Add the node0.cer certificate to the node0 truststore of the node using the keytool -import command.
$ keytool -import -v -trustcacerts -alias node0 -file node0.cer -keystore truststore.node0
• cqlsh does not work with the certificate in the format generated. Use openssl togenerate a PEM file of the certificate with no keys, node0.cer.pem, and a PEM file ofthe key with no certificate, node0.key.pem. First, the keystore is imported in PKCS12format to a destination keystore, node0.p12, in the example. This is followed by the twocommands that extract the two PEM files.
Page 28 DataStax Distribution of Apache Cassandra
Securing DDAC
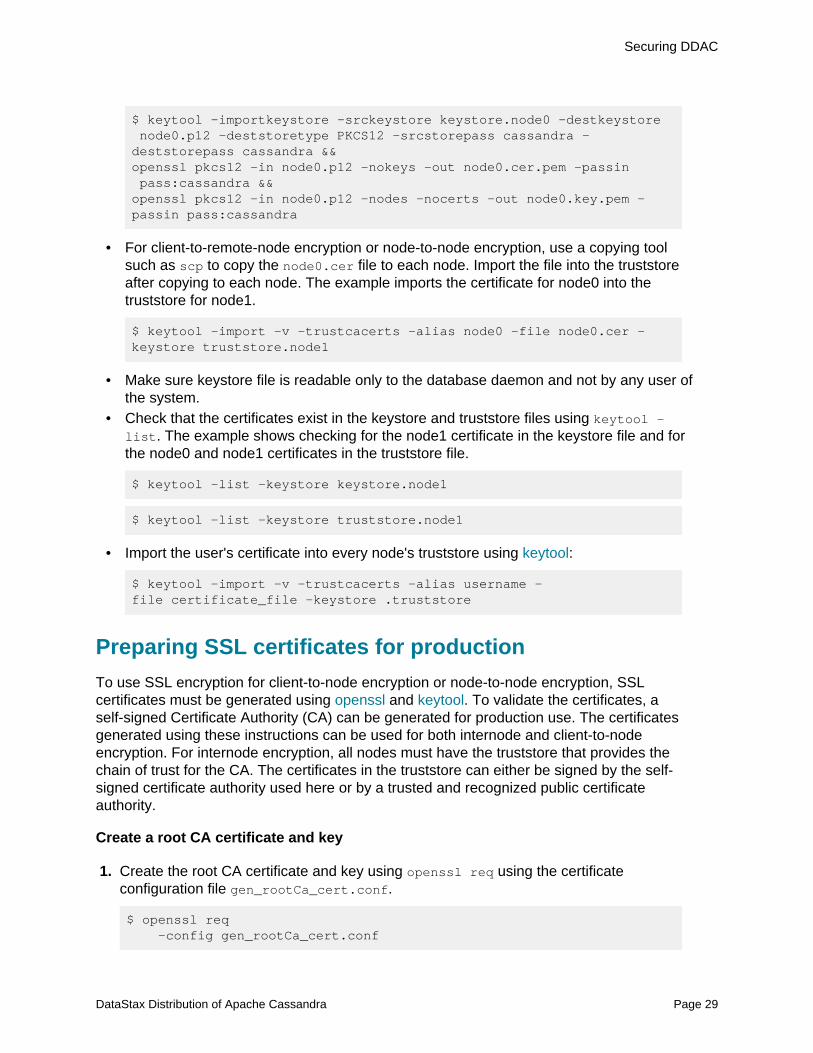
$ keytool -importkeystore -srckeystore keystore.node0 -destkeystore node0.p12 -deststoretype PKCS12 -srcstorepass cassandra -deststorepass cassandra &&openssl pkcs12 -in node0.p12 -nokeys -out node0.cer.pem -passin pass:cassandra &&openssl pkcs12 -in node0.p12 -nodes -nocerts -out node0.key.pem -passin pass:cassandra
• For client-to-remote-node encryption or node-to-node encryption, use a copying toolsuch as scp to copy the node0.cer file to each node. Import the file into the truststoreafter copying to each node. The example imports the certificate for node0 into thetruststore for node1.
$ keytool -import -v -trustcacerts -alias node0 -file node0.cer -keystore truststore.node1
• Make sure keystore file is readable only to the database daemon and not by any user ofthe system.
• Check that the certificates exist in the keystore and truststore files using keytool -list. The example shows checking for the node1 certificate in the keystore file and forthe node0 and node1 certificates in the truststore file.
$ keytool -list -keystore keystore.node1
$ keytool -list -keystore truststore.node1
• Import the user's certificate into every node's truststore using keytool:
$ keytool -import -v -trustcacerts -alias username -file certificate_file -keystore .truststore
Preparing SSL certificates for production
To use SSL encryption for client-to-node encryption or node-to-node encryption, SSLcertificates must be generated using openssl and keytool. To validate the certificates, aself-signed Certificate Authority (CA) can be generated for production use. The certificatesgenerated using these instructions can be used for both internode and client-to-nodeencryption. For internode encryption, all nodes must have the truststore that provides thechain of trust for the CA. The certificates in the truststore can either be signed by the self-signed certificate authority used here or by a trusted and recognized public certificateauthority.
Create a root CA certificate and key
1. Create the root CA certificate and key using openssl req using the certificateconfiguration file gen_rootCa_cert.conf.
$ openssl req -config gen_rootCa_cert.conf
DataStax Distribution of Apache Cassandra Page 29

Securing DDAC
-new -x509 -nodes -subj /CN=rootCa/OU=TestCluster/O=YourCompany/C=US/ -keyout rootCa.key -out rootCa.crt -days 365
# gen_rootCa_cert.conf[ req ]distinguished_name = req_distinguished_nameprompt = nooutput_password = myPassdefault_bits = 2048
[ req_distinguished_name ]C = USO = YourCompanyOU = TestClusterCN = rootCa
Option Description
-config Configuration file to use
-new Generate new certificate
-x509 Outputs a self-signed certificate
-nodes If a private key is created, it is not encrypted
-subj Set subject name when processing
-keyout Specify the private key filename to write
-out Specify the certificate filename to write
-days Specify the number of days for which tocertify the certificate
The resulting files are the rootCA certificate and the rootCa private key.
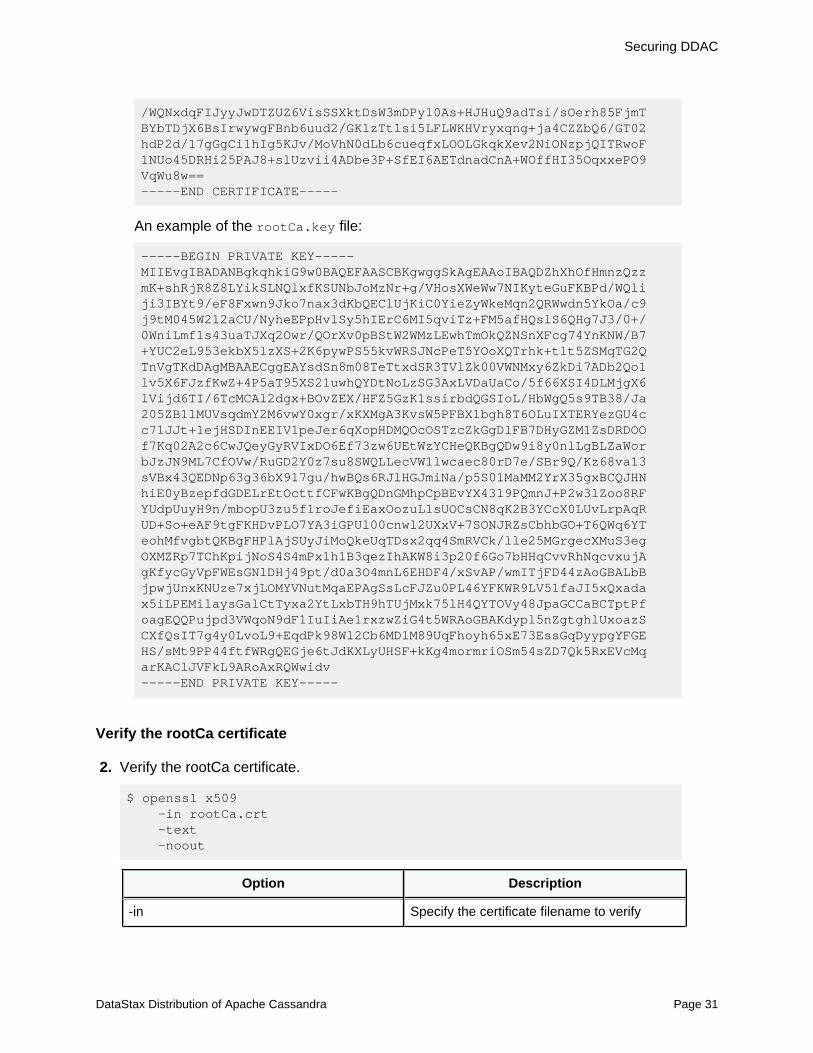
An example of the rootCa.crt file:
-----BEGIN CERTIFICATE-----MIIDADCCAegCCQCWl1PhaMCqNDANBgkqhkiG9w0BAQsFADBCMQswCQYDVQQGEwJVUzEMMAoGA1UEChMDTExQMRQwEgYDVQQLEwtUZXN0Q2x1c3RlcjEPMA0GA1UEAxMGcm9vdENhMB4XDTE2MDkxMDAzNTkzOFoXDTE3MDkxMDAzNTkzOFowQjELMAkGA1UEBhMCVVMxDDAKBgNVBAoTA0xMUDEUMBIGA1UECxMLVGVzdENsdXN0ZXIxDzANBgNVBAMTBnJvb3RDYTCCASIwDQYJKoZIhvcNAQEBBQADggEPADCCAQoCggEBANmFeE58eafNDPOYr6yFGNHxnwtiKRIs1CXF8pJQ1smgzM2v6D9UeixdZ5bDs0grK14a4UoE939ZCWKOLcgFi3394XwXHCf0mSjudrHd0ptAQKVSMqILRiJ5nJaR4yqfZBFbB2fliQ5r9z2P20zTjlbbXZoJT83KF4Q+ke+VLLmEgSsLowjmq+JPP4Uzlp8dCyVLpAeDsnf/T7/RaeIuZ+Wzje5pMlerY7Cv9A6te/SkFK1bZYzMsTCFOY6RBk1KdcVyDvhico1b8Hv5hQLZ4v3nd6RtfmXNdL7YrqnLA9LnmS9ZFIk1w95Plg6hdBOuGT62W3llIypMbZBOdWBMp0MCAwEAATANBgkqhkiG9w0BAQsFAAOCAQEAmoh6xkoa71yuVxJOO24wDfSNIpgAiP1uj7tvgza0yPs221o8p2e/34wdRaWdzLnc3Iu8cLpommuq9b82
Page 30 DataStax Distribution of Apache Cassandra
Securing DDAC
/WQNxdqFIJyyJwDTZUZ6VisSSXktDsW3mDPy10As+HJHuQ9adTsi/sOerh85FjmTBYbTDjX6BsIrwywgFBnb6uud2/GKlzTtlsi5LFLWKHVryxqng+ja4CZZbQ6/GT02hdP2d/17gGgCi1hIg5KJv/MoVhN0dLb6cueqfxLOOLGkqkXev2NiONzpjQITRwoF1NUo45DRHi25PAJ8+slUzvii4ADbe3P+SfEI6AETdnadCnA+WOffHI35OqxxePO9VqWu8w==-----END CERTIFICATE-----
An example of the rootCa.key file:
-----BEGIN PRIVATE KEY-----MIIEvgIBADANBgkqhkiG9w0BAQEFAASCBKgwggSkAgEAAoIBAQDZhXhOfHmnzQzzmK+shRjR8Z8LYikSLNQlxfKSUNbJoMzNr+g/VHosXWeWw7NIKyteGuFKBPd/WQliji3IBYt9/eF8Fxwn9Jko7nax3dKbQEClUjKiC0YieZyWkeMqn2QRWwdn5YkOa/c9j9tM045W212aCU/NyheEPpHvlSy5hIErC6MI5qviTz+FM5afHQslS6QHg7J3/0+/0WniLmfls43uaTJXq2Owr/QOrXv0pBStW2WMzLEwhTmOkQZNSnXFcg74YnKNW/B7+YUC2eL953ekbX5lzXS+2K6pywPS55kvWRSJNcPeT5YOoXQTrhk+tlt5ZSMqTG2QTnVgTKdDAgMBAAECggEAYsdSn8m08TeTtxdSR3TVlZk00VWNMxy6ZkDi7ADb2Qo1lv5X6FJzfKwZ+4P5aT95XS21uwhQYDtNoLzSG3AxLVDaUaCo/5f66XSI4DLMjgX6lVijd6TI/6TcMCAl2dgx+BOvZEX/HFZ5GzK1ssirbdQGSIoL/HbWgQ5s9TB38/Ja205ZB1lMUVsqdmY2M6vwY0xgr/xKXMgA3KvsW5PFBX1bgh8T6OLuIXTERYezGU4cc71JJt+1ejHSDInEEIV1peJer6qXopHDMQOcOSTzcZkGgDlFB7DHyGZM1ZsDRDOOf7Kq02A2c6CwJQeyGyRVIxDO6Ef73zw6UEtWzYCHeQKBgQDw9i8y0nlLgBLZaWorbJzJN9ML7CfOVw/RuGD2Y0z7su8SWQLLecVW1lwcaec80rD7e/SBr9Q/Kz68va13sVBx43QEDNp63g36bX917gu/hwBQs6RJlHGJmiNa/p5S01MaMM2YrX35gxBCQJHNhiE0yBzepfdGDELrEtOcttfCFwKBgQDnGMhpCpBEvYX43l9PQmnJ+P2w3lZoo8RFYUdpUuyH9n/mbopU3zu5f1roJefiEaxOozuL1sUOCsCN8qK2B3YCcX0LUvLrpAqRUD+So+eAF9tgFKHDvPLO7YA3iGPUl00cnwl2UXxV+7SONJRZsCbhbGO+T6QWq6YTeohMfvgbtQKBgFHPlAjSUyJiMoQkeUqTDsx2qq4SmRVCk/lle25MGrgecXMuS3egOXMZRp7TChKpijNoS4S4mPx1h1B3qezIhAKW8i3p20f6Go7bHHqCvvRhNqcvxujAgKfycGyVpFWEsGNlDHj49pt/d0a3O4mnL6EHDF4/xSvAP/wmITjFD44zAoGBALbBjpwjUnxKNUze7xjLOMYVNutMqaEPAgSsLcFJZu0PL46YFKWR9LV51faJI5xQxadax5iLPEMilaysGalCtTyxa2YtLxbTH9hTUjMxk75lH4QYTOVy48JpaGCCaBCTptPfoagEQQPujpd3VWqoN9dF1IuIiAe1rxzwZiG4t5WRAoGBAKdypl5nZgtghlUxoazSCXfQsIT7g4y0LvoL9+EqdPk98Wl2Cb6MD1M89UqFhoyh65xE73EssGqDyypgYFGEHS/sMt9PP44ftfWRgQEGje6tJdKXLyUHSF+kKg4mormriOSm54sZD7Qk5RxEVcMqarKAClJVFkL9ARoAxRQWwidv-----END PRIVATE KEY-----
Verify the rootCa certificate
2. Verify the rootCa certificate.
$ openssl x509 -in rootCa.crt -text -noout
Option Description
-in Specify the certificate filename to verify
DataStax Distribution of Apache Cassandra Page 31
Securing DDAC
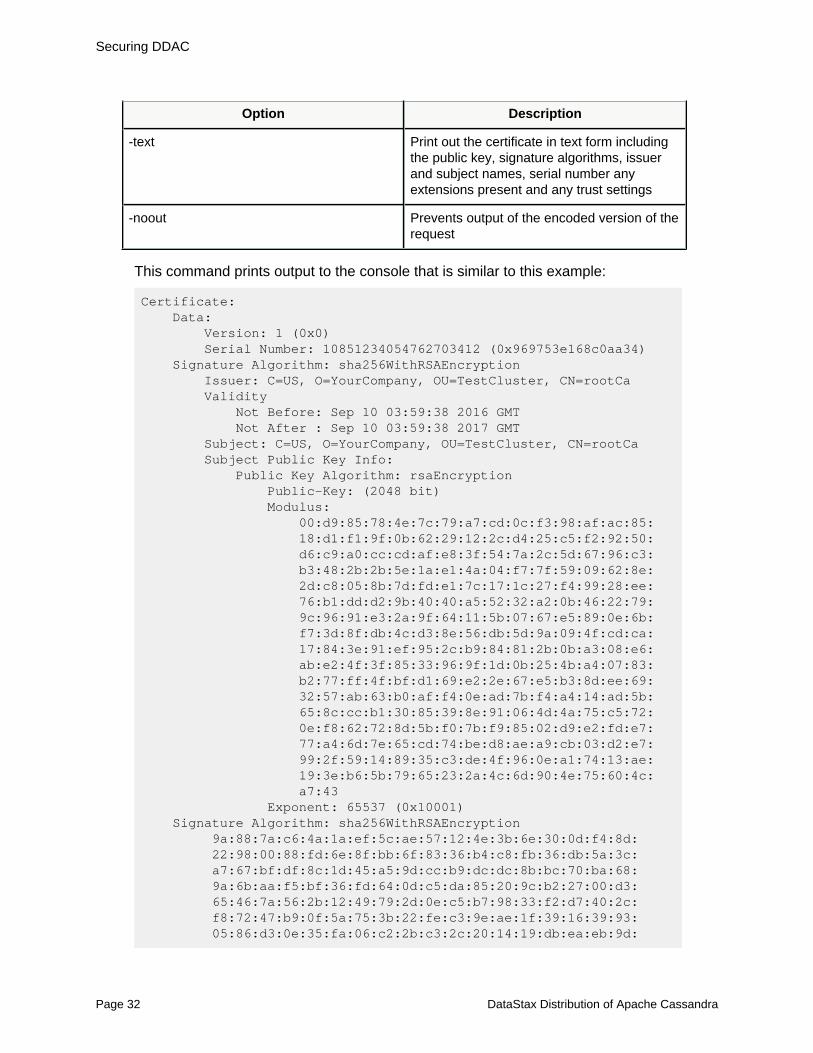
Option Description
-text Print out the certificate in text form includingthe public key, signature algorithms, issuerand subject names, serial number anyextensions present and any trust settings
-noout Prevents output of the encoded version of therequest
This command prints output to the console that is similar to this example:
Certificate: Data: Version: 1 (0x0) Serial Number: 10851234054762703412 (0x969753e168c0aa34) Signature Algorithm: sha256WithRSAEncryption Issuer: C=US, O=YourCompany, OU=TestCluster, CN=rootCa Validity Not Before: Sep 10 03:59:38 2016 GMT Not After : Sep 10 03:59:38 2017 GMT Subject: C=US, O=YourCompany, OU=TestCluster, CN=rootCa Subject Public Key Info: Public Key Algorithm: rsaEncryption Public-Key: (2048 bit) Modulus: 00:d9:85:78:4e:7c:79:a7:cd:0c:f3:98:af:ac:85: 18:d1:f1:9f:0b:62:29:12:2c:d4:25:c5:f2:92:50: d6:c9:a0:cc:cd:af:e8:3f:54:7a:2c:5d:67:96:c3: b3:48:2b:2b:5e:1a:e1:4a:04:f7:7f:59:09:62:8e: 2d:c8:05:8b:7d:fd:e1:7c:17:1c:27:f4:99:28:ee: 76:b1:dd:d2:9b:40:40:a5:52:32:a2:0b:46:22:79: 9c:96:91:e3:2a:9f:64:11:5b:07:67:e5:89:0e:6b: f7:3d:8f:db:4c:d3:8e:56:db:5d:9a:09:4f:cd:ca: 17:84:3e:91:ef:95:2c:b9:84:81:2b:0b:a3:08:e6: ab:e2:4f:3f:85:33:96:9f:1d:0b:25:4b:a4:07:83: b2:77:ff:4f:bf:d1:69:e2:2e:67:e5:b3:8d:ee:69: 32:57:ab:63:b0:af:f4:0e:ad:7b:f4:a4:14:ad:5b: 65:8c:cc:b1:30:85:39:8e:91:06:4d:4a:75:c5:72: 0e:f8:62:72:8d:5b:f0:7b:f9:85:02:d9:e2:fd:e7: 77:a4:6d:7e:65:cd:74:be:d8:ae:a9:cb:03:d2:e7: 99:2f:59:14:89:35:c3:de:4f:96:0e:a1:74:13:ae: 19:3e:b6:5b:79:65:23:2a:4c:6d:90:4e:75:60:4c: a7:43 Exponent: 65537 (0x10001) Signature Algorithm: sha256WithRSAEncryption 9a:88:7a:c6:4a:1a:ef:5c:ae:57:12:4e:3b:6e:30:0d:f4:8d: 22:98:00:88:fd:6e:8f:bb:6f:83:36:b4:c8:fb:36:db:5a:3c: a7:67:bf:df:8c:1d:45:a5:9d:cc:b9:dc:dc:8b:bc:70:ba:68: 9a:6b:aa:f5:bf:36:fd:64:0d:c5:da:85:20:9c:b2:27:00:d3: 65:46:7a:56:2b:12:49:79:2d:0e:c5:b7:98:33:f2:d7:40:2c: f8:72:47:b9:0f:5a:75:3b:22:fe:c3:9e:ae:1f:39:16:39:93: 05:86:d3:0e:35:fa:06:c2:2b:c3:2c:20:14:19:db:ea:eb:9d:
Page 32 DataStax Distribution of Apache Cassandra
Securing DDAC
db:f1:8a:97:34:ed:96:c8:b9:2c:52:d6:28:75:6b:cb:1a:a7: 83:e8:da:e0:26:59:6d:0e:bf:19:3d:36:85:d3:f6:77:fd:7b: 80:68:02:8b:58:48:83:92:89:bf:f3:28:56:13:74:74:b6:fa: 72:e7:aa:7f:12:ce:38:b1:a4:aa:45:de:bf:63:62:38:dc:e9: 8d:02:13:47:0a:05:d4:d5:28:e3:90:d1:1e:2d:b9:3c:02:7c: fa:c9:54:ce:f8:a2:e0:00:db:7b:73:fe:49:f1:08:e8:01:13: 76:76:9d:0a:70:3e:58:e7:df:1c:8d:f9:3a:ac:71:78:f3:bd: 56:a5:ae:f3
Generate public/private key pair and keystore for each node
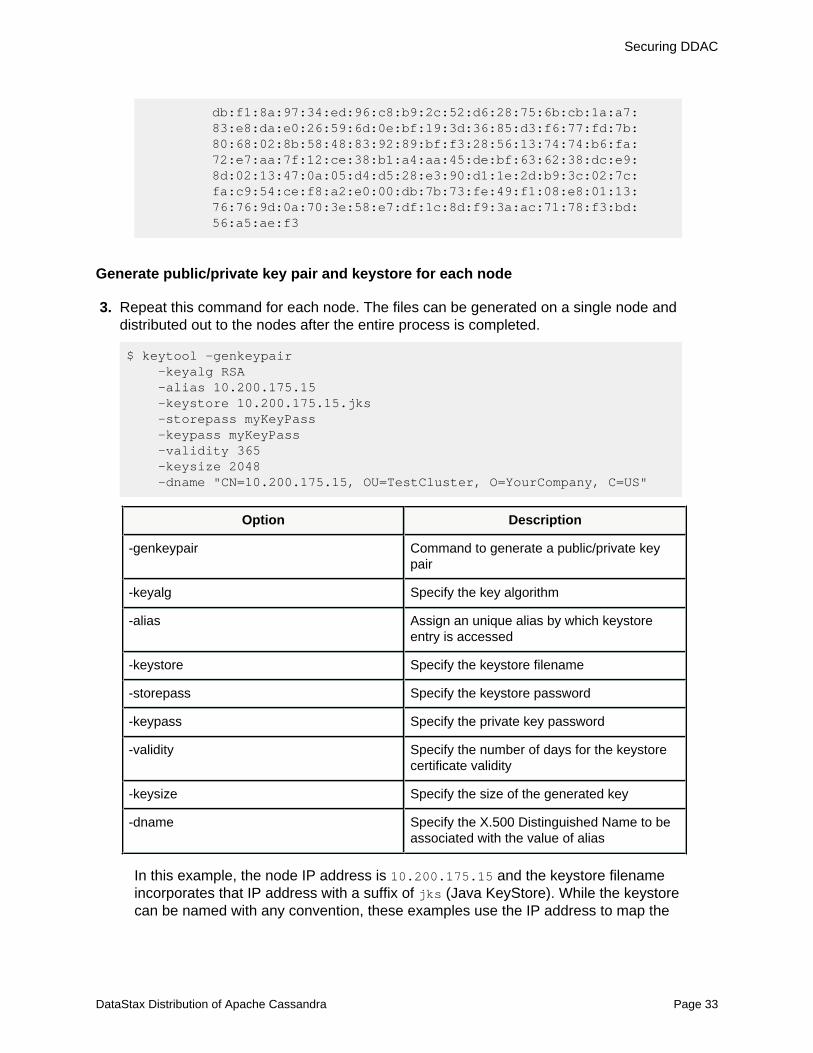
3. Repeat this command for each node. The files can be generated on a single node anddistributed out to the nodes after the entire process is completed.
$ keytool -genkeypair -keyalg RSA -alias 10.200.175.15 -keystore 10.200.175.15.jks -storepass myKeyPass -keypass myKeyPass -validity 365 -keysize 2048 -dname "CN=10.200.175.15, OU=TestCluster, O=YourCompany, C=US"
Option Description
-genkeypair Command to generate a public/private keypair
-keyalg Specify the key algorithm
-alias Assign an unique alias by which keystoreentry is accessed
-keystore Specify the keystore filename
-storepass Specify the keystore password
-keypass Specify the private key password
-validity Specify the number of days for the keystorecertificate validity
-keysize Specify the size of the generated key
-dname Specify the X.500 Distinguished Name to beassociated with the value of alias
In this example, the node IP address is 10.200.175.15 and the keystore filenameincorporates that IP address with a suffix of jks (Java KeyStore). While the keystorecan be named with any convention, these examples use the IP address to map the
DataStax Distribution of Apache Cassandra Page 33
Securing DDAC
files to the nodes. The dname sets the CN value to the node's IP address or FQDN aswell. The storepass and keypass must be the same value.
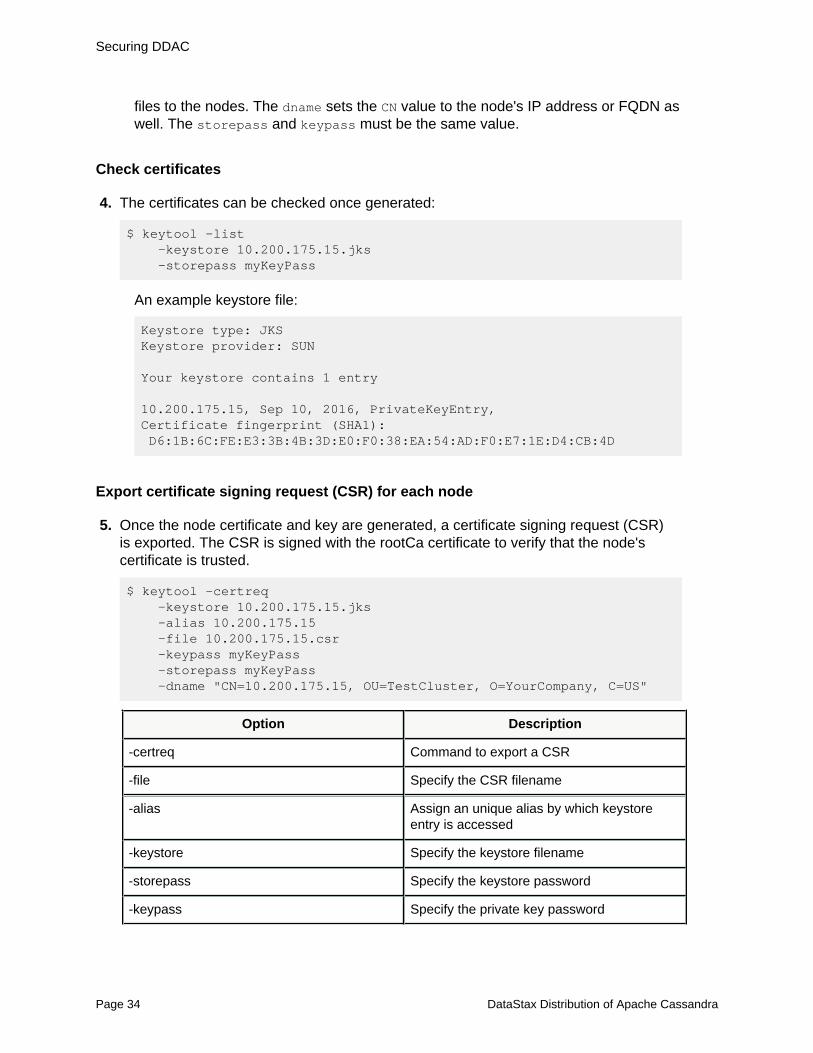
Check certificates
4. The certificates can be checked once generated:
$ keytool -list -keystore 10.200.175.15.jks -storepass myKeyPass
An example keystore file:
Keystore type: JKSKeystore provider: SUN
Your keystore contains 1 entry
10.200.175.15, Sep 10, 2016, PrivateKeyEntry, Certificate fingerprint (SHA1): D6:1B:6C:FE:E3:3B:4B:3D:E0:F0:38:EA:54:AD:F0:E7:1E:D4:CB:4D
Export certificate signing request (CSR) for each node
5. Once the node certificate and key are generated, a certificate signing request (CSR)is exported. The CSR is signed with the rootCa certificate to verify that the node'scertificate is trusted.
$ keytool -certreq -keystore 10.200.175.15.jks -alias 10.200.175.15 -file 10.200.175.15.csr -keypass myKeyPass -storepass myKeyPass -dname "CN=10.200.175.15, OU=TestCluster, O=YourCompany, C=US"
Option Description
-certreq Command to export a CSR
-file Specify the CSR filename
-alias Assign an unique alias by which keystoreentry is accessed
-keystore Specify the keystore filename
-storepass Specify the keystore password
-keypass Specify the private key password
Page 34 DataStax Distribution of Apache Cassandra

Securing DDAC
Option Description
-dname Specify the X.500 Distinguished Name to beassociated with the value of alias
An example CSR file:
-----BEGIN NEW CERTIFICATE REQUEST-----MIICvDCCAaQCAQAwRzELMAkGA1UEBhMCVVMxDDAKBgNVBAoTA0xMUDESMBAGA1UECxMJTExQMDkwNzE2MRYwFAYDVQQDEw0xMC4yMDAuMTc1LjE1MIIBIjANBgkqhkiG9w0BAQEFAAOCAQ8AMIIBCgKCAQEAhUJWFQ+9Xgs8KfhLYCBi8i0csY44YkCBFAz3jh6g80wdCqYetYcNxWi+3rgAFL6BAibt23xGqBKtNszxyUu8M7ocfw+dVeT4YQJWE0TNAnwlijx+jyl2IKCFtuON3NmGvvHviPDyNyz2VuB7jlA3fGuCSsXEzpDXdStKZNcozeIxnmLRv2VKkp8edOX0Bi3QOxwKgwzZQ0/Z7yWaixl1WB2YKzY9s1BnoEoRHdFeQZR7f9QuQYBwIKsCx3cFsiEQJnpKqbZYLFrPmpMrR7ynLx6MGZVDuLfrXp/yFyuHmamIM80CGvKljwr/onalDY2F5AeSdUyBM3vVTWrC9n9jwQIDAQABoDAwLgYJKoZIhvcNAQkOMSEwHzAdBgNVHQ4EFgQUSbrkacD4XXCIaJQtX+7/en3Z8r8wDQYJKoZIhvcNAQELBQADggEBAAxU2FbQxy21EHcnfC4YETDQvXuwv4qQzcT61faZEjmznZ9ekm8ckzV5NlHpyArk12EO13twh94U56ZItKfiYOKWtP5wUGcoYhdyQnG0p6wunVRJAMidoZMAkjJ6bXwDwgNqnlKL48iGD8ZnguVUM353KwTDm1mvJ4yEssEcnBKd4lDzfZN+yx3pmyCr/MjMCODLF7VVMRH5FpQZ0+uGAIq0fx8FeEugxGie4tkzqP3xkkUBRDKkfrUC8Z61gL3K1LpLZ77a1okpP3cNkvSStVgbhLH9qwnhCORNGHy+NyZLm1a+hS4QCAJzRKlCnsdwUTp+HXUtyNLd7GJHGLPu0YY=-----END NEW CERTIFICATE REQUEST-----
Sign node certificate with rootCa for each node
6. The CSR is input, signed with the rootCa certificate and a signed node certificate iscreated.
$ openssl x509 -req -CA rootCa.crt -CAkey rootCa.key -in 10.200.175.15.csr -out 10.200.175.15.crt_signed -days 365 -CAcreateserial -passin pass:myPass
Option Description
-req Specify that the input file is a CSR
-CA Identify the rootCa certificate
DataStax Distribution of Apache Cassandra Page 35
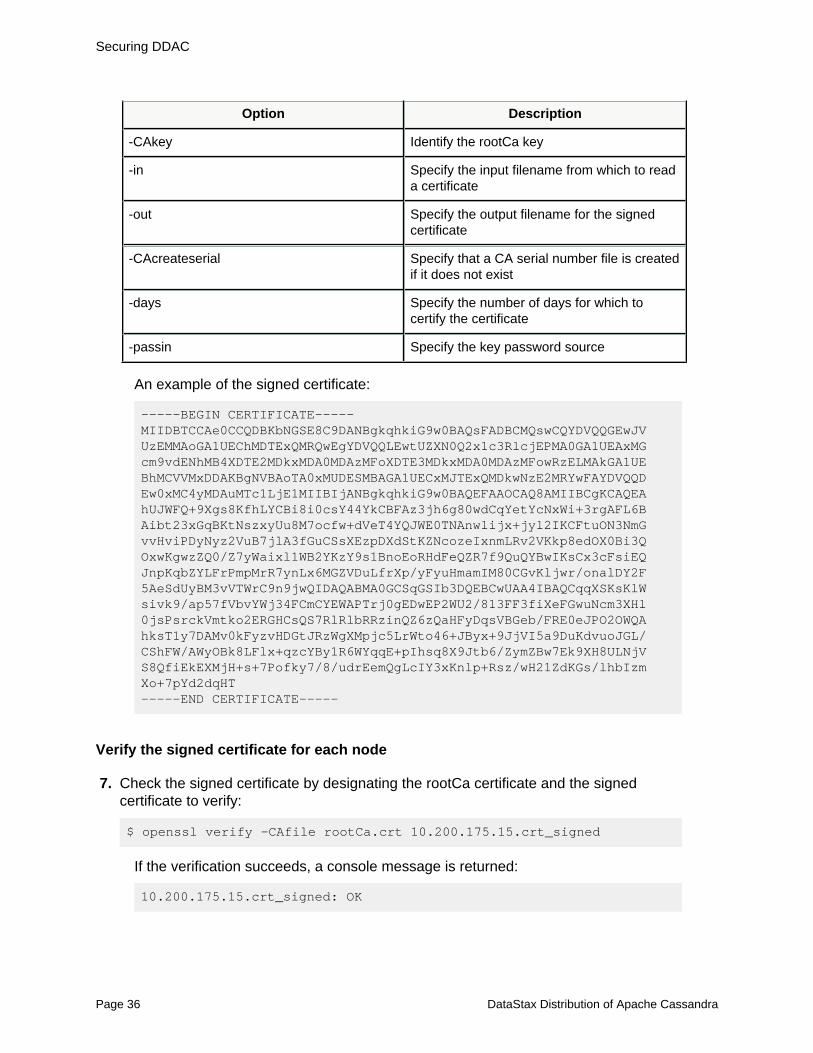
Securing DDAC
Option Description
-CAkey Identify the rootCa key
-in Specify the input filename from which to reada certificate
-out Specify the output filename for the signedcertificate
-CAcreateserial Specify that a CA serial number file is createdif it does not exist
-days Specify the number of days for which tocertify the certificate
-passin Specify the key password source
An example of the signed certificate:
-----BEGIN CERTIFICATE-----MIIDBTCCAe0CCQDBKbNGSE8C9DANBgkqhkiG9w0BAQsFADBCMQswCQYDVQQGEwJVUzEMMAoGA1UEChMDTExQMRQwEgYDVQQLEwtUZXN0Q2x1c3RlcjEPMA0GA1UEAxMGcm9vdENhMB4XDTE2MDkxMDA0MDAzMFoXDTE3MDkxMDA0MDAzMFowRzELMAkGA1UEBhMCVVMxDDAKBgNVBAoTA0xMUDESMBAGA1UECxMJTExQMDkwNzE2MRYwFAYDVQQDEw0xMC4yMDAuMTc1LjE1MIIBIjANBgkqhkiG9w0BAQEFAAOCAQ8AMIIBCgKCAQEAhUJWFQ+9Xgs8KfhLYCBi8i0csY44YkCBFAz3jh6g80wdCqYetYcNxWi+3rgAFL6BAibt23xGqBKtNszxyUu8M7ocfw+dVeT4YQJWE0TNAnwlijx+jyl2IKCFtuON3NmGvvHviPDyNyz2VuB7jlA3fGuCSsXEzpDXdStKZNcozeIxnmLRv2VKkp8edOX0Bi3QOxwKgwzZQ0/Z7yWaixl1WB2YKzY9s1BnoEoRHdFeQZR7f9QuQYBwIKsCx3cFsiEQJnpKqbZYLFrPmpMrR7ynLx6MGZVDuLfrXp/yFyuHmamIM80CGvKljwr/onalDY2F5AeSdUyBM3vVTWrC9n9jwQIDAQABMA0GCSqGSIb3DQEBCwUAA4IBAQCqqXSKsKlWsivk9/ap57fVbvYWj34FCmCYEWAPTrj0gEDwEP2WU2/813FF3fiXeFGwuNcm3XHl0jsPsrckVmtko2ERGHCsQS7RlRlbRRzinQZ6zQaHFyDqsVBGeb/FRE0eJPO2OWQAhksT1y7DAMv0kFyzvHDGtJRzWgXMpjc5LrWto46+JByx+9JjVI5a9DuKdvuoJGL/CShFW/AWyOBk8LFlx+qzcYBy1R6WYqqE+pIhsq8X9Jtb6/ZymZBw7Ek9XH8ULNjVS8QfiEkEXMjH+s+7Pofky7/8/udrEemQgLcIY3xKnlp+Rsz/wH21ZdKGs/lhbIzmXo+7pYd2dqHT-----END CERTIFICATE-----
Verify the signed certificate for each node
7. Check the signed certificate by designating the rootCa certificate and the signedcertificate to verify:
$ openssl verify -CAfile rootCa.crt 10.200.175.15.crt_signed
If the verification succeeds, a console message is returned:
10.200.175.15.crt_signed: OK
Page 36 DataStax Distribution of Apache Cassandra
Securing DDAC
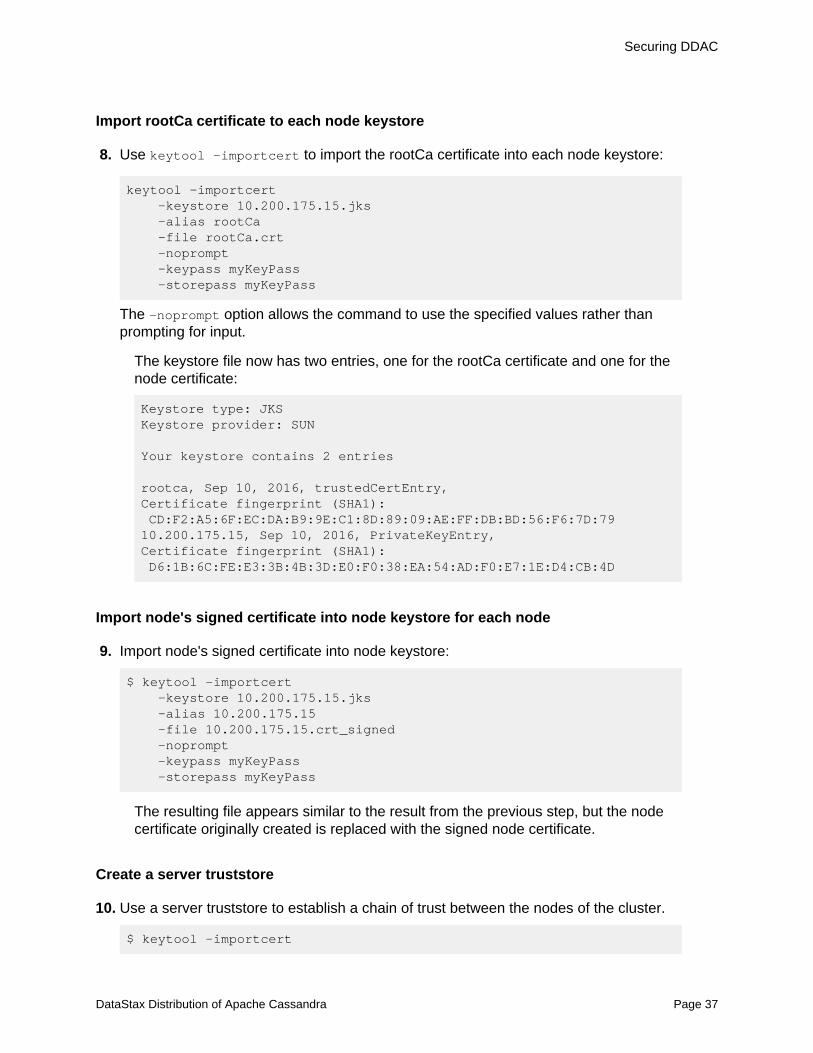
Import rootCa certificate to each node keystore
8. Use keytool -importcert to import the rootCa certificate into each node keystore:
keytool -importcert -keystore 10.200.175.15.jks -alias rootCa -file rootCa.crt -noprompt -keypass myKeyPass -storepass myKeyPass
The -noprompt option allows the command to use the specified values rather thanprompting for input.
The keystore file now has two entries, one for the rootCa certificate and one for thenode certificate:
Keystore type: JKSKeystore provider: SUN
Your keystore contains 2 entries
rootca, Sep 10, 2016, trustedCertEntry, Certificate fingerprint (SHA1): CD:F2:A5:6F:EC:DA:B9:9E:C1:8D:89:09:AE:FF:DB:BD:56:F6:7D:7910.200.175.15, Sep 10, 2016, PrivateKeyEntry, Certificate fingerprint (SHA1): D6:1B:6C:FE:E3:3B:4B:3D:E0:F0:38:EA:54:AD:F0:E7:1E:D4:CB:4D
Import node's signed certificate into node keystore for each node
9. Import node's signed certificate into node keystore:
$ keytool -importcert -keystore 10.200.175.15.jks -alias 10.200.175.15 -file 10.200.175.15.crt_signed -noprompt -keypass myKeyPass -storepass myKeyPass
The resulting file appears similar to the result from the previous step, but the nodecertificate originally created is replaced with the signed node certificate.
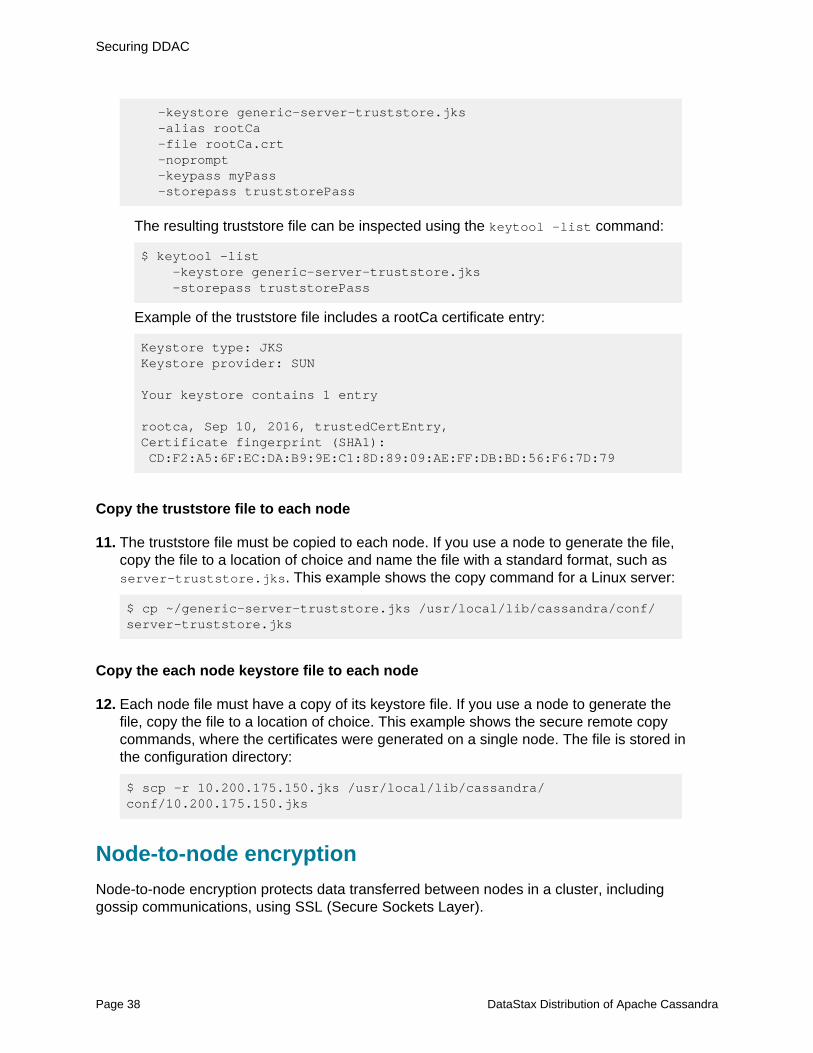
Create a server truststore
10. Use a server truststore to establish a chain of trust between the nodes of the cluster.
$ keytool -importcert
DataStax Distribution of Apache Cassandra Page 37
Securing DDAC
-keystore generic-server-truststore.jks -alias rootCa -file rootCa.crt -noprompt -keypass myPass -storepass truststorePass
The resulting truststore file can be inspected using the keytool -list command:
$ keytool -list -keystore generic-server-truststore.jks -storepass truststorePass
Example of the truststore file includes a rootCa certificate entry:
Keystore type: JKSKeystore provider: SUN
Your keystore contains 1 entry
rootca, Sep 10, 2016, trustedCertEntry, Certificate fingerprint (SHA1): CD:F2:A5:6F:EC:DA:B9:9E:C1:8D:89:09:AE:FF:DB:BD:56:F6:7D:79
Copy the truststore file to each node
11. The truststore file must be copied to each node. If you use a node to generate the file,copy the file to a location of choice and name the file with a standard format, such asserver-truststore.jks. This example shows the copy command for a Linux server:
$ cp ~/generic-server-truststore.jks /usr/local/lib/cassandra/conf/server-truststore.jks
Copy the each node keystore file to each node
12. Each node file must have a copy of its keystore file. If you use a node to generate thefile, copy the file to a location of choice. This example shows the secure remote copycommands, where the certificates were generated on a single node. The file is stored inthe configuration directory:
$ scp -r 10.200.175.150.jks /usr/local/lib/cassandra/conf/10.200.175.150.jks
Node-to-node encryption
Node-to-node encryption protects data transferred between nodes in a cluster, includinggossip communications, using SSL (Secure Sockets Layer).
Page 38 DataStax Distribution of Apache Cassandra
Securing DDAC
Prerequisites: Prepare SSL certificates with a self-signed CA (page 29) for production,or prepare SSL certificates (page 28) for development.
To enable node-to-node SSL, you must set the server_encryption_options in thecassandra.yaml file.
Enable server_encryption_options on each node
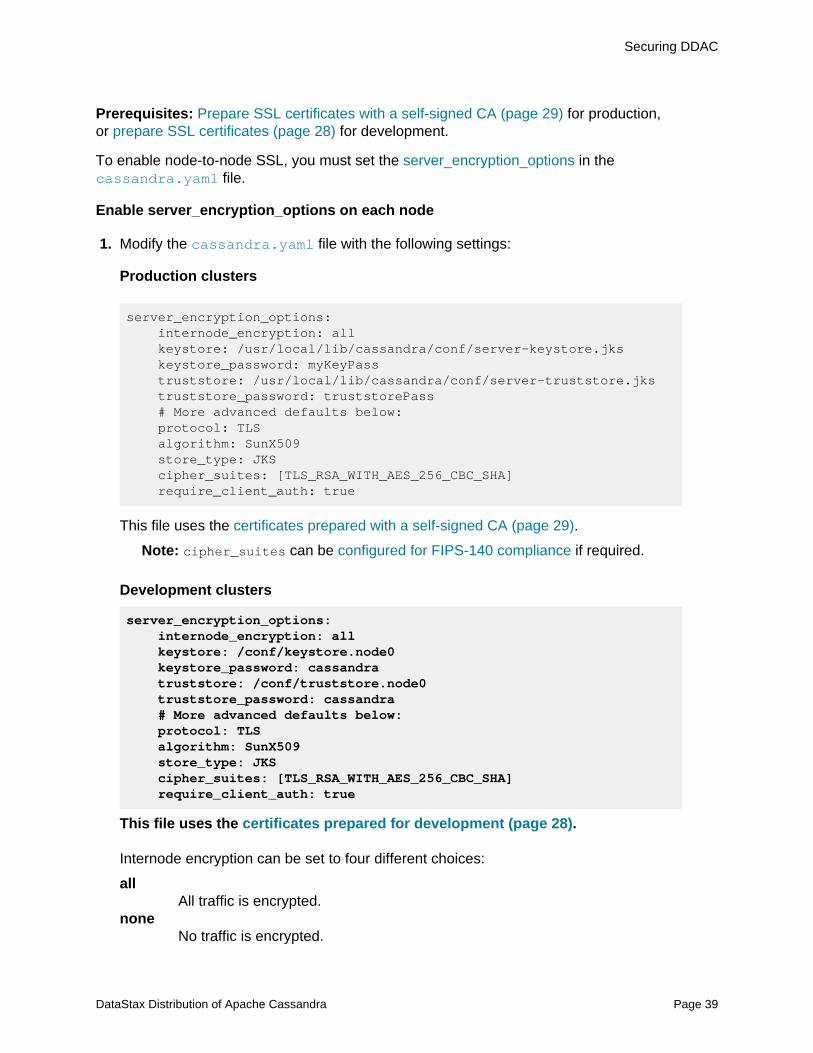
1. Modify the cassandra.yaml file with the following settings:
Production clusters
server_encryption_options: internode_encryption: all keystore: /usr/local/lib/cassandra/conf/server-keystore.jks keystore_password: myKeyPass truststore: /usr/local/lib/cassandra/conf/server-truststore.jks truststore_password: truststorePass # More advanced defaults below: protocol: TLS algorithm: SunX509 store_type: JKS cipher_suites: [TLS_RSA_WITH_AES_256_CBC_SHA] require_client_auth: true
This file uses the certificates prepared with a self-signed CA (page 29).
Note: cipher_suites can be configured for FIPS-140 compliance if required.
Development clusters
server_encryption_options: internode_encryption: all keystore: /conf/keystore.node0 keystore_password: cassandra truststore: /conf/truststore.node0 truststore_password: cassandra # More advanced defaults below: protocol: TLS algorithm: SunX509 store_type: JKS cipher_suites: [TLS_RSA_WITH_AES_256_CBC_SHA] require_client_auth: true
This file uses the certificates prepared for development (page 28).
Internode encryption can be set to four different choices:
allAll traffic is encrypted.
noneNo traffic is encrypted.
DataStax Distribution of Apache Cassandra Page 39
Securing DDAC
dcTraffic between datacenters is encrypted.
rackTraffic between racks is encrypted.
Set appropriate paths to the keystore and truststore files. Set the passwords tothe passwords set during keystore and truststore generation. If two-way certificateauthentication is desired, set require_client_auth to true.
Restart the database.
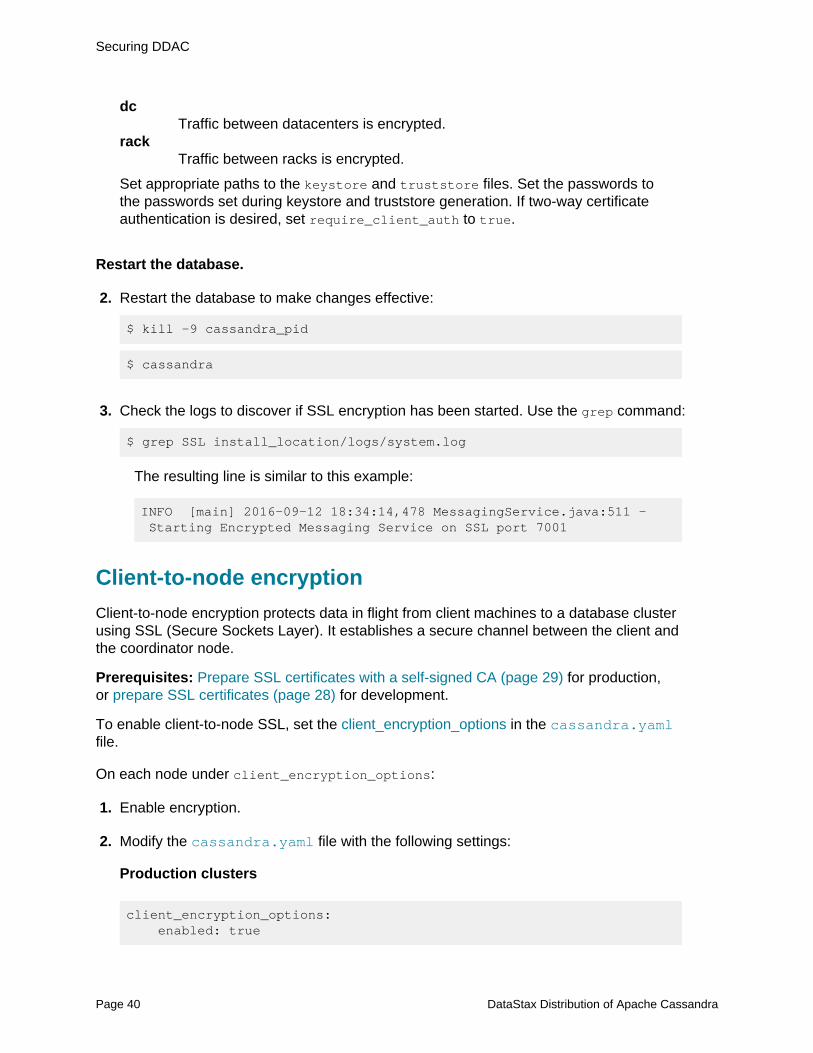
2. Restart the database to make changes effective:
$ kill -9 cassandra_pid
$ cassandra
3. Check the logs to discover if SSL encryption has been started. Use the grep command:
$ grep SSL install_location/logs/system.log
The resulting line is similar to this example:
INFO [main] 2016-09-12 18:34:14,478 MessagingService.java:511 - Starting Encrypted Messaging Service on SSL port 7001
Client-to-node encryption
Client-to-node encryption protects data in flight from client machines to a database clusterusing SSL (Secure Sockets Layer). It establishes a secure channel between the client andthe coordinator node.
Prerequisites: Prepare SSL certificates with a self-signed CA (page 29) for production,or prepare SSL certificates (page 28) for development.
To enable client-to-node SSL, set the client_encryption_options in the cassandra.yamlfile.
On each node under client_encryption_options:
1. Enable encryption.
2. Modify the cassandra.yaml file with the following settings:
Production clusters
client_encryption_options: enabled: true
Page 40 DataStax Distribution of Apache Cassandra
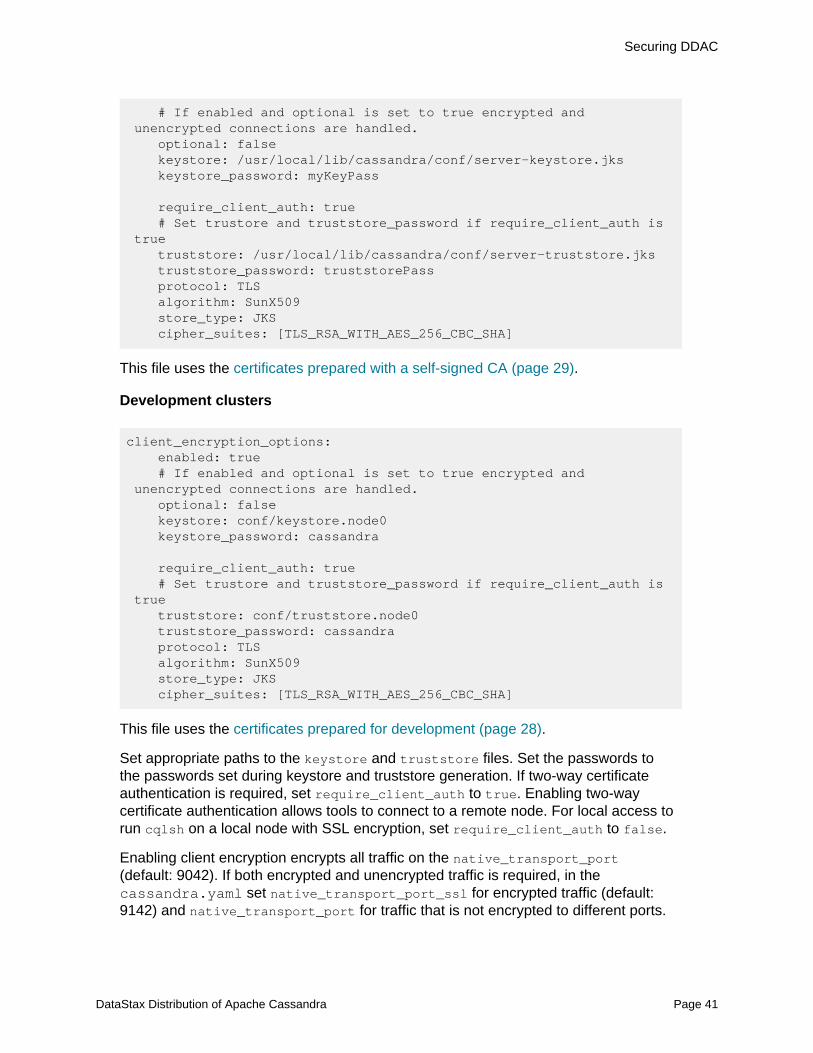
Securing DDAC
# If enabled and optional is set to true encrypted and unencrypted connections are handled. optional: false keystore: /usr/local/lib/cassandra/conf/server-keystore.jks keystore_password: myKeyPass require_client_auth: true # Set trustore and truststore_password if require_client_auth is true truststore: /usr/local/lib/cassandra/conf/server-truststore.jks truststore_password: truststorePass protocol: TLS algorithm: SunX509 store_type: JKS cipher_suites: [TLS_RSA_WITH_AES_256_CBC_SHA]
This file uses the certificates prepared with a self-signed CA (page 29).
Development clusters
client_encryption_options: enabled: true # If enabled and optional is set to true encrypted and unencrypted connections are handled. optional: false keystore: conf/keystore.node0 keystore_password: cassandra require_client_auth: true # Set trustore and truststore_password if require_client_auth is true truststore: conf/truststore.node0 truststore_password: cassandra protocol: TLS algorithm: SunX509 store_type: JKS cipher_suites: [TLS_RSA_WITH_AES_256_CBC_SHA]
This file uses the certificates prepared for development (page 28).
Set appropriate paths to the keystore and truststore files. Set the passwords tothe passwords set during keystore and truststore generation. If two-way certificateauthentication is required, set require_client_auth to true. Enabling two-waycertificate authentication allows tools to connect to a remote node. For local access torun cqlsh on a local node with SSL encryption, set require_client_auth to false.
Enabling client encryption encrypts all traffic on the native_transport_port(default: 9042). If both encrypted and unencrypted traffic is required, in thecassandra.yaml set native_transport_port_ssl for encrypted traffic (default:9142) and native_transport_port for traffic that is not encrypted to different ports.
DataStax Distribution of Apache Cassandra Page 41
Securing DDAC
Restart the database.
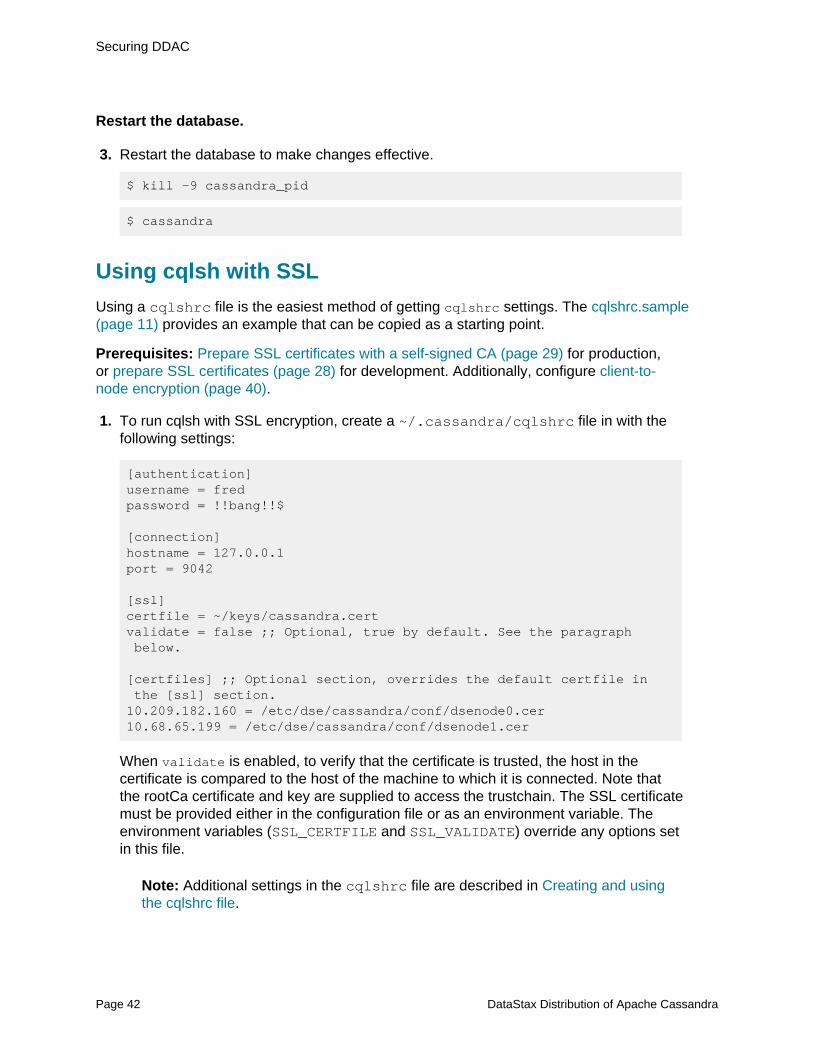
3. Restart the database to make changes effective.
$ kill -9 cassandra_pid
$ cassandra
Using cqlsh with SSL
Using a cqlshrc file is the easiest method of getting cqlshrc settings. The cqlshrc.sample(page 11) provides an example that can be copied as a starting point.
Prerequisites: Prepare SSL certificates with a self-signed CA (page 29) for production,or prepare SSL certificates (page 28) for development. Additionally, configure client-to-node encryption (page 40).
1. To run cqlsh with SSL encryption, create a ~/.cassandra/cqlshrc file in with thefollowing settings:
[authentication]username = fredpassword = !!bang!!$
[connection]hostname = 127.0.0.1port = 9042 [ssl]certfile = ~/keys/cassandra.certvalidate = false ;; Optional, true by default. See the paragraph below.
[certfiles] ;; Optional section, overrides the default certfile in the [ssl] section.10.209.182.160 = /etc/dse/cassandra/conf/dsenode0.cer 10.68.65.199 = /etc/dse/cassandra/conf/dsenode1.cer
When validate is enabled, to verify that the certificate is trusted, the host in thecertificate is compared to the host of the machine to which it is connected. Note thatthe rootCa certificate and key are supplied to access the trustchain. The SSL certificatemust be provided either in the configuration file or as an environment variable. Theenvironment variables (SSL_CERTFILE and SSL_VALIDATE) override any options setin this file.
Note: Additional settings in the cqlshrc file are described in Creating and usingthe cqlshrc file.
Page 42 DataStax Distribution of Apache Cassandra
Securing DDAC
An optional section, [certfiles], overrides the default certfile in the [ssl] section.The use of the same IP addresses in the [certfiles] section, as is used to generatethe dname of the certificates, is required for two-way SSL encryption. Each node musthave a line in the [certfiles] section for client-to-remote-node or node-to-node.Using certfiles] is more common for development clusters.
2. Start cqlsh with the --ssl option for cqlsh to local node encrypted connection:
$ install_location/bin/cqlsh --ssl
3. A username and password can also be supplied at cqlsh startup. This example providesthe username cassandra with password cassandra:
$ install_location/bin/cqlsh --ssl -u cassandra -p cassandra
Tip: CQLSH can read the username and password from the cqlshrc file atstart up.
4. For a remote node encrypted connection, start cqlsh with the --ssl option and an IPaddress:
$ install_location/bin/cqlsh --ssl 172.31.10.22
Using nodetool (JMX) with SSL encryption
Using nodetool with SSL requires some JMX setup. Changes to cassandra-env.sh (page11) are required, and a configuration file, ~/.cassandra/nodetool-ssl.properties, iscreated.
Prerequisites: Configure the following options before setting up nodetool to run with SSLand authentication:
• Prepare SSL certificates with a self-signed CA (page 29) for production, or prepareSSL certificates (page 28) for development. Additionally, configure client-to-nodeencryption (page 40)
• Enabling JMX authentication and authorization (page 21) if authentication andauthorization are required.
1. To run nodetool with SSL encryption, additional changes are required to cassandra-env.sh (page 11). Add the following settings to the file. Use the file path to the keystoreand truststore, and appropriate passwords for each file. Make these changes on allnodes in the cluster.
Production
JVM_OPTS="$JVM_OPTS -Dcom.sun.management.jmxremote.ssl=true"
DataStax Distribution of Apache Cassandra Page 43

Securing DDAC
JVM_OPTS="$JVM_OPTS -Dcom.sun.management.jmxremote.ssl.need.client.auth=true" JVM_OPTS="$JVM_OPTS -Dcom.sun.management.jmxremote.registry.ssl=true" #JVM_OPTS="$JVM_OPTS -Dcom.sun.management.jmxremote.ssl.enabled.protocols=<enabled-protocols>" #JVM_OPTS="$JVM_OPTS -Dcom.sun.management.jmxremote.ssl.enabled.cipher.suites=<enabled-cipher-suites>" JVM_OPTS="$JVM_OPTS -Djavax.net.ssl.keyStore=/usr/local/lib/cassandra/conf/server-keystore.jks" JVM_OPTS="$JVM_OPTS -Djavax.net.ssl.keyStorePassword=myKeyPass" JVM_OPTS="$JVM_OPTS -Djavax.net.ssl.trustStore=/usr/local/lib/cassandra/conf/server-truststore.jks" JVM_OPTS="$JVM_OPTS -Djavax.net.ssl.trustStorePassword=truststorePass"
Development
JVM_OPTS="$JVM_OPTS -Dcom.sun.management.jmxremote.ssl=true" JVM_OPTS="$JVM_OPTS -Dcom.sun.management.jmxremote.ssl.need.client.auth=true" JVM_OPTS="$JVM_OPTS -Dcom.sun.management.jmxremote.registry.ssl=true" #JVM_OPTS="$JVM_OPTS -Dcom.sun.management.jmxremote.ssl.enabled.protocols=<enabled-protocols>" #JVM_OPTS="$JVM_OPTS -Dcom.sun.management.jmxremote.ssl.enabled.cipher.suites=<enabled-cipher-suites>"
JVM_OPTS="$JVM_OPTS -Djavax.net.ssl.keyStore=keystore.node0" JVM_OPTS="$JVM_OPTS -Djavax.net.ssl.keyStorePassword=cassandra" JVM_OPTS="$JVM_OPTS -Djavax.net.ssl.trustStore=truststore.node0" JVM_OPTS="$JVM_OPTS -Djavax.net.ssl.trustStorePassword=cassandra"
Where the settings implement the following SSL options:
• (Required) Enable SSL for JMX by settingcom.sun.management.jmxremote.ssl to true
• Use a two-way certificate authentication by settingcom.sun.management.jmxremote.ssl.need.client.auth to true
• Create an RMI registry protected by SSL that is created and configured bythe out-of-the-box management agent when the Java VM is started by settingcom.sun.management.jmxremote.registry.ssl to true
• Enable client authentication over SSL to have full security by settingcom.sun.management.jmxremote.ssl.need.client.auth to true
• (Required) Set appropriate paths to the keystore and truststore files.
Page 44 DataStax Distribution of Apache Cassandra
Securing DDAC
• (Required) Set the passwords to the passwords set during keystore andtruststore generation.
2. Restart the database.
3. To run nodetool with SSL encryption, create a .cassandra/nodetool-ssl.properties file in your home or client program directory with the following settingson the same system that runs nodetool.
Production
-Dcom.sun.management.jmxremote.ssl=true-Dcom.sun.management.jmxremote.ssl.need.client.auth=true-Dcom.sun.management.jmxremote.registry.ssl=true -Djavax.net.ssl.keyStore=/usr/local/lib/cassandra/conf/server-keystore.jks-Djavax.net.ssl.keyStorePassword=myKeyPass-Djavax.net.ssl.trustStore=/usr/local/lib/cassandra/conf/server-truststore.jks-Djavax.net.ssl.trustStorePassword=truststorePass
Development
-Djavax.net.ssl.keyStore=keystore.node0-Djavax.net.ssl.keyStorePassword=cassandra-Djavax.net.ssl.trustStore=truststore.node0-Djavax.net.ssl.trustStorePassword=cassandra-Dcom.sun.management.jmxremote.ssl.need.client.auth=true-Dcom.sun.management.jmxremote.registry.ssl=true
4. Start nodetool with the --ssl option for encrypted connection for any nodetooloperation.
$ install_location/bin/nodetool -ssl info
5. Start nodetool with the --ssl option for encrypted connection and a username andpassword for authentication and authorization for any nodetool operation.
$ install_location/bin/nodetool -ssl -u cassandra -pw cassandra status
Using jconsole (JMX) with SSL encryption
Using jconsole with SSL requires the same JMX changes to cassandra-env.sh (page 11)as with nodetool. See using nodetool (JMX) with SSL encryption (page 43). You do not
DataStax Distribution of Apache Cassandra Page 45
Securing DDAC
need to create nodetool-ssl.properties, but you must use the same JVM keystoreand truststore options on the Jconsole command line.
Prerequisites: Prepare SSL certificates with a self-signed CA (page 29) for production,or prepare SSL certificates (page 28) for development. Additionally, configure client-to-node encryption (page 40).
1. Copy the keystore and truststore files created in the prerequisite to the system wherejconsole is launched. In this example, the files are server-keystore.jks and server-truststore.jks.
2. Run jconsole using the JVM options:
jconsole -J-Djavax.net.ssl.keyStore=server-keystore.jks -J-Djavax.net.ssl.keyStorePassword=myKeyPass -J-Djavax.net.ssl.trustStore=server-truststore.jks -J-Djavax.net.ssl.trustStorePassword=truststorePass
If no errors occur, jconsole launches a session with the node. If connecting toa remote node, enter the hostname and JMX port in Remote Process. If usingauthentication, enter the username and password.
Page 46 DataStax Distribution of Apache Cassandra


![DataStaxODBCdriverforApache ......[DataStax ODBC driver for Apache Cassandra and DataStax Enterprise with CQL connector 32-bit] Description=DataStax ODBC driver for Apache Cassandra](https://static.fdocuments.net/doc/165x107/5ec5d38556938a726220ac95/datastaxodbcdriverforapache-datastax-odbc-driver-for-apache-cassandra-and.jpg)
