Database lab manual
141
Faculty of Computer Science and Engineering Introduction to Database Lab CS-232L Ghulam Ishaq Khan Institute of Engineering Sciences and Technology, Pakistan SQL/MYSQL
-
Upload
feroz-haider -
Category
Education
-
view
180 -
download
9
Transcript of Database lab manual

Faculty
Faculty of Computer Science and Engineering
Introduction to Database Lab CS-232L
Ghulam Ishaq Khan Institute of Engineering
Sciences and Technology, Pakistan
SQL/MYSQL
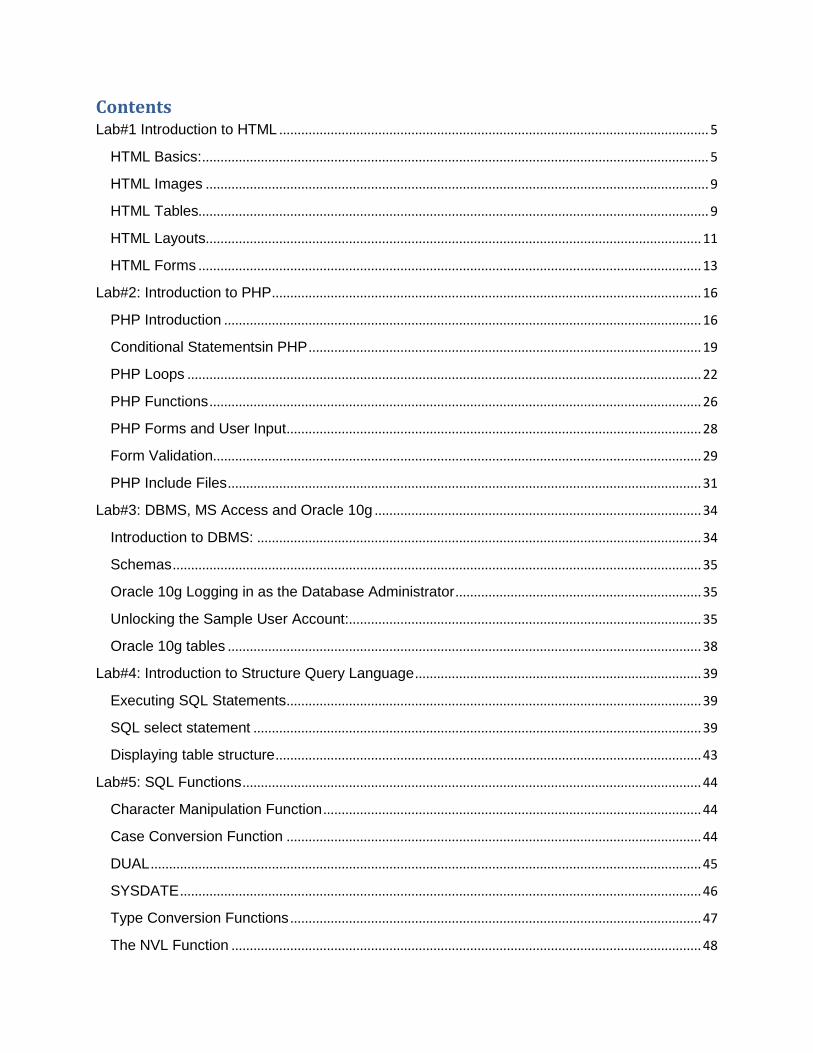
Contents Lab#1 Introduction to HTML ..................................................................................................................... 5
HTML Basics: .......................................................................................................................................... 5
HTML Images ......................................................................................................................................... 9
HTML Tables........................................................................................................................................... 9
HTML Layouts....................................................................................................................................... 11
HTML Forms ......................................................................................................................................... 13
Lab#2: Introduction to PHP ..................................................................................................................... 16
PHP Introduction .................................................................................................................................. 16
Conditional Statementsin PHP ........................................................................................................... 19
PHP Loops ............................................................................................................................................ 22
PHP Functions ...................................................................................................................................... 26
PHP Forms and User Input ................................................................................................................. 28
Form Validation..................................................................................................................................... 29
PHP Include Files ................................................................................................................................. 31
Lab#3: DBMS, MS Access and Oracle 10g ......................................................................................... 34
Introduction to DBMS: ......................................................................................................................... 34
Schemas ................................................................................................................................................ 35
Oracle 10g Logging in as the Database Administrator ................................................................... 35
Unlocking the Sample User Account:................................................................................................ 35
Oracle 10g tables ................................................................................................................................. 38
Lab#4: Introduction to Structure Query Language .............................................................................. 39
Executing SQL Statements ................................................................................................................. 39
SQL select statement .......................................................................................................................... 39
Displaying table structure .................................................................................................................... 43
Lab#5: SQL Functions ............................................................................................................................. 44
Character Manipulation Function ....................................................................................................... 44
Case Conversion Function ................................................................................................................. 44
DUAL ...................................................................................................................................................... 45
SYSDATE .............................................................................................................................................. 46
Type Conversion Functions ................................................................................................................ 47
The NVL Function ................................................................................................................................ 48

Decode Function .................................................................................................................................. 49
Lab#6: Creating and Managing Tables:................................................................................................ 52
Naming Rules ....................................................................................................................................... 52
Data Definition Language: .................................................................................................................. 52
Data Manipulation Language (DML) ................................................................................................. 56
SQL Constraints: .................................................................................................................................. 60
Lab#7: MYSQL ......................................................................................................................................... 68
MySQL Introduction: ............................................................................................................................ 68
Lab#8: Database connectivity with PHP ............................................................................................... 74
PHP Database ODBC ......................................................................................................................... 74
Connecting to an ODBC ...................................................................................................................... 74
Retrieving Records............................................................................................................................... 74
PHP MySQL Connect to a Database ................................................................................................ 77
PHP MySQL Create Database and Tables ...................................................................................... 78
PHP MySQL Insert Into ....................................................................................................................... 81
PHP MySQL Select .............................................................................................................................. 83
PHP MySQL The Where Clause ....................................................................................................... 85
PHP MySQL Order By Keyword ........................................................................................................ 86
PHP MySQL Update ............................................................................................................................ 87
Lab#9: Group functions and sub queries.............................................................................................. 90
Group Functions ................................................................................................................................... 91
Group By Clause .................................................................................................................................. 94
Having clause ....................................................................................................................................... 96
Order of evaluation of the clauses: .................................................................................................... 98
SUBQUERIES ...................................................................................................................................... 98
Using group functions in a subquery ............................................................................................... 101
Lab#10: SQL Statements ...................................................................................................................... 104
Database Transactions ..................................................................................................................... 104
Set Operators ...................................................................................................................................... 107
SQL View ............................................................................................................................................. 111
Lab#11: Introduction to PL/SQL ........................................................................................................... 115
General syntax to create PL/SQL: ................................................................................................... 115

Use of PL/SQL variables ................................................................................................................... 115
PL/SQL IF Statement ......................................................................................................................... 117
IF/THEN ELSE Statement ................................................................................................................ 117
Nested IF/THEN ELSE Statement ................................................................................................... 118
PL/SQL Loops..................................................................................................................................... 119
Lab#12: More on PL/SQL ..................................................................................................................... 123
Cursors ................................................................................................................................................ 123
Stored Procedures ............................................................................................................................. 130
PL/SQL Functions .............................................................................................................................. 131
Trigger .................................................................................................................................................. 136

Lab#1 Introduction to HTML
HTML Basics: Writing HTML Using Notepad or TextEdit
Save Your HTML. Run the HTML in Your Browser
HTML headings are defined with the <h1> to <h6> tags.
HTML paragraphs are defined with the <p> tag.
HTML documents are defined by HTML elements.
An HTML element is everything from the start tag to the end tag:
The start tag is often called the opening tag. The end tag is often called the closing tag.
Some HTML elements have empty content. Empty elements are closed in the start tag
Most HTML elements can have attributes
HTML Document Example
<!DOCTYPE html>
<html>
<body>
<p>This is my first paragraph.</p>
</body>
</html>
This example contains 3 HTML elements.
Above Example Explanation
The <p> element:
<p>This is my first paragraph.</p>. The <p> element defines a paragraph in the HTML
document. The element has a start tag <p> and an end tag </p>. The element content
is: This is my first paragraph.
The <body> element:

<body>
<p>This is my first paragraph.</p>
</body>
The <body> element defines the body of the HTML document. The element has a start
tag <body> and an end tag </body>. The element content is another HTML element (a
p element).
The <html> element:
<html>
<body>
<p>This is my first paragraph.</p>
</body>
</html>
The <html> element defines the whole HTML document. The element has a start tag
<html> and an end tag </html>. The element content is another HTML element (the
body element).
HTML Attributes
HTML elements can have attributes. Attributes provide additional information about
an element. Attributes are always specified in the start tag. Attributes come in
name/value pairs like: name="value"
Attribute Example
HTML links are defined with the <a> tag. The link address is specified in the href
attribute: e.g.
<a href="http://www.w3schools.com">This is a link</a>
Always Quote Attribute Values
Attribute values should always be enclosed in quotes.
Double style quotes are the most common, but single style quotes are also allowed.
In some rare situations, when the attribute value itself contains quotes, it is necessary to
use single quotes: name='John "ShotGun" Nelson'
HTML Headings
Headings are defined with the <h1> to <h6> tags.
<h1> defines the most important heading. <h6> defines the least important heading.
Example
<h1>This is a heading</h1>
<h2>This is a heading</h2>
<h3>This is a heading</h3>
HTML Lines
The <hr>tag creates a horizontal line in an HTML page.
The hr element can be used to separate content:
Example

<p>This is a paragraph</p>
<hr><p>This is a paragraph</p>
<hr><p>This is a paragraph</p>
HTML Comments
Comments can be inserted into the HTML code to make it more readable and
understandable. Comments are ignored by the browser and are not displayed.
Comments are written like this:
Example
<!-- This is a comment -->
Note: There is an exclamation point after the opening bracket, but not before the
closing bracket.
<html> defines an HTML document
<body> defines the documents body
<h1> to <h6> defines HTML headings
<hr> define a horizontal line
<!--> defines a comment
<p> defines a paragraph
<br> inserts a single line break
HTML Text Formatting Tags
Tag Description
<b> Defines bold text
<big> Defines big text
<em> Defines emphasized text
<i> Defines a part of text in an alternate voice or mood
<small> Defines small text
<strong> Defines strong text
<sub> Defines subscripted text
<sup> Defines superscripted text
HTML Link Syntax
The HTML code for a link is simple. It looks like this:
<a href="url">Link text</a>
The href attribute specifies the destination of a link.
Example
<a href="http://www.w3schools.com/">Visit W3Schools</a>

HTML Links - The name Attribute
The name attribute specifies the name of an anchor.
The name attribute is used to create a bookmark inside an HTML document.
Note: The upcoming HTML5 standard suggests using the id attribute instead of the
name attribute for specifying the name of an anchor. Using the id attribute actually
works also for HTML4 in all modern browsers.
Bookmarks are not displayed in any special way. They are invisible to the reader.
Example
A named anchor inside an HTML document:
<a name="tips">Useful Tips Section</a>
Create a link to the "Useful Tips Section" inside the same document:
<a href="#tips">Visit the Useful Tips Section</a>
Or, create a link to the "Useful Tips Section" from another page:
<a href="http://www.w3schools.com/html_links.htm#tips">
Visit the Useful Tips Section</a>
The HTML <title> Element
The <title> tag defines the title of the document.
The title element is required in all HTML/XHTML documents.
The title element:
defines a title in the browser toolbar
provides a title for the page when it is added to favorites
displays a title for the page in search-engine results
A simplified HTML document:
<!DOCTYPE html>
<html>
<head>
<title>Title of the document</title>
</head>
<body>
The content of the document......
</body>
</html>
HTML head Elements
Tag Description
<head> Defines information about the document
<title> Defines the title of a document
<base> Defines a default address or a default target for all links on a page
<link> Defines the relationship between a document and an external

resource
<meta> Defines metadata about an HTML document
<script> Defines a client-side script
<style> Defines style information for a document
HTML Images HTML Images - The <img> Tag and the Src Attribute
In HTML, images are defined with the <img> tag.
The <img> tag is empty, which means that it contains attributes only, and has no closing
tag. To display an image on a page, you need to use the src attribute. Src stands for
"source". The value of the src attribute is the URL of the image you want to display.
Syntax for defining an image:
<img src="url" alt="some_text">
The URL points to the location where the image is stored. An image named "boat.gif",
located in the "images" directory on "www.w3schools.com" has the URL:
http://www.w3schools.com/images/boat.gif. The browser displays the image where the
<img> tag occurs in the document. If you put an image tag between two paragraphs, the
browser shows the first paragraph, then the image, and then the second paragraph.
HTML Images - The Alt Attribute
The required alt attribute specifies an alternate text for an image, if the image cannot be
displayed. The value of the alt attribute is an author-defined text:
<img src="boat.gif" alt="Big Boat">
The alt attribute provides alternative information for an image if a user for some reason
cannot view it (because of slow connection, an error in the src attribute, or if the user
uses a screen reader).
HTML Images - Set Height and Width of an Image
The height and width attributes are used to specify the height and width of an image.
The attribute values are specified in pixels by default:
<img src="pulpit.jpg" alt="Pulpit rock" width="304" height="228">
HTML Tables Tables are defined with the <table> tag.
A table is divided into rows (with the <tr> tag), and each row is divided into data cells
(with the <td> tag). td stands for "table data," and holds the content of a data cell. A
<td> tag can contain text, links, images, lists, forms, other tables, etc.

Table Example
<table border="1">
<tr>
<td>row 1, cell 1</td>
<td>row 1, cell 2</td>
</tr>
<tr>
<td>row 2, cell 1</td>
<td>row 2, cell 2</td>
</tr>
</table>
How the HTML code above looks in a browser:
row 1, cell 1 row 1, cell 2
row 2, cell 1 row 2, cell 2
HTML Tables and the Border Attribute
If you do not specify a border attribute, the table will be displayed without borders.
Sometimes this can be useful, but most of the time, we want the borders to show.
To display a table with borders, specify the border attribute:
HTML Table Headers
Header information in a table are defined with the <th> tag.
All major browsers display the text in the <th> element as bold and centered.
<table border="1">
<tr>
<th>Header 1</th>
<th>Header 2</th>
</tr>
<tr>
<td>row 1, cell 1</td>
<td>row 1, cell 2</td>
</tr>
<tr>
<td>row 2, cell 1</td>
<td>row 2, cell 2</td>
</tr>
</table>
How the HTML code above looks in your browser:
Header 1 Header 2
row 1, cell 1 row 1, cell 2
row 2, cell 1 row 2, cell 2

HTML Table Tags
Tag Description
<table> Defines a table
<th> Defines a table header
<tr> Defines a table row
<td> Defines a table cell
<caption> Defines a table caption
<colgroup> Defines a group of columns in a table, for formatting
<col> Defines attribute values for one or more columns in a table
<thead> Groups the header content in a table
<tbody> Groups the body content in a table
<tfoot> Groups the footer content in a table
HTML Layouts Web page layout is very important to make your website look good.
Design your webpage layout very carefully.
Website Layouts
Most websites have put their content in multiple columns (formatted like a magazine or
newspaper).
Multiple columns are created by using <div> or <table> elements. CSS are used to
position elements, or to create backgrounds or colorful look for the pages.
Even though it is possible to create nice layouts with HTML tables, tables were
designed for presenting tabular data - NOT as a layout tool!.
HTML Layouts - Using Tables
A simple way of creating layouts is by using the HTML <table> tag.
Multiple columns are created by using <div> or <table> elements. CSS are used to
position elements, or to create backgrounds or colorful look for the pages.
Using tables is not the correct use of the <table> element. The purpose of the
<table> element is to display tabular data.
The following example uses a table with 3 rows and 2 columns - the first and last row
spans both columns using the colspan attribute:
Example
<!DOCTYPE html>
<html>
<body>

<table width="500" border="0">
<tr>
<td colspan="2" style="background-color:#FFA500;">
<h1>Main Title of Web Page</h1>
</td>
</tr>
<tr>
<td style="background-color:#FFD700;width:100px;text-align:top;">
<b>Menu</b><br>
HTML<br>
CSS<br>
JavaScript
</td>
<td style="background-color:#EEEEEE;height:200px;width:400px;text-align:top;">
Content goes here</td>
</tr>
<tr>
<td colspan="2" style="background-color:#FFA500;text-align:center;">
Copyright © W3Schools.com</td>
</tr>
</table>
</body>
</html>
The HTML code above will produce the following result:
Main Title of Web Page
Menu
HTML
CSS
JavaScript
Content goes here
Copyright © W3Schools.com

HTML Forms HTML forms are used to pass data to a server. A form can contain input elements like
text fields, checkboxes, radio-buttons, submit buttons and more. A form can also
contain select lists, textarea, fieldset, legend, and label elements.
The <form> tag is used to create an HTML form:
<form>
input elements
</form>
HTML Forms - The Input Element
The most important form element is the input element.
The input element is used to select user information.
An input element can vary in many ways, depending on the type attribute. An input
element can be of type text field, checkbox, password, radio button, submit button, and
more.
The most used input types are described below.
Text Fields
<input type="text">defines a one-line input field that a user can enter text into:
<form>
First name: <input type="text" name="firstname"><br>
Last name: <input type="text" name="lastname">
</form>
How the HTML code above looks in a browser:
First name:
Last name:
Note: The form itself is not visible. Also note that the default width of a text field is 20
characters.
Password Field
<input type="password">defines a password field:
<form>
Password: <input type="password" name="pwd"></form>
How the HTML code above looks in a browser:
Password:
Note: The characters in a password field are masked (shown as asterisks or circles).

Radio Buttons
<input type="radio">defines a radio button. Radio buttons let a user select ONLY ONE
of a limited number of choices:
<form>
<input type="radio" name="sex" value="male">Male<br>
<input type="radio" name="sex" value="female">Female
</form>
How the HTML code above looks in a browser:
Male
Female
Checkboxes
<input type="checkbox">defines a checkbox. Checkboxes let a user select ZERO or
MORE options of a limited number of choices.
<form>
<input type="checkbox" name="vehicle" value="Bike">I have a bike<br>
<input type="checkbox" name="vehicle" value="Car">I have a car
</form>
How the HTML code above looks in a browser:
I have a bike
I have a car
Submit Button
<input type="submit">defines a submit button.
A submit button is used to send form data to a server. The data is sent to the page
specified in the form's action attribute. The file defined in the action attribute usually
does something with the received input:
<form name="input" action="html_form_action.asp" method="get">
Username: <input type="text" name="user"><input type="submit"
value="Submit"></form>
How the HTML code above looks in a browser:
Username: Submit
If you type some characters in the text field above, and click the "Submit" button, the
browser will send your input to a page called "html_form_action.asp". The page will
show you the received input.

HTML Form Tags
Tag Description
<form> Defines an HTML form for user input
<input> Defines an input control
<textarea> Defines a multi-line text input control
<label> Defines a label for an input element
<fieldset> Defines a border around elements in a form
<legend> Defines a caption for a fieldset element
<select> Defines a select list (drop-down list)
<optgroup> Defines a group of related options in a select list
<option> Defines an option in a select list
<button> Defines a push button

Lab#2: Introduction to PHP
PHP Introduction PHP stands for PHP: Hypertext Preprocessor. It is a server-side scripting language, like
ASP. PHP scripts are executed on the server. It supports many databases (MySQL,
Informix, Oracle, Sybase, Solid, PostgreSQL, Generic ODBC, etc.). It is an open source
software. PHP is a powerful tool for making dynamic and interactive Web pages. It is
the widely-used, free, and efficient alternative to competitors such as Microsoft's ASP.
In this section you will learn about PHP, and how to execute scripts on your server.
PHP File
PHP files can contain text, HTML tags and scripts, PHP files are returned to the browser
as plain HTML, PHP files have a file extension of ".php", ".php3", or ".phtml"
Basic PHP Syntax
A PHP script always starts with <?php and ends with ?>. A PHP script can be placed
anywhere in the document. On servers with shorthand-support, you can start a PHP
script with <? and end with ?>. For maximum compatibility, we recommend that you use
the standard form (<?php) rather than the shorthand form. <?php ?>
A PHP file must have a .php extension. A PHP file normally contains HTML tags, and
some PHP scripting code. Below, we have an example of a simple PHP script that
sends the text "Hello World" back to the browser:
<html>
<body>
<?php
echo "Hello World";
?>
</body>
</html>
Each code line in PHP must end with a semicolon. The semicolon is a separator and is
used to distinguish one set of instructions from another.
There are two basic statements to output text with PHP: echo and print.
In the example above we have used the echo statement to output the text "Hello World".
Comments in PHP
In PHP, we use // to make a one-line comment or /* and */ to make a comment block:
<html>
<body>

<?php
//This is a comment
/*
This is
a comment
block
*/
?>
</body>
</html>
PHP Variables
Variables are "containers" for storing information. PHP variables are used to hold values
or expressions. A variable can have a short name, like x, or a more descriptive name,
like carName. Rules for PHP variable names: Variables in PHP starts with a $ sign,
followed by the name of the variable The variable name must begin with a letter or the
underscore character A variable name can only contain alpha-numeric characters and
underscores (A-z, 0-9, and _ ) A variable name should not contain spaces Variable
names are case sensitive (y and Y are two different variables)
Creating (Declaring) PHP Variables
PHP has no command for declaring a variable.
A variable is created the moment you first assign a value to it:
$myCar="Volvo";
After the execution of the statement above, the variable myCar will hold the value
Volvo.
Tip: If you want to create a variable without assigning it a value, then you assign it the
value of null.
Let's create a variable containing a string, and a variable containing a number:
<?php
$txt="Hello World!";
$x=16;
?>
Note: When you assign a text value to a variable, put quotes around the value.
PHP is a Loosely Typed Language
In PHP, a variable does not need to be declared before adding a value to it. In the
example above, notice that we did not have to tell PHP which data type the variable is.
PHP automatically converts the variable to the correct data type, depending on its

value. In a strongly typed programming language, you have to declare (define) the type
and name of the variable before using it.
Strings in PHP String variables are used for values that contain characters.
In this chapter we are going to look at the most common functions and operators used
to manipulate strings in PHP.
After we create a string we can manipulate it. A string can be used directly in a function
or it can be stored in a variable.
Below, the PHP script assigns the text "Hello World" to a string variable called $txt:
<?php
$txt="Hello World";
echo $txt;
?>
The output of the code above will be:
Hello World
Now, lets try to use some different functions and operators to manipulate the string.
The Concatenation Operator There is only one string operator in PHP. The concatenation operator (.) is used to put
two string values together.To concatenate two string variables together, use the
concatenation operator: <?php
$txt1="Hello World!";
$txt2="What a nice day!";
echo $txt1 . " " . $txt2;
?>
The output of the code above will be:
Hello World! What a nice day!
If we look at the code above you see that we used the concatenation operator two
times. This is because we had to insert a third string (a space character), to separate
the two strings.
The strlen() function The strlen() function is used to return the length of a string.
Let's find the length of a string:
<?php
echo strlen("Hello world!");
?>
The output of the code above will be:
12
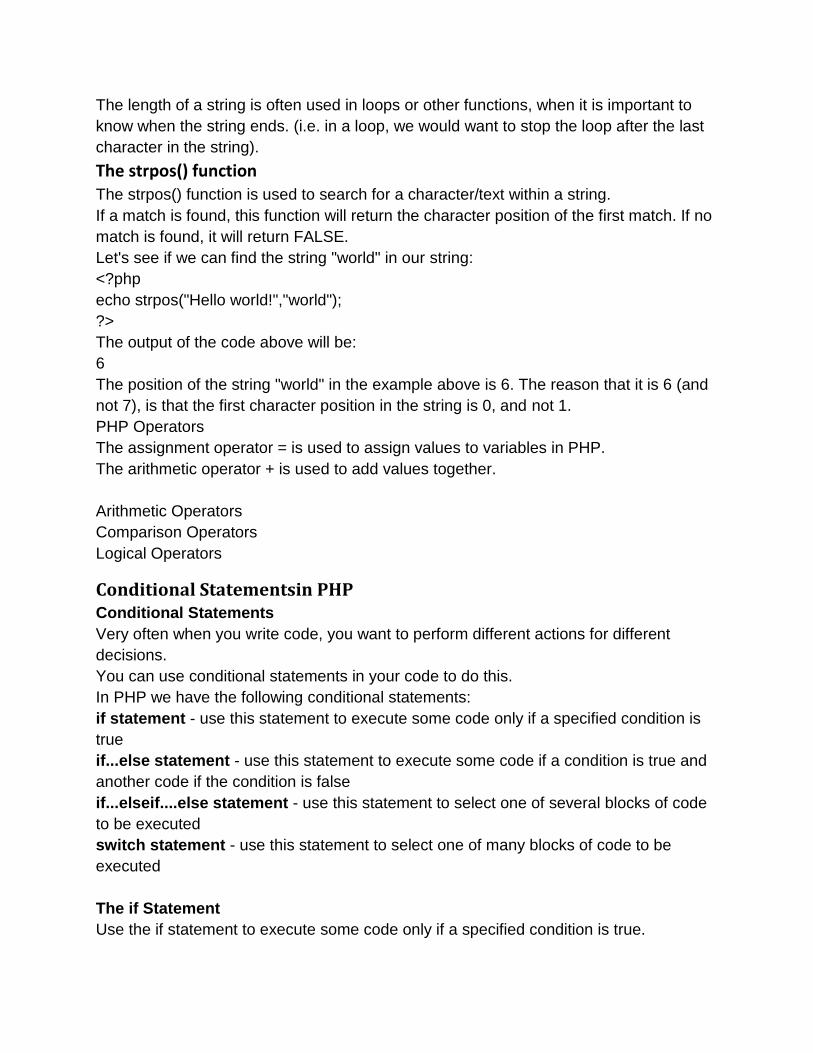
The length of a string is often used in loops or other functions, when it is important to
know when the string ends. (i.e. in a loop, we would want to stop the loop after the last
character in the string).
The strpos() function The strpos() function is used to search for a character/text within a string.
If a match is found, this function will return the character position of the first match. If no
match is found, it will return FALSE.
Let's see if we can find the string "world" in our string:
<?php
echo strpos("Hello world!","world");
?>
The output of the code above will be:
6
The position of the string "world" in the example above is 6. The reason that it is 6 (and
not 7), is that the first character position in the string is 0, and not 1.
PHP Operators
The assignment operator = is used to assign values to variables in PHP.
The arithmetic operator + is used to add values together.
Arithmetic Operators
Comparison Operators
Logical Operators
Conditional Statementsin PHP Conditional Statements
Very often when you write code, you want to perform different actions for different
decisions.
You can use conditional statements in your code to do this.
In PHP we have the following conditional statements:
if statement - use this statement to execute some code only if a specified condition is
true
if...else statement - use this statement to execute some code if a condition is true and
another code if the condition is false
if...elseif....else statement - use this statement to select one of several blocks of code
to be executed
switch statement - use this statement to select one of many blocks of code to be
executed
The if Statement
Use the if statement to execute some code only if a specified condition is true.

Syntax
if (condition) code to be executed if condition is true;
The following example will output "Have a nice weekend!" if the current day is Friday:
<html>
<body>
<?php
$d=date("D");
if ($d=="Fri") echo "Have a nice weekend!";
?>
</body>
</html>
Notice that there is no ..else.. in this syntax. The code is executed only if the specified
condition is true.
The if...else Statement
Use the if....else statement to execute some code if a condition is true and another code
if a condition is false.
Syntax
if (condition)
{
code to be executed if condition is true;
}
else
{
code to be executed if condition is false;
}
Example
The following example will output "Have a nice weekend!" if the current day is Friday,
otherwise it will output "Have a nice day!":
<html>
<body>
<?php
$d=date("D");
if ($d=="Fri")
{
echo "Have a nice weekend!";
}

else
{
echo "Have a nice day!";
}
?>
</body>
</html>
The if...elseif....else Statement
Use the if....elseif...else statement to select one of several blocks of code to be
executed.
Syntax
if (condition)
{
code to be executed if condition is true;
}
elseif (condition)
{
code to be executed if condition is true;
}
else
{
code to be executed if condition is false;
}
Example
The following example will output "Have a nice weekend!" if the current day is Friday,
and "Have a nice Sunday!" if the current day is Sunday. Otherwise it will output "Have a
nice day!":
<html>
<body>
<?php
$d=date("D");
if ($d=="Fri")
{
echo "Have a nice weekend!";
}
elseif ($d=="Sun")

{
echo "Have a nice Sunday!";
}
else
{
echo "Have a nice day!";
}
?>
</body>
</html>
PHP Loops Often when you write code, you want the same block of code to run over and over again
in a row. Instead of adding several almost equal lines in a script we can use loops to
perform a task like this.
In PHP, we have the following looping statements:
while - loops through a block of code while a specified condition is true
do...while - loops through a block of code once, and then repeats the loop as long as a
specified condition is true
for - loops through a block of code a specified number of times
foreach - loops through a block of code for each element in an array
The while Loop
The while loop executes a block of code while a condition is true.
Syntax
while (condition)
{
code to be executed;
}
Example
The example below defines a loop that starts with i=1. The loop will continue to run as
long as i is less than, or equal to 5. i will increase by 1 each time the loop runs:
<html>
<body>
<?php
$i=1;
while($i<=5)
{

echo "The number is " . $i . "<br />";
$i++;
}
?>
</body>
</html>
Output:
The number is 1
The number is 2
The number is 3
The number is 4
The number is 5
The do...while Statement
The do...while statement will always execute the block of code once, it will then check
the condition, and repeat the loop while the condition is true.
Syntax
do
{
code to be executed;
}
while (condition);
Example
The example below defines a loop that starts with i=1. It will then increment i with 1, and
write some output. Then the condition is checked, and the loop will continue to run as
long as i is less than, or equal to 5:
<html>
<body>
<?php
$i=1;
do
{
$i++;
echo "The number is " . $i . "<br />";
}
while ($i<=5);
?>
</body>
</html>
Output:
The number is 2
The number is 3
The number is 4
The number is 5
The number is 6
The for Loop The for loop is used when you know in advance how many times the script should run.
Syntax
for (init; condition; increment)
{
code to be executed;
}
Parameters:
init: Mostly used to set a counter (but can be any code to be executed once at the
beginning of the loop)
condition: Evaluated for each loop iteration. If it evaluates to TRUE, the loop continues.
If it evaluates to FALSE, the loop ends.
increment: Mostly used to increment a counter (but can be any code to be executed at
the end of the iteration)
Note: The init and increment parameters above can be empty or have multiple
expressions (separated by commas).
Example
The example below defines a loop that starts with i=1. The loop will continue to run as
long as the variable i is less than, or equal to 5. The variable i will increase by 1 each
time the loop runs:
<html>
<body>
<?php
for ($i=1; $i<=5; $i++)
{
echo "The number is " . $i . "<br />";
}
?>

</body>
</html>
Output:
The number is 1
The number is 2
The number is 3
The number is 4
The number is 5
The foreach Loop
The foreach loop is used to loop through arrays.
Syntax
foreach ($array as $value)
{
code to be executed;
}
For every loop iteration, the value of the current array element is assigned to $value
(and the array pointer is moved by one) - so on the next loop iteration, you'll be looking
at the next array value.
Example
The following example demonstrates a loop that will print the values of the given array:
<html>
<body>
<?php
$x=array("one","two","three");
foreach ($x as $value)
{
echo $value . "<br />";
}
?>
</body>
</html>
Output:
one
two
three

PHP Functions The real power of PHP comes from its functions. In PHP, there are more than 700 built-
in functions. In this section we will show you how to create your own functions. To keep
the script from being executed when the page loads, you can put it into a function.
A function will be executed by a call to the function. You may call a function from
anywhere within a page.
Create a PHP Function
A function will be executed by a call to the function.
Syntax
function functionName()
{
code to be executed;
}
PHP function guidelines:
Give the function a name that reflects what the function does
The function name can start with a letter or underscore (not a number)
Example
A simple function that writes my name when it is called:
<html>
<body>
<?php
function writeName()
{
echo "Kai Jim Refsnes";
}
echo "My name is ";
writeName();
?>
</body>
</html>
Output:
My name is Kai Jim Refsnes
PHP Functions - Adding parameters

To add more functionality to a function, we can add parameters. A parameter is just like
a variable.
Parameters are specified after the function name, inside the parentheses.
Example 1
The following example will write different first names, but equal last name:
<html>
<body>
<?php
function writeName($fname)
{
echo $fname . " Refsnes.<br />";
}
echo "My name is ";
writeName("Kai Jim");
echo "My sister's name is ";
writeName("Hege");
echo "My brother's name is ";
writeName("Stale");
?>
</body>
</html>
Output:
My name is Kai Jim Refsnes.
My sister's name is Hege Refsnes.
My brother's name is Stale Refsnes.
Example 2
The following function has two parameters:
<html>
<body>
<?php
function writeName($fname,$punctuation)
{
echo $fname . " Refsnes" . $punctuation . "<br />";
}
echo "My name is ";

writeName("Kai Jim",".");
echo "My sister's name is ";
writeName("Hege","!");
echo "My brother's name is ";
writeName("Ståle","?");
?>
</body>
</html>
Output:
My name is Kai Jim Refsnes.
My sister's name is Hege Refsnes!
My brother's name is Ståle Refsnes?
PHP Functions - Return values
To let a function return a value, use the return statement.
Example
<html>
<body>
<?php
function add($x,$y)
{
$total=$x+$y;
return $total;
}
echo "1 + 16 = " . add(1,16);
?>
</body>
</html>
Output:
1 + 16 = 17
PHP Forms and User Input The PHP $_GET and $_POST variables are used to retrieve information from forms,
like user input.
PHP Form Handling
The most important thing to notice when dealing with HTML forms and PHP is that any
form element in an HTML page will automatically be available to your PHP scripts.

Example
The example below contains an HTML form with two input fields and a submit button:
<html>
<body>
<form action="welcome.php" method="post">
Name: <input type="text" name="fname" />
Age: <input type="text" name="age" />
<input type="submit" />
</form>
</body>
</html>
When a user fills out the form above and clicks on the submit button, the form data is
sent to a PHP file, called "welcome.php":
"welcome.php" looks like this:
<html>
<body>
Welcome <?php echo $_POST["fname"]; ?>!<br />
You are <?php echo $_POST["age"]; ?> years old.
</body>
</html>
Output could be something like this:
Welcome John!
You are 28 years old.
Form Validation User input should be validated on the browser whenever possible (by client scripts).
Browser validation is faster and reduces the server load.
You should consider server validation if the user input will be inserted into a database. A
good way to validate a form on the server is to post the form to itself, instead of jumping
to a different page. The user will then get the error messages on the same page as the
form. This makes it easier to discover the error.
PHP $_GET Variable
In PHP, the predefined $_GET variable is used to collect values in a form with
method="get".
The $_GET Variable
The predefined $_GET variable is used to collect values in a form with method="get"
Information sent from a form with the GET method is visible to everyone (it will be
displayed in the browser's address bar) and has limits on the amount of information to
send.
Example
<form action="welcome.php" method="get">
Name: <input type="text" name="fname" />
Age: <input type="text" name="age" />
<input type="submit" />
</form>
When the user clicks the "Submit" button, the URL sent to the server could look
something like this:
http://www.w3schools.com/welcome.php?fname=Peter&age=37
The "welcome.php" file can now use the $_GET variable to collect form data (the names
of the form fields will automatically be the keys in the $_GET array):
Welcome <?php echo $_GET["fname"]; ?>.<br />
You are <?php echo $_GET["age"]; ?> years old!
When to use method="get"?
When using method="get" in HTML forms, all variable names and values are displayed
in the URL.
Note: This method should not be used when sending passwords or other sensitive
information!
However, because the variables are displayed in the URL, it is possible to bookmark the
page. This can be useful in some cases.
Note: The get method is not suitable for very large variable values. It should not be
used with values exceeding 2000 characters.
PHP $_POST Function
In PHP, the predefined $_POST variable is used to collect values in a form with
method="post".
The $_POST Variable
The predefined $_POST variable is used to collect values from a form sent with
method="post".
Information sent from a form with the POST method is invisible to others and has no
limits on the amount of information to send.

Note: However, there is an 8 Mb max size for the POST method, by default (can be
changed by setting the post_max_size in the php.ini file).
Example
<form action="welcome.php" method="post">
Name: <input type="text" name="fname" />
Age: <input type="text" name="age" />
<input type="submit" />
</form>
When the user clicks the "Submit" button, the URL will look like this:
http://www.w3schools.com/welcome.php
The "welcome.php" file can now use the $_POST variable to collect form data (the
names of the form fields will automatically be the keys in the $_POST array):
Welcome <?php echo $_POST["fname"]; ?>!<br />
You are <?php echo $_POST["age"]; ?> years old.
When to use method="post"?
Information sent from a form with the POST method is invisible to others and has no
limits on the amount of information to send.
However, because the variables are not displayed in the URL, it is not possible to
bookmark the page.
The PHP $_REQUEST Variable
The predefined $_REQUEST variable contains the contents of both $_GET, $_POST,
and $_COOKIE.
The $_REQUEST variable can be used to collect form data sent with both the GET and
POST methods.
Example
Welcome <?php echo $_REQUEST["fname"]; ?>!<br />
You are <?php echo $_REQUEST["age"]; ?> years old.
PHP Include Files PHP include and require Statements
In PHP, you can insert the content of one PHP file into another PHP file before the
server executes it.
The include and require statements are used to insert useful codes written in other files,
in the flow of execution.
Syntax

include 'filename';
or
require 'filename';
PHP include and require Statement
Basic Example
Assume that you have a standard header file, called "header.php". To include the
header file in a page, use include/require:
<html>
<body>
<?php include 'header.php'; ?>
<h1>Welcome to my home page!</h1>
<p>Some text.</p>
</body>
</html>
Example 2
Assume we have a standard menu file that should be used on all pages.
"menu.php":
echo '<a href="/default.php">Home</a>
<a href="/tutorials.php">Tutorials</a>
<a href="/references.php">References</a>
<a href="/examples.php">Examples</a>
<a href="/about.php">About Us</a>
<a href="/contact.php">Contact Us</a>';
All pages in the Web site should include this menu file. Here is how it can be done:
<html>
<body>
<div class="leftmenu">
<?php include 'menu.php'; ?>
</div>
<h1>Welcome to my home page.</h1>
<p>Some text.</p>
</body>
</html>
Example 3
Assume we have an include file with some variables defined ("vars.php"):
<?php
$color='red';

$car='BMW';
?>
Then the variables can be used in the calling file:
<html>
<body>
<h1>Welcome to my home page.</h1>
<?php include 'vars.php';
echo "I have a $color $car"; // I have a red BMW
?>
</body>
</html>

Lab#3: DBMS, MS Access and Oracle 10g
Introduction to DBMS: A Database Management System (DBMS) is a set of computer programs that controls
the creation, maintenance, and the use of the database of an organization and its end
users. It allows organizations to place control of organization-wide database
development in the hands of database administrators (DBAs) and other specialists
Introduction to Oracle. Oracle Database is the official name of the flagship relational
database management
system (RDBMS) software product released by Oracle Corporation. The product has
been renamed several times, and is also referred to as Oracle RDBMS or simply Oracle
Lawrence J. Ellison (Larry Ellison) has served as Oracle's CEO throughout the
company's history. Ellison served as the Chairman of the Board until his replacement by
Jeffrey O. Version numbering. Oracle products have historically followed their own
release-numbering and naming conventions. With the Oracle RDBMS 10g release,
Oracle Corporation started standardizing all current versions of its major products using
the "10g" label, although some sources continued to refer to Oracle Applications
Release 11i as Oracle 11i. Major database-related products and some of their versions
include:
• Oracle Application Server 10g (also known as "Oracle AS 10g"): a middleware
product;
• Oracle Applications Release 11i (aka Oracle e-Business Suite, Oracle Financials
or Oracle 11i): a suite of business applications;
• Oracle Developer Suite 10g (9.0.4);
• Oracle JDeveloper 10g: a Java integrated development environment;
Since version 7, Oracle's RDBMS release numbering has used the following codes:
• Oracle7: 7.0.16 — 7.3.4
• Oracle8 Database: 8.0.3 — 8.0.6
• Oracle8i Database Release 1: 8.1.5.0 — 8.1.5.1
• Oracle8i Database Release 2: 8.1.6.0 — 8.1.6.3
• Oracle8i Database Release 3: 8.1.7.0 — 8.1.7.4
• Oracle9i Database Release 1: 9.0.1.0 — 9.0.1.5 (patchset as of December 2003)
• Oracle9i Database Release 2: 9.2.0.1 — 9.2.0.8 (patchset as of April 2007)
• Oracle Database 10g Release 1: 10.1.0.2 — 10.1.0.5 (patchset as of February
2006)
• Oracle Database 10g Release 2: 10.2.0.1 — 10.2.0.4 (patchset as of April 2008)
• Oracle Database 11g Release 1: 11.1.0.6 — 11.1.0.7 (patchset as of September
2008)
• Oracle Database 11g Release 2: 11.2.0.1 (released 2009-09-01)
Schemas Oracle database conventions refer to defined groups of ownership (generally associated
with a "username") as schemas. Most Oracle database (Oracle 8i, 9i) installations
traditionally come with a default schema called SCOTT. After the installation process
has set up the sample tables, the user can log into the database with the username
scott and the password tiger. (The name of the SCOTT schema originated with Bruce
Scott, one of the first employees at Oracle (then Software Development Laboratories),
who had a cat named Tiger.) Oracle 10g also have the default schema called system
and HR.
Oracle 10g Logging in as the Database Administrator The first thing you need to do is to log in as the Oracle Database XE Administrator.
Follow these steps:
Open the Database Home Page login window:
On Windows, from the Start menu, select Programs (or All Programs), then Oracle
Database 10g Express Edition, and then Go To Database Home Page
At the Database Home Page login window, enter the following information:
Username: Enter system for the user name.
Password: Enter the password that was specified when Oracle Database XE was
installed.
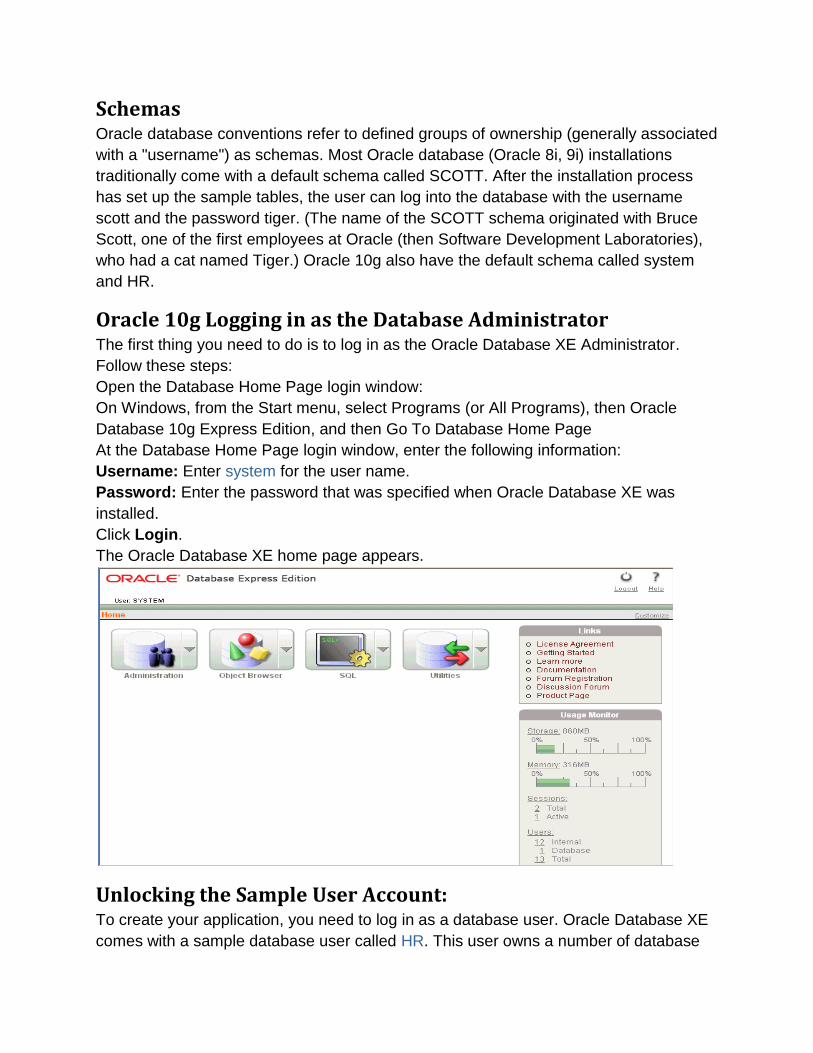
Click Login.
The Oracle Database XE home page appears.
Unlocking the Sample User Account: To create your application, you need to log in as a database user. Oracle Database XE
comes with a sample database user called HR. This user owns a number of database
tables in a sample schema that can be used to create applications for a fictional Human
Resources department. However, for security reasons, this user's account is locked.
You need to unlock this account before you can build a sample application.
To unlock the sample user account:
Make sure you are still logged on as the database administrator, as described in the
previous section.
Click the Administration icon, and then click Database Users.
Click the HR schema icon to display the user information for HR.
f
Under Manage Database User, enter the following settings:
Password and Confirm Password: Enter hr for the password.
Account Status: Select Unlocked.
Roles: Ensure that both CONNECT and RESOURCE are enabled.
Click Alter User.
Logging in as the Sample User Account
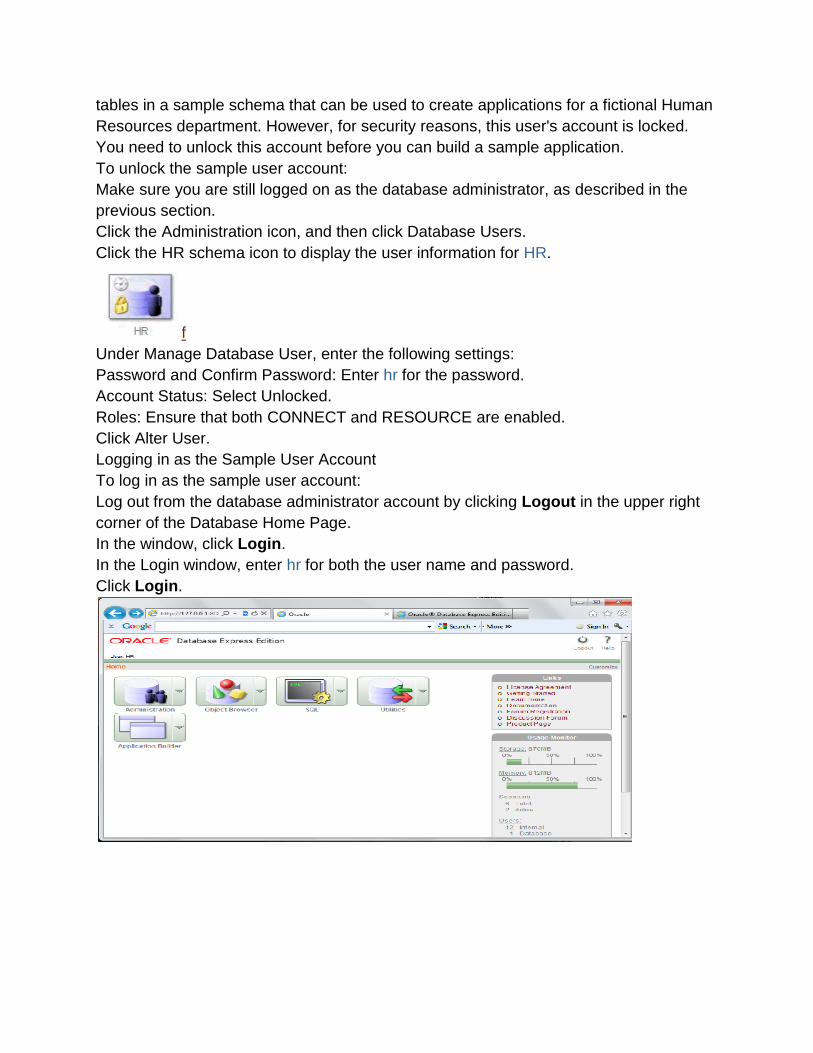
To log in as the sample user account:
Log out from the database administrator account by clicking Logout in the upper right
corner of the Database Home Page.
In the window, click Login.
In the Login window, enter hr for both the user name and password.
Click Login.

Now click on object browser (arrow pin) then click on Browse.
When you click on Tables the following screen will appear. Which shows the tables
include in HR Schema.
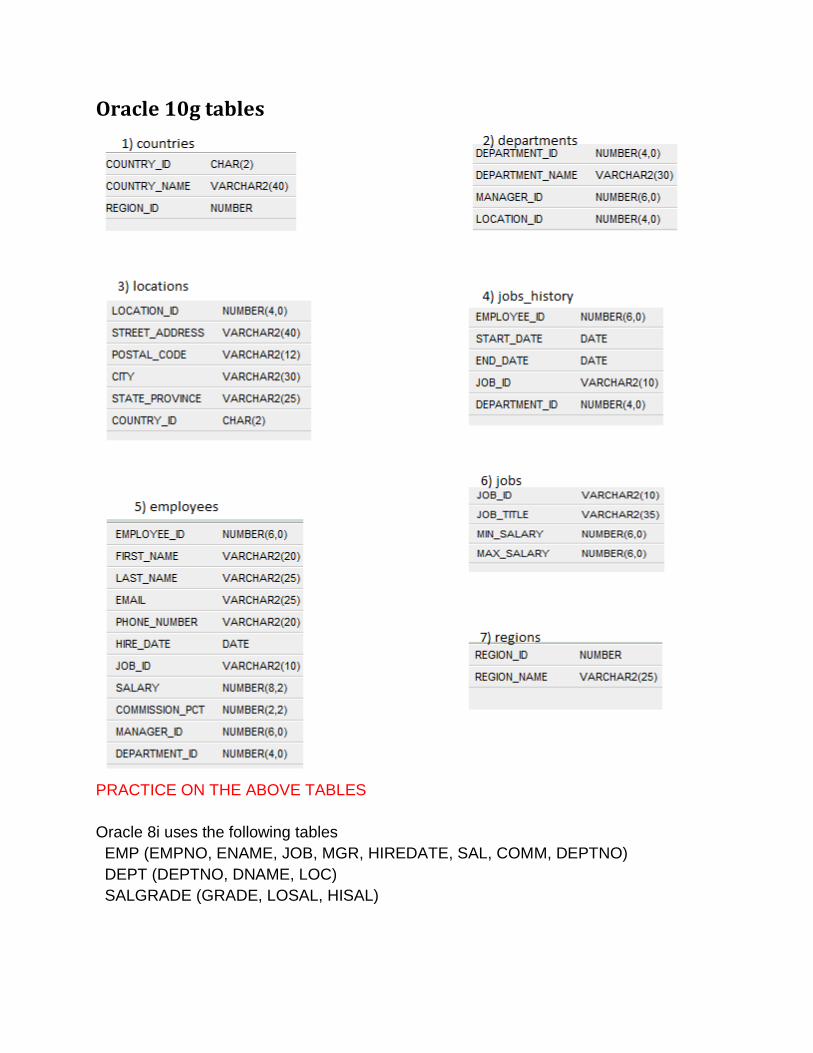
Oracle 10g tables
PRACTICE ON THE ABOVE TABLES
Oracle 8i uses the following tables
EMP (EMPNO, ENAME, JOB, MGR, HIREDATE, SAL, COMM, DEPTNO)
DEPT (DEPTNO, DNAME, LOC)
SALGRADE (GRADE, LOSAL, HISAL)

Lab#4: Introduction to Structure Query Language
SQL stands for Structure Query Language, SQL statements are not case sensitive
SQL statements can be on one or more lines. Keywords cannot be abbreviated or split
across lines Clauses are usually placed on separate lines, Tabs and indents are used to
enhance readability
Executing SQL Statements Place a semicolon (;) at the end of the last clause
Place a slash on the last line in the buffer
Place a slash at the SQL prompt
SQL select statement Selecting all Columns
You can display all columns of data in a table by following the SELECT keyword
with an asterisk (*).
e.g
SELECT * from employees;
Selecting specific Columns
You can use the SELECT statement to display specific columns of the table by
specifying the column names, separated by commas
e.g
SELECT department_id, department_name from deptartments;
Arithmetic expressions
• You may need to modify the way in which data is displayed, perform
calculation, or look at what-if scenarios. This is possible using arithmetic
expressions. An arithmetic expression may contain column names,
constant numeric values, and the arithmetic operators.
• List of arithmetic operators available in SQL are + Add, - Subtract, *
Multiply, / Divide
• You can use arithmetic operators in any clause of a SQL statement except
the FROM clause.
• If an arithmetic expression contains more than one operator then
multiplication and division are evaluated first.
• If operators within an expression are of same priority, then evaluation is
done from left to right.
• You can use parentheses to force the expression within parentheses to be
evaluated first.
e.g
SELECT first_name, last_name salary, 12*salary+100 from employees;

will give different result from
e.g
SELECT first_name, last_name salary, 12*(salary+100) from employees;
Null value
If a row lacks the data value for a particular column, that value is said to be null,
or to contain null. A null value is a value that is unavailable, unassigned,
unknown, or inapplicable. A null value is not the same as zero or a space. Zero is
a number and space is a character.
If any column value in an arithmetic expression is null, the result is null. For e.g,
if you attempt to perform division with zero, you get an error. However if you
divide a number by null, the result is a null or unknown.
Defining a column alias
Specify the alias after the column in the SELECT list using space as a separator.
By default alias heading appear in uppercase. If the alias contains spaces, special
character (such as # or $), or is case sensitive, enclose the alias in double
quotation marks (― ―).
e.g
SELECT first_name AS name, salary AS Monthly-Salary from employees;
SELECT first_name “Name”, salary*12 “Annual Salary” from employees;
Eliminating duplicate rows
To eliminate duplicate rows in the result, include the DISTINCT keyword in the
SELECT clause immediately after the SELECT keyword.
e.g
SELECT DISTINCT department_id from employees;
Limiting rows selected
You can restrict the rows returned from the query by using the WHERE clause. A
WHERE clause contains a condition that must be met and it directly follows the
FORM clause.
The WHERE clause can compare values in columns, literal values, arithmetic
expressions or functions. The WHERE clause consists of three elements:
Column name, Comparison operator, Column name, constant or list of values
e.g.
SELECT first_name, last_name, job_id, department_id from employees where
department_id=30;
Character strings and dates in the WHERE clause must be enclosed in single
quotation marks (‗ ‗) Number constants however should not. All character
searches are case sensitive.
The default date display is DD-MON-YY.
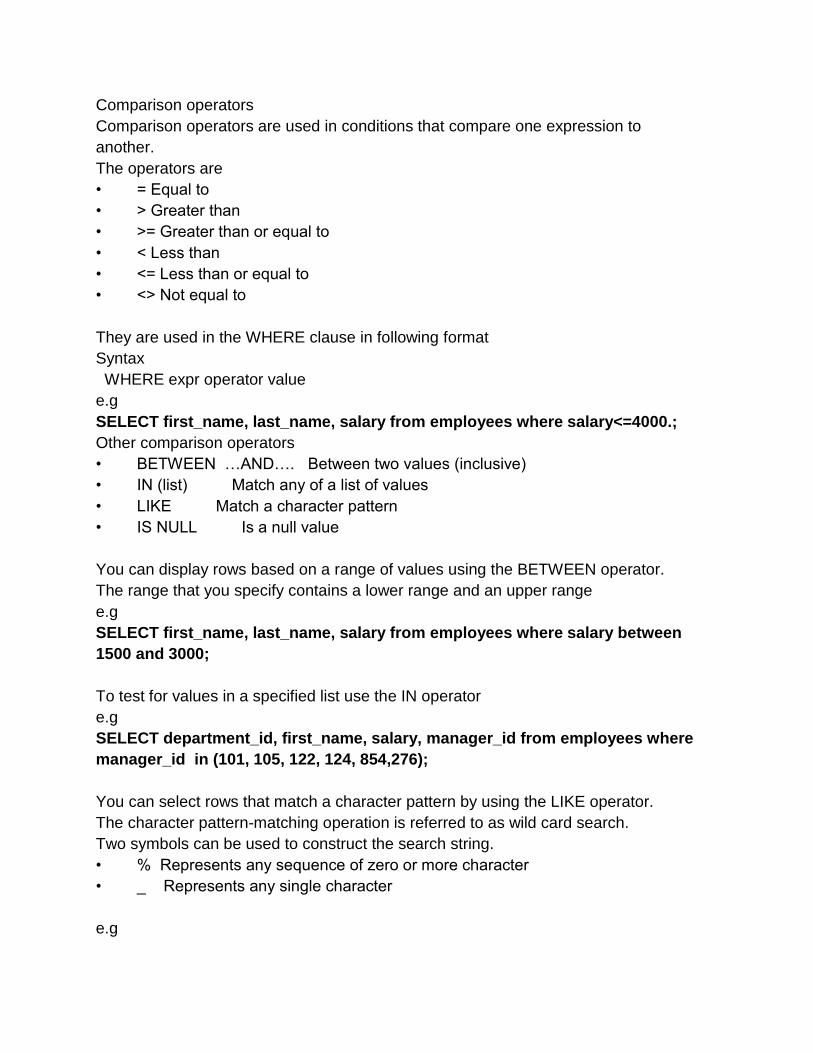
Comparison operators
Comparison operators are used in conditions that compare one expression to
another.
The operators are
• = Equal to
• > Greater than
• >= Greater than or equal to
• < Less than
• <= Less than or equal to
• <> Not equal to
They are used in the WHERE clause in following format
Syntax
WHERE expr operator value
e.g
SELECT first_name, last_name, salary from employees where salary<=4000.;
Other comparison operators
• BETWEEN …AND…. Between two values (inclusive)
• IN (list) Match any of a list of values
• LIKE Match a character pattern
• IS NULL Is a null value
You can display rows based on a range of values using the BETWEEN operator.
The range that you specify contains a lower range and an upper range
e.g
SELECT first_name, last_name, salary from employees where salary between
1500 and 3000;
To test for values in a specified list use the IN operator
e.g
SELECT department_id, first_name, salary, manager_id from employees where
manager_id in (101, 105, 122, 124, 854,276);
You can select rows that match a character pattern by using the LIKE operator.
The character pattern-matching operation is referred to as wild card search.
Two symbols can be used to construct the search string.
• % Represents any sequence of zero or more character
• _ Represents any single character
e.g

SELECT first_name, last_name from employees where first_name like „S%‟;
SELECT first_name, last_name from emp where first_name like „_A%‟;
Null operator
The IS NULL operator tests for values that are null. A null value means the value
is unavailable, unassigned, unknown or inapplicable. Therefore you cannot test
with (=) because a null value cannot be equal or unequal to any value.
e.g
SELECT first_name, manager_id from employees where manager_id is null;
Logical operators
A logical operator combines the result of two component conditions to produce a
single result based on them or to invert the result of a single condition. Three
logical operators are available in SQL.
• AND Returns TRUE if both component conditions are TRUE
• OR Returns TRUE if either component condition is TRUE
• NOT Returns TRUE if the following condition is FALSE
You can use several conditions in one WHERE clause using the AND and OR
operators.
e.g
SELECT empno,ename,job,sal from emp where sal>=1100 and job=‟CLERK‟;
SELECT empno,ename,job,sal from emp where sal>=1100 or job=‟CLERK‟;
SELECT ename,job from emp where job not in („CLERK‟, „MANAGER‟,
„ANALYST‟);
Rules of Precedence
Order Evaluated Operator
1 All comparison operators
2 NOT
3 AND
4 OR
Override rules of precedence by using parentheses
SELECT first_name,job_id,salarat from employees where job_id=‟ST_CLERK‟ or
Job_ID=‟ST_MAN‟ and sal>5000;
SELECT first_name, job_id, salary from employees where (job_id=‟ST_CLERK‟ or
job_id=‟ ST_MAN‟) and salary>8000;
Order by clause
The order by clause can be used to sort the rows. If it is used then it must be
placed in last. The default sort order is ascending. To reverse the order you
specify the keyword DESC after column name in ORDE BY clause.
e.g

SELECT first_name, last_name, department_id, job_id from employees ordere by
last_name;
SELECT first_name, last_name, department_id, job_id from employees ordere by
last_name desc;
You can use a column alias in the order by clause.
e.g
SELECT employee_id, first_name, salary*12 annsal from employee order by
annsal;
Sorting by multiple columns
You can sort query results by more than one column. The sort limit is the number
of columns in the given table.
e.g
SELECT first_name, department_id, salary from employees order by
department_id, salaray desc;
Displaying table structure In SQL* Plus you can display the structure of a table using the DESCRIBE
command.
e.g
DESCRIBE employees;
OR
DESC employees;
Note: for Exercises See attached page or will be provided by the Lab Instructor.

Lab#5: SQL Functions
Functions are a very powerful feature of SQL and can be used to do the following:
Perform calculation on data, Modify individual data items, Manipulate output for groups
of rows, Format dates and numbers for display, Convert column data types
Character Manipulation Function CONCAT, SUBSTR, LENGTH, INSTR, and LPAD are the five character
manipulation functions
• CONCAT: Joins values together
• SUBSTR: Extracts a string of determined length
• LENGTH: Shows the length of a string as a numeric value
• INSTR: Finds numeric position of a named character
• LPAD: Pads the character value right-justified
• RPAD: Pads the character value left-justified
E.g
To display employee first name and last name joined together, length of the
employee first name, and the numeric position of the letter A in the employee first
name, for all employees who are clerk.
SELECT first_name, CONCAT (first_name, last_name), LENGTH (first_name),
INSTR (first_name,‟A‟) FROM employees WHERE SUBSTR (job,3,7) = „CLERK‟;
Assignment
Display employee name and job joined together, length of the employee name, and the
numeric
position of the letter M in the employee name, for all employees who are manager.
Case Conversion Function LOWER, UPPER and INITCAP are the three case conversion functions
• LOWER: Converts mixed case or uppercase character string to lowercase
• UPPER: Converts mixed case or lowercase character string to uppercase
• INITCAP: Converts first letter of each word to uppercase and remaining letter

to lowercase
E.g
Display the employee number, name, and department number for employee Neena.
SELECT employee_id, first_name, department_id FROM employees
WHERE LOWER (first_name)=‟neena‟;
Assignment
Display the names of employees in employees table such that in first column they are
displayed in uppercase, in second column they are displayed in lower case and in the
third column only the first letter is capital and all other letters in lower case.
Number Function
DUAL The DUAL table is owned by the user SYS and can be accessed by all users. It
contains one column, DUMMY and one row with value X. The DUAL table is useful
when you want to return a value once only for instance the value of a constant,
pseudocolumn, or expression that is not derived from a table with user data.
E.g
SELECT ROUND (45.923,2), ROUND (45.923,0), ROUND (45.923,-1) from dual;
Calculate the remainder of the ratio of salary to commission for all employees
whose job_id is SA_MAN(sale manager).

SELECT first_name, salary, commission_pct, MOD (salaray, commission_pct)
FROM employees WHERE job_id=‟SA_MAN‟;
Assignment
Display the employee number, name, salary and salary increase by 15% expressed
as a whole number. Label the column New Salary.
SYSDATE SYSDATE is a date function that returns the current date and time. You can use
sysdate just as you would use any other column name. For example you can display
the current date by selecting sysdate from a table. It is customary to select sysdate
from a dummy table called dual.
Oracle Date Format
Oracle stored dates in an internal numeric format, representing the century, year,
month, day, hours, minutes, and seconds.
Date Functions
Date functions operate on Oracle dates. All date functions returns a value of DATE
datatypes except MONTHS_BETWEEN, which return a numeric value.

Type Conversion Functions In addition to Oracle datatypes, columns of tables in an Oracle database can be
defined using ANSI, DB2, and SQL/DS datatypes. However, the oracle Server internally
converts such datatypes to Oracle datatypes. In some cases, Oracle server allows data
of one datatypes where it expects data of a different datatype. This is allowed when
Oracle server can automatically convert the data to the expected datatypes. This
datatypes conversion can be done implicitly by Oracle server or explicitly by the user.
Explicit datatypes conversion are done by using the conversion functions. Conversion
functions convert a value from one datatype to another. Generally the form of the
function names follows the convention datatype TO datatyps. The first datatype is the
input datatype and the last datatype is the output.
Implicit Datatypes Conversion
Explicit Datatypes Conversion
SQL provides three functions to convert a value from one datatype to another.
The format model must be enclosed in single quotation marks and is case sensitive.

E.g
To display the name and hire dates as this format 17 November 1981 for all the
employees
SELECT first_name, TO_CHAR (sysdate,‟fmDD Month YYYY‟) hiredate FROM
employees;
The NVL Function To convert a null value to an actual value we use the NVL function.
Syntax
NVL (Source_expr1, To_expr2)
Where:
Expr1 is the source value or expression that may contain null
Expr2 is the target value for converting
You can use the NVL function to convert any datatype but return value is always the
same as the datatype of expr1.
E.G
To calculate the annual compensation of all employees, you need to multiply the
monthly
salary by 12 and then add the commission to it. But here the salary will be calculated
only
for those employees who earn a commission. If any column value is an expression is
null,
the result is null.
So to calculate values for all employees, you must convert the null value to a number
before applying the arithmetic operator.
SELECT first_name, salary, commission_pct, (salary*12)+NVL(commission_pct,0)
FROM employees;
Assignment
Create a query that will display the employee name and commission amount. If the
employee does not earn commission put 99 label the column COMM.

Decode Function The DECODE function decodes an expression in a way similar to the IF-THEN-ELSE
logic used in various languages. The DECODE function decodes expression
after comparing it to each search value. If the expression is the same as search, result
is returned. If the default value is omitted a null value is returned where a search
value does not match any of the result values.
E.g
SELECT job,sal,
DECODE (job_id, 'IT_PROG', SAL*1.1, 'SA_CLERK', SAL*1.15, 'ST_MAN',
SAL*1.20, SAL) REVISED_SALARY FROM employees;
JOIN
When data from more than one table in the database is required, a join condition is
used. Rows in one table can be joined to rows in another table according to common
values existing in corresponding columns, that is, usually primary and foreign key
columns. For displaying data from two or more related tables. Write a simple join
condition in the WHERE clause.
Syntax:
SELECT table1.column, table2.column FROM table1, table2
WHERE table1.column1=table2.column2;
Cartesian Product
When a join condition is invalid or omitted completely, the result is a Cartesian
product in which all combinations of rows will be displayed. All rows in the first
table are joined to all rows in the second table.
A Cartesian product tends to generate a large number of rows, and its result is rarely
useful. You should always include a valid join condition in a WHERE clause, unless
you have a specific need to combine all rows from all tables.
E.g
To displays employee name and department name from EMPLOYEES and
DEPTARTMETNS table we will use cartesian product. Since no WHERE clause has
been specified so all rows from EMP table are joined with all rows in the DEPT table,
there by generating 2889 rows in the
output.
SELECT first_name, department_name FROM employees, deptartments;
Types of Joins
• Equijoin
• Non-equijoin
• Outer join

• Self join
What is Equijoin?
To determine the name of an employee‘s department, you compare the value in the
Department_id column in the EMPLOYEES table with the DEPARTMENT_ID values in
the DEPARTMENTS table. The relationship between the EMP and DEPT tables is an
equijoin that is, values in the DEPARTMENT_ID column on both tables must be equal.
Frequently this type of join involves primary and foreign key complements.
E.g
SELECT employees.employee_id, employees.first_name,
employees.department_id, departments.department_id, departments.location_id
FROM employees, departments
WHERE employee.department_id=departments.department_id;
The SELECT clause specifies the column names to retrieve employee name, employee
number, and department number, which are column in the EMP table department
number, department name, and location, which are column in the dept table
The FORM clause specifies the two tables that the database must access EMP table
and DEPT table
The WHERE clause specifies how the tables are to be joined
EMPLOYEES.DEPARTMENT_ID=DEPARTMENTS.DEPARTMENT_ID
Because the DEPARTMENT_ID column is common to both tables. In addition to the
join, you may have criteria for you WHERE clause.
Assignment
Create a unique listing of all employees (only name) that are in department 30. Include
the location of department 30 in the output.
Write a query to display the employee name, department name, and location of
all employees who earn a commission.
Non-Equijoins
The relationship between the EMPLOYEES table and the JOBS table is a non-equijoin
meaning that no column in the EMPLOYEES table corresponds directly to a column
in the JOBS table. The relationship between the two tables is that the SALARY Column
in the EMPLOYEES table is between the MIN_SALARY and MAX_SALARY column of
the JOBS table. The relationship is obtained using an operator other than equal (=).
E.g
SELECT employees.first_name, employees.salary, jobs.job_title
FROM employees, jobs WHERE employees.salary BETWEEN jobs.min_salary
AND jobs.max_salary;

Outer Joins
If a row does not satisfy a join condition the row will not appear in the query result.
For example in the equijoin condition of EMP and DEPT tables, department
OPERATIONS does not appear because no one works in that department.
The missing rows(s) can be returned if an outer join operator is used in the join
condition. The operator is a plus sign enclosed in parentheses (+), and it is placed on
the ―side‖ of the join that is deficient in information. This operator has the effect of
creating one or more null rows, to which one or more rows from the nondeficient
table can be joined.
Note:
The outer join operator can appear on only one side of the expression, the side that
has information missing. It returns those rows from one table that has no direct match
in the other table.
A condition involving an outer join cannot use the IN operator to be linked to another
condition by the OR operator.
E.g
In the equijoin condition of EMPLOYEES and DEPARTMENTS tables, department
OPERATIONS does not appear because no one works in that department. So we will
have to do outer join
SELECT employees.first_name, departments.department_id,
departments.department_name
FROM employees, department WHERE employees.department_id (+) =
departments.department_id;
Self Join
Sometimes you need to join a table to itself. To find the name of each employee's
manager, you need to join the EMPLOYEES table to itself, or perform a self join.
E.g
SELECT worker.first_name ||' works for '|| manager.first_name
FROM employees worker, employees manager WHERE worker.manager_id =
manager.employee_id;
The above example joins the EMP table to itself. To simulate two tables in the FROM
clause, there are two aliases, namely WORKER and MANAGER for the same table,
EMPLOYEES. Here the WHERE clause contains the join that means " where a worker'
manager
number matches the employee number for the manager".
Note: for Exercises See attached page or will be provided by the Lab Instructor.

Lab#6: Creating and Managing Tables:
Naming Rules Name database tables and columns according to the standard rules for naming any
Oracle database object: Table names and column names must begin with a letter and
can be 1-30 character long. Names must contain only the characters A-Z, a-z, 0-9, _
(underscore), $ and # (legal characters, but their use is discouraged). Names must not
duplicate the name of another object owned by the same Oracle Server user. Names
must not be an Oracle Server reserved word. Naming Guidelines Use descriptive
names for tables and other database objects. Name the same entity consistently in
different tables. For example, the department number in column is called DEPTNO in
both the EMP table and the DEPT table. Note: Names are case insensitive. For
example, EMP is treated as the same name as eMP or eMp.
Data Definition Language: The CREATE TABLE Statement , The ALTER TABLE Statement
The CREATE TABLE Statement Create tables to store data by executing the SQL CREATE TABLE statement. This
statement is one of the data definition language (DDL) statements. DDL statements are
a subset of SQL statements used to create, modify, or remove Oracle database
structures.
These statements have an immediate effect on the database, and they also record
information in the data dictionary.
To create a table, a user must have the CREATE TABLE privilege and a storage area in
which to crate objects.


The ALTER TABLE Statement
After you create your tables, you may need to change the table structure because you
omitted a column or your column definition needs to be changed. You can do this by
using the ALTER TABLE statement.
You can add columns to a table by using the ALTER TABLE statement with the ADD
clause.
Adding a Column
Guidelines for adding a column
You can add or modify columns, but you cannot drop them from a table.
You cannot specify where the column is to appear. The new column becomes the last
column
The example above adds a column named job to the dept1 table. The JOB column
becomes the last column in the table.
Note: If a table already contains rows when a column is added, then the new column is
initially null for all the rows.

Modifying a Column
You can modify a column definition by using the ALTER TABLE statement with the
MODIFY clause. Column modification can include changes to a column‘s datatype, size,
and the default value
Guidelines
Increases the width or precision of a numeric column. Decreases the width of a column
if the columns only null values or if the table has no rows Change the datatype if the
column contains null values. Convert a CHAR column to the VARCHAR1 datatype or
convert a VARCHAR2 column to the CHAR datatypes if the column contains null values
or if you do not change the size. A change to the default value of a column affects only
subsequent insertions to the table. E.g
Renaming a Table
Assignments

3. Modify the EMPLOYEE table to allow for longer employee last names (50).
4. Rename the EMPLOYEE table to EMPLOYEE1
Data Manipulation Language (DML) Data manipulation language is a core part of SQL. When you want to add, update, or
delete data in the database, you execute a DML statement. A collection of DML
statements that form a logical unit work is called a transaction.
Consider a banking database. When a bank customer transfers money from a saving
account to a checking account, the transaction might consists of three separate
operations: decrease savings account, increase the checking account, and record the
transaction in the transaction journal. The Oracle Server must guarantee that all three
SQL statements are performed to maintain the account in proper balance. When
something prevents one of the statements in the transaction from executing, the other
statements of the transaction must be done.
Adding a New Row to a Table

Because you can insert a new row that contains values for each column, the column list
is not required in the INSERT clause. However if you do not use the column list, the
values must be listed according to the default order of the columns in the table.
Methods for Inserting Null Values
Be sure that the targeted column allows null values by verifying Null? status from the
SQL DESCRIBE command.
Inserting Special Values
Check you table by using select command
The above example records the information for employee Green in the EMP table. It
supplies the current date and time in the HIREDATE column. It uses the SYSDATE
function for current date and time.

Inserting Specific Date Values
The format DD-MM-YY is usually used to insert a date value. With this format, recall
that the century defaults to the current century. Because the date also contains time
information, the default time is midnight (00:00:00).
If a date is required to be entered in a format other than the default (for example,
another century) and/or a specific time is required, use the TO_DATE function.
The Update Statement
The UPDATE statement is used to modify the data in a table.
Syntax
Update one Column in a Row
We want to add a first name to the person with a last name of "Rasmussen":
Update several Columns in a Row
We want to change the address and add the name of the city:
The DELETE Statement
The DELETE statement is used to delete rows in a table.

Syntax
Delete a Row
"Nina Rasmussen" is going to be deleted:
Delete All Rows
It is possible to delete all rows in a table without deleting the table. This means that
the table structure, attributes, and indexes will be intact:
Dropping a Table
The DROP TABLE statement removes the definition of an Oracle table. When you drop
a table, the database loses all the data in the table and all the indexes associated with
it.
Syntax:
Truncating a Table
It is used to remove all rows from a table and to release the storage space used by that
table.
Syntax:

SQL Constraints:


Note: for Exercises See attached page or will be provided by the Lab Instructor.

Lab#7: MYSQL
MySQL Introduction: MySQL is a database server, MySQL is ideal for both small and large applications
MySQL supports standard SQL, MySQL compiles on a number of platforms, MySQL is
free to download and use.
Starting MySQL Command-Line Interface
MySQL is preinstalled on our virtual machine and automatically starts when you boot
the VM. Once you log in to the VM, you can start the MySQL command-line interface by
typing mysql:
cs144@cs144:~$ mysql
Then you should receive the following prompt
mysql>
and be inside the MySQL command-line interface. All commands in this tutorial should
be issued inside the MySQL command-line unless noted otherwise.
Choosing a Databases in MySQL
MySQL allows users to create multiple databases, so that a single MySQL server can
host databases for many independent applications. Before you start issuing SQL
commands to mysql, you first have to select the database that you will be using. In
order to see what databases currently exist, run
SHOW DATABASES;
You will see an output like
+--------------------+
| Database |
+--------------------+
| information_schema |
| CS144 |
| TEST |
+--------------------+
information_schema is a database that MySQL creates automatically and uses to
maintain some internal statistics on datbases and tables. The other two databases,
CS144 and TEST, are what we created for the project (note database names are case-
sensitive in MySQL). This two database setup mimics common development
environments in the real world. The CS144 database is your "production" database,
meant for use in the final versions of your code. The TEST database is for any
experimentation and for use during development and debugging. Select the TEST
database for the rest of this tutorial by issuing the command
USE TEST;

It is also possible to specify a database as a command line parameter to the mysql
command:
cs144@cs144:~$ mysql TEST
Creating a Table
Once you select a database, you can execute any SQL command. For example, you
can create a table using the CREATE TABLE command:
CREATE TABLE <tableName> (
<list of attributes and their types> );
Note that all reserved keywords (like CREATE and TABLE) are case-insensitive and
identifiers (like table names and attribute names) are case-sensitive in MySQL by
default. That is, a table named STUDENT is different from the student table.
You may enter a command on one line or on several lines. If your command runs over
several lines, you will be prompted with " -> " until you type the semicolon that ends any
command. An example table-creation command is:
CREATE TABLE tbl(a int, b char(20));
This command creates a table named tbl with two attributes. The first, named a, is an
integer, and the second, named b, is a character string of length (up to) 20.
When you create a table, you can declare a (set of) attribute(s) to be the primary key
like:
CREATE TABLE <tableName> (..., a <type> PRIMARY KEY, b, ...);
or
CREATE TABLE <tableName> (<attrs and their types>, PRIMARY KEY(a,b,c));
Inserting and Retrieving Tuples
Having created a table, we can insert tuples into it. The simplest way to insert is with the
INSERT command:
INSERT INTO <tableName> VALUES( <list of values for attributes, in order> );
For instance, we can insert the tuple (10, 'foobar') into relation tbl by
INSERT INTO tbl VALUES(10, 'foobar');
Once tuples are inserted, we can see the tuples in a relation with the command:
SELECT * FROM <tableName>;
For instance, after the above create and insert statements, the command
SELECT * FROM tbl;
produces the result
+------+--------+
| a | b |
+------+--------+
| 10 | foobar |
+------+--------+

Bulk Loading Data
Instead of inserting tuples one at a time, it is possible to create a file that contains all
tuples that you want to load in batch. The command for bulking loading tuples from a file
is the following:
LOAD DATA LOCAL INFILE <dataFile> INTO TABLE <tableName>;
where <dataFile> is the name of the file that contains the tuples. Each line in the data
file corresponds to one tuple and columns are separated by a tab character (\t). You can
specify a NULL value in the data file using \N.
For example, the following data file
1 first
2 second
3 \N
will insert three tuples, (1, 'first'), (2, 'second'), and (3, NULL) to a table. If you want to
use, say, commas to separate columns, not tabs, add FIELDS TERMINATED BY ',' to
the LOAD command as follows:
LOAD DATA LOCAL INFILE <dataFile> INTO TABLE <tableName>
FIELDS TERMINATED BY ',';
If some columns in the data file is enclosed with, say, double quotes, you need to add
OPTIONALLY ENCLOED BY '"' as well:
LOAD DATA LOCAL INFILE <dataFile> INTO TABLE <tableName>
FIELDS TERMINATED BY ',' OPTIONALLY ENCLOSED BY '"';
Notes on CR/LF issue: If your host OS is Windows, you need to pay particular
attention to how each line of a text file ends. By convention, Windows uses a pair of CR
(carriage return) and LF (line feed) characters to terminate lines. On the other hand,
Unix (including Linux and Mac OS X) use only a LF character. Therefore, problems
arise when you are feeding a text file generated from a Windows program to a program
running in Unix (such as mysql in Ubuntu). Since the end of the line of the input file is
different from what the tools expect, you may encounter unexpected behavior from
these tools. If you encounter this problem, you may want to run dos2unix command
from Ubuntu on your Windows-generated text file. This command converts CR and LF
at the end of each line in the input file to just LF. Type dos2unix --help to learn how to
use this command.
Getting Rid of Your Tables
To remove a table from your database, execute
DROP TABLE <tableName>;
We suggest you execute
DROP TABLE tbl;
after trying out the sequence of commands in this tutorial to avoid leaving a lot of
garbage tables around.

Getting Information About Your TABLES
You can get the set of all tables within the current database by the following command:
SHOW TABLES;
Once you know the list of tables, it is also possible to learn more about the table by
issuing the command:
DESCRIBE <tableName>;
Executing SQL From a File
Instead of typing and running SQL commands at a terminal, it is often more convenient
to type the SQL command(s) into a file and cause the file to be executed.
To run the commands in foo.sql (in the current working directory), type:
SOURCE foo.sql;
in mysql. Files like foo.sql that have SQL commands to be executed are often referred
to as a (batch) script file. You can also execute the script file directly from the Unix shell
by redirecting the input to mysql like the following:
cs144@cs144:~$ mysql TEST < foo.sql
Again, pay attention to the CR/LF issue if your host OS is windows and if you create
your SQL batch script file from Windows. Run dos2unix on the file if necessary.
Recording Your MySQL Session In a File
mysql provides the command TEE to save the queries that you executed and their
results to a file. At the mysql> prompt, you say:
TEE foo.txt;
and a file called foo.txt will appear in your current directory and will record all user input
and system output, until you exit mysql or type:
NOTEE;
Note that if the file foo.txt existed previously, new output will be appended to the file.
Quitting mysql
To leave mysql, type
QUIT;
MySQL Users and Privileges
By default, when you run mysql, you connect to MySQL as a user with the same name
of your Unix account: cs144. It is also possible to connect to MySQL as a different user
by specifying the -u option:
cs144@cs144:~$ mysql <database> -u <username> -p
Here, <username> should be replaced with the username that you want to use, and the
option -p asks mysql to prompt for the password of the user. So far in this tutorial, we
haven't had to use the -p option because the default user cs144 has empty password.

In our VM, we created another user root with password password. For example, if you
run
cs144@cs144:~$ mysql TEST -u root -p
mysql will ask for a password, for which you have to type "password" (without quotes).
After successful login, you are now connected to the TEST database as the user root.
The user root is the "superuser" or the "database administrator" of our MySQL
installation and has full access to all databases and tables, including the ability to create
new users, change user privileges, and so on. Because the root user has unrestricted
access, for security purposes, it is best to connect to MySQL as root only when you
need to perform one of these administrative tasks. For your project work, the default
user account cs144 (no password) will be sufficeint, which has full access to the CS144
and TEST databases but nothing else.
If you are logged in to MySQL as the root user, you can create a new MySQL user with
the CREATE USER command:
CREATE USER <user> IDENTIFIED BY '<password>';
where <user> is the name of the new user and <password> is its password. To create a
user with an empty password, you can simply type CREATE USER <user>; skipping the
IDENTIFIED BY part. All user data is stored in the user table in the mysql database,
issuing the following query as root will give you the list of current users:
SELECT * FROM mysql.user;
Note that prefixing the table name user with the database name mysql with a dot allows
you to access a table in a database not in currently in use. (mysql is the database
where MySQL maintains administrative records.) Once a new user is created, you will
have to grant appropriate privileges to the user with the GRANT command. For
example, the command
GRANT ALL ON TEST.* to cs144@localhost;
will give all privileges for the TEST database to the user cs144 (on localhost). To see
the privileges that you have, run:
SHOW GRANTS;
which will produce an output like:
+----------------------------------------------------------+
| Grants for cs144@localhost |
+----------------------------------------------------------+
| GRANT USAGE ON *.* TO 'cs144'@'localhost' |
| GRANT ALL PRIVILEGES ON `CS144`.* TO 'cs144'@'localhost' |
| GRANT ALL PRIVILEGES ON `TEST`.* TO 'cs144'@'localhost' |
+----------------------------------------------------------+
As the root user, you can also create and drop databases using CREATE DATABASE
and DROP DATABASE command like the following:
CREATE DATABASE TESTDB;

DROP DATABASE TESTDB;
As a final note, keep in mind that MySQL maintains its own username and password
pairs independently of the underlying OS. Thus, it is possible to create a MySQL user
that does not exist in the underlying OS and vice versa. This means that your default
MySQL user cs144 is not related to your Ubuntu account cs144 except the shared
name. In fact, as you may have noticed, cs144 in MySQL has a different password
(empty) from cs144 of the Ubuntu account ("password").
Help Facilities
mysql provides internal help facilities for MySQL commands. To see a list of commands
for which help is available, type help or help contents in mysql. To look up help for a
particular topic (listed in the contents), type help followed by the topic.

Lab#8: Database connectivity with PHP
PHP Database ODBC ODBC is an Application Programming Interface (API) that allows you to connect to a
data source (e.g. an MS Access database).
Create an ODBC Connection
With an ODBC connection, you can connect to any database, on any computer in your
network, as long as an ODBC connection is available.
Here is how to create an ODBC connection to a MS Access Database:
Open the Administrative Tools icon in your Control Panel.
Double-click on the Data Sources (ODBC) icon inside.
Choose the System DSN tab.
Click on Add in the System DSN tab.
Select the Microsoft Access Driver. Click Finish.
In the next screen, click Select to locate the database.
Give the database a Data Source Name (DSN).
Click OK.
Note that this configuration has to be done on the computer where your web site is
located. If you are running Internet Information Server (IIS) on your own computer, the
instructions above will work, but if your web site is located on a remote server, you have
to have physical access to that server, or ask your web host to to set up a DSN for you
to use.
Connecting to an ODBC The odbc_connect() function is used to connect to an ODBC data source. The function
takes four parameters: the data source name, username, password, and an optional
cursor type.
The odbc_exec() function is used to execute an SQL statement.
Example
The following example creates a connection to a DSN called northwind, with no
username and no password. It then creates an SQL and executes it:
$conn=odbc_connect('northwind','','');
$sql="SELECT * FROM customers";
$rs=odbc_exec($conn,$sql);
Retrieving Records The odbc_fetch_row() function is used to return records from the result-set. This
function returns true if it is able to return rows, otherwise false.

The function takes two parameters: the ODBC result identifier and an optional row
number:
odbc_fetch_row($rs)
Retrieving Fields from a Record
The odbc_result() function is used to read fields from a record. This function takes two
parameters: the ODBC result identifier and a field number or name.
The code line below returns the value of the first field from the record:
$compname=odbc_result($rs,1);
The code line below returns the value of a field called "CompanyName":
$compname=odbc_result($rs,"CompanyName");
Closing an ODBC Connection
The odbc_close() function is used to close an ODBC connection.
odbc_close($conn);
An ODBC Example
The following example shows how to first create a database connection, then a result-
set, and then display the data in an HTML table.
<html>
<body>
<?php
$conn=odbc_connect('northwind','','');
if (!$conn)
{exit("Connection Failed: " . $conn);}
$sql="SELECT * FROM customers";
$rs=odbc_exec($conn,$sql);
if (!$rs)
{exit("Error in SQL");}
echo "<table><tr>";
echo "<th>Companyname</th>";
echo "<th>Contactname</th></tr>";
while (odbc_fetch_row($rs))
{
$compname=odbc_result($rs,"CompanyName");
$conname=odbc_result($rs,"ContactName");
echo "<tr><td>$compname</td>";

echo "<td>$conname</td></tr>";
}
odbc_close($conn);
echo "</table>";
?>
</body>
</html>
PHP MySQL Introduction
MySQL is the most popular open-source database system.
What is MySQL?
MySQL is a database.
The data in MySQL is stored in database objects called tables.
A table is a collection of related data entries and it consists of columns and rows.
Databases are useful when storing information categorically. A company may have a
database with the following tables: "Employees", "Products", "Customers" and "Orders".
Database Tables
A database most often contains one or more tables. Each table is identified by a name
(e.g. "Customers" or "Orders"). Tables contain records (rows) with data.
Below is an example of a table called "Persons":
LastName FirstName Address City
Hansen Ola Timoteivn 10 Sandnes
Svendson Tove Borgvn 23 Sandnes
Pettersen Kari Storgt 20 Stavanger
The table above contains three records (one for each person) and four columns
(LastName, FirstName, Address, and City).
Queries
A query is a question or a request.
With MySQL, we can query a database for specific information and have a recordset
returned.
Look at the following query:
SELECT LastName FROM Persons
The query above selects all the data in the "LastName" column from the "Persons"
table, and will return a recordset like this:
LastName
Hansen

Svendson
Pettersen
Facts About MySQL Database
One great thing about MySQL is that it can be scaled down to support embedded
database applications. Perhaps it is because of this reputation that many people believe
that MySQL can only handle small to medium-sized systems.
The truth is that MySQL is the de-facto standard database for web sites that support
huge volumes of both data and end users (like Friendster, Yahoo, Google).
Look at http://www.mysql.com/customers/ for an overview of companies using MySQL.
PHP MySQL Connect to a Database Create a Connection to a MySQL Database. Before you can access data in a database,
you must create a connection to the database. In PHP, this is done with the
mysql_connect() function. Syntax
mysql_connect(servername,username,password);
Parameter Description
servername Optional. Specifies the server to connect to. Default value is
"localhost:3306"
username Optional. Specifies the username to log in with. Default value is the
name of the user that owns the server process
password Optional. Specifies the password to log in with. Default is ""
Example
In the following example we store the connection in a variable ($con) for later use in the
script. The "die" part will be executed if the connection fails:
<?php
$con = mysql_connect("localhost","peter","abc123");
if (!$con)
{
die('Could not connect: ' . mysql_error());
}
// some code
?>

Closing a Connection
The connection will be closed automatically when the script ends. To close the
connection before, use the mysql_close() function:
<?php
$con = mysql_connect("localhost","peter","abc123");
if (!$con)
{
die('Could not connect: ' . mysql_error());
}
// some code
mysql_close($con);
?>
PHP MySQL Create Database and Tables A database holds one or multiple tables.
Create a Database
The CREATE DATABASE statement is used to create a database in MySQL.
Syntax
CREATE DATABASE database_name
To learn more about SQL, please visit our SQL tutorial.
To get PHP to execute the statement above we must use the mysql_query() function.
This function is used to send a query or command to a MySQL connection.
Example
The following example creates a database called "my_db":
<?php
$con = mysql_connect("localhost","peter","abc123");
if (!$con)
{
die('Could not connect: ' . mysql_error());
}
if (mysql_query("CREATE DATABASE my_db",$con))
{
echo "Database created";
}
else
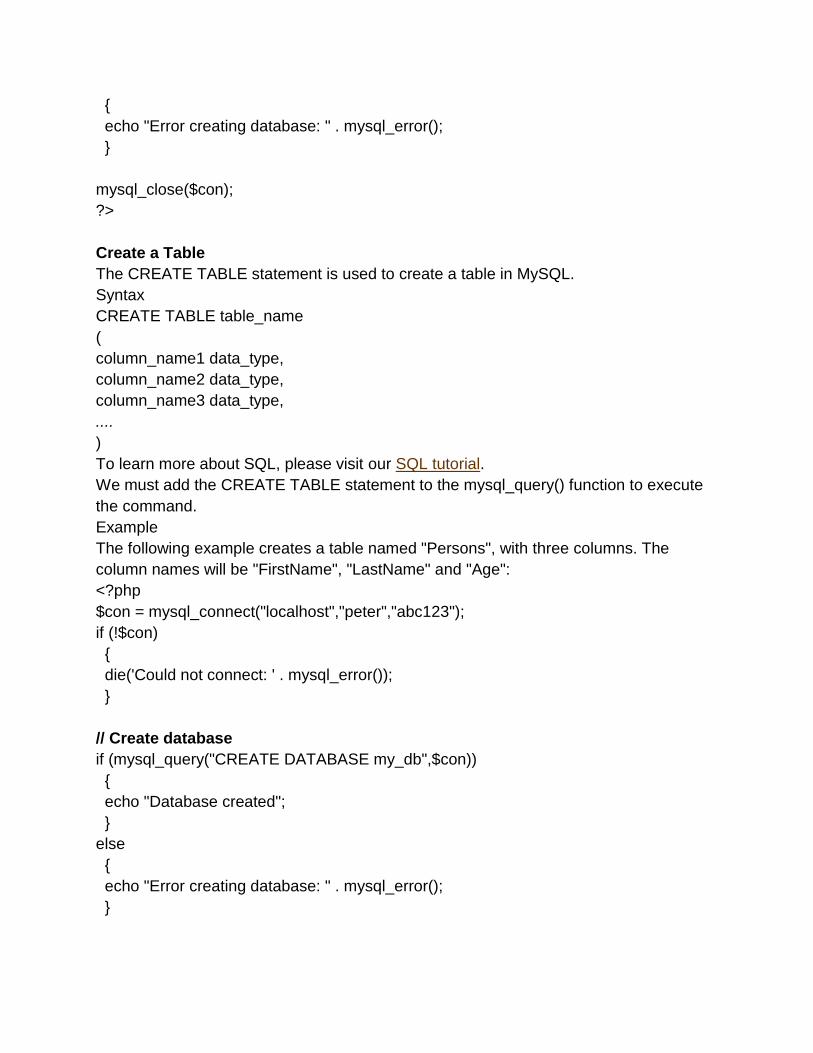
{
echo "Error creating database: " . mysql_error();
}
mysql_close($con);
?>
Create a Table
The CREATE TABLE statement is used to create a table in MySQL.
Syntax
CREATE TABLE table_name
(
column_name1 data_type,
column_name2 data_type,
column_name3 data_type,
....
)
To learn more about SQL, please visit our SQL tutorial.
We must add the CREATE TABLE statement to the mysql_query() function to execute
the command.
Example
The following example creates a table named "Persons", with three columns. The
column names will be "FirstName", "LastName" and "Age":
<?php
$con = mysql_connect("localhost","peter","abc123");
if (!$con)
{
die('Could not connect: ' . mysql_error());
}
// Create database
if (mysql_query("CREATE DATABASE my_db",$con))
{
echo "Database created";
}
else
{
echo "Error creating database: " . mysql_error();
}

// Create table
mysql_select_db("my_db", $con);
$sql = "CREATE TABLE Persons
(
FirstName varchar(15),
LastName varchar(15),
Age int
)";
// Execute query
mysql_query($sql,$con);
mysql_close($con);
?>
Important: A database must be selected before a table can be created. The database
is selected with the mysql_select_db() function.
Note: When you create a database field of type varchar, you must specify the maximum
length of the field, e.g. varchar(15).
Primary Keys and Auto Increment Fields
Each table should have a primary key field. A primary key is used to uniquely identify
the rows in a table. Each primary key value must be unique within the table.
Furthermore, the primary key field cannot be null because the database engine requires
a value to locate the record. The following example sets the personID field as the
primary key field. The primary key field is often an ID number, and is often used with the
AUTO_INCREMENT setting. AUTO_INCREMENT automatically increases the value of
the field by 1 each time a new record is added. To ensure that the primary key field
cannot be null, we must add the NOT NULL setting to the field.
Example
$sql = "CREATE TABLE Persons
(
personID int NOT NULL AUTO_INCREMENT,
PRIMARY KEY(personID),
FirstName varchar(15),
LastName varchar(15),
Age int
)";
mysql_query($sql,$con);

PHP MySQL Insert Into The INSERT INTO statement is used to insert new records in a table.
Insert Data Into a Database Table
The INSERT INTO statement is used to add new records to a database table.
Syntax
It is possible to write the INSERT INTO statement in two forms.
The first form doesn't specify the column names where the data will be inserted, only
their values:
INSERT INTO table_name
VALUES (value1, value2, value3,...)
The second form specifies both the column names and the values to be inserted:
INSERT INTO table_name (column1, column2, column3,...)
VALUES (value1, value2, value3,...)
To learn more about SQL, please visit our SQL tutorial.
To get PHP to execute the statements above we must use the mysql_query() function.
This function is used to send a query or command to a MySQL connection.
Example
In the previous chapter we created a table named "Persons", with three columns;
"Firstname", "Lastname" and "Age". We will use the same table in this example. The
following example adds two new records to the "Persons" table:
<?php
$con = mysql_connect("localhost","peter","abc123");
if (!$con)
{
die('Could not connect: ' . mysql_error());
}
mysql_select_db("my_db", $con);
mysql_query("INSERT INTO Persons (FirstName, LastName, Age)
VALUES ('Peter', 'Griffin',35)");
mysql_query("INSERT INTO Persons (FirstName, LastName, Age)
VALUES ('Glenn', 'Quagmire',33)");
mysql_close($con);
?>

Insert Data From a Form Into a Database
Now we will create an HTML form that can be used to add new records to the "Persons"
table.
Here is the HTML form:
<html>
<body>
<form action="insert.php" method="post">
Firstname: <input type="text" name="firstname" />
Lastname: <input type="text" name="lastname" />
Age: <input type="text" name="age" />
<input type="submit" />
</form>
</body>
</html>
When a user clicks the submit button in the HTML form in the example above, the form
data is sent to "insert.php".
The "insert.php" file connects to a database, and retrieves the values from the form with
the PHP $_POST variables.
Then, the mysql_query() function executes the INSERT INTO statement, and a new
record will be added to the "Persons" table.
Here is the "insert.php" page:
<?php
$con = mysql_connect("localhost","peter","abc123");
if (!$con)
{
die('Could not connect: ' . mysql_error());
}
mysql_select_db("my_db", $con);
$sql="INSERT INTO Persons (FirstName, LastName, Age)
VALUES
('$_POST[firstname]','$_POST[lastname]','$_POST[age]')";
if (!mysql_query($sql,$con))
{
die('Error: ' . mysql_error());

}
echo "1 record added";
mysql_close($con);
?>
PHP MySQL Select The SELECT statement is used to select data from a database.
Select Data From a Database Table
The SELECT statement is used to select data from a database.
Syntax
SELECT column_name(s)
FROM table_name
To learn more about SQL, please visit our SQL tutorial.
To get PHP to execute the statement above we must use the mysql_query() function.
This function is used to send a query or command to a MySQL connection.
Example
The following example selects all the data stored in the "Persons" table (The * character
selects all the data in the table):
<?php
$con = mysql_connect("localhost","peter","abc123");
if (!$con)
{
die('Could not connect: ' . mysql_error());
}
mysql_select_db("my_db", $con);
$result = mysql_query("SELECT * FROM Persons");
while($row = mysql_fetch_array($result))
{
echo $row['FirstName'] . " " . $row['LastName'];
echo "<br />";
}
mysql_close($con);
?>
The example above stores the data returned by the mysql_query() function in the
$result variable.

Next, we use the mysql_fetch_array() function to return the first row from the recordset
as an array. Each call to mysql_fetch_array() returns the next row in the recordset. The
while loop loops through all the records in the recordset. To print the value of each row,
we use the PHP $row variable ($row['FirstName'] and $row['LastName']).
The output of the code above will be:
Peter Griffin
Glenn Quagmire
Display the Result in an HTML Table
The following example selects the same data as the example above, but will display the
data in an HTML table:
<?php
$con = mysql_connect("localhost","peter","abc123");
if (!$con)
{
die('Could not connect: ' . mysql_error());
}
mysql_select_db("my_db", $con);
$result = mysql_query("SELECT * FROM Persons");
echo "<table border='1'>
<tr>
<th>Firstname</th>
<th>Lastname</th>
</tr>";
while($row = mysql_fetch_array($result))
{
echo "<tr>";
echo "<td>" . $row['FirstName'] . "</td>";
echo "<td>" . $row['LastName'] . "</td>";
echo "</tr>";
}
echo "</table>";
mysql_close($con);
?>

The output of the code above will be:
Firstname Lastname
Glenn Quagmire
Peter Griffin
PHP MySQL The Where Clause The WHERE clause is used to filter records.
The WHERE clause is used to extract only those records that fulfill a specified criterion.
Syntax
SELECT column_name(s)
FROM table_name
WHERE column_name operator value
To learn more about SQL, please visit our SQL tutorial.
To get PHP to execute the statement above we must use the mysql_query() function.
This function is used to send a query or command to a MySQL connection.
Example
The following example selects all rows from the "Persons" table where
"FirstName='Peter'":
<?php
$con = mysql_connect("localhost","peter","abc123");
if (!$con)
{
die('Could not connect: ' . mysql_error());
}
mysql_select_db("my_db", $con);
$result = mysql_query("SELECT * FROM Persons
WHERE FirstName='Peter'");
while($row = mysql_fetch_array($result))
{
echo $row['FirstName'] . " " . $row['LastName'];
echo "<br />";
}
?>
The output of the code above will be:
Peter Griffin

PHP MySQL Order By Keyword The ORDER BY keyword is used to sort the data in a recordset.
The ORDER BY Keyword
The ORDER BY keyword is used to sort the data in a recordset.
The ORDER BY keyword sort the records in ascending order by default.
If you want to sort the records in a descending order, you can use the DESC keyword.
Syntax
SELECT column_name(s)
FROM table_name
ORDER BY column_name(s) ASC|DESC
To learn more about SQL, please visit our SQL tutorial.
Example
The following example selects all the data stored in the "Persons" table, and sorts the
result by the "Age" column:
<?php
$con = mysql_connect("localhost","peter","abc123");
if (!$con)
{
die('Could not connect: ' . mysql_error());
}
mysql_select_db("my_db", $con);
$result = mysql_query("SELECT * FROM Persons ORDER BY age");
while($row = mysql_fetch_array($result))
{
echo $row['FirstName'];
echo " " . $row['LastName'];
echo " " . $row['Age'];
echo "<br />";
}
mysql_close($con);
?>
The output of the code above will be:
Glenn Quagmire 33
Peter Griffin 35

Order by Two Columns
It is also possible to order by more than one column. When ordering by more than one
column, the second column is only used if the values in the first column are equal:
SELECT column_name(s)
FROM table_name
ORDER BY column1, column2
PHP MySQL Update The UPDATE statement is used to modify data in a table.
Update Data In a Database
The UPDATE statement is used to update existing records in a table.
Syntax
UPDATE table_name
SET column1=value, column2=value2,...
WHERE some_column=some_value
Note: Notice the WHERE clause in the UPDATE syntax. The WHERE clause specifies
which record or records that should be updated. If you omit the WHERE clause, all
records will be updated!
To learn more about SQL, please visit our SQL tutorial.
To get PHP to execute the statement above we must use the mysql_query() function.
This function is used to send a query or command to a MySQL connection.
Example
Earlier in the tutorial we created a table named "Persons". Here is how it looks:
FirstName LastName Age
Peter Griffin 35
Glenn Quagmire 33
The following example updates some data in the "Persons" table:
<?php
$con = mysql_connect("localhost","peter","abc123");
if (!$con)
{
die('Could not connect: ' . mysql_error());
}
mysql_select_db("my_db", $con);
mysql_query("UPDATE Persons SET Age=36

WHERE FirstName='Peter' AND LastName='Griffin'");
mysql_close($con);
?>
After the update, the "Persons" table will look like this:
FirstName LastName Age
Peter Griffin 36
Glenn Quagmire 33
PHP MySQL Delete
The DELETE statement is used to delete records in a table.
Delete Data In a Database
The DELETE FROM statement is used to delete records from a database table.
Syntax
DELETE FROM table_name
WHERE some_column = some_value
Note: Notice the WHERE clause in the DELETE syntax. The WHERE clause specifies
which record or records that should be deleted. If you omit the WHERE clause, all
records will be deleted!
To learn more about SQL, please visit our SQL tutorial.
To get PHP to execute the statement above we must use the mysql_query() function.
This function is used to send a query or command to a MySQL connection.
Example
Look at the following "Persons" table:
FirstName LastName Age
Peter Griffin 35
Glenn Quagmire 33
The following example deletes all the records in the "Persons" table where
LastName='Griffin':
<?php
$con = mysql_connect("localhost","peter","abc123");
if (!$con)
{
die('Could not connect: ' . mysql_error());
}

mysql_select_db("my_db", $con);
mysql_query("DELETE FROM Persons WHERE LastName='Griffin'");
mysql_close($con);
?>
After the deletion, the table will look like this:
FirstName LastName Age
Glenn Quagmire 33

Lab#9: Group functions and sub queries
Today we will cover SQL Group functions and Sub queries. But before going to these
topics we‘d link our lab with the previous contents by starting with joins.
JOIN
When data from more than one table in the database is required, a join condition is
used. Rows in one table can be joined to rows in another table according to common
values existing in corresponding columns, that is, usually primary and foreign key
columns. For displaying data from two or more related tables. Write a simple join
condition in the WHERE clause.
Syntax:
SELECT table1.column, table2.column
FROM table1, table2
WHERE table1.column1=table2.column2;
Cartesian Product
When a join condition is invalid or omitted completely, the result is a Cartesian product
in which all combinations of rows will be displayed. All rows in the first table are joined
to all rows in the second table.
A Cartesian product tends to generate a large number of rows, and its result is rarely
useful. You should always include a valid join condition in a WHERE clause, unless you
have a specific need to combine all rows from all tables.
E.g
To displays employee name and department name from EMP and DEPT table we will
use cartesian product. Since no WHERE clause has been specified so all rows from
EMP table are joined with all rows in the DEPT table, there by generating 56 rows in the
output.
SELECT ename, dname
FROM emp, dept;
Using table aliases
Qualifying column names with table names can be very time consuming, particularly if
table names are lengthy. You can use table aliases instead of table names. Just as a
column alias gives a column another name, a table alias gives a table another name.
Table aliases help to keep SQL code smaller, therefore using less memory.
Notice how table aliases are identified in the FORM clause in example below. The table
name is specified in full, followed by a space and then the table alias. The EMP table
has been given an alias of E, whereas the DEPT table has an alias of D.
E.g

SELECT e.empno, e.ename, e.deptno, d.deptno, d.loc
FROM emp e, dept d
WHERE e.deptno = d.deptno;
Assignment 1
1. Display the employee name and department name for all employees who have
an A in their name. Save your SQL statement in a file (create a Notepad file).
2. Write a query to display the name, job, department number, and department
name for all employees who work in DALLAS. Save you SQL statement in a file.
Self Join
Sometimes you need to join a table to itself. To find the name of each employee's
manager, you need to join the EMP table to itself, or perform a self join.
E.g
SELECT worker.ename ||' works for '|| manager.ename
FROM emp worker, emp manager
WHERE worker.mgr = manager.empno;
The above example joins the EMP table to itself. To simulate two tables in the FROM
clause, there are two aliases, namely WORKER and MANAGER for the same table,
EMP. Here the WHERE clause contains the join that means " where a worker' manager
number matches the employee number for the manager".
Assignment 2
1. Display the employee name and employee number along with their manager's name
and manager number. Label the columns Employee, Emp#, Manager and Mgr#
respectively. Save you SQL statement in a file.
2. Modify the assignment 1 to display all employees including King, who has no
manager. Save your SQL statement in a file.
Group Functions So far we have studied single-row functions, which accept one or more arguments and
return one value for each row returned by the query.
In group functions we will operate on sets of rows to give one result per group. These
sets may be the whole table or the table split into groups.

Types of group functions
AVG
COUNT
MAX
MIN
SUM
Each of the functions accepts an argument. The following table identifies the options
that you can use in the syntax
Function Description
AVG ([DISTINCT|ALL] n) Average value of n, ignoring null values
COUNT ({*[DISTINCT|ALL] expr}) Number of rows, where expr evaluates to
something other than null (Count all
selected rows using * including duplicates
and rows with nulls)
MAX ([DISTINCT|ALL] expr) Maximum value of expr, ignoring null
values
MIN ([DISTINCT|ALL] expr) Minimum value of expr, ignoring null
values
SUM ([DISTINCT|ALL] n) Sum values of n, ignoring null values
Guidelines for Using Group Functions
DISTINCT makes the function consider only nonduplicate values.
ALL makes it consider every value including duplicates. The default is ALL and
therefore does not need to be specified.
The data types for the arguments may be CHAR, VARCHAR2, NUMBER, or DATE
where expr is listed.
All group functions except COUNT (*) ignore null values. To substitute a value for null
values use the NVL function.
AVG, SUM , MAX and MIN Functions
E.g
SELECT AVG (sal), MAX(sal), MIN(sal), SUM(sal)
FROM emp
WHERE job LIKE 'SALES%';
You can use AVG, SUM, MIN, and MAX functions against columns that can store
numeric data. The example on the slide displays the average, heighest ,lowest, and
sum of monthly salaries for all salespeople.

You can use MAX and MIN functions for any datatypes.
E.g
SELECT MIN (hiredate), MAX(hiredate)
FROM emp;
E.g
SELECT MIN(ename), MAX (ename)
FROM emp;
Note: AVG, SUM functions can be used only with numeric data types.
Count function
The COUNT function has two functions:
COUNT (*)
COUNT (expr)
COUNT (*) returns the number of rows in a table, including duplicate rows and rows
containing null values in any of the columns. If a WHERE clause is included in the
SELECT statement, COUNT (*) returns the number of rows that satisfies the condition
in the WHERE clause.
In contrast, COUNT (expr) returns the number of non null rows in the column identified
by expr.
E.g
SELECT COUNT(*)
FROM emp
WHERE deptno=30;
Here it will display the number of employees in department 30.
To display the number of department in the EMP table
SELECT COUNT(deptno)
FROM emp;
To display the number of distinct departments in the EMP table.
SELECT COUNT (DISTINCT (deptno))

FROM emp;
To display the number of employees in department 30 who earn a commission
SELECT COUNT (comm)
FROM emp
WHERE deptno=30;
The result will give you the total number of rows to be four because two employees in
department 30 cannot earn a commission and contain null value in COMM column.
Group function and null values
All group function excepts COUNT(*) ignore null values in the column.
E.g
SELECT AVG(comm)
FROM emp;
In the above example the average is calculated based only on the rows in the table,
where a valid value is stored in the COMM column. The average is calculated as total
commission being paid to all employees divided by the number of employees receiving
commission (4).
Using the NVL function with group function
The NVL function forces group functions to include null values.
E.g
SELECT AVG(NVL(comm,0))
FROM emp;
In the example the average is calculated based on all rows in the table regardless of
whether null values are stored in the COMM column. The average is calculated as total
commission being paid to all employees divided by the total number of employees in the
company (14).
Creating groups of data
Until now all group functions have treated the table as one large group of information. At
times, we need to divide the table of information into smaller groups. This can be done
by using the GROUP BY clause.
Group By Clause We can use the GROUP BY clause to divide the rows in a table into groups. You can
then use the group functions to return summary information for each group.

Syntax:
SELECT column, group_function(column)
FROM table
[WHERE condition]
[GROUP BY group_by_expression]
[ORDER BY column];
Note:
If you include a group function in a SELECT clause, you cannot select individual results
as well unless the individual column appears in the GROUP BY clause. You will receive
an error message if you fail to include the column list.
Using a WHERE clause, you can preexclude rows before dividing them into groups.
You must include the columns in the GROUP BY clause.
You cannot use the column alias in the GROUP BY clause.
Bu default rows are sorted by ascending order of the columns included in the GROUP
BY list. You can override this by using the ORDER BY clause.
Using the group by clause
When using the GROUP BY clause, make sure that all columns in the SELECT list that
are not in the group functions are included in the GROUP BY clause.
E.g
SELECT deptno, AVG(sal)
FROM emp
GROUP BY deptno;
The example above displays the department number and the average salary for each
department. Here is how this SELECT statement, containing a GROUP BY clause, is
evaluated:
The SELECT clause specifies the columns to be retrieved;
Department number column in the EMP table
The average of all the salaries in the group you specified in the GROUP BY clause
The FROM clause specifies the table that the database must access: the EMP table.
The WHERE clause specifies the rows to retrieved. Since there is no WHERE clause,
by default all rows are retrieved.
The GROUP BY clause specifies how the rows should be grouped. The rows are being
grouped by department number, so the AVG function that is being applied to the salary
column will calculate the average salary for each department.
The GROUP BY column does not have to be in the SELECT clause.

E.g
SELECT AVG (sal)
FROM emp
GROUP BY deptno;
In example the SELECT statement displays the average salaries for each department
without displaying the respective department numbers.
Grouping by more than one column
You can return summary results for groups and subgroups by listing more than one
GROUP BY column. You can determine the default sort order of the results by the order
of the columns in the GROUP BY clause.
E.g
SELECT deptno, job, sum (sal)
FROM emp
GROUP BY deptno, job;
This example is evaluated as
The SELECT clause specifies the column to retrieved:
Department number in the EMP table
Job title in the EMP table
The sum of all the salaries in the group that you specified in the GROUP BY clause
The FROM clause specifies the tables that the database must access: the EMP table
The GROUP BY clause specifies how you must group the rows:
First, the rows are grouped by department number.
Second, within the department number groups, the rows are grouped by job title.
So the SUM function is being applied to the salary column for all job titles within each
department number group.
Having clause As we use the WHERE clause to restrict the rows that we select, we use the HAVING
clause to restrict groups.
You use the HAVING clause to specify which groups are to be displayed. Therefore,
you further restrict the groups on the basis of aggregate information.
Syntax
SELECT column, group_function
FROM table
[WHERE conditon]
[GROUP BY group_by_expression]

[HAVING group_condition]
[ORDER BY column];
The Oracle Server performs the following steps when you use the HAVING clause:
Rows are grouped
The group function is applied to the group
The groups that match the criteria in the HAVING clause are displayed
The HAVING clause can precede the GROUP BY clause, but it is recommended that
you place the GROUP BY clause first because it is more logical. Groups are formed and
group functions are calculated before the HAVING clause is applied to the groups in the
SELECT list.
E.g
SELECT deptno, max (sal)
FROM emp
GROUP BY deptno
HAVING max (sal)>2900;
This example displays department numbers and maximum salary for those department
whose maximum salary is greater than 2900.
You can use the GROUP BY clause without using a group function in the SELECT list.
If you restrict rows based on the result of a group function, you must have a GROUP BY
clause as well as the HAVING clause.
E.g
SELECT job, SUM (sal) PARROLL
FROM emp
WHERE job NOT LIKE ‗SALES%‘
GROUP BY job
HAVING SUM (sal)>5000
ORDER BY SUM (sal);
The above example displays the job title and total monthly salary for each job title with a
total payroll exceeding 5000. It also exclude salespeople and sorts the list by the total
monthly salary.
Nesting group functions
Group functions can be nested to a depth of two.
E.g

SELECT max (avg (sal) )
FROM emp
GROUP BY deptno;
It displays the maximum average salary.
Order of evaluation of the clauses: WHERE clause
GROUP BY clause
HAVING clause
Assignments 3
1. Determine the number of managers without listing them. Label the column as
Number of Managers. Save you SQL statement in a file.
2. Write a query that will display the difference between the highest and lowest
salaries. Label the column DIFFERENCE. Save you SQL statement in a file.
3. Display the highest, lowest, sum, and average salary of all employees. Label the
columns Maximum, Minimum, Sum, and Average, respectively. Round your results to
the decimal position. Save you SQL statement in a file.
4. Modify the above assignment to display the minimum, maximum, sum, and
average salary for each job type. Save you SQL statement in a file.
5. Write a query to display the number of people with the same job. Save you SQL
statement in a file.
6. Write a query to display the department name, location name, number of
employees, and the average salary for all employees in that department. Label the
columns dname, loc, Number of People, and Salary, respectively. Round the average
salary to two decimal places. Save you SQL statement in a file.
SUBQUERIES Using a Subquery to Solve a Problem
Suppose you want to write a query to find out who earns a salary greater than Jones
salary. To solve this problem, you need two queries: one query to find what Jones earns
and second query to find who earns more than that amount.
You can solve this problem by combining the two queries, placing one query inside the
other query. The inner query or the subquery returns a value that is used by the outer

query or the main query. Using a subquery is equivalent to performing two sequential
queries and using the result of the first query as the search value in the second query.
What is a Subquery?
A subquery is a SELECT statement that is embedded in a clause of another SELECT
statement. You can build powerful statements out of simple ones by using subqueries.
They can be very useful when you need to select rows from a table with a condition that
depends on the data in the table itself.
You can place the subquery in a number of SQL clauses:
WHERE clause
HAVING clause
FROM clause
Syntax
SELECT select_list
FROM table
WHERE expr operator
(SELECT select_list
FROM table);
In the syntax:
operator includes a comparison operator such as >,= or IN
Note: Comparison operators fall into two classes. Single-row operators (>,=,>=,<,<>,<=)
and multiple-row operators (IN, ANY, ALL)
The subquery is often referred to as a nested SELECT, sub-SELECT, or inner SELECT
statement. The subquery generally executes first, and its output is used to complete the
query condition for the main or outer query.
E.g
SELECT ename
FROM emp
WHERE sal>
(SELECT sal
FROM emp
WHERE empno=7566);
In the above example, the inner query determines the salary of employee 7566. The
outer query takes the result of the inner query and uses this result to display all the
employees who earn more than this amount.
Guidelines for using subqueries
A subquery must be enclosed in parentheses.
A subquery must appear on the right side of the comparison operator.

Subqueries cannot contain an ORDER BY clause. You can have only one ORDER BY
clause for a SELECT statement, and if specified it must be the last clause in the main
SELECT statement.
Two classes of comparison operators are used in subquries: single-row operators and
multiple-row operators.
Types of Subqueries
Single-row subqueries:
Queries that return only one row from the inner SELECT statement
Returns CLERK
Multiple-row subqueries:
Queries that returns more than one row from the inner SELECT statement
Returns CLERK
MANAGER
Single row sub queries
A single row subquery is one that returns one row from the inner SELECT statement.
This type of subquery uses a single row operators. (i.e =,>,>=,<,<=,<>)
E.g
Display the employees whose job title is the same as that of employee 7369.
SELECT ename,job
FROM emp
WHERE job=
(SELECT job
FROM emp
WHERE empno=7369);
A SELECT statement can be considered as a query block. For example to display
employees whose job title is the same as that of employee 7369 and whose salary is
greater than that of employee 7876.
SELECT ename,job
Main query
Subquery
Main query
Subquery

FROM emp CLERK
WHERE job=
(SELECT job
FROM emp
WHERE empno=7369)
AND sal>
(SELECT sal 1100
FROM emp
WHERE empno=7876)
The example consists of three query blocks: the outer query and two inner queries. The
inner query blocks are executed first, producing the query results: CLERK and 1100
respectively. The outer query block is then processed and uses the values returned by
the inner queries to complete its search conditions.
Both inner queries return single values (CLERK and 1100 respectively),so this SQL
statement is called a single row subquery.
Using group functions in a subquery You can display data from a main query by using a group function in a subquery to
return a single row. The subquery is in parentheses and is placed after the comparison
operator.
E.g
Display the employee name, job, title and salary of all employees whose salary is equal
to the minimum salary.
SELECT ename,job,sal
FROM emp
WHERE sal=
(SELECT MIN(sal)
FROM emp);
The MIN group function returns a single value (800) to the outer query.
Having clause with subqueries
You can use subqueries not only in the WHERE clause, but also in the HAVING clause.
The Oracle Server executes the subquery, and the results are returned into the
HAVING clause of the main query.
E.g
Display all the departments that have a minimum salary greater than that of department
20.

SELECT deptno, MIN(sal)
FROM emp
GROUP BY deptno
HAVING MIN (sal)>
(SELECT MIN (sal)
FROM emp
WHERE deptno=20);
E.g
Find the job with the lowest average salary
SELECT job, AVG(sal)
FROM emp
GROUP BY job
HAVING AVG (sal)=
(SELECT MIN (AVG(sal))
FROM emp
GROUP BY job);
Multiple row subqueries
Subqueries that return more than one row are called multiple row subqueries. You use a
multiple row operator (i.e IN) instead of a single row operator, with a multiple row
subquery. The multiple row operator expects one or more values.
E.g
Find the employees who earn the same salary as the minimum salary for departments.
SELECT ename,sal,deptno
FROM emp
WHERE sal IN
(SELECT MIN (sal)
FROM emp
GROUP BY deptno);
In the example the inner query is executed first, producing a query result containing
three rows: 800,950,1300. The main query block is then processed and uses the values
returned by the inner query to complete its search condition.
Assignments
Write a query to display the employee name and hire date for all employees in the same
department as Blake. Exclude Blake.

ENAME HIREDATE
MARTIN 28-SEP-81
ALLEN 20-FEB-81
TURNER 08-SEP-81
JAMES 03-DEC-81
WARD 22-FEB-81
Create a query to display the employee number and name for all employees who earn
more than the average salary. Sort the result in descending order of salary.
EMPNO ENAME
--------- ----------
7839 KING
7788 SCOTT
7902 FORD
7566 JONES
7698 BLAKE
CLARK
Display the employee name, department number, and job title for all employees whose
department location is Dallas.
ENAME DEPTNO JOB
---------- --------- ---------
SMITH 20 CLERK
JONES 20 MANAGER
SCOTT 20 ANALYST
ADAMS 20 CLERK
FORD 20 ANALYSTS

Lab#10: SQL Statements
Data retrieval
SELECT
manipulation language (DML)
INSERT, UPDATE, DELETE Data
Data definition language (DDL)
CREATE, ALTER, DROP, RENAME, TRUNCATE
Transaction control
COMMIT, ROLLBACK, SAVEPOINT
Data control language (DCL)
GRANT, REVOKE
Database Transactions The Oracle Server ensures data consistency based on transactions. Transactions
give you more flexibility and control when changing data and they ensure data
consistency in the event of user process failure or system failure.
Transactions consist of DML statements that make up one consistent change to the
data. For example, a transfer of funds between two accounts should include the debit to
one account and the credit to another account in the same amount. Both actions should
either fail or succeed together. The credit should not be committed without the debit.
When Does a Transaction Start and End?
A transaction begins when the first executable SQL statement is encountered and
terminates when one of the following occurs:
A COMMIT or ROLLBACK statement is issued
A DDL statement, such as CREATE, is issued
A DCL statement is issued
The user exits SQL*Plus
A machine fails or the system crashes
Note: After one transaction ends, the next executable SQL statement automatically
starts the next transaction.
A DDL statement or a DCL statement is automatically committed and therefore implicitly
ends a transaction.
Explicit Transaction Control Statements:
You can control the logic of transactions by using the COMMIT, SAVEPOINT, and
ROLLBACK statements.

Statement Description
COMMIT Ends the current transaction by making
all pending data changes permanent
SAVEPOINT name Marks a savepoint within the current
transaction
ROLLBACK [TO SAVEPOINT name] ROLLBACK ends the current transaction
by discarding all pending data changes.
ROLLBACK TO SAVEPOINT name
discard the savepoint and all
subsequent changes
Advantages of COMMIT and ROLLBACK Statements
Ensure data consistency
Preview data changes before making changes permanent
Group logically related operations
Implicit Transaction Processing
Status Circumstances
Automatic commit DDL statement or DCL statement is
issued
Normal exit from SQL*Plus, without
explicitly issuing COMMIT or
ROLLBACK
Automatic rollback Abnormal termination of SQL*Plus or
system failure
System Failures
When a transaction is interrupted by a system failure, the entire transaction is
automatically rolled back. This prevents the error from causing unwanted changes to
the data and returns the tables to their state at the time of the last commit. In this way,
the Oracle Server protects the integrity of the tables.
Committing Changes
Every data change made during the transaction is temporary until the transaction is
committed.
Make all pending changes permanent by using the COMMIT statement.
Following a COMMIT State of the data after a COMMIT is issued:
Data changes are written to the database.
The previous state of the data is permanently lost.

All users can view the results of the transaction.
The locks on the affected rows are released: the rows are now available for other users
to perform new data changes.
All savepoints are erased.
E.g.
SQL> UPDATE emp
2 SET deptno=10
3 WHERE empno=7782;
SQL> COMMIT;
The above example updates the EMP table and sets the department number for
employee 7782 (Clark) to 10. It then makes the change permanent by issuing the
COMMIT statement.
Rolling Back Changes
Discard all pending changes by using the ROLLBACK statement.
Following a ROLLBACK:
Data changes are undone.
The previous state of the data is restored.
The locks on the affected rows are released.
E.g
While attempting to remove a record from the TEST table, you can accidentally empty
the table. You can correct the mistake, reissue the proper statement and make the data
change permanent.
SQL> DELETE FROM test;
Oho what I have done
SQL> ROLLBACK;
SQL> DELETE FEOM test
2 WHERE id=100;
SQL> COMMIT;
Rolling Back Changes to a Savepoint
You can create a marker in the current transaction by using the SAVEPOINT statement.
The transaction therefore can be divided into smaller sections. You can then discard
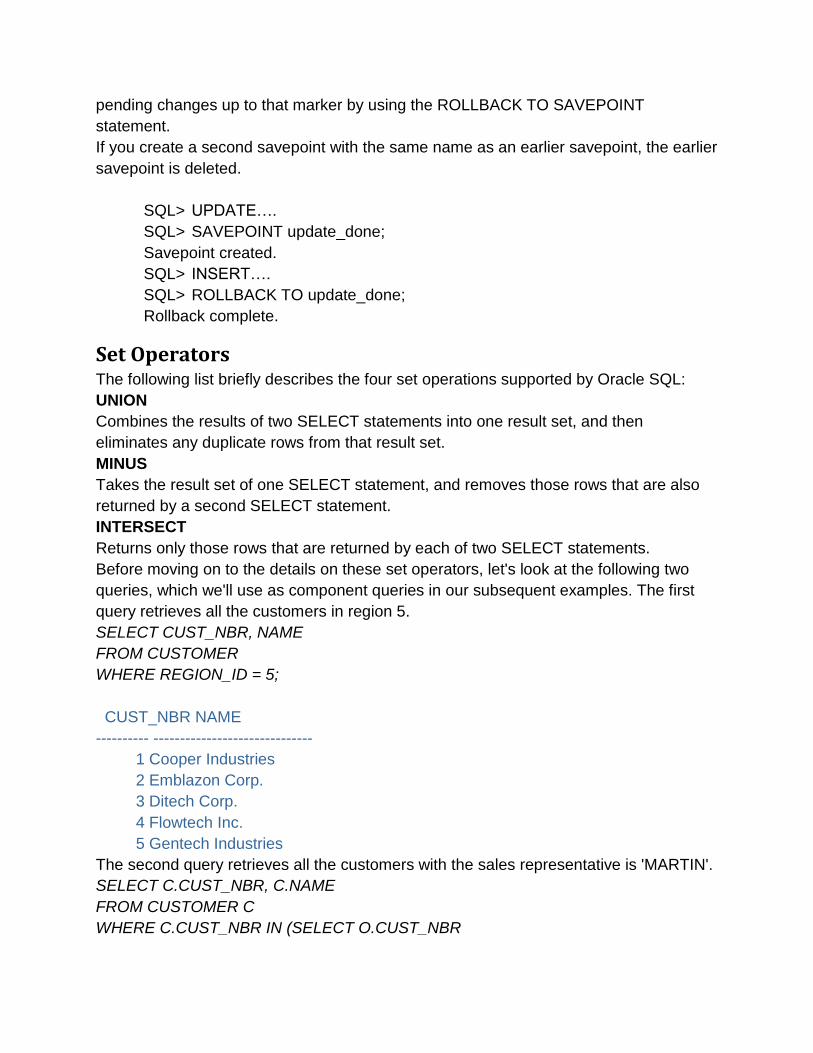
pending changes up to that marker by using the ROLLBACK TO SAVEPOINT
statement.
If you create a second savepoint with the same name as an earlier savepoint, the earlier
savepoint is deleted.
SQL> UPDATE….
SQL> SAVEPOINT update_done;
Savepoint created.
SQL> INSERT….
SQL> ROLLBACK TO update_done;
Rollback complete.
Set Operators The following list briefly describes the four set operations supported by Oracle SQL:
UNION
Combines the results of two SELECT statements into one result set, and then
eliminates any duplicate rows from that result set.
MINUS
Takes the result set of one SELECT statement, and removes those rows that are also
returned by a second SELECT statement.
INTERSECT
Returns only those rows that are returned by each of two SELECT statements.
Before moving on to the details on these set operators, let's look at the following two
queries, which we'll use as component queries in our subsequent examples. The first
query retrieves all the customers in region 5.
SELECT CUST_NBR, NAME
FROM CUSTOMER
WHERE REGION_ID = 5;
CUST_NBR NAME
---------- ------------------------------
1 Cooper Industries
2 Emblazon Corp.
3 Ditech Corp.
4 Flowtech Inc.
5 Gentech Industries
The second query retrieves all the customers with the sales representative is 'MARTIN'.
SELECT C.CUST_NBR, C.NAME
FROM CUSTOMER C
WHERE C.CUST_NBR IN (SELECT O.CUST_NBR
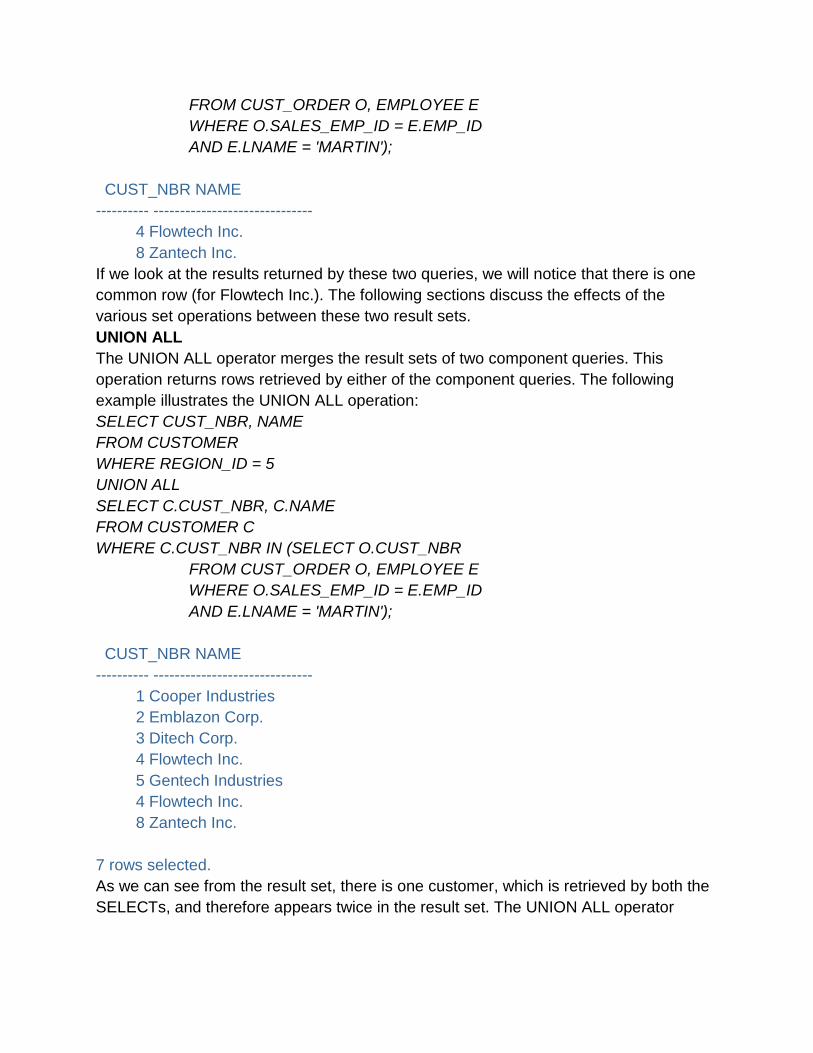
FROM CUST_ORDER O, EMPLOYEE E
WHERE O.SALES_EMP_ID = E.EMP_ID
AND E.LNAME = 'MARTIN');
CUST_NBR NAME
---------- ------------------------------
4 Flowtech Inc.
8 Zantech Inc.
If we look at the results returned by these two queries, we will notice that there is one
common row (for Flowtech Inc.). The following sections discuss the effects of the
various set operations between these two result sets.
UNION ALL
The UNION ALL operator merges the result sets of two component queries. This
operation returns rows retrieved by either of the component queries. The following
example illustrates the UNION ALL operation:
SELECT CUST_NBR, NAME
FROM CUSTOMER
WHERE REGION_ID = 5
UNION ALL
SELECT C.CUST_NBR, C.NAME
FROM CUSTOMER C
WHERE C.CUST_NBR IN (SELECT O.CUST_NBR
FROM CUST_ORDER O, EMPLOYEE E
WHERE O.SALES_EMP_ID = E.EMP_ID
AND E.LNAME = 'MARTIN');
CUST_NBR NAME
---------- ------------------------------
1 Cooper Industries
2 Emblazon Corp.
3 Ditech Corp.
4 Flowtech Inc.
5 Gentech Industries
4 Flowtech Inc.
8 Zantech Inc.
7 rows selected.
As we can see from the result set, there is one customer, which is retrieved by both the
SELECTs, and therefore appears twice in the result set. The UNION ALL operator

simply merges the output of its component queries, without caring about any duplicates
in the final result set.
UNION
The UNION operator returns all distinct rows retrieved by two component queries. The
UNION operation eliminates duplicates while merging rows retrieved by either of the
component queries. The following example illustrates the UNION operation:
SELECT CUST_NBR, NAME
FROM CUSTOMER
WHERE REGION_ID = 5
UNION
SELECT C.CUST_NBR, C.NAME
FROM CUSTOMER C
WHERE C.CUST_NBR IN (SELECT O.CUST_NBR
FROM CUST_ORDER O, EMPLOYEE E
WHERE O.SALES_EMP_ID = E.EMP_ID
AND E.LNAME = 'MARTIN');
CUST_NBR NAME
---------- ------------------------------
1 Cooper Industries
2 Emblazon Corp.
3 Ditech Corp.
4 Flowtech Inc.
5 Gentech Industries
8 Zantech Inc.
6 rows selected.
This query is a modification of the previous query; the keywords UNION ALL have been
replaced with UNION. Notice that the result set contains only distinct rows (no
duplicates). To eliminate duplicate rows, a UNION operation needs to do some extra
tasks as compared to the UNION ALL operation. These extra tasks include sorting and
filtering the result set. If we observe carefully, we will notice that the result set of the
UNION ALL operation is not sorted, whereas the result set of the UNION operation is
sorted. These extra tasks introduce a performance overhead to the UNION operation. A
query involving UNION will take extra time compared to the same query with UNION
ALL, even if there are no duplicates to remove. Therefore, unless we have a valid need
to retrieve only distinct rows, we should use UNION ALL instead of UNION for better
performance.
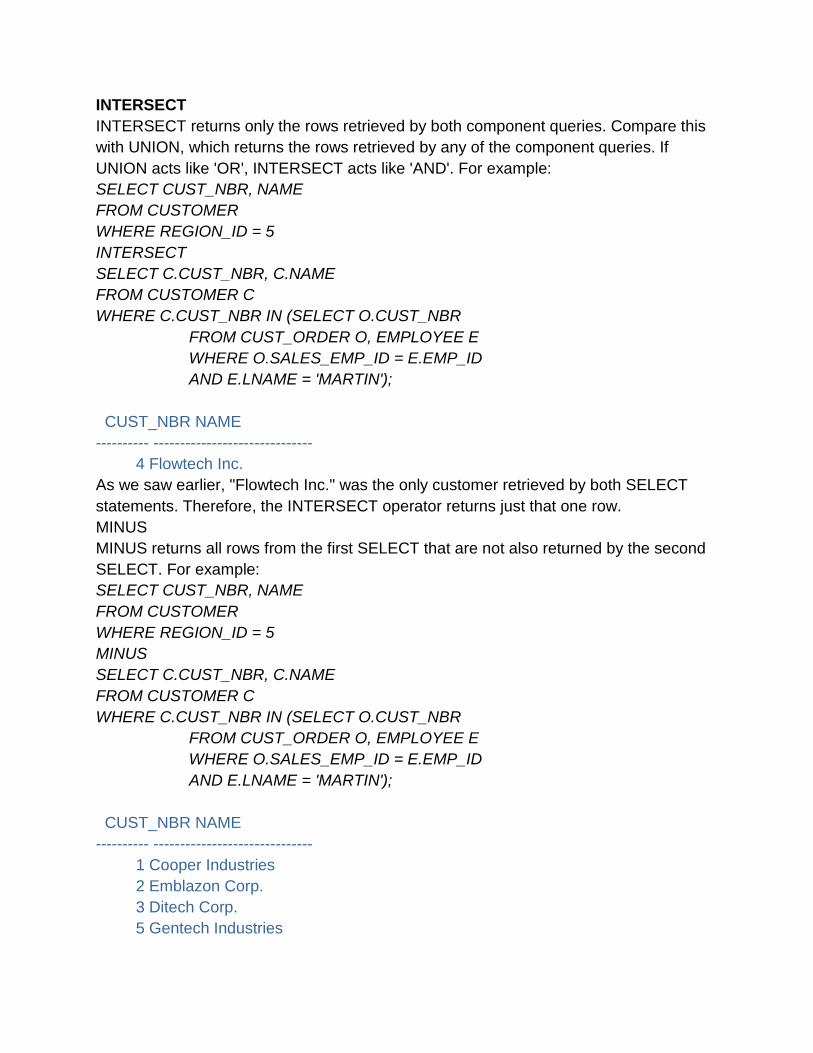
INTERSECT
INTERSECT returns only the rows retrieved by both component queries. Compare this
with UNION, which returns the rows retrieved by any of the component queries. If
UNION acts like 'OR', INTERSECT acts like 'AND'. For example:
SELECT CUST_NBR, NAME
FROM CUSTOMER
WHERE REGION_ID = 5
INTERSECT
SELECT C.CUST_NBR, C.NAME
FROM CUSTOMER C
WHERE C.CUST_NBR IN (SELECT O.CUST_NBR
FROM CUST_ORDER O, EMPLOYEE E
WHERE O.SALES_EMP_ID = E.EMP_ID
AND E.LNAME = 'MARTIN');
CUST_NBR NAME
---------- ------------------------------
4 Flowtech Inc.
As we saw earlier, "Flowtech Inc." was the only customer retrieved by both SELECT
statements. Therefore, the INTERSECT operator returns just that one row.
MINUS
MINUS returns all rows from the first SELECT that are not also returned by the second
SELECT. For example:
SELECT CUST_NBR, NAME
FROM CUSTOMER
WHERE REGION_ID = 5
MINUS
SELECT C.CUST_NBR, C.NAME
FROM CUSTOMER C
WHERE C.CUST_NBR IN (SELECT O.CUST_NBR
FROM CUST_ORDER O, EMPLOYEE E
WHERE O.SALES_EMP_ID = E.EMP_ID
AND E.LNAME = 'MARTIN');
CUST_NBR NAME
---------- ------------------------------
1 Cooper Industries
2 Emblazon Corp.
3 Ditech Corp.
5 Gentech Industries

SQL View You can present logical subsets or combinations of data by creating views of tables. A
view is a logical table based on a table or another view. A view contains no data of its
own but is like a window through which data from tables can be viewed or changed. The
tables on which a view is based are called base tables. The view is stored as a SELECT
statement in the data dictionary.
Advantages of Views
Views restrict access to the database because the view can display a selective portion
of the database.
Views allow users to make simple queries to retrieve the results from complicated
queries. For example, views allow users to query information from multiple tables
without knowing how to write a join statement.
Views provide data independence for ad hoc users and application programs. One view
can be used to retrieve data from several tables.
Views provide groups of users access to data according to their particular criteria.
Simple Views versus Complex Views
There are two classifications for views: simple and complex. The basic difference is
related to the DML (insert, update, and delete) operations.
A simple view is one that:
Derives data from only one table
Contains no functions or group of data
Can perform DML through the view
A complex view is the one that:
Derives data from many tables
Contains functions or group of data
Does not always allow DML through the view
Creating a View
You can create a view by embedding a subquery within the CREATE VIEW statement
Syntax:
CREATE [OR REPLACE] [FORCE | NOFORCE] VIEW view
[(alias [, alias]…..)}
AS subquery
[WITH CHECK OPTION [CONSTRAIT constraint]]
[WITH READ ONLY]
In the syntax:
OR REPLACE re-creates the view if it already exists

FORCE creates the view regardless of whether or not the base tables exist
NOFORCE creates the view only if the base tables exist (This is the default)
view is the name of the view
alias specifies names for the expressions selected by the view‘s query. (The number
of aliases must match the number of expressions selected by the view)
subquery is a complete SELECT statement (You can use aliases for the columns in
the SELECT list)
WITH CHECK OPTION specifies that only rows accessible to the view can be
inserted or updated.
constraint is the name assigned to the CHECK OPTION constraint
WITH READ ONLY ensures that no DML operations can be performed n this view
E.g
Create a view, EMPVU10, that contains details of employees in department 10
SQL> CREATE VIEW empvu10
2 AS SELECT empno, ename, job
3 FROM emp
4 WHERE deptno=10;
Describe the structure of the view by using the Describe command
SQL> DESCRIBE empvu10;
Guidelines for creating a view:
The subquery that defines a view can contain complex SELECT syntax, including joins,
groups, and subqueries
The subquery that defines the view cannot contain an ORDER BY clause. The ORDER
BY clause is specified when you retrieve data from the view.
If you do not specify a constraint name for a view created with the CHECK OPTION, the
system will assign a default name in the format SYS_Cn
You can use the OR REPLACE option to change the definition of the view without
dropping and re-creating it or regranting object privileges previously granted on it.
You can control the column names by including column aliases within the subquery
E.g
SQL> CREATE VIEW salvu30
2 AS SELECT empno EMPLOYEE_NUMBER, ename NAME,
3 sal SALARY
4 FROM emp

5 WHERE deptno=30;
The example above creates a view containing the employee number (empno) with the
alias EMPLOYEE_NUMBER, name (ename) with the alias NAME and salary (sal) with
the alias SALARY for department 30.
Retrieving Data from a View
You can retrieve data from a view as you would from any table. You can either display
the contents of the entire view or just view specific rows and columns.
E.g
SQL> SELECT *
2 FROM salvu30;
Views in the Data Dictionary
Once your view has been created, you can query the data dictionary table called
USER_VIEWS to see the name of the view and the view definition. The text of the
SELECT statement that constitutes your view is stored in a LONG column
Data Access Using Views
When you access data, using a view, the Oracle Server performs the following
operations:
Retrieves the view definition from the data dictionary table USER_VIEWS.
Checks access privileges for the view base table.
Converts the view query into an equivalent operation on the underlying base table or
tables, other words, data is retrieved from, or an update made to the base table.
Modifying a View
The OR REPLACE option allows a view to be created even if one exists with this name
already, thus replacing the old version of the view for its owner. This means that the
view can be altered without dropping, re-creating, and regranting object privileges.
Note: When assigning column aliases in the CREATE VIEW clause, remember that the
aliases are listed in the same order as the columns in the subquery.
E.g
SQL> CREATE OR REPLACE VIEW empvu10
(employee_number, employee_name, job_title)
3 AS SELECT empno, ename, job
4 FROM emp
5 WHERE deptno=10;

Creating a Complex View
Complex view contains group functions to display values from two tables
E.g
SQL> CREATE VIEW dept_sum_vu
2 (name, minsal, maxsal, avgsal)
3 AS SELECT d.dname, MIN(e.sal), MAX(e.sal), AVG(e.sal)
4 FROM emp e, dept d
5 WHERE e.deptno=d.deptno
6 GROUP BY d.dname;
The above example creates a complex view of the department names, minimum salary,
maximum salary and average salary by the department. Note that alternative names
have been specified for the view. This is a requirement if any column of the view is
derived from a function or an expression.

Lab#11: Introduction to PL/SQL
PL/SQL is procedural programming language that uses sequential instructions to
process data. SQL commands can be used within PL/SQL to interact with the database.
PL/SQL is also part of the Oracle development environment which can be stored
directly into an Oracle database.
General syntax to create PL/SQL:
DECLARE
declare here all the variables
BEGIN
write here all the program statements
EXCEPTION
write here all the error-handling statements
END;
Variables are declared in the program declaration section using PL/SQL variables
types, which are similar to SQL variables types. All the program statements are defined
in the BEGIN section of the program and EXCEPTION section is for error handling
statements. Before you insert PL/SQL code into SQL Server, you have to set up the
server output which is the space to display code result. Type this command before
inserting the code;
SET SERVEROUTPUT ON
DECLARE
TodaysDate DATE;
BEGIN
TodaysDate:= SYSDATE;
DBMS_OUTPUT.PUT_LINE(‗Today‘‘s date is ‗);
DBMS_OUTPUT.PUT_LINE(TodaysDate);
END;
/
Use of PL/SQL variables This example declares, populates, and displays inventory information:
DECLARE
inv_id NUMBER(3);
inv_name VARCHAR2(35);
quantity NUMBER(5);

PRICE NUMBER(6);
COST NUMBER (6); INV_VALUE NUMBER(9);
date_rec DATE;
BEGIN
INV_ID := 100;
INV_NAME := 'Cars';
quantity :=50;
price :=36000;
cost :=20000;
date_rec := '02-September-2002';
inv_value := quantity * price;
DBMS_OUTPUT.PUT_LINE('Inventory ID: '||inv_id);
DBMS_OUTPUT.PUT_LINE('Inventory Name: '||inv_name);
DBMS_OUTPUT.PUT_LINE('quantity: '||quantity);
DBMS_OUTPUT.PUT_LINE('Price per unit: '||price);
DBMS_OUTPUT.PUT_LINE('cost per unit '||cost);
DBMS_OUTPUT.PUT_LINE('Inventory Value '||inv_value);
DBMS_OUTPUT.PUT_LINE('Date Received '||date_rec);
END;
/
Watch the calculations and declarations
DECLARE
pi NUMBER :=3.1415926;
radius BINARY_INTEGER :=5;
diameter NUMBER;
area NUMBER;
BEGIN
diameter := 2*pi*radius;
area := PI*(radius**2);
DBMS_OUTPUT.PUT_LINE('If radius of a circle is'||radius);
DBMS_OUTPUT.PUT_LINE('Diameter is'||ROUND(diameter,2));
DBMS_OUTPUT.PUT_LINE('And area is'||ROUND(area,2));
END;
/
PL/SQL operators are + for addition, - for subtraction or negation, * for multiplication, /
for division, ** for exponentiation. Note: exponentiation used in the circle area. Also
see sql operators for more operators and examples.

PL/SQL IF Statement Like any other language, IF can be used to make selections among range of options.
The general syntax for PL/SQL if statement is as follows:
IF condition THEN
PL/SQL statement to be executed
END IF
Any if statement must have corresponding end if. The condition tests true value and
returns either True or False. It executes the programming statement within the if block
when the condition is satisfied.
Here is an if statement example:
DECLARE
birth_date DATE;
today_date DATE;
age BINARY_INTEGER;
BEGIN
birth_date:=TO_DATE('01/03/1980','MM/DD/YYYY');
today_date := SYSDATE;
age:=TRUNC((today_date-birth_date)/365,0);
IF age > 18 THEN
DBMS_OUTPUT.PUT_LINE('The age is ' || age || ' which is more then 18 years');
END IF;
END;
/
This program declares two date variables and assigns date values to each. Then
subtracts
today date from the other day provided and divides it by 356 days to get a year value.
TRUNC truncates the result to specified decimal points, in this case 0. When declared,
the default date is in the format 01-Jan-02. You must convert it to date value in order to
perform calculation. The result from the date calculation is stored in the variable age.
Then if statement is used to check this value is more then 18 and display the DBMS line
if so, otherwise nothing will happen.
IF/THEN ELSE Statement If tests a condition and else test alternative. In the previous example, message is
displayed when the condition is true and nothing happens when the condition is false.
What about if you want display another message when the condition is false?. Well, that
is when you need an ELSE statement.

Here is an IF/THEN ELSE statement syntax:
IF condition THEN
PL/SQL statement to be executed when the condition is true
ELSE
PL/SQL alternative statement to be executed when the condition is false
END IF;
The following is an example of if/then else statement:
DECLARE
today_date DATE;
today_day VARCHAR2(9);
BEGIN
today_date := SYSDATE;
today_day := TO_CHAR(today_date,'DAY');
today_day:=RTRIM(today_day);
today_day := INITCAP(today_day);
IF today_day = 'Friday' THEN
DBMS_OUTPUT.PUT_LINE('Today is '|| today_day);
ELSE
DBMS_OUTPUT.PUT_LINE('Today is not Friday');
END IF;
END;
/
Nested IF/THEN ELSE Statement Nested if/then else statement is structure that tests multiple conditions. If the first
condition is not true, then it tests the second condition, third, fourth, and so on depend
on
the number of conditions and finally executes else if specified.
The following is continuation of previous example that tests todayay_day variable for
everyday and displays related message using nested if statement:
DECLARE
today_date DATE;
today_day VARCHAR2(9);
BEGIN
today_date := SYSDATE;
today_day := TO_CHAR(today_date,'DAY');
today_day:=RTRIM(today_day);

today_day := INITCAP(today_day);
IF today_day = 'Friday' THEN
DBMS_OUTPUT.PUT_LINE('Today is Friday');
ELSIF today_day = 'Saturday' THEN
DBMS_OUTPUT.PUT_LINE('Today is Saturday');
ELSIF today_day = 'Sunday' THEN
DBMS_OUTPUT.PUT_LINE('Today is Sunday');
ELSIF today_day = 'Monday' THEN
DBMS_OUTPUT.PUT_LINE('Today is Monday');
ELSIF today_day = 'Tuesday' THEN
DBMS_OUTPUT.PUT_LINE('Today is Tuesday');
ELSIF today_day = 'Wednesday' THEN
DBMS_OUTPUT.PUT_LINE('Today is Wednesday');
ELSIF today_day = 'Thursday' THEN
DBMS_OUTPUT.PUT_LINE('Today is Thursday');
END IF;
END;
/
Similarly, you can test if the condition is greater, less, equal, not equal signs to test the
condition. You can also combine two condition using OR and AND. For example you
can test if age is less then 18 or greater then 65 by simply doing this:
IF age < 18 OR age > 65 THEN
Execute statement
END IF;
You can also test if two or more conditions test true by doing this:
IF age > 18 AND salary > 45000 THEN
execute statement
END IF;
The End of PL/SQL IF Statement
PL/SQL Loops Loops are program structures that perform tasks continuously or until a specific exit
condition is reached. There are two types of loops, pretest loop and posttest loop. In
pretest loop, the condition is tested before the looping program statement is executed.
In
posttest loop, the condition is tested after the looping program statement is executed.
Pretest loop is used when there is a case in which the looping program statements
might
never be tested while posttest loop is used when there is a case that the loop statement

will be execute. There are also different sub types of loops such as LOOP..EXIT,
WHILE..LOOP, LOOP..EXIT WHEN, and FOR..LOOP. We will illustrate this by
examples.
This is the syntax for LOOP..EXIT which is pretest loop:
LOOP
PL/SQL program statement
IF condition THEN
EXIT;
END IF;
PL/SQL statement
END LOOP;
We will be working on the following employees table to illustrate the use of loops
Field Name Data Type Stores
EmployeeID INTEGER Employee ID
FName VARCHAR2 First Name
SName VARCHAR2 Last Name
Position VARCHAR2 Position
The following example inserts first four employee's IDs and same position using
LOOP..EXIT statement:
DECLARE
employeeID BINARY_INTEGER := 1;
position VARCHAR2(10) := 'Sales';
BEGIN
LOOP
INSERT INTO employees VALUES(employeeID, NULL,
NULL, position);
IF employeeID=4 THEN
EXIT;
END IF;
employeeID := employeeID+1;
END LOOP;
END;
/
This is the result of the above example. After the loop was executed, we selected
everything from employees table to show the inserted data.
This is the syntax for LOOP..EXIT WHEN which is posttest loop:
LOOP
PL/SQL program statement

EXIT WHEN condition;
END LOOP;
The following is previous example using LOOP..EXIT WHEN this time:
DECLARE
employeeID BINARY_INTEGER := 1;
position VARCHAR2(10) := 'Sales';
BEGIN
LOOP
INSERT INTO employees VALUES(employeeID, NULL, NULL,
position);
EXIT WHEN employeeID=4;
employeeID := employeeID+1;
END LOOP;
END;
/
This is the syntax for WHILE..LOOP which is pretest loop:
WHILE condition
LOOP
PL/SQL program statement
END LOOP;
The following is previous example using WHILE..LOOP this time:
DECLARE
employeeID BINARY_INTEGER := 1;
position VARCHAR2(10) := 'Sales';
BEGIN
WHILE employeeID < 5
LOOP
INSERT INTO employees VALUES(employeeID, NULL, NULL,
position);
employeeID := employeeID+1;
END LOOP;
END;
/
This is the syntax for FOR..LOOP which the loop increments or decrements from
certain point to certain point.
FOR counter IN start_value .. end_value

LOOP
PL/SQL program statement
END LOOP;
The following is previous example using FOR..LOOP this time:
BEGIN
FOR employeeID IN 1..4
LOOP
INSERT INTO employees VALUES(employeeID, NULL, NULL,
'Sales');
END LOOP;
END;
/

Lab#12: More on PL/SQL
Dear batch20 (CS) students, this Lab will be my last Lab with you people. This lab is
continuation of previous lab(DB Lab#11) and will be part of your final examination. In
today‘s Lab I will be discussing the following PL/SQL topics.
Cursors
Implicit Cursors
Explicit Cursors
Stored Procedure
Functions
Parameters in Procedure and Functions
Triggers
Cursors A cursor is a temporary work area created in the system memory when a SQL
statement is executed. A cursor contains information on a select statement and the
rows of data accessed by it. This temporary work area is used to store the data
retrieved from the database, and manipulate this data. A cursor can hold more than one
row, but can process only one row at a time. The set of rows the cursor holds is called
the active set.
There are two types of cursors in PL/SQL:
Implicit cursors:
These are created by default when DML statements like, INSERT, UPDATE, and
DELETE statements are executed. They are also created when a SELECT statement
that returns just one row is executed.
Explicit cursors:
They must be created when you are executing a SELECT statement that returns more
than one row. Even though the cursor stores multiple records, only one record can be
processed at a time, which is called as current row. When you fetch a row the current
row position moves to next row.
Both implicit and explicit cursors have the same functionality, but they differ in the way
they are accessed.
Implicit Cursors:
When you execute DML statements like DELETE, INSERT, UPDATE and SELECT
statements, implicit statements are created to process these statements.
Oracle provides few attributes called as implicit cursor attributes to check the status of
DML operations. The cursor attributes available are %FOUND, %NOTFOUND,
%ROWCOUNT, and %ISOPEN.

For example, When you execute INSERT, UPDATE, or DELETE statements the cursor
attributes tell us whether any rows are affected and how many have been affected.
When a SELECT... INTO statement is executed in a PL/SQL Block, implicit cursor
attributes can be used to find out whether any row has been returned by the SELECT
statement. PL/SQL returns an error when no data is selected.
The status of the cursor for each of these attributes are defined in the below table.
Attributes Return Value Example
%FOUND The return value is TRUE, if the DML
statements like INSERT, DELETE and
UPDATE affect at least one row and if
SELECT ….INTO statement return at least
one row.
SQL%FOUND
The return value is FALSE, if DML
statements like INSERT, DELETE and
UPDATE do not affect row and if
SELECT….INTO statement do not return a
row.
%NOTFOUND The return value is FALSE, if DML
statements like INSERT, DELETE and
UPDATE at least one row and if SELECT
….INTO statement return at least one row.
SQL%NOTFOUND
The return value is TRUE, if a DML
statement like INSERT, DELETE and
UPDATE do not affect even one row and if
SELECT ….INTO statement does not
return a row.
%ROWCOUNT Return the number of rows affected by the
DML operations INSERT, DELETE,
UPDATE, SELECT
SQL%ROWCOUNT
For Example: Consider the PL/SQL Block that uses implicit cursor attributes as
shown below:
DECLARE var_rows number(5);
BEGIN
UPDATE employee
SET salary = salary + 1000;
IF SQL%NOTFOUND THEN
dbms_output.put_line('None of the salaries where updated');
ELSIF SQL%FOUND THEN
var_rows := SQL%ROWCOUNT;
dbms_output.put_line('Salaries for ' || var_rows || 'employees are updated');

END IF;
END;
In the above PL/SQL Block, the salaries of all the employees in the ‗employee‘ table are
updated. If none of the employee‘s salary are updated we get a message 'None of the
salaries where updated'. Else we get a message like for example, 'Salaries for 1000
employees are updated' if there are 1000 rows in ‗employee‘ table.
Explicit Cursors
An explicit cursor is defined in the declaration section of the PL/SQL Block. It is
created on a SELECT Statement which returns more than one row. We can provide a
suitable name for the cursor.
The General Syntax for creating a cursor is as given below:
CURSOR cursor_name IS select_statement;
cursor_name – A suitable name for the cursor.
select_statement – A select query which returns multiple rows.
How to use Explicit Cursor?
There are four steps in using an Explicit Cursor.
DECLARE the cursor in the declaration section.
OPEN the cursor in the Execution Section.
FETCH the data from cursor into PL/SQL variables or records in the Execution Section.
CLOSE the cursor in the Execution Section before you end the PL/SQL Block.
1) Declaring a Cursor in the Declaration Section:
DECLARE
CURSOR emp_cur IS
SELECT *
FROM emp_tbl
WHERE salary > 5000;
In the above example we are creating a cursor ‗emp_cur‘ on a query which returns
the records of all the
employees with salary greater than 5000. Here ‗emp_tbl‘ in the table which contains
records of all the
employees.
2) Accessing the records in the cursor:
Once the cursor is created in the declaration section we can access the cursor in
the execution
section of the PL/SQL program.
How to access an Explicit Cursor?
These are the three steps in accessing the cursor.
1) Open the cursor.

2) Fetch the records in the cursor one at a time.
3) Close the cursor.
General Syntax to open a cursor is:
OPEN cursor_name;
General Syntax to fetch records from a cursor is:
FETCH cursor_name INTO record_name;
OR
FETCH cursor_name INTO variable_list;
General Syntax to close a cursor is:
CLOSE cursor_name;
When a cursor is opened, the first row becomes the current row. When the data is
fetched it is copied to the record or variables and the logical pointer moves to the next
row and it becomes the current row. On every fetch statement, the pointer moves to the
next row. If you want to fetch after the last row, the program will throw an error. When
there is more than one row in a cursor we can use loops along with explicit cursor
attributes to fetch all the records.
Points to remember while fetching a row:
· We can fetch the rows in a cursor to a PL/SQL Record or a list of variables created in
the PL/SQL Block.
· If you are fetching a cursor to a PL/SQL Record, the record should have the same
structure as the cursor.
· If you are fetching a cursor to a list of variables, the variables should be listed in the
same order in the fetch statement as the columns are present in the cursor.
General Form of using an explicit cursor is:
DECLARE
variables;
records;
create a cursor;
BEGIN
OPEN cursor;
FETCH cursor;
process the records;
CLOSE cursor;
END;
Lets Look at the example below
Example 1:
1> DECLARE
2> emp_rec emp_tbl%rowtype;

3> CURSOR emp_cur IS
4> SELECT *
5> FROM
6> WHERE salary > 10;
7> BEGIN
8> OPEN emp_cur;
9> FETCH emp_cur INTO emp_rec;
10> dbms_output.put_line (emp_rec.first_name || ' ' || emp_rec.last_name);
11> CLOSE emp_cur;
12> END;
In the above example, first we are creating a record ‗emp_rec‘ of the same structure as
of table ‗emp_tbl‘ in line no 2. We can also create a record with a cursor by replacing
the table name with the cursor name. Second, we are declaring a cursor ‗emp_cur‘ from
a select query in line no 3 - 6. Third, we are opening the cursor in the execution section
in line no 8. Fourth, we are fetching the cursor to the record in line no 9. Fifth, we are
displaying the first_name and last_name of the employee in the record emp_rec in line
no 10. Sixth, we are closing the cursor in line no 11.
What are Explicit Cursor Attributes?
Oracle provides some attributes known as Explicit Cursor Attributes to control the data
processing while using cursors. We use these attributes to avoid errors while accessing
cursors through OPEN, FETCH and CLOSE Statements.
When does an error occur while accessing an explicit cursor?
a) When we try to open a cursor which is not closed in the previous operation.
b) When we try to fetch a cursor after the last operation.
These are the attributes available to check the status of an explicit cursor.
Attributes Return values Example
%FOUND TRUE, if fetch statement returns at
least one row.
Cursor_name%FOUND
FALSE, if fetch statement doesn‘t
return a row.
%NOTFOUND TRUE, , if fetch statement doesn‘t
return a row.
Cursor_name%NOTFOUND
FALSE, if fetch statement returns at
least one row.
%ROWCOUNT The number of rows fetched by the
fetch statement
Cursor_name%ROWCOUNT
If no row is returned, the PL/SQL
statement returns an error.

%ISOPEN TRUE, if the cursor is already open
in the program
Cursor_name%ISNAME
FALSE, if the cursor is not opened
in the program.
Using Loops with Explicit Cursors:
Oracle provides three types of cursors namely SIMPLE LOOP, WHILE LOOP and FOR
LOOP. These loops can be used to process multiple rows in the cursor. Here I will
modify the same example for each loops to explain how to use loops with cursors.
Cursor with a Simple Loop:
1> DECLARE
2> CURSOR emp_cur IS
3> SELECT first_name, last_name, salary FROM emp_tbl;
4> emp_rec emp_cur%rowtype;
5> BEGIN
6> IF NOT sales_cur%ISOPEN THEN
7> OPEN sales_cur;
8> END IF;
9> LOOP
10> FETCH emp_cur INTO emp_rec;
11> EXIT WHEN emp_cur%NOTFOUND;
12> dbms_output.put_line(emp_cur.first_name || ' ' ||emp_cur.last_name
13> || ' ' ||emp_cur.salary);
14> END LOOP;
15> END;
16> /
In the above example we are using two cursor attributes %ISOPEN and %NOTFOUND.
In line no 6, we are using the cursor attribute %ISOPEN to check if the cursor is open, if
the condition is true the program does not open the cursor again, it directly moves to
line no 9.
In line no 11, we are using the cursor attribute %NOTFOUND to check whether the
fetch returned any row. If there is no rows found the program would exit, a condition
which exists when you fetch the cursor after the last row, if there is a row found the
program continues.
We can use %FOUND in place of %NOTFOUND and vice versa. If we do so, we need
to reverse the logic of the program. So use these attributes in appropriate instances.
Cursor with a While Loop:
Lets modify the above program to use while loop.
1> DECLARE

2> CURSOR emp_cur IS
3> SELECT first_name, last_name, salary FROM emp_tbl;
4> emp_rec emp_cur%rowtype;
5> BEGIN
6> IF NOT sales_cur%ISOPEN THEN
7> OPEN sales_cur;
8> END IF;
9> FETCH sales_cur INTO sales_rec;
10> WHILE sales_cur%FOUND THEN
11> LOOP
12> dbms_output.put_line(emp_cur.first_name || ' ' ||emp_cur.last_name
13> || ' ' ||emp_cur.salary);
15> FETCH sales_cur INTO sales_rec;
16> END LOOP;
17> END;
18> /
In the above example, in line no 10 we are using %FOUND to evaluate if the first fetch
statement in line no 9 returned a row, if true the program moves into the while loop. In
the loop we use fetch statement again (line no 15) to process the next row. If the fetch
statement is not executed once before the while loop the while condition will return false
in the first instance and the while loop is skipped. In the loop, before fetching the record
again, always process the record retrieved by the first fetch statement, else you will skip
the first row.
Cursor with a FOR Loop:
When using FOR LOOP you need not declare a record or variables to store the cursor
values, need not open, fetch and close the cursor. These functions are accomplished by
the FOR LOOP automatically.
General Syntax for using FOR LOOP:
FOR record_name IN cusror_name
LOOP
process the row...
END LOOP;
Let‘s use the above example to learn how to use for loops in cursors.
1> DECLARE
2> CURSOR emp_cur IS
3> SELECT first_name, last_name, salary FROM emp_tbl;
4> emp_rec emp_cur%rowtype;
5> BEGIN
6> FOR emp_rec in sales_cur
7> LOOP

8> dbms_output.put_line(emp_cur.first_name || ' ' ||emp_cur.last_name
9> || ' ' ||emp_cur.salary);
10> END LOOP;
11>END;
12> /
In the above example, when the FOR loop is processed a record ‗emp_rec‘of structure
‗emp_cur‘ gets created, the cursor is opened, the rows are fetched to the record
‗emp_rec‘ and the cursor is closed after the last row is processed. By using FOR Loop
in your program, you can reduce the number of lines in the program.
NOTE: In the examples given above, we are using backward slash ‗/‘ at the end of the
program. This indicates the oracle engine that the PL/SQL program has ended and it
can begin processing the statements.
Stored Procedures What is a Stored Procedure?
A stored procedure or in simple a proc is a named PL/SQL block which performs one
or more specific task. This is similar to a procedure in other programming languages. A
procedure has a header and a body. The header consists of the name of the procedure
and the parameters or variables passed to the procedure. The body consists or
declaration section, execution section and exception section similar to a general
PL/SQL Block. A procedure is similar to an anonymous PL/SQL Block but it is named
for repeated usage.
We can pass parameters to procedures in three ways.
1) IN-parameters
2) OUT-parameters
3) IN OUT-parameters
A procedure may or may not return any value.
General Syntax to create a procedure is:
CREATE [OR REPLACE] PROCEDURE proc_name [list of parameters]
IS
Declaration section
BEGIN
Execution section
EXCEPTION
Exception section
END;

IS - marks the beginning of the body of the procedure and is similar to DECLARE in
anonymous PL/SQL Blocks. The code between IS and BEGIN forms the Declaration
section.
The syntax within the brackets [ ] indicate they are optional. By using CREATE OR
REPLACE together the procedure is created if no other procedure with the same name
exists or the existing procedure is replaced with the current code.
The below example creates a procedure ‗employer_details‘ which gives the details of
the employee.
1> CREATE OR REPLACE PROCEDURE employer_details
2> IS
3> CURSOR emp_cur IS
4> SELECT first_name, last_name, salary FROM emp_tbl;
5> emp_rec emp_cur%rowtype;
6> BEGIN
7> FOR emp_rec in sales_cur
8> LOOP
9> dbms_output.put_line(emp_cur.first_name || ' ' ||emp_cur.last_name
10> || ' ' ||emp_cur.salary);
11> END LOOP;
12>END;
13> /
How to execute a Stored Procedure?
There are two ways to execute a procedure.
1) From the SQL prompt.
EXECUTE [or EXEC] procedure_name;
2) Within another procedure – simply use the procedure name.
procedure_name;
NOTE: In the examples given above, we are using backward slash ‗/‘ at the end of the
program. This indicates the oracle engine that the PL/SQL program has ended and it
can begin processing the statements.
PL/SQL Functions What is a Function in PL/SQL?
A function is a named PL/SQL Block which is similar to a procedure. The major
difference between a procedure and a function is, a function must always return a value,
but a procedure may or may not return a value.
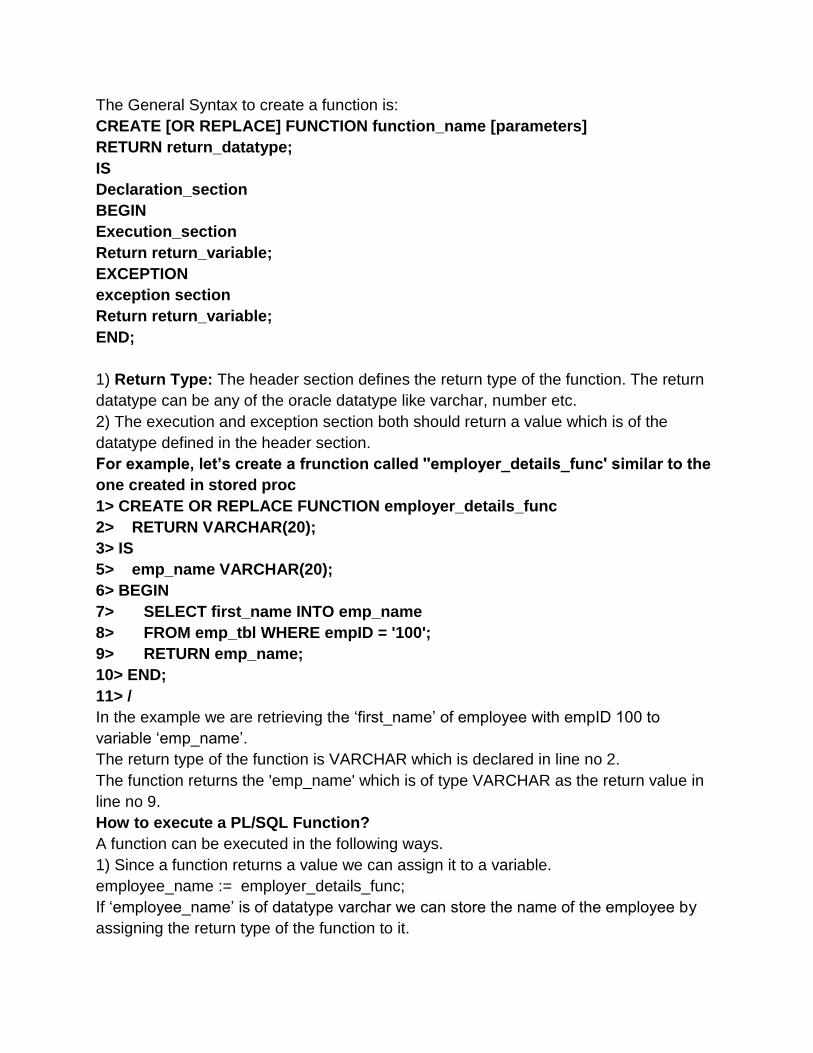
The General Syntax to create a function is:
CREATE [OR REPLACE] FUNCTION function_name [parameters]
RETURN return_datatype;
IS
Declaration_section
BEGIN
Execution_section
Return return_variable;
EXCEPTION
exception section
Return return_variable;
END;
1) Return Type: The header section defines the return type of the function. The return
datatype can be any of the oracle datatype like varchar, number etc.
2) The execution and exception section both should return a value which is of the
datatype defined in the header section.
For example, let‟s create a frunction called ''employer_details_func' similar to the
one created in stored proc
1> CREATE OR REPLACE FUNCTION employer_details_func
2> RETURN VARCHAR(20);
3> IS
5> emp_name VARCHAR(20);
6> BEGIN
7> SELECT first_name INTO emp_name
8> FROM emp_tbl WHERE empID = '100';
9> RETURN emp_name;
10> END;
11> /
In the example we are retrieving the ‗first_name‘ of employee with empID 100 to
variable ‗emp_name‘.
The return type of the function is VARCHAR which is declared in line no 2.
The function returns the 'emp_name' which is of type VARCHAR as the return value in
line no 9.
How to execute a PL/SQL Function?
A function can be executed in the following ways.
1) Since a function returns a value we can assign it to a variable.
employee_name := employer_details_func;
If ‗employee_name‘ is of datatype varchar we can store the name of the employee by
assigning the return type of the function to it.

2) As a part of a SELECT statement
SELECT employer_details_func FROM dual;
3) In a PL/SQL Statements like,
dbms_output.put_line(employer_details_func);
This line displays the value returned by the function.
Parameters in Procedure and Functions
How to pass parameters to Procedures and Functions in PL/SQL ?
In PL/SQL, we can pass parameters to procedures and functions in three ways.
1) IN type parameter: These types of parameters are used to send values to stored
procedures.
2) OUT type parameter: These types of parameters are used to get values from stored
procedures. This is similar to a return type in functions.
3) IN OUT parameter: These types of parameters are used to send values and get
values from stored procedures.
NOTE: If a parameter is not explicitly defined a parameter type, then by default it is an
IN type parameter.
1) IN parameter:
This is similar to passing parameters in programming languages. We can pass values to
the stored procedure through these parameters or variables. This type of parameter is a
read only parameter. We can assign the value of IN type parameter to a variable or use
it in a query, but we cannot change its value inside the procedure.
The General syntax to pass a IN parameter is
CREATE [OR REPLACE] PROCEDURE procedure_name (
param_name1 IN datatype, param_name12 IN datatype ... )
param_name1, • param_name2... are unique parameter names.
datatype - defines the datatype of the variable.
IN - is optional, by default it is a IN type parameter.
2) OUT Parameter:
The OUT parameters are used to send the OUTPUT from a procedure or a function.
This is a write-only parameter i.e, we cannot pass values to OUT paramters while
executing the stored procedure, but we can assign values to OUT parameter inside the
stored procedure and the calling program can recieve this output value.
The General syntax to create an OUT parameter is
CREATE [OR REPLACE] PROCEDURE proc2 (param_name OUT datatype)
The parameter should be explicity declared as OUT parameter.
3) IN OUT Parameter:

The IN OUT parameter allows us to pass values into a procedure and get output values
from the procedure. This parameter is used if the value of the IN parameter can be
changed in the calling program.
By using IN OUT parameter we can pass values into a parameter and return a value to
the calling program using the same parameter. But this is possible only if the value
passed to the procedure and output value have a same datatype. This parameter is
used if the value of the parameter will be changed in the procedure.
The General syntax to create an IN OUT parameter is
CREATE [OR REPLACE] PROCEDURE proc3 (param_name IN OUT datatype)
The below examples show how to create stored procedures using the above three types
of parameters.
Example1:
Using IN and OUT parameter:
Let‘s create a procedure which gets the name of the employee when the employee id is
passed.
1> CREATE OR REPLACE PROCEDURE emp_name (id IN NUMBER, emp_name
OUT NUMBER)
2> IS
3> BEGIN
4> SELECT first_name INTO emp_name
5> FROM emp_tbl WHERE empID = id;
6> END;
7> /
We can call the procedure „emp_name‟ in this way from a PL/SQL Block.
1> DECLARE
2> empName varchar(20);
3> CURSOR id_cur SELECT id FROM emp_ids;
4> BEGIN
5> FOR emp_rec in id_cur
6> LOOP
7> emp_name(emp_rec.id, empName);
8> dbms_output.putline('The employee ' || empName || ' has id ' || emp-rec.id);
9> END LOOP;
10> END;
11> /
In the above PL/SQL Block
In line no 3; we are creating a cursor ‗id_cur‘ which contains the employee id.
In line no 7; we are calling the procedure ‗emp_name‘, we are passing the ‗id‘ as IN
parameter and ‗empName‘ as OUT parameter.

In line no 8; we are displaying the id and the employee name which we got from the
procedure ‗emp_name‘.
Example 2:
Using IN OUT parameter in procedures:
1> CREATE OR REPLACE PROCEDURE emp_salary_increase
2> (emp_id IN emptbl.empID%type, salary_inc IN OUT emptbl.salary%type)
3> IS
4> tmp_sal number;
5> BEGIN
6> SELECT salary
7> INTO tmp_sal
8> FROM emp_tbl
9> WHERE empID = emp_id;
10> IF tmp_sal between 10000 and 20000 THEN
11> salary_inout := tmp_sal * 1.2;
12> ELSIF tmp_sal between 20000 and 30000 THEN
13> salary_inout := tmp_sal * 1.3;
14> ELSIF tmp_sal > 30000 THEN
15> salary_inout := tmp_sal * 1.4;
16> END IF;
17> END;
18> /
The below PL/SQL block shows how to execute the above 'emp_salary_increase'
procedure.
1> DECLARE
2> CURSOR updated_sal is
3> SELECT empID,salary
4> FROM emp_tbl;
5> pre_sal number;
6> BEGIN
7> FOR emp_rec IN updated_sal LOOP
8> pre_sal := emp_rec.salary;
9> emp_salary_increase(emp_rec.empID, emp_rec.salary);
10> dbms_output.put_line('The salary of ' || emp_rec.empID ||
11> ' increased from '|| pre_sal || ' to '||emp_rec.salary);
12> END LOOP;
13> END;
14> /

Trigger A trigger is a pl/sql block structure which is fired when a DML statements like Insert,
Delete, Update is executed on a database table. A trigger is triggered automatically
when an associated DML statement is executed.
Syntax of Triggers
The Syntax for creating a trigger is:
CREATE [OR REPLACE ] TRIGGER trigger_name
{BEFORE | AFTER | INSTEAD OF }
{INSERT [OR] | UPDATE [OR] | DELETE}
[OF col_name]
ON table_name
[REFERENCING OLD AS o NEW AS n]
[FOR EACH ROW]
WHEN (condition)
BEGIN
--- sql statements
END;
CREATE [OR REPLACE ] TRIGGER trigger_name - This clause creates a trigger with
the given name or overwrites an existing trigger with the same name.
{BEFORE | AFTER | INSTEAD OF } - This clause indicates at what time should the
trigger get fired. i.e for example: before or after updating a table. INSTEAD OF is used
to create a trigger on a view. before and after cannot be used to create a trigger on a
view.
{INSERT [OR] | UPDATE [OR] | DELETE} - This clause determines the triggering event.
More than one triggering events can be used together separated by OR keyword. The
trigger gets fired at all the specified triggering event.
[OF col_name] - This clause is used with update triggers. This clause is used when you
want to trigger an event only when a specific column is updated.
CREATE [OR REPLACE ] TRIGGER trigger_name - This clause creates a trigger with
the given name or overwrites an existing trigger with the same name.
[ON table_name] - This clause identifies the name of the table or view to which the
trigger is associated.
[REFERENCING OLD AS o NEW AS n] - This clause is used to reference the old and
new values of the data being changed. By default, you reference the values as
:old.column_name or :new.column_name. The reference names can also be changed

from old (or new) to any other user-defined name. You cannot reference old values
when inserting a record, or new values when deleting a record, because they do not
exist.
[FOR EACH ROW] - This clause is used to determine whether a trigger must fire when
each row gets affected ( i.e. a Row Level Trigger) or just once when the entire sql
statement is executed(i.e.statement level Trigger).
WHEN (condition) - This clause is valid only for row level triggers. The trigger is fired
only for rows that satisfy the condition specified.
For Example: The price of a product changes constantly. It is important to maintain the
history of the prices of the products.
We can create a trigger to update the 'product_price_history' table when the price of the
product is updated in the 'product' table.
1) Create the 'product' table and 'product_price_history' table
CREATE TABLE product_price_history
(product_id number(5),
product_name varchar2(32),
supplier_name varchar2(32),
unit_price number(7,2) );
CREATE TABLE product
(product_id number(5),
product_name varchar2(32),
supplier_name varchar2(32),
unit_price number(7,2) );
2) Create the price_history_trigger and execute it.
CREATE or REPLACE TRIGGER price_history_trigger
BEFORE UPDATE OF unit_price
ON product
FOR EACH ROW
BEGIN
INSERT INTO product_price_history
VALUES
(:old.product_id,
:old.product_name,
:old.supplier_name,
:old.unit_price);
END;

/
3) Lets update the price of a product.
UPDATE PRODUCT SET unit_price = 800 WHERE product_id = 100
Once the above update query is executed, the trigger fires and updates the
'product_price_history' table.
4)If you ROLLBACK the transaction before committing to the database, the data
inserted to the table is also rolled back.
Types of PL/SQL Triggers
There are two types of triggers based on the which level it is triggered.
1) Row level trigger - An event is triggered for each row upated, inserted or deleted.
2) Statement level trigger - An event is triggered for each sql statement executed.
PL/SQL Trigger Execution Hierarchy
The following hierarchy is followed when a trigger is fired.
1) BEFORE statement trigger fires first.
2) Next BEFORE row level trigger fires, once for each row affected.
3) Then AFTER row level trigger fires once for each affected row. This events will
alternates between BEFORE and AFTER row level triggers.
4) Finally the AFTER statement level trigger fires.
For Example: Let's create a table 'product_check' which we can use to store messages
when triggers are fired.
CREATE TABLE product
(Message varchar2(50),
Current_Date number(32)
);
Let's create a BEFORE and AFTER statement and row level triggers for the product
table.
1) BEFORE UPDATE, Statement Level:
This trigger will insert a record into the table 'product_check' before a sql update
statement is executed, at the statement level.
CREATE or REPLACE TRIGGER Before_Update_Stat_product
BEFORE
UPDATE ON product

Begin
INSERT INTO product_check
Values('Before update, statement level',sysdate);
END;
/
2) BEFORE UPDATE, Row Level:
This trigger will insert a record into the table 'product_check' before each row is
updated.
CREATE or REPLACE TRIGGER Before_Upddate_Row_product
BEFORE
UPDATE ON product
FOR EACH ROW
BEGIN
INSERT INTO product_check
Values('Before update row level',sysdate);
END;
/
3) AFTER UPDATE, Statement Level:
This trigger will insert a record into the table 'product_check' after a sql update
statement is executed, at the statement level.
CREATE or REPLACE TRIGGER After_Update_Stat_product
AFTER
UPDATE ON product
BEGIN
INSERT INTO product_check
Values('After update, statement level', sysdate);
End;
/
4) AFTER UPDATE, Row Level:
This trigger will insert a record into the table 'product_check' after each row is updated.
CREATE or REPLACE TRIGGER After_Update_Row_product
AFTER
insert On product
FOR EACH ROW
BEGIN
INSERT INTO product_check
Values('After update, Row level',sysdate);
END;

/
Now lets execute a update statement on table product.
UPDATE PRODUCT SET unit_price = 800
WHERE product_id in (100,101);
Lets check the data in 'product_check' table to see the order in which the trigger
is fired.
SELECT * FROM product_check;
Output:
Mesage Current_Date
------------------------------------------------------------
Before update, statement level 26-Nov-2008
Before update, row level 26-Nov-2008
After update, Row level 26-Nov-2008
Before update, row level 26-Nov-2008
After update, Row level 26-Nov-2008
After update, statement level 26-Nov-2008
The above result shows 'before update' and 'after update' row level events have
occured twice, since two records were updated. But 'before update' and 'after update'
statement level events are fired only once per sql statement.
The above rules apply similarly for INSERT and DELETE statements.
How To know Information about Triggers.
We can use the data dictionary view 'USER_TRIGGERS' to obtain information about
any trigger.
The below statement shows the structure of the view 'USER_TRIGGERS'
DESC USER_TRIGGERS;
NAME Type
--------------------------------------------------------
TRIGGER_NAME VARCHAR2(30)
TRIGGER_TYPE VARCHAR2(16)
TRIGGER_EVENT VARCHAR2(75)
TABLE_OWNER VARCHAR2(30)
BASE_OBJECT_TYPE VARCHAR2(16)
TABLE_NAME VARCHAR2(30)
COLUMN_NAME VARCHAR2(4000)
REFERENCING_NAMES VARCHAR2(128)
WHEN_CLAUSE VARCHAR2(4000)
STATUS VARCHAR2(8)
DESCRIPTION VARCHAR2(4000)
ACTION_TYPE VARCHAR2(11)
TRIGGER_BODY LONG
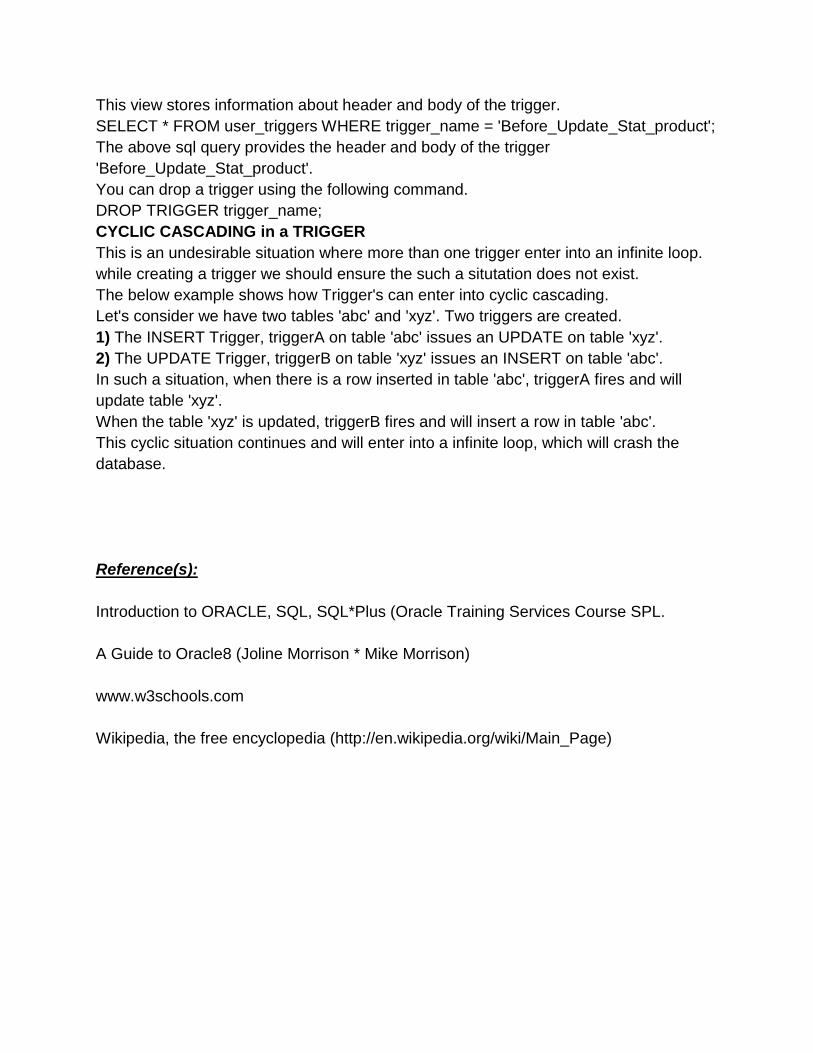
This view stores information about header and body of the trigger.
SELECT * FROM user_triggers WHERE trigger_name = 'Before_Update_Stat_product';
The above sql query provides the header and body of the trigger
'Before_Update_Stat_product'.
You can drop a trigger using the following command.
DROP TRIGGER trigger_name;
CYCLIC CASCADING in a TRIGGER
This is an undesirable situation where more than one trigger enter into an infinite loop.
while creating a trigger we should ensure the such a situtation does not exist.
The below example shows how Trigger's can enter into cyclic cascading.
Let's consider we have two tables 'abc' and 'xyz'. Two triggers are created.
1) The INSERT Trigger, triggerA on table 'abc' issues an UPDATE on table 'xyz'.
2) The UPDATE Trigger, triggerB on table 'xyz' issues an INSERT on table 'abc'.
In such a situation, when there is a row inserted in table 'abc', triggerA fires and will
update table 'xyz'.
When the table 'xyz' is updated, triggerB fires and will insert a row in table 'abc'.
This cyclic situation continues and will enter into a infinite loop, which will crash the
database.
Reference(s):
Introduction to ORACLE, SQL, SQL*Plus (Oracle Training Services Course SPL.
A Guide to Oracle8 (Joline Morrison * Mike Morrison)
www.w3schools.com
Wikipedia, the free encyclopedia (http://en.wikipedia.org/wiki/Main_Page)