Cthulhu Handbag - elzeblaadje.files.wordpress.com · 1 Elzeblaadje©Alice Bakker-Sicking 2014-2015...
6
1 Elzeblaadje©Alice Bakker-Sicking 2014-2015 Cthulhu Handbag Crochet pattern Introduction The ancient god Cthulhu rises at sunset from the waters of the sea. This was the theme of my Cthulhu challenge. I decided to make a handbag. I will write down some details of the making of the bag, so you can make your own Cthulhu handbag. The Mini Cthulhu on the photograph is published as pattern on my blog. http://elzeblaadje.wordpress.com/ Needed green and red cotton yarn, 3-4 skeins, hook 2.5 mm, 2 large red beads, 2 large green buttons, 2 small shirt buttons green fabric, some stuffing like fiberfill, chenille or coated wire, reinforcement band, 1,5 m cord, a small piece of green band 2 snaps, yarn needle small needle iron thread US terminology is used MR = Magic ring sc = Single crochet hdc = Half double crochet dc = Double crochet slst = Slipstitch st = stitch ch = Chain inc = Increase across the round/row dec = Decrease across the round/row Bottom Begin with red cotton and make a circular bottom. Start with a Magic Ring and crochet 6 sc in the ring, mark the beginning of the rounds. Crochet in a spiral way and increase in every round 6 stitches, later on 7, 8 or 9, make a flat bottom! You can make the bottom as wide as you like. I made 25 rounds. For making the waves it is practical
Transcript of Cthulhu Handbag - elzeblaadje.files.wordpress.com · 1 Elzeblaadje©Alice Bakker-Sicking 2014-2015...
1 Elzeblaadje©Alice Bakker-Sicking 2014-2015
Cthulhu Handbag Crochet pattern
Introduction
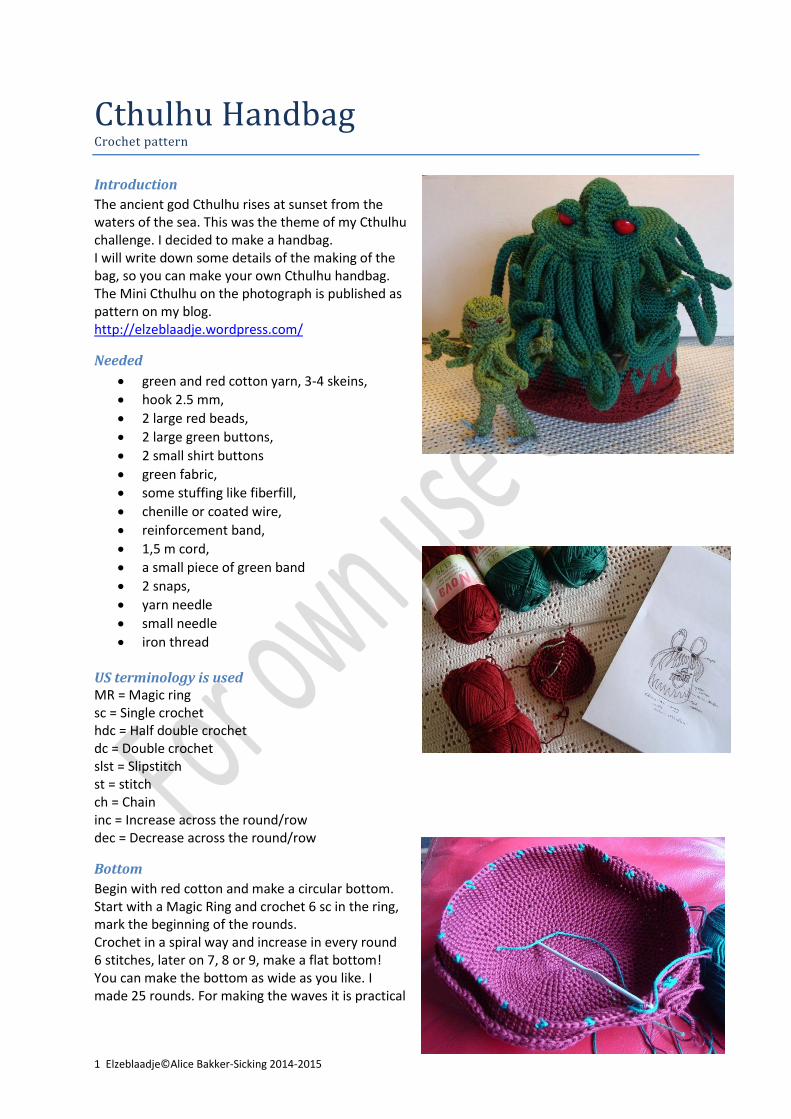
The ancient god Cthulhu rises at sunset from the waters of the sea. This was the theme of my Cthulhu challenge. I decided to make a handbag. I will write down some details of the making of the bag, so you can make your own Cthulhu handbag. The Mini Cthulhu on the photograph is published as pattern on my blog. http://elzeblaadje.wordpress.com/
Needed
green and red cotton yarn, 3-4 skeins,
hook 2.5 mm,
2 large red beads,
2 large green buttons,
2 small shirt buttons
green fabric,
some stuffing like fiberfill,
chenille or coated wire,
reinforcement band,
1,5 m cord,
a small piece of green band
2 snaps,
yarn needle
small needle
iron thread
US terminology is used MR = Magic ring sc = Single crochet hdc = Half double crochet dc = Double crochet slst = Slipstitch st = stitch ch = Chain inc = Increase across the round/row dec = Decrease across the round/row
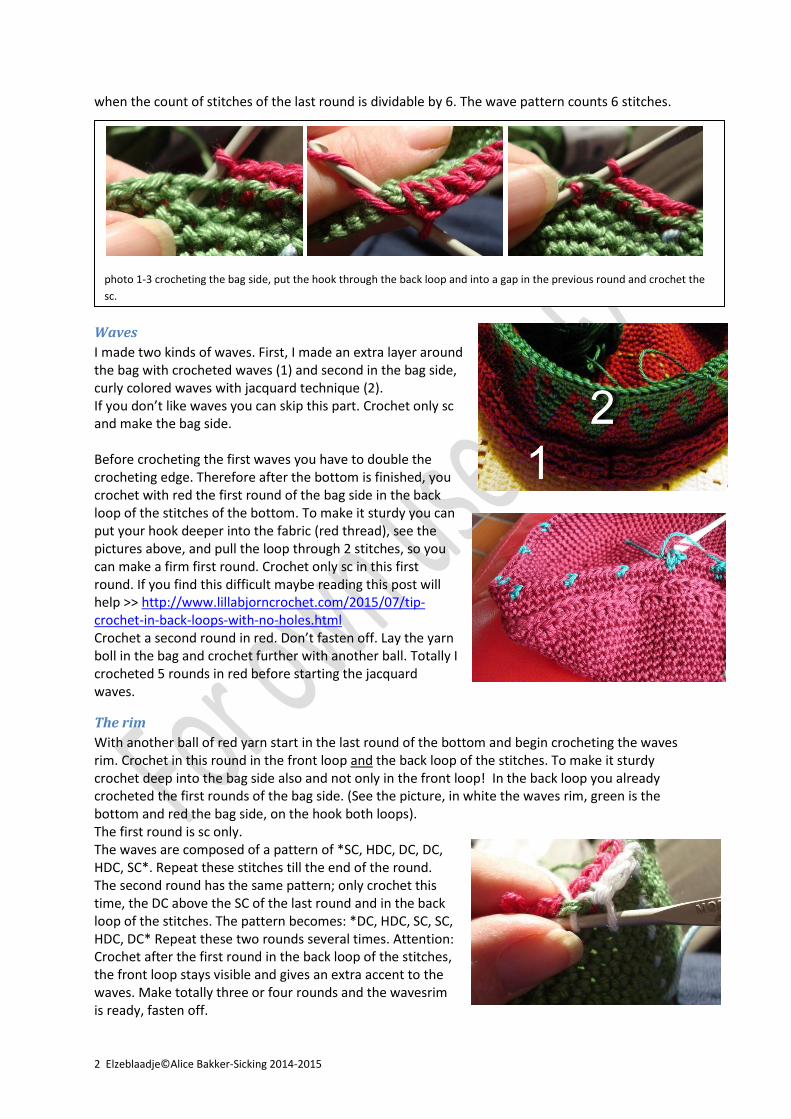
Bottom
Begin with red cotton and make a circular bottom. Start with a Magic Ring and crochet 6 sc in the ring, mark the beginning of the rounds. Crochet in a spiral way and increase in every round 6 stitches, later on 7, 8 or 9, make a flat bottom! You can make the bottom as wide as you like. I made 25 rounds. For making the waves it is practical
2 Elzeblaadje©Alice Bakker-Sicking 2014-2015
when the count of stitches of the last round is dividable by 6. The wave pattern counts 6 stitches.
Waves
I made two kinds of waves. First, I made an extra layer around the bag with crocheted waves (1) and second in the bag side, curly colored waves with jacquard technique (2). If you don’t like waves you can skip this part. Crochet only sc and make the bag side. Before crocheting the first waves you have to double the crocheting edge. Therefore after the bottom is finished, you crochet with red the first round of the bag side in the back loop of the stitches of the bottom. To make it sturdy you can put your hook deeper into the fabric (red thread), see the pictures above, and pull the loop through 2 stitches, so you can make a firm first round. Crochet only sc in this first round. If you find this difficult maybe reading this post will help >> http://www.lillabjorncrochet.com/2015/07/tip-crochet-in-back-loops-with-no-holes.html Crochet a second round in red. Don’t fasten off. Lay the yarn boll in the bag and crochet further with another ball. Totally I crocheted 5 rounds in red before starting the jacquard waves.
The rim
With another ball of red yarn start in the last round of the bottom and begin crocheting the waves rim. Crochet in this round in the front loop and the back loop of the stitches. To make it sturdy crochet deep into the bag side also and not only in the front loop! In the back loop you already crocheted the first rounds of the bag side. (See the picture, in white the waves rim, green is the bottom and red the bag side, on the hook both loops). The first round is sc only. The waves are composed of a pattern of *SC, HDC, DC, DC, HDC, SC*. Repeat these stitches till the end of the round. The second round has the same pattern; only crochet this time, the DC above the SC of the last round and in the back loop of the stitches. The pattern becomes: *DC, HDC, SC, SC, HDC, DC* Repeat these two rounds several times. Attention: Crochet after the first round in the back loop of the stitches, the front loop stays visible and gives an extra accent to the waves. Make totally three or four rounds and the wavesrim is ready, fasten off.
photo 1-3 crocheting the bag side, put the hook through the back loop and into a gap in the previous round and crochet the
sc.

3 Elzeblaadje©Alice Bakker-Sicking 2014-2015
The bag side After finishing the waves, (1) return to the bag side and start with green to crochet the jacquard waves (2). You can use a stitch marker to mark the rounds. Carry along the threads while crocheting in such a way that on the inside of the bag there are no loose threads. Don't cut the thread, crochet over it and pull it a bit tight, so the carried color doesn't show through. (see picture)
Wave jacquard pattern:
1. 1 green sc and 5 red sc, repeat till end of round. 2. 2 green sc and 4 red sc, repeat till end of round, 3. 3 green sc and 3 red sc, repeat till end of round, 4. 4 green sc and 2 red sc, repeat till end of round, 5. 2 green sc and 1 red sc, repeat till end of round, 6. 3 green sc, 1 red sc, 1 green sc, 1 red sc, repeat till end of round, 7. 4 green sc, 2 red sc, repeat till end of round, 8. Fasten off the red thread and move on with the green yarn, the waves are ready.
The bag side
Now comes the easy part, crochet with green the side of the bag until it is high enough, and then start with the decreases. I made 23 rounds of green before the decreases. Totally counts the bag side 35 rounds before the decreases.
Decreasing
Count the stitches of the last round; divide it in 8 or 9 parts. On the end of each part decrease one sc. Repeat this round 5 times. Try to make the decreases above each other.
Crochet the tunnel
After the decreases, crochet sc to the middle of the first part and turn the work, mark this stitch. On this place you construct a split. Crochet from now on back and forth. Crochet the next round SC, HDC or DC to the marked stitch. Turn and crochet a second row, repeat these rows 2 times or more until the tunnel is 2 cm high (approx. 1 inch). Fold the tunnel and sew the tunnel manually to the bag. Lace a piece of black or green cord through the tunnel. Make a loose knot in the cord. Now you can tighten the bag.
The handles
Make 2 I made the handles in the end. First measure a piece of reinforcement that is somewhat longer than the tunnel of the bag. Sew manually with the yarn needle this piece to the base of the tunnel. Measure also two pieces of black cord for making the handles, they have to be a bit longer than the handles
4 Elzeblaadje©Alice Bakker-Sicking 2014-2015
themselves. Estimate the length of the cord on the basis of your bag with cover. Crochet a MR with 8 sc in it, don’t tighten the stitches in the MR, leave a gap open, wide enough for the cord to put through. Crochet in a spiral way sc over 8 stitches until the length of the cord is reached minus 3 - 4 cm / 1 – 1.5 inch. Lace the cord pieces up into the handles. Fold the ends of the cord pieces, to form a loop, put the loose end of the cord in to the handle. Sew the end of the handles (with the sewing machine) onto the bag and reinforcement, let the loop protrude; sew the loops manually with the yarn needle to the bag.
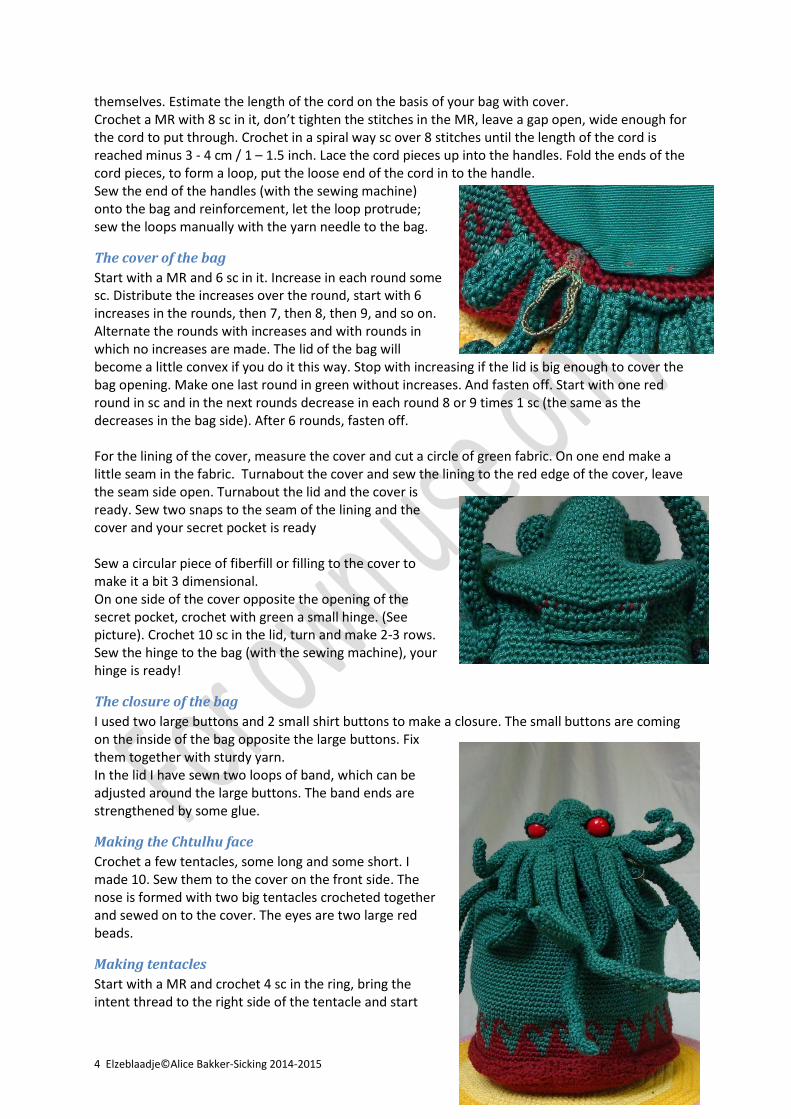
The cover of the bag
Start with a MR and 6 sc in it. Increase in each round some sc. Distribute the increases over the round, start with 6 increases in the rounds, then 7, then 8, then 9, and so on. Alternate the rounds with increases and with rounds in which no increases are made. The lid of the bag will become a little convex if you do it this way. Stop with increasing if the lid is big enough to cover the bag opening. Make one last round in green without increases. And fasten off. Start with one red round in sc and in the next rounds decrease in each round 8 or 9 times 1 sc (the same as the decreases in the bag side). After 6 rounds, fasten off. For the lining of the cover, measure the cover and cut a circle of green fabric. On one end make a little seam in the fabric. Turnabout the cover and sew the lining to the red edge of the cover, leave the seam side open. Turnabout the lid and the cover is ready. Sew two snaps to the seam of the lining and the cover and your secret pocket is ready Sew a circular piece of fiberfill or filling to the cover to make it a bit 3 dimensional. On one side of the cover opposite the opening of the secret pocket, crochet with green a small hinge. (See picture). Crochet 10 sc in the lid, turn and make 2-3 rows. Sew the hinge to the bag (with the sewing machine), your hinge is ready!
The closure of the bag
I used two large buttons and 2 small shirt buttons to make a closure. The small buttons are coming on the inside of the bag opposite the large buttons. Fix them together with sturdy yarn. In the lid I have sewn two loops of band, which can be adjusted around the large buttons. The band ends are strengthened by some glue.
Making the Chtulhu face
Crochet a few tentacles, some long and some short. I made 10. Sew them to the cover on the front side. The nose is formed with two big tentacles crocheted together and sewed on to the cover. The eyes are two large red beads.
Making tentacles
Start with a MR and crochet 4 sc in the ring, bring the intent thread to the right side of the tentacle and start
5 Elzeblaadje©Alice Bakker-Sicking 2014-2015
crocheting in a spiral way, over the whole length of the tentacle increase here and there a sc. By the end the rounds measure 8, 9 or 10 sc. Put a chenille or a piece of coated wire in the tentacle and if necessary some stuffing, and sew the tentacles to the cover
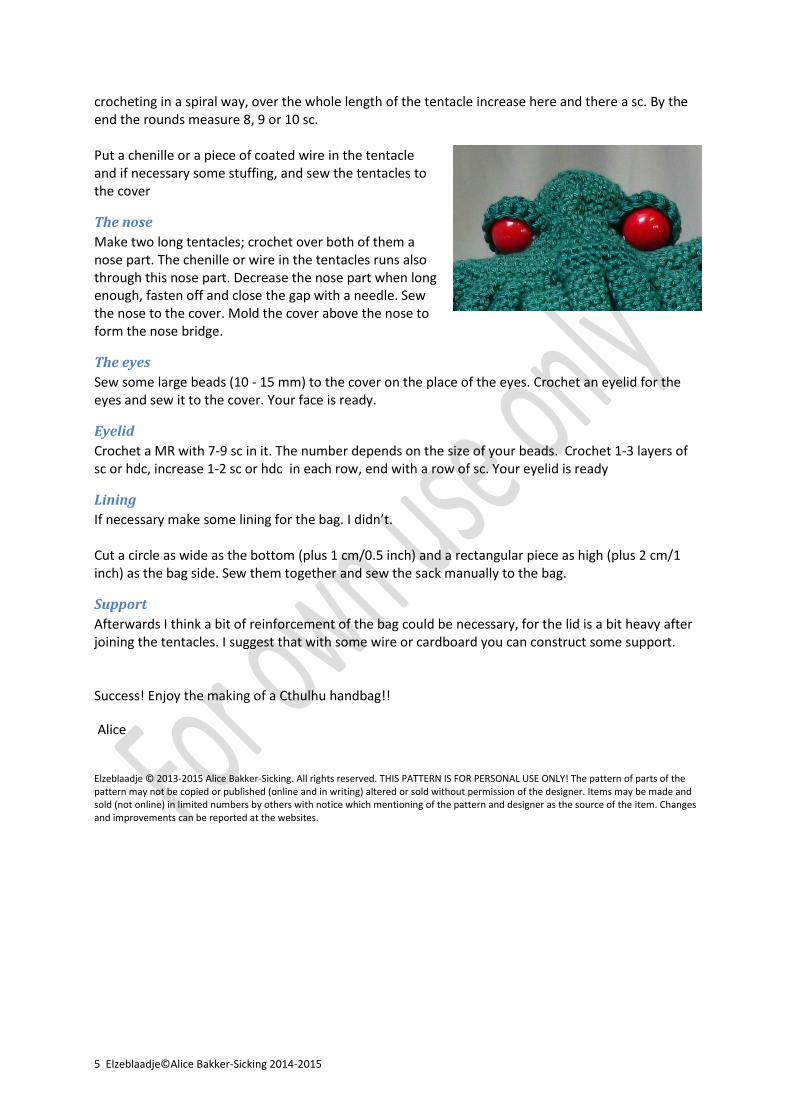
The nose
Make two long tentacles; crochet over both of them a nose part. The chenille or wire in the tentacles runs also through this nose part. Decrease the nose part when long enough, fasten off and close the gap with a needle. Sew the nose to the cover. Mold the cover above the nose to form the nose bridge.
The eyes
Sew some large beads (10 - 15 mm) to the cover on the place of the eyes. Crochet an eyelid for the eyes and sew it to the cover. Your face is ready.
Eyelid
Crochet a MR with 7-9 sc in it. The number depends on the size of your beads. Crochet 1-3 layers of sc or hdc, increase 1-2 sc or hdc in each row, end with a row of sc. Your eyelid is ready
Lining
If necessary make some lining for the bag. I didn’t. Cut a circle as wide as the bottom (plus 1 cm/0.5 inch) and a rectangular piece as high (plus 2 cm/1 inch) as the bag side. Sew them together and sew the sack manually to the bag.
Support
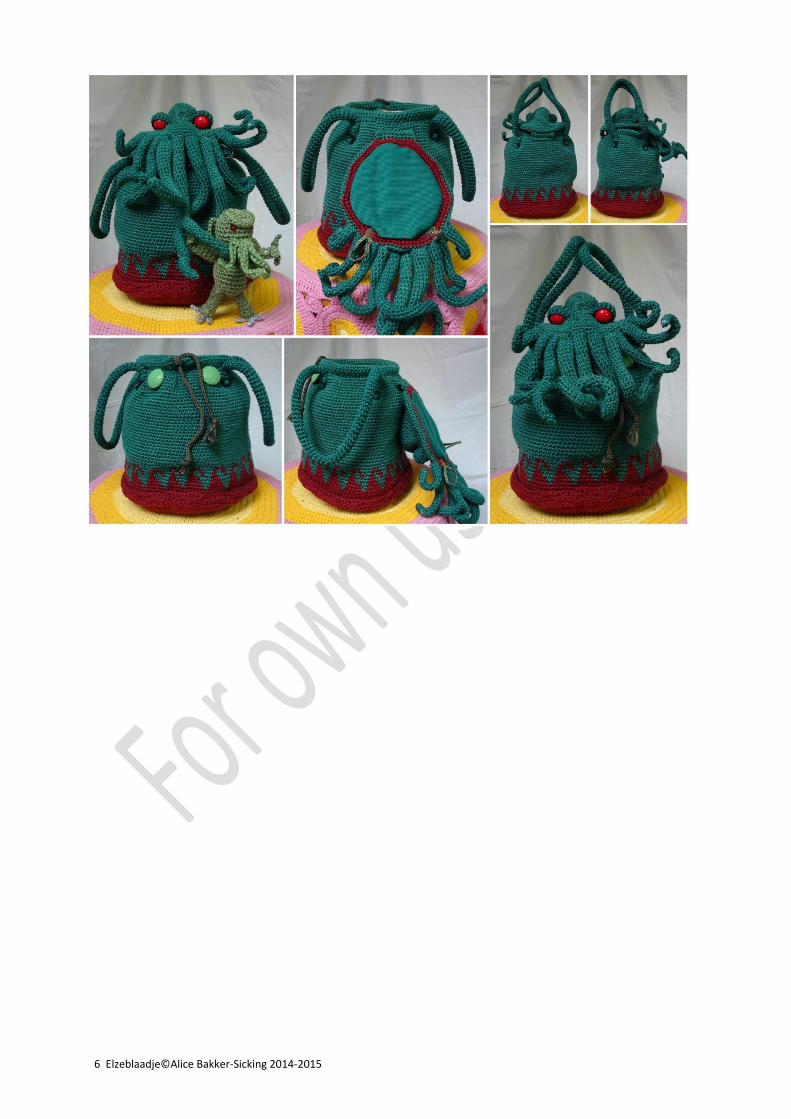
Afterwards I think a bit of reinforcement of the bag could be necessary, for the lid is a bit heavy after joining the tentacles. I suggest that with some wire or cardboard you can construct some support. Success! Enjoy the making of a Cthulhu handbag!!
Alice
Elzeblaadje © 2013-2015 Alice Bakker-Sicking. All rights reserved. THIS PATTERN IS FOR PERSONAL USE ONLY! The pattern of parts of the pattern may not be copied or published (online and in writing) altered or sold without permission of the designer. Items may be made and sold (not online) in limited numbers by others with notice which mentioning of the pattern and designer as the source of the item. Changes and improvements can be reported at the websites.
6 Elzeblaadje©Alice Bakker-Sicking 2014-2015


![[MindbendeR] Il Richiamo Di Cthulhu - Cthulhu Netbook](https://static.fdocuments.net/doc/165x107/55cf96d8550346d0338e262a/mindbender-il-richiamo-di-cthulhu-cthulhu-netbook-5681830dec108.jpg)