CSU Talent Management User Guide - Colorado State … Talent Management User Guide How to Request...
28
my HR Working together. CSU Talent Management User Guide How to Request References in TMS Last Updated: 4/27/2017
Transcript of CSU Talent Management User Guide - Colorado State … Talent Management User Guide How to Request...
my HRWorking together.
CSU Talent ManagementUser Guide How to Request References in TMS
Last Updated: 4/27/2017

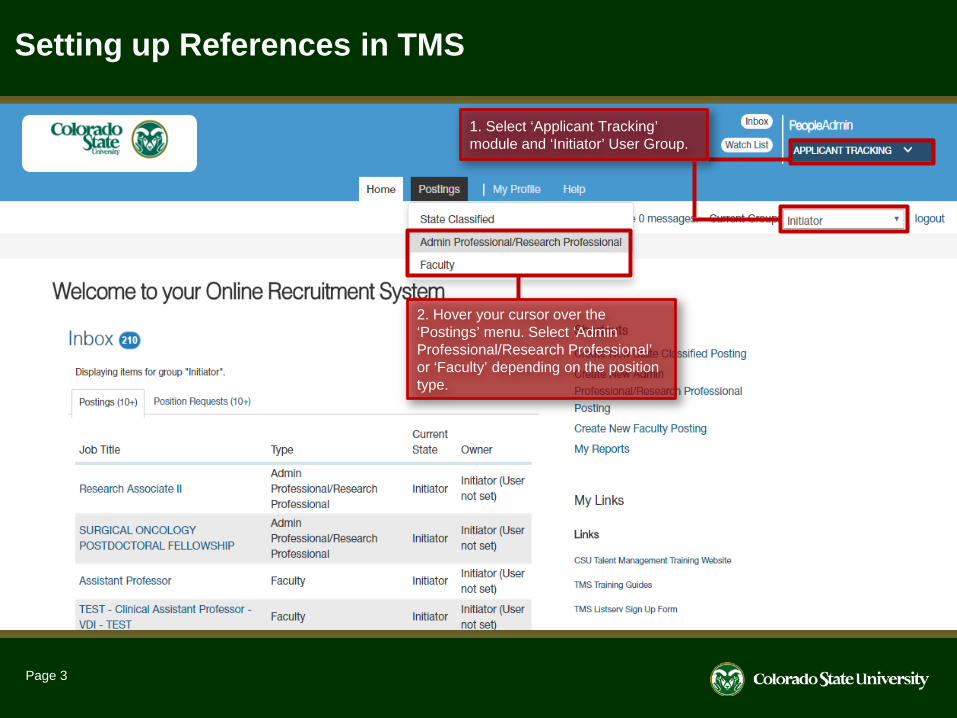
Setting up References in TMS
Page 2
The reference collection tool in the TMS is a valuable resource for search committees. It is possible for the system to collect names and contact information of references, automatically solicit letters of recommendation at predetermined workflow states, as well as update an applicant’s workflow state to indicate that all of their letters of recommendation have been submitted.
The following slides will demonstrate how to use this resource when creating new Posting requests.
Page 3
Setting up References in TMS
2. Hover your cursor over the ‘Postings’ menu. Select ‘Admin Professional/Research Professional’ or ‘Faculty’ depending on the position type.
1. Select ‘Applicant Tracking’ module and ‘Initiator’ User Group.
Page 4
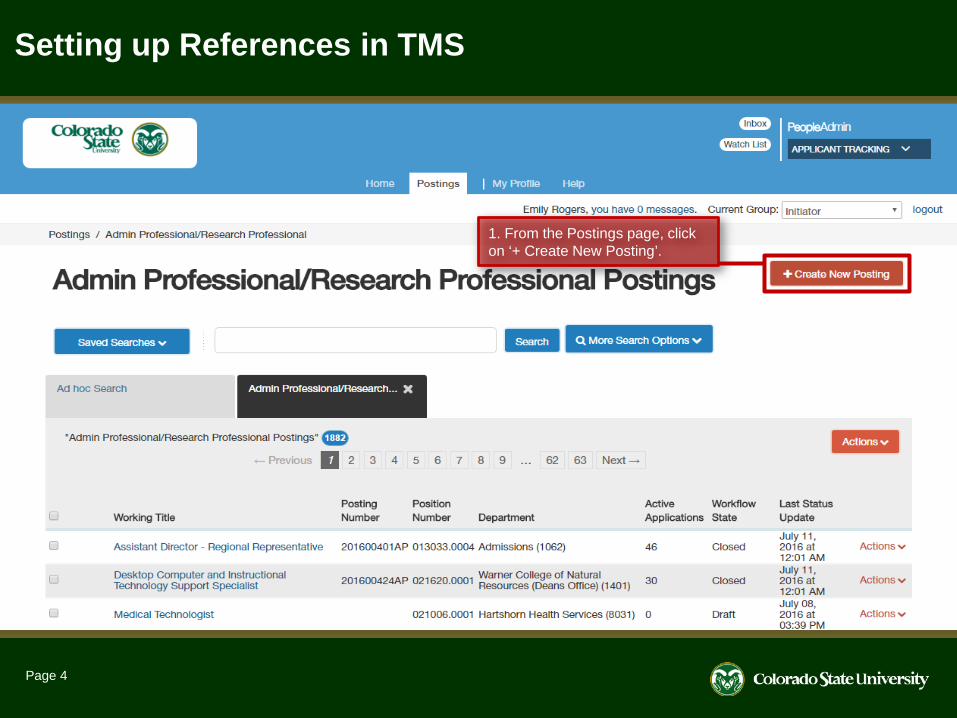
Setting up References in TMS
1. From the Postings page, click on ‘+ Create New Posting’.
Page 5
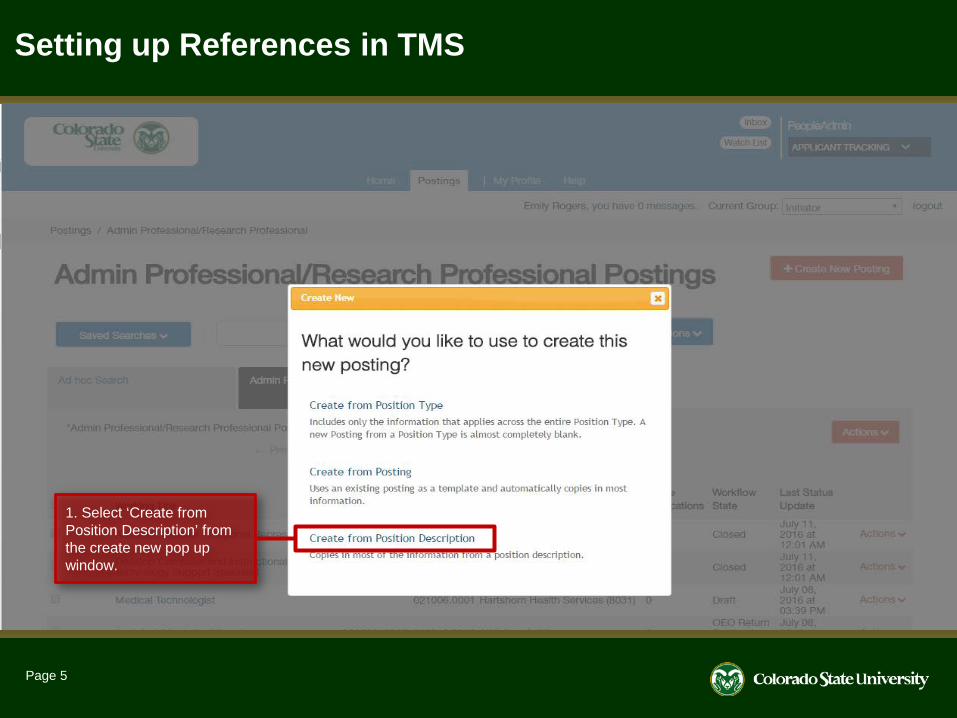
Setting up References in TMS
1. Select ‘Create from Position Description’ from the create new pop up window.
Page 6
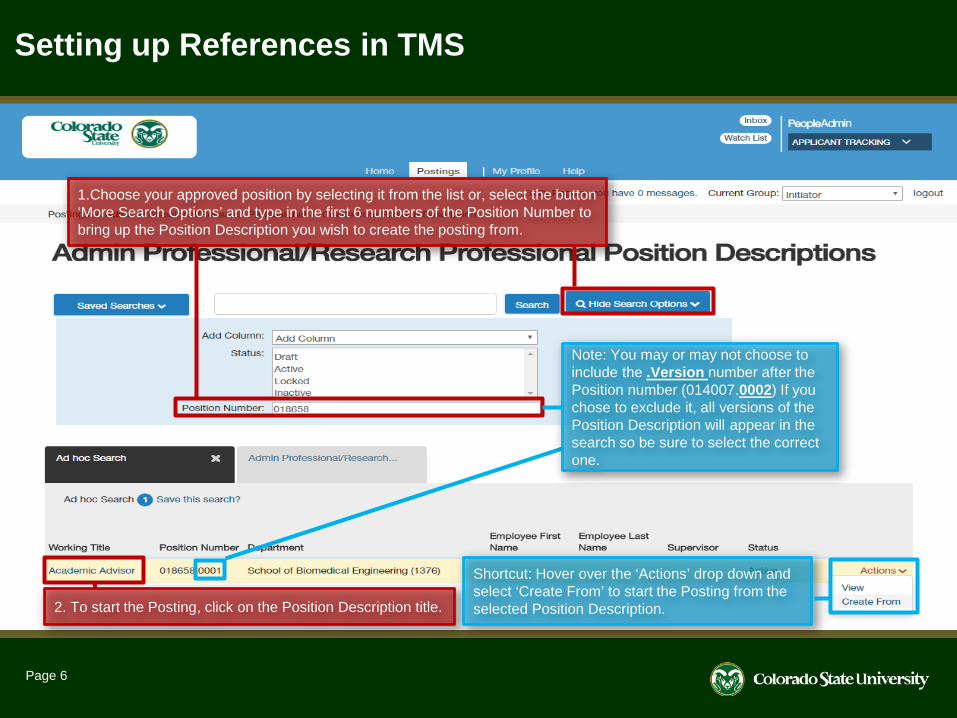
Setting up References in TMS
1.Choose your approved position by selecting it from the list or, select the button ‘More Search Options’ and type in the first 6 numbers of the Position Number to bring up the Position Description you wish to create the posting from.
Note: You may or may not choose to include the .Version number after the Position number (014007.0002) If you chose to exclude it, all versions of the Position Description will appear in the search so be sure to select the correct one.
2. To start the Posting, click on the Position Description title.
Shortcut: Hover over the ‘Actions’ drop down and select ‘Create From’ to start the Posting from the selected Position Description.
Page 7
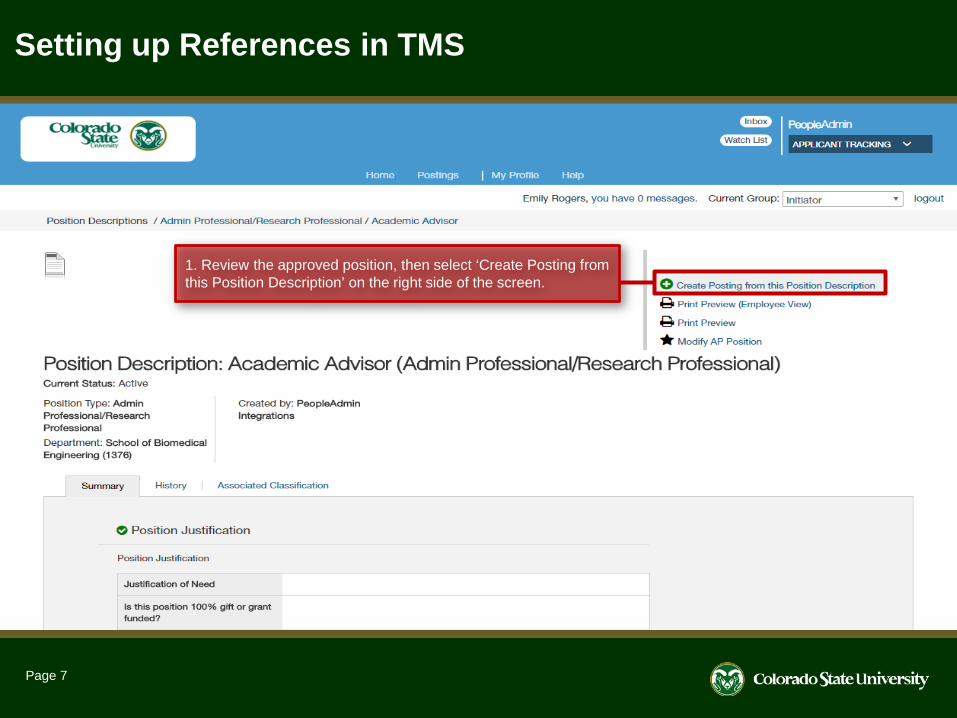
Setting up References in TMS
1. Review the approved position, then select ‘Create Posting from this Position Description’ on the right side of the screen.
Page 8
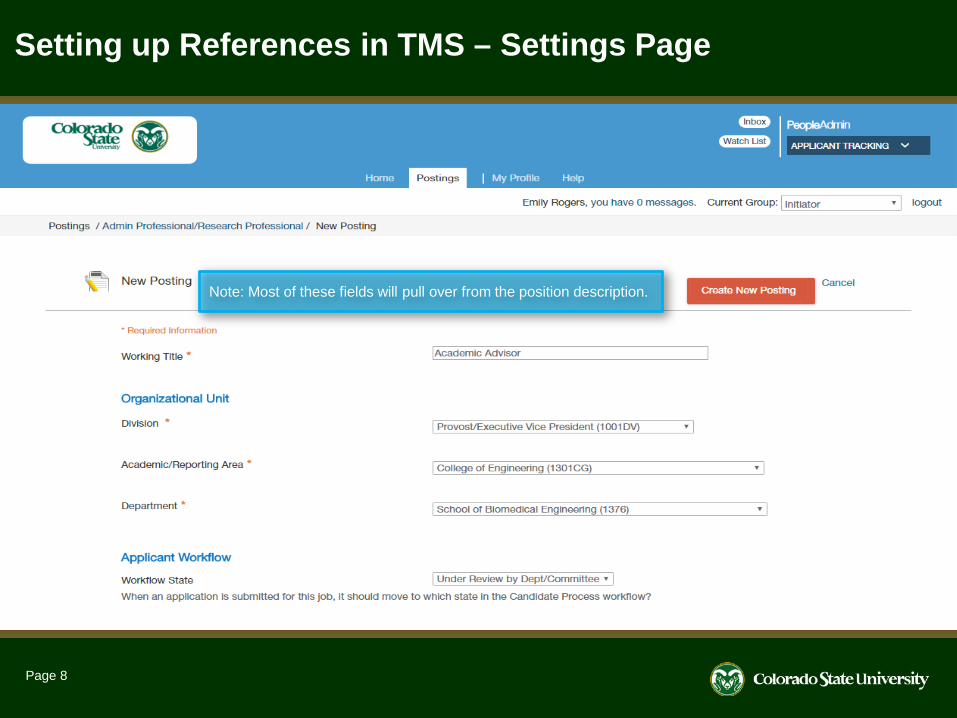
Setting up References in TMS – Settings Page
Note: Most of these fields will pull over from the position description.
Page 9
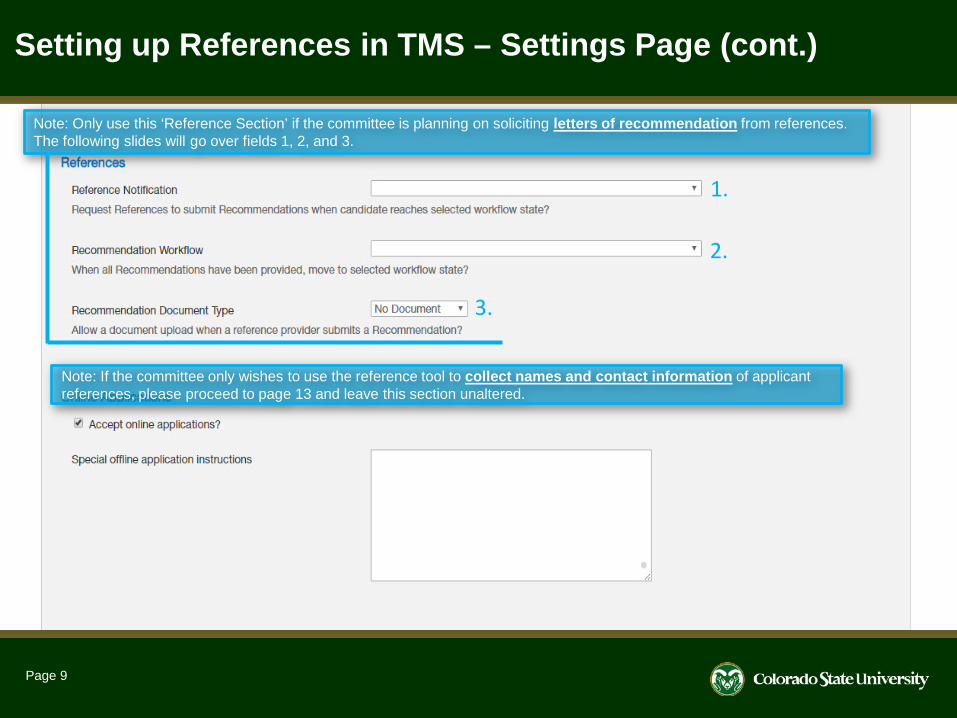
Note: Only use this ‘Reference Section’ if the committee is planning on soliciting letters of recommendation from references. The following slides will go over fields 1, 2, and 3.
Setting up References in TMS – Settings Page (cont.)
Note: If the committee only wishes to use the reference tool to collect names and contact information of applicant references, please proceed to page 13 and leave this section unaltered.
1.
2.
3.
Page 10
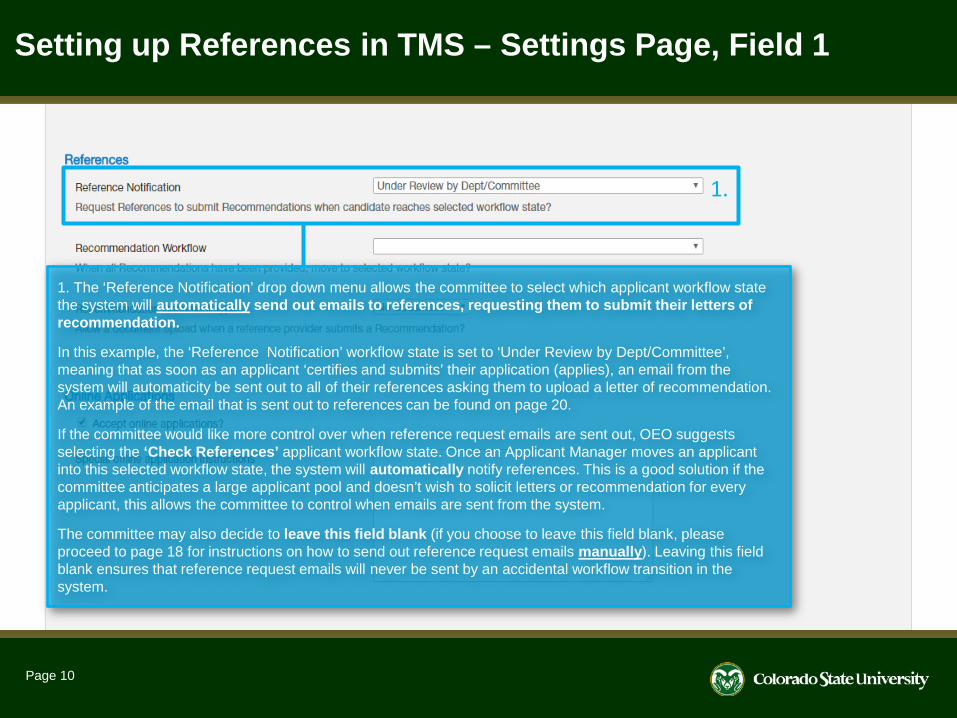
1. The ‘Reference Notification’ drop down menu allows the committee to select which applicant workflow state the system will automatically send out emails to references, requesting them to submit their letters of recommendation.
In this example, the ‘Reference Notification’ workflow state is set to ‘Under Review by Dept/Committee’, meaning that as soon as an applicant ‘certifies and submits’ their application (applies), an email from the system will automaticity be sent out to all of their references asking them to upload a letter of recommendation. An example of the email that is sent out to references can be found on page 20.
If the committee would like more control over when reference request emails are sent out, OEO suggests selecting the ‘Check References’ applicant workflow state. Once an Applicant Manager moves an applicant into this selected workflow state, the system will automatically notify references. This is a good solution if the committee anticipates a large applicant pool and doesn’t wish to solicit letters or recommendation for every applicant, this allows the committee to control when emails are sent from the system.
The committee may also decide to leave this field blank (if you choose to leave this field blank, please proceed to page 18 for instructions on how to send out reference request emails manually). Leaving this field blank ensures that reference request emails will never be sent by an accidental workflow transition in the system.
Setting up References in TMS – Settings Page, Field 1
1.
Page 11
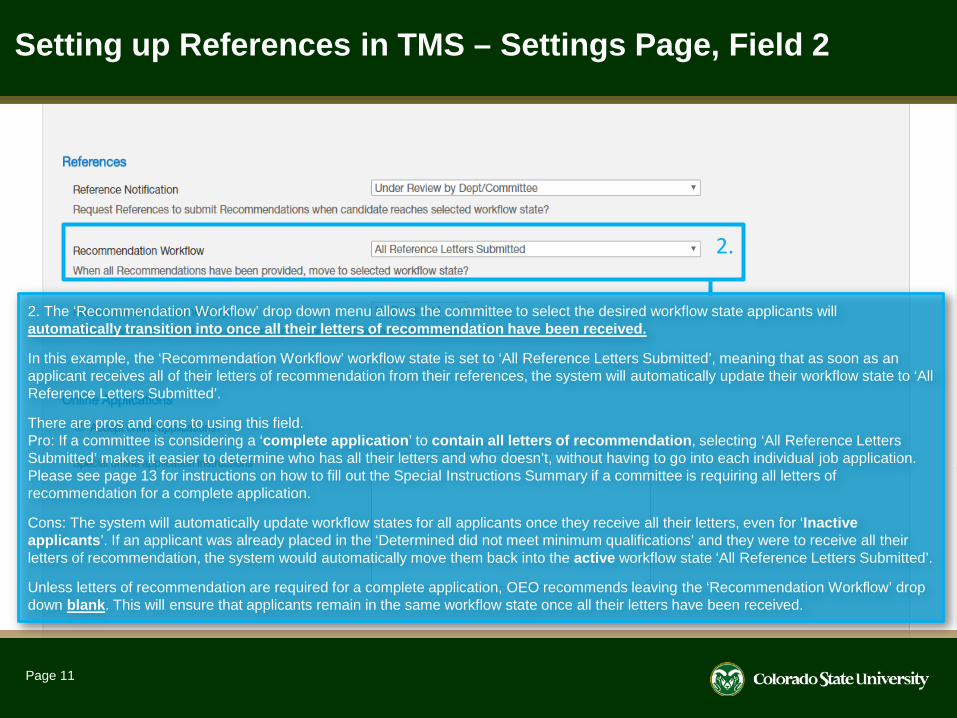
Setting up References in TMS – Settings Page, Field 2
2.
2. The ‘Recommendation Workflow’ drop down menu allows the committee to select the desired workflow state applicants will automatically transition into once all their letters of recommendation have been received.
In this example, the ‘Recommendation Workflow’ workflow state is set to ‘All Reference Letters Submitted’, meaning that as soon as an applicant receives all of their letters of recommendation from their references, the system will automatically update their workflow state to ‘All Reference Letters Submitted’.
There are pros and cons to using this field. Pro: If a committee is considering a ‘complete application’ to contain all letters of recommendation, selecting ‘All Reference Letters Submitted’ makes it easier to determine who has all their letters and who doesn’t, without having to go into each individual job application. Please see page 13 for instructions on how to fill out the Special Instructions Summary if a committee is requiring all letters of recommendation for a complete application.
Cons: The system will automatically update workflow states for all applicants once they receive all their letters, even for ‘Inactiveapplicants’. If an applicant was already placed in the ‘Determined did not meet minimum qualifications’ and they were to receive all theirletters of recommendation, the system would automatically move them back into the active workflow state ‘All Reference Letters Submitted’.
Unless letters of recommendation are required for a complete application, OEO recommends leaving the ‘Recommendation Workflow’ drop down blank. This will ensure that applicants remain in the same workflow state once all their letters have been received.
Page 12
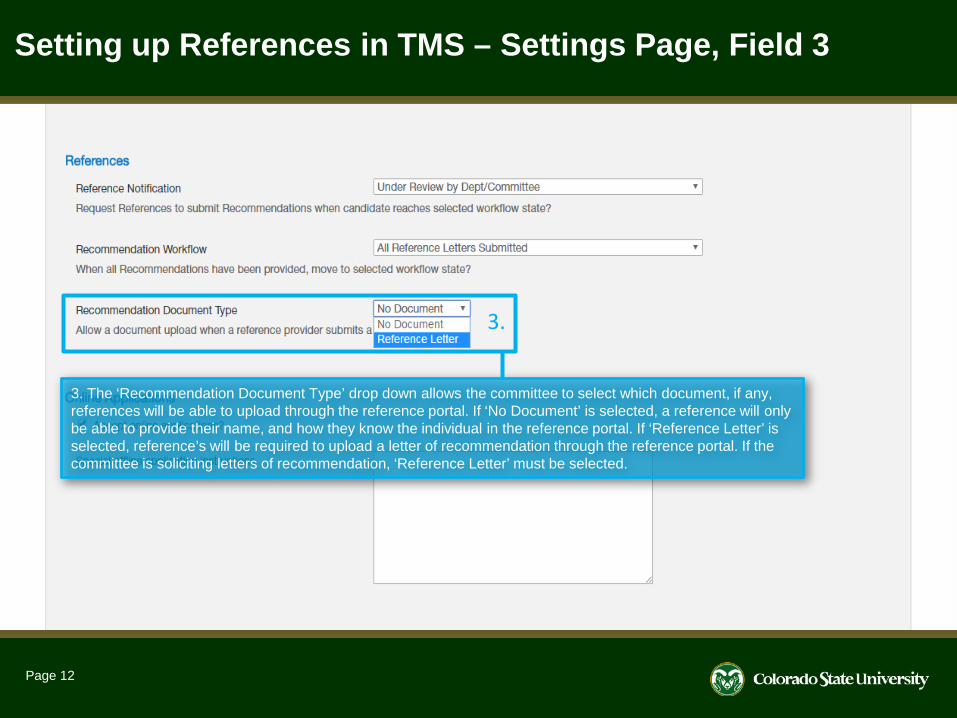
Setting up References in TMS – Settings Page, Field 3
3. The ‘Recommendation Document Type’ drop down allows the committee to select which document, if any, references will be able to upload through the reference portal. If ‘No Document’ is selected, a reference will only be able to provide their name, and how they know the individual in the reference portal. If ‘Reference Letter’ is selected, reference’s will be required to upload a letter of recommendation through the reference portal. If the committee is soliciting letters of recommendation, ‘Reference Letter’ must be selected.
3.
Page 13
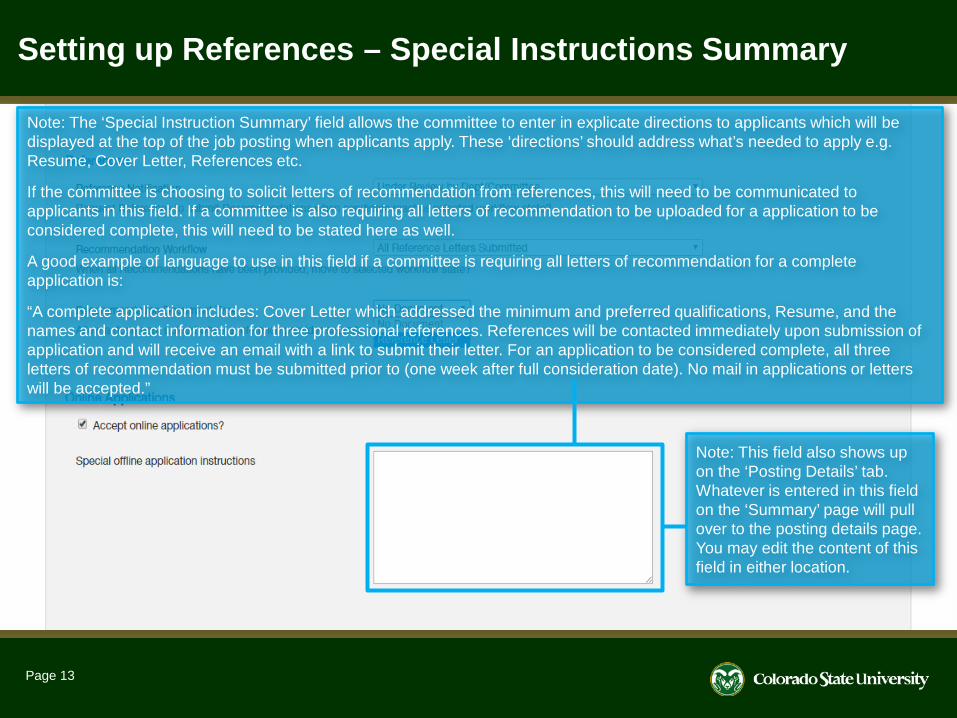
Setting up References – Special Instructions Summary
Note: The ‘Special Instruction Summary’ field allows the committee to enter in explicate directions to applicants which will be displayed at the top of the job posting when applicants apply. These ‘directions’ should address what’s needed to apply e.g. Resume, Cover Letter, References etc.
If the committee is choosing to solicit letters of recommendation from references, this will need to be communicated to applicants in this field. If a committee is also requiring all letters of recommendation to be uploaded for a application to be considered complete, this will need to be stated here as well.
A good example of language to use in this field if a committee is requiring all letters of recommendation for a complete application is:
“A complete application includes: Cover Letter which addressed the minimum and preferred qualifications, Resume, and the names and contact information for three professional references. References will be contacted immediately upon submission of application and will receive an email with a link to submit their letter. For an application to be considered complete, all three letters of recommendation must be submitted prior to (one week after full consideration date). No mail in applications or letters will be accepted.”
Note: This field also shows up on the ‘Posting Details’ tab. Whatever is entered in this field on the ‘Summary’ page will pull over to the posting details page. You may edit the content of this field in either location.
Page 14
Next steps: Reference Tab
The following page skips straight to the ‘Reference Tab’.
For continued directions on how to fill out the posting request in it’s entirety please see our AP Posting guide, starting on page 9 located here:
http://oeo.colostate.edu/Data/Sites/1/tms-pdf-guides/csu-create-and-edit-an-admin-pro-job-posting.pdf
For continued help with Faculty Postings, please see our guide, starting on page 10 located here:
http://oeo.colostate.edu/Data/Sites/1/tms-pdf-guides/csu-create-and-edit-a-faculty-job-posting.pdf
Page 15
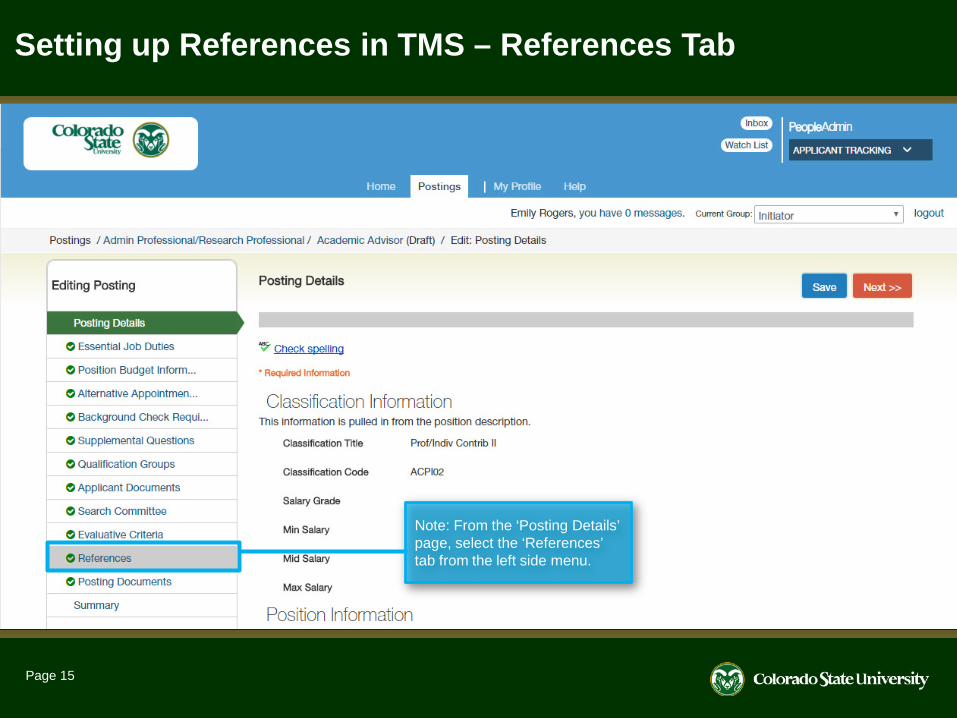
Setting up References in TMS – References Tab
Note: From the ‘Posting Details’ page, select the ‘References’ tab from the left side menu.
Page 16
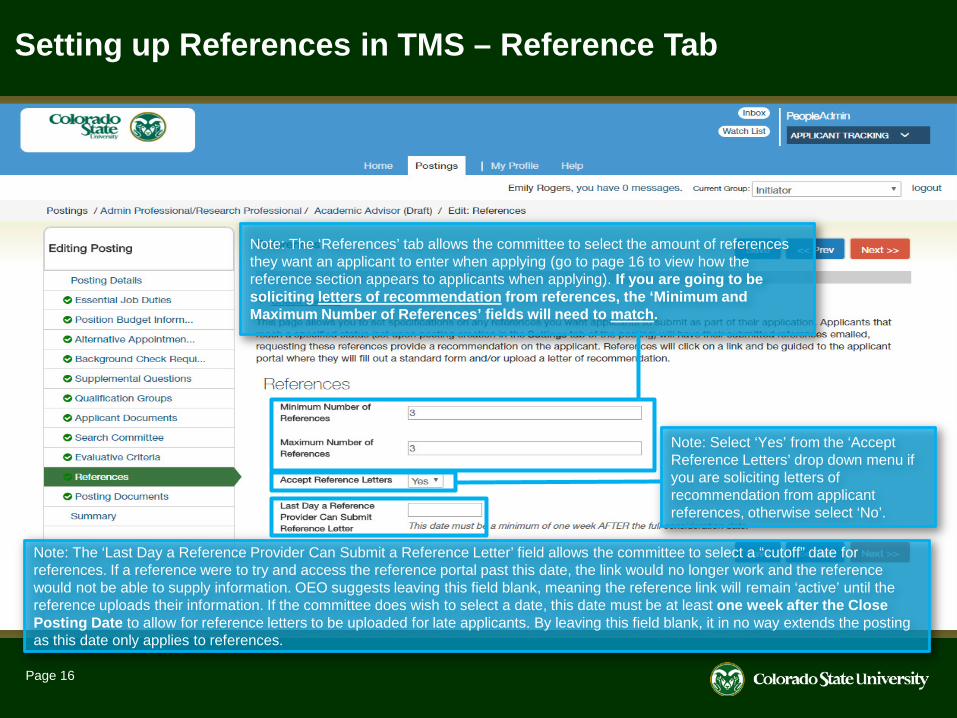
Setting up References in TMS – Reference Tab
Note: The ‘References’ tab allows the committee to select the amount of references they want an applicant to enter when applying (go to page 16 to view how the reference section appears to applicants when applying). If you are going to be soliciting letters of recommendation from references, the ‘Minimum and Maximum Number of References’ fields will need to match.
Note: Select ‘Yes’ from the ‘Accept Reference Letters’ drop down menu if you are soliciting letters of recommendation from applicant references, otherwise select ‘No’.
Note: The ‘Last Day a Reference Provider Can Submit a Reference Letter’ field allows the committee to select a “cutoff” date for references. If a reference were to try and access the reference portal past this date, the link would no longer work and the reference would not be able to supply information. OEO suggests leaving this field blank, meaning the reference link will remain ‘active’ until the reference uploads their information. If the committee does wish to select a date, this date must be at least one week after the Close Posting Date to allow for reference letters to be uploaded for late applicants. By leaving this field blank, it in no way extends the postingas this date only applies to references.
Applicant and Reference Views/Emails examples
Page 17
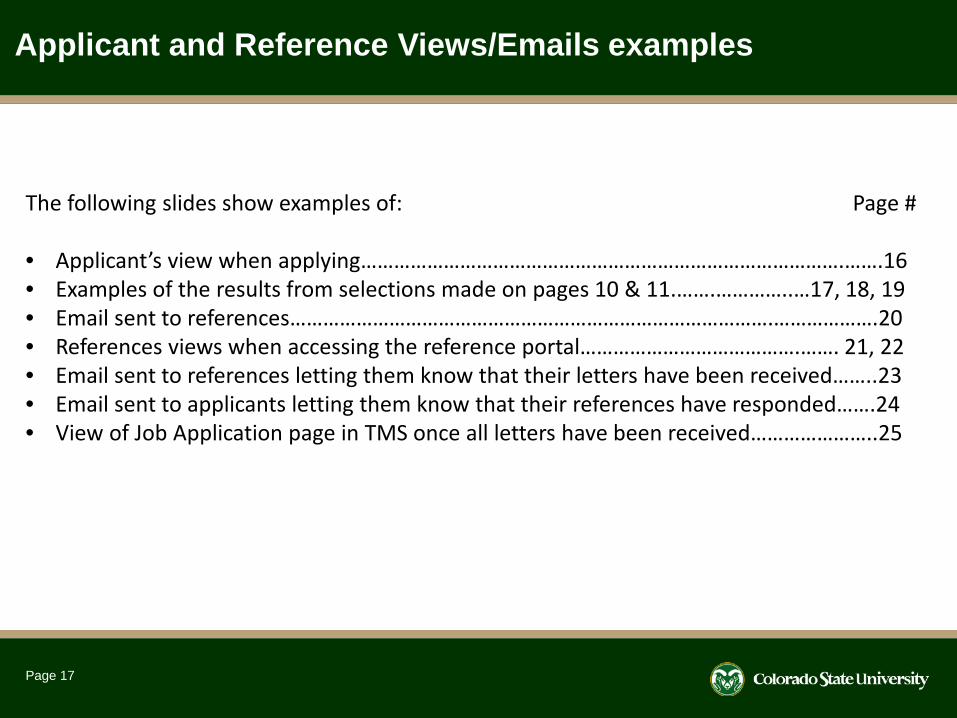
The following slides show examples of: Page #
• Applicant’s view when applying…………………………………………………………………………….…….16• Examples of the results from selections made on pages 10 & 11.…….…………..…17, 18, 19• Email sent to references…………………………………………………………………………….……………….20• References views when accessing the reference portal………………………………….……. 21, 22 • Email sent to references letting them know that their letters have been received……..23• Email sent to applicants letting them know that their references have responded…….24• View of Job Application page in TMS once all letters have been received…………………..25
Applicant Portal – Reference Section
Page 18
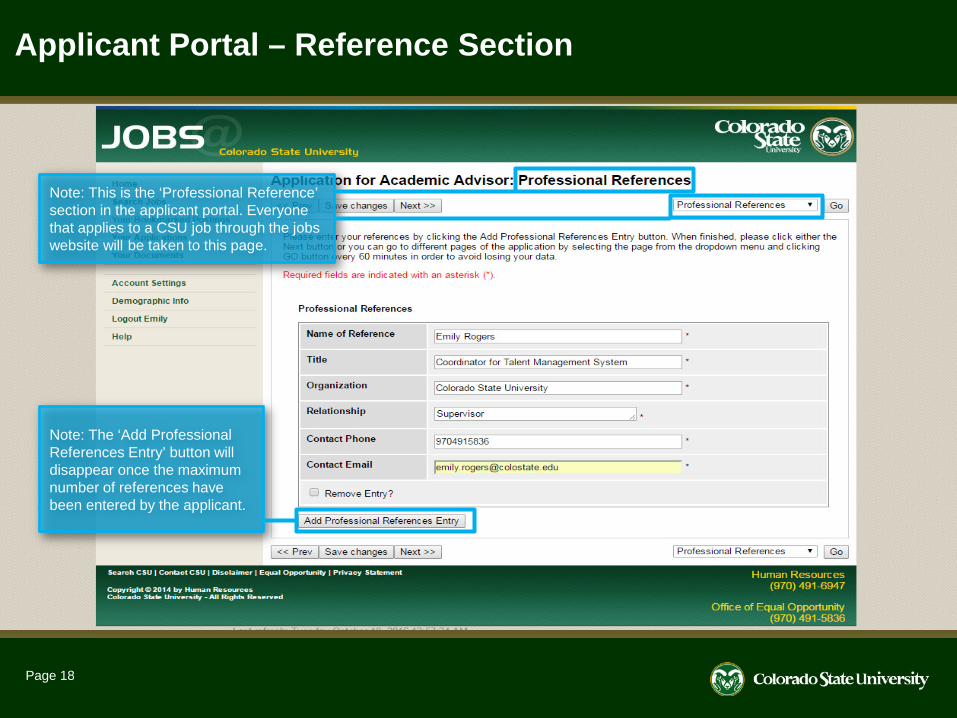
Note: This is the ‘Professional Reference’ section in the applicant portal. Everyone that applies to a CSU job through the jobs website will be taken to this page.
Note: The ‘Add Professional References Entry’ button will disappear once the maximum number of references have been entered by the applicant.
Job Application – View in TMS (available to Search Committee Members and Applicant Managers)
Page 19
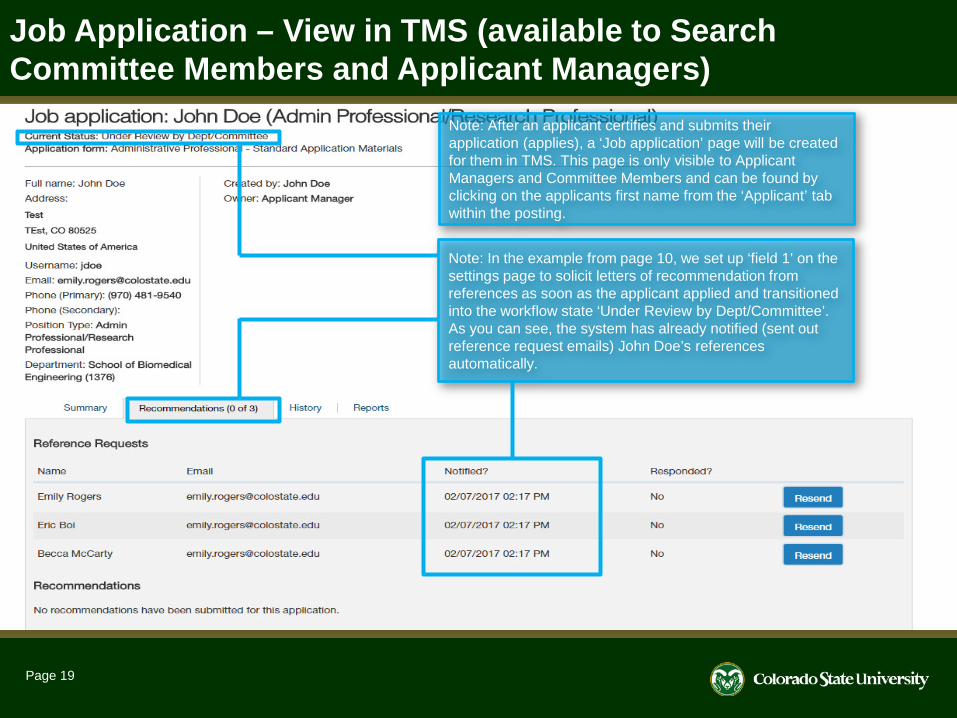
Note: In the example from page 10, we set up ‘field 1’ on the settings page to solicit letters of recommendation from references as soon as the applicant applied and transitioned into the workflow state ‘Under Review by Dept/Committee’. As you can see, the system has already notified (sent out reference request emails) John Doe’s references automatically.
Note: After an applicant certifies and submits their application (applies), a ‘Job application’ page will be created for them in TMS. This page is only visible to Applicant Managers and Committee Members and can be found by clicking on the applicants first name from the ‘Applicant’ tab within the posting.
Job Application – How to send out reference request emails manually
Page 20
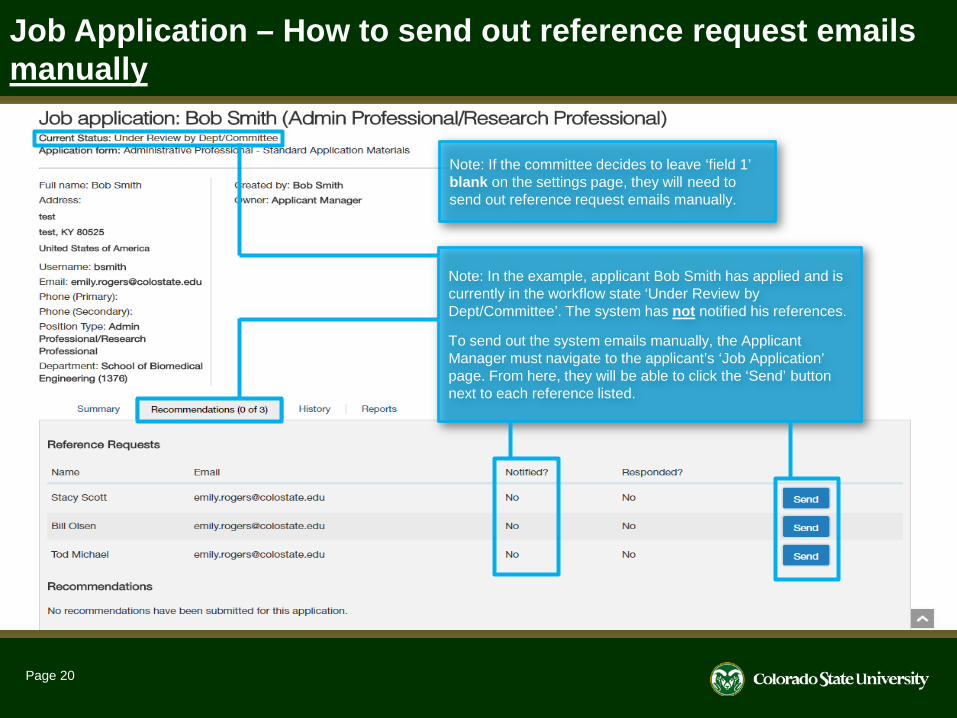
Note: In the example, applicant Bob Smith has applied and is currently in the workflow state ‘Under Review by Dept/Committee’. The system has not notified his references.
To send out the system emails manually, the Applicant Manager must navigate to the applicant’s ‘Job Application’ page. From here, they will be able to click the ‘Send’ button next to each reference listed.
Note: If the committee decides to leave ‘field 1’ blank on the settings page, they will need to send out reference request emails manually.
Job Application – How to send out reference request emails manually (cont.)
Page 21
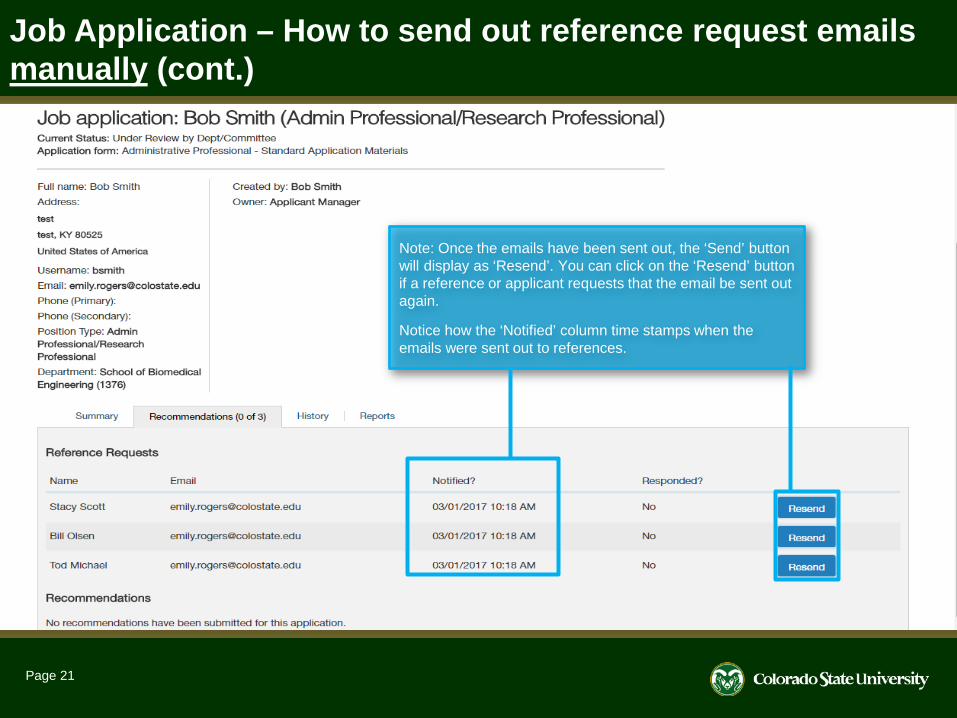
Note: Once the emails have been sent out, the ‘Send’ button will display as ‘Resend’. You can click on the ‘Resend’ button if a reference or applicant requests that the email be sent out again.
Notice how the ‘Notified’ column time stamps when the emails were sent out to references.
System email sent to References
Page 22
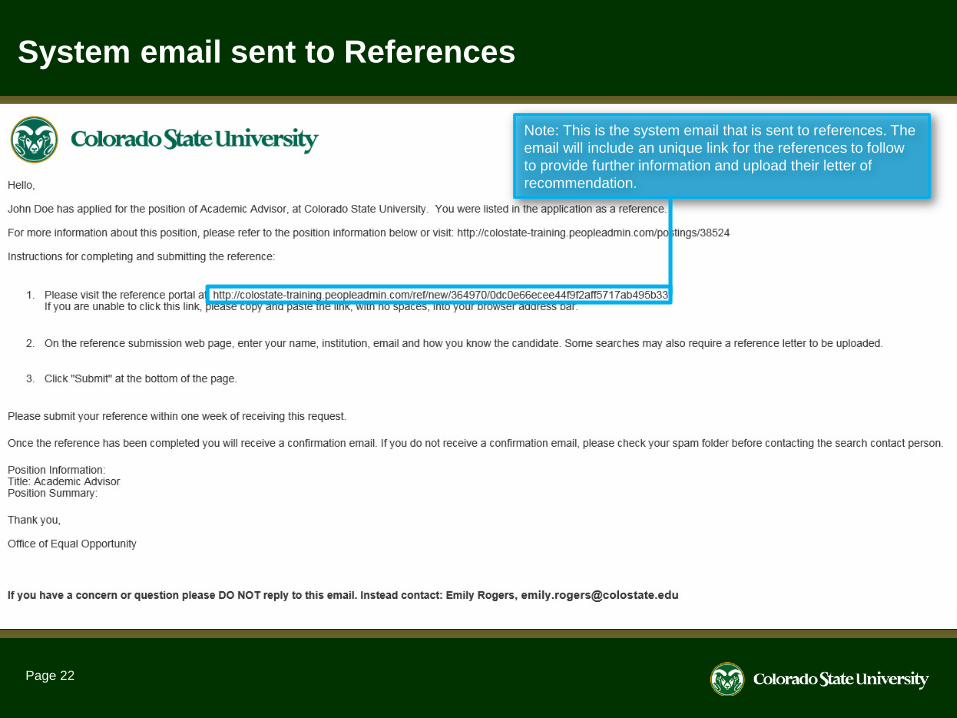
Note: This is the system email that is sent to references. The email will include an unique link for the references to follow to provide further information and upload their letter of recommendation.
Reference view – Reference Portal
Page 23
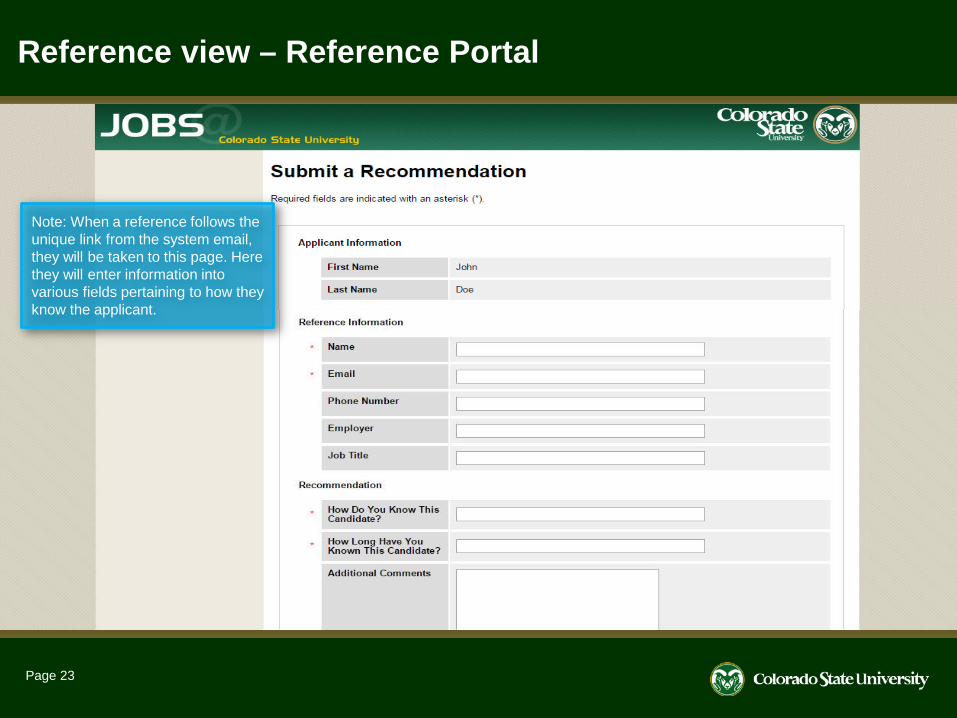
Note: When a reference follows the unique link from the system email, they will be taken to this page. Here they will enter information into various fields pertaining to how they know the applicant.

Reference view – Reference Portal (cont.)
Page 24
Note: If ‘Reference Letter’ was selected from the ‘Recommendation Document Type’ drop down menu on ‘field 3’ from the settings page, this bottom section will appear to the reference. This is where they will upload their letter of recommendation.
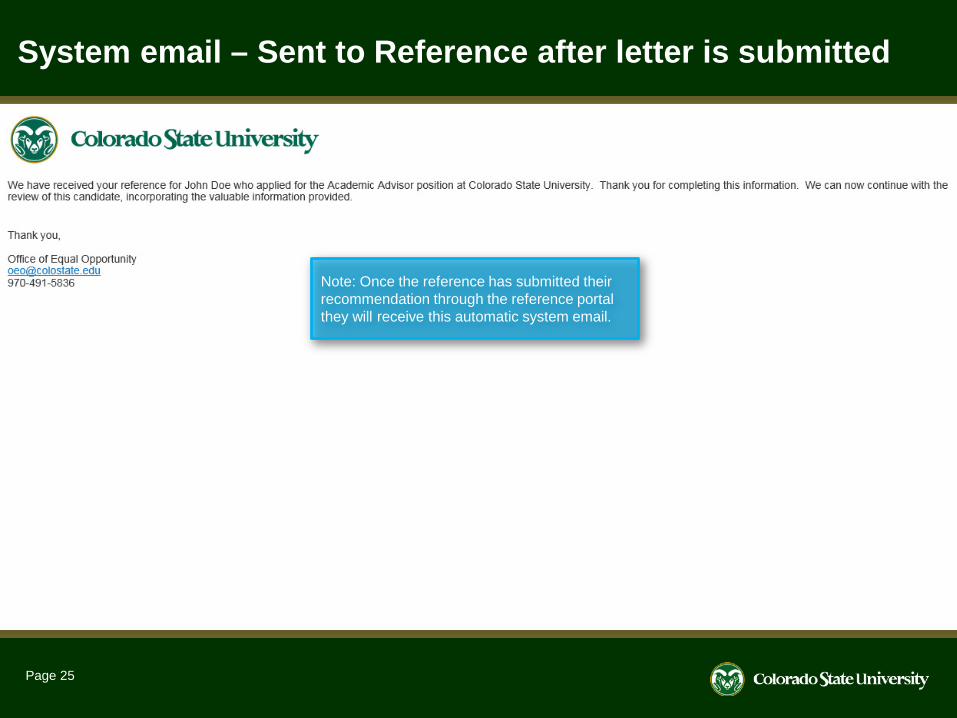
System email – Sent to Reference after letter is submitted
Page 25
Note: Once the reference has submitted their recommendation through the reference portal they will receive this automatic system email.
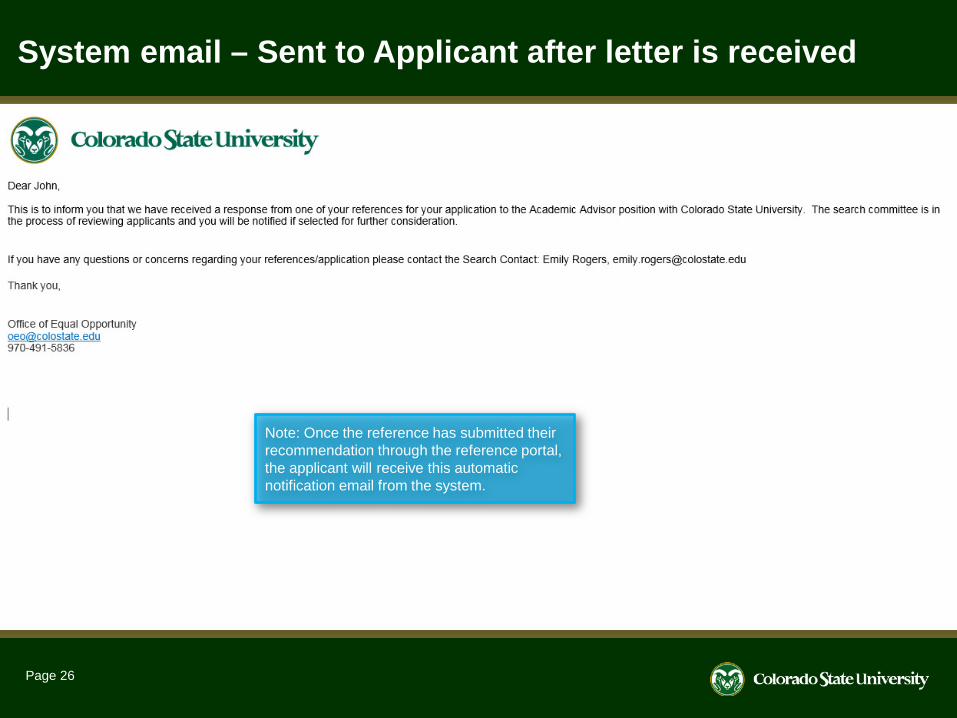
System email – Sent to Applicant after letter is received
Page 26
Note: Once the reference has submitted their recommendation through the reference portal, the applicant will receive this automatic notification email from the system.
Page 27
Note: Once the reference has submitted their recommendation through the reference portal the applicant will receive notification email from the system.
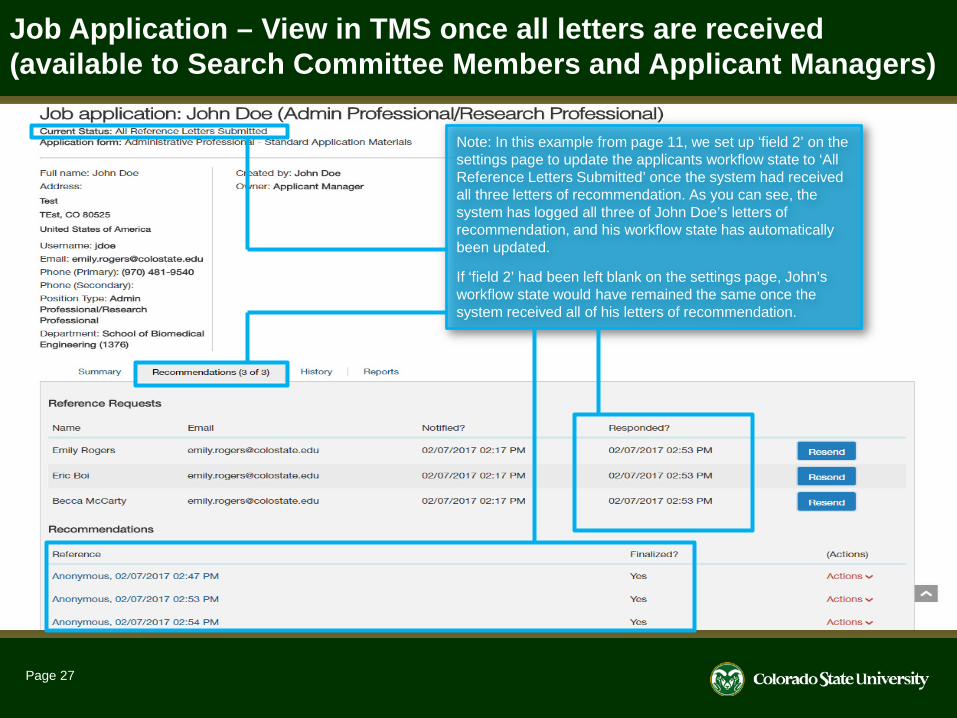
Note: In this example from page 11, we set up ‘field 2’ on the settings page to update the applicants workflow state to ‘All Reference Letters Submitted’ once the system had received all three letters of recommendation. As you can see, the system has logged all three of John Doe’s letters of recommendation, and his workflow state has automatically been updated.
If ‘field 2’ had been left blank on the settings page, John’s workflow state would have remained the same once the system received all of his letters of recommendation.
Job Application – View in TMS once all letters are received (available to Search Committee Members and Applicant Managers)
Page 28
For additional help, contact the Office of Equal Opportunity at:
(970) 491-5836Or
Need further help?