CREATED BY RICKY KWONG ACCOUNTS PAYABLE...
17
CREATED BY RICKY KWONG ACCOUNTS PAYABLE, PROCUREMENT SERVICES Creating a Non-PO Invoice for US Dept of Homeland Security
Transcript of CREATED BY RICKY KWONG ACCOUNTS PAYABLE...
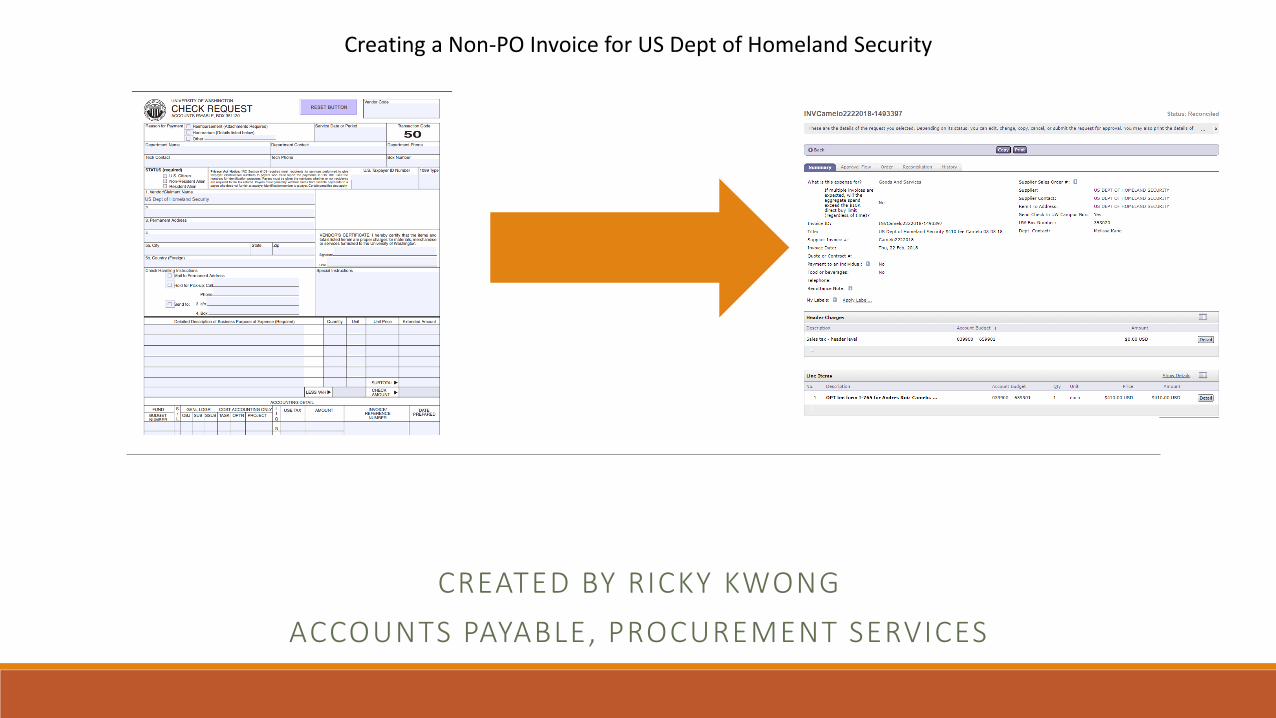
CREATED BY RICKY KWONG
ACCOUNTS PAYABLE, PROCUREMENT SERVICES
Creating a Non-PO Invoice for US Dept of Homeland Security
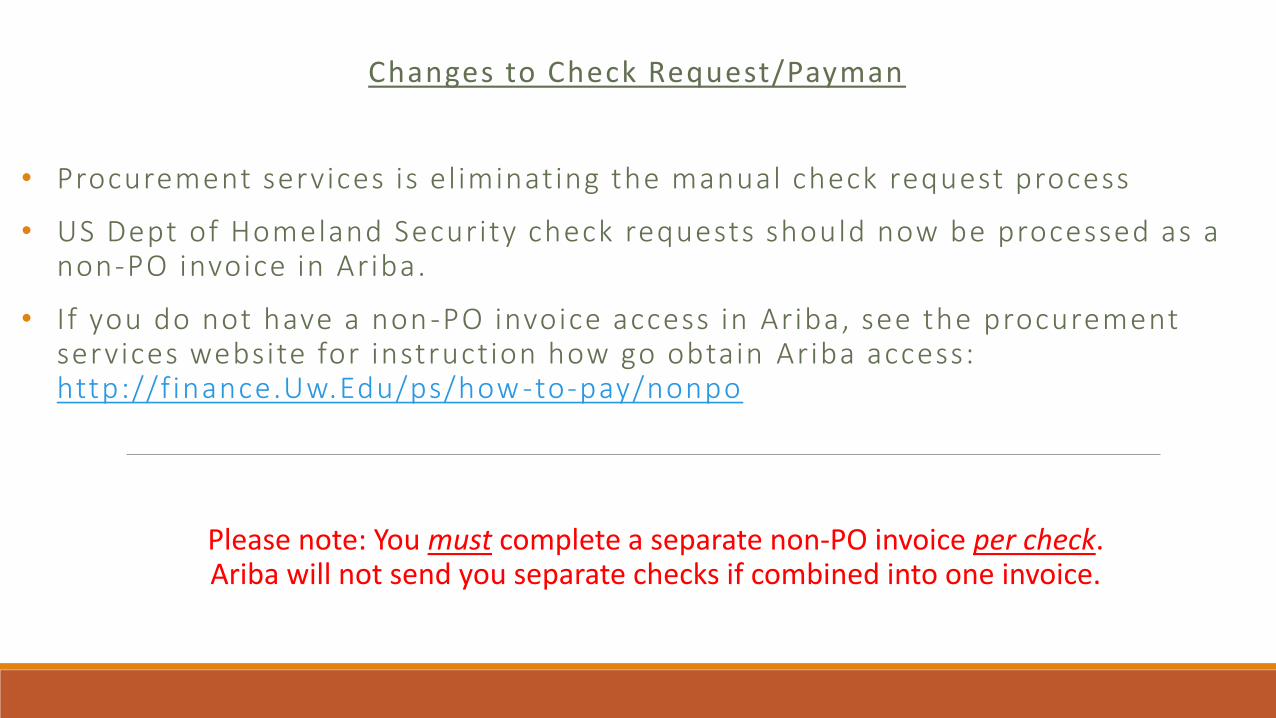
Changes to Check Request/Payman
• Procurement services is el iminating the manual check request process
• US Dept of Homeland Security check requests should now be processed as a non-PO invoice in Ariba.
• I f you do not have a non-PO invoice access in Ariba, see the procurement services website for instruction how go obtain Ariba access: http://f inance.Uw.Edu/ps/how -to-pay/nonpo
Please note: You must complete a separate non-PO invoice per check. Ariba will not send you separate checks if combined into one invoice.
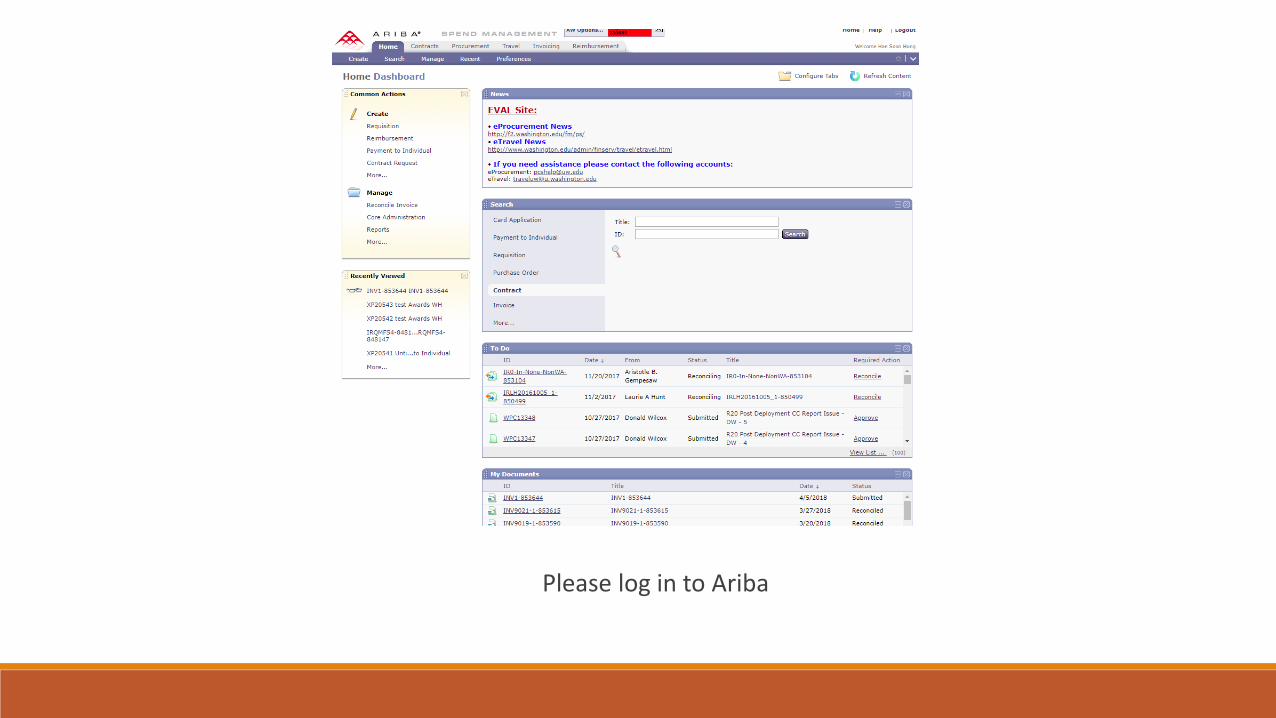
Please log in to Ariba

On the home tab, click on ‘Create’, then ‘Non-PO Invoice’.This will take you to the invoice creation page.
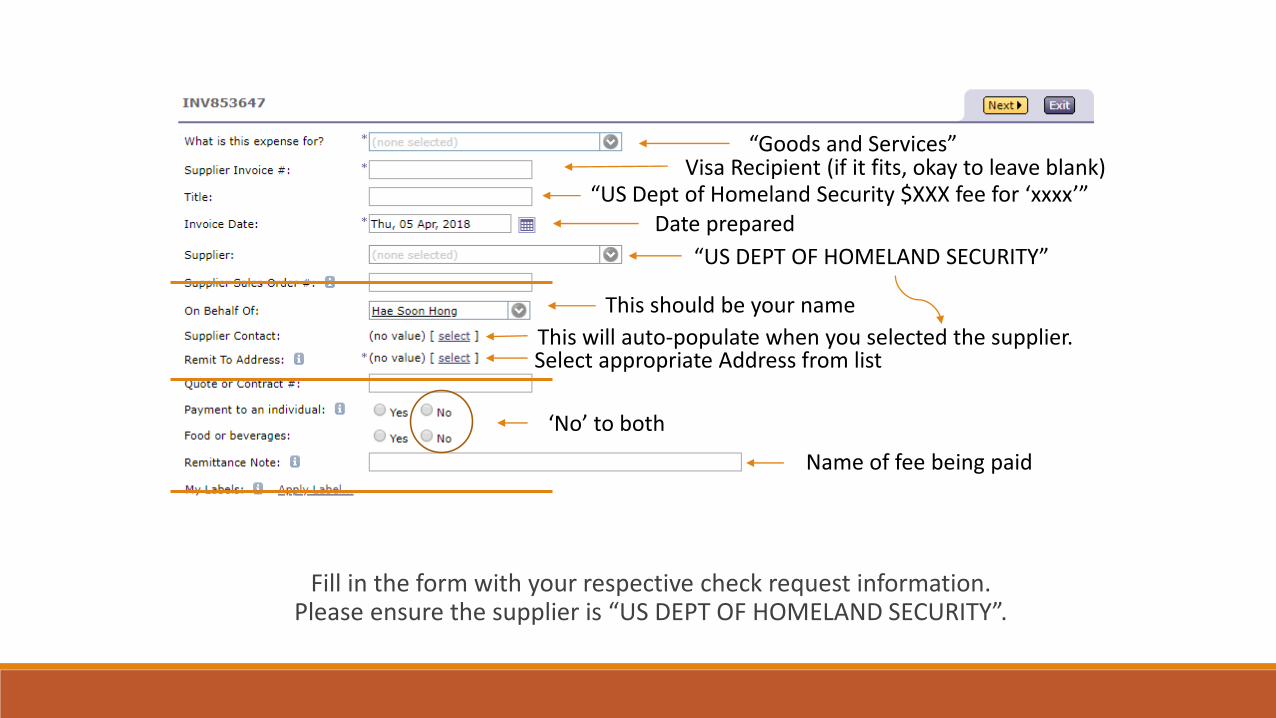
Fill in the form with your respective check request information.Please ensure the supplier is “US DEPT OF HOMELAND SECURITY”.
“Goods and Services”Visa Recipient (if it fits, okay to leave blank)
“US Dept of Homeland Security $XXX fee for ‘xxxx’”Date prepared
“US DEPT OF HOMELAND SECURITY”
This should be your name
This will auto-populate when you selected the supplier.Select appropriate Address from list
‘No’ to both
Name of fee being paid
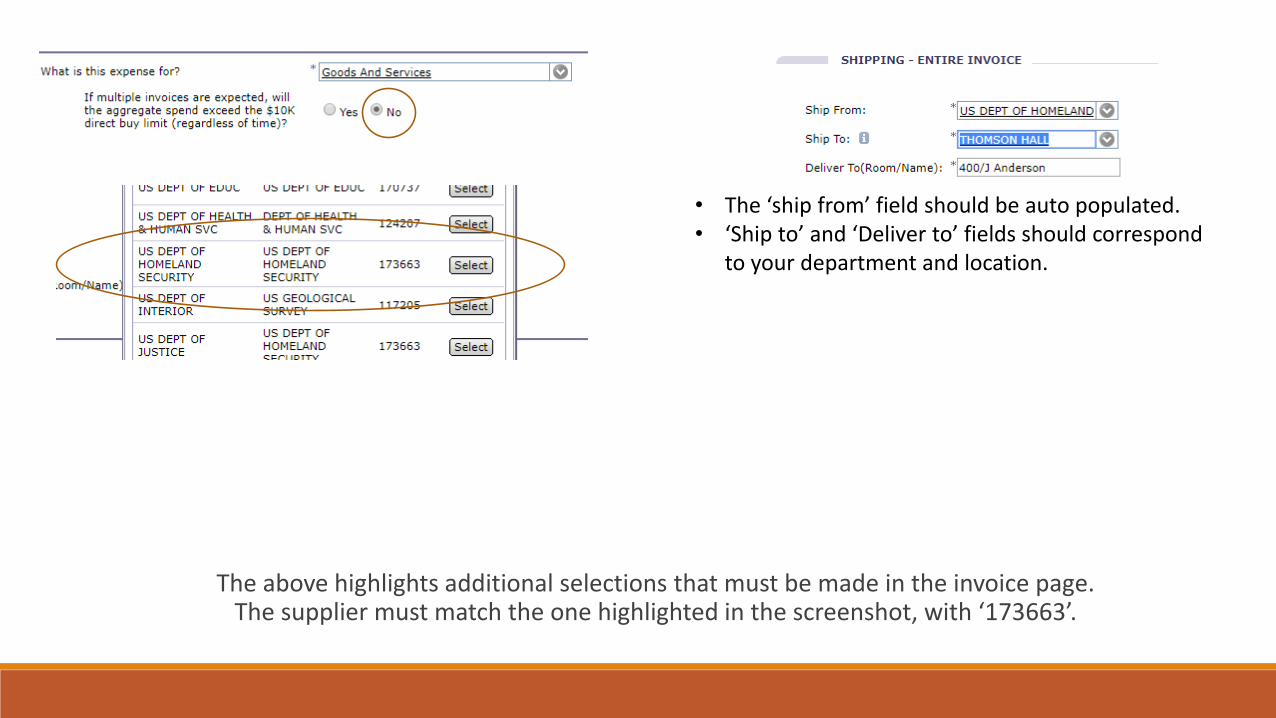
The above highlights additional selections that must be made in the invoice page.The supplier must match the one highlighted in the screenshot, with ‘173663’.
• The ‘ship from’ field should be auto populated.• ‘Ship to’ and ‘Deliver to’ fields should correspond
to your department and location.
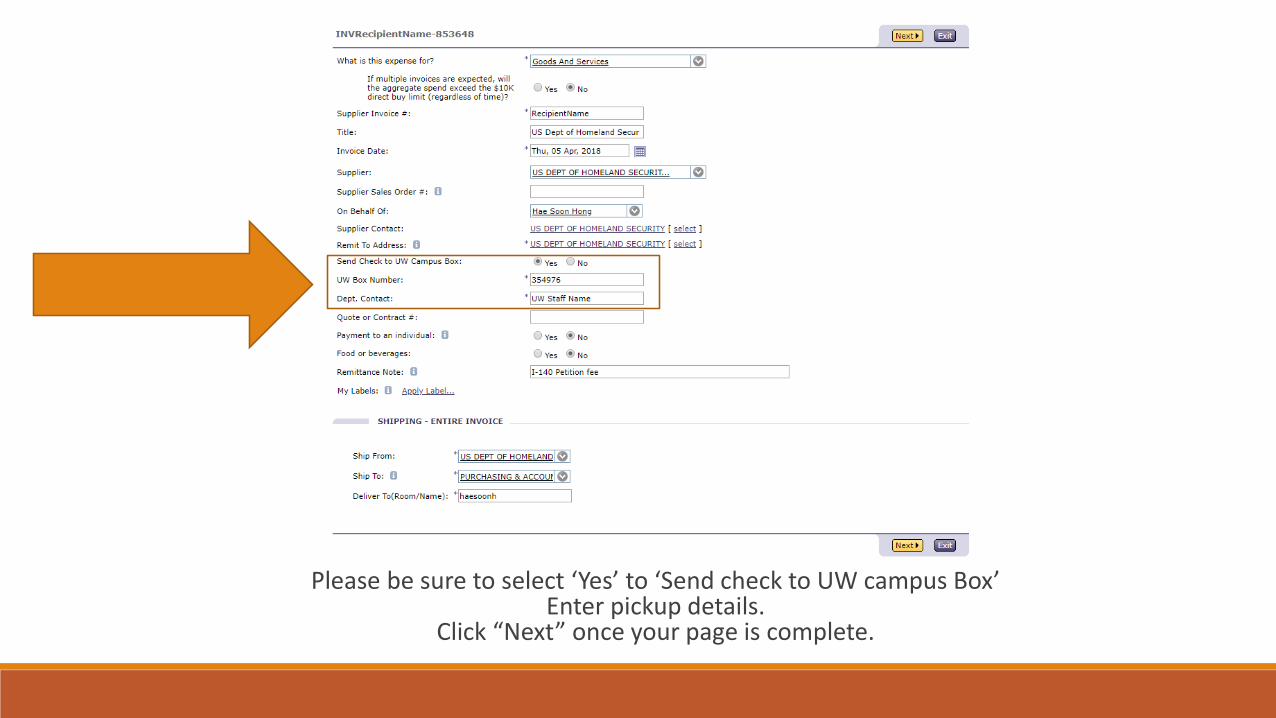
Please be sure to select ‘Yes’ to ‘Send check to UW campus Box’Enter pickup details.
Click “Next” once your page is complete.
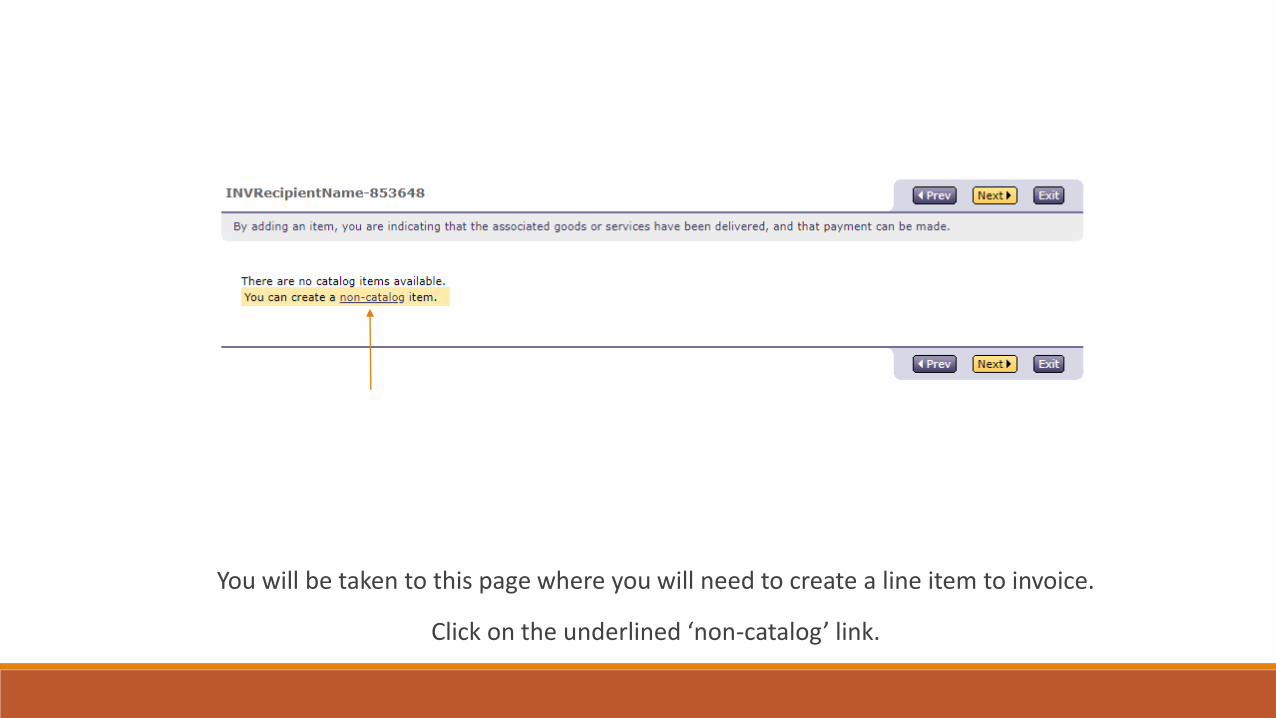
You will be taken to this page where you will need to create a line item to invoice.
Click on the underlined ‘non-catalog’ link.
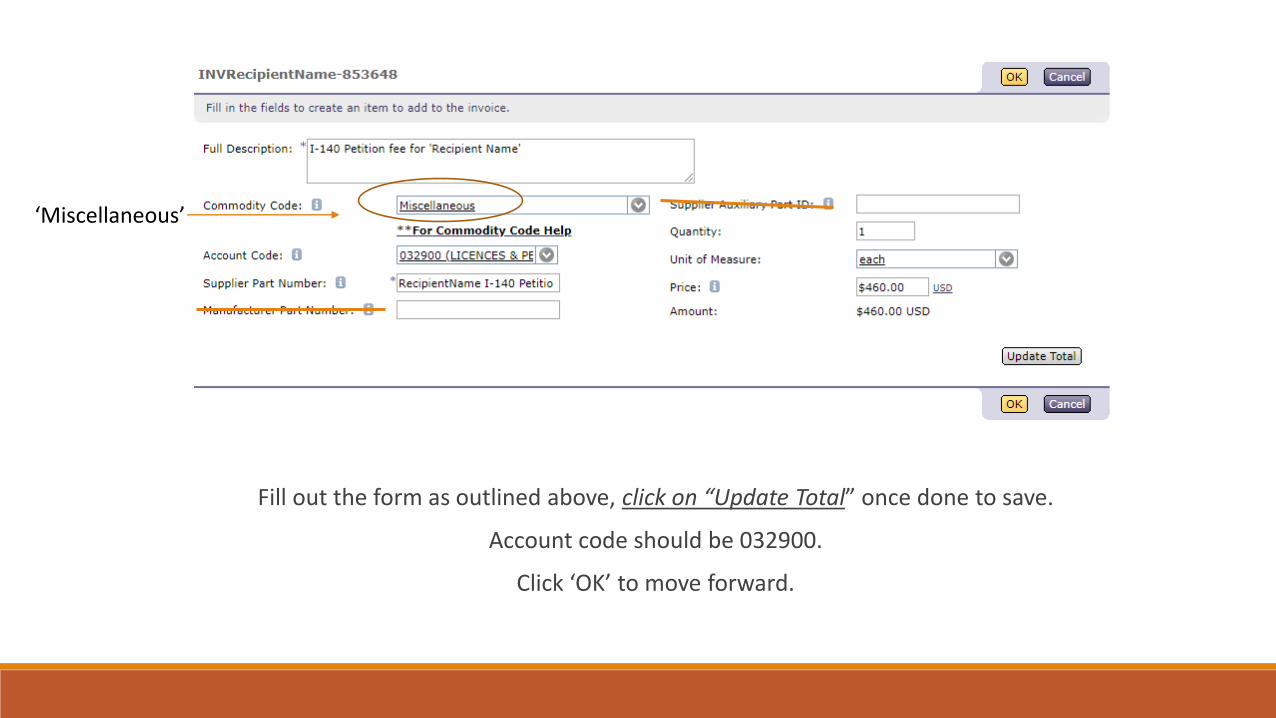
Fill out the form as outlined above, click on “Update Total” once done to save.
Account code should be 032900.
Click ‘OK’ to move forward.
‘Miscellaneous’
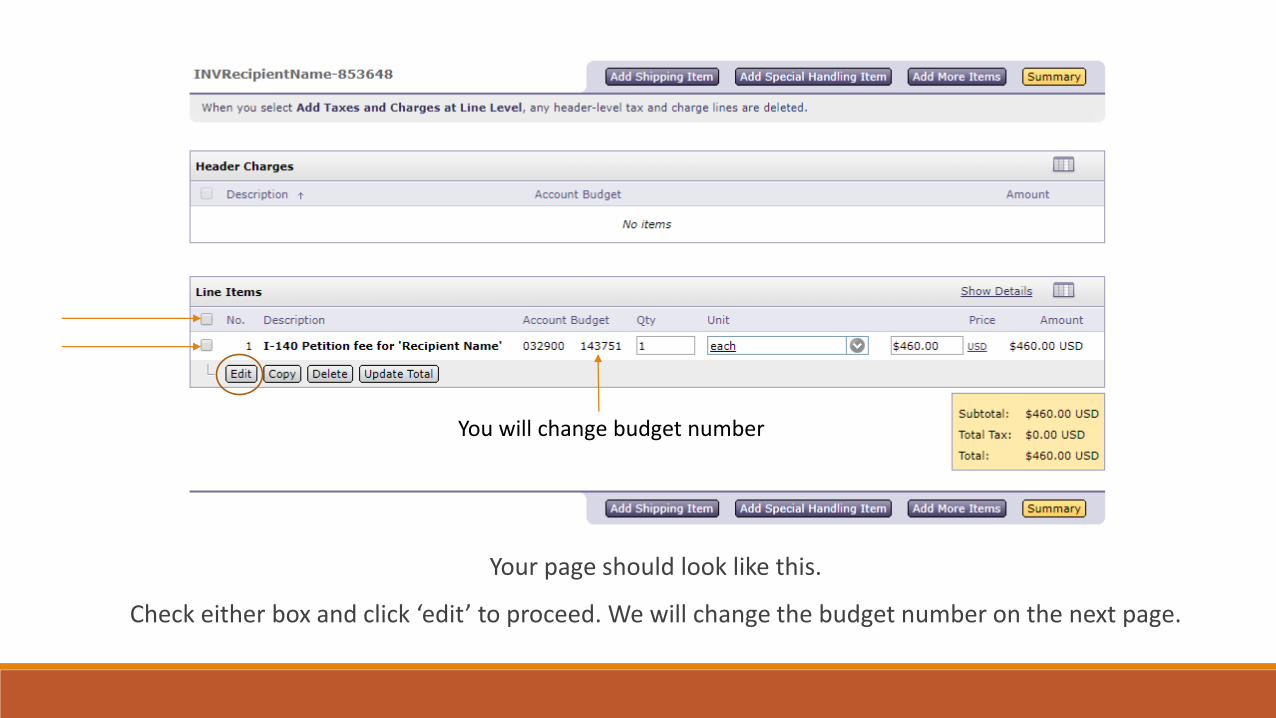
Your page should look like this.
Check either box and click ‘edit’ to proceed. We will change the budget number on the next page.
You will change budget number
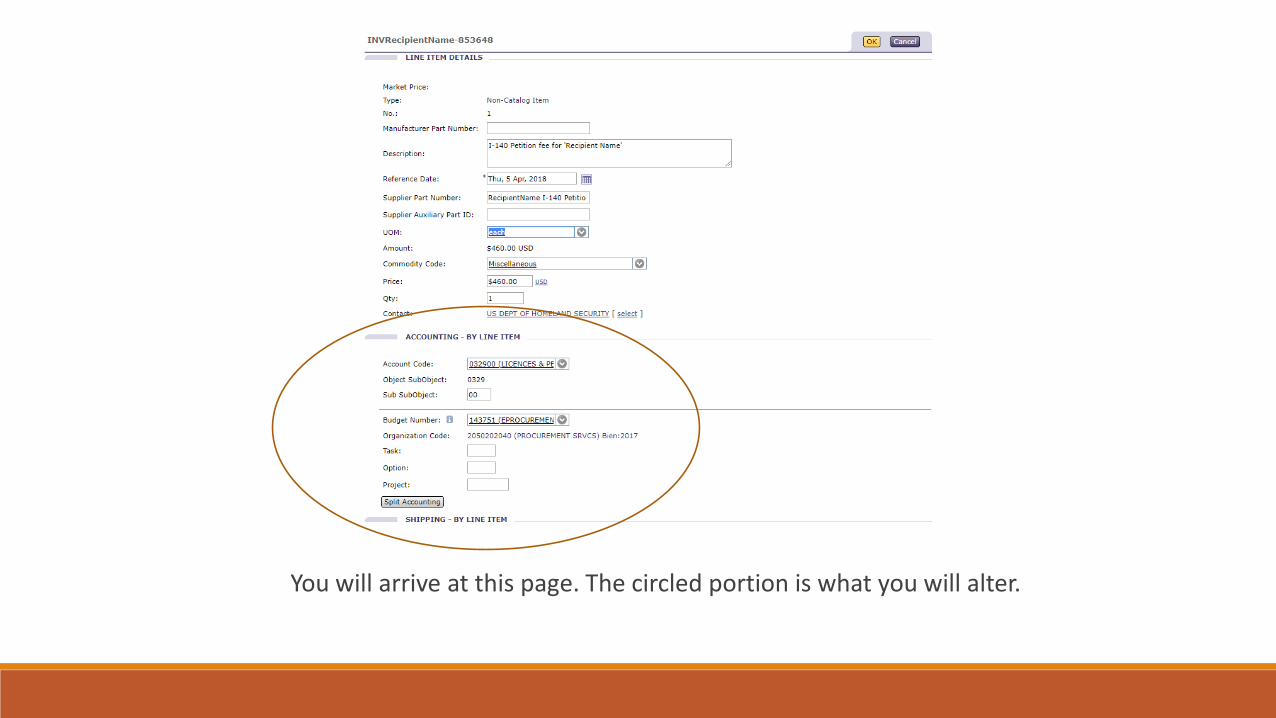
You will arrive at this page. The circled portion is what you will alter.
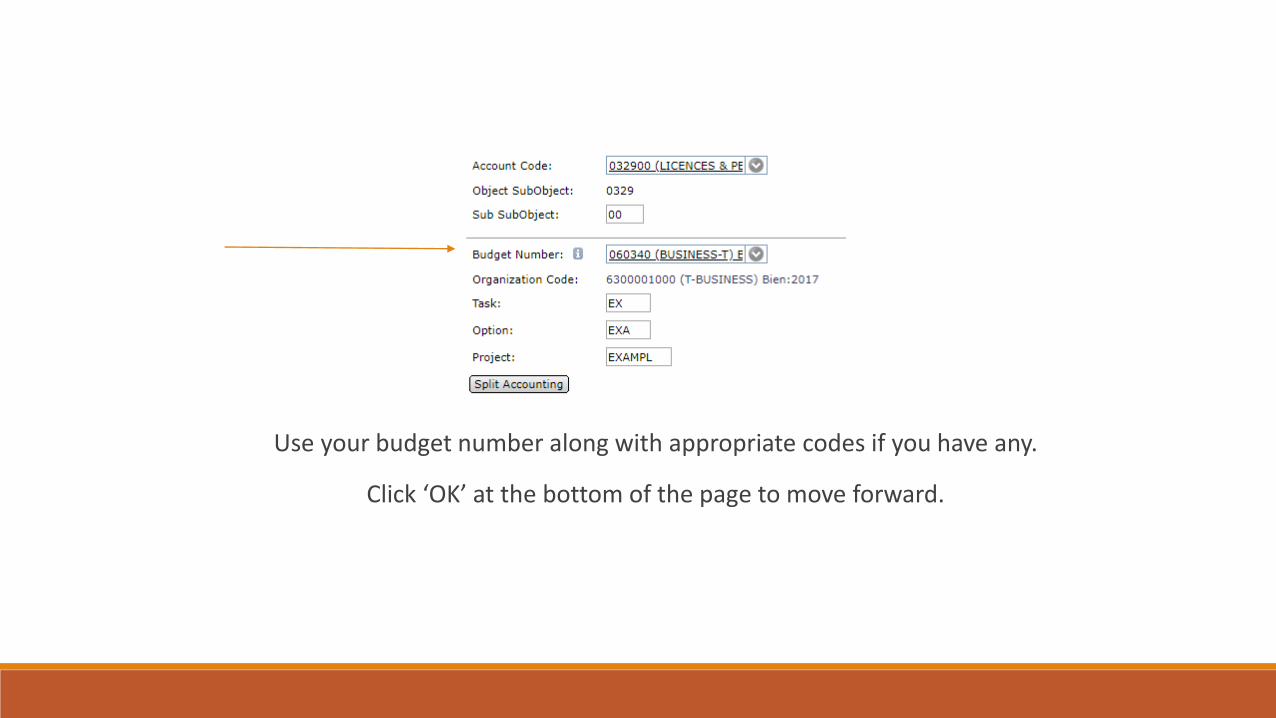
Use your budget number along with appropriate codes if you have any.
Click ‘OK’ at the bottom of the page to move forward.
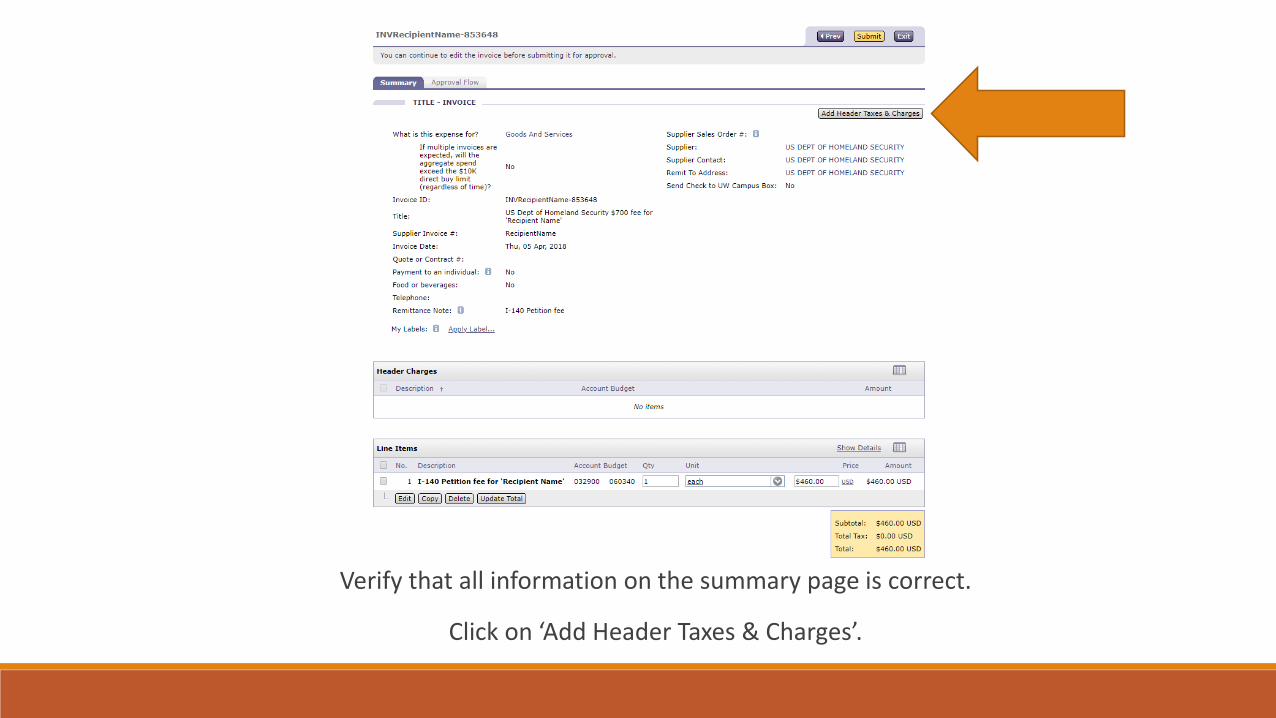
Verify that all information on the summary page is correct.
Click on ‘Add Header Taxes & Charges’.
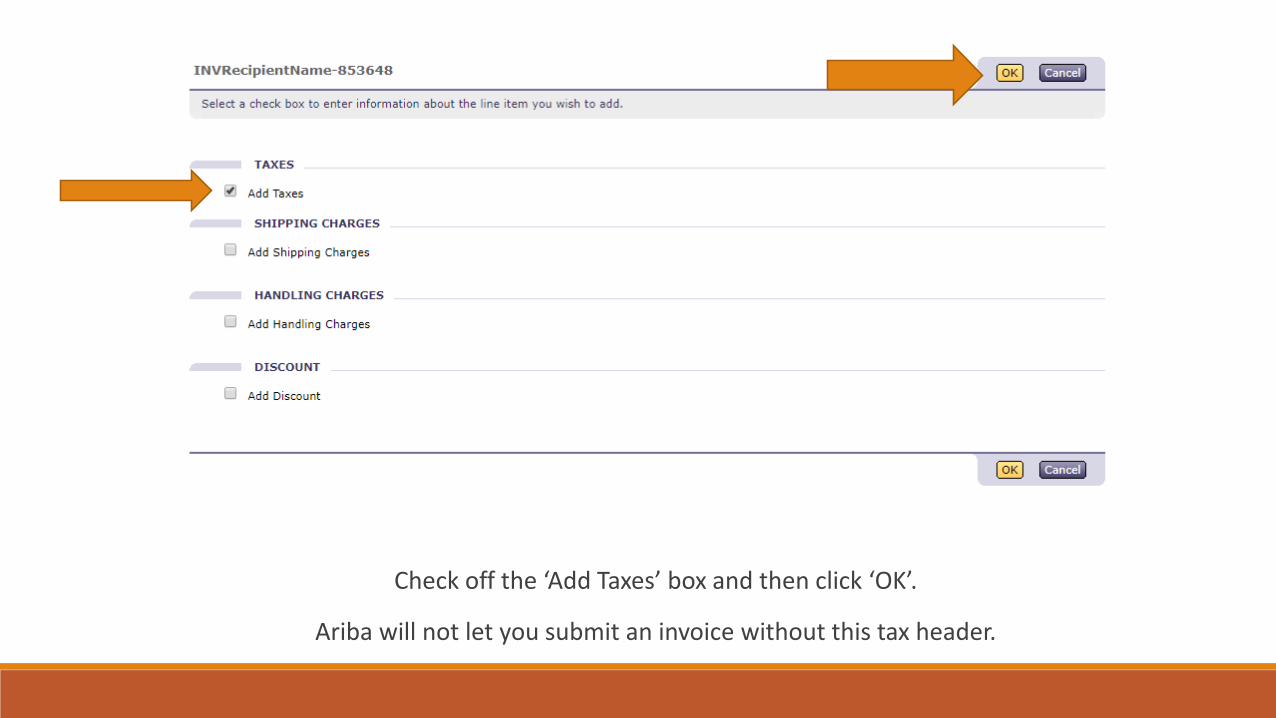
Check off the ‘Add Taxes’ box and then click ‘OK’.
Ariba will not let you submit an invoice without this tax header.
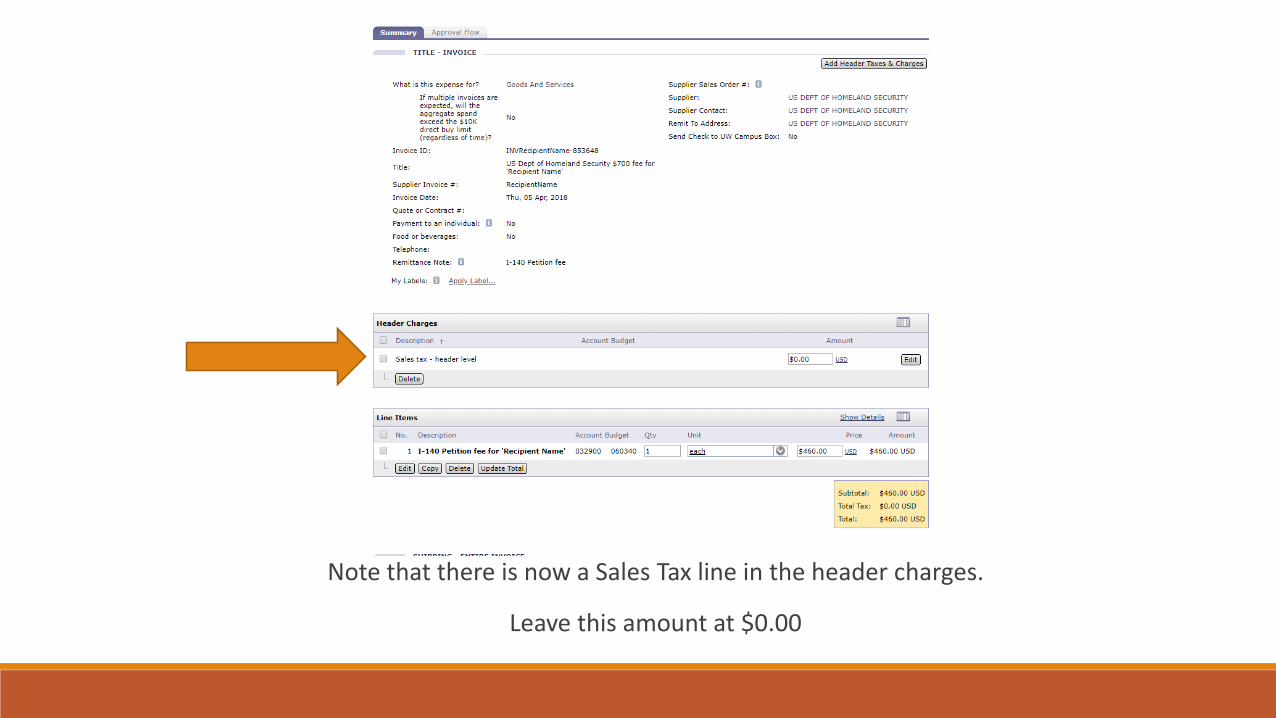
Note that there is now a Sales Tax line in the header charges.
Leave this amount at $0.00
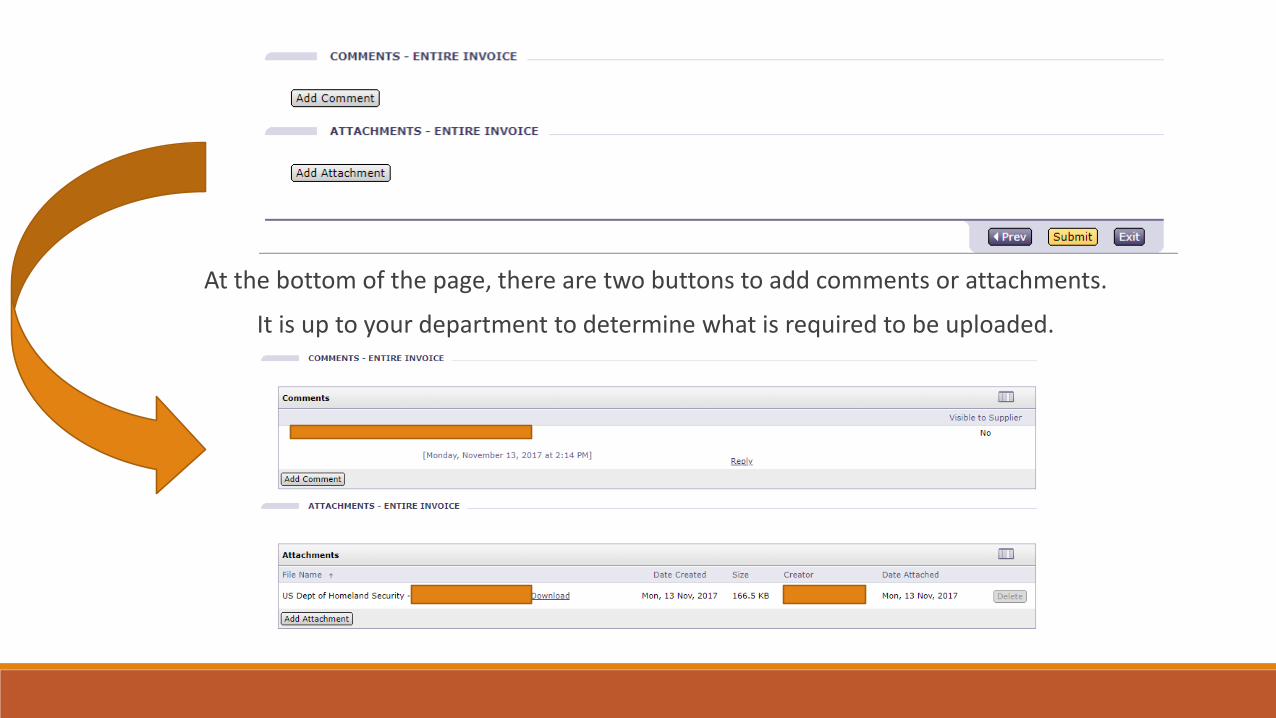
At the bottom of the page, there are two buttons to add comments or attachments.
It is up to your department to determine what is required to be uploaded.
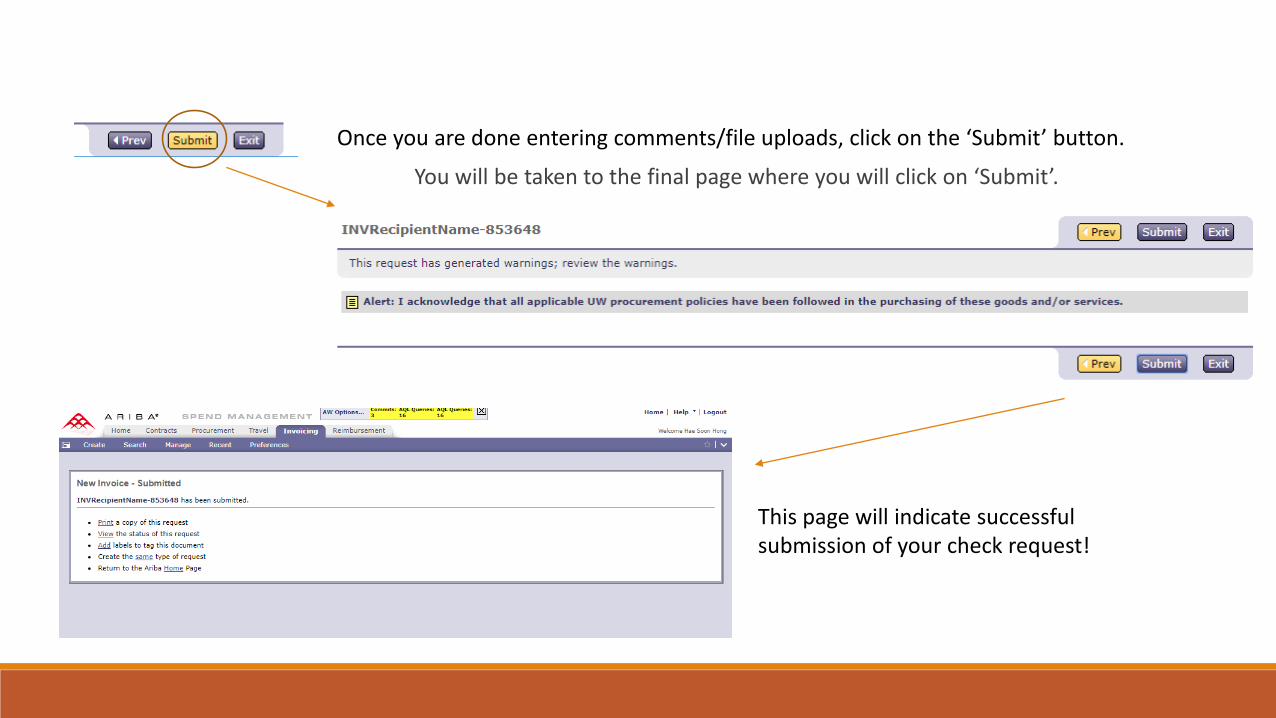
You will be taken to the final page where you will click on ‘Submit’.
Once you are done entering comments/file uploads, click on the ‘Submit’ button.
This page will indicate successful submission of your check request!