Core Stabilization for Low Back Pain Protocol · Core Stabilization for Low Back Pain Protocol...
10
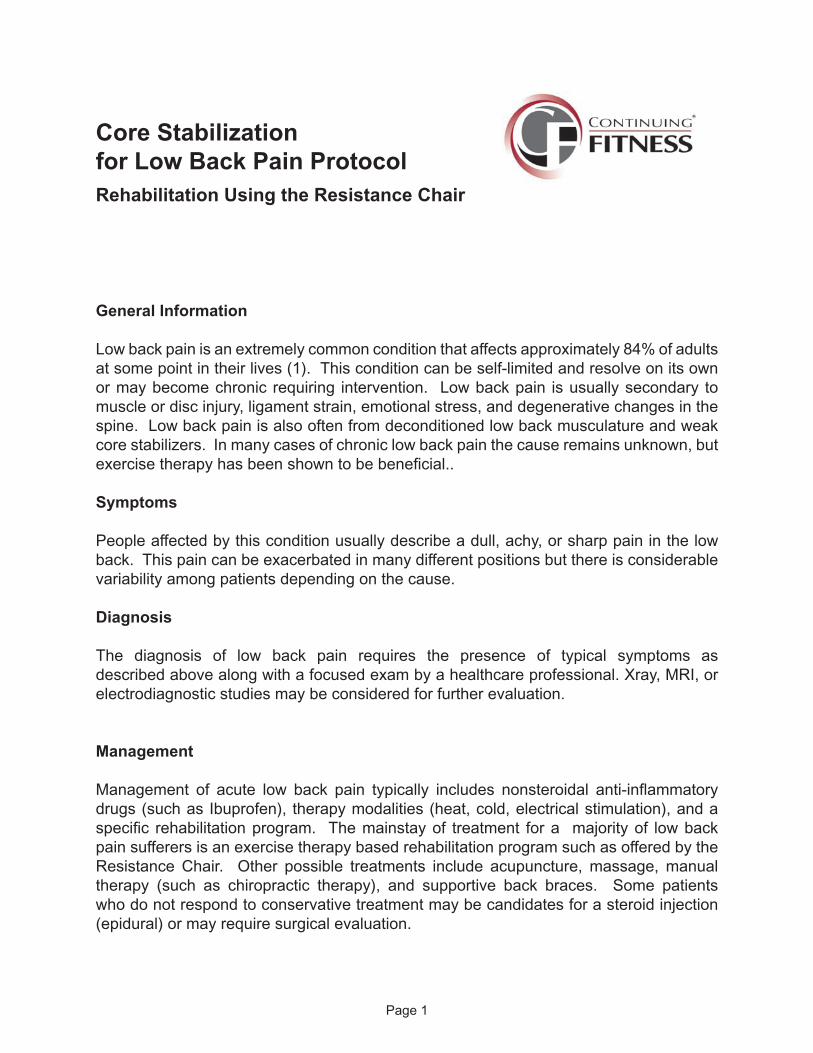
Core Stabilization for Low Back Pain Protocol Rehabilitation Using the Resistance Chair General Information Low back pain is an extremely common condition that affects approximately 84% of adults at some point in their lives (1). This condition can be self-limited and resolve on its own or may become chronic requiring intervention. Low back pain is usually secondary to muscle or disc injury, ligament strain, emotional stress, and degenerative changes in the spine. Low back pain is also often from deconditioned low back musculature and weak core stabilizers. In many cases of chronic low back pain the cause remains unknown, but exercise therapy has been shown to be beneficial.. Symptoms People affected by this condition usually describe a dull, achy, or sharp pain in the low back. This pain can be exacerbated in many different positions but there is considerable variability among patients depending on the cause. Diagnosis The diagnosis of low back pain requires the presence of typical symptoms as described above along with a focused exam by a healthcare professional. Xray, MRI, or electrodiagnostic studies may be considered for further evaluation. Management Management of acute low back pain typically includes nonsteroidal anti-inflammatory drugs (such as Ibuprofen), therapy modalities (heat, cold, electrical stimulation), and a specific rehabilitation program. The mainstay of treatment for a majority of low back pain sufferers is an exercise therapy based rehabilitation program such as offered by the Resistance Chair. Other possible treatments include acupuncture, massage, manual therapy (such as chiropractic therapy), and supportive back braces. Some patients who do not respond to conservative treatment may be candidates for a steroid injection (epidural) or may require surgical evaluation. Page 1
Transcript of Core Stabilization for Low Back Pain Protocol · Core Stabilization for Low Back Pain Protocol...
Core Stabilizationfor Low Back Pain ProtocolRehabilitation Using the Resistance Chair
General Information
Low back pain is an extremely common condition that affects approximately 84% of adults at some point in their lives (1). This condition can be self-limited and resolve on its own or may become chronic requiring intervention. Low back pain is usually secondary to muscle or disc injury, ligament strain, emotional stress, and degenerative changes in the spine. Low back pain is also often from deconditioned low back musculature and weak core stabilizers. In many cases of chronic low back pain the cause remains unknown, but exercise therapy has been shown to be beneficial..
Symptoms
People affected by this condition usually describe a dull, achy, or sharp pain in the low back. This pain can be exacerbated in many different positions but there is considerable variability among patients depending on the cause.
Diagnosis
The diagnosis of low back pain requires the presence of typical symptoms as described above along with a focused exam by a healthcare professional. Xray, MRI, or electrodiagnostic studies may be considered for further evaluation.
Management
Management of acute low back pain typically includes nonsteroidal anti-inflammatory drugs (such as Ibuprofen), therapy modalities (heat, cold, electrical stimulation), and a specific rehabilitation program. The mainstay of treatment for a majority of low back pain sufferers is an exercise therapy based rehabilitation program such as offered by the Resistance Chair. Other possible treatments include acupuncture, massage, manual therapy (such as chiropractic therapy), and supportive back braces. Some patients who do not respond to conservative treatment may be candidates for a steroid injection (epidural) or may require surgical evaluation.
Page 1
The Resistance Chair Solution
Exercise therapy has been shown to be effective in reducing pain and improving overall function in adults with low back pain (2). People with low back pain should engage in a program of regular specific exercises and stretching focused on lumbar stabilization and core strengthening. Rehabilitation for low back pain emphasizing core strength, low back support, and posture correction result in the alleviation of pain and disability (3). The Resistance Chair Solution addresses all these factors by incorporating a core strengthening and stability management approach for the treatment of low back pain.
References:
1. Deyo RA; Tsui-Wu YJ. Descriptive epidemiology of low-back pain and its related medical care in the United States. Spine 1987 Apr;12 (3): 264-8. 2. Hayden JA; van Tulder MW; Malmivaara AV; Koes BW. Meta-analysis: exercise therapy for nonspecific low back pain. Ann Intern Med 2005 May 3;142 (9):765-75.
3. Banwell, B, Hoehing, P. Physical Interventions, Exercise, and Rehabilitation. In: Soft Tissue Rheumatic Pain: Recognition, Management, Prevention, 3rd ed, Sheon, RP, Moskowitz, RW, Goldberg, VM (Eds), Williams & Wilkins, Baltimore 1996.
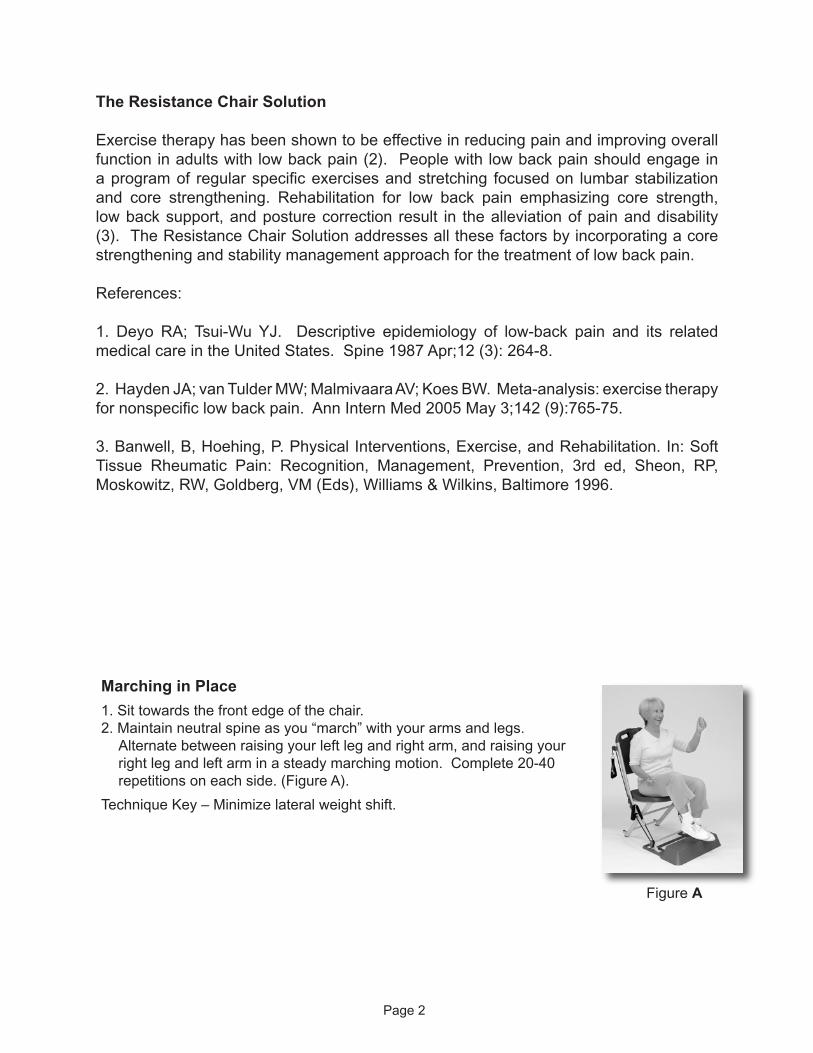
Marching in Place
1. Sit towards the front edge of the chair.2. Maintain neutral spine as you “march” with your arms and legs.
Alternate between raising your left leg and right arm, and raising your right leg and left arm in a steady marching motion. Complete 20-40 repetitions on each side. (Figure A).
Technique Key – Minimize lateral weight shift.
Figure A
Page 2

Upper Body Twist
Goal: To stretch spine.
1. While seated with your back upright at the front edge of the seat, cross your right leg over the left knee, then slowly twist your body and look over your right shoulder. (Figure A)
2. Hold this position at least 20 seconds while breathing deeply.3. Switch to the other side and repeat the same routine in the opposite
direction. Remember to sit up straight and breath as you perform this stretch. Do not hold your breath.
Figure A
Trunk Flexion Stretch
Goal: To stretch the muscles of the lower back.
1. Begin sitting upright in chair. Round your back as you bend forward to reach your chest towards your thighs. (Figure A)
2. Contract your abdominal muscles as you roll back up to starting position.
3. Hold position for 20 seconds. Repeat 3 times.
Figure A
Seated “Cat/Camel” Stretch
Goal: To warm up and increase range of motion of spine.
1. Sit upright at the front of the chair, hands resting on your thighs.
2. Exhale as you look towards your navel and round your back (Figure A).
3. Inhale as you lift your chest towards the ceiling and arch your back. (Figure B).
4. Repeat 10 times each direction.Figure A Figure B
Page 3

Seated Hip Stretch
Goal: To stretch hip muscles.
1. Sit upright at the front of the chair with your right ankle resting on your left knee (Figure A).
2. Gently press your right knee towards the floor. Maintain your weight even between your right and left buttocks.
3. Hold stretch for 20 seconds. Recommend holding for 60-90 seconds if possible. Repeat other side.
Figure A
Abdominal Curls
Goal: To improve abdominal strength.
1. Sit upright in chair.2. With upper pulleys extended over your
shoulders, interlock your fingers in front of your chest by pulling the two handles together. (Figure A)
3. Contract abdominal muscles as you bend forward at the waist as far as comfortably possible while rounding your back. (Figure B)
4. Slowly return to starting position.5. Repeat 10 times and perform 2 sets.
Technique key – Make sure that while rounding your back the abdominal muscles are pulling inward, not pushing outward.
Figure A Figure B
Oblique Strengthening
Goal: To improve trunk strength.
1. Sit on side of chair as shown.2. Grasp upper cable handle and hold in
front of sternum with both hands (Fig. A).3. Sit tall while twisting from your waist away
from the pulley anchor. Keep weight evenly distributed between right and left buttocks as you twist (Fig. B).
4. Slowly return to starting position.5. Repeat 10 times and perform 2 sets.
Technique key – Maintain pulleys directly in front of sternum throughout twist. Figure A Figure B
Page 4
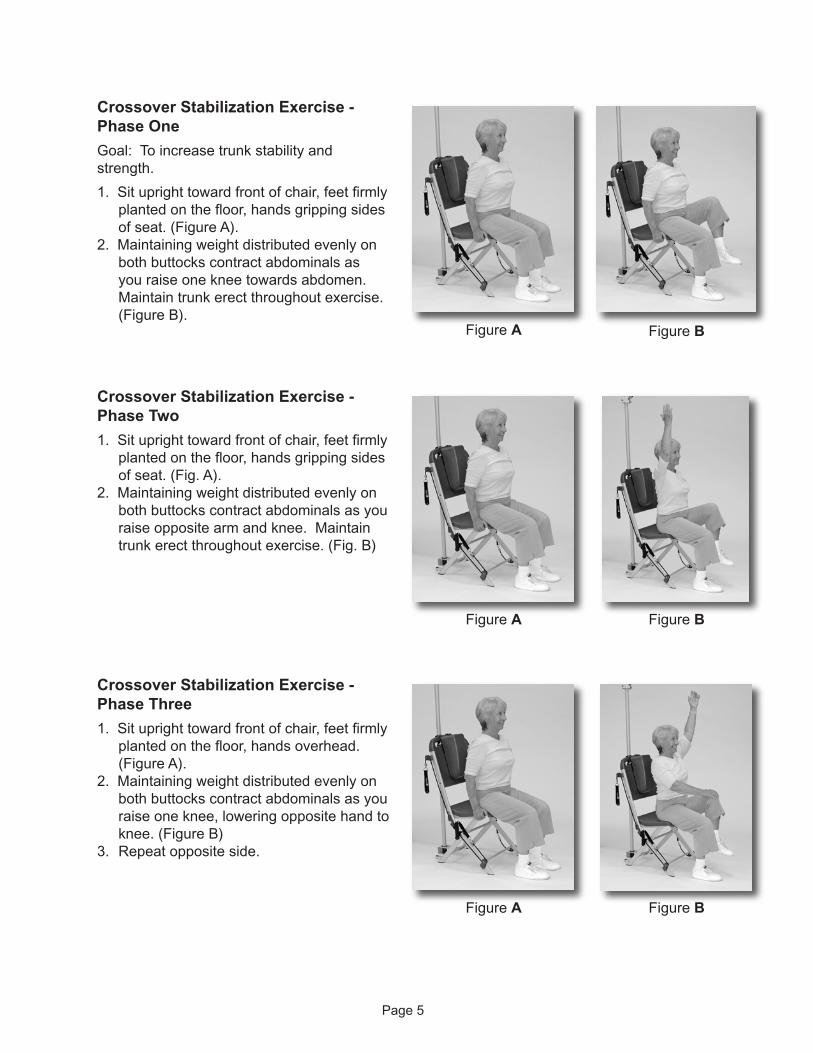
Crossover Stabilization Exercise - Phase One
Goal: To increase trunk stability and strength.
1. Sit upright toward front of chair, feet firmly planted on the floor, hands gripping sides of seat. (Figure A).
2. Maintaining weight distributed evenly on both buttocks contract abdominals as you raise one knee towards abdomen. Maintain trunk erect throughout exercise. (Figure B).
Figure A Figure B
Crossover Stabilization Exercise - Phase Two
1. Sit upright toward front of chair, feet firmly planted on the floor, hands gripping sides of seat. (Fig. A).
2. Maintaining weight distributed evenly on both buttocks contract abdominals as you raise opposite arm and knee. Maintain trunk erect throughout exercise. (Fig. B)
Figure A Figure B
Crossover Stabilization Exercise - Phase Three
1. Sit upright toward front of chair, feet firmly planted on the floor, hands overhead. (Figure A).
2. Maintaining weight distributed evenly on both buttocks contract abdominals as you raise one knee, lowering opposite hand to knee. (Figure B)
3. Repeat opposite side.
Figure A Figure B
Page 5
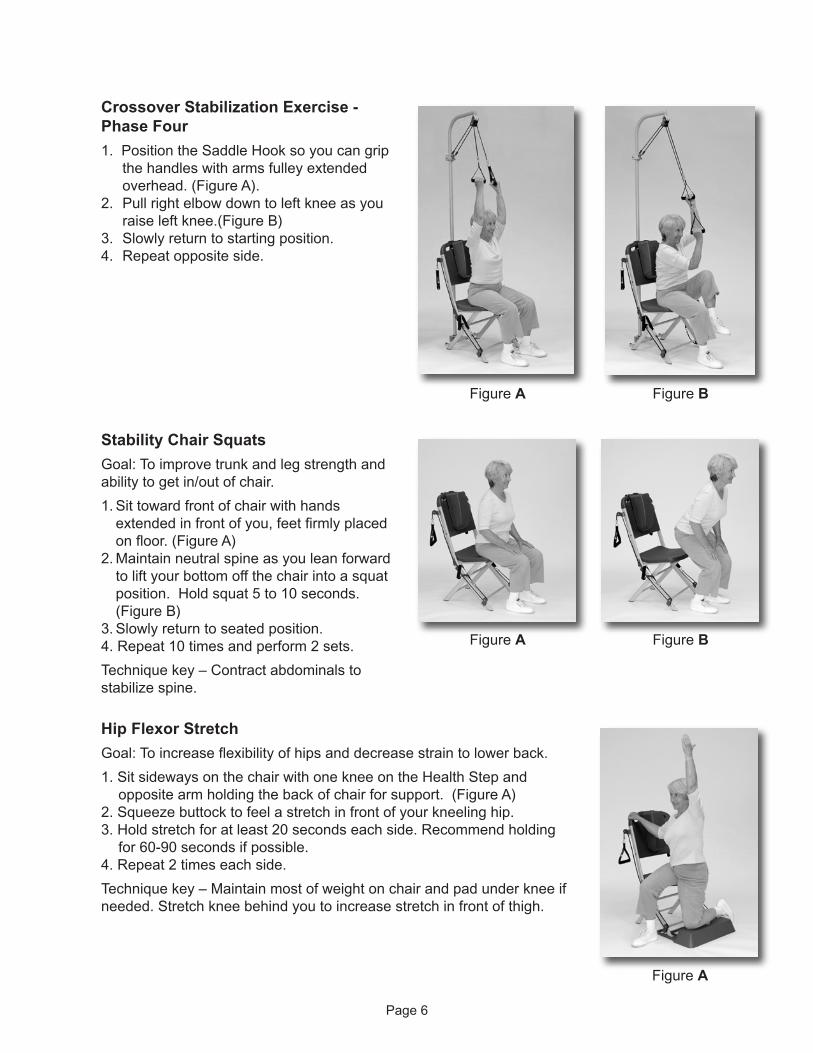
Crossover Stabilization Exercise - Phase Four
1. Position the Saddle Hook so you can grip the handles with arms fulley extended overhead. (Figure A).
2. Pull right elbow down to left knee as you raise left knee.(Figure B)
3. Slowly return to starting position.4. Repeat opposite side.
Figure A Figure B
Stability Chair Squats
Goal: To improve trunk and leg strength and ability to get in/out of chair.
1. Sit toward front of chair with hands extended in front of you, feet firmly placed on floor. (Figure A)
2. Maintain neutral spine as you lean forward to lift your bottom off the chair into a squat position. Hold squat 5 to 10 seconds. (Figure B)
3. Slowly return to seated position.4. Repeat 10 times and perform 2 sets.
Technique key – Contract abdominals to stabilize spine.
Figure A Figure B
Hip Flexor Stretch
Goal: To increase flexibility of hips and decrease strain to lower back.
1. Sit sideways on the chair with one knee on the Health Step and opposite arm holding the back of chair for support. (Figure A)
2. Squeeze buttock to feel a stretch in front of your kneeling hip.3. Hold stretch for at least 20 seconds each side. Recommend holding
for 60-90 seconds if possible.4. Repeat 2 times each side.
Technique key – Maintain most of weight on chair and pad under knee if needed. Stretch knee behind you to increase stretch in front of thigh.
Figure A
Page 6
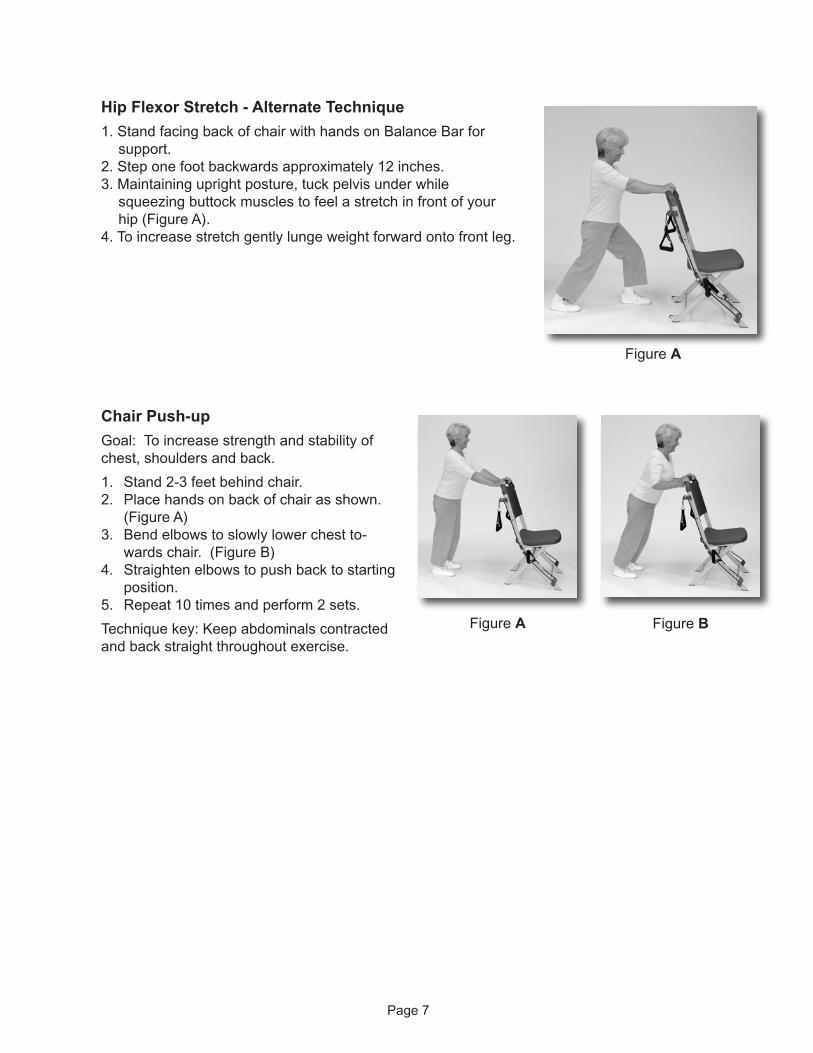
Hip Flexor Stretch - Alternate Technique
1. Stand facing back of chair with hands on Balance Bar for support.
2. Step one foot backwards approximately 12 inches.3. Maintaining upright posture, tuck pelvis under while
squeezing buttock muscles to feel a stretch in front of your hip (Figure A).
4. To increase stretch gently lunge weight forward onto front leg.
Figure A
Chair Push-up
Goal: To increase strength and stability of chest, shoulders and back.
1. Stand 2-3 feet behind chair.2. Place hands on back of chair as shown.
(Figure A)3. Bend elbows to slowly lower chest to-
wards chair. (Figure B)4. Straighten elbows to push back to starting
position.5. Repeat 10 times and perform 2 sets.
Technique key: Keep abdominals contracted and back straight throughout exercise.
Figure A Figure B
Page 7

Additional Exercises with the Freedom Flex
Lateral Pulldown
Goal: To increase strength of back muscles.
1. Position the Saddle Hook so you can grip the handles with arms fulley extended overhead. (Figure A).
2. Grasp handles, palms facing forward.3. Maintain upright posture (neutral spine)
as you pull cables down towards chest (Figure B).
4. Slowly return cables to starting position.5. Repeat 10 times and perform 2 sets.
Figure A Figure B
Front Pulldown
1. Adjust Saddle Hook so you can grip handles with arms fully extended overhead.
2. Grasp handles with palms facing toward you, elbows in front of body. (Figure A).
3. With arms in front, maintain upright posture (neutral spine) as you pull cables down toward chest (Figure B).
4. Slowly return cables to starting position.5. Repeat 10 times and perform 2 sets.
Figure A Figure B
Page 8

Overhead Cable Resisted Crunch
1. Hold overhead cables together just above forehead (Figure A)
2. Maintaining cable position, contract abdominal muscles to curl forward while rounding your back. (Figure B)
3. Slowly return to starting position.4. Repeat 10 times and perform 2 sets.
Figure A Figure B
Overhead Cable Resisted Obliques -Phase One
1. Adjust saddle so that you can hold cables with arms extended overhead. (Figure A)
2. Sit upright toward front of chair3. Maintaining upright posture, pull right
elbow towards left knee. This movement occurs by contraction of the muscles in your trunk. (Figure B)
4. Slowly return to starting position.5. Repeat on opposite side.6. Repeat 10 times and perform 2 sets each
side.
Figure A Figure B
Page 9
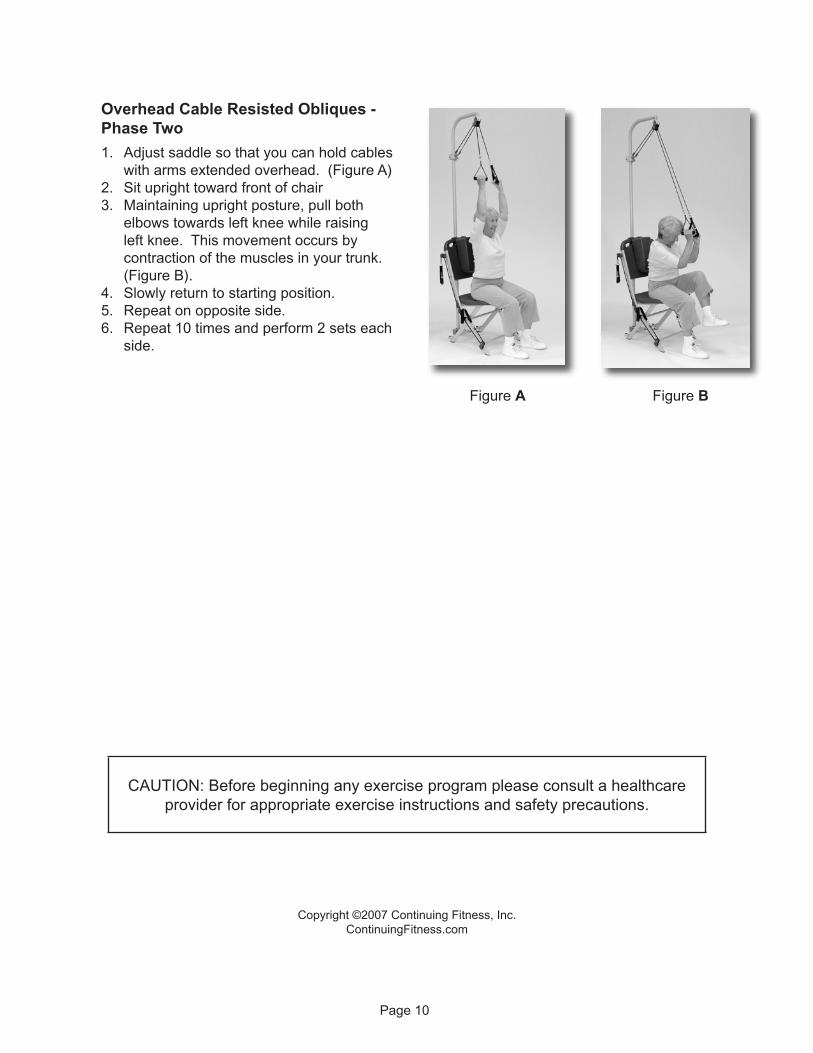
Overhead Cable Resisted Obliques -Phase Two
1. Adjust saddle so that you can hold cables with arms extended overhead. (Figure A)
2. Sit upright toward front of chair3. Maintaining upright posture, pull both
elbows towards left knee while raising left knee. This movement occurs by contraction of the muscles in your trunk. (Figure B).
4. Slowly return to starting position.5. Repeat on opposite side.6. Repeat 10 times and perform 2 sets each
side.
Figure A Figure B
CAUTION: Before beginning any exercise program please consult a healthcare provider for appropriate exercise instructions and safety precautions.
Copyright ©2007 Continuing Fitness, Inc.ContinuingFitness.com
Page 10