
COOK’S TOOLS - UNL Food | University of Nebraska–Lincoln · buy that next piece of kitchen...
9
COOK’S TOOLS by Alice Henneman, MS, RD, Extension Educator Having the right kitchen tools can make cooking easier and more fun! However, you don't need every tool in the store. Before you buy that next piece of kitchen equipment, check the following tips and suggestions. Share this list with a son, daughter or friend who is just beginning to purchase cooking equipment. Choosing cook's tools is somewhat subjective and a matter of preference. Use this list to help decide which tools will best fit your needs. BAKEWARE – General Tips • Foods absorb more heat and bake faster in a glass or dark metal container than a shiny metal one and may be done in less time. If substituting a dark metal or glass pan for a shiny metal pan, some bakers recommend reducing the oven temperature by 25 0 F to make up for this faster baking time. • Foods brown more in glass and dark metal baking pans than in shiny metal ones. Some cooks bake cookies and cakes in shiny metal pans as they prefer a lighter brown color for these foods. When baking pies and breads, darker pans or glass pans may be preferable. Some people choose glass over dark metal as it is easier to see how a food is browning. • A nonstick finish on pans can be harmed if you cut foods while they’re still in this type of pan. KITCHEN TOOL DESCRIPTION/USE TIP(S) Baking Sheets • Two jelly roll pans OR • Two cookie sheets OR • One of each • A jelly roll pan is a large flat baking sheet with approximately 1-inch sloping sides. • A cookie sheet has one or more turned up edges that are less deep than the sides of a jelly roll pan. • A jelly roll pan may be substituted for a cookie sheet, but a jelly roll can’t be baked on a cookie sheet. • Used for: o Cookies o Biscuits o Breads o Pizza • Purchase a baking sheet that is at least 2 inches smaller on each side than the inside of the oven. This promotes even heat circulation. Page 1 of 9
Transcript of COOK’S TOOLS - UNL Food | University of Nebraska–Lincoln · buy that next piece of kitchen...

COOK’S TOOLS by Alice Henneman, MS, RD, Extension Educator
Having the right kitchen tools can make cooking easier and more fun! However, you don't need every tool in the store. Before you buy that next piece of kitchen equipment, check the following tips and suggestions.
Share this list with a son, daughter or friend who is just beginning to purchase cooking equipment. Choosing cook's tools is somewhat subjective and a matter of preference. Use this list to help decide which tools will best fit your needs.
BAKEWARE – General Tips • Foods absorb more heat and bake faster in a glass or dark metal container than a shiny metal one and may be done in less time. If substituting a dark metal or glass pan for a shiny metal pan, some bakers recommend reducing the oven temperature by 250F to make up for this faster baking time.
• Foods brown more in glass and dark metal baking pans than in shiny metal ones. Some cooks bake cookies and cakes in shiny metal pans as they prefer a lighter brown color for these foods. When baking pies and breads, darker pans or glass pans may be preferable. Some people choose glass over dark metal as it is easier to see how a food is browning.
• A nonstick finish on pans can be harmed if you cut foods while they’re still in this type of pan.
KITCHEN TOOL DESCRIPTION/USE TIP(S) Baking Sheets
• Two jelly roll pans OR • Two cookie sheets OR • One of each
• A jelly roll pan is a large flat baking sheet with approximately 1-inch sloping sides. • A cookie sheet has one or more turned up edges that are less deep than the sides of a jelly roll pan. • A jelly roll pan may be substituted for a cookie sheet, but a jelly roll can’t be baked on a cookie sheet. • Used for:
o Cookies o Biscuits o Breads o Pizza
• Purchase a baking sheet that is at least 2 inches smaller on each side than the inside of the oven. This promotes even heat circulation.
Page 1 of 9

KITCHEN TOOL DESCRIPTION/USE TIP(S) Bread Pans (sometimes called “loaf” pans)
Two 9- x 5-inch bread pans
Used for: o Yeast breads & quick breads o Meatloaf o Pound cakes
• If you don’t have a bread pan, shape yeast breads and bake directly on a cookie or jelly roll sheet.
Cake Pan
• Two 8- or 9-inch square cake pans
• One 13 x 9-inch baking dish
Optional: Two 9-inch round cake pans
Used for: o Cakes o Brownies o Rolls o Casseroles o Fruit crisps o Frozen desserts (if made of
freezer-safe material)
• A 2-inch high pan will help insure your cakes don’t overflow the pan. • Use two 8 x 8 x 2-inch square pans or two 9 x 2-inch round pans as a substitute for a 13 x 9 x 2-inch pan.
Casserole Dishes (with oven-proof lids)
One to three casserole dishes with a size range of ½ to 3 quarts, depending on your cooking needs.
• Usually a deep, round container with handles and an oven-proof lid • Used mainly for baking combinations of foods such as meats, vegetables, pasta, rice, etc. that are mixed together with some type of sauce. Frequently served as a “one-dish meal.”
• Casseroles typically are prepared in ceramic or glass bakeware. These materials retain heat well and are ideal for baking and serving casserole dishes.
Cooling Rack
One or more large or two or more smaller cooling racks
• Used to cool foods after removing them from a heat source. • Available in round, square, and rectangular shapes. • Made of closely placed metal wires on short feet that raise it above the countertop. This structure allows air to circulate and cool the food.
• Purchase a cooling rack with sturdy wires that won’t sag under the weight of heavier foods.
Muffin Tin
(also referred to as muffin pan)
12-cup (2 1/2-inches across the top of the cup is standard size)
• A pan containing individual cups • Used for:
o Muffins o Cupcakes o Mini-meatloaves o Some types of rolls, such as
clover-leaf rolls o Individual quiches
• A standard muffin tin has cups of about 1/2-cup capacity and is the size most often used in recipes.
Pie Plate
One 9-inch pie plate
• A round pan with sloping sides • Used for:
o Pies, quiches o Rolls o Deep-dish pizzas
• A 9- by 1 1/2-inch pie plate holds about 5 cups while an 8- by 1 1/2-inch pie plate holds about 4 cups.
Page 2 of 9

KITCHEN TOOL DESCRIPTION/USE TIP(S)
Blender
• A blender works well for puréeing ingredients, such as for soups, and is terrific for making smoothies and milkshakes. • Buy a heavy-duty blender if you want to crush ice. Some people like an immersion or hand-held “stick” blender for pureeing soups in the pot or whipping hot chocolate.
• Though more expensive, glass and stainless steel containers are more durable than plastic ones. One benefit of glass vs. steel is seeing what you’re doing. • As a general guideline, never fill the container more than about 2/3 full. • If you’ll be blending small volumes of food, buy a blender that is tapered at the bottom. A blender forces food up against the blender walls where it is re-directed back down on the blades and blended until the desired consistency. In a blender that is wide at the bottom, small volumes of food will remain in the bottom of the container and won’t undergo this mixing process.
Colander
(sometimes referred to as a “strainer” or “sieve;” see “strainer” for more information)
• A bowl-shaped container with holes used for draining liquids from solids, such as water from pasta. Made from a variety of materials, including stainless steel, plastic and wire mesh • Usually have a footed or ring-type base at the bottom.
• Look for a colander that feels solid and stable when set on a surface.
Cutting Board • Plastic cutting boards are easier to keep clean as they can be run through the dishwasher. • Look for a type of plastic cutting board that won’t dull your knives. Usually, it will state this on the packaging materials. Glass or acrylic plastic cutting boards can dull knives.
• Avoid cross-contamination when cutting different foods for the same meal. This is especially important if cutting raw meats, poultry or seafood and then cutting ready-to-eat foods. Two possibilities are:
o Wash cutting board with hot soapy water and hot rinse water between uses.
o Purchase more than one cutting board. • If your cutting board doesn’t have non-skid materials on the underside, use a damp towel underneath to prevent it from moving while cutting.
Grater • Used for shredding hard foods, such as cheese and carrots, into small particles. • Available in several shapes and sizes.
• Buy a stainless steel grater to avoid problems with rusting. • A box-type grater with a handle at the top may be the most multi-purpose, having several sizes of holes. To avoid nicked fingers, buy one with a wide base that sits stably on a surface.
Page 3 of 9

KITCHEN TOOL DESCRIPTION/USE TIP(S) Kitchen Timer
• A digital timer is battery-operated. It is helpful to have one that times in seconds as well as minutes and hours. Helpful to have a timer that continues to count after alarm has sounded. • A manual wind-up timer generally is less expensive than a digital one. However, it may offer fewer features and doesn’t count in seconds.
• If timing several things tasks at one time, may be helpful to have more than one timer. Or, purchase a timer that tracks 2 or more things at a time.
KNIVES – General Tips Three basic kitchen knives that cover most cutting tasks are a chef’s knife, a paring knife and a serrated bread knife.
To help prolong the life of your knives:
• Many knife companies recommend against washing knives in the dishwasher. This may damage the blade. Wooden handles may not hold up well when washed in a dishwasher. Always dry the knife before storage
• Follow manufacturer's directions for sharpening knives. A sharp knife cuts better and is safer than a dull knife. There is a tendency to use too much force with a dull knife, lose control and get cut.
• Avoid cutting on hard surfaces that dull the edge of your knife, such as glass or acrylic plastic cutting boards. Softer cutting boards, such as polyethylene plastic cutting boards, are much easier on knives. Look for boards that say they won’t dull knives.
Store knives in a storage system that keeps the blades separate and clean. Do not throw them together in a drawer where they can bump against each other and possibly damage or dull the blades. It is harder to keep knives clean in a knife block as the slits in the block can’t be washed.
Never put a knife in a dishpan with other dishes as it is easy to accidentally cut your finger.
Most home knife sharpeners aren’t intended for use with knives with serrated edges. Check manufacturer’s directions before sharpening a knife with a serrated edge. Serrated knives are used on foods requiring more of a sawing motion. They undergo less wear and tear because of their design and generally need less sharpening.
KITCHEN TOOL DESCRIPTION/USE TIP(S) Chef’s Knife (also called a French Knife)
• Slices, minces and chops foods. • Use to cut fresh fruits, vegetables, and herbs. • Can be used to cut raw meat and carve or slice cooked meat. • Has broad, tapered shape and fine sharp edge. Blade ranges from 6 to 12 inches, measures at least 1-1/2 inches at widest point and is designed to rock on a cutting board as it cuts food.
• For most people, an 8-inch chef’s knife is easy to handle. • When purchasing, consider:
o Does it feel comfortable when you hold it?
o Can you easily manage it when going through the motions of slicing and chopping?
o Does the blade feel solid, not lightweight and flimsy?
• Always use with a cutting board. • To prevent vegetables and fruits from slipping on a cutting board, cut these foods in half before slicing or chopping further. Then place the cut side on the board. This helps anchor foods firmly on your cutting board and helps protect against cutting yourself. • Often faster to use than a food processor.
Page 4 of 9
KITCHEN TOOL DESCRIPTION/USE TIP(S) Paring Knife • Use for small, detailed work such as:
o Peeling fruits and vegetables o Sectioning orange o Slicing garlic o Coring a tomato
• Blade ranges from 3- to 4- inches.
• Choose a blade size that feels comfortable in your hand.
Serrated Bread Knife • Tooth-like edge saws through foods with a hard exterior and a soft interior such as:
o Breads and cakes o Whole fruits such as oranges and
other citrus fruits, melons and tomatoes
o Hard-shelled squash • Can also be used to:
o Shred cabbage & lettuce o Carve or slice cooked meat
• A common size for most tasks is a 9- to 10-inch blade.
• Definitely use a long, serrated knife such as a bread knife for cutting large foods like a watermelon or a cantaloupe. Some people try to cut large melons with a chef’s knife, which can slip easily on these foods.
KITCHEN TOOL DESCRIPTION/USE TIP(S) Measuring Cups, Dry • Usually comes in set of four and
include a 1/4-, 1/3-, 1/2- and 1-cup measure. Some sets include additional sizes.
• Measuring cups with handles are convenient for scooping out ingredients such as sugar, oatmeal, etc.
Measuring Cups, Liquid • Have a pour spout and a space above the last measuring line so liquids don’t spill during measuring and pouring. • Made of a see-through material, such as glass and plastic, for ease and accuracy in measuring.
• Never substitute a dry measuring cup for a liquid measuring one. It is easy to spill fluids when a dry measuring cup is filled to the top. Most dry measuring cups are made of a material that can’t be seen through for measuring. • Use the size of liquid measuring cup closest to the size you are measuring for most accuracy.
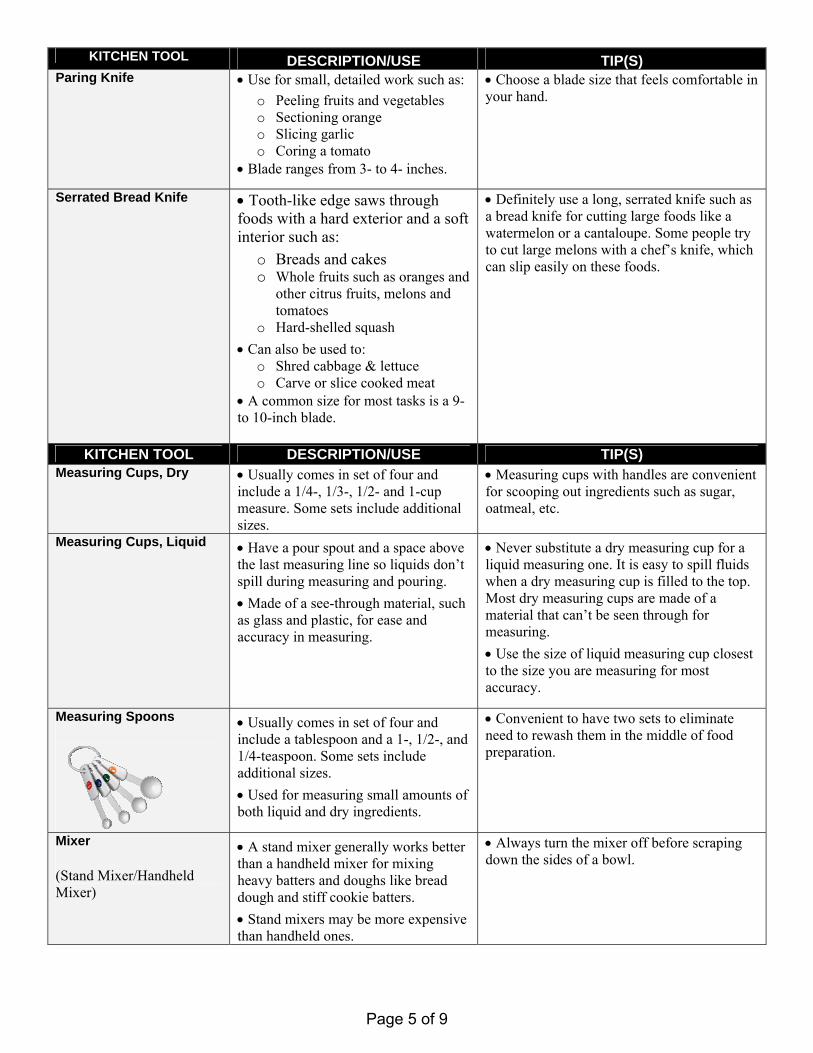
Measuring Spoons
• Usually comes in set of four and include a tablespoon and a 1-, 1/2-, and 1/4-teaspoon. Some sets include additional sizes. • Used for measuring small amounts of both liquid and dry ingredients.
• Convenient to have two sets to eliminate need to rewash them in the middle of food preparation.
Mixer
(Stand Mixer/Handheld Mixer)
• A stand mixer generally works better than a handheld mixer for mixing heavy batters and doughs like bread dough and stiff cookie batters. • Stand mixers may be more expensive than handheld ones.
• Always turn the mixer off before scraping down the sides of a bowl.
Page 5 of 9

KITCHEN TOOL DESCRIPTION/USE TIP(S)
Mixing Bowls • Frequently purchased in a set of 3 or more bowls. Sizes range from 1 quart to 5 or more quarts. • Typically available in glass, plastic and metal. Plastic bowls are unsuitable for beating egg whites as it is hard to wash away any fat that has been in the bowl and this may lessen the volume of the beaten eggs.
• If buying just one set, metal bowls may be most versatile. Buy stainless steel bowls; they don’t react to acid like aluminum bowls do. • Stainless steel bowls adapt well to temperature changes:
o Add ice and water and use as an “ice bath” to cool foods like hard-cooked eggs.
o Use on top of a saucepan as a double boiler. Note: the bowl will get very hot, so use hot mitts when touching.
Mixing Spoons, Large
(Solid and Slotted Heads)
• Use a solid mixing spoon for stirring ingredients either at the kitchen counter or the stove. • Use a slotted spoon when you need to let liquid drain from food, such as removing browned, crumbled ground beef from a pan.
• Look for a spoon that is easy to handle as mixing spoons are usually around 12 inches long. • If you’ll use the spoon for stirring at the stove, look for a type of material that is heat resistant, such as stainless steel, some of the newer heat-resistant nylon spoons and wood. For stainless steel spoons, look for a spoon with a handle that won’t get hot. • For stirring in nonstick cookware, use a nonstick or wooden spoon to avoid damaging the nonstick surface. • If using a wooden spoon, be sure it is in good condition and not cracked or rough on the surface, making it hard to clean.
Pastry Blender (also called a pastry cutter or a dough blender)
• Used for cutting cold fat, such as butter or shortening, into a flour mixture. • Consists of 5 to 6 U-shaped, sturdy steel wires or blades attached to a handle. • Typically used when making pastry dough, such as pie crusts. • Often used in making crumb crusts and biscuits.
• For easier mixing, cut cold fat into chunks before blending.
POTS AND PANS – General Tips Start your collection of pots and pans by buying just the basics. Add more as needed. In determining the size of a skillet, measure across the TOP of the skillet if the size isn’t given. Choose pots and pans made of heavy-gauge materials — thicker, heavier-weight pots and pans spread and hold heat more evenly than thinner, lighter weight pans. Look for heat-resistant handles for ease-of-use at the stove. Here are five pots and pans to get you started.
KITCHEN TOOL DESCRIPTION/USE TIP(S) Fry pan
10-inch fry pan
• Especially good for delicate quick-cooking foods that don’t need much browning, such as:
o Omelets o Scrambled and fried egg o Delicate light fish
• Purchase an oven safe fry pan for extra versatility and use. • Use nylon cooking utensils with nonstick cookware to avoid scratching the finish.
Page 6 of 9

KITCHEN TOOL DESCRIPTION/USE TIP(S) Sauté Pan (with lid)
12-inch sauté pan
• Varies from a fry pan in the angle of its sides. A fry pan has sloping slides while a sauté pan has fairly straight or slightly curved sides that are usually higher than those of a fry pan and allow it to hold more food. • Especially good at browning foods quickly in a small amount of fat.
• Purchase a sauté pan with a lid so you can add liquids after foods are browned and simmer them with the lid on. • As a general rule, a sauté pan without a nonstick surface browns food better than a pan with a nonstick surface. • To help keep food from sticking in a sauté pan without a nonstick coating, preheat the pan with a thin coating of fat before adding the food.
Saucepan (with lid)
3- to 4-quart saucepan AND 1 1/2- to 2-quart saucepan
• Deep, round pans with a long handle. Come in various sizes. Usually come with a tight-fitting lid. • Uses include cooking:
o Vegetables o Sauces o Soup o Rice o Hard-cooked eggs
• Consider buying a double boiler insert to cook more heat-sensitive foods, such as stirred custard, over simmering water. A double boiler fits inside the top part of the saucepan.
Dutch Oven (with lid)
6- to 8-quart Dutch oven
• A large pot with a tight-fitting lid and a handle for lifting on each side. • Uses include:
o Soups and stews o Deep-frying o Cooking pasta o Braising or roasting meat
• If you make larger amounts of food at a time, buy the 8-quart size.
KITCHEN TOOL DESCRIPTION/USE TIP(S) Rolling Pin • Used for rolling out dough, such as
cookie, pie, biscuit or yeast dough. • Can be used to crush crackers.
• Unless rolling very delicate dough, such as pastry dough, heavier rolling pins tend to work best. Their weight helps produce smooth dough with less effort.
Sifter
• Sifts ingredients such as flour and powdered sugar. • Some recipes call for sifting together dry ingredients, such as flour, salt, baking powder, baking soda, etc. to help combine them. • Usually made of stainless steel or plastic. Avoid aluminum sifters as they may rust. • Two common ways sifters work are:
o Turning a crank-type handle. o Squeezing a trigger-type handle.
• Before buying a sifter, go through the motions of using the sifter to see how it feels. If it is hard to turn or squeeze, it may tire your hand if you do much sifting. • A “fine mesh strainer” also may be used to sift ingredients. See “strainer” for more information.
Page 7 of 9

SPATULAS – General Tips
Spatulas are flat, narrow kitchen utensils that come in a variety of materials and shapes. Here are some of the most common ones and their uses.
Softer plastic and rubber spatulas are used for mixing and folding ingredients. Flexible spatulas with a long, rectangular blade are used for spreading frosting, leveling off ingredients and removing foods like brownies from pans; the blade is frequently made of metal.
KITCHEN TOOL DESCRIPTION/USE TIP(S) Cake Spatula
(sometimes called a straight-edged spatula)
• Flexible metal spatula with a long, flat, rectangular blade. • Uses include:
o Spreading frosting o Leveling off the tops of
measured ingredients, especially those in dry measuring cups
• A straight-edged knife can be substituted for a cake spatula for leveling off ingredients. • A table knife or a rubber spatula can be substituted for a cake spatula for frosting a cake.
Pie Spatula
(also called a pie server)
• Flexible metal spatula with a triangular shaped blade that will fit under a slice of pie • Uses include lifting and serving:
o Pieces of pie o Sections of cakes
• A pie spatula or “pie server” may have more of bend in the end of the blade near the handle than a “cake server.” However, most styles also may double as a cake server.
Rubber Spatula
(sometimes referred to as a “rubber scraper”)
Note: though called a “rubber spatula,” today, many spatulas are made of silicone rather than rubber.
A variation of the rubber spatula is the “spoon spatula,” sometimes called “spoonula”
• Rubber and silicone spatulas come in a variety of shapes and sizes:
o Used for tasks as scraping the sides of bowls or pans, folding mixtures together and stirring ingredients
o Rounded on one or both sides of their head to aid in scraping and stirring
• Spoon spatulas, sometimes called spoonulas, are a cross between a spoon and a spatula and may become a favorite tool for mixing foods. • The most common size of spatula has a head of about 2- by 3-inches.
• When purchasing a rubber or silicone spatula or spoon spatula, choose one with a head that is both firm and flexible so it can conform to the mixing bowl, yet still mix heavy batters. Look for a sturdy but comfortable handle. • Check for the degree of heat resistance. Today, many spatulas, will resist heat of 4000F or higher, making them suitable for stirring at the stove.
• Check if you can put the whole spatula in the dishwasher. For some spatulas with a wooden handle, you may need to remove the handle and wash just the head in the dishwasher.
KITCHEN TOOL DESCRIPTION/USE TIP(S) Strainer, Fine Mesh
(also called a sieve; sometimes referred to as a colander – see “colander” for more information)
• Strains liquids and semi-liquids such as chicken stocks, lumpy gravy, seeds from fruit sauces, etc. • Can be used to sift flour and powdered sugar.
• Buy a stainless steel rather than an aluminum strainer that can become discolored if used with a food containing acid. • A strainer with a handle on one end and a hook on the other that can rest over a pan or bowl is most convenient to use. • Start by buying a multi-purpose, medium-size strainer, about 7- to 9-inches across. Add more sizes as the need arises.
Page 8 of 9

KITCHEN TOOL DESCRIPTION/USE TIP(S) Thermometer, Dial or Digital Instant-Read Food Thermometer
• Not designed to stay in food during cooking. Use at end of cooking period. • Insert the full length of the sensing area, usually 2 to 2 1/2 inches for dial and 1 or less for digital thermometers (check manufacturer's directions). Insert so the sensing area is in the center of the thickest part of the food and not touching bone, fat or gristle. • About 15 to 20 seconds required for the temperature to be accurately displayed on a dial thermometer and about 10 seconds on a digital thermometer.
• For a thin food, such as a hamburger patty or boneless chicken breast, it may be necessary to insert the thermometer sideways with the sensing area in the center. • Frequently not dishwasher-safe. Wash by hand with hot soapy water and hot rinse water before and after use.
Tongs • Use to move and transfer hot foods, such as:
o Frying chicken o Turning food in the oven o Removing food from the grill
• Shorter tongs used for most indoor cooking tasks. Longer tongs often used for outdoor grilling to avoid getting hands near the fire.
• Metal, spring-loaded tongs with scalloped edges are most common type. • Tongs that don’t lock in the closed position can be held shut with a thick rubber band for an easier fit in a drawer. • Test several types of tongs before purchasing to see if they feel comfortable to use.
Turner (most common type is a pancake turner)
• Used for lifting/turning and removing foods such as pancakes, hamburgers, cookies and eggs. • Come in many sizes and shapes and are most often made of nylon or stainless steel.
• Some have holes or slots in the head section for draining off liquids or fats when lifting foods. • Purchase a nylon-type turner for use in nonstick cookware to avoid scratching the nonstick surface.
Vegetable Peeler • Several uses: o Remove thin skins, such as on
apples, potatoes and carrots. o Slice off thin sections of cheese. o Shave chocolate for chocolate
curls. • Generally, less food beneath the skin is removed with a vegetable peeler than with a knife. • Less chance of getting cut with a vegetable peeler than with a knife.
• Most come with blades that swivel rather than remain stationary. Swivel blade tends to be easier to use. • The are two main types of peelers in relation to the position of the blade
o Blade in a straight line with the handle. o Blade at right angles to handle:
Called “Y” or “harp” peeler because of shape
More common in Europe
Wire Whisks (also called wire whips)
• Match size and shape of whisks to the task. Some whisks are longer and narrower -- others are like big balloons. • Use balloon-type to beat a lot of air into a mix, such as whipped cream or meringue. • Use narrow whisks work for soups, sauces and mixing salad dressings.
• Choose whisks with the area sealed where wires go into the handle to prevent food from becoming trapped. These whisks may be more expensive, but will probably last longer and cost less over time. • Look for “dishwasher safe” whisks to save time and help assure thorough cleaning.
Page 9 of 9
ahennema
Typewritten Text
ahennema
Typewritten Text
ahennema
Typewritten Text
ahennema
Typewritten Text
This is a peer-reviewed publication.


