Congratulations on your new IKEA Kitchen, and on the money ... · It’s time to discover another...
16
© Inter IKEA Systems B.V. 2012 Congratulations on your new IKEA Kitchen, and on the money you saved!
Transcript of Congratulations on your new IKEA Kitchen, and on the money ... · It’s time to discover another...

© Inter IKEA Systems B.V. 2012
Congratulations on your new IKEA Kitchen, and on the money you saved!

INSTALLATION GUIDE FOR YOUR
AKURUM KITCHEN

It’s time to discover another major advantage of investing in an IKEA kitchen – it’s a lot easier than you might think to assemble and install it yourself.
We’ve already done most of the hard work for you so that installation will be as simple as possible. Plus, intelligent design makes it easy to adjust cabinets, doors and drawers for a perfect end result.
Before you beginThis guide and corresponding posters will take you through the preparation and installation process step-by-step. The posters provide a hands-free way to refer to detailed installation instructions while you work. We have also created a Kitchen Installation video, available on www.IKEA.ca, to give you an overview of the installation process.
We encourage you to read both the guide and posters in their entirety before getting started. When you’re ready to begin a particular step, be sure to hang the corresponding poster on nearby wall.
Have fun!You’re only seven steps away from a brand new kitchen. As you’ll quickly realize, it’s one of the most rewarding projects you’ll ever do – with results you’re sure to enjoy for years to come!
Seven steps to a brand new kitchen
2© Inter IKEA Systems B.V. 2012

The tools you’ll need
3
Hammer
AwlPhillips screwdriver Slotted screwdriver
Leve
l (4
foo
t)
Carpenter's rule or measuring tape
Rasp/File
Electric drill• drill holes for handles, wall fittings etc.• assemble and install cabinets
Jig-saw – for sawing holes for the sink and the extractor fan
Clamps
Rig
ht a
ngle
squ
are
FIXA 35 mm hole cutter – to drill extra holes for the tap in the sink (if necessary)
Mitre box with saw – to ensure that you cut the cornices at exactly the right angle
Pencil
Fine-toothed handsaw – for sawing worktops, plinths etc.
Adjustable wrench – to fasten wall cabinets to the suspension rail, and for cutting holes with the FIXA tool
© Inter IKEA Systems B.V. 2012

4
A little preparation can save a lot of time later on – especially when it comes to installing your kitchen.
Removing the old kitchenBefore removing old cabinets and countertops, switch off the electricity, gas and water. Remove base cabinets first, so that you can easily get to the wall cabinets. Checking for uneven spotsFlat, level surfaces are the best start for a good installation. Take the time now to locate and correct uneven walls and floors. The first three points on the step 3 poster show how to check. If major problems need to be fixed, you may want to hire a professional.
Marking cabinet positionMeasure and draw in the position of your cabinets on the wall so you can be sure everything fits.
Mapping out utilitiesIf you’re re-routing water or gas pipes or making changes to electrical outlets, hire qualified specialists. They will do a safe and professional job.
Preparing the walls and floorWith the room empty, now is the time to prime walls, put on a first coat of paint, and/or install new flooring. Keep in mind, new flooring is easier to install now, but be sure to protect the surface until the kitchen is finished. The second coat of paint and any wallpapering should be completed after the cabinets are installed.
Step 1. Prepare your kitchen
© Inter IKEA Systems B.V. 2012
5
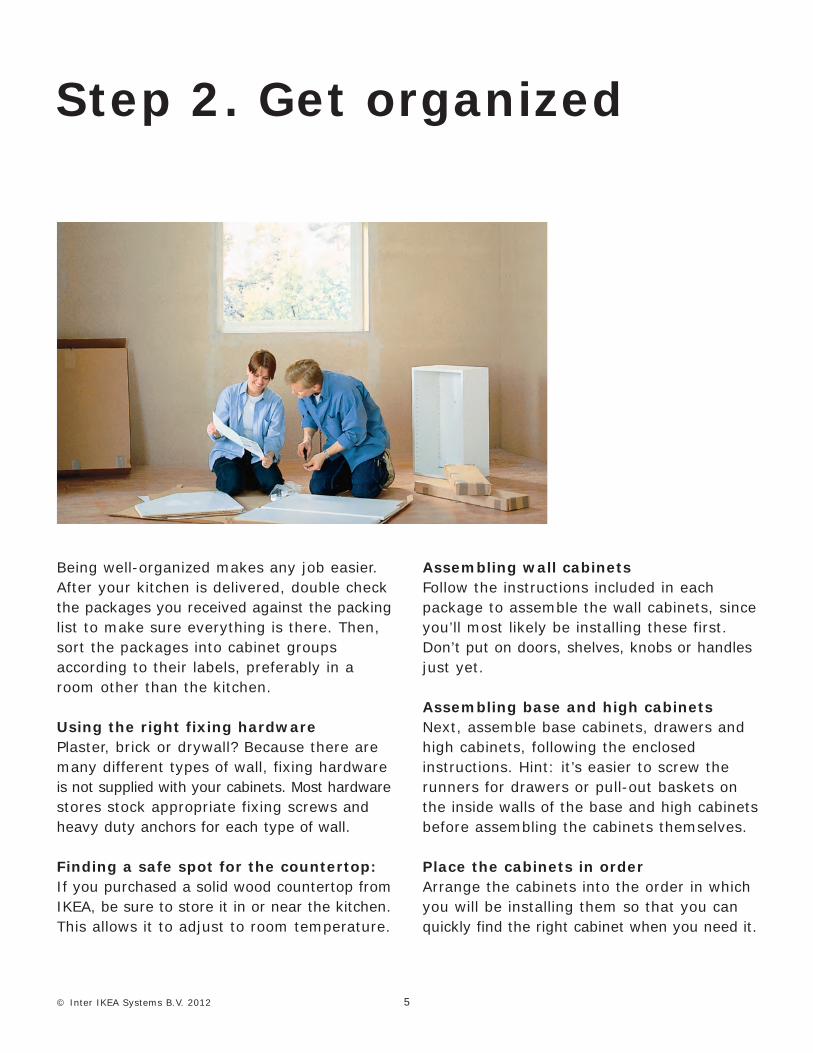
Being well-organized makes any job easier. After your kitchen is delivered, double check the packages you received against the packing list to make sure everything is there. Then, sort the packages into cabinet groups according to their labels, preferably in a room other than the kitchen.
Using the right fixing hardwarePlaster, brick or drywall? Because there are many different types of wall, fixing hardware is not supplied with your cabinets. Most hardware stores stock appropriate fixing screws and heavy duty anchors for each type of wall.
Finding a safe spot for the countertop:If you purchased a solid wood countertop from IKEA, be sure to store it in or near the kitchen. This allows it to adjust to room temperature.
Assembling wall cabinetsFollow the instructions included in each package to assemble the wall cabinets, since you’ll most likely be installing these first. Don’t put on doors, shelves, knobs or handles just yet.
Assembling base and high cabinetsNext, assemble base cabinets, drawers and high cabinets, following the enclosed instructions. Hint: it’s easier to screw the runners for drawers or pull-out baskets on the inside walls of the base and high cabinets before assembling the cabinets themselves.
Place the cabinets in orderArrange the cabinets into the order in which you will be installing them so that you can quickly find the right cabinet when you need it.
Step 2. Get organized
© Inter IKEA Systems B.V. 2012

Note: If your kitchen layout doesn’t include wall cabinets, please skip to Step 4.
This is where the fun really begins. In most kitchens, it is best to begin the installation with the wall cabinets. This way there won’t be any base cabinets to work around and you can more easily use a step-ladder.
In some cases, depending on the layout, appliances and countertops, it may be better to begin with the base cabinets. To start with wall cabinets, hang the step 3 poster on the wall. It will take you through each step for installing the wall cabinets, including:
• Finding wall studs• Position the suspension rail• Mounting the wall cabinets• Levelling the wall cabinets• Securing the wall cabinets
Making the job easier on yourselfKeep in mind, hanging wall cabinets is easiest to do with a partner and a sturdy step ladder. Always start with a corner cabinet and work your way out. Once you’ve completed all the steps on the poster, you’re ready to install base and high cabinets.
Step 3. Hang the wall cabinets
Hang the poster on the wall for Step 3
6© Inter IKEA Systems B.V. 2012
Step 3. Hang the wall cabinets
4. Mark the level lines for the wall
cabinets and suspension rail
Using the high point on the floor that you
marked in Step 1, measure up the wall 83
7/8” for the top of 30” wall cabinets or 92
5/8” for 39” wall cabinets. Next, locate the
bottom of the suspension rail by measuring
down 2 1/2” (3” for horizontal cabinets)
from the first mark. Then draw level lines
on the wall.
1. Checking for uneven spots
Start by checking the walls visually and
running a 4 foot level along the surface.
Mark any irregularities, such as bows and
high spots. If major problems need to be
fixed, you may want to hire a professional.
It may also be necessary to use shims
when mounting the cabinets.10. Level and secure the cabinet
Fit the small metal plate over the bolt, thread
the nut loosely in place. Level the cabinet,
using shims at the bottom edge if necessary.
With your wrench, loosely secure the cabinet
hardware. Do not tighten; this will allow you
to make adjustments once all of the
cabinets are installed.9. Hang the corner cabinet
Starting with the corner cabinet, align one
piece of the suspension rail hardware with
the predrilled hole at the top of the cabinet.
Position the second hole and its hardware.
Note: If you don’t have a corner cabinet,
install a cabinet that fits against both the
back and side walls, allowing the filler space
shown on your plan.
8. Secure the suspension rail
Secure the suspension rail to the studs,
aligning the bottom edge of the rail with the
level line marked on the wall. If you found a
bow in the wall of more than 1/4” in Step 1,
shim the suspension rail until it is stra
ight.
Should the end of the rail fall between
studs, secure it to the wall with a heavy
duty anchor.
7. Insert suspension rail hardware
Slide the suspension rail hardware into the
suspension rail before putting it up. You’ll
need two pieces per wall cabinet. (Be sure
to position one piece on each side of the
corner cabinet if your plan calls for one.)
You may find it helpful to tape the hardware
into place until the rail goes up.6. Cut the suspension rail
Measure the length of the wall cabinets to
be installed along one wall. Include the
length of wall behind a high cabinet only if
the high cabinet is 12” deep. Subtract 1/4”
from the overall measurement. (This will
leave 1/8” of space at either end of the rail.)
Use your hack saw to cut the suspension rail
to this length.
Note: If you will be installing a high
cabinet, final adjustments and tightening
of the mounting hardware should be
done after the high cabinet is installed
to ensure that everything is level.
14. Tighten the mounting screws
When all wall cabinets have been mounted,
aligned and connected, and final adjustments
have been made, tighten all of the mounting
hardware. Slide the plastic covers in place
over the metal corner bracket.
13. Fasten cabinets together
Place the connection screws enclosed with
the cabinet frames into the holes and
tighten. Remove the clamps. Continue
fastening the remaining cabinets together
in the same way.12. Drill th
rough cabinet walls
You’ll find predrilled holes on the inside of
each cabinet. For all doors use a 3/16" drill
bit to drill through the fourth holes from the
top and bottom edges. (The second and
third holes are for the door hinges.)
11. Hang the remaining wall cabinets
Hang the rest of the cabinets in the same
way, aligning each with the previous one.
Use your clamps to temporarily hold adjacent
cabinets into position. To avoid marring the
surface of your cabinets, use a small scrap
of wood between the clamp and the
cabinet.
When you’ve completed Step 3, all of the wall cabinets will be in place.
AKURUM wall cabinets are mounted using a sturdy
steel suspension rail. This ensures a strong
installation, and makes it easier to hang and level
the cabinets.
If you haven’t already done so in Step 1, measure
and draw the position of the cabinets on the wall to
ensure that everything will fit. Also be sure you’ve
marked uneven and high spots on the wall.
5. Finding the studs in drywall
At the marked suspension rail line, tap the
wall from the corner out (or use a stud-
finder) to check for the first stud. Mark its
position. While subsequent studs are usually
at 16” intervals, they may be at 12” or 24”
intervals in some kitchens. Mark the location
of each stud along the line. This will show
you where to attach the suspension rail to
the wall.
2. Next
Check the floor to find its high point. The
level will help you here as well. Check all
areas where you’ll be installing base or
high cabinets, and mark the high and low
points on the wall.
3. Finally
Fit a combination square or right angled
wood panel into each corner, and see if
there are any gaps between it and the
wall. If the gap is m
ore than 1/4”, call
your IKEA expert for assistance. In a “U”
shaped kitchen, measure between opposite
walls at a number of spots to see if they
are parallel.
Hang these instructions
on the wall so you’ll
have your hands free!
© Inter IK
EA System
s B.V. 2012

Step 3. Hang the wall cabinets
4. Mark the level lines for the wall cabinets and suspension railUsing the high point on the floor that you marked in Step 2, measure up the wall 83 7/8" for the top of 30" wall cabinets or 92 5/8" for 39" wall cabinets. Next, locate the bottom of the suspension rail by measuring down 2 1/2" (3" for horizontal cabinets) from the first mark. Then draw level lines on the wall.
1. Checking for uneven spotsStart by checking the walls visually and running a 4 foot level along the surface. Mark any irregularities, such as bows and high spots. If major problems need to be fixed, you may want to hire a professional. It may also be necessary to use shims when mounting the cabinets.
10. Level and secure the cabinetFit the small metal plate over the bolt, thread the nut loosely in place. Level the cabinet, using shims at the bottom edge if necessary. With your wrench, loosely secure the cabinet hardware. Do not tighten; this will allow you to make adjustments once all of the cabinets are installed.
9. Hang the corner cabinetStarting with the corner cabinet, align one piece of the suspension rail hardware with the predrilled hole at the top of the cabinet. Position the second hole and its hardware. Note: If you don’t have a corner cabinet, install a cabinet that fits against both the back and side walls, allowing the filler space shown on your plan.
8. Secure the suspension railSecure the suspension rail to the studs, aligning the bottom edge of the rail with the level line marked on the wall. If you found a bow in the wall of more than 1/4" in Step 1, shim the suspension rail until it is straight. Should the end of the rail fall between studs, secure it to the wall with a heavy duty anchor.
7. Insert suspension rail hardwareSlide the suspension rail hardware into the suspension rail before putting it up. You’ll need two pieces per wall cabinet (be sure to position one piece on each side of the corner cabinet if your plan calls for one). You may find it helpful to tape the hardware into place until the rail goes up.
6. Cut the suspension railMeasure the length of the wall cabinets to be installed along one wall. Include the length of wall behind a high cabinet only if the high cabinet is 12" deep. Subtract 1/4" from the overall measurement (this will leave 1/8" of space at either end of the rail). Use your hack saw to cut the suspension rail to this length.
Note: If you will be installing a high cabinet, final adjustments and tightening of the mounting hardware should be done after the high cabinet is installed to ensure that everything is level.
14. Tighten the mounting screwsWhen all wall cabinets have been mounted, aligned and connected, and final adjustments have been made, tighten all of the mounting hardware. Slide the plastic covers in place over the metal corner bracket.
13. Fasten cabinets together Place the connection screws enclosed with the cabinet frames into the holes and tighten. Remove the clamps. Continue fastening the remaining cabinets together in the same way.
12. Drill through cabinet wallsYou’ll find predrilled holes on the inside of each cabinet. For all doors use a 3/16" drill bit to drill through the fourth holes from the top and bottom edges (the second and third holes are for the door hinges).
11. Hang the remaining wall cabinetsHang the rest of the cabinets in the same way, aligning each with the previous one. Use your clamps to temporarily hold adjacent cabinets into position. To avoid marring the surface of your cabinets, use a small scrap of wood between the clamp and the cabinet.
When you’ve completed Step 3, all of the wall cabinets will be in place.
AKURUM wall cabinets are mounted using a sturdy steel suspension rail. This ensures a strong installation, and makes it easier to hang and level the cabinets.
If you haven’t already done so in Step 1, measure and draw the position of the cabinets on the wall to ensure that everything will fit. Also be sure you’ve marked uneven and high spots on the wall.
5. Finding the studs in drywallAt the marked suspension rail line, tap the wall from the corner out (or use a stud-finder) to check for the first stud. Mark its position. While subsequent studs are usually at 16" intervals, they may be at 12" or 24" intervals in some kitchens. Mark the location of each stud along the line. This will show you where to attach the suspension rail to the wall.
2. NextCheck the floor to find its high point. The level will help you here as well. Check all areas where you’ll be installing base or high cabinets, and mark the high and low points on the wall.
3. FinallyFit a combination square or right angled wood panel into each corner, and see if there are any gaps between it and the wall. If the gap is more than 1/4", call your IKEA expert for assistance. In a "U" shaped kitchen, measure between opposite walls at a number of spots to see if they are parallel.
Hang these instructions on the wall so you’ll
have your hands free!
© Inter IK
EA S
ystems B
.V. 2012
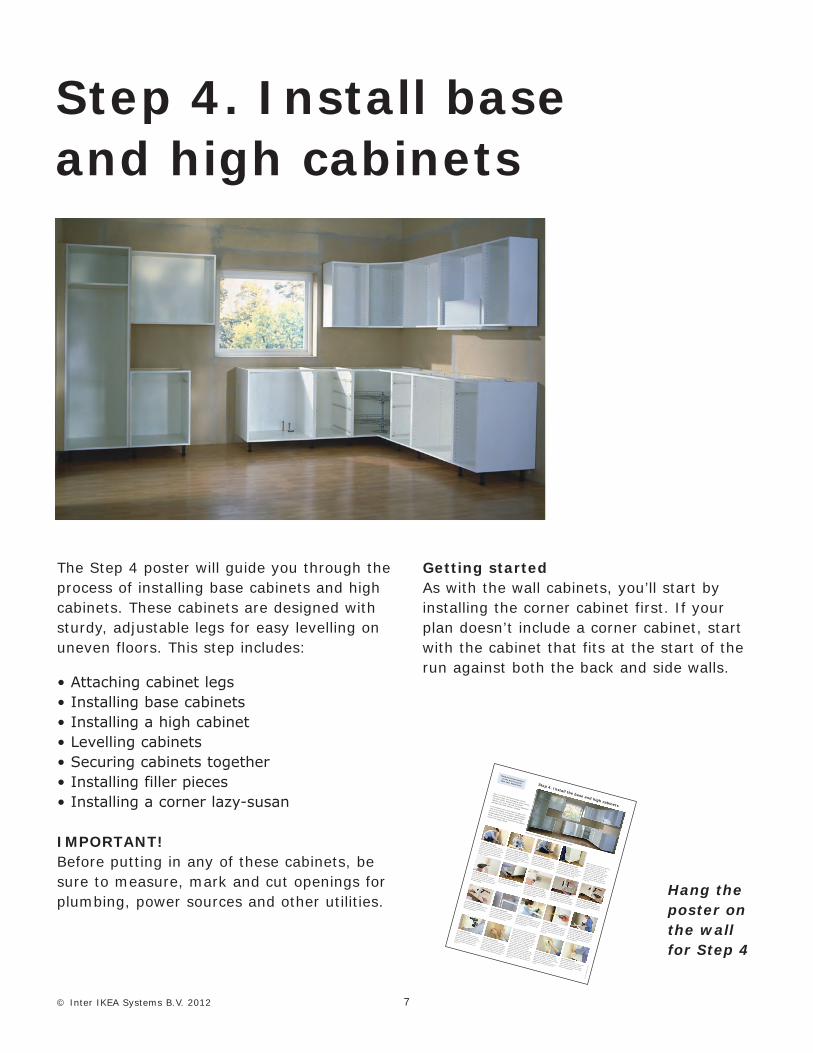
The Step 4 poster will guide you through the process of installing base cabinets and high cabinets. These cabinets are designed with sturdy, adjustable legs for easy levelling on uneven floors. This step includes:
• Attaching cabinet legs• Installing base cabinets• Installing a high cabinet• Levelling cabinets• Securing cabinets together• Installing filler pieces• Installing a corner lazy-susan
IMPORTANT!Before putting in any of these cabinets, be sure to measure, mark and cut openings for plumbing, power sources and other utilities.
Getting startedAs with the wall cabinets, you’ll start by installing the corner cabinet first. If your plan doesn’t include a corner cabinet, start with the cabinet that fits at the start of the run against both the back and side walls.
Step 4. Install base and high cabinets
Hang the poster on the wall for Step 4
7© Inter IKEA Systems B.V. 2012
3. Secure the support board
Align the top edge of the support board
with the level line you marked at 4 5/16”.
Secure it to the studs. Should the end of
the support board fall between studs, secure
it to the wall with a heavy-duty anchor.
4. Start with the corner cabinet
Attach legs to the front edges of the
cabinets according to package instructions.
If you are not using the support board,
attach back legs as well. Always use a back
leg at the end of the run, as this makes
attaching the side toe-kick easier.
2. Cut base cabinet support boards
Measure the length of the base and high
cabinets to be installed. Do not include the
wall space behind appliances. Cut the base
cabinet support board into measured
lengths. Cut the board 1 1/2” shorter where
a side toekick is planned.
9. Drill through the cabinet walls
Use a 3/16" drill bit to drill through the fourth
holes from the top and bottom edges. When
installing a drawer cabinet, drill through the
fifth hole from the top.
8. Install the next base cabinet
Mark, drill, and insert the screws for the
next cabinet. Lift the cabinet into place,
carefully aligning it with the previous cabinet
and securing them together with a clamp.
7. Secure the cabinet to the wall
Tighten the screws, but not completely.
Assure that the cabinet is level front-to-
back and side-to-side. Hint: Installing the
LAZY SUSAN is easier now than after the
countertops are in place.
6. Install the corner cabinet
Lift the corner cabinet back into place and
adjust the legs so that it stands level.
5. Drill, anchor and screw
Using the appropriate drill bit and type of
screw for your wall material, drill holes at
the spots you’ve marked. If there’s no stud,
insert a heavy-duty anchor then the screw
and tighten halfway.
12. Tighten all the screws
When all base cabinets have been mounted
and aligned, tighten all screws into the wall.
Now the high cabinet is in place, make the
final adjustments to the wall cabinets and
tighten all the screws.
11. Install the high cabinet
The high cabinet should be installed the
same way you installed the base cabinets.
If you re using a cover panel on one side,
mount this before install-ing the cabinet
using the enclosed instructions.
10. Fasten cabinets together
Place the connection screws enclosed with
the cabinet frames into the holes and
tighten. Continue in this fashion with the
remaining base cabinets.
Step 4. Install the base and high cabinets
When you’ve completed Step 4, all of the cabinet frames will be in place.
18. The finishing touch
Dab your finger into a 3-in-1 oil to prevent
the caulk from sticking, then run your
finger along the caulk, forcing it into the
crevice. Remove the tape for an airtight
seal and a straight edge.
17. Prepare the area to be caulked
To produce an airtight seal between the
wall and the cabinet, you’ll need to caulk
around the filler pieces. Choose a well made
latex brand (it doesn’t need to be
waterproof.) Tape alongside the area to be
caulked. Apply a bead of caulk into the
crevice.
15. Install filler pieces
Put the filler piece in place with the cut
edge against the wall. Attach by drilling a
screw through the predrilled holes from the
inside of the cabinet. Install other filler
pieces in the same way. When you’ve
finished installing all filler pieces, go to
picture 17.
16. If the wall is uneven
If the wall is not level and flat, the filler
must be cut to conform to the wall’s shape.
To do this, you’ll need to make a template
for tracing the wall’s shape onto the filler. A
piece of thin plywood or heavy cardboard
makes a suitable template. You’ll also need
a measuring tape, pencil and compass.
Cut the template material so that it’s the
same height as the cabinet. Hold it in place
where the filler will be installed. Open the
compass a couple of inches and place the
point against the wall. Holding the compass
horizontal and level, follow the line of the
wall so that the pencil traces a clear line on
the template. To cut the template to the
correct width, measure the distance from
the farthest point on the wall to the
cabinet. Find the same point on the
template and mark it. Draw a straight line
from this point to the top and bottom of the
template to form the flat edge that will fit
against the cabinet. Cut the template and
check that it fits, then trace the shape onto
the fller and follow the cutting directions in
picture 14.
Next, it’s time for the base and high cabinets.
Before you begin, note all plumbing, power sources
and other utilities. Measure these locations
carefully, and, using a hole saw, cut the appropriate
openings before each cabinet is installed.
In the following steps, you’ll install the legs at the
front of the cabinets, and secure a cabinet support
board to the wall. This is a length of particleboard
packed together with the toe-kick panels. If you
prefer, you can use legs on the back of the cabinets
in lieu of the support board.
Note: Legs can be shared by two cabinets,
see the instructions. Place the corner
cabinet against the wall so that its back
edge is resting on the support board.
Through the holes at the top back corners
of the cabinet, mark where to drill for the
fixing screw. Set the cabinet aside. If
there s no corner cabinet, install the
cabinet that will fit against the back and
side walls, allowing the filler space shown
on your plan.
14. Cut filler peicesWith a handsaw: draw
a line connecting the top and bottom marks
on the front side of the filler, and cut it with
the face side up. Jigsaw: mark both sides of
the filler. Put masking tape over the line on
the front side to prevent chipping. Cut it
from the back side.
1. Marking the level lines
Using the high point of the floor that you
marked earlier, measure up 4 5/16”. Use a
4 foot level to draw a line on the wall at this
height. Now measure 34 1/2” from the
same point on the floor and draw another
level line. This will help you level the top of
the base cabinets.
13. Measure filler pieces
Check the wall with your level to see if it is
even and flat. If so, measure the distance
from the wall to the cabinet and mark this
distance at the top and bottom of the filler
piece. Note: If the wall is uneven, skip to
picture 16.
Hang these instructions
on the wall so you’ll
have your hands free!
© Inter IK
EA System
s B.V. 2012

3. Secure the support boardAlign the top edge of the support board with the level line you marked at 4 5/16". Secure it to the studs. Should the end of the support board fall between studs, secure it to the wall with a heavy-duty anchor.
4. Start with the corner cabinetAttach legs to the front edges of the cabinets according to package instructions. If you are not using the support board, attach back legs as well. Always use a back leg at the end of the run, as this makes attaching the side toe-kick easier.
2. Cut base cabinet support boardsMeasure the length of the base and high cabinets to be installed. Do not include the wall space behind appliances. Cut the base cabinet support board into measured lengths. Cut the board 1 1/2" shorter where a side toekick is planned.
9. Drill through the cabinet wallsUse a 3/16" drill bit to drill through the fourth holes from the top and bottom edges. When installing a drawer cabinet, drill through the fifth hole from the top.
8. Install the next base cabinetMark, drill, and insert the screws for the next cabinet. Lift the cabinet into place, carefully aligning it with the previous cabinet and securing them together with a clamp.
7. Secure the cabinet to the wallTighten the screws, but not completely. Assure that the cabinet is level front-to-back and side-to-side. Hint: Installing the corner base cabinet carousel is easier now than after the countertops are in place.
6. Install the corner cabinetLift the corner cabinet back into place and adjust the legs so that it stands level.
5. Drill, anchor and screwUsing the appropriate drill bit and type of screw for your wall material, drill holes at the spots you’ve marked. If there’s no stud, insert a heavy-duty anchor then the screw and tighten halfway.
12. Tighten all the screwsWhen all base cabinets have been mounted and aligned, tighten all screws into the wall. Now the high cabinet is in place, make the final adjustments to the wall cabinets and tighten all the screws.
11. Install the high cabinetThe high cabinet should be installed the same way you installed the base cabinets. If you re using a cover panel on one side, mount this before installing the cabinet using the enclosed instructions.
10. Fasten cabinets togetherPlace the connection screws enclosed with the cabinet frames into the holes and tighten. Continue in this fashion with the remaining base cabinets.
Step 4. Install the base and high cabinets
When you’ve completed Step 4, all of the cabinet frames will be in place.
18. The finishing touch Dab your finger into a 3-in-1 oil to prevent the caulk from sticking, then run your finger along the caulk, forcing it into the crevice. Remove the tape for an airtight seal and a straight edge.
17. Prepare the area to be caulkedTo produce an airtight seal between the wall and the cabinet, you’ll need to caulk around the filler pieces. Choose a well made latex brand (it doesn’t need to be waterproof.) Tape alongside the area to be caulked. Apply a bead of caulk into the crevice.
15. Install filler pieces Put the filler piece in place with the cut edge against the wall. Attach by drilling a screw through the predrilled holes from the inside of the cabinet. Install other filler pieces in the same way. When you’ve finished installing all filler pieces, go to picture 17.
16. If the wall is unevenIf the wall is not level and flat, the filler must be cut to conform to the wall’s shape. To do this, you’ll need to make a template for tracing the wall’s shape onto the filler. A piece of thin plywood or heavy cardboard makes a suitable template. You’ll also need a measuring tape, pencil and compass.
Cut the template material so that it’s the same height as the cabinet. Hold it in place where the filler will be installed. Open the compass a couple of inches and place the point against the wall. Holding the compass horizontal and level, follow the line of the wall so that the pencil traces a clear line on the template. To cut the template to the correct width, measure the distance from the farthest point on the wall to the cabinet. Find the same point on the template and mark it. Draw a straight line from this point to the top and bottom of the template to form the flat edge that will fit against the cabinet. Cut the template and check that it fits, then trace the shape onto the filler and follow the cutting directions in picture 14.
Next, it’s time for the base and high cabinets. Before you begin, note all plumbing, power sources and other utilities. Measure these locations carefully, and using a hole saw, cut the appropriate openings before each cabinet is installed.
In the following steps, you’ll install the legs at the front of the cabinets, and secure a cabinet support board to the wall. This is a length of particleboard packed together with the toe-kick panels. If you prefer, you can use legs on the back of the cabinets in lieu of the support board.
Note: Legs can be shared by two cabinets, see the instructions. Place the corner cabinet against the wall so that its back edge is resting on the support board. Through the holes at the top back corners of the cabinet, mark where to drill for the fixing screw. Set the cabinet aside. If there s no corner cabinet, install the cabinet that will fit against the back and side walls, allowing the filler space shown on your plan.
14. Cut filler piecesWith a handsaw: draw a line connecting the top and bottom marks on the front side of the filler, and cut it with the face side up. Jigsaw: mark both sides of the filler. Put masking tape over the line on the front side to prevent chipping. Cut it from the back side.
1. Marking the level linesUsing the high point of the floor that you marked earlier, measure up 4 5/16". Use a 4 foot level to draw a line on the wall at this height. Now measure 34 1/2" from the same point on the floor and draw another level line. This will help you level the top of the base cabinets.
13. Measure filler piecesCheck the wall with your level to see if it is even and flat. If so, measure the distance from the wall to the cabinet and mark this distance at the top and bottom of the filler piece. Note: if the wall is uneven, skip to picture 16.
Hang these instructions on the wall so you’ll
have your hands free!
© Inter IK
EA S
ystems B
.V. 2012

Now it’s time to install the countertop and sink. This
poster details the installation care and maintenance of
our solid wood countertops.
When measuring and sawing the solid wood tops
throughout this step, we suggest placing them on
sawhorses for easiest handling. Once you’ve finished
Step 5, it’s a good idea to hire professionals to connect
the water, gas or electricity, and to install the oven,
dishwasher and lighting.
3. Saw the countertop
If you’re sawing by hand, we recommend
using a fine-toothed handsaw for control. To
avoid splintering the countertop, tape over
the area to be cut. If you’re using a circu
lar
saw, turn the counter face down and clamp
a straight-edge in place to guide the saw
along the cut line. Finish the cut edge with
your file.
2. Measure the counter
Measure the counter from the end of the
base cabinet out, allowing for the cover
panel plus a 1/2” overhang. Mark with a
pencil on the finished side if you’ll be using
a handsaw and on the underside if using a
power saw.
9. Secure the countertop
Your countertop should be secured as
shown using the hardware provided. The
slotted brackets allow the counterop to
expand and contract normally. Set
countertops in place, allowing the same
gaps as when you measured. Locate
attachment points at regular intervals and
drill pilot holes before securing the top.8. Install the sink
Lift off the countertop and turn it upside
down, placing it back on your saw horses.
Install the sink according to the sink
manufacturer’s instructions.
7. Trim the cabinet top rails
Fit the countertop back into place on the
base cabinet. Check that the sink hole is
not obstructed by the top frame rails of the
base cabinet. If it is, y
ou’ll need to trim the
rails so that the sink will fit
properly.
6. Seal the sink cutout
To prevent moisture from penetrating the
countertop, apply a polyurethane seal along
the cut edges with a paintbrush.
5. Saw the sink hole
Place the countertop on sawhorses. Drill a
1/2” hole for the jigsaw blade at all four
corners of the cut line. Following this same
cut line, saw the hole for the sink unit.
11. Prepare wood countertop for use
Your solid wood countertop from IKEA was
pretreated at the factory to condition and
protect it until installation. To prepare it for
use, sand the surface with a fine sandpaper
and finish it with IKEA BEHANDLA approved
wood-block oil. 10. Install the faucet
If your sink is not pre-drilled for the faucet
or other fittings, you ll need to cut the
necessary holes in the sink. Tape and mark
a place for each of the fittings. Drill all
holes with the aid of the FIXA tool and
install the faucet and fittings following the
manufacturer s instructions.
When you’ve completed Step 5, the countertops and sink will be in place.
© Inter IK
EA System
s B.V. 2012
Hang these instructions
on the wall so you’ll
have your hands free!
12. Assure long-term beauty
Sand and oil your counterop regularly for
long-term beauty and protection. Stains
and minor damage can be removed using
fine sandpaper. Wipe the sanded surface
clean and re-oil the affected area.
1. Position the countertop
Lay the countertop on top of the base
cabinets, allowing 1/8”at the back wall, and
a smaller space against the side wall or high
cabinet. If you’re installing tops in an “L”
shape, the two sections must meet in a
butt joint. (Do not make angle or mitre-cut
joints.) These steps allow the counter to
undergo normal expansion and contraction.
4. Mark a spot for the sink
With the countertop in place, trace the
inside of the base cabinet on the underside
of the countertop. This helps assure that
the sink cutout will be aligned correctly. Then,
place the sink upside down on the underside
of the countertop, positioning it correctly
side to side and front to back. Trace around
the edge of the sink with a pencil.
Using your pencil and a straight edge, draw
a “cut” line inside this line, according to the
directions that came with your sink.
Step 5. Install the countertop
The base for your new kitchen is now in place. Now it’s time to turn your attention to the countertops and sink. In addition to the solid wood countertops detailed in this step, IKEA also offers a wide range in custom countertops.
Solid wood countertopsThe Step 5 poster details the installation, care and maintenance of these durable solid wood countertops.
• Measuring countertop lengths• Making a corner seam• Sawing the countertop• Cutting a hole for the sink• Sealing cut edges• Installing the sink• Installing the countertop• Installing the tap
Bringing in the professionalsYour new kitchen is beginning to take shape! At this point, you’ll probably need to hire a professional to connect water, gas or electricity and to install the dishwasher, oven and lighting.
Step 5. Install the countertop
Hang the poster on the wall for Step 5
8© Inter IKEA Systems B.V. 2012

Now it’s time to install the countertop and sink. This poster details the installation care and maintenance of our solid wood countertops.
When measuring and sawing the solid wood tops throughout this step, we suggest placing them on sawhorses for easiest handling. Once you’ve finished Step 5, it’s a good idea to hire professionals to connect the water, gas or electricity, and to install the oven, dishwasher and lighting.
3. Saw the countertop If you’re sawing by hand, we recommend using a fine-toothed handsaw for control. To avoid splintering the countertop, tape over the area to be cut. If you’re using a circular saw, turn the counter face down and clamp a straight-edge in place to guide the saw along the cut line. Finish the cut edge with your file.
2. Measure the counterMeasure the counter from the end of the base cabinet out, allowing for the cover panel plus a 1/2" overhang. Mark with a pencil on the finished side if you’ll be using a handsaw and on the underside if using a power saw.
9. Secure the countertopYour countertop should be secured as shown using the hardware provided. The slotted brackets allow the counterop to expand and contract normally. Set countertops in place, allowing the same gaps as when you measured. Locate attachment points at regular intervals and drill pilot holes before securing the top.
8. Install the sinkLift off the countertop and turn it upside down, placing it back on your saw horses. Install the sink according to the sink manufacturer’s instructions.
7. Trim the cabinet top railsFit the countertop back into place on the base cabinet. Check that the sink hole is not obstructed by the top frame rails of the base cabinet. If it is, you’ll need to trim the rails so that the sink will fit properly.
6. Seal the sink cutout To prevent moisture from penetrating the countertop, apply a polyurethane seal along the cut edges with a paintbrush.
5. Saw the sink holePlace the countertop on sawhorses. Drill a 1/2" hole for the jigsaw blade at all four corners of the cut line. Following this same cut line, saw the hole for the sink unit.
11. Prepare wood countertop for useYour solid wood countertop from IKEA was pretreated at the factory to condition and protect it until installation. To prepare it for use, sand the surface with a fine sandpaper and finish it with IKEA BEHANDLA approved wood-block oil.
10. Install the faucetIf your sink is not pre-drilled for the faucet or other fittings, you will need to cut the necessary holes in the sink. Tape and mark a place for each of the fittings. Drill all holes with the aid of the FIXA tool and install the faucet and fittings following the manufacturer s instructions.
When you’ve completed Step 5, the countertops and sink will be in place.
© Inter IK
EA S
ystems B
.V. 2012
Hang these instructions on the wall so you’ll
have your hands free!
12. Assure long-term beautySand and oil your counterop regularly for long-term beauty and protection. Stains and minor damage can be removed using fine sandpaper. Wipe the sanded surface clean and re-oil the affected area.
1. Position the countertopLay the countertop on top of the base cabinets, allowing 1/8" at the back wall, and a smaller space against the side wall or high cabinet. If you’re installing tops in an "L" shape, the two sections must meet in a butt joint (do not make angle or mitre-cut joints). These steps allow the counter to undergo normal expansion and contraction.
4. Mark a spot for the sinkWith the countertop in place, trace the inside of the base cabinet on the underside of the countertop. This helps assure that the sink cutout will be aligned correctly. Then, place the sink upside down on the underside of the countertop, positioning it correctly side to side and front to back. Trace around the edge of the sink with a pencil.
Using your pencil and a straight edge, draw a "cut" line inside this line, according to the directions that came with your sink.
Step 5. Install the countertop

Now that the cabinet frames are in place, it’s time to add shelving, lighting, drawers and other accessories. All cabinet frames have predrilled holes for quick and easy installation of shelving, drawers and other interior accessories. This also makes it simple to make adjustments or add accessories later on!
The Step 6 poster provides instructions for: • Installing cover panels• Installing lighting • Fitting shelves• Attaching knobs and handles• Installing drawers
The poster also shows an overview of the various accessories that can be installed.
For complete details, you’ll need to follow the instructions included in each package.
Step 6. Install shelves, drawers and more
2. Attach toe-kick edging
Cover the cut edge of the toe-kicks
with the enclosed edging strip.
Press it on with a warm iron, then
cut it to the right length.
1. Saw toe-kicksCarefully measure and mark toe-
kicks so that they cover the open
area below your base cabinets. Saw
toe-kicks to the correct length using
a fine-toothed saw.
Step 7. Add the fi nishing touches
4. Attach light valances
Measure, cut and fit the light
valances beneath the wall cabinets.
Instructions for installation and
placement are included with the
valances. Remember to attach
sealing strips. 6. Attach the hinge plate
Screw the door hinge base plate
into the second and third predrilled
holes at the top and bottom.
8. Hang the doorsSnap the hinge body onto the base
plate and adjust the door to the
correct position, using the adjustment
screws. Instructions for doing this
are included with the hinges.
7. Fit the hinge to the door
Insert the hinge body into the
predrilled hole in the door and press
as shown. No screws are needed.
9. Attach door handles
Select and measure the position of
the door handles. Use a FIXA drill
template for the correct drilling
points so that you can place handles
in the same position on all doors. Be
sure to check on which side the door
opens before you mark and drill the
holes. Hold a block of wood behind
each door so that the surface
doesn’t splinter when the drill bit
goes through.10. Attach protective tabs
These self-adhesive tabs will reduce
the sound when you close cabinet
doors. You’ll find them in the package
with the hinges. Peel and stick to
the upper and lower corners of the
doors or cabinets, opposite the
hinge side.
2. Install lighting If cabinet lighting is included in your
kitchen plan, we suggest that you
install it now. Use a qualified
electrician for professional results.
5. Attach drawer fronts
Using the hardware provided, mount
each drawer front to the drawer box
through the pre drilled, prealigned
holes. These holes and the hardware
allow easy adjustment for perfect
drawer front alignment.
When you’ve completed Step 6, all interior cabinet
accessories will be in place. The cabinets have
predrilled holes for quick and easy installation of shelving,
drawers and interior accessories. This also makes it
simple to make adjustments or add accessories later on.
If you need to attach cover panels to the cabinet frames,
put them on before doing anything else, since they’re
screwed on from the inside.
Step 6. Install shelves, drawers & more
When you’ve completed Step 6, all interior cabinet accessories will be in place.
When you’ve completed Step 7, your new IKEA
kitchen is ready to use! It’s almost time to celebrate—
you only have a few more things left to do! But they’re
important, so be sure to take your time. Remember to
install any child safety devices you’ve chosen. Drawer and
cabinet safety catches help you protect your children
from dangerous household chemicals and other items that
could bring them harm.
1. Install cover panelsTemporarily secure the cover panel
into place using a clamp. Drill pilot
holes through the cabinet frame
from the inside of the cabinets,
being careful not to drill through the
cover panel. Screw the cover panel
into place.3. Install shelves
Insert four supports per shelf into
the predrilled holes inside each
cabinet, then rest a shelf on top of
them. Think about what you need to
store, and place the shelves to
make best use of the space.
4. Attach drawer knobs/handles
On a 6” high drawer front, attach
knobs and handles to the drawer
front before it is mounted to the
drawer box.
5. Install cornicesFollow the installation instructions
included with the cornice. For best
results, use a miter box saw to cut
the corners of each cornice at a 45°
angle. Measure carefully so that
cornices will be the right length.
3. Clip toe-kicks into place
Follow the directions for attaching
the toe-kick clips. At corners set
one clip facing up and the other
down – this allows them both to fit
on the same leg. Snap the toe-kicks
into place.
RATIONELL interior fittings for
the drawers.
GRUNDTAL accessories in
stainless steel.
RATIONELL pull-out baskets –
it's all within reach.
Just some of the great storage ideas...
BYGEL accessories in powder coated steel.
The drawers glide smoothly on
sturdy self-closing runners for years
of service. To set the drawer in the
open position, slide it out until it
stops, then tilt slightly up so it
clears the stop point on the runner.
To close the drawer tilt it up again
and roll it shut.
Congratulations!You’ve done it! Time to step back and admire
your work: a practical, attractive kitchen full
of ingenious features that will make your life
easier for years to come. And best of all you
got more for your money at IKEA because you
did most of the work yourself!
Hang these instructions on the wall so you’ll have your hands free!
© Inter IK
EA System
s B.V. 2012
Hang the poster on the wall for Step 6
9© Inter IKEA Systems B.V. 2012
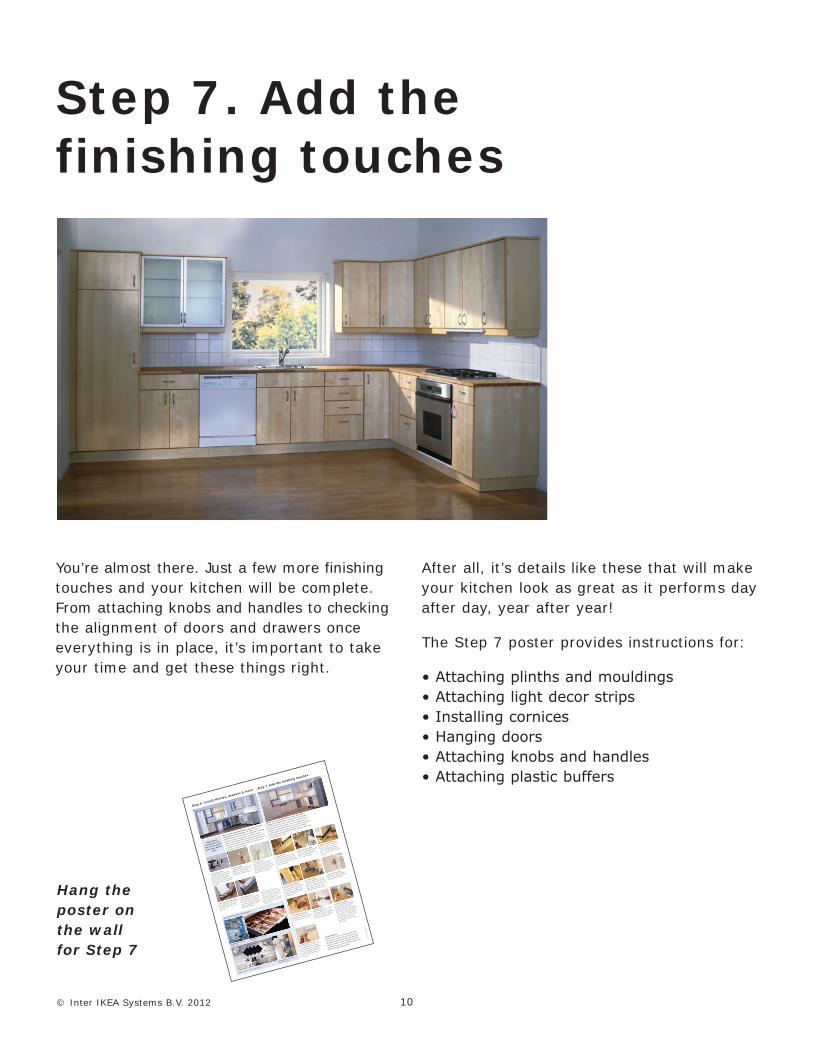
You’re almost there. Just a few more finishing touches and your kitchen will be complete. From attaching knobs and handles to checking the alignment of doors and drawers once everything is in place, it’s important to take your time and get these things right.
After all, it’s details like these that will make your kitchen look as great as it performs day after day, year after year!
The Step 7 poster provides instructions for:
• Attaching plinths and mouldings• Attaching light decor strips• Installing cornices• Hanging doors• Attaching knobs and handles• Attaching plastic buffers
Step 7. Add the finishing touches
Hang the poster on the wall for Step 7
10© Inter IKEA Systems B.V. 2012
2. Attach toe-kick edging
Cover the cut edge of the toe-kicks
with the enclosed edging strip.
Press it on with a warm iron, then
cut it to the right length.
1. Saw toe-kicks
Carefully measure and mark toe-
kicks so that they cover the open
area below your base cabinets. Saw
toe-kicks to the correct length using
a fine-toothed saw.
Step 7. Add the fi nishing touches
4. Attach light valances
Measure, cut and fit the light
valances beneath the wall cabinets.
Instructions for installation and
placement are included with the
valances. Remember to attach
sealing strips.
6. Attach the hinge plate
Screw the door hinge base plate
into the second and third predrilled
holes at the top and bottom.
8. Hang the doors
Snap the hinge body onto the base
plate and adjust the door to the
correct position, using the adjustment
screws. Instructions for doing this
are included with the hinges.7. Fit the hinge to the door
Insert the hinge body into the
predrilled hole in the door and press
as shown. No screws are needed.
9. Attach door handles
Select and measure the position of
the door handles. Use a FIXA drill
template for the correct drilling
points so that you can place handles
in the same position on all doors. Be
sure to check on which side the door
opens before you mark and drill the
holes. Hold a block of wood behind
each door so that the surface
doesn’t splinter when the drill bit
goes through.
10. Attach protective tabs
These self-adhesive tabs will reduce
the sound when you close cabinet
doors. You’ll find them in the package
with the hinges. Peel and stick to
the upper and lower corners of the
doors or cabinets, opposite the
hinge side.
2. Install lighting
If cabinet lighting is included in your
kitchen plan, we suggest that you
install it now. Use a qualified
electrician for professional results.
5. Attach drawer fronts
Using the hardware provided, mount
each drawer front to the drawer box
through the pre drilled, prealigned
holes. These holes and the hardware
allow easy adjustment for perfect
drawer front alignment.
When you’ve completed Step 6, all interior cabinet
accessories will be in place. The cabinets have
predrilled holes for quick and easy installation of shelving,
drawers and interior accessories. This also makes it
simple to make adjustments or add accessories later on.
If you need to attach cover panels to the cabinet frames,
put them on before doing anything else, since they’re
screwed on from the inside.
Step 6. Install shelves, drawers & more
When you’ve completed Step 6, all interior cabinet accessories will be in place. When you’ve completed Step 7, your new IKEA
kitchen is ready to use! It’s almost tim
e to celebrate—
you only have a few more things left to do! But they’re
important, so be sure to take your time. Remember to
install any child safety devices you’ve chosen. Drawer and
cabinet safety catches help you protect your children
from dangerous household chemicals and other items that
could bring them harm.
1. Install cover panels
Temporarily secure the cover panel
into place using a clamp. Drill pilot
holes through the cabinet frame
from the inside of the cabinets,
being careful not to drill through the
cover panel. Screw the cover panel
into place.
3. Install shelves
Insert four supports per shelf into
the predrilled holes inside each
cabinet, then rest a shelf on top of
them. Think about what you need to
store, and place the shelves to
make best use of the space.
4. Attach drawer knobs/handles
On a 6” high drawer front, attach
knobs and handles to the drawer
front before it is mounted to the
drawer box.
5. Install cornices
Follow the installation instructions
included with the cornice. For best
results, use a miter box saw to cut
the corners of each cornice at a 45°
angle. Measure carefully so that
cornices will be the right length.
3. Clip toe-kicks into place
Follow the directions for attaching
the toe-kick clips. At corners set
one clip facing up and the other
down – this allows them both to fit
on the same leg. Snap the toe-kicks
into place.
RATIONELL interior fittings for
the drawers.
GRUNDTAL accessories in
stainless steel.
RATIONELL pull-out baskets –
it's all within reach.
Just some of the great storage ideas...
BYGEL accessories in powder coated steel.
The drawers glide smoothly on
sturdy self-closing runners for years
of service. To set the drawer in the
open position, slide it out until it
stops, then tilt slightly up so it
clears the stop point on the runner.
To close the drawer tilt it up again
and roll it shut.
Congratulations!
You’ve done it! Time to step back and admire
your work: a practical, attractive kitchen full
of ingenious features that will make your life
easier for years to come. And best of all you
got more for your money at IKEA because you
did most of the work yourself!
Hang these
instructions on
the wall so you’ll
have your hands
free!
© Inter IK
EA System
s B.V. 2012

2. Attach toe-kick edging Cover the cut edge of the toe-kicks with the enclosed edging strip. Press it on with a warm iron, then cut it to the right length.
1. Saw toe-kicksCarefully measure and mark toe-kicks so that they cover the open area below your base cabinets. Saw toe-kicks to the correct length using a fine-toothed saw.
Step 7. Add the finishing touches
4. Attach light valancesMeasure, cut and fit the light valances beneath the wall cabinets. Instructions for installation and placement are included with the valances. Remember to attach sealing strips.
6. Attach the hinge plateScrew the door hinge base plate into the second and third predrilled holes at the top and bottom.
8. Hang the doorsSnap the hinge body onto the base plate and adjust the door to the correct position, using the adjustment screws. Instructions for doing this are included with the hinges.
7. Fit the hinge to the doorInsert the hinge body into the predrilled hole in the door and press as shown. No screws are needed.
9. Attach door handlesSelect and measure the position of the door handles. Use a FIXA drill template for the correct drilling points so that you can place handles in the same position on all doors. Be sure to check on which side the door opens before you mark and drill the holes. Hold a block of wood behind each door so that the surface doesn’t splinter when the drill bit goes through.
10. Attach protective tabsThese self-adhesive tabs will reduce the sound when you close cabinet doors. You’ll find them in the package with the hinges. Peel and stick to the upper and lower corners of the doors or cabinets, opposite the hinge side.
2. Install lighting If cabinet lighting is included in your kitchen plan, we suggest that you install it now. Use a qualified electrician for professional results.
5. Attach drawer frontsUsing the hardware provided, mount each drawer front to the drawer box through the pre drilled, prealigned holes. These holes and the hardware allow easy adjustment for perfect drawer front alignment.
When you’ve completed Step 6, all interior cabinet accessories will be in place. The cabinets have predrilled holes for quick and easy installation of shelving, drawers and interior accessories. This also makes it simple to make adjustments or add accessories later on. If you need to attach cover panels to the cabinet frames, put them on before doing anything else, since they’re screwed on from the inside.
Step 6. Install shelves, drawers & more
When you’ve completed Step 7, your new IKEA kitchen is ready to use! It’s almost time to celebrate—you only have a few more things left to do! But they’re important, so be sure to take your time. Remember to install any child safety devices you’ve chosen. Drawer and cabinet safety catches help you protect your children from dangerous household chemicals and other items that could bring them harm.
1. Install cover panelsTemporarily secure the cover panel into place using a clamp. Drill pilot holes through the cabinet frame from the inside of the cabinets, being careful not to drill through the cover panel. Screw the cover panel into place.
3. Install shelvesInsert four supports per shelf into the predrilled holes inside each cabinet, then rest a shelf on top of them. Think about what you need to store, and place the shelves to make best use of the space.
4. Attach drawer knobs/handlesOn a 6" high drawer front, attach knobs and handles to the drawer front before it is mounted to the drawer box.
5. Install cornicesFollow the installation instructions included with the cornice. For best results, use a miter box saw to cut the corners of each cornice at a 45° angle. Measure carefully so that cornices will be the right length.
3. Clip toe-kicks into placeFollow the directions for attaching the toe-kick clips. At corners set one clip facing up and the other down—this allows them both to fit on the same leg. Snap the toe-kicks into place.
RATIONELL interior fittings for the drawers.
GRUNDTAL accessories in stainless steel.
RATIONELL pull-out baskets – it's all within reach.
Just some of the great storage ideas...
BYGEL accessories in powder coated steel.
The drawers glide smoothly on sturdy self-closing runners for years of service. To set the drawer in the open position, slide it out until it stops, then tilt slightly up so it clears the stop point on the runner. To close the drawer tilt it up again and roll it shut.
Congratulations! You’ve done it! Time to step back and admire your work: a practical, attractive kitchen full of ingenious features that will make your life easier for years to come. And best of all you got more for your money at IKEA because you did most of the work yourself!
Hang these instructions on the wall so you’ll have your hands free!
© Inter IK
EA S
ystems B
.V. 2012

You’ve done it! Time to step back and admire your work: a practical, attractive kitchen full of ingenious features designed to make your life easier every day. Best of all, you got more for your money at IKEA because you did a lot of the work yourself. With just a little care and maintenance, your new IKEA kitchen will keep looking its best for years to come.
Caring for your cabinetsClean the doors, cabinet interiors and wood surfaces with a soft, damp cloth using cleaning products intended for these materials. After cleaning, wipe down with a clean dry cloth. DO NOT use cleaning agents that contain ammonia, alcohol or abrasives.
Keeping sinks shiningStainless steel sinks should be cleaned with a mild detergent and sponge, then rinsed thoroughly and wiped dry. Be sure to clean in the direction of the metal’s grain. Never use steel wool, steel brushes, bleaching or scouring powders on a stainless steel sink. Avoid cleaning silver on the sinktop, since this may discolour it.
11
Now, enjoy your new kitchen!
© Inter IKEA Systems B.V. 2012
For care of solid wood countertops, see poster Step 5.