Configuring Cross Docking for Non-Retail Replenishment in Dynamics AX 2012
38
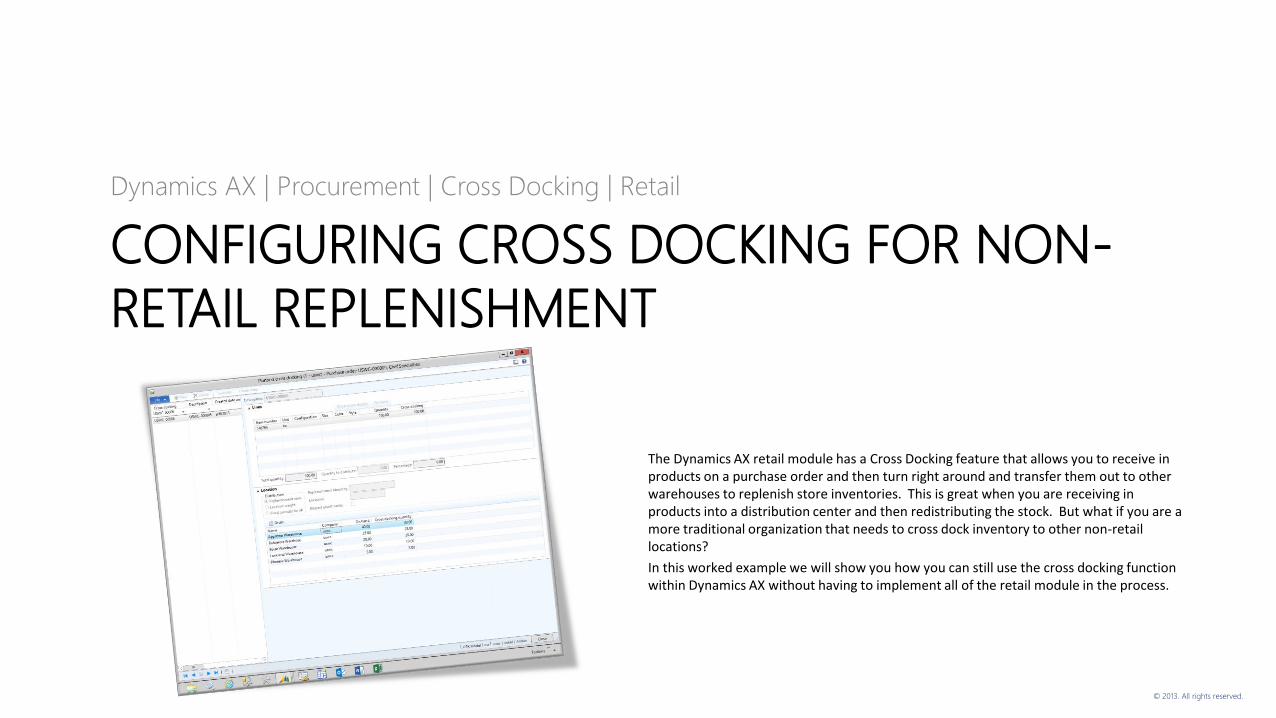
© 2013. All rights reserved. CONFIGURING CROSS DOCKING FOR NON- RETAIL REPLENISHMENT Dynamics AX | Procurement | Cross Docking | Retail The Dynamics AX retail module has a Cross Docking feature that allows you to receive in products on a purchase order and then turn right around and transfer them out to other warehouses to replenish store inventories. This is great when you are receiving in products into a distribution center and then redistributing the stock. But what if you are a more traditional organization that needs to cross dock inventory to other non-retail locations? In this worked example we will show you how you can still use the cross docking function within Dynamics AX without having to implement all of the retail module in the process.
-
Upload
murray-fife -
Category
Business
-
view
2.045 -
download
1
Transcript of Configuring Cross Docking for Non-Retail Replenishment in Dynamics AX 2012
© 2013. All rights reserved.
CONFIGURING CROSS DOCKING FOR NON-
RETAIL REPLENISHMENT
Dynamics AX | Procurement | Cross Docking | Retail
The Dynamics AX retail module has a Cross Docking feature that allows you to receive in products on a purchase order and then turn right around and transfer them out to other warehouses to replenish store inventories. This is great when you are receiving in products into a distribution center and then redistributing the stock. But what if you are a more traditional organization that needs to cross dock inventory to other non-retail locations?
In this worked example we will show you how you can still use the cross docking function within Dynamics AX without having to implement all of the retail module in the process.
© 2013. All rights reserved.
CONFIGURING WAREHOUSES AS
REPLENISHMENT STORESWhen the cross docking function is performed, Dynamics AX will want to distribute out the products to Retail Stores, so the first step in the configuration process is to associate a store with your warehouse. This will just be done for indentification purposes, so don’t worry about having to configure too much information.
In this section we will show how to create a simple store that is associated with your warehouse.
© 2013. All rights reserved.
Configuring
Warehouses as
Replenishment
Stores
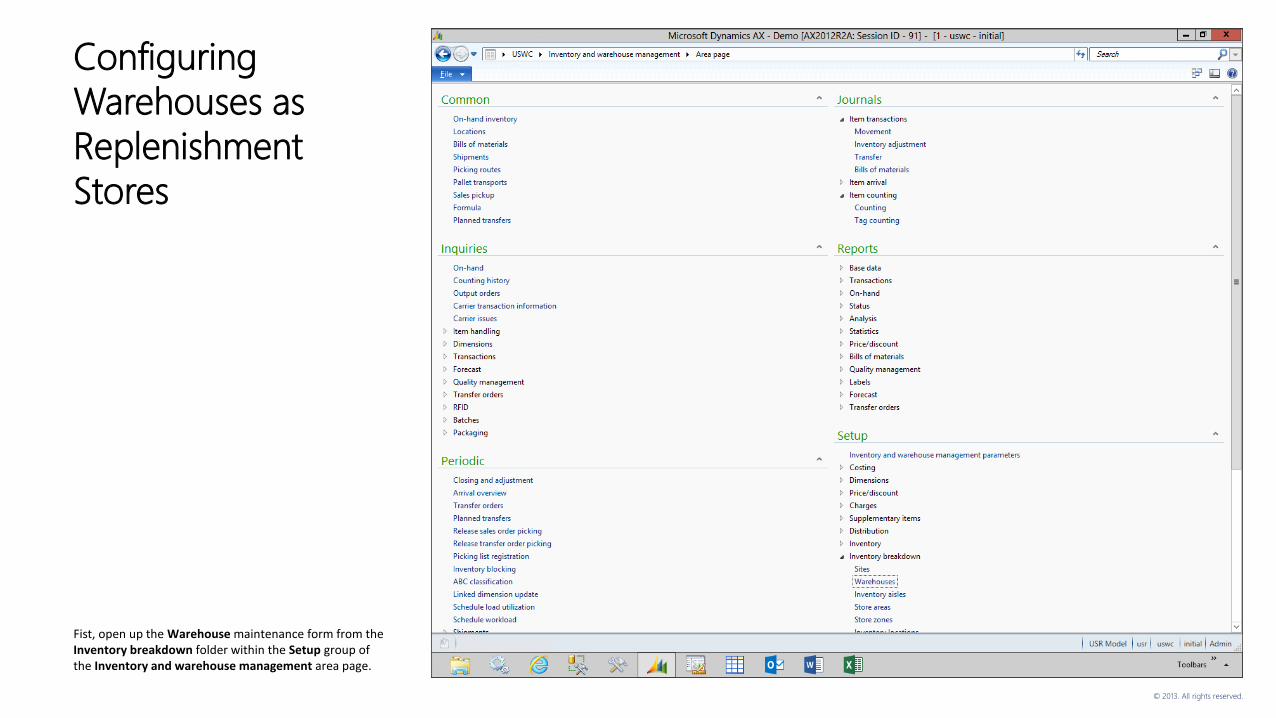
Fist, open up the Warehouse maintenance form from the Inventory breakdown folder within the Setup group of the Inventory and warehouse management area page.
© 2013. All rights reserved.
Configuring
Warehouses as
Replenishment
Stores
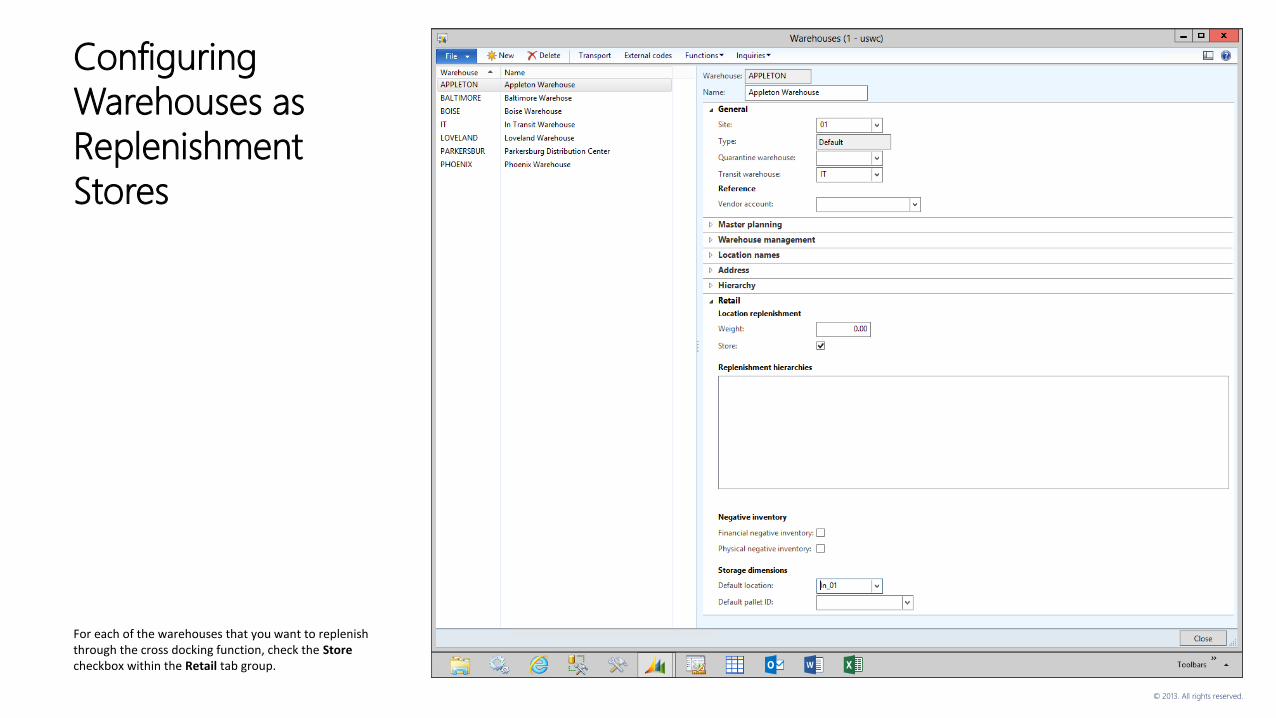
For each of the warehouses that you want to replenish through the cross docking function, check the Storecheckbox within the Retail tab group.
© 2013. All rights reserved.
Configuring
Warehouses as
Replenishment
Stores
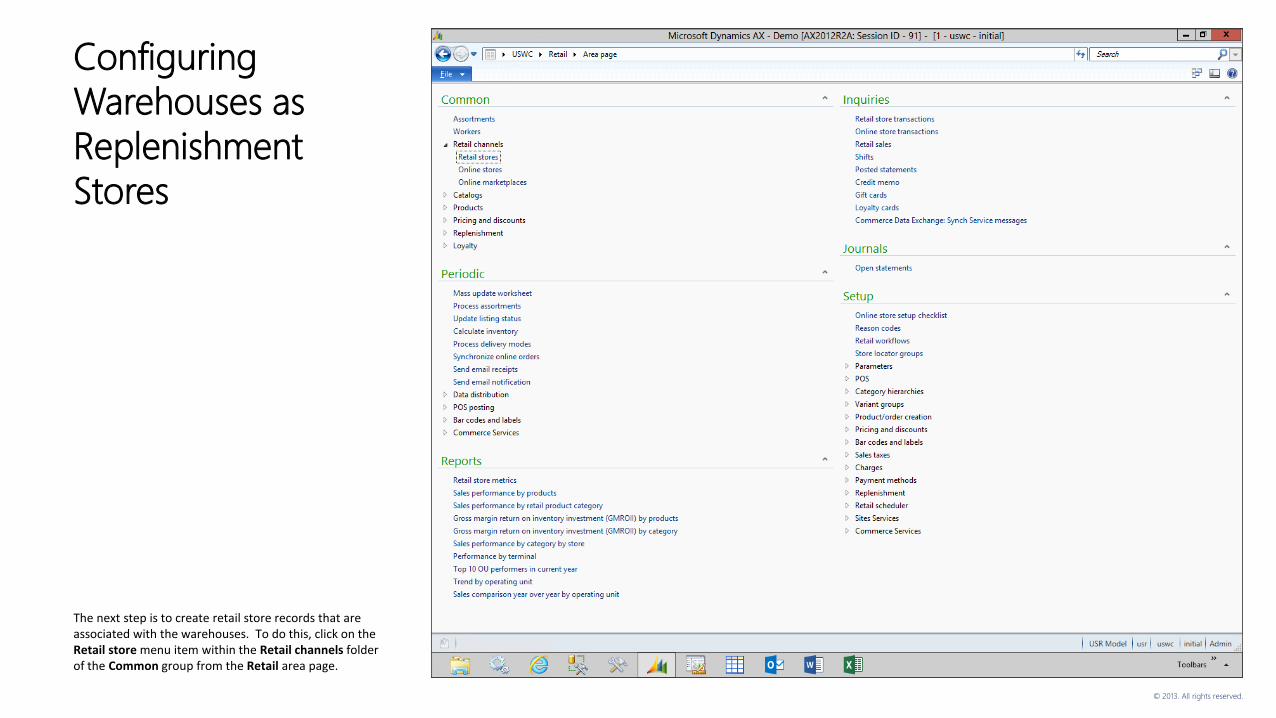
The next step is to create retail store records that are associated with the warehouses. To do this, click on the Retail store menu item within the Retail channels folder of the Common group from the Retail area page.
© 2013. All rights reserved.
Configuring
Warehouses as
Replenishment
Stores
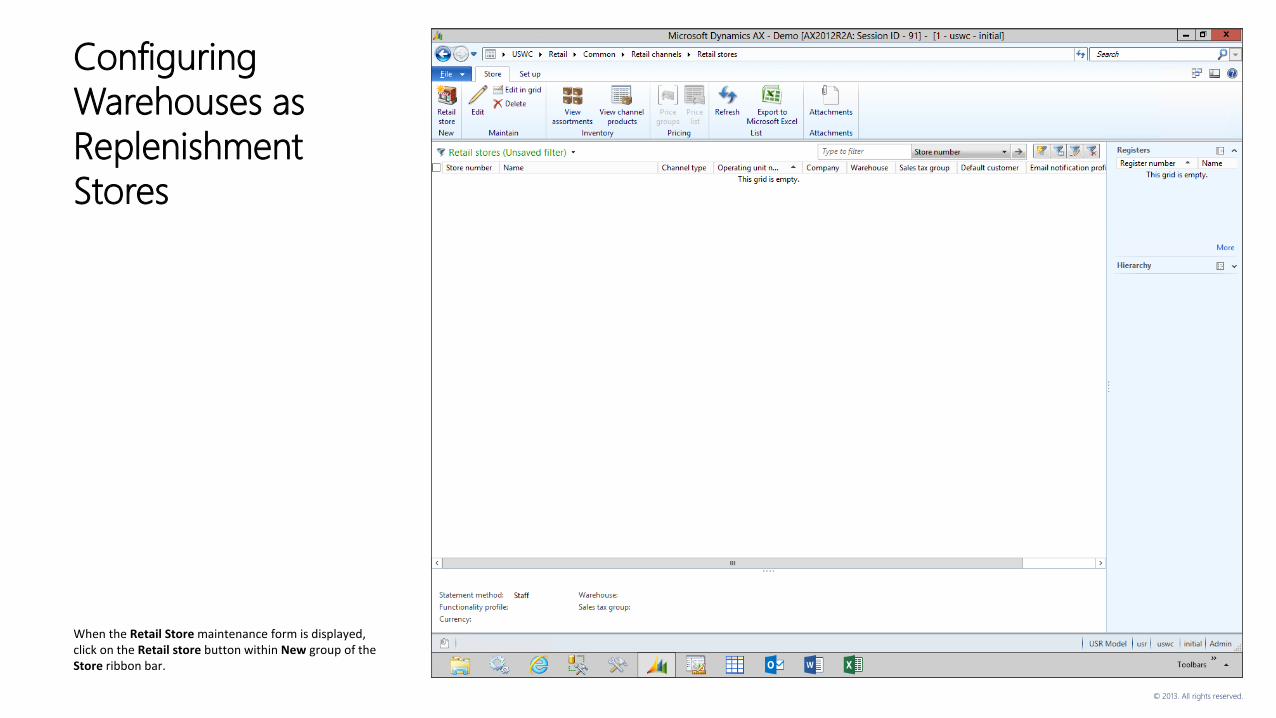
When the Retail Store maintenance form is displayed, click on the Retail store button within New group of the Store ribbon bar.
© 2013. All rights reserved.
Configuring
Warehouses as
Replenishment
Stores
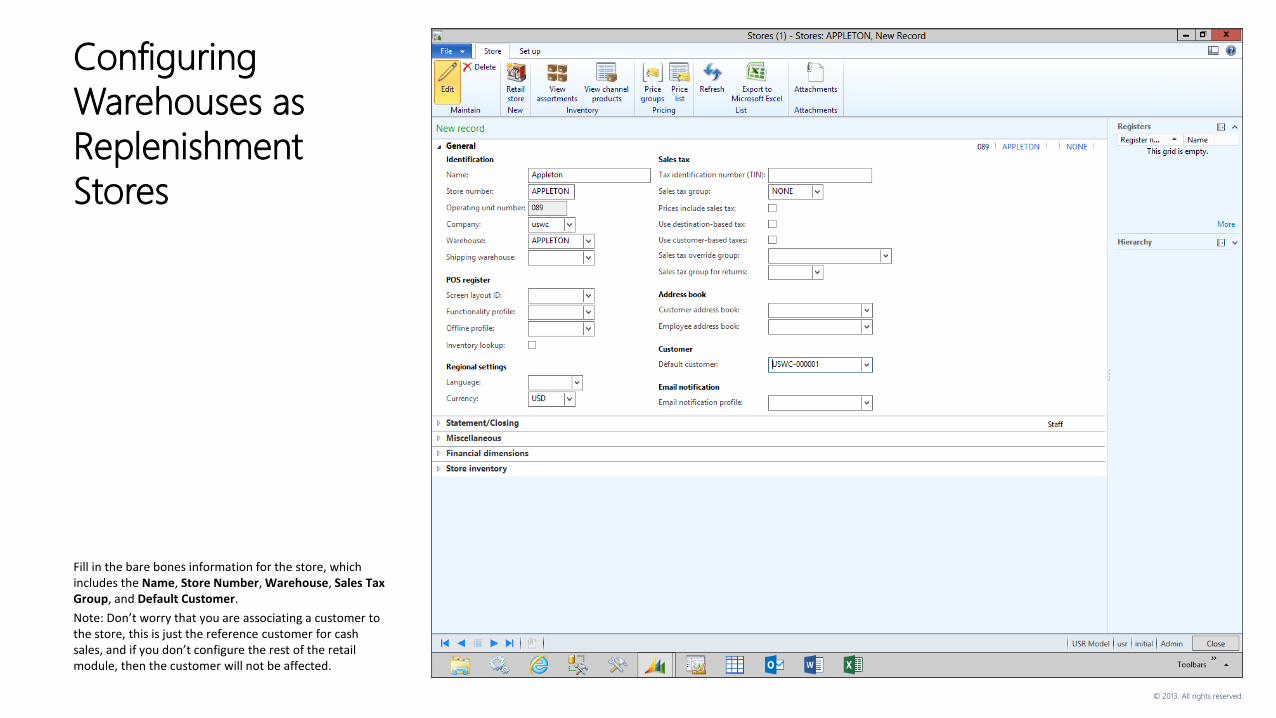
Fill in the bare bones information for the store, which includes the Name, Store Number, Warehouse, Sales Tax Group, and Default Customer.
Note: Don’t worry that you are associating a customer to the store, this is just the reference customer for cash sales, and if you don’t configure the rest of the retail module, then the customer will not be affected.
© 2013. All rights reserved.
Configuring
Warehouses as
Replenishment
Stores
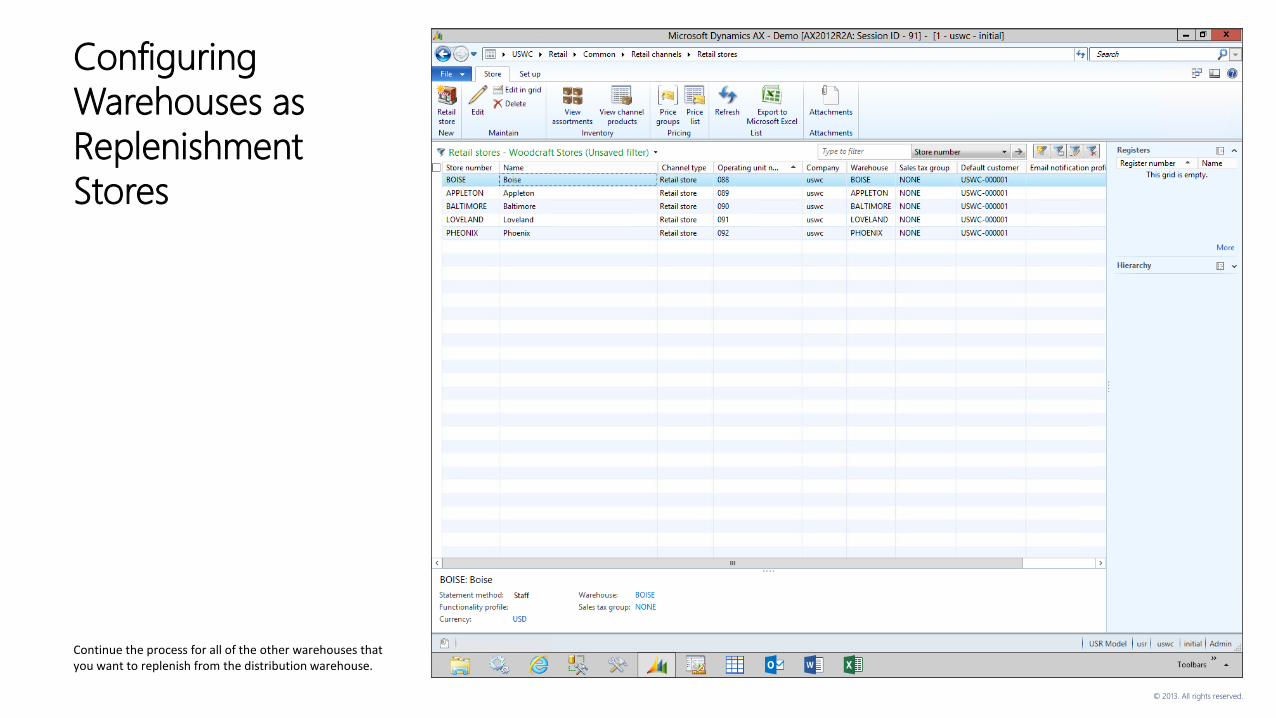
Continue the process for all of the other warehouses that you want to replenish from the distribution warehouse.
© 2013. All rights reserved.
CREATING CROSS DOCK TRANSFERS FROM
PURCHASE ORDERSOnce the warehouses are associated to the retail store shells, we can use them for with the Cross Dock function within purchasing.
In this example we will show the cross dock function in action.
© 2013. All rights reserved.
Creating Cross Dock
Transfers From
Purchase Orders
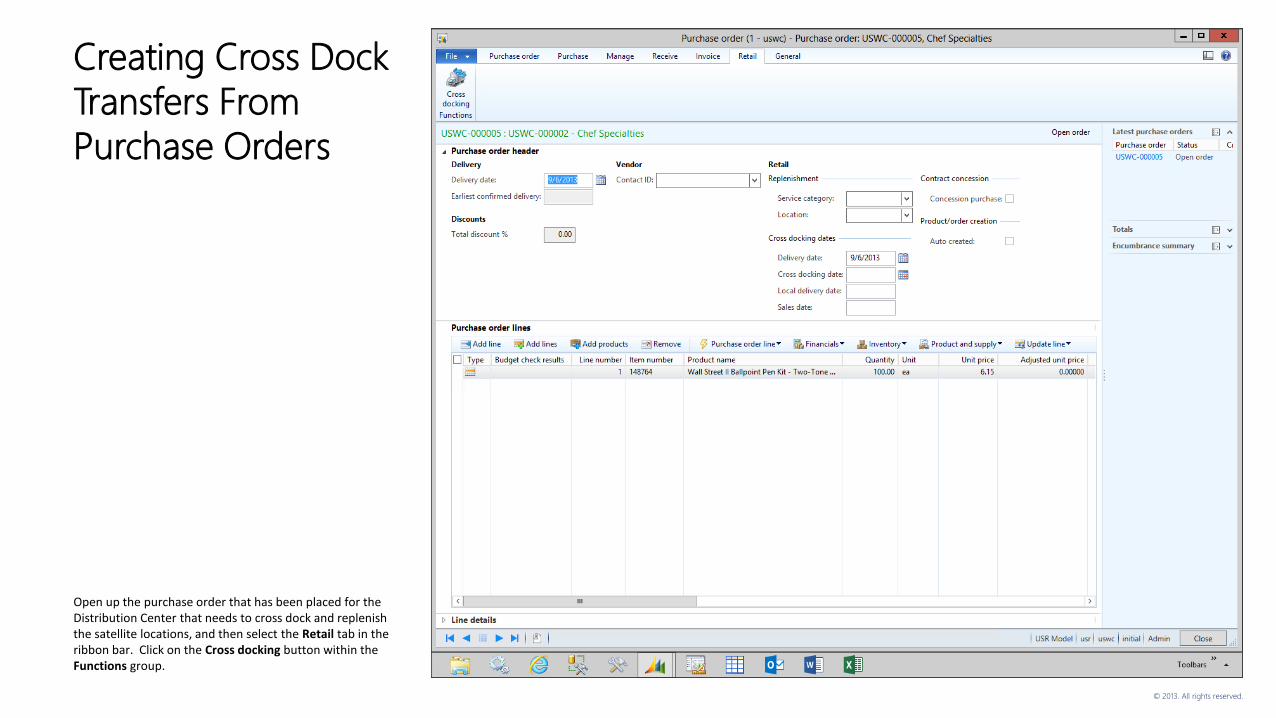
Open up the purchase order that has been placed for the Distribution Center that needs to cross dock and replenish the satellite locations, and then select the Retail tab in the ribbon bar. Click on the Cross docking button within the Functions group.
© 2013. All rights reserved.
Creating Cross Dock
Transfers From
Purchase Orders
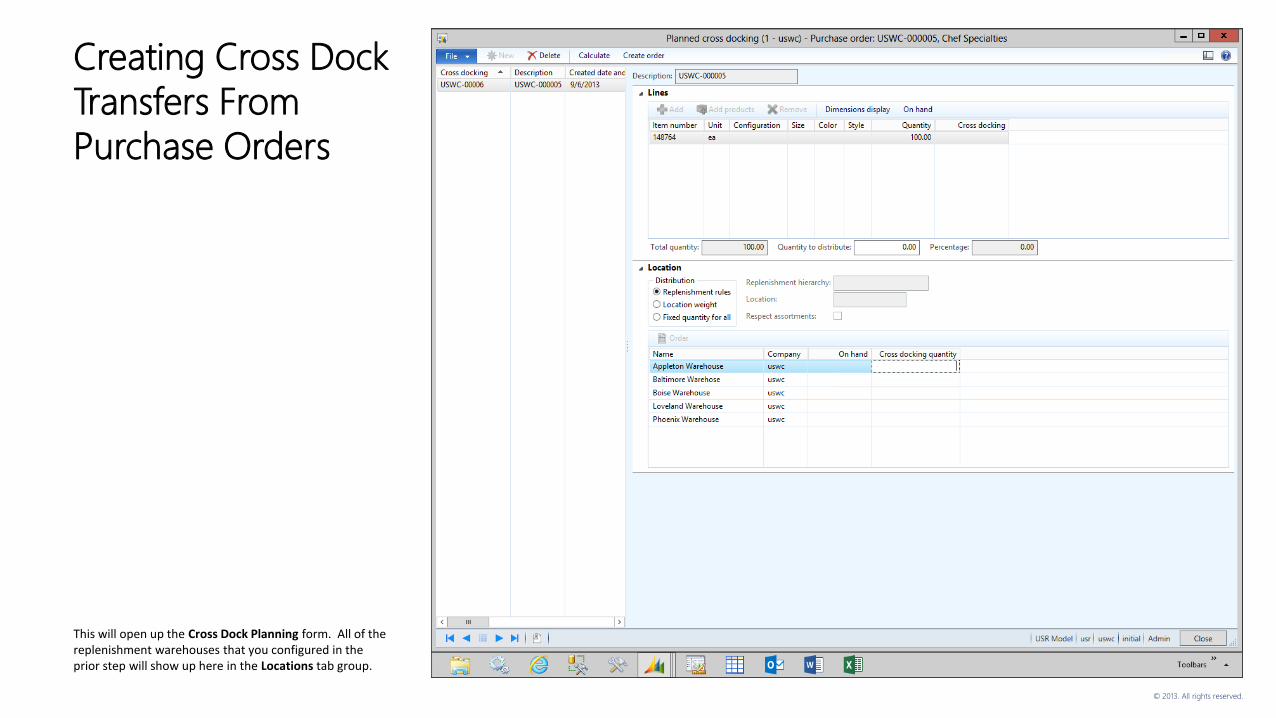
This will open up the Cross Dock Planning form. All of the replenishment warehouses that you configured in the prior step will show up here in the Locations tab group.
© 2013. All rights reserved.
Creating Cross Dock
Transfers From
Purchase Orders
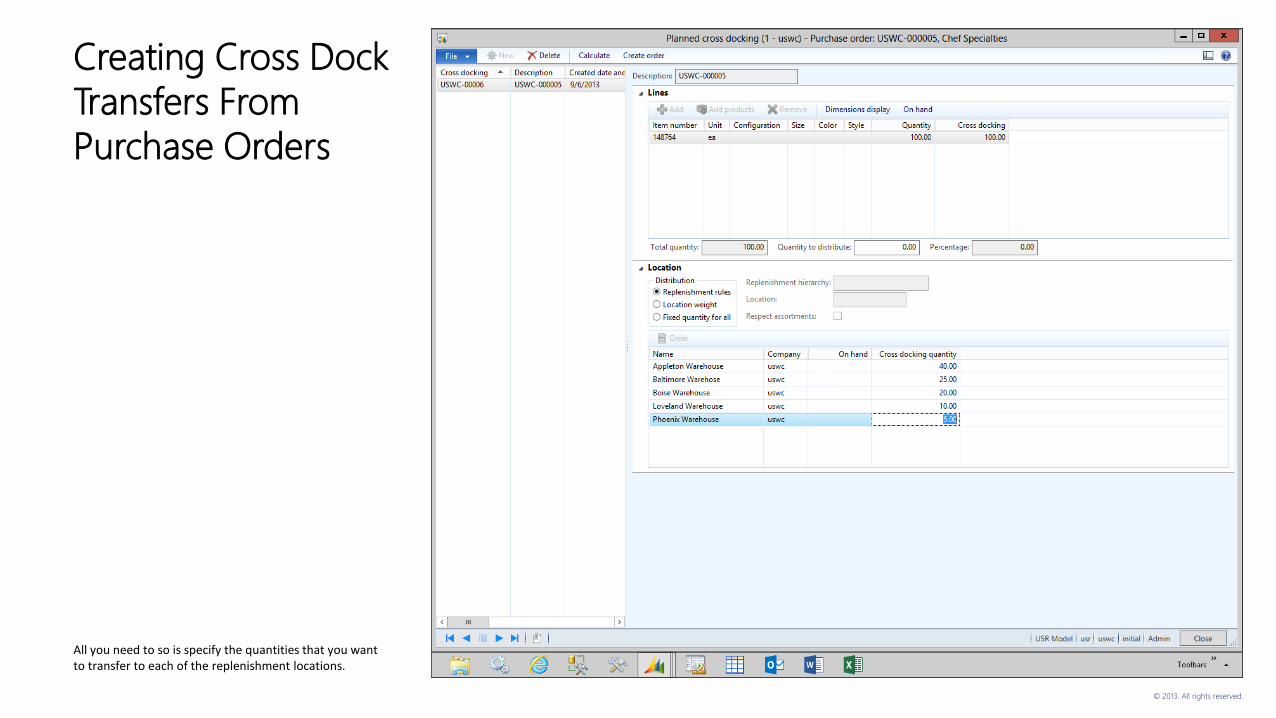
All you need to so is specify the quantities that you want to transfer to each of the replenishment locations.

© 2013. All rights reserved.
Creating Cross Dock
Transfers From
Purchase Orders
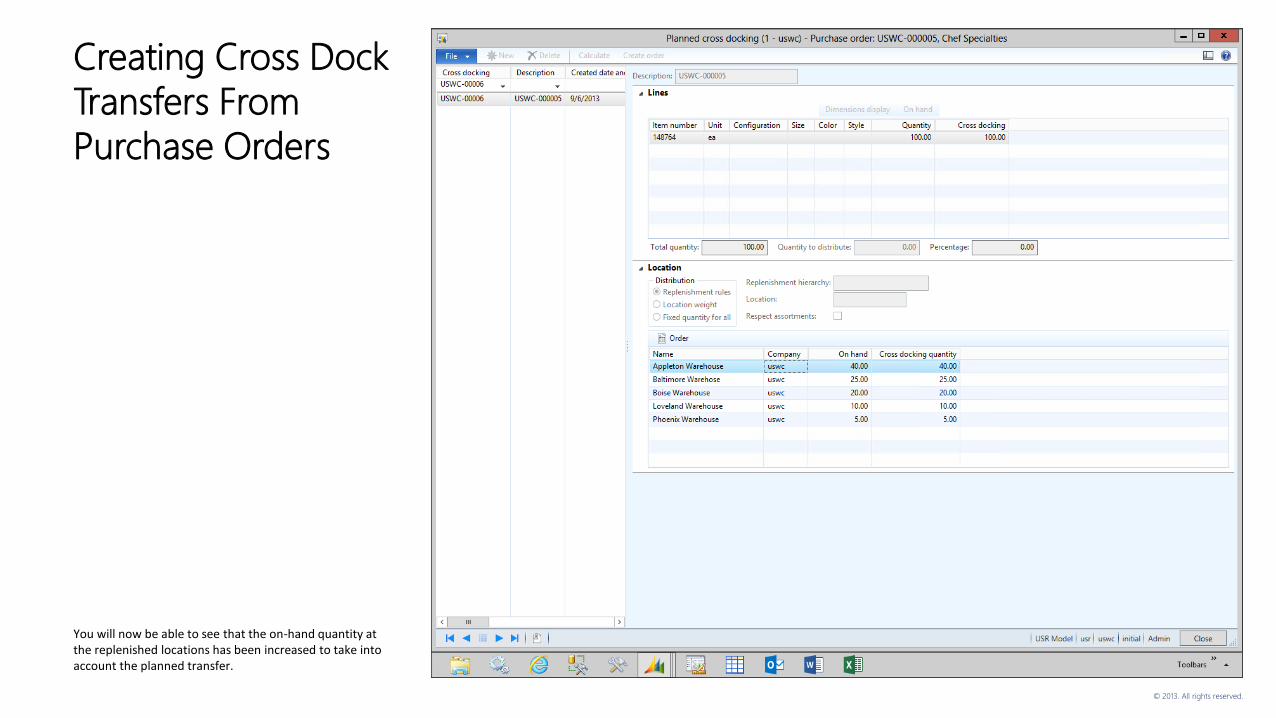
When you have updated the quantities, click the Create order button in the menu bar to create the transfer orders.
© 2013. All rights reserved.
Creating Cross Dock
Transfers From
Purchase Orders
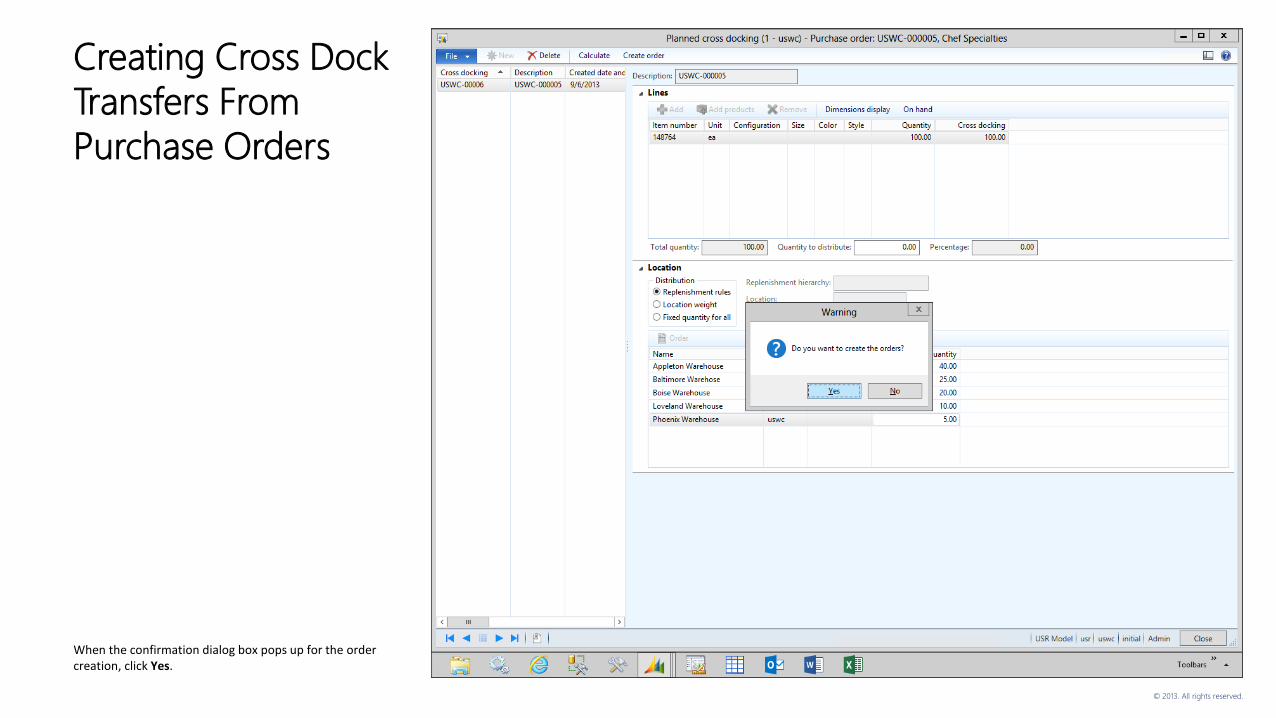
When the confirmation dialog box pops up for the order creation, click Yes.
© 2013. All rights reserved.
Creating Cross Dock
Transfers From
Purchase Orders
You will now be able to see that the on-hand quantity at the replenished locations has been increased to take into account the planned transfer.
© 2013. All rights reserved.
Performing a
Receipt and Cross
Dock Transaction
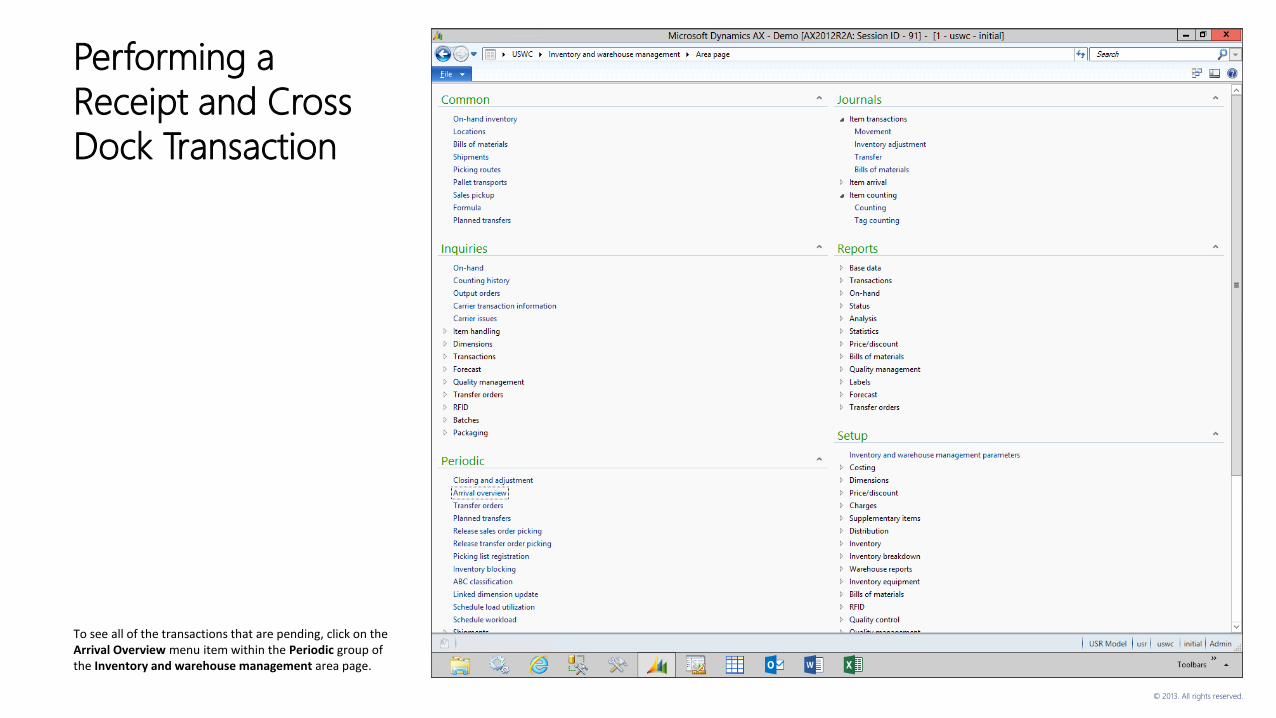
To see all of the transactions that are pending, click on the Arrival Overview menu item within the Periodic group of the Inventory and warehouse management area page.
© 2013. All rights reserved.
Performing a
Receipt and Cross
Dock Transaction
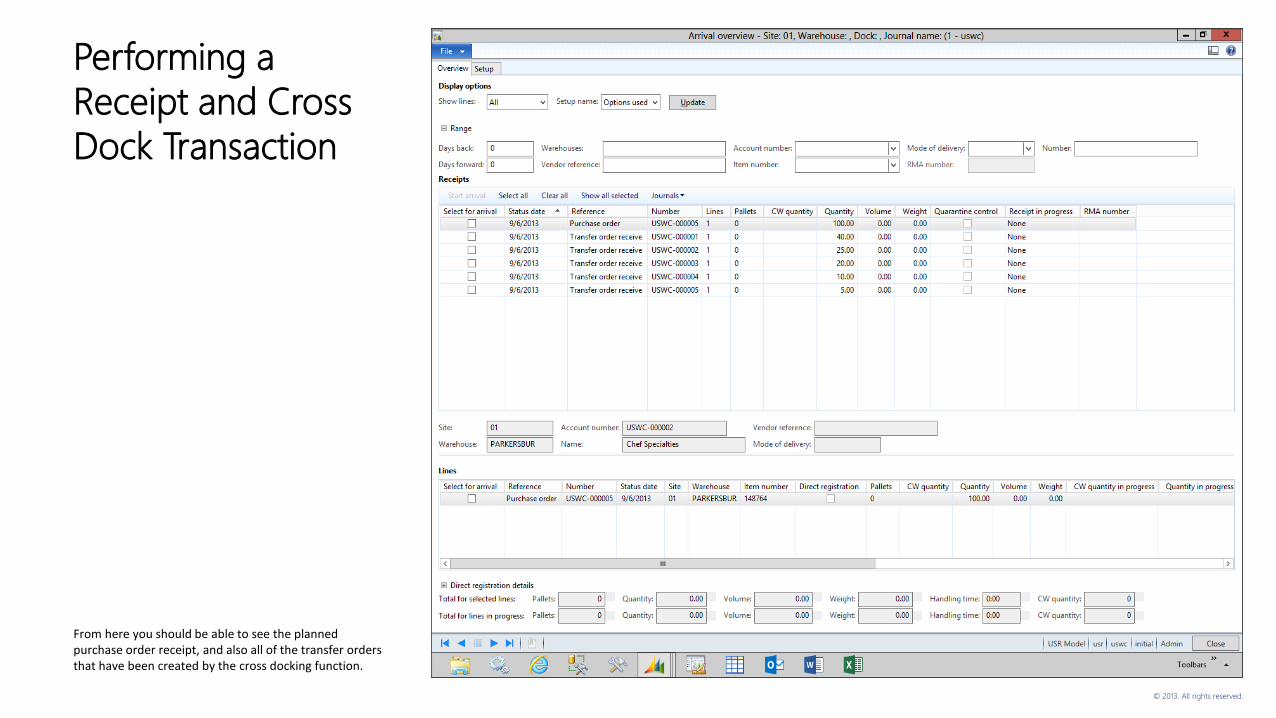
From here you should be able to see the planned purchase order receipt, and also all of the transfer orders that have been created by the cross docking function.
© 2013. All rights reserved.
PERFORMING A RECEIPT AND CROSS DOCK
TRANSACTIONOnce all of the transactions have been scheduled, performing the cross docking is just a matter of receiving the product, transferring it out to all of the other warehouses, and then confirming the receipt.
In this section we will show all of the transactions in action.
© 2013. All rights reserved.
Performing a
Receipt and Cross
Dock Transaction
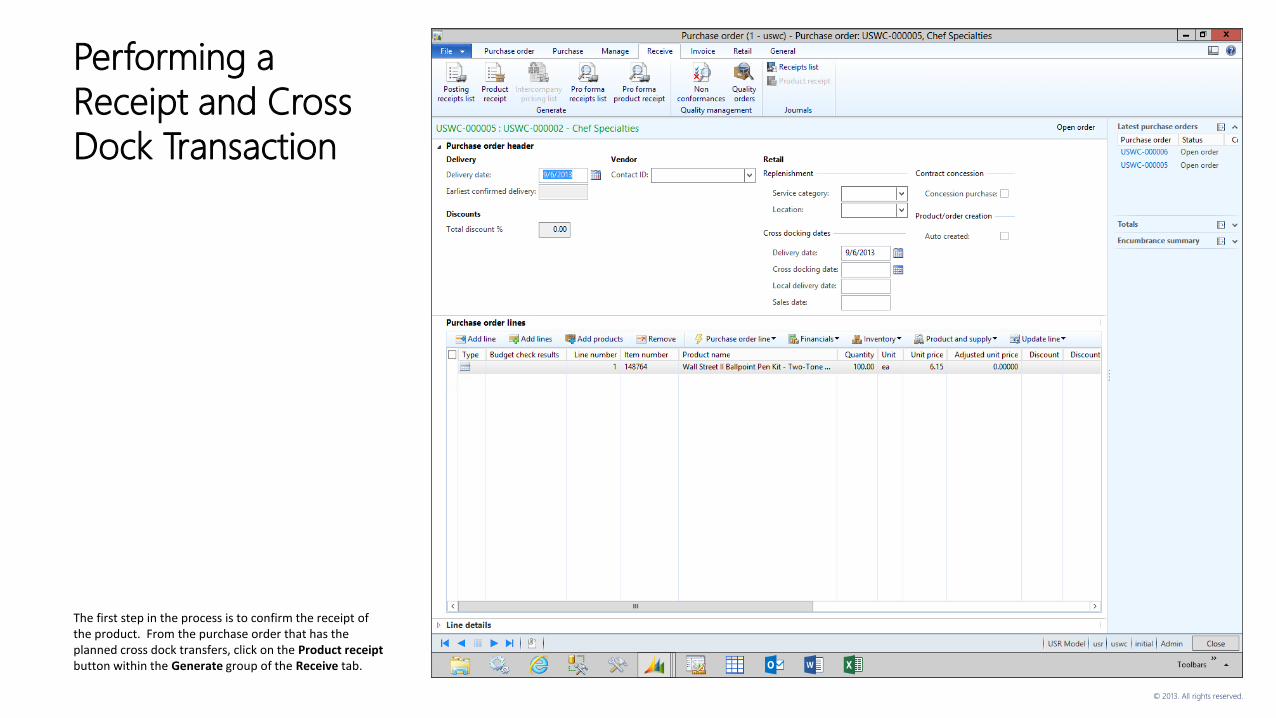
The first step in the process is to confirm the receipt of the product. From the purchase order that has the planned cross dock transfers, click on the Product receiptbutton within the Generate group of the Receive tab.
© 2013. All rights reserved.
Performing a
Receipt and Cross
Dock Transaction
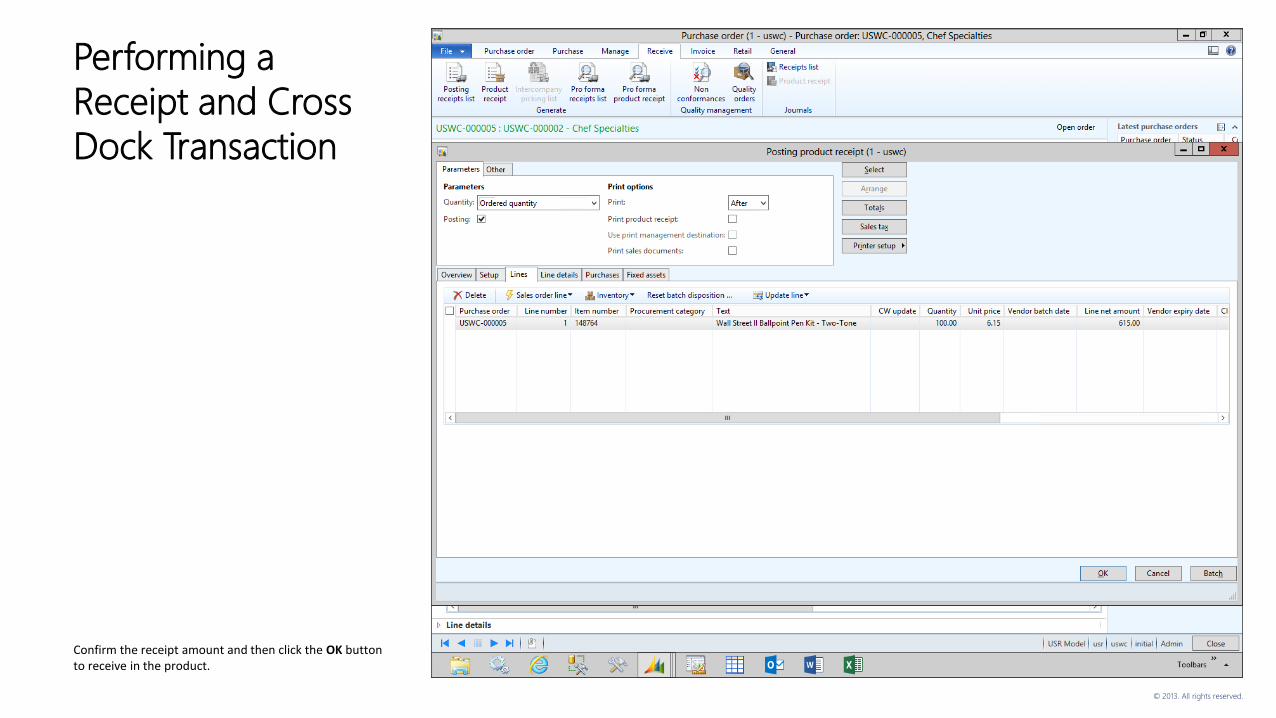
Confirm the receipt amount and then click the OK button to receive in the product.
© 2013. All rights reserved.
Performing a
Receipt and Cross
Dock Transaction
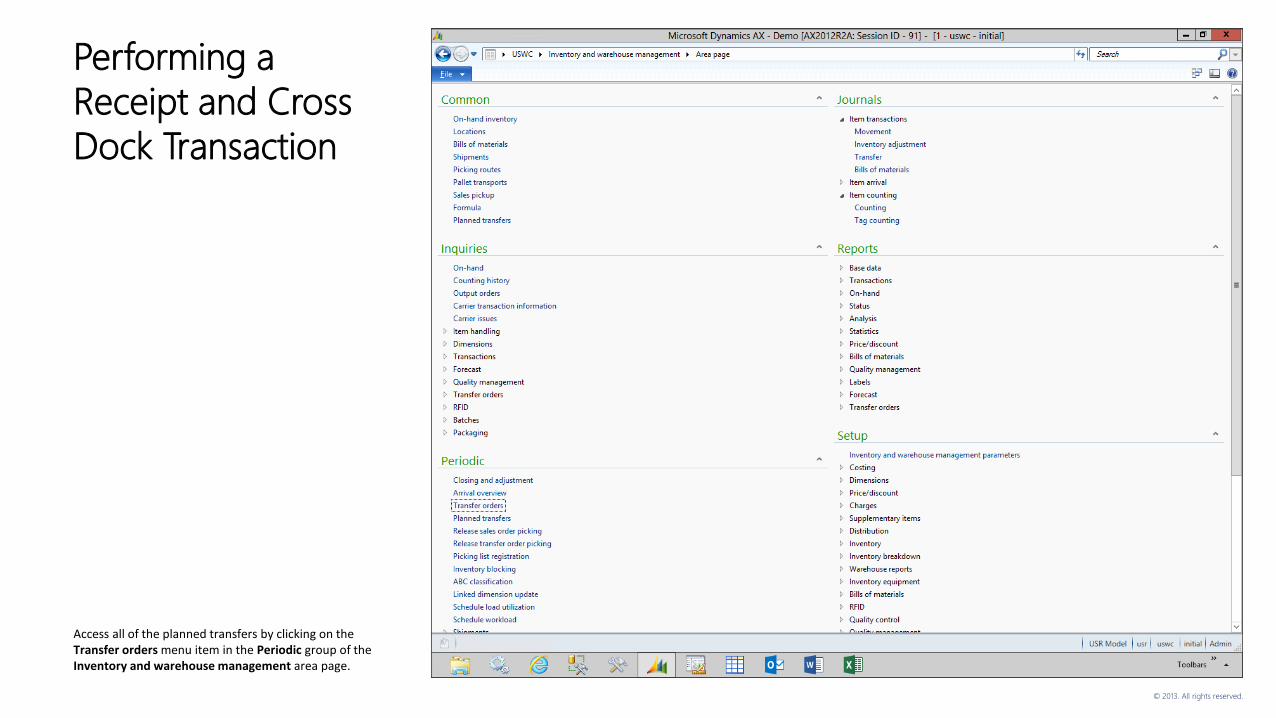
Access all of the planned transfers by clicking on the Transfer orders menu item in the Periodic group of the Inventory and warehouse management area page.
© 2013. All rights reserved.
Performing a
Receipt and Cross
Dock Transaction
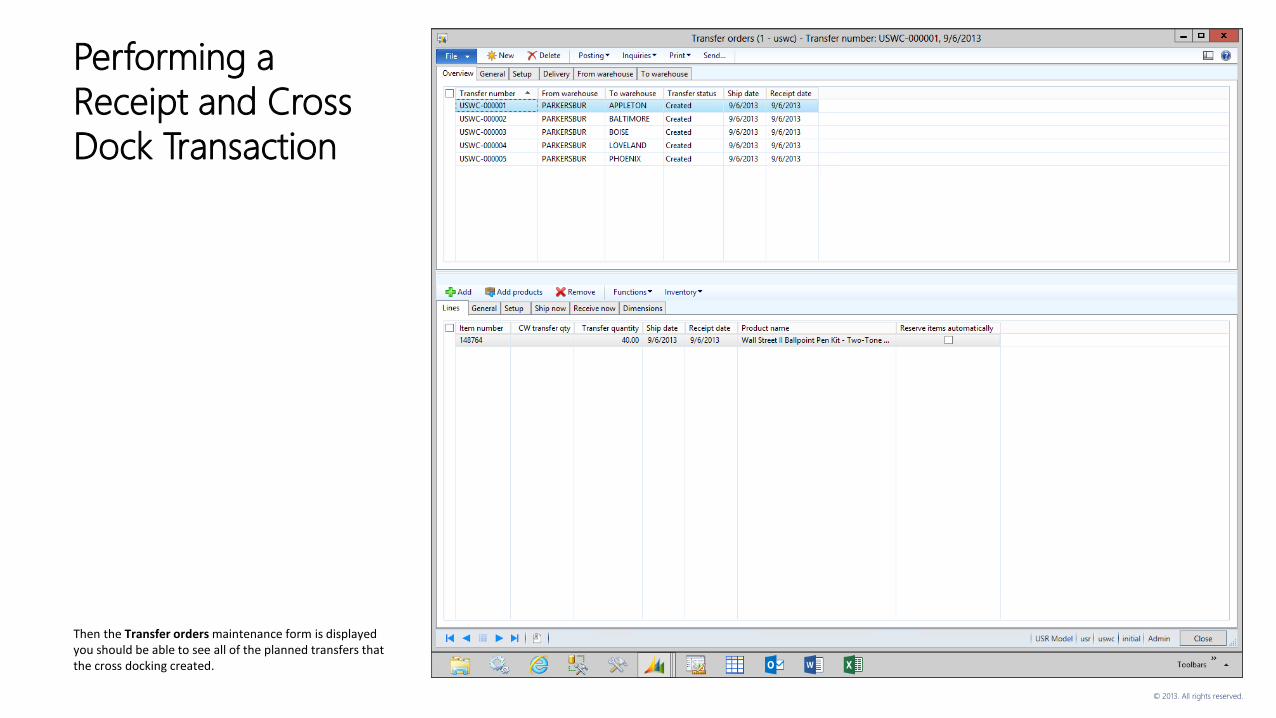
Then the Transfer orders maintenance form is displayed you should be able to see all of the planned transfers that the cross docking created.

© 2013. All rights reserved.
Performing a
Receipt and Cross
Dock Transaction
Select the transfers that you want to perform, and from the Posting menu drop down, select the Picking listoption to create the pick ticket for each of the transfers.
© 2013. All rights reserved.
Performing a
Receipt and Cross
Dock Transaction
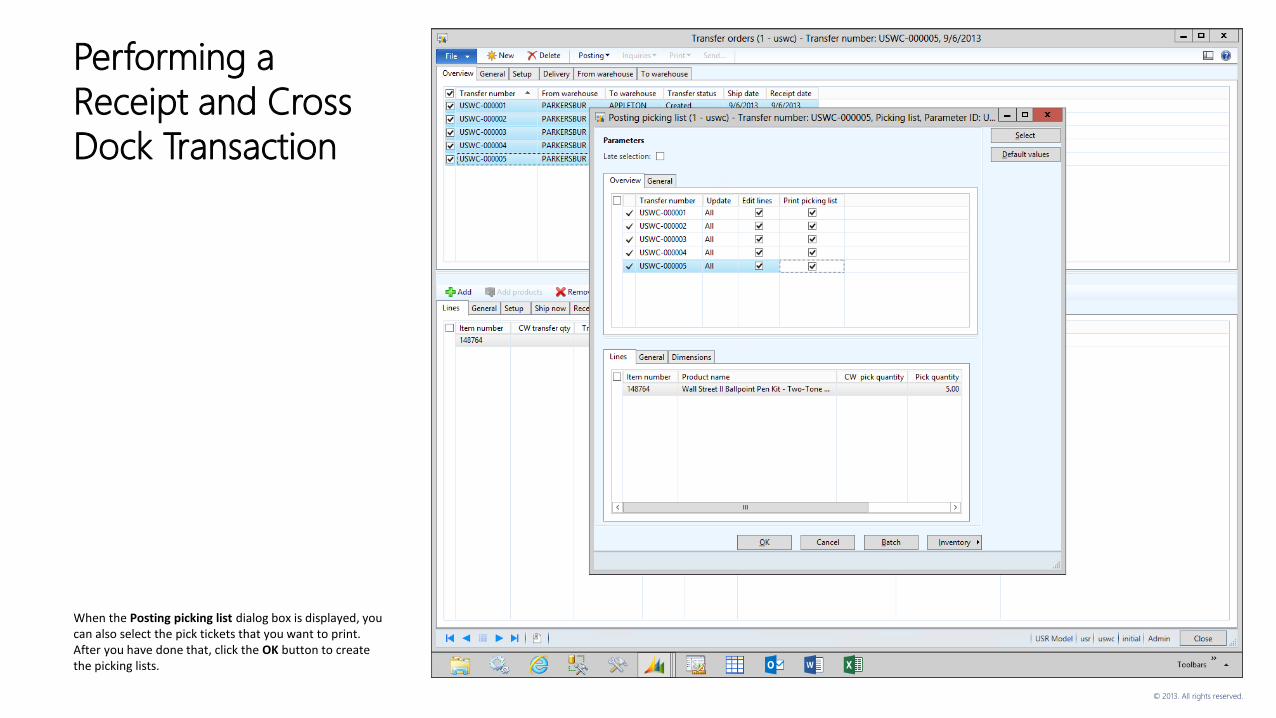
When the Posting picking list dialog box is displayed, you can also select the pick tickets that you want to print. After you have done that, click the OK button to create the picking lists.
© 2013. All rights reserved.
Performing a
Receipt and Cross
Dock Transaction
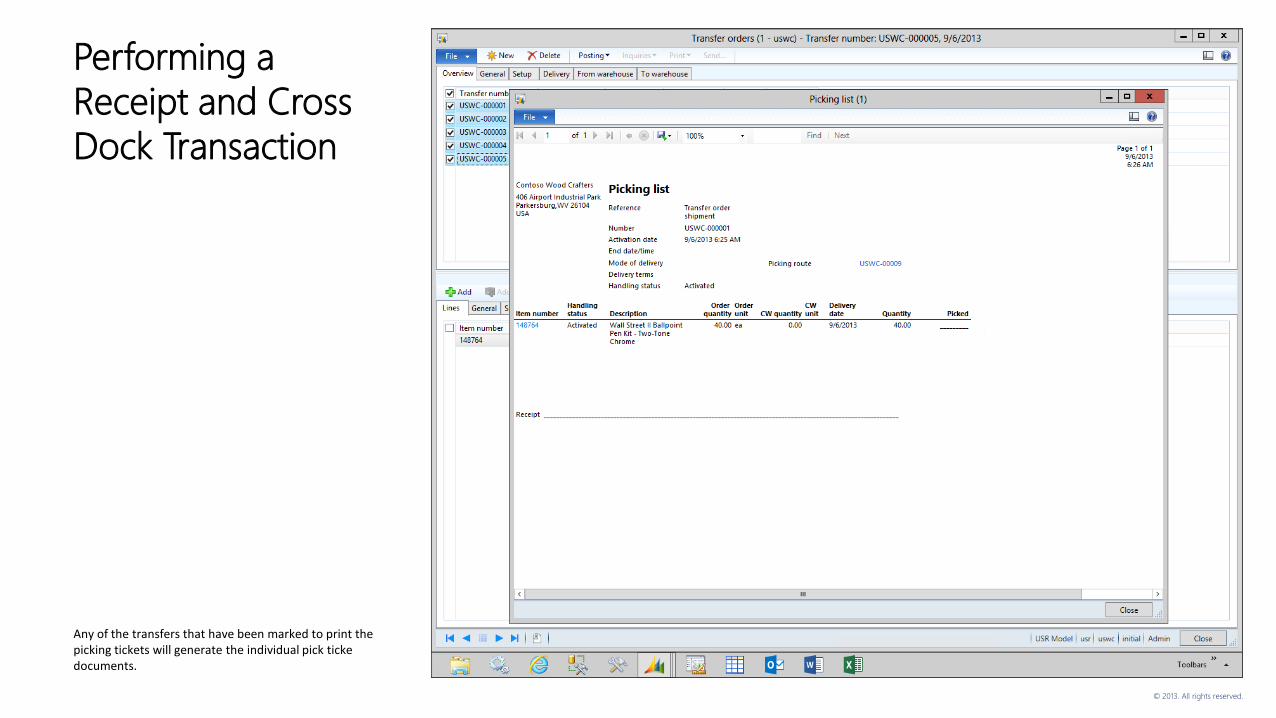
Any of the transfers that have been marked to print the picking tickets will generate the individual pick tickedocuments.
© 2013. All rights reserved.
Performing a
Receipt and Cross
Dock Transaction
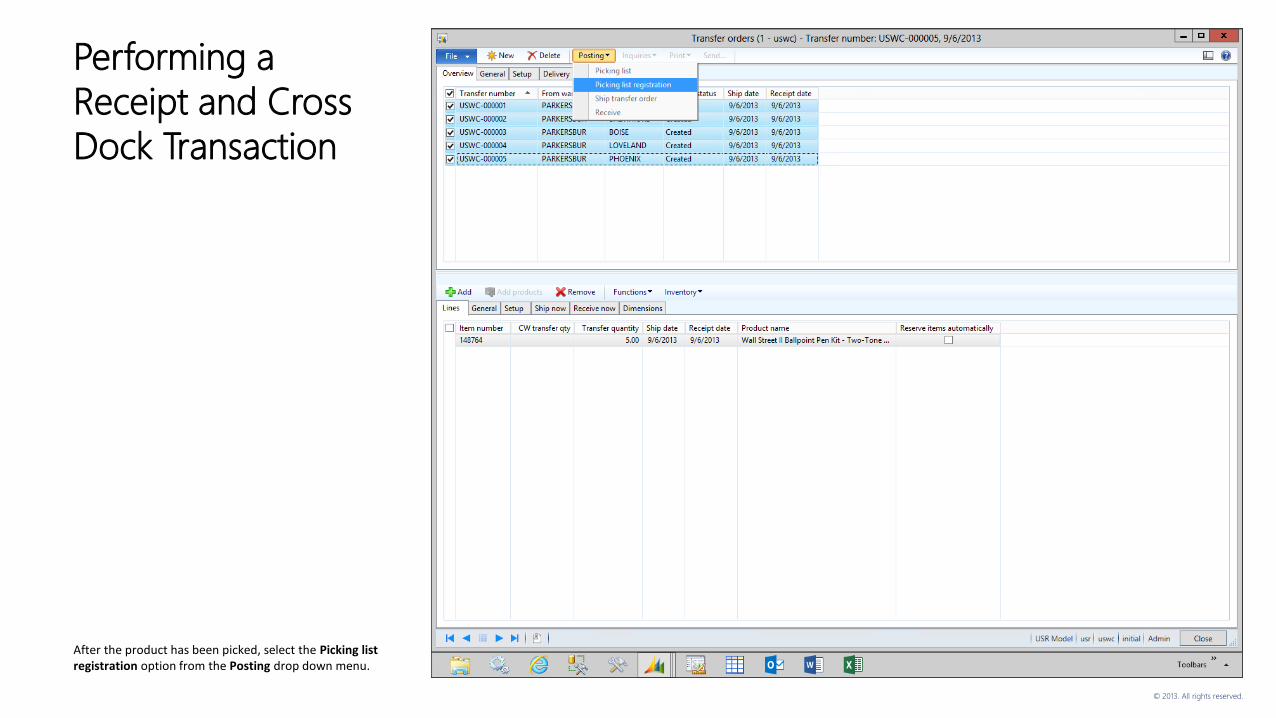
After the product has been picked, select the Picking list registration option from the Posting drop down menu.
© 2013. All rights reserved.
Performing a
Receipt and Cross
Dock Transaction
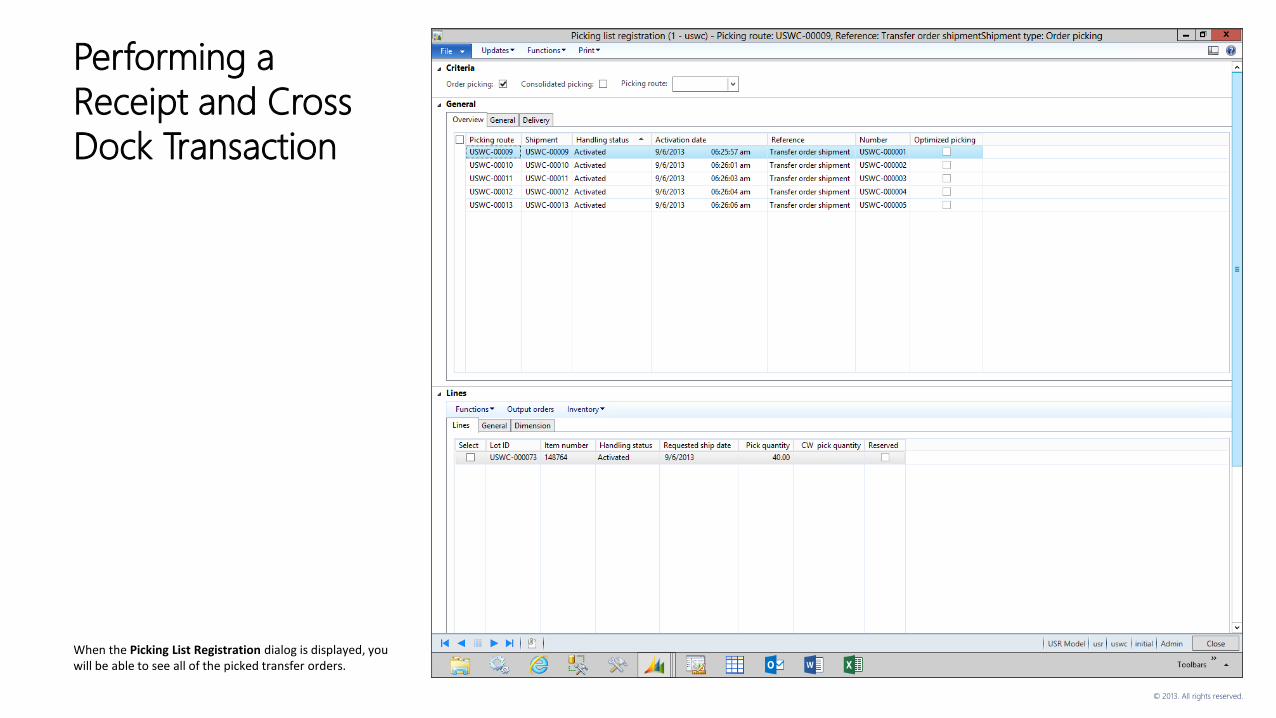
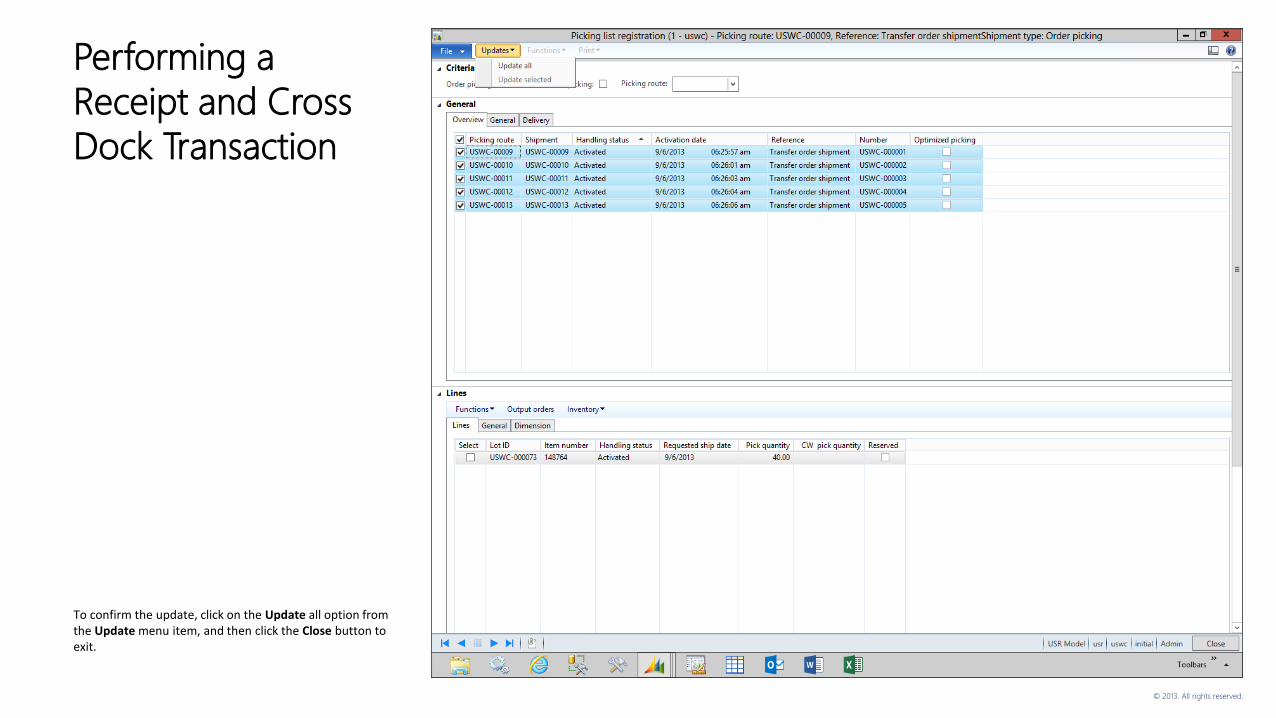
When the Picking List Registration dialog is displayed, you will be able to see all of the picked transfer orders.
© 2013. All rights reserved.
Performing a
Receipt and Cross
Dock Transaction
To confirm the update, click on the Update all option from the Update menu item, and then click the Close button to exit.
© 2013. All rights reserved.
Performing a
Receipt and Cross
Dock Transaction
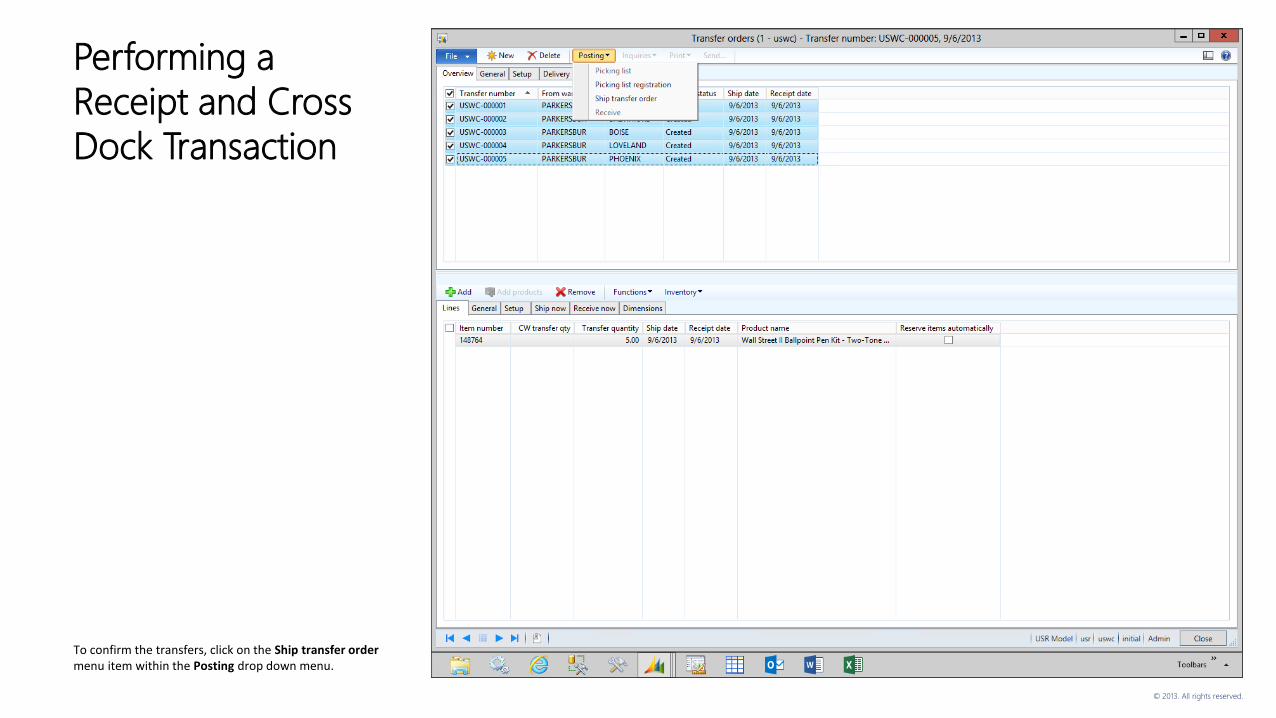
To confirm the transfers, click on the Ship transfer ordermenu item within the Posting drop down menu.
© 2013. All rights reserved.
Performing a
Receipt and Cross
Dock Transaction
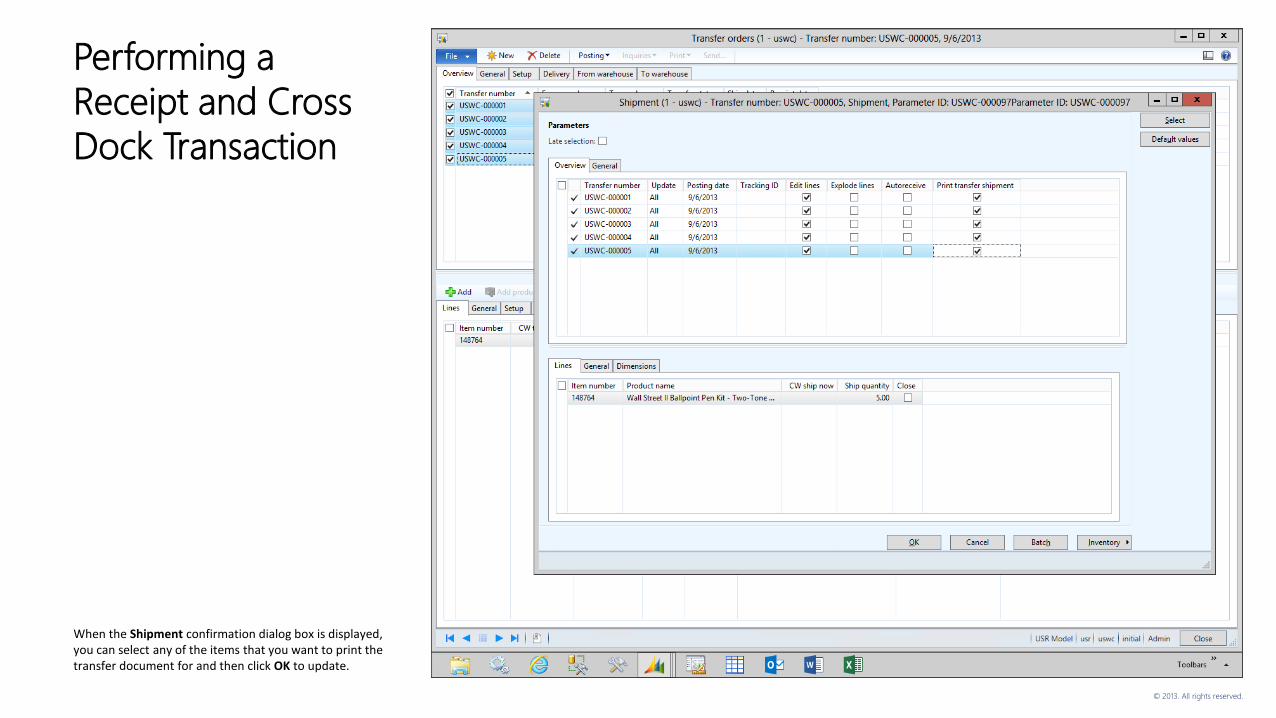
When the Shipment confirmation dialog box is displayed, you can select any of the items that you want to print the transfer document for and then click OK to update.
© 2013. All rights reserved.
Performing a
Receipt and Cross
Dock Transaction
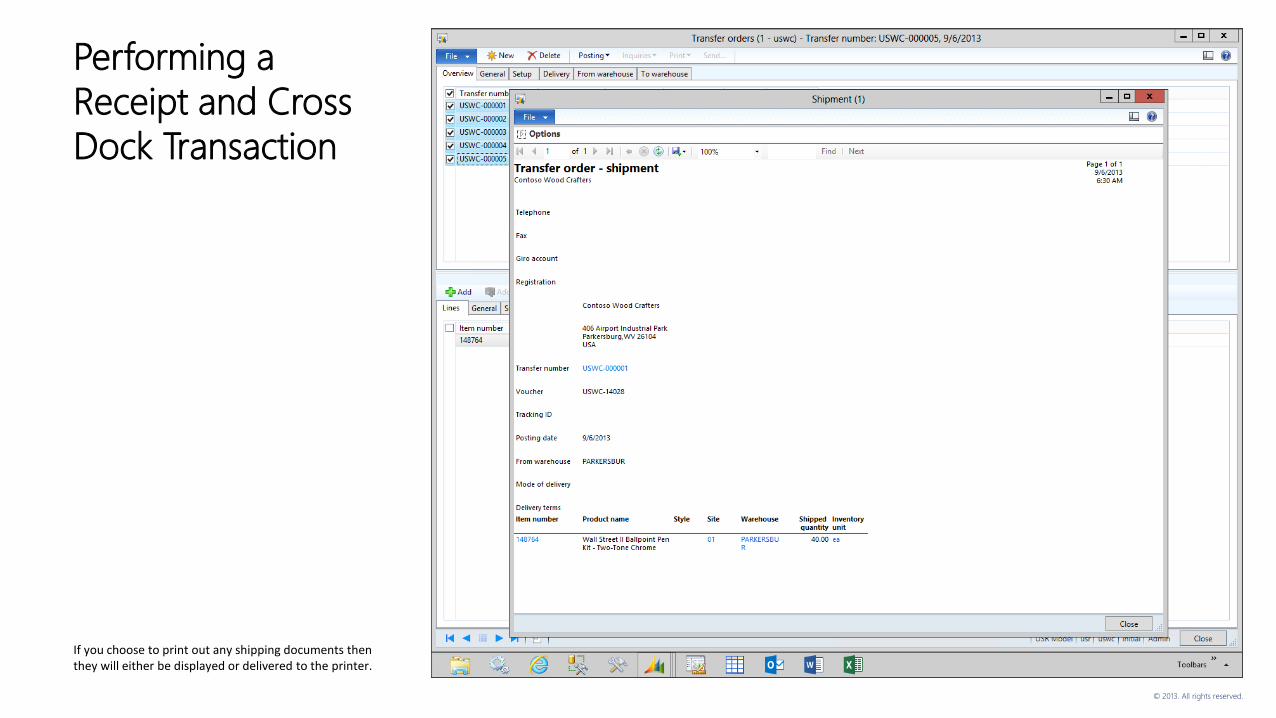
If you choose to print out any shipping documents then they will either be displayed or delivered to the printer.
© 2013. All rights reserved.
Performing a
Receipt and Cross
Dock Transaction
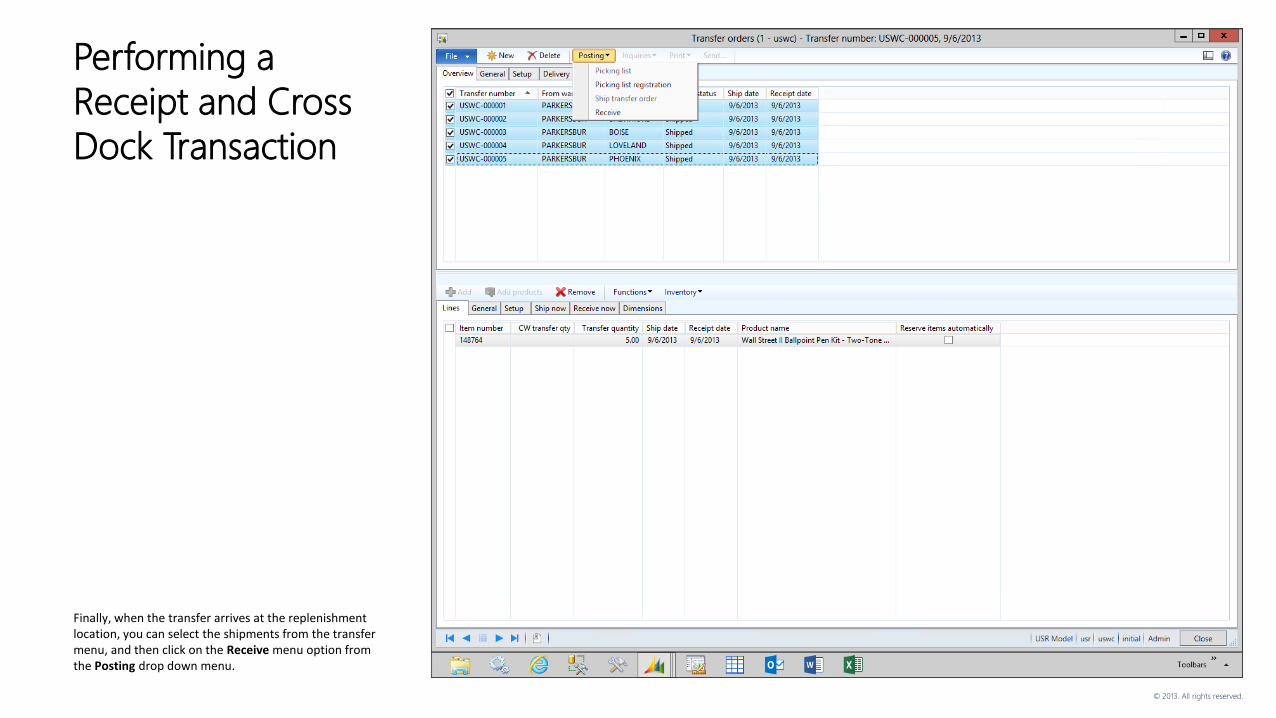
Finally, when the transfer arrives at the replenishment location, you can select the shipments from the transfer menu, and then click on the Receive menu option from the Posting drop down menu.
© 2013. All rights reserved.
Performing a
Receipt and Cross
Dock Transaction
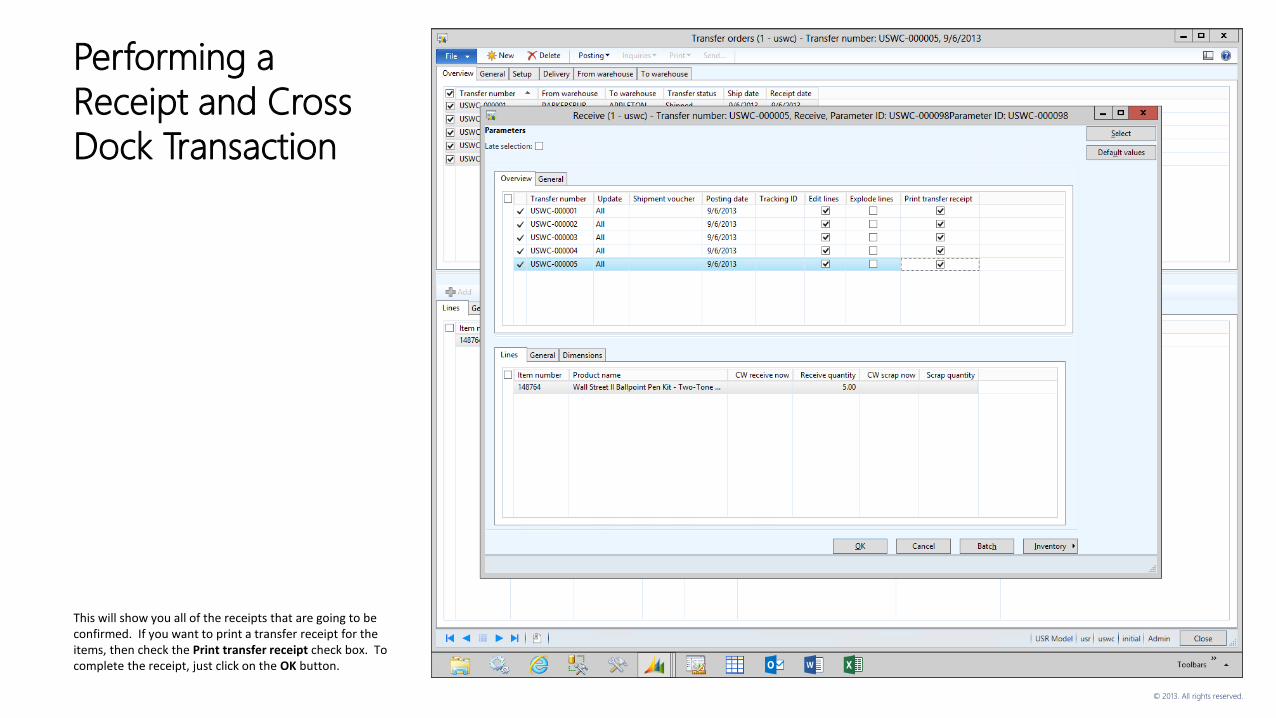
This will show you all of the receipts that are going to be confirmed. If you want to print a transfer receipt for the items, then check the Print transfer receipt check box. To complete the receipt, just click on the OK button.
© 2013. All rights reserved.
Performing a
Receipt and Cross
Dock Transaction
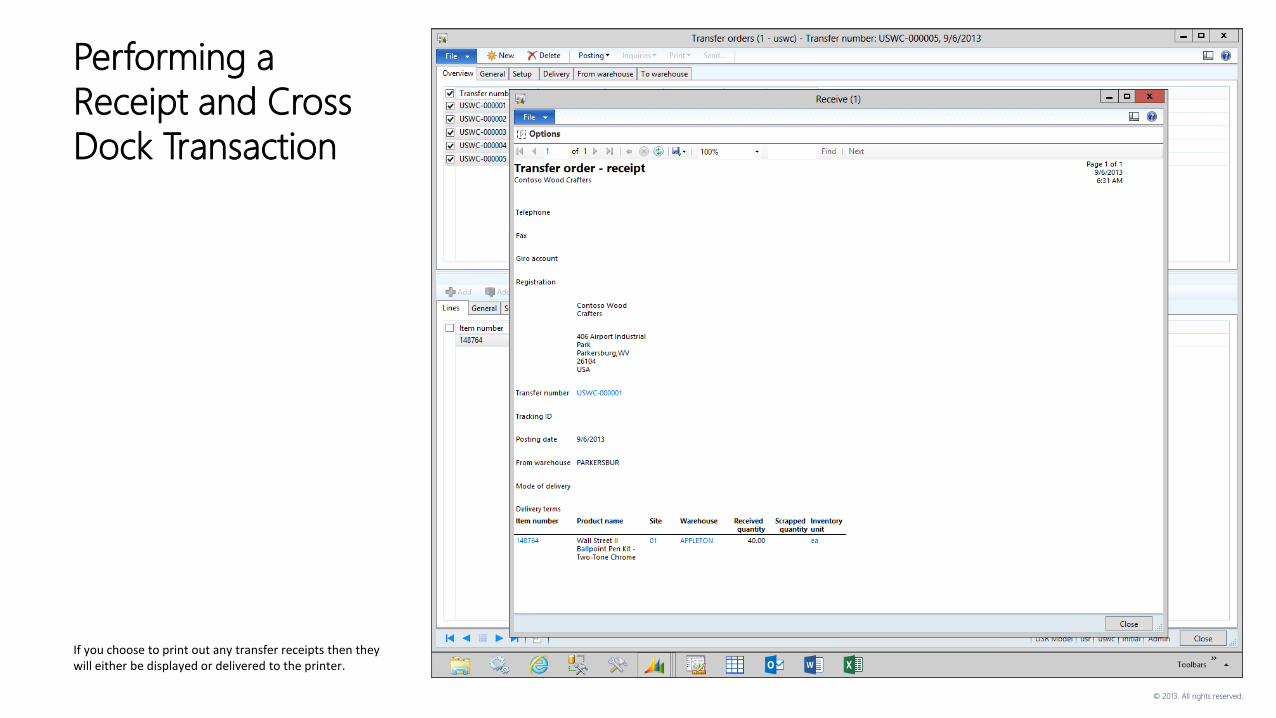
If you choose to print out any transfer receipts then they will either be displayed or delivered to the printer.
© 2013. All rights reserved.
Performing a
Receipt and Cross
Dock Transaction
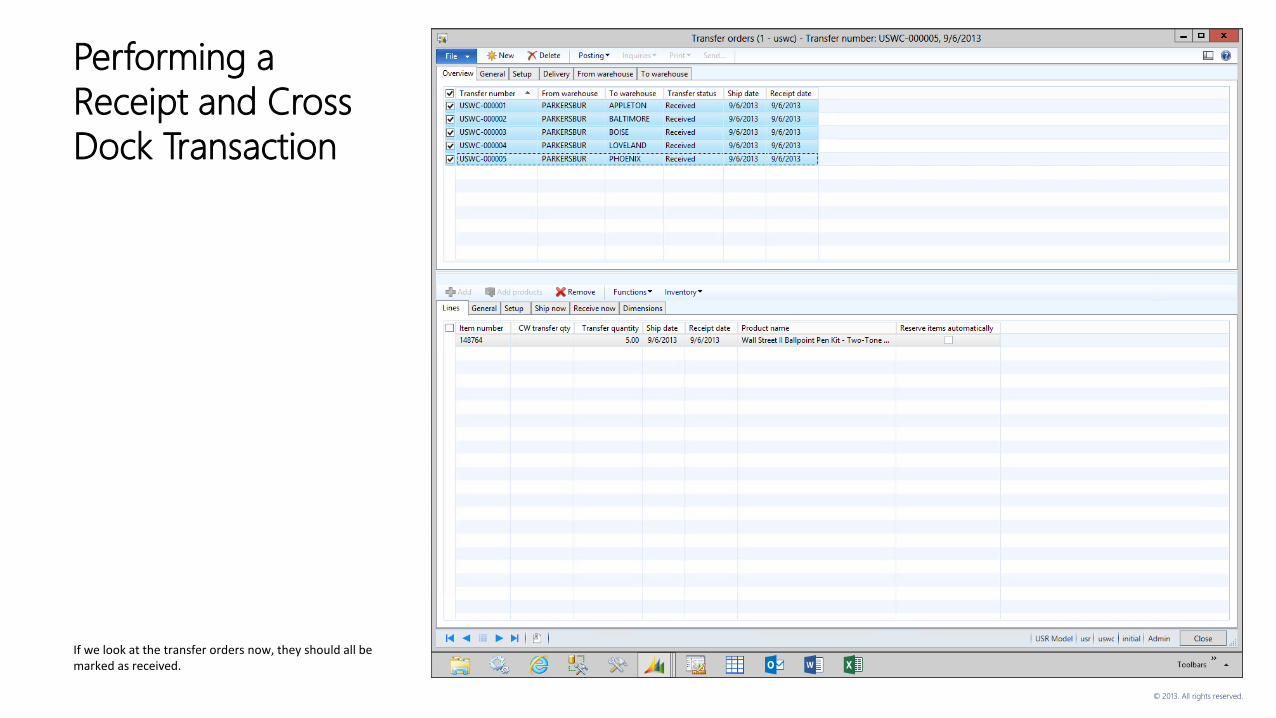
If we look at the transfer orders now, they should all be marked as received.
© 2013. All rights reserved.
SUMMARY
Even though the cross docking function within Dynamics AX is built within the Retail module, it does not mean that you have to be a retail organization to take advantage of it. You can still use it by configuring the basic store information which does not take more that a minute to configure.
In this example, we just showed the basic functionality of the cross docking. After you have mastered these, you can start looking at some of the other functions including:
• Calculating the replenishment quantity based on store weighting
• Creating more elaborate replenishment rules through the replenishment hierarchies
• Using the arrivals workbench to streamline the receiving and transfer process.
Don’t be scared off by the retail label, test the cross docking out, you may like what you see.

http://slideshare.net/murrayfife/presentations
Murray FifeMicrosoft MVP