Condition Monitoring Pod - · PDF fileEnluse B.V. – tel. +31(0)765781280 – email...
5
Enluse B.V. – tel. +31(0)765781280 – email [email protected] – www.enluse.com Condition Monitoring Pod Partnr.’s CMP100 kit + magnet & steel corrosion indicator: LA-CMPOD050NPT 1/2" NPT threads LA-CMPOD075NPT 3/4" NPT threads LA-CMPOD100NPT 1.0" NPT threads LA-CMPOD125NPT 1.25" NPT threads LA-CMPOD150NPT 1.5" NPT threads LA-CMPOD050BSPP 1/2" BSPP threads LA-CMPOD075BSPP 3/4" BSPP threads LA-CMPOD100BSPP 1.0" BSPP threads LA-CMPODM2015 M20x1.5 threads Luneta Condition Monitoring Pod Most bull’s eye level gauges are used only to confirm oil volume. Many root causes and symptoms of machine failure are missed due to the limited ability of these sight glasses. The Luneta Condition Monitoring Pod is a multi-parameter inspection pod that greatly modernizes and expands the daily one-minute inspections. Specifications 2.75” x 3.18” x 3.5” (w x h x l) Large acrylic sight glass with 1.4” diameter x 1.25” deep viewing area Alumininum body Stainless steel pilot tube Rare earth magnetic plug M16x2 sample port threads for attaching to vacuum pump and sample bottle Viton O-Ring Available sizes ½” – NPT and BSPP ¾” – NPT and BSPP 1” – NPT and BSPP 1¼” – NPT 1½” – NPT M20x1.5 Metric
Transcript of Condition Monitoring Pod - · PDF fileEnluse B.V. – tel. +31(0)765781280 – email...
Enluse B.V. – tel. +31(0)765781280 – email [email protected] – www.enluse.com
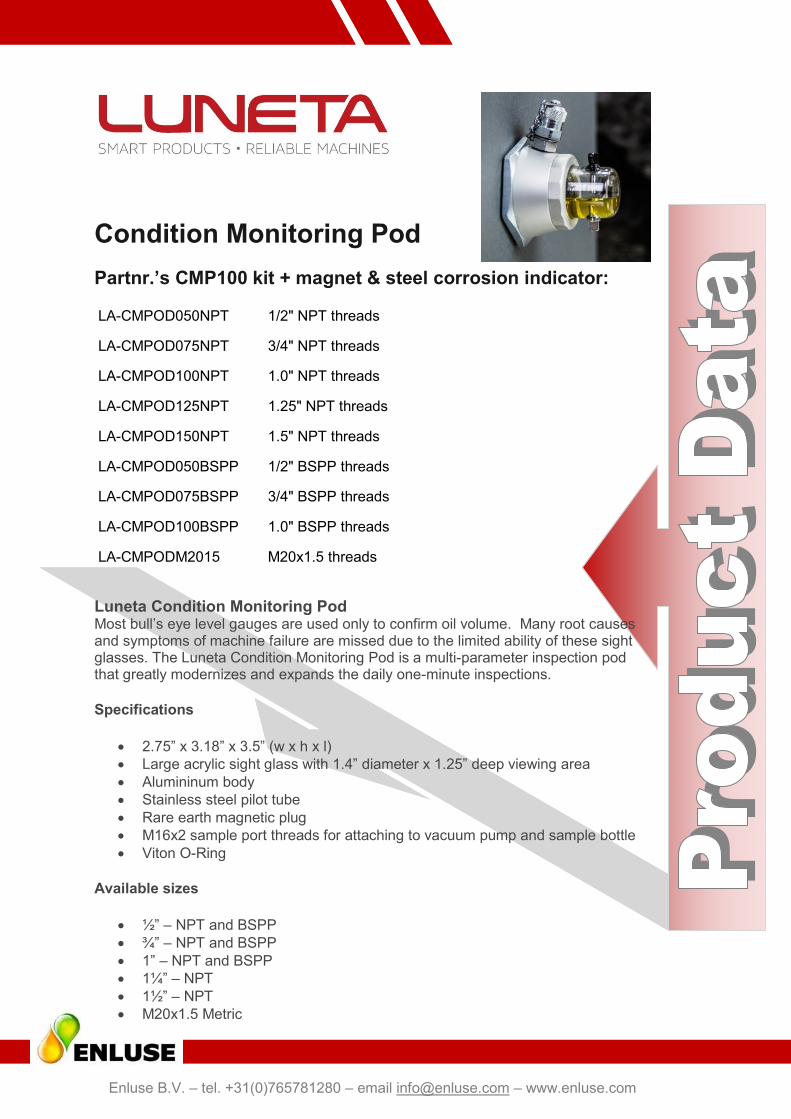
Condition Monitoring Pod
Partnr.’s CMP100 kit + magnet & steel corrosion indicator:
LA-CMPOD050NPT 1/2" NPT threads
LA-CMPOD075NPT 3/4" NPT threads
LA-CMPOD100NPT 1.0" NPT threads
LA-CMPOD125NPT 1.25" NPT threads
LA-CMPOD150NPT 1.5" NPT threads
LA-CMPOD050BSPP 1/2" BSPP threads
LA-CMPOD075BSPP 3/4" BSPP threads
LA-CMPOD100BSPP 1.0" BSPP threads
LA-CMPODM2015 M20x1.5 threads
Luneta Condition Monitoring Pod Most bull’s eye level gauges are used only to confirm oil volume. Many root causes and symptoms of machine failure are missed due to the limited ability of these sight glasses. The Luneta Condition Monitoring Pod is a multi-parameter inspection pod that greatly modernizes and expands the daily one-minute inspections.
Specifications
2.75” x 3.18” x 3.5” (w x h x l)
Large acrylic sight glass with 1.4” diameter x 1.25” deep viewing area
Alumininum body
Stainless steel pilot tube
Rare earth magnetic plug
M16x2 sample port threads for attaching to vacuum pump and sample bottle
Viton O-Ring
Available sizes
½” – NPT and BSPP
¾” – NPT and BSPP
1” – NPT and BSPP
1¼” – NPT
1½” – NPT
M20x1.5 Metric

Enluse B.V. – tel. +31(0)765781280 – email [email protected] – www.enluse.com
For use on
Gearboxes
Sumps
Reservoirs
Low Pressure Systems
3-D sight glass Not only does the 3-D sight glass enable quick inspection for water emulsions, foam, sediment and bubbly oil, it can be easily removed for cleaning. Capability without complexity.
Included sample port The built-in oil sampling valve lets you take live-zone oil samples without shutting down the machine. Because it's included, you don't have to purchase and install a separate sampling valve. Saves time and money.
Magnetic plug The included magnetic plug offers hands-free inspection. Dark oil? Just rotate the sight glass to move the magnetic plug above oil level or remove it for detailed inspection. It's quick glance condition monitoring at its best.

Enluse B.V. – tel. +31(0)765781280 – email [email protected] – www.enluse.com
Oil Level Crosshairs Need precision oil level monitoring? Crosshairs ensure you know exactly where the oil level stands and makes what could be a vague inspection parameter much more accurate and streamlined.
Issue Detection Probe Now you can easily spot corrosion and varnish issues that would typically require opening the machine. The included inspection rod provides quick confirmation of corrosion suppression of oil-wet and non-oil-wet surfaces.
Quick Access Point Remove the inspection rod to access the oil for your field tests like water contamination, dielectric constant, oil temperature, viscosity, blotter, surface tension and more. A quick syringe sample enables a variety of tests.
Enluse B.V. – tel. +31(0)765781280 – email [email protected] – www.enluse.com
Condition Monitoring Pod™
Installation Instructions
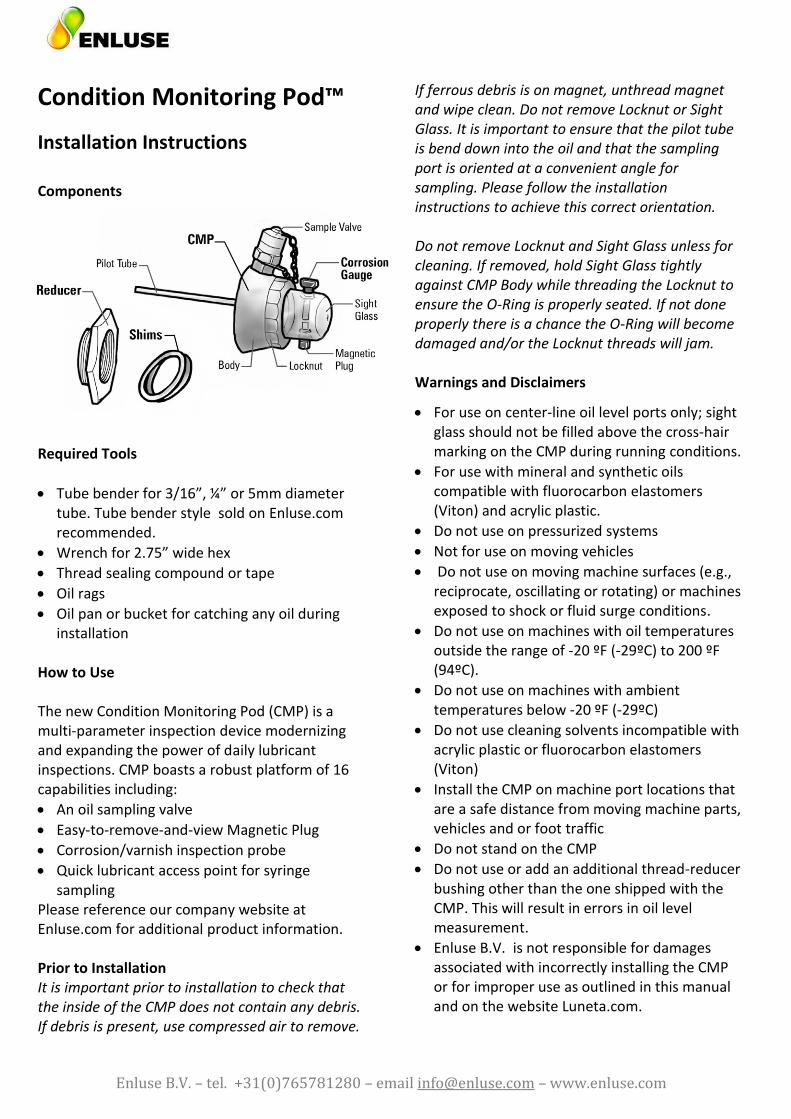
Components
Required Tools
Tube bender for 3/16”, ¼” or 5mm diameter tube. Tube bender style sold on Enluse.com recommended.
Wrench for 2.75” wide hex
Thread sealing compound or tape
Oil rags
Oil pan or bucket for catching any oil during installation
How to Use
The new Condition Monitoring Pod (CMP) is a multi-parameter inspection device modernizing and expanding the power of daily lubricant inspections. CMP boasts a robust platform of 16 capabilities including:
An oil sampling valve
Easy-to-remove-and-view Magnetic Plug
Corrosion/varnish inspection probe
Quick lubricant access point for syringe sampling
Please reference our company website at Enluse.com for additional product information. Prior to Installation It is important prior to installation to check that the inside of the CMP does not contain any debris. If debris is present, use compressed air to remove.
If ferrous debris is on magnet, unthread magnet and wipe clean. Do not remove Locknut or Sight Glass. It is important to ensure that the pilot tube is bend down into the oil and that the sampling port is oriented at a convenient angle for sampling. Please follow the installation instructions to achieve this correct orientation. Do not remove Locknut and Sight Glass unless for cleaning. If removed, hold Sight Glass tightly against CMP Body while threading the Locknut to ensure the O-Ring is properly seated. If not done properly there is a chance the O-Ring will become damaged and/or the Locknut threads will jam. Warnings and Disclaimers
For use on center-line oil level ports only; sight glass should not be filled above the cross-hair marking on the CMP during running conditions.
For use with mineral and synthetic oils compatible with fluorocarbon elastomers (Viton) and acrylic plastic.
Do not use on pressurized systems
Not for use on moving vehicles
Do not use on moving machine surfaces (e.g., reciprocate, oscillating or rotating) or machines exposed to shock or fluid surge conditions.
Do not use on machines with oil temperatures outside the range of -20 ºF (-29ºC) to 200 ºF (94ºC).
Do not use on machines with ambient temperatures below -20 ºF (-29ºC)
Do not use cleaning solvents incompatible with acrylic plastic or fluorocarbon elastomers (Viton)
Install the CMP on machine port locations that are a safe distance from moving machine parts, vehicles and or foot traffic
Do not stand on the CMP
Do not use or add an additional thread-reducer bushing other than the one shipped with the CMP. This will result in errors in oil level measurement.
Enluse B.V. is not responsible for damages associated with incorrectly installing the CMP or for improper use as outlined in this manual and on the website Luneta.com.

Enluse B.V. – tel. +31(0)765781280 – email [email protected] – www.enluse.com
STEP 1 – Identify Appropriate Location Identify a port hole on your machine that is positioned at the oil level. Do not install CMP below oil level or on pressurized systems. STEP 2 – Drop Oil Level Drop oil level in the machine below the port hole to prevent spillage during CMP installation.
STEP 3 – Install Reducer Tightly thread the Reducer into the port hole of your machine using a wrench and thread sealer.
STEP 4 – Check Sample Valve Orientation Hand thread the CMP into Reducer. If the Sampling Port is not at a convenient location when fully tightened, use the supplied shims between the Reducer and CMP to reorient the Sampling Port. Note: the down direction for bending the Pilot Tube.
STEP 5 – Bend Pilot Tube Unthread the CMP from the Reducer and using the appropriate Tube Bender, bend the Pilot Tube down in the direction noted in previous step. Chose a bend location and angle which best places the tip of the Pilot Tube within your machine for good sampling. STEP 6 – Install CMP Tightly thread the CMP into the Reducer using pipe sealer. If Shims were required, don’t forget to install these at the same time. Tip: Use the Sampling Port as leverage to achieve enough torque.
STEP 7 – Correct Sight Glass Orientation Thread the Corrosion Gauge into the Sight Glass port opposite the Magnetic Plug. Loosen the Locknut and rotate the Sight Glass so that the Magnetic Plug is at the bottom and the Corrosion Gauge is at the top. Hand tighten the Locknut. Note: Do NOT use thread sealer or threadlocker on the Locknut. And DO NOT remove Locknut and Sight Glass unless for cleaning.
STEP 8 – Add Oil Check that all threaded components are tight and then replenish the machine with oil so that the oil is level with the cross hairs on the Sight Glass.
Oil level even with port
Oil level dropped to
below port below port
Apply thread sealer
Sampling port
Down
Shims
Tube bender
Apply thread sealer
Do not apply thread
sealer or threadlocker to
locknut
Corrosion Gauge