Concave Mirrors Reflection, Image Height, and Distance.
35
Concave Mirrors Reflection, Image Height, and Distance
-
Upload
eustace-berry -
Category
Documents
-
view
243 -
download
3
Transcript of Concave Mirrors Reflection, Image Height, and Distance.
Concave Mirrors
Reflection, Image Height, and Distance
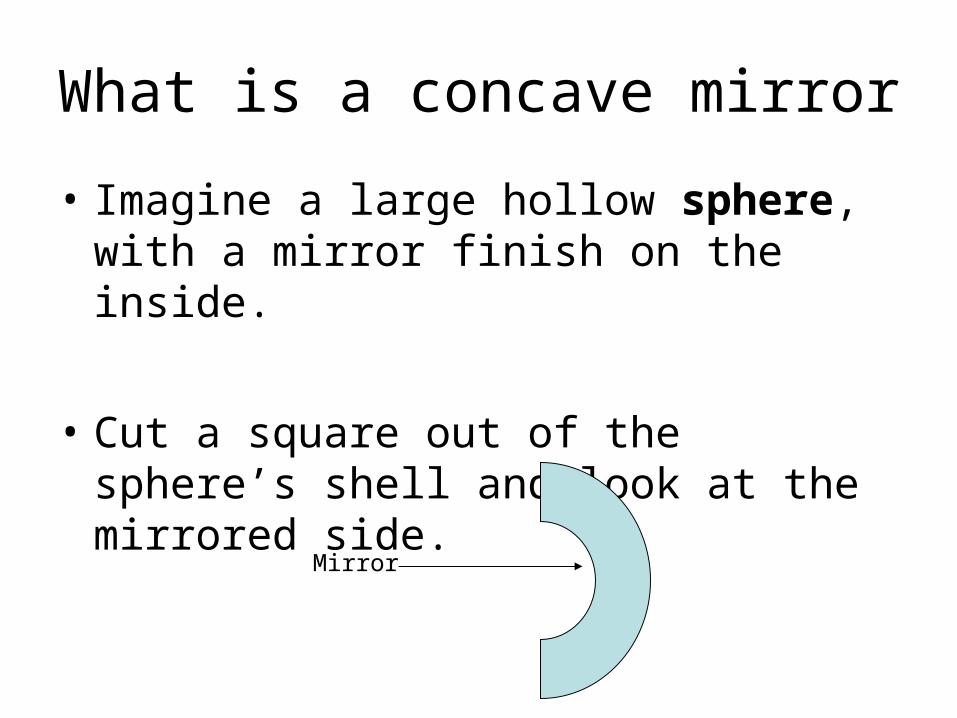
What is a concave mirror
• Imagine a large hollow sphere, with a mirror finish on the inside.
• Cut a square out of the sphere’s shell and look at the mirrored side.
Mirror
Ray Diagram
• A Ray Diagram will tell you what a reflection will look like in the mirror without having to actually look into it…
Parts of Ray Diagrams
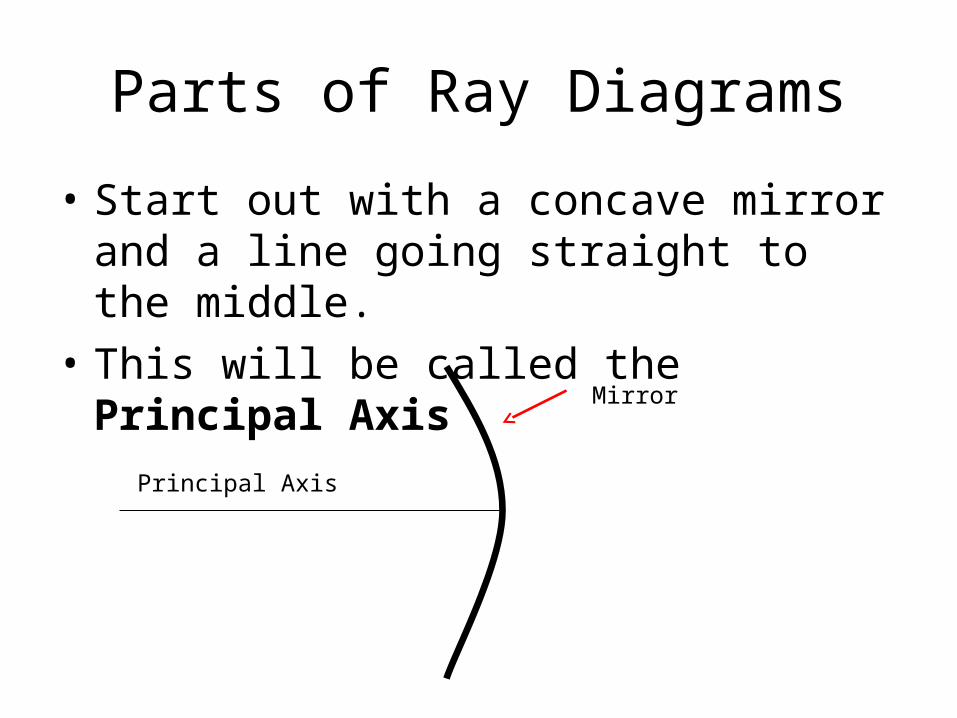
• Start out with a concave mirror and a line going straight to the middle.
• This will be called the Principal Axis
Principal Axis
Mirror
Center of Curvature
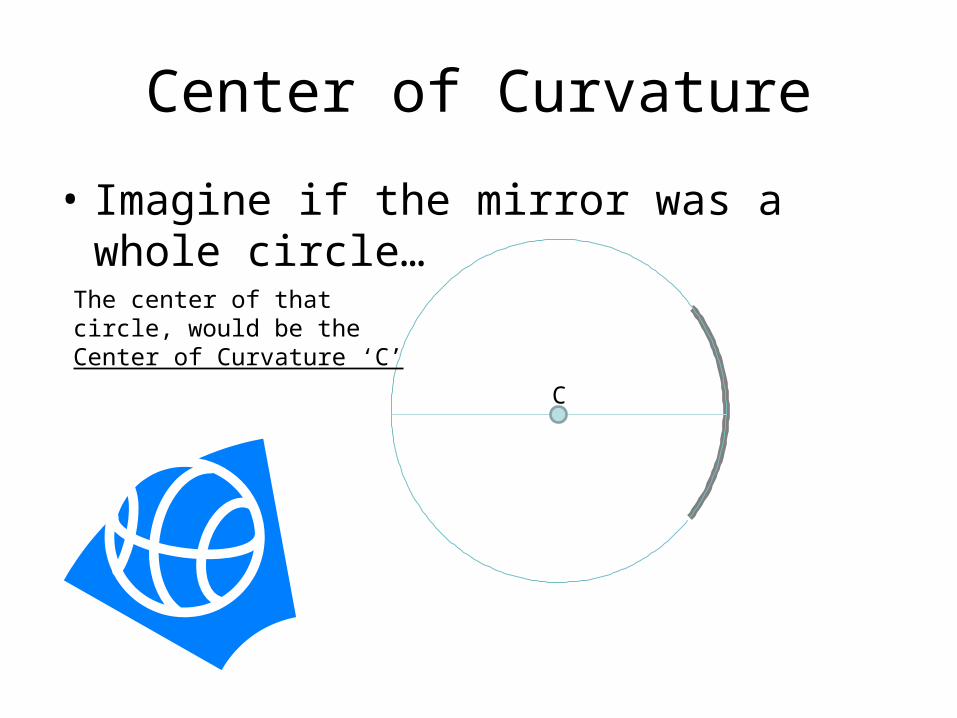
• Imagine if the mirror was a whole circle…
The center of that circle, would be the Center of Curvature ‘C’
C
Focal Point
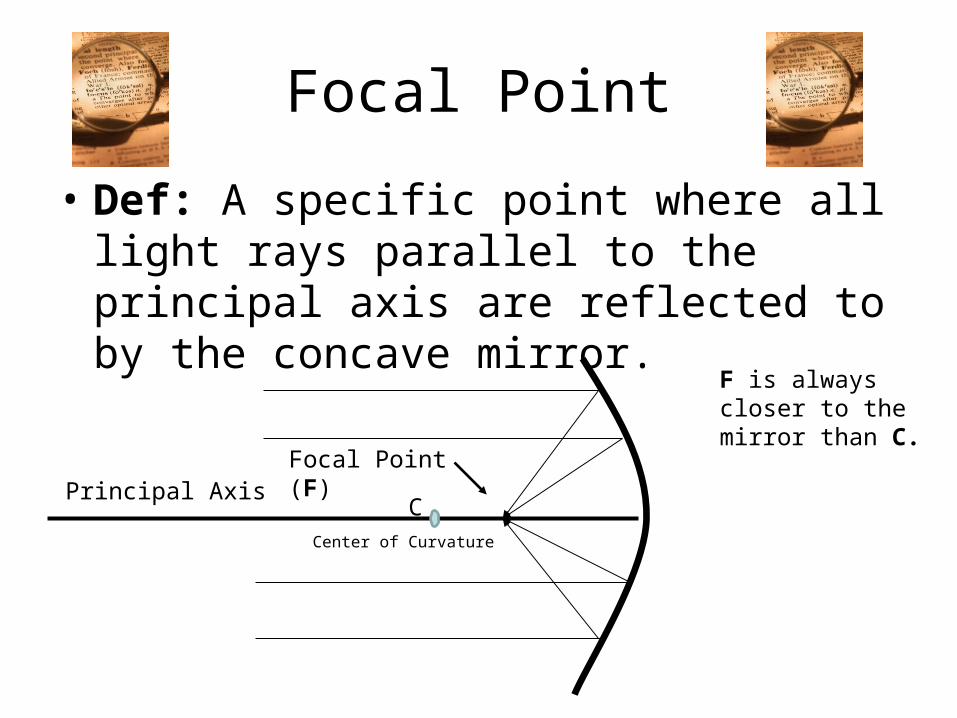
• Def: A specific point where all light rays parallel to the principal axis are reflected to by the concave mirror.
Principal AxisFocal Point (F)
F is always closer to the mirror than C.
CCenter of Curvature
Laws of Reflection
• There are two rules to tell us how light will reflect when it hits a curved mirror
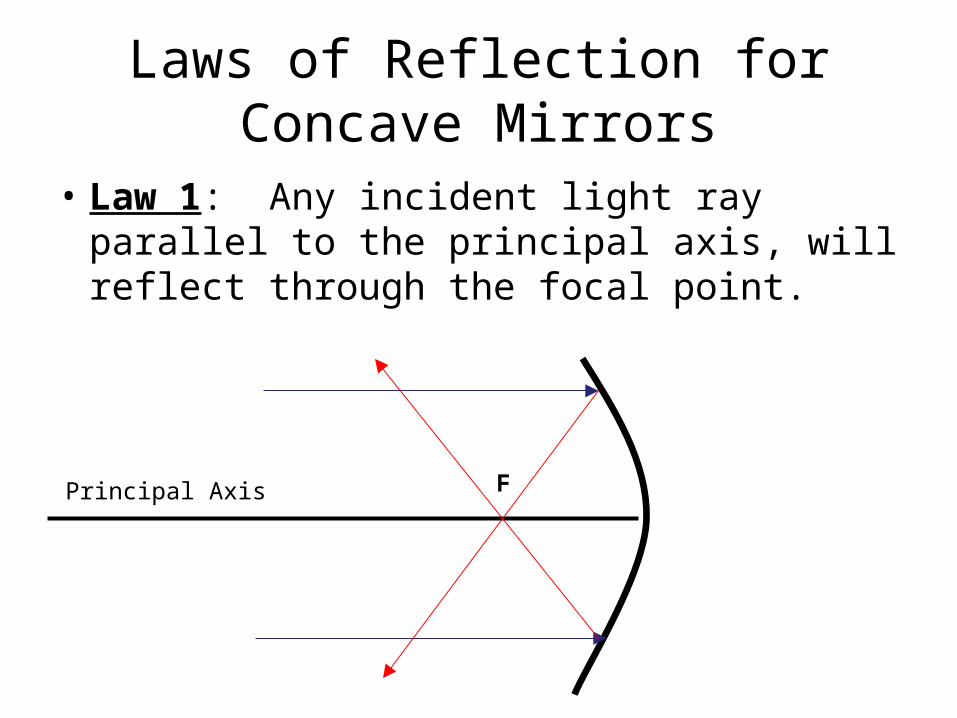
Laws of Reflection for Concave Mirrors
• Law 1: Any incident light ray parallel to the principal axis, will reflect through the focal point.
Principal Axis F

Laws of Reflection for Concave Mirrors
• Law 2: Any incident ray of light passing through the focal point will reflect parallel to the principal axis.
Principal Axis F
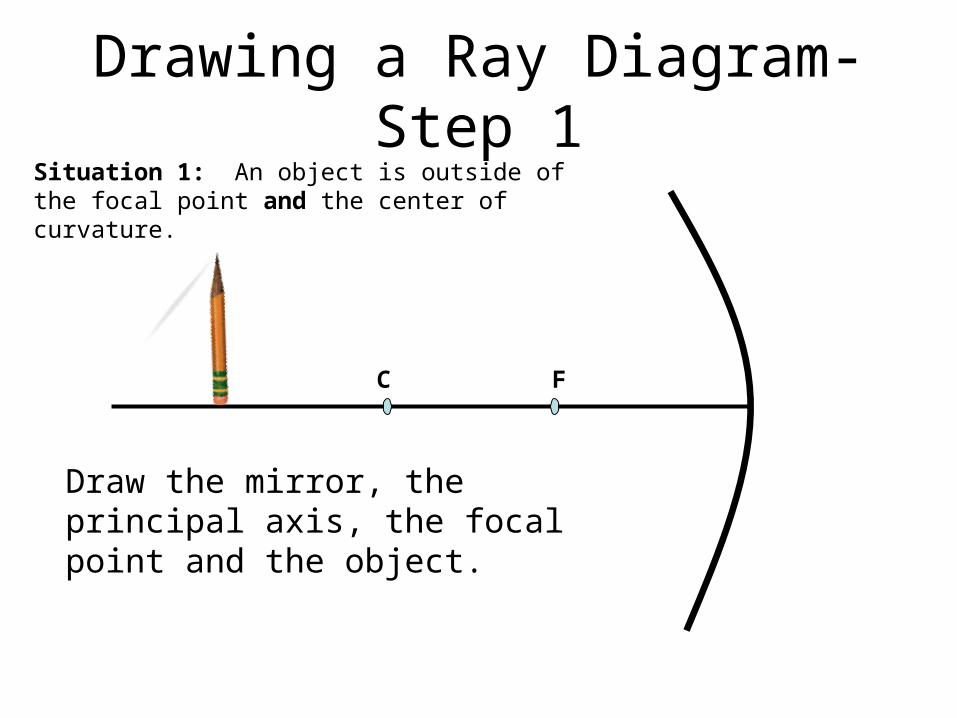
Drawing a Ray Diagram- Step 1
C F
Situation 1: An object is outside of the focal point and the center of curvature.
Draw the mirror, the principal axis, the focal point and the object.
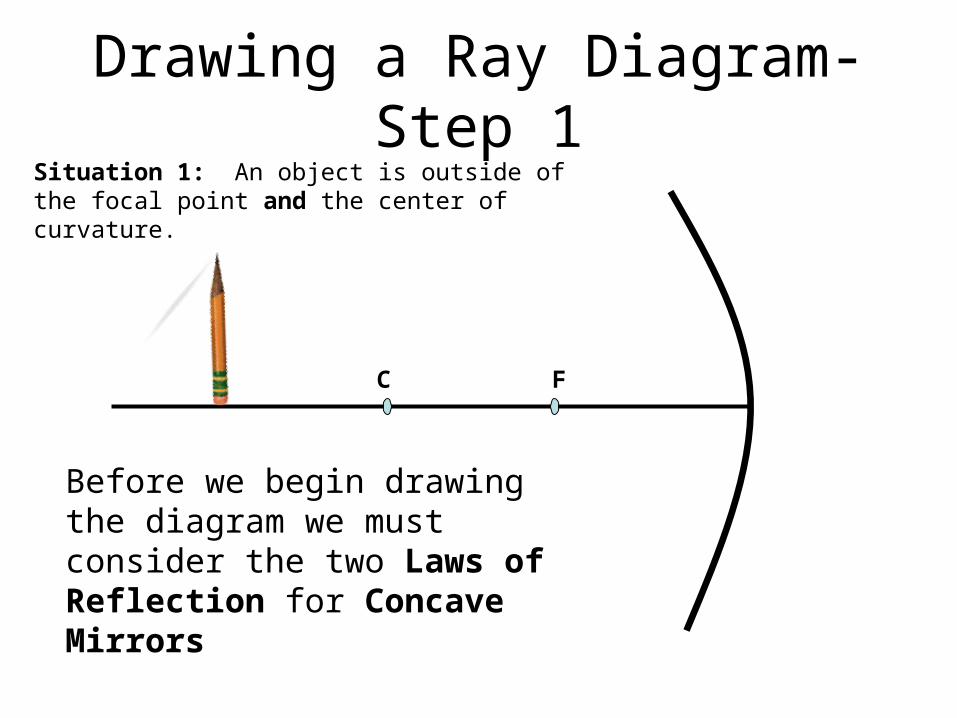
Drawing a Ray Diagram- Step 1
C F
Situation 1: An object is outside of the focal point and the center of curvature.
Before we begin drawing the diagram we must consider the two Laws of Reflection for Concave Mirrors
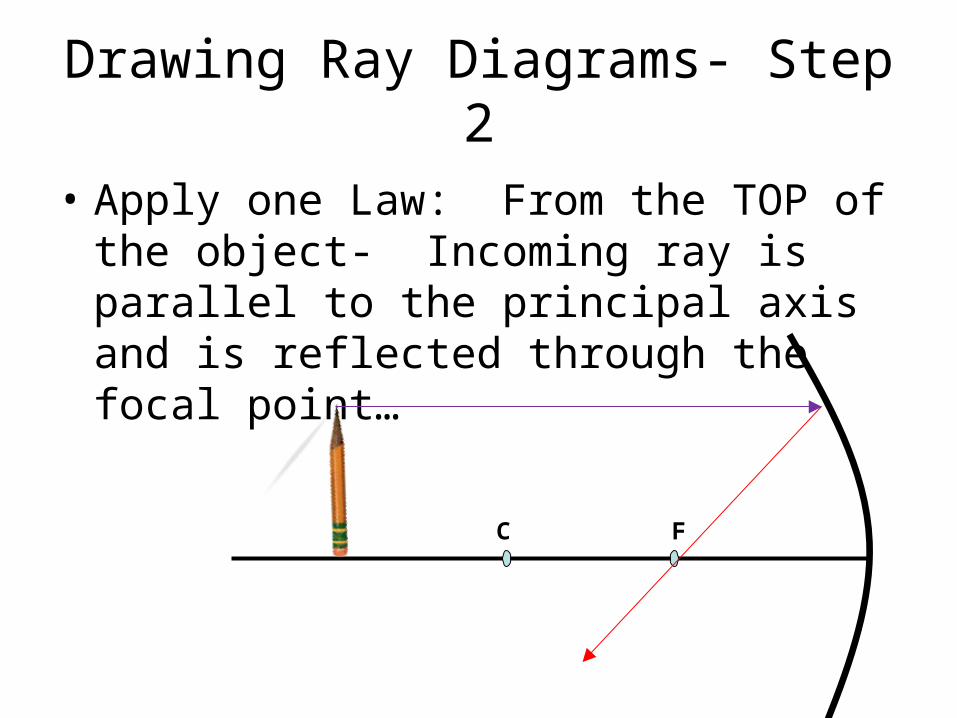
Drawing Ray Diagrams- Step 2
• Apply one Law: From the TOP of the object- Incoming ray is parallel to the principal axis and is reflected through the focal point…
C F
Drawing Ray Diagrams- Step 3
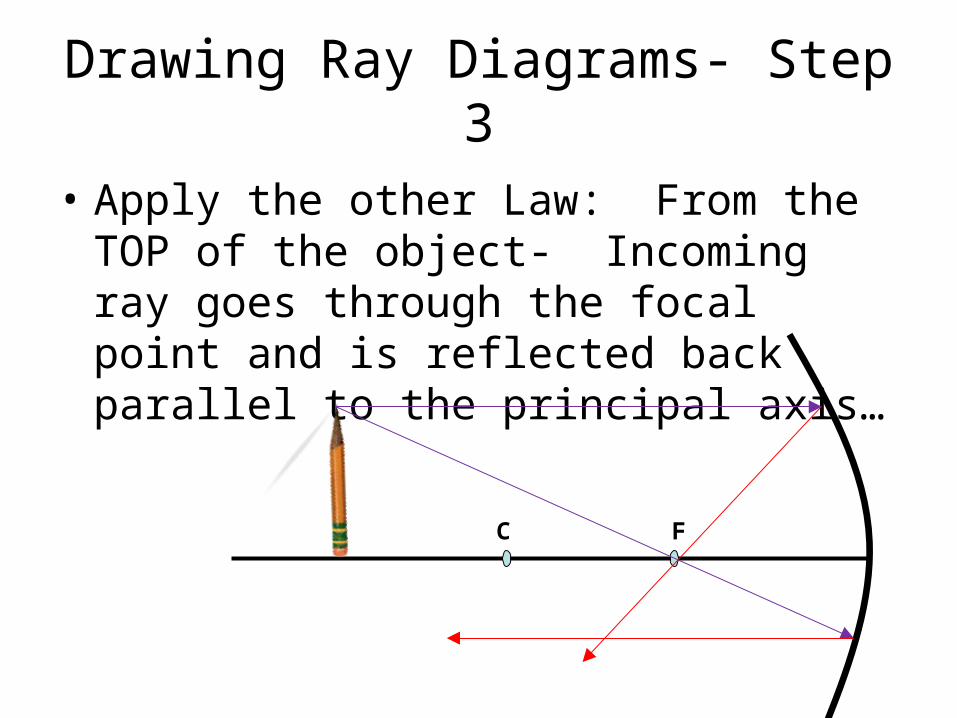
• Apply the other Law: From the TOP of the object- Incoming ray goes through the focal point and is reflected back parallel to the principal axis…
C F

Drawing Ray Diagrams- Step 4
• Where the red lines (reflected beams of light) cross will be where the top of the pencil appears to be in the reflection you see in the mirror…
C F
Drawing Ray Diagrams- Step 4
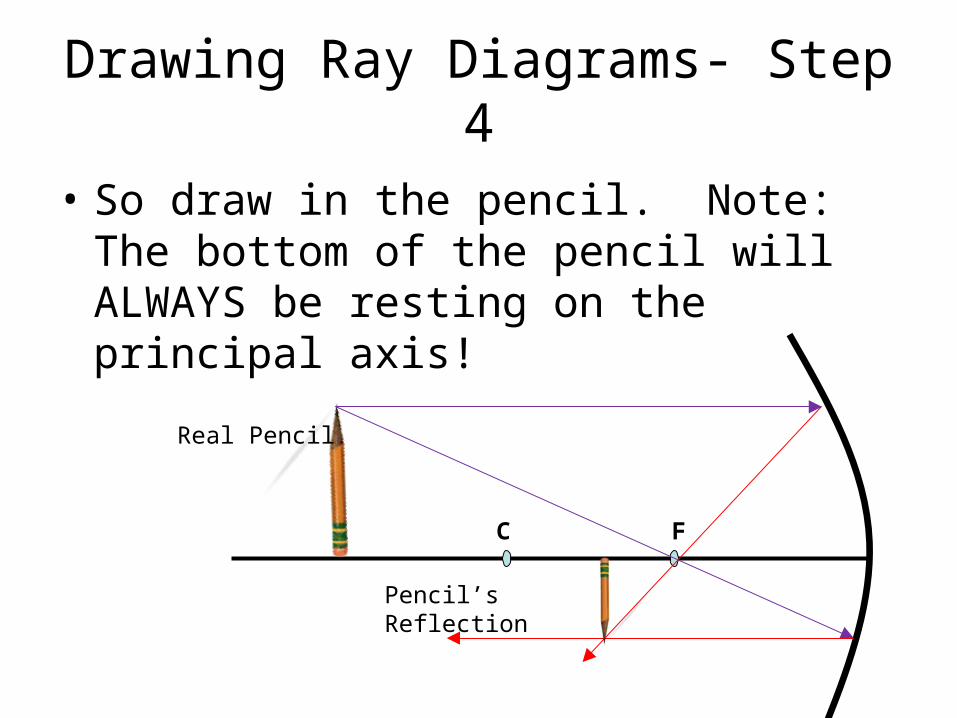
• So draw in the pencil. Note: The bottom of the pencil will ALWAYS be resting on the principal axis!
C F
Real Pencil
Pencil’s Reflection
Situation 1
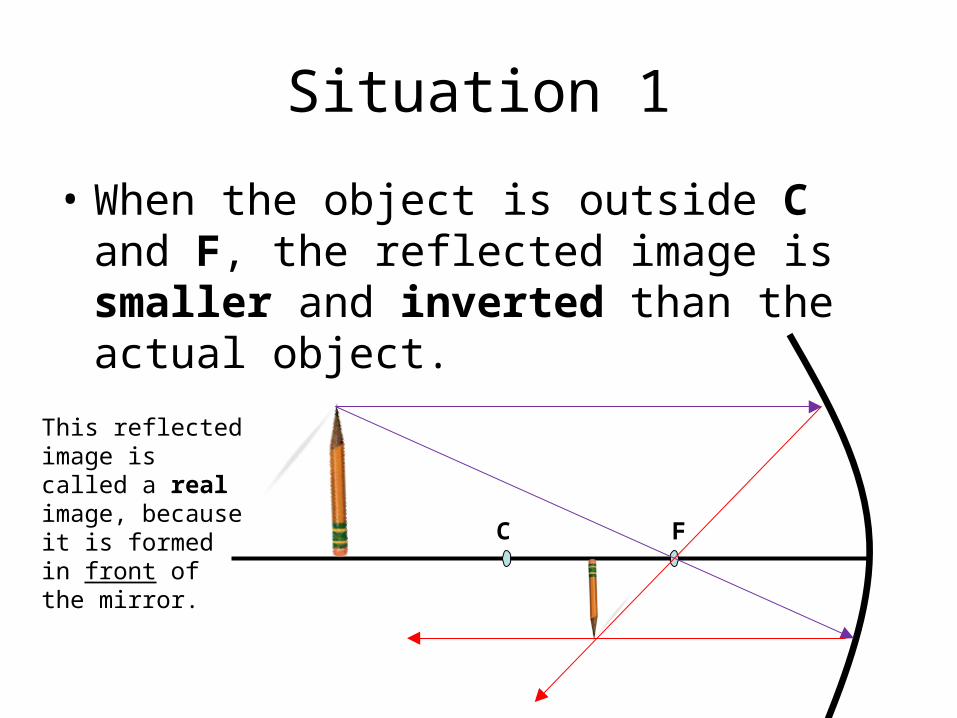
• When the object is outside C and F, the reflected image is smaller and inverted than the actual object.
C F
This reflected image is called a real image, because it is formed in front of the mirror.
Situation 2
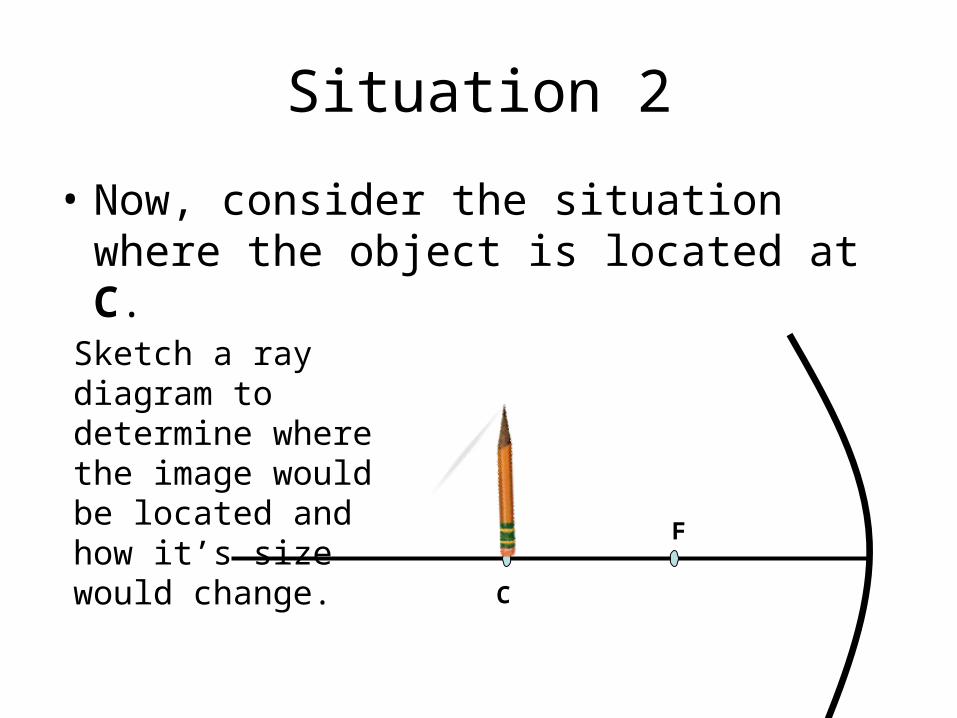
• Now, consider the situation where the object is located at C.
C
F
Sketch a ray diagram to determine where the image would be located and how it’s size would change.

Situation 2
CF
The image is still inverted, but is the same size as the actual object, and located directly underneath it.

Situation 3
• What if the object is located between C and F?
C
F
Sketch a ray diagram to determine where the image would be located and how it’s size would change.

Situation 3
C
F
Image is inverted, magnified larger than the actual object, and appears farther away than the original.

Situation 4
• The object is located on the focal point.
CF
The reflected rays never overlap, so no image is formed. An object sitting at the focal point of the mirror “disappears” in the mirror.
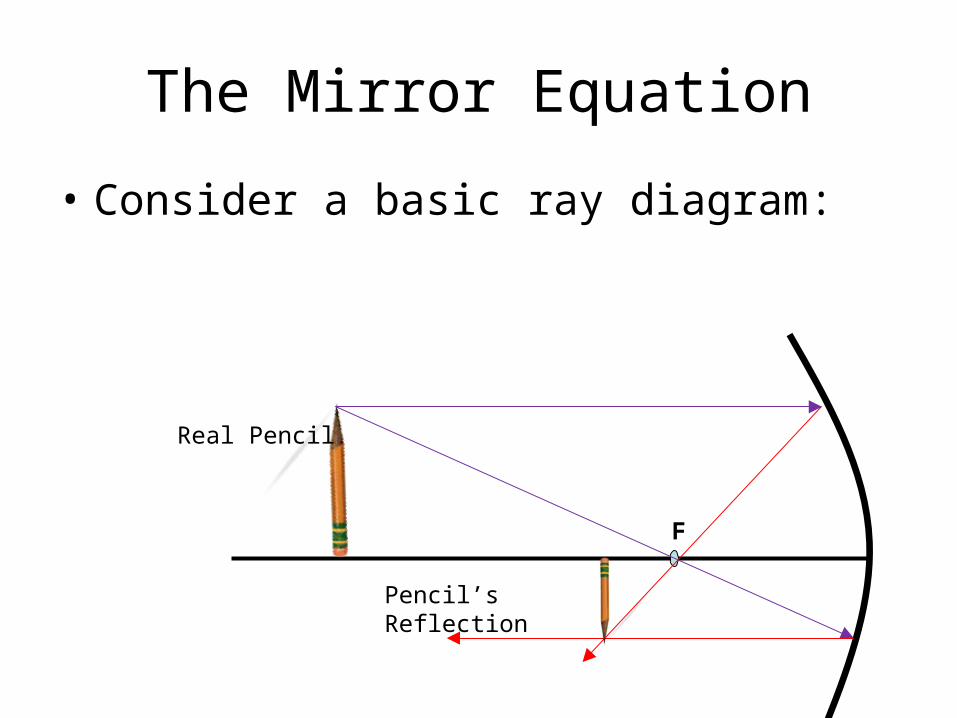
The Mirror Equation
• Consider a basic ray diagram:
F
Real Pencil
Pencil’s Reflection
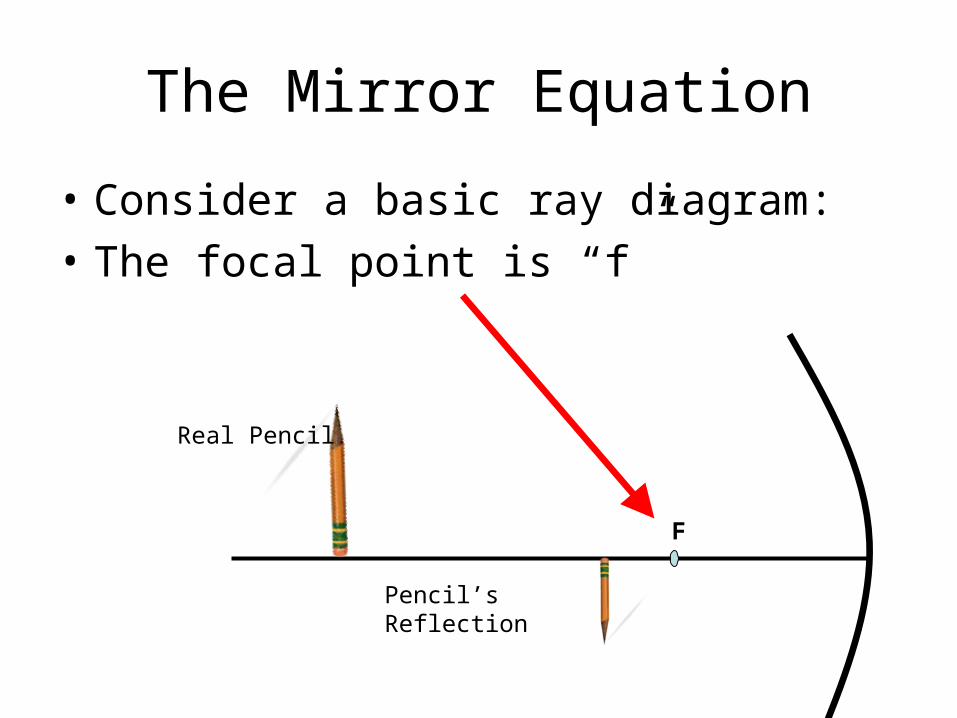
The Mirror Equation
• Consider a basic ray diagram:
• The focal point is “f”
F
Real Pencil
Pencil’s Reflection
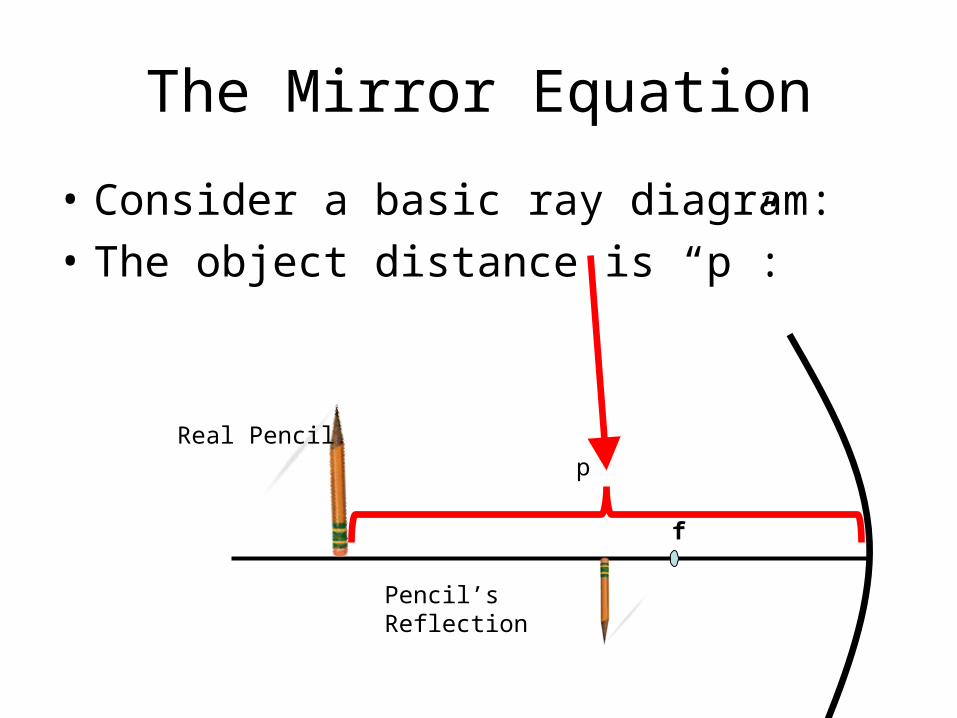
The Mirror Equation
• Consider a basic ray diagram:
• The object distance is “p”:
f
Real Pencil
Pencil’s Reflection
p
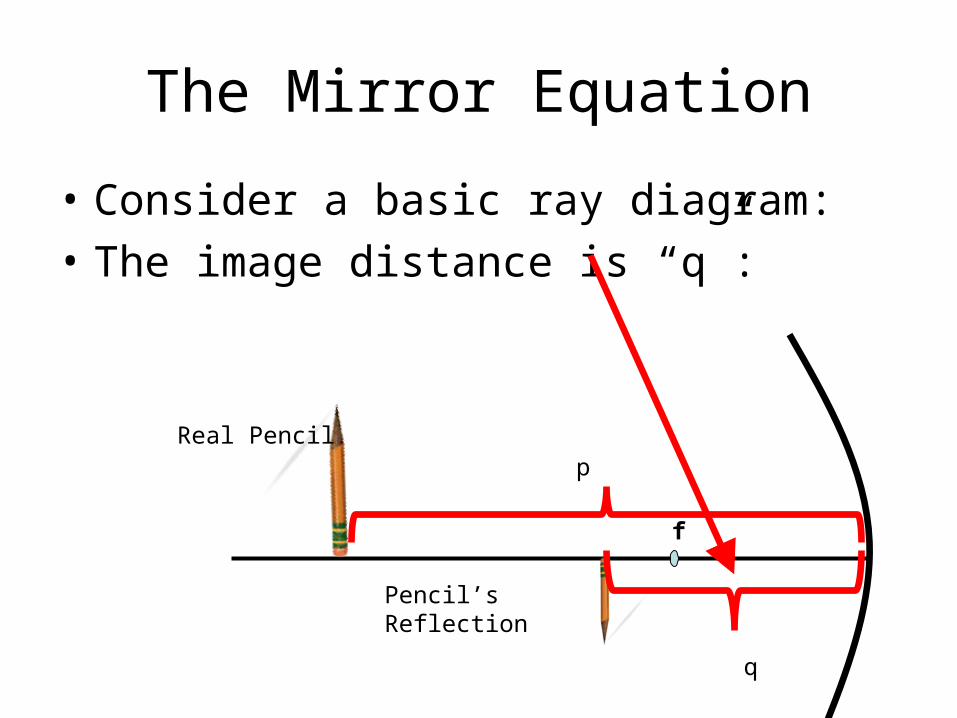
The Mirror Equation
• Consider a basic ray diagram:
• The image distance is “q”:
f
Real Pencil
Pencil’s Reflection
p
q
The Mirror Equation
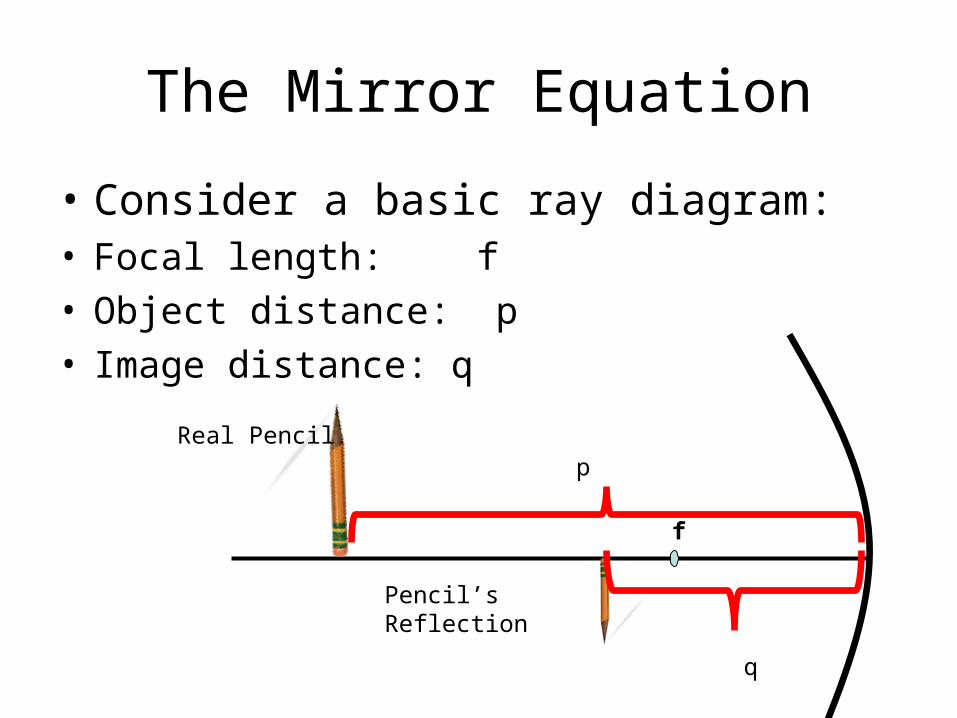
• Consider a basic ray diagram:• Focal length: f• Object distance: p• Image distance: q
f
Real Pencil
Pencil’s Reflection
p
q
The Mirror Equation
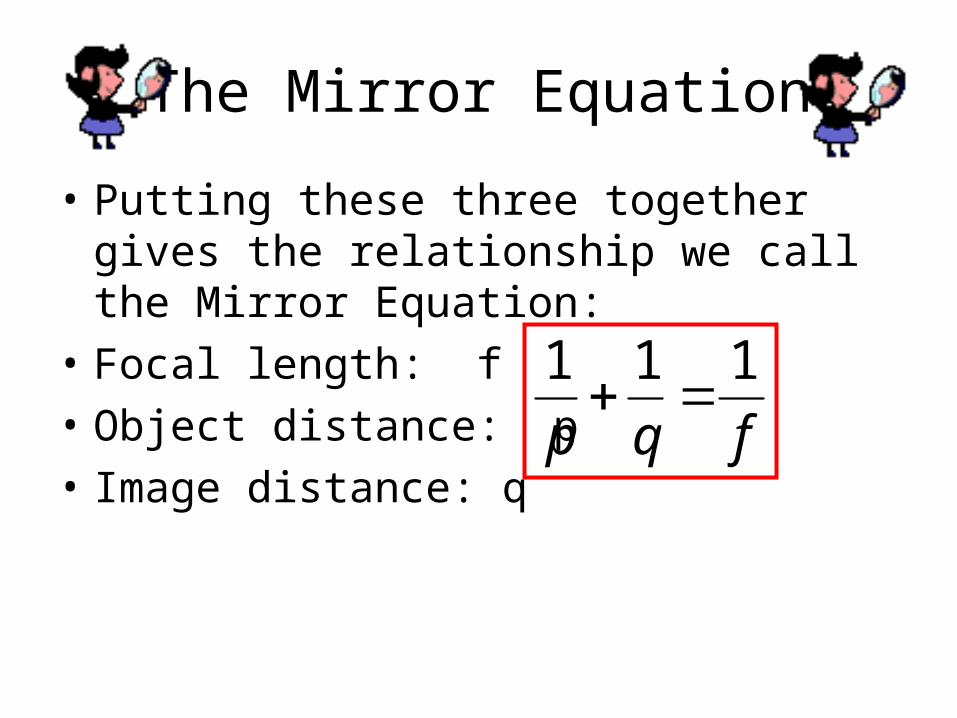
• Putting these three together gives the relationship we call the Mirror Equation:
• Focal length: f
• Object distance: p
• Image distance: q fqp
111
Magnification
• Mirrors also change the size of objects.
• How much it changes the size is called the Magnification of the mirror.
Magnification
• Magnification is a ratio of the object and the image’s:
a) height
or
b) distance
Either one will give you the magnification.
Magnification
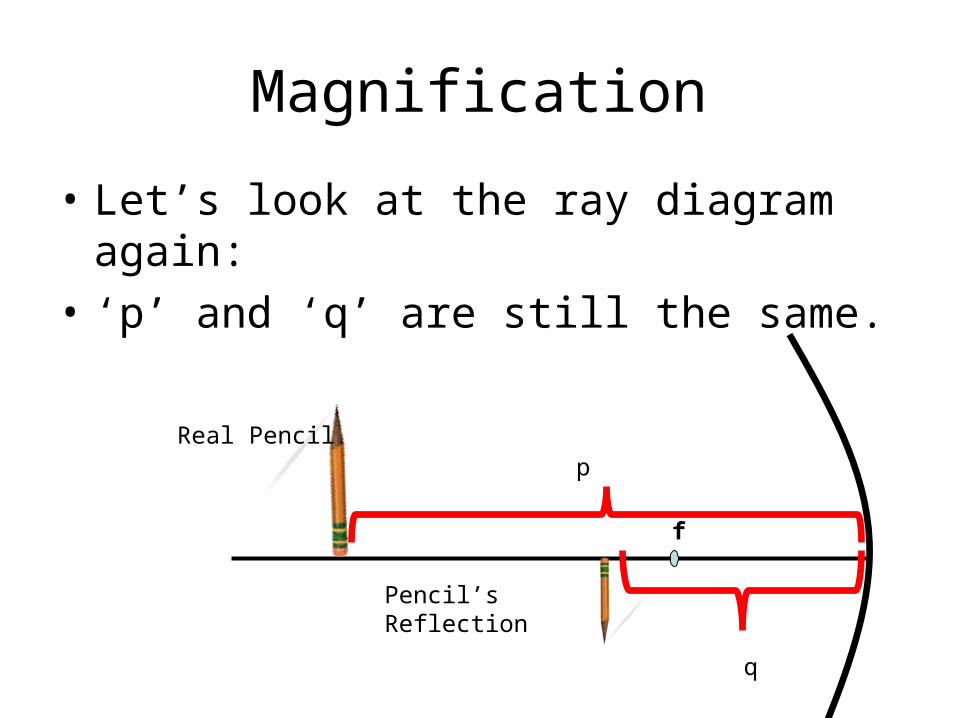
• Let’s look at the ray diagram again:
• ‘p’ and ‘q’ are still the same.
f
Real Pencil
Pencil’s Reflection
p
q

Magnification
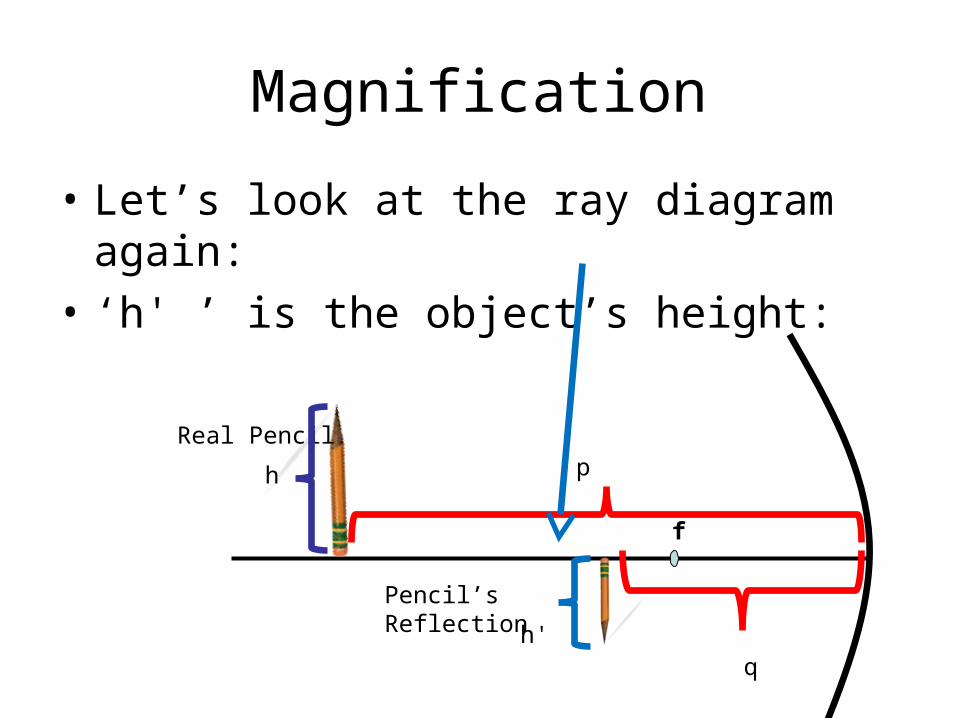
• Let’s look at the ray diagram again:
• ‘h’ is the object’s height:
f
Real Pencil
Pencil’s Reflection
p
q
h
Magnification
• Let’s look at the ray diagram again:
• ‘h' ’ is the object’s height:
f
Real Pencil
Pencil’s Reflection
p
q
h
h'
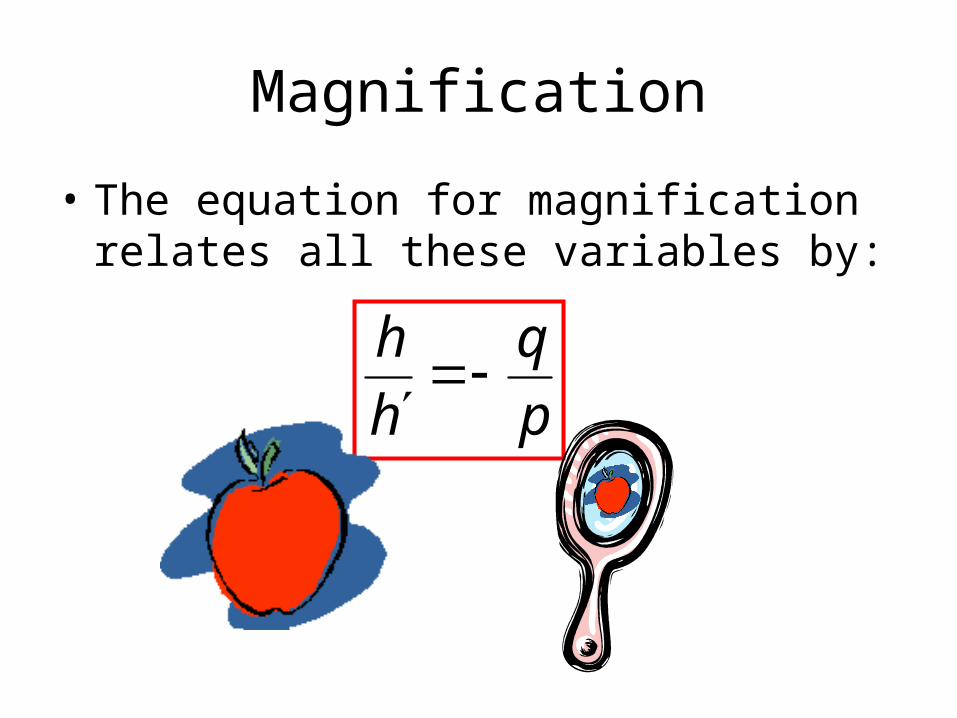
Magnification
• The equation for magnification relates all these variables by:
p
q
h
h
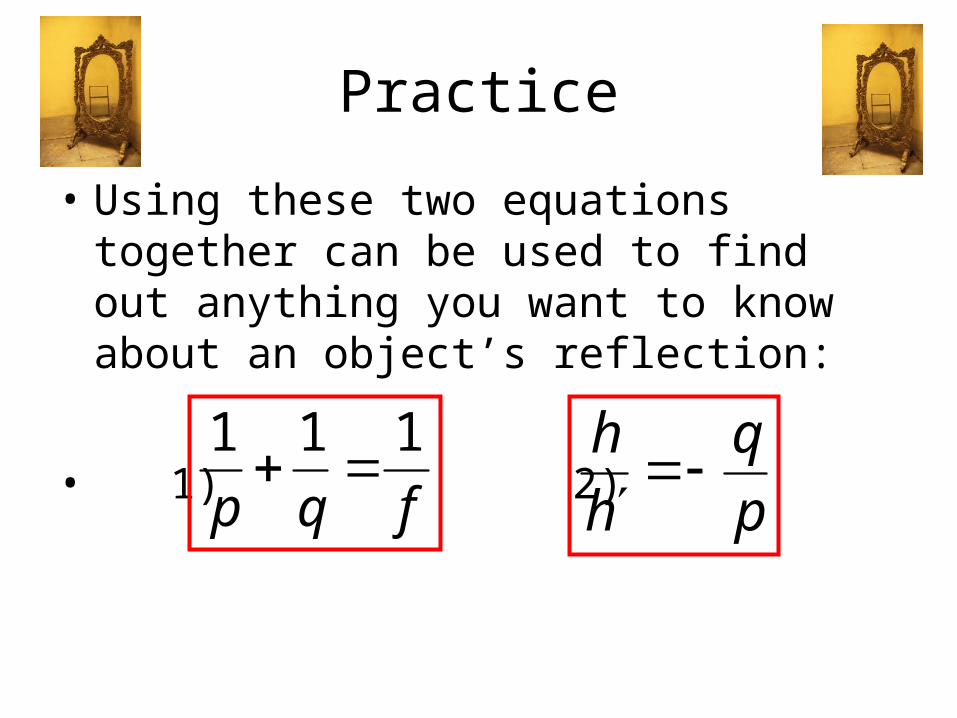
Practice
• Using these two equations together can be used to find out anything you want to know about an object’s reflection:
• 1) 2)
p
q
h
h
fqp
111
Practice
• Pg. 463 Practice B 1-3 ONLY!