Comodo Internet Security Installation Guide Security... · Comodo Internet Security - Installation...
55
Comodo Internet Security Software Version 10.0 Installation Guide Guide Version 10.0.042017 Comodo Security Solutions 1255 Broad Street Clifton, NJ, 07013 United States
Transcript of Comodo Internet Security Installation Guide Security... · Comodo Internet Security - Installation...
ComodoInternet Security
Software Version 10.0
Installation GuideGuide Version 10.0.042017
Comodo Security Solutions1255 Broad StreetClifton, NJ, 07013
United States

Comodo Internet Security - Installation Guide
1. CIS InstallationBefore you install Comodo Internet Security, read the installation instructions carefully and also review the system requirements. Additional services and features such as activation of your GeekBuddy account and/or Comodo Guarantee are carried out after the base installation has been completed.
The CIS software itself is identical for all customers regardless of the package type. All versions (including free) include all security features, technologies and updates. The difference between the package types lies in the availability of additional services such as GeekBuddy, TrustConnect, Cloud Backup and the Comodo Guarantee. Activation of additional services is carried out after the base installation has been completed.
Note - Before beginning installation, please ensure you have uninstalled any other antivirus and firewall products that are on your computer. More specifically, remove any other products of the same type as those Comodo productsyou plan to install. For example, if you plan to install only the firewall then you do not need to remove 3rd party antivirus solutions and vice-versa. If you are installing full CIS (both FW and AV) then you need to remove both typesof product if they are present on your system. Failure to remove products of the same type could cause conflicts that mean CIS will not function correctly. Users should consult their vendor’s documentation for precise uninstallation guidelines, however the following rough steps will help most Windows users:
• Click the Start button to open the Windows Start menu
• Select Control Panel > Programs and Features (Win 10, Win 8/8.1, Win 7, Vista); Control Panel > Add or Remove Programs (XP)
• Select your current antivirus or firewall program(s) from the list
• Click Remove/Uninstall button
• Repeat process until all required programs have been removed
Click the links below for detailed explanations:
• CIS Premium - Installation
• CIS Pro - Installation
• CIS Complete - Installation
1.1.CIS Premium – Installation
Before beginning installation, please ensure you have uninstalled any other antivirus and firewall products that are on your computer. Next, download the setup file from https://www.comodo.com/home/internet-security/free-internet-security.php.
After saving, double click on the setup file to start the installation wizard.
Step 1 - Choosing the Interface Language
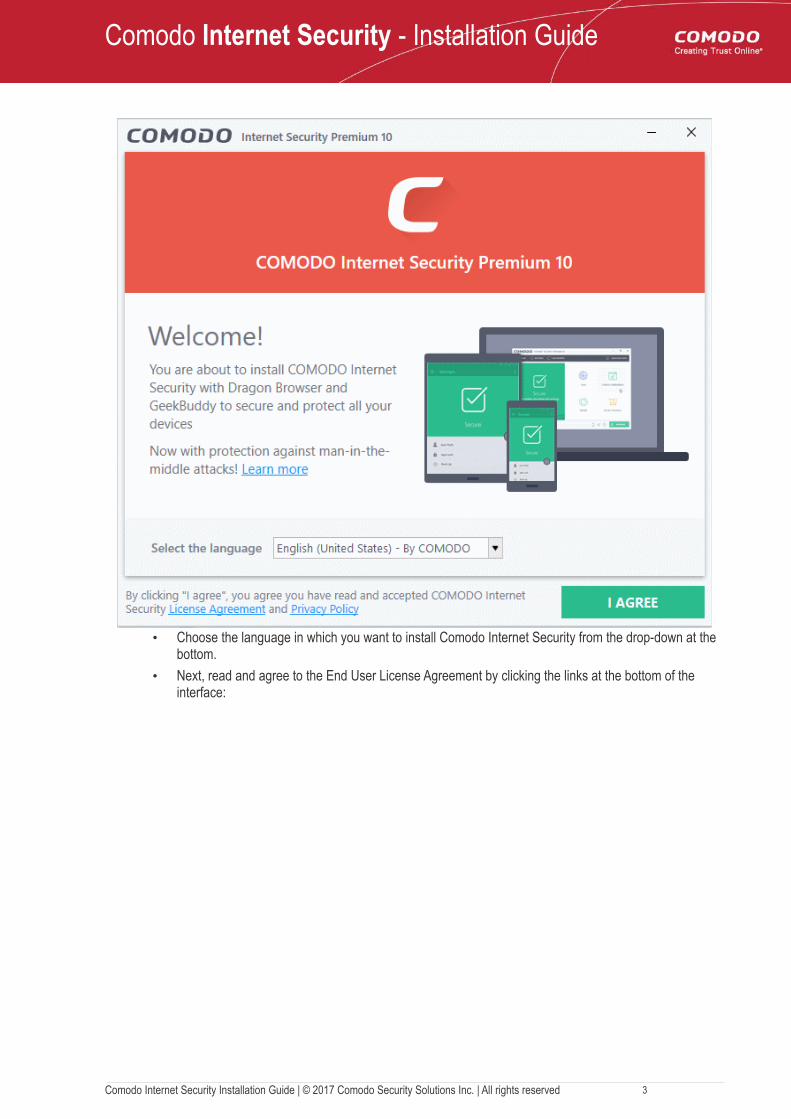
The installation wizard starts automatically and the 'Select the language' dialog is displayed.
Comodo Internet Security Installation Guide | © 2017 Comodo Security Solutions Inc. | All rights reserved 2
Comodo Internet Security - Installation Guide
• Choose the language in which you want to install Comodo Internet Security from the drop-down at the bottom.
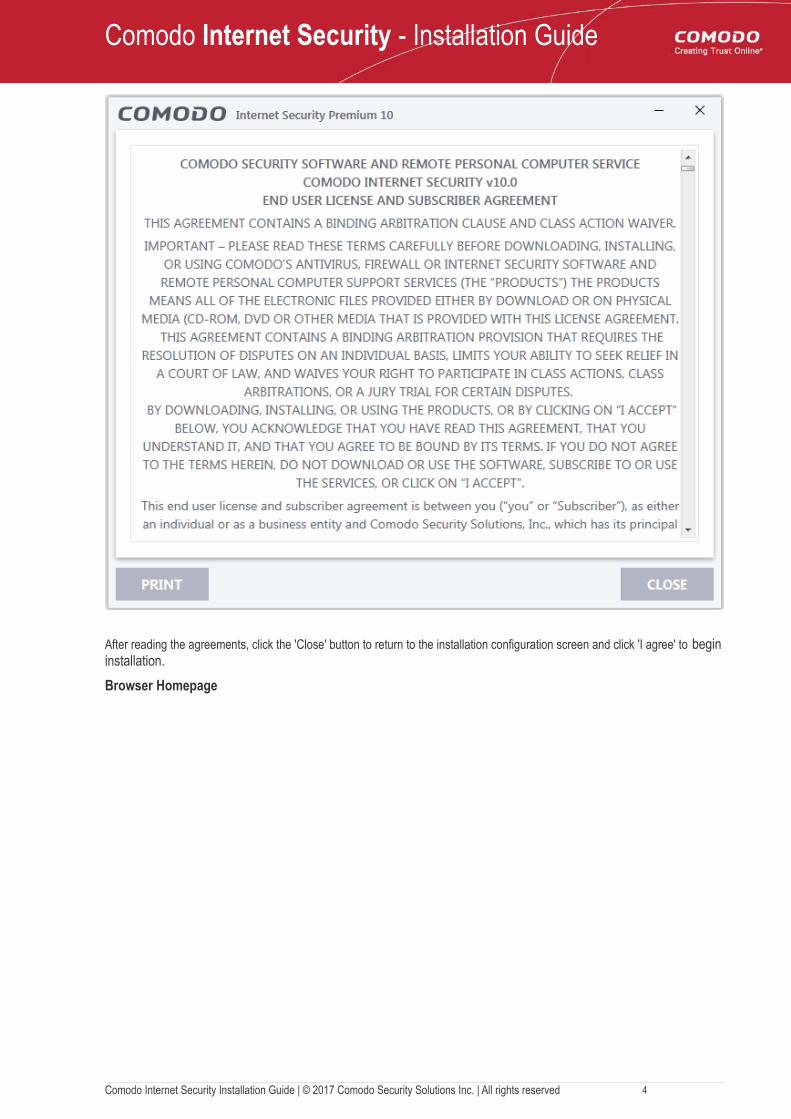
• Next, read and agree to the End User License Agreement by clicking the links at the bottom of the interface:
Comodo Internet Security Installation Guide | © 2017 Comodo Security Solutions Inc. | All rights reserved 3
Comodo Internet Security - Installation Guide
After reading the agreements, click the 'Close' button to return to the installation configuration screen and click 'I agree' to begininstallation.
Browser Homepage
Comodo Internet Security Installation Guide | © 2017 Comodo Security Solutions Inc. | All rights reserved 4
Comodo Internet Security - Installation Guide
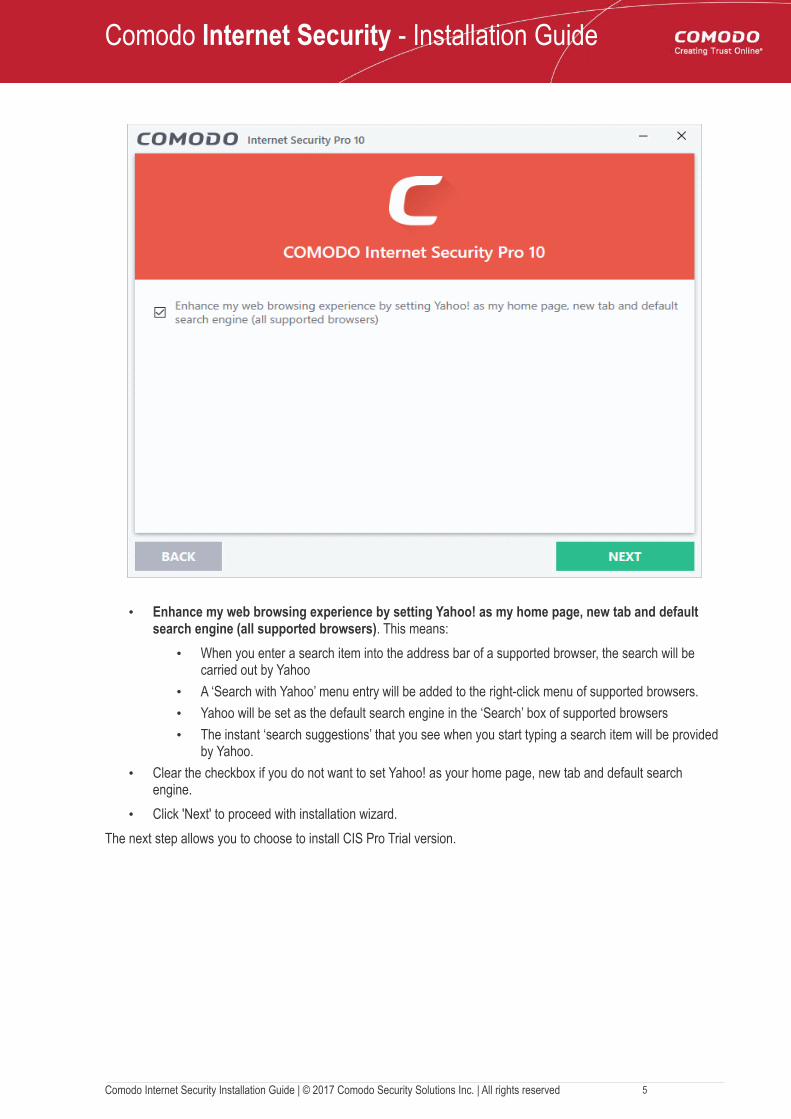
• Enhance my web browsing experience by setting Yahoo! as my home page, new tab and default search engine (all supported browsers). This means:
• When you enter a search item into the address bar of a supported browser, the search will be carried out by Yahoo
• A ‘Search with Yahoo’ menu entry will be added to the right-click menu of supported browsers.
• Yahoo will be set as the default search engine in the ‘Search’ box of supported browsers
• The instant ‘search suggestions’ that you see when you start typing a search item will be provided by Yahoo.
• Clear the checkbox if you do not want to set Yahoo! as your home page, new tab and default search engine.
• Click 'Next' to proceed with installation wizard.
The next step allows you to choose to install CIS Pro Trial version.
Comodo Internet Security Installation Guide | © 2017 Comodo Security Solutions Inc. | All rights reserved 5
Comodo Internet Security - Installation Guide
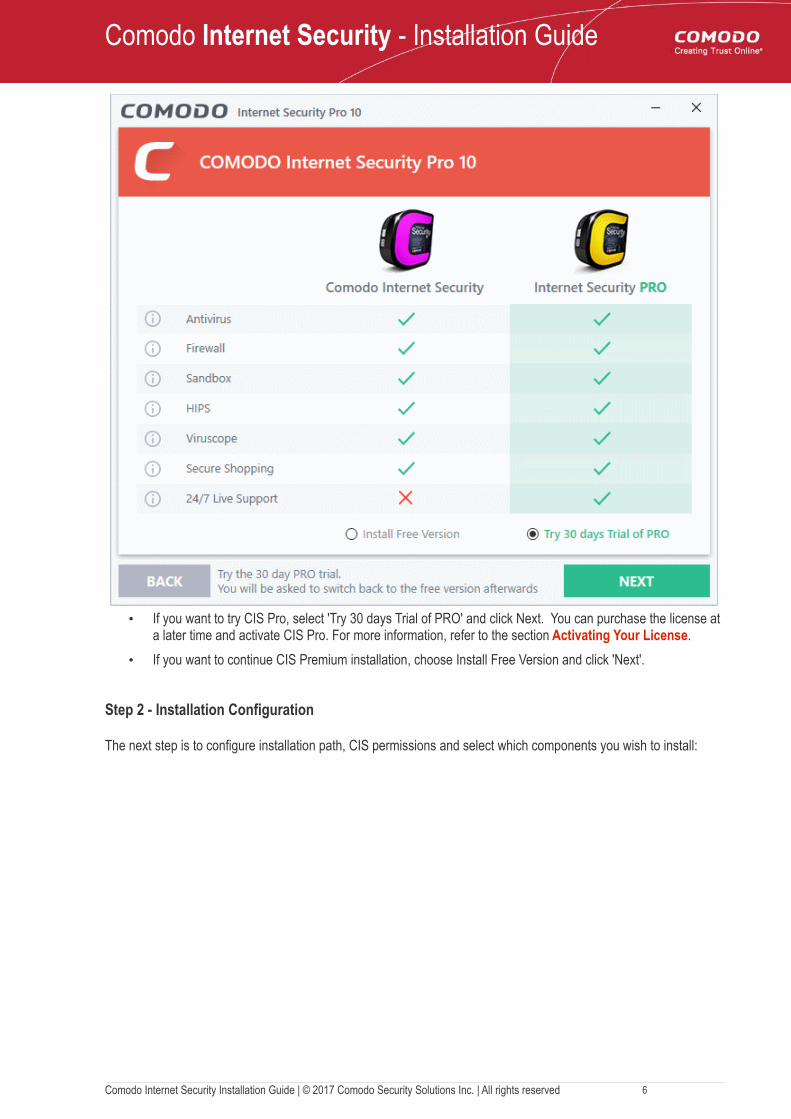
• If you want to try CIS Pro, select 'Try 30 days Trial of PRO' and click Next. You can purchase the license at a later time and activate CIS Pro. For more information, refer to the section Activating Your License.
• If you want to continue CIS Premium installation, choose Install Free Version and click 'Next'.
Step 2 - Installation Configuration
The next step is to configure installation path, CIS permissions and select which components you wish to install:
Comodo Internet Security Installation Guide | © 2017 Comodo Security Solutions Inc. | All rights reserved 6
Comodo Internet Security - Installation Guide
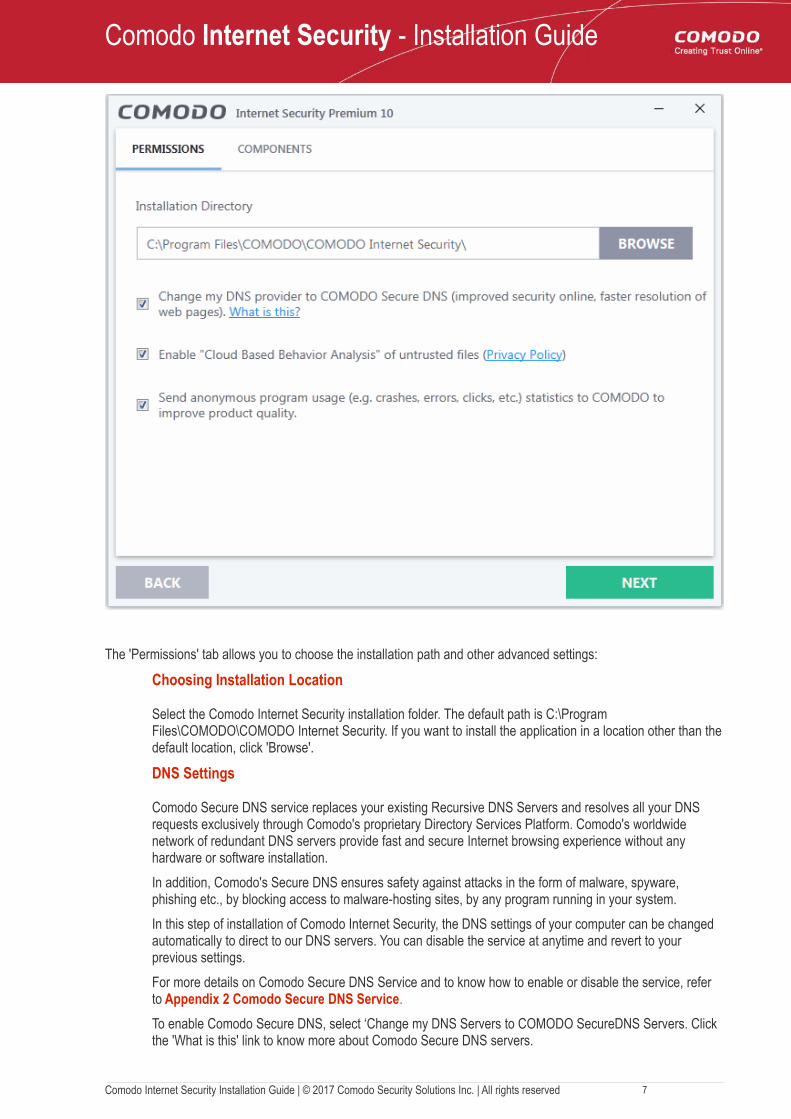
The 'Permissions' tab allows you to choose the installation path and other advanced settings:
Choosing Installation Location
Select the Comodo Internet Security installation folder. The default path is C:\Program Files\COMODO\COMODO Internet Security. If you want to install the application in a location other than thedefault location, click 'Browse'.
DNS Settings
Comodo Secure DNS service replaces your existing Recursive DNS Servers and resolves all your DNS requests exclusively through Comodo's proprietary Directory Services Platform. Comodo's worldwide network of redundant DNS servers provide fast and secure Internet browsing experience without any hardware or software installation.
In addition, Comodo's Secure DNS ensures safety against attacks in the form of malware, spyware, phishing etc., by blocking access to malware-hosting sites, by any program running in your system.
In this step of installation of Comodo Internet Security, the DNS settings of your computer can be changed automatically to direct to our DNS servers. You can disable the service at anytime and revert to your previous settings.
For more details on Comodo Secure DNS Service and to know how to enable or disable the service, refer to Appendix 2 Comodo Secure DNS Service.
To enable Comodo Secure DNS, select ‘Change my DNS Servers to COMODO SecureDNS Servers. Click the 'What is this' link to know more about Comodo Secure DNS servers.
Comodo Internet Security Installation Guide | © 2017 Comodo Security Solutions Inc. | All rights reserved 7
Comodo Internet Security - Installation Guide
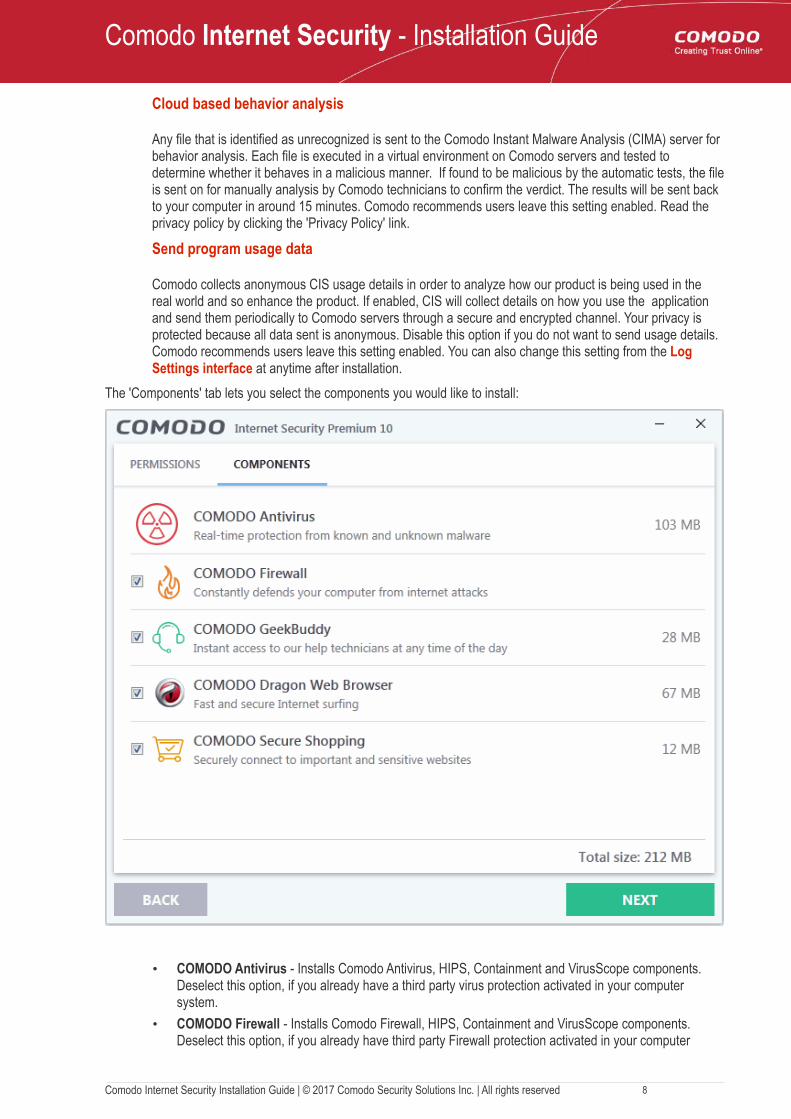
Cloud based behavior analysis
Any file that is identified as unrecognized is sent to the Comodo Instant Malware Analysis (CIMA) server for behavior analysis. Each file is executed in a virtual environment on Comodo servers and tested to determine whether it behaves in a malicious manner. If found to be malicious by the automatic tests, the fileis sent on for manually analysis by Comodo technicians to confirm the verdict. The results will be sent back to your computer in around 15 minutes. Comodo recommends users leave this setting enabled. Read the privacy policy by clicking the 'Privacy Policy' link.
Send program usage data
Comodo collects anonymous CIS usage details in order to analyze how our product is being used in the real world and so enhance the product. If enabled, CIS will collect details on how you use the application and send them periodically to Comodo servers through a secure and encrypted channel. Your privacy is protected because all data sent is anonymous. Disable this option if you do not want to send usage details. Comodo recommends users leave this setting enabled. You can also change this setting from the Log Settings interface at anytime after installation.
The 'Components' tab lets you select the components you would like to install:
• COMODO Antivirus - Installs Comodo Antivirus, HIPS, Containment and VirusScope components. Deselect this option, if you already have a third party virus protection activated in your computer system.
• COMODO Firewall - Installs Comodo Firewall, HIPS, Containment and VirusScope components. Deselect this option, if you already have third party Firewall protection activated in your computer
Comodo Internet Security Installation Guide | © 2017 Comodo Security Solutions Inc. | All rights reserved 8

Comodo Internet Security - Installation Guide
system.
• COMODO GeekBuddy - Installs GeekBuddy, a 24 x 7 remote support service in which Comodo experts can help you solve any computer related problems you may encounter. Refer to the section Comodo GeekBuddy for more details.
• COMODO Dragon Web Browser - Installs Dragon, a fast and versatile internet browser based on Chromium technology and infused with Comodo's unparalleled level of security. Refer to the section Dragon Browser for more details.
• COMODO Secure Shopping - Installs Comodo Secure Shopping, a security hardened virtual environment which offers complete protection for online banking and shopping. Refer to the section Comodo Secure Shopping for more details.
• Once you are satisfied with your settings, click 'Next' button
Step 3 – Importing browser settings
• Set Comodo Dragon as default browser – Setup Comodo Dragon as your default browser to open your webpages
• Import Google Chrome settings (history, bookmarks, cookies, browser cache, etc.) to Comodo Dragon browser – Automatically imports your bookmarks, history and other data
Step 4 - Installation Progress
Comodo Internet Security Installation Guide | © 2017 Comodo Security Solutions Inc. | All rights reserved 9
Comodo Internet Security - Installation Guide
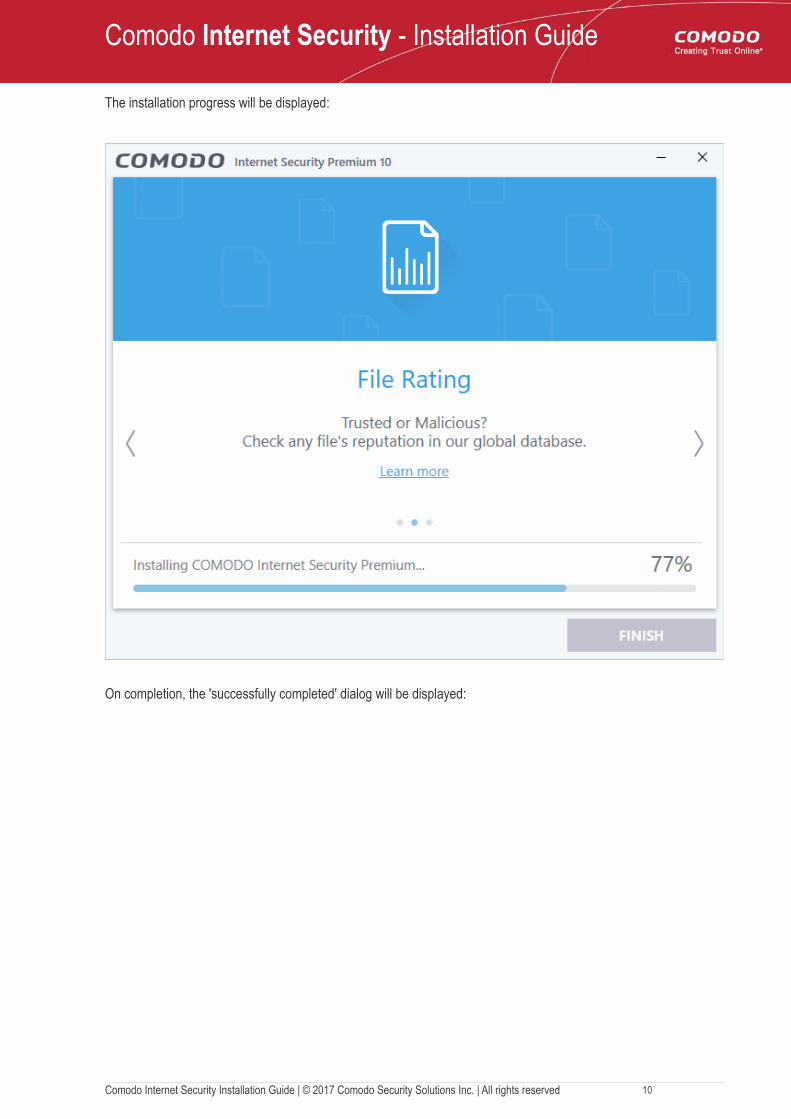
The installation progress will be displayed:
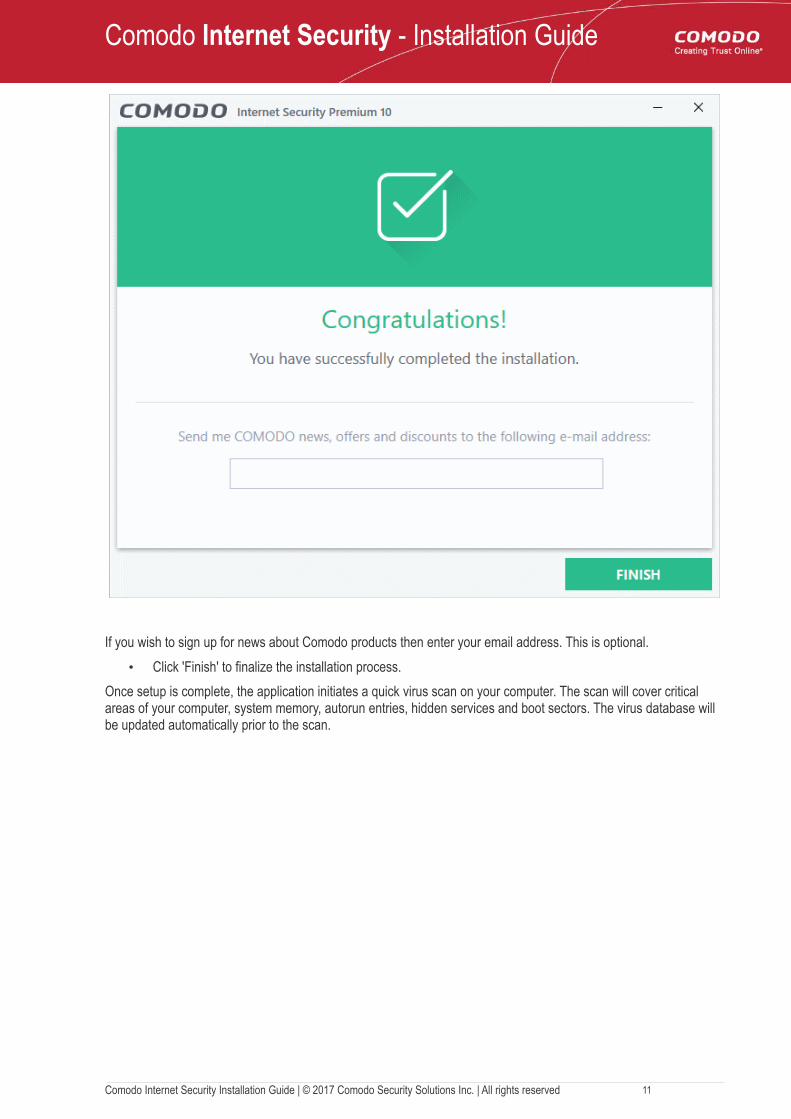
On completion, the 'successfully completed' dialog will be displayed:
Comodo Internet Security Installation Guide | © 2017 Comodo Security Solutions Inc. | All rights reserved 10
Comodo Internet Security - Installation Guide
If you wish to sign up for news about Comodo products then enter your email address. This is optional.
• Click 'Finish' to finalize the installation process.
Once setup is complete, the application initiates a quick virus scan on your computer. The scan will cover critical areas of your computer, system memory, autorun entries, hidden services and boot sectors. The virus database will be updated automatically prior to the scan.
Comodo Internet Security Installation Guide | © 2017 Comodo Security Solutions Inc. | All rights reserved 11

Comodo Internet Security - Installation Guide
You can send this task to the background by clicking the 'Send to Background' button. Background tasks can be viewed in the 'Task Manager' interface. Refer to the section 'Manage CIS Tasks' for more details.
If you do not want the scan to continue at this time, click the 'Stop' button.
Any threats found will be shown at the end of the scan. The alert will display the number of threats/infections discovered and provide you with cleaning options.
• If you wish to have a GeekBuddy professional from Comodo remove the threats, click 'Contact Expert'. If you are a first-time user, you will be taken to Comodo GeekBuddy webpage to sign-up for a GeekBuddy subscription. If you have already signed-up for GeekBuddy services, the support chat session will start and
Comodo Internet Security Installation Guide | © 2017 Comodo Security Solutions Inc. | All rights reserved 12

Comodo Internet Security - Installation Guide
a skilled technician will offer to clean your system. For more details on GeekBuddy, see Comodo GeekBuddy.
• If you wish to clean the infections yourself, select 'No, Thanks'. The scan results screen will be displayed. The results show all identified threats and let you choose how you want to handle them. Select 'Clean' to remove the threat from your computer. Refer to 'Processing Infected Files' if you need more help with this.
An example results screen is shown below:
Step 5 - Selecting Network
If your computer is connected to a home or work network, then you are prompted to configure it at the 'New Network Detected!' dialog. The top of the dialog shows whether you are using a wired or wireless connection.
Comodo Internet Security Installation Guide | © 2017 Comodo Security Solutions Inc. | All rights reserved 13

Comodo Internet Security - Installation Guide
• Select your location from the three options
• Select 'Do not detect new networks again' If you are an experienced user that wishes to manually set-up
their own trusted networks (this can be done in 'Network Zones' and through the 'Stealth Ports Wizard').
Step 6 - Restarting Your System
Your computer needs to be restarted in order to complete the installation process.
• If you want to restart your computer immediately, save all your work and click 'Restart Now'.
• If you want to restart the computer at a later time, select the period from the drop-down and click
Comodo Internet Security Installation Guide | © 2017 Comodo Security Solutions Inc. | All rights reserved 14
Comodo Internet Security - Installation Guide
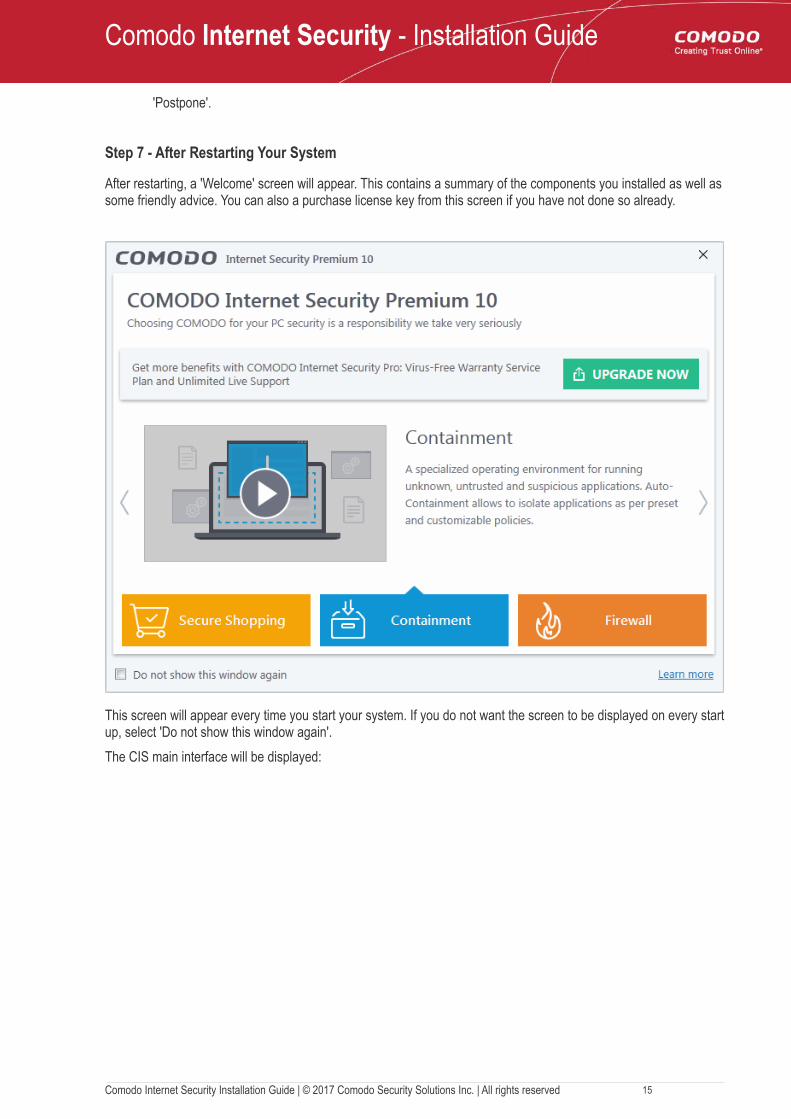
'Postpone'.
Step 7 - After Restarting Your System
After restarting, a 'Welcome' screen will appear. This contains a summary of the components you installed as well assome friendly advice. You can also a purchase license key from this screen if you have not done so already.
This screen will appear every time you start your system. If you do not want the screen to be displayed on every startup, select 'Do not show this window again'.
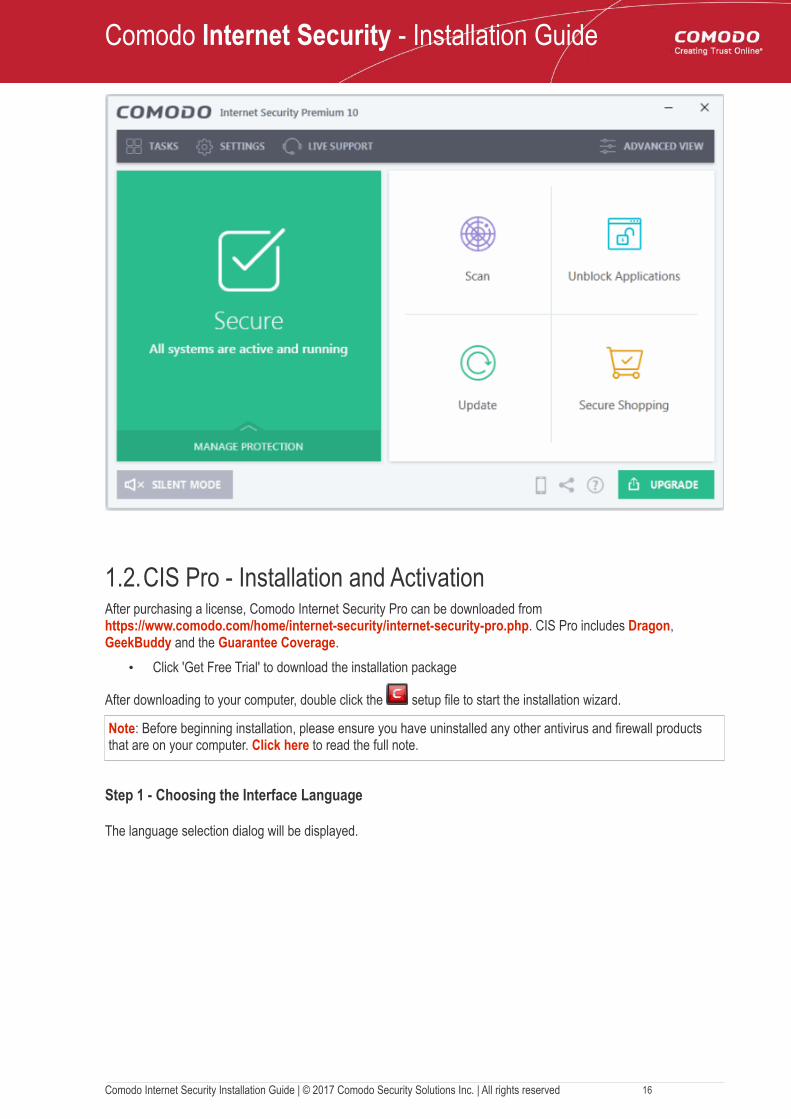
The CIS main interface will be displayed:
Comodo Internet Security Installation Guide | © 2017 Comodo Security Solutions Inc. | All rights reserved 15
Comodo Internet Security - Installation Guide
1.2.CIS Pro - Installation and ActivationAfter purchasing a license, Comodo Internet Security Pro can be downloaded from https://www.comodo.com/home/internet-security/internet-security-pro.php. CIS Pro includes Dragon, GeekBuddy and the Guarantee Coverage.
• Click 'Get Free Trial' to download the installation package
After downloading to your computer, double click the setup file to start the installation wizard.
Note: Before beginning installation, please ensure you have uninstalled any other antivirus and firewall products that are on your computer. Click here to read the full note.
Step 1 - Choosing the Interface Language
The language selection dialog will be displayed.
Comodo Internet Security Installation Guide | © 2017 Comodo Security Solutions Inc. | All rights reserved 16
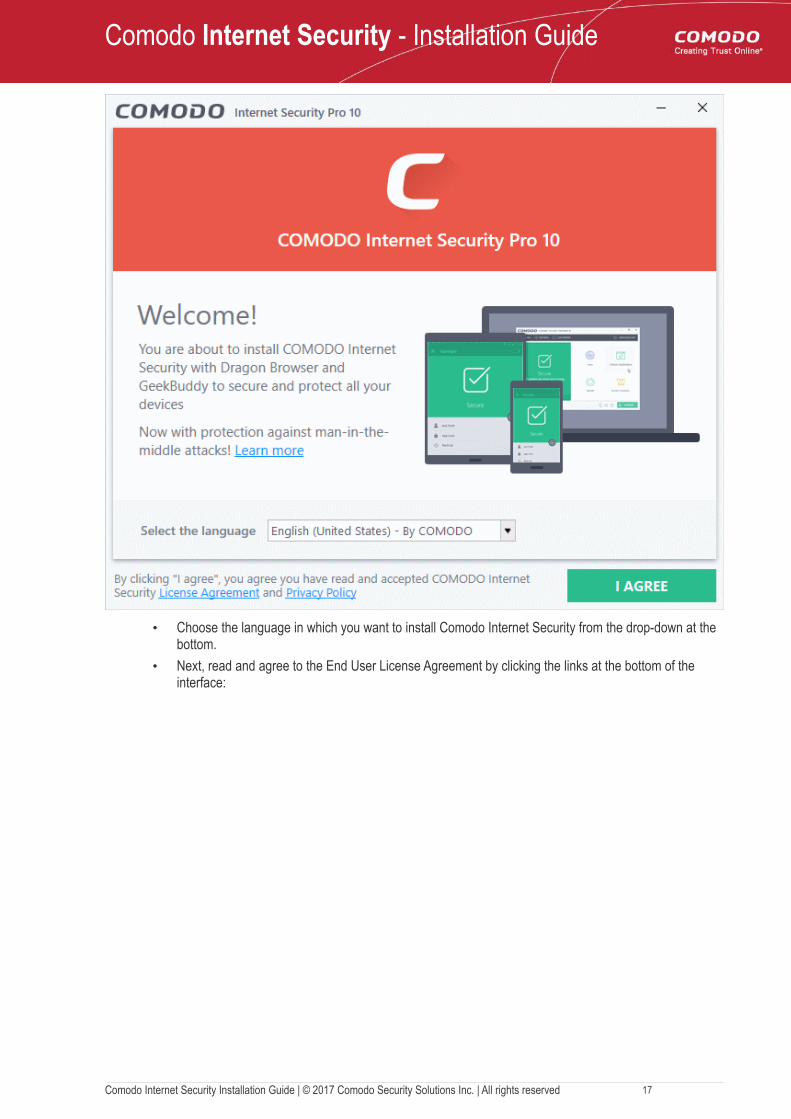
Comodo Internet Security - Installation Guide
• Choose the language in which you want to install Comodo Internet Security from the drop-down at the bottom.
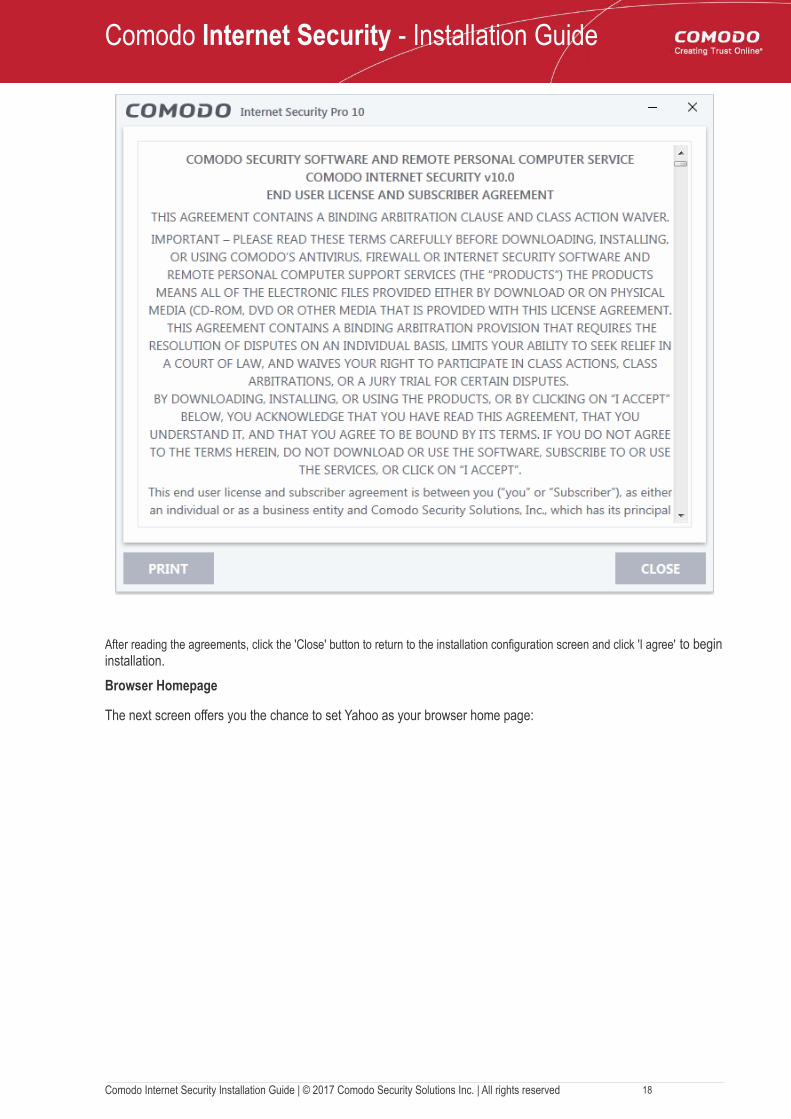
• Next, read and agree to the End User License Agreement by clicking the links at the bottom of the interface:
Comodo Internet Security Installation Guide | © 2017 Comodo Security Solutions Inc. | All rights reserved 17
Comodo Internet Security - Installation Guide
After reading the agreements, click the 'Close' button to return to the installation configuration screen and click 'I agree' to begininstallation.
Browser Homepage
The next screen offers you the chance to set Yahoo as your browser home page:
Comodo Internet Security Installation Guide | © 2017 Comodo Security Solutions Inc. | All rights reserved 18
Comodo Internet Security - Installation Guide
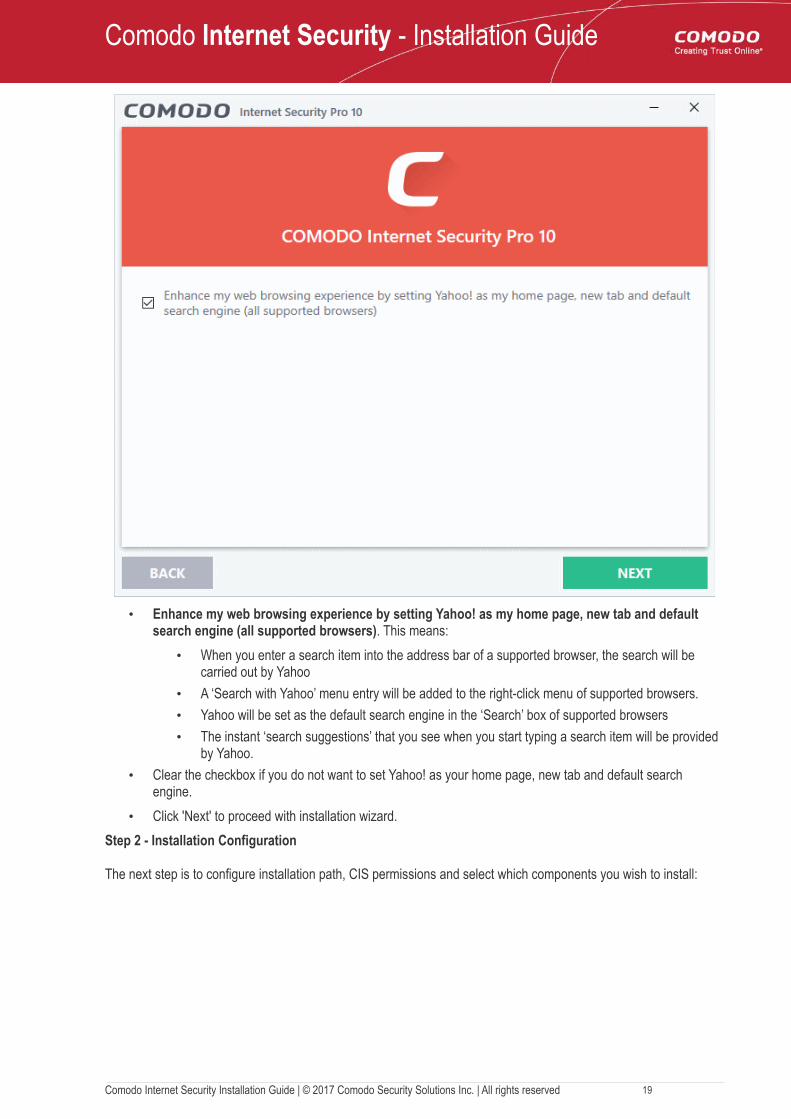
• Enhance my web browsing experience by setting Yahoo! as my home page, new tab and default search engine (all supported browsers). This means:
• When you enter a search item into the address bar of a supported browser, the search will be carried out by Yahoo
• A ‘Search with Yahoo’ menu entry will be added to the right-click menu of supported browsers.
• Yahoo will be set as the default search engine in the ‘Search’ box of supported browsers
• The instant ‘search suggestions’ that you see when you start typing a search item will be provided by Yahoo.
• Clear the checkbox if you do not want to set Yahoo! as your home page, new tab and default search engine.
• Click 'Next' to proceed with installation wizard.
Step 2 - Installation Configuration
The next step is to configure installation path, CIS permissions and select which components you wish to install:
Comodo Internet Security Installation Guide | © 2017 Comodo Security Solutions Inc. | All rights reserved 19
Comodo Internet Security - Installation Guide
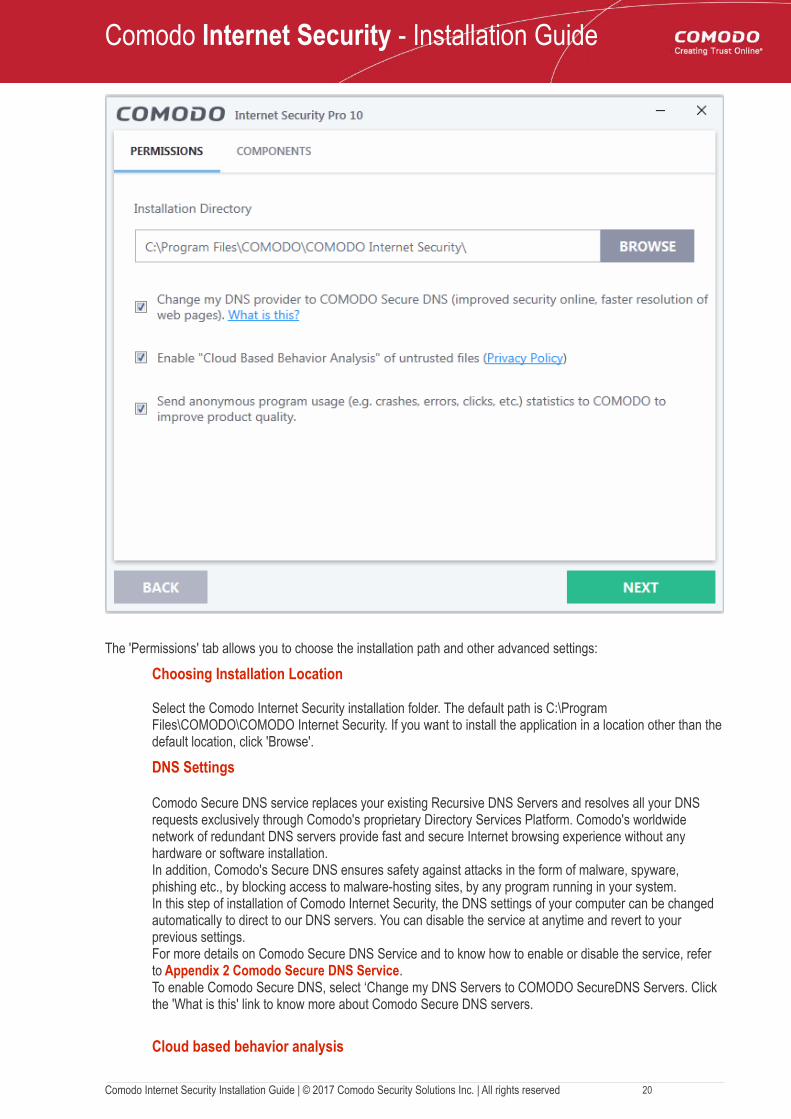
The 'Permissions' tab allows you to choose the installation path and other advanced settings:
Choosing Installation Location
Select the Comodo Internet Security installation folder. The default path is C:\Program Files\COMODO\COMODO Internet Security. If you want to install the application in a location other than thedefault location, click 'Browse'.
DNS Settings
Comodo Secure DNS service replaces your existing Recursive DNS Servers and resolves all your DNS requests exclusively through Comodo's proprietary Directory Services Platform. Comodo's worldwide network of redundant DNS servers provide fast and secure Internet browsing experience without any hardware or software installation. In addition, Comodo's Secure DNS ensures safety against attacks in the form of malware, spyware, phishing etc., by blocking access to malware-hosting sites, by any program running in your system.In this step of installation of Comodo Internet Security, the DNS settings of your computer can be changed automatically to direct to our DNS servers. You can disable the service at anytime and revert to your previous settings. For more details on Comodo Secure DNS Service and to know how to enable or disable the service, refer to Appendix 2 Comodo Secure DNS Service.To enable Comodo Secure DNS, select ‘Change my DNS Servers to COMODO SecureDNS Servers. Click the 'What is this' link to know more about Comodo Secure DNS servers.
Cloud based behavior analysis
Comodo Internet Security Installation Guide | © 2017 Comodo Security Solutions Inc. | All rights reserved 20
Comodo Internet Security - Installation Guide
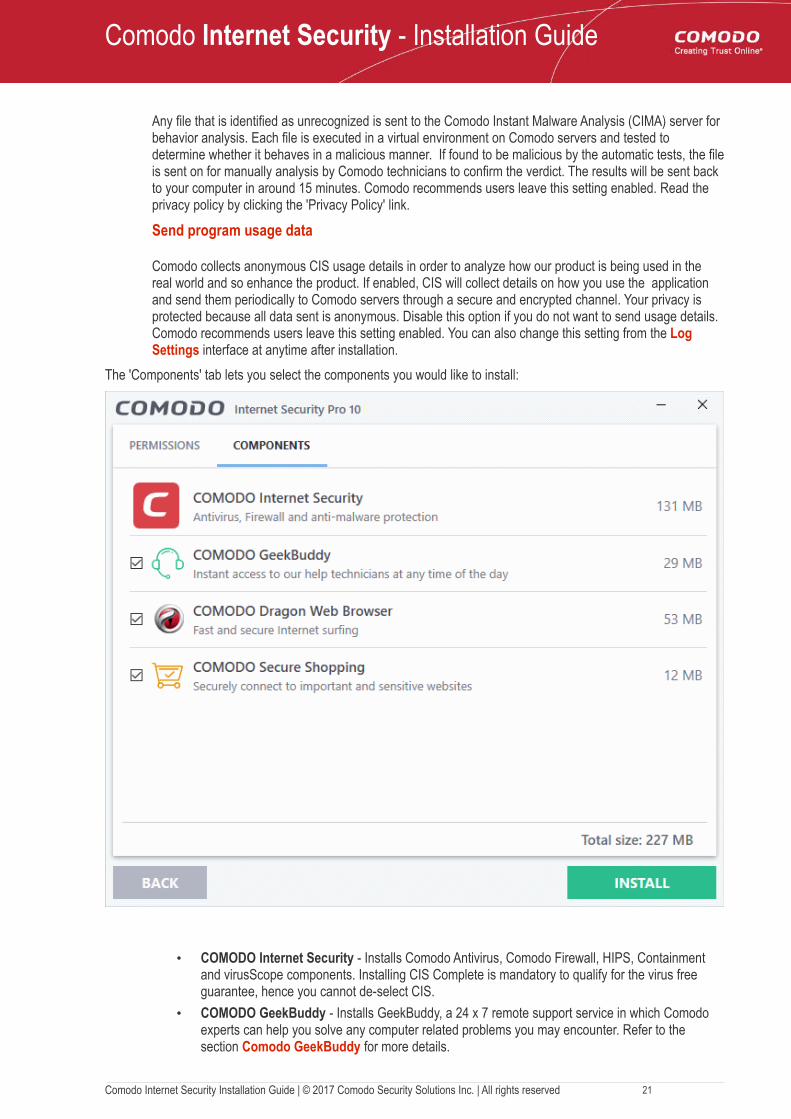
Any file that is identified as unrecognized is sent to the Comodo Instant Malware Analysis (CIMA) server for behavior analysis. Each file is executed in a virtual environment on Comodo servers and tested to determine whether it behaves in a malicious manner. If found to be malicious by the automatic tests, the fileis sent on for manually analysis by Comodo technicians to confirm the verdict. The results will be sent back to your computer in around 15 minutes. Comodo recommends users leave this setting enabled. Read the privacy policy by clicking the 'Privacy Policy' link.
Send program usage data
Comodo collects anonymous CIS usage details in order to analyze how our product is being used in the real world and so enhance the product. If enabled, CIS will collect details on how you use the application and send them periodically to Comodo servers through a secure and encrypted channel. Your privacy is protected because all data sent is anonymous. Disable this option if you do not want to send usage details. Comodo recommends users leave this setting enabled. You can also change this setting from the Log Settings interface at anytime after installation.
The 'Components' tab lets you select the components you would like to install:
• COMODO Internet Security - Installs Comodo Antivirus, Comodo Firewall, HIPS, Containment and virusScope components. Installing CIS Complete is mandatory to qualify for the virus free guarantee, hence you cannot de-select CIS.
• COMODO GeekBuddy - Installs GeekBuddy, a 24 x 7 remote support service in which Comodo experts can help you solve any computer related problems you may encounter. Refer to the section Comodo GeekBuddy for more details.
Comodo Internet Security Installation Guide | © 2017 Comodo Security Solutions Inc. | All rights reserved 21
Comodo Internet Security - Installation Guide
• Comodo Dragon Web Browser - Installs Dragon, a fast and versatile internet browser based on Chromium technology and infused with Comodo's unparalleled level of security. Refer to the section Dragon Browser for more details.
• COMODO Secure Shopping - Installs Comodo Secure Shopping, a security hardened virtual environment which offers complete protection for online banking and shopping. Refer to the section Comodo Secure Shopping for more details.
• Once you are satisfied with your settings, click 'Install' button
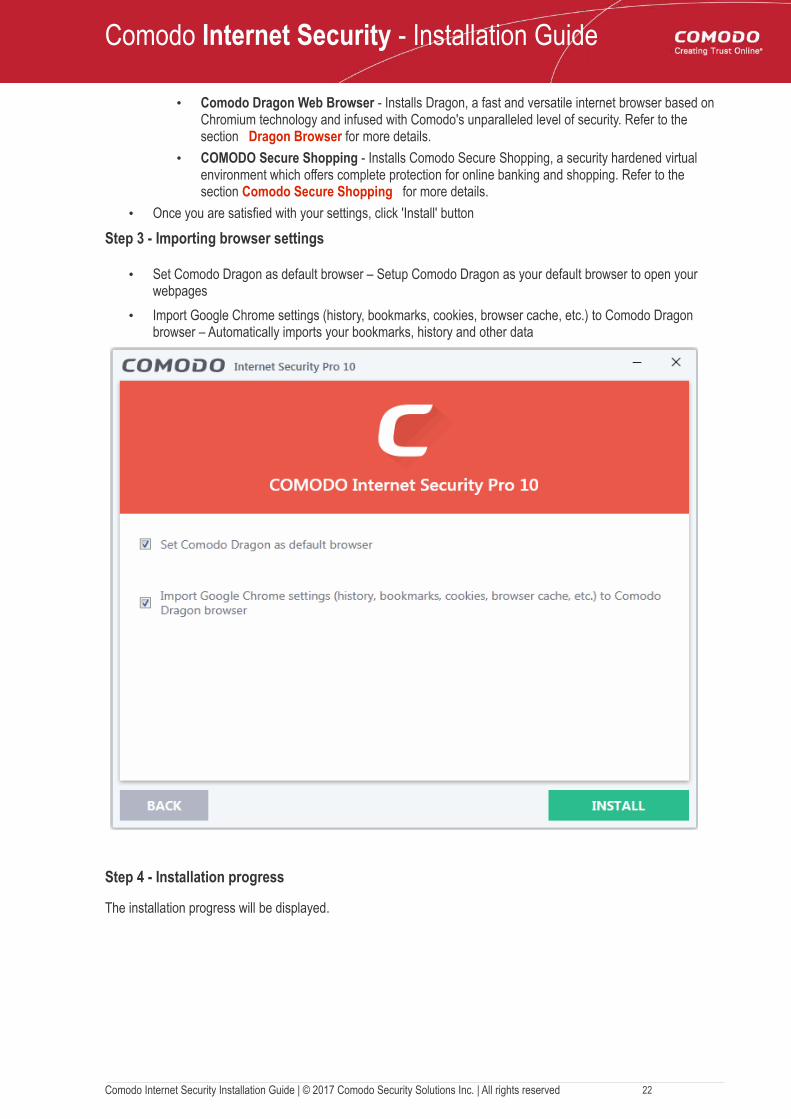
Step 3 - Importing browser settings
• Set Comodo Dragon as default browser – Setup Comodo Dragon as your default browser to open your webpages
• Import Google Chrome settings (history, bookmarks, cookies, browser cache, etc.) to Comodo Dragon browser – Automatically imports your bookmarks, history and other data
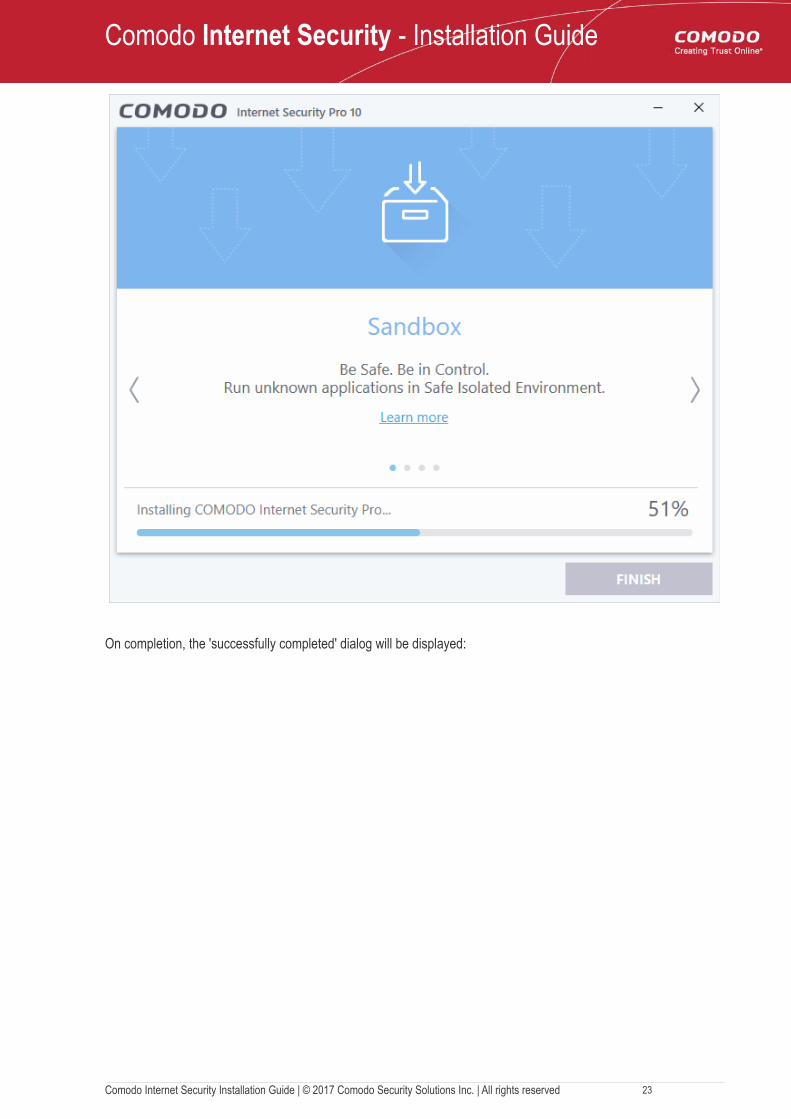
Step 4 - Installation progress
The installation progress will be displayed.
Comodo Internet Security Installation Guide | © 2017 Comodo Security Solutions Inc. | All rights reserved 22
Comodo Internet Security - Installation Guide
On completion, the 'successfully completed' dialog will be displayed:
Comodo Internet Security Installation Guide | © 2017 Comodo Security Solutions Inc. | All rights reserved 23
Comodo Internet Security - Installation Guide
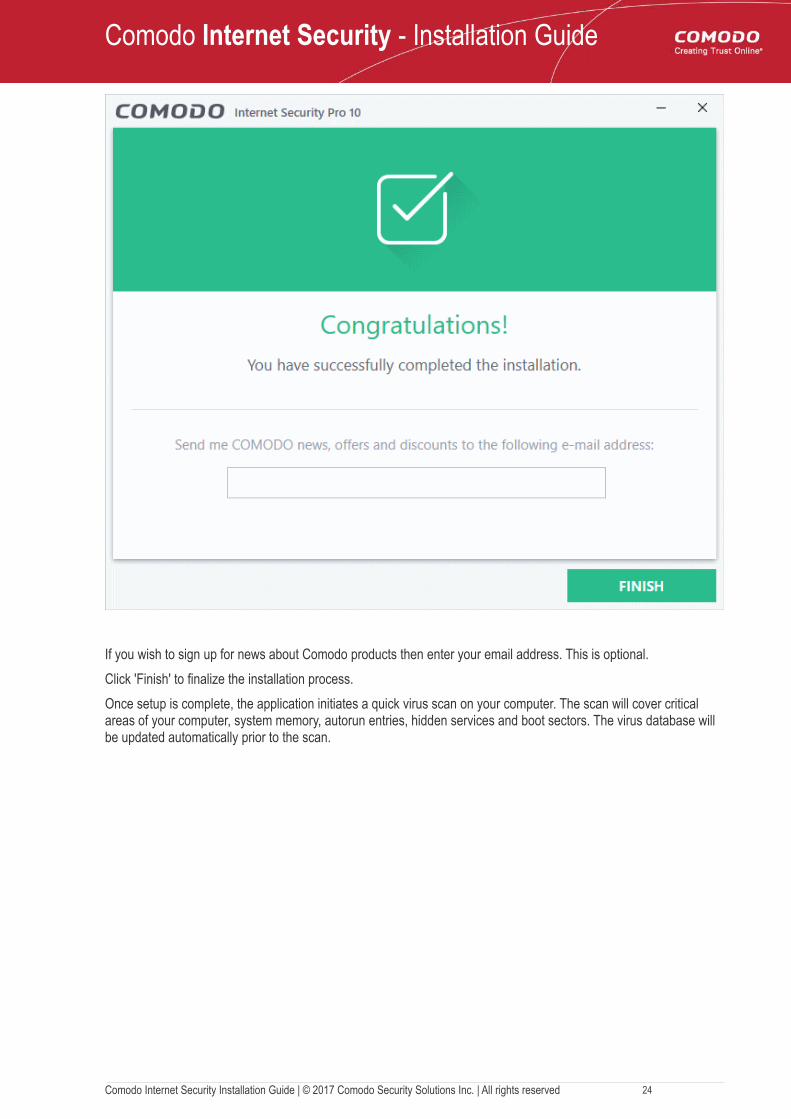
If you wish to sign up for news about Comodo products then enter your email address. This is optional.
Click 'Finish' to finalize the installation process.
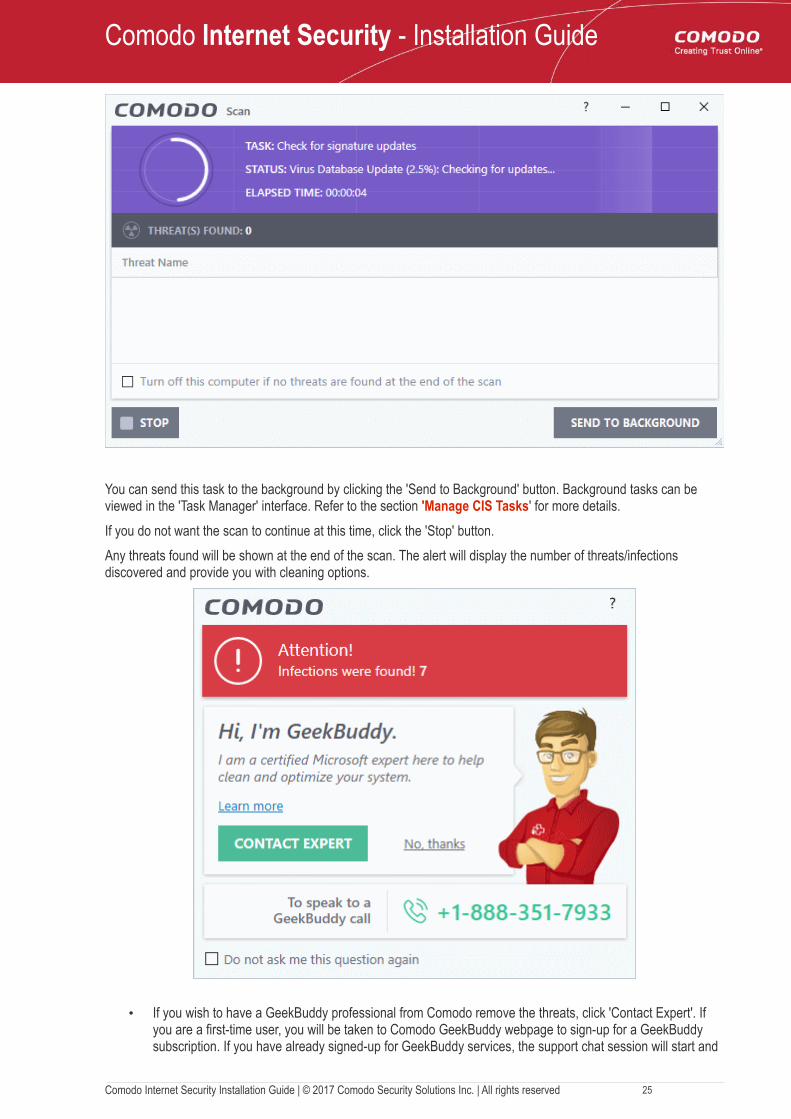
Once setup is complete, the application initiates a quick virus scan on your computer. The scan will cover critical areas of your computer, system memory, autorun entries, hidden services and boot sectors. The virus database will be updated automatically prior to the scan.
Comodo Internet Security Installation Guide | © 2017 Comodo Security Solutions Inc. | All rights reserved 24
Comodo Internet Security - Installation Guide
You can send this task to the background by clicking the 'Send to Background' button. Background tasks can be viewed in the 'Task Manager' interface. Refer to the section 'Manage CIS Tasks' for more details.
If you do not want the scan to continue at this time, click the 'Stop' button.
Any threats found will be shown at the end of the scan. The alert will display the number of threats/infections discovered and provide you with cleaning options.
• If you wish to have a GeekBuddy professional from Comodo remove the threats, click 'Contact Expert'. If you are a first-time user, you will be taken to Comodo GeekBuddy webpage to sign-up for a GeekBuddy subscription. If you have already signed-up for GeekBuddy services, the support chat session will start and
Comodo Internet Security Installation Guide | © 2017 Comodo Security Solutions Inc. | All rights reserved 25

Comodo Internet Security - Installation Guide
a skilled technician will offer to clean your system. For more details on GeekBuddy, see Comodo GeekBuddy.
• If you wish to clean the infections yourself, select 'No, Thanks'. The scan results screen will be displayed. The results show all identified threats and let you choose how you want to handle them. Select 'Clean' to remove the threat from your computer. Refer to 'Processing Infected Files' if you need more help with this.
An example results screen is shown below:
Step 5 - Selecting Network
If your computer is connected to a home or work network, then you are prompted to configure it at the 'New Network Detected!' dialog. The top of the dialog shows whether you are using a wired or wirelss connection.
Comodo Internet Security Installation Guide | © 2017 Comodo Security Solutions Inc. | All rights reserved 26

Comodo Internet Security - Installation Guide
• Select your location from the three options
• Select 'Do not detect new networks again' If you are an experienced user that wishes to manually set-up
their own trusted networks (this can be done in 'Network Zones' and through the 'Stealth Ports Wizard').
Step 6 - Restarting Your System
Your computer needs to be restarted in order to complete the installation process.
• If you want to restart your computer immediately, save all your work and click 'Restart Now'.
• If you want to restart the computer at a later time, select the period from the drop-down and click
Comodo Internet Security Installation Guide | © 2017 Comodo Security Solutions Inc. | All rights reserved 27
Comodo Internet Security - Installation Guide
'Postpone'.
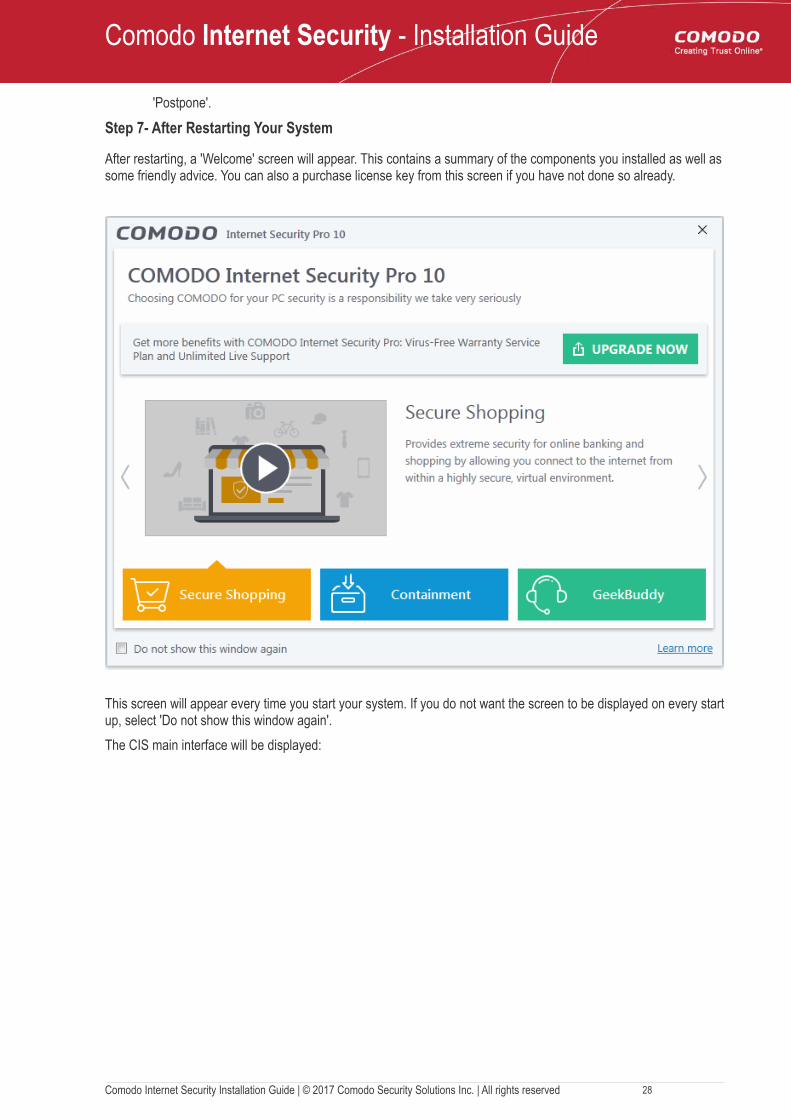
Step 7- After Restarting Your System
After restarting, a 'Welcome' screen will appear. This contains a summary of the components you installed as well assome friendly advice. You can also a purchase license key from this screen if you have not done so already.
This screen will appear every time you start your system. If you do not want the screen to be displayed on every startup, select 'Do not show this window again'.
The CIS main interface will be displayed:
Comodo Internet Security Installation Guide | © 2017 Comodo Security Solutions Inc. | All rights reserved 28

Comodo Internet Security - Installation Guide
Important Note: After installation, you need to activate your CIS Pro license.
• For help to activate your license, see Activating Your License.
• For help to activate your guarantee, see Activating Your Guarantee Coverage.
1.3. CIS Complete - Installation and ActivationCIS Complete Web Installer
Comodo Internet Security Complete Trial can be downloaded from https://www.comodo.com/home/internet-security/internet-security-complete.php and includes Dragon Browser, GeekBuddy, Cloud Backup, TrustConnect, Secure Shopping and the Comodo Guarantee.
You can subscribe for the CIS Complete package you wish from the same page. Once you complete your purchase process, the license key will be sent to you via email. You can activate your license after installation of the CIS Complete trial package.
• Click 'Get Free Trial' to download the installation package
After downloading the required Comodo Internet Security setup file to your local hard drive, double click on the setup file to start the installation wizard.
Note: Before beginning installation, please ensure you have uninstalled any other antivirus and firewall products that are on your computer. Click here to read the full note.
CIS Complete DVDIf you have purchased CIS Complete DVD, insert the DVD in to your DVD drive. The disk will autorun and the installation will begin automatically.
Comodo Internet Security Installation Guide | © 2017 Comodo Security Solutions Inc. | All rights reserved 29
Comodo Internet Security - Installation Guide
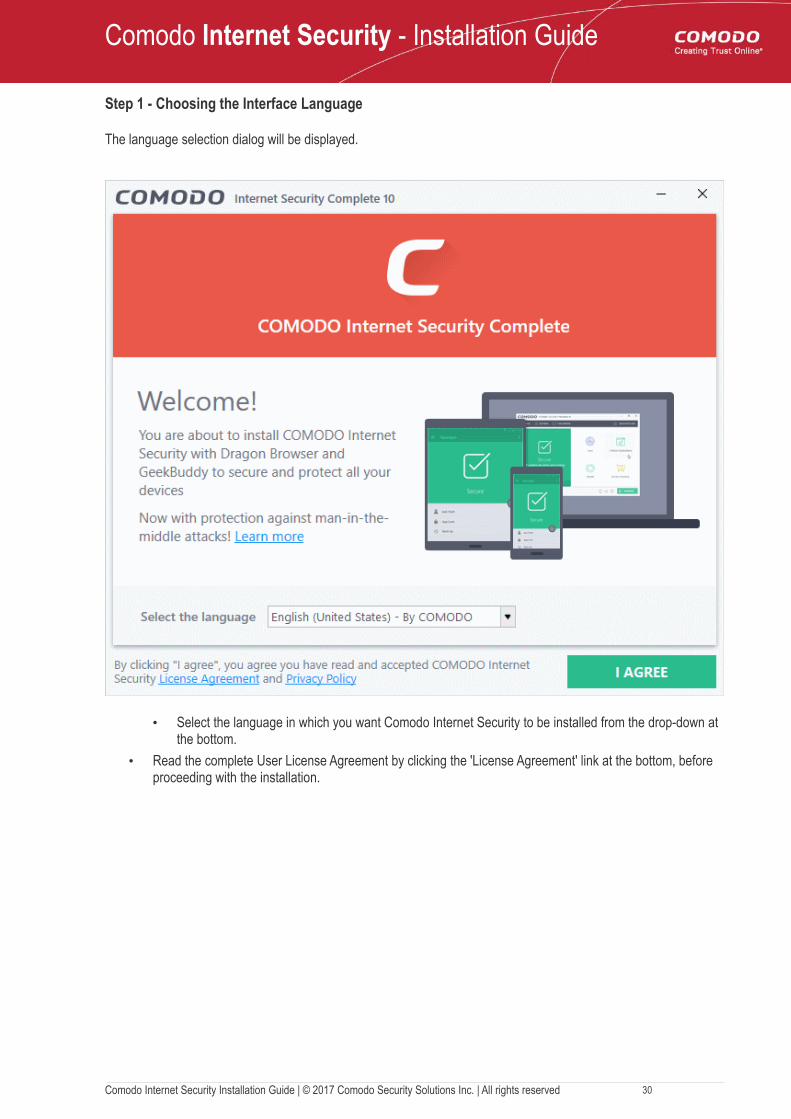
Step 1 - Choosing the Interface Language
The language selection dialog will be displayed.
• Select the language in which you want Comodo Internet Security to be installed from the drop-down at the bottom.
• Read the complete User License Agreement by clicking the 'License Agreement' link at the bottom, before proceeding with the installation.
Comodo Internet Security Installation Guide | © 2017 Comodo Security Solutions Inc. | All rights reserved 30
Comodo Internet Security - Installation Guide
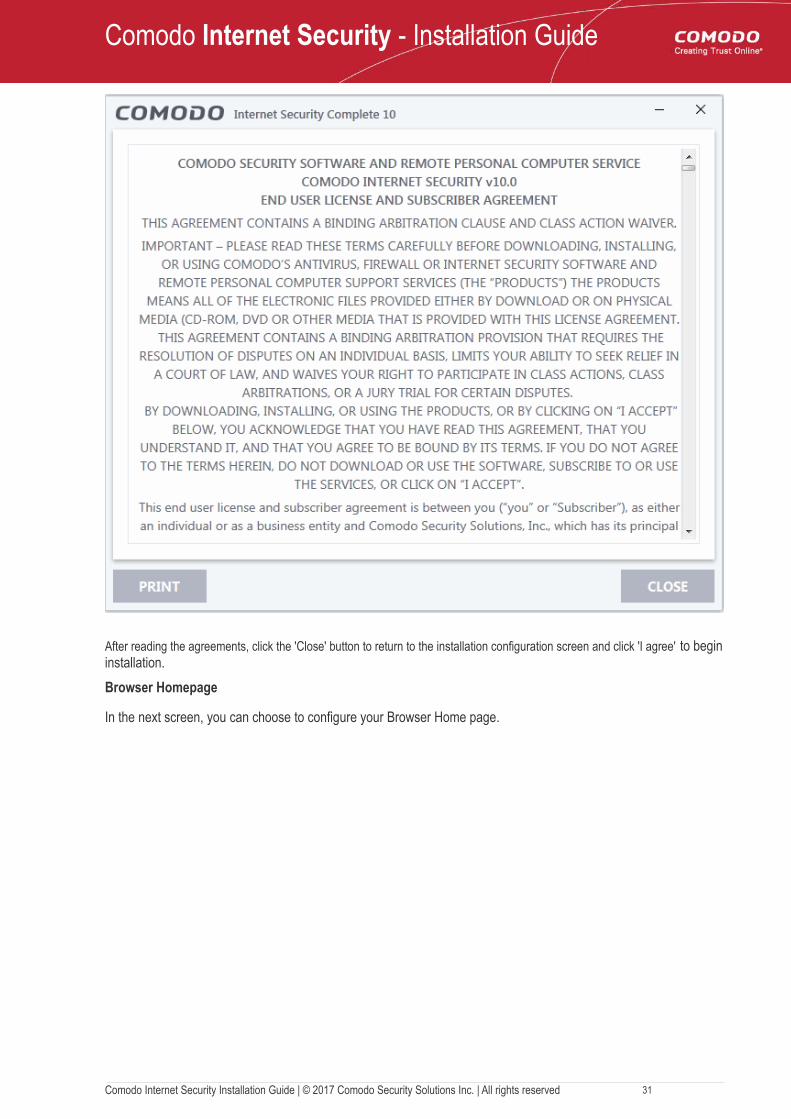
After reading the agreements, click the 'Close' button to return to the installation configuration screen and click 'I agree' to begininstallation.
Browser Homepage
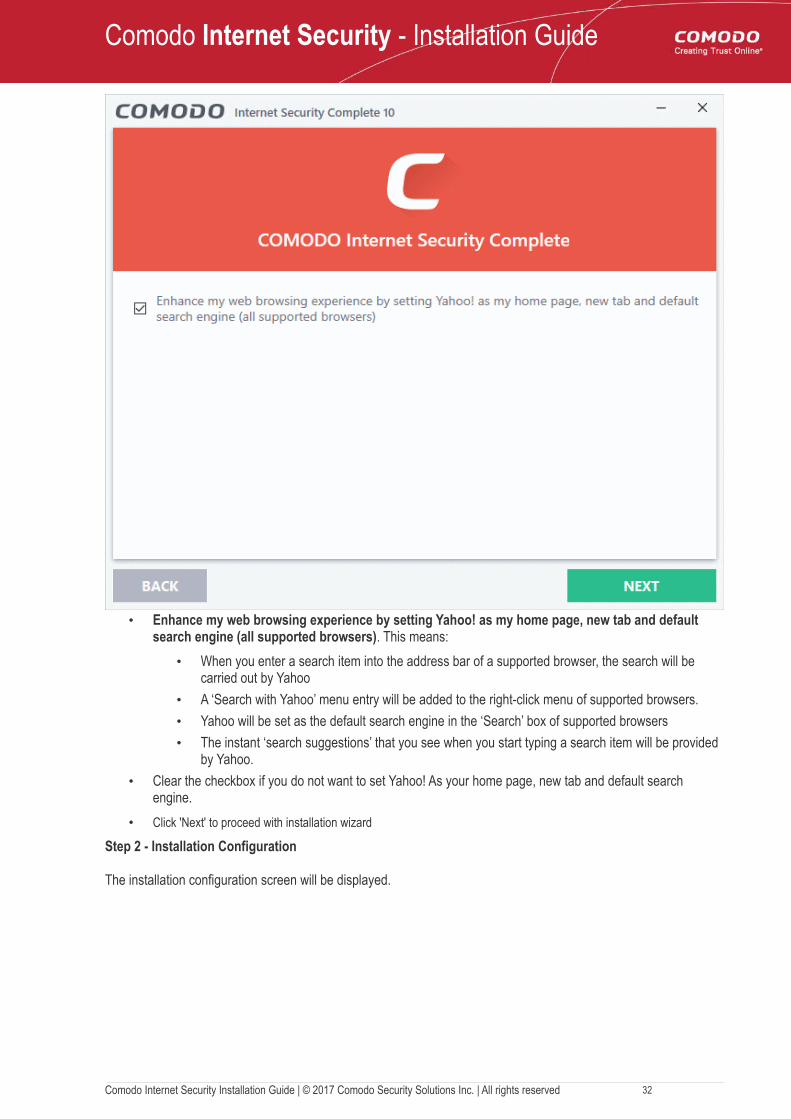
In the next screen, you can choose to configure your Browser Home page.
Comodo Internet Security Installation Guide | © 2017 Comodo Security Solutions Inc. | All rights reserved 31
Comodo Internet Security - Installation Guide
• Enhance my web browsing experience by setting Yahoo! as my home page, new tab and default search engine (all supported browsers). This means:
• When you enter a search item into the address bar of a supported browser, the search will be carried out by Yahoo
• A ‘Search with Yahoo’ menu entry will be added to the right-click menu of supported browsers.
• Yahoo will be set as the default search engine in the ‘Search’ box of supported browsers
• The instant ‘search suggestions’ that you see when you start typing a search item will be provided by Yahoo.
• Clear the checkbox if you do not want to set Yahoo! As your home page, new tab and default search engine.
• Click 'Next' to proceed with installation wizard
Step 2 - Installation Configuration
The installation configuration screen will be displayed.
Comodo Internet Security Installation Guide | © 2017 Comodo Security Solutions Inc. | All rights reserved 32
Comodo Internet Security - Installation Guide
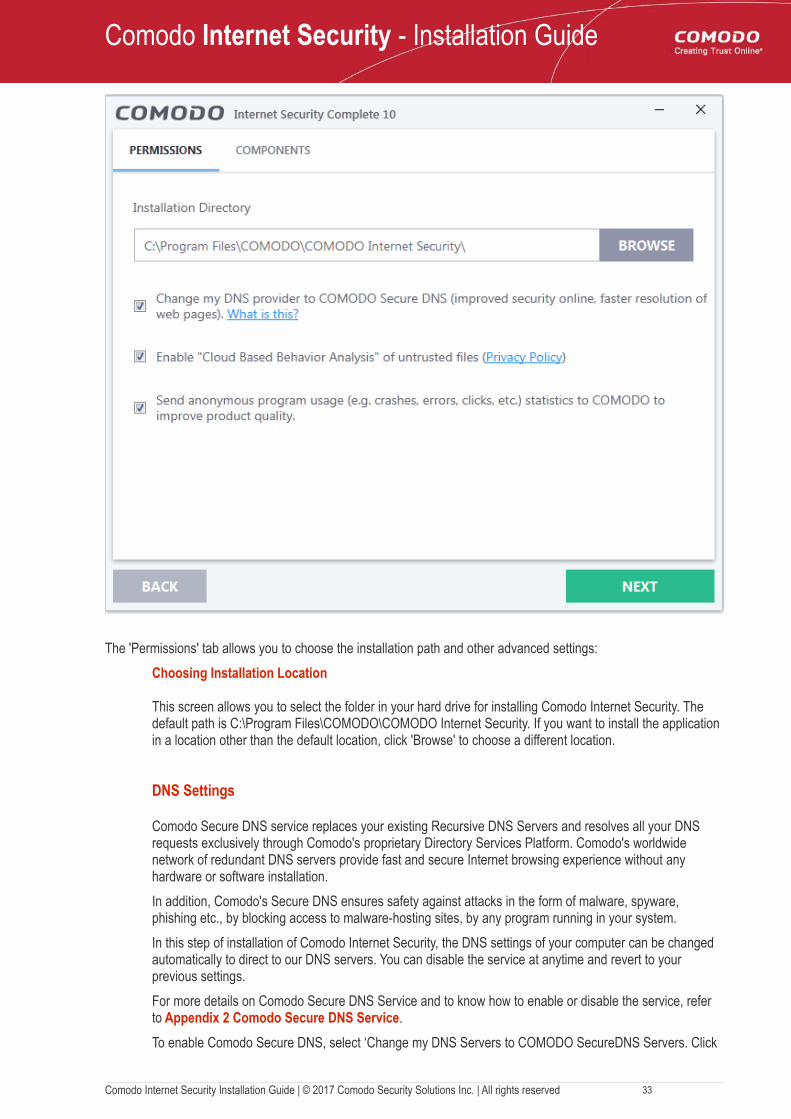
The 'Permissions' tab allows you to choose the installation path and other advanced settings:
Choosing Installation Location
This screen allows you to select the folder in your hard drive for installing Comodo Internet Security. The default path is C:\Program Files\COMODO\COMODO Internet Security. If you want to install the application in a location other than the default location, click 'Browse' to choose a different location.
DNS Settings
Comodo Secure DNS service replaces your existing Recursive DNS Servers and resolves all your DNS requests exclusively through Comodo's proprietary Directory Services Platform. Comodo's worldwide network of redundant DNS servers provide fast and secure Internet browsing experience without any hardware or software installation.
In addition, Comodo's Secure DNS ensures safety against attacks in the form of malware, spyware, phishing etc., by blocking access to malware-hosting sites, by any program running in your system.
In this step of installation of Comodo Internet Security, the DNS settings of your computer can be changed automatically to direct to our DNS servers. You can disable the service at anytime and revert to your previous settings.
For more details on Comodo Secure DNS Service and to know how to enable or disable the service, refer to Appendix 2 Comodo Secure DNS Service.
To enable Comodo Secure DNS, select ‘Change my DNS Servers to COMODO SecureDNS Servers. Click
Comodo Internet Security Installation Guide | © 2017 Comodo Security Solutions Inc. | All rights reserved 33
Comodo Internet Security - Installation Guide
the 'What is this' link to know more about Comodo Secure DNS servers.
Cloud based behavior analysis
Any file that is identified as unrecognized is sent to the Comodo Instant Malware Analysis (CIMA) server for behavior analysis. Each file is executed in a virtual environment on Comodo servers and tested to determine whether it behaves in a malicious manner. If yes, the file is then manually analyzed by Comodo technicians to confirm whether it is a malicious file or not. The results will be sent back to your computer in around 15 minutes. Comodo recommends users leave this setting enabled. Read the privacy policy by clicking the 'Privacy Policy' link.
Send program usage data
Comodo collects collects the usage details from millions of CIS users to analyze their usage patterns for the continual enhancement of the product. Your CIS instillation will collect details on how you use the application and send them periodically to Comodo servers through a secure and encrypted channel. Also your privacy is protected as this data is sent anonymous. This data will be useful to the engineers and developers at Comodo to identify the areas to be developed further for delivering the best Internet Security product. Disable this option if you do not want your usage details to be sent to Comodo. Comodo recommends users leave this setting enabled. You can change this setting from Logn Settings interface, at anytime after installation.
• Please review and/or modify the settings in the dialog.
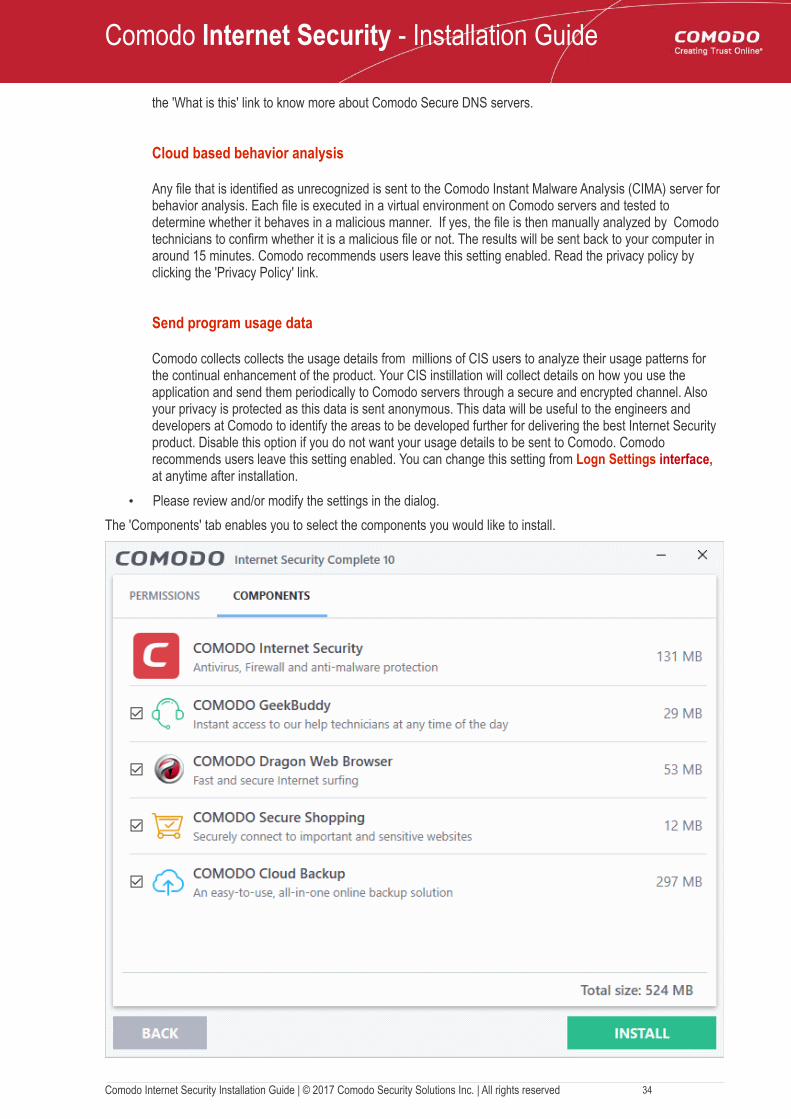
The 'Components' tab enables you to select the components you would like to install.
Comodo Internet Security Installation Guide | © 2017 Comodo Security Solutions Inc. | All rights reserved 34
Comodo Internet Security - Installation Guide
• COMODO Internet Security - Installs Comodo Antivirus, Comodo Firewall, HIPS, Containment and VirusScope components. Installing CIS Complete is mandatory to qualify for the virus free guarantee, henceyou cannot de-select CIS.
• COMODO GeekBuddy - Installs GeekBuddy, a 24 x 7 remote support service in which Comodo experts can help you solve any computer related problems you may encounter. Refer to the section Comodo GeekBuddy for more details.
• COMODO Dragon Web Browser - Installs Dragon, a fast and versatile internet browser based on Chromium technology and infused with Comodo's unparalleled level of security. Refer to the section Dragon Browser for more details.
• COMODO Secure Shopping - Installs Comodo Secure Shopping, a security hardened virtual environment which offers complete protection for online banking and shopping. Refer to the section Comodo Secure Shopping for more details.
• Comodo Cloud Backup - Selecting this option installs Acronis Comodo Cloud Backup, a powerful and easy-to-use desktop application that helps home and business users protect their valuable data against damage or loss. Refer to the section Comodo Backup for more details.
• Once you are satisfied with your settings, click 'Install' button
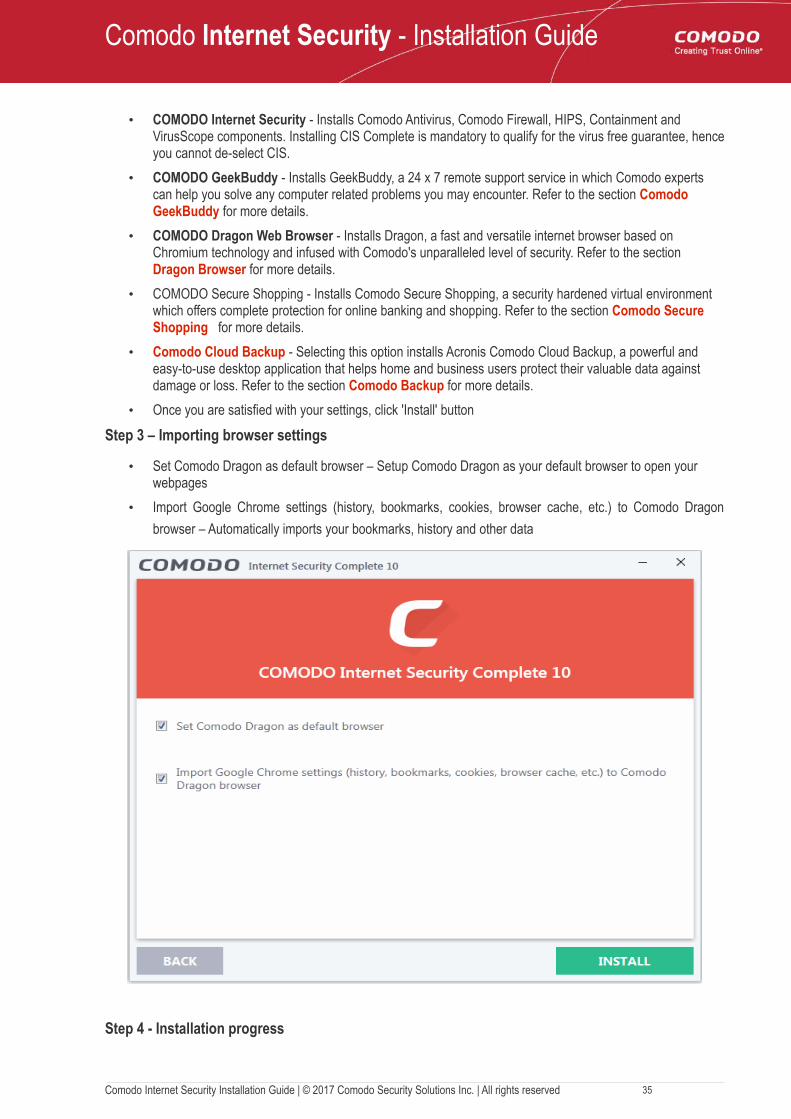
Step 3 – Importing browser settings
• Set Comodo Dragon as default browser – Setup Comodo Dragon as your default browser to open your webpages
• Import Google Chrome settings (history, bookmarks, cookies, browser cache, etc.) to Comodo Dragon
browser – Automatically imports your bookmarks, history and other data
Step 4 - Installation progress
Comodo Internet Security Installation Guide | © 2017 Comodo Security Solutions Inc. | All rights reserved 35
Comodo Internet Security - Installation Guide
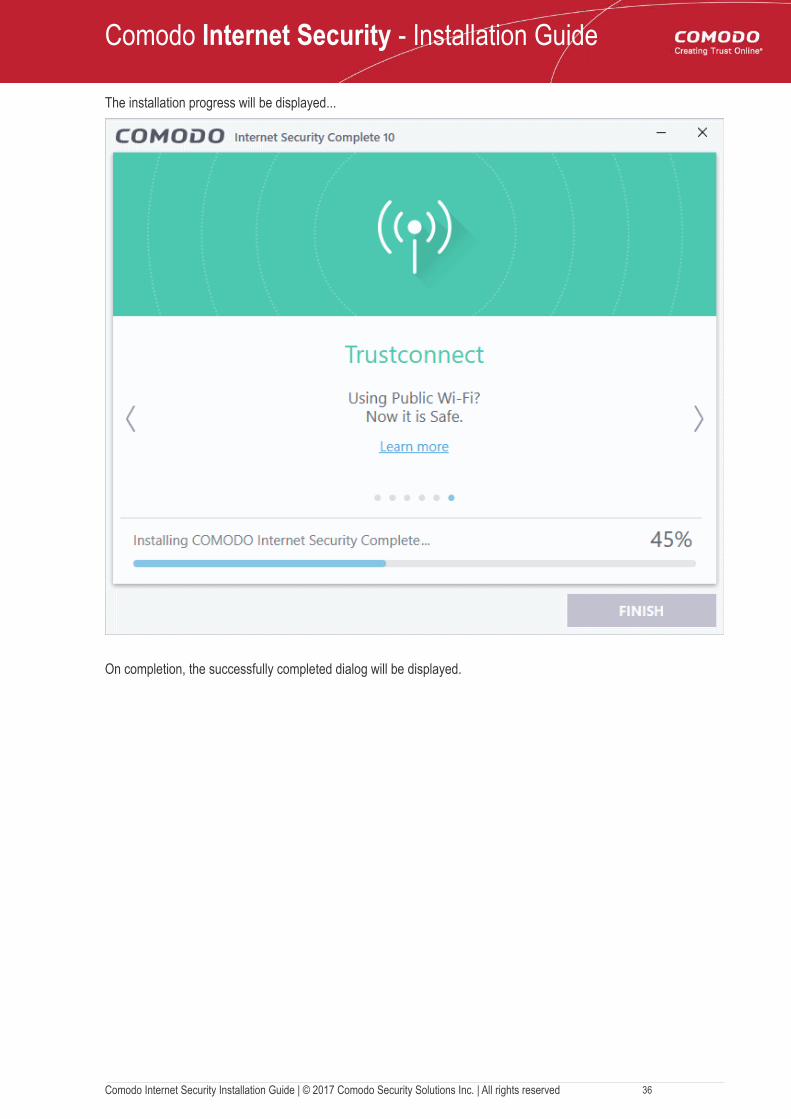
The installation progress will be displayed...
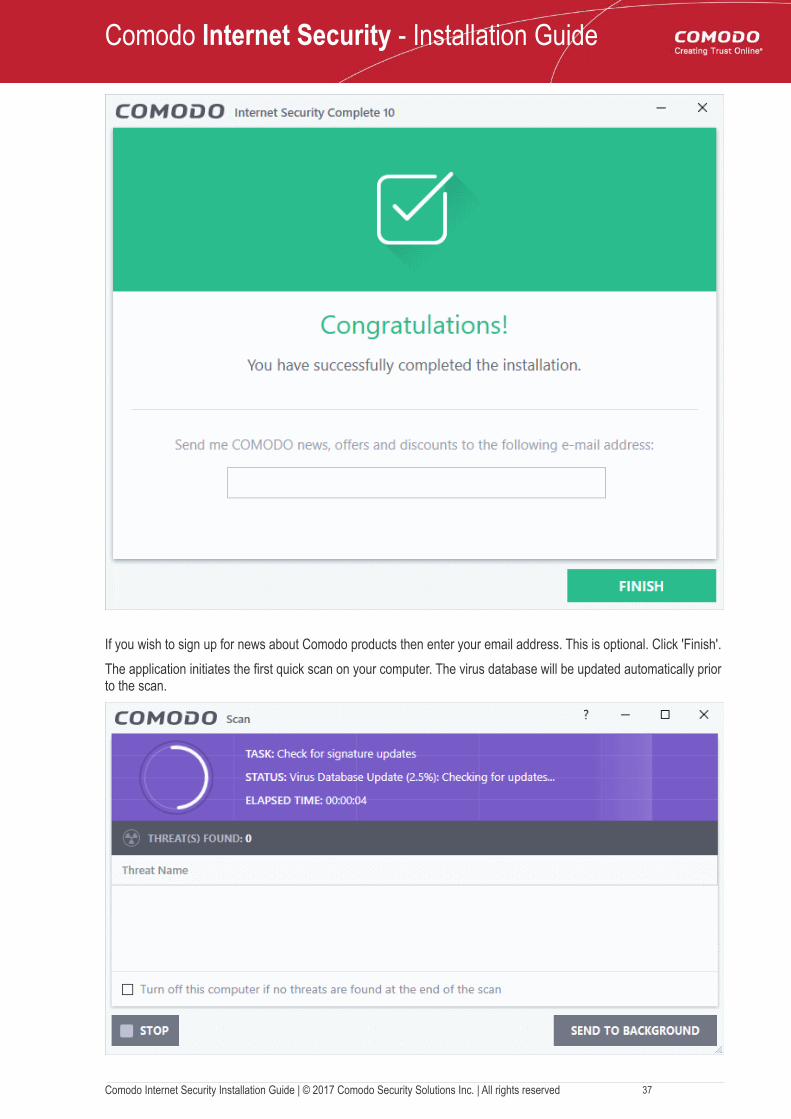
On completion, the successfully completed dialog will be displayed.
Comodo Internet Security Installation Guide | © 2017 Comodo Security Solutions Inc. | All rights reserved 36
Comodo Internet Security - Installation Guide
If you wish to sign up for news about Comodo products then enter your email address. This is optional. Click 'Finish'.
The application initiates the first quick scan on your computer. The virus database will be updated automatically priorto the scan.
Comodo Internet Security Installation Guide | © 2017 Comodo Security Solutions Inc. | All rights reserved 37
Comodo Internet Security - Installation Guide
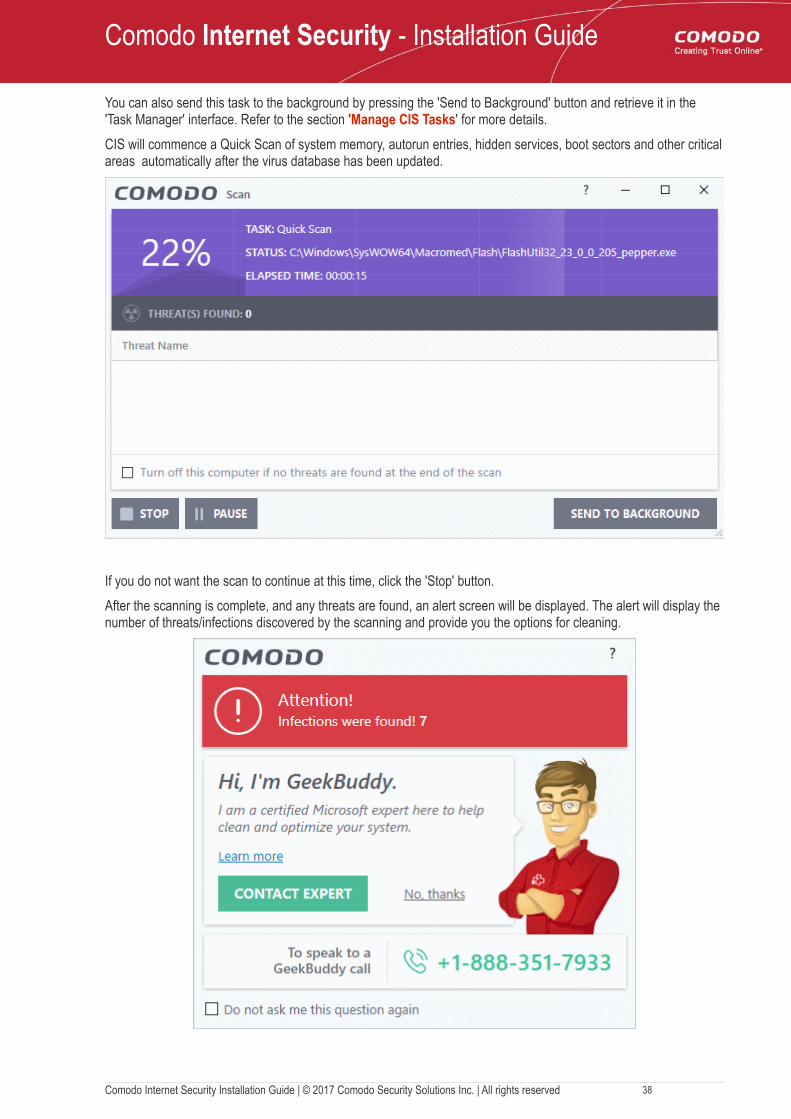
You can also send this task to the background by pressing the 'Send to Background' button and retrieve it in the 'Task Manager' interface. Refer to the section 'Manage CIS Tasks' for more details.
CIS will commence a Quick Scan of system memory, autorun entries, hidden services, boot sectors and other criticalareas automatically after the virus database has been updated.
If you do not want the scan to continue at this time, click the 'Stop' button.
After the scanning is complete, and any threats are found, an alert screen will be displayed. The alert will display the number of threats/infections discovered by the scanning and provide you the options for cleaning.
Comodo Internet Security Installation Guide | © 2017 Comodo Security Solutions Inc. | All rights reserved 38
Comodo Internet Security - Installation Guide
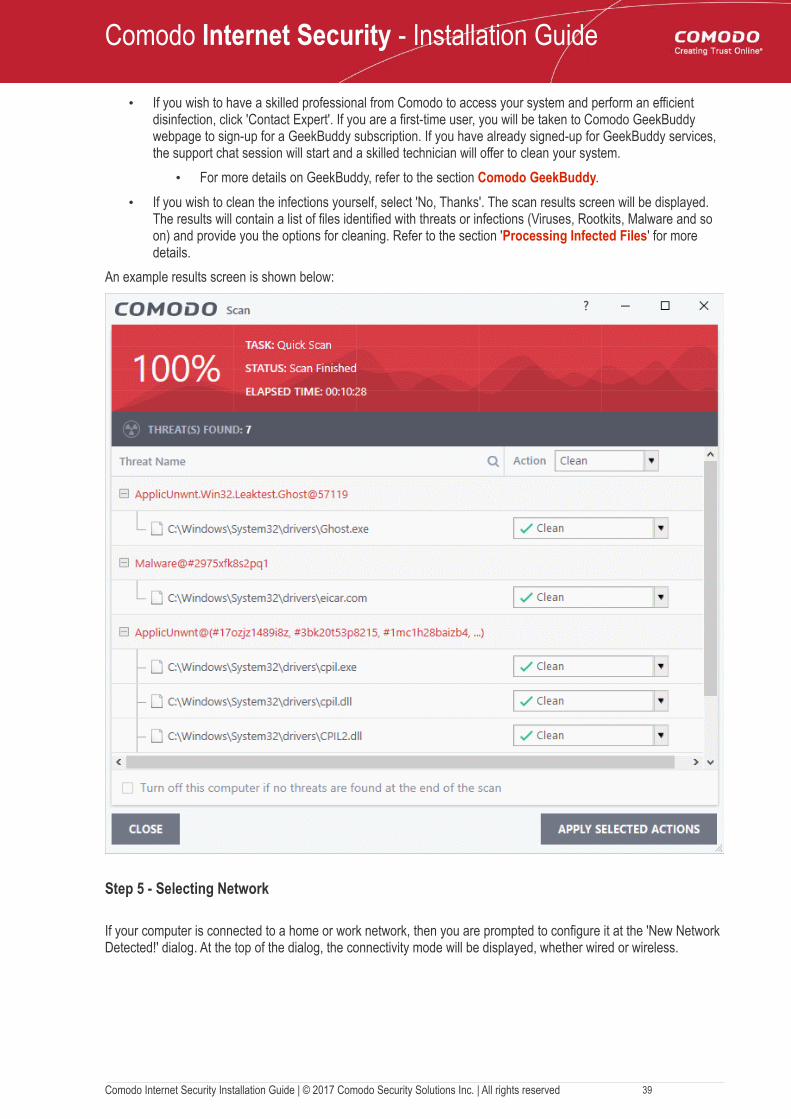
• If you wish to have a skilled professional from Comodo to access your system and perform an efficient disinfection, click 'Contact Expert'. If you are a first-time user, you will be taken to Comodo GeekBuddy webpage to sign-up for a GeekBuddy subscription. If you have already signed-up for GeekBuddy services, the support chat session will start and a skilled technician will offer to clean your system.
• For more details on GeekBuddy, refer to the section Comodo GeekBuddy.
• If you wish to clean the infections yourself, select 'No, Thanks'. The scan results screen will be displayed. The results will contain a list of files identified with threats or infections (Viruses, Rootkits, Malware and so on) and provide you the options for cleaning. Refer to the section 'Processing Infected Files' for more details.
An example results screen is shown below:
Step 5 - Selecting Network
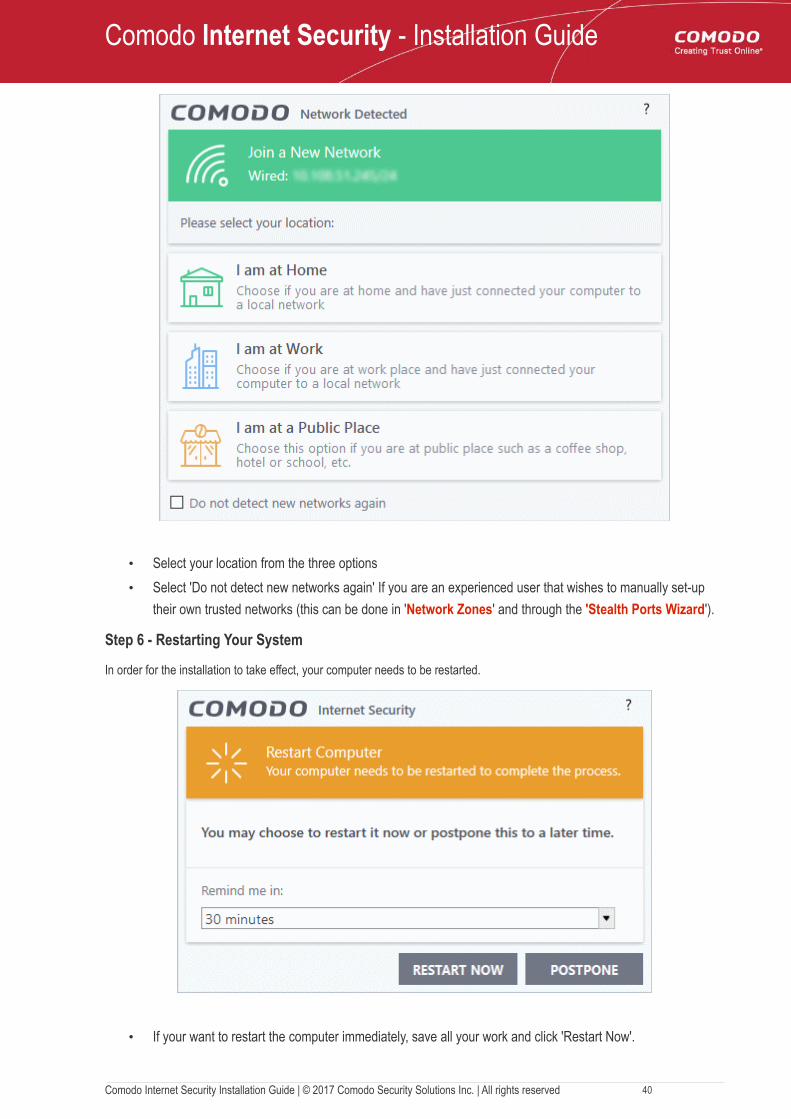
If your computer is connected to a home or work network, then you are prompted to configure it at the 'New Network Detected!' dialog. At the top of the dialog, the connectivity mode will be displayed, whether wired or wireless.
Comodo Internet Security Installation Guide | © 2017 Comodo Security Solutions Inc. | All rights reserved 39
Comodo Internet Security - Installation Guide
• Select your location from the three options
• Select 'Do not detect new networks again' If you are an experienced user that wishes to manually set-up
their own trusted networks (this can be done in 'Network Zones' and through the 'Stealth Ports Wizard').
Step 6 - Restarting Your System
In order for the installation to take effect, your computer needs to be restarted.
• If your want to restart the computer immediately, save all your work and click 'Restart Now'.
Comodo Internet Security Installation Guide | © 2017 Comodo Security Solutions Inc. | All rights reserved 40
Comodo Internet Security - Installation Guide
• If you want to restart the computer at a later time, select the period from the drop-down and click 'Postpone'.
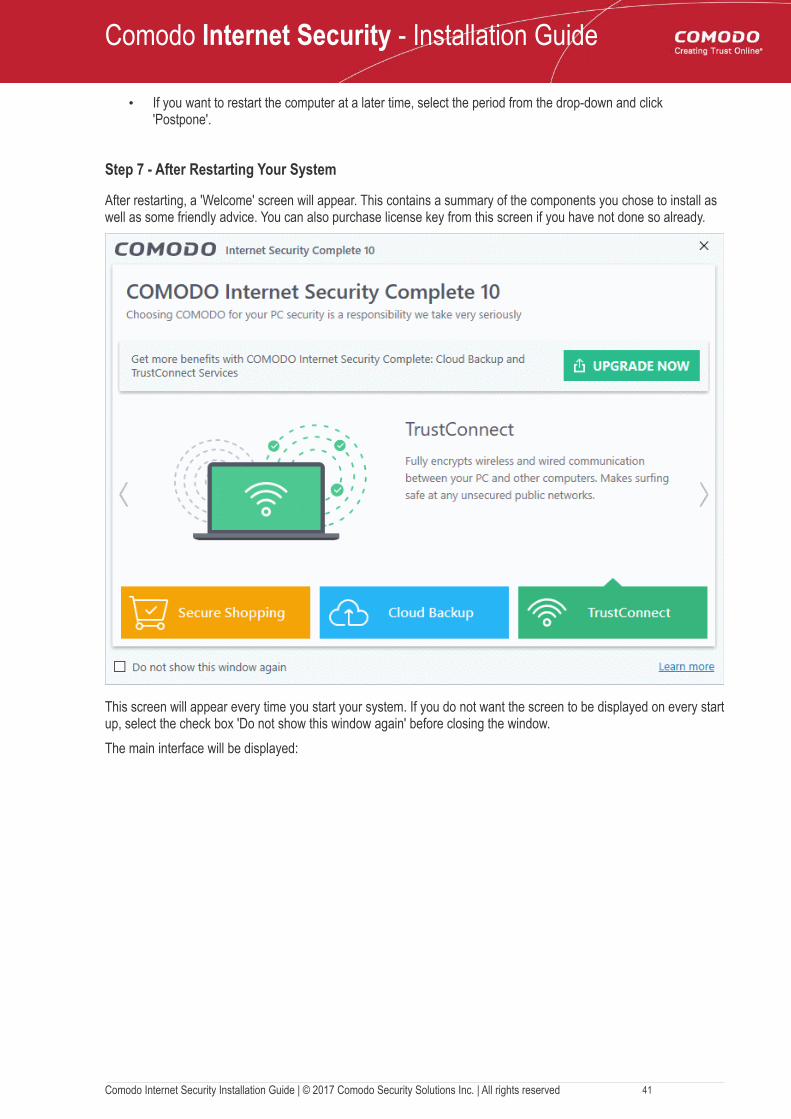
Step 7 - After Restarting Your System
After restarting, a 'Welcome' screen will appear. This contains a summary of the components you chose to install as well as some friendly advice. You can also purchase license key from this screen if you have not done so already.
This screen will appear every time you start your system. If you do not want the screen to be displayed on every startup, select the check box 'Do not show this window again' before closing the window.
The main interface will be displayed:
Comodo Internet Security Installation Guide | © 2017 Comodo Security Solutions Inc. | All rights reserved 41
Comodo Internet Security - Installation Guide
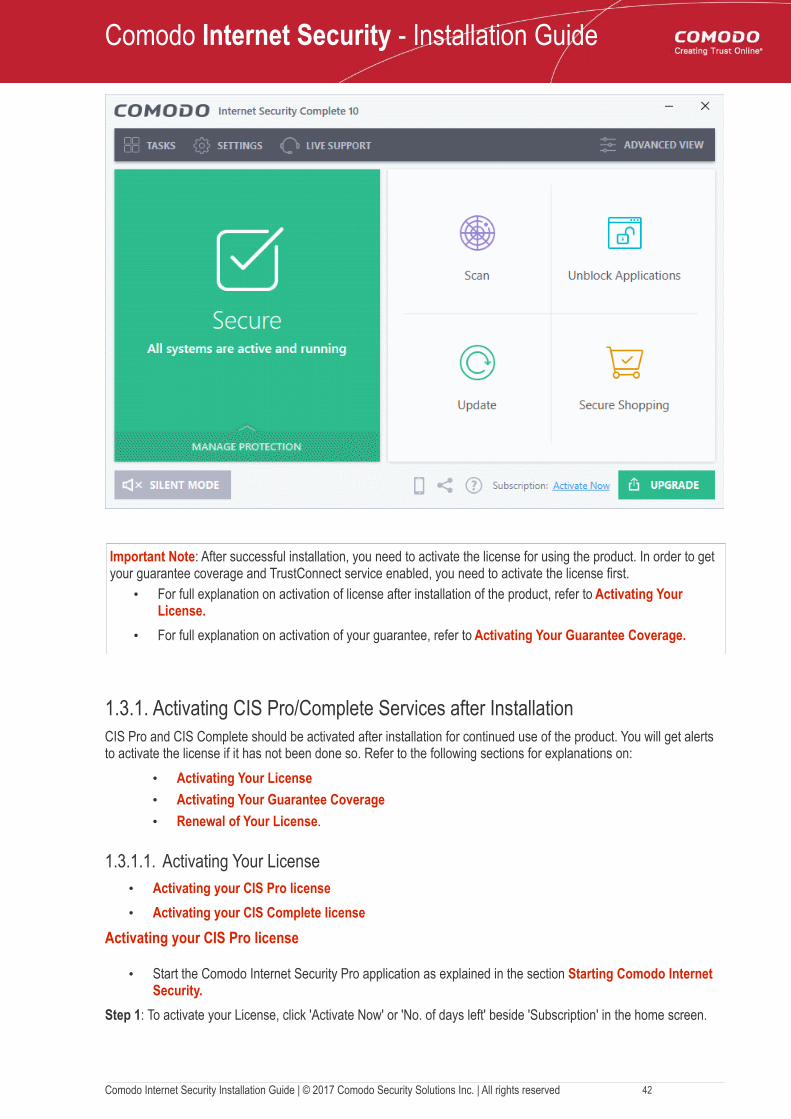
Important Note: After successful installation, you need to activate the license for using the product. In order to get your guarantee coverage and TrustConnect service enabled, you need to activate the license first.
• For full explanation on activation of license after installation of the product, refer to Activating Your License.
• For full explanation on activation of your guarantee, refer to Activating Your Guarantee Coverage.
1.3.1. Activating CIS Pro/Complete Services after InstallationCIS Pro and CIS Complete should be activated after installation for continued use of the product. You will get alerts to activate the license if it has not been done so. Refer to the following sections for explanations on:
• Activating Your License
• Activating Your Guarantee Coverage
• Renewal of Your License.
1.3.1.1. Activating Your License• Activating your CIS Pro license
• Activating your CIS Complete license
Activating your CIS Pro license
• Start the Comodo Internet Security Pro application as explained in the section Starting Comodo Internet Security.
Step 1: To activate your License, click 'Activate Now' or 'No. of days left' beside 'Subscription' in the home screen.
Comodo Internet Security Installation Guide | © 2017 Comodo Security Solutions Inc. | All rights reserved 42
Comodo Internet Security - Installation Guide
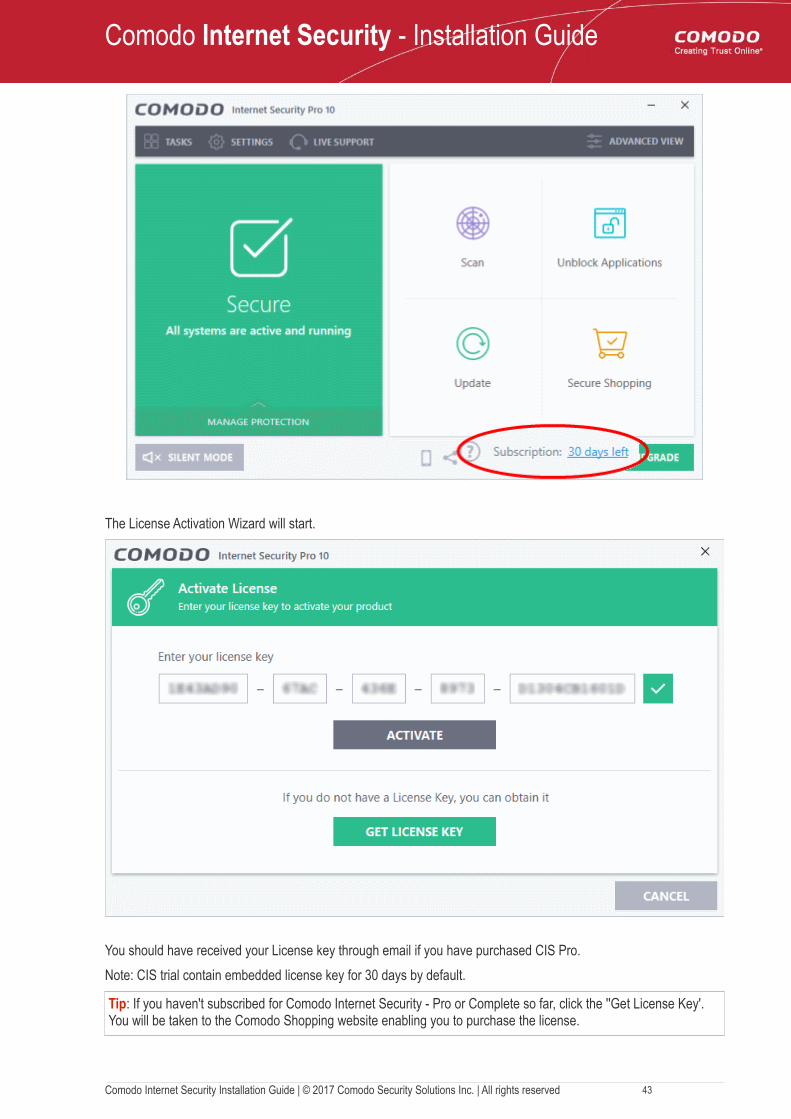
The License Activation Wizard will start.
You should have received your License key through email if you have purchased CIS Pro.
Note: CIS trial contain embedded license key for 30 days by default.
Tip: If you haven't subscribed for Comodo Internet Security - Pro or Complete so far, click the ''Get License Key'. You will be taken to the Comodo Shopping website enabling you to purchase the license.
Comodo Internet Security Installation Guide | © 2017 Comodo Security Solutions Inc. | All rights reserved 43
Comodo Internet Security - Installation Guide
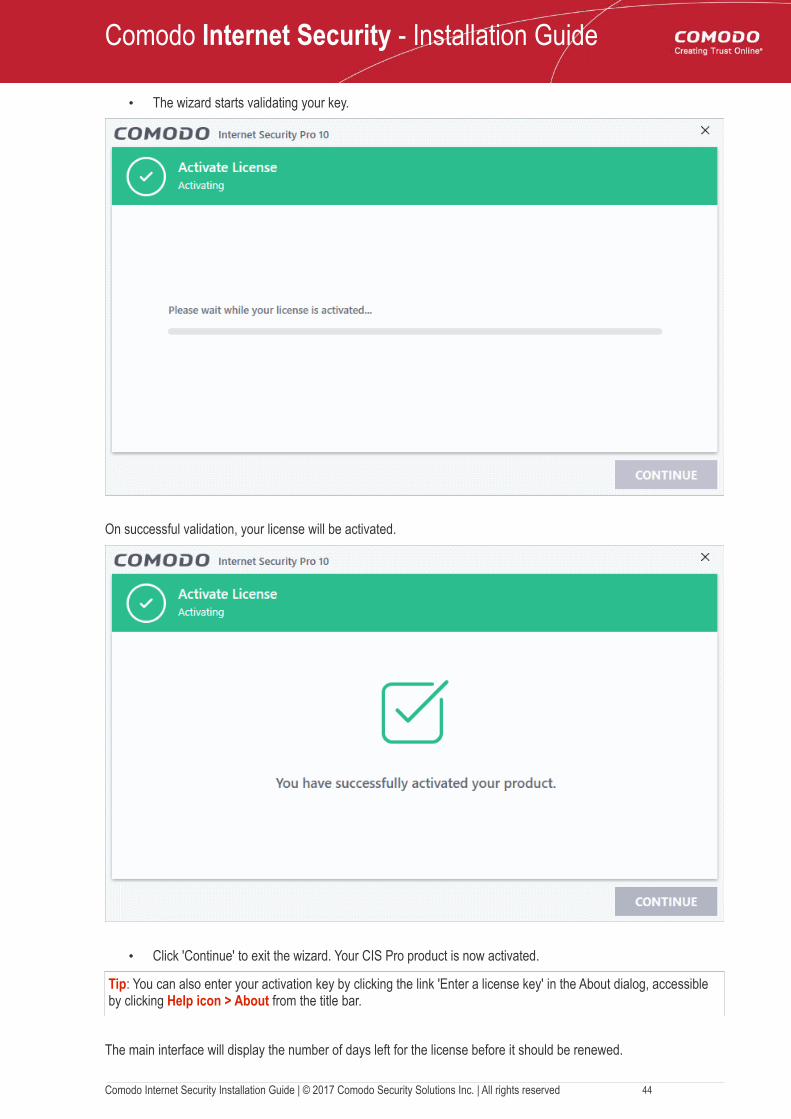
• The wizard starts validating your key.
On successful validation, your license will be activated.
• Click 'Continue' to exit the wizard. Your CIS Pro product is now activated.
Tip: You can also enter your activation key by clicking the link 'Enter a license key' in the About dialog, accessible by clicking Help icon > About from the title bar.
The main interface will display the number of days left for the license before it should be renewed.
Comodo Internet Security Installation Guide | © 2017 Comodo Security Solutions Inc. | All rights reserved 44

Comodo Internet Security - Installation Guide
Activating your CIS Complete license
• Start the Comodo Internet Security Complete application as explained in the section Starting Comodo Internet Security.
The License Activation Wizard will start:
Comodo Internet Security Installation Guide | © 2017 Comodo Security Solutions Inc. | All rights reserved 45
Comodo Internet Security - Installation Guide
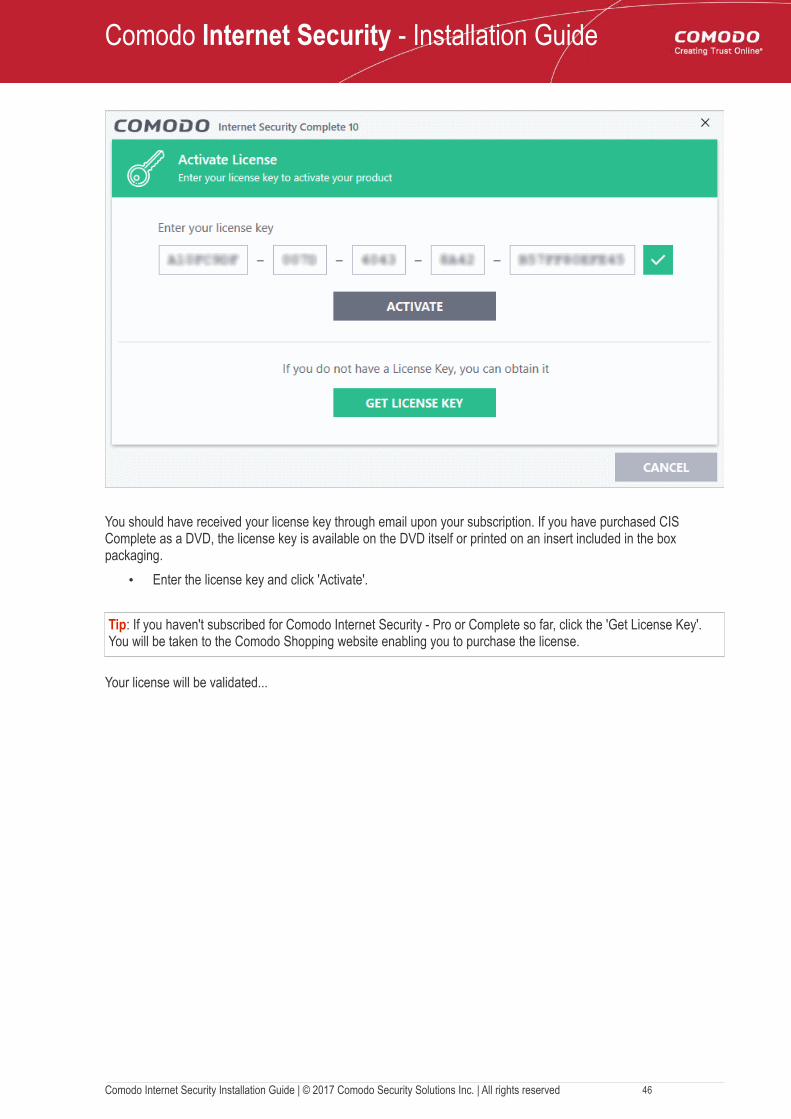
You should have received your license key through email upon your subscription. If you have purchased CIS Complete as a DVD, the license key is available on the DVD itself or printed on an insert included in the box packaging.
• Enter the license key and click 'Activate'.
Tip: If you haven't subscribed for Comodo Internet Security - Pro or Complete so far, click the 'Get License Key'. You will be taken to the Comodo Shopping website enabling you to purchase the license.
Your license will be validated...
Comodo Internet Security Installation Guide | © 2017 Comodo Security Solutions Inc. | All rights reserved 46
Comodo Internet Security - Installation Guide
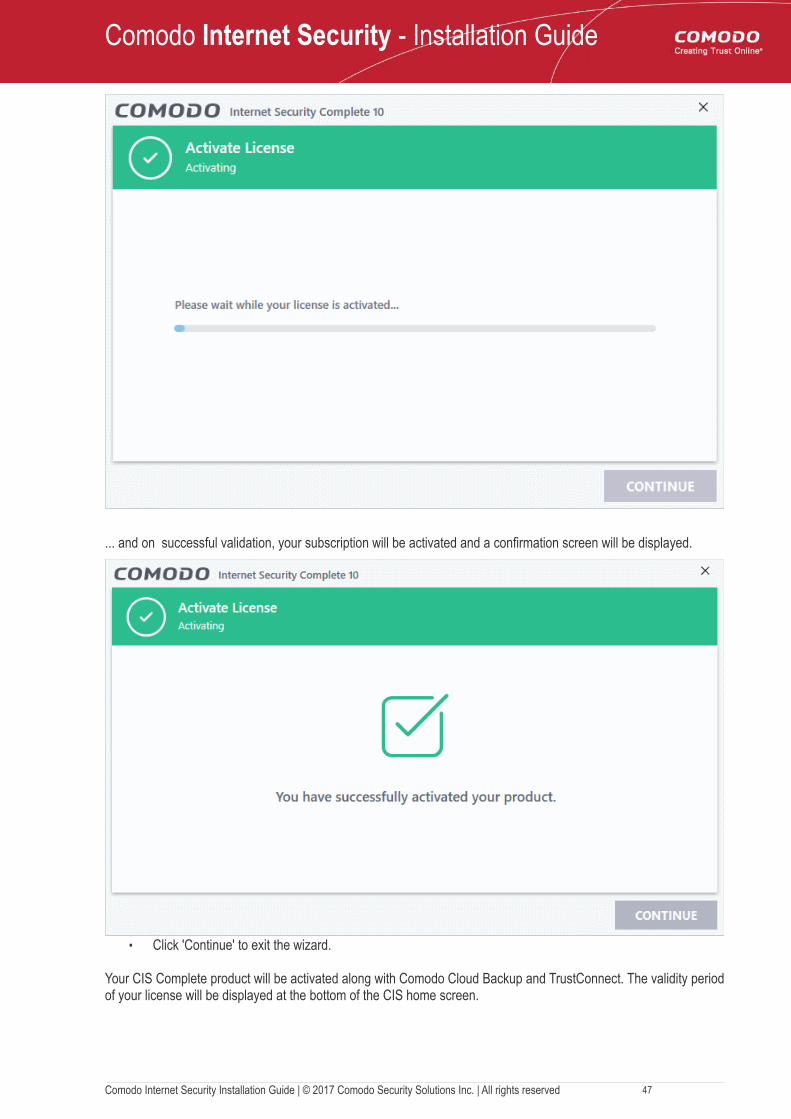
... and on successful validation, your subscription will be activated and a confirmation screen will be displayed.
• Click 'Continue' to exit the wizard.
Your CIS Complete product will be activated along with Comodo Cloud Backup and TrustConnect. The validity periodof your license will be displayed at the bottom of the CIS home screen.
Comodo Internet Security Installation Guide | © 2017 Comodo Security Solutions Inc. | All rights reserved 47
Comodo Internet Security - Installation Guide
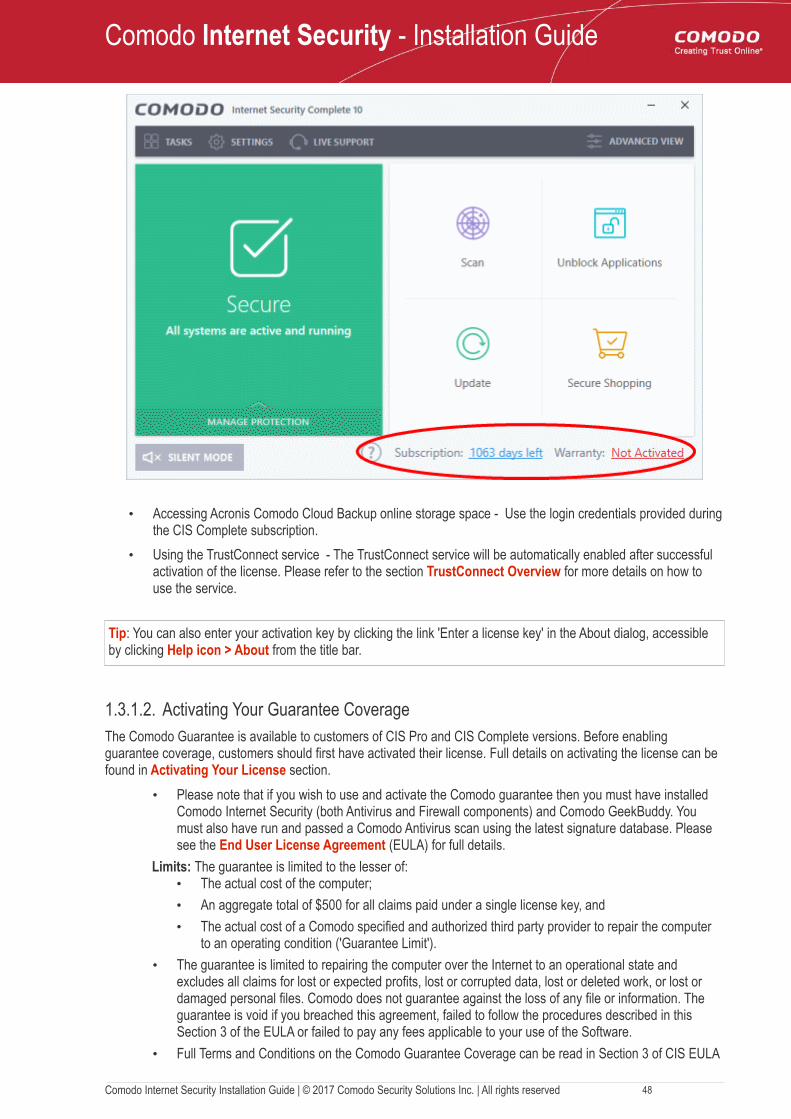
• Accessing Acronis Comodo Cloud Backup online storage space - Use the login credentials provided duringthe CIS Complete subscription.
• Using the TrustConnect service - The TrustConnect service will be automatically enabled after successful activation of the license. Please refer to the section TrustConnect Overview for more details on how to use the service.
Tip: You can also enter your activation key by clicking the link 'Enter a license key' in the About dialog, accessible by clicking Help icon > About from the title bar.
1.3.1.2. Activating Your Guarantee CoverageThe Comodo Guarantee is available to customers of CIS Pro and CIS Complete versions. Before enabling guarantee coverage, customers should first have activated their license. Full details on activating the license can be found in Activating Your License section.
• Please note that if you wish to use and activate the Comodo guarantee then you must have installed Comodo Internet Security (both Antivirus and Firewall components) and Comodo GeekBuddy. You must also have run and passed a Comodo Antivirus scan using the latest signature database. Please see the End User License Agreement (EULA) for full details.
Limits: The guarantee is limited to the lesser of:• The actual cost of the computer;
• An aggregate total of $500 for all claims paid under a single license key, and
• The actual cost of a Comodo specified and authorized third party provider to repair the computer to an operating condition ('Guarantee Limit').
• The guarantee is limited to repairing the computer over the Internet to an operational state and excludes all claims for lost or expected profits, lost or corrupted data, lost or deleted work, or lost or damaged personal files. Comodo does not guarantee against the loss of any file or information. The guarantee is void if you breached this agreement, failed to follow the procedures described in this Section 3 of the EULA or failed to pay any fees applicable to your use of the Software.
• Full Terms and Conditions on the Comodo Guarantee Coverage can be read in Section 3 of CIS EULA
Comodo Internet Security Installation Guide | © 2017 Comodo Security Solutions Inc. | All rights reserved 48
Comodo Internet Security - Installation Guide
(Step 2 of the Installation process for CIS Pro and Step 1 for CIS Complete).
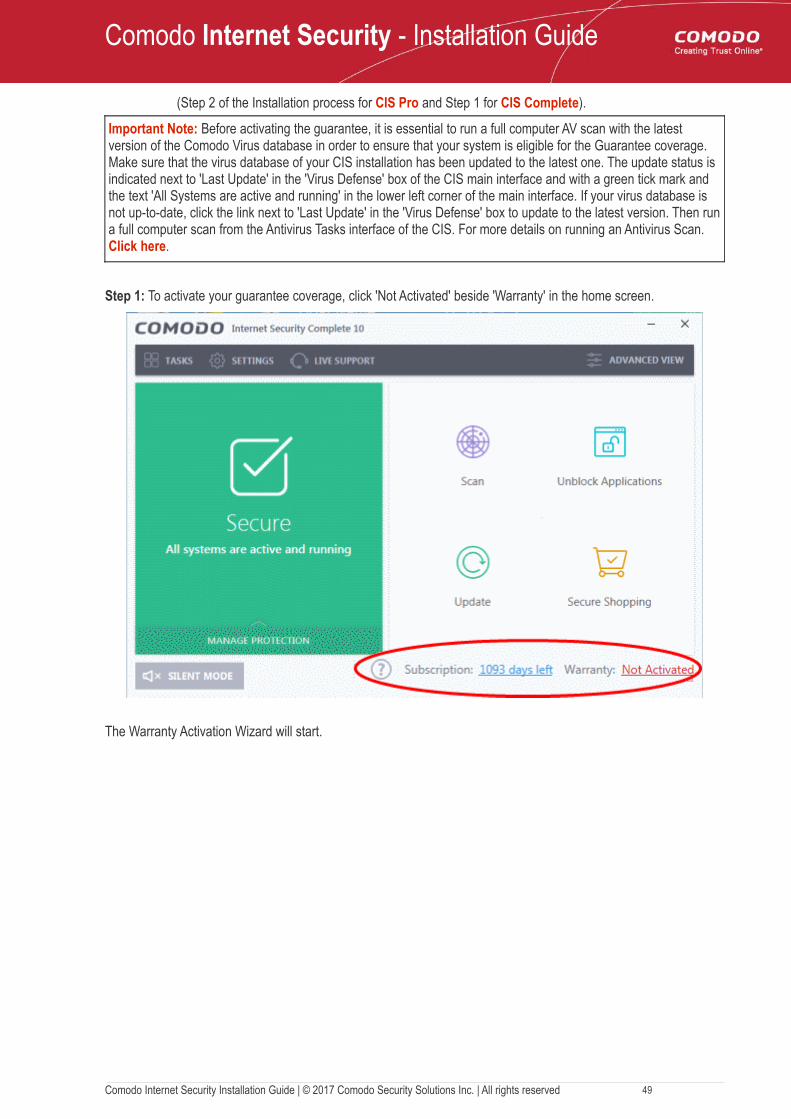
Important Note: Before activating the guarantee, it is essential to run a full computer AV scan with the latest version of the Comodo Virus database in order to ensure that your system is eligible for the Guarantee coverage. Make sure that the virus database of your CIS installation has been updated to the latest one. The update status is indicated next to 'Last Update' in the 'Virus Defense' box of the CIS main interface and with a green tick mark and the text 'All Systems are active and running' in the lower left corner of the main interface. If your virus database is not up-to-date, click the link next to 'Last Update' in the 'Virus Defense' box to update to the latest version. Then runa full computer scan from the Antivirus Tasks interface of the CIS. For more details on running an Antivirus Scan. Click here.
Step 1: To activate your guarantee coverage, click 'Not Activated' beside 'Warranty' in the home screen.
The Warranty Activation Wizard will start.
Comodo Internet Security Installation Guide | © 2017 Comodo Security Solutions Inc. | All rights reserved 49
Comodo Internet Security - Installation Guide
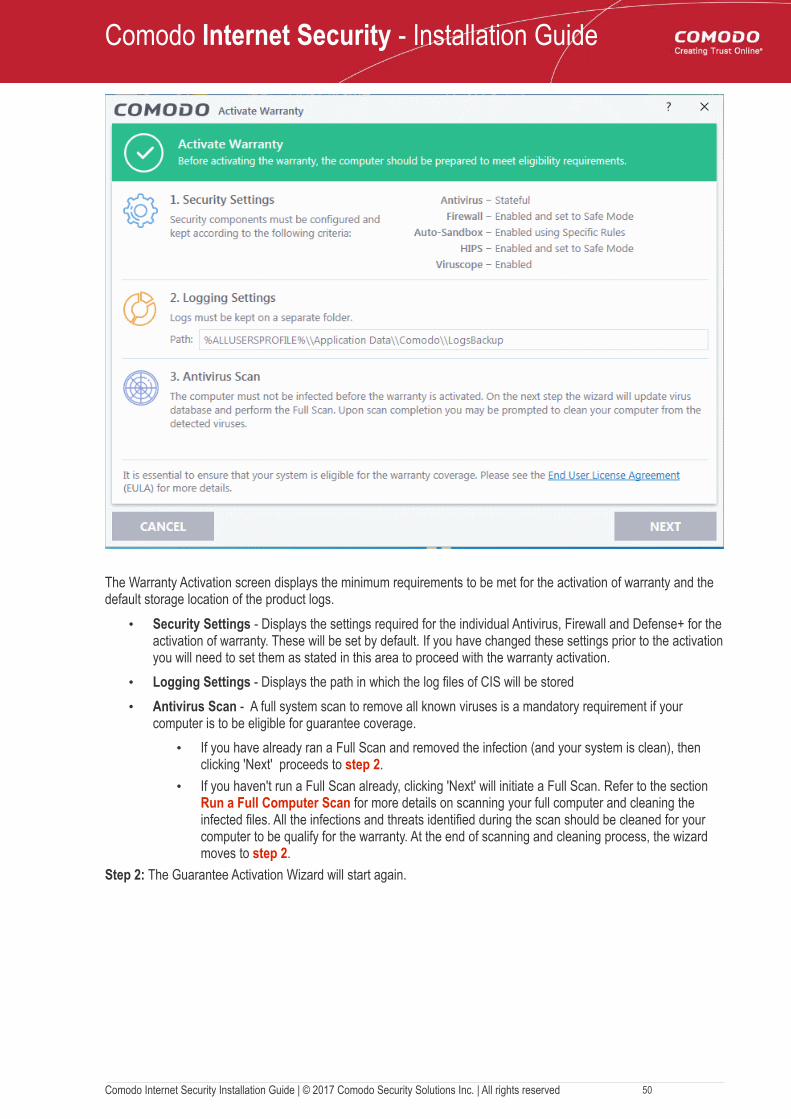
The Warranty Activation screen displays the minimum requirements to be met for the activation of warranty and the default storage location of the product logs.
• Security Settings - Displays the settings required for the individual Antivirus, Firewall and Defense+ for theactivation of warranty. These will be set by default. If you have changed these settings prior to the activationyou will need to set them as stated in this area to proceed with the warranty activation.
• Logging Settings - Displays the path in which the log files of CIS will be stored
• Antivirus Scan - A full system scan to remove all known viruses is a mandatory requirement if your computer is to be eligible for guarantee coverage.
• If you have already ran a Full Scan and removed the infection (and your system is clean), then clicking 'Next' proceeds to step 2.
• If you haven't run a Full Scan already, clicking 'Next' will initiate a Full Scan. Refer to the section Run a Full Computer Scan for more details on scanning your full computer and cleaning the infected files. All the infections and threats identified during the scan should be cleaned for your computer to be qualify for the warranty. At the end of scanning and cleaning process, the wizard moves to step 2.
Step 2: The Guarantee Activation Wizard will start again.
Comodo Internet Security Installation Guide | © 2017 Comodo Security Solutions Inc. | All rights reserved 50

Comodo Internet Security - Installation Guide
• Click 'Next'. The warranty will be activated and the progress will be displayed.
Note: You must be connected to Internet for activating your warranty.
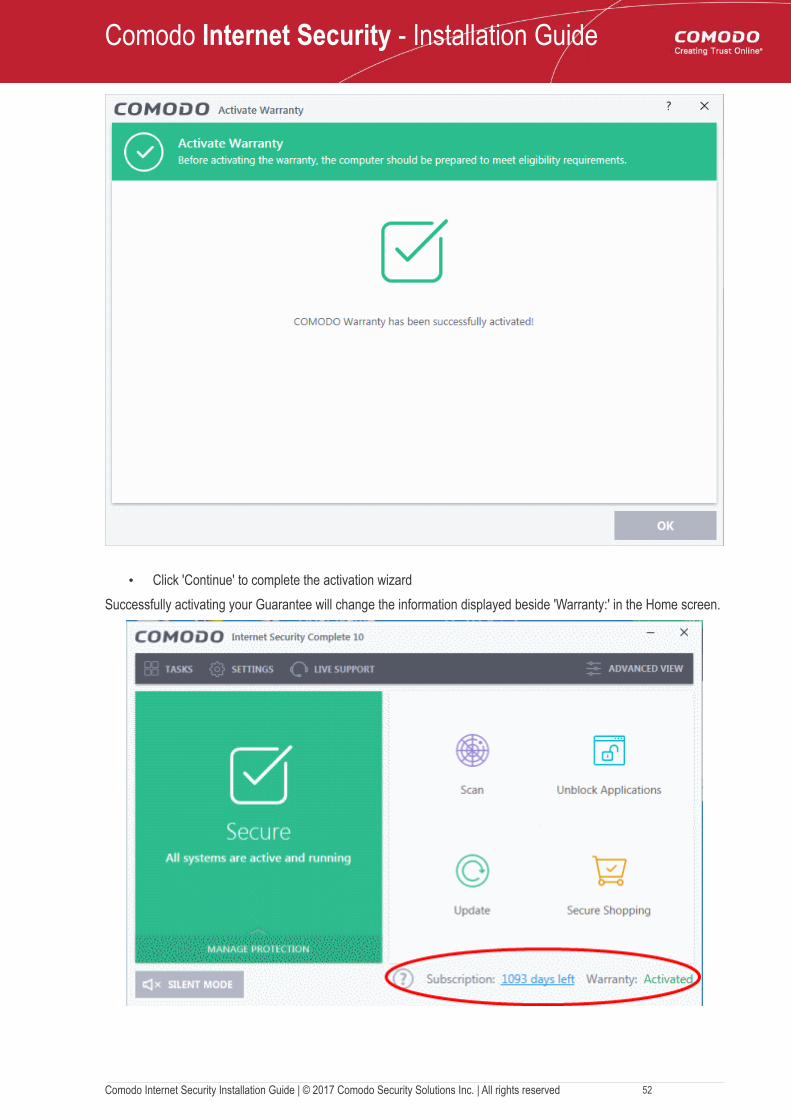
On completion, the 'successfully activated' screen will be displayed.
Comodo Internet Security Installation Guide | © 2017 Comodo Security Solutions Inc. | All rights reserved 51
Comodo Internet Security - Installation Guide
• Click 'Continue' to complete the activation wizard
Successfully activating your Guarantee will change the information displayed beside 'Warranty:' in the Home screen.
Comodo Internet Security Installation Guide | © 2017 Comodo Security Solutions Inc. | All rights reserved 52
Comodo Internet Security - Installation Guide
Note: Please ensure that you are connected to internet during warranty activation. The activation wizard will check Comodo servers to validate your CIS Complete license key in order to activate the warranty. If you are not connected to Internet at the time of warranty activation, the wizard will not continue and a 'Activation Failed' dialog will appear. Check your internet connection and try again.
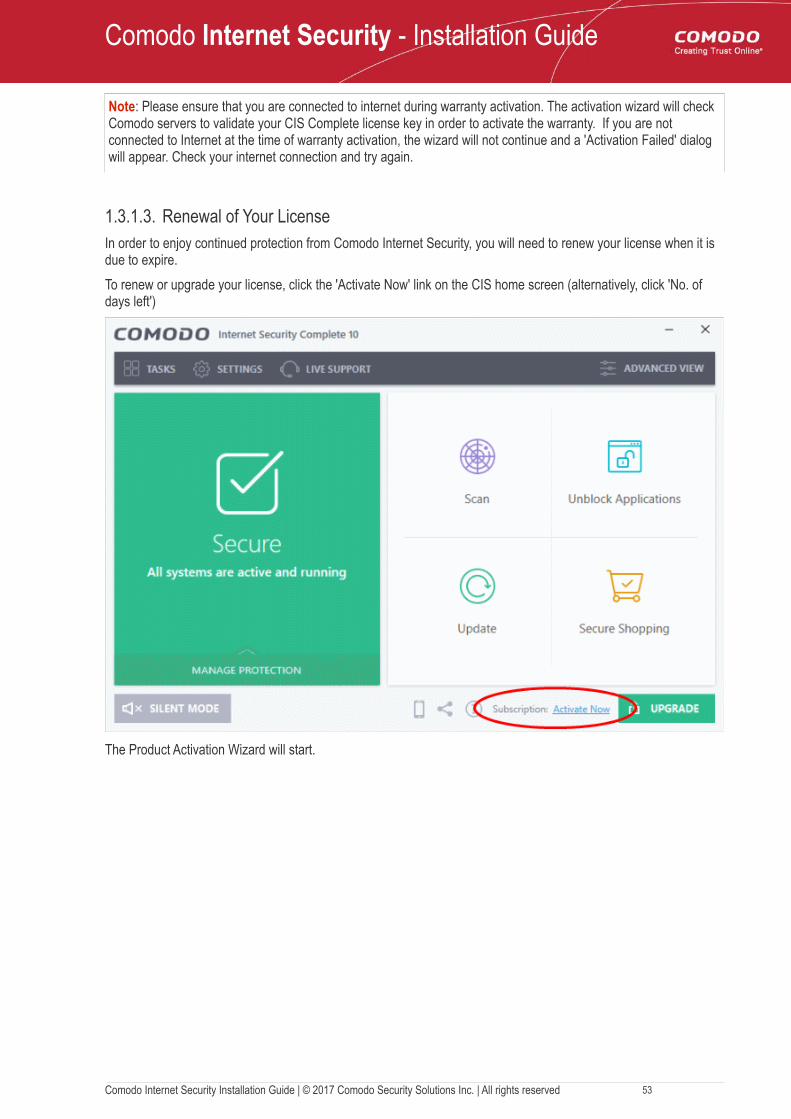
1.3.1.3. Renewal of Your LicenseIn order to enjoy continued protection from Comodo Internet Security, you will need to renew your license when it is due to expire.
To renew or upgrade your license, click the 'Activate Now' link on the CIS home screen (alternatively, click 'No. of days left')
The Product Activation Wizard will start.
Comodo Internet Security Installation Guide | © 2017 Comodo Security Solutions Inc. | All rights reserved 53
Comodo Internet Security - Installation Guide
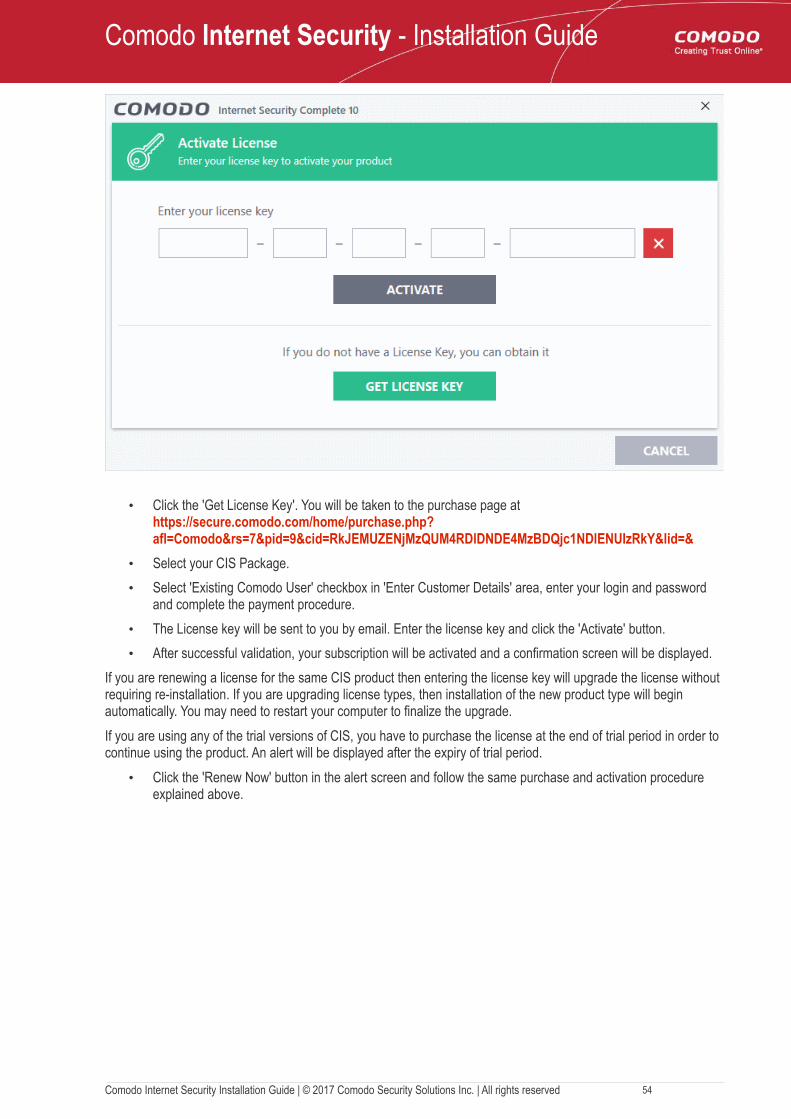
• Click the 'Get License Key'. You will be taken to the purchase page at https://secure.comodo.com/home/purchase.php?afl=Comodo&rs=7&pid=9&cid=RkJEMUZENjMzQUM4RDlDNDE4MzBDQjc1NDlENUIzRkY&lid=&
• Select your CIS Package.
• Select 'Existing Comodo User' checkbox in 'Enter Customer Details' area, enter your login and password and complete the payment procedure.
• The License key will be sent to you by email. Enter the license key and click the 'Activate' button.
• After successful validation, your subscription will be activated and a confirmation screen will be displayed.
If you are renewing a license for the same CIS product then entering the license key will upgrade the license without requiring re-installation. If you are upgrading license types, then installation of the new product type will begin automatically. You may need to restart your computer to finalize the upgrade.
If you are using any of the trial versions of CIS, you have to purchase the license at the end of trial period in order to continue using the product. An alert will be displayed after the expiry of trial period.
• Click the 'Renew Now' button in the alert screen and follow the same purchase and activation procedure explained above.
Comodo Internet Security Installation Guide | © 2017 Comodo Security Solutions Inc. | All rights reserved 54
Comodo Internet Security - Installation Guide
About ComodoThe Comodo organization is a global innovator of cybersecurity solutions, protecting critical information across the digital landscape. Building on its unique position as the world's largest certificate authority, Comodo authenticates, validates and secures networks and infrastructures from individuals to mid-sized companies to the world's largest enterprises. Comodo provides complete end-to-end security solutions across the boundary, internal network and endpoint with innovative technologies solving the most advanced malware threats, both known and unknown. With global headquarters in Clifton, New Jersey, and branch offices in Silicon Valley, Comodo has international offices in China, India, the Philippines, Romania, Turkey, Ukraine and the United Kingdom. For more information, visit comodo.com.
Comodo Security Solutions, Inc. Comodo CA Limited
1255 Broad Street
Clifton, NJ, 07013
United States
Email: [email protected]
3rd Floor, 26 Office Village, Exchange Quay, Trafford Road, Salford, Greater Manchester M5 3EQ,
United Kingdom.
Tel : +44 (0) 161 874 7070
Fax : +44 (0) 161 877 1767
Comodo Internet Security Installation Guide | © 2017 Comodo Security Solutions Inc. | All rights reserved 55