Common user interface, yet new stuff Notice the following: Excel has tabs and buttons similar to...
32
Common user interface, yet new stuff Notice the following: • Excel has tabs and buttons similar to Word • new tabs: Formulas, Data • new features: – name box – Formula bar – Current Sheet1 is active. Click + to add more sheets
-
Upload
shanon-miles -
Category
Documents
-
view
214 -
download
1
Transcript of Common user interface, yet new stuff Notice the following: Excel has tabs and buttons similar to...

Common user interface, yet new stuff Notice the following:
• Excel has tabs and buttons similar to Word
• new tabs: Formulas, Data
• new features: – name box– Formula bar– Current Sheet1 is active. Click + to
add more sheets
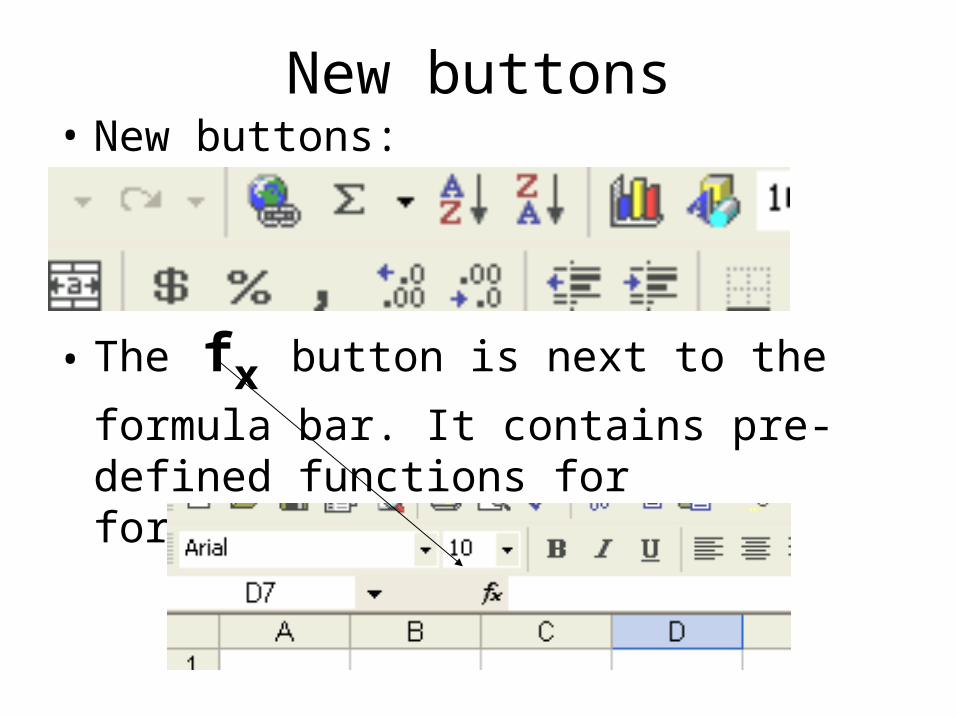
New buttons• New buttons:
• The fx button is next to the formula bar.
It contains pre-defined functions for formulas.

Excel View & settings 1/3PLEASE SKIP THIS SLIDE. It’s old…PLEASE SKIP THIS SLIDE. It’s old…
Tools Customize
Try:Investigate the options:• buttons on 1 or 2 rows• show full menu

Excel View & settings 2/3
You can control the view of your window via the View Tabtry:
•Check or uncheck the boxes for:– the formula bar, – Gridlines– Headings
•Observe the various Views: normal, page layout

Excel View & settings 3/3You can change the way Excel behaves via the File Tab, Options
Try:•Press <ENTER> several times and notice the direction of move. •Click File Tab, Options– Click on the category called Advanced. Try
changing the option called “After pressing Enter, move selection...”Change the Direction to right.
– Click on another category. Try changing an option of your choice. Test it out.

Moving around…
• Recall, in the Excel grid:– columns go up and down,– rows go across
• To move around: try– <enter> key– <tab> key– scroll and click– the arrow keys
Editing in Excel 1/8
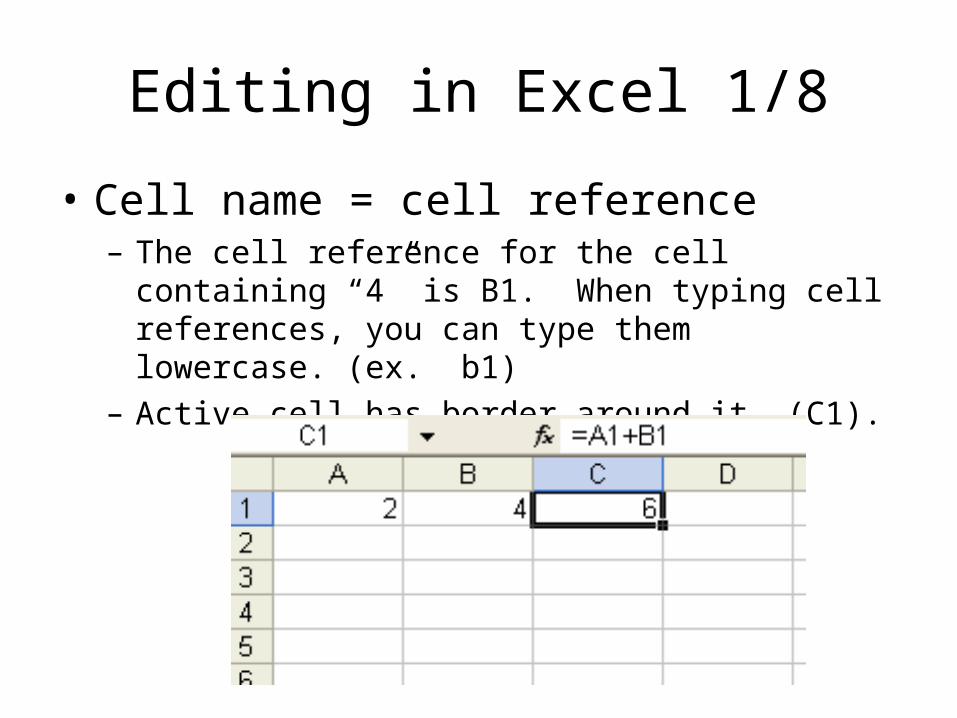
• Cell name = cell reference– The cell reference for the cell containing “4” is B1.
When typing cell references, you can type them lowercase. (ex. b1)
– Active cell has border around it (C1).

In the next slide…
• Focus only on the blue partFocus only on the blue part
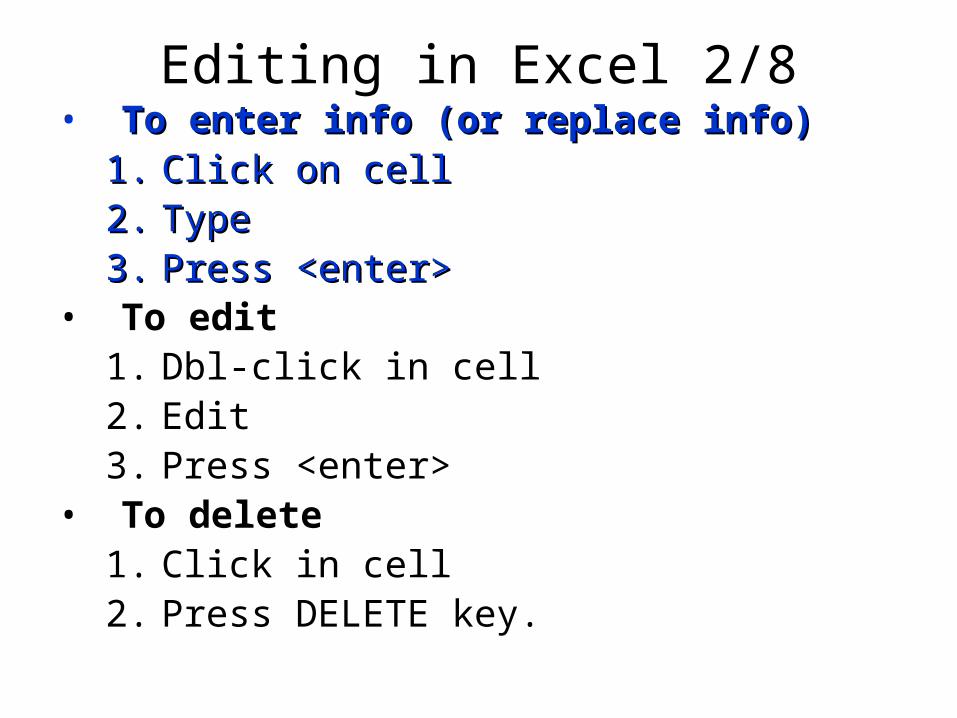
Editing in Excel 2/8• To enter info (or replace info)To enter info (or replace info)
1.1. Click on cellClick on cell2.2. TypeType3.3. Press <enter>Press <enter>
• To edit1. Dbl-click in cell2. Edit3. Press <enter>
• To delete1. Click in cell2. Press DELETE key.

Editing Exercise 3/8Try:Type the following into the cells pictured: 2,
4, =a1+b1, Joe. • Replace Joe with Vanna (click and type
and <ENTER>)

Editing in Excel 4/8• To enter info (or replace info)
1. Click on cell2. Type3. Press <enter>
• To editTo edit1.1. Dbl-click in cellDbl-click in cell2.2. EditEdit3.3. Press <enter>Press <enter>
• To delete1. Click in cell2. Press DELETE key.
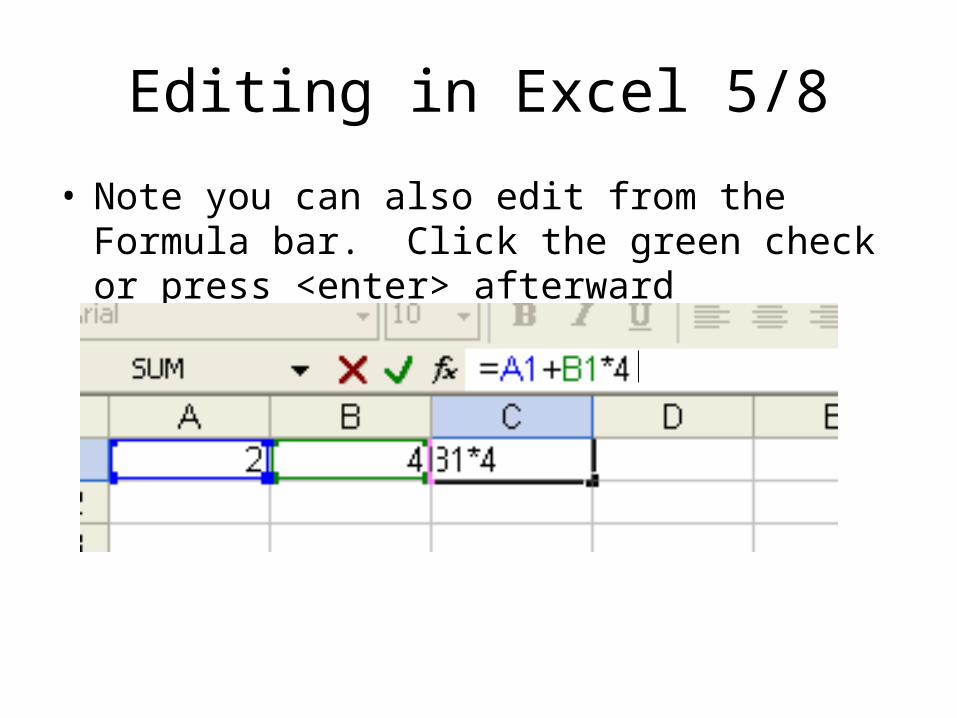
Editing in Excel 5/8
• Note you can also edit from the Formula bar. Click the green check or press <enter> afterward
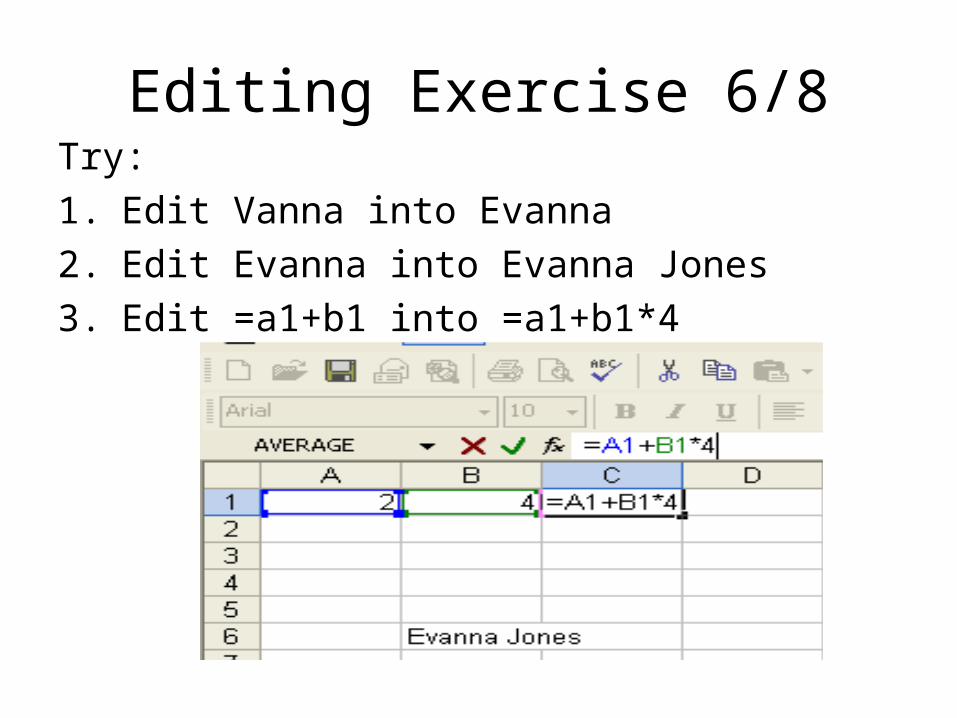
Editing Exercise 6/8Try:1. Edit Vanna into Evanna2. Edit Evanna into Evanna Jones3. Edit =a1+b1 into =a1+b1*4

Editing in Excel 7/8• To enter info (or replace info)
1. Click on cell2. Type3. Press <enter>
• To edit1. Dbl-click in cell2. Edit3. Press <enter>
• To delete1. Click in cell2. Press DELETE key.

Exercise: Insert & Delete columns and rows 8/8
Try: • Delete all entries of your previous
practice and type the enter the following:
• Click File Tab, Save as: Excel Practice to U: or USB: drive
In the next slide…
• Focus only on the blue partFocus only on the blue part
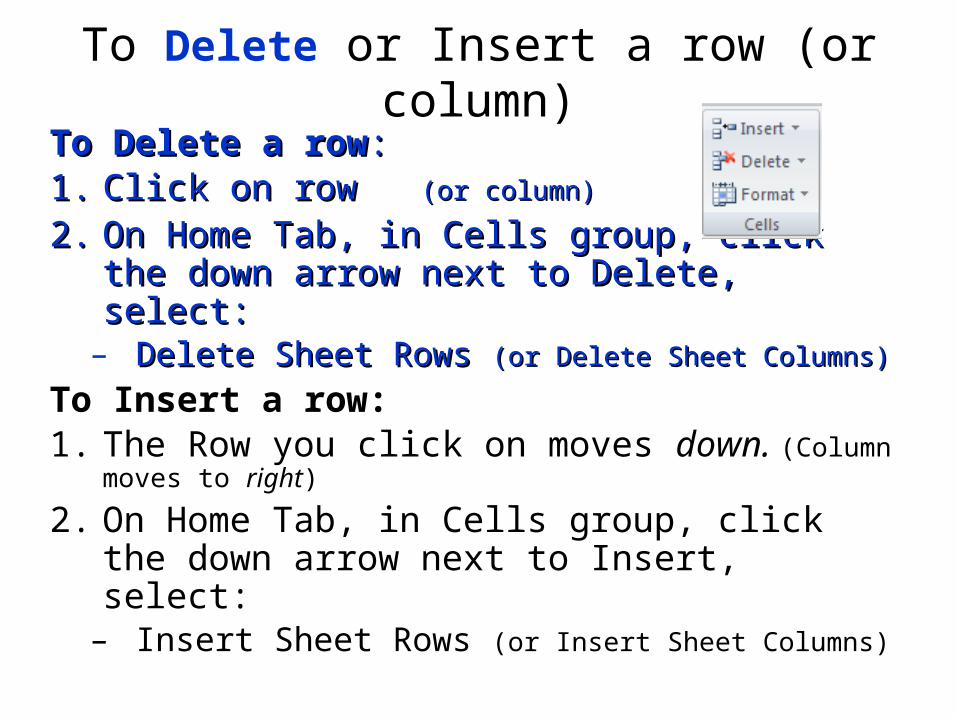
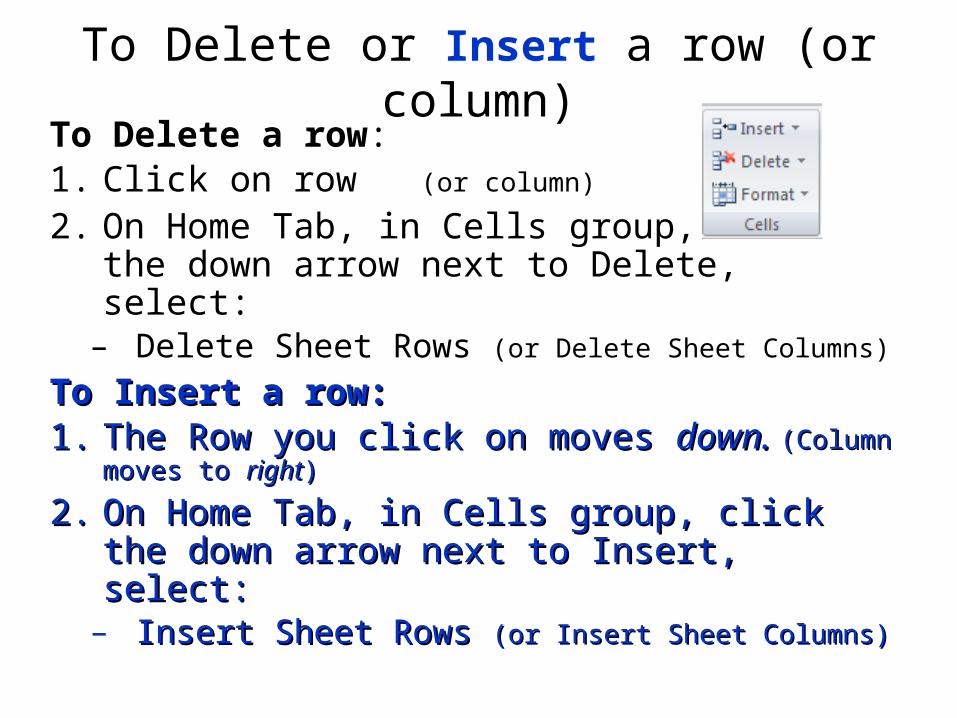
To Delete or Insert a row (or column)
To Delete a rowTo Delete a row::1.1. Click on row Click on row (or column)(or column)
2.2. On Home Tab, in Cells group, clickOn Home Tab, in Cells group, click the the down arrow next to Delete, select:down arrow next to Delete, select:
– Delete Sheet Rows Delete Sheet Rows (or Delete Sheet Columns)(or Delete Sheet Columns)
To Insert a row:1. The Row you click on moves down.
(Column moves to right)
2. On Home Tab, in Cells group, click the down arrow next to Insert, select:
– Insert Sheet Rows (or Insert Sheet Columns)

Exercise: delete row
Try:• Delete the “Tom” row.
Beforeafter
To Delete or Insert a row (or column)To Delete a row:1. Click on row (or column)
2. On Home Tab, in Cells group, click the down arrow next to Delete, select:
– Delete Sheet Rows (or Delete Sheet Columns)
To Insert a row:To Insert a row:1.1. The Row you click on moves The Row you click on moves down. down.
(Column moves to (Column moves to rightright))
2.2. On Home Tab, in Cells group, clickOn Home Tab, in Cells group, click the the down arrow next to Insert, select:down arrow next to Insert, select:
– Insert Sheet Rows Insert Sheet Rows (or Insert Sheet Columns)(or Insert Sheet Columns)

Exercise: insert row• Insert an “Oscar 85, 90” row in
between Joe and Mary.(Save your work: Click Save button)
Beforeafter

Set up page and print previewPrint Preview:
• Click File Tab, Print (print preview is at the right)
• Or add icon to your Quick Access Toolbar.

Set up page and print preview• Set up page in Page Layout Tab• In Page Setup group, change page
Orientation.• In Sheet Options group,
– check box to print gridlines – check box to print headings
• (FYI – more settings if you launch dialog box in Page Setup group)

Set up page and print preview
Try:Use Print Preview to preview “before”
and “after” making the following changes:
1.In Page Layout, change page orientation to landscape
2.In Page Layout, check boxes to print gridlines, and to print headings.
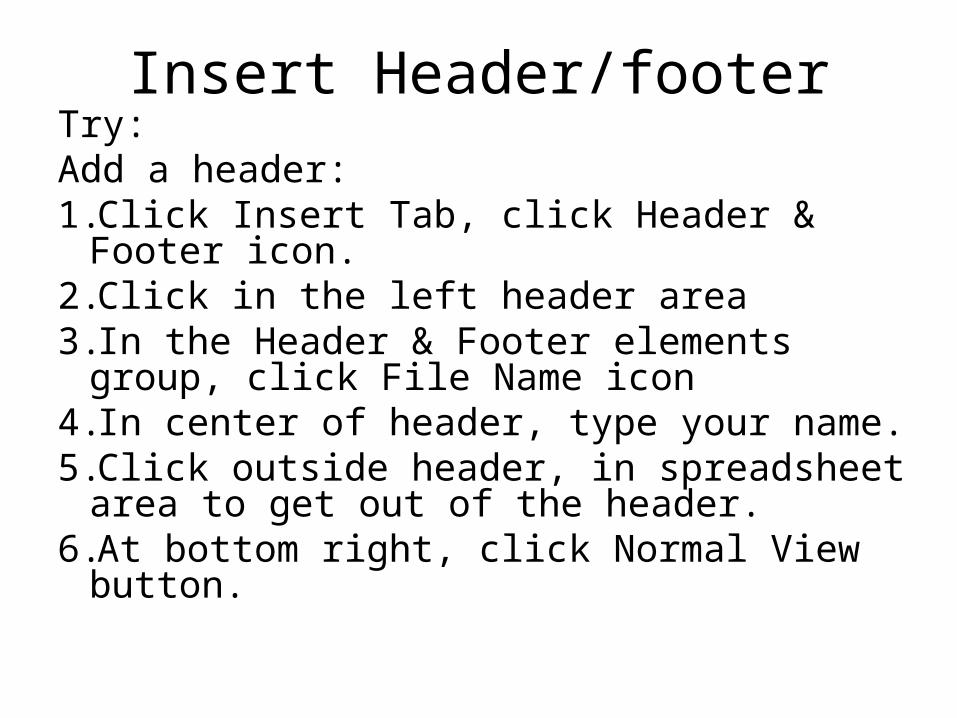
Insert Header/footerTry: Add a header:1.Click Insert Tab, click Header &
Footer icon. 2.Click in the left header area 3.In the Header & Footer elements
group, click File Name icon4.In center of header, type your name.5.Click outside header, in spreadsheet
area to get out of the header.6.At bottom right, click Normal View
button.

Save, close and newTry:
• Click the Save Button.• Click File Tab, Close to close the
spreadsheet file only, not the program.
• Click File Tab, New. Double click “Blank worksheet” for a new spreadsheet.
• Click File Tab, Save As and save as Formula Practice to U: or USB
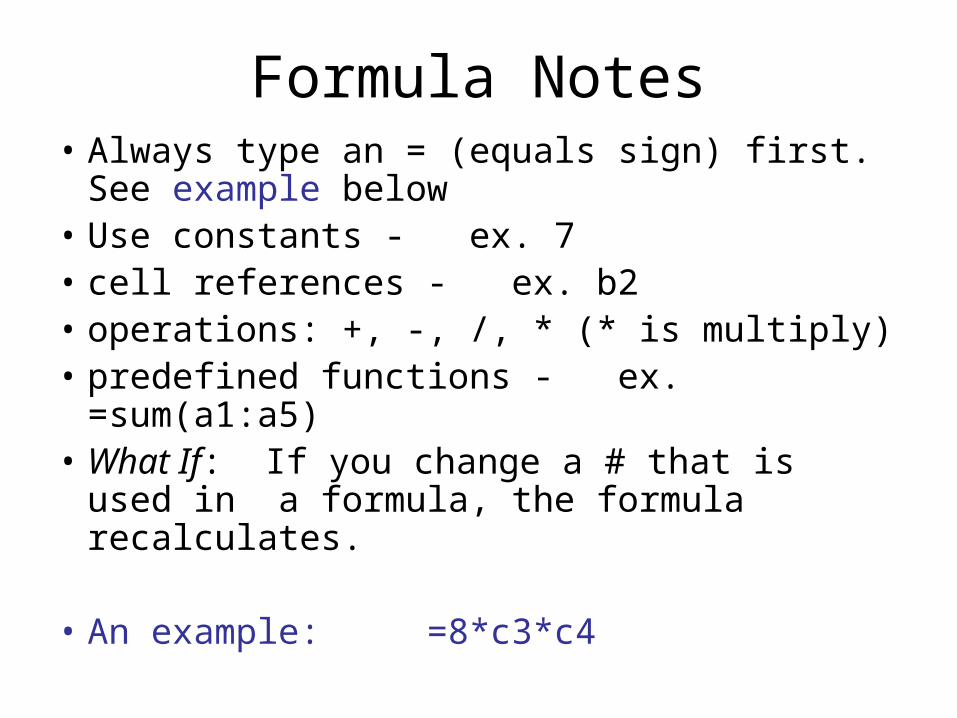
Formula Notes• Always type an = (equals sign) first. See
example below• Use constants - ex. 7• cell references - ex. b2 • operations: +, -, /, * (* is multiply) • predefined functions - ex. =sum(a1:a5) • What If: If you change a # that is used in
a formula, the formula recalculates.
• An example: =8*c3*c4

Formula exercise 1/3
1. Retype 2, 4, and =a1+b1 into a1, b1 and c1.
2. Click back on the cell c1 to see the formula in the formula bar. Its value is in cell.
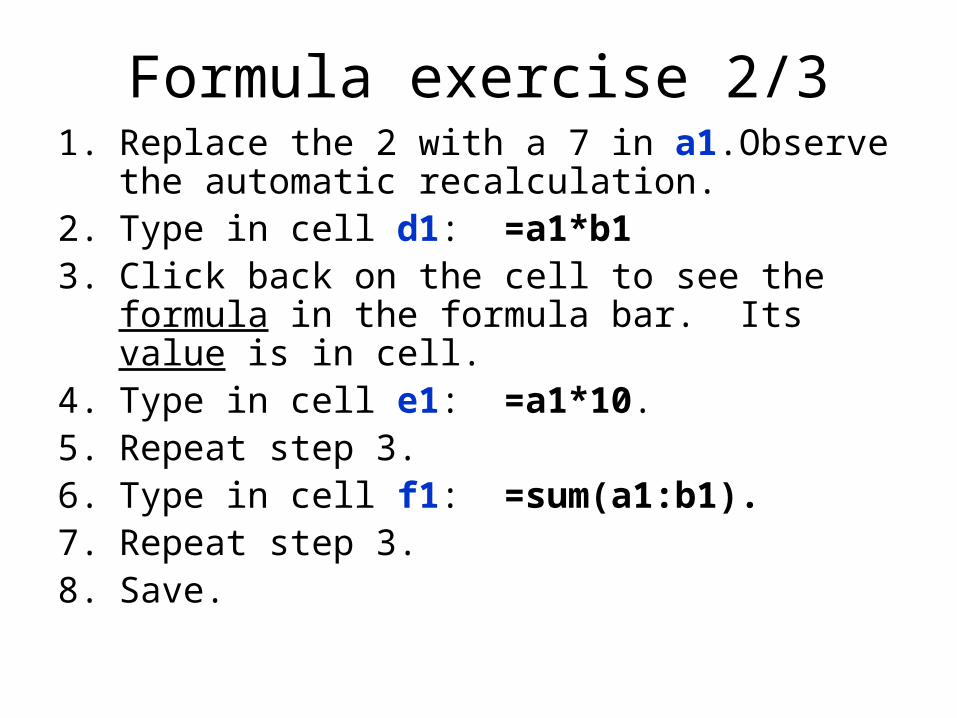
Formula exercise 2/31. Replace the 2 with a 7 in a1.Observe the
automatic recalculation.2. Type in cell d1: =a1*b13. Click back on the cell to see the formula
in the formula bar. Its value is in cell.4. Type in cell e1: =a1*10. 5. Repeat step 3.6. Type in cell f1: =sum(a1:b1).7. Repeat step 3.8. Save.
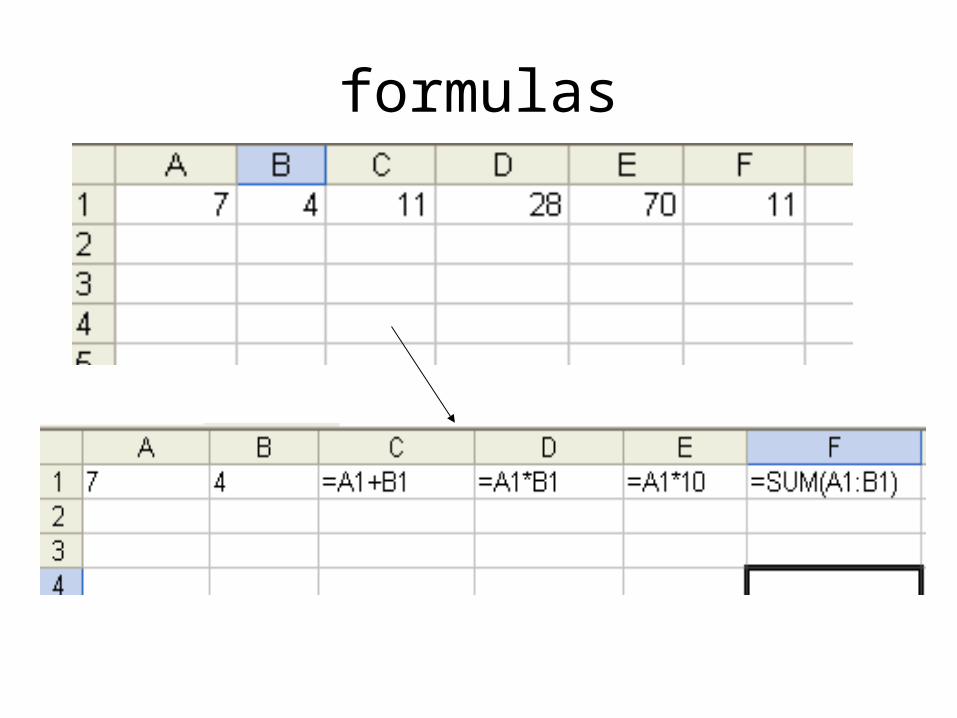
formulas
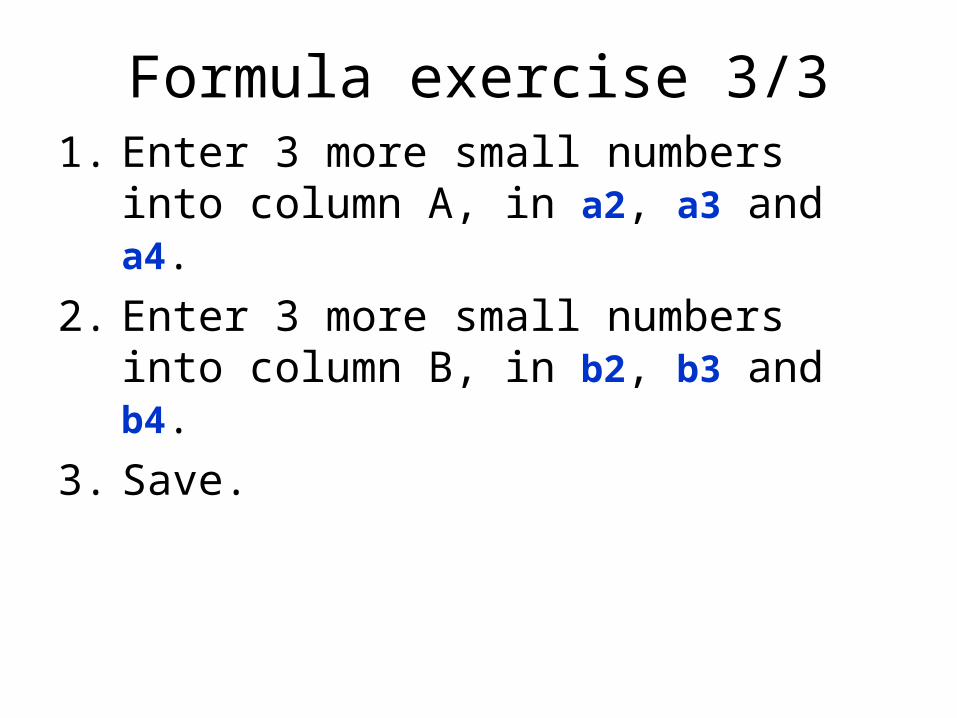
Formula exercise 3/31. Enter 3 more small numbers into
column A, in a2, a3 and a4. 2. Enter 3 more small numbers into
column B, in b2, b3 and b4.3. Save.
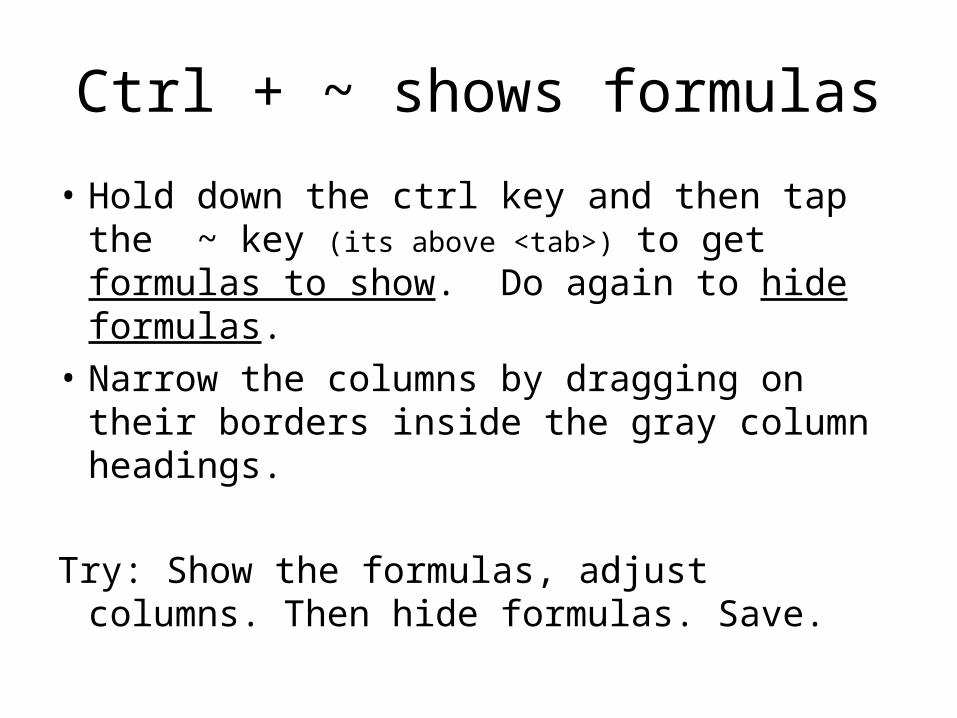
Ctrl + ~ shows formulas
• Hold down the ctrl key and then tap the ~ key (its above <tab>) to get formulas to show. Do again to hide formulas.
• Narrow the columns by dragging on their borders inside the gray column headings.
Try: Show the formulas, adjust columns. Then hide formulas. Save.
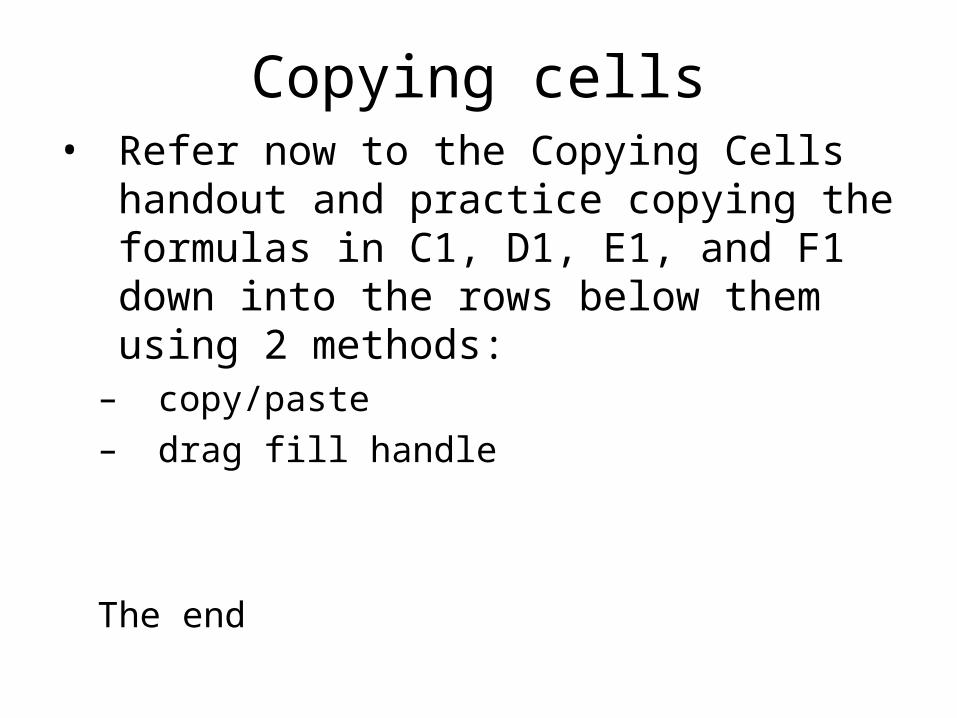
Copying cells• Refer now to the Copying Cells
handout and practice copying the formulas in C1, D1, E1, and F1 down into the rows below them using 2 methods:
– copy/paste – drag fill handle
The end