Color Graphic Novel Guide - AuthorHouse Self … Graphic Novel Guide So You’re WorkiNG oN a Full...
10
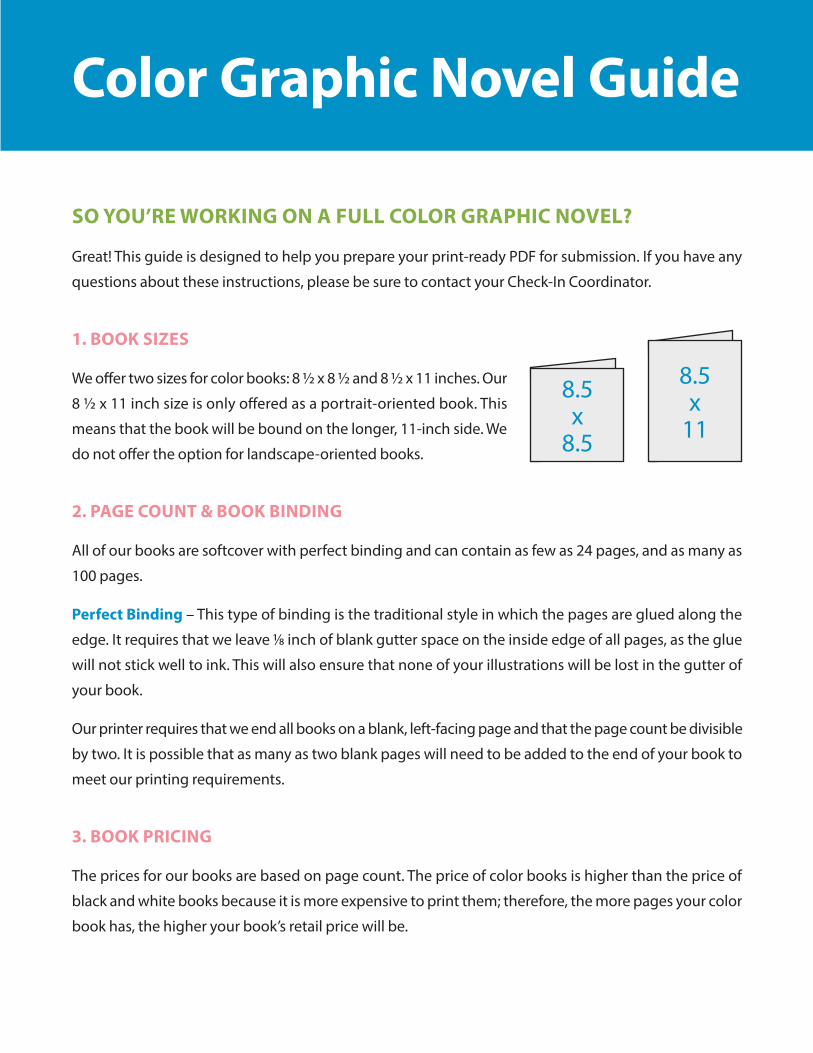
Color Graphic Novel Guide SO YOU’RE WORKING ON A FULL COLOR GRAPHIC NOVEL? Great! This guide is designed to help you prepare your print-ready PDF for submission. If you have any questions about these instructions, please be sure to contact your Check-In Coordinator. 1. BOOK SIZES We offer two sizes for color books: 8 ½ x 8 ½ and 8 ½ x 11 inches. Our 8 ½ x 11 inch size is only offered as a portrait-oriented book. This means that the book will be bound on the longer, 11-inch side. We do not offer the option for landscape-oriented books. 2. PAGE COUNT & BOOK BINDING All of our books are softcover with perfect binding and can contain as few as 24 pages, and as many as 100 pages. Perfect Binding – This type of binding is the traditional style in which the pages are glued along the edge. It requires that we leave 1/8 inch of blank gutter space on the inside edge of all pages, as the glue will not stick well to ink. This will also ensure that none of your illustrations will be lost in the gutter of your book. Our printer requires that we end all books on a blank, left-facing page and that the page count be divisible by two. It is possible that as many as two blank pages will need to be added to the end of your book to meet our printing requirements. 3. BOOK PRICING The prices for our books are based on page count. The price of color books is higher than the price of black and white books because it is more expensive to print them; therefore, the more pages your color book has, the higher your book’s retail price will be. 8.5 x 8.5 8.5 x 11
Transcript of Color Graphic Novel Guide - AuthorHouse Self … Graphic Novel Guide So You’re WorkiNG oN a Full...
Color Graphic Novel Guide
So You’re WorkiNG oN a Full Color GraphiC Novel?
Great! This guide is designed to help you prepare your print-ready PDF for submission. If you have any
questions about these instructions, please be sure to contact your Check-In Coordinator.
1. Book SizeS
We offer two sizes for color books: 8 ½ x 8 ½ and 8 ½ x 11 inches. Our
8 ½ x 11 inch size is only offered as a portrait-oriented book. This
means that the book will be bound on the longer, 11-inch side. We
do not offer the option for landscape-oriented books.
2. paGe CouNt & Book BiNdiNG
All of our books are softcover with perfect binding and can contain as few as 24 pages, and as many as
100 pages.
perfect Binding – This type of binding is the traditional style in which the pages are glued along the
edge. It requires that we leave 1/8 inch of blank gutter space on the inside edge of all pages, as the glue
will not stick well to ink. This will also ensure that none of your illustrations will be lost in the gutter of
your book.
Our printer requires that we end all books on a blank, left-facing page and that the page count be divisible
by two. It is possible that as many as two blank pages will need to be added to the end of your book to
meet our printing requirements.
3. Book priCiNG
The prices for our books are based on page count. The price of color books is higher than the price of
black and white books because it is more expensive to print them; therefore, the more pages your color
book has, the higher your book’s retail price will be.
8.5x
8.5
8.5x
11

deSiGN aSpeCtS to CoNSider
The following five aspects will help you during the design of your book.
1. Full Bleed imaGeS aNd Bleed SpaCe
If you would like your images to extend all the way to the edges
of your pages, these are called “full-bleed” images. In order for
us to print “full-bleed” images, they must extend ¼ of an inch
beyond where the printer will trim the page. This ¼ inch of
space around the outer edge of your book is known as “bleed
space”. Having it there ensures that when your book is trimmed,
the image will go all the way to the edge of the page.
On the outside edge of your interior proof, there will be a thin grey line to indicate the trim lines.
Anything that appears outside of that grey line will be trimmed off at the printer. If your images have
vital information close to the edges, we advise that you do not make them full-bleed, as slight shifting
may occur during trimming.
All images that are not full-bleed need to be kept at least ¾ of an inch away from the edge of the page.
Bleed Space (1/8 inch for interior pages)

please see the examples below for a better understanding of trim lines and bleed space.
Before printer trimming
even numbered pages odd numbered pages
after printer trimming
even numbered pages odd numbered pages

2. imaGe Size aNd reSolutioN
An important thing to pay attention to when formatting the images in your book is resolution. For the
best quality printing, we require that all images be at least 300 Dots Per Inch (DPI). If you wish to include
full-bleed images, they must be at least the following size to account for bleed space:
8.5 x 8.5 book size – 8.625 x 8.75 inches
8.5 x 11 book size – 8.625 x 11.25 inches
3. Color SpaCe: rGB vS. CmYk
Most images that are created on a computer, scanned, or
are taken with a digital camera will automatically be in the
color space known as RGB. This stands for Red/Green/Blue
and involves colors that have light emitting from behind
them in the way that computer screens or cameras do.
Since books cannot be printed with a backlight, images
cannot be printed in RGB. However, we can convert them
to CMYK, which is the color space that we do print in.
CMYK stands for Cyan/Magenta/Yellow/Black and is the predominant color space used in the printing
industry. Since these colors are not backed by light, your images may appear slightly less vibrant once
we have converted them to CMYK. Usually, the change is not noticeable in photographs, but it can make
a difference in illustrations with vibrant or deep colors. For this reason, it is best if you can convert your
images to CMYK before sending them in so you know what they will look like. If you are not able to do
this, your book designer will do it for you once your project is in design.
rGB CmYk
rGB: red + Green + Blue
(primary colors of light)
CmYk: Cyan + magenta + Yellow + Black
(primary colors of pigment)

4. Color SaturatioN limitS
Each of these four colors (Cyan, Magenta, Yellow and Black) print in a separate layer which saturates the
page with toner. Different layers may have more toner than others. The amount of toner present in each
layer is represented by a percentage ranging from 0% - 100%. This percentage is the tonal saturation.
The percentages of, C+M+Y+K have the potential to equal 400%. To avoid potential drying issues during
printing, our printer requires all images to be kept below 240% tonal saturation. If needed, we will adjust
tonal saturation to be under 240% for you.
C-86% M-97% Y-34% K-29%
Total Tonal Saturation: 246%
C-85% M-89% Y-25% K-29%
Total Tonal Saturation: 228%
5. Color matChiNG
Our printers will do everything possible to ensure that your book’s colors are printed as accurately and
consistently as possible; however, we do allow for a narrow range of color variance between printed
copies of your book. This does not mean that your colors will change – blues will remain blue and reds
will remain red – but you may see slight differences in the color’s brightness or hue. This is nothing to be
concerned about and you may even notice similar differences in other books, greeting cards, or printed
materials at retail stores. Slight variations are a normal part of the printing process.

Creating a print-ready File for a Color Graphic Novel
SpeCial NoteS reGardiNG pdF FileS
Please note that the file you submit will need to meet the printer requirements. Submitting a print-
ready file means that the exact design you submit will be sent to the printer. Since the file is meant to be
“ready for printing,” we will not design your graphic novel. We will add a copyright page and, if necessary,
insert blank pages at the end of the manuscript to meet our printer’s requirements. These are the only
adjustments that will be made to your file by our designers. If you want design elements such as page
numbers, headers, or a table of contents to appear in your book, then these elements will need to be
included in the PDF file that you submit.
Because of the specific file requirements for creating e-books, we cannot guarantee that graphic novels
will meet the requirements of all e-book vendors.
imaGeS iN pdF FileS
Please be sure images meet the following requirements:
• All images need to have a resolution of at least 300 DPI/PPI (Dots Per Inch/Pixels Per Inch). Images
with a resolution of less than 300 DPI may appear distorted and blurry when printed.
• All images must fit within the printer margins of your book.
• If you are using any images or text that you did not create yourself, you will need to obtain written
permission from the copyright holder to include the material in your book.
CreatiNG Your pdF
These instructions were prepared using Microsoft Word 2007 and show a book that is not set up at full bleed.
If you are using a different version of Microsoft Word, some screens may differ from the diagrams. If you
are using another word processing application (such as WordPerfect or OpenOffice) or professional layout
software (such as QuarkXPress), you can refer to your product’s documentation for instructions on adjusting
these settings. If you are using InDesign and would like a template, please ask your Check-In Coordinator.
First, you will need to set the page size and margins in your Word document to match the size of your
final book. To begin, open your manuscript in Word.

1. On the toolbar, go to page layout. Once there, choose margins, and finally, Custom margins.
2. Once the set-up window opens, choose paper, then paper Size and select Custom size. This is where
you will enter the trim size of your book in the Width and height sections.

3. Still in the set-up window, choose margins. At this point you will need to enter the margin
specifications for your trim size by referencing the list below:
page Setup: marginstop Bottom inside outside Gutter.75 .75 .5 .5 .13
4. After your page margins are entered be sure that orientation is set to portrait, and multiple pages
is set to mirror margins.
5. Still in the set-up window, choose Layout. Under Headers and Footers, choose Different odd and
even. This is the last step to set the margins, so you may now choose OK.

revieW Your maNuSCript
Since changing your margins will shift your text, please be sure to look over your entire file. If any tables,
lists, or images are outside of the margins you will need to reposition them.
If everything looks okay, you can now proceed to printing your PDF.
priNt Your pdF
1. Choose your office or File button in the toolbar and select print.
2. In the print window, select adobe pdF.
3. Choose properties, and then default settings.Select an option that contains the prefix pdF/X-1a.
If you do not have this option, choose high Quality print or press Quality.

4. Be sure that rely on system fonts only; do not use document fonts is unchecked.
5. Choose paper Quality, and then Color.
6. Select okay and decide the best place for you to save your PDF file.
BeFore You SuBmit
Before submitting your final file, review your PDF again. To view the PDF as it will appear printed, go to
View, then select Two-up Continuous and Show Cover Page During Two-up. This will ensure that you are
seeing the layout of your book as if you were looking at an open book.
5/1/14