Clutch Purse Tutorial
12
Need: -2 pieces of outside fabric (6.25” x 11”) -2 pieces of inside fabric (6.25”x 11”) -Optional: 2 pieces of interfacing (6.25”x 11”) -1 nine inch zipper (or take a longer one and make it shorter, read instructions on packaging for how to do that) -1 yard of pom pom trim (I found these lovelies at Joann’s in the decorator fabric section) *Remember to always back stitch at beginning and end of sewing. This keeps it from unraveling* *All seam allowances are ¼”* 1. Take the two pieces of exterior fabric and create a center pleat on each. Take the first piece, long way across, and fold in half .
-
Upload
nimmi-nims -
Category
Documents
-
view
227 -
download
0
description
sewing
Transcript of Clutch Purse Tutorial
Need:
-2 pieces of outside fabric (6.25” x 11”)
-2 pieces of inside fabric (6.25”x 11”)
-Optional: 2 pieces of interfacing (6.25”x 11”)
-1 nine inch zipper (or take a longer one and make it shorter, read instructions on packaging for how to do that)
-1 yard of pom pom trim (I found these lovelies at Joann’s in the decorator fabric section)
*Remember to always back stitch at beginning and end of sewing. This keeps it from unraveling*
*All seam allowances are ¼”*
1. Take the two pieces of exterior fabric and create a center pleat on each. Take the first piece, long way across, and fold in half .

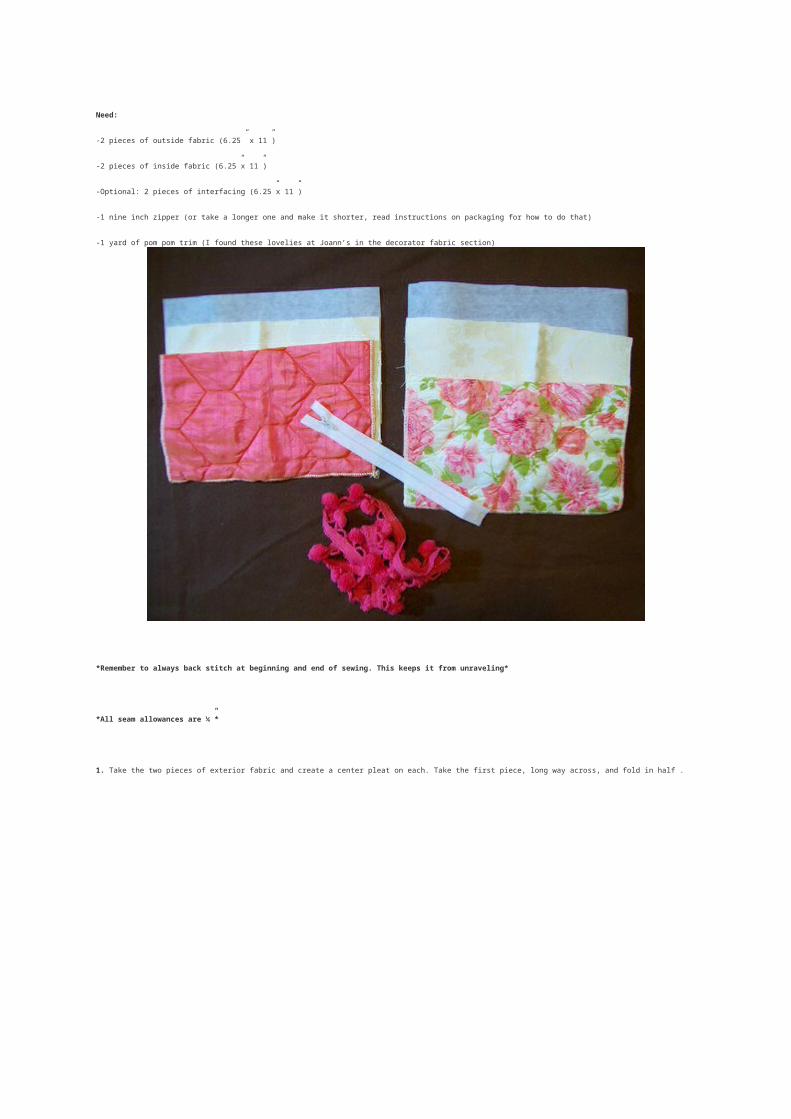
An inch in from the middle crease, take top fabric and fold it back an inch.
Pin in place.
Then flip over and do the same to the over side of the middle crease. Do the same thing for the other piece of exterior fabric.
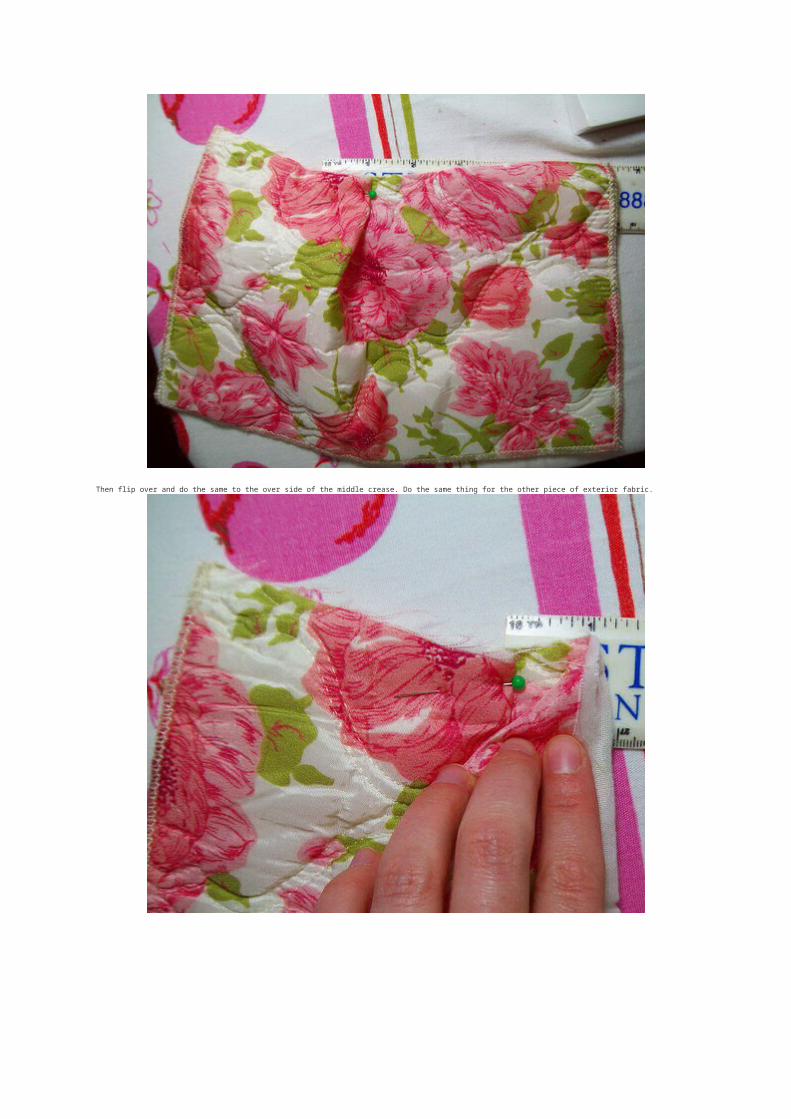
**Repeat on other piece of exterior fabric**
2. Place zipper face down onto top of piece of exterior fabric. Pin on.
3. Using a zipper foot, sew it on. Open and iron.
4. Place the other side of zipper onto other piece of exterior fabric at the top, right sides facing. Pin on.
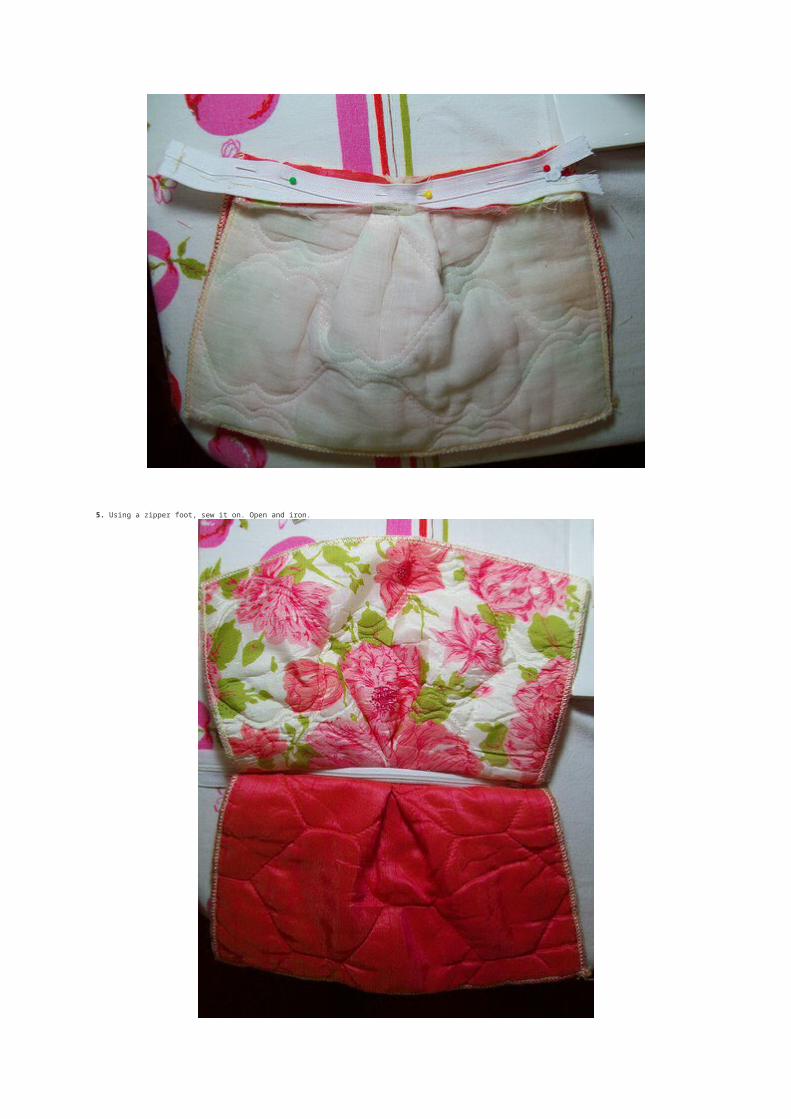
5. Using a zipper foot, sew it on. Open and iron.
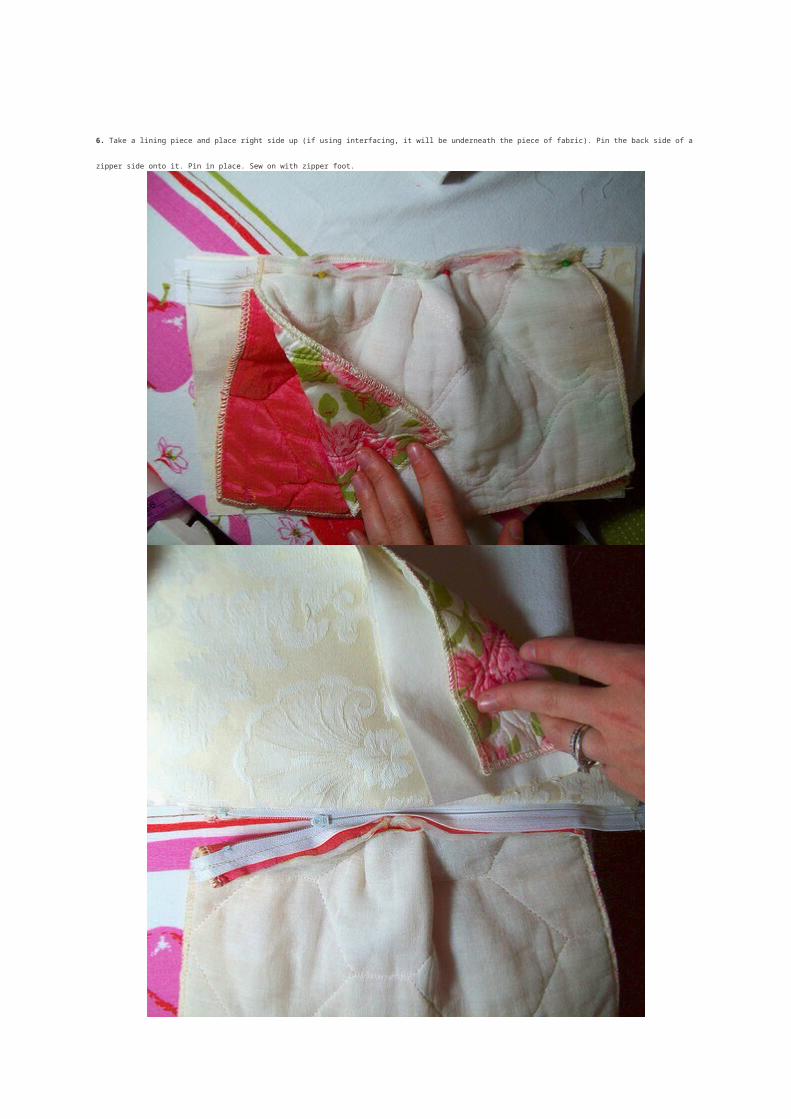
6. Take a lining piece and place right side up (if using interfacing, it will be underneath the piece of fabric). Pin the back side of a zipper side onto it. Pin in place. Sew on with zipper foot.
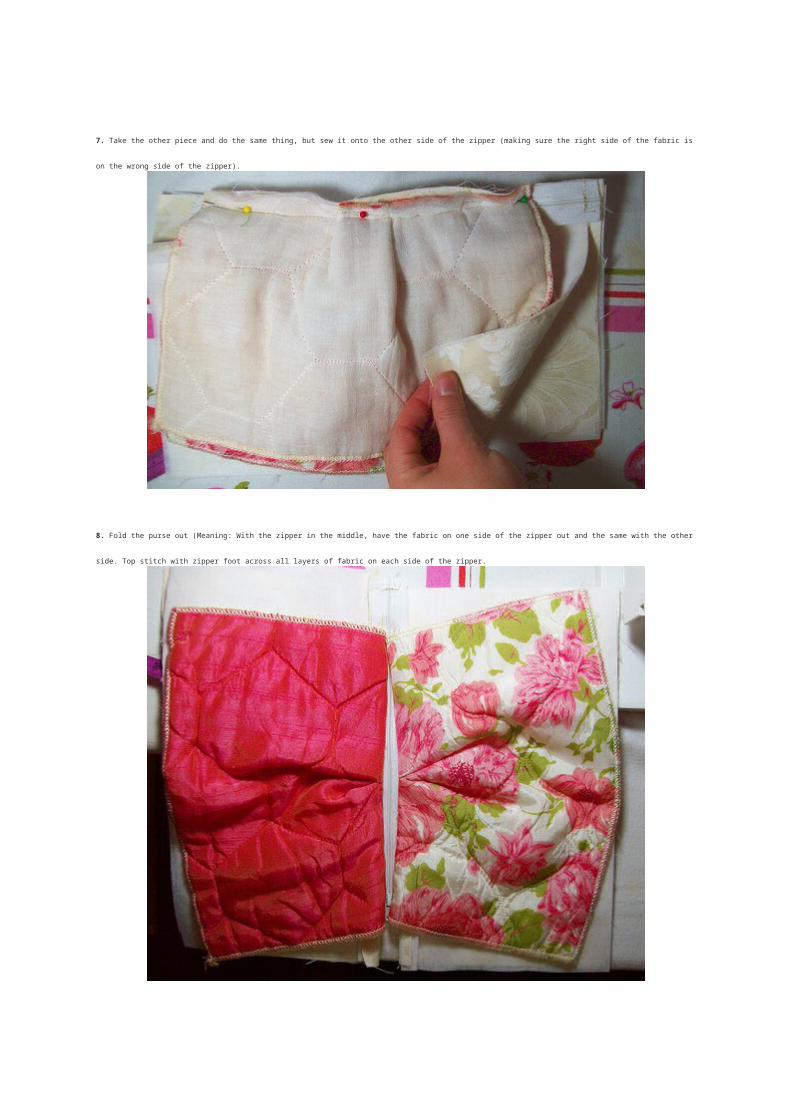
7. Take the other piece and do the same thing, but sew it onto the other side of the zipper (making sure the right side of the fabric is on the wrong side of the zipper).
8. Fold the purse out (Meaning: With the zipper in the middle, have the fabric on one side of the zipper out and the same with the other side. Top stitch with zipper foot across all layers of fabric
on each side of the zipper.
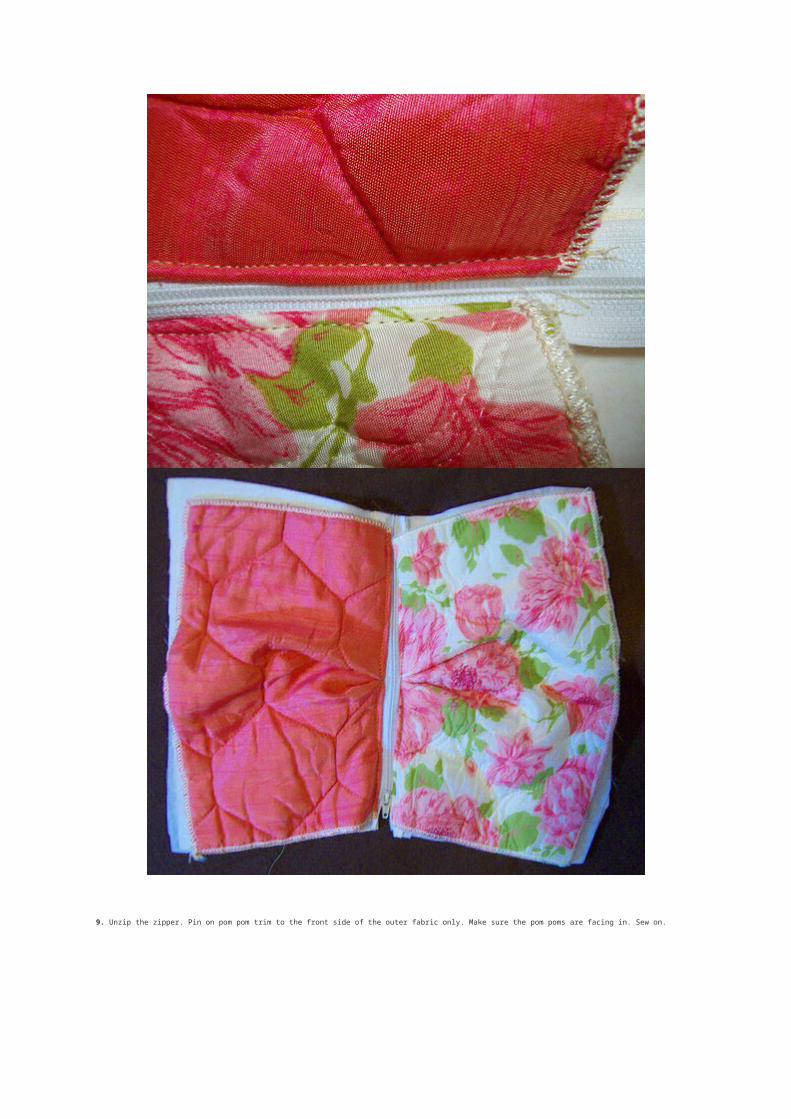
9. Unzip the zipper. Pin on pom pom trim to the front side of the outer fabric only. Make sure the pom poms are facing in. Sew on.
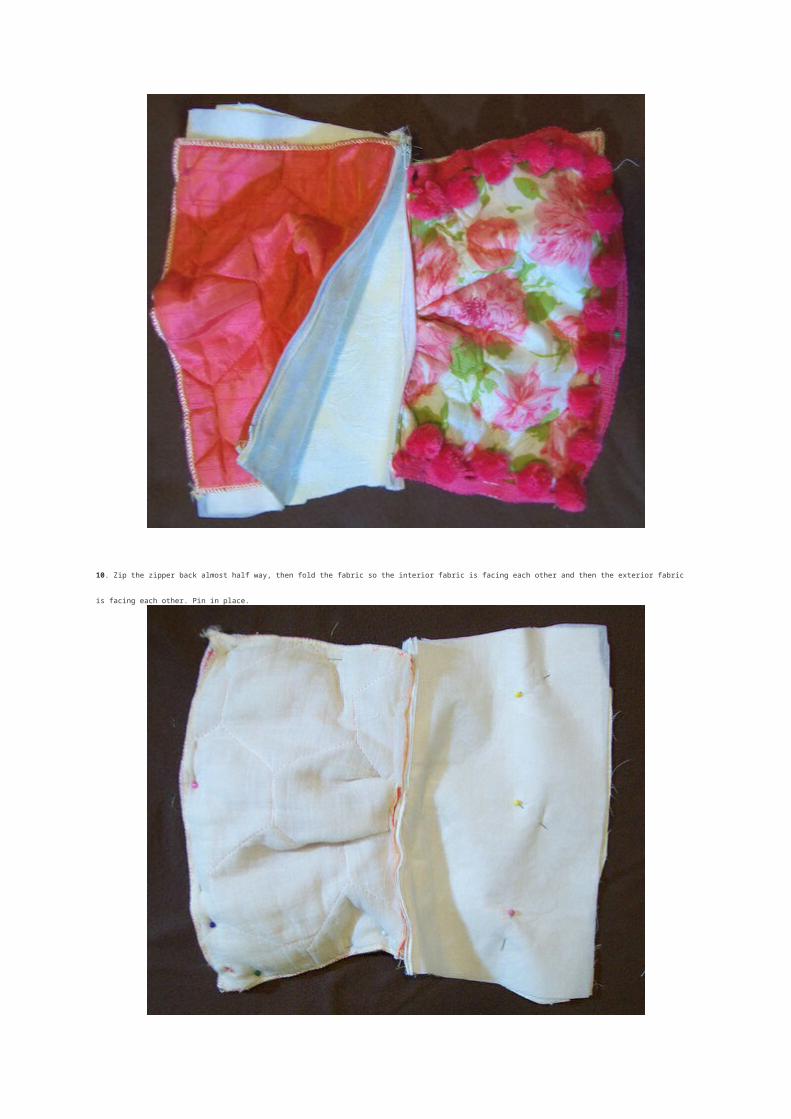
10. Zip the zipper back almost half way, then fold the fabric so the interior fabric is facing each other and then the exterior fabric is facing each other. Pin in place.

11. Sew around the purse, with the exception of an opening in the bottom of the interior fabrics. This is where you will turn the purse right side out.
12. Turn purse right side out and sew the opening shut (I did mine by hand so you couldn’t see the stitching. I have no idea what I did stitchwise, I just did it). You can machine sew it closed as
well.
13. Push the interior fabrics inside the exterior to have the final purse.

14. Then take a small piece of ribbon and tie it on the loop of the zipper.

labels: anthropologiefied , how to , purse , sewing