Close Combat, Routing, Rally and Pursuit - Angelfire · Gemini-ARAP WH40K Rules 2.3 and 2.4.4 Close...
21
Gemini-ARAP WH40K Rules 2.3 and 2.4.1 Close Combat. Page 1 Close Combat, Routing, Rally and Pursuit . This page was originally written for use with earlier versions of the ARAP rules such as 2.3. The 2.4 version of the rules have simplified mêlée combat and hopefully improved it. Refer to the 2.4 basic rules pages for the more up to date version of the mêlée rules. These pages have been left in place to provide a little more depth on situations that I only briefly covered during the rewrite. Where contradictions occur the 2.4 page has precedence. Note that in 2.4 rules “to-hit” goals have now become low scores . Statements such as “hits on a 3+” should now be read “...on a 4 or less”, for example. How to calculate the required “to-hit” score in mêlée combat has also changed. Charging into Combat. Fighting in Close Combat requires some form of Close Combat armament. These range from simple weapons like claws or clubs to compact firearms or energy mêlée weapons. The basic points cost of a model is assumed to include a simple weapon. Most creatures have natural weapons or carry various knives, clubs combat accessories or bayonets etc. In reality an individual may carry several small weapons but in game terms such weapons are considered to be the equivalent of a single hand weapon and allow them to fight without penalties for being unarmed or using improvised weapons. These weapons are included in the base cost of a creature and are termed “Free Weapons”. Even if not mentioned in the wargear description it is assumed the model has the equivalent of a single free hand weapon unless it is specifically stated they are unarmed. All Soldiers or Warriors can be assumed to carry a knife or two, for example. Free weapons are not counted when determining if a model has two Close Combat weapons and is entitled to make an extra attack in Close combat. The first hand weapon a figure has is assumed to be free. Additional hand weapons and other more sophisticated types of close combat weapons are counted. Being locked in close combat, successfully charging an enemy or being charged automatically activates all participants in the units. This phase of the turn must be used to fight a round of close combat or to break off.
Transcript of Close Combat, Routing, Rally and Pursuit - Angelfire · Gemini-ARAP WH40K Rules 2.3 and 2.4.4 Close...
Gemini-ARAP WH40K Rules 2.3 and 2.4.1
Close Combat. Page 1
Close Combat, Routing, Rally and Pursuit.
This page was originally written for use with earlier versions of
the ARAP rules such as 2.3. The 2.4 version of the rules have simplified
mêlée combat and hopefully improved it. Refer to the 2.4 basic rules
pages for the more up to date version of the mêlée rules. These pages
have been left in place to provide a little more depth on situations that
I only briefly covered during the rewrite. Where contradictions occur the
2.4 page has precedence. Note that in 2.4 rules “to-hit” goals have
now become low scores. Statements such as “hits on a 3+” should now
be read “...on a 4 or less”, for example. How to calculate the required
“to-hit” score in mêlée combat has also changed.
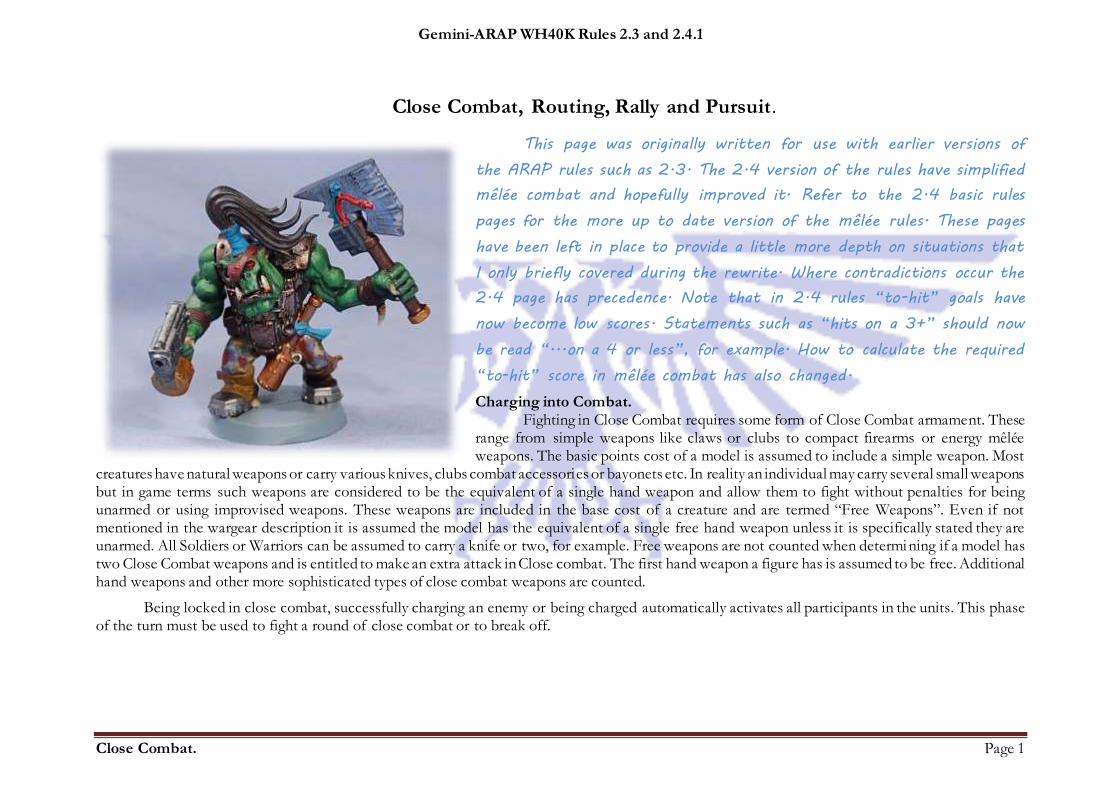
Charging into Combat. Fighting in Close Combat requires some form of Close Combat armament. These
range from simple weapons like claws or clubs to compact firearms or energy mêlée weapons. The basic points cost of a model is assumed to include a simple weapon. Most
creatures have natural weapons or carry various knives, clubs combat accessories or bayonets etc. In reality an individual may carry several small weapons but in game terms such weapons are considered to be the equivalent of a single hand weapon and allow them to fight without penalties for being unarmed or using improvised weapons. These weapons are included in the base cost of a creature and are termed “Free Weapons”. Even if not mentioned in the wargear description it is assumed the model has the equivalent of a single free hand weapon unless it is specifically stated they are unarmed. All Soldiers or Warriors can be assumed to carry a knife or two, for example. Free weapons are not counted when determining if a model has two Close Combat weapons and is entitled to make an extra attack in Close combat. The first hand weapon a figure has is assumed to be free. Additional hand weapons and other more sophisticated types of close combat weapons are counted.
Being locked in close combat, successfully charging an enemy or being charged automatically activates all participants in the units. This phase of the turn must be used to fight a round of close combat or to break off.
Gemini-ARAP WH40K Rules 2.3 and 2.4.1
Close Combat. Page 2
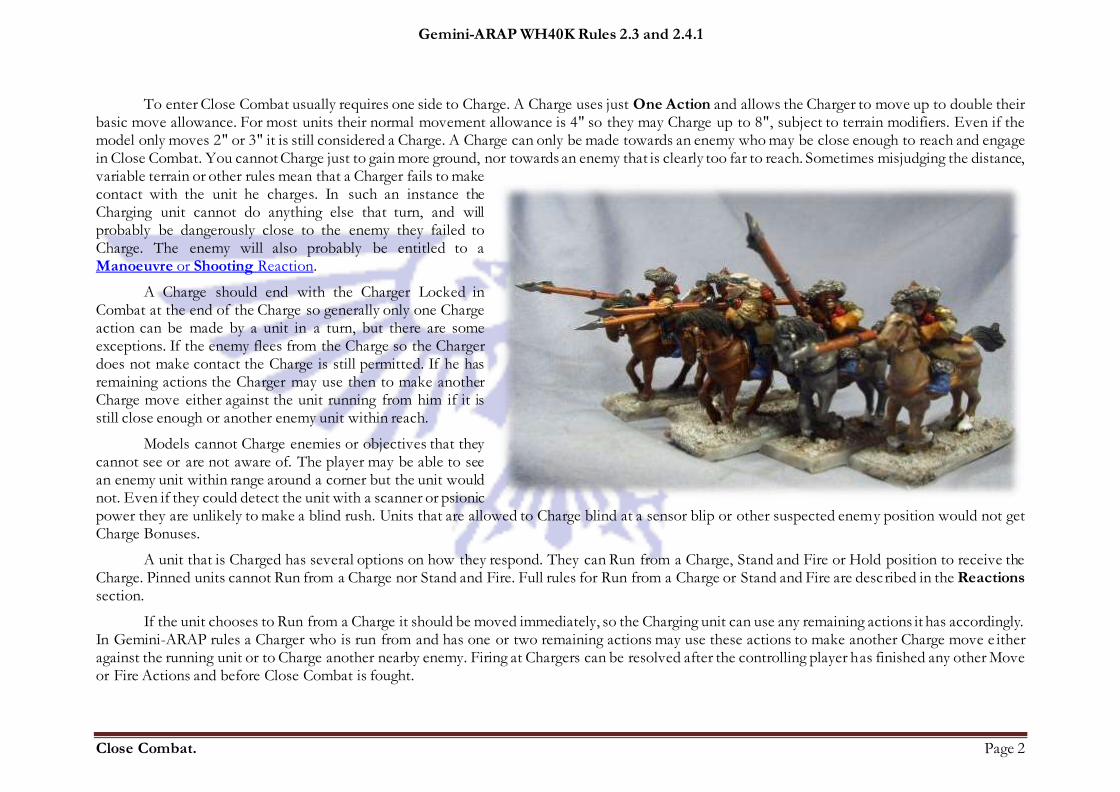
To enter Close Combat usually requires one side to Charge. A Charge uses just One Action and allows the Charger to move up to double their basic move allowance. For most units their normal movement allowance is 4" so they may Charge up to 8", subject to terrain modifiers. Even if the model only moves 2" or 3" it is still considered a Charge. A Charge can only be made towards an enemy who may be close enough to reach and engage in Close Combat. You cannot Charge just to gain more ground, nor towards an enemy that is clearly too far to reach. Sometimes misjudging the distance, variable terrain or other rules mean that a Charger fails to make contact with the unit he charges. In such an instance the Charging unit cannot do anything else that turn, and will probably be dangerously close to the enemy they failed to Charge. The enemy will also probably be entitled to a Manoeuvre or Shooting Reaction.
A Charge should end with the Charger Locked in Combat at the end of the Charge so generally only one Charge action can be made by a unit in a turn, but there are some exceptions. If the enemy flees from the Charge so the Charger does not make contact the Charge is still permitted. If he has remaining actions the Charger may use then to make another Charge move either against the unit running from him if it is still close enough or another enemy unit within reach.
Models cannot Charge enemies or objectives that they cannot see or are not aware of. The player may be able to see an enemy unit within range around a corner but the unit would not. Even if they could detect the unit with a scanner or psionic power they are unlikely to make a blind rush. Units that are allowed to Charge blind at a sensor blip or other suspected enemy position would not get Charge Bonuses.
A unit that is Charged has several options on how they respond. They can Run from a Charge, Stand and Fire or Hold position to receive the Charge. Pinned units cannot Run from a Charge nor Stand and Fire. Full rules for Run from a Charge or Stand and Fire are described in the Reactions section.
If the unit chooses to Run from a Charge it should be moved immediately, so the Charging unit can use any remaining actions it has accordingly. In Gemini-ARAP rules a Charger who is run from and has one or two remaining actions may use these actions to make another Charge move e ither against the running unit or to Charge another nearby enemy. Firing at Chargers can be resolved after the controlling player has finished any other Move or Fire Actions and before Close Combat is fought.
Gemini-ARAP WH40K Rules 2.3 and 2.4.1
Close Combat. Page 3
A Charged unit may Stand and Fire. (Official 7th Edition Rules now call this “Overwatch”). A unit can only Stand and Fire if the Charger moves through the unit’s firing arc and the unit has missile weapons or ranged attacks and is not prevented from using them by some condition. A unit that Stands and Fires is not Activated (since it is the Charger’s turn) but must roll two D6 against its Activation Value if it wishes to fire. If they fail this test they must stand to receive the attack, they cannot Flee from the Charge.
If one success is rolled Pistols, Assault Weapons and Rapid Fire weapons may be used and may only fire once. If two successes are rolled Slow and Heavy Weapons may also be used. If two successes were rolled the Heavy Weapon may fire its normal number of times. Slow w eapons may only fire once. Units with the “Relentless” Special Rule may fire their Heavy Weapons if only one success was rolled.
All weapons that Stand and Fire fire as a Snap Shot so the firing units BS is treated as being 1. Template weapons work out how many chargers are under the template when they are 7" away. Troops that move greater than 12" during the turn they charged will be at an additional -1 to hit, regardless of the actual distance they are charging. For example, a unit with a move of 5 that used two move actions to get within 3" of an enemy and used its third final action to charge would have moved 13" and be an additional -1 to hit, even though the actual charge was just 3".
Shotguns are assumed to wait until the target is at half-range to fire so the +1 modifier to hit.
Template weapons work out how many chargers are under the template when they are 7" away unless the Charge started from a closer
range.
Area Weapons are fired assuming the start of the charge as the range or the maximum range of the weapon, whichever is the lesser.
Charging Fire. If Charging a distance greater than the basic move allowance the Charger may fire while charging. This has the same action cost as a normal
charge (one action) but can only be done if Pistol or Assault Weapons are used. You cannot Charge and Fire and also take an extra +D6" of move for being Fleet.
Chargers can only fire on the unit they are Charging.
Only Pistols or Assault Weapons can be fired during a Charge.
Charge distance must be greater than the Charger’s basic move allowance.
Grenades cannot be thrown as for a Shooting action when Charging. If a unit has grenades they have the effects described in Grenades Used During a Charge.
Only one shot can be made by each Charging model and these are at BS 1. The usual modifiers for target size and being in cover etc also apply.
The rules listed for Shotguns, Area and Template weapons under Stand and Fire also apply to these weapons used in Charging Fire.
Shotguns are assumed to wait until the target is at half-range to fire so have a +1 modifier to hit.
Gemini-ARAP WH40K Rules 2.3 and 2.4.1
Close Combat. Page 4
Template weapons work out how many enemies are under the template when the chargers are 7" away unless the Charge started from a closer range.
Area Weapons are fired assuming the start of the charge as the range or the maximum range of the weapon, whichever is the lesser.
If a Charged unit chooses to Stand and Fire there will obviously be instances when both the Chargers and Charged are firing. The side with the highest overall Initiative fires first unless the Charged unit are in Cover. In this case the Charged unit always gets to fire fi rst.
Casualties inflicted during Stand and Fire and Charging Fire count towards the total number of casualties inflicted in the fi rst round of Close Combat and contribute towards determining which side wins the round. Make a note of this value, you will need to add it to the number of wounds inflicted when the actual Close Combats are fought.
Mêlée Radius. Essentially the objective of a Charge is to bring models into base to base contact. Some models do not have bases or may have bases that give
an unfair advantage. To allow for this ARAP rules give each figure a Mêlée Radius. Any enemy figure within this distance is treated as though it is in base to base contact. A figure can attack any enemy within its Mêlée Radius and Attack Arc and can be attacked if it is in the Mêlée Radius and Attack Arc of an enemy. The Mêlée Radius is the model’s size category in inches. Most models are Size Two so have a Mêlée Radius of 2". A 50mm cavalry base is a handy rule for this. Size One models have a Mêlée Radius of 1" and Size Three models that are capable of close combat have a Mêlée Radius of 3". In the rules below a figure within Mêlée Radius is treated as though it was in base to base contact.
Arranging Chargers. When charging an enemy unit the following rules are used when arranging the combatants:
Move the unit member nearest the unit to be charged up to their full Charge allowance. Adjust distance for difficult, variable or very difficult terrain. Make any dangerous terrain tests and remove the model if it is eliminated. If the model was eliminated move the next nearest model and so forth. If a model makes base to base contact with an enemy model or gets within Mêlée Radius the Charge is successful. The rest of the Charging unit is moved up to their full Charge allowance in accordance with the rules below. If the model did not make base to base contact it is left where it finished and the rest of the unit is moved towards it by their Charge allowance to retain unit coherency. If no models make contact or enter Mêlée Radius the charge fails. A unit that fails a Charge may not shoot that turn or do anything else.
Chargers are moved so they make base to base contact with the nearest unengaged enemy. You cannot place several models against a single enemy if there are enemies in range with no friendly models in base to base contact with them.
If all enemy models in charge range are in base to base contact with a friendly model chargers can be placed in base to base contact with an enemy already in contact with a friendly model or moved to within Mêlée Radius.
If none of the above conditions can be met the model is placed so that it maintains unit coherency if possible.
Models that are charged are turned to face their attackers but a note is made of whether the charge was into the side or rear of the unit since this will determine Charge bonuses and other factors.

Gemini-ARAP WH40K Rules 2.3 and 2.4.1
Close Combat. Page 5
If two or more units are in Close Combat they are termed as “Locked in Combat” or “Locked”. Models that are in Base-to-Base contact with an enemy or within Mêlée Radius are termed as “Engaged”. For some models their pose prevents actual base to base contact with another model or the model may not have a base. If models can be placed so that they are touching another they are considered to be in base to base contact in the following rules.
Models within Mêlée Radius of enemy models are able to fight as well as those in base-to-base contact. This represents the fact that the two units in combat would be mixed together in reality and not two distinct groups with the edges touching.
The troops that will fight in the first Close Combat round are therefore those that have charged or been charged and finish the movement phase in base to base combat or within Mêlée Radius of the enemy.
Only Engaged models can fight. All Locked models are eligible as casualties.
Models that Charged but did not end up Engaged cannot do anything for that Combat turn, but may become casualties.
When and How to Fight. Fighting Close Combats is probably best left until the end of the player turn so the full tactical picture has developed. Wait until the player has
rolled a Bust or had made all the other Move, Firing and Charge Actions that they can. Some units may have Actions left that they have not used because they have charged or been charged. If they successfully destroy the enemy in this Close Combat round they can use these remaining actions, even if the player went Bust.
Note that both players get to fight in the ASSAULT phase, regardless of whose turn it actually is.
It is possibly misleading to think of the combat round consisting of one side fighting and then the other. Engaged models fight in order of Initiative with all models with the same Initiative fighting at the same time. It may be helpful to think of a Close Combat round as being made up of several steps, with the highest Initiative fighters fighting in the first “Initiative step”, then those next highest in the s econd step and so on. Some members of a unit may therefore fight early on in a round and others near the end. If models on each side have the same Initiative then they fight simultaneously, both rolling their to-hit, to damage and Save rolls at the same time.
Combat during Close Combat is made using the fighter’s Weapon Skill and he makes as many attacks as the Attack number of his profile. Certain situations or weapons may give additional attacks. Each fighter in a Close Combat makes as many attacks as the number in the “Attack” section of his profile (with the exceptions described next).
Charge Bonus. Units that Charged that turn get an extra attack for the first round of combat. This attack is assumed to take place during the charge so is not
subject to the -1 penalty for using an extra weapon in Close Combat and gaining an additional attack. Charging an enemy unit in i ts flank or rear can be even more disruptive to the enemy so a unit that charges the enemy ’s flank gets a charge bonus of two extra attacks, not one. If the unit charged in the
Gemini-ARAP WH40K Rules 2.3 and 2.4.1
Close Combat. Page 6
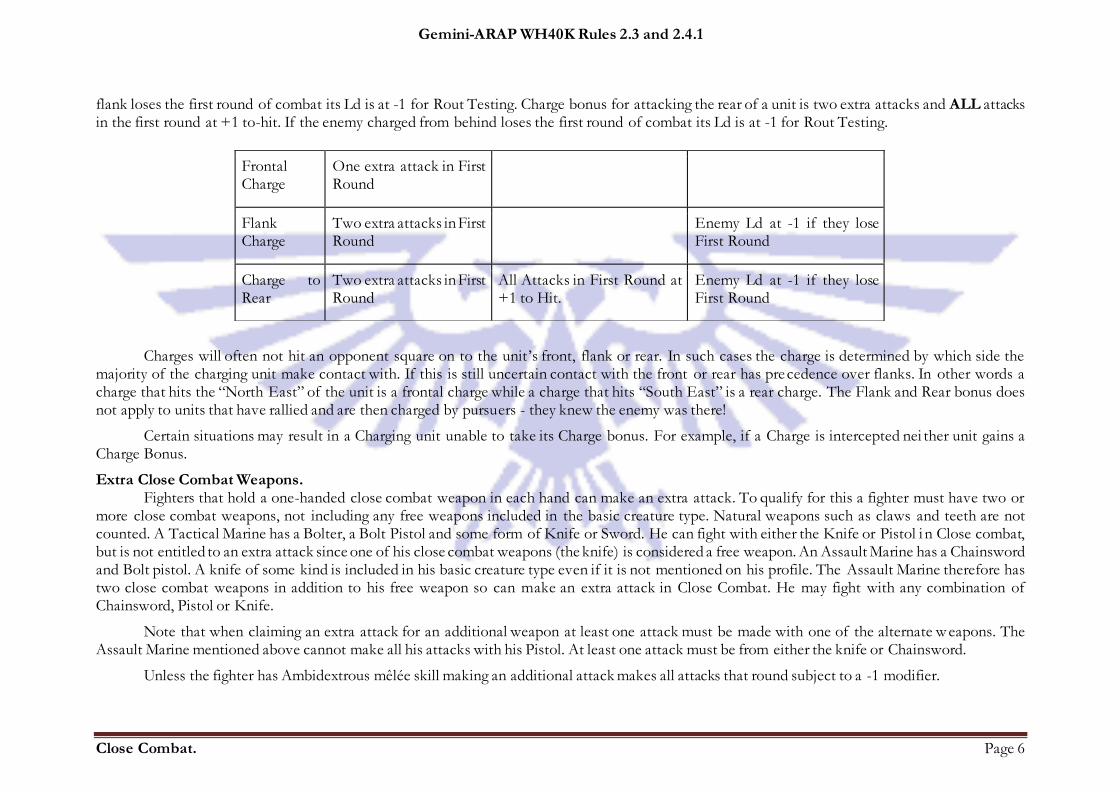
flank loses the first round of combat its Ld is at -1 for Rout Testing. Charge bonus for attacking the rear of a unit is two extra attacks and ALL attacks in the first round at +1 to-hit. If the enemy charged from behind loses the first round of combat its Ld is at -1 for Rout Testing.
Charges will often not hit an opponent square on to the unit ’s front, flank or rear. In such cases the charge is determined by which side the majority of the charging unit make contact with. If this is still uncertain contact with the front or rear has precedence over flanks. In other words a charge that hits the “North East” of the unit is a frontal charge while a charge that hits “South East” is a rear charge. The Flank and Rear bonus does not apply to units that have rallied and are then charged by pursuers - they knew the enemy was there!
Certain situations may result in a Charging unit unable to take its Charge bonus. For example, if a Charge is intercepted nei ther unit gains a Charge Bonus.
Extra Close Combat Weapons. Fighters that hold a one-handed close combat weapon in each hand can make an extra attack. To qualify for this a fighter must have two or
more close combat weapons, not including any free weapons included in the basic creature type. Natural weapons such as claws and teeth are not counted. A Tactical Marine has a Bolter, a Bolt Pistol and some form of Knife or Sword. He can fight with either the Knife or Pistol i n Close combat, but is not entitled to an extra attack since one of his close combat weapons (the knife) is considered a free weapon. An Assault Marine has a Chainsword and Bolt pistol. A knife of some kind is included in his basic creature type even if it is not mentioned on his profile. The Assault Marine therefore has two close combat weapons in addition to his free weapon so can make an extra attack in Close Combat. He may fight with any combination of Chainsword, Pistol or Knife.
Note that when claiming an extra attack for an additional weapon at least one attack must be made with one of the alternate w eapons. The Assault Marine mentioned above cannot make all his attacks with his Pistol. At least one attack must be from either the knife or Chainsword.
Unless the fighter has Ambidextrous mêlée skill making an additional attack makes all attacks that round subject to a -1 modifier.
Frontal Charge
One extra attack in First Round
Flank Charge
Two extra attacks in First Round
Enemy Ld at -1 if they lose First Round
Charge to Rear
Two extra attacks in First Round
All Attacks in First Round at +1 to Hit.
Enemy Ld at -1 if they lose First Round
Gemini-ARAP WH40K Rules 2.3 and 2.4.1
Close Combat. Page 7
Examples:
A Guardsman with a Chainsword and Laspistol that has one attack and needs a 4+ to hit can either roll one dice for a 4+ or ma ke two attacks that need a 5+ to hit. His single attack can be with either the Pistol or the Chainsword, with the latter being the more logical choice since it is a more powerful weapon. If he opts for two attacks one must be with the pistol, the other with the chainsword. Using two weapons increases his chance of landing a h it from 50% to 56% and gives a 1 in 9 chance of landing two hits.
A Hero with two attacks needing a 4+ to hit either fires his right weapon twice needing 4+s, fires his left twice needing 4+s or makes three attacks needing 5+s
A Bounty Hunter with a pair of bolt pistols surprises the robber band in a rear attack. He has a attack profile of 2 and needs a basic score of 4+ to hit. For attacking from the rear all his attacks are at +1 and he gets two Charge Bonus Attacks. He can therefore make four attacks at 3+ or five all at 4+ since the modifiers of +1 for the rear charge cancels out the penalty of -1 for the extra attack.
Roll to Hit. To determine the number of attacks make a count of how many models with the same Initiative are Engaged with an enemy. Each of these can
make their full number of attacks and may be eligible for Charge Bonus attacks or an extra attack for an additional Close Combat weapon. Add these values together. The total is the number of attack dice you may roll to hit. If the some of the Engaged models have differing WS or armament some of these attacks may have a different target score to meet or may have different characteristics so use coloured dice to distinguish these.
The quick way to do this to identify the models on both sides that have the same Initiative and see how many are within their Mêlée Radius and Attack Arc of one or more enemies. Those that are will be able to fight in that Initiative step.
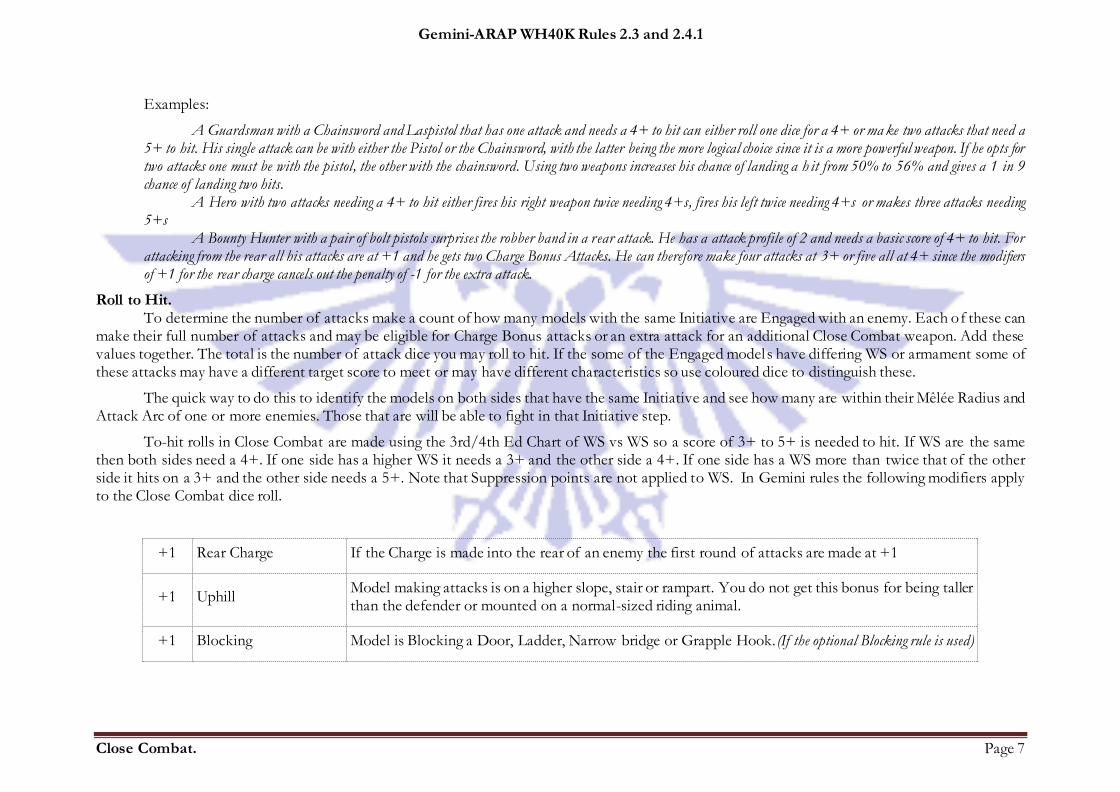
To-hit rolls in Close Combat are made using the 3rd/4th Ed Chart of WS vs WS so a score of 3+ to 5+ is needed to hit. If WS are the same then both sides need a 4+. If one side has a higher WS it needs a 3+ and the other side a 4+. If one side has a WS more than twice that of the other side it hits on a 3+ and the other side needs a 5+. Note that Suppression points are not applied to WS. In Gemini rules the following modifiers apply to the Close Combat dice roll.
+1 Rear Charge If the Charge is made into the rear of an enemy the first round of attacks are made at +1
+1 Uphill Model making attacks is on a higher slope, stair or rampart. You do not get this bonus for being taller than the defender or mounted on a normal-sized riding animal.
+1 Blocking Model is Blocking a Door, Ladder, Narrow bridge or Grapple Hook.(If the optional Blocking rule is used)
Gemini-ARAP WH40K Rules 2.3 and 2.4.1
Close Combat. Page 8
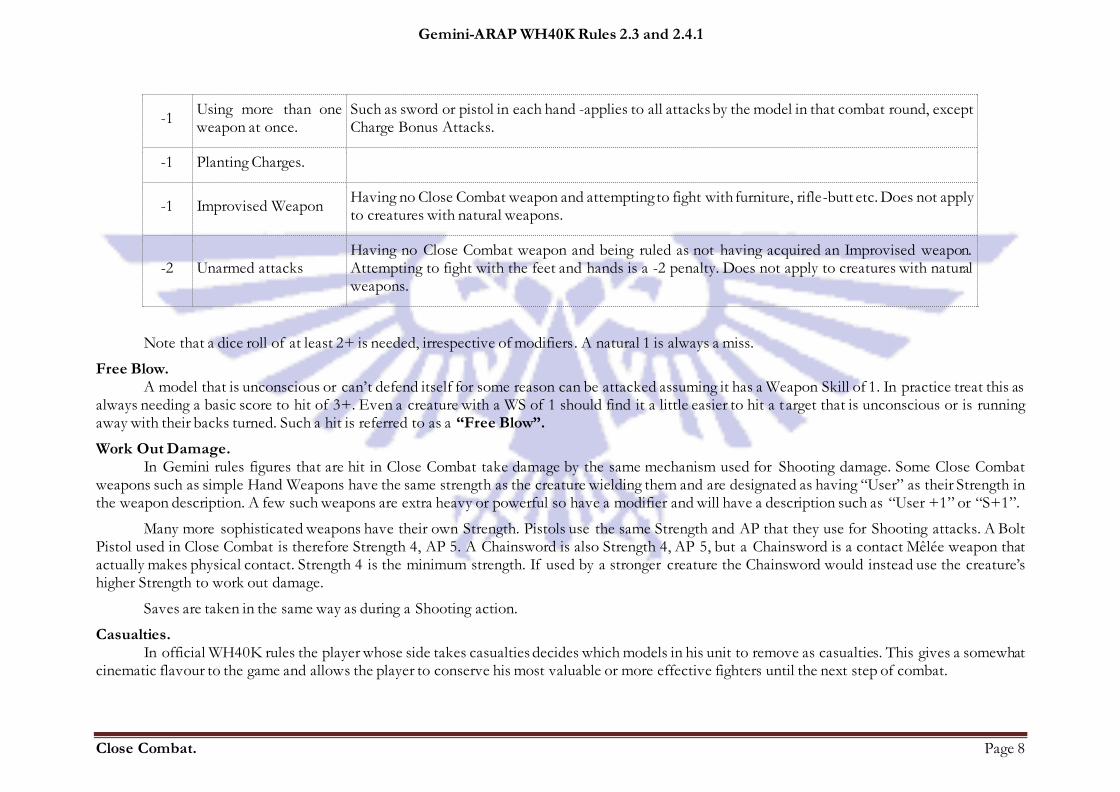
-1 Using more than one weapon at once.
Such as sword or pistol in each hand -applies to all attacks by the model in that combat round, except Charge Bonus Attacks.
-1 Planting Charges.
-1 Improvised Weapon Having no Close Combat weapon and attempting to fight with furniture, rifle-butt etc. Does not apply to creatures with natural weapons.
-2 Unarmed attacks Having no Close Combat weapon and being ruled as not having acquired an Improvised weapon. Attempting to fight with the feet and hands is a -2 penalty. Does not apply to creatures with natural weapons.
Note that a dice roll of at least 2+ is needed, irrespective of modifiers. A natural 1 is always a miss.
Free Blow. A model that is unconscious or can’t defend itself for some reason can be attacked assuming it has a Weapon Skill of 1. In practice treat this as
always needing a basic score to hit of 3+. Even a creature with a WS of 1 should find it a little easier to hit a t arget that is unconscious or is running away with their backs turned. Such a hit is referred to as a “Free Blow”.
Work Out Damage. In Gemini rules figures that are hit in Close Combat take damage by the same mechanism used for Shooting damage. Some Close Combat
weapons such as simple Hand Weapons have the same strength as the creature wielding them and are designated as having “User” as their Strength in the weapon description. A few such weapons are extra heavy or powerful so have a modifier and will have a description such as “User +1” or “S+1”.
Many more sophisticated weapons have their own Strength. Pistols use the same Strength and AP that they use for Shooting attacks. A Bolt Pistol used in Close Combat is therefore Strength 4, AP 5. A Chainsword is also Strength 4, AP 5, but a Chainsword is a contact Mêlée weapon that actually makes physical contact. Strength 4 is the minimum strength. If used by a stronger creature the Chainsword would instead use the creature’s higher Strength to work out damage.
Saves are taken in the same way as during a Shooting action.
Casualties. In official WH40K rules the player whose side takes casualties decides which models in his unit to remove as casualties. This gives a somewhat
cinematic flavour to the game and allows the player to conserve his most valuable or more effective fighters until the next step of combat.
Gemini-ARAP WH40K Rules 2.3 and 2.4.1
Close Combat. Page 9
An alternate approach is to randomly allocate wounds using the following priorities.
Enemies in base to base contact are removed first.
Enemies within the Attacker’s Mêlée Radius are removed as casualties.
Any other Engaged or Locked enemies.
Sometimes it will be really obvious which figure is wounded. If you rolled a distinctly coloured dice for a special weapon or character and it caused a wound then obviously the wound should go to a figure in contact with that fighter.
Who Won? The winner of a Close Combat round is the side that inflicts the most unsaved wounds. Make a note of the difference in unsaved wounds, since
this will be used as a modifier in the Rout test.
If a combat involves more than one unit on one or both sides the total number of unsaved wounds scored by the units of each side is totalled together. The side that has scored the least unsaved wounds has lost that round of combat and all units on that side involved in the combat must take individual Rout tests. This may result in some units Routing while others continue to fight in the next round. Obviously if one side is totally destroyed in a round there is no need for the surviving side to take a Rout test even if it suffered more wounds than the destroyed unit!
When there are more than two sides fighting the winning side(s) in a round are those that cause more unsaved wounds than they receive.
Example:
A is fighting both B and C. B takes 3 wounds from A. C takes 1 wound from A but inflicts 2 on A.
A is 4-2=+2, B is -3 and C 2-1=+1. Both A and C win that round, B has a negative score so loses and must Rout test.
Units that receive more unsaved wounds than they cause must take a Rout test. Wounds that are caused and then saved by a saving throw do not count towards these totals. If B and C were on the same side in the above example their side would have inflicted 2 wounds but taken 4. They would both Rout test with a -2 modifier, 2-4= -2.
What Happens If A Side Loses? When a unit loses a round of Close Combat it must make a Morale Check, which in Gemini Rules is also known as a “Rout Test”. Some units
do not take Rout tests or have other rules, and these are covered later.
To take a Rout Test 2D6 are rolled and the total must be less than or equal to the unit ’s Ld value. If the Leader of the unit is alive and has a different Ld use this instead, even if it is lower. If an Independent Character with a higher Ld has joined the unit use this value to reflect him inspiring the troops. If characters with a different Ld are with the unit they are still bound by the results of the test made with the unit’s or leader’s Ld.

Gemini-ARAP WH40K Rules 2.3 and 2.4.1
Close Combat. Page 10
Any Suppression points the combatants had are not applied to the Ld value used for Rout Tests. In fact any outstanding Suppression points the combatants had are discarded for units engaged in Close Combat. They have more immediate concerns!
The following modifiers do apply to the Ld value for Rout Tests:-
-x A modifier of -1 is applied for each unsaved wound the side lost the combat by. If the losing side made 3 kills but lost 5 then each unit on that side will Rout test with a -2 modifier.
-1 If unit was Charged in Flank or Rear during this combat round. Only applies to the first round of combat after being Charged.
-1 If the enemy unit(s) include some models with the Daemonic Visage Attribute.
-2 If all of the enemy have the Daemonic Visage Attribute or a Greater Daemon is a surviving enemy combatant.
+1 If unit is fighting a Hated enemy.
A score of double 1 rolled for the Rout test (“Snake Eyes”) automatically passes the test, irrespective of any modifiers. The refore always roll a Rout test even if the modifiers have taken your required score below zero.
A unit that fails a Rout test immediately flees in panic. It takes a direct route away from the unit that Routed them and any known nearby enemy units. Usually it will move towards the nearest “friendly” table edge but it can move towards nearby cover or any direction that does not take it towards a visible or known enemy.
Once a Rout test is failed the unit makes a “Flinch move” at the end of the lost combat round. The Routers are turned away from the enemy and moved D6". This figure already includes the penalty for the troops turning more than 90°. The Flinch move helps make it clear that the Routers are no longer Locked in Combat and Routing. After the Flinch move movement of Routers is made in the Compulsory Move phase of the routing side’s next turn(s) until they Rally, are destroyed or leave the field. Modify this movement rate for the terrain being crossed.
If the unit passes the Rout Test it goes on to fight another Close Combat round in the next player turn unless it decided to attempt to Break off or Hit and Run.
Gemini-ARAP WH40K Rules 2.3 and 2.4.1
Close Combat. Page 11
“No Retreat” Rule: Fearless, Stubbon and other Units that do not Rout Test.
Some units are “Fearless”, “Dogged” or do not take Morale tests for some other reason. If such units lose a Close Combat round they take +1 additional wounds for each unsaved wound they lost the round by. Saves may be attempted for these additional wounds. In Gemini this rule only applies to units of more than one model, not to Fearless or Dogged creatures or individuals fighting on their own.
For Example:- A Fearless unit inflicts three wounds but takes five. It therefore lost the bout by 2. The Fearless unit takes two more additional wounds and must roll Saves to prevent them taking affect.
The “No retreat” rule seems to have been dropped in 7th
Edition rules. This rule is not applicable to 2.4 rules either.
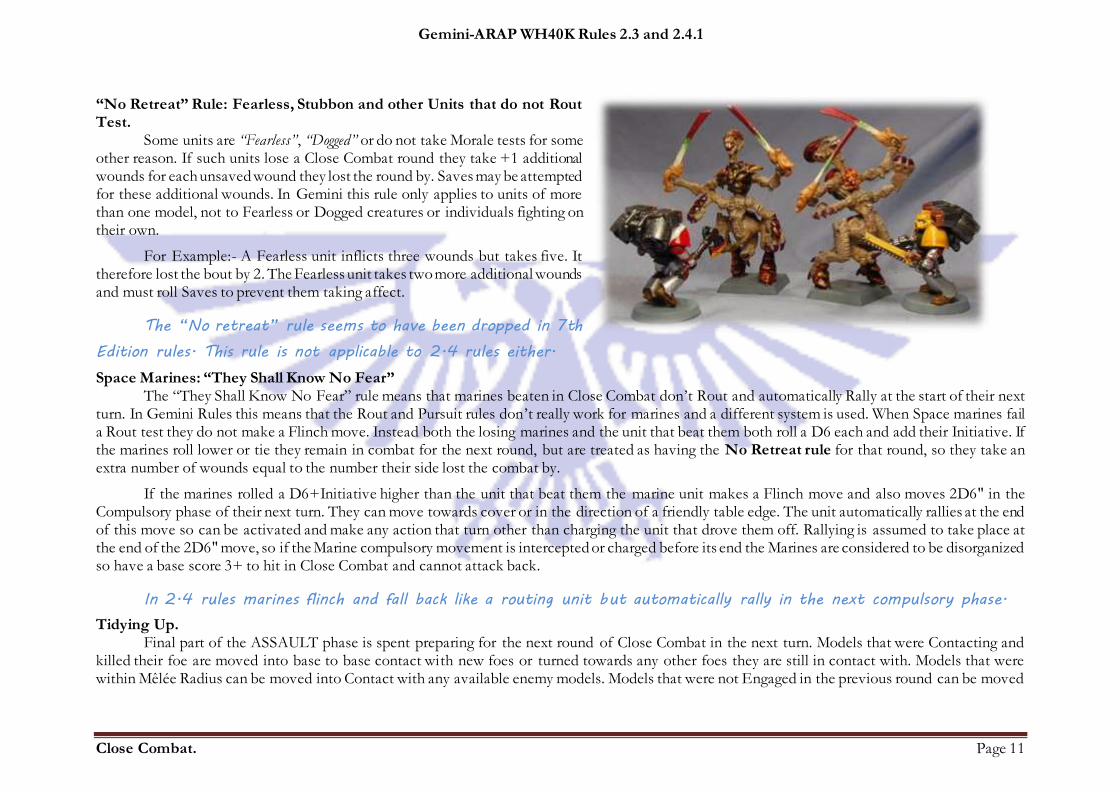
Space Marines: “They Shall Know No Fear” The “They Shall Know No Fear” rule means that marines beaten in Close Combat don’t Rout and automatically Rally at the start of their next
turn. In Gemini Rules this means that the Rout and Pursuit rules don’t really work for marines and a different system is used. When Space marines fail a Rout test they do not make a Flinch move. Instead both the losing marines and the unit that beat them both roll a D6 each and add their Initiative. If the marines roll lower or tie they remain in combat for the next round, but are treated as having the No Retreat rule for that round, so they take an extra number of wounds equal to the number their side lost the combat by.
If the marines rolled a D6+Initiative higher than the unit that beat them the marine unit makes a Flinch move and also moves 2D6" in the Compulsory phase of their next turn. They can move towards cover or in the direction of a friendly table edge. The unit automatically rallies at the end of this move so can be activated and make any action that turn other than charging the unit that drove them off. Rallying is assumed to take place at the end of the 2D6" move, so if the Marine compulsory movement is intercepted or charged before its end the Marines are considered to be disorganized so have a base score 3+ to hit in Close Combat and cannot attack back.
In 2.4 rules marines flinch and fall back like a routing unit but automatically rally in the next compulsory phase.
Tidying Up. Final part of the ASSAULT phase is spent preparing for the next round of Close Combat in the next turn. Models that were Contacting and
killed their foe are moved into base to base contact with new foes or turned towards any other foes they are still in contact with. Models that were within Mêlée Radius can be moved into Contact with any available enemy models. Models that were not Engaged in the previous round can be moved
Gemini-ARAP WH40K Rules 2.3 and 2.4.1
Close Combat. Page 12
into Contact with free enemies or can be moved into Mêlée Radius if possible. Distribute the models following the rules given in the Charge section. The distance models may move for these tidying up actions may not exceed their standard movement allowance, which for most creatures is 4".
Consolidating. If a unit in Close Combat kills all of its remaining enemies in a round it gets a Consolidation move as a bonus. It only gets this bonus if it
becomes unlocked by killing all of its remaining opponents, not by causing them to Rout or from them Breaking Off or making a Hit and Run. A unit that was fighting multiple enemy units can Consolidate if it destroys at least one enemy unit and all other units are Routing , Breaking Off or Hit and Running, providing the unit is not in Pursuit.
Consolidating allows the unit to make a free move of D6" in any direction that can ignore difficult/very difficult/variable terrain and dangerous ground tests. This move cannot be used as a charge so any movement towards an enemy unit must be halted out of Mêlée Radius. The Consolidated unit can be activated in their next turn and make any actions.
A unit may become involved in a Close Combat before it has used all of its rolled actions for a turn. It may have used its fi rst or second action to charge an enemy or may have been charged as a reaction. If such a unit kills all its close combat opponents in that turn i t may take any remaining actions after the Consolidation.
Routing, Pursuit and Rallying. A unit that fails a Rout test immediately flees in panic. It takes a direct route away from the unit that Routed them and any known nearby enemy
units. Usually it will move towards the nearest “friendly” table edge but it can move towards nearby cover or any direction that does not take it towards a visible or known enemy.
Once a Rout test is failed the unit makes a “Flinch move” at the end of the lost combat round. The Routers are turned away from the enemy and moved D6". This figure already includes the penalty for the troops turning more than 90°. The Flinch move helps make it clear that the Routers are no longer Locked in Combat and Routing. After the Flinch move movement of Routers is made in the Compulsory Move phase of the routing side’s next turn(s) until they Rally, are destroyed or leave the field.
All Routing movement made during the Compulsory Move phase is made at Flee rate. For units with a basic move of 6 or less thi s will be 2D6", while units with a basic move of more than 6 Flee at 3D6". Modify this movement rate for the terrain being crossed.
If a unit is in Close Combat with an enemy that Routs it will attempt to pursue (See next section for exceptions to this).
A Routing unit moves D6" at the end of the ASSAULT phase they were Routed in and then 2D6/3D6" in the Compulsory section of their own player turn. This happens before any attempts to activate other units for Move or Shooting Actions. A unit pursuing Routers is moved at the same time as the Routers move for as long as it has a Routing unit to pursue. (ie Pursuers are moved in the Router’s player’s turn).
Units pursuing Routers are also moved at the same time as the Routers and make their own 2D6" or 3D6" roll. They are moved after the Routers are moved and after any Rally tests the Routers are entitled to take. If a Rally test is passed the Pursuers are not moved. Whenever the Pursuers
Gemini-ARAP WH40K Rules 2.3 and 2.4.1
Close Combat. Page 13
move distance is enough to get one or more models in base-to base contact or Mêlée Radius of a Router all Contacting or Associated Pursuers can attack the Routers with Routing troops being 3+ to hit and unable to attack back. Pursuers can’t overtake the unit they pursue if their movement roll exceeds the distance between them and the Routers. Catching up with Routers does not entitle Pursuers to any Charge bonuses s ince a pursuit is not a Charge.
At the start of each of the Routing Player’s following turns during the Compulsory MOVEMENT phase the Routing player moves his unit 2D6/3D6" and then may test to Rally. A Routing therefore always makes at least one 2D6/3D6" movement after the ASSAULT phase the Rout occurred in. The Routing player can attempt to end the Rout and Rally the troops by rolling a 2D6 less than or equal to the unit or surviving unit leader’s Ld. If the Rally test is failed the Pursuers are moved 2D6/3D6" and if the Routers are caught by Pursuers they are attacked. If any Routers survive they will be moved again at the start of the Routing Players next turn, and can text to Rally again.
If a Routing unit’s move takes the unit’s flight into or through cover the unit may re-roll a failed Rally test that turn.
If the unit fails to Rally before it reaches the table edge it may make one last attempt when it does so. If it fails the unit is removed from play.
If no enemy units (other than undetected hidden units) are within 8" of the Routing unit Rally tests are at +1.
Once all Rally tests for a unit have been made the Pursuers are moved if the unit has not rallied.
If a unit Rallies the models can be faced in any direction as a free move. They can be activated in that turn, and may make any actions other than Charging the unit that was Pursuing them.
If engaged in hand to hand combat during the Rout by any unit (not just the Pursuers) the Routing unit will not be able to fi ght back and are a basic 3+ to hit.
If the Rally is successful and the Pursuing unit or any other enemy unit then makes contact this is treated as a Charge and new round of Close Combat.
If the Pursuit takes the Pursuers through another non-routing enemy unit the Pursuers will Charge them and begin a new Close Combat against this unit in the next ASSAULT phase.
If the Routers leave the table the Pursuing unit will also leave the table. Pursuers will return to the table from the spot t hey left on a 4+ throw of a D6 in any of the pursuing player’s subsequent turns.
Pursuers that kill all of the Routers they are pursuing automatically Consolidate in the next turn unless they have entered c ombat with a fresh enemy.
Gemini-ARAP WH40K Rules 2.3 and 2.4.1
Close Combat. Page 14
In Summary:
1. Take a Rout test. If the Rout test is failed move Routers D6" (Flinch). 2. At the start of the Routing Player’s next turn, before attempting any Activations, move the Routers 2D6" (or 3D6" if basic move is
more than 6") then test to Rally. 3. If the Rally test is failed go to 4, if it is passed go to 6. 4. Move Pursuers 2D6" (or 3D6" if basic move is more than 6"). If one or more Pursuers make base to base contact with the Routers
go to 5. If the Pursuers do not catch the Routers the player continue with the turn, Activating other units, fighting Close Combats etc. At start of the Routing player’s next turn go to 2.
5. Pursuers in base to base contact with Routers or those within 3" of Pursuers in base to base contact of Routers can attack the Routers hitting on a basic 3+. Routers cannot make attacks back. If Routing unit is not destroyed go to 2 at the start of the Routing player’s next turn.
6. The Formerly Routing unit can be activated that turn, and may make any actions except Charging the unit(s) that were Pursuing them. Pursuing units do not move this turn but may be activated and move/shoot/charge normally in their own following turn.
Not Pursuing. Troops in Close Combat who cause an enemy to Rout will usually Pursue unless they are still in combat with another unbroken u nit. Units
fighting multiple opponents can only pursue if all the surviving enemy units Rout. They can’t leave an enemy who is actively fighting them to chase after a Routing one.
If a player does not wish his troops to pursue he must pass a Leadership test and roll 2D6 equal to or lower than his troops ’ Ld. This is done after the Routers make their Flinch move at the end of the ASSAULT Phase they routed in. If this test is failed the unit is moved after the Routers. Units in Frenzy will always pursue. Units that rout a Hated enemy make any test not to pursue or halt pursuit at Ld-1 (ie they must roll 2D6+1 less than Ld). Suppression points are not applied to these rolls since outstanding S-points are removed by a unit engaging in Close Combat. Suppression points incurred during a pursuit may be applied.
Units with a move of less than 4" do not have to automatically pursue if an enemy Routs. They do not have to take a Leadership test to see if they don’t pursue. If the player chooses to pursue a Ld test must be passed to halt the unit, as per usual rules.
If the combat was for a defended terrain feature such as a wall, trench or strongpoint the winning side does not have to pass a Leadership test to not pursue unless the winning side is in Frenzy. Units in Frenzy that have won a combat for a terrain feature may avoid pursuing if they pass a Ld test.
Gemini-ARAP WH40K Rules 2.3 and 2.4.1
Close Combat. Page 15
If Pursuing an enemy and wishing to Halt a Pursuit the Pursuing player must roll 2D6 equal to or lower than his troops Ld before the unit is moved after the Routers in the Router’s MOVEMENT phase. This test is taken after the Routers’ move and Rally tests. Trying to halt or avoid pursuit of a Hated enemy is made Ld against 2D6+1.
Unit Coherency and Close Combat. All models in a unit are supposed to always remain within 3" of another member of a unit. A split unit that does not have a leader character
must use its troops’ Ld value for tests and may be without other benefits the Leader provides.
During an Assault there may arise situations where some models may charge while others stay back or to one side to flank or fire on another unit. With the increased movement allowances associated with Routs and Pursuits it is easy for a unit to become split. A spli t unit will try to reform once all parts are out of Close Combat. The main body will be considered to be that containing the Leader, or the largest if the Leader is dead. Usually the smaller part would move to make contact with the larger and equal sized units will meet midway. If the smaller part is in Close Combat or in a fire fight the unengaged unit will move towards it.
Rout tests and Close Combat round results are worked out using the strength and Ld of the sub-unit in Close combat. If there is a Rout only the sub-unit Routs. If pursuers encounter the rest of the unit it is treated as charging a new enemy unit.
Attack Arcs. In current official rules models in Close Combat can fight in a full 360° arc. This approach can be adopted for Gemini games and the result is
much the same for most models. For those wishing for a little more depth to their Close Combat fighters can be given Attack Arcs.
Humans and most models only fight to the front 180°. In most combats this doesn’t make much difference and it is assumed that at the start of each round the fighter automatically turns towards the nearest/greatest threat. This will usually be the enemy with the highest WS, Toughness or just the biggest.
The arc to which attacks can be delivered may be significant if the fighter has multiple attacks and/or opponents. If the fighter is surrounded he must clear away the enemies before him before he can direct his attacks at other enemies.
Some creatures have special attacks which can be made outside the forward 180° arc.
Stomps are all around attacks, usually by large animals and assumed to be combinations of treading on things, flailing and kicking. Most Swarms have Stomp attacks.
Biting and Goring are attacks made with the jaws, horns, antlers or tusks and can only be made to the 90° front arc.
Claw attacks can be made to the front and sides. Not all creatures with claws necessarily have a “Claw” attack. Some can only strike to the front. Creatures with a Bite, Claw or Gore attack are never considered to be fighting unarmed.
Tail attacks are made to the sides and rear, never to the front.
Gemini-ARAP WH40K Rules 2.3 and 2.4.1
Close Combat. Page 16
Tentacle -all around attack. A tail attack that could strike in front of the creature would be termed a tentacle attack.
These natural weapon attacks are not subject to two-weapon modifiers.
For Example: A Dinosaur-like creature has two gore/bite attacks, a stomp attack and a tail attack. This gives it four attacks but only if the enemy attack both the head and the flanks or rear. If the enemy only makes a frontal attack then the creature only has three attacks. If the head is kept occupied by a large number of attackers it can only make two attacks against attackers beside or behind it.
The above rules on Attack arcs only refer to Attacking in Close Combat. Defending against an attack from any direction is made at full WS no matter what the relative position of the attack since it also represents dodging and ducking. The exception to this is if the target is Routing or Breaking Off. In these cases Free Blow rules are used so the target is a basic 3+ to hit before modifiers.
Mass Attacks. There may be situations when friendly models form several ranks in base to base contact behind the fighters in contact with the enemy. An
example of this would be the Phalanx used by primitive fighters but the situation may also occur with more modern troops. Only fighters within Mêlée Radius of an enemy can fight. Models on 40mm bases cannot place as many individuals into the same space and this may be seen as refl ecting that they need a bit more elbow room. In some situations this will still allow a large number of fighters to attack one individual. If the GM wishes he may rule that a fighter in close combat can never be attacked by more than six individuals of equal or greater size.
Close Combat Charges Against Cover and Obstacles. In the ASSAULT phase troops fight in Initiative Order, regardless of whose turn it is or who Charged. The side with the highest Initiative gets
to strike first in all rounds. Striking first and being able to kill some of your foes will mean there are less fighters to at tack you when it is your opponent’s time to fight.
The main exception to the above rule is when the unit charged is in cover. When this is the case the unit charging the cover has to strike last in the first round of combat irrespective of Initiative levels, so effectively the charging unit is at Initiative level 1.
For a unit to be considered to be “In Cover” under Gemini Rules it would normally have to have the sort of protection that is classed as Hard Cover in the Shooting rules. This would usually mean they are inside a building, in a trench or behind a stout wall. Some forms of Obstacles may al so count as making the unit behind them “In Cover” in the Assault phase even if they were only considered to be Soft Cover or No Cover in the Shooting phase. A hedge of thorns would offer little protection against bullets but would obviously slow and hinder a Charging unit trying to cross it so a unit behind it would claim the benefit of being In Cover and Striking first. Therefore under Gemini rules Cover in the Assault phase are features that offer Hard Cover against Shooting and/or are Obstacles to Movement. Dangerous terrain or other features that require a dice roll to cross, such as a Climbing roll or Initiative test for jumping, are also treated as having the same effect as Cover if a Charging unit moves through/over them.
Gemini-ARAP WH40K Rules 2.3 and 2.4.1
Close Combat. Page 17
The advantage of cover only applies to the first round of combat. If the combat continues into another round the Chargers have managed to bypass the cover and both sides fight normally in Initiative order.
Some situations such as the use of Grenades may negate the benefits of Cover in the Assault phase. Units that are Pinned or Gone to Ground cannot claim the benefit of cover if Charged.
If the Chargers have sufficient move they may be able to run around cover and fight in normal Initiative order. This is permi ssible in Gemini Rules, but may result in the Charger’s move exceeding their basic move allowance and making them eligible as Stand and Fire Targets.
Grenades Used During a Charge. In the official WH40K 3rd/4th Ed Rules grenades are only used in the ASSAULT phase. Gemini rules also allow their use in a Shooting action
but players should be aware that how Grenades perform during Shooting and during a Charge is quite different. During a charge Grenades are used in the same way as in the official 4th/5 th+ Edition rules. Rather that working out the effect of each grenade thrown we instead look at the tactical effect of grenades being used. The majority of the unit must be equipped with grenades of the correct type for them to be used during a charge action. If a unit has grenades it is assumed they are used automatically during a charge, unless the unit does not wish to use them for stealth reasons. Grenades used during a Charge do not make to-hit or to-damage rolls and any casualties they cause are assumed to be taken into account in the unit ’s attacks in the following Close Combat round. When Grenades are used during a Charge they have the effect of influencing Initiative rather than infl icting wounds.
Grenades are categorized as being either Specialist or Assault and/or Defensive in nature.
Specialist grenades such as krak or melta cannot be used in a charge.
Frag grenades can be used either as Assault or Defensive Grenades.
Charging units with Assault Grenades or Flesh Hooks use them as a free action when Charging, even if they do not use Charging Fire and Charge from less than their Move Allowance. Charged units with Defensive Grenades can use them for free when Charged. The uni t does not have to roll for Stand and Fire and can use them if Charged from any range. Defensive Grenades can only be used if the chargers are within the defending unit ’s firing arc. Fleet creatures may not add +D6" to their Charge move if they choose to fire while charging and/or use Assault grenades.
Assault Grenades are thrown by a Charging unit and used to drive a unit in cover out of cover or keep their heads down for vital seconds while obstacles are negotiated. The use of grenades has no effect on Stand and Fire but negates the benefits of cover in the Close Combat so both sides fight in Initiative Order.
Defensive Grenades are thrown by a Charged unit at a Charging enemy and cause sufficient disruption that the Charging unit may not make their Charge bonus attacks. They can only be used if the Chargers can be brought into the defending unit ’s firing arc by a turn of 90° or less. They cannot be used if the Charged unit is already locked in Close Combat.
Fleshhooks. Fleshhooks are not a Grenade but a Tyranid Attribute that allows creatures with this feature to move easily over obstacles. In 4th Edition Rules they are described as having the same effect as (4th Edition) Fragmentation Grenades. In Gemini Rules charging Tyranids
Gemini-ARAP WH40K Rules 2.3 and 2.4.1
Close Combat. Page 18
with Flesh Hooks fight simultaneously with troops in cover rather than the defending unit striking first. Using Fleshhooks is obviously quieter than using grenades which may be significant in infiltration missions.
Krak Attack. Against a particularly tough or well armoured foe often the most effective option is to drop a Krak grenade at his feet or down his jumper.
Troops attempting to do this must have Krak grenades and are only permitted to make one attack (of any kind) that combat round at Initiative 1. The
grenade is successfully used on a roll of 6 (A “1” in 2.4 rules). Krak Attacks in Close Combat are S6, AP4. Only Krak grenades can be used for this sort of attack since other grenades have too large an effect area. Krak Attack rules are used for non-vehicles. Attacking Dreadnoughts, Robots or Vehicles with Krak grenades uses the “planting charges” rules.
(2.4) A to-hit roll of a 6 against a target with WS results in the grenade or bomb detonating while still held by
the fighter attempting to plant it!
Ultramarines that are Tyranid War Veterans can make Krak Attacks at 3+ (4 or less in 2.4 rules) if fighting against Tyranids.
Breaking Off and Hit and Run. Instead of fighting, a unit that is Locked in Close Combat can instead attempt to Break Away or Disengage at the start of the second or
subsequent Close Combat round. On a successful Ld test the unit turns tail and moves their flee distance (2D6" or 3D6"). Unlike a Rout move, a Break Off can be made in any direction, not just towards cover or a friendly table edge. A Break Off move cannot take the unit into Close Combat with another unit. If approaching an enemy unit halt it no less than 1" from the enemy and wait for the unit’s activation to make any Charges.
The enemy gets to make one attack per fighter it had engaged, treating the disengaging units as 3+ to hit. The Broken off uni t can be activated their next player turn and can make any action except moving towards or charging the unit it broke combat with. The other unit can be activated their next turn unless it is still in Close combat with other units. It can make any action that turn except moving towards or charging the unit that broke combat with it.
If the Ld test was failed the unit Breaking Away automatically Routs and Rout and Pursuit rules apply if the enemy is not sti ll engaged by another foe.
Units with the “Hit and Run” Special Rule can attempt to disengage at the end of a Close Combat round by making an Initiative test. If the test is failed they remain in combat next round. A unit that fails a Hit and Run test cannot attempt to Break Off at the start of the following Close Combat round. If successful they move away 3D6" in any direction and take no hits as they do so. They can be activated in their next turn.
Gemini-ARAP WH40K Rules 2.3 and 2.4.1
Close Combat. Page 19
Close Combat Summary. Combatants either fight or break off. If Fighting go to 2, if breaking off go to Break Off table.
1. Determine order of Initiative 2. Roll to Hit for all fighters of the same Initiative 3. Roll to Wound 4. Make Saves 5. Remove Casualties 6. If all enemies killed go to 14 7. If any Initiative steps have yet to fight, go to 3 otherwise 9 8. Determine which side(s) have won and modifiers to Rout Test(s) 9. Rout Test. If loser passes go to 15, if failed go to 12. 10. If winner still locked in combat with other enemies, go to 15 otherwise 13. 11. Move losers to Flinch, Unit will move as Routers in the Compulsory phase of their next turn. Go to 16 12. If you wish the unit not to pursue, test against Ld. If successful, go to 16. If the unit pursues it will move in the Compulsory phase of
the Router’s next turn if the Routers do not Rally. Go to 16 13. Consolidate move D6" then go to 16. Unit can be activated in their next turn 14. Tidy Up. Will fight combat round next turn. 15. Sequence ends. Combat Round finished.
Routing Summary. R1. Take a Rout test. If the Rout test is failed move Routers D6". R2. Next Compulsory MOVEMENT phase move the Routers 2D6" (or 3D6" if basic move is more than 6") then test to Rally. R3. If the Rally test is failed go to R4, if it is passed go to R6. R4. Move Pursuers 2D6" (or 3D6" if basic move is more than 6"). If one or more Pursuers make base to base contact or are within mêlée radius
of the Routers go to R5. If the Pursuers do not catch the Routers go to R2. R5. Pursuers in base to base contact with Routers or those within 3" of Pursuers in base to base contact of Routers can attack the Routers
hitting on a basic 3+. Routers cannot make attacks back. If Routing unit is not destroyed go to R2. R6. The Formerly Routing unit can be activated that turn and may make any actions except Charging the unit(s) that were Pursuing. Pursuing
units do not move this turn but may be activated and move/shoot/charge normally in their own following turn.
Break Off Summary. B1. Roll against Ld. If Failed got to B5, otherwise B2 B2. Other side takes one free blow per engaged combatant. B3. Move Breaking off unit 2D6/3D6".
Gemini-ARAP WH40K Rules 2.3 and 2.4.1
Close Combat. Page 20
B4. Unit can be activated their next turn, go to B6. B5. Unit Routs. B6. Sequence Ends.
Shooting. Reactions.
Gemini-ARAP WH40K Rules 2.3 and 2.4.1
Close Combat. Page 21
Contents Close Combat, Routing, Rally and Pursuit 1 Charging into Combat. 1 Charging Fire. 3 Mêlée Radius. 4 Arranging Chargers. 4 When and How to Fight. 5 Charge Bonus. 5 Extra Close Combat Weapons. 6 Roll to Hit. 7 Free Blow. 8 Work Out Damage. 8 Casualties. 8 Who Won? 9 What Happens If A Side Loses? 9 “No Retreat” Rule: Fearless, Stubbon and other Units that do not Rout Test. 11 Space Marines: “They Shall Know No Fear” 11
Tidying Up. 11 Consolidating. 12 Routing, Pursuit and Rallying. 12 In Summary: 14 Not Pursuing. 14 Unit Coherency and Close Combat. 15 Attack Arcs. 15 Mass Attacks. 16 Close Combat Charges Against Cover and Obstacles. 16 Grenades Used During a Charge. 17 Krak Attack. 18 Breaking Off and Hit and Run. 18 Close Combat Summary. 19 Routing Summary. 19 Break Off Summary. 19


![Mout Close Qtrs Combat Class[1]](https://static.fdocuments.net/doc/165x107/587993131a28ab95318b5f23/mout-close-qtrs-combat-class1.jpg)