cerec - plumeria-dental.jp · Title: cerec Created Date: 5/30/2014 4:12:16 AM
Upload
truongdungCategory
view
227download
0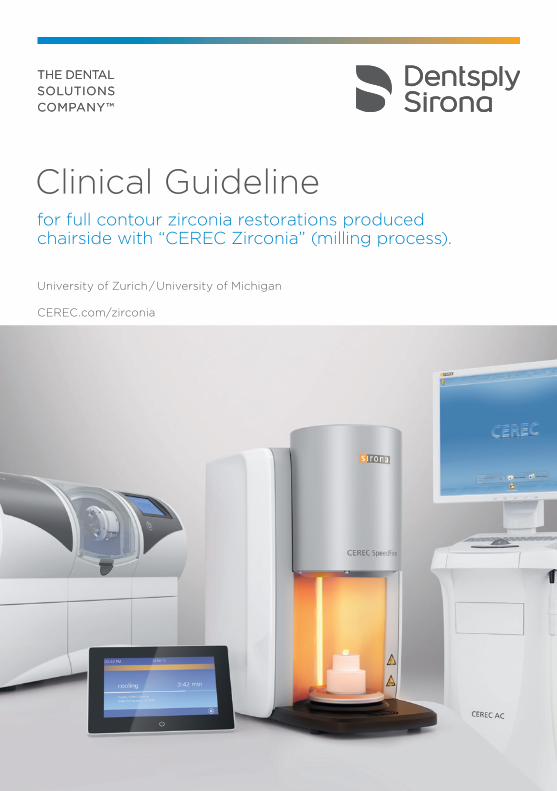
for full contour zirconia restorations produced chairside with “CEREC Zirconia” (milling process).
Clinical Guideline
University of Zurich / University of Michigan CEREC.com/zirconia

Clinical workflow – step by step
PurposeDirect and time efficient chair-side production of full contour zirconia restorations.
Indications• Crowns and bridges up to
3 units with a maximum clinical mesiodistal span of 30 mm in the posterior and anterior areas.
• Cases with restricted occlusal clearance and reduced axial wall thickness as well as situations where conservative preparation of the tooth is desired.
• When adhesive bonding is not desired.
• As an alternative to metal restorations for esthetic reasons.
Options• Color matching with the use of
pre-shaded blocks is sufficient in many cases. Additional shade customization may be accomplished with stains (e. g. VITA Akzent +).
• Restoration retention may be enhanced with the use of adhesive cementation.
02 I 03
Special thanks to the two authors, who have played a major role in creating this guidline.
Prof. Dr. Dr. Albert MehlClinic of Preventive Dentistry, Periodontology and Cariology,
Division of Computerized Restorative Dentistry University of Zurich
Dennis J. Fasbinder, DDSClinical Professor
University of Michigan School of Dentistry
Ann Arbor, MI

• Determination of tooth color before treatment using the CEREC Zirconia Shade Guide.
• Preparation according to the general guidelines for the type of restoration.
• Recommended type of preparation: usual zirconia preparation (chamfer).
• For adequate retention of non-adhesive cementation: tapering of not more than 6–10° on a height of at least 4 mm.
• Sharp transitions and angles inside the preparation should be avoided (primarily occlusal and incisal).
• Harmonious smooth preparation margin without any sharp edges, corners or transitions.
• Minimal thickness strengths: preparation margin area: 0.5 mm; radial 0.8 mm; occlusal and incisal: 1.0 mm.
• Connector cross sections for bridges should be at least 9 mm2.
• Observe the scan guidelines of the respective CEREC scan system (Bluecam or Omnicam).
• Ensure that the preparation margins were thoroughly scanned and have no artifacts.
• Scan the entire quadrant. • Complete the scanning of the preparation as
well as the antagonist area.• Perform the buccal scan and check the
occlusion on the virtual model.
sirona.com/correctscanning How to scan with CEREC Omnicam
• Complete the design process according to the type of restoration.
• Administration tab: select manufacturer “Sirona” and then material “CEREC Zirconia (Milling)”.
• Tip: the virtual articulator with average values could optionally be used.
• Recommended Restoration Parameters:– Spacer: 80 µm– Occlusal Milling Offset: 0 µm
(only works with grinding, not milling)– Proximal Contacts Strength: 0 µm– Occlusal Contacts Strength: –25 µm– Dynamic Contacts Strength: –50 µm– Minimal Thickness (Radial): 800 µm– Minimal Thickness (Occlusal): 1,000 µm– Margin Thickness: 30 µm (Milling Fine)
and 100 µm (Milling Fast)
1 2 3 4Color matching Recommended preparation Recommendation intra-oral scan
Design
04 I 05
Steps 1 to 4

• Select the appropriate block color.• Select the appropriate block size and
mill option (Fine or Fast).• Scan or enter the bar code on the block
as shown in the software or on the display of the milling unit (serves to calculate the zirconia shrinkage with the exact scaling factor).
• Insert and fix the CEREC Zirconia block in the milling unit’s block holder.
• Carefully remove the block out of the milling unit without touching the milled restoration and avoid breaking the restoration from the block.
• Remove the residual milling dust from the surface of the pre-sintered restoration: first with pressurized air, then with a large sable brush (size 10).
• Carefully separate the restoration from the block at the sprue area. A straight handpiece with a diamond wheel or a straight carbide bur can be used for this.
• Finalize and smooth the sprue area over a soft mat using a straight handpiece and/or with special zirconia polishers (coarse and medium diamond impregnated rubber wheels, e. g. Meisinger).
• Attempts to reduce the margin areas of the pre-sintered restoration should be avoided.
• Again carefully remove the remaining dust from the restoration.
Milling/Mill preview Preparation for the sintering process5 6
06 I 07
Steps 5 to 6
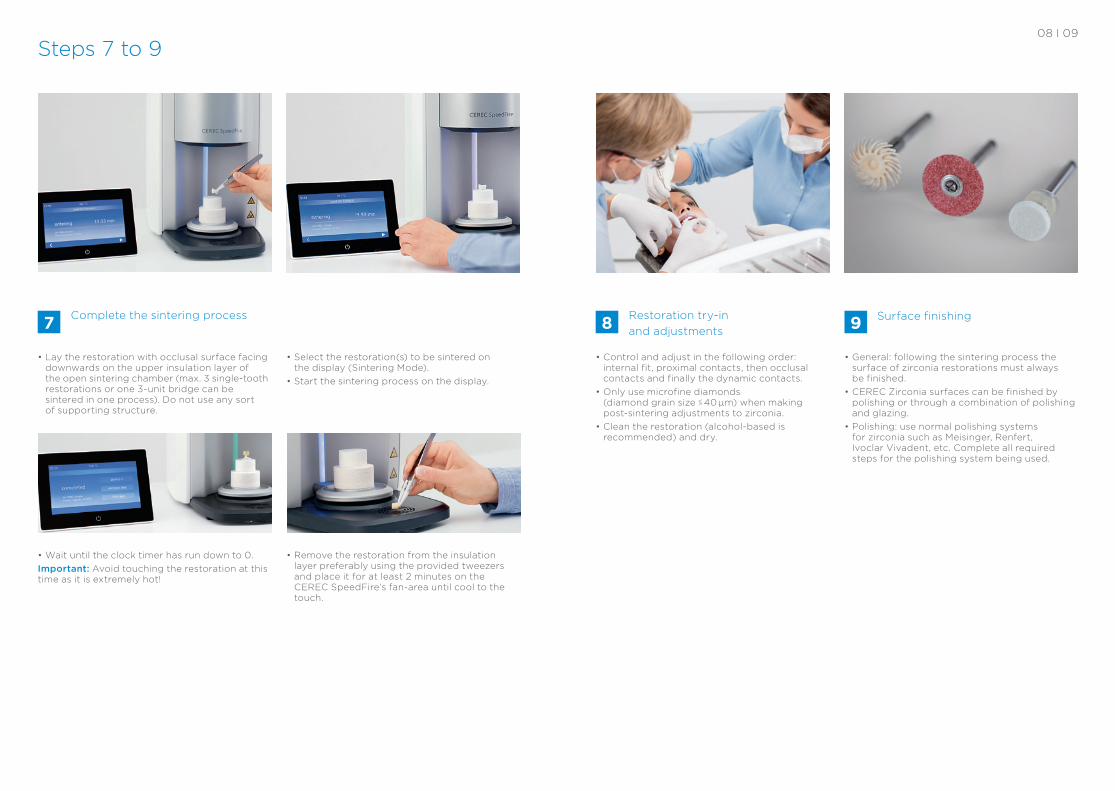
• Control and adjust in the following order: internal fit, proximal contacts, then occlusal contacts and finally the dynamic contacts.
• Only use microfine diamonds (diamond grain size < = 40 µm) when making post-sintering adjustments to zirconia.
• Clean the restoration (alcohol- based is recommended) and dry.
• General: following the sintering process the surface of zirconia restorations must always be finished.
• CEREC Zirconia surfaces can be finished by polishing or through a combination of polishing and glazing.
• Polishing: use normal polishing systems for zirconia such as Meisinger, Renfert, Ivoclar Vivadent, etc. Complete all required steps for the polishing system being used.
• Lay the restoration with occlusal surface facing downwards on the upper insulation layer of the open sintering chamber (max. 3 single- tooth restorations or one 3-unit bridge can be sintered in one process). Do not use any sort of supporting structure.
• Select the restoration(s) to be sintered on the display (Sintering Mode).
• Start the sintering process on the display.
• Wait until the clock timer has run down to 0.Important: Avoid touching the restoration at this time as it is extremely hot!
• Remove the restoration from the insulation layer preferably using the provided tweezers and place it for at least 2 minutes on the CEREC SpeedFire’s fan-area until cool to the touch.
7 Complete the sintering process 8 9Restoration try-in and adjustments
Surface finishing
08 I 09
Steps 7 to 9
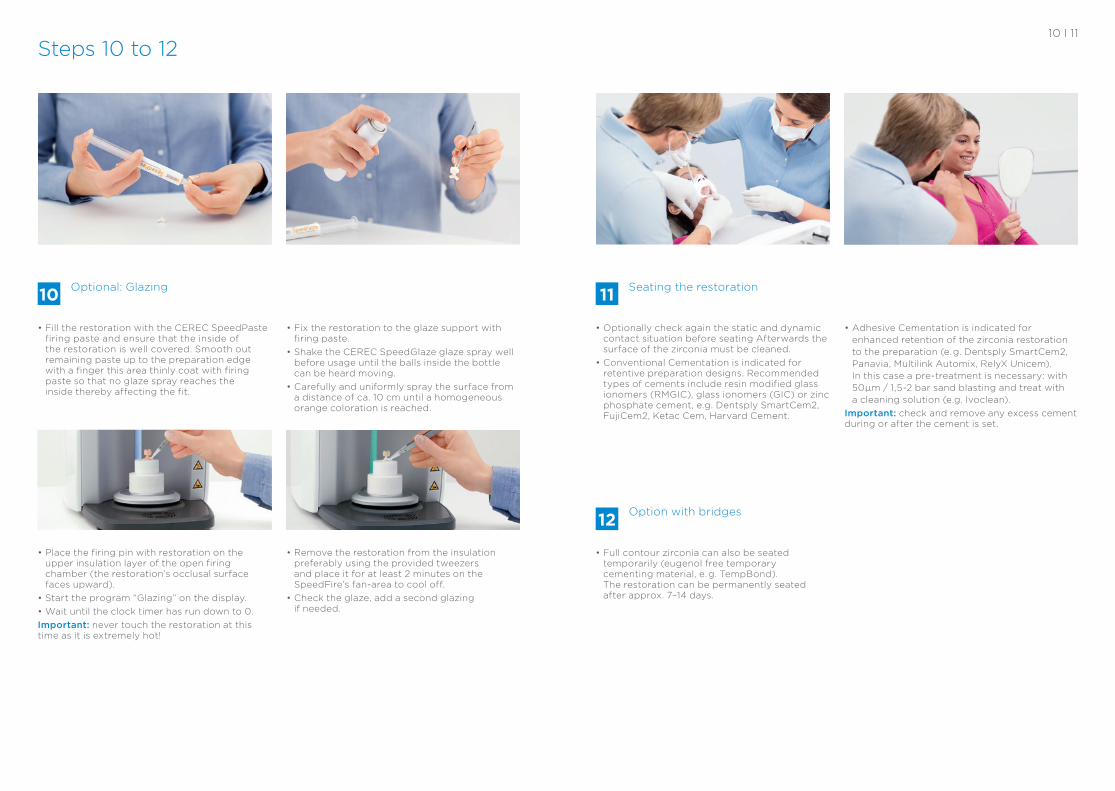
• Fill the restoration with the CEREC SpeedPaste firing paste and ensure that the inside of the restoration is well covered. Smooth out remaining paste up to the preparation edge with a finger this area thinly coat with firing paste so that no glaze spray reaches the inside thereby affecting the fit.
• Fix the restoration to the glaze support with firing paste.
• Shake the CEREC SpeedGlaze glaze spray well before usage until the balls inside the bottle can be heard moving.
• Carefully and uniformly spray the surface from a distance of ca. 10 cm until a homogeneous orange coloration is reached.
• Optionally check again the static and dynamic contact situation before seating Afterwards the surface of the zirconia must be cleaned.
• Conventional Cementation is indicated for retentive preparation designs. Recommended types of cements include resin modified glass ionomers (RMGIC), glass ionomers (GIC) or zinc phosphate cement, e.g. Dentsply SmartCem2, FujiCem2, Ketac Cem, Harvard Cement.
• Adhesive Cementation is indicated for enhanced retention of the zirconia restoration to the preparation (e. g. Dentsply SmartCem2, Panavia, Multilink Automix, RelyX Unicem). In this case a pre-treatment is necessary: with 50µm / 1,5-2 bar sand blasting and treat with a cleaning solution (e.g. Ivoclean).
Important: check and remove any excess cement during or after the cement is set.
• Full contour zirconia can also be seated temporarily (eugenol free temporary cementing material, e. g. TempBond). The restoration can be permanently seated after approx. 7–14 days.
Option with bridges12
10 Optional: Glazing 11 Seating the restoration
10 I 11
Steps 10 to 12
• Remove the restoration from the insulation preferably using the provided tweezers and place it for at least 2 minutes on the SpeedFire’s fan-area to cool off.
• Check the glaze, add a second glazing if needed.
• Place the firing pin with restoration on the upper insulation layer of the open firing chamber (the restoration’s occlusal surface faces upward).
• Start the program “Glazing” on the display.• Wait until the clock timer has run down to 0.Important: never touch the restoration at this time as it is extremely hot!
Clinical ProceduresPreventive Restorative Orthodontics Endodontics Implants Prosthetics
Platform TechnologiesCAD/CAM Imaging Treatment Centers Instruments
Dentsply SironaSirona Dental Systems GmbH Fabrikstraße 31, 64625 Bensheim, Germany dentsplysirona.com
Su
bje
ct t
o t
ech
nic
al c
han
ge
s an
d e
rro
rs, O
rde
r n
o. A
911
00
-M4
3-C
00
7-0
1-76
00
, P
rin
ted
in G
erm
any,
Dis
po
no
. 04
60
5-G
C, O
EW
17 W
S 0
117.
V0