Clarity General Ledger Year-end Procedure Guide 2019... · 2019-12-17 · Clarity General Ledger...
16
Clarity General Ledger Year-end Procedure Guide – 2019
Transcript of Clarity General Ledger Year-end Procedure Guide 2019... · 2019-12-17 · Clarity General Ledger...
Clarity General Ledger Year-end Procedure Guide – 2019
Clarity General Ledger Year-end Procedure Guide - 2019
i
Table of Contents Welcome back! ...................................................................................................................................... 1
Download the General ledger Year-End Steps Checklist ...................................................................... 1
Printing the Checklist. ............................................................................................................................ 2
Need more help? ................................................................................................................................... 3
Perform Program Maintenance ..................................................................................................................... 4
Install Program Updates ........................................................................................................................ 4
Fiscal Year End Close ................................................................................................................................... 5
Step 1: Complete Month-End Checklist ................................................................................................. 5
Step 2: Create Allocations for period 14/YY .......................................................................................... 6
Step 3: Run Checkout for period 14/YY ................................................................................................. 6
Step 4: Print Trial Balance for period 14/YY .......................................................................................... 6
Step 5: Print the Detail Ledger for the year (optional) ........................................................................... 7
Step 6: Print Year-End Financial Statements ........................................................................................ 7
Step 7: Print all Journals for year (optional) .......................................................................................... 7
Step 8: Backup the General ledger database (optional) ........................................................................ 8
Step 9: Close Year-End ......................................................................................................................... 8
Step 10: Run Checkout for period 00/YY of the new year ..................................................................... 9
Step 11: Print Trial Balance for period 00/YY ........................................................................................ 9
Step 12: Print Financial Statements for period 00/YY ........................................................................... 9
Step 13: Change Current Period to New Year .................................................................................... 10
Congratulations! ................................................................................................................................... 10
Post Audit .................................................................................................................................................... 11
Step 1: Enter audit entries into Journal Amounts ................................................................................ 11
Step 2: Create reversing audit entries ................................................................................................. 11
Step 3: Run Create Allocations for period 14/YY ................................................................................ 12
Step 4: Run Checkout for period 14/YY ............................................................................................... 12
Step 5: Print final copy of Financial Statements .................................................................................. 12
Step 6: Print Detail Ledger (optional) ................................................................................................... 13
Step 7: Print Final Trial Balance for period 14/YY ............................................................................... 13
Step 8: Close period 14/YY ................................................................................................................. 13
Congratulations! .......................................................................................................................................... 14

Clarity General Ledger Year-End Checklist – 2019
1
Caselle Clarity General Ledger Year-End Checklist – 2019
Welcome back!
Please download the latest Year-end Checklist from our website. Follow the steps below. The General Ledger Year-end Checklist is a list of tasks that need to be completed at the end of the year. These tasks will help you switch from cash to accrual and prepare you for audit. The checklist can be downloaded using the instructions in the following section.
Download the General ledger Year-End Steps Checklist
Note: If you downloaded the General Ledger Year-End Steps Checklist last year, you may skip this section.
To download the 2019 General Ledger Year-End Steps Checklist, follow these steps:
1. Click here to visit out year-end website. 2. On the right side of the screen, there is a section title Steps Checklist. Right-click on General
Ledger. 3. Select Save target as… 4. Save the file to a location on your computer or network. 5. If the Download compete screen appears, click Close. 6. Open the Clarity program. 7. Move your mouse’s arrow to the Checklist on the right side of the screen so that it slides out. 8. Click the Manage Checklists button (clipboard with a checkmark).
9. Click the Import a Checklist button (yellow folder with an arrow going into the folder).
10. Navigate to the “GL Checklist.xml” file saved in step 4 above. Click Open. 11. Click on the new checklist that was imported on the left of the screen. You may have to scroll to
the bottom. *Note: If there was a year-end checklist that was imported in years past, the new checklist may be named with a number after it (e.g. General Ledger Year-end 1)
Clarity General Ledger Year-End Checklist – 2019
2
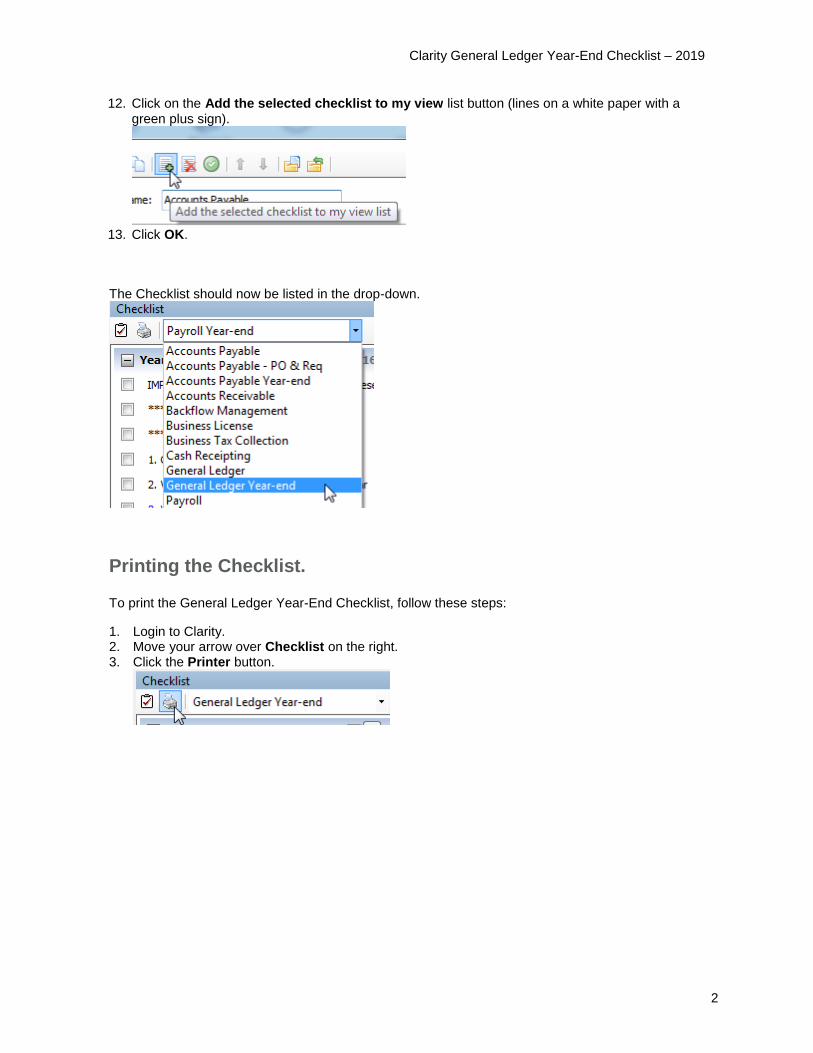
12. Click on the Add the selected checklist to my view list button (lines on a white paper with a green plus sign).
13. Click OK.
The Checklist should now be listed in the drop-down.
Printing the Checklist.
To print the General Ledger Year-End Checklist, follow these steps:
1. Login to Clarity. 2. Move your arrow over Checklist on the right. 3. Click the Printer button.
Clarity General Ledger Year-End Checklist – 2019
3
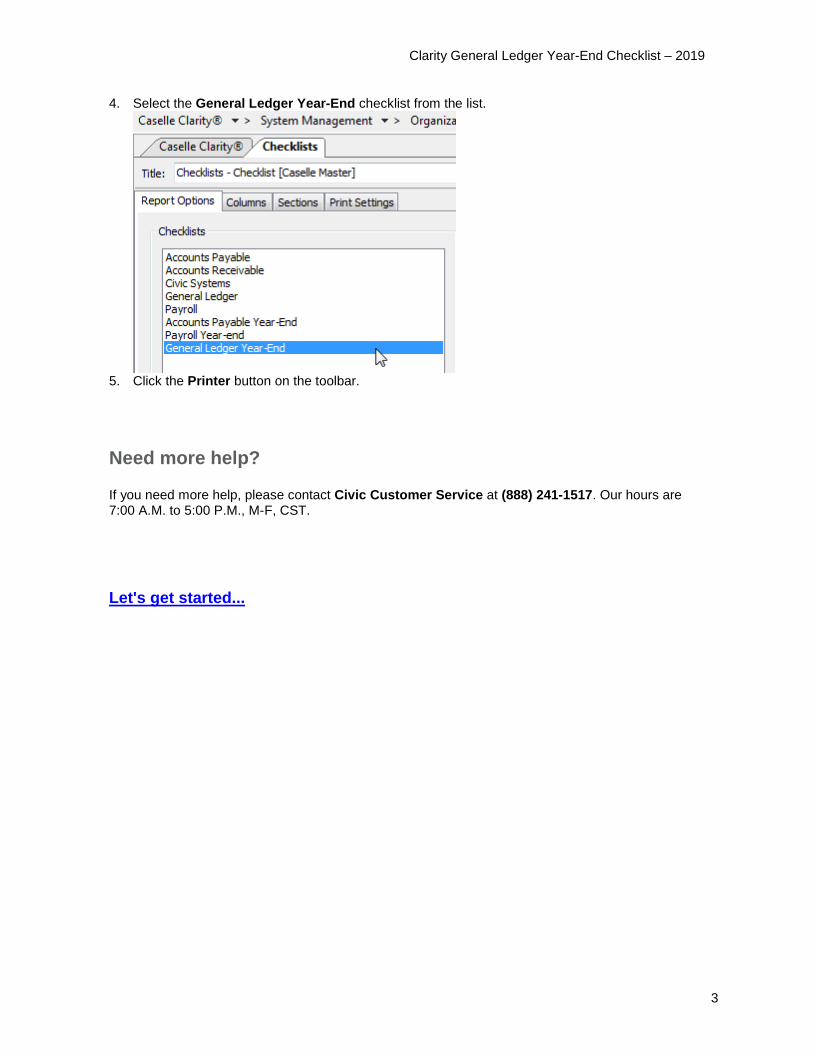
4. Select the General Ledger Year-End checklist from the list.
5. Click the Printer button on the toolbar.
Need more help?
If you need more help, please contact Civic Customer Service at (888) 241-1517. Our hours are 7:00 A.M. to 5:00 P.M., M-F, CST.
Let's get started...
Perform Program Maintenance
4
Perform Program Maintenance
Install Program Updates
Make sure that the latest Clarity release has been downloaded and installed before you complete the year end procedures.
You should be running release 4.2.147.3002 or later. If you’re not sure what release you are running, login to Clarity and look in the upper left corner. If the release number is lower than 4.2.147.3002, you should download this version before proceeding.
Fiscal Year End Close
5
Fiscal Year End Close
Follow these steps to close out your fiscal year in the General Ledger module prior to your audit. These steps will require you to print and review various reports and prepare General Ledger for the coming year. The year-end tasks compute the beginning balances for the new year and should be run during the first month after the fiscal year end. Even though these steps close the previous fiscal year, you still have the ability to make entries into the previous fiscal year as long as GL periods are still open. You are able to work in two (2) fiscal years at once.
When working with General Ledger, you can use period 13/YY as a closing period. Using period 13 allows you to enter transactions that affect the year that just ended without altering the last General Ledger period.
Important! Period 13/YY can be used in Accounts Payable as well. For example, if you have Accounts Payable invoices that were entered after year-end, you could post them back to period 13. In addition, if you need to enter year-end adjustments in the General Ledger, you can enter them in period 13.
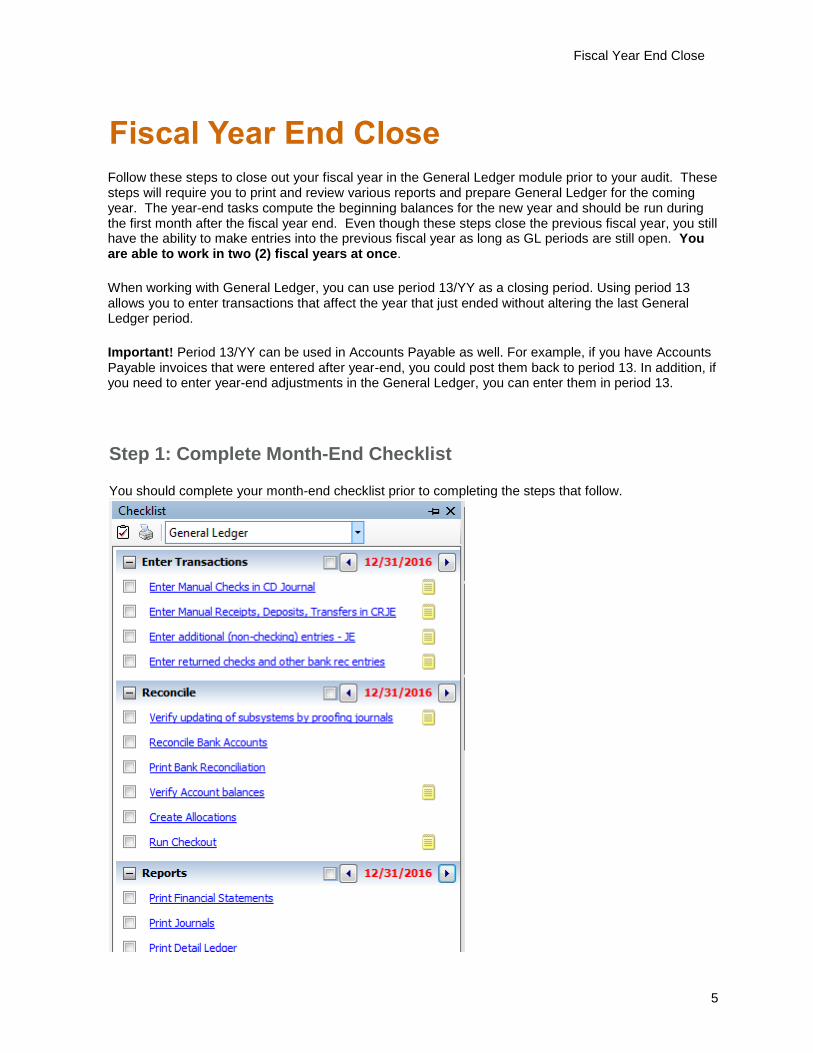
Step 1: Complete Month-End Checklist
You should complete your month-end checklist prior to completing the steps that follow.
Fiscal Year End Close
6
Step 2: Create Allocations for period 14/YY
Run allocations for period 14/YY to make sure that all cash has been allocated.
1. Open Clarity General Ledger > Journals > Create Allocations.
2. Change the Period field to 14/YY.
3. Click GO (CTRL+G).
4. Click OK and/or Yes through any prompts that appear.
5. Click Yes to close Create Allocations.
Step 3: Run Checkout for period 14/YY
Run Checkout to help you discover any errors that need to be corrected before you continue.
1. Open Clarity General Ledger > Organization > Checkout.
2. Change the Check through period field to 14/YY.
3. Click GO (CTRL+G).
4. Review the report for any errors or out-of-balance issues. Correct any errors and run Checkout again for period 14/YY.
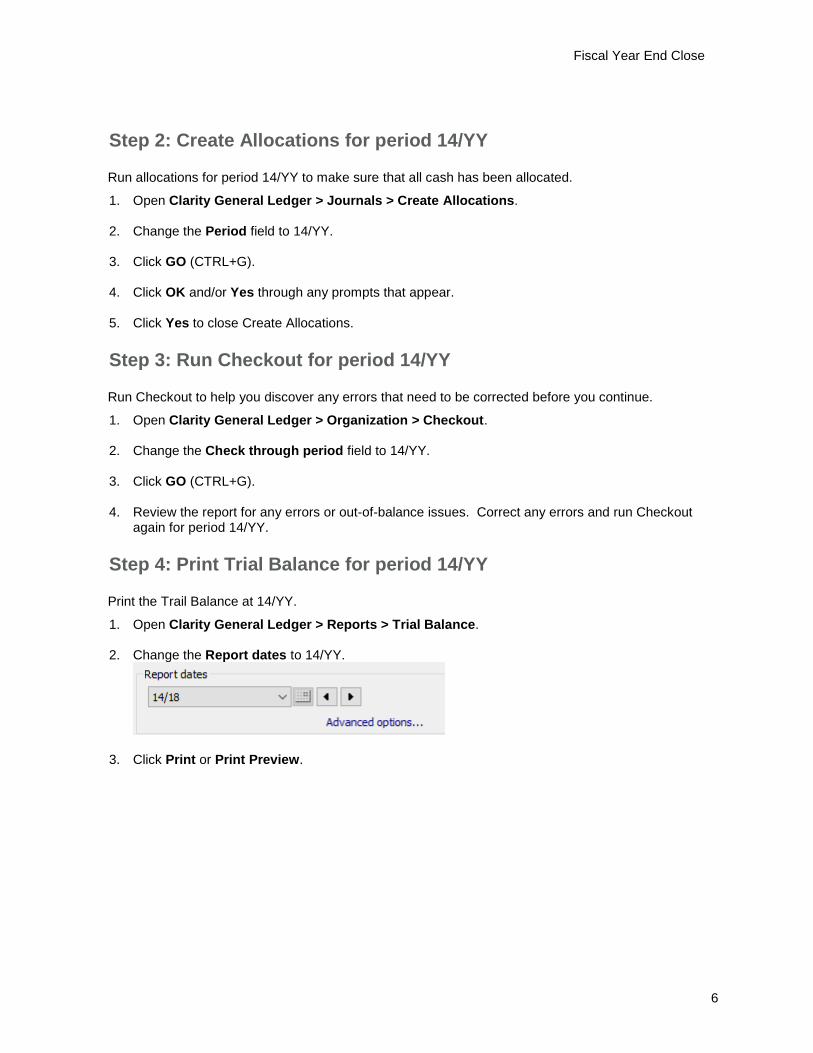
Step 4: Print Trial Balance for period 14/YY
Print the Trail Balance at 14/YY.
1. Open Clarity General Ledger > Reports > Trial Balance.
2. Change the Report dates to 14/YY.
3. Click Print or Print Preview.
Fiscal Year End Close
7
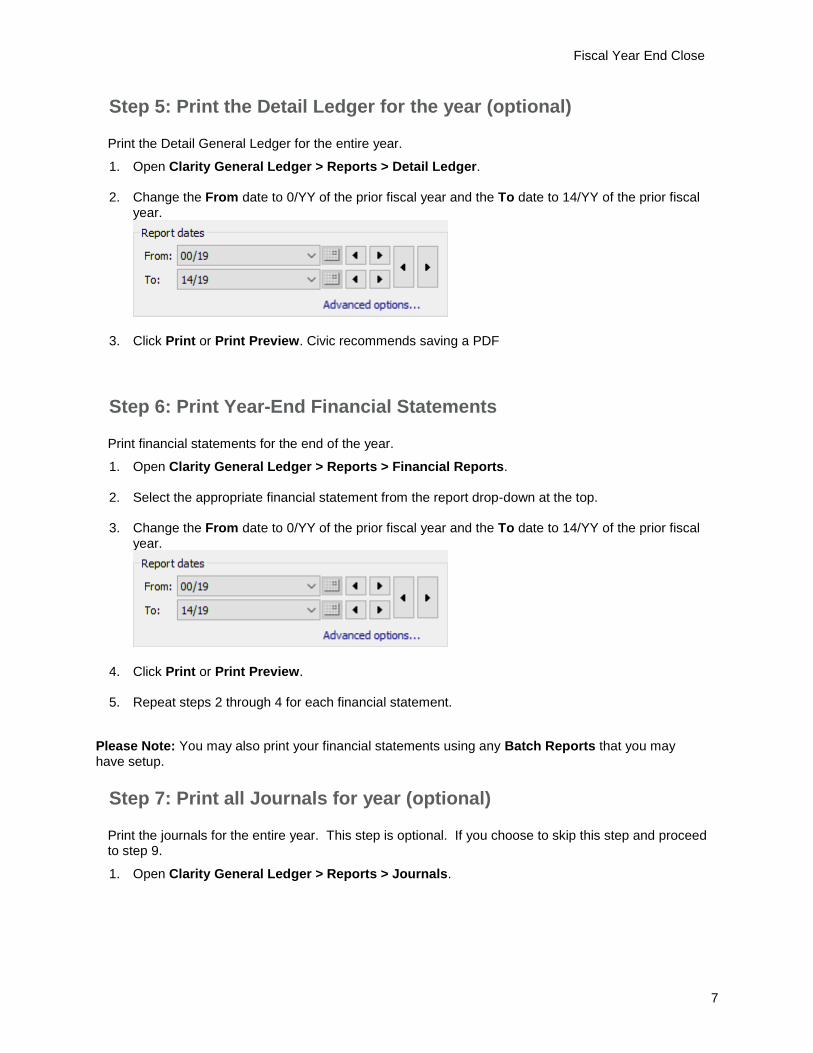
Step 5: Print the Detail Ledger for the year (optional)
Print the Detail General Ledger for the entire year.
1. Open Clarity General Ledger > Reports > Detail Ledger.
2. Change the From date to 0/YY of the prior fiscal year and the To date to 14/YY of the prior fiscal year.
3. Click Print or Print Preview. Civic recommends saving a PDF
Step 6: Print Year-End Financial Statements
Print financial statements for the end of the year.
1. Open Clarity General Ledger > Reports > Financial Reports.
2. Select the appropriate financial statement from the report drop-down at the top.
3. Change the From date to 0/YY of the prior fiscal year and the To date to 14/YY of the prior fiscal year.
4. Click Print or Print Preview.
5. Repeat steps 2 through 4 for each financial statement.
Please Note: You may also print your financial statements using any Batch Reports that you may have setup.
Step 7: Print all Journals for year (optional)
Print the journals for the entire year. This step is optional. If you choose to skip this step and proceed to step 9.
1. Open Clarity General Ledger > Reports > Journals.
Fiscal Year End Close
8
2. Change the From date to 0/YY of the prior fiscal year and the To date to 14/YY of the prior fiscal year.
3. Click Print or Print Preview.
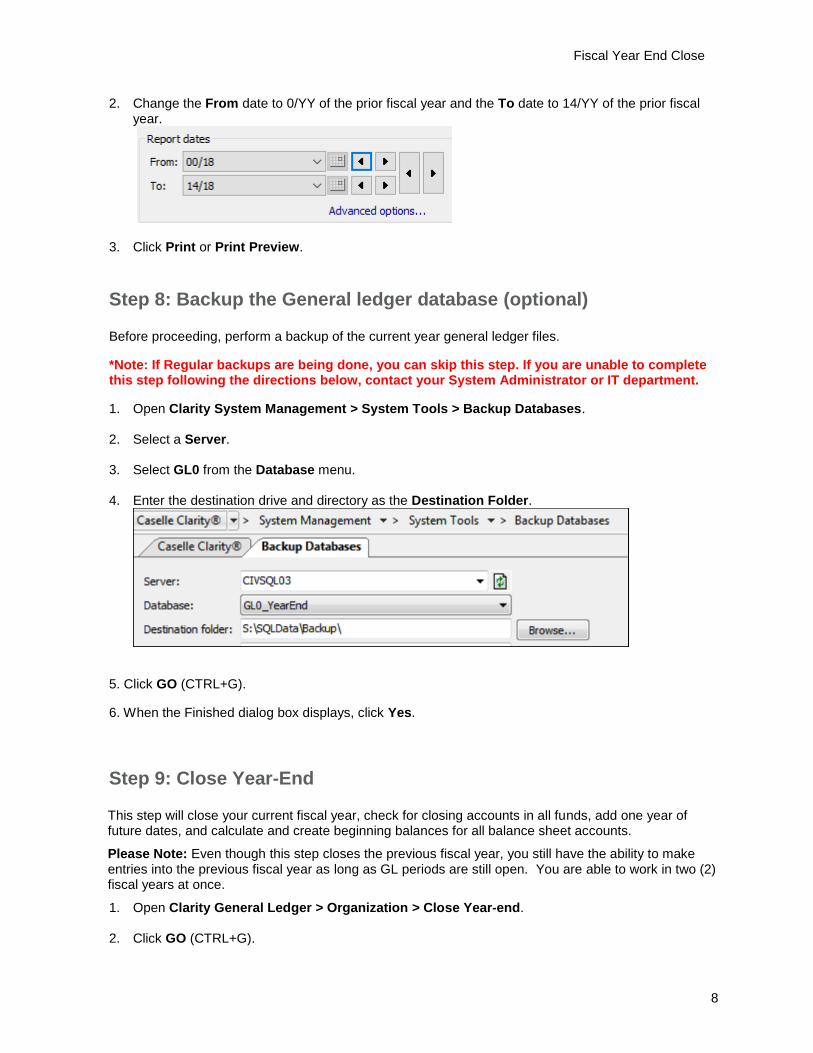
Step 8: Backup the General ledger database (optional)
Before proceeding, perform a backup of the current year general ledger files.
*Note: If Regular backups are being done, you can skip this step. If you are unable to complete this step following the directions below, contact your System Administrator or IT department.
1. Open Clarity System Management > System Tools > Backup Databases.
2. Select a Server.
3. Select GL0 from the Database menu.
4. Enter the destination drive and directory as the Destination Folder.
5. Click GO (CTRL+G).
6. When the Finished dialog box displays, click Yes.
Step 9: Close Year-End
This step will close your current fiscal year, check for closing accounts in all funds, add one year of future dates, and calculate and create beginning balances for all balance sheet accounts.
Please Note: Even though this step closes the previous fiscal year, you still have the ability to make entries into the previous fiscal year as long as GL periods are still open. You are able to work in two (2) fiscal years at once.
1. Open Clarity General Ledger > Organization > Close Year-end.
2. Click GO (CTRL+G).
Fiscal Year End Close
9
Step 10: Run Checkout for period 00/YY of the new year
Run Checkout to help you discover any errors that need to be corrected before you continue.
1. Open Clarity General Ledger > Organization > Checkout.
2. Change the Check through period field to 0/YY of the new fiscal year.
3. Click GO (CTRL+G).
4. Review the report for any errors or out-of-balance issues. Correct any errors and run Checkout again for period 0/YY.
Step 11: Print Trial Balance for period 00/YY
Print the Trail Balance at 0/YY.
1. Open Clarity General Ledger > Reports > Trial Balance.
2. Change the Report dates to 0/YY.
3. Click Print or Print Preview.
Step 12: Print Financial Statements for period 00/YY
Print financial statements for the beginning of the year. Use this step to review budget amounts against the approved budget for accuracy. Check for parentheses in the budget column to help locate possible errors. Correct any budget errors using Journals > Enter Budget Amounts.
1. Open Clarity General Ledger > Reports > Financial Reports.
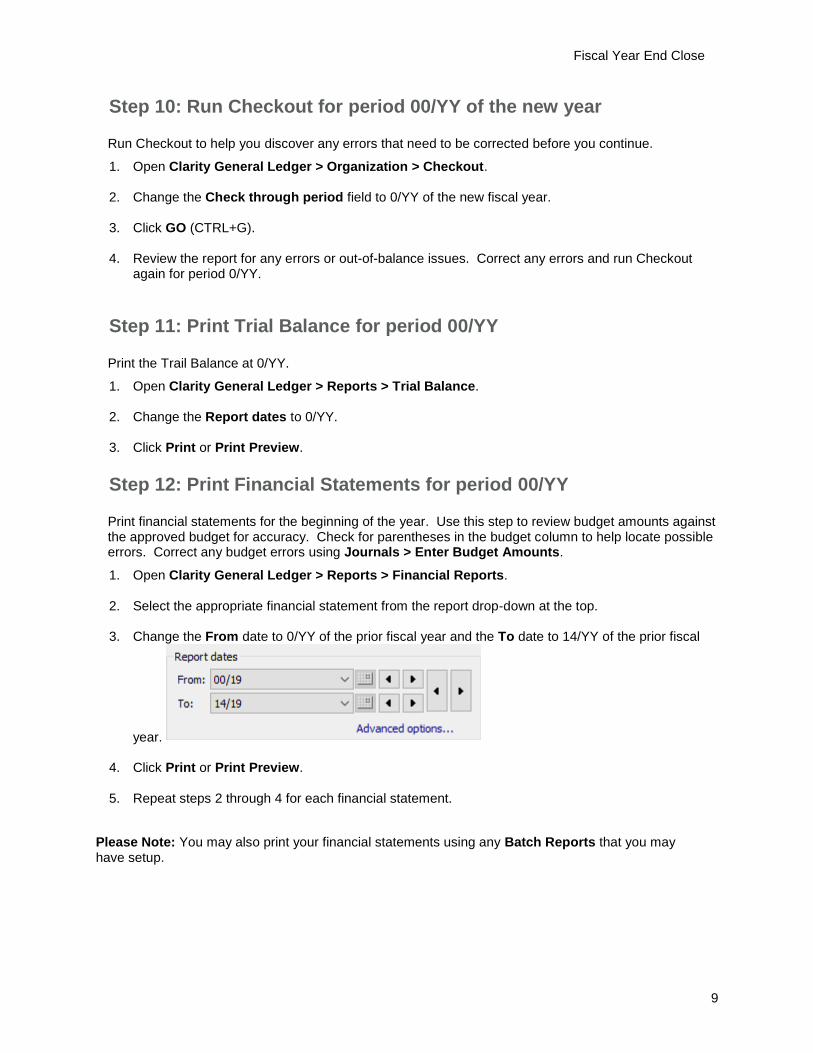
2. Select the appropriate financial statement from the report drop-down at the top.
3. Change the From date to 0/YY of the prior fiscal year and the To date to 14/YY of the prior fiscal
year.
4. Click Print or Print Preview.
5. Repeat steps 2 through 4 for each financial statement.
Please Note: You may also print your financial statements using any Batch Reports that you may have setup.
Fiscal Year End Close
10
Step 13: Change Current Period to New Year
Setting your Current Period to the new year will allow the default period to be the new year in the General Ledger and in other modules. You can still work in your prior year.
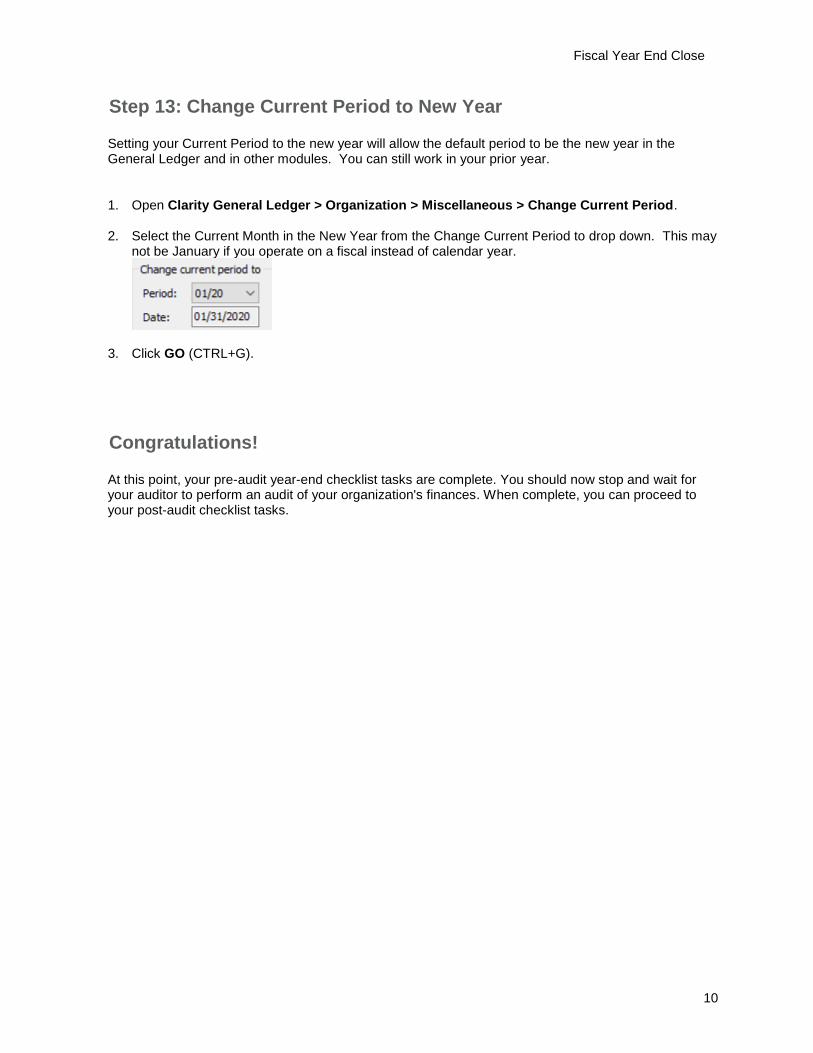
1. Open Clarity General Ledger > Organization > Miscellaneous > Change Current Period.
2. Select the Current Month in the New Year from the Change Current Period to drop down. This may not be January if you operate on a fiscal instead of calendar year.
3. Click GO (CTRL+G).
Congratulations!
At this point, your pre-audit year-end checklist tasks are complete. You should now stop and wait for your auditor to perform an audit of your organization's finances. When complete, you can proceed to your post-audit checklist tasks.
Post Audit
11
Post Audit
These steps will walk you through post audit procedures.
Step 1: Enter audit entries into Journal Amounts
Enter the audit entries that you received from your auditors in period 14/YY.
1. Open Clarity General Ledger > Journals > Create Reversing Entries
2. Select the Audit journal code from the Journal drop-down field.
3. Select 14/YY from the Period drop-down field.
4. Enter audit entries.
For those entries that need to be reversed in the next fiscal year, you could use a different journal code (e.g. RE journal code). By doing so, you will have the ability to use the system to automatically reverse these entries in the new fiscal year. See second section of Step 2 below.
Step 2: Create reversing audit entries
Reverse any audit entries entered in the previous step in the current fiscal year.
1. Open Clarity General Ledger > Journals > Create Reversing Entries.
2. Select the RE journal code from the Journal drop-down field.
3. Select 1/YY from the Period drop-down field.
4. Enter reversing entries.
Alternatively, you can use the reverse journal entries routine to automatically reverse your audit entries entered in the previous step under the RE journal code. Follow these steps:
1. Open Clarity General Ledger > Journals > Copy Journal Entries.
2. Under the Copy from source, select the 14/YY period and the RE journal code.
3. Under the Copy to destination, select the 1/YY period of the new fiscal year and the RE journal code.
4. Click the GO (CTRL+G) on the toolbar to automatically reverse the audit entries.
Post Audit
12
Step 3: Run Create Allocations for period 14/YY
Run Checkout to help you discover any errors that need to be corrected before you continue.
1. Open Clarity General Ledger > Journals > Create Allocations.
2. Change the Period field to 14/YY.
3. Click GO (CTRL+G).
Step 4: Run Checkout for period 14/YY
Run Checkout to help you discover any errors that need to be corrected before you continue.
4. Open Clarity General Ledger > Organization > Checkout.
5. Change the Check through period field to 14/YY.
6. Click GO (CTRL+G).
7. Review the report for any errors or out-of-balance issues. Correct any errors and run Checkout again for period 14/YY.
Step 5: Print final copy of Financial Statements
Print financial statements for the end of the year.
1. Open Clarity General Ledger > Reports > Financial Reports.
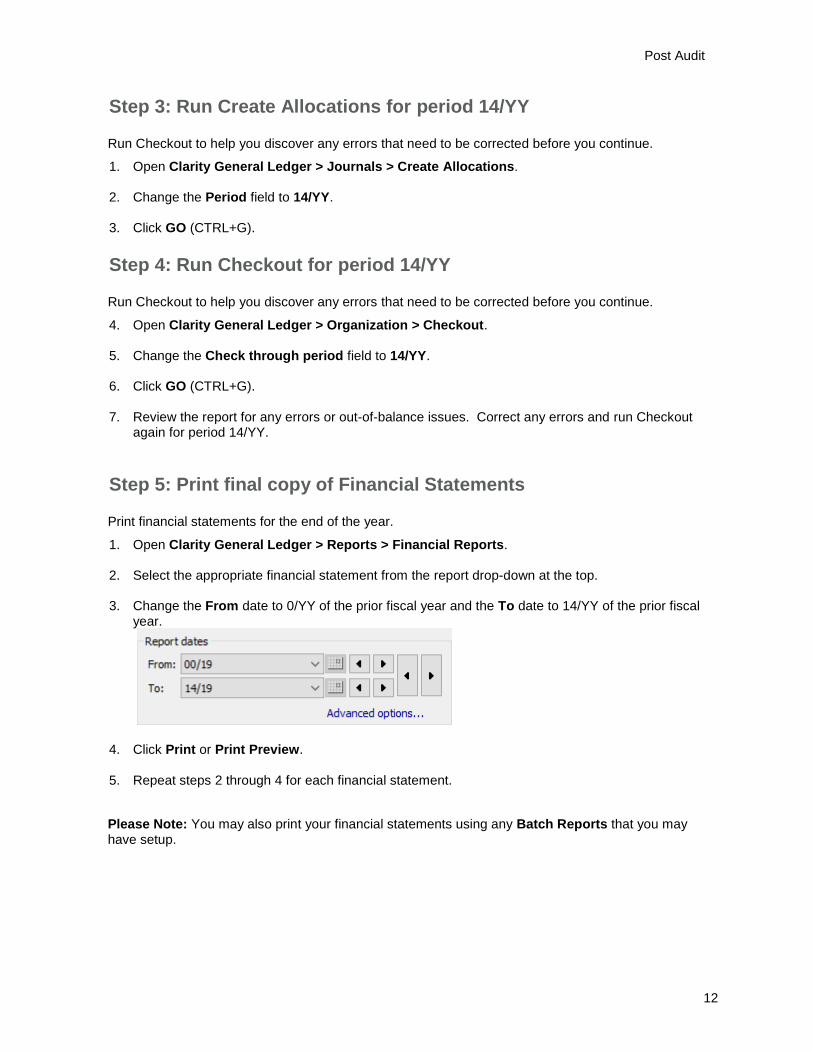
2. Select the appropriate financial statement from the report drop-down at the top.
3. Change the From date to 0/YY of the prior fiscal year and the To date to 14/YY of the prior fiscal year.
4. Click Print or Print Preview.
5. Repeat steps 2 through 4 for each financial statement.
Please Note: You may also print your financial statements using any Batch Reports that you may have setup.

Post Audit
13
Step 6: Print Detail Ledger (optional)
Print the Detail General Ledger for the entire year.
1. Open Clarity General Ledger > Reports > Detail Ledger.
2. Change the From date to 0/YY of the prior fiscal year and the To date to 14/YY of the prior fiscal year.
3. Click Print, Print Preview or Save to a PDF
Step 7: Print Final Trial Balance for period 14/YY
Print the Trail Balance at 14/YY.
1. Open Clarity General Ledger > Reports > Trial Balance.
2. Change the Report dates to 14/YY.
3. Click Print or Print Preview.
Step 8: Close period 14/YY
Close all prior year periods to prevent further changes from being made. You can still print reports and view prior year detail.
1. Open Clarity General Ledger > Organization > Miscellaneous > Close Period.
2. Change the Close Periods up to and Including to 14/YY.
8. Click GO (CTRL+G).

Congratulations!
14
Congratulations!
You have completed the General Ledger Year-end Closing!