CHAPTER 95 CLEANING INSTRUCTIONS – MERCEDES ACTROS · 2018-09-20 · UNCONTROLLED IF PRINTED 95-1...
53
UNCONTROLLED IF PRINTED 95-1 CHAPTER 95 CLEANING INSTRUCTIONS – MERCEDES ACTROS 95.1 This chapter provides basic and specific cleaning requirements for selected vehicles. Where there is a specific requirement or need to highlight particular problem areas detailed cleaning guides are provided as tables and figures in this chapter. 95.2 The Actros 8x8 fleet within the RAAF are used to transport the four Tactical Air Defence Radar Systems (TADRS). The TPS-117 (also known as the TPS-77) radar is an essential part of the TADRS along with its ancillary sub-systems. 95.3 Actros trucks do appear to be quite innocuous but they are very complex pieces of machinery. While all contamination and QRM must be removed, the main areas of concern are: a. external areas; b. cabin; c. suspension; d. underneath vehicles; e. engine and engine compartment; f. spare wheel mount; g. tarpaulins; h. camouflage nets and i. tyres (new, old and spares). 95.4 All points are not specific to all Actros trucks. ADF FORCE EXTRACTION CLEANING MANUAL
Transcript of CHAPTER 95 CLEANING INSTRUCTIONS – MERCEDES ACTROS · 2018-09-20 · UNCONTROLLED IF PRINTED 95-1...

UNCONTROLLED IF PRINTED
95-1
CHAPTER 95
CLEANING INSTRUCTIONS – MERCEDES ACTROS
95.1 This chapter provides basic and specific cleaning requirements for selected vehicles. Where there is a specific requirement or need to highlight particular problem areas detailed cleaning guides are provided as tables and figures in this chapter.
95.2 The Actros 8x8 fleet within the RAAF are used to transport the four Tactical Air Defence Radar Systems (TADRS). The TPS-117 (also known as the TPS-77) radar is an essential part of the TADRS along with its ancillary sub-systems.
95.3 Actros trucks do appear to be quite innocuous but they are very complex pieces of machinery. While all contamination and QRM must be removed, the main areas of concern are:
a. external areas;
b. cabin;
c. suspension;
d. underneath vehicles;
e. engine and engine compartment;
f. spare wheel mount;
g. tarpaulins;
h. camouflage nets and
i. tyres (new, old and spares).
95.4 All points are not specific to all Actros trucks.
ADF FORCE EXTRACTION CLEANING MANUAL

UNCONTROLLED IF PRINTED
95-2
External Areas
95.5 The cleaning instructions for the Actros external areas, as illustrated in Figures 95-1 to 95-8, include the points detailed in Table 95-1
Figure 95-1: Actros External Areas
Figure 95-2: Actros Front External Areas
ADF FORCE EXTRACTION CLEANING MANUAL

UNCONTROLLED IF PRINTED
95-3
Figure 95-3: Actros Bull Bar Lowered
Figure 95-4: Actros Rear Light Fitting
Figure 95-5: Actros Jerry Can Holder (Left) and Rear View (Right)
Figure 95-6: Actros Stowage Bins
ADF FORCE EXTRACTION CLEANING MANUAL

UNCONTROLLED IF PRINTED
95-4
Figure 95-7: Actros Fuel Tank (Left) and Tool Tray (Right)
Figure 95-8: Actros Hydraulic Access Behind Cabin Step
ADF FORCE EXTRACTION CLEANING MANUAL
UNCONTROLLED IF PRINTED
95-5
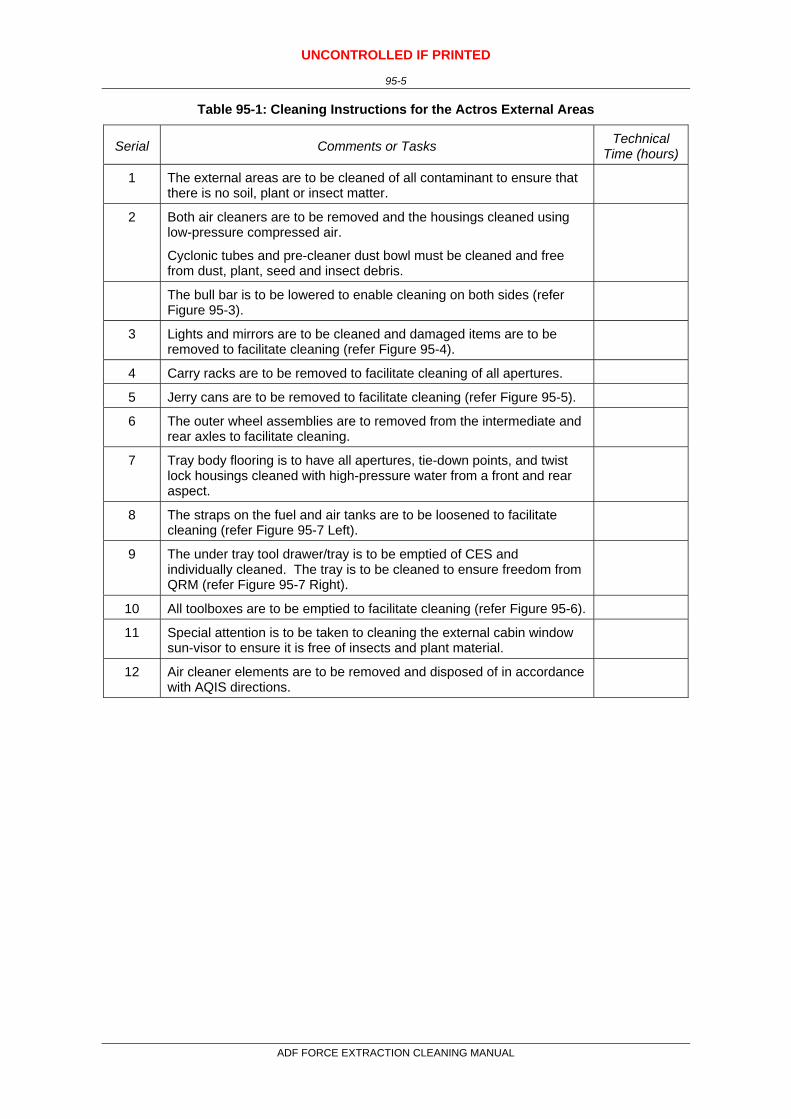
Table 95-1: Cleaning Instructions for the Actros External Areas
Serial Comments or Tasks Technical Time (hours)
1 The external areas are to be cleaned of all contaminant to ensure that there is no soil, plant or insect matter.
2 Both air cleaners are to be removed and the housings cleaned using low-pressure compressed air.
Cyclonic tubes and pre-cleaner dust bowl must be cleaned and free from dust, plant, seed and insect debris.
The bull bar is to be lowered to enable cleaning on both sides (refer Figure 95-3).
3 Lights and mirrors are to be cleaned and damaged items are to be removed to facilitate cleaning (refer Figure 95-4).
4 Carry racks are to be removed to facilitate cleaning of all apertures.
5 Jerry cans are to be removed to facilitate cleaning (refer Figure 95-5).
6 The outer wheel assemblies are to removed from the intermediate and rear axles to facilitate cleaning.
7 Tray body flooring is to have all apertures, tie-down points, and twist lock housings cleaned with high-pressure water from a front and rear aspect.
8 The straps on the fuel and air tanks are to be loosened to facilitate cleaning (refer Figure 95-7 Left).
9 The under tray tool drawer/tray is to be emptied of CES and individually cleaned. The tray is to be cleaned to ensure freedom from QRM (refer Figure 95-7 Right).
10 All toolboxes are to be emptied to facilitate cleaning (refer Figure 95-6).
11 Special attention is to be taken to cleaning the external cabin window sun-visor to ensure it is free of insects and plant material.
12 Air cleaner elements are to be removed and disposed of in accordance with AQIS directions.
ADF FORCE EXTRACTION CLEANING MANUAL

UNCONTROLLED IF PRINTED
95-6
Cabin
95.6 The cleaning instructions for the Actros cabin, as illustrated in Figures 95-9 to 95-13, include the point detailed in Table 95-2.
Figure 95-9: Actros Cabin Doors (Left) and Seating (Right)
Figure 95-10: Actros Cabin Foot Pedals (Left) and Under Seat Area (Right)
ADF FORCE EXTRACTION CLEANING MANUAL
UNCONTROLLED IF PRINTED
95-7
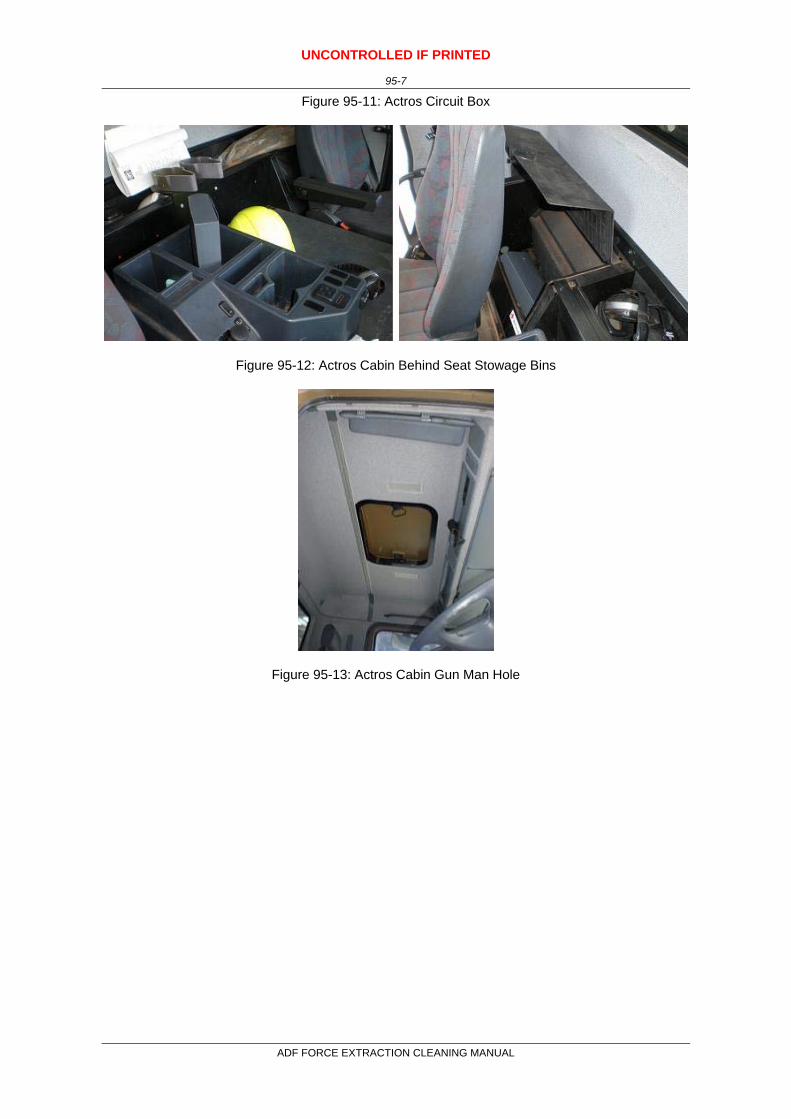
Figure 95-11: Actros Circuit Box
Figure 95-12: Actros Cabin Behind Seat Stowage Bins
Figure 95-13: Actros Cabin Gun Man Hole
ADF FORCE EXTRACTION CLEANING MANUAL

UNCONTROLLED IF PRINTED
95-8
Table 95-2: Cleaning Instructions for the Actros Cabin Ceiling and Cupola
Serial Comments or Tasks Technical Time (hours)
1 Remove the rubber floor matting to clean the cabin floor.
2 Inspect mirror sills and mirrors.
3 The window and door rubber seals are to be cleaned of all soil, plant and insect matter (refer Figure 95-9). Seals on the bonnet area are to be cleaned in a similar fashion.
4 Door trims are to be removed and cleaned
5 The seats and the floor mats are to be removed and the cabin floor cleaned.
6 Special attention is to be made in the cleaning of the under seat area (refer Figure 95-10).
Care is to be taken to ensure no water gets into/onto the Circuit Box (refer Figure 95-11).
7 The cabin area is to be vacuumed and air-blown clean.
8 The dashboard is a fully enclosed capsule and should not require removal. Check integrity of the capsule and clean the surrounds.
9 Ventilation ducts are to be unscrewed and air-blown clean.
10 Remove the front cover from the ventilation fan housing and clean the fan housing. All soil, plant and insect matter are to be removed.
11 Storage areas behind the seats are to be emptied and the areas cleaned (refer Figure 95-12).
12 Critically inspect the gun mount and manhole to ensure they are free from dirt, dust, plant and insect material (refer Figure 95-13).
ADF FORCE EXTRACTION CLEANING MANUAL

UNCONTROLLED IF PRINTED
95-9
Suspension
95.7 The specific cleaning instructions for Actros suspension, as illustrated in Figures 95-14 to 95-17, include those points detailed in Table 95-3.
Figure 95-14: Actros Front Wheel Well
Figure 95-15: Actros Front Suspension
ADF FORCE EXTRACTION CLEANING MANUAL

UNCONTROLLED IF PRINTED
95-10
Figure 95-16: Actros Rear Wheel Well
Figure 95-17: Actros Wheel Hubs and Springs
Table 95-3: Cleaning Instructions for the Actros Suspension
Serial Comments or Tasks Technical Time (hours)
1 Ensure suspension rocker beam mounts on chassis are clean and free of soil, plant and insect material.
2 Mud and other debris collect in the spring seat, where the spring is mounted to the axle assembly, and are difficult to remove from the base of the springs. Ensure that this area is cleaned well.
3 Mud and other debris collect in the inside area on the inner side of the wheel. Ensure that this area is cleaned well
4 Ensure axles and mounts on chassis are clean and free of soil, plant and insect material.
ADF FORCE EXTRACTION CLEANING MANUAL

UNCONTROLLED IF PRINTED
95-11
Underneath Vehicle
95.8 The cleaning instructions for underneath the Actros, as illustrated in Figures 95-18 to 95-22, include the points detailed in Table 95-4.
Figure 95-18: Actros Air Brakes
Figure 95-19: Actros Rear Axle Area
Figure 95-20: Actros Tail-shaft Area
ADF FORCE EXTRACTION CLEANING MANUAL

UNCONTROLLED IF PRINTED
95-12
Figure 95-21: Actros Under Chassis Cavities (Left) and Engine/Tail-shaft Area (Right)
Figure 95-22: Actros Under Chassis Hoses and Cabling
Table 95-4: Cleaning Instructions for Underneath the Actros
Serial Comments or Tasks Technical Time (hours)
1 Frame areas are to be washed through with high-pressure water utilising a flexible nozzle.
2 Ensure the spring brake housing assemblies, including the mounting for the spring brake emergency release bolts, mounted on the intermediate and rear axles are clean and free from mud, dirt, plant and other debris.
3 Clean in between all cables, paying attention to where the cable ties are located and between the cable and vehicle.
ADF FORCE EXTRACTION CLEANING MANUAL

UNCONTROLLED IF PRINTED
95-13
Engine – Engine Compartment
95.9 The specific cleaning instructions for Actros engine and engine compartment, as illustrated in Figures 95-23 and 95-26, include those points detailed in Table 95-5.
Figure 95-23: Actros Engine Compartment
Figure 95-24: Actros Engine
ADF FORCE EXTRACTION CLEANING MANUAL

UNCONTROLLED IF PRINTED
95-14
Figure 95-25: Actros Engine Bay Heat Suppressant
Figure 95-26: Actros Engine Bay Rear and Side Views – Exhaust and Air conditioner
ADF FORCE EXTRACTION CLEANING MANUAL

UNCONTROLLED IF PRINTED
95-15
Table 95-5: Cleaning Instructions for the Actros Engine Compartment
Serial Comments or Tasks Technical Time (hours)
1 Clean the engine compartment and engine to ensure they are free of dust, built-up dirt and grease, insect and plant material.
Ensure any engine openings/breathers are taped or plugged to stop ingress of water.
Ensure the starter motor and alternator are covered and taped to stop ingress of water.
Do not direct high-pressure water jets at any of the engine openings/breathers, or at any of the electrical/electronic components.
2 Remove the brake booster assembly and pedal pivot housing and check to ensure the housing is free of insect or plant material.
3 Remove the clutch pedal pivot housing cover and check to ensure the housing is free of insect or plant material.
4 Remove heater assembly and clean heater core to remove all dirt, dust, plant and insect material.
2.0
5 Clean heater/ventilation fan housing to ensure it is free from dirt, dust, plant and insect material.
6 Remove the air cleaner flexible line from the air plenum in the right-hand front mudguard assembly and ensure it is free from insect and plant material.
0.5
7 Remove the air cleaner element and dispose of in accordance with AQIS instructions. Replace the air cleaner element with a new part.
0.5
8 Remove the radiator to facilitate cleaning.
The radiator is to be high-pressure air-cleaned to remove seed and then washed down by a low-pressure water high-volume wash;
Bent radiator grills may require heat treatment to burn any embedded seed material (using heat shrink guns).
It may be necessary to use brushes or pick insect and seed matter out from between the veins on the radiators.
ADF FORCE EXTRACTION CLEANING MANUAL

UNCONTROLLED IF PRINTED
95-16
Spare Wheel Mount
95.10 The cleaning instructions for the Actros spare wheel mount, as illustrated in Figure 95-27 and 95-28, include the points detailed in Table 95-6.
Figure 95-27: Actros Spare Wheel Mount Right and Left Side Views
Figure 95-28: Actros Spare Wheel Winch
ADF FORCE EXTRACTION CLEANING MANUAL

UNCONTROLLED IF PRINTED
95-17
Table 95–6: Cleaning Instructions for the Actros Spare Wheel Mount
Serial Comments or Tasks Technical Time (hours)
1 All tools are to be fully removed and extended to facilitate cleaning.
2 Tyre to be fully removed and to be cleaned as per “Tyres (New, Old and Spares)” below.
3 Tyre cover (if fitted) to be fully removed and to be washed and scrubbed to remove all QRM.
4 All externally fitted items of equipment to be removed and both the items and the mounting brackets to be cleaned of all QRM
5 Frame areas are to be washed with high-pressure water utilising a flexible nozzle.
6 The hand winch is to be extended to full length and subject to a high-pressure water clean using degreaser, if required, to remove all soil, plant and insect matter (refer Figure 95-28).
7 The winch drum is also to be degreased and subject to a high-pressure water clean
8 All winch ropes, wire ropes and slings are to be re-oiled after inspection. An application of a protective covering (plastic bag) may be required to protect the refurbished ropes and cables
ADF FORCE EXTRACTION CLEANING MANUAL

UNCONTROLLED IF PRINTED
95-18
Battery Bay
95.11 The cleaning instructions for the Actros battery bay, as illustrated in Figure 95-29, include the points detailed in Table 95-7.
Figure 95-29: Actros Spare Battery Bay
Table 95–7: Cleaning Instructions for the Actros Battery Bay
1 Remove batteries and individually clean. Do not replace until batteries and batter box has been inspected by AQIS (refer Figure 95-29).
2 Clean battery leads to ensure they are free of QRM.
3 The battery box support member is to be flushed through using a flexible nozzle until clear water is seen to exit.
4 Flush support bases and tubing underneath battery box.
ADF FORCE EXTRACTION CLEANING MANUAL
UNCONTROLLED IF PRINTED
95-19
Tarpaulins
95.12 The cleaning instructions for the tarpaulins include the points detailed in Table 95-8.
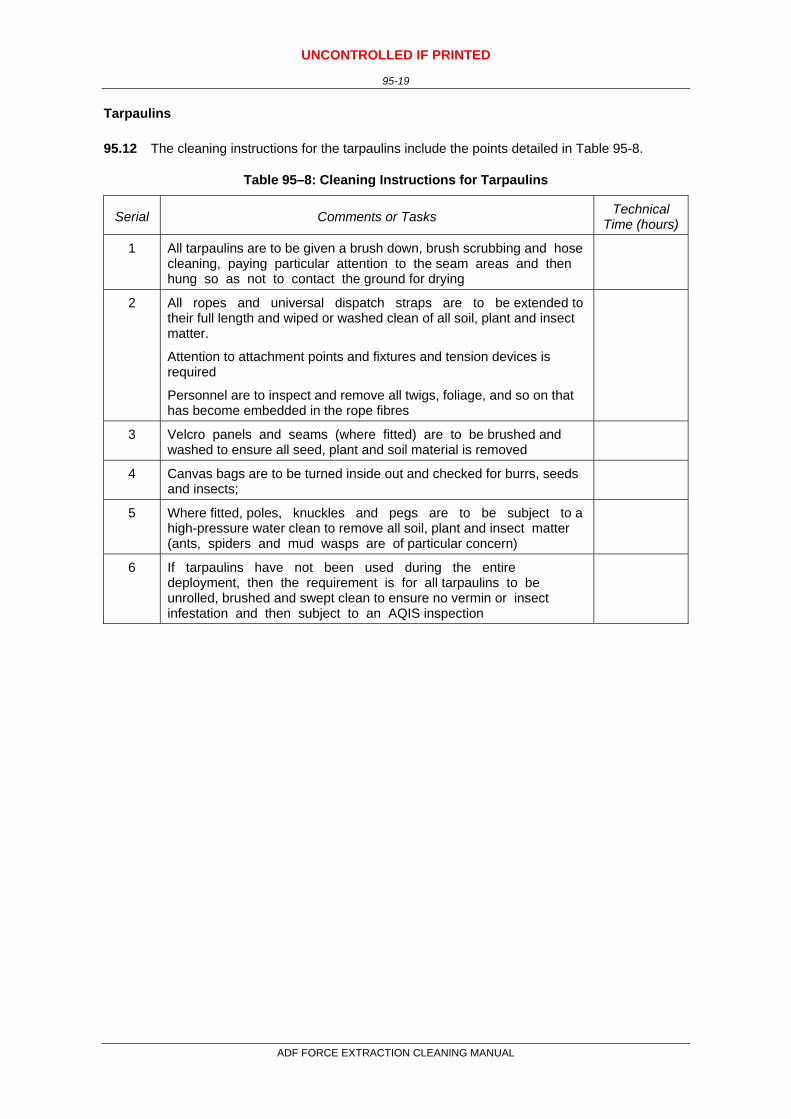
Table 95–8: Cleaning Instructions for Tarpaulins
Serial Comments or Tasks Technical Time (hours)
1 All tarpaulins are to be given a brush down, brush scrubbing and hose cleaning, paying particular attention to the seam areas and then hung so as not to contact the ground for drying
2 All ropes and universal dispatch straps are to be extended to their full length and wiped or washed clean of all soil, plant and insect matter.
Attention to attachment points and fixtures and tension devices is required
Personnel are to inspect and remove all twigs, foliage, and so on that has become embedded in the rope fibres
3 Velcro panels and seams (where fitted) are to be brushed and washed to ensure all seed, plant and soil material is removed
4 Canvas bags are to be turned inside out and checked for burrs, seeds and insects;
5 Where fitted, poles, knuckles and pegs are to be subject to a high-pressure water clean to remove all soil, plant and insect matter (ants, spiders and mud wasps are of particular concern)
6 If tarpaulins have not been used during the entire deployment, then the requirement is for all tarpaulins to be unrolled, brushed and swept clean to ensure no vermin or insect infestation and then subject to an AQIS inspection
ADF FORCE EXTRACTION CLEANING MANUAL

UNCONTROLLED IF PRINTED
95-20
Camouflage Nets
95.13 The cleaning instructions for camouflage nets include the points detailed in Table 95-9.
Table 95–9: Cleaning Instructions for Camouflage Nets
Serial Comments or Tasks Technical Time (hours)
1 Removal of grass and debris may be achieved by use of a petrol powered blower/vacuum in the first instance, use of water should be avoided
2 Heavily soiled camouflage nets may require further scrubbing and a dip in an approved detergent/ disinfectant (one in 20 solution). This has been achieved in the past by using trailers with required additive
3 Depending on the degree of contamination and diligence in the cleaning process, camouflage nets may require three or more trailer dips to achieve the required AQIS clearance
4 Drying is to be achieved by hanging the camouflage net so that it does not come into contact with the ground
5 Nets are to be inspected to ensure that all plant material is removed
6 Camouflage poles are to be brushed or swept clean; and metal joiners are to be removed cleaned and inspected by AQIS officers
ADF FORCE EXTRACTION CLEANING MANUAL

UNCONTROLLED IF PRINTED
95-21
Tyres (New, Old and Spares)
95.14 The cleaning instructions for Tyres (New, Old and Spares) include the points detailed in Table 95-10.
Table 95–10: Cleaning Instructions for Tyres (New, Old and Spares)
Serial Comments or Tasks Technical Time (hours)
1 All tyres are to be washed and scrubbed to remove all QRM.
2 Damaged tyres are to be inspected by AQIS, who will determine their suitability for return to Australia. If necessary, damaged tyres (for example, perished, cracked or split) are to be removed and disposed of in accordance with the tyre disposal policy;
3 Cracked tyres have the risk of containing QRM therefore perished tyres are to be subject to disposal.
4 All tyres are to be treated with an approved residual insecticide after cleaning
5 Fitted tyres that are damaged should be replaced with new tyres.
6 Used and fitted tyres on rims are to be individually verified that the tyres are on rims, inflated with beading sealed and that the tyres are clean, free of water and other quarantine risk material.
7 Tyres that are not fitted to rims are to be stored in such a manner that water cannot collect inside the tyre. The preferred AQIS solution is that tyres are stored within containers. Tyres not fitted on rims will require fumigation on return to Australia.
8 AQIS considers a Non-Commercial consignment of tyres to contain a maximum of 8 tyres (inclusive of the wheels on the vehicle) and be imported with an accompanying vehicle. If tyres are to be transported back to Australia in containers or crates, please refer to the AQIS internet site (http://www.daff.gov.au/) ICON (Import Conditions Database) for the commodity “tyres”.
Annexes: A. Cleaning Instructions – ACTROS Gantry B. Cleaning Instructions – ACTROS Fuel Tanker C. Cleaning Instructions – ACTROS Cargo Crane Variant D. Cleaning Instructions – ACTROS TPS-117 Radar Antenna E. Cleaning Checklist – ACTROS Truck
ADF FORCE EXTRACTION CLEANING MANUAL
UNCONTROLLED IF PRINTED
95A - 1
ANNEX A TO CHAPTER 95
CLEANING INSTRUCTIONS – GANTRY VARIANT
1. This Annex provides specific cleaning requirements for selected vehicles. Where there is a specific requirement or need to highlight particular problem areas detailed cleaning guides are provided as tables and figures in this Annex.
2. The cleaning requirements that follow are in addition to those points for the Actros vehicle included in Chapter 95 of this publication.
External Areas
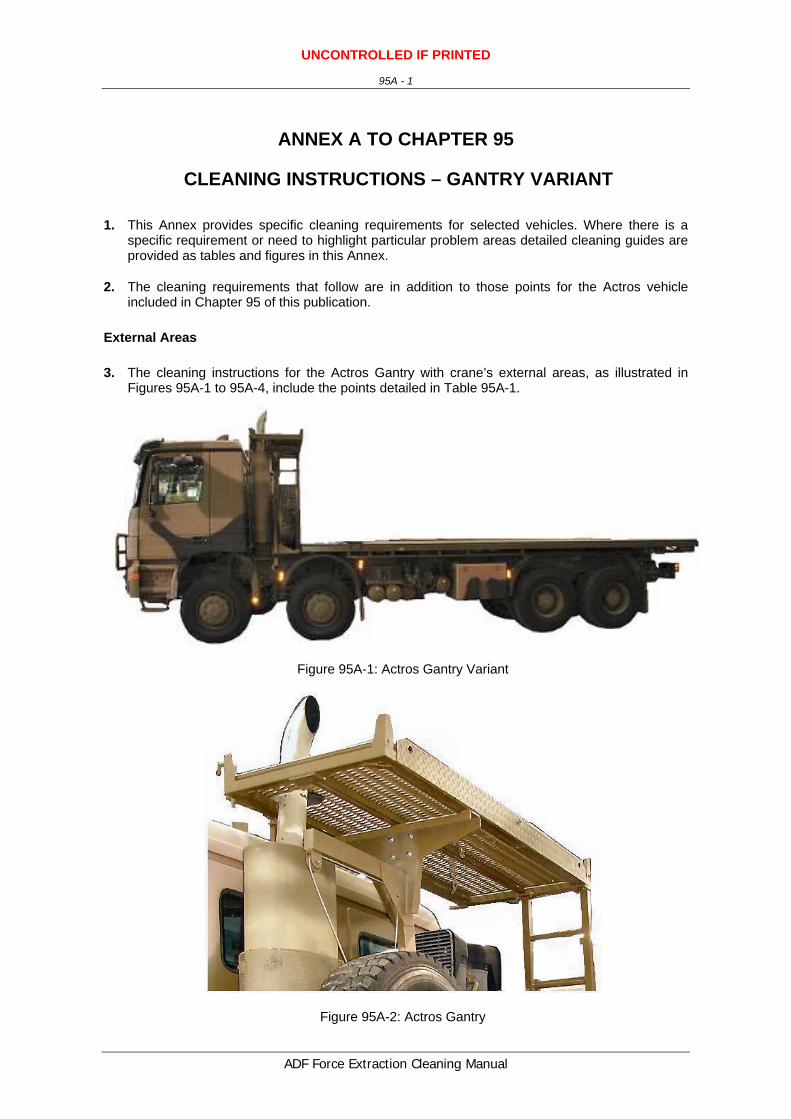
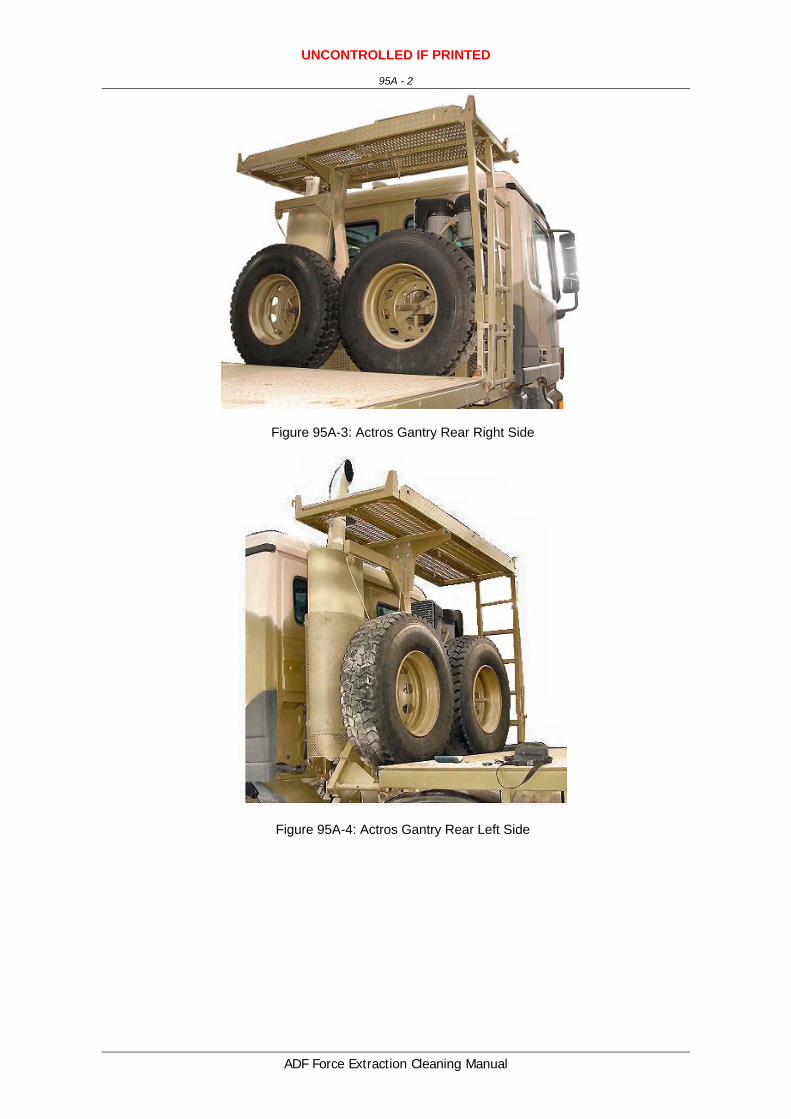
3. The cleaning instructions for the Actros Gantry with crane’s external areas, as illustrated in Figures 95A-1 to 95A-4, include the points detailed in Table 95A-1.
Figure 95A-1: Actros Gantry Variant
Figure 95A-2: Actros Gantry
ADF Force Extraction Cleaning Manual
UNCONTROLLED IF PRINTED
95A - 2
Figure 95A-3: Actros Gantry Rear Right Side
Figure 95A-4: Actros Gantry Rear Left Side
ADF Force Extraction Cleaning Manual

UNCONTROLLED IF PRINTED
95A - 3
Table 95A--1: Cleaning Instructions for the Actros Gantry External Areas
Serial Comments or Tasks Technical Time (hours)
1 Remove all CES and individually clean.
2 The winch and lifting cables (if fitted) are to be reeled out, degreased and given a high-pressure water clean to remove all soil, plant and insect matter
3 Extend or unwind all cables to allow cleaning of all grease and oil to ensure that no soil, plant or insect matter is embedded.
4 All items are to be extended to full length and subject to a high-pressure water clean using degreaser, if required, to remove all soil, plant and insect matter
5 Ensure all frames are cleaned and free of QRM
6 All opened ended frames must be flushed with high-pressure water until clean and free of QRM
7 Extend hydraulic systems and ensure they are free of grease and QRM
8 Particular attention is to be made to the platform and stairs areas which are to be flushed with high-pressure water ensure all soil, plant and insect matter is removed.
9 Clean the hollow sections of the gantry by using flushing through the tubes with a pressure washer.
10 Refer to “Spare Tyre Mount” below for cleaning guides for the spare wheels.
11 Refer to Chapter 95 for detailed cleaning guidelines.
ADF Force Extraction Cleaning Manual

UNCONTROLLED IF PRINTED
95A - 4
Spare Tyre Mount
4. The cleaning instructions for the Actros Gantry’s spare tyre mount, as illustrated in Figures 95A-3 and 95A-4 above, include the points detailed in Table 95A-2.
Table 95A-–2: Cleaning Instructions for the Actros Gantry’s Spare Tyre Mount
Serial Comments or Tasks Technical Time (hours)
1 All tools are to be fully removed and extended to facilitate cleaning.
2 Tyre to be fully removed and to be cleaned as per “Tyres (New, Old and Spares)” below.
3 Tyre cover (if fitted) to be fully removed and to be washed and scrubbed to remove all QRM.
4 All externally fitted items of equipment to be removed and both the items and the mounting brackets to be cleaned of all QRM
5 Frame areas are to be washed with high-pressure water utilising a flexible nozzle.
6 The hand winch is to be extended to full length and subject to a high-pressure water clean using degreaser, if required, to remove all soil, plant and insect matter
7 The winch drum is also to be degreased and subject to a high-pressure water clean
8 All winch ropes, wire ropes and slings are to be re-oiled after inspection. An application of a protective covering (plastic bag) may be required to protect the refurbished ropes and cables
ADF Force Extraction Cleaning Manual

UNCONTROLLED IF PRINTED
95A - 5
Winches and Wire Ropes
5. The cleaning instructions for the Actros Gantry’s winches and wire ropes, as illustrated in Figures 95A–5 to 95A–7, include the point detailed in Table 95A–3.
Figure 95A-5: Actros’s Gantry’s Winch Assembly
Figure 95A-6: Actros’s Gantry’s Winch Drum
Figure 95A-7: Actros’s Gantry’s Winch Rollers Rear (Left) and Front (Right)
ADF Force Extraction Cleaning Manual

UNCONTROLLED IF PRINTED
95A - 6
Table 95A–3: Cleaning Instructions for the Actros Gantry’s Winches and Wire Ropes
Serial Comments or Tasks Technical Time (hours)
1 The winch drum bay is to be cleaned to ensure it is free of QRM.
2 All items are to be extended to full length and subject to a high-pressure water clean using degreaser, if required, to remove all soil, plant and insect matter.
3 The winch drum is also to be degreased and subject to a high-pressure water clean.
4 All winch ropes and wire ropes are to be re-oiled after inspection. An application of a protective covering (plastic bag) may be required to protect the refurbished ropes and cables
5 The winch assembly fair leads are to be cleaned and free of grease, soil, plant and insect matter.
ADF Force Extraction Cleaning Manual

UNCONTROLLED IF PRINTED
95B - 1
ANNEX B TO CHAPTER 95
CLEANING INSTRUCTIONS – FUEL TANKER VARIANT
1. This Annex provides specific cleaning requirements for selected vehicles. Where there is a specific requirement or need to highlight particular problem areas detailed cleaning guides are provided as tables and figures in this Annex.
2. The cleaning requirements that follow are in addition to those points for the Actros vehicle included in Chapter 95 of this publication.
External Areas
3. The cleaning instructions for the Actros fuel tanker’s external areas (truck tanker fuel), as illustrated in Figures 95B-1 to 95B-16, include the points detailed in Table 95B-1.
Figure 95B-1: Actros Fuel Tanker’s External Areas
Figure 95B-2: Actros Fuel Tanker’s Hose Holders and Passenger Side View
ADF Force Extraction Cleaning Manual

UNCONTROLLED IF PRINTED
95B - 2
Figure 95B-3: Actros Fuel Tanker’s Fuel Hoses and Hose Reel Assemblies
Figure 95B-4: Actros Fuel Tanker’s Hose Reels & Hydraulics Tank
Figure 95B-5: Actros Fuel Tanker’s Hydraulic Controls (Left) and Emergency Cut Off Button (Right)
ADF Force Extraction Cleaning Manual

UNCONTROLLED IF PRINTED
95B - 3
Figure 95B-6: Actros Fuel Tanker’s Pipe Holders
Figure 95B-7: Actros Fuel Tanker’s Rear View
ADF Force Extraction Cleaning Manual

UNCONTROLLED IF PRINTED
95B - 4
Figure 95B-8: Actros Fuel Tanker’s Left and Right Side-on of Rear Pumps
Figure 95B-9: Actros Fuel Tanker’s Overflow Hose
Figure 95B-10: Actros Fuel Tanker’s Pump Control Panel
ADF Force Extraction Cleaning Manual

UNCONTROLLED IF PRINTED
95B - 5
Figure 95B-11: Actros Fuel Tanker’s Rear Pumps & Electrical Cables
ADF Force Extraction Cleaning Manual

UNCONTROLLED IF PRINTED
95B - 6
Table 95B-1: Cleaning Instructions for the Actros Fuel Tanker’s External Areas
Serial Comments or Tasks Technical Time (hours)
1 Remove the carrier racks and clean with a high-pressure water cleaner.
2 Unroll all hoses and clean all oil and grease material to ensure there is no soil, plant or insect matter. Clean hose assembly with a high-pressure water cleaner (Refer Figures 95B-3, 95B-4 and 95B-5).
3 CES bins are to be emptied to facilitate cleaning with high-pressure water.
4 Clean all hose holders fitted on the sides of the tank (Refer Figure 95B-6).
5 Clean all hose couplings and hose coupling assembly with a high-pressure water cleaner (Refer Figures 95B-7, 95B-8 and 95B-11).
6 Remove Jerry-cans and clean the bracket with high-pressure water (Refer Figure 95B-7).
7 Mudguards are to be removed to facilitate cleaning around the attachment points
8 Inspect and clean the pumps and fittings at the rear of the tank (refer Figure 95B-8).
9 Disconnect the fuel overflow hose and inspect to ensure it is free of QRM (Refer Figure 95B-9).
10 Inspect and clean the pump control panel at the rear of the tank (refer Figure 95B-10). Do not use high pressure water or steam to clean any areas of the control panel: Use air clean or hand wash only.
11 Clean in between all cables, paying attention to where the cable ties are located and between the cable and vehicle (Refer Figure 95B-11).
12 Ensure the external areas of the fuel tank are free of QRM.
13 Ensure the towing connections and rear winch areas are cleaned and free of QRM (refer Figure 95B-12). Refer to “winches and wire ropes” below for further information.
14 Raise the safety rails on the tank catwalk and ensure they are free of QRM (Refer Figures 95B-13, and 95B-14).
15 Ensure the external areas of the catwalk along the top of the tank and the area around the tank entry cupola are free of QRM (refer Figure 95-14)
16 Unpack the anti spill kit and clean the container (Refer Figure 95B-15). Ensure the kit is free of QRM.
17 CES bins are to be emptied to facilitate cleaning with high-pressure water (Refer Figure 95B-16).
18 Refer to Chapter 95 for detailed cleaning guidelines.
ADF Force Extraction Cleaning Manual

UNCONTROLLED IF PRINTED
95B - 7
Figure 95B-12: Actros Fuel Tanker’s Rear Towing & Winch
Figure 95B-13: Actros Fuel Tanker’s Tank With Safety Rails
ADF Force Extraction Cleaning Manual

UNCONTROLLED IF PRINTED
95B - 8
Figure 95B-14: Actros Fuel Tanker’s Tank Catwalk
Figure 95B-15: Actros Fuel Tanker’s Anti Spill Kit
ADF Force Extraction Cleaning Manual

UNCONTROLLED IF PRINTED
95B - 9
Figure 95B-16: Actros Fuel Tanker’s Rear Main Stowage Cupboard
ADF Force Extraction Cleaning Manual

UNCONTROLLED IF PRINTED
95B - 10
Spare Tyre Mount
4. The cleaning instructions for the Actros Fuel Tanker’s spare tyre mount, as illustrated in Figure 95B-17, include the points detailed in Table 95B-2.
Figure 95B-17: Actros Fuel Tanker’s Spare Tyre Mount
Table 95B–2: Cleaning Instructions for the Actros Fuel Tanker’s Spare Tyre Mount
Serial Comments or Tasks Technical Time (hours)
1 Refer to Chapter 95 for detailed cleaning guidelines.
2 All tools are to be fully removed and extended to facilitate cleaning.
3 Tyre to be fully removed and to be cleaned as per “Tyres (New, Old and Spares)” below.
4 Tyre cover (if fitted) to be fully removed and to be washed and scrubbed to remove all QRM.
5 All externally fitted items of equipment to be removed and both the items and the mounting brackets to be cleaned of all QRM
6 Frame areas are to be washed with high-pressure water utilising a flexible nozzle.
ADF Force Extraction Cleaning Manual

UNCONTROLLED IF PRINTED
95B - 11
Winches and Wire Ropes
5. The cleaning instructions for the Actros Fuel Tanker’s winches and wire ropes, as illustrated in Figure 95B–18, include the point detailed in Table 95B–3.
Figure 95B-19: Actros Fuel Tanker’s Winch
Table 95B–3: Cleaning Instructions for the Actros Fuel Tanker’s Winches and Wire Ropes
Serial Comments or Tasks Technical Time (hours)
1 The winch drum bay is to be cleaned to ensure it is free of QRM.
2 All items are to be extended to full length and subject to a high-pressure water clean using degreaser, if required, to remove all soil, plant and insect matter.
3 The winch drum is also to be degreased and subject to a high-pressure water clean.
4 All winch ropes and wire ropes are to be re-oiled after inspection. An application of a protective covering (plastic bag) may be required to protect the refurbished ropes and cables
5 The winch assembly fair leads are to be cleaned and free of grease, soil, plant and insect matter.
ADF Force Extraction Cleaning Manual

UNCONTROLLED IF PRINTED
95C - 1
ANNEX C TO CHAPTER 95
CLEANING INSTRUCTIONS – CARGO CRANE VARIANT
1. This Annex provides specific cleaning requirements for selected vehicles. Where there is a specific requirement or need to highlight particular problem areas detailed cleaning guides are provided as tables and figures in this Annex.
2. The cleaning requirements that follow are in addition to those points for the Actros vehicle included in Chapter 95 of this publication.
External Areas
3. The cleaning instructions for the Actros with Crane’s external areas, as illustrated in Figure 95C-1, include the points detailed in Table 95C-1.
Figure 95C-1: Actros Cargo with Crane
ADF Force Extraction Cleaning Manual

UNCONTROLLED IF PRINTED
95C - 2
Figure 95C-1: Actros Cargo with Crane Spare Wheel and Air-conditioner
Table 95C-1: Cleaning Instructions for the Actros with Crane’s External Areas
Serial Comments or Tasks Technical Time (hours)
1 Remove all CES and individually clean.
2 The external areas are to be cleaned of all contaminant to ensure that there is no soil, plant or insect matter.
3 Tray body flooring is to have all apertures, tie-down points, and twist lock housings cleaned with high-pressure water from a front and rear aspect.
4 Tarpaulins (if fitted) are to be fully removed and to be cleaned as per “Tarpaulin” in Chapter 95.
5 Remove the canopy and bows (if fitted) and clean. Clean the hollow sections of the canopy bows by using flushing through the tubes with a pressure washer.
6 Refer to “Spare Tyre Mount” below for cleaning guides for the spare wheels.
7 Refer to Chapter 95C for detailed cleaning guidelines.
ADF Force Extraction Cleaning Manual

UNCONTROLLED IF PRINTED
95C - 3
Cargo Crane Hydraulics
4. The cleaning instructions for the Actros with Crane’s hydraulics areas as illustrated in Figures 95C-2 and 95C-3, include the points detailed in Table 95C-2.
Figure 95C-2: Actros with Crane’s Hoist Side
Figure 95C-2: Actros with Crane’s Hoist and Stabilizer
ADF Force Extraction Cleaning Manual

UNCONTROLLED IF PRINTED
95C - 4
Figure 95C-2: Actros with Crane’s Right and Left View
Figure 95C-3: Actros with Crane’s Hoist & Hoist Arm Cavity
Figure 95C-3: Actros with Crane’s Hoist Control Boxes
ADF Force Extraction Cleaning Manual

UNCONTROLLED IF PRINTED
95C - 5
Table 95C-2: Cleaning Instructions for the Actros Crane Hydraulics
CAUTION HYDRAULIC COMPONENTS
Do not use high pressure water or steam to clean the hydraulics or hydraulic control areas unless under the supervision of a qualified
technician
Serial Comments or Tasks Technical Time (hours)
1 Lifting rams are to be fully extended and cleaned. 1.0
2 Extend stabilisers, clean the hydraulic cylinder and rod, stabiliser housing and foot assembly.
1.5
3 The hydraulic area is to be cleaned of all grease and oil to ensure there is no soil, plant or insect matter. Regrease lightly after AQIS inspection to working surface only.
4 The hydraulic control areas are to be either hand wiped or air-cleaned unless under the supervision of a qualified technician
5 Check under all hydraulic looming for cleanliness
6 All electrical and hydraulic lines are to be separated and all grease and soil debris cleaned from in between them.
ADF Force Extraction Cleaning Manual
UNCONTROLLED IF PRINTED
95C - 6
Supports and Stands
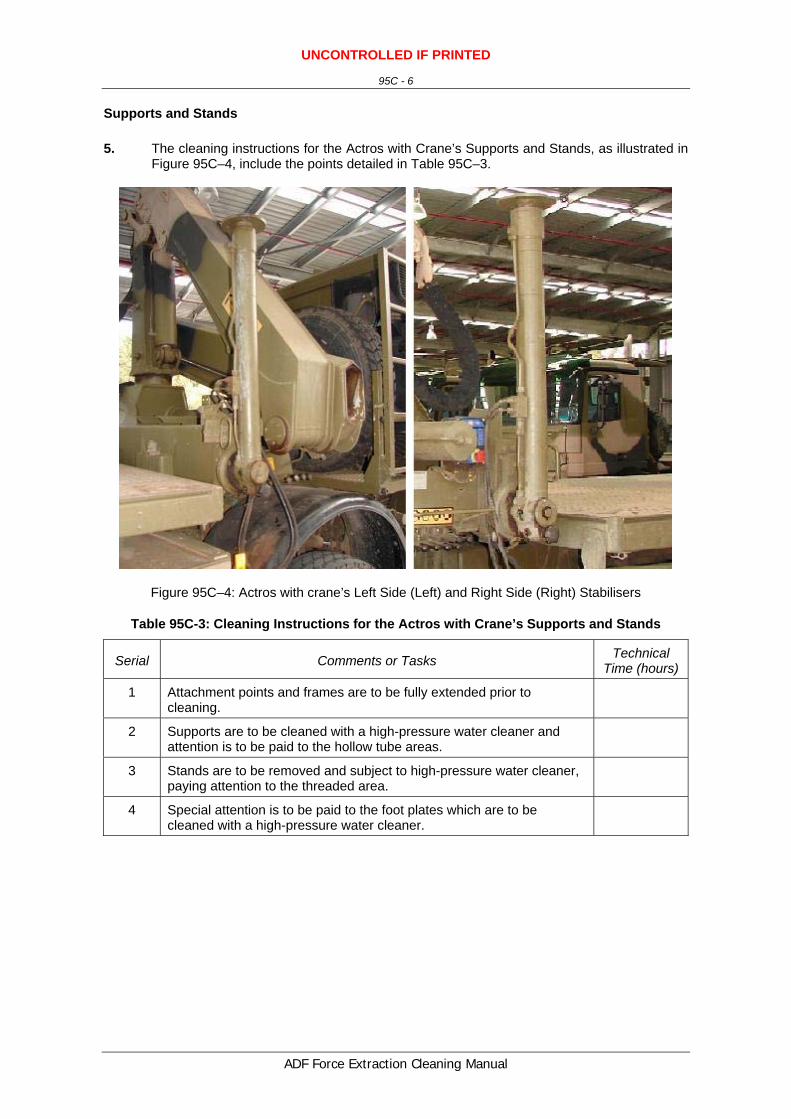
5. The cleaning instructions for the Actros with Crane’s Supports and Stands, as illustrated in Figure 95C–4, include the points detailed in Table 95C–3.
Figure 95C–4: Actros with crane’s Left Side (Left) and Right Side (Right) Stabilisers
Table 95C-3: Cleaning Instructions for the Actros with Crane’s Supports and Stands
Serial Comments or Tasks Technical Time (hours)
1 Attachment points and frames are to be fully extended prior to cleaning.
2 Supports are to be cleaned with a high-pressure water cleaner and attention is to be paid to the hollow tube areas.
3 Stands are to be removed and subject to high-pressure water cleaner, paying attention to the threaded area.
4 Special attention is to be paid to the foot plates which are to be cleaned with a high-pressure water cleaner.
ADF Force Extraction Cleaning Manual

UNCONTROLLED IF PRINTED
95C - 7
Spare Tyre Mount
6. The cleaning instructions for the Actros spare tyre mount, as illustrated in Figure 95C-2 above, include the points detailed in Table 95C-5.
Table 95C–5: Cleaning Instructions for the Actros Spare Tyre Mount
Serial Comments or Tasks Technical Time (hours)
1 All tools are to be fully removed and extended to facilitate cleaning.
2 Tyre to be fully removed and to be cleaned as per “Tyres (New, Old and Spares)” below.
3 Tyre cover (if fitted) to be fully removed and to be washed and scrubbed to remove all QRM.
4 All externally fitted items of equipment to be removed and both the items and the mounting brackets to be cleaned of all QRM
5 Frame areas are to be washed with high-pressure water utilising a flexible nozzle.
6 Refer to Chapter 95C for detailed cleaning guidelines.
ADF Force Extraction Cleaning Manual

UNCONTROLLED IF PRINTED
95D - 1
ANNEX D TO CHAPTER 95
CLEANING INSTRUCTIONS – ACTROS CARRIED TPS-117
(OR TPS-77) RADAR ANTENNA
1. This Annex provides specific cleaning requirements for selected equipment. Where there is a specific requirement or need to highlight particular problem areas detailed cleaning guides are provided as tables and figures in this Annex.
2. The cleaning requirements that follow are in addition to those points for the Actros vehicle included in Chapter 95 of this publication.
3. The TPS-117 Radar Antenna has also been designated as the TPS-77 radar.
Radar Cleaning Instructions
4. The cleaning instructions for the TPS-117 Radar Antenna, as illustrated in Figures 95D-1 and 95D-2, include the points detailed in Table 95D-1.
Figure 95D-1: TPS-117 Radar Antenna
ADF Force Extraction Cleaning Manual

UNCONTROLLED IF PRINTED
95D - 2
Figure 95D-2: TPS-117 Radar Antenna Collapsed for Transport
Table 95D-1: Cleaning Instructions for the TPS-117 Radar Antenna
EXTREME CAUTION ELECTRICAL COMPONENTS
Do not use water or steam to clean any interiors areas of the radar or radar controls unless under the supervision of a qualified technician
Serial Comments or Tasks Technical Time (hours)
1 The dish is to be cleaned down with water to remove all soil, plant and insect matter. Attention is to be paid to small areas where foliage, seeds and insect material can become lodged.
2 Attachment points and frames are to be cleaned, and attention is to be paid to the hollow tube areas.
3 Electronic equipment is to be air-hose cleaned and brushed down with brushes to remove soil and insect debris. Filters are to be removed and cleaned where fitted. All cables are to be unwound and wiped down, paying attention to connectors.
Mounting frames that are fixed to the floor are to be moved to facilitate cleaning and inspection. Equipment is to be dismounted to facilitate cleaning.
4 All multi-pair cable is to be wiped clean over the entire length including connectors. Conduit is to be cleaned by a high-pressure water clean or removed to facilitate cleaning and inspection by AQIS.
ADF Force Extraction Cleaning Manual

UNCONTROLLED IF PRINTED
95D - 3
Hydraulics
5. The specific cleaning instructions for Radar hydraulics, illustrated in Figure 95D-3, include those points detailed in Table 95D–2
Figure 95D-3: TPS-117 Radar Antenna Hydraulics
Table 95D–2: Cleaning Instructions for the TPS-117 Radar hydraulics
Serial Comments or Tasks Technical Time (hours)
1 Lifting rams are to be fully extended and cleaned. 1.0
2 Extend stabilisers, clean the hydraulic cylinder and rod, stabiliser housing and foot assembly.
1.5
3 The hydraulic area is to be cleaned of all grease and oil to ensure there is no soil, plant or insect matter. Regrease lightly after AQIS inspection to working surface only.
4 The hydraulic control areas are to be either hand wiped or air-cleaned unless under the supervision of a qualified technician
5 Check under all hydraulic looming for cleanliness
6 All electrical and hydraulic lines are to be separated and all grease and soil debris cleaned from in between them.
CAUTION HYDRAULIC COMPONENTS
Do not use high pressure water or steam to clean the hydraulics or hydraulic control areas unless under the supervision of a qualified
technician
ADF Force Extraction Cleaning Manual

UNCONTROLLED IF PRINTED
95D - 4
Supports and Stands
6. The cleaning instructions for the TPS-117 Radar Antenna supports and stands, as illustrated in Figure 95D–4 include the points detailed in Table 95D–3.
Figure 95D-4: TPS-117 Radar Antenna Supports and Stands
Table 95D-3: Cleaning Instructions for the TPS-117 Supports and Stands
Serial Comments or Tasks Technical Time (hours)
1 Attachment points and frames are to be cleaned, and attention is to be paid to the hollow tube areas.
2 Supports are to be cleaned with a high-pressure water cleaner.
3 Stands are to be removed and subject to high-pressure water cleaner, paying attention to the threaded area.
4 Special attention is to be paid to the foot plates which are to be with a high-pressure water cleaner.
5 Forklift pockets, in the base of the shelter, are to be cleaned and free of dirt, dust, plant and insect material.
ADF Force Extraction Cleaning Manual

ANNEX E TO CHAPTER 95
CLEANING CHECKLIST – ACTROS TRUCKS
All serials may not be specific to all ACTROSS trucks
Vehicle Registration No: ……………………………….
Serial
Description
Tick
External Areas
1 Radiator cleaned of all seed and insect matter by high-pressure air and hand-picked clean.
2 Engine bay area cleaned of all contaminant
3 Both air cleaners removed and the housings cleaned using low-pressure compressed air.
4 Cyclonic tubes and pre-cleaner dust bowl cleaned and free from dust, plant, seed and insect debris
5 Lights and mirrors cleaned and damaged items removed and cleaned
6 Carry racks apertures removed and cleaned
7 Window and door rubber seals cleaned of all soil, plant and insect matter
8 Seals on the bonnet area cleaned
9 Outer wheel assemblies removed from the intermediate and rear axles and cleaned
10 All apertures, tie-down points, and twist lock housings in tray body flooring cleaned with high-pressure water from a front and rear aspect
11 Straps on the fuel and air tanks loosened and tanks cleaned
12 Batteries and tools removed from the battery box and tool attachment points and cleaned
13 All toolboxes emptied and cleaned
14 Air cleaner elements removed and disposed of in accordance with AQIS directions
15 Jerry cans removed and cleaned

Cabin
1 Seats and floor mats removed and cleaned and the cabin floor cleaned
2 Lights and mirrors cleaned and damaged items removed and cleaned
3 Window and door rubber seals cleaned of all soil, plant and insect matter
4 Door trims have been removed and cleaned
5 Seats and under seat area cleaned and free of QRM.
6 The cabin area vacuumed and air-blown clean
7 Ventilation ducts have been unscrewed and air-blown clean
8 The front cover of the ventilation fan housing has been removed and cleaned.
Suspension
1 Suspension rocker beam mounts on chassis cleaned.
2 The spring seat, the axle assembly, and springs have been cleaned..
3 All wheels both inside and out have been cleaned.
4 Axles and mounts on chassis are clean.
Underneath Areas
1 Airbags have been fully extended and cleaned.
2 The frame areas have been washed.
3 The spring brake housing assemblies, including the mounting for the spring brake emergency release bolts, have been cleaned.
4 Winch ropes have been wound off the winch drum and the rope, drum and guides/ rollers cleaned.
5 Winch cables have been cleaned.

Engine
1 The engine compartment and engine have been cleaned.
2 The brake booster assembly and pedal pivot housing have been removed and cleaned.
3 The clutch pedal pivot housing cover has been removed and the housing cleaned.
4 The heater assembly and clean heater core have been removed and cleaned.
5 The heater/ventilation fan housing has been cleaned.
6 The air cleaner flexible line from the air plenum in the right-hand front mudguard assembly has been removed and cleaned.
7 The air cleaner element has been removed and disposed of in accordance with AQIS instructions.
Mack Spare Tyre Mount
1 All tools have been removed and/or extended and cleaned.
2 The tyre has been fully removed and cleaned.
3 Tyre cover (if fitted) has been fully removed and cleaned.
4 All externally fitted items of equipment have been and both the items and the mounting brackets removed and cleaned.
5 The frame areas have been washed.
Tarpaulins
1 All tarpaulins have been given a brush down, brush scrubbing and hose cleaning, with particular attention to the seam areas and then hung so as not to contact the ground for drying
2 All ropes and universal dispatch straps have been extended to their full length and wiped or washed clean of all soil, plant and insect matter
3 Attachment points and fixtures and tension devices are free of all soil, plant and insect matter
4 All twigs, foliage, etc has been removed from rope fibres
5 Velcro panels and seams (where fitted) have been brushed and washed to ensure all seed, plant and soil material is removed
6 All canvas bags have been turned inside out and checked for burrs, seeds and insects;
7 Where fitted, poles, knuckles and pegs have been subject to a high-pressure water cleaning.
8 Unused tarpaulins that have not been used during the entire deployment, have been unrolled, brushed and swept clean to ensure no vermin or insect infestation and then subject to an AQIS inspection

Camouflage Nets
1 All grass and debris have been removed
2 Heavily soiled camouflage nets have been further scrubbed and dipped in an approved detergent/ disinfectant (one in 20 solution).
3 Drying has been achieved by the hanging the camouflage net so that it did not come into contact with the ground
4 All nets have been inspected to ensure that all plant material is removed
5 All camouflage poles have been brushed or swept clean; and metal joiners have been removed cleaned and then inspected by AQIS officers
Tyres (New, Old and Spares)
1 All tyres have been washed and scrubbed to remove all QRM
2 Cracked/ perished tyres have been assessed for disposal
3 All tyres have been treated with an approved residual insecticide after cleaning
4 All fitted tyres that were damaged have been replaced with new tyres
5 Used and fitted tyres on rims have been individually verified that the tyres are on rims, are inflated with beading sealed and that the tyres are clean, free of water and other quarantine risk material
6 Tyres not fitted to rims have been stored in such a manner that water has not collected inside the tyre
7 The consignment contains a maximum of 8 tyres and is to be imported with an accompanying vehicle
The consignment contains more than a maximum of 8 tyres and will not be imported with an accompanying vehicle
(Delete whichever is not applicable)
Signed ………………………………………. Date: ………………….
Name: ………………………………………