Chapter 4 Inheritance, Interfaces & Packages
41
Chapter 4 Inheritance, Interfaces & Packages This chapter deals with the concept of inheritance, interfaces and packages. 4.1 Inheritance Inheritance is the capability of a class to use the properties and methods of another class while adding its own functionality. The concept of inheritance greatly enhances the ability to reuse code as well as making design a much simpler. In inheritance we extend a class by creating a new class. The classes participating in the process of inheritance have a parent-child relationship. The original class is the parent class or the base class or the superclass. The new class is called a child class or a subclass or a derived class of the parent. The process of extending a class in object-oriented programming is called inheritance. In a subclass we can add new methods and new fields as well as override existing methods in the parent class to change their behaviours. The subclass and the superclass has an "is-a" relationship. Within a subclass we can access public and protected methods and fields of superclass , but not the private methods of superclass. If the subclass and the superclass are in the same package,we can also access the default methods and fields of superclass. Java uses the extends keyword to set the relationship between a parent class and a child class. for example, class B inherits, or extends, class A : Example : public class P { public void publicMethod() { } protected void protectedMethod() { } void defaultMethod() { } } class C extends P// class C INHERITS METHODS OF CLASS P { public void testMethod() { publicMethod(); protectedMethod(); defaultMethod();
Transcript of Chapter 4 Inheritance, Interfaces & Packages
Chapter 4
Inheritance, Interfaces & Packages
This chapter deals with the concept of inheritance, interfaces and packages.
4.1 Inheritance
Inheritance is the capability of a class to use the properties and methods of another class
while adding its own functionality. The concept of inheritance greatly enhances the ability to
reuse code as well as making design a much simpler.
In inheritance we extend a class by creating a new class.
The classes participating in the process of inheritance have a parent-child
relationship.
The original class is the parent class or the base class or the superclass.
The new class is called a child class or a subclass or a derived class of the parent.
The process of extending a class in object-oriented programming is called
inheritance.
In a subclass we can add new methods and new fields as well as override existing
methods in the parent class to change their behaviours.
The subclass and the superclass has an "is-a" relationship.
Within a subclass we can access public and protected methods and fields of superclass , but
not the private methods of superclass. If the subclass and the superclass are in the same
package,we can also access the default methods and fields of superclass.
Java uses the extends keyword to set the relationship between a parent class and a child
class.
for example, class B inherits, or extends, class A :
Example :
public class P
{
public void publicMethod() { }
protected void protectedMethod() { }
void defaultMethod() { }
}
class C extends P// class C INHERITS METHODS OF CLASS P
{
public void testMethod() {
publicMethod();
protectedMethod();
defaultMethod();
}
}
Types of inheritance:
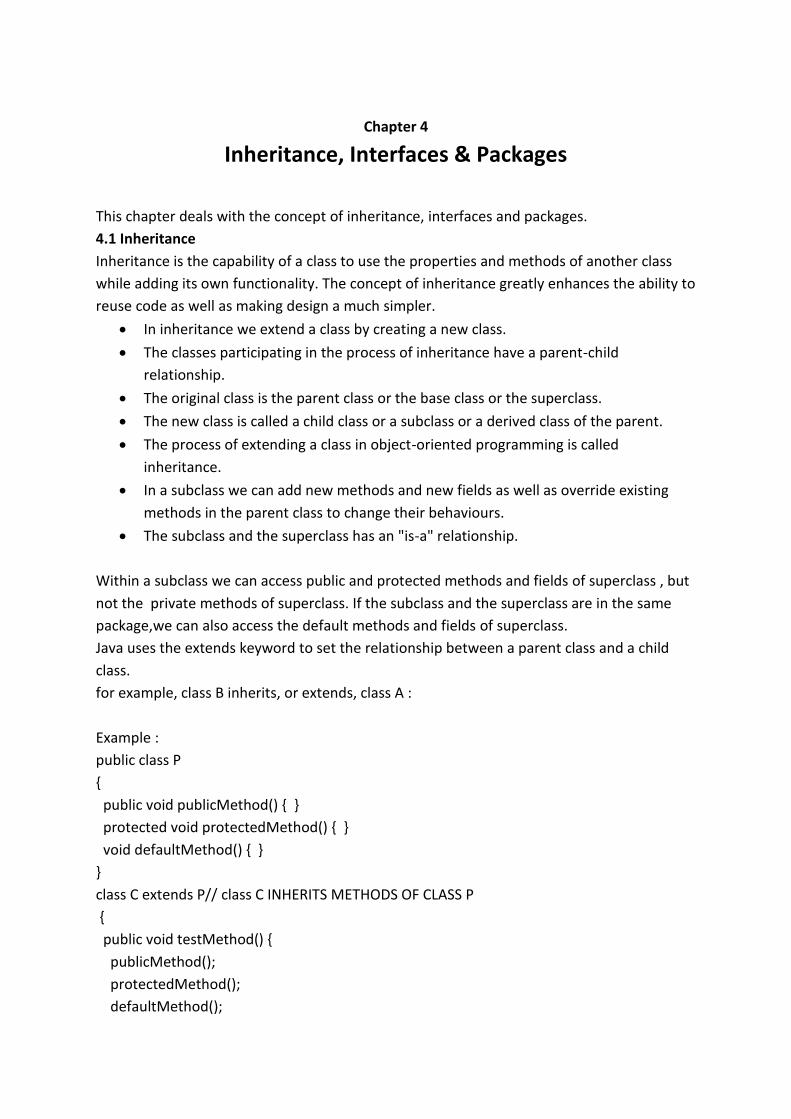
Single inheritance: In this type of inheritance classes have only one superclass .
in the example below class B inherits class A :
Here A is the superclass(parent class or base class) and B is the subclass(child class or
derived class)
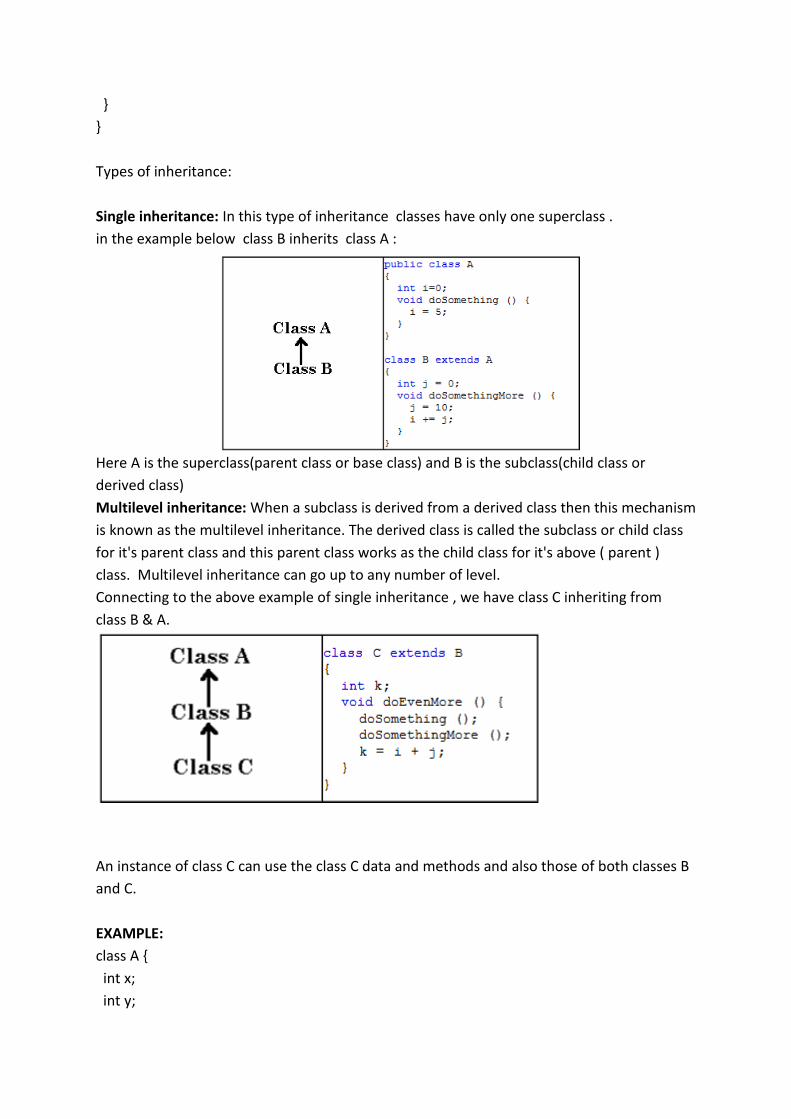
Multilevel inheritance: When a subclass is derived from a derived class then this mechanism
is known as the multilevel inheritance. The derived class is called the subclass or child class
for it's parent class and this parent class works as the child class for it's above ( parent )
class. Multilevel inheritance can go up to any number of level.
Connecting to the above example of single inheritance , we have class C inheriting from
class B & A.
An instance of class C can use the class C data and methods and also those of both classes B
and C.
EXAMPLE:
class A {
int x;
int y;
int get(int p, int q){
x=p;
y=q;
return(0);
}
void Show(){
System.out.println(x);
}
}
class B extends A{
void Showb(){
System.out.println("B");
}
}
class C extends B{
void display(){
System.out.println("C");
}
public static void main(String args[]){
A a = new A();
a.get(5,6);
a.Show();
}
}
Multiple Inheritance
The mechanism of inheriting the features of more than one base class into a single class is
known as multiple inheritance.
Java does not support multiple inheritance but the multiple inheritance can be achieved
by using the interface.
Keyword super
Super is used to access the members of the super class.It can be used for two purposes ,
1. to access the hidden data variables of the super class hidden by the sub class.
2. to call super class constructor in the subclass.
E.g. Suppose class A is the super class that has two instance variables as int a and float b.
class B is the subclass that also contains its own data members named a and b. then we can
access the super class variables a and b inside the subclass class B in the following manner.
super. member;
class A
{
int a;
float b;
void Show()
{
System.out.println("b in super class: " + b);
}
}
class B extends A
{
int a;
float b;
B( int p, float q)
{
a = p;
super.b = q;
}
void Show()
{
super.Show();
System.out.println("b in super class: " + super.b);
System.out.println("a in sub class: " + a);
}
public static void main(String[] args)
{
B subobj = new B(1, 5);
subobj.Show();
}
}
Output:
b in super class: 5.0
b in super class: 5.0
a in sub class: 1
the keyword super is used to call super class constructor in the subclass. This functionality
can be achieved just by using the following command.
super(parameter list);
Here parameter list is the list of the parameters required by the constructor in the super
class. super must be the first statement executed inside a super class constructor. If we
want to call the default constructor then we pass the empty parameter list.
The following program illustrates the use of the super keyword to call a super class
constructor.
class A
{
int a;
int b;
int c;
A(int p, int q, int r){
a=p;
b=q;
c=r;
}
}
class B extends A
{
int d;
B(int l, int m, int n, int o){
super(l,m,n);
d=o;
}
void Show()
{
System.out.println("a = " + a);
System.out.println("b = " + b);
System.out.println("c = " + c);
System.out.println("d = " + d);
}
public static void main(String args[])
{
B b = new B(4,3,8,7);
b.Show();
}
}
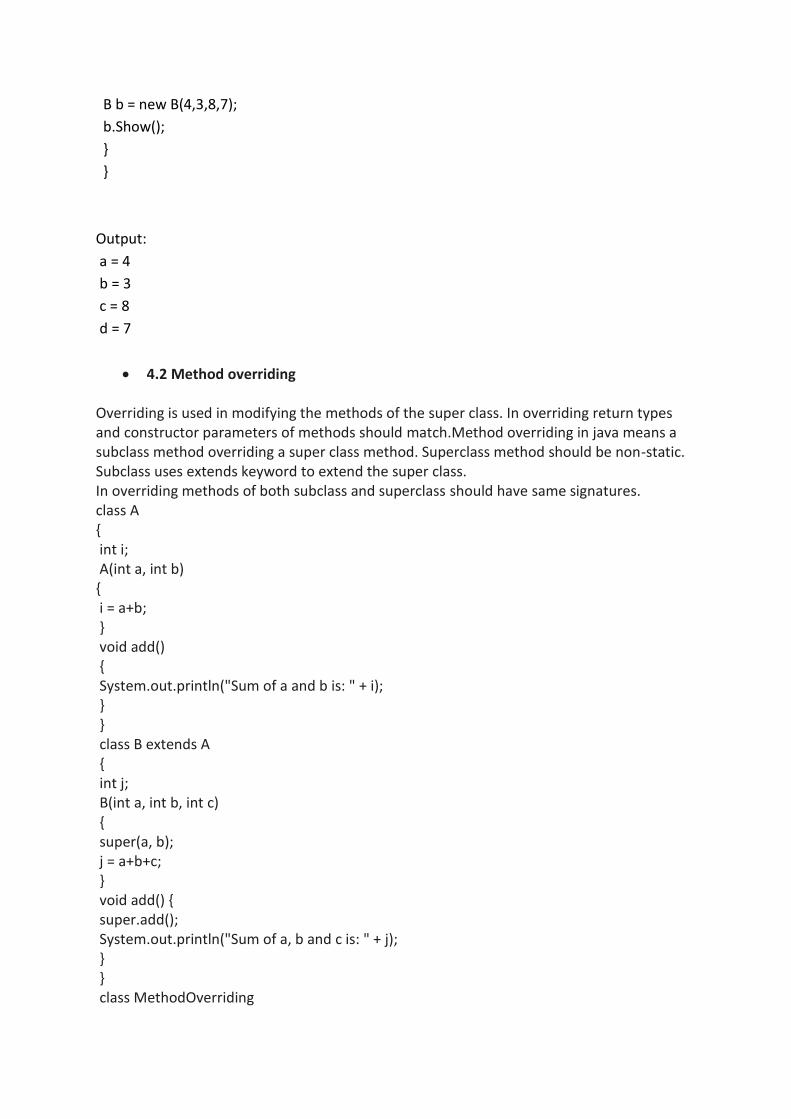
Output:
a = 4
b = 3
c = 8
d = 7
4.2 Method overriding
Overriding is used in modifying the methods of the super class. In overriding return types and constructor parameters of methods should match.Method overriding in java means a subclass method overriding a super class method. Superclass method should be non-static. Subclass uses extends keyword to extend the super class. In overriding methods of both subclass and superclass should have same signatures. class A { int i; A(int a, int b) { i = a+b; } void add() { System.out.println("Sum of a and b is: " + i); } } class B extends A { int j; B(int a, int b, int c) { super(a, b); j = a+b+c; } void add() { super.add(); System.out.println("Sum of a, b and c is: " + j); } } class MethodOverriding
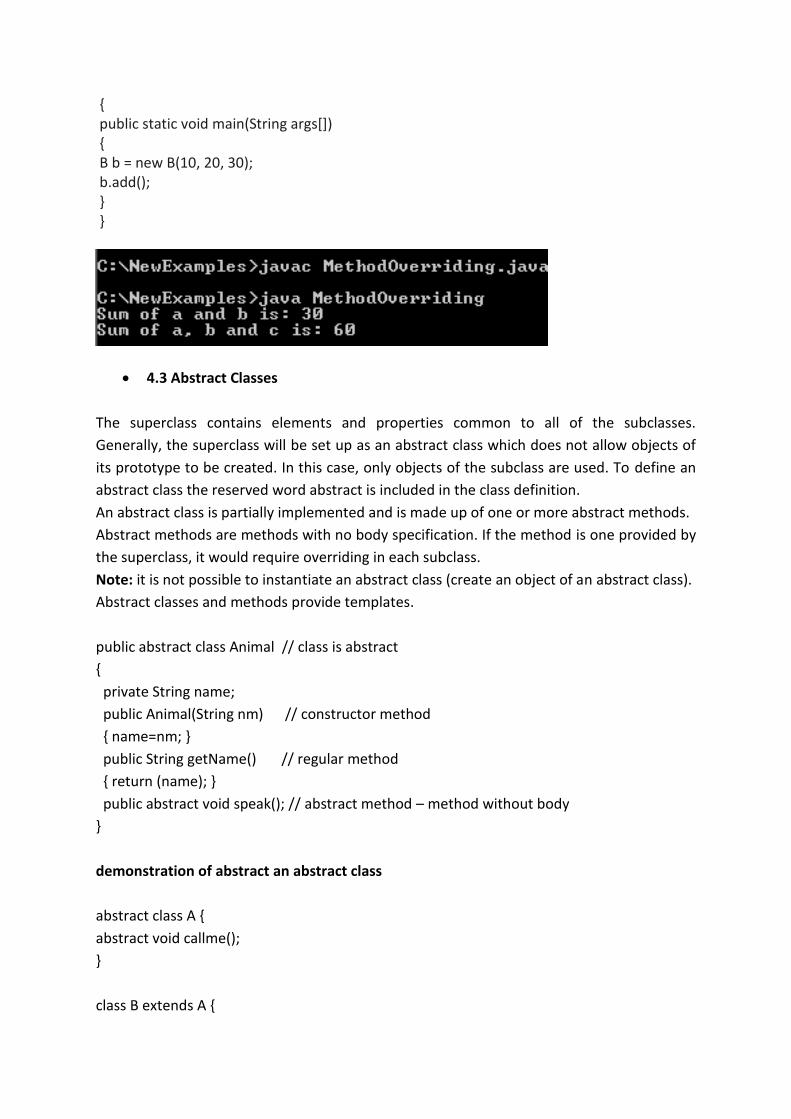
{ public static void main(String args[]) { B b = new B(10, 20, 30); b.add(); } }
4.3 Abstract Classes
The superclass contains elements and properties common to all of the subclasses.
Generally, the superclass will be set up as an abstract class which does not allow objects of
its prototype to be created. In this case, only objects of the subclass are used. To define an
abstract class the reserved word abstract is included in the class definition.
An abstract class is partially implemented and is made up of one or more abstract methods.
Abstract methods are methods with no body specification. If the method is one provided by
the superclass, it would require overriding in each subclass.
Note: it is not possible to instantiate an abstract class (create an object of an abstract class).
Abstract classes and methods provide templates.
public abstract class Animal // class is abstract
{
private String name;
public Animal(String nm) // constructor method
{ name=nm; }
public String getName() // regular method
{ return (name); }
public abstract void speak(); // abstract method – method without body
}
demonstration of abstract an abstract class
abstract class A {
abstract void callme();
}
class B extends A {
void callme() {
System.out.println("B's implementation of callme.");
}
}
class AbstractDemo {
public static void main(String args[]) {
B b = new B();
b.callme();
}
}
Notice that no objects of class A are declared in the program. As seen above, it is not
possible to instantiate an abstract class.
4.4 Interfaces
Interfaces are similar to abstract classes but all methods in an interface are abstract and all
properties are static final. Java does not allow multiple inheritance for classes, an interface
is used to tie elements of several classes together. Interfaces are also used to separate
design from coding as class method headers are specified but not their bodies.
A class implements an interface rather than extends it. Any class that implements the
interface must override all the interface methods with it's own methods.
Declaring an interface
<modifier> interface <interface-name> {
//members and methods()
}
The access level for the entire interface is usually public.
Implementing an Interface
To implement an interface:
1. add that the class implements the interface to the class declaration
2. add the methods specified by the interface to the body of the class
Syntax
<modifier> class ClassName implements InterfaceName {
//members and methods()
}
Note that a class may have additional properties and methods not associated with the
interface.
Example
interface IntExample{
public void sayHello();
}
public class JavaInterfaceExample implements IntExample{
public void sayHello(){
System.out.println("Hello Visitor !");
}
public static void main(String args[]){
JavaInterfaceExample javaInterfaceExample = new JavaInterfaceExample();
javaInterfaceExample.sayHello();
}
}
Output :
Hello Visitor!
4.5 Package
Java classes can be grouped together in packages. A package name is the same as the
directory name which contains the .java files.
Package naming conventions
Packages are usually defined using a hierarchical naming pattern, with levels in the
hierarchy separated by periods (.).The Java Language Specification establishes package
naming conventions to avoid the possibility of two published packages having the same
name. The naming conventions describe how to create unique package names, so that
packages that are widely distributed will have unique namespaces.
Package declaration
The first statement, in a Java source file, must be the package declaration. Following the
optional package declaration, we can have import statements, which allow you to specify
classes from other packages that can be referenced without qualifying them with their
package.
Suppose we have a file called HelloWorld.java, and we want to put this file in a package
world.we start with specifying the keyword package with the name of the package we want
to use on top of our source file, before the code that defines the classes in the package, as
shown in the example below:
// only comment can be placed here
package world;
public class HelloWorld {
public static void main(String[] args) {
System.out.println("Hello World");
}
}
Default package: Although all Java classes are in a directory, it is possible to omit the
package declaration. If we omit the package declaration Java creates a default package.
Importing packages
classes within packages must be fully specified with their package name or names, it could
become tedious to type in the long dot-separated package path name for every class we
want to use. For this reason, Java includes the import statement to bring certain classes, or
entire packages, into visibility. Once imported, a class can be used directly, using its name.
import statements occur immediately following the package statement and before any
class definitions. the general form of the import statement is as follows:
import pkg1[.pkg2].(classname|*);
Here, pkg1 is the name of a top-level package, and pkg2 is the name of a subordinate
package inside the outer package separated by a dot (.).Finally, you specify either an explicit
classname or a star (*), which indicates that the Java compiler should import the entire
package.
example:
import java.util.Date;
import java.io.*;
How to use packages
There are 2 ways to use the public classes stored in package.
1. Declare the fully-qualified class name.
For example,
world.HelloWorld helloWorld = new world.HelloWorld();
world.moon.HelloMoon helloMoon = new world.moon.HelloMoon();
2. Use an "import" keyword:
import world.*; // we can call any public classes inside the world package
import world.moon.*; // we can call any public classes inside the world.moon package
import java.util.*; // import all public classes from java.util package
The CLASSPATH Environment Variable
To use a package that is not in a subdirectory of the current directory (i.e., the directory
having javac), we must set the environment variable CLASSPATH to instruct the java
compiler where to look.
For example, if there is a package with name abc in /p/course/java/public/abc , you would
set CLASSPATH like this:
setenv CLASSPATH .: /p/course/java/public
Examples of working with a package
Example 1:
package p1;
public class c1{
public double length;
public double volume(){
return length* length * length;
}
}
Using the created package
class c3{
public static void main(String args[]){
p1.c1 obj1 = new p1.c1();
obj1.length=3.0;
System.Out.Println(“\nvolume details”);
System.Out.Println(“\nside :”+ obj1.length );
System.Out.Println(“\nvolume :”+ obj1.volume() );
}
}
Output :
Volume details
Side : 3.00
Volume : 27.00
Example 2:
Demo.java(creating a package)
package p1;
class c1{
public void m1(){
System.out.println("Method m1 of Class c1");
}
public static void main(String args[]){
c1 obj = new c1();
obj.m1();
}
}
Demo2.java (creating a subpackage)
package p1.p2;
class c2{
public void m2(){
System.out.println("Method m2 of Class c2");
}
public static void main(String args[]){
c2 obj = new c2();
obj.m2();
} }
Importing packages
// Using packages created in earlier part
package p3;
import p1.*; //imports classes only in package p1 and NOT in the sub-package p2
class c3{
public void m3(){
System.out.println("Method m3 of Class c3");
}
public static void main(String args[]){
c1 obj1 = new c1();
obj1.m1();
p1.p2.c2 obj2 = new p1.p2.c2();
obj2.m2();
}
}
Chapter 5
Exceptions handling & multithreading
5.1 Exceptions handling
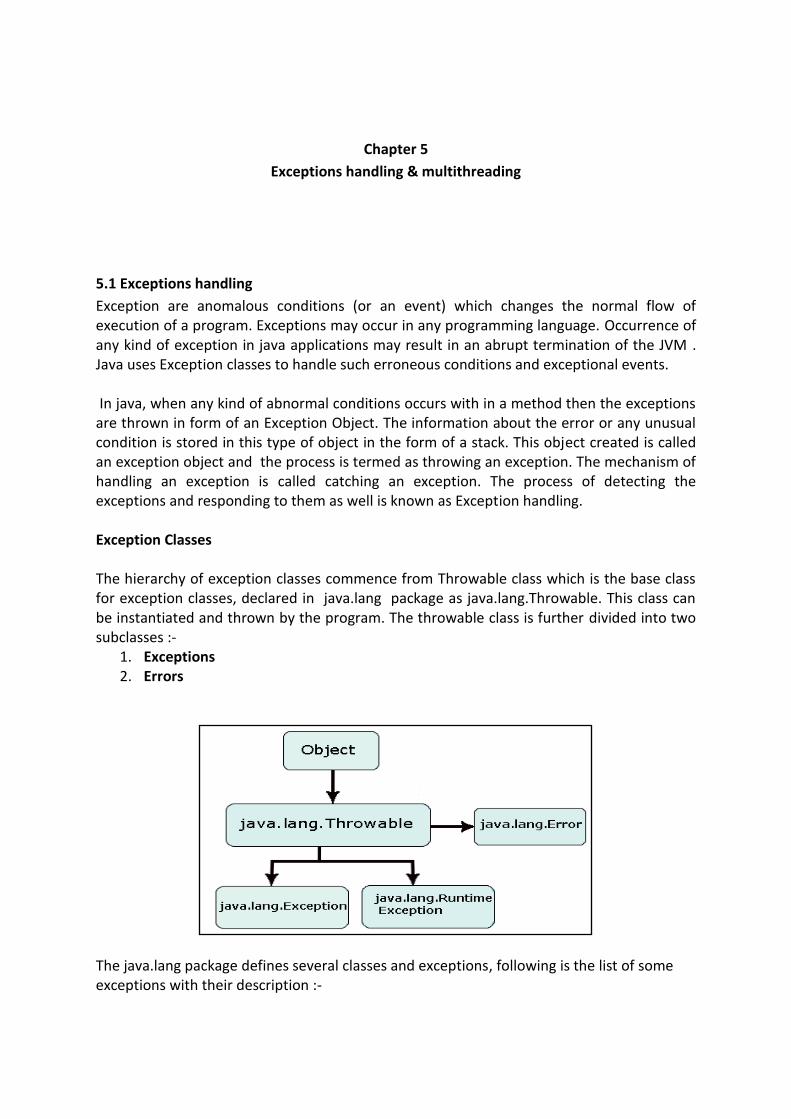
Exception are anomalous conditions (or an event) which changes the normal flow of execution of a program. Exceptions may occur in any programming language. Occurrence of any kind of exception in java applications may result in an abrupt termination of the JVM . Java uses Exception classes to handle such erroneous conditions and exceptional events. In java, when any kind of abnormal conditions occurs with in a method then the exceptions are thrown in form of an Exception Object. The information about the error or any unusual condition is stored in this type of object in the form of a stack. This object created is called an exception object and the process is termed as throwing an exception. The mechanism of handling an exception is called catching an exception. The process of detecting the exceptions and responding to them as well is known as Exception handling. Exception Classes The hierarchy of exception classes commence from Throwable class which is the base class for exception classes, declared in java.lang package as java.lang.Throwable. This class can be instantiated and thrown by the program. The throwable class is further divided into two subclasses :-
1. Exceptions 2. Errors
The java.lang package defines several classes and exceptions, following is the list of some exceptions with their description :-
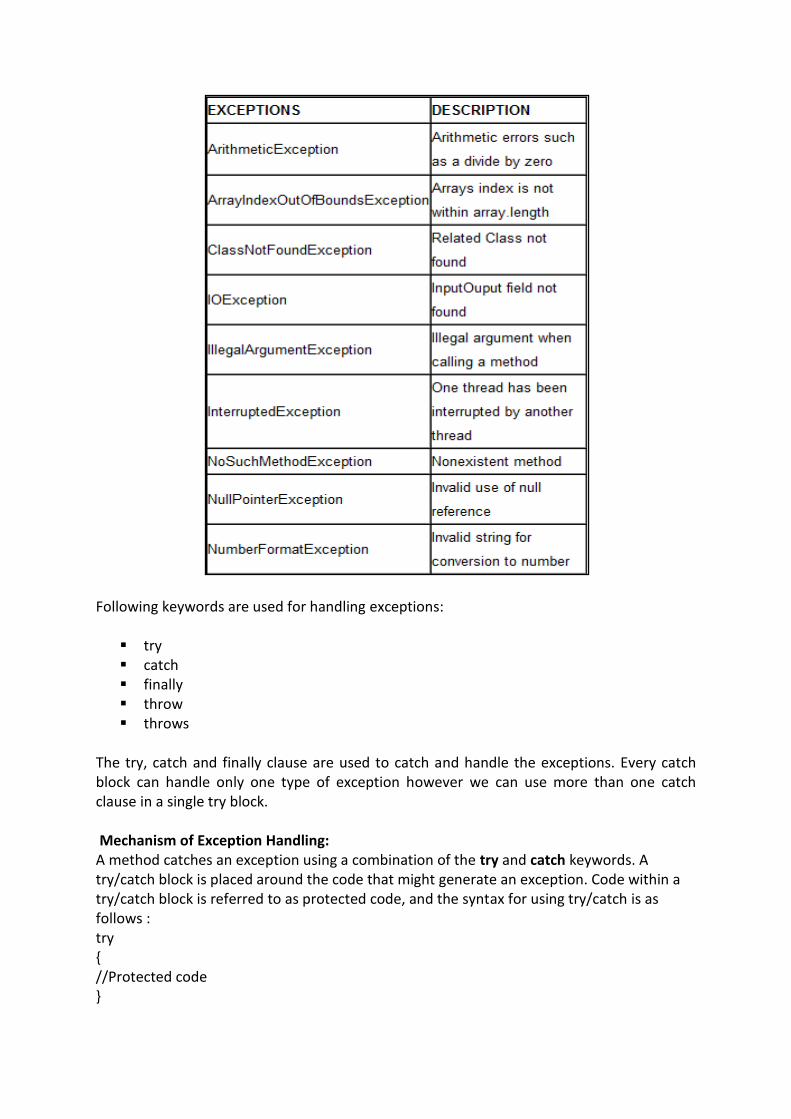
Following keywords are used for handling exceptions:
try catch finally throw throws
The try, catch and finally clause are used to catch and handle the exceptions. Every catch block can handle only one type of exception however we can use more than one catch clause in a single try block. Mechanism of Exception Handling: A method catches an exception using a combination of the try and catch keywords. A try/catch block is placed around the code that might generate an exception. Code within a try/catch block is referred to as protected code, and the syntax for using try/catch is as follows : try { //Protected code }
catch(ExceptionName e1) { //Catch block } Example Example shows the implementation of the try, catch and finally block. Here we have used "fis = new FileInputStream (new File (args[0]));" which throws an exception if we write a name of a file which doesn't exist as shown in the output. import java.io.*; class Test{ public static void main(String args[])throws IOException { FileInputStream fis=null; try{ fis = new FileInputStream (new File (args[0])); } catch (FileNotFoundException e){ System.out.println("File not found!"); } finally{ fis.close(); } } } Output : File not found! Multiple catch Blocks: A try block can be followed by multiple catch blocks. The syntax for multiple catch blocks is as follows: try { //Protected code } catch(ExceptionType1 e1) { //Catch block }catch(ExceptionType2 e2) { //Catch block }catch(ExceptionType3 e3) {
//Catch block } Example : example given below which shows the implementation of multiple catch blocks for a single try block. public class Multi_Catch { public static void main (String args[]) { int array[]={20,10,30}; int num1=15,num2=0; int res=0; try { res = num1/num2; System.out.println("The result is" +res); for(int ct =2;ct >=0; ct--) { System.out.println("The value of array are" +array[ct]); } } catch (ArrayIndexOutOfBoundsException e) { System.out.println("Error?. Array is out of Bounds"); } catch (ArithmeticException e) { System.out.println ("Can't be divided by Zero"); } } } Output : Can't be divided by Zero The throws/throw Keywords: If a method does not handle a checked exception, the method must declare it using the throws keyword. The throws keyword appears at the end of a method's signature.
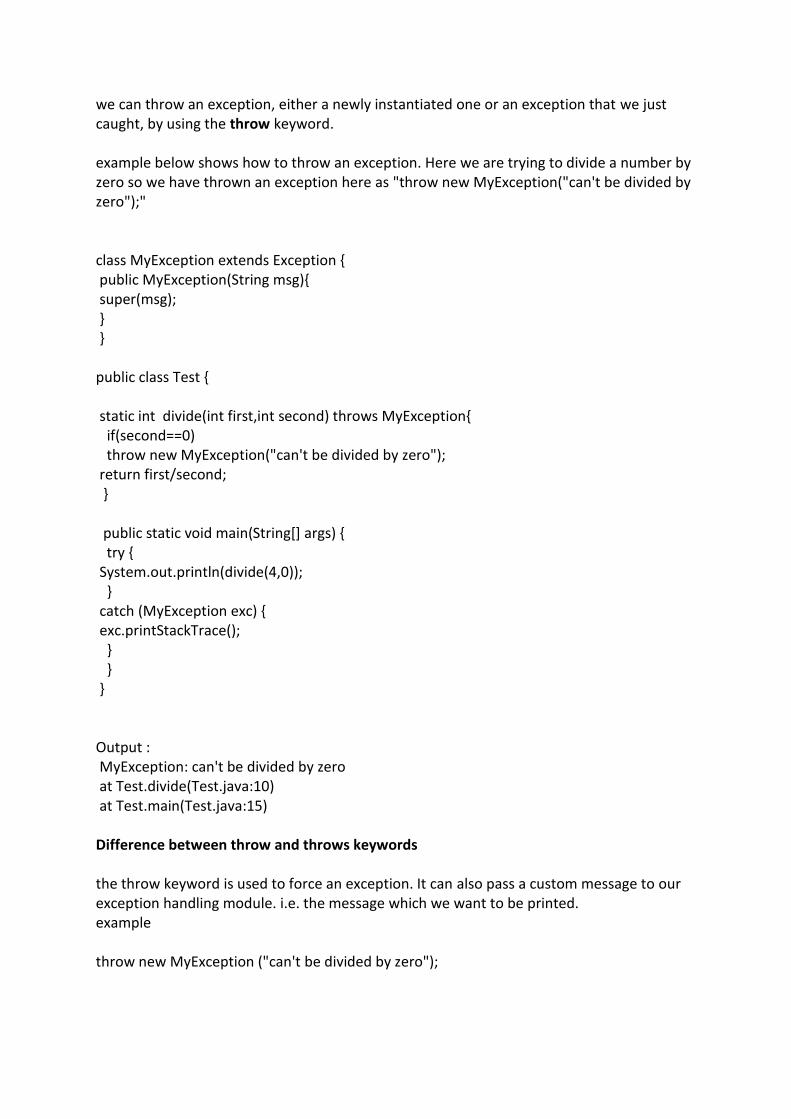
we can throw an exception, either a newly instantiated one or an exception that we just caught, by using the throw keyword. example below shows how to throw an exception. Here we are trying to divide a number by zero so we have thrown an exception here as "throw new MyException("can't be divided by zero");" class MyException extends Exception { public MyException(String msg){ super(msg); } } public class Test { static int divide(int first,int second) throws MyException{ if(second==0) throw new MyException("can't be divided by zero"); return first/second; } public static void main(String[] args) { try { System.out.println(divide(4,0)); } catch (MyException exc) { exc.printStackTrace(); } } } Output : MyException: can't be divided by zero at Test.divide(Test.java:10) at Test.main(Test.java:15) Difference between throw and throws keywords the throw keyword is used to force an exception. It can also pass a custom message to our exception handling module. i.e. the message which we want to be printed. example throw new MyException ("can't be divided by zero");
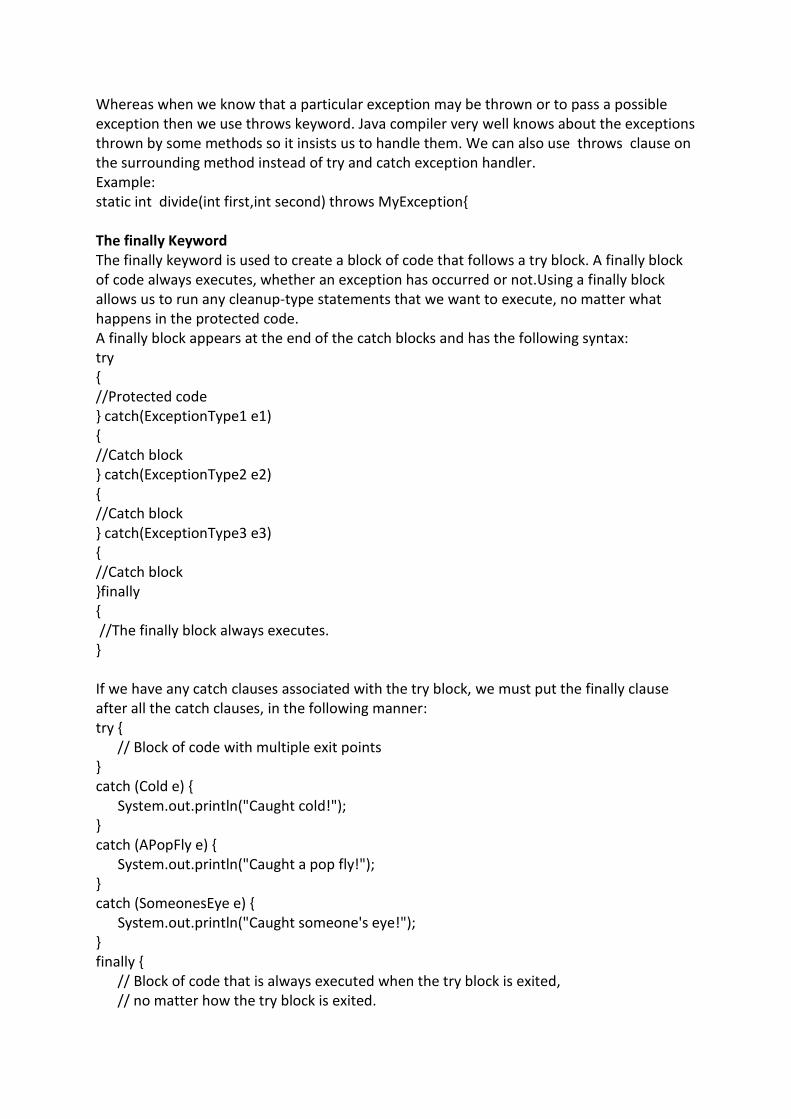
Whereas when we know that a particular exception may be thrown or to pass a possible exception then we use throws keyword. Java compiler very well knows about the exceptions thrown by some methods so it insists us to handle them. We can also use throws clause on the surrounding method instead of try and catch exception handler. Example: static int divide(int first,int second) throws MyException{ The finally Keyword The finally keyword is used to create a block of code that follows a try block. A finally block of code always executes, whether an exception has occurred or not.Using a finally block allows us to run any cleanup-type statements that we want to execute, no matter what happens in the protected code. A finally block appears at the end of the catch blocks and has the following syntax: try { //Protected code } catch(ExceptionType1 e1) { //Catch block } catch(ExceptionType2 e2) { //Catch block } catch(ExceptionType3 e3) { //Catch block }finally { //The finally block always executes. } If we have any catch clauses associated with the try block, we must put the finally clause after all the catch clauses, in the following manner: try { // Block of code with multiple exit points } catch (Cold e) { System.out.println("Caught cold!"); } catch (APopFly e) { System.out.println("Caught a pop fly!"); } catch (SomeonesEye e) { System.out.println("Caught someone's eye!"); } finally { // Block of code that is always executed when the try block is exited, // no matter how the try block is exited.
System.out.println("Is that something to cheer about?"); } If during execution of the code within a try block, an exception is thrown that is handled by a catch clause associated with the try block, the finally clause will be executed after the catch clause. For example, if a Cold exception is thrown during execution of the statements in the try block above, the following will be the, output: Caught cold! Is that something to cheer about?
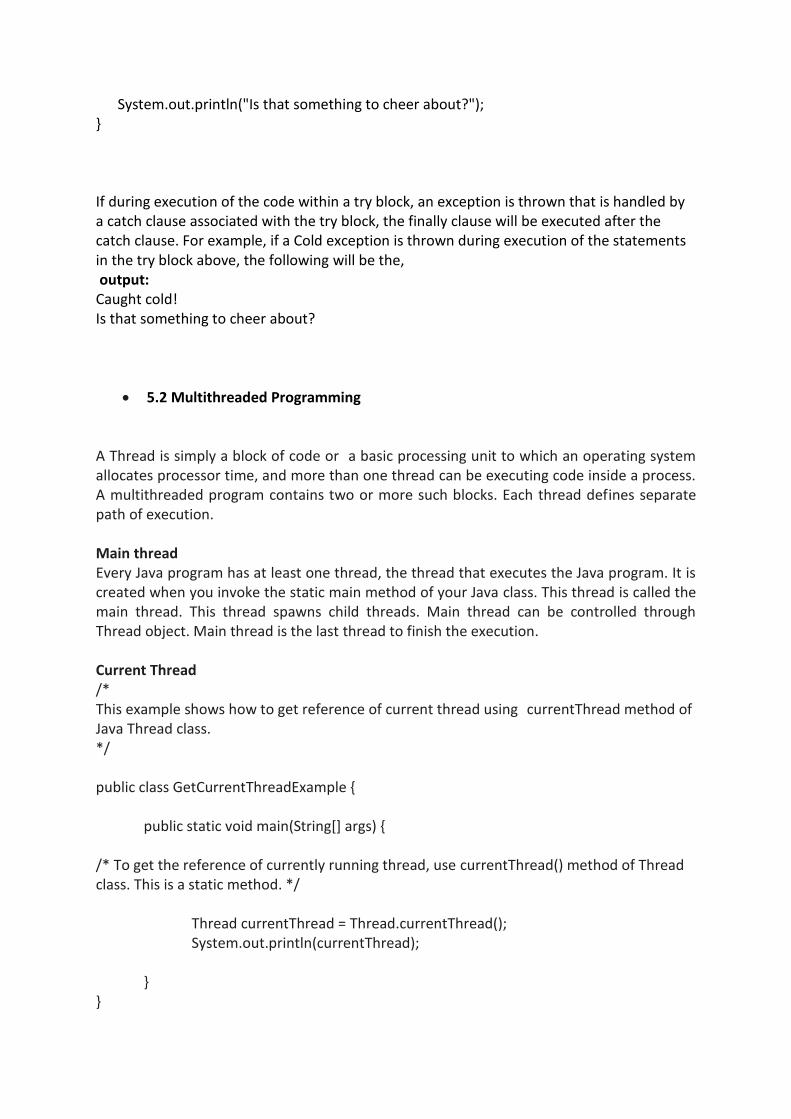
5.2 Multithreaded Programming A Thread is simply a block of code or a basic processing unit to which an operating system allocates processor time, and more than one thread can be executing code inside a process. A multithreaded program contains two or more such blocks. Each thread defines separate path of execution. Main thread Every Java program has at least one thread, the thread that executes the Java program. It is created when you invoke the static main method of your Java class. This thread is called the main thread. This thread spawns child threads. Main thread can be controlled through Thread object. Main thread is the last thread to finish the execution. Current Thread /* This example shows how to get reference of current thread using currentThread method of Java Thread class. */ public class GetCurrentThreadExample { public static void main(String[] args) { /* To get the reference of currently running thread, use currentThread() method of Thread class. This is a static method. */ Thread currentThread = Thread.currentThread(); System.out.println(currentThread); } }
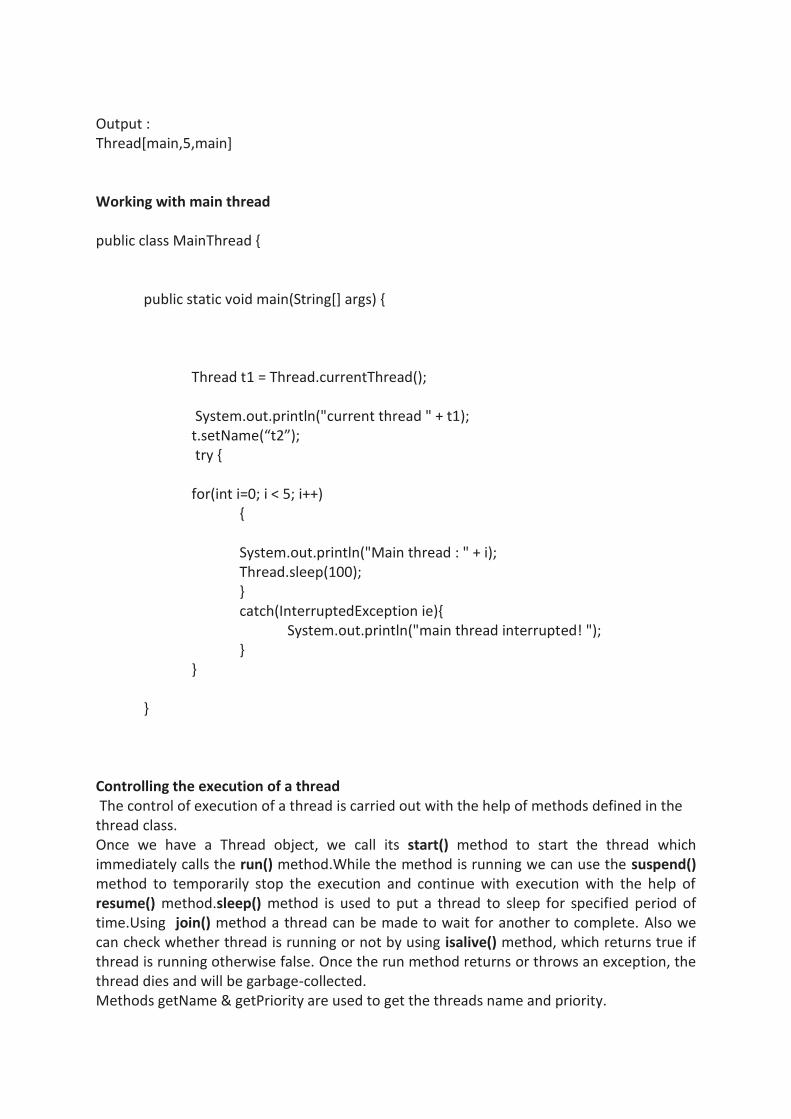
Output : Thread[main,5,main] Working with main thread public class MainThread { public static void main(String[] args) { Thread t1 = Thread.currentThread(); System.out.println("current thread " + t1); t.setName(“t2”);
try { for(int i=0; i < 5; i++)
{ System.out.println("Main thread : " + i); Thread.sleep(100); } catch(InterruptedException ie){ System.out.println("main thread interrupted! "); } } } Controlling the execution of a thread The control of execution of a thread is carried out with the help of methods defined in the thread class. Once we have a Thread object, we call its start() method to start the thread which immediately calls the run() method.While the method is running we can use the suspend() method to temporarily stop the execution and continue with execution with the help of resume() method.sleep() method is used to put a thread to sleep for specified period of time.Using join() method a thread can be made to wait for another to complete. Also we can check whether thread is running or not by using isalive() method, which returns true if thread is running otherwise false. Once the run method returns or throws an exception, the thread dies and will be garbage-collected. Methods getName & getPriority are used to get the threads name and priority.
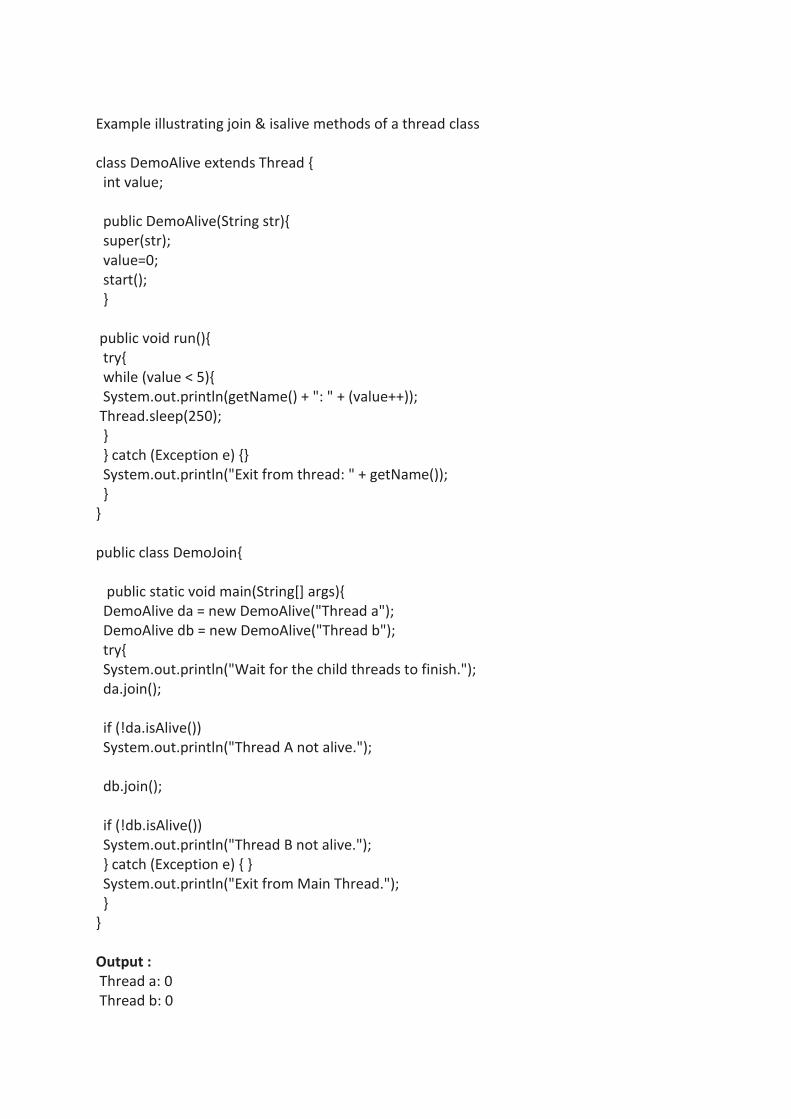
Example illustrating join & isalive methods of a thread class class DemoAlive extends Thread { int value; public DemoAlive(String str){ super(str); value=0; start(); } public void run(){ try{ while (value < 5){ System.out.println(getName() + ": " + (value++)); Thread.sleep(250); } } catch (Exception e) {} System.out.println("Exit from thread: " + getName()); } } public class DemoJoin{ public static void main(String[] args){ DemoAlive da = new DemoAlive("Thread a"); DemoAlive db = new DemoAlive("Thread b"); try{ System.out.println("Wait for the child threads to finish."); da.join(); if (!da.isAlive()) System.out.println("Thread A not alive."); db.join(); if (!db.isAlive()) System.out.println("Thread B not alive."); } catch (Exception e) { } System.out.println("Exit from Main Thread."); } } Output : Thread a: 0 Thread b: 0

Thread a: 1 Thread b: 1 Thread a: 2 Thread b: 2 Thread a: 3 Thread b: 3 Thread a: 4 Thread b: 4 Exit from thread: Thread a Thread A not alive. Exit from thread: Thread b Thread B not alive. Exit from Main Thread. Every Thread has a state .This state’s define the life cycle of a thread .A Thread can be in one of these six states.
New : A state in which a thread has not been started. Runnable: A state in which a thread is executing. Blocked: A state in which a thread is waiting for a lock to access an object. Waiting: A state in which a thread is waiting indefinitely for another thread to
perform an action. timed__waiting: A state in which a thread is waiting for up to a specified period of
time for another thread to perform an action. Terminated: A state in which a thread has exited.
The values that represent these states are encapsulated in the java.lang.Thread.State enum. The members of this enum are NEW, RUNNABLE, BLOCKED, WAITING, TIMED__WAITING, and TERMINATED. Creating a Thread There are two ways to create a thread.
Extend the java.lang.Thread class( extending the thread class) Implement the java.lang.Runnable interface( implementing the runnable interface)
Creating the thread by implementing the runnable interface Any class that implements an interface must create a method to match all of the methods in the interface. we must include a run method if you implement Runnable. Not including a run method will cause a compile time error. Here is an example of a class created with the Runnable interface. class MyClass implements Runnable{ public void run(){ // Body
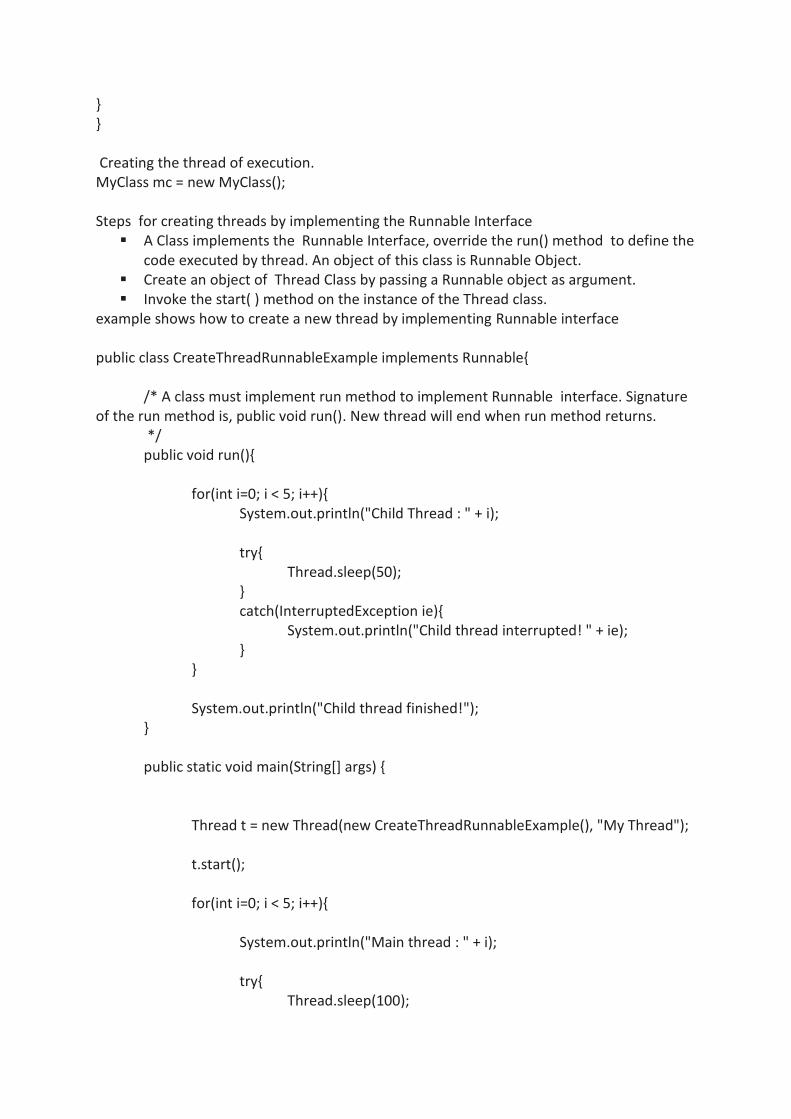
} } Creating the thread of execution. MyClass mc = new MyClass(); Steps for creating threads by implementing the Runnable Interface
A Class implements the Runnable Interface, override the run() method to define the code executed by thread. An object of this class is Runnable Object.
Create an object of Thread Class by passing a Runnable object as argument. Invoke the start( ) method on the instance of the Thread class.
example shows how to create a new thread by implementing Runnable interface public class CreateThreadRunnableExample implements Runnable{ /* A class must implement run method to implement Runnable interface. Signature of the run method is, public void run(). New thread will end when run method returns. */ public void run(){ for(int i=0; i < 5; i++){ System.out.println("Child Thread : " + i); try{ Thread.sleep(50); } catch(InterruptedException ie){ System.out.println("Child thread interrupted! " + ie); } } System.out.println("Child thread finished!"); } public static void main(String[] args) { Thread t = new Thread(new CreateThreadRunnableExample(), "My Thread"); t.start(); for(int i=0; i < 5; i++){ System.out.println("Main thread : " + i); try{ Thread.sleep(100);
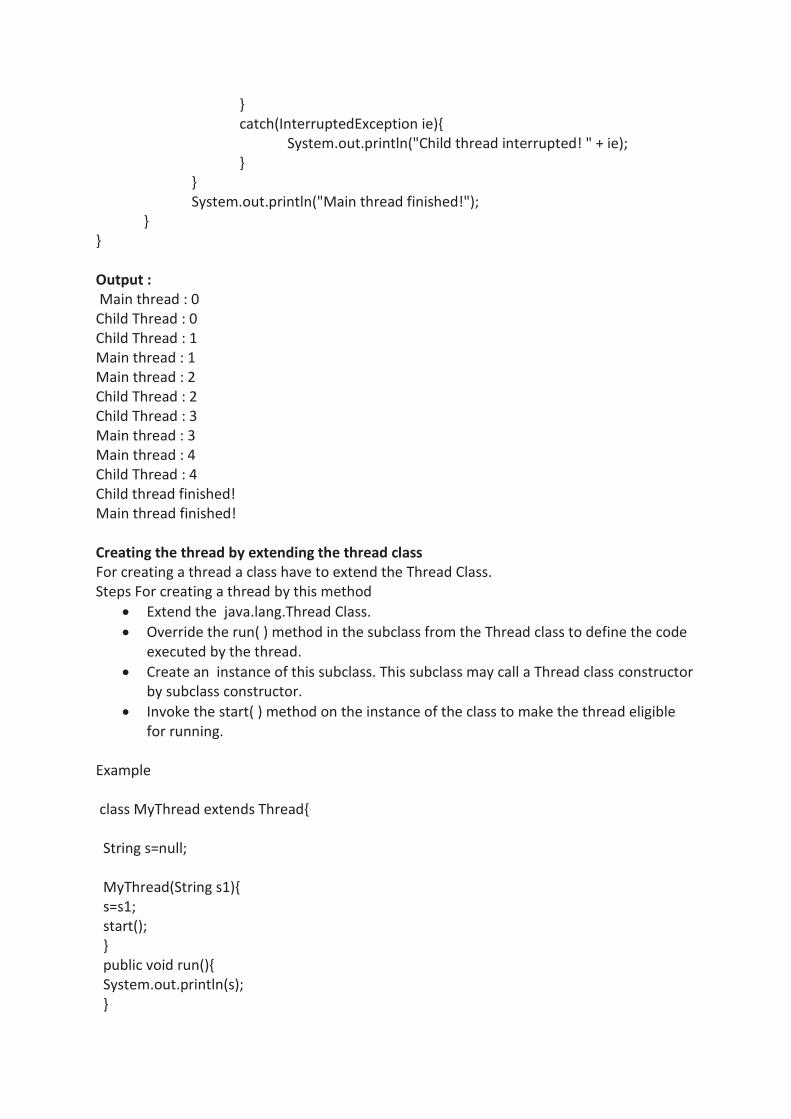
} catch(InterruptedException ie){ System.out.println("Child thread interrupted! " + ie); } } System.out.println("Main thread finished!"); } } Output : Main thread : 0 Child Thread : 0 Child Thread : 1 Main thread : 1 Main thread : 2 Child Thread : 2 Child Thread : 3 Main thread : 3 Main thread : 4 Child Thread : 4 Child thread finished! Main thread finished! Creating the thread by extending the thread class For creating a thread a class have to extend the Thread Class. Steps For creating a thread by this method
Extend the java.lang.Thread Class.
Override the run( ) method in the subclass from the Thread class to define the code executed by the thread.
Create an instance of this subclass. This subclass may call a Thread class constructor by subclass constructor.
Invoke the start( ) method on the instance of the class to make the thread eligible for running.
Example class MyThread extends Thread{ String s=null; MyThread(String s1){ s=s1; start(); } public void run(){ System.out.println(s); }
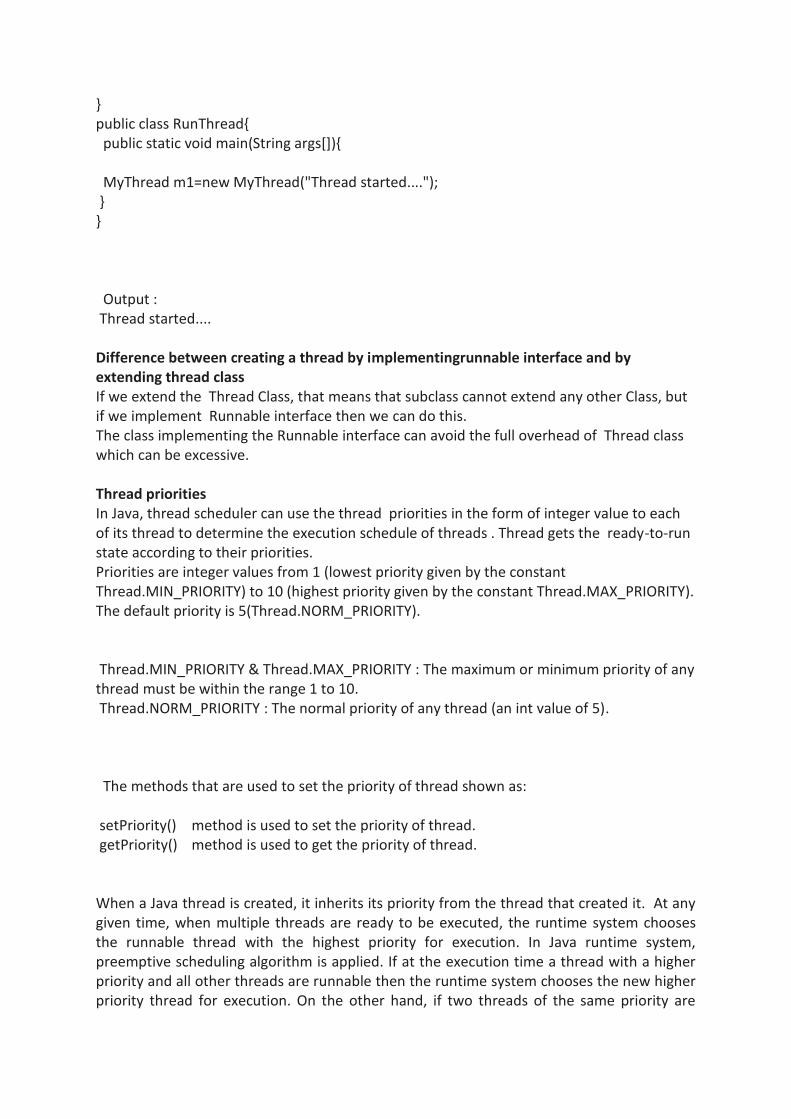
} public class RunThread{ public static void main(String args[]){ MyThread m1=new MyThread("Thread started...."); } } Output : Thread started.... Difference between creating a thread by implementingrunnable interface and by extending thread class If we extend the Thread Class, that means that subclass cannot extend any other Class, but if we implement Runnable interface then we can do this. The class implementing the Runnable interface can avoid the full overhead of Thread class which can be excessive. Thread priorities In Java, thread scheduler can use the thread priorities in the form of integer value to each of its thread to determine the execution schedule of threads . Thread gets the ready-to-run state according to their priorities. Priorities are integer values from 1 (lowest priority given by the constant Thread.MIN_PRIORITY) to 10 (highest priority given by the constant Thread.MAX_PRIORITY). The default priority is 5(Thread.NORM_PRIORITY). Thread.MIN_PRIORITY & Thread.MAX_PRIORITY : The maximum or minimum priority of any thread must be within the range 1 to 10. Thread.NORM_PRIORITY : The normal priority of any thread (an int value of 5). The methods that are used to set the priority of thread shown as: setPriority() method is used to set the priority of thread. getPriority() method is used to get the priority of thread. When a Java thread is created, it inherits its priority from the thread that created it. At any given time, when multiple threads are ready to be executed, the runtime system chooses the runnable thread with the highest priority for execution. In Java runtime system, preemptive scheduling algorithm is applied. If at the execution time a thread with a higher priority and all other threads are runnable then the runtime system chooses the new higher priority thread for execution. On the other hand, if two threads of the same priority are
waiting to be executed by the CPU then the round-robin algorithm is applied in which the scheduler chooses one of them to run according to their round of time-slice. class MyThread1 extends Thread{ MyThread1(String s){ super(s); start(); } public void run(){ for(int i=0;i<3;i++){ Thread cur=Thread.currentThread(); cur.setPriority(Thread.MIN_PRIORITY); int p=cur.getPriority(); System.out.println("Thread Name :"+Thread.currentThread().getName()); System.out.println("Thread Priority :"+cur); } } } class MyThread2 extends Thread{ MyThread2(String s){ super(s); start(); } public void run(){ for(int i=0;i<3;i++){ Thread cur=Thread.currentThread(); cur.setPriority(Thread.MAX_PRIORITY); int p=cur.getPriority(); System.out.println("Thread Name :"+Thread.currentThread().getName()); System.out.println("Thread Priority :"+cur); } } } public class ThreadPriority{ public static void main(String args[]){ MyThread1 m1=new MyThread1("My Thread 1"); MyThread2 m2=new MyThread2("My Thread 2"); } } Output of the Program: Thread Name :My Thread 1
Thread Name :My Thread 2 Thread Priority :Thread[My Thread 2,10,main] Thread Name :My Thread 2 Thread Priority :Thread[My Thread 2,10,main] Thread Name :My Thread 2 Thread Priority :Thread[My Thread 2,10,main] Thread Priority :Thread[My Thread 1,1,main] Thread Name :My Thread 1 Thread Priority :Thread[My Thread 1,1,main] Thread Name :My Thread 1 Thread Priority :Thread[My Thread 1,1,main] In this program two threads are created. We have set up maximum priority for the first thread "MyThread2" and minimum priority for the first thread "MyThread1" .
Chapter 6 String handling
This chapter focuses on strings and classes available in java to manipulate strings.
Strings, are a sequence of characters. In Java ,strings are objects and Java provides the
String class to create and manipulate strings.Java also supports The StringBuffer and
StringBuilder classes which used when there is required to make modifications to Strings of
characters.
Let us go through the String class and its methods.
6.1 String class
String represents a sequence of characters and has fixed length of character sequence.
Once a string object has been created than we cannott change the character that comprise
that string. It is immutable.
String object can be instantiated like any other object String s=new String(); This creates an empty string s by calling default constructor.
char c[]={'a','b','d'}; String s=new String(c); In this case string s points to the character array "abd".
The direct way to create a string is as follows: String greeting = "Hello world!";
String Methods
length () : This method returns the number of characters in the string .
Example:
String str = "mahesh";
int x = str.length ();
variable x holds the value 6.
String trim (): Removes whitespace from the leading and trailing edges of the string.
Example:
String string = " valia ";
String str = string.trim ();
variable str holds the string "valia".
String charAt() :This method returns the character located at the String's specified
index. The string indexes start from zero.
Here is the syntax of this method:
public char charAt(int index)
Example:
public class Test{
public static void main(String args[]){
String s = "Strings are immutable";
char result = s.charAt(8);
System.out.println(result);
}
}
Output:
a
String toLowerCase () & String toUpperCase ()
The first method returns a new string with all the characters set to lower case while the
second returns the characters set to upper case.
Example:
import java.io.*;
public class Test{
public static void main(String args[]){
String Str = new String("Welcome to valia college");
System.out.println(Str.toLowerCase() );
System.out.println(Str.toUpperCase() );
}
}
Output:
welcome to valia college
WELCOME TO VALIA COLLEGE
String compareTo() Method
First method compares this String to another Object and second method compares two
strings lexicographically(in alphabetical order).
the syntax of this method is:
int compareTo(Object o)
or
int compareTo(String anotherString)
this method returns value 0 if the argument is a string lexicographically equal to this string;
a value less than 0 if the argument is a string lexicographically greater than this string; and a
value greater than 0 if the argument is a string lexicographically less than this string.
Example:
public class Test{
public static void main(String args[]){
String str1 = "Strings are immutable";
String str2 = "Strings are immutable";
String str3 = "Integers are not immutable";
int result = str1.compareTo( str2 );
System.out.println(result);
result = str2.compareTo( str3 );
System.out.println(result);
result = str3.compareTo( str1 );
System.out.println(result);
}
}
Output:
0
10
-10
String endsWith() Method
This method tests if this string ends with the specified suffix.
the syntax of this method:
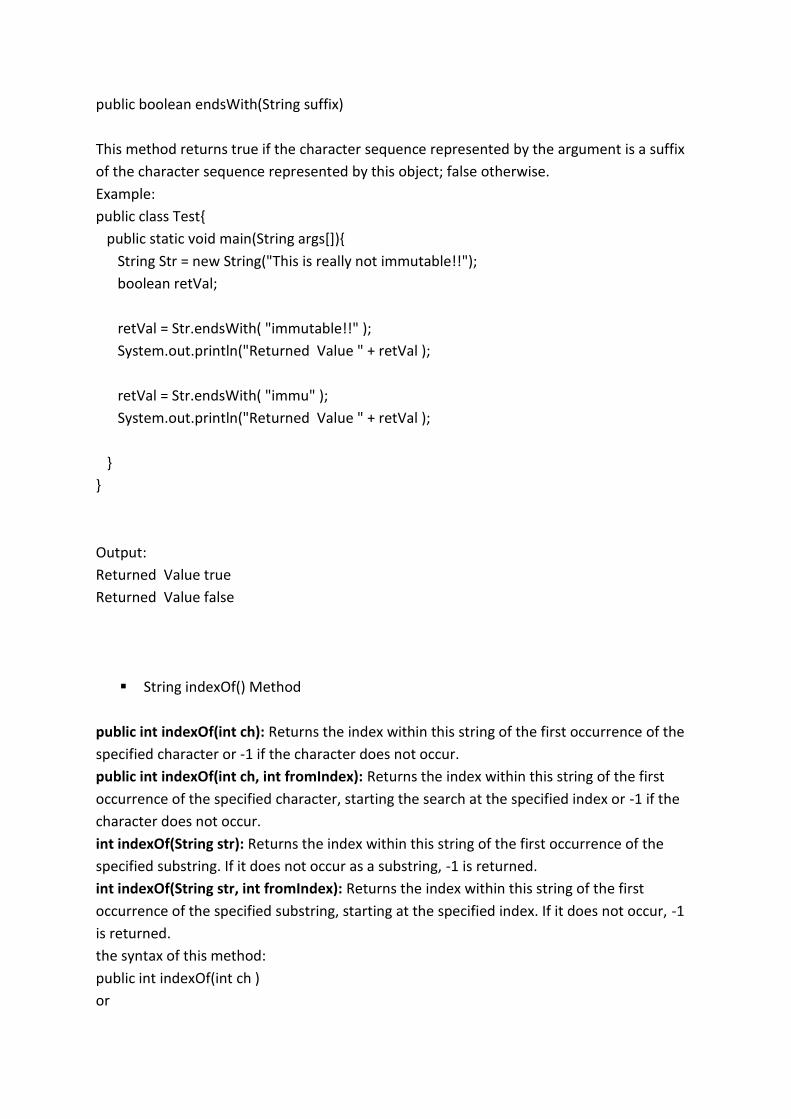
public boolean endsWith(String suffix)
This method returns true if the character sequence represented by the argument is a suffix
of the character sequence represented by this object; false otherwise.
Example:
public class Test{
public static void main(String args[]){
String Str = new String("This is really not immutable!!");
boolean retVal;
retVal = Str.endsWith( "immutable!!" );
System.out.println("Returned Value " + retVal );
retVal = Str.endsWith( "immu" );
System.out.println("Returned Value " + retVal );
}
}
Output:
Returned Value true
Returned Value false
String indexOf() Method
public int indexOf(int ch): Returns the index within this string of the first occurrence of the
specified character or -1 if the character does not occur.
public int indexOf(int ch, int fromIndex): Returns the index within this string of the first
occurrence of the specified character, starting the search at the specified index or -1 if the
character does not occur.
int indexOf(String str): Returns the index within this string of the first occurrence of the
specified substring. If it does not occur as a substring, -1 is returned.
int indexOf(String str, int fromIndex): Returns the index within this string of the first
occurrence of the specified substring, starting at the specified index. If it does not occur, -1
is returned.
the syntax of this method:
public int indexOf(int ch )
or
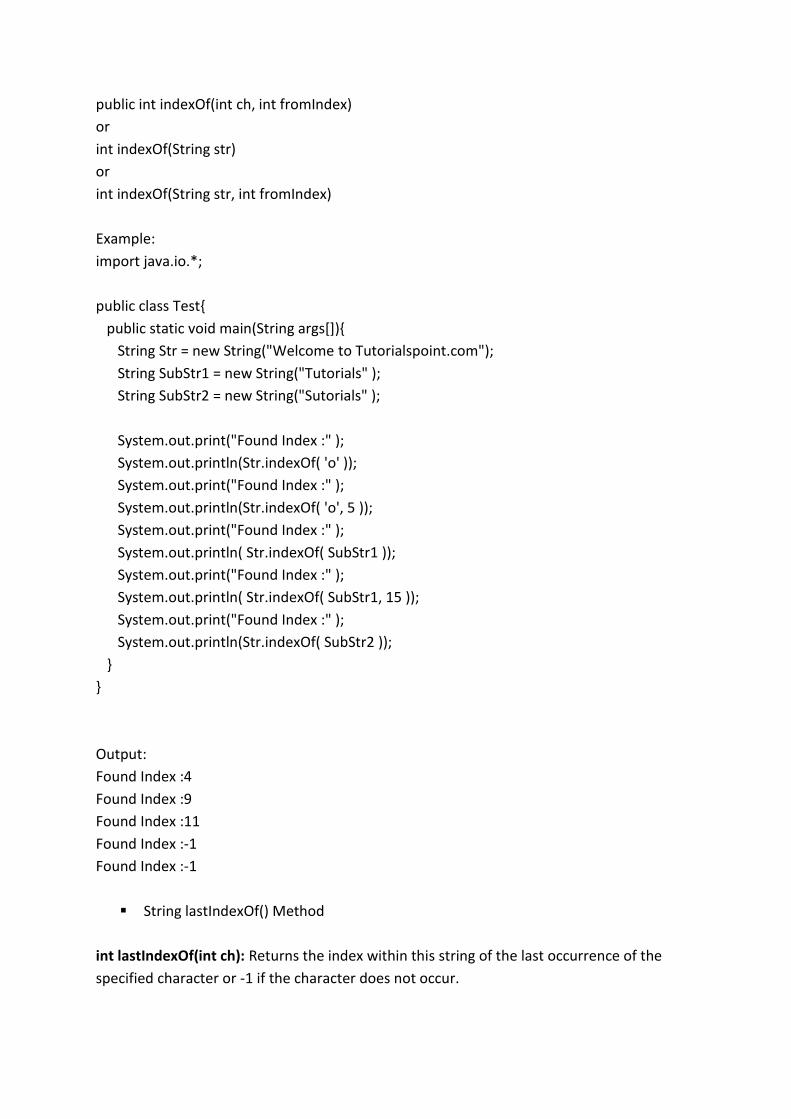
public int indexOf(int ch, int fromIndex)
or
int indexOf(String str)
or
int indexOf(String str, int fromIndex)
Example:
import java.io.*;
public class Test{
public static void main(String args[]){
String Str = new String("Welcome to Tutorialspoint.com");
String SubStr1 = new String("Tutorials" );
String SubStr2 = new String("Sutorials" );
System.out.print("Found Index :" );
System.out.println(Str.indexOf( 'o' ));
System.out.print("Found Index :" );
System.out.println(Str.indexOf( 'o', 5 ));
System.out.print("Found Index :" );
System.out.println( Str.indexOf( SubStr1 ));
System.out.print("Found Index :" );
System.out.println( Str.indexOf( SubStr1, 15 ));
System.out.print("Found Index :" );
System.out.println(Str.indexOf( SubStr2 ));
}
}
Output:
Found Index :4
Found Index :9
Found Index :11
Found Index :-1
Found Index :-1
String lastIndexOf() Method
int lastIndexOf(int ch): Returns the index within this string of the last occurrence of the
specified character or -1 if the character does not occur.
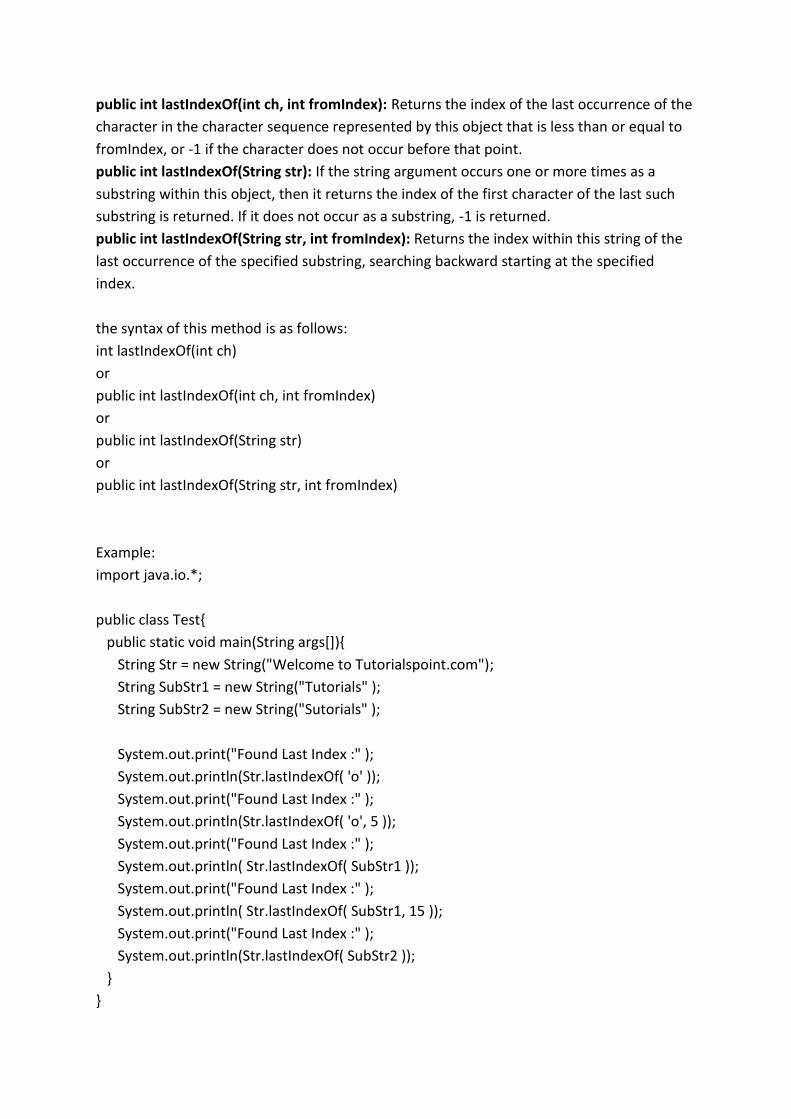
public int lastIndexOf(int ch, int fromIndex): Returns the index of the last occurrence of the
character in the character sequence represented by this object that is less than or equal to
fromIndex, or -1 if the character does not occur before that point.
public int lastIndexOf(String str): If the string argument occurs one or more times as a
substring within this object, then it returns the index of the first character of the last such
substring is returned. If it does not occur as a substring, -1 is returned.
public int lastIndexOf(String str, int fromIndex): Returns the index within this string of the
last occurrence of the specified substring, searching backward starting at the specified
index.
the syntax of this method is as follows:
int lastIndexOf(int ch)
or
public int lastIndexOf(int ch, int fromIndex)
or
public int lastIndexOf(String str)
or
public int lastIndexOf(String str, int fromIndex)
Example:
import java.io.*;
public class Test{
public static void main(String args[]){
String Str = new String("Welcome to Tutorialspoint.com");
String SubStr1 = new String("Tutorials" );
String SubStr2 = new String("Sutorials" );
System.out.print("Found Last Index :" );
System.out.println(Str.lastIndexOf( 'o' ));
System.out.print("Found Last Index :" );
System.out.println(Str.lastIndexOf( 'o', 5 ));
System.out.print("Found Last Index :" );
System.out.println( Str.lastIndexOf( SubStr1 ));
System.out.print("Found Last Index :" );
System.out.println( Str.lastIndexOf( SubStr1, 15 ));
System.out.print("Found Last Index :" );
System.out.println(Str.lastIndexOf( SubStr2 ));
}
}
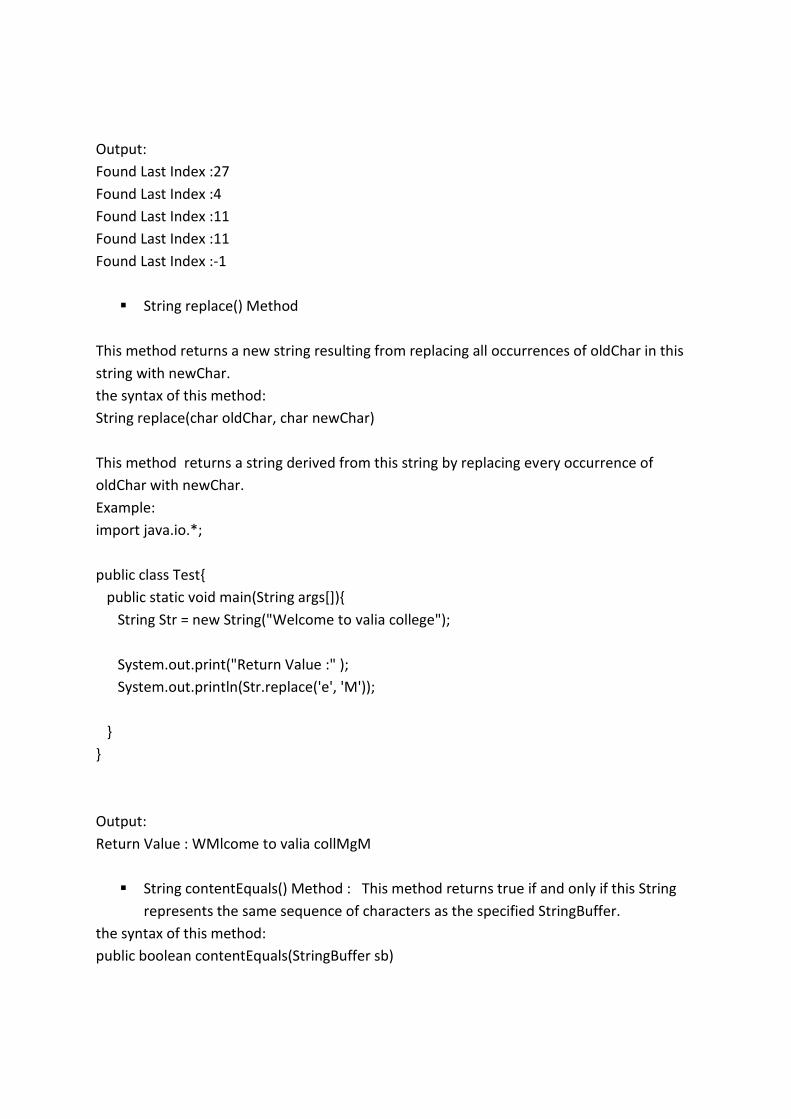
Output:
Found Last Index :27
Found Last Index :4
Found Last Index :11
Found Last Index :11
Found Last Index :-1
String replace() Method
This method returns a new string resulting from replacing all occurrences of oldChar in this
string with newChar.
the syntax of this method:
String replace(char oldChar, char newChar)
This method returns a string derived from this string by replacing every occurrence of
oldChar with newChar.
Example:
import java.io.*;
public class Test{
public static void main(String args[]){
String Str = new String("Welcome to valia college");
System.out.print("Return Value :" );
System.out.println(Str.replace('e', 'M'));
}
}
Output:
Return Value : WMlcome to valia collMgM
String contentEquals() Method : This method returns true if and only if this String
represents the same sequence of characters as the specified StringBuffer.
the syntax of this method:
public boolean contentEquals(StringBuffer sb)
This method returns true if and only if this String represents the same sequence of
characters as the specified StringBuffer, otherwise false.
Example:
public class Test{
public static void main(String args[]){
String str1 = "Not immutable";
String str2 = "Strings are immutable";
StringBuffer str3 = new StringBuffer( "Not immutable");
boolean result = str1.contentEquals( str3 );
System.out.println(result);
result = str2.contentEquals( str3 );
System.out.println(result);
}
}
Output:
true
false
String.split ()
This method uses the concept of a regular expression to specify the delimiters. The split()
method takes a parameter giving the regular expression to use as a delimiter and returns a
String array containing the tokens so delimited.
String str = "This is a string object";
String[] words = str.split (" ");
for (int i=0; i < words.length; i++)
System.out.println (words[i]);
Output :
This
is
a
string
object
To use "*" as a delimiter, specify "\\*".
String str2 = "A*bunch*of*stars";
String[] starwords = str2.split ("\\*");
for (int i=0; i < starwords.length; i++)
System.out.println (starwords[i]);
Output :
A
bunch
of
stars
Here are some more methods supported by string class
1 char charAt(int index)
Returns the character at the specified index.
2 String concat(String str)
Concatenates the specified string to the end of this string.
3 boolean contentEquals(StringBuffer sb)
Returns true if and only if this String represents the same sequence of characters as the
specified StringBuffer.
4 static String copyValueOf(char[] data)
Returns a String that represents the character sequence in the array specified.
5 static String copyValueOf(char[] data, int offset, int count)
Returns a String that represents the character sequence in the array specified.
6 boolean endsWith(String suffix)
Tests if this string ends with the specified suffix.
7 boolean equals(Object anObject)
Compares this string to the specified object.
8 boolean equalsIgnoreCase(String anotherString)
Compares this String to another String, ignoring case considerations.
9 byte getBytes()
Encodes this String into a sequence of bytes using the platform's default charset, storing
the result into a new byte array.
10 byte[] getBytes(String charsetName
Encodes this String into a sequence of bytes using the named charset, storing the result into
a new byte array.
11 void getChars(int srcBegin, int srcEnd, char[] dst, int dstBegin)
Copies characters from this string into the destination character array.
12 int hashCode()
Returns a hash code for this string.
13 String intern()
Returns a canonical representation for the string object.
14 int length()

Returns the length of this string.
15 String substring(int beginIndex)
Returns a new string that is a substring of this string.
16 String substring(int beginIndex, int endIndex)
Returns a new string that is a substring of this string.
17 char[] toCharArray()
Converts this string to a new character array.
18 String toString()
This object (which is already a string!) is itself returned.
6.2 String Buffer and StringBuilder class
The StringBuffer and StringBuilder classes are used when there is required to make
modifications to Strings of characters.
StringBuffer (java.lang.StringBuffer)
This represents growable and writeable character sequence. It is mutable.
StringBuffer defines 3-constructor:
StringBuffer(); //initial capacity of 16 characters
StringBuffer(int size); //The initial size
StringBuffer(String str);
The following table describes the various important string search methods.
String Buffer append() Method
This method updates the value of the object that invoked the method. The method takes
boolean, char, int, long, Strings etc.
StringBuffer append(boolean b)
StringBuffer append(char c)
StringBuffer append(char[] str)
StringBuffer append(double d)
StringBuffer append(float f)
StringBuffer append(int i)
StringBuffer append(long l)
StringBuffer append(Object obj)
StringBuffer append(StringBuffer sb)
StringBuffer append(String str)
These methods return the updated StringBuffer objects.
Example:
public class Test{
public static void main(String args[]){
StringBuffer sb = new StringBuffer(" Test");
sb.append(" String Buffer");
System.out.println(sb);
}
}
Output:
Test String Buffer
The StringBuffer uses an internal char array for the intermediate steps so that new strings
objects are not created. If it becomes full, the array is copied into a new larger array with
the additional space available for more append operations.
String Buffer reverse() Method
This method reverses the value of the StringBuffer object that invoked the method.
Syntax:
StringBuffer reverse()
This method returns StringBuffer object with the reversed sequence.
Example:
public class Test{
public static void main(String args[]){
StringBuffer buffer = new String( " mahesh");
buffer.reverse();
System.out.println(buffer);
}
}
Output:
hseham
String Buffer delete() Method
This method removes the characters in a substring of this StringBuffer. The substring begins
at the specified start and extends to the character at index end - 1 or to the end of the
StringBuffer if no such character exists. If start is equal to end, no changes are made.
Syntax:
StringBuffer delete(int start, int end)
Example:
public class Test{
public static void main(String args[]){
StringBuilder sb = new StringBuilder("abcdefghijk");
sb.delete(3,7);
System.out.println(sb);
}
}
Output:
abchijk
String Buffer insert() Method
This method removes the characters in a substring of this StringBuffer. The substring begins
at the specified start and extends to the character at index end - 1 or to the end of the
StringBuffer if no such character exists. If start is equal to end, no changes are made.
Syntax:
StringBuffer insert(int offset, boolean b)
StringBuffer insert(int offset, char c)
insert(int offset, char[] str)
StringBuffer insert(int index, char[] str, int offset, int len)
StringBuffer insert(int offset, float f)
StringBuffer insert(int offset, int i)
StringBuffer insert(int offset, long l)
StringBuffer insert(int offset, Object obj)
StringBuffer insert(int offset, String str)
Example:
public class Test{
public static void main(String args[]){
StringBuilder sb = new StringBuilder("abcdefghijk");
sb.insert(3,"123");
System.out.println(sb);
}
}
Output:
abc123defghijk
String Buffer replace() Method
This method replaces the characters in a substring of this StringBuffer with characters in the
specified String.
The substring begins at the specified start and extends to the character at index end - 1 or to
the end of the StringBuffer if no such character exists.
Syntax:
StringBuffer replace(int start, int end, String str)
Example:
public class Test{
public static void main(String args[]){
StringBuilder sb = new StringBuilder("abcdefghijk");
sb.replace(3, 8, "ZARA");
System.ou.println(sb);
}
}
Output:
abcZARAijk
Here is the list of other methods available in dtring buffer class:
1 int capacity()
Returns the current capacity of the String buffer.
2 char charAt(int index)
The specified character of the sequence currently represented by the string buffer, as
indicated by the index argument, is returned.
3 void ensureCapacity(int minimumCapacity)
Ensures that the capacity of the buffer is at least equal to the specified minimum.
4 void getChars(int srcBegin, int srcEnd, char[] dst, int dstBegin)
Characters are copied from this string buffer into the destination character array dst.
5 int indexOf(String str)
Returns the index within this string of the first occurrence of the specified substring.
6 int indexOf(String str, int fromIndex)
Returns the index within this string of the first occurrence of the specified substring,
starting at the specified index.
7 int lastIndexOf(String str)
Returns the index within this string of the rightmost occurrence of the specified substring.
8 int lastIndexOf(String str, int fromIndex)
Returns the index within this string of the last occurrence of the specified substring.
9 int length()
Returns the length (character count) of this string buffer.
10 void setCharAt(int index, char ch)
The character at the specified index of this string buffer is set to ch.
11 void setLength(int newLength)
Sets the length of this String buffer.
12 CharSequence subSequence(int start, int end)
Returns a new character sequence that is a subsequence of this sequence.
13 String substring(int start)
Returns a new String that contains a subsequence of characters currently contained in this
StringBuffer.The substring begins at the specified index and extends to the end of the
StringBuffer.
14 String substring(int start, int end)
Returns a new String that contains a subsequence of characters currently contained in this
StringBuffer.
15 String toString()
Converts to a string representing the data in this string buffer.
6.3 StringBuilder (java.lang.StringBuilder)
The difference between the StringBuffer and StringBuilder is that StringBuilders methods
are not thread safe(not Synchronised).Because StringBuilder is not synchronized, it offers
faster performance than StringBuffer.
All the methods available on StringBuffer are also available on StringBuilder, so it really is a
drop-in replacement. .
6.4 StringTokenizer (java.util.StringTokenizer)
The java.util.StringTokenizer allows us to break a string into substrings, or tokens, that are
separated by delimiters. The delimiters are whitespace (spaces, carriage returns, etc.) by
default but we can defined others.
A StringTokenizer provides an Enumeration object that steps through the tokens:
String str = "This is a string object";
StringTokenizer st = new StringTokenizer (str);
while (st.hasMoreTokens ()) {
System.out.println (st.nextToken ());
...
}
Output:
This
is
a
string
object
An overloaded constructor allows us to specify the delimiters. For example,
String str = "A*bunch*of*stars";
StringTokenizer st = new StringTokenizer (str,"*");
This breaks the string into the tokens separated by the "*" character.


![Inheritance and Interfaces · Inheritance and Interfaces [Bono] 4 Inheritance •terminology: a subclass (or derivedclass) inherits from a superclass (or baseclass) •subclass class](https://static.fdocuments.net/doc/165x107/5fbd6e1b5849d46804357e40/inheritance-and-interfaces-inheritance-and-interfaces-bono-4-inheritance-aterminology.jpg)