Chapter 2. Editing And Compiling - dvc.edu · Chapter 2. Editing And ... Programming Concepts in...
17
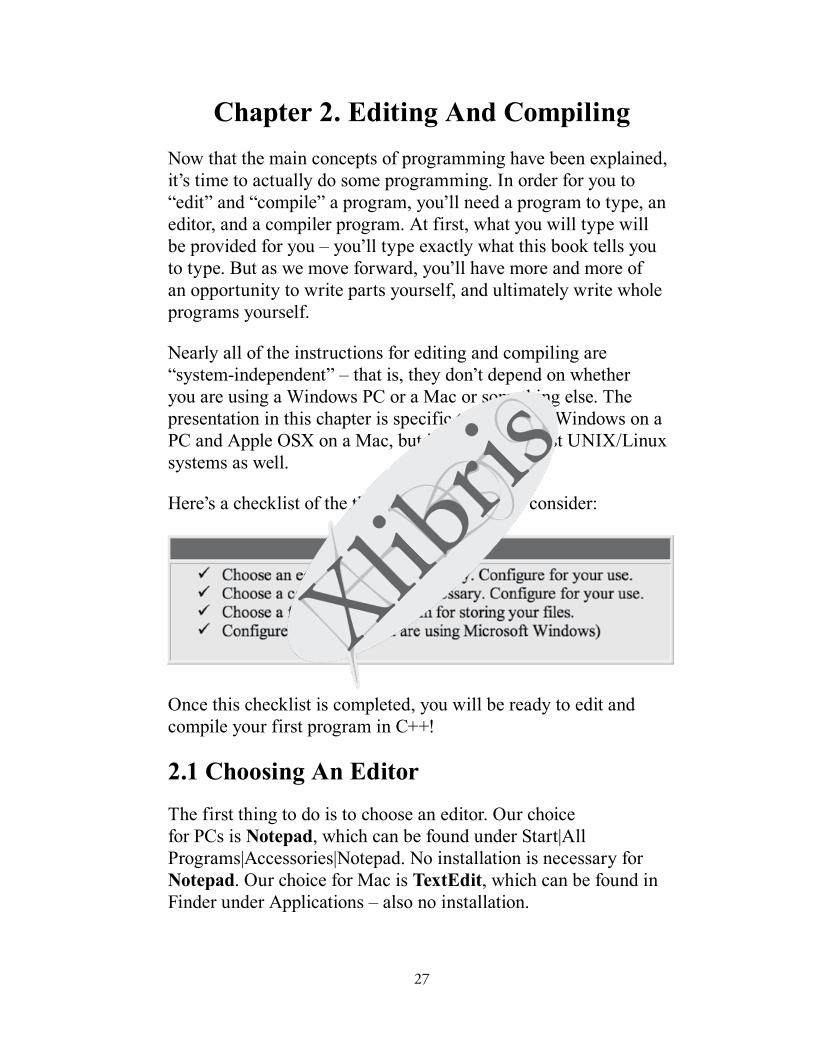
27 Chapter 2. Editing And Compiling Now that the main concepts of programming have been explained, it’s time to actually do some programming. In order for you to “edit” and “compile” a program, you’ll need a program to type, an editor, and a compiler program. At first, what you will type will be provided for you – you’ll type exactly what this book tells you to type. But as we move forward, you’ll have more and more of an opportunity to write parts yourself, and ultimately write whole programs yourself. Nearly all of the instructions for editing and compiling are “system-independent” – that is, they don’t depend on whether you are using a Windows PC or a Mac or something else. The presentation in this chapter is specific to Microsoft Windows on a PC and Apple OSX on a Mac, but it pertains to most UNIX/Linux systems as well. Here’s a checklist of the things you will need to consider: Once this checklist is completed, you will be ready to edit and compile your first program in C++! 2.1 Choosing An Editor The first thing to do is to choose an editor. Our choice for PCs is Notepad, which can be found under Start|All Programs|Accessories|Notepad. No installation is necessary for Notepad. Our choice for Mac is TextEdit, which can be found in Finder under Applications – also no installation.
Transcript of Chapter 2. Editing And Compiling - dvc.edu · Chapter 2. Editing And ... Programming Concepts in...
27
Chapter 2. Editing And CompilingNow that the main concepts of programming have been explained, it’s time to actually do some programming. In order for you to “edit” and “compile” a program, you’ll need a program to type, an editor, and a compiler program. At first, what you will type will be provided for you – you’ll type exactly what this book tells you to type. But as we move forward, you’ll have more and more of an opportunity to write parts yourself, and ultimately write whole programs yourself.
Nearly all of the instructions for editing and compiling are “system-independent” – that is, they don’t depend on whether you are using a Windows PC or a Mac or something else. The presentation in this chapter is specific to Microsoft Windows on a PC and Apple OSX on a Mac, but it pertains to most UNIX/Linux systems as well.
Here’s a checklist of the things you will need to consider:
Once this checklist is completed, you will be ready to edit and compile your first program in C++!
2.1 Choosing An EditorThe first thing to do is to choose an editor. Our choice for PCs is Notepad, which can be found under Start|All Programs|Accessories|Notepad. No installation is necessary for Notepad. Our choice for Mac is TextEdit, which can be found in Finder under Applications – also no installation.
Robert Burns
28
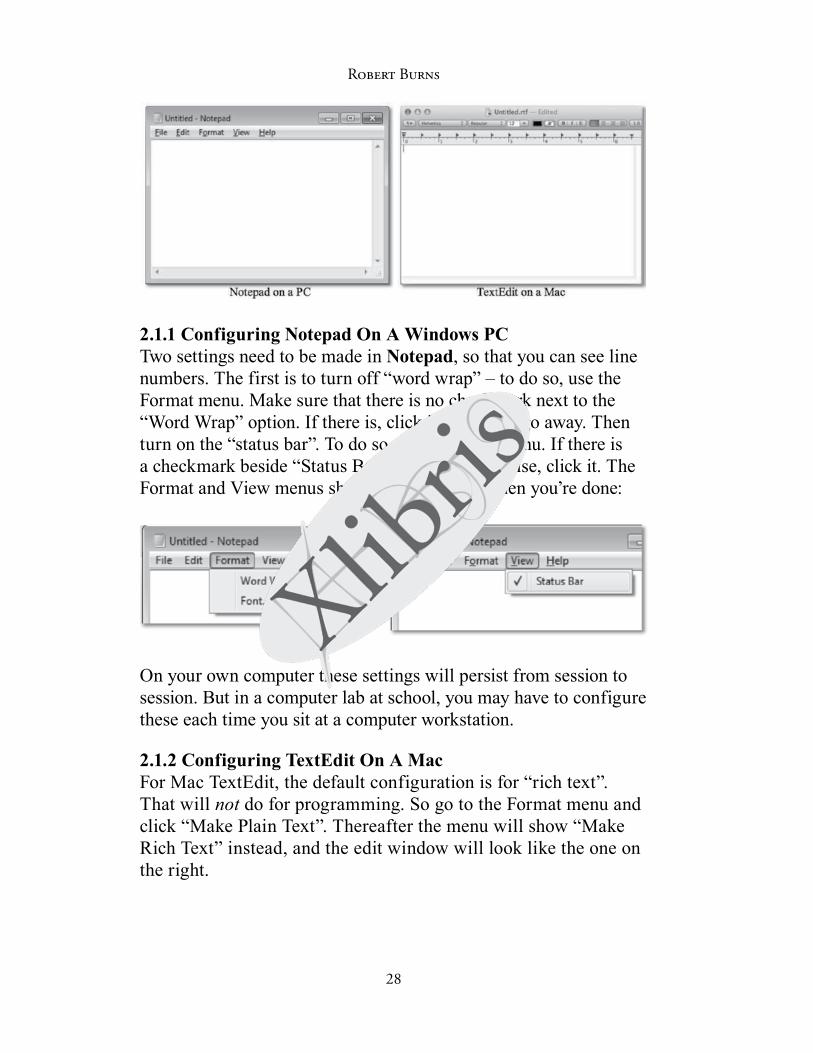
2.1.1 Configuring Notepad On A Windows PCTwo settings need to be made in Notepad, so that you can see line numbers. The first is to turn off “word wrap” – to do so, use the Format menu. Make sure that there is no checkmark next to the “Word Wrap” option. If there is, click it to make it go away. Then turn on the “status bar”. To do so, use the View menu. If there is a checkmark beside “Status Bar”, leave it. Otherwise, click it. The Format and View menus should look like this when you’re done:
On your own computer these settings will persist from session to session. But in a computer lab at school, you may have to configure these each time you sit at a computer workstation.
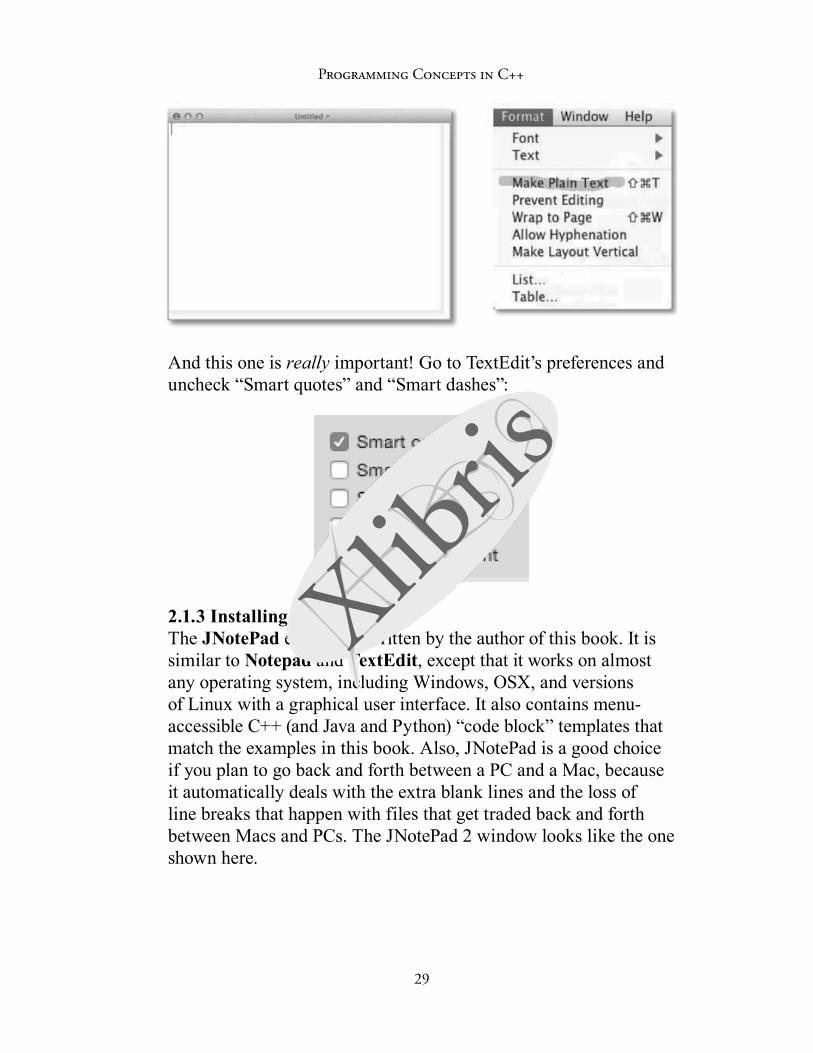
2.1.2 Configuring TextEdit On A MacFor Mac TextEdit, the default configuration is for “rich text”. That will not do for programming. So go to the Format menu and click “Make Plain Text”. Thereafter the menu will show “Make Rich Text” instead, and the edit window will look like the one on the right.
Programming Concepts in C++
29
And this one is really important! Go to TextEdit’s preferences and uncheck “Smart quotes” and “Smart dashes”:
2.1.3 Installing JNotePadThe JNotePad editor was written by the author of this book. It is similar to Notepad and TextEdit, except that it works on almost any operating system, including Windows, OSX, and versions of Linux with a graphical user interface. It also contains menu-accessible C++ (and Java and Python) “code block” templates that match the examples in this book. Also, JNotePad is a good choice if you plan to go back and forth between a PC and a Mac, because it automatically deals with the extra blank lines and the loss of line breaks that happen with files that get traded back and forth between Macs and PCs. The JNotePad 2 window looks like the one shown here.
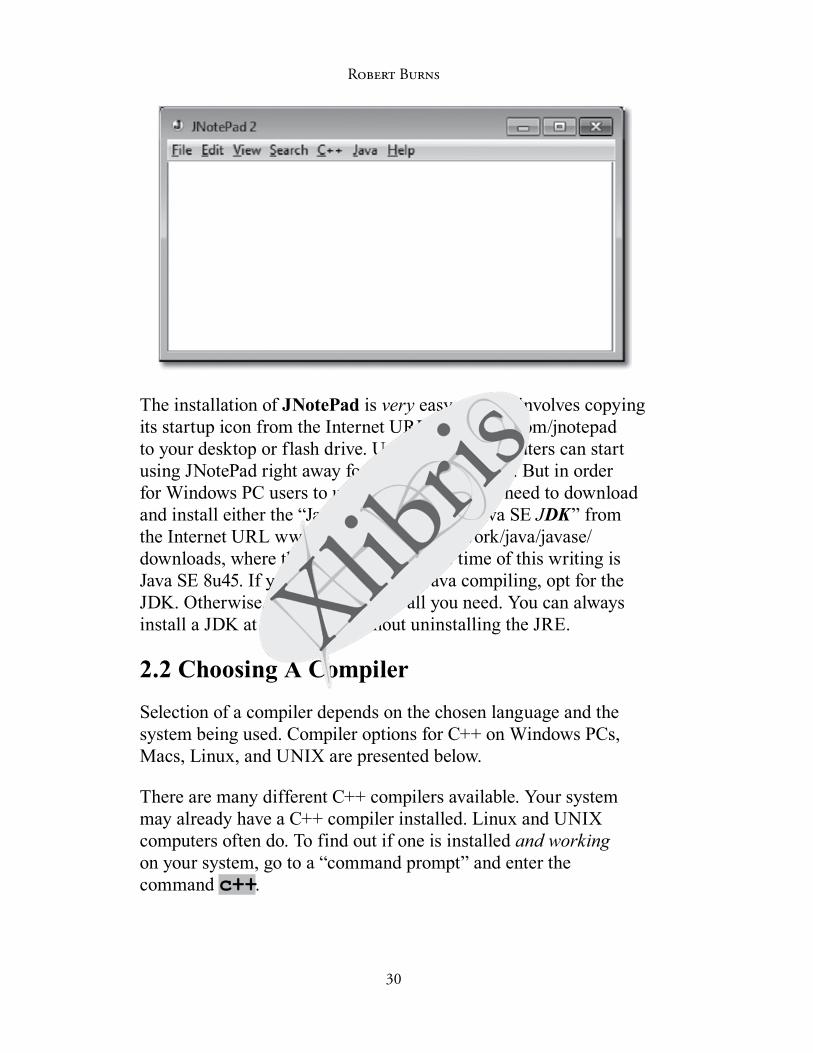
Robert Burns
30
The installation of JNotePad is very easy – it just involves copying its startup icon from the Internet URL www.rdb3.com/jnotepad to your desktop or flash drive. Users of Mac computers can start using JNotePad right away for C++ programming. But in order for Windows PC users to use the icon, they first need to download and install either the “Java SE JRE” or the “Java SE JDK” from the Internet URL www.oracle.com/technetwork/java/javase/downloads, where the latest version at the time of this writing is Java SE 8u45. If you intend to do any Java compiling, opt for the JDK. Otherwise, the lighter JRE is all you need. You can always install a JDK at a later date without uninstalling the JRE.
2.2 Choosing A CompilerSelection of a compiler depends on the chosen language and the system being used. Compiler options for C++ on Windows PCs, Macs, Linux, and UNIX are presented below.
There are many different C++ compilers available. Your system may already have a C++ compiler installed. Linux and UNIX computers often do. To find out if one is installed and working on your system, go to a “command prompt” and enter the command c++.
Programming Concepts in C++
31
2.2.1 What’s A Command Prompt?Just about all systems have a command prompt. It’s a solid-color window (usually black or white) with a message (or “prompt”) that indicates it’s ready for a user to type a command. After a command gets typed, it gets sent to the system when the user presses the ENTER (or “return”) key. Before we can talk about compilers and compiling, we need to get a command prompt so that we can type commands.
How you get to a command prompt depends on the system you’re using. On a Mac, you simply run the Terminal app that is part of its OSX operating system – it’s in the Applications folder. On Linux and UNIX systems, you probably start out with a command prompt when the computer boots up.
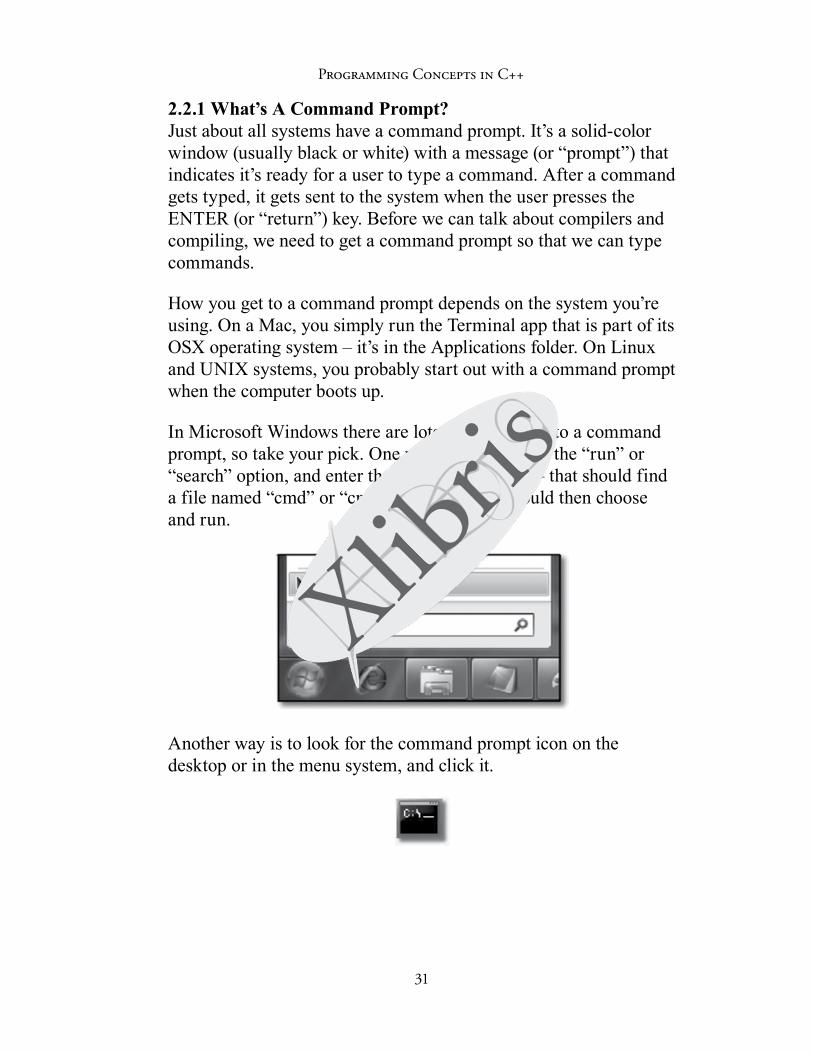
In Microsoft Windows there are lots of ways to get to a command prompt, so take your pick. One way is to use either the “run” or “search” option, and enter the three letters cmd – that should find a file named “cmd” or “cmd.exe”, which you would then choose and run.
Another way is to look for the command prompt icon on the desktop or in the menu system, and click it.
Robert Burns
32
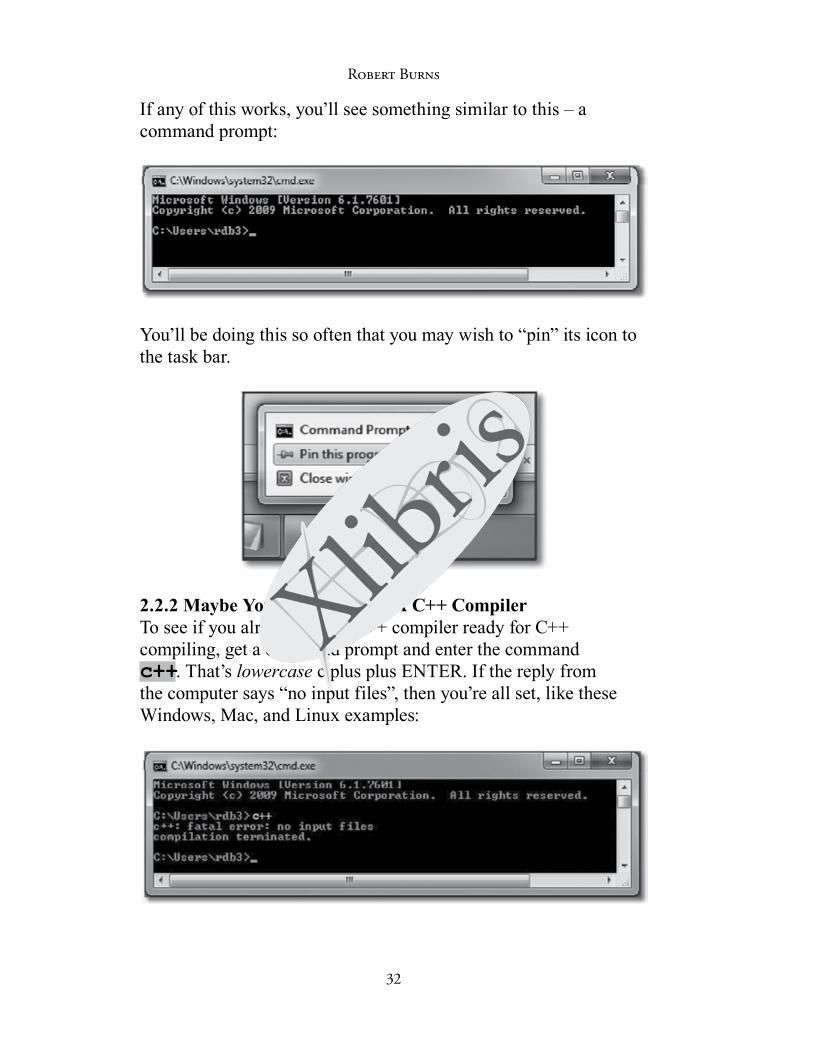
If any of this works, you’ll see something similar to this – a command prompt:
You’ll be doing this so often that you may wish to “pin” its icon to the task bar.
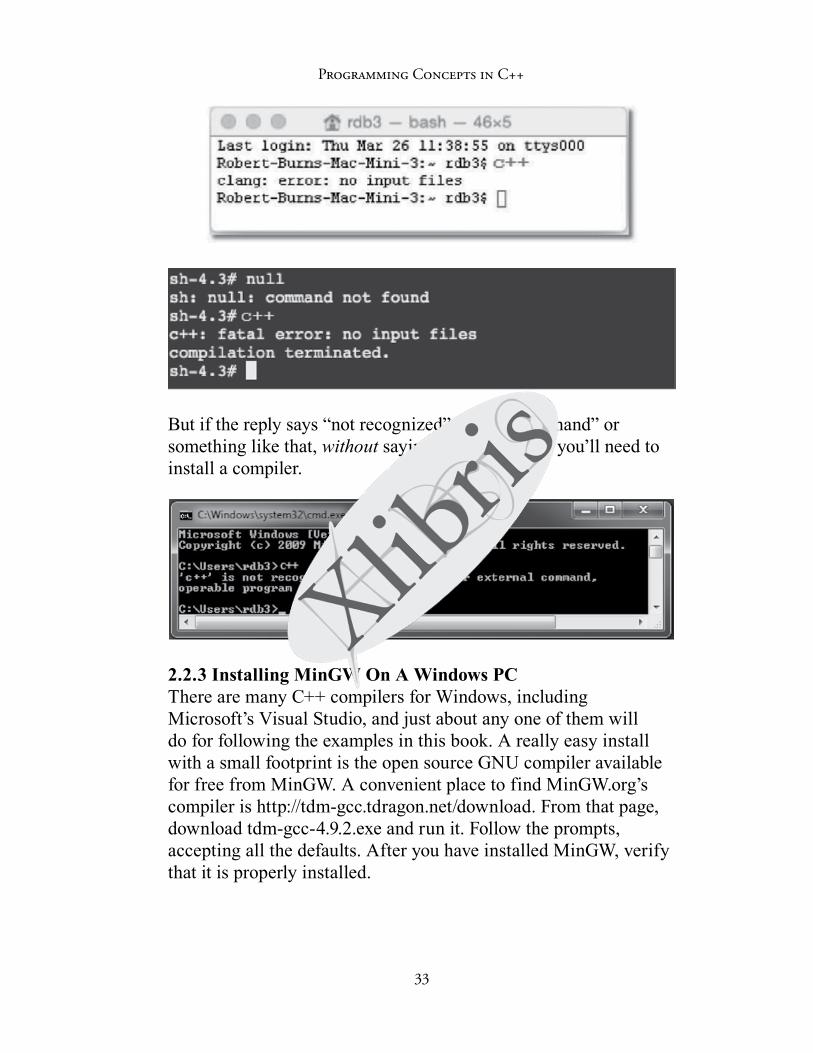
2.2.2 Maybe You Already Have A C++ CompilerTo see if you already have a C++ compiler ready for C++ compiling, get a command prompt and enter the command c++. That’s lowercase c plus plus ENTER. If the reply from the computer says “no input files”, then you’re all set, like these Windows, Mac, and Linux examples:
Programming Concepts in C++
33
But if the reply says “not recognized” or “bad command” or something like that, without saying “no input files” you’ll need to install a compiler.
2.2.3 Installing MinGW On A Windows PCThere are many C++ compilers for Windows, including Microsoft’s Visual Studio, and just about any one of them will do for following the examples in this book. A really easy install with a small footprint is the open source GNU compiler available for free from MinGW. A convenient place to find MinGW.org’s compiler is http://tdm-gcc.tdragon.net/download. From that page, download tdm-gcc-4.9.2.exe and run it. Follow the prompts, accepting all the defaults. After you have installed MinGW, verify that it is properly installed.
Robert Burns
34
To do so, you need to get a “command prompt” window and enter the command c++. It should now say “no input files”. But if it still shows “bad command”, verify that you now have a folder named c:\TDM-GCC-32\bin containing a file named c++.exe. If so, it’s installed and you’ll need one more step before the c++ command works. The command is path=c:\TDM-GCC-32\bin;%path% and you’ll have to enter it every time you open a command prompt window for compiling C++.
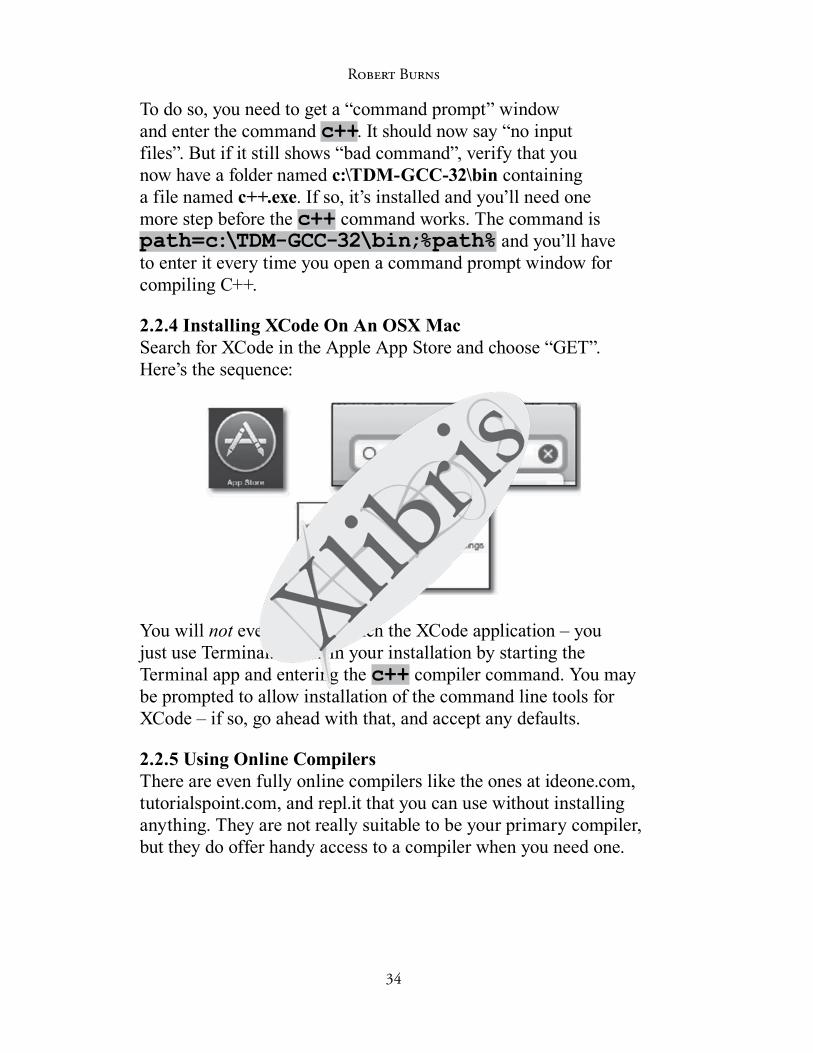
2.2.4 Installing XCode On An OSX MacSearch for XCode in the Apple App Store and choose “GET”. Here’s the sequence:
You will not ever need to launch the XCode application – you just use Terminal. Confirm your installation by starting the Terminal app and entering the c++ compiler command. You may be prompted to allow installation of the command line tools for XCode – if so, go ahead with that, and accept any defaults.
2.2.5 Using Online CompilersThere are even fully online compilers like the ones at ideone.com, tutorialspoint.com, and repl.it that you can use without installing anything. They are not really suitable to be your primary compiler, but they do offer handy access to a compiler when you need one.
Programming Concepts in C++
35
2.3 Choosing A Folder For Storing FilesTo store your C++ “source files” on a PC or Mac and do your programming work, you should have a folder reserved specifically for that purpose. This is called your “working folder”. Decide upon this and get it ready before writing your first program.
You can put your working folder on a hard drive or on removable media, like a flash drive. If you are not yet comfortable with “command-line” mode or file structure navigation, it’s easiest to simply use a flash drive. Also, with your files on a flash drive they are readily portable between home and classroom and lab, and so on – even between PC and Mac. The rest of this section is organized for students using flash drives, as others with more experience can easily adapt the instructions for themselves.
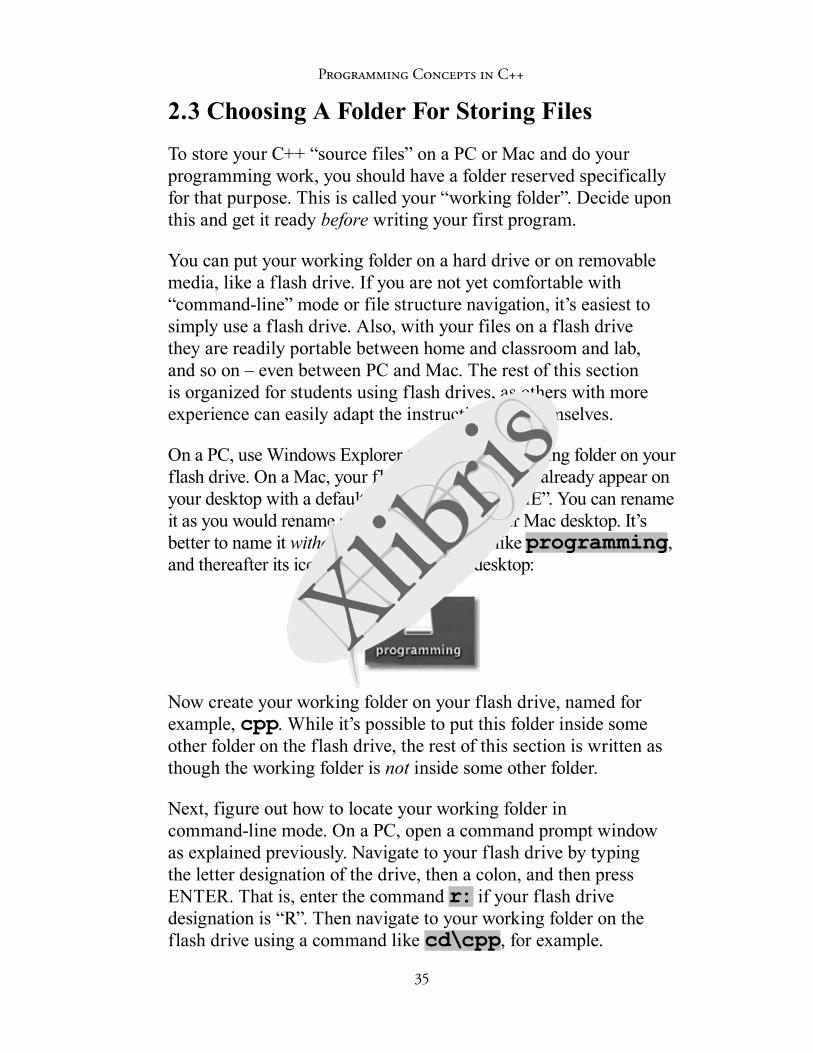
On a PC, use Windows Explorer to create your working folder on your flash drive. On a Mac, your flash drive icon should already appear on your desktop with a default name, like “NO NAME”. You can rename it as you would rename any file or folder on your Mac desktop. It’s better to name it without spaces – something like programming, and thereafter its icon will appear on your desktop:
Now create your working folder on your flash drive, named for example, cpp. While it’s possible to put this folder inside some other folder on the flash drive, the rest of this section is written as though the working folder is not inside some other folder.
Next, figure out how to locate your working folder in command-line mode. On a PC, open a command prompt window as explained previously. Navigate to your flash drive by typing the letter designation of the drive, then a colon, and then press ENTER. That is, enter the command r: if your flash drive designation is “R”. Then navigate to your working folder on the flash drive using a command like cd\cpp, for example.
Robert Burns
36
On a Mac, start the Terminal app and enter the command cd /volumes/programming/cpp, for example. That’s cd, not CD, and it’s slash /, not backslash \. And don’t forget the space after cd.
Or on either Mac or PC, type cd , drag and drop your working folder onto it, and press ENTER. That’s c d space, not just c d. Then you can do the drag and drop to complete the command, and then press ENTER.
2.3.1 How To Backup Your FilesThe rule is simple: “only backup the files that you do not want to lose.” After you finish editing your source files, and save them onto a hard drive or flash drive, imagine for a moment what would happen if the hard drive fails tonight or you misplace your flash drive. It’s a good idea to backup your files by putting a copy of them on the Internet. There are several free options, including emailing attachments to yourself, and cloud-based file hosting services like Dropbox or Google Drive. If you are doing assignments for a computer course you are taking, the course may even offer a class website for submitting your files, and you could use that to backup your work.
Decide on your own process for backing up your work, and make it a habit to email or upload your files at the end of each work session.
2.4 Configuring A Windows PC For ProgrammingActually, you can use PCs for programming without any configuration changes. But there is one change that makes things easier for identifying files, and it is highly recommended. The problem is that Windows hides filename extensions by default. That is, the compiled program’s file hello.exe may appear only partially – that is, without the dot and the “exe” after the dot – in a file listing. To change this behavior, start Windows Explorer from its icon, which looks like this in Windows 8:
Programming Concepts in C++
37
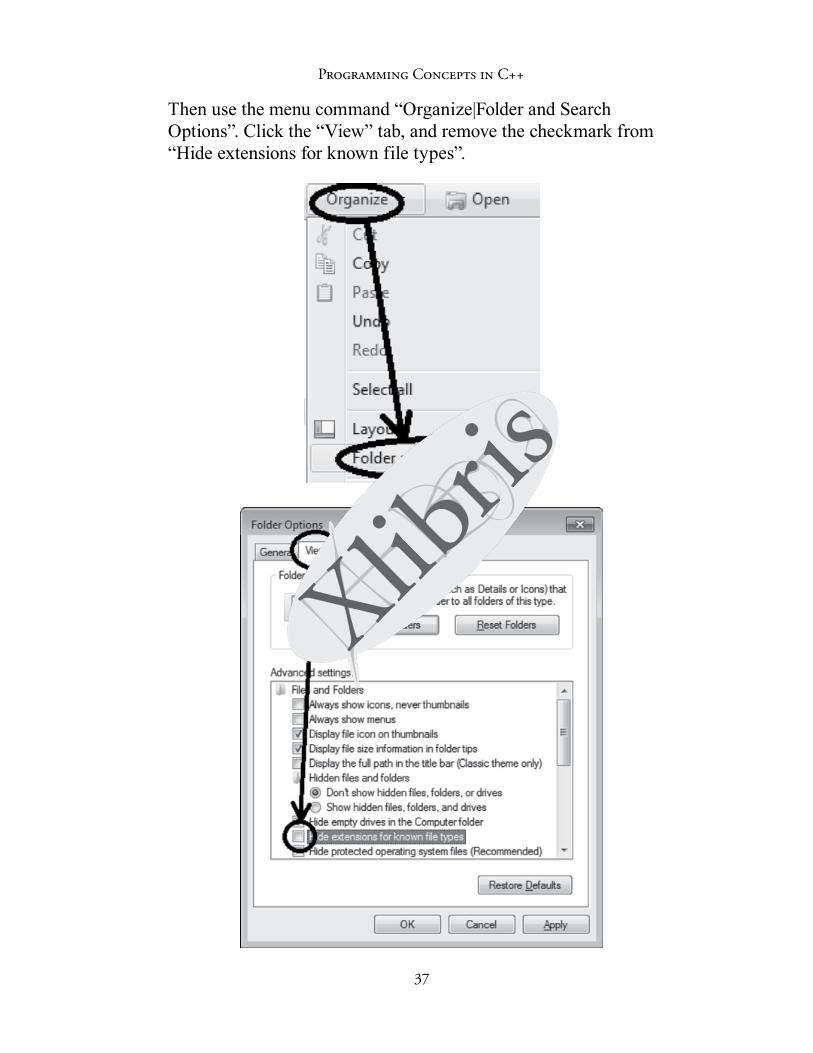
Then use the menu command “Organize|Folder and Search Options”. Click the “View” tab, and remove the checkmark from “Hide extensions for known file types”.
Robert Burns
38
The Windows 7 folder options are also located in the Control Panel, under Appearance and Personalization. Look for Folder Options, then the View tab, and then uncheck “Hide extensions for known file types”. Click OK and then close.
On your own computer, this setting will persist from session to session. But in a computer lab, you may have to configure this each time. Note that Macs do not hide filename extensions by default, so unless you changed that default, no configuration is necessary.
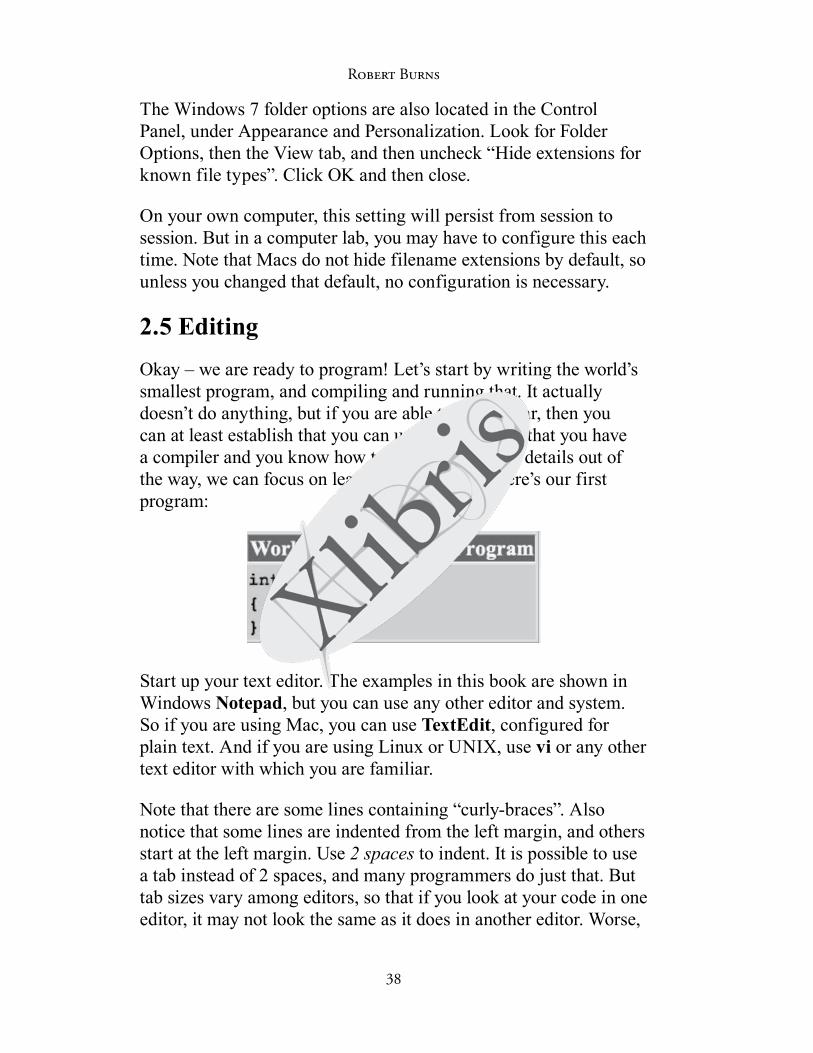
2.5 EditingOkay – we are ready to program! Let’s start by writing the world’s smallest program, and compiling and running that. It actually doesn’t do anything, but if you are able to get this far, then you can at least establish that you can use an editor and that you have a compiler and you know how to use it. With these details out of the way, we can focus on learning to program! Here’s our first program:
Start up your text editor. The examples in this book are shown in Windows Notepad, but you can use any other editor and system. So if you are using Mac, you can use TextEdit, configured for plain text. And if you are using Linux or UNIX, use vi or any other text editor with which you are familiar.
Note that there are some lines containing “curly-braces”. Also notice that some lines are indented from the left margin, and others start at the left margin. Use 2 spaces to indent. It is possible to use a tab instead of 2 spaces, and many programmers do just that. But tab sizes vary among editors, so that if you look at your code in one editor, it may not look the same as it does in another editor. Worse,
Programming Concepts in C++
39
if you use spaces sometimes and tabs sometimes, what looks fine in one editor may look misaligned in another.
2.5.1 How To Type CodeThe tendency is to type code “linearly” – that is, from the top line to the bottom, from left to right. But that is not the best way to type code. Matching parentheses and curly-braces appear throughout code. The toughest part is to keep track of these and make sure that each open parenthesis has a matching closing parenthesis. The easiest way to do that is to type opening and closing symbols together, and then separate them.
In the “World’s Smallest C++ Program” above, and any other program you write, you should type the opening curly-brace, then on the next line type the closing curly-brace. Consider that as a “curly-brace container”. Fill it with code (if any) only after you create the container.
Note that as you type the program, there is an indication on the editor about the line number that is currently being edited. In Notepad this is located in the lower right with the abbreviations “Ln” for line number and “Col” for column number. (If this does not appear, then revisit section 2.1.1 above.) This is not so important for now, but knowing the line number will be important when we get to the compiling step, in case the compiler detects and reports typing errors. Unfortunately the line number does not appear in TextEdit on a Mac – one reason why JNotePad may be the better choice for an editor.
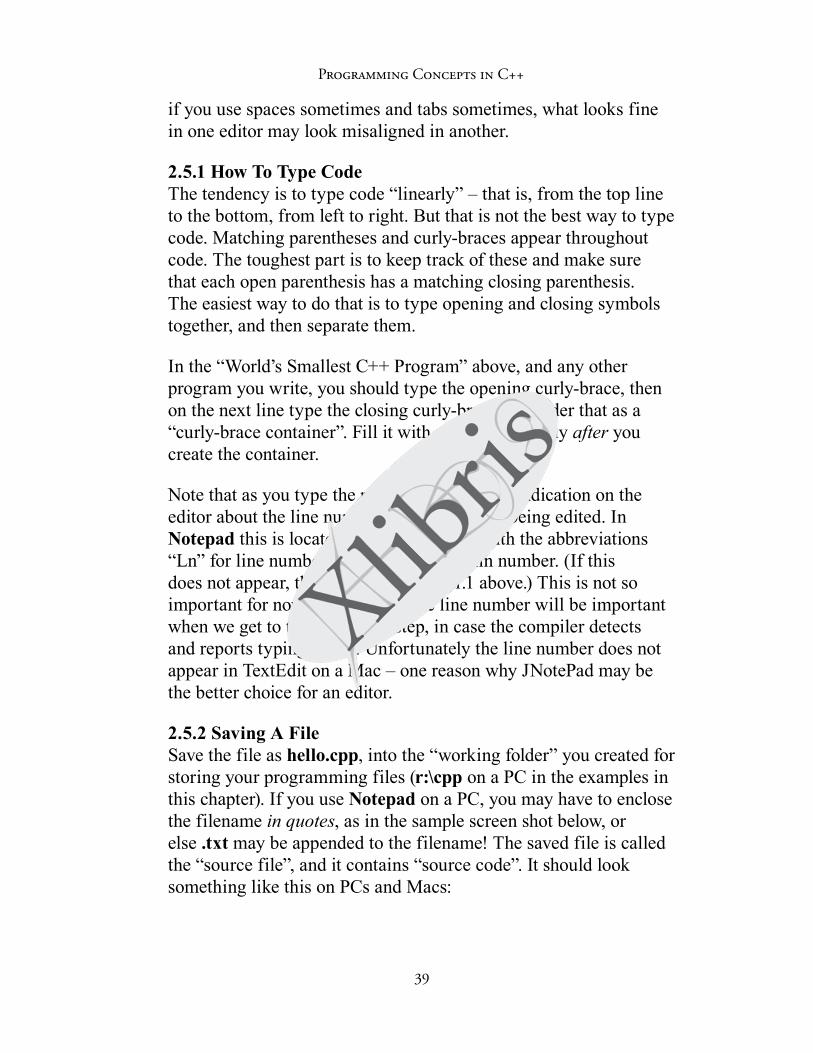
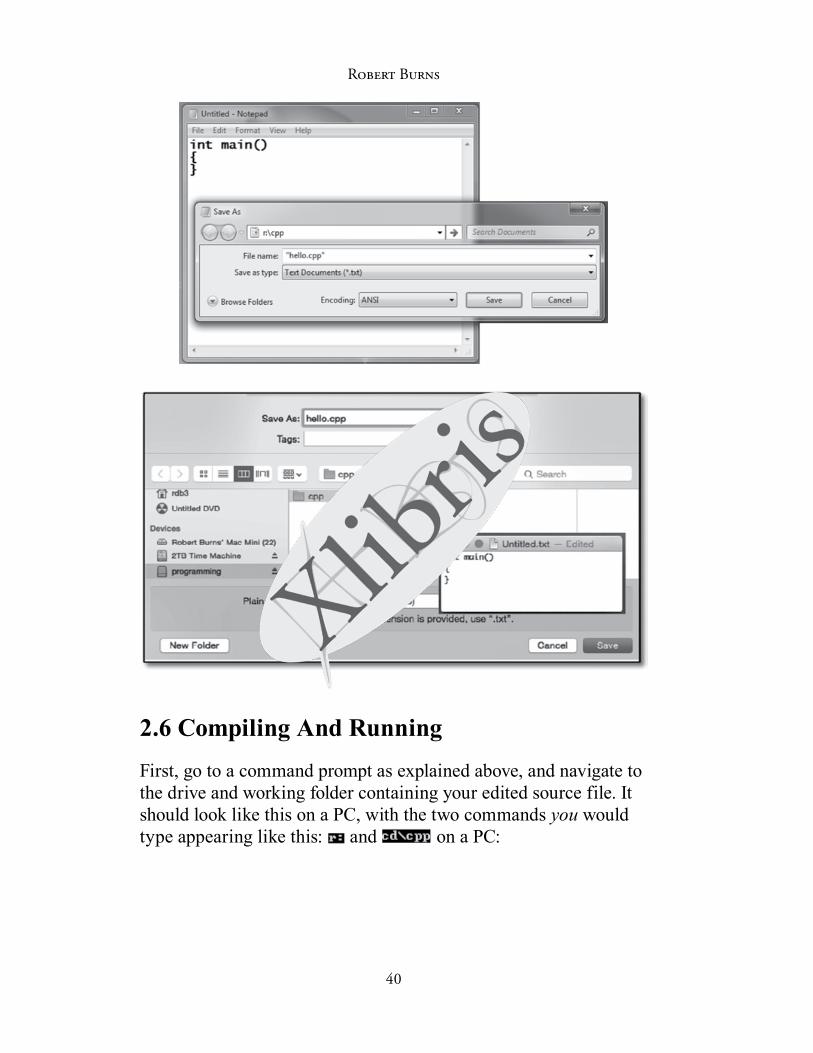
2.5.2 Saving A FileSave the file as hello.cpp, into the “working folder” you created for storing your programming files (r:\cpp on a PC in the examples in this chapter). If you use Notepad on a PC, you may have to enclose the filename in quotes, as in the sample screen shot below, or else .txt may be appended to the filename! The saved file is called the “source file”, and it contains “source code”. It should look something like this on PCs and Macs:
Robert Burns
40
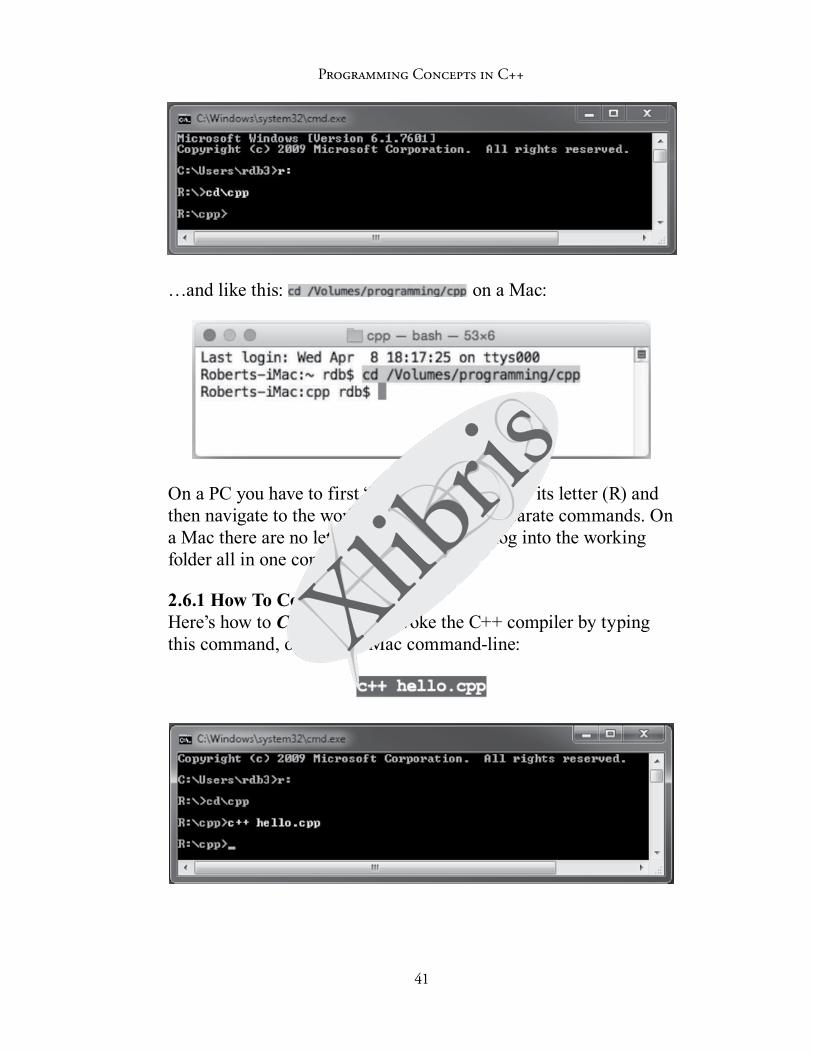
2.6 Compiling And RunningFirst, go to a command prompt as explained above, and navigate to the drive and working folder containing your edited source file. It should look like this on a PC, with the two commands you would type appearing like this: and on a PC:
Programming Concepts in C++
41
…and like this: on a Mac:
On a PC you have to first “log into” the drive by its letter (R) and then navigate to the working folder, in two separate commands. On a Mac there are no lettered drives, and you log into the working folder all in one command.
2.6.1 How To CompileHere’s how to COMPILE it. Invoke the C++ compiler by typing this command, on a PC or Mac command-line:

Robert Burns
42
Note that on some Windows systems with the GNU compiler, you may have to type the command path=c:\TDM-GCC-32\bin;%path% first.
If there are any errors, it should be evident from the output of the compiler. Line numbers should also appear in the output of the compiler, guiding you to the problem. Otherwise there’s no indication of success other than the appearance of another command prompt. Here’s how to RUN what you just compiled:
2.6.2 How To RunIf successful, the compiler in Windows will have created a.exe in the working folder. On a Mac or in Linux or UNIX, it’s a.out instead. The .exe and .out files are called “Executable” files. It is the actual program file. You can distribute this file to people using the same operating system, and they will be able to run it. To run, type this command:
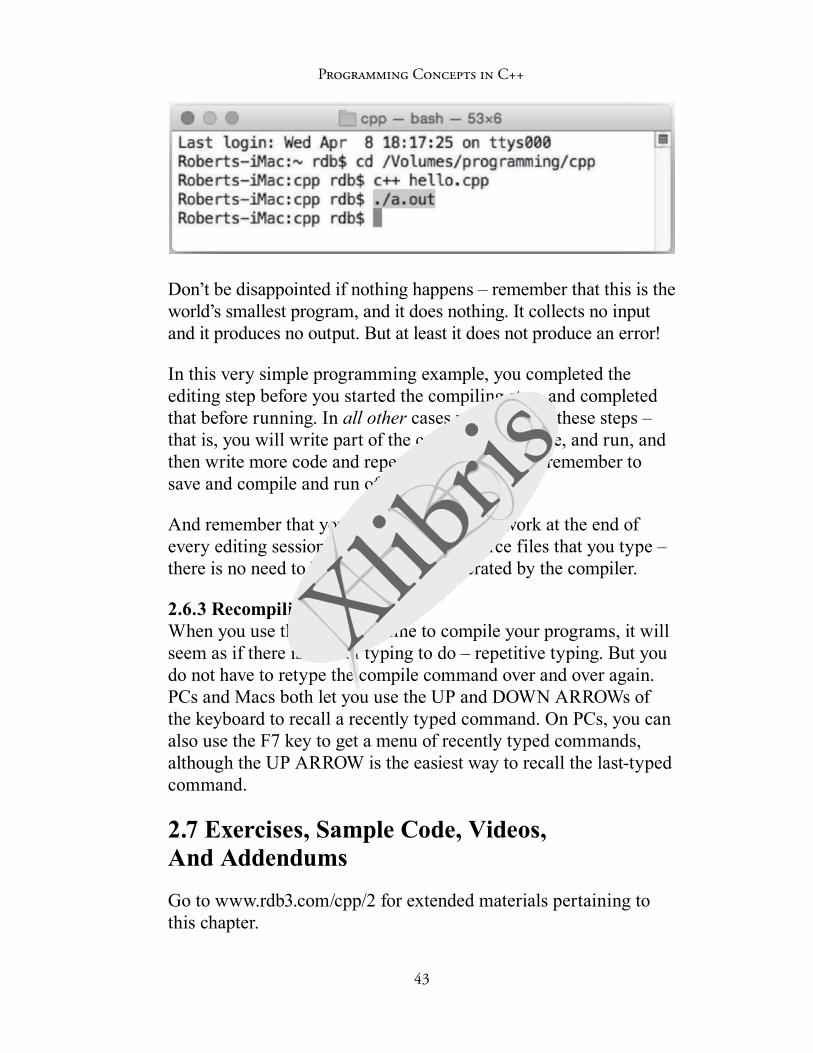
Programming Concepts in C++
43
Don’t be disappointed if nothing happens – remember that this is the world’s smallest program, and it does nothing. It collects no input and it produces no output. But at least it does not produce an error!
In this very simple programming example, you completed the editing step before you started the compiling step, and completed that before running. In all other cases you will mix these steps – that is, you will write part of the code, save, compile, and run, and then write more code and repeat this process. Just remember to save and compile and run often.
And remember that you should backup your work at the end of every editing session. Backup only the source files that you type – there is no need to backup any files generated by the compiler.
2.6.3 RecompilingWhen you use the command-line to compile your programs, it will seem as if there is a lot of typing to do – repetitive typing. But you do not have to retype the compile command over and over again. PCs and Macs both let you use the UP and DOWN ARROWs of the keyboard to recall a recently typed command. On PCs, you can also use the F7 key to get a menu of recently typed commands, although the UP ARROW is the easiest way to recall the last-typed command.
2.7 Exercises, Sample Code, Videos, And AddendumsGo to www.rdb3.com/cpp/2 for extended materials pertaining to this chapter.