Chapter 1: Web Content and HTML Unit 2 - Web Development · Chapter 2: Styling and CSS Week 5...
63
UNIT 2 Ch. 1 1 2 3 4 5 6 7 8 9 Ch. 2 10 11 12 13 14 Big Questions Why do people create websites? How can text communicate content and structure on a web page? How can I incorporate content I find online into my own webpage? What strategies can I use when coding to find and fix issues? Unit 2 - Web Development In the Web Development unit, students are empowered to create and share the content on their own web pages. They begin by thinking about the role of the web, and how it can be used as a medium for creative expression. As students develop their pages and begin to see themselves as programmers, they are encouraged think critically about the impact of sharing information online and how to be more critical content consumers. They are also introduced to problem solving as it relates to programming, as they learn valuable skills such as debugging, commenting, and structure of language. At the conclusion of the unit, students compile their work to create a personal website they can publish and share. Chapter 1: Web Content and HTML Week 1 Lesson 1: Exploring Websites Unplugged This lesson covers the purposes that a website might serve, both for the users and the creators. The class explores a handful of the most-used websites in the United States and discusses how each of those sites is useful for users and how it might also serve its creators. Lesson 2: Websites for Expression Unplugged This lesson introduces websites as a means of personal expression. The class first discusses different ways that people express and share their interests and ideas, then looks at a few exemplar websites made by students from a previous course. Finally everyone brainstorms and shares a list of topics and interests to include, creating a resource for developing a personal website in the rest of the unit. Lesson 3: Intro to HTML Web Lab This lesson introduces to HTML as a solution to the problem of how to communicate both the content and structure of a website to a computer. The lesson begins with a brief unplugged activity demonstrating the challenges of effectively communicating the structure of a web page. The class looks at an HTML page in Web Lab and discusses how HTML tags help solve this problem, then uses HTML to write the first web pages of the unit.
Transcript of Chapter 1: Web Content and HTML Unit 2 - Web Development · Chapter 2: Styling and CSS Week 5...

UNIT
2Ch. 1 1 2 3 4 5 6 7 8 9 Ch. 2 10 11
12 13 14
Big Questions
Why do people create websites?How can text communicate content and structure on aweb page?How can I incorporate content I find online into myown webpage?What strategies can I use when coding to find and fixissues?
Unit 2 - Web DevelopmentIn the Web Development unit, students are empowered to create and share the content on their own web pages. Theybegin by thinking about the role of the web, and how it can be used as a medium for creative expression. As studentsdevelop their pages and begin to see themselves as programmers, they are encouraged think critically about the impact ofsharing information online and how to be more critical content consumers. They are also introduced to problem solving as itrelates to programming, as they learn valuable skills such as debugging, commenting, and structure of language. At theconclusion of the unit, students compile their work to create a personal website they can publish and share.
Chapter 1: Web Content and HTML
Week 1
Lesson 1: Exploring WebsitesUnplugged
This lesson covers the purposes that a website might serve, both for the users and the creators.The class explores a handful of the most-used websites in the United States and discusses howeach of those sites is useful for users and how it might also serve its creators.
Lesson 2: Websites for ExpressionUnplugged
This lesson introduces websites as a means of personal expression. The class first discussesdifferent ways that people express and share their interests and ideas, then looks at a fewexemplar websites made by students from a previous course. Finally everyone brainstorms andshares a list of topics and interests to include, creating a resource for developing a personalwebsite in the rest of the unit.
Lesson 3: Intro to HTMLWeb Lab
This lesson introduces to HTML as a solution to the problem of how to communicate both thecontent and structure of a website to a computer. The lesson begins with a brief unplugged activitydemonstrating the challenges of effectively communicating the structure of a web page. The classlooks at an HTML page in Web Lab and discusses how HTML tags help solve this problem, thenuses HTML to write the first web pages of the unit.

Week 2
Lesson 4: HeadingsWeb Lab
This lesson continues the introduction to HTML tags, this time with headers. The class practicesusing header tags to create page and section titles and learns how the different header elementsare displayed by default. Next, the class plans how to organize their content on the personal webpages that will be built across the unit and begins the first page of the project.
Lesson 5: Digital FootprintUnplugged
This lesson takes a step back from creating the personal website to talk about personal informationpeople choose to share digitally. The class begins by discussing what types of information aregood to share with other people, then looks at several sample social media pages to see whattypes of personal information could be shared intentionally or unintentionally. Finally, the classcomes up with a set of guidelines to follow when putting information online.
Week 3
Lesson 6: ListsWeb Lab
This lesson introduces ordered and unordered lists and the associated <ul>, <ol>, and<li> HTML tags. The class practices using the tags, then goes back to the personal web pageproject to add a new HTML page that includes the new tags.
Lesson 7: Intellectual Property and ImagesUnplugged | Web Lab
This lesson covers how to use media such as images, video, or music created by others a websitewhile respecting the rights of the creator of that media. After first studying Creative Commonslicensing, the class learns how to add images to web pages, and how to give proper attributionwhen doing so.
Lesson 8: Clean Code and DebuggingWeb Lab
In this lesson covers common issues that arise when designing web pages in HTML. The class willcorrect errors in a sequence of increasingly complex web pages found on Code Studio and learnthe importance of comments, whitespace, and indentation as tools for making web pages easier toread.
Week 4
Lesson 9: Project - Multi-Page WebsitesWeb Lab | Project
This lesson covers hyperlinks, which allow web developers to connect pages together into onewebsite. The class will link together all the previous pages into one project, and create navigationbars for each page before publishing the entire site to the Web.
Chapter Commentary

Big Questions
How do I modify the appearance and style of my webpages?How do I safely and appropriately make use of thecontent published on the Internet?
Chapter CommentaryStudents use computing as a form of self expression as they design and develop basic web pages. Focusing on the tags,keywords, and syntax used to communicate instructions to the computer, students use HTML to structure the content of aweb page. They also explore the privacy and intellectual property implications of publishing their work online.
Chapter 2: Styling and CSS
Week 5
Lesson 10: Styling Text with CSSWeb Lab
This lesson introduces CSS as a way to style elements on the page. The class learns the basicsyntax for CSS rule-sets and then explores properties that impact HTML text elements. Finally,everyone applies text styles to their personal websites.
Lesson 11: Styling Elements with CSSWeb Lab
This lesson continues the introduction to CSS style properties, this time focusing more on non-textelements. The class begins by investigating and modifying the new CSS styles on a Desserts ofthe World page. Afterwards, everyone applies this new knowledge to their personal websites.
Lesson 12: Sources and Search EnginesAfter first completing a web search scavenger hunt, the class learns about the inner workings ofsearch engines and has an opportunity to flex their analytical skills in a search for strange andunlikely animals.
Lesson 13: RGB Colors and ClassesWeb Lab
This lesson covers classes and custom colors. The class first learns how to specify custom colorsusing RGB (red, green, blue) values, then applies these colors to a new Four Seasons web page,which uses CSS classes. Using classes, the class adds more styles to the Four Seasons webpage, then use them to style their personal websites.
Week 6
Lesson 14: Project - Personal Portfolio WebsiteWeb Lab | Project
In the last few days of the unit, the class finalizes their personal websites, working with peers to getfeedback, review the rubric, and put the finishing touches on the site. To cap off the unit, everyoneshares their projects and how they were developed.

Chapter CommentaryAfter covering the basics of HTML, students dive into improving their websites with CSS. They learn to use colors, fonts andmargins to create a unique style of their own design. At the end of the chapter students publish a personal portfolio websitethat demonstrates use of HTML for content and CSS for a personalized.

If you are interested in licensing Code.org materials for commercial purposes, contact us.

UNIT
2Ch. 1 1 2 3 4 5 6 7 8 9 Ch. 2 10 11
12 13 14
Lesson 1: Exploring WebsitesUnplugged
OverviewEvery website has a purpose, a reason someone created it andothers use it. In this lesson, students will start to consider thepurposes a website might serve, both for the users and the creators.Students will explore a handful of the most-used websites in theUnited States and try to figure out how each of those sites is useful forusers and how they might also serve their creators.
PurposeUnit 2 is all about the World Wide Web, with a focus on creatingwebsites for self expression. To start students thinking about whythey might want to create a website, they must begin to consider howwebsites are useful tools for both users and creators. The lessonstarts with popular websites because they all serve clear purposes fora large number of users, but eventually students are asked to narrowtheir vision to simpler sites that might serve the needs of a smalleruser group.
AgendaWarm Up (10 minutes)
The Last Website you Visited
Activity (45 minutes)
Websites We Use FrequentlyFinding the Purpose
Wrap Up (5 min)
Web Development Goals
ObjectivesStudents will be able to:
Identify the reasons someone might visit agiven websiteIdentify the reasons someone might create agiven website
PreparationPrint a copy of The Purpose of
Websites - Activity Guide for eachstudent.
LinksHeads Up! Please make a copy ofany documents you plan to sharewith students.
For the Teacher
The Purpose of Websites - Exemplar
For the Students
The Purpose of Websites - Activity Guide
VocabularyWebsite - A collection of interlinked webpages on the World Wide Web
Make a Copy
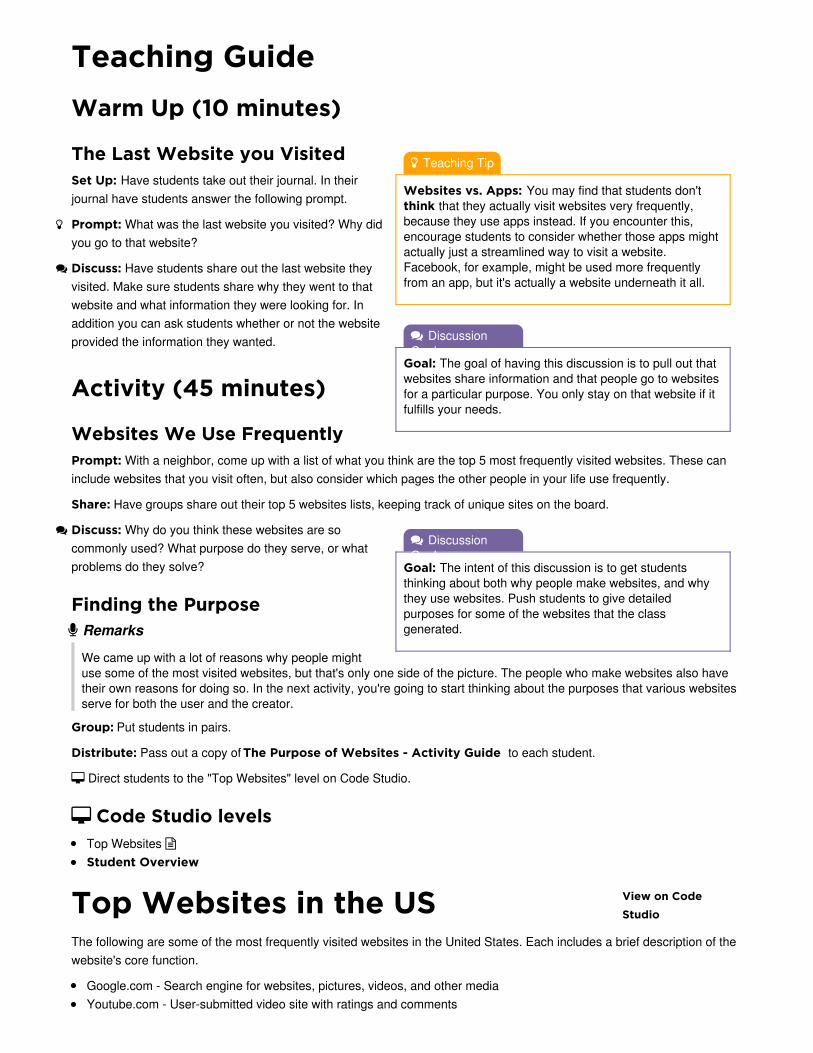
Teaching Tip
Websites vs. Apps: You may find that students don'tthink that they actually visit websites very frequently,because they use apps instead. If you encounter this,encourage students to consider whether those apps mightactually just a streamlined way to visit a website.Facebook, for example, might be used more frequentlyfrom an app, but it's actually a website underneath it all.
View on CodeStudio
DiscussionGoal
Goal: The intent of this discussion is to get studentsthinking about both why people make websites, and whythey use websites. Push students to give detailedpurposes for some of the websites that the classgenerated.
DiscussionGoal
Goal: The goal of having this discussion is to pull out thatwebsites share information and that people go to websitesfor a particular purpose. You only stay on that website if itfulfills your needs.
Teaching GuideWarm Up (10 minutes)
The Last Website you VisitedSet Up: Have students take out their journal. In theirjournal have students answer the following prompt.
Prompt: What was the last website you visited? Why didyou go to that website?
Discuss: Have students share out the last website theyvisited. Make sure students share why they went to thatwebsite and what information they were looking for. Inaddition you can ask students whether or not the websiteprovided the information they wanted.
Activity (45 minutes)
Websites We Use FrequentlyPrompt: With a neighbor, come up with a list of what you think are the top 5 most frequently visited websites. These caninclude websites that you visit often, but also consider which pages the other people in your life use frequently.
Share: Have groups share out their top 5 websites lists, keeping track of unique sites on the board.
Discuss: Why do you think these websites are socommonly used? What purpose do they serve, or whatproblems do they solve?
Finding the Purpose Remarks
We came up with a lot of reasons why people mightuse some of the most visited websites, but that's only one side of the picture. The people who make websites also havetheir own reasons for doing so. In the next activity, you're going to start thinking about the purposes that various websitesserve for both the user and the creator.
Group: Put students in pairs.
Distribute: Pass out a copy of The Purpose of Websites - Activity Guide to each student.
Direct students to the "Top Websites" level on Code Studio.
Code Studio levelsTop Websites Student Overview
Top Websites in the USThe following are some of the most frequently visited websites in the United States. Each includes a brief description of thewebsite's core function.
Google.com - Search engine for websites, pictures, videos, and other mediaYoutube.com - User-submitted video site with ratings and comments

Teaching Tip
The goal of this activity to get students to consider whydifferent websites were created. They don't need tonecessarily get it "right" for each site, but they shoulddemonstrate that they have considered the potentialpurposes that a website might serve for the creator. Ifstudents struggle to identify the purpose a site serves itscreator, consider asking the following prompts:
Does the web site sell goods or services?Do users contribute anything (images, information,reviews) that might be useful to the creator?Does the site include any paid advertising?
Facebook.com - Social media community that allows users to share information with friendsAmazon.com - Online shopping sites for all kinds of goodsYahoo.com - A search engine, email provider, and news sourceWikipedia.org - A free encyclopedia with content generated by users
The Purpose of WebsitesThe Purpose of Websites
Top Websites
This first page of this activity guide asks students toconsider what purposes some of the most visitedwebsites might serve. Using a list of the top ten websitesin the US, student pairs select three sites that interestthem and for each discuss:
Why people might use that site (what purpose does itserve users?)Why the creators might have made that site (whatpurpose does it serve the creators?)
Encourage students to be as detailed as possible whenbrainstorming the purposes of these sites.
Share: Once everyone has had a chance to brainstormabout their sites, give the class a chance to share out their thoughts.
Personal Websites
The second page of this activity guide encourages students to transition from thinking about huge sites that serve theneeds of millions of people, to the much smaller kinds of sites they could create, which can still effectively serve theneeds of a narrower group of users.
Read through the personal website description with the class:
Website Description: Julia wants to become a better home cook, so she started a blog where she can post about therecipes she tries. Each week Julia attempts a new recipe and adds a page about it to her blog. Sometimes the recipes goreally well and her blog readers leave her encouraging comments. Occasionally her recipe attempts don’t go so well, butshe still posts and usually gets some helpful advice from her readers. After starting to blog about the meals she makes,Julia has started to cook more often and is attempting dishes that she never would have tried before.
Discuss: Give students an opportunity to ask questions about this example site. Make sure they understand how a smallsite that is primarily a tool for individual self expression can also be a useful site for other people.
The final questions on the activity guide ask students to come up with potential purposes this website serves both for itscreator and its users.
Share: Ask for volunteers to share the purposes they came up with.
Wrap Up (5 min)
Web Development GoalsJournal: At this point we've just scratched the surface of what websites really are, and we haven't even begun to createwebsites of our own. In your journal, come up with three goals for yourself this unit. These could be related to improving onone of our class practices, learning how to make a specific kind of web site, or creating a site that serves some purpose foryou or others.
Standards AlignmentCSTA K-12 Computer Science Standards

IC - Impacts of Computing
If you are interested in licensing Code.org materials for commercial purposes, contact us.

UNIT
2Ch. 1 1 2 3 4 5 6 7 8 9 Ch. 2 10 11
12 13 14
Lesson 2: Websites for ExpressionUnplugged
OverviewIn this lesson students investigate ways to use websites as a meansof personal expression and develop a list of topics and interests thatthey would want to include on a personal website. To begin the lessonstudents brainstorm different ways that people express and sharetheir interests and ideas. Students then look at a few exemplarwebsites made by students from a previous CS Discoveries course toidentify ways they are expressing their ideas. Finally studentsbrainstorm and share a list of topics and interests they might want toinclude on a personal website which they can reference for ideas asthey progress through the unit.
PurposeThis lesson introduces the central story of Unit 2, namely that webdevelopment, and by extension computer science, is an avenue forself expression. The warm up situates web development as anothermeans of self-expression alongside visual art, dance, music, fashion,social media, and many other ways students are likely alreadyexpressing themselves. Seeing student exemplars helps scopestudents expectations for their skills by the end of the unit. Finally thebrainstorm of content for their website provides students anopportunity to consider what messages they want to express as theybuild their websites.
AgendaWarm Up
Express Yourself
Activity
Personal Website Planning
Wrap Up (5 mins)
ObjectivesStudents will be able to:
Identify websites as a form of personalexpression
PreparationPrepare journals or optionally print copies
of Personal Website Sketch - ActivityGuide
LinksHeads Up! Please make a copy ofany documents you plan to sharewith students.
For the Teacher
Personal Website Sketch - Exemplar
For the Students
Personal Website Sketch - Activity Guide
VocabularyWebsite Content - The raw text, images,and other elements included in a web page
Make a Copy

DiscussionGoal
Goal: This warm-up should generate a list of waysstudents express their ideas. If they need help gettingstarted offer them a couple examples from the list below.The goal of this warm-up is to frame web development asanother form of self-expression in this list.
Draw a picture, write a song, build something, dance,clothing and fashion, write and share something, talkingwith friends, posting something online
Teaching Tip
Use Journals: Theactivity for today'slesson can easily becompleted in studentjournals. Project orotherwise share theprompts and letstudents completetheir work in theirjournals.
Teaching GuideWarm Up
Express YourselfPrompt: What are the ways that you or your friends express yourselves? Think about different ways of communicating,activities, or spaces that you consider a form of self-expression.
Discuss: Students should brainstorm ideasindependently, then share with a neighbor, and finallyshare with the class at large.
Remarks
We share our thoughts, feelings, and ideas in manydifferent ways. Some people might express theirthoughts online, others might do so in the way theydress or by making a song or drawing a picture. Self-expression is a really important part of our lives, and aswe're going to see, making websites is another way wecan express our ideas, interests, and feelings.
Activity
Personal Website Planning Personal Website Planning GuidePersonal Website Planning Guide
Distribute: Have students open a journal or optionallydistribute copies of Personal Website Sketch -Activity Guide
Brainstorm Content: Read through this section of theactivity guide. Then give students several minutes tosilently brainstorm content they might want to include ina personal website.
Share: Have students share their content ideas with aneighbor.
Remarks
When sharing ideas with other people an importantthing to consider isn't just what you want to say, buthow you want to say it. You just created a list of ideasyou might want to share on your personal websites.Let's go look at some personal websites otherstudents have made and think about not only what content they're sharing, but how they are presenting that message.
View Personal Websites: Send students to Code.org and have them look through the exemplar websites in pairs. Usethese websites as inspiration for their own personal websites. They were created in Web Lab by other CS Discoveriesstudents.
Code Studio levels
Lesson Overview Teacher Overview Student Overview

Teaching Tip
Limit Time: Sketching a website can easily grow to takean entire class period if student expectations aren'tscoped. Explain to students that they'll have plenty of timeto refine their designs once they've developed moreprogramming skills. Roughly 10 minutes should be plentyto get a reasonable sketch. Emphasize that their topiclists is much more important at this point but both will beupdated throughout the unit.
Website Sketch: Give students some time to sketchone page from their website. Remind students that theyshould be thinking of ways to effectively share thecontent on that page. Use the student exemplarsstudents looked at to help scope the complexity of webpages they should be considering.
Wrap Up (5 mins)
Share: Give students a chance to share their websitesketches with a neighbor.
Remarks
This unit we'll be working to bring many of your ideas to reality. Along the way you're going to learn some new computerlanguages and explore the way the websites you use are created. The sketches you made or even the content you wantto share might change as we go through the unit, but this goal of using websites for self-expression will be therethroughout.
Collect: If students did not put their website sketches in a journal collect them. They will explicitly be referenced again inLesson 4.
Standards AlignmentCSTA K-12 Computer Science Standards
AP - Algorithms & Programming
IC - Impacts of Computing
If you are interested in licensing Code.org materials for commercial purposes, contact us.
View on CodeStudio
[Personal Website Sketch]
(https://docs.google.com/document/d/10zHN3SErzKQLNEvr8e0j2UVjPCR5oSQdrfoFpbZbJiU/edit?usp=sharing) - Exemplar (PDF | DOCX)
Exemplar Personal Websites Student Overview

UNIT
2Ch. 1 1 2 3 4 5 6 7 8 9 Ch. 2 10 11
12 13 14
Lesson 3: Intro to HTMLWeb Lab
OverviewIn this lesson students are introduced HTML as a solution to theproblem of how to communicate both the content and structure of awebsite to a computer. The lesson begins with a brief unpluggedactivity demonstrating the challenges of effectively communicating thestructure of a web page. Students then look at an exemplar HTMLpage in Web Lab and discuss with their classmates how HTML tagshelp solve this problem. Students then write their first HTML. A wrap-up discussion helps to solidify the understanding of content vs.structure that was developed throughout the lesson.
PurposeThis lesson introduces many new concepts and tools to students.They are introduced to HTML, the Web Lab tool, and how to navigatelesson resources on Code.org in general. While the understanding ofHTML as a way to communicate the structure of a web page is acritical learning objective, this lesson has students do minimalprogramming since there are many other new ideas and tools tograsp. In the next lesson students will have more time to spendprogramming in HTML.
AgendaWarm Up (10 mins)
The Need for HTML
Activity (30 minutes)
Exploring HTML
Wrap Up (5 minutes)
Reflection
ObjectivesStudents will be able to:
Explain that HTML allows a programmer tocommunicate the way content should bestructured on a web pageWrite a simple HTML document that usesopening and closing tags to structure contentUnderstand how to use lesson resourcesprovided in Web Lab
PreparationReview the Code Studio levels
LinksHeads Up! Please make a copy ofany documents you plan to sharewith students.
For the Teacher
Exemplar Text Website
VocabularyHTML - Hypertext Markup Language, alanguage used to create web pagesHTML Element - A piece of a website,marked by an opening tag and often closedwith a closing tagHTML Tag - The special set of charactersthat indicates the start and end of an HTMLelement and that element's typeWebsite Content - The raw text, images,and other elements included in a web pageWebsite Structure - The purpose ofdifferent pieces of content in a web page,used to help the computer determine how thatcontent should be displayed
Introduced Code<p></p>
<html></html>

<head></head>
<!DOCTYPE>
<body></body>

DiscussionGoal
Goal: Activities like this one are often used in CS coursesto help highlight just how much precision is needed tocommunicate instructions to a computer. In this instancethe goal is similar. You want to highlight the challenge ofdifferentiating the actual content on the page andinstructions indicating how it should be structured. Thisdemonstration helps justify the creation of HTML in orderto tag pieces of content to help the computer understandwhat they are and hence how they should look.
Teaching GuideWarm Up (10 mins)
The Need for HTMLDisplay: Show the image inside the Exemplar Text Website
Prompt: Imagine you wanted to explain to a person over the phone how to draw this web page. Write down as clearinstructions so that what they would draw would perfectly match this image.
Discuss: Once students have written their instructionshave them briefly share their instructions with a neighbor.
Demo: Run a quick demo using the instructions below.
Pick one student to verbally share one of theirinstructions with you.The teacher should act as the person on the phonetrying to draw the web pagePublicly “draw” the website exactly as the studentsinstructions say. For example, if told to "Write bigger",write the word "bigger" on the page. If they don'tindicate where text goes then place text in randomlocations.As the student gives you instructions have them tell you if you have drawn it correctly. If you have not drawn it correctly,have them make their directions more specific until you can draw it correctly.Change students after a couple instructions to get more students involved.Keep track of the instructions students give and the improvements they make to the instructions somewhere visible aswell.Repeat this process until you have recreated most of the web page.
Discuss: Once you have finished drawing the site, quickly create a list of all the different kinds of information they neededto account for in their instructions. For example, location, size, font, etc.
Remarks
There's a lot of information that we need to communicate if we want to create web pages. It's not enough to just knowwhat content you want to put on your page, like the actual words or images. You need to know where things should beand how they should look. Today we're going to start learning the languages used on the web to represent this additionalinformation.
Activity (30 minutes)
Exploring HTML Remarks
Today we are going to start working with a lot of resources. As we discover each type of resource, we'll add it to the listhere at the front of the room, and at the end of the lesson we'll review how each is used.
Display: At the front of the room, write the heading "Resources" on the board or blank poster paper, leaving space to listthe various resources as they appear in the lesson.

Teaching Tip
Using Resources: Below you can find recommendationsfor using the many resources students are introduced to inthe lesson. Wait until after students have seen all of theseresources to review at the end of the lesson, but add themto the list and model the correct usage as they appear.
Videos: Watched as a class, but students can alwaysreturn to them.Map Levels: Contain text and diagrams explainingcontent. These are intended as helpful studentresources, not class readings. They are a good place togo for review after learning content or when studentsget stuck in levels.Level Instructions: Instructions may introduce smallpieces of new content. Each level features a "Do This"section explaining what students are supposed to do inthat level. Set the expectation early that reading theseinstructions, not just the "Do This" section, is important.Level Tips: Students can click these tips in theinstruction areas of lessons. Students should use theseas a first place to check for help before talking withpeers or a teacher.Inspector Tool: Highlights the code corresponding toa web page element when hovered over in the PreviewArea.Bubble Color: Bubbles may turn green but there is novalidation of correctness. Green only means a studentclicked Continue or Finish for a level. Set theunderstanding early that this is more a tool for themthan an indication of either completeness orcorrectness.
Code Studio levels
Lesson Overview Student Overview
Experiment with Web Lab 2 (click tabs to see student view)
Video: Intro to Web Lab - Part 1 Student Overview
Explore HTML Teacher Overview Student Overview
DiscussionGoal
Goal: Students answers will vary but will likely centeraround the fact that using tags helps the computer knowwhat different pieces of content "are". Using these tagshelps the computer know what the tags are supposed tolook like. If this discussion needs to be returned to afterstudents have seen more tags that's fine as well. In eithercase use this discussion to motivate the content vs.structure wrap-up point.
Content Corner
Content - Structure - Style: Once students have beenthrough this lesson the definitions provided here shouldhave some context. The content is the literal words thatare being typed on the page. Using HTML students areproviding stucture to the page, explaining how thosepieces of content should be interpreted. Later in the unitstudents will learn CSS, a language that allows them toindividually style elements. For now, however, the stylesbeing applied based on their HTML tags are just thedefault styles of their web browser. Students don't need tofully understand this difference at this point, as it will bemuch clearer once they learn CSS in chapter 2. Thedifference between content and structure, however, will bereturned to many times in this chapter.
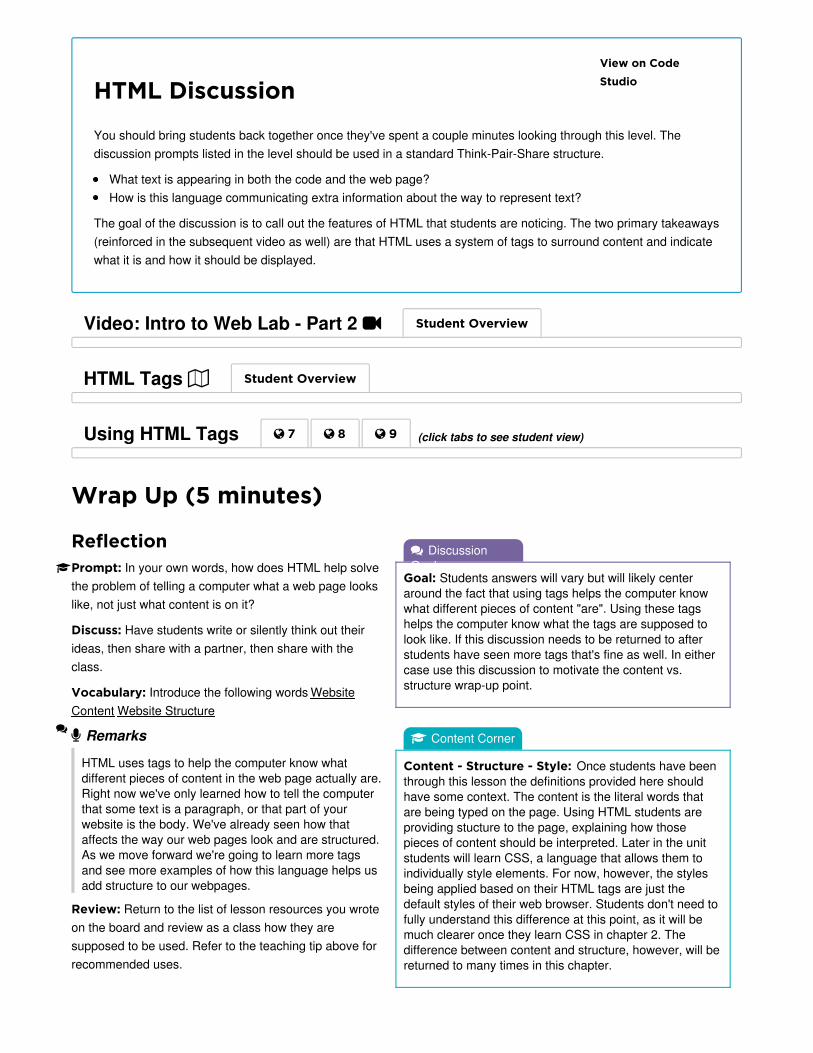
Wrap Up (5 minutes)
ReflectionPrompt: In your own words, how does HTML help solvethe problem of telling a computer what a web page lookslike, not just what content is on it?
Discuss: Have students write or silently think out theirideas, then share with a partner, then share with theclass.
Vocabulary: Introduce the following words WebsiteContent Website Structure
Remarks
HTML uses tags to help the computer know whatdifferent pieces of content in the web page actually are.Right now we've only learned how to tell the computerthat some text is a paragraph, or that part of yourwebsite is the body. We've already seen how thataffects the way our web pages look and are structured.As we move forward we're going to learn more tagsand see more examples of how this language helps usadd structure to our webpages.
Review: Return to the list of lesson resources you wroteon the board and review as a class how they aresupposed to be used. Refer to the teaching tip above forrecommended uses.
View on CodeStudioHTML Discussion
You should bring students back together once they've spent a couple minutes looking through this level. Thediscussion prompts listed in the level should be used in a standard Think-Pair-Share structure.
What text is appearing in both the code and the web page?How is this language communicating extra information about the way to represent text?
The goal of the discussion is to call out the features of HTML that students are noticing. The two primary takeaways(reinforced in the subsequent video as well) are that HTML uses a system of tags to surround content and indicatewhat it is and how it should be displayed.
Video: Intro to Web Lab - Part 2 Student Overview
HTML Tags Student Overview
Using HTML Tags 7 8 9 (click tabs to see student view)

Standards AlignmentCSTA K-12 Computer Science Standards
AP - Algorithms & Programming
If you are interested in licensing Code.org materials for commercial purposes, contact us.

UNIT
2Ch. 1 1 2 3 4 5 6 7 8 9 Ch. 2 10 11
12 13 14
Lesson 4: HeadingsWeb Lab
OverviewIn this lesson, students continue to use HTML to structure text on webpages, this time with headings. Students learn how the differentheading elements are displayed by default and practice using them tocreate page and section titles. Students then start to decide how theywill organize their content on their own personal web pages. In thelast level, students begin the project that they will continue to work onthroughout the unit.
PurposeThis lesson introduces the heading tags that students will use in theirpages for the rest of the unit. It also reinforces the general structure ofHTML (opening tag / content / closing tag) so that students are readyto begin adding their own content in the project.
The personal web page that students work on at the end of the lessonwill follow them throughout the unit. As they learn more HTML andCSS, they will improve the page, adding images, colors, and differentfonts. This lesson is a chance for them to start the page, knowing thatthey will continue to improve it over the next few weeks.
AgendaWarm Up (5 minutes)
Tags Poster
Activity (45 minutes)
Pair ProgrammingWeb Lab: Headings
Wrap Up (5 minutes)
Journal
ObjectivesStudents will be able to:
Use heading tags to change the appearanceof text on a web page.Structure content into headings, subheadings,and paragraphs.
PreparationHave student journals (or project sketches)
ready to give back.If you will not use journals to track HTML
tags, prepare poster paper to do so as awhole class
VocabularyHeading - A title or summary for a documentor section of a document.
Introduced Code<h1></h1>

Teaching Tip
Journal or Poster?Throughout this unit studentswill be keeping track of thetags they learn. This warm updescibes one option forstudents to record the HTMLtags that they learn by writingthem in their journals. If youwish you can keep track of thesame information on a sharedclass poster that you updateafter each lesson. Promptsthroughout the unit will tell youwhen students should update their journals or the classposter.
Teaching Tip
Pair Programming: Pair programming is practiced ineducation and in industry. Students who pair program aremore confident in their abilities and are more likely tocontinue to study computer science. This practice is mosteffective if it is introduced early and the rules for switchingpartners are enforced by the teacher. You can read moreabout Pair Programming in the Computer ScienceDiscoveries Curriculum Guide
DiscussionGoal
Goal: The goal of this discussion is to review the tags thatstudents saw in the previous lesson.
<!DOCTYPE html> - Tells the computer that this is a
document written in HTML<html> - Indicates the beginning of your code written in
HTML<head> - Contains information (sometimes called
"metadata") about your web page<body> - Contains all the main content of your web
page<p> - Defines a paragraph
Teaching GuideWarm Up (5 minutes)
Tags PosterGroup: Put students into groups of three to fourstudents.
Journal: Have students make a T-chart on a blank pagein their journals and label the top "HTML Tags"
Prompt: Yesterday, you learned about HTML, thelanguage of the World Wide Web. HTML uses tags tostructure content on web pages. In your groups, think ofas many tags as you remember and what they do.
Give students a few minutes to think of as many tags asthey can.
Discuss: Groups should discuss with one another andrecord their ideas in their journals (or alternately prepareto share on the shared class poster). Afterwards quicklyshare across the room to make sure all groups havelisted all tags.
Remarks
As we learn more HTML tags, we'll be keeping track ofthem so we'll have a reference as we make our webpages.
Activity (45 minutes)
Pair ProgrammingGroup: students into pairs.
Remarks
We're going to be working on Web Lab again today, butthis time we'll be using pair programming. Pairprogamming helps people make better programs byworking together, but there are some rules we have tofollow to make sure it goes well.
Display: Show the Pair Programming video.
Review: Ensure that students understand the rules forpair programming:
There is only one computer.The driver is the only one to touch thekeyboard/mouse.The navigator should look for problems in the code and keep track of the high-level plan.Both driver and navigator should be communicating constantly.Driver and navigator must switch when the teacher indicates, typically every couple minutes.
Web Lab: Headings

Transition: Have pairs go to Code Studio and both log in using the "Pair Programming" feature.
Prompt: students to switch driver and navigator every three minutes.
Code Studio levels
Wrap Up (5 minutes)
JournalPrompt: Have students update their "HTML Tags" log with the heading tags they learned in this lesson.
Prompt: Have students reflect on their development of the Five Practices of CS Discoveries (Problem Solving,Persistence, Creativity, Collaboration, Communication). Choose one of the following prompts as you deem appropriate.
Choose one of the five practices in which you believe you demonstrated growth in this lesson. Write something you didthat exemplified this practice.
Choose one practice you think you can continue to grow in. What’s one thing you’d like to do better?
Lesson Overview Student Overview
Pair Programming Student Overview
Headings 3 4 5 6 (click tabs to see student view)
View on CodeStudioUpdating the Tags List
This map level recaps the tags that students learned throughout this lesson. Encourage students to use thisresource to update their HTML tags list or poster.
Headings in HTML Teacher Overview Student Overview
View on CodeStudioReview the Problem Solving
ProcessReview the four steps of the Problem Solving Process as a class.
Problem Solving Process for Programming Teacher Overview
Student Overview
Your Personal Website 9 10 (click tabs to see student view)

Choose one practice you thought was especially important for the activity we completed today. What made it soimportant?
Standards AlignmentCSTA K-12 Computer Science Standards
AP - Algorithms & Programming
If you are interested in licensing Code.org materials for commercial purposes, contact us.

UNIT
2Ch. 1 1 2 3 4 5 6 7 8 9 Ch. 2 10 11
12 13 14
Lesson 5: Digital FootprintUnplugged
OverviewAs students have recently spent some time thinking about the actualcontent that will go into their personal website, this lesson takes astep back from the unit-long project (publication of a personalwebsite) to help students articulate what personal information theychoose to share digitally and with whom. It also reinforces the notionthat much of the information that they choose to share digitally fallslargely out of their control the moment it is released.
Students begin by individually identifying appropriate audiences withwhom they would be comfortable sharing given pieces of personalinformation. They then look at several social media pages todetermine what sorts of information people are sharing aboutthemselves or one another. Last, students reflect on what guidelinesthey think are appropriate for posting information online.
The ultimate point of this lesson is not to scare students, but rather toexperientially bring students to realizing precisely what level of controlthey don’t have in releasing information into the web.
PurposeNow that students are beginning to share information publicly, it'scrucial that we instill in them an understanding of the potentialconsequences of sharing personal information online.
The first activity engages students in considering specific pieces ofpersonal information and the audiences with whom they would orwould not want that information to remain private. The goal of thisactivity is for students to understand that for any given piece ofpersonal information if there is any audience they would like tomaintain privacy with they should consider not posting thatinformation online.
In a follow up activity students look through several example socialmedia profiles for fake students. Individually these pages containrelatively innocuous information, but when students cross referenceinformation across multiple profiles they see how a detailed picture (ordigital footprint) can start to form. Through this activity students seethat even information that they may not see as private on its own canshare more information than intended when combined with othersmall details.
AgendaWarm Up (10 min)
ObjectivesStudents will be able to:
Understand and explain reasons that it isdifficult to control who sees informationpublished online.Understand and justify guidelines for safelypublishing information online.
PreparationPrint out copies of When Does Your
Privacy Matter? - Activity Guide for eachstudent
Print out copies of Social Sleuth -Activity Guide for each student (or one foreach group if grouping)
LinksHeads Up! Please make a copy ofany documents you plan to sharewith students.
For the Teacher
Social Sleuth - ExemplarWhen Does Your Privacy Matter? -Exemplar
For the Students
When Does Your Privacy Matter? -Activity Guide
Social Sleuth - Activity Guide
VocabularyDigital Footprint - The collectedinformation about an individual acrossmultiple websites on the Internet.
Make a Copy
Make a Copy

Your Digital Footprint
Activity (30-40 min)
How Much Do You Care About Privacy?Investigating Social Profiles
Wrap Up (5 minutes)
Shaping Your Digital Footprint

DiscussionGoal
Goal: This discussion is not about coming up with acomprehensive list of personal information students mayhave shared with websites, nor is it to frighten them out ofsharing information. The goal is for students to startthinking more critically about when and where they shareinformation about themselves.
This will prime them for the main activity of the day, lookingat specific pieces of information and audiences to considerwhen their privacy matters, and whether they areunknowingly giving up their privacy.
DiscussionGoal
In the pair discussion on the Activity Guide, the goal is notto focus on what the actual private information is (like whohappens to be “the favorite teacher” or the “secret crush”of a student), but rather about identifying commonalitiesand differences in what students deem appropriate toshare with different audiences.
Students may be tempted to think about specificexamples that they would or would not be comfortablewith others knowing, but you want to push them towardsthinking more generally of the types of information andaudiences presented.
Teaching GuideWarm Up (10 min)
Your Digital FootprintPrompt: Ask the students to consider what websitesthey have given personal information to. In small groups,ask students to come up with a list of websites that theyhave accounts on (even if they use sign in withFacebook, Google, or similar).
Discuss: Have students silently brainstorm or journal,then share with a partner, and finally share as a full class.Create a comprehensive list of all of the websites thatmay have their personal information.
Discuss: Ask the class about what kind of informationthey think these websites might have about them. Youcan frame it from a few different angles:
What information do you know you've given to a website (eg. your email address)What information might you have unknowingly given to a website (eg. a picture with your home address)What information might other people have shared about you without your knowledge or permission (eg. tagging you onFacebook)
Activity (30-40 min)
How Much Do You Care About Privacy?Distribute: When Does Your Privacy Matter? - Activity Guide
When Does Your Privacy Matter?When Does Your Privacy Matter?
Step 1: Individually, have students complete the grid on the front side of the activity guide. Encourage them to thinkcritically about the consequences of each audience having access to each piece of personal information. What mightseem like an innocuous piece of information might have far reaching consequences depending on who has access to it.
Step 2: Once students have completed the privacy grid,have them come together into pairs or small groups.They should look for cells in each grid where theirpartner marked a different answer than they did anddiscuss their choices. Encourage students to respectfullydebate when they disagree on an issue. While there areno right or wrong answers here, it's useful for students tohear how others may have considered consequences(both positive and negative) that they didn't think of.
Step 3: After the small group discussion, studentsshould complete the reflection questions on the nextpage of the activity guide.
Prompt: Were there any places on the grid where yourdiscussion with your partner changed your perspective? If so, what were they?
Discuss: Have students share places where they changed their mind. Focus particularly on blind spots, assumptions, ormisconceptions that students had about access to their personal information that may have been revealed throughdiscussion with a partner.
Investigating Social ProfilesGoal: Explore how small pieces of personal information spread across multiple sites on the Internet can produce a fairlydetailed picture of a person, known as a digital footprint.
Group: This activity can be done individually, but is better when students are in groups of 2-3
Distribute: Social Sleuth - Activity Guide
Transition: Send students to Code Studio.
Code Studio levels
View on CodeStudio
When Does Your Privacy Matter? - Activity Guide Exemplar (PDF | DOCX)Social Sleuth - Activity Guide Exemplar (PDF | DOCX)
Lesson Overview Teacher Overview Student Overview
Social Sleuth_2018 Teacher Overview Student Overview

DiscussionGoal
Goal: Use this discussion to create a lasting checklist ofbest practices for when publishing information online.Possible checks include:
Could someone identify me with this information?: forexample name, address, phone number, etc.Do I want everyone to see this?: Don't publish anythingyou don't want to possibly be published to the world.Do I want this to be permanent?: You lose control ofinformation once it's published and it could be aroundfor your entire life.
Students' lists may be different but should cover theseprinciples and additional ones they saw in today's lesson.
Wrap Up (5 minutes)
Goal: Develop a common understanding of how ourchoices to publish information online contribute to adigital footprint.
Shaping Your Digital Footprint Remarks
The activities today focused on how social mediawebsites contribute to a digital footprint. As we prepareto publish our first web pages, you'll need to think abouthow those contribute to your digital footprint.
Prompt: With your elbow partner, come up with achecklist that you can use to determine what should, andshouldn't, be posted online.
View on CodeStudio
Social Sleuth
Step 1: Students look through all of the provided social media pages on Code Studio. Thepages represent several unique individuals, each of whom has an account on three social media platforms. Theyare distributed as follows (do not share this with students):
FaceSpace Chirpr instantframe
John Thomas John T @johnsnow johnsnow
Haley Gutierrez Haley G @flyinghail desertrider
Lizzie Dell Lizzie Dell @lillizard photolizzie
Tip:
Students are asked to choose two users from the available profiles, but if you are short on time, you can ask students to complete just one of the footprints.
Step 2: Once they've looked through the pages, students will attempt to figure out who the two users are andanswer some detailed questions about them. The footprint questions are designed to push students towardscombining details from multiple social platforms and understanding that together the profiles represent moredetailed information than the users probably intend to reveal about themselves. Some questions may not beanswerable for all users, or may have different levels of details (full street address for one user, but only a city andstate for another).
Share: Have the class share the digital footprints that they developed through the activity.
Discuss:
Which information was most difficult to find?Which details were innocuous on their own, but revealed private information when combined with other details?How does this make you think differently about what you choose to post online?

Share: Allow groups to share out their checklists, using the responses to develop a class-wide web publishing checklist.Consider making a poster of your class-wide checklist that you can refer back to throughout the unit.
Standards AlignmentCSTA K-12 Computer Science Standards
IC - Impacts of Computing
NI - Networks & the Internet
If you are interested in licensing Code.org materials for commercial purposes, contact us.

UNIT
2Ch. 1 1 2 3 4 5 6 7 8 9 Ch. 2 10 11
12 13 14
Lesson 6: ListsWeb Lab
OverviewStudents are introduced to ordered and unordered lists in HTML andwork through a few levels in which they use the <ul>, <ol>, and <li>tags. They then go back to their project, where they add a new HTMLpage. Inside the new page, they write the HTML to display a recipe,top ten list, or any other content that uses the new tags that they havelearned.
PurposeThis lesson introduces list elements, which are different from theprevious elements in that they involve nested tags. Students shouldunderstand that the list item elements (<li></li>) go inside the listelements (<ul></ul> or <ol></ol>).
Students also continue to work on their projects, adding a new HTMLpage. Students are free to choose the content of this page, but itshould include some type of list. Right now there is no way for usersto navigate from one project page to another, but students will learnmore about how to link the pages together in Lesson 9, right beforethey publish their project.
AgendaWarm Up (10 minutes)
Quick Share
Activity (40 minutes)
Web Lab: Lists
Wrap Up (10 minutes)
Journal
ObjectivesStudents will be able to:
Use the <ol>, <ul>, and <li> tags to createordered and unordered lists in an HTML page.Create and name a new HTML page.
PreparationHave student journals (or project sketches)
ready if they will use them to generate ideasfor their lists page.
Introduced Code<ul></ul>
<ol></ol>
<li></li>
DiscussionGoal
Goal: The goal of this discussion is to allow studentssome time to think about how lists are used, and to thinkabout the difference between ordered and unordered listsbefore seeing them in HTML. Some possible lists studentsmight come up with might be lists of their favorite things,top 10 lists, a shopping list, etc.
When students are discussing whether lists should beordered or unordered use examples to highlight thedifference. For example a list of finishers in a race shouldprobably be ordered, while a grocery list probably does notneed to be. Return to this discussion later in the lesson ifneed be.
Teaching Tip
Pair Programming: More on Pair Programming can befound in the Computer Science DiscoveriesCurriculum Guide.
Teaching GuideWarm Up (10 minutes)
Quick Share Remarks
In the last lesson, we looked at different types of content that we would or would not want to share with the world. Todayyou'll create an entirely new page for your project, and you'll need to think about the content of that page, but you'll alsobe using a new structure: lists.
Prompt: Take a few minutes to brainstorm some content that you would like to share with the world that you think could bestructured as a list.
Discuss: Students should brainstorm individually, thenshare with partners, then finally share with the wholeclass.
Prompt: Sometimes we use numbers to order our lists.Which of these lists do you think should be numbered,and which should not be numbered?
Discuss: Allow students to share their ideas for whennumbering is appropriate.
Remarks
In HTML, there are two types of lists, ordered lists,which have numbers, and unordered lists, which havebullets. We're going to learn how to make both types oflists today so that you can use this structure in yourproject.
Activity (40 minutes)
Web Lab: ListsGroup: Place students into pairs.
Circulate: Helps students as they work through the firstset of levels. Keep track of when pairs make it to Level 5.
Code Studio levels
Lesson Overview Student Overview
Lists 2 3 4 5 (click tabs to see student view)
Lists in HTML Teacher Overview Student Overview

Wrap Up (10 minutes)
JournalPrompt: Have students update the "HTML Tags" page in their journals with the tags they learned in this lesson.
Prompt: Have students reflect on their development of the five practices of CS Discoveries (Problem Solving,Persistence, Creativity, Collaboration, Communication). Choose one of the following prompts as you deem appropriate.
Choose one of the five practices in which you believe you demonstrated growth in this lesson. Write something you didthat exemplified this practice.
Choose one practice you think you can continue to grow in. What’s one thing you’d like to do better?
Choose one practice you thought was especially important for the activity we completed today. What made it soimportant?
Standards AlignmentCSTA K-12 Computer Science Standards
AP - Algorithms & Programming
If you are interested in licensing Code.org materials for commercial purposes, contact us.
View on CodeStudioReview
Bring the class back together after all students have completed the previous level. You can track their progress inyour Teacher Panel for that level. Review what students have learned about lists in the level progression. Theprevious level provides an opportunity to review both types of lists and how some common errors can affect howthe list is displayed. Students can also use this time to update their HTML tag lists with <ul> , <ol> , and <li> .
Expanding Your Website 7 (click tabs to see student view)
Expanding Personal Website 8 (click tabs to see student view)

UNIT
2Ch. 1 1 2 3 4 5 6 7 8 9 Ch. 2 10 11
12 13 14
Lesson 7: Intellectual Property and ImagesUnplugged | Web Lab
OverviewStarting with an discussion of their personal opinions on how othersshould be allowed to use their work, the class explores the purposeand role of copyright for both creators and users of creative content.They then move on to an activity exploring the various CreativeCommons licenses as a solution to the difficulty in dealing withcopyright.
Finally, with a common understanding of the restrictions of variousCreative Commons licenses, students learn how to add images totheir web pages using the <img> tag.
PurposeUntil this point the only content that students have used on their webpages is their own, but it's common, and quite useful, to be able tointegrate information and media created by others. Before learningabout the technical ways to do this, however, we need to step backand gain a common understanding of the restrictions and purpose ofcopyright. We use the Creative Commons license as a cleareralternative to the more restrictive standard copyright and guidestudents through searching for, using, and properly citing CreativeCommons licensed media.
AgendaWarm Up (10 min)
Use of Your Work
Activity 1 (20 min)
The Creative Commons Solution
Activity 2 (20 min)
Adding Images
Wrap Up (5 min)
Your Own CC License
ObjectivesStudents will be able to:
Explain the purpose of copyright.Identify the rights and restrictions granted byvarious Creative Commons licensesAdd an image to a web page
PreparationPreview Creative Commons Overview
- Video. You may need to download itbefore school if Youtube is blocked.
LinksHeads Up! Please make a copy ofany documents you plan to sharewith students.
For the Teacher
Licensing Your Work - Exemplar
For the Students
Creative Commons Overview - VideoLicensing Your Work - Activity Guide
VocabularyCitation - A quotation from or reference to abook, paper, or author, especially in ascholarly work.Copyright - the exclusive legal right to print,publish, perform, film, or record literary,artistic, or musical material, and to authorizeothers to do the sameCreative Commons - A collection of publiccopyright licenses that enable the freedistribution of an otherwise copyrighted work,used when an author wants to give people theright to share, use, and build upon a work thatthey have createdIntellectual Property - A work or inventionthat is the result of creativity, such as a piece
Make a Copy

of writing or a design, to which one has rightsand for which one may apply for a patent,copyright, trademark, etc.
Introduced Code<img />

Teaching Tip
These prompts aim to relate broader questions ofcopyright to students' own experiences creating andsharing content online. To make this hit close to home youmay want to change the prompts to pick particular forms ofsocial media that students are interested in. If you knowstudents don't use a lot of social media, then alter theprompt to reflect another area where your students mightthink their own creative work was used inappropriately.
Teaching GuideWarm Up (10 min)
Use of Your Work Remarks
All of you have been working hard to create a new website that you're going to publish to the world. When you publishsomething, though, it can be hard to control what other people do with it. Sometimes people use our work in ways thatdon't seem fair to us. I'm going to describe a few situations for you. If you think what happened was fair, stand up. If youthink it was unfair, sit down.
1. You take an awesome picture and someone puts it ontheir social media account and with your name besideit.
2. You write a story and someone else publishes it andsays that they wrote it.
3. You write a song and someone sings it to her friends.4. You write a song and someone sings it at a concert
and makes a lot of money.5. You take a picture and someone else Photoshops it
and puts the new version on his web site.
Remarks
It's okay if not everyone agrees how they want their work to be used. Copyright law says that whoever creates newcontent, such as a picture, a story, or a song, gets to decide how other people are allowed to use it.
Prompt: What rules would you make for people who want to use your creative work?
Discuss: Have students journal individually, then share with a neighbor, and finally discuss as a whole class.
Activity 1 (20 min)
The Creative Commons Solution Remarks
Copyright is granted the moment something is created, so unless explicitly told otherwise, we have to assume anypicture, video, or other media we find online is fully covered by copyright law, which means that no one else can makecopies or post it online without permission.
Sometimes, though, we want people to share our work so that more people can see it. The Creative Commons (CC)license was developed to help content creators have more specific control over how other people can use their work.
Group: Pair students.
Distribute: Give each student a copy of Licensing Your Work - Activity Guide
Licensing Your WorkLicensing Your Work
License Components
The first portion of this activity guide covers the components of a Creative Commons license. Push students to thinkcritically here about both the value each component adds to the creator, but also the ways it might limit the culturalexchange of ideas, connecting the components of the license to the scenarios that they considered earlier in the class.
Choosing the Right License
The second portion of this activity provides students with four CC licenses and two content creator scenarios. For eachscenario, students are asked to evaluate which of the four provided licenses is the least restrictive but still addresses

Teaching Tip
Is it Derivative?: Students may struggle with whetherthe use of a work is derivative or not. The rule of thumb isto consider whether your use of a licensed work would beconsidered a new copyrightable work.
Converting an image from digital to print, or a song fromCD to mp3 would not create a derivative work, butanimating a drawing or adding new lyrics to a songwould be creating derivative works.
DiscussionGoal
Goal: While there may not be a specific "right" license foreach of these scenarios, encourage students to alwaysconsider whether the license they chose is more restrictivethan it strictly needs to be. One of the design goals of theCreative Commons license is to increase the amount ofcreative material available to the general public, promotingthe sharing of intellectual property for the common good.With this in mind we should only be adding the minimalrestrictions needed to meet the content creator's wishes.
the concerns and needs of the content creator.
Discuss: Ask several students to share out theirresponses to the Choosing the Right Licensescenarios. Encourage discussion and debate if studentsidentified different licenses for the same scenarios.
Activity 2 (20 min)
Adding ImagesTransition: Send students to Code Studio, where theywill learn about the <img> tag and have an opportunity to
add images to the pages they've already created.
Code Studio levels
Lesson Overview Student Overview
Images in HTML Student Overview
Adding Images 3 4 5 (click tabs to see student view)
View on CodeStudioRecommended Search Engines
Because we can't know which sites might be blocked in your district, we've avoided pointing students to a specificsearch engine. Not all search engines make it easy to set Creative Commons filters - some of the easiest include:
Creative Commons SearchGoogle Image Advanced SearchWikimedia CommonsFlickr Creative Commons
As with any site with crowdsourced content, search engine results will change from day to day, and some of thoseresults may be inappropriate for the classroom. You may want to check these sites shortly before displaying themto the class, and decide what is best for your classroom.
Creative Commons Search Teacher Overview Student Overview
Attribution 7 8 (click tabs to see student view)

Wrap Up (5 min)
Your Own CC LicenseJournal: Have students update their "HTML Tags" list with the tags they learned in this lesson.
Journal: Think of all the personally created items that you've put on your website so far, and those that you may add in thefuture. Without a clear license all of those of things (and your web pages themselves) and covered under the fully restrictivecopyright. Which Creative Commons license would you rather use (if any) and why?
If there is time you may want to consider having students return to their site and add the Creative Commons license theydecided they would like their website to have.
Check out the Creative Commons license chooser
Students can add a footer at the bottom of each page with their Creative Commons License.
Standards AlignmentCSTA K-12 Computer Science Standards
AP - Algorithms & Programming
IC - Impacts of Computing
If you are interested in licensing Code.org materials for commercial purposes, contact us.

UNIT
2Ch. 1 1 2 3 4 5 6 7 8 9 Ch. 2 10 11
12 13 14
Lesson 8: Clean Code and DebuggingWeb Lab
OverviewStudents deal with common issues that arise when designing webpages in HTML. Students will correct errors in a sequence ofincreasingly complex web pages. In the process they will learn theimportance of comments, whitespace, and indentation as tools formaking web pages easier to read. At the end of the lesson studentscreate a list of strategies for debugging web pages and ensuring theyare easy to read and maintain.
PurposeBugs in HTML are more forgiving than programming languages suchas JavaScript (the language used in Unit 3). However debugging is anexplicit problem solving process that students will use repeatedlywhen working with any language on the computer. When problemsolving there are different strategies that a computer scientist can useto find the source of the issue.
In addition to the strategies to fix bugs once they have occurred thereare certain styles of writing HTML code that help prevent bugs ormake it easier to find bugs. The three main style conventions used arecomment, whitespace, and indentation. To motivate students toconsider using these conventions in the future, the debugging levelsdemonstrate that it is easier to debug a program that is written withthese style conventions.
AgendaWarm Up (10 minutes)
Previous Experience with Bugs
Activity (35 minutes)
Web Lab: Smash Those Bugs!
Wrap Up (10 minutes)
Coding Style Conventions
ObjectivesStudents will be able to:
Describe why using whitespace, indentation,and comments makes your code easier tomaintain.Develop a set of techniques for preventingbugs in HTML code and finding them whenthey occur
PreparationPrepare poster paper, sticky notes, and
markers
VocabularyBug - Part of a program that does not workcorrectly.Comment - A note in the source code of acomputer program that helps explain the codeto people who read itDebugging - Finding and fixing problems inan algorithm or program.Indentation - The placement of text fartherto the right or left of the surrounding text,making it easier to understand the program'sstructureWhitespace - Any character that shows upas a blank space on the screen, such as aspace, a tab, or a new line; helps separatedifferent parts of the document to make iteasier to read
Introduced Code<!-- -->

DiscussionGoal
Goal: Students do not need to get all the bugs or thestrategies in this first discussion. They will add to this listthroughout class.
Bugs students might share could include:
Closing and opening tag switchedNot closing a tagNot putting quotes around attributes valuesSpelling a tag name wrongNot putting a list item inside a type of list elementUsing the wrong header tagWrong file path for an imageForgetting the equals sign between attribute name andvalueClosing tags out of orderNot putting content inside a tag
Strategies students might share for debugging couldinclude:
Guess and CheckTaking out sections to see which section is causingproblemsLooking for missing tagsFiguring out what section of the code has the problem(Making the problem smaller)Asking a friend for helpThinking about when the code last worked and whatyou have added since then
Teaching Tip
Using the Bugs Poster: Encourage students to use thisbugs poster as a resource through the rest of the unit.Whenever a student successfully squashes a new bug,have them put it on the poster. When students are getstuck, they can check the bug poster for someone whomay have encountered the same issue before.
Use Journals: If you like you can have sutdentsindividually track their bugs on a new page in theirjournals, just like the "HTML Tags" page that they havebeen updating.
Teaching GuideWarm Up (10 minutes)
Previous Experience with BugsSet up: Put an poster up on the wall where all studentscan get to it. Write the title "Class Bugs" at the top butwait to explain the meaning of the term until it isintroduced below.
Group: Place students in groups of 3-4.
Distribute: Give each group a handful of sticky notes
Prompt: With your group:
Come up with at least three specific problems youhave encountered while trying to write web pages inHTML.What project were you working on?How did you ultimately track down and fix theproblem?
Discuss: Have students share out the bugs they havefaced and strategies they have used for finding them.
Vocabulary: Introduce the concept of bug anddebugging explaining them in the context of the problemsand strategies students shared.
Share: Ask each group to use the sticky notes they weregiven to write down at least three of the bugs they'veencountered and how they solved them, using one stickyper bug. Each sticky should have:
1. A brief description of the bug2. Steps taken to solve it3. Name of student who solved it
Once groups have written down their bugs, have themstick them up on the class poster.
Remarks
The problems you had when your HTML code did notwork correctly are bugs. The process of fixing bugs andstrategies used to fix them is called debugging. Todaywe're going to be working on our debugging skills andlearning some strategies to keep our code clean to helpavoid them.
Activity (35 minutes)
Web Lab: Smash Those Bugs!Group: Put students in pairs to work on these Code Studio levels.

DiscussionGoal
Goal: Students answers will vary but should hopefullyinclude the following:
Number of bugsUse of comments (text between the characters <!-- and
--> )
Separating things onto separate lines (whitespace)Grouping together things that are one idea such as a list(whitespace)Indenting elements that are inside other elements
If students don't mention some of these things ask them tocompare two sites that have different uses of theseelements.
Setting Expectations: Use this discussion to motivatethe need for making readable code. Highlight that you willexpect them to follow the norms they learned today fromnow onwards, in particular on their projects for this unit.
Code Studio levels
Wrap Up (10 minutes)
Coding Style ConventionsPrompt: What made it harder or easier to debug the webpages?
Discuss: Have students share out things that made iteasier or harder to debug the web pages they encounter.
Remarks
Code needs to be useful for both people andcomputers. Code that your computer can run might stillbe really hard for someone (or even you!) to read andmake changes to. From now on it's important that weuse these practices to ensure our code is easy to readfor people, not just good enough for a computer to use.
Standards AlignmentCSTA K-12 Computer Science Standards
AP - Algorithms & Programming
If you are interested in licensing Code.org materials for commercial purposes, contact us.
Lesson Overview Student Overview
Debugging 2 3 4 5 6 (click tabs to see student view)
Formatting HTML Student Overview
Challenge 8 (click tabs to see student view)

UNIT
2Ch. 1 1 2 3 4 5 6 7 8 9 Ch. 2 10 11
12 13 14
Lesson 9: Project - Multi-Page WebsitesWeb Lab | Project
OverviewAfter learning about how to link web pages to one another, studentsare finally able to publish the website they have been working on. Inthis lesson, they link together all the previous pages they have createdinto one project, create a new page, and add navigation between thepages before publishing the entire site to the Web.
PurposeIn several of the previous lessons, students created web pages thatwill be included in their websites. In this lesson, they will learn to linkall of these pages together and publish them to the Internet.
AgendaWarm Up (15 minutes)
Content Brainstorm
Activity
Multi-Page WebsitesPeer Review
Wrap Up (10 minutes)
Journal: Personal Website
ObjectivesStudents will be able to:
Connect multiple web pages into one websiteusing hyperlinks.
LinksHeads Up! Please make a copy ofany documents you plan to sharewith students.
For the Teacher
Personal Website - Exemplar
For the Students
Personal Website - Project Guide
Personal Website - Peer Review
Personal Website - Rubric
VocabularyHyperlink - A link from a HTML file toanother location or file, typically activated byclicking on a highlighted word or image on thescreen.
Introduced Code<a></a>
Make a Copy
Make a Copy
Make a Copy

View on CodeStudio
View on CodeStudio
What are hyperlinks?
View on CodeStudio
What are hyperlinks?**How do I add a hyperlink?**
A web site should include more than one
View on CodeStudio
View on CodeStudio
Teaching Tip
Adding Multiple Pages: Students who decide to addmore than one web page will need extra paper to completetheir sketches. Alternatively, you may choose to havestudents complete their sketches and image tables in theirjournals.
Teaching GuideWarm Up (15 minutes)
Content Brainstorm Remarks
In this lesson, you'll be publishing your website to the Internet so that anyone with the address can see it. Before you dothat, though, you're going to have a chance to add anything that you think might be missing from your site.
Prompt: What are some things you want on your site that you haven't had a chance to add yet?
Give students a few minutes to brainstorm some ideas, then allow them to share with the class.
Remarks
In a moment, you'll be able to create new pages using any of these ideas. Before we do, though, we need to make surethat our users will be able to get to all of the pages on our sites. To do that, we'll need to use a hyperlink.
Activity
Multi-Page WebsitesDistribute the Personal Website - Project Guideand review the first page as a class.
Circulate: Support students as they complete the firsttwo pages of the Project Guide. When students arefinished designing their pages, have them transition toCode Studio.
Code Studio levelsLesson Overview Teacher OverviewStudent Overview
Personal Website - Project Guide Exemplar (PDF | DOCX)Personal Website - Peer Review Exemplar (PDF | DOCX)
Hyperlinks Student Overview
Levels 3 4
Student Instructions
Making a Multi-page SiteStudent Instructions
Do This

**How do I add a hyperlink?**
Create aNavigation BarHere's your project from before. You'll belinking the two pages by creating anavigation bar at the top of the page.Websites usually have the same navigationbar across all of their pages so you can getback and forth between things on the site.You can see an example of a navigationbar on this page
web page, and they should connect toeach other. Here's an example of a projectwith multiple pages that are connected byhyperlinks (the blue underlined words thattake you to another page when you clickon them).
Do ThisUse the inspector tool to see the codethat creates the hyperlinks on the top ofindex.html.Discuss with your partner how you thinkthat code works.Click on recipe.html in the files list onthe left hand side. Add a hyperlink tothe top of this page that will take youback to index.html. View on Code
Studio
View on CodeStudio
In your homepage(index.html),add twohyperlinks at thetop of the page,one to your listspage, and oneto the home page.Even though it might seem strange to link a page to itself, it's less confusing if the navigation bar isexactly the same on every page.Copy the code for the navigation bar, then add it to the top of your lists page.Test your links in the preview area by clicking on them.
Project Guide Teacher OverviewStudent Overview
Planning CheckpointCheck over student plans before allowing them to continue on the rest of the levels.
Your Personal WebsiteIn the next few levels, you'll be completing and publishing your personal website.
You've already done a lot of work on your website, but this is your chance to get creative and add a new page of somethingthat you care about.
Here are some ideas for your new page, but you can do anything approved by your teacher.
A movie, television, or book reviewDescription of a favorite holiday traditionA "cause" page that explains an issue that is important to you
If you have more than one idea, you can add multiple pages to your site.
Your Project Guide will help you remember everything you need to do. Make sure you have your teacher's approval beforemoving to the next level.
Examples

View on CodeStudio
View on CodeStudio
View on CodeStudio
View on CodeStudio
Levels 6 7 8 9 10 11
Student Instructions
Create and Name Your New PageBefore you start coding, you should make sure that you have all the pages that you need in your project.
Do ThisCreate a new HTML page and rename it. (Look at Lesson 6 Level 8 if you've forgotten how.)Repeat this process for any other pages you want to add.
Student Instructions
Upload ImagesNext, you'll need to upload all of your images into your project.
Do ThisDownload all the images you want onto your computer. Visit Lesson 7 Level 5 for help if you need it.Make sure you have the right to use these images.Write down all of the attribution information that you need.Upload all of the images into your project. Visit Lesson 7 Level 5 if you've forgotten how.
Student Instructions
Add HTMLNext, you should add the HTML to your pages.
Do ThisFor each of the new pages that you've created, add HTML to make the page you sketched in your project guide.You may also add more HTML to the pages you've already created.
Student Instructions
Navigation Bar and FooterEach of your pages needs a navigation bar and a footer.
Do This

View on CodeStudio
View on CodeStudio
DiscussionGoal
Goal: Students should reflect on the process so far andkeep track of the fact that this is an iterative process wherethey are constantly improving things as they go.
For each page, make sure it has a navigation bar that links to other pages in your site. For a review of the navigation bar,go to Lesson 9 Level 4.For each page, make sure it has a footer at the bottom that explains the copyright information for your page. (Go toCreative Commons for help in creating this HTML.)
Student Instructions
Review Your ProjectYou're almost ready to publish your project, but you should check one more time that you have fulfilled all the requirementsfor this project.
Do ThisCheck that you are comfortable sharing all the information that's on your site.Check that all of your images are correctly attributed, and that you have the right to put them on your site.Check that your project includes everything included in the project rubric.Use comments and whitespace to make your website readable.Ask your partner to help you find any potential problems with your site.
Student Instructions
Share Your ProjectIt's time to share your project with the world!
Do ThisClick the button at the top of this page.
Copy the URL it gives you, and email it to the people you want to see your page.
Peer ReviewGroup: Place students in pairs.
Distribute: Personal Website - Peer Review
Support: Help students as they complete the Peer Review Guide, then allow students to make any final revisions to theirwebsites.
Collect: Project Guides, Peer Review Guides, and student website addresses.
Wrap Up (10 minutes)
Journal: Personal WebsitePrompt: After the first day of pulling together yourpersonal website reflect on your experience.
How did you use the problem solving process to increating your site?What do you like about your site so far?What do you still want to know how to do?
View on CodeStudio
Send students to Code Studio to complete their reflection on their attitudes toward computer science. Although theiranswers are anonymous, the aggregated data will be available to you once at least five students have completed thesurvey.
Code Studio levelsLevels 12
Student InstructionsDiscuss: Have students share out the things they still want to learn how to do.
Keep this list and cross it off as they learn more things in the unit.
Journal: Have students add the new tags they learned to the "HTML Tags" section of their journal.
Standards AlignmentCSTA K-12 Computer Science Standards
AP - Algorithms & Programming
IC - Impacts of Computing
If you are interested in licensing Code.org materials for commercial purposes, contact us.

UNIT
2Ch. 1 1 2 3 4 5 6 7 8 9 Ch. 2 10 11
12 13 14
Lesson 10: Styling Text with CSSWeb Lab
OverviewThis lesson introduces CSS as a way to style elements on the page.Students learn the basic syntax for CSS rule-sets and then exploreproperties that impact HTML text elements. They work on a HTMLpage about Guinness World Record holders, adding their own style tothe provided page. In the last level, students apply what they havelearned about styles for text elements to their personal web page.
PurposeWhile there are many CSS properties, the properties highlighted inthe levels are simple properties that can style text elements. Studentswill use these properties often. More properties are covered insubsequent lessons.
AgendaWarm Up (5 minutes)
Journal: HTML Appearance
Activity (40 minutes)
Web Lab: Introduction to CSS
Wrap Up (10 minutes)
Recording CSS Properties
ObjectivesStudents will be able to:
Use CSS selectors to style HTML textelements.Create and link to an external style sheet.Explain the differences between HTML andCSS in both use and syntax.
PreparationCreate a new poster titled CSS Properties
if your students will not be tracking new CSSproperties in their journals
VocabularyCSS - Cascading Style Sheets; a languageused to describe how HTML elements shouldbe styledCSS Selector - the part of a CSS rule-setthat defines which HTML elements the styleshould be applied to
Introduced Codetext-decoration: value
text-align: value
font-size: value
font-family: value
color: value

DiscussionGoal
Goal: Students may mention that the <h1> tag has largefont, or that the <li> tag puts a number or bullet before thetext. Some other options that they may not consider arethat all the text appears in black, and uses the same font.None of the text is underlined or bolded. Prompt studentsto realize that there are other possible styles that they seeon web pages that it not the default appearance whenHTML is used.
Teaching GuideWarm Up (5 minutes)
Journal: HTML AppearancePrompt: In the past few lessons, we've been usingHTML to write our web pages. HTML lets us use tags todefine the structure of a page. With your partner, comeup with a list of all the different HTML tags as you canrecall, and what they mean.
Discuss: Choose one of the tags that describes text onthe screen ( <p> , <li> , <h1> , etc.) and have the students
describe how the contents of that tag appear on a webpage. Ask students whether they would always wantthose elements to appear in that exact way. For example,<p> always means that the content is a paragraph, but should paragraphs always look the same on every page and on
every site?
Remarks
So far we have only made web pages where we control the content and structure, such as which parts of the pages areheaders, lists, or paragraphs. We've been using HTML as the language to specify the content and structure of the pages.While HTML allows us some control over how the page looks, but doesn't give developers much control over the specificthe look and style of each element. To do that, we need a language to express style. Web developers use CSS to specifythe style of a page. We use different languages for structure and style because it makes it easier to differentiate betweenthe code for style and the code for structure.
Activity (40 minutes)
Web Lab: Introduction to CSSTransition: Send students to Code Studio.
Code Studio levels
Lesson Overview Student Overview
View on CodeStudio
Have students explore this level with a partner. Afterwards lead a short share out so thatpartners can share with the class their responses to the three questions in the instructions.The subsequent video should help reinforce what students discovered so there's no need to lead a lengthy debriefconversation.
Exploration: Adding Style Teacher Overview Student Overview
Video: Intro to CSS_2018 Student Overview
Styling Text 4 5 (click tabs to see student view)

Wrap Up (10 minutes)
Recording CSS PropertiesReview: Briefly review the "Content-Structure-Style" paradigm introduced in the map level during the lesson. Aim todistinguish between how HTML indicates the structure of a document and CSS now allows students to set the styles.
View on CodeStudioIntroducing Content-Structure-
StyleThis map level, and in particular the first section, introduce the Content-Structure-Style paradigm that students willuse to help understand the differences between HTML and CSS. While they have previously been using HTML tagsto label and categorize their content, they're now learning how to control the style of the different elements in theirpage using CSS. Students may have some misconceptions at this point since their browser has used default stylesfor their different kinds of content (e.g. <h1> tags by default make text larger). As they move through these lessons
they should come to see that tagging content really just allows the browser's default styles, or the styles they defineusing CSS, to be applied to the correct pieces of content in their web pages.
CSS and Style Sheets Teacher Overview Student Overview
Fonts and Style 7 8 9 10 (click tabs to see student view)
View on CodeStudioDifferences in Browsers and
Operating SystemsAs mentioned in this map, you may find that different combinations of computers and browsers render fontsdifferently. While there is a common specification for how HTML and CSS should be read and displayed on thescreen, each browser does so in a slightly different way, which can lead to the same page looking different ondifferent computers. If your students encounter this, you can reassure them that it's a common challenge that webdevelopers face.
In the case of font-family: fantasy , you can actually specify a list of fonts, from most to least specific. That way, if a
user's computer has the exact font you specified, that's what they'll see, but if not the browser will try the next fonton your list. To try and ensure that users see the font in the example image, you could write the css as font-family:
Papyrus, fantasy . That way, even if a user's browser has a different default font for "fantasy", it will try to load the
specific font "Papyrus" first.
CSS Text Properties Teacher Overview Student Overview
Video: Intro to CSS Part 2_2018 Student Overview
Styling your Website 13 14 (click tabs to see student view)

Teaching Tip
Journal or Poster? Just as with the "HTML Tags" pagein their journals, you may choose to have your class keeptrack of CSS Properties in a shared class poster.
Set Up: Have students create a new T-chart in theirjournals called CSS Properties where students can easilyget to it.
Group: Place students in groups of two to five - you'llneed at least one group for each of the propertiesintroduced in this lesson.
Jigsaw: Assign each group one of the properties introduced today. Each group needs to come up with the a descriptionand example for their property.
Share: Have groups add their properties to their journals or to the class "CSS Properties" poster.
Standards AlignmentCSTA K-12 Computer Science Standards
AP - Algorithms & Programming
If you are interested in licensing Code.org materials for commercial purposes, contact us.

UNIT
2Ch. 1 1 2 3 4 5 6 7 8 9 Ch. 2 10 11
12 13 14
Lesson 11: Styling Elements with CSSWeb Lab
OverviewThis lesson continues the introduction to CSS style properties, thistime focusing more on non-text elements. Students begin this lessonby looking at a website about Desserts of the World. They investigateand modify the new CSS styles on this website, adding their ownstyles to the page. After working on the Desserts page, studentsapply their knowledge of new CSS properties to do more styling oftheir personal websites.
PurposeThis lesson builds on what students previously learned about CSSproperties, this time looking at properties that can be used allelements. These new properties impact the visual look of the webpage beyond its text and give students more precise control over thelayout of their pages. As students expand their knowledge of styleproperties, many may have questions about how they can do evenmore with CSS. Curious students can explore more properties at W3Schools .
AgendaWarm Up (5 minutes)
Discuss: What Styles Do You Want?
Activity (40 minutes)
Web Lab: Styling Elements with CSS
Wrap Up (5 minutes)
ObjectivesStudents will be able to:
Use CSS properties to change the size,position, and borders of elements.Create a CSS rule-set for the body elementthat impacts all elements on the page.
Introduced Codewidth: value
margin: value
height: value
border-width: value
border-style: value
border-color: value
background-color: value
float: value

Teaching Tip
Pair Programming: Consider using pair programming forsome or all of this lesson, in particular as students arelearning new CSS properties.
DiscussionGoal
Goal: Students will likely bring up:
Adding background colors to thingsBeing able to move things around on the page (center,left, right)Being able to add borders to thingsBeing able to control the size of objects
Teaching GuideWarm Up (5 minutes)
Discuss: What Styles Do You Want?Prompt: Yesterday we styled text elements. What other ways do you wish you could style your page?
Discuss: Have students share styles they would like tobe able to add their page.
Remarks
Today we are going to learn more properties we canuse to style our web pages. Hopefully some of themallow you to add some of the styles we listed in thisdiscussion.
Activity (40 minutes)
Web Lab: Styling Elements withCSSTransition: Send students to Code Studio.
Code Studio levels
Wrap Up (5 minutes)
Journal: Have students add the new properties they learned to the CSS Properties page in their journal or the class poster.
Prompt: Have students reflect on their development of the five practices of CS Discoveries (Problem Solving,Persistence, Creativity, Collaboration, Communication). Choose one of the following prompts as you deem appropriate.
Lesson Overview Student Overview
Exploring more CSS 2 3 (click tabs to see student view)
The Body Element Student Overview
Layout with CSS 5 6 7 8 9 10 (click tabs to see student view)
Layout Properties Student Overview
Styling your Website 12 (click tabs to see student view)

Choose one of the five practices in which you believe you demonstrated growth in this lesson. Write something you didthat exemplified this practice.
Choose one practice you think you can continue to grow in. What’s one thing you’d like to do better?
Choose one practice you thought was especially important for the activity we completed today. What made it soimportant?
Standards AlignmentCSTA K-12 Computer Science Standards
AP - Algorithms & Programming
If you are interested in licensing Code.org materials for commercial purposes, contact us.

UNIT
2Ch. 1 1 2 3 4 5 6 7 8 9 Ch. 2 10 11
12 13 14
Lesson 12: Sources and Search EnginesOverviewThis lesson encourages students to think more critically about howweb searches work and how to find relevant and trustworthyinformation online. After viewing and discussion a video about howsearch engines work, students will search for information aboutseveral unlikely animals. They'll need to analyze the sites they find forreliability in order to identify which of the animals is actually a hoax.
PurposeStudents use search engines all the time. They take for granted howhard it is to produce search engine results in seconds. In order to givethem a deeper understanding of the algorithms that control modernsearch, students will develop their own algorithms.
This lesson connects back to Unit 1, which is explicitly called out inthe Wrap Up. This a problem that humans and computers solvedifferently. In fact it's a problem that computers solve better thanhumans, as a human would take too much time to search throughhuge amounts of data. Humans, however, still have a major role toplay in searching effectively, as computers are unable to reliably tellus which websites contain trustworthy information and which arescams. Through this lesson, students will collaboratively create aclass checklist that they can use to vet websites they come across forrelevance and trustworthiness.
AgendaWarm Up (10 minutes)
Internet Scavenger Hunt
Activity (30 minutes)
Relevant and Trustworthy SitesThe Trustworthiness Checklist
Wrap Up (5 minutes)
Human versus Computer Searching
ObjectivesStudents will be able to:
Use basic web searching techniques to findrelevant information onlineIdentify elements that contribute to a website'strustworthiness or untrustworthiness
PreparationPrint a copy of Internet Scavenger Hunt
- Activity Guide for each pair of students.Print a copy of Strange Yet True
Animals - Activity Guide for each pair ofstudents.
Create a blank poster titledTrustworthiness Checklist and place it onthe wall.
LinksHeads Up! Please make a copy ofany documents you plan to sharewith students.
For the Teacher
Strange Yet True Animals - Key
For the Students
How Search Works - Video (download)Internet Scavenger Hunt - Activity Guide
Strange Yet True Animals - Activity Guide
VocabularyAlgorithm - A precise sequence ofinstructions for processes that can beexecuted by a computerRelevant - Closely connected or appropriateto the matter at handSearch Engine - A program that searches forand identifies items in a database thatcorrespond to keywords or charactersspecified by the user, used especially for
Make a Copy
Make a Copy

finding particular sites on the World WideWeb.Trustworthy - Able to be relied on as honestor truthful

DiscussionGoal
Goal: The first three prompt questions are intended tohelp students identify any searching techniques that theycurrently use. If students don't have clear strategies, youmay want to spend some time discussion basic searchtechniques. Keep track of search strategies on the boardfor reference later.
The last question gets to the focus of the activities in thislesson. It's likely that students didn't consider whether ornot their information was accurate, but if they do come upwith some ideas, make sure that you track them in a placewhere they can be referred to later in the lesson.
Teaching Tip
The purpose of this exercise is not to trick the students,but rather to give them an opportunity to explore whichaspects of websites can help users to evaluate theirtrustworthiness. If students have completed similaractivities before, encourage them to use what they havelearned to complete the activity to more depth, explainingin more detail how they can decide whether a website istrustworthy.
Teaching GuideWarm Up (10 minutes)
Internet Scavenger HuntGroup: Place students in pairs.
Distribute: Each group will need a copy of Internet Scavenger Hunt - Activity Guide
Transition: Send students to the computers to prepare for the scavenger hunt.
Remarks
When I start the clock you will have exactly 7 minutesto complete as much of this scavenger hunt as youcan. Your goal isn't to answer every question on thislist, but to find as much accurate information aspossible in the time you've been given.
Prompt:
Which things were hardest to find?Which were easiest to find?What strategies did you use to find things online?How did you know the information you found wascorrect?
Discuss: Student pairs share out what they were able todiscover about the scavenger hunt and what strategies worked well for finding information.
Activity (30 minutes)
Relevant and Trustworthy SitesDisplay: Watch the How Search Works - Video with the class.
Remarks
Now that we know a little bit more about how search engines work, we're going to search for some information aboutsome of the world's strangest animals.
Group: Place students in pairs.
Distribute: Give each pair one copy of Strange Yet True Animals - Activity Guide
Unlikely AnimalsUnlikely Animals
Search: Give student pairs some time to search onlineand fill in the table on the activity guide. They shouldhave little difficulty finding this information by justsearching for the names of each animal.
Share: Ask student pairs to share out their answers foreach of animals. If, during any point in the share out,others in the class disagree with an answer encouragethem to discuss where and how they found theirinformation.
Vocab: It's likely that students found websites that wererelevant to their topics, but how do we know if they are trustworthy?

Teaching Tip
Students may come upon sites that explain that thepacific northwest tree octopus is in fact a fictional animal.If so, you can ask them to think about why they believesome sites over others, and how they are sure that theother two animals are real. Have them continue filling outthe worksheet with these questions in mind, and let themknow that they will be able to share their thoughts later inthe activity.
You can find more untrustworthy websites in this forumpost.
Teaching Tip
Just in Case: The Pacific Northwest Tree Octopus is thefake animal.
Teaching Tip
Prompting Conversation: If your students arestruggling to come up with ideas, consider prompting themwith any of the following:
What does the web address of a trustworthy oruntrustworthy site look like?Is a well designed site more likely to be trustworthy, oruntrustworthy?Would you expect a trustworthy site to have easilyfound contact information?Can you learn anything from the kinds of ads that a sitedisplays?
Remarks
You did a great job finding websites that were relevant to your search. You found a lot of interesting information aboutthose strange animals, but is any of it real? You and your partner have five minutes to decide which of these animalsare real, and which are made up. For each of yourdecisions you'll need some supporting evidence thatshows why your source websites are eithertrustworthy, or untrustworthy.
Search: Give students five more minutes to lookthrough their source sites to try to figure out whether ornot they're trustworthy.
Share: Allow each pair to share out their assessment oftrustworthy and untrustworthy sites. Push students togive detailed reasons for why they trust a site or not, andkeep track of them on the board. Once all of the pairshave had a chance to share, reveal the that the TreeOctopus was the only fake animal. Depending on howaccurate your students were, consider visiting the siteas a class to explore some of the clues that it's not quite
The Trustworthiness ChecklistSet Up: Start a poster on the wall labeledTrustworthiness Checklist.
Group: Place students in groups of 4-5.
Prompt: Now that we've identified some sites that are,and are not, trustworthy, work with your group to comeup with a list of things to check for when trying todetermine whether or not to believe a website.
Share: Have groups share out their lists. As a class,generate a class Trustworthiness Checklist on a poster.You can refer back to this in the future whenever askingstudents to find information online.
Wrap Up (5 minutes)
Human versus Computer SearchingJournal: Think about your own websites - do you think people would find your site trustworthy or untrustworthy? Whatchanges could you make to your site to encourage users to trust your content?
Standards AlignmentCSTA K-12 Computer Science Standards
IC - Impacts of Computing
If you are interested in licensing Code.org materials for commercial purposes, contact us.

UNIT
2Ch. 1 1 2 3 4 5 6 7 8 9 Ch. 2 10 11
12 13 14
Lesson 13: RGB Colors and ClassesWeb Lab
OverviewIn this lesson, students first learn how to specify custom colors usingtheir RGB (red, green, blue) values. They then apply these colors to anew Four Seasons web page, which uses CSS classes. CSS classesallow web developers to treat groups of elements they want styleddifferently than other elements of the same type. Using classes,students add more styles to the Four Seasons web page, then usethem to style their personal websites.
PurposeUp until this point, the only styling students have been able to do isstyling by element, which means that every element of a particularkind has the same style. Classes allow for web developers to grouptogether a set of elements they want to style. This means studentscan single out a certain element they want to style or group togetherelements from one or more types of elements. Once elements are in aclass, the class can be used as a selector in a style rule.
Note: Single elements can also be selected by id, but this type ofselection is possible with a class applied only to that single element.Because id selection does not add any extra functionality, it is nottaught in this course.
AgendaWarm Up (5 minutes)
RGB Colors Matching
Activity (40 minutes)
RGB and Classes
Wrap Up (5 minutes)
Journal: Reflecting on the Practices
ObjectivesStudents will be able to:
Group elements using classes in order tocreate more specific styles on their website.Apply the rgb() color function to add customcolors to their website
PreparationPrint a copy of RGB Colors - Activity
Guide for every student.
LinksHeads Up! Please make a copy ofany documents you plan to sharewith students.
For the Teacher
RGB Colors - Key
For the Students
RGB Colors - Activity Guide
VocabularyCSS Class - An identifier that allows multipleelements in an HTML document to be styledin the same way
Introduced Codergb(red, green, blue)
Make a Copy

Teaching GuideWarm Up (5 minutes)
RGB Colors Matching Remarks
So far, you've been using color names to choose colors for your web pages. That means that you can only use the colorsthat someone else has already thought of. Today, you're going to learn how to mix new colors for your pages.
Distribute: Hand out the RGB Colors - Activity Guide .
Transtion: Send students to Code Studio to use the RGB widget at the beginning of this progression to complete theactivity guide. You may want to answer one question together, then allow students to work in pairs to complete the firstactivity.
Remarks
On the computer screen, we mix colors by combining red, green, and blue. In the next few levels, you'll have a chance touse the color mixer to choose your own colors, then put them into a web page.
Activity (40 minutes)
RGB and ClassesTransition: Once students have completed the warm up, allow them to continue working through the remaining levels.
Code Studio levels
Wrap Up (5 minutes)
Journal: Reflecting on the PracticesJournal: Have students update their "CSS Properties" page in their journal with the new information they've learned aboutclasses.
View on CodeStudio
RGB Colors - Activity Guide Key (PDF | DOCX)
Lesson Overview Teacher Overview Student Overview
RGB Widget Student Overview
RGB Exploration 3 4 5 6 (click tabs to see student view)
CSS Classes Student Overview
Styling with Classes 8 9 10 11 (click tabs to see student view)

Journal: Have students reflect on their development of the five practices of CS Discoveries (Problem Solving, Persistence,Creativity, Collaboration, Communication). Choose one practice you thought was especially important for the activity wecompleted today. What made it so important?
Standards AlignmentCSTA K-12 Computer Science Standards
AP - Algorithms & Programming
If you are interested in licensing Code.org materials for commercial purposes, contact us.

UNIT
2Ch. 1 1 2 3 4 5 6 7 8 9 Ch. 2 10 11
12 13 14
Lesson 14: Project - Personal PortfolioWebsiteWeb Lab | Project
OverviewStudents have spent a lot of time throughout the unit working on theirPersonal Website. In the final couple of days students finalize theirwebsites. They work with peers to get feedback, put the finishingtouches on the websites, review the rubric and reflect on theirprocess. To cap off the unit, they will share their projects and also aoverview of the process they took to get to that final design.
PurposeThis project emphasizes many of the core practices of this course.Students will need creativity, problem solving skills, and persistenceto complete their websites. This final section of the project requiresthose practices as well as collaboration and communication. Peerreview will encourage students to leverage their peers as resources.The final reflection and presentation allow students to practicecommunication about their work.
AgendaDay 1
Define: Rubric ReviewPlan: Finishing Personal WebsiteTry: Finalize Personal Website
Day 2
Reflect: Peer ReviewPlan and Try: Final TouchesReflect: Final Reflection
Day 3
Showcase Set UpStudent Website Showcase
ObjectivesStudents will be able to:
Apply CSS styles across an entire websiteExplain the design choices they made on theirwebsite to other peoplePrioritize and implement incrementalimprovements
PreparationFigure out a way to showcase all the
students projects and get as many users aspossible to check them out
Plan out the day breakdown based on yourclass schedule
Print a copy of Final Personal Website -Peer Review for each student.
Print a copy of Final Personal Website -Project Guide for each student.
Print a copy of Final Personal Website -Rubric for each student.
LinksHeads Up! Please make a copy ofany documents you plan to sharewith students.
For the Teacher
Final Personal Website - Peer ReviewExemplarFinal Personal Website - Project GuideExemplar
For the Students
Final Personal Website - Peer Review
Final Personal Website - Project Guide
Final Personal Website - Rubric
Make a Copy
Make a Copy
Make a Copy
View on CodeStudio
View on CodeStudioView on Code
Studio
Teaching GuideDay 1
Define: Rubric Review Remarks
Over the course of the whole unit you have been developing a personal website. Over the next couple of classes you willbe creating a final version of that project. As we prepare to showcase your work, we will use the problem solving processas our guide to ensure we have the best quality product possible.
The first step of the problem solving process is to define the problem. To help define our problem we need to understandthe expectations of the final product. The rubric for your Personal Website will help us. Let's go over it before starting.
Distribute: Give each student a copy of Final Personal Website - Project Guide .
Discuss: As a class, review the rubric portion of the Project Guide and clarify any questions students have.
Plan: Finishing Personal Website Remarks
Next you will begin the planning stage of the problem solving process. Keep in mind you have limited time to completethis project so you will need to prioritize the work you need to.
Students should use Final Personal Website - Project Guide to plan out the work they will do to finish their PersonalWebsite.
Try: Finalize Personal Website Remarks
Now that you all have plans, it is time to begin implementing your plan. We will be doing a peer review as a class. Youshould work to make a polished product to share during the peer review.
Transition: Students log onto Code Studio and begin finalizing their websites.
Code Studio levelsLesson Overview Teacher OverviewStudent Overview
View on Code Studio to access answer key(s)
Final Personal Website Student Overview
Personal WebsiteThis is it! You have been working on your Personal Website for the whole unit. Put the finishing touches on it and submit itto your teacher! Remember to use the problem solving process as your guide in preparing your final product.
Do ThisDefine: Read the rubric so you know what is expectedPlan: Decide what you still need to work on and put those things in priority orderTry: Implement your improvements to your personal website.

View on Code
Reflect: Get feedback from a classmate and decide what of that feedback to act on.
Don't forget to take a screenshot of your home page and save it somewhere on your computer so you can find it later(Need help with how to screenshot? Check out this website .)
Day 2
Remarks
You should now have a polished product you are proud of. An important part of any major project is to get feedback frompeople not working on that project with you. They may bring some perspective you might have missed. We will spendtoday giving and getting feedback. Then you will reflect on how to put this feedback into action.
Reflect: Peer ReviewDistribute: One copy of Final Personal Website - Peer Review to each student.
Group: Pair students up.
Peer Review ProcessPeer Review Process
Students will:
Open up their website projects in Web Lab.Fill in the top part of the worksheet, identifying what they would like feedback on.Trade places with their partner so their partner is now looking at their sheet and website.Give feedback on partners work.Switch back to their sheet and website to review feedback.Make a plan for implementing some of the feedback.
Plan and Try: Final Touches Transition:Students return to Code Studio and make any improvements that were identified in the peer review session.If they did not get any suggestions from the peer review, the teacher may want to give them some suggestions.
Students should also review the rubric as a final way to check their work.
Reflect: Final ReflectionSetup: Students will need their journals and all of their screenshots of the progress on their home page. You may wantprinted versions if you are going to display them during the showcase.
Prompts:
I am most proud of the following aspect(s) of my personal website:The biggest challenge that I overcame so far in making my personal website:Improvements I still want to make to my website are:If I knew at the beginning of this project what I know now, I would have started it differently by doing this:I would describe the level of effort I’ve invested into this project as:
Send students to Code Studio to complete their reflection on their attitudes toward computer science. Although theiranswers are anonymous, the aggregated data will be available to you once at least five students have completed thesurvey.
Code Studio levelsLevels 3
Student Instructions

StudioDay 3
Showcase Set UpSetup: Students need:
A computer to display the website.A way to display their website progression screenshots
Student Website ShowcaseStudents should stand next to their computers and talk to people attending the showcase about their work. If you can't getothers to come visit your room for this activity, you can split the class in half and have one half present while the otherscirculate. Then they can switch.
Standards AlignmentCSTA K-12 Computer Science Standards
AP - Algorithms & Programming
If you are interested in licensing Code.org materials for commercial purposes, contact us.