Ceramic Figure Sculpture - University of Florida College ... · Male Head in Terra Cotta, and...
29
Ceramic Figure Sculpture Art 2704C, Section 2313 Instructor: Ariel Bowman UF Ceramics, School of Art + Art History Fall 2017: Tuesday and Thursday/ Periods 8-10, Meeting from 3:00 pm-6:00 pm in FAC B-14 Office: FAC B-12, Hours: Thursdays 1:00 pm – 2:00 pm E-mail: [email protected] Credit Hours - 03 Course Syllabus Acknowledgement By signing this form and continuing participation in this course you acknowledge that you have read and understand the policies contained in the course syllabus. In addition, you agree that you have read and understand attendance requirements and grading policies, and are aware of the ‘Guidelines for use of University Facilities and Grounds for Making and Exhibiting Design’ (A copy of these guidelines is posted in the School of Art + Art History Office.) Name: (print) _________________________________________________________________________ Signature: ____________________________________________________________________________ Email: _______________________________________________________________________________ Student Information Phone Number________________________Health Concerns___________________________________ College, Year______________________________________Major______________________________________ Reason for taking this course? Favorite artist? Prior experiences with ceramics?
Transcript of Ceramic Figure Sculpture - University of Florida College ... · Male Head in Terra Cotta, and...
Ceramic Figure Sculpture Art 2704C, Section 2313
Instructor: Ariel Bowman UF Ceramics, School of Art + Art History Fall 2017: Tuesday and Thursday/ Periods 8-10, Meeting from 3:00 pm-6:00 pm in FAC B-14 Office: FAC B-12, Hours: Thursdays 1:00 pm – 2:00 pm E-mail: [email protected] Credit Hours - 03
Course Syllabus Acknowledgement
By signing this form and continuing participation in this course you acknowledge that you have read and understand the policies contained in the course syllabus. In addition, you agree that you have read and understand attendance requirements and grading policies, and are aware of the ‘Guidelines for use of University Facilities and Grounds for Making and Exhibiting Design’ (A copy of these guidelines is posted in the School of Art + Art History Office.) Name: (print) _________________________________________________________________________ Signature: ____________________________________________________________________________ Email: _______________________________________________________________________________ Student Information Phone Number________________________Health Concerns___________________________________ College, Year______________________________________Major______________________________________ Reason for taking this course? Favorite artist? Prior experiences with ceramics?
Ceramic Figure Sculpture Art 2704C
Instructor: Ariel Bowman UF Ceramics, School of Art + Art History Fall 2017: Tuesday and Thursday/ Periods 8-10, Meeting from 3:00 pm-6:00 pm in FAC B-14 Office: FAC B-12, Hours: Thursdays 1:00 pm -2:00 pm E-mail: [email protected] Credit Hours - 03 IMPORTANT: It is expected that you read, Welcome to UF Ceramics, for an orientation to the UF Ceramics studios.
I will send this as a separate PDF file through the class list serve.
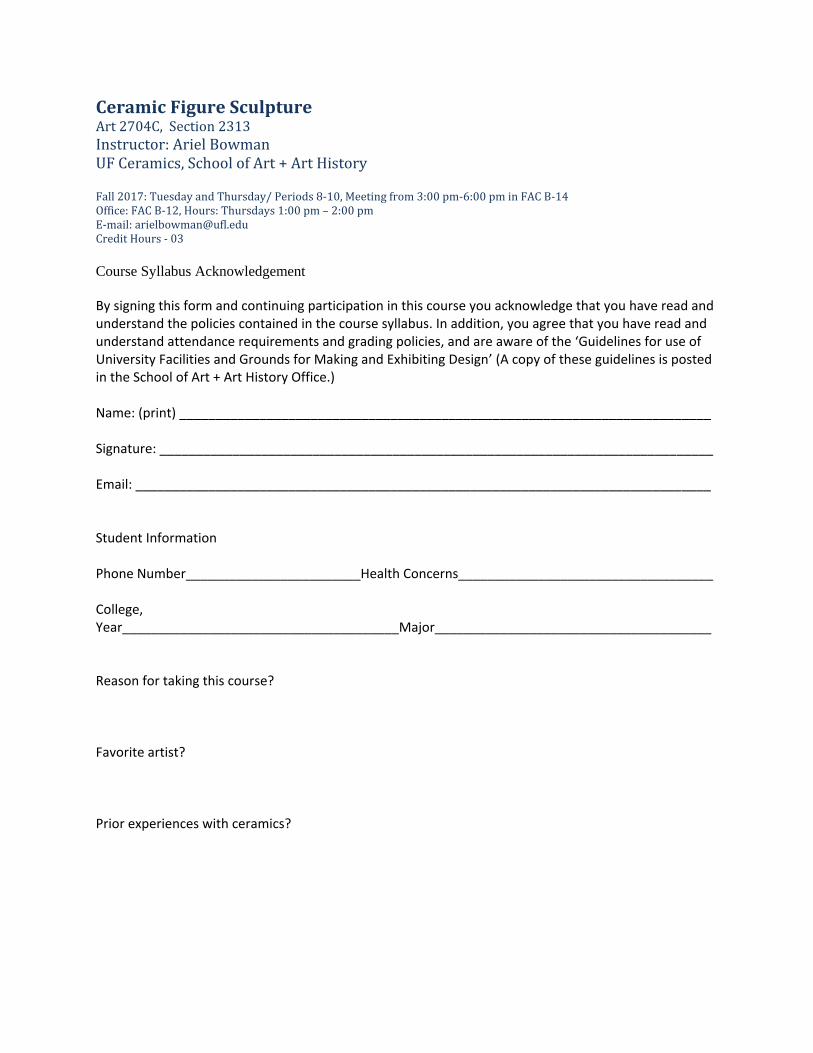
Syllabus Course Description: This course is a perceptually based introduction to figure sculpture using fired clay as the medium. The class will study the human form through life modeling with options for its representation in three dimensions. An orientation to building, surfacing, and firing ceramics and processes of hand-forming clay including: pinching, coil-building, slab building, modeling, and carving will be introduced. The class format will include PowerPoint image and video presentations, two life model sequences, demonstrations, critiques, and team firings. The course focuses on three themes: the “perceptual”, the “gestural”, and the “interpretive”. Group “lab work;” loading, firing, and unloading class kiln firings is required and integrated into the structure of the course. Course Goals: 1. The course is designed to teach ceramic figure sculpting techniques including the fundamentals of modeling, carving, coil, pinch, and slab building. 2. Students will be taught technical skills including: the forming techniques (listed above), glaze application and firing techniques for ceramic sculpture. 3. Students will enhance their perceptual skills through modeling from a life model and from life casts. 4. The course will provide experiences with contemporary concepts in ceramic figure sculpture. 5. The course presents opportunities to analyze, discuss and critique ceramic figure sculpture and the concepts being conveyed through this genre.
Textbooks:
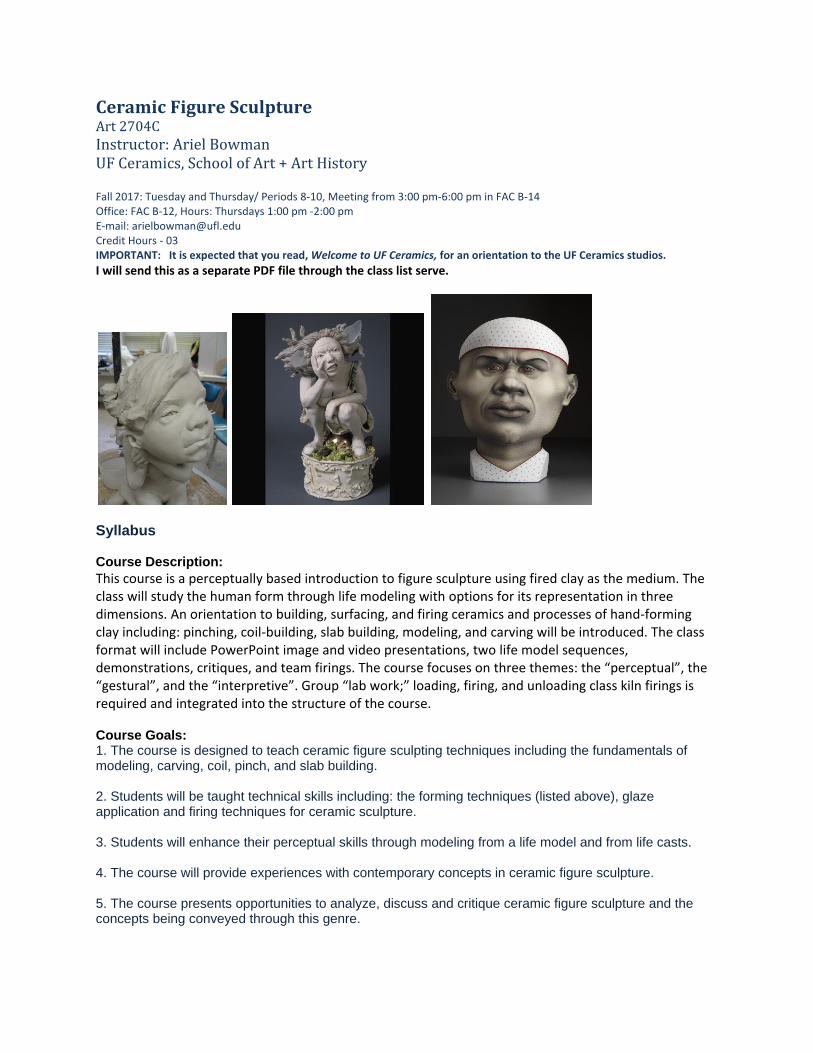
(1) Portrait Sculpting: Anatomy and Expressions in Clay (Required) ig Author: Philippe and Charisse Farault, Publisher: PCF Studios, Inc., 2004, Edition: 1, ISBN: 0975506501. New Retail Price: $54.95 Used Retail Price: $41.25. Available at the UF Bookstore. Note: The UF Bookstore had problems with the publisher since PCF is a private studio and the sole publisher for this book. If you do not find the book at Fowlett’s please order the book on-line from PCF Studios. (2) Anatomy for Sculptors, (Highly Recommended)
Author Uldis Zarins with Sandis Kondrats Anatomy for Sculptors, Understanding the Human Figure is available at www.anatomy4sculptors.com and Amazon (US), $95.00
(3) Anatomy for the Artist, (Recommended/Optional)
Author Sarah Simblet, Publisher: DK Publishing, Edition: Copyright, ISBN: 9780789480453 . New
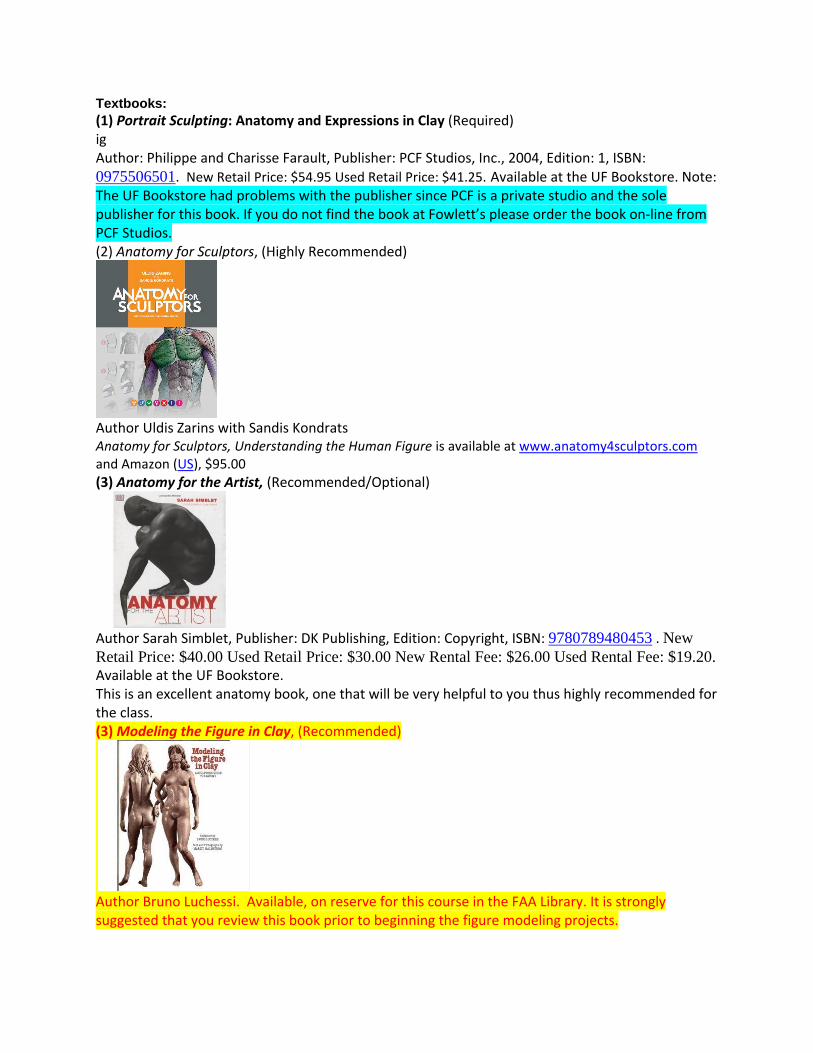
Retail Price: $40.00 Used Retail Price: $30.00 New Rental Fee: $26.00 Used Rental Fee: $19.20. Available at the UF Bookstore. This is an excellent anatomy book, one that will be very helpful to you thus highly recommended for the class. (3) Modeling the Figure in Clay, (Recommended)
Author Bruno Luchessi. Available, on reserve for this course in the FAA Library. It is strongly suggested that you review this book prior to beginning the figure modeling projects.

Visible Body Human Anatomy Atlas for Mac or PC ($25): http://www.visiblebody.com/download_overview/ Pocket Anatomy for iPhone and iPad ($15; students may check out an iPad at AFA for one week at a time and install their own software for the duration of the loan): https://itunes.apple.com/us/app/pocket-body-musculoskeletal/id388633565?mt=8 Required reading: Chapter 5 of Make it in Clay,
Authors: Toki and Speight. This chapter presents an overview of construction techniques applicable to your projects. This book will be placed on room reserve in the FAA Library. Additional resources on ceramic techniques: The following books have been placed on room reserve under the course number in the Fine Art and Architecture Library. The Craft and Art of Clay, Author Susan Peterson; an excellent text for information for building and glaze techniques). Hands in Clay, Author Charlotte Speight; an excellent text for information for building and glaze techniques. Ceramic Figures: A Directory of Artists, author Michael Flynn, Rutgers Press is an excellent overview of international contemporary ceramic sculptors who work with the human figure. Modeling the Head in Clay, by Bruno Lucchesi DVDs – Two videos will be used as informational resources in the classroom: Sculpting the Portrait: Male Head in Terra Cotta, and Sculpting the Reclining Figure. Both films document the methods used by sculptor Bruno Lucchesi. Online:
http://www.posespace.com Site offers 360 degree images of models in a vast array of poses. You can sign up for free. Periodicals – American Ceramics, Ceramics Art and Perception, Sculpture, Ceramics Monthly, Studio Potter, Ceramics: Technical. All of the following magazines have very interesting ideas and information pertaining to sculpture. Online visual resources- www.ArtAxis.org, Access Ceramics: http://accessceramics.org/index.php?state=result_set&field=artist&field_id=21, Ceramic Database: http://www.flickr.com/photos/gusstiffpottery/sets/72157600047044355/
General Information: The course work for this class will consist of 3 projects supported by assigned readings, web and library research. Maquettes are required for each project. This course is fast paced so please plan ahead! I strongly suggest that you read all project statements at the beginning of the semester. The entire course is presented during our first meeting so that you can begin thinking about the ideas you wish to undertake for each of the projects. Attendance Policy: Plan to arrive promptly at 3:00 pm and set up to begin working. Attendance will be taken right at the beginning of each class; lateness will be noted and will affect your grade. If you arrive 10 minutes after class begins you will be considered late. Early departures are not permitted. If you need to leave class early please inform me and offer a reason for an early departure. Otherwise not attending class for the full time will be noted and will adversely affect your participation grade. Tardiness, leaving early and absences will result in a grade reduction. Three late arrivals/departures will equal one absence. On the 4th unexcused absence the participation grade drops by 50% (5 pts), the 5th at 100% (10pts) and 6th is failure of the course. Class attendance is central to the learning process and to your success in the course. It is expected that you will attend regularly and be punctual. Everyone will value this courtesy to the group. During many classes we will be working from a life model and this time is very valuable and cannot be replaced. In addition, group demonstrations and lectures, roving critiques, individual tutorials, and discussions will be scheduled for most class periods. Students who are absent due to illness should contact me via email as and if possible bring me a doctor’s note. UF’s attendance rules state: The university recognizes the right of the individual professor to make attendance mandatory. After due warning, professors may prohibit further attendance and subsequently assign a failing grade for excessive absences. Students are responsible for satisfying all academic objectives as defined by the instructor. Students who do not attend at least one of the first two class meetings of a course or laboratory in which they are registered, and who have not contacted the department to indicate their intent, may be dropped from the course. Course Structure (Methods of Instruction): This class meets twice a week for a period of 3 hours each session. It encompasses studio work time, brief instructional lectures and demonstrations, individual tutorials, group discussions of assigned reading and group critiques. Preparation, active use of in class studio sessions, and full participation in firings and lab work is required. You total performance is reflected in your final grade. Ceramics is an exacting endeavor. Success in working with clay is skill based on and can be mastered through regular practice. The ceramic process is one which cannot be rushed or neglected without consequences. Sculptural clay works often require an indirect process, where pre-planning the project is the first step in making a successful art work. Information will be given during specified class periods to show a variety of techniques. Methods of Grading:
Project grades will evaluate: craftsmanship/execution, design/individuality, concept/expression, technical difficulty, research and planning (library and web research, maquettes), form development, modeling style, and completeness of presentation. Your individual development in the technical areas: research skills and firing skills will be evaluated. Your consistency, persistence and participation in critiques will be recorded.
Cumulative grades will be an evaluation of the following criteria; project grades, conceptual development, research, glaze testing, firing competency and participation/energy, pre-planning (maquettes and sketches). The timely completion of all aspects of assigned projects will be very much a part of your grade. If you do not make the deadlines for any part of the assignment you will accrue late grades and limit the possibility of receiving an excellent grade. As professional artists you will not have the luxury of missing an established deadline for a gallery or museum exhibition or any professional commitment. As young professionals you are being groomed to succeed; meeting deadlines is a success principle. You are responsible for completing 3 projects (resulting in four sculptures and supporting maquettes) along with required supplementary glaze testing. It is your responsibility to manage the controlled drying of each project to meet set class deadlines for bisque and glaze kilns. In addition to specific criteria defined by individual project goals, all projects will be graded on their success in the following areas: concept development, use of design decisions to support your concepts, craftsmanship, and meeting deadlines for building, firing and critique. As previously mentioned, a sketchbook is required for recording notes and ideas. All work must be finished within the specified deadlines. Concept / Idea: This pertains to the ability to discover and define design problems and issues in a clear and consistent language. Solution: This pertains to the quality of your Visual and Conceptual Solution. Factors such as composition, inventiveness, originality, layout and craft will be considered in grading. Class work: You are required to keep all information related to this class in your sketch book and should photocopy the pages to create a presentation for the process of each project. Quantity (yes, sometimes over quality) and innovation are important factors. The more you do, the better your design will be and the more skilled you will become. Craft: I will not accept work that does not meet the required presentation standards (which are listed on each individual project sheet). Also important in considering project grades: Failure to meet deadlines will result in a zero. For situations that are called to my attention in advance, something can be arranged. You should always plan ahead. Grades will also be influenced by the following criteria: evolution from proposal to finished work, aesthetic concerns, and adherence to assignments, craftsmanship, skill development, conceptual rigor, experimentation, inventiveness, risk-taking, personal investment, and critical discussions.
LATE WORK: All projects must be completed on time to receive full credit. Specific due dates are stated on the class calendar posted in the classroom and on the class blog. Failure to complete any project on time will result in a drop of one full letter grade. The ceramic process requires that green ware be completely fabricated and detailed, then dried for an average of 7 – 10 days, depending upon scale and complexity. Please finish building all wet work on time for green ware due dates and manage the careful drying of your work so that you can meet all deadlines. Clay requires your regular attention to achieve good results. It cannot be rushed or neglected. You must have work finished and installed before the start of class on critique days or your work will not be critiqued and your project grade will be lowered. It is the student’s responsibility to turn in all work on time. Full participation by showing completed work during all critiques is required along with active participation through shared ideas and commentary.
Grades
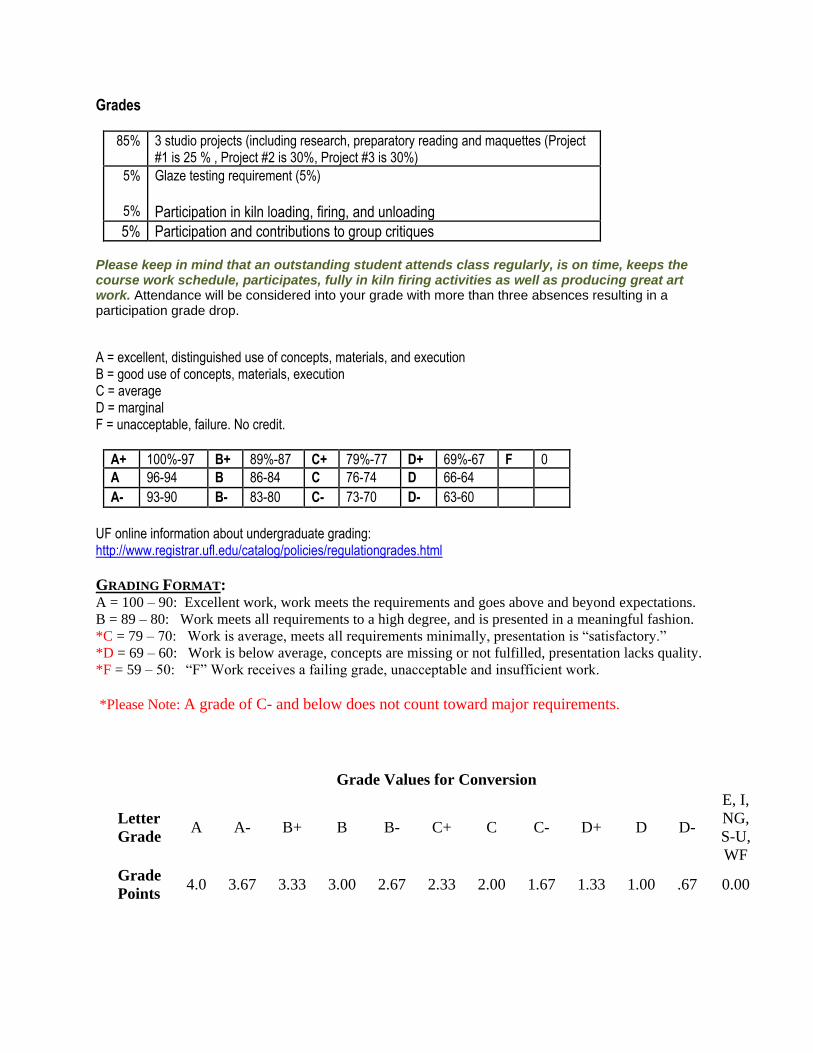
85% 3 studio projects (including research, preparatory reading and maquettes (Project #1 is 25 % , Project #2 is 30%, Project #3 is 30%)
5%
5%
Glaze testing requirement (5%)
Participation in kiln loading, firing, and unloading
5% Participation and contributions to group critiques Please keep in mind that an outstanding student attends class regularly, is on time, keeps the course work schedule, participates, fully in kiln firing activities as well as producing great art work. Attendance will be considered into your grade with more than three absences resulting in a participation grade drop.
A = excellent, distinguished use of concepts, materials, and execution B = good use of concepts, materials, execution C = average D = marginal F = unacceptable, failure. No credit.
A+ 100%-97 B+ 89%-87 C+ 79%-77 D+ 69%-67 F 0 A 96-94 B 86-84 C 76-74 D 66-64 A- 93-90 B- 83-80 C- 73-70 D- 63-60
UF online information about undergraduate grading: http://www.registrar.ufl.edu/catalog/policies/regulationgrades.html
GRADING FORMAT: A = 100 – 90: Excellent work, work meets the requirements and goes above and beyond expectations.
B = 89 – 80: Work meets all requirements to a high degree, and is presented in a meaningful fashion.
*C = 79 – 70: Work is average, meets all requirements minimally, presentation is “satisfactory.”
*D = 69 – 60: Work is below average, concepts are missing or not fulfilled, presentation lacks quality.
*F = 59 – 50: “F” Work receives a failing grade, unacceptable and insufficient work.
*Please Note: A grade of C- and below does not count toward major requirements.
Grade Values for Conversion
Letter
Grade A A- B+ B B- C+ C C- D+ D D-
E, I,
NG,
S-U,
WF
Grade
Points 4.0 3.67 3.33 3.00 2.67 2.33 2.00 1.67 1.33 1.00 .67 0.00
Clay and Glaze Materials: The clays we are using in this course can be purchased through Ceramics by paying for tickets at UF’s Bookstore. Nan’s Sculpture Clay is $12.50 for 25 lbs. (one blue clay ticket). Glaze materials including, slips, wax resist, stains, patinas and pyrometric costs are covered by one materials fee. The plaster and other mold making materials (alja-safe – you are entitled to 1 lb. through the fees for this class) are sold separately and can be purchased by the pound through the bookstore. I will collect tickets during the second class meeting and dispense clay to you to start the first project. Additional clay will be available during class and can be gotten from our Ceramics tech, Derek Reeverts during scheduled hours posted on his office door. Please arrange to pick up your clay during these hours. It is suggested that you keep any additional clay (3 logs) locked in your locker and that you recycle your used clay for future use. Please ask me if you do not know how to recondition your clay so that you can use it again. Supplies:
The new art supply store in town is soMAart HUB. Try there for tools first. Other suppliers can be found on: http://1drv.ms/1kvdgtZ
The Basics: Bound sketchbook, plasticine for maquettes (optional but good for certain designs), serrated metal rib and serrated wooden modeling tool, clay shapers, trimming tool, calipers, light plastic (launderers' plastic, or light weight plastic drop cloth), misting bottle, small bucket, cut-off wire, needle tool, fork (or other scoring tool), small sponge, clean up sponge, fabric (uncoated canvas or cotton polyester blend, or muslin (try Goodwill for remnant or old bed sheets), small container for slip, brushes for finishing and decorating, sur-form rasp, exacto knife, blow dryer, and * turntable or lazy-susan as work surface (Home Depot or Lowes). * Cover with 2' x 2' piece of 3/4" sealed plywood (required). Specialty Tools (are needed and can be ordered on-line): 1. Kemper Ribbon Sculpting tools (set of 6), available thru Laguna/Axner’s in Florida – 1-800-843-7057, approximately $8.99
2. Special sculpture tool via EUCLID’s. WE CAN PLACE A CLASS ORDER IF YOU WISH AND SAVE ON SHIPPING. THEY ARE NOW CARRYING A VARIETY OF STAINLESS STEEL SCULPTURE TOOLS. THIS WILL BE DISCUSSED IN CLASS. http://www.euclids.com/SStools2.htm (Item #: TP426, TP354) 1-800-296-5456 3. Michael Sherrill red rib, SMT-R1, $6.00 (also suggest yellow rib same price) http://www.highwaterclays.com/handtools/cooltools2.html#smt As required for individual projects:
1. Algi-safe ($11.88/ 1lb.from Your Clay Store), 2. Moulding plaster ($.46 / 1lb. from Your Clay Store), 3. Amaco Underglazes – Creative Ceramics in Ocala, website: [email protected]
or 352-237-3562 4. Duncan or Mayco Underglazes, vintage decals – Frazier Ceramics in Gainsville, 372-1506
If you would like to order through a Ceramic materials vendor please feel free to contact:
Bennett Pottery Supply (1-800-432-0074), or Axner/Laguna Clay Company (1-800-843-7057).
Health and Safety: Please wear shoes and proper attire, tie back hair and loose clothing when working around shop equipment.
The ceramics program recommends that you wear a respirator when mixing clay and glaze materials and applying glaze with a spray gun. Fowlett’s Bookstore has ordered N95 Filtering Face piece Respirators. They are also available at CVS and Wall Green’s. Tight fitting respirators can be ordered from Grainger’s or a similar lab safety supply company. > consider this as an investment if
you are a Ceramics major.
The link for information regarding the SA+AH H&S policy and handbook on health and safety
is: http://www.arts.ufl.edu/art/healthandsafety
2) Each student must complete a H&S STUDENT WAIVER FORM (available next to the copier
in the SAAH office) and on-line (see address above). Waivers must be turned into the SAAH
Director of Operations before the end of the 2nd week of classes. Please staple the course sheets
together. University of Florida Environmental Health and Safety (EH&S) has determined that the use of respiratory protection is not required for projects and activities typically performed in the School of Art + Art History. It is against the School of Art + Art History policy for any instructor to require students to wear respiratory protection however, you may recommend it, and you may voluntarily choose to wear respiratory protection: either an N95 filtering face piece, commonly known as a dust mask, or a tight fitting half or full-face respirator. Any user who chooses to wear such respiratory protection is therefore said to be a voluntary user. Environmental Health and Safety follows or exceeds OSHA 29CFR1910.132-137 standards for Personal Protective Equipment. Any voluntary user: student, faculty, or staff is required to follow all Environmental Health and Safety policy which can be found at: http://www.ehs.ufl.edu/General/resppol.pdf. For simplicity, the regulations are outlined below. You must follow each step in order: 1. I want to wear an N95 dust mask. a. Complete “Request for Respirator Use” form (http://www.ehs.ufl.edu/OCCMED/respreq.pdf). Mail to: Environmental Health & Safety attn: OCCMED PO Box 112195 Gainesville, FL 32611 b. Complete “Medical History Questionnaire for N95 Filtering Face piece Respirators” form (http://www.ehs.ufl.edu/OCCMED/N95.pdf) and “UF Voluntary Use Respirator Supplementary Information Memo” (Below) Mail to: SHCC OCCMED Box 100148 Gainesville, FL 32611 c. Include Payment: i. There is a $5 charge for the review and processing of this form. 1. Graduate student payment options: a. Enclose a $5 check with drivers license number written on the check
b. Bill to Gator Grad Care by filling out enclosed UF Graduate Student Voluntary Use Respirator Payment Memo 2. Undergraduates must make payment in person. Go to: Health Science Center Dental tower, second floor Room D2-49 On the corner of Archer Road and center drive West entrance ii. Contact SHCC OCCMED at 352.392.0627 with questions.
Health and Safety
Specific Area information for Ceramics
Area Rules:
Follow all SA+AH Health and Safety handbook guidelines.
Alcohol is forbidden in studios.
No smoking in the building or within 50 feet of any entrance.
No eating or drinking in the glaze or mixing areas.
Shoes must be worn at all times.
It is recommended that protective equipment be worn at all times: safety glasses when
grinding, chipping shelves, etc., protective lenses for kiln viewing, gloves for hot objects,
heat resistant aprons for raku, ear protection for grinding and sawing, rubber gloves for
mixing hazardous materials
Do not block aisles, halls, doors
Do not bring children or pets into the studios
Do not store things on the floor
Do not park bikes in the building
Clean up spills immediately
Scoop up dry materials, mop up liquids, do not replace spilled materials in original source
if spilled for they are contaminated
Carry heavy and large trash bags loaded with trash to dumpster
Place materials containing Barium and Chrome in the hazardous waste disposal
area
Do not sweep for this puts hazardous materials into the air; rather scrape up chunks and
wet-clean area.
Lockers: Please sign up for a locker to be used to store tools and personal belongings. The list is available through Derek Reeverts. Lockers must be cleaned out and locks removed by the end of finals week, or the contents will be considered abandoned. If you are returning, please note this on the door of the locker and your belongings will not be disturbed. Studio Courtesy: Please leave the studio clean. Regardless of the condition you find it in, we request that you leave it clean for the next person. Remember to place all work in progress on the storage shelves. Leave the work tables clear and clean. This is a group studio, and we all need to pitch in to keep it a safe and healthy functioning work environment. Studio etc.: Each student is responsible for ensuring that his/her projects and materials are safely stored, displayed, installed, and removed from the classroom and critique space. Projects must be set up and removed from the critique space at the times and spaces designated for each project. The instructor, the School of Art and Art History, and the Ceramics Department are not responsible for student work left in workspaces, installation spaces, the critique space, the shops, or the classrooms.
Projects/materials are not to be stored in the group working space. Please address any concerns, problems, and questions regarding this class to the instructor as they arise. The instructor is available during office hours, and by making an appointment for a special meeting time. Always be open-minded when considering new ideas and constructive criticism. Critique ideas; not people. The SAAH studios like science labs on campus are designated for student use. Please be advised that visitors are not permitted without approval. The SAAH has an official policy for those not currently taking classes. The following form is required for access. University Policies:
Philosophy: The University of Florida is an institution which encourages the intellectual and personal growth of its students as scholars and citizens. As an educational institution, the University recognizes that the transmission of knowledge, the pursuit of truth, and the development of individuals requires the free exchange of ideas, self-expression, and the challenging of beliefs and customs. In order to maintain an environment where these goals can be achieved safely and equitably, the University promotes civility, respect and integrity among all members of the community. As stated in the Standard of Ethical Conduct, students are expected to exhibit high standards of behavior and concern for others. Academic Honesty: As a result of completing the registration form at the University of Florida, every student has signed the following statement: “I understand that the University of Florida expects its students to be honest in all of their academic endeavors and understand that my failure to comply with this commitment may result in disciplinary action up to and including expulsion from the University. Detailed Academic Honesty Guidelines may be found at: http://www.aa.ufl.edu/aa/Rules/4017.htm Cheating and illegal use of copyrighted material is not tolerated. ACCOMMODATIONS FOR STUDENTS WITH DISABILITIES: I will make every attempt to accommodate students with disabilities. At the same time, anyone requesting classroom accommodation must first register with the Dean of Students Office. The Dean of Students Office will provide you with the necessary documentation, which you must then provide to me when requesting accommodation. “Students requesting classroom accommodation must first register with the Dean of Students Office. The Dean of Students Office will provide documentation to the student who must then provide this documentation to the Instructor when requesting accommodation.”
The Dean of Students Office can be contacted at: 352-392-1261. Information is also available on their website, at http://www.dso.ufl.edu/drp. Please speak with the instructor about any concerns. OTHER GUIDELINES: The instructor, the School of Art and Art History, and the Ceramics Department are not responsible for student work left in workspaces, installation spaces, the critique space, the shops, or the classrooms. Projects/materials are not to be stored in the group working space. Each student is responsible for ensuring that his/her projects and materials are safely stored, displayed, installed, and removed from the classroom and critique space. Projects must be set up and removed from the critique space at the times and spaces designated for each project. Students must check their school email accounts regularly. Students are responsible for any information, deadlines, and updates emailed to their webmail accounts. Students should check with the instructor or another student outside of class time when they miss a class
(prior to missing the class if possible), as in- and out-of-class exercises are spontaneously assigned. Students should bring a doctor’s note for any class from which they expect to be excused. Please address any concerns, problems, and questions regarding this class to the instructor as they arise. Outside class, the instructor is available during office hours, by making an appointment for another time, or through email. Students can expect a response to email within 24 hours. Always be open-minded when considering new ideas and constructive criticism. Critique ideas; not people. No side conversations during presentations or critiques. Do not use cell phones or iPads (or other headphones) during class time, unless approved by instructor during a workday. No text messaging. Also please turn cell phones to silent during class time. Please do this before you arrive to class. Disruptive Behavior: Be advised that you can and will be dismissed from class if you engage in disruptive behavior. Students who intentionally act to impair, interfere with, or obstruct the mission, purposes, order, operations, processes, and functions of the University shall be subject to appropriate disciplinary action by University authorities for misconduct, as set forth in the applicable rules of the Board of Regents and the University and state law governing such actions. A detailed list of disruptive conducts and actions may be found at http://www.aa.ufl.edu/aa/Rules/1008.htm Counseling Services: Resources are available on campus for students experiencing personal problems or lacking clear career and academic goals, which interfere with their academic performance. You can find out more about counseling services here: http://www.counsel.ufl.edu University Counseling Services/ Counseling Center 301 Peabody Hall P.O. Box 114100, University of Florida Gainesville, FL 32611-4100 Phone: 352-392-1575 Web: www.counsel.ufl.edu Critical Dates on the university calendar may be viewed at – http://www.reg.ufl.edu/dates-critical.html
LAB & STUDIO ACCESS AGREEMENT FORM Laboratory and studio spaces in the School of Art and Art History are for educational and research purposes. Use of these spaces is intended for currently enrolled students, faculty and staff only. Occasionally, access may be granted to non-enrolled students, faculty or staff on a case by case situation. Permission is granted through the use of this form. Laboratories and studios are managed and maintained by each SA+AH Area, therefore permission is granted by the Area Head or Teaching Lab Specialist for that lab/studio. If granted permission, all persons using an SA+AH lab/studio must adhere to the policies, procedures and safety measures established in the SA+AH Health and Safety Handbook (www.arts.ufl.edu/art/healthandsafety.com) as well any further instructions given by area Teaching Lab Specialists. Access may be revoked at the discretion of the Area Head, Teaching Lab Specialist, or SA+AH Director, at any time, for any reason, particularly for failure to adhere to verbal or written instructions. The SA+AH maintains laboratories and studios in art+ technology, ceramics, creative photography, drawing, graphic design, painting, printmaking and sculpture. Access to one lab or studio does not grant access to any other facility within the SA+AH. Applicant Name: _______________________________________________________________________________
Purpose for Access: ____________________________________________________________________ _______________________________________________________________________________________________________________________________________________________________________________________________________________________________________________________________
Address: _____________________________________________________________________________
Phone & Email:________________________________________________________________________
Laboratory/Studio:_____________________________________________________________________
Dates of Access: _______________________________________________________________________
Signature: _______________________________________________________________________(date)
I agree to adhere to all SA+AH policies and procedures for the lab/studio for which I am granted access.
Area Head/Teaching Lab Specialist
Name: _______________________________________________________________________________
Signature :________________________________________________________________(date)
Each Area Head or Teaching Lab Specialist that grants permission for voluntary use will keep a file of signed agreement forms.
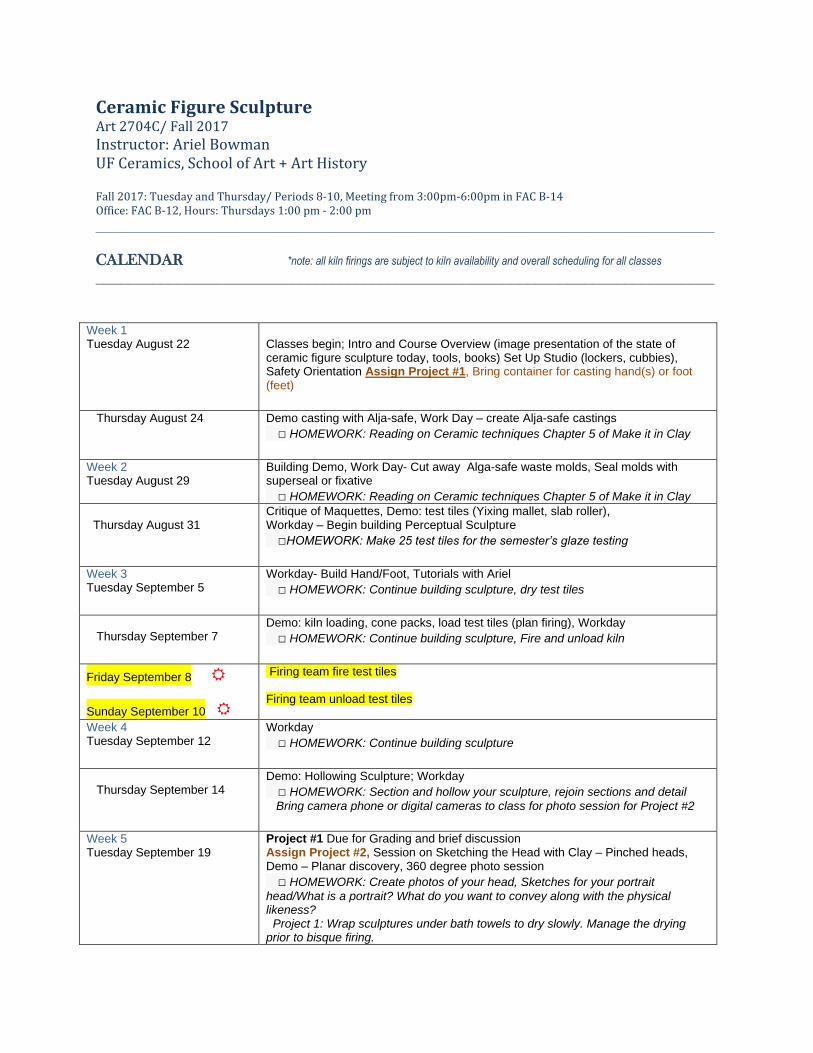
Ceramic Figure Sculpture Art 2704C/ Fall 2017
Instructor: Ariel Bowman UF Ceramics, School of Art + Art History Fall 2017: Tuesday and Thursday/ Periods 8-10, Meeting from 3:00pm-6:00pm in FAC B-14 Office: FAC B-12, Hours: Thursdays 1:00 pm - 2:00 pm
____________________________________________________________________________
CALENDAR *note: all kiln firings are subject to kiln availability and overall scheduling for all classes
____________________________________________________________________________
Week 1 Tuesday August 22
Classes begin; Intro and Course Overview (image presentation of the state of ceramic figure sculpture today, tools, books) Set Up Studio (lockers, cubbies), Safety Orientation Assign Project #1, Bring container for casting hand(s) or foot (feet)
Thursday August 24 Demo casting with Alja-safe, Work Day – create Alja-safe castings
□ HOMEWORK: Reading on Ceramic techniques Chapter 5 of Make it in Clay
Week 2 Tuesday August 29
Building Demo, Work Day- Cut away Alga-safe waste molds, Seal molds with superseal or fixative
□ HOMEWORK: Reading on Ceramic techniques Chapter 5 of Make it in Clay Thursday August 31
Critique of Maquettes, Demo: test tiles (Yixing mallet, slab roller), Workday – Begin building Perceptual Sculpture
□HOMEWORK: Make 25 test tiles for the semester’s glaze testing
Week 3 Tuesday September 5
Workday- Build Hand/Foot, Tutorials with Ariel
□ HOMEWORK: Continue building sculpture, dry test tiles
-- Thursday September 7
Demo: kiln loading, cone packs, load test tiles (plan firing), Workday
□ HOMEWORK: Continue building sculpture, Fire and unload kiln
Friday September 8
Sunday September 10
Firing team fire test tiles Firing team unload test tiles
Week 4 Tuesday September 12
Workday
□ HOMEWORK: Continue building sculpture
-- Thursday September 14
Demo: Hollowing Sculpture; Workday
□ HOMEWORK: Section and hollow your sculpture, rejoin sections and detail
Bring camera phone or digital cameras to class for photo session for Project #2
Week 5 Tuesday September 19
Project #1 Due for Grading and brief discussion Assign Project #2, Session on Sketching the Head with Clay – Pinched heads, Demo – Planar discovery, 360 degree photo session
□ HOMEWORK: Create photos of your head, Sketches for your portrait
head/What is a portrait? What do you want to convey along with the physical likeness? Project 1: Wrap sculptures under bath towels to dry slowly. Manage the drying prior to bisque firing.
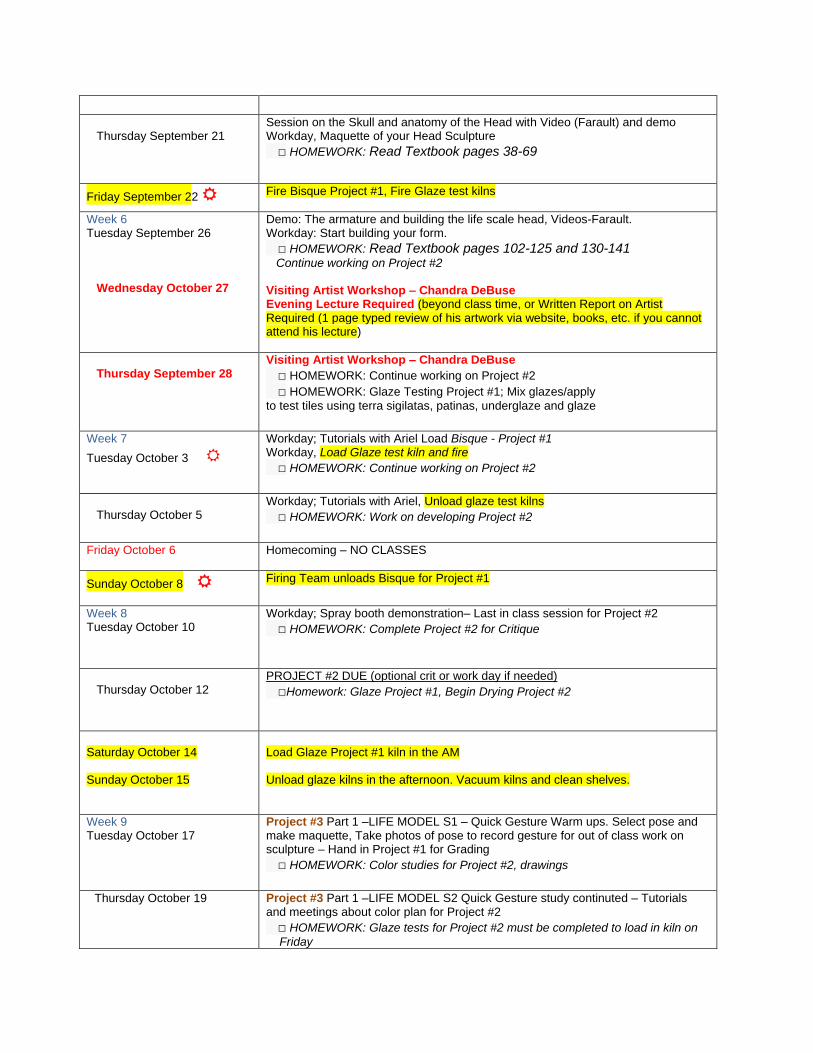
-- Thursday September 21
Session on the Skull and anatomy of the Head with Video (Farault) and demo Workday, Maquette of your Head Sculpture
□ HOMEWORK: Read Textbook pages 38-69
Friday September 22 Fire Bisque Project #1, Fire Glaze test kilns
Week 6 Tuesday September 26 Wednesday October 27
Demo: The armature and building the life scale head, Videos-Farault. Workday: Start building your form.
□ HOMEWORK: Read Textbook pages 102-125 and 130-141 Continue working on Project #2 Visiting Artist Workshop – Chandra DeBuse Evening Lecture Required (beyond class time, or Written Report on Artist Required (1 page typed review of his artwork via website, books, etc. if you cannot attend his lecture)
-- Thursday September 28
Visiting Artist Workshop – Chandra DeBuse
□ HOMEWORK: Continue working on Project #2
□ HOMEWORK: Glaze Testing Project #1; Mix glazes/apply
to test tiles using terra sigilatas, patinas, underglaze and glaze
Week 7
Tuesday October 3
Workday; Tutorials with Ariel Load Bisque - Project #1 Workday, Load Glaze test kiln and fire
□ HOMEWORK: Continue working on Project #2
-- Thursday October 5
Workday; Tutorials with Ariel, Unload glaze test kilns
□ HOMEWORK: Work on developing Project #2
Friday October 6
Homecoming – NO CLASSES
Sunday October 8
Firing Team unloads Bisque for Project #1
Week 8 Tuesday October 10
Workday; Spray booth demonstration– Last in class session for Project #2
□ HOMEWORK: Complete Project #2 for Critique
Thursday October 12
PROJECT #2 DUE (optional crit or work day if needed)
□Homework: Glaze Project #1, Begin Drying Project #2
Saturday October 14 Sunday October 15
Load Glaze Project #1 kiln in the AM Unload glaze kilns in the afternoon. Vacuum kilns and clean shelves.
Week 9 Tuesday October 17
Project #3 Part 1 –LIFE MODEL S1 – Quick Gesture Warm ups. Select pose and make maquette, Take photos of pose to record gesture for out of class work on sculpture – Hand in Project #1 for Grading
□ HOMEWORK: Color studies for Project #2, drawings
--Thursday October 19 Project #3 Part 1 –LIFE MODEL S2 Quick Gesture study continuted – Tutorials
and meetings about color plan for Project #2
□ HOMEWORK: Glaze tests for Project #2 must be completed to load in kiln on
Friday
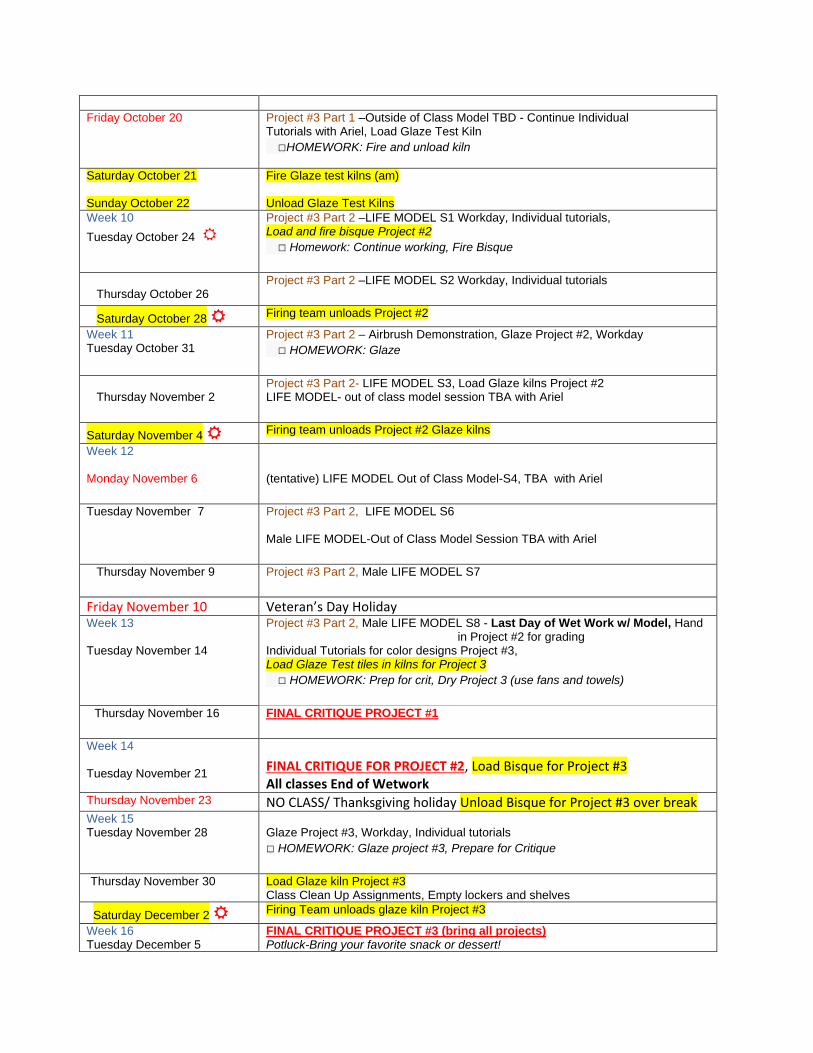
Friday October 20 Project #3 Part 1 –Outside of Class Model TBD - Continue Individual Tutorials with Ariel, Load Glaze Test Kiln
□HOMEWORK: Fire and unload kiln
Saturday October 21 Sunday October 22
Fire Glaze test kilns (am) Unload Glaze Test Kilns
Week 10
Tuesday October 24
Project #3 Part 2 –LIFE MODEL S1 Workday, Individual tutorials, Load and fire bisque Project #2
□ Homework: Continue working, Fire Bisque
-- Thursday October 26
Project #3 Part 2 –LIFE MODEL S2 Workday, Individual tutorials
Saturday October 28 Firing team unloads Project #2
Week 11 Tuesday October 31
Project #3 Part 2 – Airbrush Demonstration, Glaze Project #2, Workday
□ HOMEWORK: Glaze
-- Thursday November 2
Project #3 Part 2- LIFE MODEL S3, Load Glaze kilns Project #2 LIFE MODEL- out of class model session TBA with Ariel
Saturday November 4 Firing team unloads Project #2 Glaze kilns
Week 12 Monday November 6
(tentative) LIFE MODEL Out of Class Model-S4, TBA with Ariel
Tuesday November 7 Project #3 Part 2, LIFE MODEL S6
Male LIFE MODEL-Out of Class Model Session TBA with Ariel
Thursday November 9 Project #3 Part 2, Male LIFE MODEL S7
Friday November 10 Veteran’s Day Holiday Week 13 Tuesday November 14
Project #3 Part 2, Male LIFE MODEL S8 - Last Day of Wet Work w/ Model, Hand in Project #2 for grading
Individual Tutorials for color designs Project #3, Load Glaze Test tiles in kilns for Project 3
□ HOMEWORK: Prep for crit, Dry Project 3 (use fans and towels)
--Thursday November 16 FINAL CRITIQUE PROJECT #1
Week 14 Tuesday November 21
FINAL CRITIQUE FOR PROJECT #2, Load Bisque for Project #3 All classes End of Wetwork
Thursday November 23 NO CLASS/ Thanksgiving holiday Unload Bisque for Project #3 over break Week 15 Tuesday November 28
Glaze Project #3, Workday, Individual tutorials
□ HOMEWORK: Glaze project #3, Prepare for Critique
-Thursday November 30 Load Glaze kiln Project #3
Class Clean Up Assignments, Empty lockers and shelves
Saturday December 2 Firing Team unloads glaze kiln Project #3
Week 16 Tuesday December 5
FINAL CRITIQUE PROJECT #3 (bring all projects) Potluck-Bring your favorite snack or dessert!
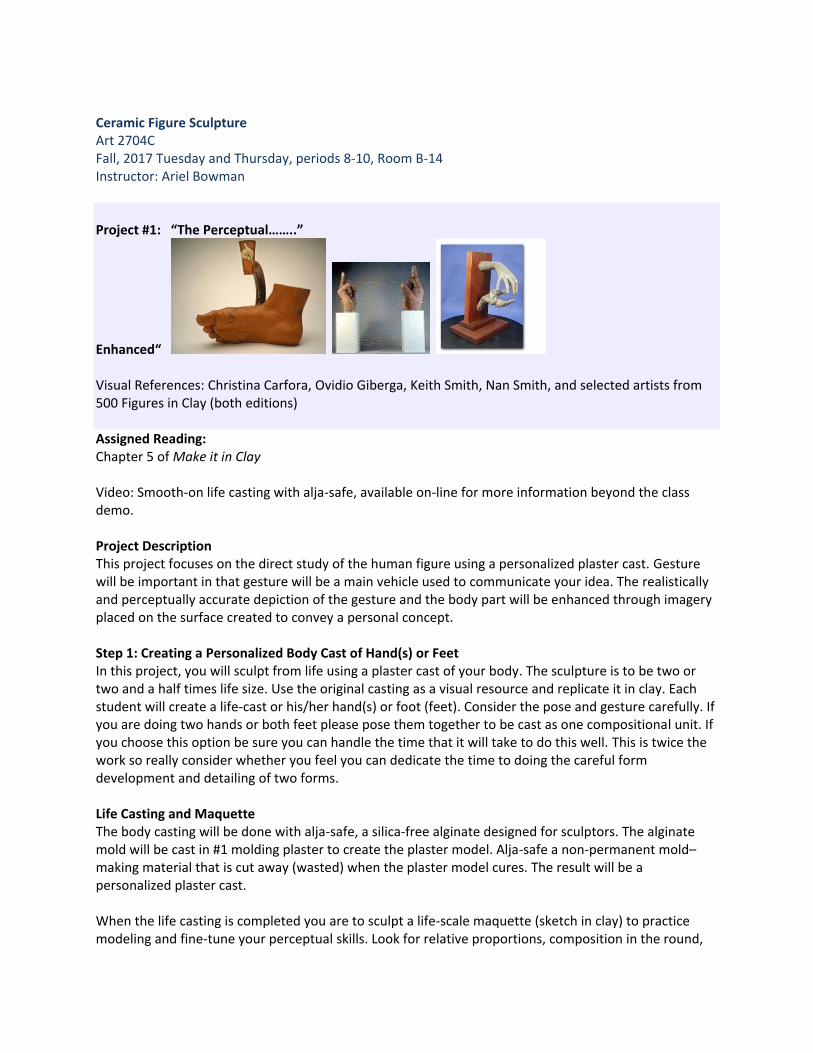
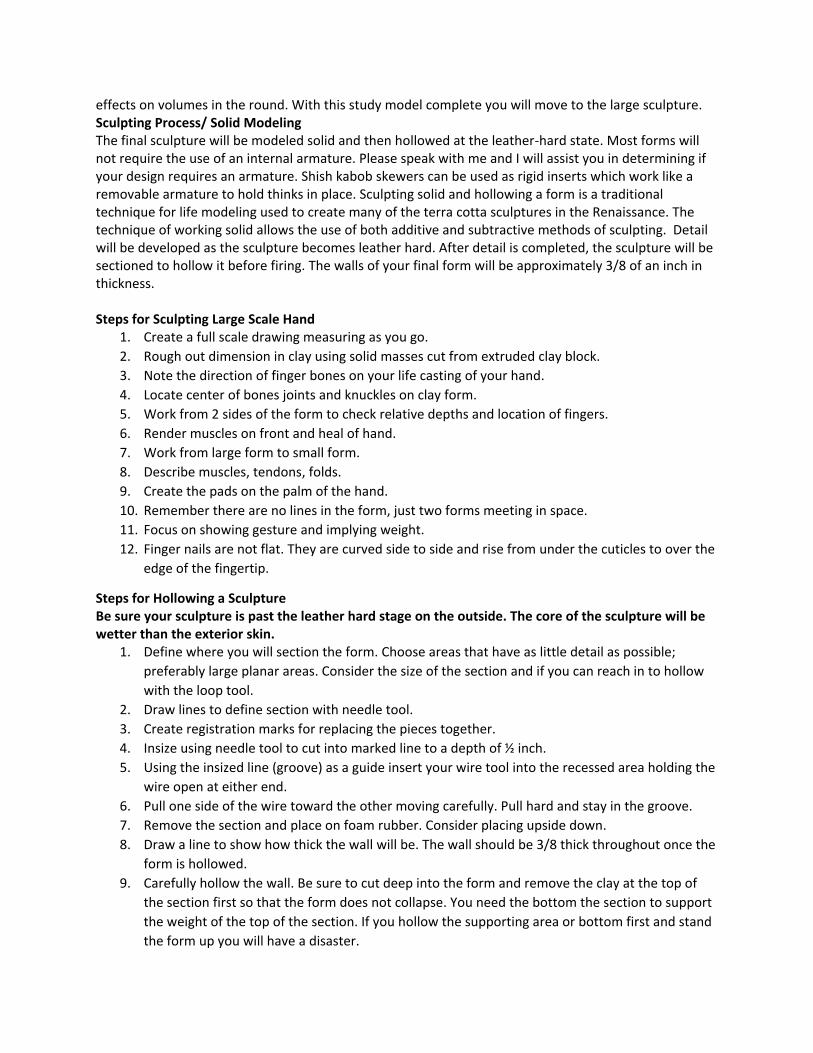
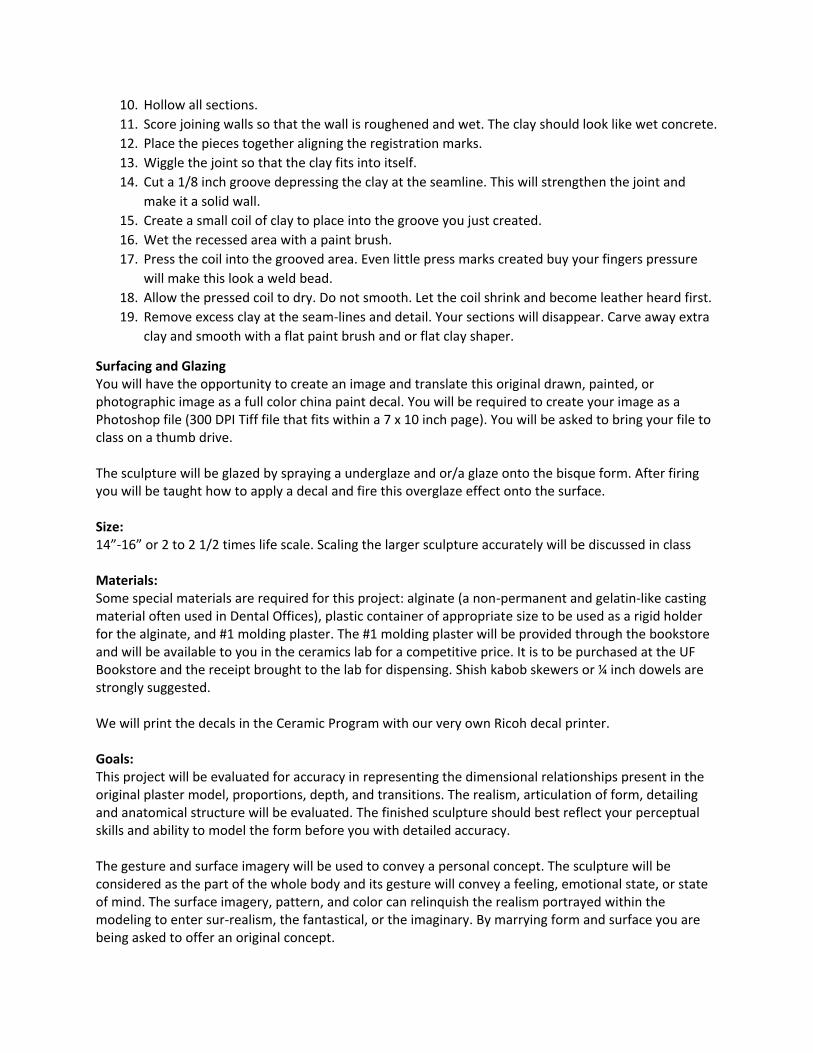
Ceramic Figure Sculpture Art 2704C Fall, 2017 Tuesday and Thursday, periods 8-10, Room B-14 Instructor: Ariel Bowman Project #1: “The Perceptual……..”
Enhanced“ Visual References: Christina Carfora, Ovidio Giberga, Keith Smith, Nan Smith, and selected artists from 500 Figures in Clay (both editions) Assigned Reading: Chapter 5 of Make it in Clay Video: Smooth-on life casting with alja-safe, available on-line for more information beyond the class demo. Project Description This project focuses on the direct study of the human figure using a personalized plaster cast. Gesture will be important in that gesture will be a main vehicle used to communicate your idea. The realistically and perceptually accurate depiction of the gesture and the body part will be enhanced through imagery placed on the surface created to convey a personal concept. Step 1: Creating a Personalized Body Cast of Hand(s) or Feet In this project, you will sculpt from life using a plaster cast of your body. The sculpture is to be two or two and a half times life size. Use the original casting as a visual resource and replicate it in clay. Each student will create a life-cast or his/her hand(s) or foot (feet). Consider the pose and gesture carefully. If you are doing two hands or both feet please pose them together to be cast as one compositional unit. If you choose this option be sure you can handle the time that it will take to do this well. This is twice the work so really consider whether you feel you can dedicate the time to doing the careful form development and detailing of two forms. Life Casting and Maquette The body casting will be done with alja-safe, a silica-free alginate designed for sculptors. The alginate mold will be cast in #1 molding plaster to create the plaster model. Alja-safe a non-permanent mold–making material that is cut away (wasted) when the plaster model cures. The result will be a personalized plaster cast. When the life casting is completed you are to sculpt a life-scale maquette (sketch in clay) to practice modeling and fine-tune your perceptual skills. Look for relative proportions, composition in the round,
effects on volumes in the round. With this study model complete you will move to the large sculpture. Sculpting Process/ Solid Modeling The final sculpture will be modeled solid and then hollowed at the leather-hard state. Most forms will not require the use of an internal armature. Please speak with me and I will assist you in determining if your design requires an armature. Shish kabob skewers can be used as rigid inserts which work like a removable armature to hold thinks in place. Sculpting solid and hollowing a form is a traditional technique for life modeling used to create many of the terra cotta sculptures in the Renaissance. The technique of working solid allows the use of both additive and subtractive methods of sculpting. Detail will be developed as the sculpture becomes leather hard. After detail is completed, the sculpture will be sectioned to hollow it before firing. The walls of your final form will be approximately 3/8 of an inch in thickness. Steps for Sculpting Large Scale Hand
1. Create a full scale drawing measuring as you go.
2. Rough out dimension in clay using solid masses cut from extruded clay block.
3. Note the direction of finger bones on your life casting of your hand.
4. Locate center of bones joints and knuckles on clay form.
5. Work from 2 sides of the form to check relative depths and location of fingers.
6. Render muscles on front and heal of hand.
7. Work from large form to small form.
8. Describe muscles, tendons, folds.
9. Create the pads on the palm of the hand.
10. Remember there are no lines in the form, just two forms meeting in space.
11. Focus on showing gesture and implying weight.
12. Finger nails are not flat. They are curved side to side and rise from under the cuticles to over the
edge of the fingertip.
Steps for Hollowing a Sculpture Be sure your sculpture is past the leather hard stage on the outside. The core of the sculpture will be wetter than the exterior skin.
1. Define where you will section the form. Choose areas that have as little detail as possible;
preferably large planar areas. Consider the size of the section and if you can reach in to hollow
with the loop tool.
2. Draw lines to define section with needle tool.
3. Create registration marks for replacing the pieces together.
4. Insize using needle tool to cut into marked line to a depth of ½ inch.
5. Using the insized line (groove) as a guide insert your wire tool into the recessed area holding the
wire open at either end.
6. Pull one side of the wire toward the other moving carefully. Pull hard and stay in the groove.
7. Remove the section and place on foam rubber. Consider placing upside down.
8. Draw a line to show how thick the wall will be. The wall should be 3/8 thick throughout once the
form is hollowed.
9. Carefully hollow the wall. Be sure to cut deep into the form and remove the clay at the top of
the section first so that the form does not collapse. You need the bottom the section to support
the weight of the top of the section. If you hollow the supporting area or bottom first and stand
the form up you will have a disaster.
10. Hollow all sections.
11. Score joining walls so that the wall is roughened and wet. The clay should look like wet concrete.
12. Place the pieces together aligning the registration marks.
13. Wiggle the joint so that the clay fits into itself.
14. Cut a 1/8 inch groove depressing the clay at the seamline. This will strengthen the joint and
make it a solid wall.
15. Create a small coil of clay to place into the groove you just created.
16. Wet the recessed area with a paint brush.
17. Press the coil into the grooved area. Even little press marks created buy your fingers pressure
will make this look a weld bead.
18. Allow the pressed coil to dry. Do not smooth. Let the coil shrink and become leather heard first.
19. Remove excess clay at the seam-lines and detail. Your sections will disappear. Carve away extra
clay and smooth with a flat paint brush and or flat clay shaper.
Surfacing and Glazing You will have the opportunity to create an image and translate this original drawn, painted, or photographic image as a full color china paint decal. You will be required to create your image as a Photoshop file (300 DPI Tiff file that fits within a 7 x 10 inch page). You will be asked to bring your file to class on a thumb drive. The sculpture will be glazed by spraying a underglaze and or/a glaze onto the bisque form. After firing you will be taught how to apply a decal and fire this overglaze effect onto the surface. Size: 14”-16” or 2 to 2 1/2 times life scale. Scaling the larger sculpture accurately will be discussed in class Materials: Some special materials are required for this project: alginate (a non-permanent and gelatin-like casting material often used in Dental Offices), plastic container of appropriate size to be used as a rigid holder for the alginate, and #1 molding plaster. The #1 molding plaster will be provided through the bookstore and will be available to you in the ceramics lab for a competitive price. It is to be purchased at the UF Bookstore and the receipt brought to the lab for dispensing. Shish kabob skewers or ¼ inch dowels are strongly suggested. We will print the decals in the Ceramic Program with our very own Ricoh decal printer. Goals: This project will be evaluated for accuracy in representing the dimensional relationships present in the original plaster model, proportions, depth, and transitions. The realism, articulation of form, detailing and anatomical structure will be evaluated. The finished sculpture should best reflect your perceptual skills and ability to model the form before you with detailed accuracy. The gesture and surface imagery will be used to convey a personal concept. The sculpture will be considered as the part of the whole body and its gesture will convey a feeling, emotional state, or state of mind. The surface imagery, pattern, and color can relinquish the realism portrayed within the modeling to enter sur-realism, the fantastical, or the imaginary. By marrying form and surface you are being asked to offer an original concept.
Grading Criteria: Maquette (graded separately from finished sculpture) Gesture; conceptual intent and how well it conveys the idea _30%____ Perceptual Skill indicated through Modeling (anatomical detail;were you really looking?) _40%____ Craft (finishing, surfaces, technical execution) _30%___ Large Scale Sculpture Perceptual Skill indicated through Modeling (were you really looking?) __10%___ Craft (finishing, surfaces) __10%___ Anatomical Correctness (accuracy, believable gesture, detailing) __10%___ Aesthetics; design of form in the round, relationship of 2D and 3D __10%___ Modeling Style (evidence of hand, consistency of sculptural quality of touch) __10%___ Degree of Difficulty/Degree of Success __10%___ Completed on Time?( 5 points of average taken off if late) Glaze or surface finish Concept and image development; originality, is idea communicated __10%___ Crafting; application of glaze, consistency of surface, control of thickness __10%___ Color usage; supporting idea and design __10%___ Decal; application __10%___ Completed on Time? ( 5 points of average taken off if late) Firing Participation Notes: Loaded bisque, Fired Bisque, Unloaded Bisque, Loaded Glaze, __5%___ Unloaded glaze loaded decal, unloaded decal. Presentation for Crit: on pedestal, fully completed? __5%___ Surfacing Techniques "Steps for Applying A Glaze": (1) Remove dust and/or oils from the surface of the bisque ware. Options: a. douce quickly under water b. wipe down with a damp sponge wet with water c. wipe with a sponge dampened with rubbing alcohol; this removes oils and is especially recommended for preparing bisqueware that will be brushed with commercial underglaze color
* Note - If this step is overlooked you are at risk that the glaze will not form a proper bond with the clay during the firing process. They glaze may not stick to the ware in parts or may be resisted is areas where dust or oils remain. The glaze imperfection that will result is called crawling.
(2) Wax the bottom of the piece. The wax application should be done with care for it creates a line defining the glaze's edge. For three dimensional objects it is usually recommended that wax be applied on the bottom surface and continued 1/4" up the side of the piece. The application of wax along the bottom edge of the exterior wall will
prevent a piece from sticking to the kiln shelf in the case that the glaze moves/runs during the firing. (This movement can occur if the glaze application is too heavy, if the glaze has a tendency to move, or if the kiln is fired beyond the desired temperature). (3) Thoroughly mix the glaze. Use of a stirring stick, wisk, or gloves is required for safety purposes. Be sure you are mixing the glaze materials that have settled to the bottom of the bucket. They are the heavier materials that will give you the proper glaze result if mixed thoroughly.
(4) Check the thickness of the glaze. Dip your gloved finger into the glaze you have just mixed. The liquid should appear as an opaque coating over your gloved finger. The liquid should drip slowly off of your finger, but the coating should remain. The glaze should be of a milk-like consistency. The glaze should feel a bit creamy when you rub your fingers together. Remove glove and wash your hands if needed after you do this quick test. (5) Adjust the glaze if necessary before using it! If the glaze is lumpy please run it thorough a sieve. If the glaze seems too thick, add water. Please ask for help if you are unsure about sieving or thinning a glaze. Also remember to wash the wisk, containers, table and to replace any materials you use while working in the glaze lab. (6) Glaze the interior of a three dimensional piece first. Pour the glaze in to coat the ware and quickly spin the form so that you gain a complete coating. Do this as your pour the glaze out. Wipe any spills off of the exterior surface using a sponge and water. * This proceedure will be demonstrated in class. (7) Apply under glaze pigments. Options: a. slips/engobes b. commercial underglazes c. washes "Applying Glaze" (8) Apply glaze to the exterior of the form. Options: a. pour over b. dip into c. spray (9) Wipe the glaze residue on the sides and the bottom of your work! The wax resist melts before the glaze melts. It will not resist the beads of glaze left on the ware it they are not wipe off. Thus the work will become fused to the kiln shelf. It will need to be broken to release it! Pieces that are not thoroughly cleaned on the bottom will not be fired! (10) Place glazed ware on the class kiln cart in the kiln room.
Glazing Large Pieces Larger sculptural and vessel forms cannot be dipped due to weight and size. You might be able to pour glaze onto the surface but many times this does not give you control over the pour. Spraying glaze with a SPRAY GUN is the best possible way to get an even coat. A spray gun is different than an airbrush. A spray gun is designed to handle heavy materials like glaze, house paint. The nozzle is bigger than the small nozzle found on an airbrush. The airbrush is used for fine liquids like inks, acrylic paint, UNDERGLAZE. Six coats of sprayed glaze are equivalent to one or two coats of a dipped glaze. The finished sprayed form will look fuzzy from the buildup of sprayed materials. CMC gum is sprayed over the glazed surface like a fixative to hold the granules onto the surface for loading in the kiln. If this is not done be advised that your finger and hand marks will show on the surface of the form for it is likely that you will remove glaze materials when you are handling the ware. Actually the granules will drop off so that glaze thickness will vary. This cannot be seen until after it is too late and the piece is glaze fired and completed. Underglaze and washes and slips are sprayed if desired under a sprayed glaze. One glaze can be sprayed over another. Thickness variation can be used to change the effect of a single glaze. These options are great to consider for a sculpture where you wish to highlight aspects of a composition. Sprayed glazes can be applied over brushed or airbrushed underglaze, slips, or washes. (Note: More info on airbrushing is on your airbrushing for ceramics handout). Any area covered with wax resist and sprayed must be carefully cleaned with water and a sponge (or a wet Q-tip if smaller) or the glaze residue – bubbles and dots will show! If you wish to block out one area you can tape off the area, wax it or tape paper towels over the area when spraying a second color. Count the sprayed coats. Be sure to spray evenly. Remember the demo that was offered in class. If spraying please consider your health. An N-95 mask is recommended. Turn on the spray booth and vents when working. Remember: The spray booth is set at 35lbs for all sprayed ceramic materials. Safe use of sprayed materials, how to spray and use of the booth are demonstrated in class. Please take any additional notes you need during the demo. Following instructions for technical processes will eventuate in good results. Some say the 80% of the success in glazing is application. Steps for Applying a Decal:
Supplies: Rubbing alcohol, small scissors, glazed ceramic surface, clean water container that the paper fits into, clean water, paper towels, Sherrill red rib. 1. Clean glazed surface with rubbing alcohol to remove oils and dust. Let surface dry completely.
2. Carefully cut out the image as close to the edge using small scissors for complex shapes.
3. Remove the cardboard carefully to expose the decal.
4. Place the decal into clean water to soak. When it is ready the decal can be slide off of the paper.
What remains will be a thin veneer of color and the covercoat. Be careful this is fragile and can
easily tear.
5. Wet the glaze surface with water. Apply the decal. The water will allow you to position the
image and locate it as per your design.
6. Use the red rib to burnish the decal into place. Move from the center outward with light strokes.
Wipe the water off of the rib so that you are actually removing the excess water from between
the decal and glazed surface.
7. Check for air bubbles, creases, and any evident air pockets on the surface. Be sure you decal is
flat against the surface of the glaze.
8. Allow to dry for 12 hours prior to firing. The water needs to evaporate betwwen the decal
surface and the glaze.
Enduring Profiles Firing Profile for Magenta Toners: Put plugs into kiln peep holes.
1. 40 degrees an hour/ to 160 degrees F/ hold as a soak for 120 minutes
2. 130 degrees an hour/ to 800 degrees F/no hold
3. 250 degrees an hour/ to 1580 degrees F/ hold for 25 minutes
4. Allow the kiln to cool
5. Firing time is about 13 hours
Ceramic Figure Sculpture Art 2704C Fall, 2017 Tuesday and Thursday, periods 8-10, Room B-14 Instructor: Ariel Bowman
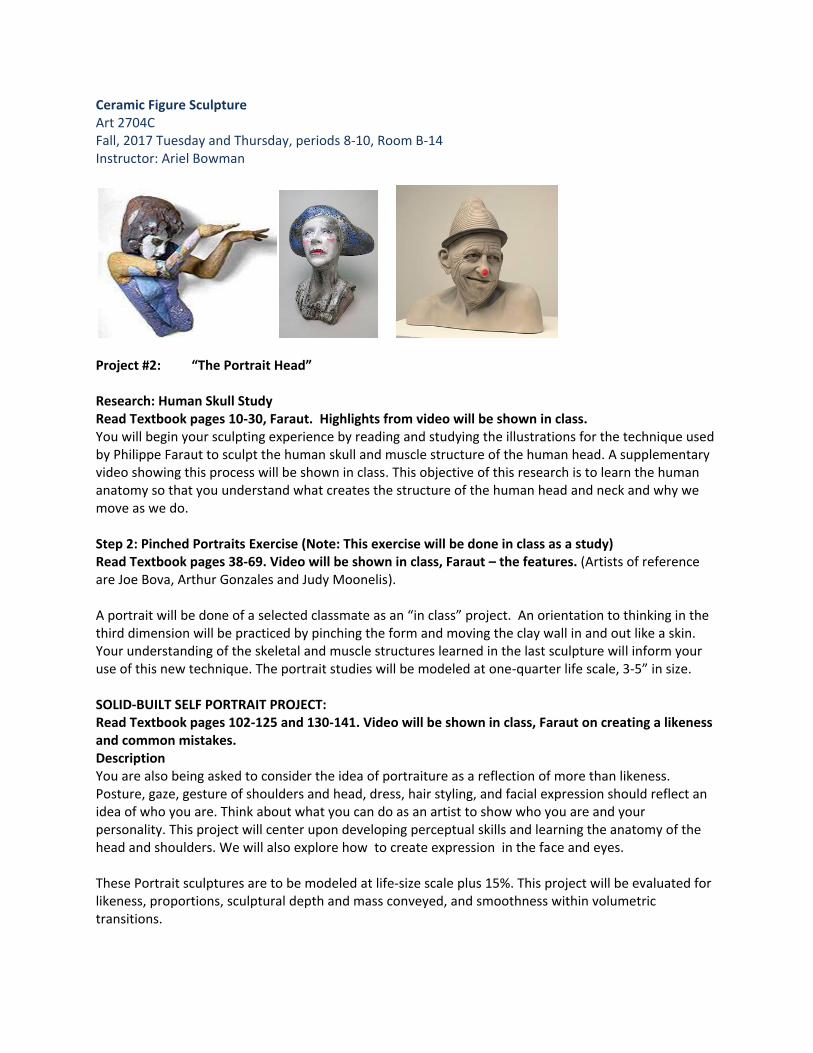
Project #2: “The Portrait Head” Research: Human Skull Study Read Textbook pages 10-30, Faraut. Highlights from video will be shown in class. You will begin your sculpting experience by reading and studying the illustrations for the technique used by Philippe Faraut to sculpt the human skull and muscle structure of the human head. A supplementary video showing this process will be shown in class. This objective of this research is to learn the human anatomy so that you understand what creates the structure of the human head and neck and why we move as we do. Step 2: Pinched Portraits Exercise (Note: This exercise will be done in class as a study) Read Textbook pages 38-69. Video will be shown in class, Faraut – the features. (Artists of reference are Joe Bova, Arthur Gonzales and Judy Moonelis). A portrait will be done of a selected classmate as an “in class” project. An orientation to thinking in the third dimension will be practiced by pinching the form and moving the clay wall in and out like a skin. Your understanding of the skeletal and muscle structures learned in the last sculpture will inform your use of this new technique. The portrait studies will be modeled at one-quarter life scale, 3-5” in size. SOLID-BUILT SELF PORTRAIT PROJECT: Read Textbook pages 102-125 and 130-141. Video will be shown in class, Faraut on creating a likeness and common mistakes. Description You are also being asked to consider the idea of portraiture as a reflection of more than likeness. Posture, gaze, gesture of shoulders and head, dress, hair styling, and facial expression should reflect an idea of who you are. Think about what you can do as an artist to show who you are and your personality. This project will center upon developing perceptual skills and learning the anatomy of the head and shoulders. We will also explore how to create expression in the face and eyes. These Portrait sculptures are to be modeled at life-size scale plus 15%. This project will be evaluated for likeness, proportions, sculptural depth and mass conveyed, and smoothness within volumetric transitions.
Process You will be asked to provide photos of your head in the round and a mirror. Photos should include a shot of each profile, ¾, front, back and top views of your head. Put all photos on a reference board to bring to class. These will be your perceptual resources for the project along with your mirror to check dimensionality and to understand anatomy and finer details. You will begin by doing 2 drawings, front view and profile view, to scale on newspaper or newsprint. Measure your head and shoulders and scale up by 15 per cent. These drawings will be used as references for proportions and to understand depth and dimension. A demonstration of how to build using an armature will be shown during class. Armatures will be provided. The research, reading and preparatory study will lead you to understand structure and working hollow. Solid modeling allows an artist to make changes and keep the clay wet over a longer period. Once the sculpture is completed it will be cut apart and hollowed. Hollowing will occur at the leather hard state. After hollowing, it will be re-assembled and final detailing will take place. Follow steps for hollowing listed for Project 1. Surfacing/Glaze The sculpture will be polychromed using ceramic underglaze and glaze materials. Imagery can be applied on the surface using the sgraffitti technique at the leather hard state. Another suggested technique is using stencil and applying imagery on the bisque fired sculpture using an airbrush. Tutorials will be offered. Glaze testing will be required. Low fire metallic or stone glaze are also suggested. A glaze demonstration will be done in class. Steps for Building onto the Armature 1. Measure the length of the head, neck and shoulders and make the pipe using tape so that you see
these measurements.
2. Add newspaper or bubble wrap to metal armature and secure with painters or masking tape. Add
plastic bag over paper to make the filler water tight if using paper.
3. Be certain that you form the filler so that it looks like the skull and not like a sphere. Do not place
much paper around the neck area and do add shoulders. Consider the posture and location of the
armature when doing this step.
4. Veneer 2 inches of clay to create a consistent wall over the filled out armature.
5. Form the clay so that it looks like a skull. Be sure the make this base for as symmetrical as possible.
To do this work on one side of the head and then match the form on the other side of the head. Use
your serrated rib to blend and remove clay. Use you red rib to smooth the clay so that you can
clearly see the form.
Criterion for Grading Portrait Sculpture Gestural Expressiveness indicating personal concept 10% Anatomical Correctness (accuracy, believable gesture) 10% Scale 5% Perceptual Skill indicated through Modeling (were you really looking?) Modeling – Eyes 10%
Modeling – Ears 10% Modeling – Hair 10% Modeling – Mouth 10% Modeling – Clothing or Accessories 5% Craft (detailing, finishing, surfaces, bottom edge, appropriate weight after hollowing) 10% Aesthetics and Modeling Style (evidence of hand, consistency of sculptural quality of touch) 10% Degree of Difficulty/Degree of Success 10% Completed on Time? (5 points of average taken off if late) Glaze or surface finish/ A Separate Grade for this project Concept and image development; originality, is idea communicated __20%___ Crafting; application of glaze, consistency of surface, control of thickness __20%___ Color usage; supporting idea and design __20%___ Experimentation with sgraffito, stencils/airbrush, metallic glazes __20%___ Glaze testing __10%___ Completed on Time? ( 5 points of average taken off if late) Firing Participation Notes: Loaded bisque, Fired Bisque, Unloaded Bisque, Loaded Glaze, __5%___ Unloaded glaze loaded decal, unloaded decal. Presentation for Crit: on pedestal, fully completed? __5%___
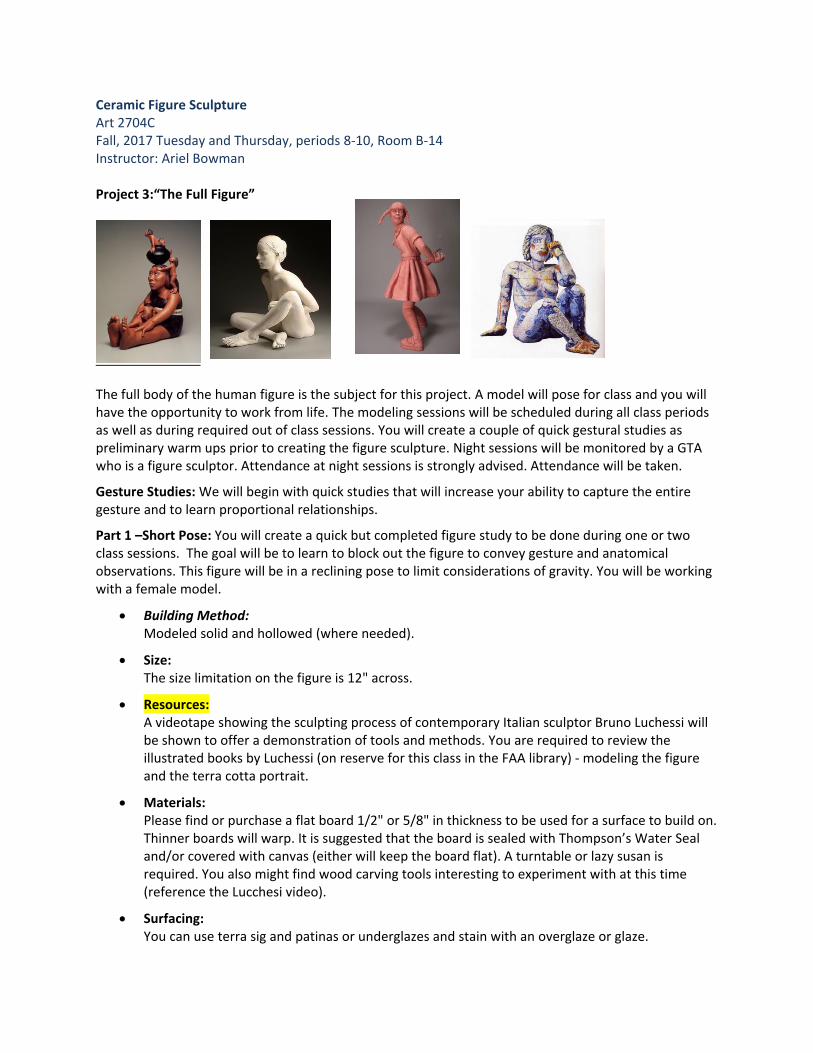
Ceramic Figure Sculpture Art 2704C Fall, 2017 Tuesday and Thursday, periods 8-10, Room B-14 Instructor: Ariel Bowman Project 3:“The Full Figure”
The full body of the human figure is the subject for this project. A model will pose for class and you will have the opportunity to work from life. The modeling sessions will be scheduled during all class periods as well as during required out of class sessions. You will create a couple of quick gestural studies as preliminary warm ups prior to creating the figure sculpture. Night sessions will be monitored by a GTA who is a figure sculptor. Attendance at night sessions is strongly advised. Attendance will be taken.
Gesture Studies: We will begin with quick studies that will increase your ability to capture the entire gesture and to learn proportional relationships.
Part 1 –Short Pose: You will create a quick but completed figure study to be done during one or two class sessions. The goal will be to learn to block out the figure to convey gesture and anatomical observations. This figure will be in a reclining pose to limit considerations of gravity. You will be working with a female model.
Building Method: Modeled solid and hollowed (where needed).
Size: The size limitation on the figure is 12" across.
Resources: A videotape showing the sculpting process of contemporary Italian sculptor Bruno Luchessi will be shown to offer a demonstration of tools and methods. You are required to review the illustrated books by Luchessi (on reserve for this class in the FAA library) - modeling the figure and the terra cotta portrait.
Materials: Please find or purchase a flat board 1/2" or 5/8" in thickness to be used for a surface to build on. Thinner boards will warp. It is suggested that the board is sealed with Thompson’s Water Seal and/or covered with canvas (either will keep the board flat). A turntable or lazy susan is required. You also might find wood carving tools interesting to experiment with at this time (reference the Lucchesi video).
Surfacing: You can use terra sig and patinas or underglazes and stain with an overglaze or glaze.
Criterion for grading: Anatomical accuracy, proportion, and gesture will be evaluated and discussed as you work.
Part 2 – Long Pose: You will create a more comprehensive figure sculpture complete with detailed modeling of face, hands and feet. This sculpture is to reflect the modeling style of a sculptor you admire. You are to create a context for the figure through the addition of an accessory that you sculpt. This could be a piece of clothing, armour, a hat, an animal. The sculpture will go beyond the academic figure modelled and gain individuality through the selection of this element and selection of a modeling style.
During this second figure modeling sequence the group will have a voice in the pose selected (perhaps seated or standing). This project will focus on developing modeling style and increasing the size of the sculpture.
Building Method:
Option to work solid or with slabs and pinch.
Size: The size of this figure will be 20” in the largest dimension.
Resources: Slides will be shown in class of ceramic figure sculptors who work within an academy style or with evident anatomical consideration including: Doug Jeck, Ron Meuch, Joseph Chinard, August Rodin and others.
Choose a figurative sculptor (realist) whose aesthetic style captures your interest. The artist can be from any period in Art History or a contemporary figurative sculptor. The sculptor does not have to work exclusively in clay.
Goals: This assignment requires that you research the style of the sculptor by looking at, at least ten sculptural pieces by the artist. Choose one piece and do a drawing where you note proportions and body type. Analyze it and list the elements of the sculptural style including; massiveness, gesture, articulation (hair, eyes, hands) simplification, posture, draped/nude, facial expression, etc.
Incorporate this “sculptural style” into youre sculpture. The sculpture is to remain anatomically correct and as life-like and “realistic” as your skills and perception will permit. The style for modeling, however, might emulate Rodin, loose and flowing, might reflect Donatello’s style tight and linear (compare to Ingres in drawing) or like Michelangelo’s muscular articulations; massive hard and robust.
Surfacing and Glazing: You can use terra sig and patinas or underglazes and stain with an overglaze. Color, pattern, and surface imagery will create meaning and context and punctuate the concept of your figure sculpture. Please be inventive.
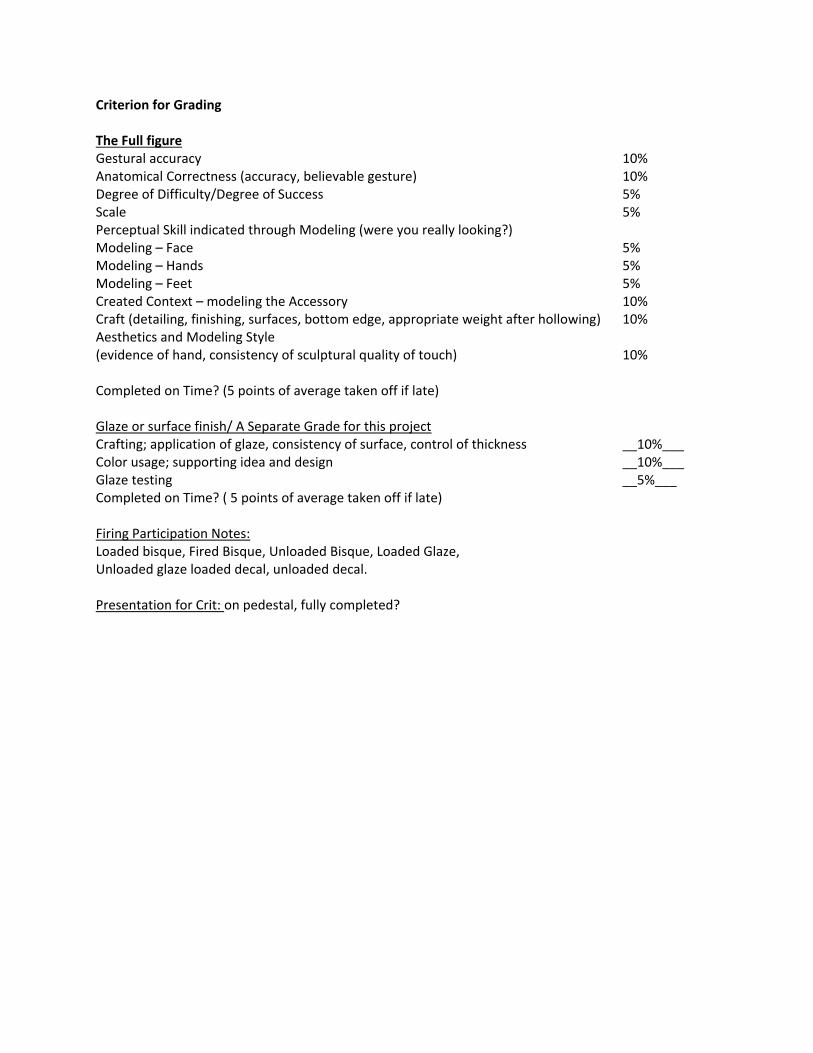
Criterion for Grading The Full figure Gestural accuracy 10% Anatomical Correctness (accuracy, believable gesture) 10% Degree of Difficulty/Degree of Success 5% Scale 5% Perceptual Skill indicated through Modeling (were you really looking?) Modeling – Face 5% Modeling – Hands 5% Modeling – Feet 5% Created Context – modeling the Accessory 10% Craft (detailing, finishing, surfaces, bottom edge, appropriate weight after hollowing) 10% Aesthetics and Modeling Style (evidence of hand, consistency of sculptural quality of touch) 10% Completed on Time? (5 points of average taken off if late) Glaze or surface finish/ A Separate Grade for this project Crafting; application of glaze, consistency of surface, control of thickness __10%___ Color usage; supporting idea and design __10%___ Glaze testing __5%___ Completed on Time? ( 5 points of average taken off if late) Firing Participation Notes: Loaded bisque, Fired Bisque, Unloaded Bisque, Loaded Glaze, Unloaded glaze loaded decal, unloaded decal. Presentation for Crit: on pedestal, fully completed?