CCW Handgun Drills
33
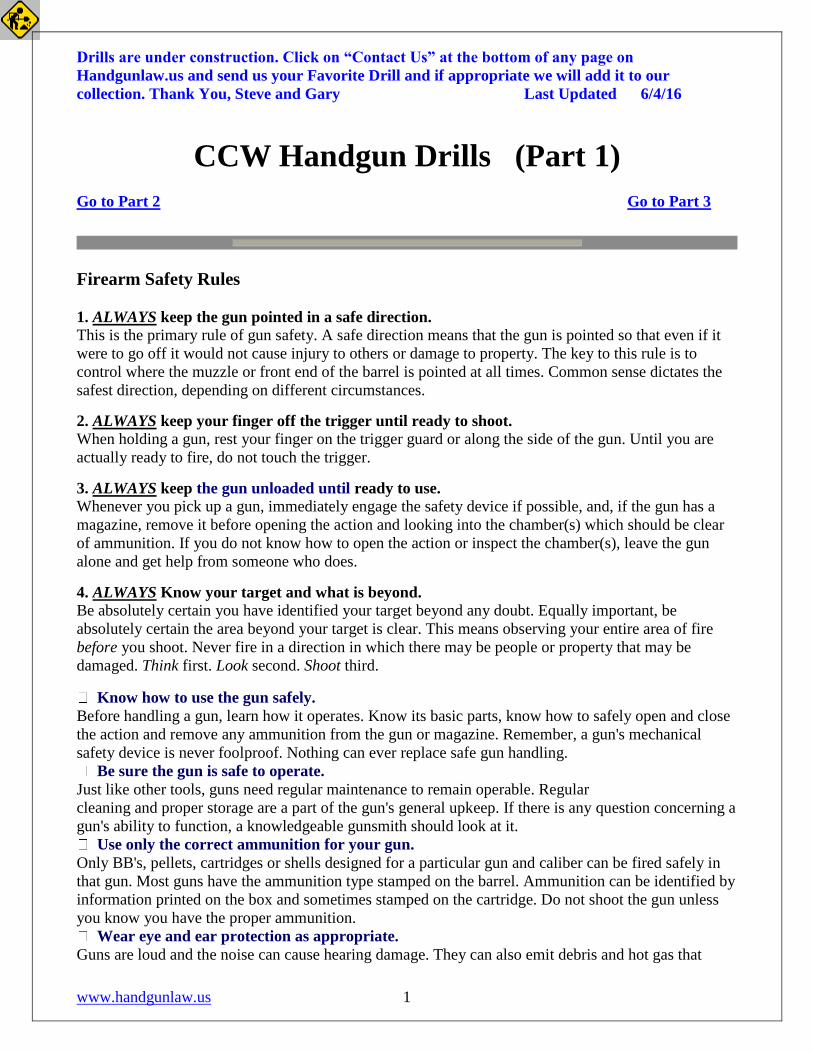
www.handgunlaw.us 1 Drills are under construction. Click on “Contact Us” at the bottom of any page on Handgunlaw.us and send us your Favorite Drill and if appropriate we will add it to our collection. Thank You, Steve and Gary Last Updated 6/4/16 CCW Handgun Drills (Part 1) Go to Part 2 Go to Part 3 Firearm Safety Rules 1. ALWAYS keep the gun pointed in a safe direction. This is the primary rule of gun safety. A safe direction means that the gun is pointed so that even if it were to go off it would not cause injury to others or damage to property. The key to this rule is to control where the muzzle or front end of the barrel is pointed at all times. Common sense dictates the safest direction, depending on different circumstances. 2. ALWAYS keep your finger off the trigger until ready to shoot. When holding a gun, rest your finger on the trigger guard or along the side of the gun. Until you are actually ready to fire, do not touch the trigger. 3. ALWAYS keep the gun unloaded until ready to use. Whenever you pick up a gun, immediately engage the safety device if possible, and, if the gun has a magazine, remove it before opening the action and looking into the chamber(s) which should be clear of ammunition. If you do not know how to open the action or inspect the chamber(s), leave the gun alone and get help from someone who does. 4. ALWAYS Know your target and what is beyond. Be absolutely certain you have identified your target beyond any doubt. Equally important, be absolutely certain the area beyond your target is clear. This means observing your entire area of fire before you shoot. Never fire in a direction in which there may be people or property that may be damaged. Think first. Look second. Shoot third. Know how to use the gun safely. Before handling a gun, learn how it operates. Know its basic parts, know how to safely open and close the action and remove any ammunition from the gun or magazine. Remember, a gun's mechanical safety device is never foolproof. Nothing can ever replace safe gun handling. Be sure the gun is safe to operate. Just like other tools, guns need regular maintenance to remain operable. Regular cleaning and proper storage are a part of the gun's general upkeep. If there is any question concerning a gun's ability to function, a knowledgeable gunsmith should look at it. Use only the correct ammunition for your gun. Only BB's, pellets, cartridges or shells designed for a particular gun and caliber can be fired safely in that gun. Most guns have the ammunition type stamped on the barrel. Ammunition can be identified by information printed on the box and sometimes stamped on the cartridge. Do not shoot the gun unless you know you have the proper ammunition. Wear eye and ear protection as appropriate. Guns are loud and the noise can cause hearing damage. They can also emit debris and hot gas that
Transcript of CCW Handgun Drills
www.handgunlaw.us 1
Drills are under construction. Click on “Contact Us” at the bottom of any page on
Handgunlaw.us and send us your Favorite Drill and if appropriate we will add it to our
collection. Thank You, Steve and Gary Last Updated 6/4/16
CCW Handgun Drills (Part 1)
Go to Part 2 Go to Part 3
Firearm Safety Rules
1. ALWAYS keep the gun pointed in a safe direction. This is the primary rule of gun safety. A safe direction means that the gun is pointed so that even if it
were to go off it would not cause injury to others or damage to property. The key to this rule is to
control where the muzzle or front end of the barrel is pointed at all times. Common sense dictates the
safest direction, depending on different circumstances.
2. ALWAYS keep your finger off the trigger until ready to shoot. When holding a gun, rest your finger on the trigger guard or along the side of the gun. Until you are
actually ready to fire, do not touch the trigger.
3. ALWAYS keep the gun unloaded until ready to use. Whenever you pick up a gun, immediately engage the safety device if possible, and, if the gun has a
magazine, remove it before opening the action and looking into the chamber(s) which should be clear
of ammunition. If you do not know how to open the action or inspect the chamber(s), leave the gun
alone and get help from someone who does.
4. ALWAYS Know your target and what is beyond.
Be absolutely certain you have identified your target beyond any doubt. Equally important, be
absolutely certain the area beyond your target is clear. This means observing your entire area of fire
before you shoot. Never fire in a direction in which there may be people or property that may be
damaged. Think first. Look second. Shoot third.
Know how to use the gun safely.
Before handling a gun, learn how it operates. Know its basic parts, know how to safely open and close
the action and remove any ammunition from the gun or magazine. Remember, a gun's mechanical
safety device is never foolproof. Nothing can ever replace safe gun handling.
Be sure the gun is safe to operate.
Just like other tools, guns need regular maintenance to remain operable. Regular
cleaning and proper storage are a part of the gun's general upkeep. If there is any question concerning a
gun's ability to function, a knowledgeable gunsmith should look at it.
Use only the correct ammunition for your gun.
Only BB's, pellets, cartridges or shells designed for a particular gun and caliber can be fired safely in
that gun. Most guns have the ammunition type stamped on the barrel. Ammunition can be identified by
information printed on the box and sometimes stamped on the cartridge. Do not shoot the gun unless
you know you have the proper ammunition.
Wear eye and ear protection as appropriate.
Guns are loud and the noise can cause hearing damage. They can also emit debris and hot gas that
www.handgunlaw.us 2
could cause eye injury. For these reasons, safety glasses and hearing protection should always be worn
by shooters and spectators.
Never use alcohol or over-the-counter, prescription or other drugs before or while shooting.
Alcohol, as well as any other substance likely to impair normal mental or physical bodily functions,
must not be used before or while handling or shooting guns.
Store guns so they are not accessible to unauthorized persons.
Many factors must be considered when deciding where and how to store guns. A person's particular
situation will be a major part of the consideration. Dozens of gun storage devices, as well as locking
devices that attach directly to the gun, are available. However, mechanical locking devices, like the
mechanical safeties built into guns, can fail and should not be used as a substitute for safe gun handling
and the observance of all gun safety rules.
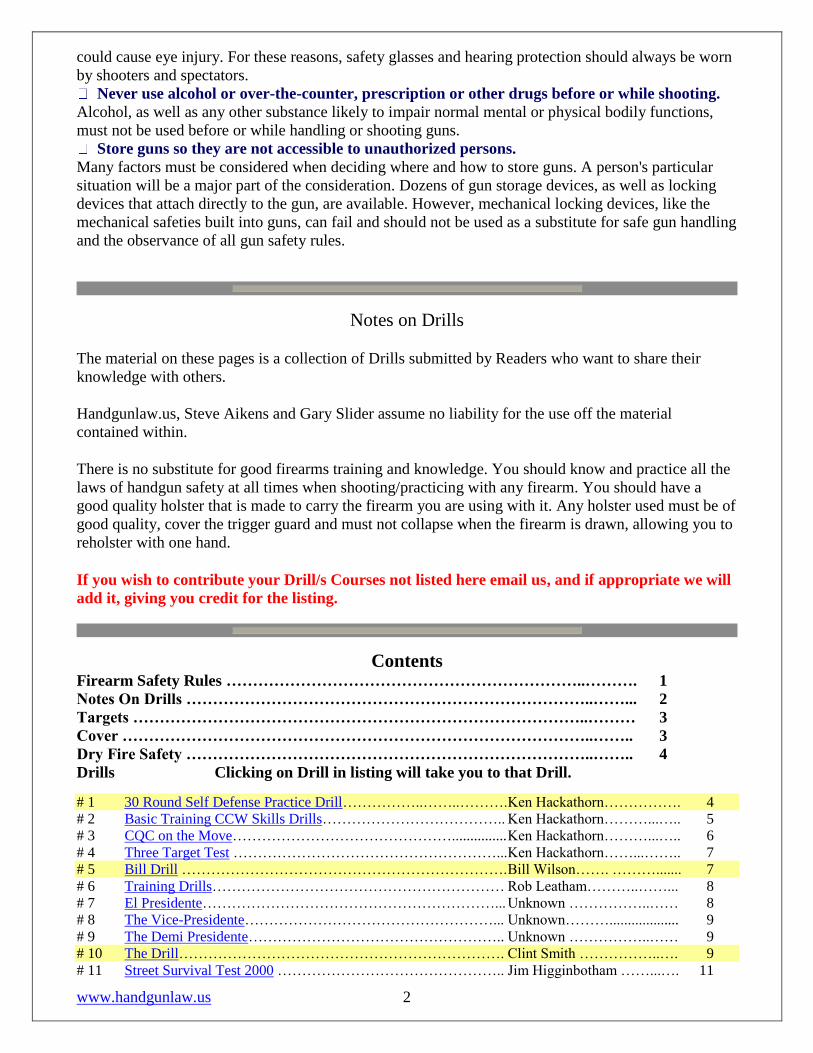
Notes on Drills
The material on these pages is a collection of Drills submitted by Readers who want to share their
knowledge with others.
Handgunlaw.us, Steve Aikens and Gary Slider assume no liability for the use off the material
contained within.
There is no substitute for good firearms training and knowledge. You should know and practice all the
laws of handgun safety at all times when shooting/practicing with any firearm. You should have a
good quality holster that is made to carry the firearm you are using with it. Any holster used must be of
good quality, cover the trigger guard and must not collapse when the firearm is drawn, allowing you to
reholster with one hand.
If you wish to contribute your Drill/s Courses not listed here email us, and if appropriate we will
add it, giving you credit for the listing.
Contents Firearm Safety Rules …………………………………………………………..………. 1
Notes On Drills …………………………………………………………………..……... 2
Targets …………………………………………………………………………..……… 3
Cover ……………………………………………………………………………..…….. 3
Dry Fire Safety …………………………………………………………………..…….. 4
Drills Clicking on Drill in listing will take you to that Drill.
# 1 30 Round Self Defense Practice Drill……………..…….. ………. Ken Hackathorn……………. 4
# 2 Basic Training CCW Skills Drills……………………………….. Ken Hackathorn………...….. 5
# 3 CQC on the Move………………………………………............... Ken Hackathorn………...….. 6
# 4 Three Target Test ………………………………………………... Ken Hackathorn……...…….. 7
# 5 Bill Drill …………………………………………………………. Bill Wilson……. ………....... 7
# 6 Training Drills…………………………………………………… Rob Leatham………..……... 8
# 7 El Presidente……………………………………………………... Unknown ……………..…… 8
# 8 The Vice-Presidente……………………………………………... Unknown………................... 9
# 9 The Demi Presidente…………………………………………….. Unknown ……………..…… 9
# 10 The Drill…………………………………………………………. Clint Smith ……………..…. 9
# 11 Street Survival Test 2000 ……………………………………….. Jim Higginbotham ……...…. 11
www.handgunlaw.us 3
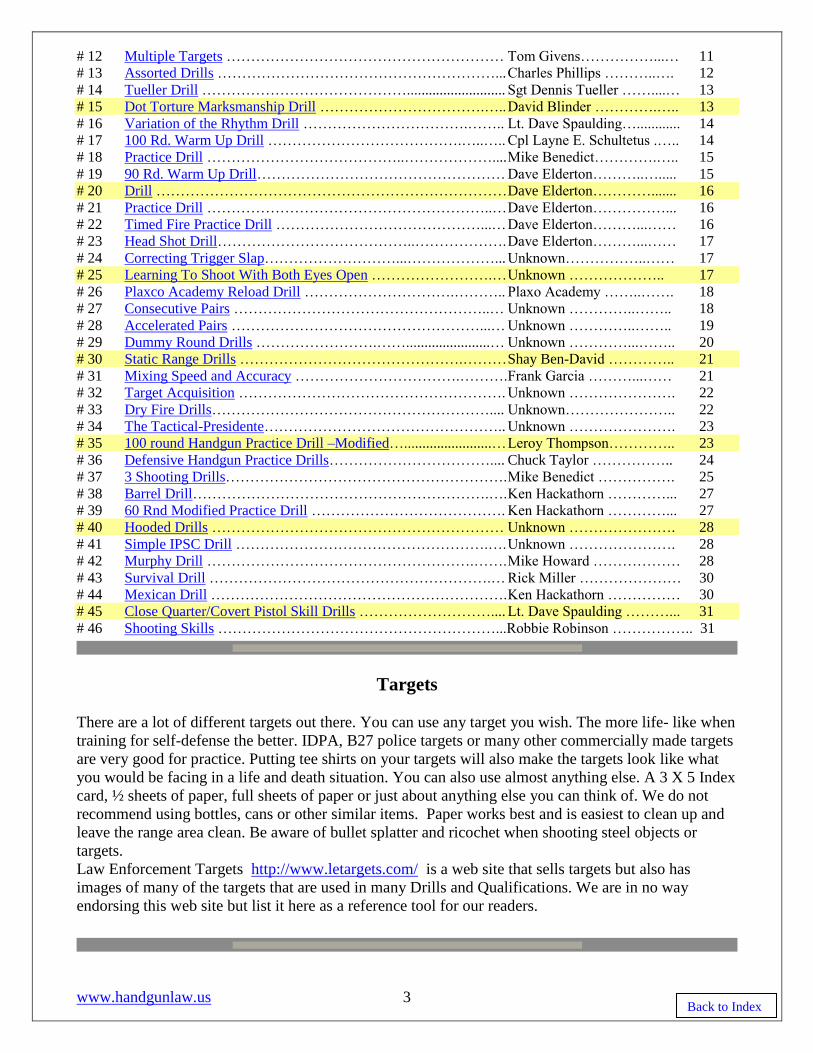
# 12 Multiple Targets ………………………………………………… Tom Givens……………...… 11
# 13 Assorted Drills …………………………………………………... Charles Phillips ………..…. 12
# 14 Tueller Drill ……………………………………........................... Sgt Dennis Tueller ……....… 13
# 15 Dot Torture Marksmanship Drill …………………………….….. David Blinder ………….….. 13
# 16 Variation of the Rhythm Drill …………………………….…….. Lt. Dave Spaulding…............ 14
# 17 100 Rd. Warm Up Drill ………………………………….…..….. Cpl Layne E. Schultetus .….. 14
# 18 Practice Drill …………………………………..……………….... Mike Benedict………….….. 15
# 19 90 Rd. Warm Up Drill…………………………………………… Dave Elderton………..…..... 15
# 20 Drill ……………………………………………………………… Dave Elderton…………....... 16
# 21 Practice Drill …………………………………………………..… Dave Elderton……………... 16
# 22 Timed Fire Practice Drill ……………………………………...… Dave Elderton………...…… 16
# 23 Head Shot Drill…………………………………..………………. Dave Elderton………...…… 17
# 24 Correcting Trigger Slap………………………...………………... Unknown……………..…… 17
# 25 Learning To Shoot With Both Eyes Open …………………….… Unknown ……………….. 17
# 26 Plaxco Academy Reload Drill ………………………….……….. Plaxo Academy ……..……. 18
# 27 Consecutive Pairs ……………………………………………..… Unknown …………..…….. 18
# 28 Accelerated Pairs ……………………………………………...… Unknown …………..…….. 19
# 29 Dummy Round Drills …………………….…….......................… Unknown …………...…….. 20
# 30 Static Range Drills ……………………………………….……… Shay Ben-David ………….. 21
# 31 Mixing Speed and Accuracy …………………………….………. Frank Garcia ………...…… 21
# 32 Target Acquisition ………………………………………………. Unknown …………………. 22
# 33 Dry Fire Drills………………………………………………….... Unknown………………….. 22
# 34 The Tactical-Presidente………………………………………….. Unknown …………………. 23
# 35 100 round Handgun Practice Drill –Modified…........................… Leroy Thompson………….. 23
# 36 Defensive Handgun Practice Drills…………………………….... Chuck Taylor …………….. 24
# 37 3 Shooting Drills…………………………………………………. Mike Benedict ……………. 25
# 38 Barrel Drill…………………………………………………….…. Ken Hackathorn …………... 27
# 39 60 Rnd Modified Practice Drill …………………………………. Ken Hackathorn …………... 27
# 40 Hooded Drills …………………………………………………… Unknown …………………. 28
# 41 Simple IPSC Drill …………………………………………….…. Unknown …………………. 28
# 42 Murphy Drill ……………………………………………….……. Mike Howard ……………… 28
# 43 Survival Drill ………………………………………………….… Rick Miller ………………… 30
# 44 Mexican Drill ……………………………………………………. Ken Hackathorn …………… 30
# 45 Close Quarter/Covert Pistol Skill Drills ……………………….... Lt. Dave Spaulding ………... 31
# 46 Shooting Skills …………………………………………………...Robbie Robinson …………….. 31
Targets
There are a lot of different targets out there. You can use any target you wish. The more life- like when
training for self-defense the better. IDPA, B27 police targets or many other commercially made targets
are very good for practice. Putting tee shirts on your targets will also make the targets look like what
you would be facing in a life and death situation. You can also use almost anything else. A 3 X 5 Index
card, ½ sheets of paper, full sheets of paper or just about anything else you can think of. We do not
recommend using bottles, cans or other similar items. Paper works best and is easiest to clean up and
leave the range area clean. Be aware of bullet splatter and ricochet when shooting steel objects or
targets.
Law Enforcement Targets http://www.letargets.com/ is a web site that sells targets but also has
images of many of the targets that are used in many Drills and Qualifications. We are in no way
endorsing this web site but list it here as a reference tool for our readers.
Back to Index
www.handgunlaw.us 4
Cover
In any self-defense use of a firearm, avoiding getting shot is equally important as stopping the attacker.
You should always practice moving to cover and shooting from cover when you practice with your
firearm. You will react as you train and moving to cover during practice will lead to, in most cases,
moving to cover when your handgun comes out in that self defense situation. If you practice that way
you will react that way. Perfect practice makes perfect.
This is how everyone is training now. As we learn more and more about what happens in life and
death situations, we are learning we react exactly as we have trained. Most Drills don’t take cover into
consideration. Do make changes to the standards listed here and use cover or move to cover at the start
of your draw.
Dry Fire Safety
Pick one room for dry fire practice and remove any ammunition from that room. Do not allow any
ammunition to come into that room. You can use snap caps if you are concerned about damaging your
firearm while dry firing. Contact the maker of your firearm if you are concerned about dry firing your
handgun. Do not dry fire a rim fire firearm like a .22 or .17 without snap caps. Dry firing those
firearms without snap caps will damage the firearm.
Practicing reloading along with your dry fire Drills must be done only with snap caps. You cannot
allow any ammo into the room and those few dollars for snap caps are a lot cheaper than putting holes
in something in your home or worse, negligently shooting someone. Never forget that you are 100%
responsible for all rounds that come out of your firearm.
Firearm Drills
#1 30 Round Self Defense Practice Drill Ken Hackathorn
With just one IDPA sized target, a sheet of target patches, and the Drills that I will enumerate below,
one can now have a decent guide in teaching oneself the finer points of armed self defense. A friend
with a competition timer will also come in handy. All Drills involve firing live ammunition and should
only be performed in a shooting range or a place where there is no danger of hitting anything other
than your target or its backstop. Oh yeah, you'll also need a gun. The instructions below assume that
you are using a semi-auto pistol, for wheel-gunners replace magazine changes with speed loader
reloads.
Remember to observe and practice the four rules of gun safety.
1. From 5 yards, allowing 1 ½ seconds, beginning at "low ready" one shot to head.
Repeat 3 times.
2. From 5 yards, allowing 2 seconds, beginning with gun holstered, one shot to head.
Repeat 3 times.
3. From 5 yards, allowing 2 seconds, beginning at "low ready," strong hand only, two shots to body.
Repeat 2 times.
Back to Index
www.handgunlaw.us 5
4. From 7 yards, allowing 2 seconds, facing 90° to left of target, gun holstered, two shots to body.
One time only.
5. From 7 yards, allowing 2 seconds, facing 90° to right of target, gun holstered, two shots to body.
One time only.
6. From 7 yards, allowing 2 seconds, facing target, gun holstered, two shots to body.
One time only.
7. From 7 yards, allowing 4 seconds, while backing to 10-12 yards, three shots to body.
Repeat 2 times.
8. From 10 yards, allowing 3 seconds, beginning with gun on target and round in chamber, change
magazine and fire one shot to body.
Repeat 2 times.
9. From 10 yards, allowing 3 seconds, beginning with gun on target and slide locked back, change
magazine and fire one shot to body.
One time only.
10. From 15 yards, allowing 2 ½ seconds, draw and fire one shot to body.
Repeat 5 times.
Head shots only count if you hit the A zone of the "head" of the target. Body shots count if you hit the
A, B, or C zones of the "body" of the target.
It is best to do these exercises with the same sidearm you intend to carry and with the same holster you
plan to use. For most of us, this will be a concealed carry sidearm and concealment holster. Also
wearing a shirt or vest that properly conceals the weapon is also recommended as the idea is to practice
what you will do should you ever need to use your CCW piece in self defense. Assume that all Drills
that require starting with a holstered firearm mean a holstered and concealed firearm. Using your star
trek mod 1911 and an offset, fast draw holster won't really teach you much about drawing and
presentation which is what these Drills are mostly about. Think real world.
Don't expect to be able to do all of these within the time required in your first few attempts, few
meaning less than fifty. While this is not a substitute for proper training, it sure is a good start for many
of us.
#2 Basic Training CCW Skills Drills Ken Hackathorn
3 yards On the signal draw keeping the gun in the retention position (Gun close to body) and fire 2 rounds
center mass. Repeat twice for a total of 6 rounds.
5 yards On signal draw and fire either 1 round or dedicated pairs firing strong hand only. It is advisable to
make some shots eye level point shots with hard focus on the target, not the sights. Fire a total of 6
rounds.
3 yards On signal back away from the target, draw and fire 3 rounds center mass while moving. Try to get to
the 7 yard line by the time you fire your last round. Repeat once for a total of 6 rounds.
7 yards
Back to Index
www.handgunlaw.us 6
On signal draw and fire a dedicated pair center mass, slowly go to ready and scan the area and
reholster. Repeat twice for a total of 6 rounds.
7 yards Move from center of target a few steps. On signal draw and fire 3 rounds center of mass moving
laterally across the range. Repeat going in the opposite direction. Move only as fast as you can hit the
target.
6 and 10 yards Draw and fire 1 round on each of 3 targets placed at varied distances on the range. Targets are placed
between 6 and 10 yards, also vary heights of targets. Repeat using dedicated pairs on each target.
7 yards Place firearm on the ground, on the signal with your strong hand tucked into your belt pick up the
firearm with your support hand and fire 1 round center of mass. Repeat once for a total of two rounds.
15 yards Draw and fire 1 round in 2.5 seconds. Repeat twice for a total of 3 rounds. These should be very
precise hits. (Hack considers this long range for self-defense, however should be practiced.)
With additional ammunition repeat course utilizing your favorite flashlight technique, or add
movement away from targets on all 10 yard or less stages.
#3 CQC on the Move Ken Hackathorn
Ammunition Required: 50 rounds
Target: IDPA silhouette scored 5-4-2.
Time Limits: Basic time limits as noted. As shooter skill increases, either shorten the time limits or
increase the distance to the target.
Stage 1 -- 3 yards/Close Combat
Shooting is done from a close combat/weapon retention position, with the weapon already drawn. Fire
2 rounds in 2 seconds. 3X total of 6 rounds.
Stage 2 -- 3 yards/Retreating from the target
On signal, begin backing away from the target. Draw and engage the target with at least 3 rounds while
moving backwards. You should end the movement at the 10 yard line. 2X. Total of 6 rounds.
Your goal is to rapidly gain distance from the threat while you are drawing and engaging the target.
The greater the distance you are from the threat, the greater your chances of survival.
Stage 3 -- 5 yards/Strong Hand Only
On signal, draw and engage the target with 2 rounds in 4 seconds STONG HAND ONLY. 3X. Total of
6 rounds.
Stage 4 -- 7 yards/Double Taps
On signal, draw and engage the target with 2 rounds in 4 seconds. 4X. Total of 8 rounds.
Stage 5 -- 7 yards/Lateral Movement
Back to Index
www.handgunlaw.us 7
How to perform this drill depends on the configuration of your range facility. The goal is to draw,
begin lateral movement, and engage the target with three rounds. This should be accomplished moving
to your strong side, and also to your weak side. 2X. Total of 6 rounds.
This exercise increases your skills at placing your shots effectively while moving to cover or if your
only path of escape is moving laterally. Go slowly at first, and then pick up your speed of movement
only as fast as you can get good hits.
Stage 6--7 or 10 yards/Multiple Targets
Facing three targets. On signal, draw and engage each target with two rounds, perform a mandatory
reload, and re-engage each target with two rounds. Total of 12 rounds fired. Par time is 15 seconds for
auto pistols and 18 seconds for revolvers.
Stage 7 -- 15 yards/Single Target for accuracy
On signal, draw and engage the target with 1 round in 3 seconds. 6X. Total of 12 rounds.
#4 Three Target Test Ken Hackathorn
I have a simple test I run when checking new trainees or operators. I place three NRA five-yard
bullseye centers up at 10 yards. I ask the student to fire six rounds at the first target slow fire, about 2.5
minutes normally). Next I ask them to fire six rounds at the second bullseye in 10 seconds, and finally
six rounds at the third in five seconds.
Each string starts with the handgun in hand, at the ready. This is done with both hands on the gun in
whatever grip or stance the student prefers. If the student cannot shoot a good slow fire group on the
first target, with plenty of time for using good sight alignment and precise trigger control-- guess what?
The second and third targets are pretty sad.
My key point is that if you cannot fire an accurate group at 10 yards taking your time, you will be in
big trouble if you ever expect to do anything well using marksmanship as a goal. Simply put, you had
better learn the basics before you plan on being anything serious with a handgun.
#5 Bill Drill (after Bill Wilson)
Teaches: draw, grip, rapid-fire, recoil control, "adequate" rather than "perfect" sight picture.
With one IPSC target 7 yards away, start from surrender position, draw, and fire 6 shots into the A-
zone. If any shots miss the A-zone, the time does not count, so the emphasis is on accuracy before
speed.
Brian Enos puts master-level time for this Drill as 2.0 seconds.
Variations: for a beginner, bring the target as close as 8 feet, or start from low ready instead of
holstered. Shoot as fast as you can while keeping the shots in the A-zone and keeping a feeling of
control over the gun. The point is to get used to the feeling of controlled rapid fire, learning to watch
Back to Index
www.handgunlaw.us 8
the sight, and familiarizing yourself with rapid-fire recoil characteristics. Drawing from the holster
helps you to learn to acquire a good shooting grip; otherwise the gun will start to feel out of control. If
you are missing the A-zone, you're making mistakes. SLOW DOWN and do it right. This Drill can be
a real ammo burner.
#6 Training Drills Rob Leatham
Slow Fire Drill -- Five shots on target, unlimited time, two hand standing position. Done once each
from 5, 10, 15, 20 and 25 yards. Each shot reinforces the basics and the shooter also verifies sight zero.
Five-Second Drill -- The shooter has five seconds to draw and fire a single shot. This is an opportunity
to refresh muscle-memory and make sure every moment from the draw to the shot placement is
correct. Then the shooter repeats the Drill with three rounds, then with four rounds, then with five
rounds, etc. all the way up to ten rounds in five seconds. Distance begins at 3, then to 5, 7 and 10
yards. All shots must be in the A-zone of the target.
Three-Grasp Drill -- The shooter draws and fires two shots from their preferred two-hand stance, then
shoots two rounds strong hand only and then two rounds weak hand only. (An alternate version is to
fire one shot from each position). This is conducted from 3,5,7 and 10 yards, all shots in the A-zone of
the target.
Shoot And Move Drill -- Fire five shots moving forward. Then five shots retreating. Then begin at the
10 yard line and leave a magazine on the ground at the 3 yard line. At the start signal, move forward
firing until you have reached the point where you placed the fresh magazine. Pick up the magazine
from the ground and reload and then fire as you retreat back to the starting point.
Shoot - Reload - Shoot Drill -- At ten yards, facing a single target. Draw and fire six rounds, reload,
and fire another six rounds. The shooter should fire as fast as they can and still keep all hits within the
A-zone of the target.
The El Presidente Drill -- At ten yards, facing three targets placed one yard apart, shoulder to
shoulder. At the signal, draw and fire two rounds on each target, reload, and re-engage each target with
two rounds. The shooter should fire as fast as they can and still keep all hits within the A-zone of the
target.
Once the shooter can perform this Drill with consistent good results, practice the traditional "El
Presidente" Drill: Begin with your back to the targets. At the signal, turn and then draw and engage
each target with two rounds, perform a mandatory reload, and re-engage each target with two rounds.
The goal is accuracy, shooting quickly yet keeping all rounds in the A-zone of the target.
Another alternative is performing either one of the versions above, but after the reload engaging the
head of each target with either one or two rounds. Doing this teaches the shooter to "change gears" --
first engaging the targets fast with coarse accuracy and then slowing down to deliver precision head
shots.
#7 El Presidente
Back to Index
www.handgunlaw.us 9
El Presidente was designed by Jeff Cooper as a rough benchmark of handgun skills. It is probably the
most widely known handgun standard around.
Setup: three IPSC targets, spaced one yard apart, 10 yards distant.
Starting Position: gun holstered, spare magazine on belt, hands held above shoulders (surrender
position), facing away (180 degrees) from targets. With standard IPSC comstock scoring.
Par times (for a clean run):
Time is measured from the start signal to the last shot fired.
D Class 15 seconds*
C Class 11.25 seconds
B Class 7.5 seconds
A Class 6.0 seconds
Master Class 5.3 seconds
Drill: At the signal, turn and draw, firing two shots into the A-zone of each target. Reload, and fire
two more shots into each target.
As originally specified, the Drill only counts if all shots are in the A-zone. A missed
A-zone counts as a missed target. But when shot in competition, all hits on the target
usually count, Grandmaster
4.75
seconds
#8 The Vice-Presidente
Designer Unknown
Three targets at 7 yards. Begin facing targets. On signal, draw and
engage each target with two shots each, reload and fire two each again.
A good time for this would be 7 seconds or less.
#9 The Demi-Presidente
Designer unknown
Same target setup as the El Presidente. On signal, turn, draw and
fire two shots to each target, reload, then one head shot each.
A good time would be 10 seconds or less.
Back to Index
www.handgunlaw.us 10
#10 The Drill Clint Smith
100 rounds
Clint has come up with a simple Drill to maintain skill needed for self-defense.
Targets Standard white paper plates and a 3” X 5” index card at 15 yards for all exercises will be used. Stack
dinner plates one above the other with the index card placed above the top dinner plate.
Marksmanship “Shoot well not fast”
From the ready position fire 10 singles on chosen target.
From the ready position fire 5 sighted doubles.
(Practice your trigger reset.)
Loading Put one round in your handgun, fire, when the gun goes empty keep the muzzle on the target and
reload.
“An empty gun is not bad luck; it’s simply a reality of being in a fight.”
Keep the gun between you and the target and reload. Do this Drill 10 times.
Non-Compliant Threats From the ready position fire 2 shots on the center plate and 1 shot on the card. Do this 2 times.
Fire 3 shots on the center plate and 1 on the card. Do this 2 times.
Fire 2 shots on the center plate, 2 shots on the lower plate and 1 shot on the card. Do this 1 time.
Slow down for your head shots. “Remember the head is not a smaller target, it’s just different.”
Drawing Practice our drawing stroke smoothly, speed comes with practice. Fast is spelled SMOOOOTH.
With an UNLOADED firearm draw 10 to 15 times correctly, and smoothly, following through to
include a sight picture and hammer fall. (Remember your dry fire practice rules.)
Load, draw and fire 10 singles, holstering between shots. Remember safety on and finger straight while
holstering.
While drawing take one step back and fire 1 shot. Do this 10 times.
Remember: M & M. “Maximize the distance, minimize the threat.”
Malfunctions “Fights and family vacations have something in common, they rarely come out the way they were
planned.”
Leave the magazine unseated with one in the chamber and fire when ready.
Stick a piece of brass in the top of the ejection port.
Set up a double feed.
The response is always the same, when the gun does not fire. Tap the magazine. Rack the slide harder
and attempt to fire. If it still doesn’t work, remove the magazine and place under your strong hand little
finger. Rack the slide 3 times and reload the gun and fire if you have a valid target.
Run variations 5 times and after clearing, fire 1 shot to complete the cycle of operation in your head.
Go slow and do it correctly. You have 21 rounds for this portion.
Strong and Support Hand
Back to Index
www.handgunlaw.us 11
Fire 5 shots strong hand only from the ready position, carefully transfer the gun to your support hand
and fire 5 shots.
Go slowly and carefully, speed and skill will come with time – and practice.
Depending on your skill level lessen the distance if you’re not hitting the target. Only hits count!!
Beginners should start at 5 yards and move back as skill increases.
#11 Street Survival Test 2000 Jim Higginbotham
2 IDPA targets 1 yard apart edge to edge*
All starts concealed. No "primed" starts.
Stage Range Description PAR time
1A 5yds Draw & Fire 2 rnds on #1 1.50
1B 5yds Draw & Fire 2 rnds on #2 1.50
2 5yds Draw & Fire 2 rnds on ea. 2.50
3A 10yds Start 90 deg. Lft, Draw and fire 1 rnd. on ea. 2.25
3B 10yds Start 90 deg. Rgt, Draw and fire 1 rnd. on ea. 2.25
Total rnds = 12 TTL par time = 10sec
- 5 PTS FOR EA. MISS
Score = 1000 / (TTL Time + .5 Sec For Ea. Point Down )
Example - 5 pts. down in 12 seconds = 1000 / 14.5 = 69
*indoor range allowance (targets 6" apart)
- Score = 900 / (ttl. time + .5 sec for ea. point down)
Expert = 95 or better.
#12 Multiple Target Drill Tom Givens IDPA/ISPC Target
Stage Procedure
1. Facing T1 at 3 yards. From the holster, draw and fire a “double tap”2 rounds in 2 seconds.
Perform 6 times for a total of 12 rounds.
2. Facing T2 at 5 yards. Begin facing 90 degrees right or left. At the
Signal, pivot, then draw and fire 2 rounds in 3 seconds. Do three
Back to Index
www.handgunlaw.us 12
Times facing to the right and three times facing to the left. Perform
6 times for a total of 12 rounds.
3. Facing T1 at 3 yards and T2 at 5 yards. At the signal, draw and fire
A “double tap” on each target, 4 rounds in 4 seconds. Perform 3 times
For a total of 12 rounds.
4. Facing T1 at 3 yards and T2 at 5 yards. At the signal, draw and fire a
“double tap” on each target, followed by a single shot to the head of
each target, 6 rounds in 8 seconds. Perform 2 times for a total of 12 rounds.
5. Facing T1 at 5 yards and T2 at 7 yards. At the signal, draw and fire a
Single head shot on each target, 2 rounds in 5 seconds.
50 total rounds fired (25 on each target) Each hit in the primary scoring zone scored
as 2 points each.
# 13 Assorted Drills Charles Phillips
Each Drill is scored individually: the student must pass each phase.
Drill 1: 4 yards. Start with the weapon in the ready position. 2 rounds in 2 seconds. 3X for a total of 6
rounds.
Drill 2: 4 yards. Start with the weapon holstered. 2 rounds in 3 seconds.
3X for a total of 6 rounds.
Drill 3: 7 yards. Start with the weapon holstered. 2 rounds in 4 seconds.
3X for a total of 6 rounds.
Drill 4: 10 yards. Start with the weapon holstered. 2 rounds in 5 seconds.
3X for a total of 6 rounds.
Drill 5: 7 yards. (Phase 1 Malfunction) Load the magazine with two live and one "dummy" round.
Load the dummy round seconds. Start with the weapon holstered. 2 rounds and a "tap-rack-bang"
malfunction clearance in 8 seconds. 2X for a total of 4 rounds.
Drill 6: 7 yards. (Phase II Malfunction). Insert a dummy round into the chamber and then attempt to
chamber a live round from the magazine in behind it, creating a "failure to fire" malfunction. Begin at
the ready position. At the signal, attempt to fire, move to cover, perform immediate action to reduce
the stoppage and fire 4 rounds in 12 seconds. (Deploying a backup gun is an optional response)
Drill 7: 7 yards. (Out of Battery Reload). Load the magazine with two rounds. Fire two rounds,
perform a mandatory reload, and fire two more rounds in 12 seconds.
Drill 8: 10 yards. (Use of Cover). Start with the weapon holstered, behind the high barricade. At the
signal, fire 2 rounds strong side barricade standing, 2 rounds weak side barricade standing and 2
rounds strong side barricade kneeling, total of 6 rounds in 15 seconds. All shooting can be done with
Back to Index
www.handgunlaw.us 13
the weapon in the strong hand.
Drill 9: 10 yards. (Use of Cover). Start two paces to the rear of cover, with the weapon holstered. At
the signal, fire 2 rounds strong side barricade standing, 2 rounds weak side barricade standing and 2
rounds strong side barricade kneeling, total of 6 rounds in 15 seconds. All shooting can be done with
the weapon in the strong hand.
Drill 10: 4 yards (Multiple Targets). Facing two targets one yard apart shoulder-to-shoulder. Start with
the weapon holstered. At the signal, engage each target with two rounds, total of 4 rounds in 4 seconds.
Drill 11: 7 yards (Multiple Targets). Facing two targets one yard apart shoulder-to-shoulder. Start with
the weapon holstered. At the signal, engage each target with two rounds, total of 4 rounds in 5 seconds.
Drill 12: 10 yards (Multiple Targets). Facing two targets one yard apart shoulder-to-shoulder. Start
with the weapon holstered. At the signal, engage each target with two rounds, total of 4 rounds in 6
seconds.
# 14 Tueller Drill Sgt. Dennis Tueller
Teaches: speed draw and fire under stress.
Requires: three people, or two people and a timer.
The Tueller Drill is essentially an exercise, under stress, to measure your draw and first shot in terms
of distance rather than time. The area that a charging assailant is able to cover in the time it takes you
to draw and fire gives you a good idea of what a "safe distance" threshold is.
At the time of the original Drill, Gunsite expected a 1.5 second par time for drawing from concealment
and firing two shots at a 3-yard target. Tueller found that the average distance an assailant could travel
in 1.5 seconds, starting from standing still, was about 21 feet. Any closer, and the assailant might start
grappling with you before the shot can go off.
There have been many arrangements of the Tueller Drill. The simplest is to have the "assailant" start
back-to-back with the shooter. At the signal, the runner runs and the shooter draws and fires at a 3-yard
IPSC target. At the sound of the shot, the runner stops and the distance is measured. If the shot was
good (A-zone), the distance counts as the shooter's "score."
# 15 Dot Torture Marksmanship Drill
This is a marksmanship Drill, fired at 3 yards or further. Targets are ten 2" dots numbered. A total of
50 rounds is needed. You will perform: 22 draws and holster, depending on magazine capacity 5-10
administrative or speed reloads, obtain 83 sight pictures and press the trigger 50 times.
Dot #1- Draw and fire one string of 5 rounds for best group. One hole if possible, total 5
rounds.
Dot #2- Draw and fire 1 shot, holster and repeat X4, total 5 rounds.
Back to Index

www.handgunlaw.us 14
Dot #3 and 4- Draw and fire 1 shot on #3, then 1 shot on 4, holster and repeat X4, total 8
rounds.
Dot #5- Draw and fire string of 5 rounds, strong hand only, total 5 rounds.
Dot #6 and 7- Draw and fire 2 shots on #6, then 2 on #7, holster, repeat X4, total 16 rounds.
Dot #8- From ready or retention, fire five shots, weak hand only, total 5 rounds.
Dot #9 and 10- Draw and fire 1 shots on #9, speed reload, fire 1 shots on #10, holster and
repeat X3, total 6 rounds.
When you can do this clean on demand, extend the length or start timing and work on speed but
maintaining accuracy. If a single shot is missed, you flunk. Only hits count and only perfect practice
makes perfect.
#16 Variation of the Rhythm Drill Lt. Dave Spaulding
Target zone is a 12 x 12 inch square, either steel or paper. At 7 yards:
One shot from the chosen ready position: 1 second
One shot from a secured holster: 2 seconds
From the chosen ready position, one shot -- reload -- one shot: 5 seconds
One shot on each of three targets from the chosen ready position: 4 seconds
Six shots on target with no more than 0.5 seconds between shots, time begins at the first shot fired. (a
variation of the rhythm Drill)
# 17 100 round Handgun Course – Modified Cpl. Layne E. Schultetus
Source: the article “One Hour, 100 round practice for Instructors” by
Cpl. Layne E. Schultetus, Palm Beach County Sheriff’s Office, Florida;
found in The Firearms Instructor (published by the International Association of Law Enforcement
Firearms Instructors) Issue 33, Pages 12 & 13.
Ammunition Required: 100 rounds
Target used: IDPA or IPSC silhouette, S&W Academy Target.
Qualification Standard: 80%/400 points
Distances of Engagement: 7, 10, 15 and 25 yards
Distance Rounds Fired Time Limit Procedure
7 yards 5 rounds 1.5 sec one shot on each draw
7 yards 10 rounds 2.5 sec two shots on each draw
Back to Index
www.handgunlaw.us 15
10 yards 5 rounds 2.0 sec one shot on each draw
10 yards 10 rounds 2.5 sec two shots on each draw
15 yards 5 rounds 2.5 sec one shot on each draw
25 yards 5 rounds 5.0 sec one shot on each draw
==============40 rounds fired. Score and change target======
10 yards 10 rounds 6.0 sec one shot on T1, reload, one shot on T2. (Repeat 5x)
10 yards 20 rounds 8.0 sec two shots on T1, reload, two shots on T2. (Repeat 5x)
10 yards 12 rounds 4.0 sec begin at ready gun position.
At the signal, advance on the target and fire two shots to the body and one to the
head before reaching the 3 yard line. (twice on T1, twice on T2)
15 yards 12 rounds 12.0 sec two shots on T1, reload, two shots on T2. (Repeat 3x)
25 yards 6 rounds 15.0 sec three shots on T1, reload, three shots on T2
--------------60 rounds fired. 30 rounds on each T1 and T2---------------
Notes: Time limits are instructor level and will need to be adjusted for personnel of average ability or
personnel firing from concealment.
# 18 Practice Drill Mike Benedict
10 yards single target 10 rnds -- single shots for precision all A Zone hits (10x)
12 yards single target 10 rnds -- controlled pairs for precision all A Zone hits (5x)
7 yards single target 12 rnds -- 2 body/1 head for precision (4x)
7 yards single target 6 rnds -- "Bill Drill" 6 rnds as fast as possible all A zone hits
7 yards single target 6 rnds -- 6 headshots slow fire for precision
10 yards single target 6 rnds -- 6 headshots slow fire for precision
10 yards 3 targets 6 rnds -- two rnds on each target all A zone hits
10 yards 3 targets 6 rnds -- two rnds on center target, 1 rnd on each on outside target two rnds on
center target again, total of 6 rounds
10 yards 3 targets 6 rnds -- one rnd on center target, 2 rnds on each outside target one rnd on center
target gain, total of 6 rounds
Back to Index

www.handgunlaw.us 16
M drill center target at 5 yards, outside targets at 10 yards
two rnds on center target, 1 rnd on each outside target, two rnds on center target
one rnd on center target, 2 rnds on each outside target, one rnd of center target
12 yards 3 targets barricade drill 2 rnds on each target from each position
right/left and high/low.
# 19 90 round warm-up Drill Dave Elderton
On an IDPA or IPSC silhouette target.
At 5 or 7 yards. Begin from the holster or from the ready position.
6 + 6 + 6 single shots to the A zone of the target.
6 single shots to the head.
6 + 6 + 6 double taps to the A zone of the target.
3 double taps to the head.
6 round “Bill Drills” – rapid fire string, as fast as you can go with no shots
outside the C zone. (Ideally, 80% or 5 shots out of 6 should be in the A zone)
Tape the target after each string. Repeat 3 times (18 rounds)
Out of Battery Reload Practice – load each of your magazines with two rounds each.
Shoot 2 + 2 + 2. Repeat 2 times (12 rounds)
6 rounds strong hand only
6 rounds weak hand only
# 20 Drill Dave Elderton
On 3 x 5 index cards at 5 or 7 yards:
6 rounds freestyle from the ready position
6 rounds freestyle from the holster
6 rounds strong hand only
6 rounds weak hand only
Repeat until the results are consistent from each position
# 21 Drill Dave Elderton
Back to Index
www.handgunlaw.us 17
At any distance:
6 + 6 rounds freestyle from the holster
6 rounds “Mozambique Drill” – two shots to the body & one to the head, repeated twice
6 rounds strong hand only
6 rounds weak hand only
# 22 Timed Fire Practice Drill Dave Elderton
On an IPDA or IPSC target at 5 yards, with an electronic timer, from the holster:
1 round in 2.0 seconds. Repeated 12 times
1 round in 1.8 seconds. Repeated 12 times
1 round in 1.6 seconds. Repeated 12 times
1 round in 1.5 seconds. Repeated 12 times
2 rounds in 2.0 seconds. Repeated 6 times
6 + 6 to the body, 6 to the head – 18 rounds in 12 seconds (5 yards)
6 + 6 to the body, 6 to the head – 18 rounds in 14 seconds (7 yards)
# 23 Headshot Drill Dave Elderton
Load magazines with 3 rounds each.
Mozambique Drill – 2 rounds to the body, 1 round to the head, out-of-battery (slide lock) reload,
Repeat. Total of 6 rounds fired.
5 yards – par time of 7 seconds
7 yards – par time of 8 seconds
10 yards – par time of 12 seconds
# 24 Correcting Trigger Slap
Shooters moving from slow fire to rapid fire often move their trigger fingers all the way off the trigger
between shots. This has a couple of negative effects. First, it
takes time. Second, it leads to inaccuracy because the tendency is to slap the trigger on the second and
subsequent shots.
To fix this, follow through on your shots with your trigger finger. Hold the trigger back all the way
through recoil. When the sights are again aligned slowly release the
trigger until the link re-engages. Then press to make the next shot.
Back to Index
www.handgunlaw.us 18
Once you know how far to release the trigger of your gun, both accuracy and speed improve.
# 25 Learning to Shoot with Both Eyes Open
Many shooters close or squint their weak eye to focus on the front sight, but doing so impairs
peripheral vision and depth perception while increasing eye fatigue. Your target-to-target transitions
will be much quicker if you are using both your eyes, and you can be more relaxed, which will
improve your shooting in general. The problem is usually that the dominant eye is not much stronger
than the weak eye, so instead of seeing one image strongly and the other faintly, you see both strongly.
When focused on the front sight, you see a confusing array of rear sights and targets, with no way to
coordinate them.
It’s impossible to sort out the double images every time you take a shot. Instead, train your eye to
simply "know" what a good sight picture and to ignore the extraneous elements. Within a few months,
you can shoot as well as anyone, with complete peripheral awareness, by learning not to "see" any
doubling of the sight picture.
The following is a recovery program for shooters with eye squinching problems:
Put a strip of scotch tape on your shooting glasses over your non-dominant eye and
learn to shoot with both eyes open. The tape will obscure the weak eye's picture to the
point where it will not interfere with your sight picture. Shoot this way until you have
acquired the technique and your stance, sight focus, and follow through feel natural.
Dry fire every day. Select either the presentation from the holster or low ready, whichever makes sense
to your situation, and practice first to make it smooth, then to make it perfect. Always keep a strong
front-sight focus, and be very aware of where the sights are when the hammer falls. Work your way up
to being able to make a presentation with your eyes closed, then open your eyes and see a solid sight
picture.
Replace the tape with a smear of Vaseline, thin enough you see a ghostly rear sight when focused on
the front sight. It will disorient you, as you'll see two rear sights and two targets. You will find that you
are able to put the sight dead on the target regardless of the double vision. Continue the dry-fire
regimen, and soon you will hardly be aware of the second image. As you get more acclimated to seeing
the sight picture with only the strong eye, you can remove more and more Vaseline.
Eventually, open both eyes. Watch the sight through recoil. You will learn that you can follow the
sight and retain a sharp picture, disregarding any weak-eye images of the rear sight or target. If your
eyes begin to confuse the images, go back to the other glasses for a few minutes. In live-fire, gradually
phase out the old glasses.
Within a few months, you won't ever think about it again--your eyes will "know" the sight picture and
the non-dominant image will seem like a peripheral, ghostly superposition. This is because attention is
what makes the image strong. The steps above will allow you to shoot as if the conflicting image didn't
exist--and the more you ignore it, the more it doesn't exist. The result is no visual confusion, just a
strong sight picture, normal depth perception, and the full range of your natural peripheral vision.
Back to Index
www.handgunlaw.us 19
# 26 Plaxco Academy Reload Drills
Set up three IPSC targets at 10 yards.
On the first target, fire one shot, reload, and fire one shot. Perform six times.
On the second target, fire two shots, reload, and fire two shots. Perform three times.
On the third target, fire six shots, reload, and fire six shots.
The goal is 100% A-hits and smooth reloads.
# 27 Consecutive Pairs
Teaches: shot-to-shot follow through, visual and kinesthetic awareness.
Shooters moving from slow-fire to rapid-fire often have trouble keeping the gun controlled, or keeping
a precise sight picture. This exercise is designed to smooth out your shot-to-shot transitions.
Drill: To isolate the mechanics of follow through, don't set up a target. Instead, fire into the berm. This
will prevent you from looking forward past the gun to see your shot placement. As long as the shots
will be stopped by the backstop, we don't care where they go. If shooting at an indoor range, set up a
target large and close enough that it will catch your fire easily.
Load a full magazine or cylinder, and with a good sight alignment (sights aligned, but not aimed at
anything in particular), carefully fire one shot into the berm. Watch the front sight move through the
arc of recoil and return to alignment, and fire a quick follow up shot. Pay attention to how the gun feels
while shooting, and make sure you aren't shifting your grip or lifting your finger off the trigger
between shots. You are letting the gun show you how to fire it smoothly, letting it rise and snap back
into alignment until it does this all by itself, as if it were spring-loaded. Watch the front sight, and don't
worry about hitting a target--you're just learning how to make your shots feel connected and
continuous.
If something feels wrong, freeze the gun and look at what you are doing. Look especially at your grip,
your trigger finger, and where your visual focus is. Correct it, pay attention to it, and keep shooting.
Repeat this drill for a half hour, and you will have a lot more awareness of how the gun fires and
returns to the target. Come back to this drill whenever you find yourself having trouble with follow
through mechanics.
Indoor Variation: If you're shooting in a range that limits rapid-fire to a shot per second, you can still
learn smooth, quick follow through by using a small target. Practice the above drill (with no target)
until you are shooting as fast as the range will allow, and then move to aimed pairs on a 3.5 card at 25-
40 feet. Keep shooting pairs, watching the front sight, paying attention to follow through, and keep
your shots on the card. Verifying the sight picture will probably keep you within the slow-fire limits.
Back to Index
www.handgunlaw.us 20
# 28 Accelerated Pairs
Teaches: Top-speed accurate fire.
Requires: High (or close) backstop.
Some shooters get hung up on the difference between double-taps (a.k.a. "hammers"--two shots fired
from one sight picture) and accelerated pairs (two shots, each with a sight picture). This exercise will
help you sort out the difference and realize that sighted pairs can be as fast as unsighted ones. The trick
is in teaching your eye to follow the front sight through recoil and make an instantaneous verification
of the sight picture.
You might be shooting more slowly than you need to. The gun is in battery and back on the target very
quickly, but many shooters add time checking the sight picture. This exercise will help you realize that
your body can shoot the gun very quickly once your eye knows what to see.
Drill: First, be sure of your backstop. You may get some very high shots in the first portion of the
drill--make sure they will be caught.
With an IPSC target or other large cardboard target three feet from the muzzle of the gun, fire a
double-tap as quickly as you physically can. Watch the target, not the sights, during both shots. You
should be able to see your rounds go through the cardboard. Don't worry about the sight picture, just
see how quickly you can manage the trigger and still feel like the gun is under control. Repeat at least
10 times.
After shooting enough top-speed pairs to have a feeling of consistency, slow down enough to bring
your shots within a hand's-breadth of each other on your target. Taping a 4x6 card to the target might
help. Tape the target after every pair.
When you are consistently firing target-focus double-taps within four inches or so of each other, switch
to watching the front sight. Follow the sight through the arc of recoil, and visually verify the sight
picture as the second shot breaks. But don't let this slow the shot. You will see that an aimed shot can
be fired in the same amount of time as an unaimed one. If you are visually following the front sight
through recoil, sight verification is instantaneous.
Diagnostics: If you have trouble seeing what the sight does during recoil, you may be blinking.
Otherwise, your eye is seeing something during the recoil cycle of the gun--pay attention to what it is.
Some people see the top of the gun or ejection port; some people watch the muzzle flash or the flash in
the chamber. Lower the gun a bit so you see a tall front sight and just watch what the front sight does
in recoil for a while. Follow the sight while looking over the gun first, then learn to follow it from a
conventional sight picture.
# 29 Dummy Round Drills
Teaches: flinch control and follow through during live fire.
Requires: best with shooting partner, can be done alone.
Back to Index
www.handgunlaw.us 21
Principle: If the hammer falls on an empty chamber during slow-fire shooting, your gun shouldn't
budge--sights should stay aligned and on target, eye still clearly focused on the front sight. If the gun
dips down (or jumps up), you're anticipating the recoil.
Procedure: Have someone else load a magazine for you, mixing live rounds with snap caps, or for a
revolver, leave one or more chambers empty. When you fire the gun, concentrate on keeping the gun
steady, sights on target, no matter what happens. When the snap cap comes up you'll be able to check
your flinch. If you're doing well, the gun won't budge. If you're not doing well, keep up with the Drill
until you are. Keep your sights aligned and on target while you release the trigger just enough to
reengage the sear (proper follow through).
You can do this yourself by loading several magazines and mixing them up, or loading a magazine
with your eyes closed, or rotating the cylinder with your eyes shut before closing it.
Variations: if you have a laser or optical sight, it's even more difficult to keep the dot perfectly on the
target when the snap cap comes up, and easier to diagnose the direction your flinch is taking you.
Also known as: cap-and-ball Drill, ball-and-dummy Drill.
# 30 Static Range Drills Shay Ben-David
Practice session - 300 Rounds*
Exercise #1 50 rounds - 25 yards - Draw and fire 2 shots. Your objective is to shoot as fast as possible but still get
A zone hits. Do a tactical reload before reholstering to practice this maneuver as well.
Exercise #2 50 rounds - 7 yards - Draw and fire 6 shots into A zone as fast as possible (under 3 seconds is a good
time). Keep practicing your tactical reloads.
Exercise #3 50 rounds - 10 yards - Load 3 rounds into each magazine. Draw and fire 2 shots to the body and 1 to
the head, perform a tactical reload or reload with retention and fire 2 more shots to the body and 1 to
the head. This drill works on transition from a bigger “aggressive target” to a smaller “accurate shot”
type target.
Exercise #4 50 rounds - 7 yards - Put 2 targets out. Load 4 rounds into each magazine. Draw and fire 2 shots at
each target, perform a slide lock reload and engage each target again with 2 shots.
Exercise #5 40 rounds - 7 yards - Start with gun in weak (support) hand at low-ready. On the signal, raise the gun
and fire 2 shots.
Back to Index
www.handgunlaw.us 22
Exercise #6 50 rounds - 7 yards - Draw and fire 2 shots with your strong hand only.
Exercise #7 10 rounds - 25 yards - Fire 10 rounds for bull's-eye. Take your time and make each shot count.
Concentrate on breathing, trigger control, and sight alignment.
# 31 Mixing Speed and Accuracy Frank Garcia
Teaches
Draw, lateral and near-to-far target acquisition, mixing speed and accuracy.
Procedure Set up one IDPA target five yards out at a 45
o angle to the left and another five yards out, 45
o to the
right. Set up two, 8 inch plates at 15 yards straight away down range. Draw and fire:
1. Double tap the IDPA target on the left
2. Shoot one plate.
3. Double tap the IDPA target on the right.
4. Shoot the other plate.
Don't miss the plate. The objective is to center-punch the close in IDPA targets at light-speed, then
refocus on the front sight and down the plate with a single shot only. Repeat until you can execute the
drill without a miss.
# 32 Target Acquisition
This Drill covers four of the fundamentals of shooting including the draw, accuracy, target acquisition
and optionally, the reload.
Procedure
Set up two IDPA targets. Start with both at seven yards, Draw and fire:
1. Two body shots to T1.
2. A single head shot to T2.
3. A single head shot to T1.
4. Two body shots to T2.
The movement of the muzzle is in a figure eight going from the body of one target, to the opposite
head, back to the first head and finally over to the body of the second target. The double taps in the
body areas can be taken a bit quicker than the head shots so the drill also teaches pacing and rhythm.
Variations
Start with head shots to force a more precise sight picture on the draw.
Reload after the first six shots and repeat the string for a total of twelve shots.
Back to Index

www.handgunlaw.us 23
Move one target back to 15 yards to work on accuracy and short/long transitions.
# 33 Dry Fire Drills.
Caution. Read the safety rules at the top of this page on Dry Firing before trying to perform any of
these drills.
Dry fire
Draw Draw and dry fire Start: __Surrender, __Interview,
__Table
Other: __Concealment, __Flashlight
Draw to kneel Draw to kneel and dry fire
Draw to prone Draw to prone and dry fire
Draw to side Draw to side and dry fire Turn: __Left, __Right
Draw to rear Draw to rear and dry fire Turn: __Left, __Right
Advancing Draw and dry fire while advancing
Retreating Draw and dry fire while retreating
Laterals Draw and dry fire while moving laterally Turn: __Left, __Right
Approach to
cover
From low ready, move to cover and dry fire Move: __2 yards, __5 yards
Course: __Left, __Right, __Forward
Approach to
kneel
From low ready, move to cover, kneel and dry
fire
Move: __2 yards, __5 yards
Course: __Left, __Right, __Forward
Approach to
prone
From low ready, move to cover, go prone and
dry fire
Move: __2 yards, __5 yards
Course: __Left, __Right, __Forward
Reload From high ready, execute reload Type: __Tactical, __Retention,
__Slide-lock
Other: __Concealment, __Flashlight
Multiple
targets
From low ready, engage multiple targets with
dry fire
Other: __Flashlight
# 34 The Tactical-Presidente
Same target setup as the El Presidente. On signal, turn, draw and
fire one shot on T-1, one shot on T-2, two shots on T-3, perform
a reload, then fire a head shot on T-2, then a head shot on T-1.
In other words: One - one - two - reload - headshot - headshot
A good time would be 10 seconds or less. This drill was designed to try to make the "El Presidente"
more tactical.
# 35 100 round Handgun Practice Drill –Modified Leroy Thompson
Back to Index
www.handgunlaw.us 24
Target Used: As available. IDPA or IPSC silhouette targets preferred.
Time Limits: Time limits based on the skill set of the group being trained. Exercises from concealment
require a longer time limit. Accuracy should be emphasized over speed.
Stage 1 -- 3 yards/Close Combat
On signal, draw and engage the target with 2 rounds from a weapon retention/close combat position.
5X. total of 5 rounds.
Stage 2 -- 3 yards/Double Tap
On signal, draw and engage the target with 2 rounds. 3X total of 6 rounds.
Stage 3 -- 3 or 5 yards/Failure to Stop Drill
On signal, draw and engage the target with 2 rounds to the body and 1 round to the head. 2X total of 6
rounds.
Stage 4 -- 3 or 5 yards/Precision Shooting
The target to be engaged should be partially screened by a "no shoot" target. 2/3rd to 1/2 of the threat
target should be visible. On signal, draw and engage the threat target with 2 rounds. 3X total of 6
rounds. -10 points for each hit on a "no shoot" target.
Stage 5 -- 5 yards/Strong Hand Only
On signal, draw engage the target with 2 rounds STRONG HAND ONLY. 3X total of 6 rounds.
Stage 6 -- 5 yards/Shooting while moving laterally
6A -- Draw and engage the target with 2 rounds while walking from the left. 3X total of 6 rounds.
6B -- Draw and engage the target with 2 rounds while walking from the right. 3X total of 6 rounds.
Stage 7 -- 10 yards/Multiple targets
Three threat targets are set up 10 yards down range. On signal, draw and engage each target with 2
rounds, perform a mandatory reload, and re-engage each target with 2 rounds. 1X total of 12 rounds.
(To modify this drill into the classic "El Presidente" exercise, have the shooter begin with his/her back
to the targets. On signal, pivot then draw and perform the drill)
Stage 8 -- 10 yards/Weak hand only
The target is engaged with 1 round WEAK HAND ONLY. To begin, the shooter can draw strong hand
and then transfer to the weak hand before shooting. Then the shooter can begin with the weapon held
in the weak hand at low ready. As shooter proficiency and dexterity increases, the drill can begin with
the shooter performing a WEAK HAND ONLY DRAW of the holstered weapon. 5X total of 5 rounds.
Stage 9 -- 15 yards/Use of cover
Three threat targets are set up. High or low cover is set up at the 10 and 15 yard lines. At the signal, the
shooter moves laterally to cover at the 10 yard line, draws and engages each target with 2 rounds,
reloads behind cover then moves cover at the 15 yard line and re-engages each target with 2 rounds.
2X total of 24 rounds.
Stage 10 -- 25 yards/Precision shooting
On signal, draw and engage the target with 6 rounds. 2X total of 12 rounds.
Stage 12 -- 50 yards/Prone shooting
On signal, draw and move to the prone position and engage with target with 6 rounds. 1X total of 6
rounds.
Back to Index
www.handgunlaw.us 25
# 36 Defensive Handgun Practice Drills Chuck Taylor
Set up 3 targets T1-T2-T3 1 yard apart shoulder to shoulder. Score & repair at the end of each stage.
Targets used and time limits for each drill at the discretion of the Rangemaster.
100 total rounds fired
(1.) Standard Exercises Perform as indicated, single target, from the holster
1 yard Close Combat position 2 rounds (2x)
3 yards standing position 2 rounds (2x)
7 yards standing position 2 rounds (3x)
10 yards standing position 2 rounds (2x)
15 yards standing position 2 rounds (2x)
25 yards standing position 2 rounds (2x)
50 yards standing position 2 rounds
28 rounds fired in Stage 1
(2.) Single Shots At 7 yards, engage a single target at a time. Par time is 1.5 seconds.
1 round on T1 (2x)
1 round on T2 (2X)
1 round on T3 (2X)
6 rounds fired in Stage 2
(3.) Multiple Targets At 7 yards, three targets, targets 1 yard apart shoulder to shoulder
2 rounds on T1 (2X)
2 rounds on T2 (2X)
2 rounds on T3 (2X)
1 round on each target T1-T2-T3
1 round on each target T1-T2-T3
2 rounds on each target T1-T2-T2
2 rounds on each target T1-T2-T3
10 rounds fired on each target; total of 30 rounds fired in Stage 3.
(4.) Headshots From the holster, one shot drill. Engage a different target on each rep.
3 yards. (3X)
5 yards. (3X)
2 headshots fired on each target; total of 6 rounds fired in Stage 4.
(5.) The Mozambique Drill from the holster
2 rounds to the body/1 headshot on T1 (2X)
Back to Index

www.handgunlaw.us 26
2 rounds to the body/1 headshot on T2 (2X)
2 rounds to the body/1 headshot on T3 (2x)
6 rounds fired on each target; total of 18 rounds fired in Stage 5
(6.) Reloading Drills/Out-Of-Battery Reload Load each of 3 magazines with 2 rounds.
From the holster at 7 yards:
2 rnds on T1, reload, 2 rnds on T2, reload, 2 rnds on T3.
2 rnds on T3, reload, 2 rnds on T2, reload, 2 rnds on T1.
4 rounds fired on each target; total of 12 rounds fired in Stage 6.
# 37 Shooting Drills Mike Benedict
Three targets set in a "V" center target at 8 yds left and right targets at 10 yds
3 yds between targets.
Two rounds on center target
One round on left target
One round on right target
Two rounds on center target
2 seconds is the time to beat from the holster
"Snowman drill"
Three circles on aligned vertical like a snowman:
2" on top
4" in the middle
8" on bottom
6 shots on each dot
6 seconds on the 2"
4 seconds on the 4"
2 seconds on the 6"
Shot from the ready and then from the holster
25 yds: 6 shots COM 10 sec
20 yds: 3 shot FTS 5 sec(x2)
15 yds: 3 shot FTS 3 sec(x2)
10 yds: 2 shot COM 2 sec(x3)
7 yds: 6 shot reload 6 shot COM 12 sec
5 yds: 6 shot strong hand, reload, 6 shots weak hand 15 seconds
3 yds: 2 rds COM 1
Back to Index

www.handgunlaw.us 27
# 38 Barrel Drill Ken Hackathorn
60 rnd
(2 or 3 targets)
Set up 3 barrels at 10, 15, and 25 yards in a zigzag pattern. Fire 2 rnds at each target from each barrel
while kneeling behind cover.
5 yards From the holster, single headshots for precision
7 yards From the holster, controlled pairs for precision
7 yards Out of battery reloads. Begin with one round in the chamber and an empty magazine. Draw
and fire one round, reload, fire one round.
7 yards Malfunction clearance drill. 2 dummy rnds & 4 to 6 live rounds per magazine. Draw and fire
double taps, TRF for each malfunction.
7 yards Malfunction clearance drill. Begin at low ready with a failure to eject malfunction created with
a piece of empty brass. Come on target, attempt to fire, clear the stovepipe, fire two rounds.
7 yards Tactical reload drill. Draw and fire two rounds, tac reload, fire
two rounds.
Remember proper After Action Drills (AAD) -- breath, check the environment, scan for additional
threats, find available cover.
# 39 60 Rnd Modified Practice Drill Ken Hackathorn
3 yards draw & fire 2 rnds 3x for total of 6 rounds
5 yards draw & fire 3 rounds strong hand only (total of 6 rnds)
5 yards begin from low ready. Fire 3 rounds weak hand only (6 rnds)
3 yards to 10 yards. Load with a three round magazine. Fire 3 rounds
while retreating. 2x for a total of 6 rounds
7 yards draw & fire 2 rnds 6x for a total of 12 rounds
7 yards draw, rapid lateral movement and fire 3 rnds. Repeat from the
other direction. Total of 6 rounds.
7 yards facing 3 targets. 2 rnds on each target. 2x (total of 12 rounds)
10 yards draw & fire 2 rnds. 3x for a total of 6 rounds.
Back to Index

www.handgunlaw.us 28
#40 Hooded Drills Unknown
Situation: You are surprised by the sudden bad turn of events as the people right next to you launch an
attack. Remember-attacks occur suddenly! This drill protocol is nothing more than the use by firearms
students of the common hooded drills that martial artists and reality fight trainers have used for
centuries.
Drill 1A: With the shooter not able to see the range, set up several target stands in realistic positions.
Staple a human picture shoot/no-shoot target to each. Place a hood over the shooter and lead him/her
into the middle of the targets so arranged. Standing in a direction away from any target, pull the hood
off and let the shooter deal with the problem presented, making the necessary shoot/no-shoot decisions.
Drill 1A-1X: Any number of variations of this drill can be done, using different human
representational targets and props. Variation: Also place objects of cover or simulated cover in the
training area, and let the shooter use them. Airsoft variation: same drills as above, but using airsoft
weapons and real people instead of targets.
#41 Simple IPSC Drill Unknown
Teaches: draw, reload, smoothness and economy of motion.
This drill is commonly used among IPSC shooters to get their draws and reloads as efficient and
smooth as possible.
With an IPSC target at seven yards, draw and fire one shot into the A zone. Speed reload, and
then fire one more shot.
Variations: Vary the distance to learn the tradeoff between speed and accuracy. Close for
hyperspeed, farther away for precision.
#42 Murphy Drill Mike Howard
Okay, you’ve practiced your square-range drills till you only have to use one target paster per drill. You
are magnificent!! Now, Mr. Murphy (the one who enacted the law bearing his name) has flung a large Huggie
full of you-know-what into the proverbial fan.
Let’s prepare by placing 3 targets (IPSC, IDPA, etc.) about 1-2 yards apart at our berm. Place simulated
cover (barricade type, barrels, pylons, or other type of marker) at 20, 15, 10, and 7 yards in such a manner that
you will have to move diagonally across the range (3-10 yards) to get to each shooting point. Dump a box (50
rounds) of ammo and about 10 snap-caps (or easily identifiable dummy rounds) appropriate to your caliber into
a pouch, box, bowl, etc. and stir gently. Load 6 rounds each into 4 mags in the dark or without looking at them.
This accomplishes two things. First, you get a little practice loading mags in the dark (which could be a valuable
skill). Second, you don’t know where or when the snap caps will turn up. Put about 10 loose rounds in your
pocket.
Back to Index
www.handgunlaw.us 29
The drill is simple: Shoot, reload, and clear malfunctions only from behind cover or while moving.
Protect your eyes. Protect your ears. Draw to ready. Keeping your head and eyes up, load. Start from ready
standing behind the 20 yard position. “Ready” means that you should be able to see possible threats, such as a
suspect’s hands while you are holding your weapon WITH YOUR FINGER STRAIGHT AND OFF THE
TRIGGER.
#1 Roll out to the right from behind your simulated cover (trying to expose only your [dominant] eye and
muzzle to the threat), fire one well-placed round center mass on the left target taking as little time as possible,
and get back behind cover(or simulate doing so). (Yes, by doing it properly you will not get to use that perfect
Weaver or Isosceles stance that you have practiced so much because it felt and looked so good). Repeat. (The
left target will be used at 20, 15, and 10 while shooting from cover.) (2 rounds)
#2 Same drill, same target from left side of (simulated) cover. (2 rounds) Watch for flinching with dummy
rounds.
#3 Fire two rounds at the middle target while moving (smoothly with a stable shooting platform) from the 20 to
the 15. A-zone hits would be nice, but do what you can. Reload or fix problems as necessary. Go to speed
kneeling at the 15. (The middle target will be your shooting while moving target).(2 rounds)
#4 Roll out right, one round center mass- left target. Repeat. (2 rounds) Found any dummies yet??
#5 Roll out left, one round center mass- left target. Repeat. (2 rounds)
#6 2 rounds, middle target, moving from 15 to 10. Murphy strikes. Your support hand is now out of
commission. Go to low kneeling. (2 rounds) Any “clicks” instead of “bangs”??
#7 Roll out right, 2 rounds strong hand only, center mass- left target. Repeat. Caution: do not attempt one-
handed reloading or malfunction clearing if you have not practiced it with an unloaded weapon and
achieved a safe level of competency!!! (4 rounds)
#8 Same drill- left side. Note: by this time you are probably at least down to your last magazine and will
have to use the loose rounds in your pocket to refill one. Practice this one-handed with head and eyes up
while watching for threats. (4 rounds)
#9 2 rounds, middle target, moving from 10 to 7. Assume a position behind cover that you feel will allow you
to get precision hits while using strong or support hand only. (2 rounds)
#10 Roll out right, 1 round, strong hand only (I think it was Bill Jordan who said something like: “Take your
time in a hurry”) to the center of the head of the right target (he has a hostage near and dear to you) and recover.
(The right target is your precision head-shot target.) Repeat. (2 rounds)
#11 Same drill, same target- left side. Then, carefully, transfer the gun to your support hand.( It’s a miracle. It
healed). (2 rounds)
#12 Remaining rounds, support hand only, right target- careful head shots. Evaluate targets and tape hits.
Recover your dummy rounds, dump them in your bag of ammo, stir gently and repeat above drill till
your box of ammo is gone. We’re having fun now!
Back to Index
www.handgunlaw.us 30
# 43 Survival Index Rick Miller
2 targets, 1 target width apart, 7 yards. IDPA Target and Scoring
Draw, fire two rounds each target.
1- Facing targets.
2- Facing 90 degrees right.
3- Facing 90 degrees left.
4- Facing away.
16 rounds/80 points possible.
Total score divided by total time.
Multiply by RSP short form for caliber used-
9mm: 25
38Spl: 25
357Mag: 28
10mm: 29
40S&W: 29
44Spl: 30
45ACP: 30
45Colt: 30
41Mag: 32
44Mag: 33
Score/rating-
149 & below: unsatisfactory
150-199: adequate
200-249: good
250+: excellent
Examples-
9mm, 76 points, 7.0 sec.: 76(points) divided by 7(sec)= 10.85 10.85x25(9mm RSP)= 271 excellent.
.40S&W, 70 points, 8.5 sec: 70 div by 8.5= 8.235 8.235x29= 138.8 unsat.
#44 Mexican Defense Course Ken Hackathorn
6 targets
Par for each stage is 5 seconds.
Stage 1- Start walking away from targets. Sometime after crossing the 10 yard line, the signal will
sound. Upon signal, turn, engage T1 with 6 rounds.
Stage 2- As in Stage 1, but shooter will engage T1 through T6 with 1 round each.
Stage 3- Walk toward targets starting from 15+ yards away. After crossing 10 yard line, and signal
sounds, engage T1 with 6 rounds.
Back to Index
www.handgunlaw.us 31
Stage 4- As in Stage 3, except engage T1 through T6 with 1 round each.
Stage 5- Start moving laterally at 10 yards out. At signal, engage T1 with 6 rounds while still moving.
Stage 6- As in Stage 5, except engage T1 through T6 with 1 round each while moving.
Mr. Hackathorn likes this drill because it's a lot harder than it appears to be to get it right. You have to
stay sharp and think, rather than just going through the motions.
#45 Close Quarter/Covert Pistol Skill Drills Lt. Dave Spaulding
From 20 feet, using 8" circles, or paper plates as targets.
Perform each drill twice, for a total of 30 rounds fired.
1- From ready, 1 round on 1 target. Par 0.8 sec.
2- On target, 2 rounds on 1 target. Par .5 sec.
3- On target, 1 round each on 2 targets. Par 1.0 sec.
4- On target, 1 round, reload, 1 round, in 1 target. Par 3.0 sec.
5- From concealment, 1 round on 1 target. Par 1.5 sec.
6- From concealment, 1 round each, on 3 targets. Par 2.8 sec.
7- From concealment, sidestep, 2 rounds on 1 target. Par 2.0 sec.
8- From concealment, kneel, 2 rounds on 1 target. Par 2.0 sec.
When able to perform easily, reduce target size.
# 46 Shooting Skills Robbie Robinson
Even though there are rankings listed, you will not suddenly become an expert gunfighter if you can
shoot these drills. The drills are intended for a person to have a good base of shooting skills that might
be needed in a gunfight, and the rankings are for informational and comparative purposes only so you
track your progress and are not intended to give you some arbitrary title of "master" or "expert" which,
in and of itself, doesn't really mean anything.
A. Use standard IDPA scoring of .50 seconds for each point down and 3 seconds for procedural errors.
B. Close DOES NOT count. If a shot barely touches a scoring ring, you DO NOT get the better score.
C. All exercises are freestyle, except where noted: SHO = Strong Hand Only WHO = Weak Hand
Only
D. All exercises are 'from the holster' except 'WHO' shots which are from the 'Weak Hand Ready'.
E. For concealment, add 6.00 seconds to the total. (approximately .25 per string)
F. Reload drills are 'shot to shot' times. After the start signal, fire a shot, perform the reload, fire
another shot, then check the time from shot one to shot two. All shots must hit a target (any distance
ok.)
G. Malfunction drills are 'start signal to shot times.' In other words, set up the malfunction, then on the
start signal, perform malfunction clearance, then fire a shot. All shots must hit a target (any distance
ok.)
H. Target placement: 5.5 feet high at top of head, one yard apart, center to center.
Back to Index

www.handgunlaw.us 32
Continued On next Page.
Back to Index

www.handgunlaw.us 33
For Part Two of Handgun Drills Click Here
For Part Three of Handgun Drills Click Here
Updates 11/9/12 - Contents Page Entry Linked to Drill in Listing.
4/27/13 – Drill # 86 thru 90 Added.
6/4/16 – Drill # 91 Added.
Back to Index