Cayuga Nature Photographers
6
June 2021 - Volume XXIX, No. 6 Cayuga Nature Photographers Newsletter 1 The Cayuga Nature Photographers meeting on May 6 by Tony Sweet offered several in-camera methods to capture creative images. On page two you will find some personal notes on the meeting, and a few basic attempts using Tony's methods are included. Fundamental to his methods is in-camera movements which will be summarized by your editor. The image at right is an early experiment in using a vertical sweep of the camera with a slow shutter. With low ISO, f/16 aperture, 1/8 sec. the result blurs horizontal details, and shows the color and form of an exotic birch tree cluster. Tony Sweet will be in the meeting to offer ideas to refine our results. Basic to the creative approach is to abandon the idea that creative results have to be based on dead sharp subject matter. Perhaps it is best to consider the impressionist paintings of previous 18 th and 19 th centuries? If you missed the meeting, that should not cause any member to think it is too difficult to participate. It's a free- wheeling method where failures are learning episodes and successes seem a magical event. You can do this. It's going be fun with many surprises. Also, watch email about photo outings this month! See page 5. Next Meeting: Thursday, June 3 at 7:30 PM CNP meetings will be using Zoom. See email for details. Notes on May Meeting ……… 2 Time for Outings? ………………. 5 Membership Notes …………….. 6
Transcript of Cayuga Nature Photographers

June 2021 - Volume XXIX, No. 6
Cayuga Nature Photographers
Newsletter
1
The Cayuga Nature Photographers meeting on May 6 by Tony Sweet offered several in-camera methods to capture creative images. On page two you will find some personal notes on the meeting, and a few basic attempts using Tony's methods are included. Fundamental to his methods is in-camera movements which will be summarized by your editor. The image at right is an early experiment in using a vertical sweep of the camera with a slow shutter. With low ISO, f/16 aperture, 1/8 sec. the result blurs horizontal details, and shows the color and form of an exotic birch tree cluster. Tony Sweet will be in the meeting to offer ideas to refine our results. Basic to the creative approach is to abandon the idea that creative results have to be based on dead sharp subject matter. Perhaps it is best to consider the impressionist paintings of previous 18th and 19th centuries? If you missed the meeting, that should not cause any member to think it is too difficult to participate. It's a free-wheeling method where failures are learning episodes and successes seem a magical event. You can do this. It's going be fun with many surprises.
Also, watch email about photo outings this month! See page 5.
Next Meeting:
Thursday, June 3 at 7:30 PM
CNP meetings will be
using Zoom. See email for details.
Notes on May Meeting ……… 2
Time for Outings? ………………. 5
Membership Notes …………….. 6

2
Cayuga Nature Photographers Newsletter Vol. XXIX, No. 6
2
Cayuga Nature Photographers Newsletter Volume XX, No. 8
ICM means in-camera movement. There are two basic types. The first is swipe and the second is multiple layers. First let's summarize swipes. These seek to record pixel data as the camera is moving, so a slow shutter is required. The result is painterly. For a scene with repetitive vertical components like straight tree trunks, a vertical swipe will record the trees tonal features while rendering horizontal features such as tiny branches to be indistinguishable. (See image on page 1.) Swipes are usually handheld. The best shutter speed is best determined by trial and error (…. and then success). You can also find diagonal features that would call for a diagonal swipe. The entire result is done in the camera. Post processing is primarily about optimizing exposure details and cropping. In the Lightroom Develop Module, I usually begin with the Auto Tone button. Tony Sweet offers this quotation as guidance:
If you want reality, just look at it.
The second technique is combined multiple exposures that are separated by small movements. The
steps are small to preserve the image integrity. Again this can be done handheld. What was helpful to
me was activating a grid pattern in my viewfinder. That kept me close to a single location.
For Canon the grid display is at: Tools>Shooting info. display> Grid display
I chose a detail in the scene and then set my multiple image to 5 combined images. After each shot, I
moved the grid crosshair a little from the previous spot. These were small movements.
Tony noted that if the path is in one direction, ridges are created. I did an L track and that seemed to
reduce any ridges. See what works for you.
In my Canon R, when I activate the multiple exposure feature there are choices for how to combine.
There are Additive/Average/Bright/Dark choices. For my newbie ability, Average seemed to work fine.
Also, the output can be saved at the result only or for all source images. I tried both. I think I'll begin
with saving all until I get a better handle on the process. Here's what I did with the output.:
1. Saved all sources as RAW and sent to Lightroom.
2. First, I reviewed the sets of images; for any set I wanted to process, I created virtual images.
3. I opened the first virtual image and used the Auto Tone button followed by small changes.
Several had 'blinkies' and I used Highlight reduction and/or exposure to correct.
These are from my personal
notes. Email me if there are
questions.
Paul Schmitt
Cayuga Nature Photographers Newsletter Vol. XXIX, No. 6
3 3
4. Once happy, I copied my setting and pasted them into images 2 to 5.
5. I selected the five optimized virtual images and still in LR, I followed the path of Photo>Edit
In>Open in Photoshop as Layers.
6. Now it is really, really easy to combine the layers. Adjust the Opacity slider to 50% in the top
four layers. See if that "floats your boat". Keep the lowest layer at 100%. Feel free to jockey
the other opacity sliders as suits your creative vision.
7. Happy? You can flatten layers if you wish to keep file sizes lower. Then just save back to
Lightroom.
8. Back in LR, that's when I did any final fixes like small edge crops or remove any distractions.
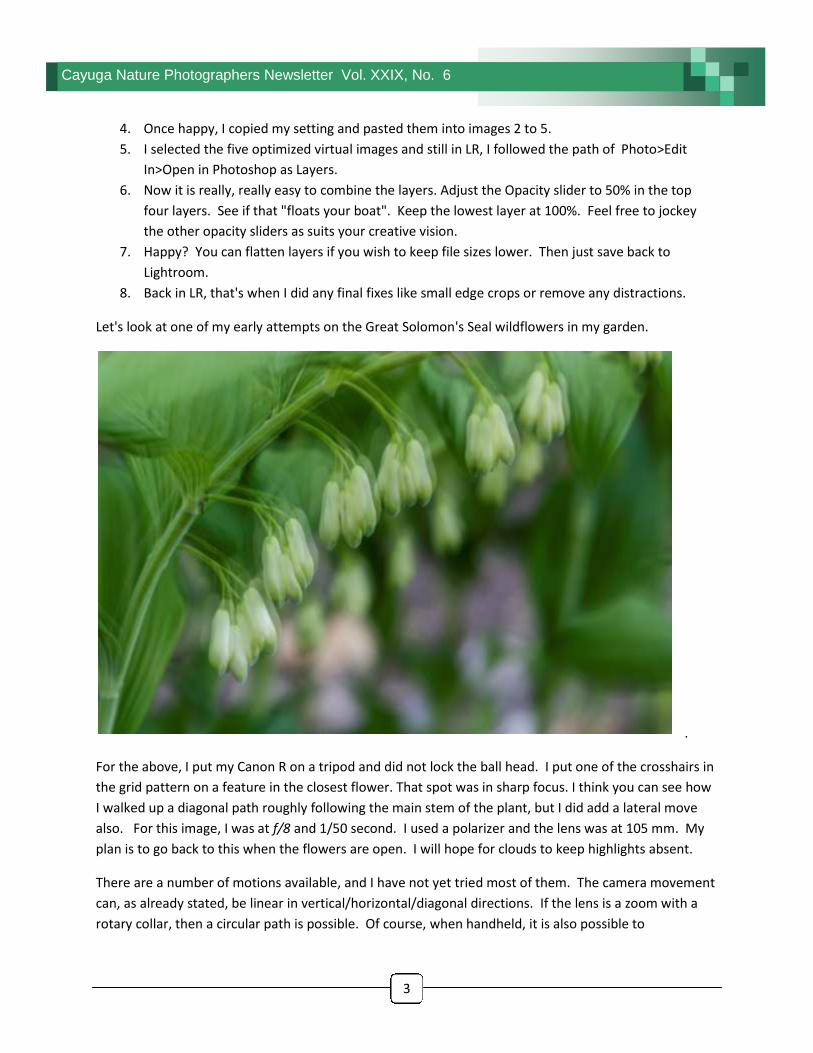
Let's look at one of my early attempts on the Great Solomon's Seal wildflowers in my garden.
.
For the above, I put my Canon R on a tripod and did not lock the ball head. I put one of the crosshairs in
the grid pattern on a feature in the closest flower. That spot was in sharp focus. I think you can see how
I walked up a diagonal path roughly following the main stem of the plant, but I did add a lateral move
also. For this image, I was at f/8 and 1/50 second. I used a polarizer and the lens was at 105 mm. My
plan is to go back to this when the flowers are open. I will hope for clouds to keep highlights absent.
There are a number of motions available, and I have not yet tried most of them. The camera movement
can, as already stated, be linear in vertical/horizontal/diagonal directions. If the lens is a zoom with a
rotary collar, then a circular path is possible. Of course, when handheld, it is also possible to
4
Cayuga Nature Photographers Newsletter Vol. XXIX, No. 6
4
Cayuga Nature Photographers Newsletter Volume XX, No. 8
Here's an idea…spring flower sales are rich in
image possibilities for practicing this.
approximate a circular motion. Add to the above, zooming the lens small amounts either during a long
exposure or in between the multiple exposures.
Tony also suggested using the rotary collar combined with small zoom steps . The combinations for the
multiple exposures are great. He also stated that zoom is preferred using a tripod. Makes sense.
Next, one can use handheld random motions.
It should be obvious that cloudy days are preferred. Contrasty light is not our friend. In addition, using a
filter to lengthen the shutter time is frequently called for. I used my circular polarizer for that when in
the shade and it was fine. But, going past that, a neutral density filter is a welcome tool. I've yet to
experiment with my adjustable ND filter.
Another idea was to use an ND filter to get to 2, 3 or 4 seconds, and use camera shake for random
effects.
It occurred to me that one could make multiple exposures with the grid kept on the same spot each
time while the lens is zoomed by small amounts. The subject at the spot would be reinforced while the
surround would be radially blurred. Anyway, I made sense to me. Have to try that.
Tony then moved to trees and, in particular, when the trees are leafing-out. The effect of small steps
will be different for small and for large features. Large ones would blend to unity while small ones
would be read as steps.
Cityscapes were another source of beautiful examples from Tony. In one example he stacked 10 second
exposures with about 1 second between each step when the lens was zoomed a small amount. The best
ones were at night. This led me to contemplate how to mix the moon into the scene.
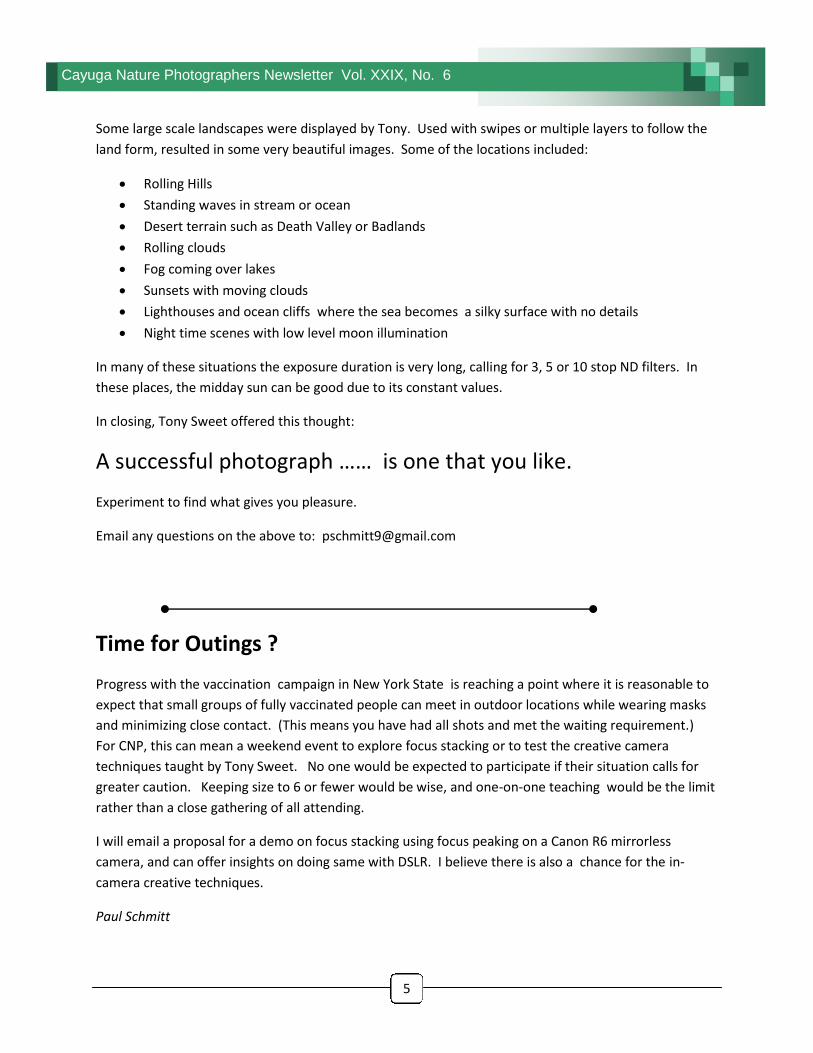
A consistent suggestion was to try anything for the surprise it might yield. Moves like these were
suggested:
Cayuga Nature Photographers Newsletter Vol. XXIX, No. 6
5 5
Some large scale landscapes were displayed by Tony. Used with swipes or multiple layers to follow the
land form, resulted in some very beautiful images. Some of the locations included:
Rolling Hills
Standing waves in stream or ocean
Desert terrain such as Death Valley or Badlands
Rolling clouds
Fog coming over lakes
Sunsets with moving clouds
Lighthouses and ocean cliffs where the sea becomes a silky surface with no details
Night time scenes with low level moon illumination
In many of these situations the exposure duration is very long, calling for 3, 5 or 10 stop ND filters. In
these places, the midday sun can be good due to its constant values.
In closing, Tony Sweet offered this thought:
A successful photograph …… is one that you like.
Experiment to find what gives you pleasure.
Email any questions on the above to: [email protected]
Time for Outings ?
Progress with the vaccination campaign in New York State is reaching a point where it is reasonable to
expect that small groups of fully vaccinated people can meet in outdoor locations while wearing masks
and minimizing close contact. (This means you have had all shots and met the waiting requirement.)
For CNP, this can mean a weekend event to explore focus stacking or to test the creative camera
techniques taught by Tony Sweet. No one would be expected to participate if their situation calls for
greater caution. Keeping size to 6 or fewer would be wise, and one-on-one teaching would be the limit
rather than a close gathering of all attending.
I will email a proposal for a demo on focus stacking using focus peaking on a Canon R6 mirrorless
camera, and can offer insights on doing same with DSLR. I believe there is also a chance for the in-
camera creative techniques.
Paul Schmitt

6
Cayuga Nature Photographers Newsletter Vol. XXIX, No. 6
6
Cayuga Nature Photographers Newsletter Volume XX, No. 8
Please Note
Membership is $20 for new and existing members. For existing members, it is due in September. You may pay at our next meeting, or, if preferred, you can mail it to Nancy Ridenour at 346 Warren Road, Ithaca, NY 14850. Thank you.
Membership is $20 for new and existing members. For existing members, it is due in September. You may pay at our next meeting For. For, For or, if preferred, you can mail it to Nancy Ridenour at 346 Warren Road, Ithaca, NY 14850. Thank you.
Membership is $20, due each currently. You may pay at our next meeting, or, if preferred, you mail it to Nancy Ridenour at 346 Warren Road, Ithaca, NY 14850.
Thank you!
Cayuga Nature Photographers Newsletter Volume XXIX, No. 6
Newsletter Editor:
Paul Schmitt
Keep updated at:
cayugaphotographers.wordpress.com
CNP President:
Brian Chabot
CNP V-P, Programs:
Devan Accardo
Webmaster: Mike Goldstein
Treasurer & Membership:
Nancy Ridenour