
Mac Management Basics 10.9 Deploying and Managing Multiple Mac Computers
Camtasia for Mac – CMac 2
Creating a Screen Capture Video
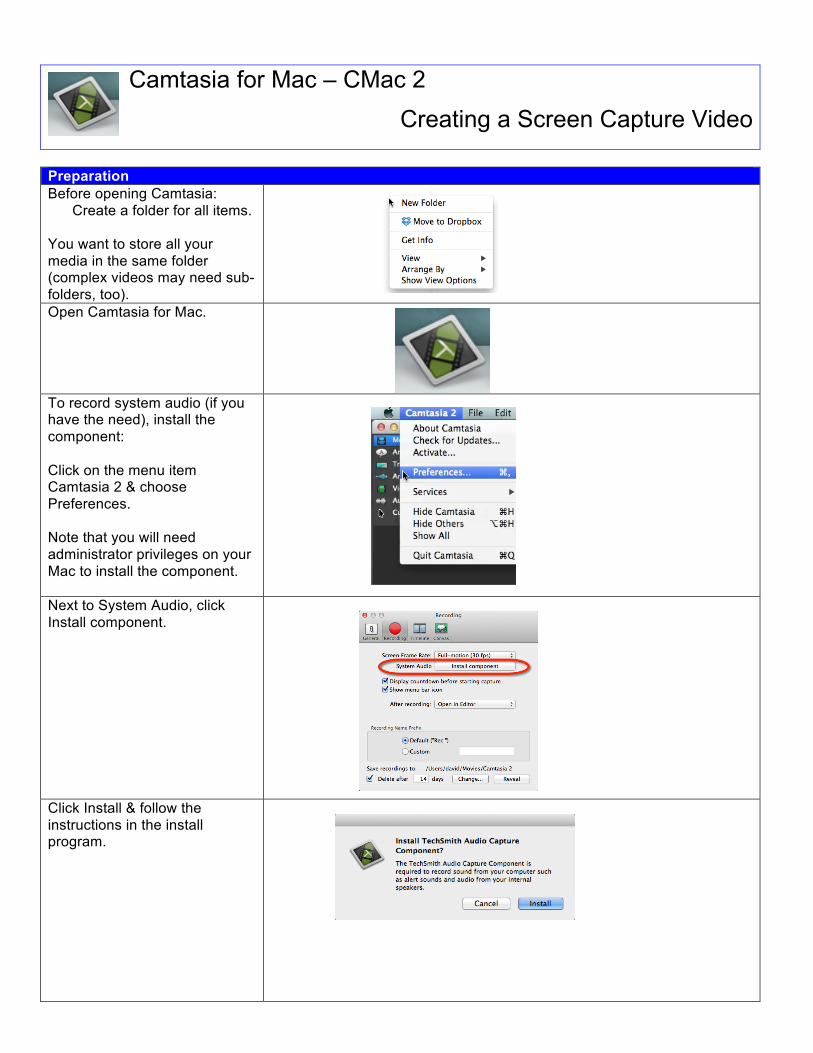
Preparation Before opening Camtasia: Create a folder for all items. You want to store all your media in the same folder (complex videos may need sub-folders, too).
Open Camtasia for Mac.
To record system audio (if you have the need), install the component: Click on the menu item Camtasia 2 & choose Preferences. Note that you will need administrator privileges on your Mac to install the component.
Next to System Audio, click Install component.
Click Install & follow the instructions in the install program.
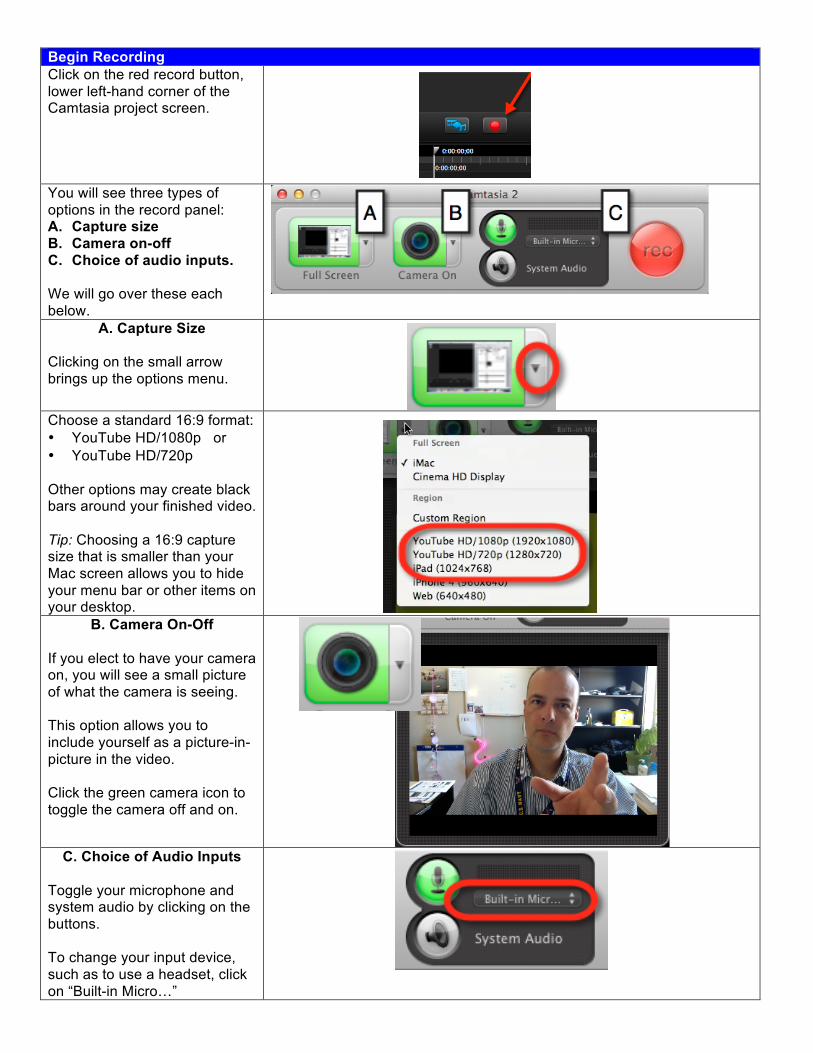
Begin Recording Click on the red record button, lower left-hand corner of the Camtasia project screen.
You will see three types of options in the record panel: A. Capture size B. Camera on-off C. Choice of audio inputs. We will go over these each below.
A. Capture Size Clicking on the small arrow brings up the options menu.
Choose a standard 16:9 format: • YouTube HD/1080p or • YouTube HD/720p Other options may create black bars around your finished video. Tip: Choosing a 16:9 capture size that is smaller than your Mac screen allows you to hide your menu bar or other items on your desktop.
B. Camera On-Off If you elect to have your camera on, you will see a small picture of what the camera is seeing. This option allows you to include yourself as a picture-in-picture in the video. Click the green camera icon to toggle the camera off and on.
C. Choice of Audio Inputs Toggle your microphone and system audio by clicking on the buttons. To change your input device, such as to use a headset, click on “Built-in Micro…”
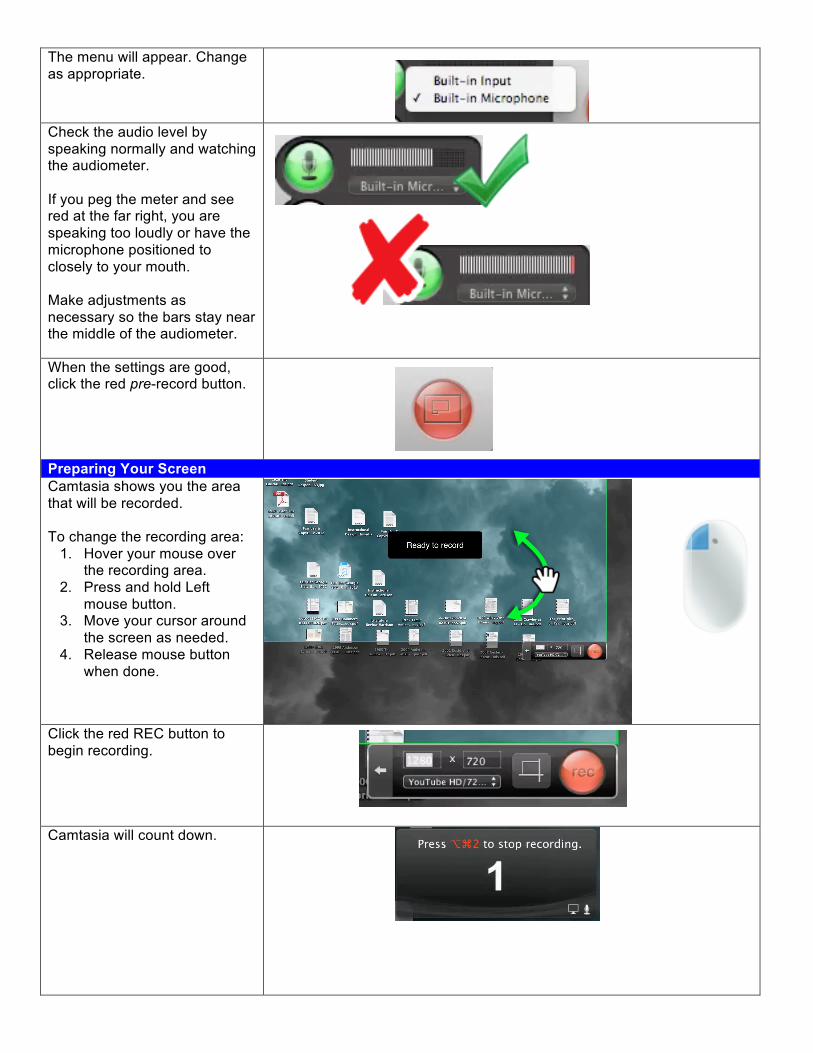
The menu will appear. Change as appropriate.
Check the audio level by speaking normally and watching the audiometer. If you peg the meter and see red at the far right, you are speaking too loudly or have the microphone positioned to closely to your mouth. Make adjustments as necessary so the bars stay near the middle of the audiometer.
When the settings are good, click the red pre-record button.
Preparing Your Screen Camtasia shows you the area that will be recorded. To change the recording area:
1. Hover your mouse over the recording area.
2. Press and hold Left mouse button.
3. Move your cursor around the screen as needed.
4. Release mouse button when done.
Click the red REC button to begin recording.
Camtasia will count down.
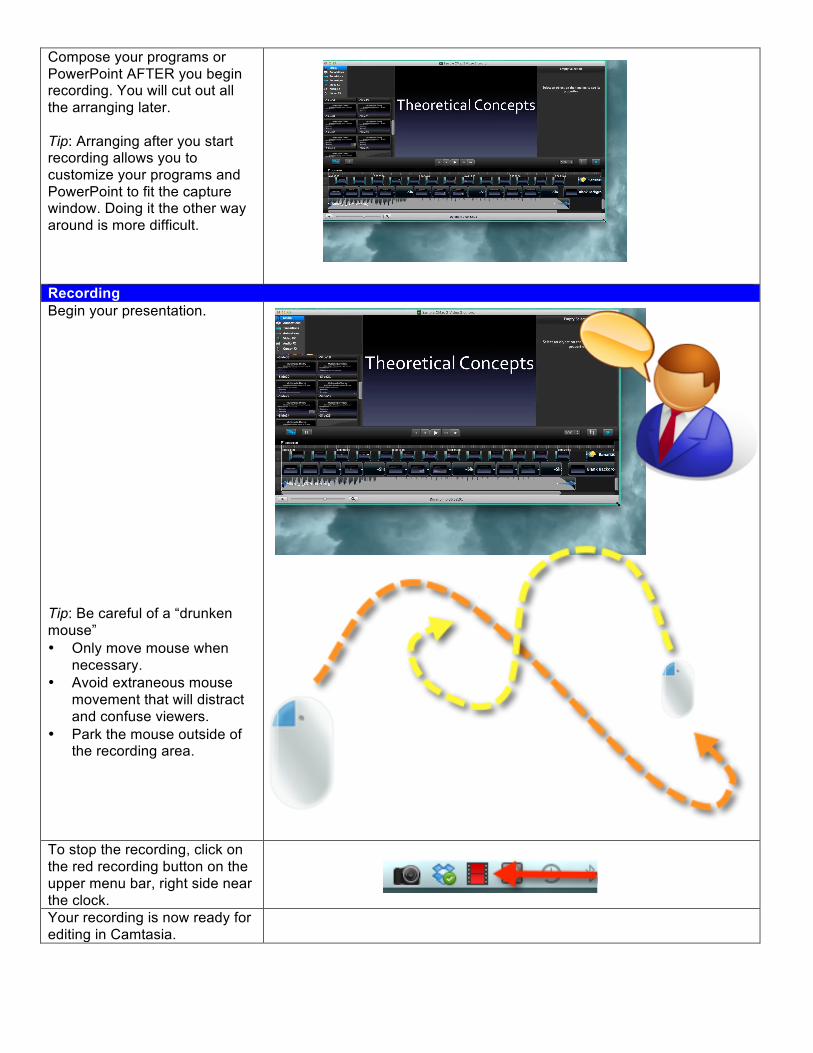
Compose your programs or PowerPoint AFTER you begin recording. You will cut out all the arranging later. Tip: Arranging after you start recording allows you to customize your programs and PowerPoint to fit the capture window. Doing it the other way around is more difficult.
Recording Begin your presentation. Tip: Be careful of a “drunken mouse” • Only move mouse when
necessary. • Avoid extraneous mouse
movement that will distract and confuse viewers.
• Park the mouse outside of the recording area.
To stop the recording, click on the red recording button on the upper menu bar, right side near the clock.
Your recording is now ready for editing in Camtasia.


