
Campus Solutions CUNYfirst...
51
Campus Solutions CUNYfirst Admissions Quick-Reference Guide
Transcript of Campus Solutions CUNYfirst...

Campus Solutions
CUNYfirst Admissions
Quick-Reference Guide

February 25, 2011 Admissions Quick-Reference Guide
February 25, 2011 Admissions Quick-Reference Guide
Viewing CAS Application Summary ....................................................................................................................................... 3
Viewing ASTA Application Summary ..................................................................................................................................... 4
Search/Match ........................................................................................................................................................................ 5
Adding an Application Manually ............................................................................................................................................ 8
Entering Residency Data .................................................................................................................................................... 10
Adding an Application – second BA .................................................................................................................................... 13
Update Application Manually ............................................................................................................................................... 14
Update Names – Add New Name Type............................................................................................................................... 15
Update Names – Edit Current Name ................................................................................................................................... 16
Update Address - Add New Address Type ......................................................................................................................... 17
Update Address – Edit Current Address.............................................................................................................................. 19
Update Contact Information (Phone/Email) ......................................................................................................................... 20
Update Program Status: Changing Program/Plan (pre-matriculation) ................................................................................. 21
Update Program Status: Matriculate ................................................................................................................................... 22
Update Program Status: Unmatriculating Students ............................................................................................................. 23
Matriculating Students in Batch ........................................................................................................................................... 24
Admit Non-Degree Students with Quick Admit .................................................................................................................... 27
Admit Non-Degree Students with EMPL ID ......................................................................................................................... 29
Readmit Student ................................................................................................................................................................. 31
Reactivate Student .............................................................................................................................................................. 33
Reallocate Student: Originating Institution ........................................................................................................................... 35
Reallocate Student: Selected Institution .............................................................................................................................. 36
View a Student’s Careers (academic level) ......................................................................................................................... 37
Viewing Application Summary ............................................................................................................................................. 38

3/4/2013 Admissions Quick-Reference Guide
Last Updated: 3/4/2013 Admissions Quick-Reference Guide 2
Viewing an Education Summary ......................................................................................................................................... 39
Viewing Applicant Progression ............................................................................................................................................ 40
Test Results Page (Post Testing Exemption) ...................................................................................................................... 41
Test Results View Page ...................................................................................................................................................... 43
Term Activate Single Student .............................................................................................................................................. 44
Enroll with Quick Enroll ....................................................................................................................................................... 46
CEMLI Search – Repository ................................................................................................................................................ 49

3/4/2013 Admissions Quick-Reference Guide
Last Updated: 3/4/2013 Admissions Quick-Reference Guide 3
Viewing CAS Application Summary
1. To review the CAS Application Summary View pages, navigate to: Student Admissions > Application Maintenance > Application Summary View > CAS Application Summary View.
2. Click the Include History check-box.
3. On the CAS Student Data Load page, enter search criteria to locate and select the desired record.
4. Review applicant choices and admission offers on the CAS Student Choice/Allocation page.
5. Review data collected for Institutional Research at CUNY on the CAS Institutional Research page
6. Review specific academic information on the CAS Educational Information page.
7. End of Procedure.

3/4/2013 Admissions Quick-Reference Guide
Last Updated: 3/4/2013 Admissions Quick-Reference Guide 4
Viewing ASTA Application Summary
1. To review the ASTA Application Summary View pages, navigate to: Student Admissions > Application Maintenance > Application Summary View > ASTA Application Summary View.
2. Click the Include History check-box.
3. On the ASTA Student Data Load page, enter search criteria to locate and select the desired record.
4. Review applicant choices and admission offers on the ASTA Student Choice/Allocation page.
5. Review data collected for Institutional Research at CUNY on the ASTA Institutional Research page
6. Review specific academic information on the ASTA Educational Information page.
7. End of Procedure.
3/4/2013 Admissions Quick-Reference Guide
Last Updated: 3/4/2013 Admissions Quick-Reference Guide 5
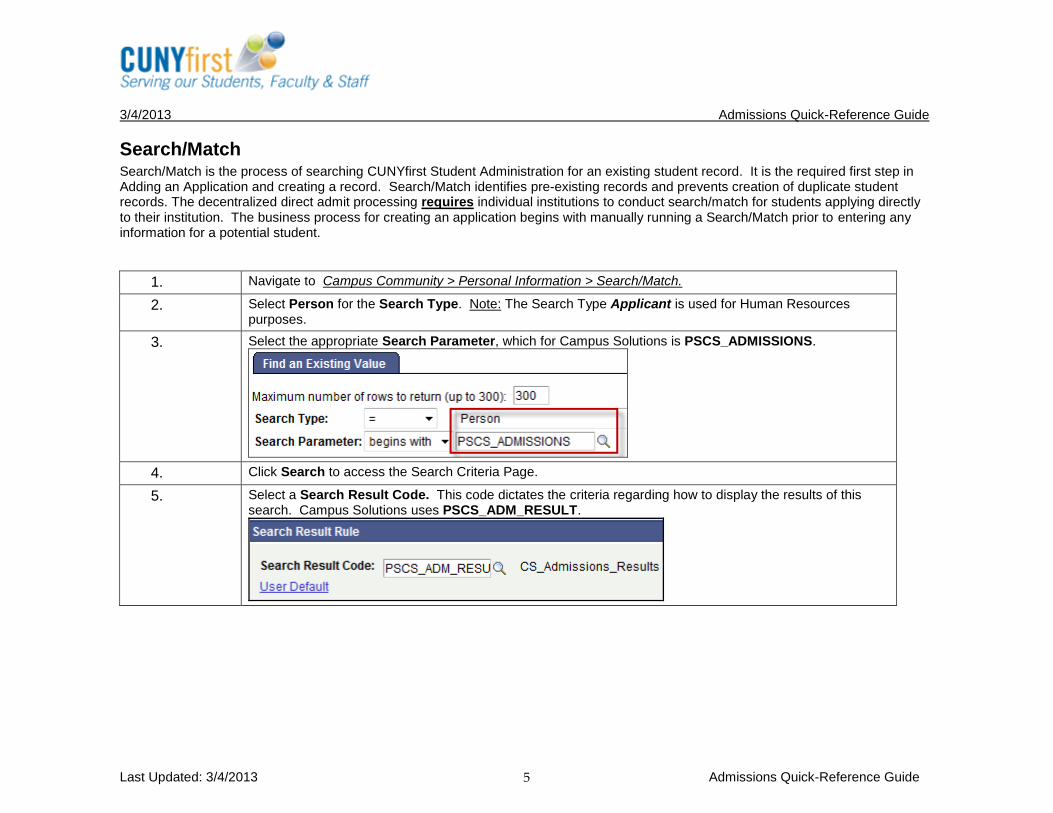
Search/Match Search/Match is the process of searching CUNYfirst Student Administration for an existing student record. It is the required first step in Adding an Application and creating a record. Search/Match identifies pre-existing records and prevents creation of duplicate student records. The decentralized direct admit processing requires individual institutions to conduct search/match for students applying directly to their institution. The business process for creating an application begins with manually running a Search/Match prior to entering any information for a potential student.
1. Navigate to Campus Community > Personal Information > Search/Match.
2. Select Person for the Search Type. Note: The Search Type Applicant is used for Human Resources purposes.
3. Select the appropriate Search Parameter, which for Campus Solutions is PSCS_ADMISSIONS.
4. Click Search to access the Search Criteria Page.
5. Select a Search Result Code. This code dictates the criteria regarding how to display the results of this search. Campus Solutions uses PSCS_ADM_RESULT.

3/4/2013 Admissions Quick-Reference Guide
Last Updated: 3/4/2013 Admissions Quick-Reference Guide 6
6. Enter Search Criteria in select Search Fields. (Enter First and Last Name for this exercise). Note that you must tab out of the last field you enter in order to access the Search button.
7. Click Search to access results of a match or potential match.
8. If a potential match is not found, a message will appear with this information. The new applicant can be added to CUNYfirst.
9. Note: If a potential match is found, the Search Results grid might include the same ID multiple times. If the name field is included in the search result code selected, the search returns rows for each name type and effective date that match the search criteria entered.
10. If the record exists, click the Carry ID button to automatically carry the ID forward to the following CUNYfirst pages in order to review or update the record (see image below). If the record does not exist, the person does not currently exist in CUNYfirst.
11. In this image, one potential match is found. Click each Results tab for more information regarding the individual. The Details link will open a new window to the Biographical Details page of the Add/Update Person component.

3/4/2013 Admissions Quick-Reference Guide
Last Updated: 3/4/2013 Admissions Quick-Reference Guide 7
12. If a record is found for the applicant, updates must be made through the Maintain Applications component. If it is not a potential match, a new record can be created through the Add Application component or the Add/Update Person component.
13. End of Procedure

3/4/2013 Admissions Quick-Reference Guide
Last Updated: 3/4/2013 Admissions Quick-Reference Guide 8
Adding an Application Manually The Add Application (UGRD) process involves bypassing the CAS/ASTA interface and permits direct entry of an admissions application using the CUNYfirst Application Entry functionality. Once the application record is saved, CUNYfirst assigns the student an EMPLID.
1. Navigate to the Add Application component: Student Admissions > Application Entry > Add Application.
2. Retain the Application Number of 0000000.
3. Retain the default ID NEW.
4. Select the Academic Institution.
5. Select the Academic Career. For Senior Colleges, Academic Careers should be UGRD or GRAD. Community Colleges will have a UGRD value. Non-Degree students will be processed through Quick Admit.
6. Click the Add button. This will bring the user to the first application page: Biographical Details.
7. In the Person Information section of the Biographical Details Page, add: Name, DOB (no slashes: mmddyyyy)
8. In the Biographical History section of the Biographical Details Page, add: Effective Date, Gender
9. In the National ID section of the Biographical Details Page, add National ID (Social Security number with no hyphens)
10. In the Contact Information section of the Biographical Details Page, add: Address. Address defaults to HOME. Dropdown includes HOME, MAILING, BILLING, PERMANENT. CAS/ASTA populates four (4) address types: HOME, MAILING, BILLING, PERMANENT. To be consistent with CAS/ASTA, the same four (4) address types should be populated. You must click the Edit Address link to perform this activity.
11. In the Contact Information section of the Biographical Details Page, add at least one Phone Number and one Email address. The Preferred checkbox must be checked for one of the phone types and one of the email types.
12. On the Biographical Details Page, click the Citizenship link to add citizenship country and status information. Click OK to return to the Student Record.
13. On the Biographical Details Page, click the Visa/Permit link to add more detailed information for International Students. Click OK to return to the Student Record.
14. Click the Regional Tab.

3/4/2013 Admissions Quick-Reference Guide
Last Updated: 3/4/2013 Admissions Quick-Reference Guide 9
15. On the Regional Page enter information regarding ethnic group and military status. If the Hispanic/Latino checkbox is checked, click on Ethnic Group dropdown menu to select appropriate group.
16. Click the Application Program Data Tab.
17. In the Program Data section of the Application Program Data Page, enter data for relevant fields which may include: Effective Date, Admit Term, Academic Program, Academic Load, Expected Graduation Term, Campus.
18. In the Program Status section of the Application Program Data Page, enter: Program Action (Change the default of APPL to ADMT for Admitted), Action Reason.
19. In the Plan Data section of the Application Program Data Page, enter: Academic Plan (major) /Sub-Plan (minor/concentration). Availability of Sub-Plans is contingent upon selection of Academic Plan.
20. Click the Application Data tab.
21. On the Application Data page, enter the Application Center, Admit Type, Academic Level, and Application Method.
22. Note: The record cannot be saved prior to entering the relevant data on the Application Data page. The record can be saved after entering all relevant data on the Application Data page, since the Application School/Recruiting page does not have any fields that are required by the system.
23. Click the Application School/Recruiting Page. (This page is not being used by Admissions in Wave 1).
24. If desired, enter data relevant to Last School Attended and Graduation Date on the Application School/Recruiting Page.
25. Click Save.
26. Note: A warning may appear if the information closely matches another record in CUNYfirst. If a Search/Match has not been done, navigate to the Search Match component to verify that the student does not have a record in CUNYfirst. If a Search/Match has been performed and it has been established that this is a new student, click Ignore Warning to proceed with saving.
27. Note: Once the record is saved, the student is assigned an Empl ID. (Note: If a Search/Match was not run prior to data entry, open a new window and complete a Search/Match prior to saving the application record.)
28. Note: Please remember that although the application data has been saved, the process of Adding an Application is NOT COMPLETE without Updating Residency, Adding the Student to appropriate Student Groups, and adding any appropriate Service Indicators! Please refer to Campus Community materials for this instruction.
29. End of Procedure.

3/4/2013 Admissions Quick-Reference Guide
Last Updated: 3/4/2013 Admissions Quick-Reference Guide 10
Entering Residency Data Official residency should be entered and maintained through the Residency Data component. Note that the Term Activation process is dependent upon updated residency information.
1. Navigate to: Campus Community > Personal Information (Student) > Identification (Student) > Residency Data.
2. Enter Search Criteria, click the Include History checkbox, and click Search.
3. If multiple results are returned, select the appropriate record.
4. If Residency information exists, click the Add a New Row icon to enter new data.
5. Use the Residency Official 1 page to enter official residency data for an individual.
6. Enter the Institution value.
7. Enter the Effective Term value.
8. From the Residency drop-down list, select the rule that describes the individual's residency status.
9. In the Residency Date field, enter the date that the individual established or reported the residency.
3/4/2013 Admissions Quick-Reference Guide
Last Updated: 3/4/2013 Admissions Quick-Reference Guide 11
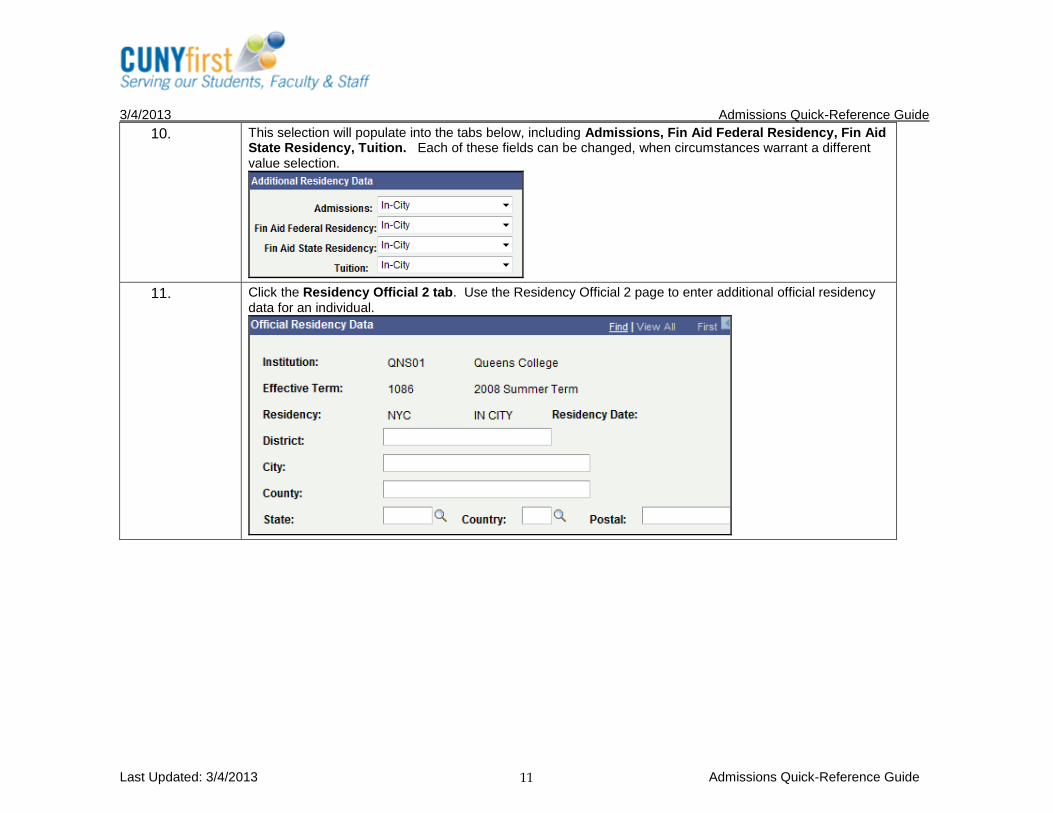
10. This selection will populate into the tabs below, including Admissions, Fin Aid Federal Residency, Fin Aid State Residency, Tuition. Each of these fields can be changed, when circumstances warrant a different value selection.
11. Click the Residency Official 2 tab. Use the Residency Official 2 page to enter additional official residency data for an individual.

3/4/2013 Admissions Quick-Reference Guide
Last Updated: 3/4/2013 Admissions Quick-Reference Guide 12
12. If desired, use the Residency Appeal page to record residency appeal information. For example, a student may have been entered as Out of State for tuition and he or she wants to submit additional information to qualify for in-state tuition.
13. Enter the Effective Date value
14. Enter the value Appeal Status value
15. Enter any relevant comments in the Comment area.
16. Residency Self-Report is not being used by CUNY at this time.
17. Click the Save button.
18. End of Procedure.

3/4/2013 Admissions Quick-Reference Guide
Last Updated: 3/4/2013 Admissions Quick-Reference Guide 13
Adding an Application – second BA All applications follow the process detailed in the Add Application instructions, but there are a few distinctions to make when adding an applicant for a second Bachelor’s Degree. The same instructions apply for second Associates Degree – simply choose the appropriate values for Last School Attended and Student Group.
Please select the following values to add this type of application:
1. For Admit Term, select First Term of Second BA
2. On the Application Data Tab, select Admit Type “3”
3. On the Application School/Recruiting Tab, select the appropriate External Org ID for the Last School Attended.
4. Add student to Student Group – PDBA. Instructions for adding students to Student Groups is located in the Campus Community Reference Guides.
5. Click the Save button.
6. End of procedure.

3/4/2013 Admissions Quick-Reference Guide
Last Updated: 3/4/2013 Admissions Quick-Reference Guide 14
Update Application Manually New student data can be added or modified through the Maintain Applications component.
For detailed steps on changing specific information, such as names and addresses, please refer to the Campus Community Quick-Reference Guide.
1. Navigate to the Maintain Applications component: Student Admissions > Application Maintenance > Maintain Applications.
2. Enter the appropriate Search criteria. The Academic Institution must be selected to proceed.
3. Click the Include History checkbox.
Note: Include History display all rows of data: current, future, and history. Users can add new data to an
existing record.
Correct History provides access to existing rows of data in the database and display all effective-dated rows. Users can add new data and update all rows, including history rows. Security access to Correct History may be limited.
4. Click Search.
5. Select the appropriate application record from the search results.
6. Update the appropriate information on desired tabs/pages. Note: Remember to use the Add a New Row icon (+) in order to preserve historical data and use effective dating for new information.
7. Click the Save button.
8. End of procedure.

3/4/2013 Admissions Quick-Reference Guide
Last Updated: 3/4/2013 Admissions Quick-Reference Guide 15
Update Names – Add New Name Type These instructions are to add a new Name Type, which uses the Add/Change a Name area.
Step Action
1. Navigate to: Campus Community > Personal Information (Student) > Biographical (Student) > Names
2. Enter Search Criteria, click the Include History checkbox and click Search.
3. If multiple results are returned, select the appropriate record.
4. Use the pull-down menu to add a new Type of Name. (To change an existing name, please follow instructions in the next step sheet)
5. Enter the name information.
6. Click Submit.
7. To review the new name type that now appears in the Current Name section select the Name History link.
8. Click the OK button. This will move the new name data to the Current Name section.
9. Click the Save button. This will save the new name data and add the user ID and date/time stamp.

3/4/2013 Admissions Quick-Reference Guide
Last Updated: 3/4/2013 Admissions Quick-Reference Guide 16
Update Names – Edit Current Name These instructions are for changing an existing Name Type and preserving history of the original name.
Step Action
1. Navigate to: Campus Community > Personal Information (Student) > Biographical (Student) > Names
2. Enter Search Criteria, click the Include History checkbox and click Search.
3. If multiple results are returned, select the appropriate record.
4. Use the pull-down menu to add a new Type of Name. (To change an existing name, please follow instructions in the next step sheet)
5. Enter the name information.
6. Click Submit.
7. To review the new name type that now appears in the Current Name section select the Name History link.
8. Click the OK button. This will move the new name data to the Current Name section.
9. Click the Save button. This will save the new name data and add the user ID and date/time stamp.

3/4/2013 Admissions Quick-Reference Guide
Last Updated: 3/4/2013 Admissions Quick-Reference Guide 17
Update Address - Add New Address Type These instructions are to add a new Address Type, which uses the Add Address Type area.
Step Action
1. Navigate to: Campus Community > Personal Information (Student) > Biographical (Student) >Addresses/Phones > Addresses
2. Enter Search Criteria, click the Include History checkbox and click Search.
1. If multiple results are returned, select the appropriate record.
3. To add a new Address type, select the Address Type checkbox appearing under the Add Address Types column.
4. Click the Edit Address link in the Add Address area.
5. Enter address information. If applicable, click the Override Address Verification checkbox.
6. Click OK.

3/4/2013 Admissions Quick-Reference Guide
Last Updated: 3/4/2013 Admissions Quick-Reference Guide 18
7. Review the new address information in the Add Address area.
8. Click Submit to move the data up to Current Address..
9. Click Save to retain new data and update the user identification and date/time stamp.
10. Note: the new address type now exists in the Current Address section.
End of Procedure.

3/4/2013 Admissions Quick-Reference Guide
Last Updated: 3/4/2013 Admissions Quick-Reference Guide 19
Update Address – Edit Current Address These instructions are to change an existing Address and preserve history of the original address,
Step Action
1. Navigate to: Campus Community > Personal Information (Student) > Biographical (Student) >Addresses/Phones > Addresses
2. Enter Search Criteria, click the Include History checkbox and click Search. Select the appropriate record.
3. To view address history or make changes to an existing address, click the Edit/View Address Detail link.
4. Click the Add a New Row icon.
5. Click the Update Addresses link.
6. Enter changes to the address and click OK.
7. Review the new address information associated with the new effective date.
8. Click OK. Click Save.
End of Procedure.

3/4/2013 Admissions Quick-Reference Guide
Last Updated: 3/4/2013 Admissions Quick-Reference Guide 20
Update Contact Information (Phone/Email) These instructions are to add or update phone and email information.
1. Navigate to: Campus Community > Personal Information (Student) > Add/Update a Person.
2. Enter Search Criteria, click the Include History checkbox and click Search. If multiple results are returned, select the appropriate record.
3. To change data for Phone, click the Add button and enter the new data.
4. Select a Phone Type and enter the new phone number. Select Preferred for the phone entry preferred by the student.
5. To change data for Email, click the Add button to enter the new data.
6. Select an Email Type and enter the new email address. Select Preferred for the email entry preferred by the student.
7. Click Save.
8. End of procedure.
3/4/2013 Admissions Quick-Reference Guide
Last Updated: 3/4/2013 Admissions Quick-Reference Guide 21
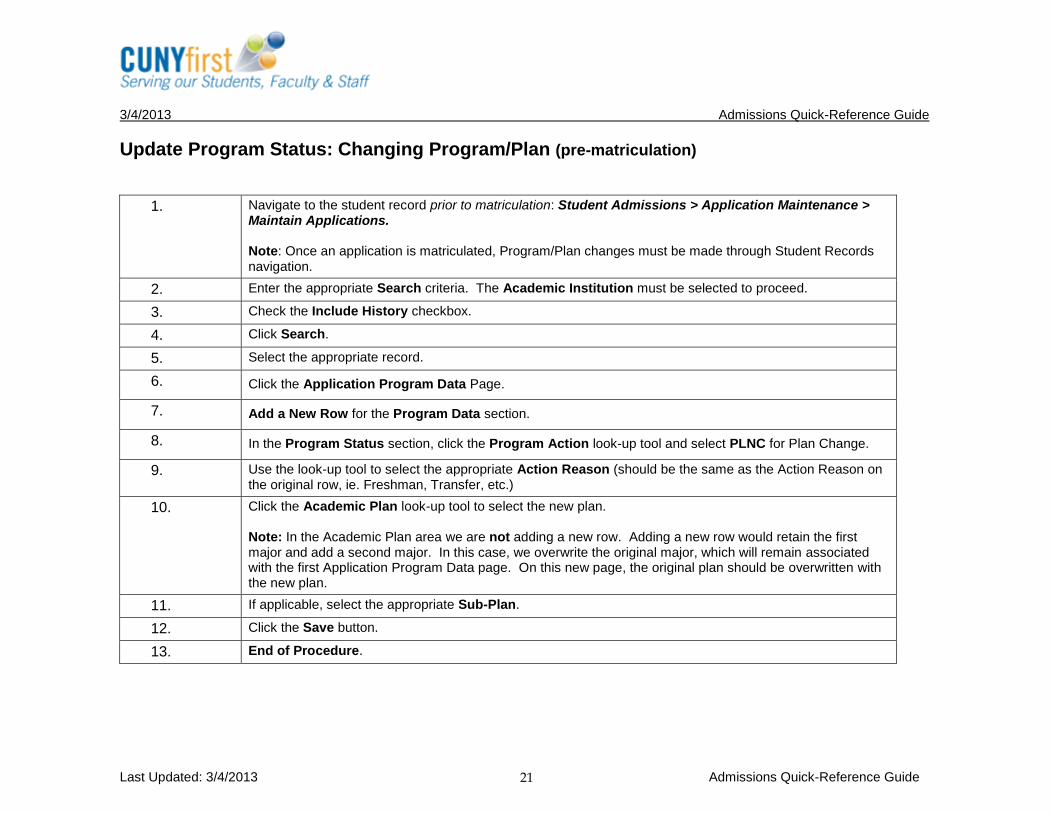
Update Program Status: Changing Program/Plan (pre-matriculation)
1. Navigate to the student record prior to matriculation: Student Admissions > Application Maintenance > Maintain Applications. Note: Once an application is matriculated, Program/Plan changes must be made through Student Records navigation.
2. Enter the appropriate Search criteria. The Academic Institution must be selected to proceed.
3. Check the Include History checkbox.
4. Click Search.
5. Select the appropriate record.
6. Click the Application Program Data Page.
7. Add a New Row for the Program Data section.
8. In the Program Status section, click the Program Action look-up tool and select PLNC for Plan Change.
9. Use the look-up tool to select the appropriate Action Reason (should be the same as the Action Reason on the original row, ie. Freshman, Transfer, etc.)
10. Click the Academic Plan look-up tool to select the new plan. Note: In the Academic Plan area we are not adding a new row. Adding a new row would retain the first major and add a second major. In this case, we overwrite the original major, which will remain associated with the first Application Program Data page. On this new page, the original plan should be overwritten with the new plan.
11. If applicable, select the appropriate Sub-Plan.
12. Click the Save button.
13. End of Procedure.

3/4/2013 Admissions Quick-Reference Guide
Last Updated: 3/4/2013 Admissions Quick-Reference Guide 22
Update Program Status: Matriculate The CAS/ASTA interface process will create the initial application program status of Admitted with a program action reason of UAPC. CAS/ASTA interface also sends updates to applications that add a row to admissions program stack with a program action of DATA and a program action reason of UAPC. The Update Application Status process involves updating an application’s program action and action reasons within CUNYfirst This process should be followed when the decision has been made to matriculate the application of a single student rather than though a batch process. When the Program Action is changed to MATR with the appropriate action reason, ownership of the student will be released to Student Records. Note: This same functional procedure is used to change many types of student status, such as Deferment, Program Change, Readmit, Applicant Withdrawal, etc.
1. Navigate to the Maintain Applications component: Student Admissions > Application Maintenance > Maintain Applications.
2. Enter the appropriate Search criteria. The Academic Institution must be selected to proceed.
3. On the Maintains Applications Search Page, enter search criteria.
4. Check the Include History checkbox.
5. Click Search.
6. Select the appropriate record and click on the Application Program Data Page.
7. Click the Add a New Row icon to the Program Data section.
8. Select the value MATR (Matriculation) for the Program Action field.
9. Update the Action Reason field with the appropriate admission code for the student (admit type).
10. Click the Refresh button. The application status will change.
11. Click the Create Program Button. This will create the Program/Plan stack.
12. Click Save. If desired, click View All to review all Program Status data with associated effective dates.
13. End of Procedure.

3/4/2013 Admissions Quick-Reference Guide
Last Updated: 3/4/2013 Admissions Quick-Reference Guide 23
Update Program Status: Unmatriculating Students
1. Navigate to the student record: Records and Enrollment > Career and Program Information > Student Program/Plan.
2. Enter the appropriate Search criteria. The Academic Institution must be selected to proceed.
3. Check the Include History checkbox.
4. Click Search.
5. Select the appropriate record.
6. On the Student Program page, click the Add a New Row icon.
7. Select the value ADRV (Admission Revocation) for the Program Action field.
8. Select the relevant Action/Reason from the pull-down menu.
9. Change the Effective Date to the following business day.
10. Click Save. A Warning Message may appear with information regarding impact of Unmatriculating a Student Record.
11. End of Procedure.

3/4/2013 Admissions Quick-Reference Guide
Last Updated: 3/4/2013 Admissions Quick-Reference Guide 24
Matriculating Students in Batch
1. Navigate to: Student Admissions > Processing Applications > Mass Change > Mass Change Definition.
2. Select the Mass Change Definition
3. Review Description page
4. Click the Student Administration tab present on the top of the page
5. Verify the student administration setup values
6. Click the Criteria and Defaults tab present on the top of the page
7. Click on the View All link in the Criteria section of the page
8. Verify the criteria/defaults setup values
9. Click the Save button. Note: For every field that was left blank the system will require you to click OK.
10. Click on Generate SQL tab.
11. Click on Clear Sw button. This clears the previous SQL.
12. Click on Generate button. This generates the new SQL as per the values input above.
13. Click the Save button.
14. Click on Countbutton. This returns the number of records expected to be changed via the process. Write down this total for later reference.
15. Navigate to Student Admissions > Processing Applications > Mass Change
16. Click the Mass Change Group link.
17. Click in the field next to Mass Change Group ID begins with
18. Enter first few letters of Mass Change Group. This will limit the results to only those that begin with the input letters.
19. Click the Search button
20. Select the Mass Change Group

3/4/2013 Admissions Quick-Reference Guide
Last Updated: 3/4/2013 Admissions Quick-Reference Guide 25
21. Verify group settings
22. Click the Run Mass Change link
23. Click in the field next to Run Control ID begins with
24. Enter first few letters of Run Control ID
25. Click the Search button
26. Select the Run Control ID
27. Verify Run Control settings
28. Click Run button
29. Click OK to launch the process
30. Click on Process Monitor
31. On the Process List tab, your process should run to a process status of SUCCESS. If you receive a process status of ERROR or QUEUED for a long time, contact your Helpdesk. If there is a process status of SUCCESS, proceed to next step
32. Click on Details
33. View the output files, including the log file, which will list the number of records updated. Verify that the count from step 18 matches
34. Click on the Activate Applicants link. The Find An Existing Value tab is displayed. Activate Applicants will complete the matriculation of the applicants and create the Student Record.
35. Click in the field next to Run Control ID begins with
36. Enter first few letters of Run Control ID
37. Click the Search button
38. Select the Run Control ID
39. Verify Run Control settings
40. Click Run button
41. Select the Process Name ADPCPPRC (Activate Applications) by clicking on the checkbox.
42. Click OK to launch the process
43. Click on Process Monitor

3/4/2013 Admissions Quick-Reference Guide
Last Updated: 3/4/2013 Admissions Quick-Reference Guide 26
44. On the Process List tab, your process should run to a process status of SUCCESS. If you receive a process status of ERROR or QUEUED for a long time, contact your Helpdesk. If there is a process status of SUCCESS, proceed to next step
45. Click on Details
46. View the output files, including the log file, which will list the number of records updated.
47. End of Procedure.

3/4/2013 Admissions Quick-Reference Guide
Last Updated: 3/4/2013 Admissions Quick-Reference Guide 27
Admit Non-Degree Students with Quick Admit For students who do not already possess an EMPL ID in CUNYfirst, Quick Admit functionality can be used to create a record without creating an application. Applicants admitted via the Quick Admit functionality do not have applications created in CUNYfirst, but will have a student record with a program/plan stack. If needed, an application can be added at a later date for these students by using the Add Application component or applying through UAPC.
For Non-Degree students who already possess an EMPL ID, the Program/Plan stack instruction should be followed.
1. Navigate to the Quick Admit component: Records and Enrollment > Enroll Students > Quick Admit a Student.
2. Note: A Search/Match should be performed to determine is a record exists. This functionality is now embedded in the Quick Admit Search Page. Click the link to perform this activity. If the applicant does not exist in CUNYfirst, then a new record may be created using this Quick Admit component. If the applicant does exist in CUNYfirst, the current record should be updated with the proper information through the Application Maintenance component.
3. Retain the default ID NEW.
4. Select the appropriate Student Institution.
5. Select the appropriate Academic Career.
6. Select the appropriate Term.
7. Click the Add button. This will bring the user to the first application page: Biographical Details.
8. Note: The Student Record created through Quick Admit contains three pages: Biographical Details, Regional, and Program/Plan. Quick Admit does not create an application, so those additional pages are not available.
9. Click the Biographical Details Tab.
10. On the Biographical Details Page, add Person Information: Name, DOB (no slashes: mmddyyyy)
11. On the Biographical Details Page, add Biographical History information: Effective Date, Gender
12. On the Biographical Details Page, add National ID: National ID (Social Security number - no hyphens)
3/4/2013 Admissions Quick-Reference Guide
Last Updated: 3/4/2013 Admissions Quick-Reference Guide 28
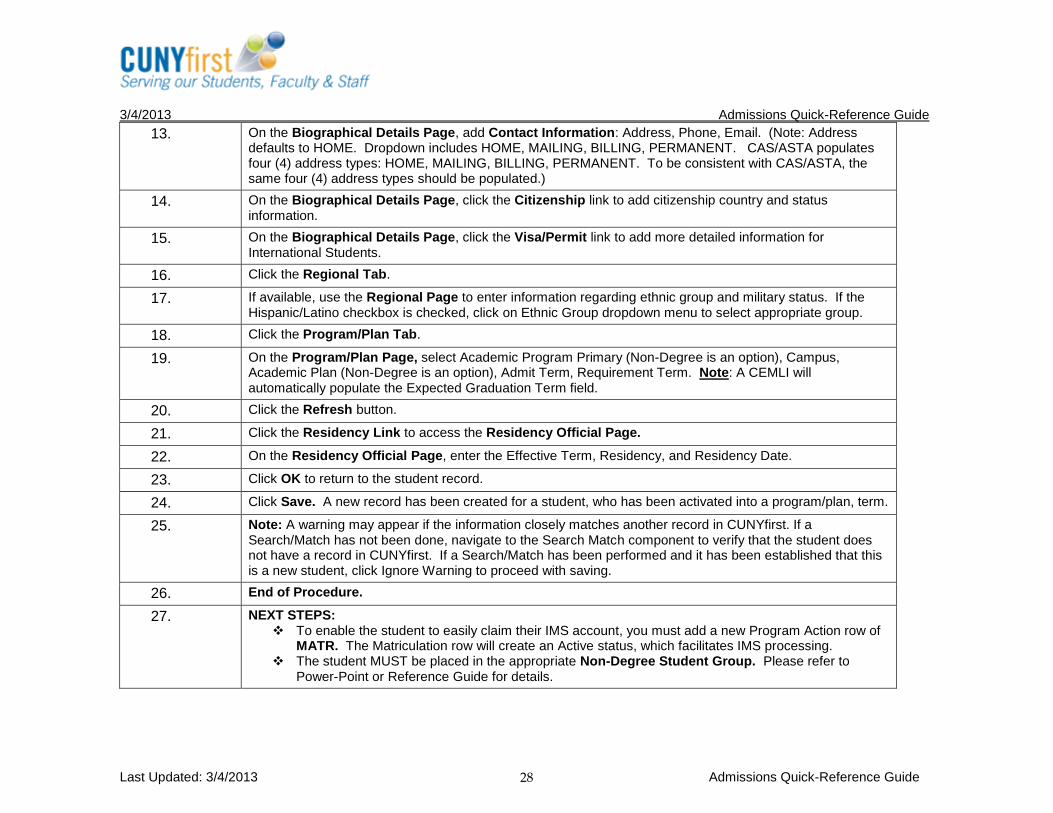
13. On the Biographical Details Page, add Contact Information: Address, Phone, Email. (Note: Address defaults to HOME. Dropdown includes HOME, MAILING, BILLING, PERMANENT. CAS/ASTA populates four (4) address types: HOME, MAILING, BILLING, PERMANENT. To be consistent with CAS/ASTA, the same four (4) address types should be populated.)
14. On the Biographical Details Page, click the Citizenship link to add citizenship country and status information.
15. On the Biographical Details Page, click the Visa/Permit link to add more detailed information for International Students.
16. Click the Regional Tab.
17. If available, use the Regional Page to enter information regarding ethnic group and military status. If the Hispanic/Latino checkbox is checked, click on Ethnic Group dropdown menu to select appropriate group.
18. Click the Program/Plan Tab.
19. On the Program/Plan Page, select Academic Program Primary (Non-Degree is an option), Campus, Academic Plan (Non-Degree is an option), Admit Term, Requirement Term. Note: A CEMLI will automatically populate the Expected Graduation Term field.
20. Click the Refresh button.
21. Click the Residency Link to access the Residency Official Page.
22. On the Residency Official Page, enter the Effective Term, Residency, and Residency Date.
23. Click OK to return to the student record.
24. Click Save. A new record has been created for a student, who has been activated into a program/plan, term.
25. Note: A warning may appear if the information closely matches another record in CUNYfirst. If a Search/Match has not been done, navigate to the Search Match component to verify that the student does not have a record in CUNYfirst. If a Search/Match has been performed and it has been established that this is a new student, click Ignore Warning to proceed with saving.
26. End of Procedure.
27. NEXT STEPS: To enable the student to easily claim their IMS account, you must add a new Program Action row of
MATR. The Matriculation row will create an Active status, which facilitates IMS processing. The student MUST be placed in the appropriate Non-Degree Student Group. Please refer to
Power-Point or Reference Guide for details.

3/4/2013 Admissions Quick-Reference Guide
Last Updated: 3/4/2013 Admissions Quick-Reference Guide 29
Admit Non-Degree Students with EMPL ID This process can be used for individuals who already possess an EMPL ID. Following are two different scenarios of individuals with EMPL ID’s.
1. Students who possess an EMPL ID from previous CUNY enrollment may already have a Program/Plan stack, but will need a new row associated with their Non-Degree enrollment.
2. Employees will have an EMPL ID but may not have a Program/Plan stack. These individuals will have their first Program/Plan added to their record.
1. Navigate to the Program/Plan component: Records and Enrollment > Career and Program Information > Student Program/Plan.
2. On the Find an Existing Value tab, enter the appropriate Search criteria. Click the Include History checkbox and click Search.
3. Select the appropriate record.
a. If the student has multiple Career Numbers, select the most recent record (highest number). On the Student Program page, click the Add a New Row icon. (+).
b. If a record does not appear, this student does not have a program plan stack. In this case,
click the Add a New Value tab. Enter their EMPL ID, Academic Career (undergraduate or graduate level of non-degree course), and retain the “0” Career Number. Click the ADD button at the bottom of the page.
4. Select the Activate value in the Program Action field.
5. Select the appropriate value in the Action Reason field (“2” - entering freshmen or grad degree or non-degree).
6. Select the Institution for the new college the student is attending.
7. Select the appropriate Non-Degree value for Academic Program.
8. Select the appropriate value Admit Term.
9. If it has not defaulted, select the appropriate value for Campus.

3/4/2013 Admissions Quick-Reference Guide
Last Updated: 3/4/2013 Admissions Quick-Reference Guide 30
10. Click the Student Plan tab.
11. Select the appropriate Non-Degree value for Academic Plan. (ex: Non-Degree Permit, Non-Degree UG, etc). Relevant fields will automatically populate upon Plan selection.
12. Click Save.
13. End of Procedure.
14. NEXT STEPS: To enable the student to easily claim their IMS account, you must add a new Program
Action row of MATR. The Matriculation row will create an Active status, which facilitates IMS processing.
The Residency status must be updated. The student MUST be placed in the appropriate Non-Degree Student Group with the
correct begin/end dates. Please refer to training materials for detailed instruction.

3/4/2013 Admissions Quick-Reference Guide
Last Updated: 3/4/2013 Admissions Quick-Reference Guide 31
Readmit Student Appropriate for a student who had previously enrolled at the college but has not enrolled for one semester or more. Certain value choices will depend on whether or not the student is retaining or changing their program/plan choice.
1. Navigate to the Program Action field on the Program/Plan page: Records and Enrollment > Career and Program Information > Program/Plan.
2. Enter Search Criteria for desired Student Record.
3. Click the Include History checkbox.
4. Click Search.
5. On the Student Program page, ensure there is a DISC (Discontinuation) row. If the student does not have a DISC row, click the Add a New Row (+) icon and use the Program Action look-up tool to select DISC with an Action Reason of ENRM (No Enrollment). Note: The DISC Effective Date must be appropriate to term activity – after the last active term and prior to the new active term. The DISC row must have the same admit terms and requirement terms as in the initial Program/Plan record.
6. On the Student Program page, click the Add a New Row icon (+) and use the Program Action look-up tool to select the RADM (Readmit) action.
7. Use the Action Reason Look-Up Tool to select Readmitted (4).
There is ONE exception to this: When a student is being readmitted solely for the purpose of graduating without taking classes, the Action Reason is (9).
8. For Admit Term, select the term into which the student is being Readmitted.
9. For the Requirement Term, follow your campus policy regarding retaining the original term or the new Admit Term.

3/4/2013 Admissions Quick-Reference Guide
Last Updated: 3/4/2013 Admissions Quick-Reference Guide 32
10. If the student is being readmitted into a new plan, go to the Plan tab and change the Requirement Term to the new term into which the student is being admitted. Since this is a new plan (major), the student will follow the curriculum corresponding to their new Admit Date.
11. If the student is being readmitted into a different plan, change the Plan Declare Date to the current date.
12. Click Save… but the process is not complete!
13. When you either Save or click a different tab within this component, the Requirement Term will automatically update to match the Admit Term. If you have chosen to retain the original Requirement Term, you must correct the auto-update after saving. If you need a reminder of the original date, please remember that it exists on the initial Program/Plan page.
14. End of Procedure.

3/4/2013 Admissions Quick-Reference Guide
Last Updated: 3/4/2013 Admissions Quick-Reference Guide 33
Reactivate Student Appropriate for a student who was admitted and matriculated to the college but never enrolled.
1. Navigate to: Records and Enrollment > Career and Program Information > Student Program/Plan.
2. Enter Search Criteria for desired Student Record.
3. Click the Include History checkbox.
4. Click Search.
5. On the Student Program page, ensure there is a DISC (Discontinuation) row. If the student does not have a DISC row, click the Add a New Row (+) icon and use the Program Action look-up tool to select DISC with an Action Reason of ENRM (No Enrollment). Note: The DISC Effective Date must be appropriate to term activity – after the last active term and prior to the new active term. The DISC row must have the same admit terms and requirement terms as in the initial Program/Plan record.
6. On the Student Program page, click the Add a New Row icon (+) and use the Program Action look-up tool to select the RADM (Readmit) action.
7. Action Reason Look-Up Tool to select the appropriate value: 2 or 3.
8. For Admit Term, select the term into which the student is being Readmitted.
9. For the Requirement Term, follow your campus policy regarding retaining the original term or the new Admit Term.
10. If the student is being readmitted into a different plan, go to the Plan tab and change the Requirement Term to the new term into which the student is being admitted. However, if it is your institution’s policy to retain the original term as the Requirement Term, then retain the original term.
11. If the student is being readmitted into a different plan, change the Plan Declare Date to the current date.

3/4/2013 Admissions Quick-Reference Guide
Last Updated: 3/4/2013 Admissions Quick-Reference Guide 34
12. Click Save… but the process is not complete!
13. When you either Save or click a different tab within this component, the Requirement Term will automatically update to match the Admit Term. If you have chosen to retain the original Requirement Term, you must correct the auto-update after saving. If you need a reminder of the original date, please remember that it exists on the initial Program/Plan page.
14. End of Procedure.

3/4/2013 Admissions Quick-Reference Guide
Last Updated: 3/4/2013 Admissions Quick-Reference Guide 35
Reallocate Student: Originating Institution When an applicant has been reallocated to a different institution, the application can be withdrawn from the originating institution and then admitted to the new institution. Note that acceptance and enrollment at the selected institution can proceed without the original institution following these steps, though they are recommended. These steps pertain to the originating institution.
1. Take the following actions for the originating institutions’ application: The Add Application Person Information page can be found by navigating to: Student Admissions > Application Maintenance > Maintain Applications.
2. For the Click the Add a New Row icon to insert a new effective dated row.
3. Update the Program Action field with WAPP (Applicant Withdrawal).
4. Update the Action Reason field with REAL (Reallocation).
5. Click Save.
3/4/2013 Admissions Quick-Reference Guide
Last Updated: 3/4/2013 Admissions Quick-Reference Guide 36
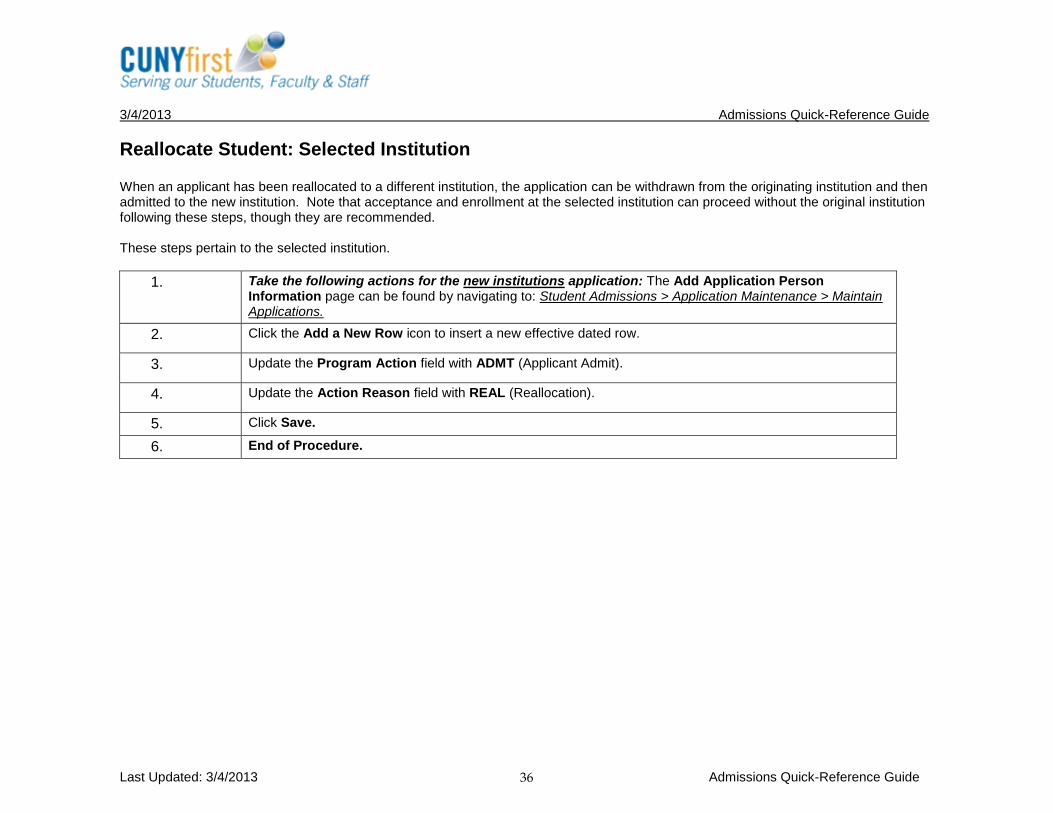
Reallocate Student: Selected Institution When an applicant has been reallocated to a different institution, the application can be withdrawn from the originating institution and then admitted to the new institution. Note that acceptance and enrollment at the selected institution can proceed without the original institution following these steps, though they are recommended. These steps pertain to the selected institution.
1. Take the following actions for the new institutions application: The Add Application Person Information page can be found by navigating to: Student Admissions > Application Maintenance > Maintain Applications.
2. Click the Add a New Row icon to insert a new effective dated row.
3. Update the Program Action field with ADMT (Applicant Admit).
4. Update the Action Reason field with REAL (Reallocation).
5. Click Save.
6. End of Procedure.

3/4/2013 Admissions Quick-Reference Guide
Last Updated: 3/4/2013 Admissions Quick-Reference Guide 37
View a Student’s Careers (academic level) A summary of the program actions taken during a student’s academic careers (level - such as undergraduate or graduate) can be viewed using the Student Career component.
The Student Career component can be found by navigating to Records and Enrollment > Career and Program Information > Student Career.
1. Enter the desired value in ID field.
2. Enter the desired value in Last Name field.
3. Enter the desired value in First name field.
4. Click the Search button.
5. Select the desired result if necessary.
6. Navigate among the rows of academic careers (if the student has more than one) or click the View All link.
7. Within each academic career, navigate among the rows of Student Career Numbers (if the student has more than one) or click the View All link.
8. View the program data displayed within each Student Career Number, within each academic career for the selected student.
9. End of process.

3/4/2013 Admissions Quick-Reference Guide
Last Updated: 3/4/2013 Admissions Quick-Reference Guide 38
Viewing Application Summary
1. Navigate to Student Admissions > Application Summaries > Application Summary.
2. Enter Search Criteria and click Search.
3. Use the Application Summary page to view a list of all applications for an individual applicant, along with associated application numbers, institutions, career, program, term, admit type, and status.
4. Click the Application Data link to review the application’s Application Program Data page. This link opens a new window to the Maintain Applications component.
5. Close the Application Program Data window to return to the Application Summary page.
6. Click the Application Detail page to view select details of a specific application, including program action (matriculated), action reason (entering freshmen), and evaluation date.
7. Click Return to return to the Application Summary page.
8. End of Procedure.

3/4/2013 Admissions Quick-Reference Guide
Last Updated: 3/4/2013 Admissions Quick-Reference Guide 39
Viewing an Education Summary
1. Navigate to Student Admissions > Applicant Summaries > Education Summary.
2. Enter desired criteria and click Search. Note that the Academic Institution field is required.
3. If multiple results are retrieved, select appropriate record.
4. On the External Academic Summary tab, use the Select Academic Data section and the corresponding Search button to review any existing data.
5. Click the Academic Data Detail link to data for GPA type, class rank, and related data. Click Return to return to the External Summary page.
6. Click the Sort Academic Data by pull-down menu to sort results by a variety of criteria.
7. Click on the External Subject Summary tab. Use the Select Subjects By section and the corresponding Search button to review any existing data. Note that only the first five rows of data will be displayed.
8. Click the Academic Subject Detail link for data regarding GPA Type, Unit Type, Total Units and Courses Attempted. Click Return to return to the External Subject Summary page.
9. Click the External Degree Summary tab. Use the Sort Degree drop-down to organize results, if desired.
10. Click the External Course Summary tab to review any data related to course level, subject, and term.
11. Use the Sort Courses By pull-down menu to sort results by a variety of criteria.
12. Click the Transcript Data link to review any existing data regarding transcripts.
13. Click Return to move back to the External Course Summary page.
14. Click on the Course Detail link to review more data regarding course level, type, and dates.
15. Click Return to move back to the External Course Summary page.
16. End of Procedure.

3/4/2013 Admissions Quick-Reference Guide
Last Updated: 3/4/2013 Admissions Quick-Reference Guide 40
Viewing Applicant Progression
1. Navigate to Student Admissions > Applicant Summaries > Applicant Progression.
2. Enter relevant criteria and click Search.
3. Review the Applicant Progression page to view a summary of an application through prospect, applicant, and student stages. These fields cannot be modified.
4. End of Procedure.

3/4/2013 Admissions Quick-Reference Guide
Last Updated: 3/4/2013 Admissions Quick-Reference Guide 41
Test Results Page (Post Testing Exemption) The Test Results Page provides users with access to only the Test scores they are given specific permissions to update. To View ALL test score data, users must navigate to the Test Results View Page (see next step sheet).
Three Test ID’s have been created for select campus administrators to update test score data with exemptions: Read Exempt, Writ Exempt and Math Exempt. CUNY test scores cannot be manually updated, as they are all processed through the SKAT interface. Users also have access to post scores for the following test ID’s: SAT, GEDE, GEDF, GEDS, RGENTS, TOEFL.
Reminder: On this Test Results page, users will only be able to view and update the test scores to which they have been granted security access. The Test Results View page provides view access to all test scores.
1. Navigate to the Test Results component through the following navigations: Records & Enrollment > Transfer Credit Evaluation > Test Results Student Admissions > Application Entry > Add Application > Transfer To: Test Results (found on the bottom of the last three Application Tabs)
2. On the Find an Existing Value tab, enter search criteria for a particular student.
3. Click Search.
4. Use the look-up tool for Test ID to select the appropriate exemption: Read Exempt, Writ Exempt, Math Exempt.
5. The fields in the Defaults for Components section do not need data values.
6. In the Test Components section, select the appropriate Component. (Q for exemptions).
7. In the Score field, enter “9999” for an exemption.
8. Select the appropriate Test Date.
9. Select the appropriate Data Source*, which should reflect the specific college making the update (SKAT-xxxx, where the ‘xxxx’ represents the college name).
10. Select “Unknown” for Academic Level.

3/4/2013 Admissions Quick-Reference Guide
Last Updated: 3/4/2013 Admissions Quick-Reference Guide 42
11. If additional Test Exemptions need to be entered, click the Add a New Row value (+) at the TOP RIGHT of the page. In a case where additional components exist of a single test (eg. SAT), use the Add a New Row value available in the Test Component section (lower portion of page).
12. Click the Save button.
13. End of procedure.
* In order for the Read Exempt, Writ Exempt, and/or Math Exempt Test ID to be populated in DegreeWorks, “SKAT-xxxx’ MUST be selected as the Data Source. Failure to select the correct Data Source will cause DegreeWorks to have missing proficiency indicators on students’ DegreeWorks records.

3/4/2013 Admissions Quick-Reference Guide
Last Updated: 3/4/2013 Admissions Quick-Reference Guide 43
Test Results View Page When a user has Update Test Result access, they will ONLY see the test results they have the ability to update on the Test Results page and the Student Services Center Admission tab. This page exists to show ALL test results associated with a particular student.
1. Begin by navigating to Records and Enrollment > Transfer Credit Evaluation > Test Results View.
2. Enter Search Criteria and click Search. Note: Academic Institution is a required field.
3. View desired information on the Test Results page.
4. Use Row Navigation to view all test results. Use the View All link to view all testing data on one page.
5. End of Procedure.

3/4/2013 Admissions Quick-Reference Guide
Last Updated: 3/4/2013 Admissions Quick-Reference Guide 44
Term Activate Single Student Though this is included in the Admissions Quick-Reference Manual, the process exists within the Student Records domain. Please refer to the Student Records Reference Guide for detailed instruction on this function.
Though term activation will often be processed via batch, students may be term activated on an individual basis. This will be the practice for enrolling Permit students at a new CUNY institution. Once a permit student is term activated, the Program/Plan component will be used to activate the student in the appropriate career, program and plan.
1. Navigate to Records and Enrollment > Student Term Information > Term Activate a Student.
2. Enter Search criteria and click Search. If multiple search results are retrieved, select the appropriate student record.
3. To Term Activate the student in a new term, click the + icon to add a new row to this record.
4. Select the appropriate values in the Academic Institution and Term fields.
5. The Student Career number will default to 0 for undergraduate students.
6. Use the checkboxes to Override All Academic levels and Projected levels.
7. Enter values for Academic Level Projected/Term Start/Term End fields. (Values are associated with the student’s career level, such as lower freshman, upper sophomore, etc.)
8. Select a value for From of Study (defaults to Enrollment)
9. Select a value for Billing Career (defaults to Academic Career)
10. Use the checkbox to indicate Eligibility for Enrollment.
11. Click the Enrollment Limit tab.
12. Select the approved Academic Load.
13. When the Override Units checkbox is clicked, fields to set Unit/Credit/and Course limits become available.
14. Select values for Session Form of Study, Fully Enrolled Date and Approved Academic Load.
15. If appropriate, check the Override Billing Units box. This action will enable the Projected Bill Units box.
16. Click the Terms in Residence tab to enter Residency terms.

3/4/2013 Admissions Quick-Reference Guide
Last Updated: 3/4/2013 Admissions Quick-Reference Guide 45
17. Click the Term Control Dates tab to enter dates of Enrollment and dates/statistics to show on transcript.
18. Click the External Study tab.
19. If relevant, select values for External Org ID Country, Study Agreement and Start/End Dates.
20. Click Save.

3/4/2013 Admissions Quick-Reference Guide
Last Updated: 3/4/2013 Admissions Quick-Reference Guide 46
Enroll with Quick Enroll Though this is included in the Admissions Quick-Reference Manual, the process exists within the Student Records domain. Please refer to the Student Records Reference Guide for detailed instruction on this function.
Navigate to Records and Enrollment> Enroll Students >Quick Enroll a Student
1. Click on the Add a new value tab
2. Enter a value for ID
3. Enter a value for Academic Career
4. Enter a value for Academic Institution
5. Enter a value for Term
6. Click on the Add button
7. Select Enroll for the Action field
8. Select the desired Class Nbr (Number) for enrollment. The Look-Up tool will lead to a Search in the Schedule of Classes. Click the green Select Class button to choose the appropriate class. Refer to the Search Schedule of Classes step-sheet for detailed search instruction.
9. The Status of enrollment will display after the Class Nbr field. This status cannot be edited.
10. Values for Related 1 and Related 2 become available upon selection of Enroll or Swap for the enrollment action. If the class has a related class that is not an auto-enroll class, select that class number in this field. The values that appear are those associated sections that are scheduled for the class in the schedule of classes.
11. Click on the Units and Grade tab
12. Use Grade Input at the end of the semester to enter the final grade given to the student for the class. The grade can be posted here, or via the grade roster generator. When a grade is entered and posted through either method, the system displays the grade here.
13. Select a Repeat code for the enrollment transaction, if applicable.
14. If there is a Requirement Designation Option designation specified for the corresponding row of the enrollment transaction and that requirement designation is at the student’s option, select whether the student elects to take the requirement designation.
15. Select the Other Class Info tab

3/4/2013 Admissions Quick-Reference Guide
Last Updated: 3/4/2013 Admissions Quick-Reference Guide 47
16. If the student has a general permission for enrollment, enter the number in the Permission field.
17. The system displays the Drop if Enroll field only when the Action field is set to Enroll.
18. If the Instructor Edit field on the Class Associations page is set to anything but No Choice, then the Ind Study Instructor field becomes available for edit. Select the instructor ID responsible for the class if the
class is an independent study.
19. Select a value for Action Reason
20. Click the General Overrides tab
21. Select the Appointment checkbox to override student enrollment appointment date, time and maximum enrollment units.
22. Check the Unit Load checkbox to skip all unit limit checks.
23. Check the Time Conflict checkbox to disable time conflict checking for class sections.
24. Check the Action Date checkbox to override the action date. The Action Date field becomes available to edit.
25. Select the date that you want to use as the Action Date for processing this enrollment transaction. The action date is the date that you process the corresponding row of the enrollment transaction. The system records the action date to track the date that you process information. By default, the system uses the current system date. When you are processing an enrollment request and you select to override the action date, this field becomes available for edit.
26. Check the Requirement Designation checkbox to override the requirement designation.
27. Check the Career checkbox to override academic career pointers and career pointer exception rules for the student’s academic career.
28. Check the Service Indicator checkbox to override service indicator holds.
29. Check the Requisites checkbox to bypass requisite checking.
30. Click the Class Overrides tab
31. Check the Closed Class checkbox to indicate the class is closed due to capacity size.
32. Check the Class Links checkbox to allow students to add/drip class sections without having to do so for required related component sections in a class association group, to allow students to enroll in a non-enrollment type section, and to allow multiple student enrollment in a course.
3/4/2013 Admissions Quick-Reference Guide
Last Updated: 3/4/2013 Admissions Quick-Reference Guide 48
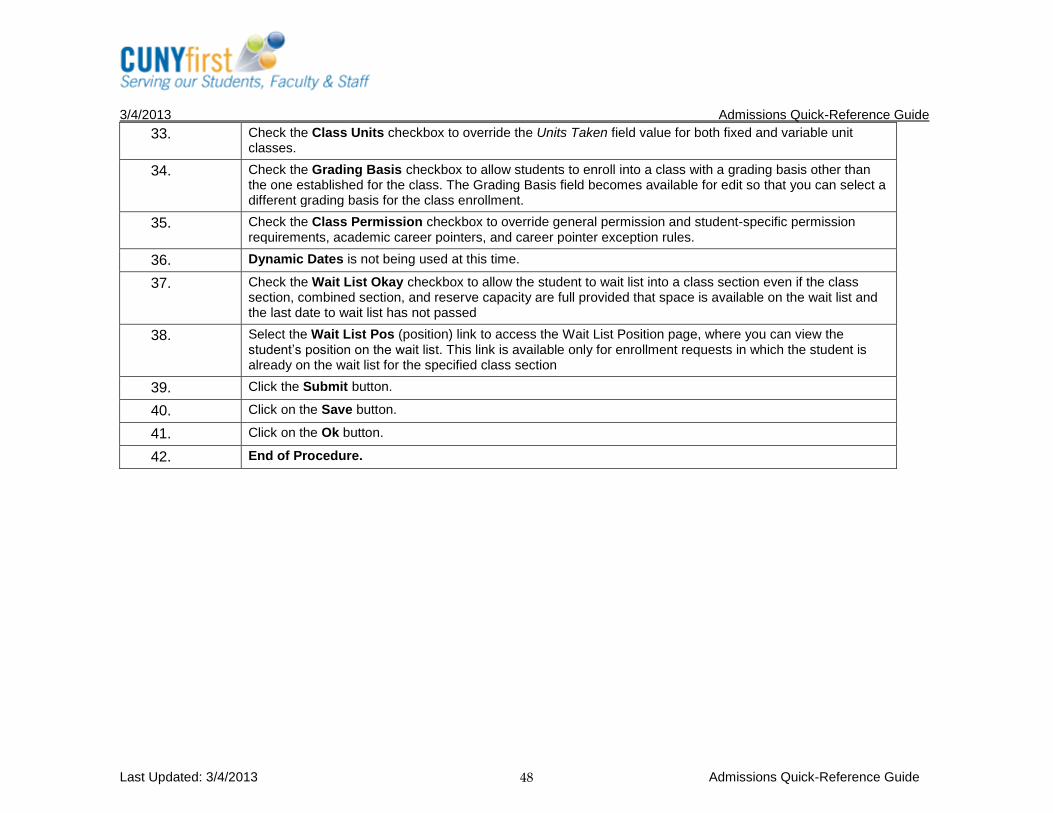
33. Check the Class Units checkbox to override the Units Taken field value for both fixed and variable unit classes.
34. Check the Grading Basis checkbox to allow students to enroll into a class with a grading basis other than the one established for the class. The Grading Basis field becomes available for edit so that you can select a different grading basis for the class enrollment.
35. Check the Class Permission checkbox to override general permission and student-specific permission requirements, academic career pointers, and career pointer exception rules.
36. Dynamic Dates is not being used at this time.
37. Check the Wait List Okay checkbox to allow the student to wait list into a class section even if the class section, combined section, and reserve capacity are full provided that space is available on the wait list and the last date to wait list has not passed
38. Select the Wait List Pos (position) link to access the Wait List Position page, where you can view the student’s position on the wait list. This link is available only for enrollment requests in which the student is already on the wait list for the specified class section
39. Click the Submit button.
40. Click on the Save button.
41. Click on the Ok button.
42. End of Procedure.

3/4/2013 Admissions Quick-Reference Guide
Last Updated: 3/4/2013 Admissions Quick-Reference Guide 49
CEMLI Search – Repository The CEMLI Search is a repository of information containing reports and queries that have been developed for CUNYfirst. After entering a keyword or other search criteria, displayed is information including: •Report Description – Including the Purpose and Use of the Report •Menu Navigation •Security Role(s) needed •Notes and other information.
Steps
1. Navigational Path: CUNY>CEMLI Search
2. Click the CUNY link.
3. Click the CEMLI Search link.
4. After selecting the CEMLI Search component, the Find CEMLI Info Enter Search Criteria page will display. Enter applicable search criteria and/or filter options to limit the search results. Search Criteria/Filter Options are: CEMLI Name, CEMLI Type, Pillar, Module, Technical Contact, Functional Contact, Support Contact, Keywords
5. Click in the CEMLI Name field.
6. Enter the desired information into the CEMLI Name field. In this example, enter a valid value. Note: Enter the specific CEMLI or Report Name to search
7. Click the Search button.
8. The Find CEMLI Info page will display the CEMLI Name entered. Note: The CEMLI or Report Name will be listed under the CEMLI ID field.

3/4/2013 Admissions Quick-Reference Guide
Last Updated: 3/4/2013 Admissions Quick-Reference Guide 50
9. Click the CEMLI ID link. Note: Select the CEMLI ID link. The View CEMLI Info page will display.
10. Click the Collapse Menu button. Note: This will allow all of the page data to display.
11. The View CEMLI Info page will display for the CEMLI Name entered. This top portion of the page includes the CEMLI Description. Select the scroll bar to scroll down the page.
12. The middle portion of the View CEMLI Info page provides the Component Info applicable to the CEMLI ID entered. This includes the following: Component, Navigation, Page Name, Accessible Roles Select the scroll bar to scroll down the page to view additional information.
13. The lower section of the View CEMLI Info page provides additional information applicable to the CEMLI ID entered. This includes Notes, Contact Information, and Additional Information. Click the Return to Previous Page link.
14. The Find CEMLI Info page will display. Click the Expand Disclosure button.
15. Selecting the Expand Disclosure button will display the Enter Search Criteria fields. Enter CEMLI Info Search criteria to search for applicable CEMLI information.
16. End of Procedure.