CallPilot Fax User Guide - textfiles.com
26
Part No. P0919427 02 CallPilot Fax User Guide
Transcript of CallPilot Fax User Guide - textfiles.com
Part No. P0919427 02
CallPilot
Fax User Guide
CallPilot Fax User GuideCopyright © 2001 Nortel Networks
All rights reserved. 2001.
The information in this document is subject to change without notice. The statements, configurations, technical data, and recommendations in this document are believed to be accurate and reliable, but are presented without express or implied warranty. Users must take full responsibility for their applications of any products specified in this document. The information in this document is proprietary to Nortel Networks NA Inc.
The software described in this document is furnished under a license agreement and may be used only in accordance with the terms of that license. The software license agreement is included in this document.
Trademarks
NORTEL NETWORKS is a trademark of Nortel Networks.
Microsoft, MS, MS-DOS, Windows, and Windows NT are registered trademarks of Microsoft Corporation.
All other trademarks and registered trademarks are the property of their respective owners.
P0919427 02

3
CallPilot Fax User Guide
About CallPilot FaxThis guide explains how to use CallPilot Fax with your personal mailbox. It explains how to receive, print and send fax messages.
To use this guide, you must determine which phone interface you use, and follow the procedures for that interface. For information about determining which interface you use, refer to “Checking which mailbox interface you use” on page 5.
Learning about FaxWith CallPilot Fax you can access Fax features from your personal mailbox.
A fax document in a mailbox is called a fax message. Fax messages can have a voice introduction. This means that a caller can leave a fax message with or without an introductory voice message in your personal mailbox.
You can:
• retrieve and print the fax message on a fax machine
• forward the fax message to another mailbox
About the Express Messaging LineYou can have an Express Messaging Line assigned to your mailbox. A fax message sent to the Express Messaging Line bypasses the Automated Attendant and is sent immediately to your mailbox. You access the fax message the same way you access other fax messages. For more information about accessing fax messages, refer to “Receiving a fax message” on page 8.
Ask your System Administrator for the telephone number of your Express Messaging Line. Then you can inform people of your direct fax line number.
Note: If you need information about other CallPilot features, refer to the CallPilot Reference Guide.
CallPilot Fax User Guide
4 CallPilot Fax User Guide
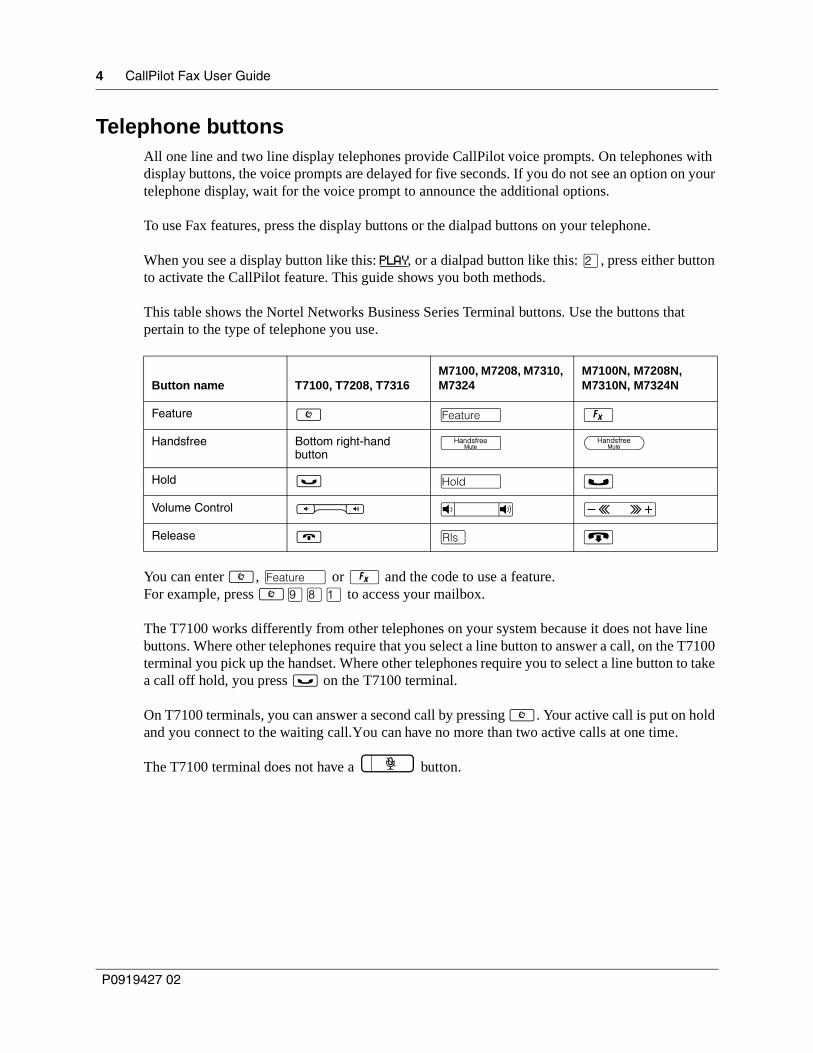
Telephone buttonsAll one line and two line display telephones provide CallPilot voice prompts. On telephones with display buttons, the voice prompts are delayed for five seconds. If you do not see an option on your telephone display, wait for the voice prompt to announce the additional options.
To use Fax features, press the display buttons or the dialpad buttons on your telephone.
When you see a display button like this: PLAY, or a dialpad button like this: ¤, press either button to activate the CallPilot feature. This guide shows you both methods.
This table shows the Nortel Networks Business Series Terminal buttons. Use the buttons that pertain to the type of telephone you use.
You can enter ≤, ƒ or ƒ and the code to use a feature.For example, press ≤·°⁄ to access your mailbox.
The T7100 works differently from other telephones on your system because it does not have line buttons. Where other telephones require that you select a line button to answer a call, on the T7100 terminal you pick up the handset. Where other telephones require you to select a line button to take a call off hold, you press ≥ on the T7100 terminal.
On T7100 terminals, you can answer a second call by pressing ≤. Your active call is put on hold and you connect to the waiting call. You can have no more than two active calls at one time.
The T7100 terminal does not have a © button.
Button name T7100, T7208, T7316M7100, M7208, M7310, M7324
M7100N, M7208N, M7310N, M7324N
Feature ≤ ƒ ƒ
Handsfree Bottom right-hand button
© ©
Hold ≥ ˙ ˙
Volume Control √ √ √
Release ® ® ®
P0919427 02
CallPilot Fax User Guide 5
Checking which mailbox interface you useCallPilot supports two interfaces: Norstar Voice Mail and CallPilot. The System Administrator determines which interface is assigned to your mailbox.
Use this procedure to check which mailbox interface you use, then follow the procedures in the guide that apply to the interface you use.
Some procedures apply to both interfaces.
To check which mailbox interface you use
1 Press ≤·°⁄.Follow the voice prompts or the display button options to open your mailbox.
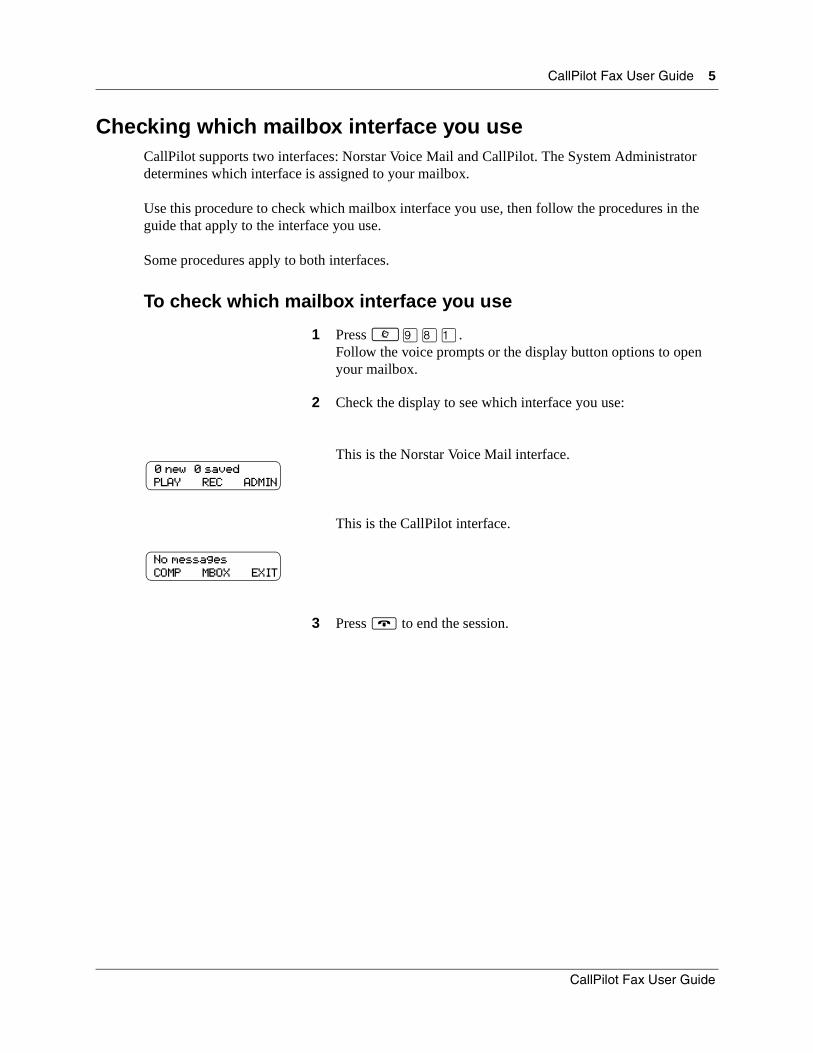
2 Check the display to see which interface you use:
This is the Norstar Voice Mail interface.
This is the CallPilot interface.
3 Press ® to end the session.
0 new 0 savedPLAY REC ADMIN
No messagesCOMP MBOX EXIT
CallPilot Fax User Guide
6 CallPilot Fax User Guide
Telling callers about fax in your mailbox greetingIn your mailbox greeting, tell callers that they can leave fax messages in your mailbox. Tell callers that they must call from a fax machine telephone to send you a fax message. The caller must press START/SEND on the fax machine. CallPilot automatically receives and stores the fax message in your mailbox. This is an example Personal mailbox greeting:
“Hello. You have reached Brian Purdy with Ideal Office Machines. I am in the office today, but I am currently away from the phone. Please leave your name, telephone number and a brief message after the tone. If you want to send me a fax and you are calling from a fax machine telephone, press the START/SEND button on the fax machine now, or when this message ends.”
For more information about mailbox greetings, refer to the CallPilot Reference Guide or ask your System Administrator.
To record a mailbox greeting
1 Press ≤·°⁄.Follow the voice prompts or the display button options to open your mailbox.
2 If you use the CallPilot interface:
• Press °¤ to open the Greetings Options menu
• Go to step 3
If you use the Norstar Voice Mail interface:
• Press ADMIN or °
• Press GREET or ¤
• Go to step 3
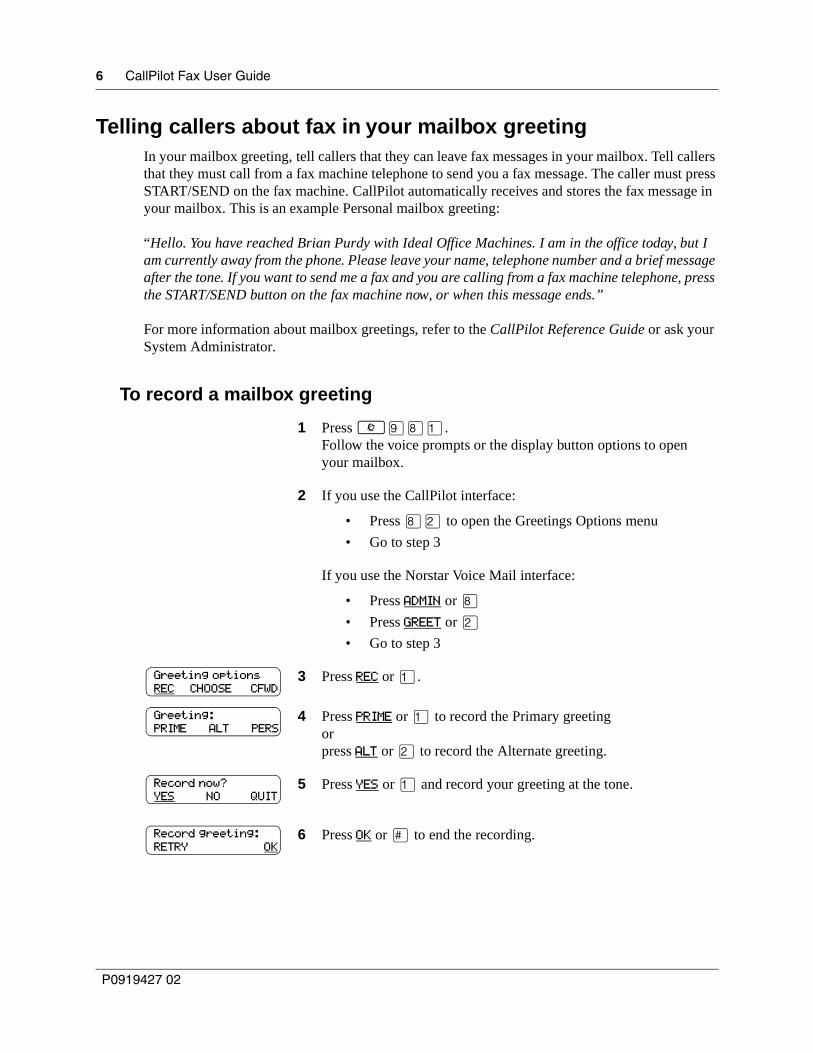
3 Press REC or ⁄.
4 Press PRIME or ⁄ to record the Primary greetingorpress ALT or ¤ to record the Alternate greeting.
5 Press YES or ⁄ and record your greeting at the tone.
6 Press OK or £ to end the recording.
Greeting optionsREC CHOOSE CFWD
Greeting:PRIME ALT PERS
Record now?YES NO QUIT
Record greeting:RETRY OK
P0919427 02
CallPilot Fax User Guide 7
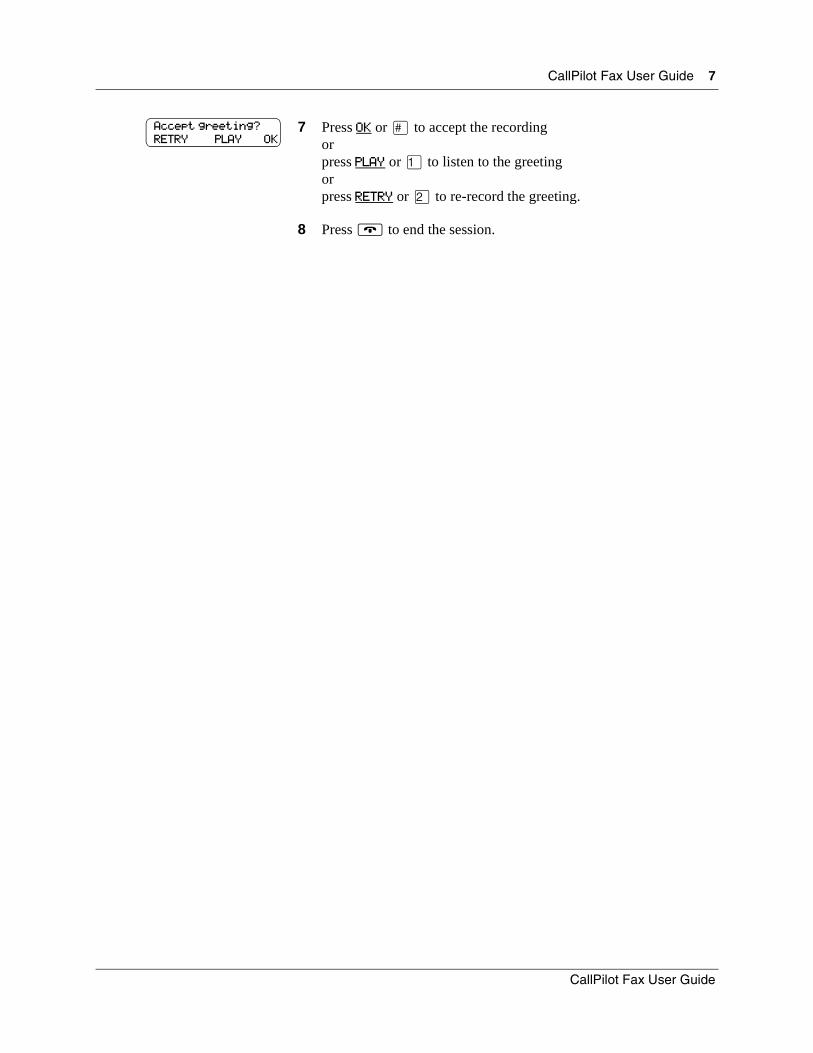
7 Press OK or £ to accept the recordingorpress PLAY or ⁄ to listen to the greetingorpress RETRY or ¤ to re-record the greeting.
8 Press ® to end the session.
Accept greeting?RETRY PLAY OK
CallPilot Fax User Guide
8 CallPilot Fax User Guide
Receiving a fax messageFax messages can contain a voice message that a caller records to introduce the fax message, or they can contain just the fax message.
A caller can send a fax message to your personal mailbox by using the autosend feature on their fax machine. If the call is answered by the Automated Attendant, the call transfers to the designated Fax answering extension. If the call is answered by a mailbox, the fax message is placed in the mailbox. If you answer the call, you hear a fax tone. Transfer the fax call to your mailbox.
Transferring a fax call to your mailboxIf you answer a call and hear a fax tone, a caller is attempting to send a fax message to your mailbox. You can transfer the call to your mailbox.
To transfer a fax call to your mailbox
1 Press ≤·°fl.Do not put the call on hold.
2 Enter your mailbox number.The fax message is left in your mailbox.
When you receive a message in your mailbox, your telephone display shows:
This display indicates that you have a new voice message or a fax message in your mailbox.To check for messages, you must open your mailbox.
Message for youMSG
P0919427 02
CallPilot Fax User Guide 9
Opening your mailbox
To open your mailbox - Norstar Voice Mail
To open your mailbox - CallPilot
1 Press ≤·°⁄.
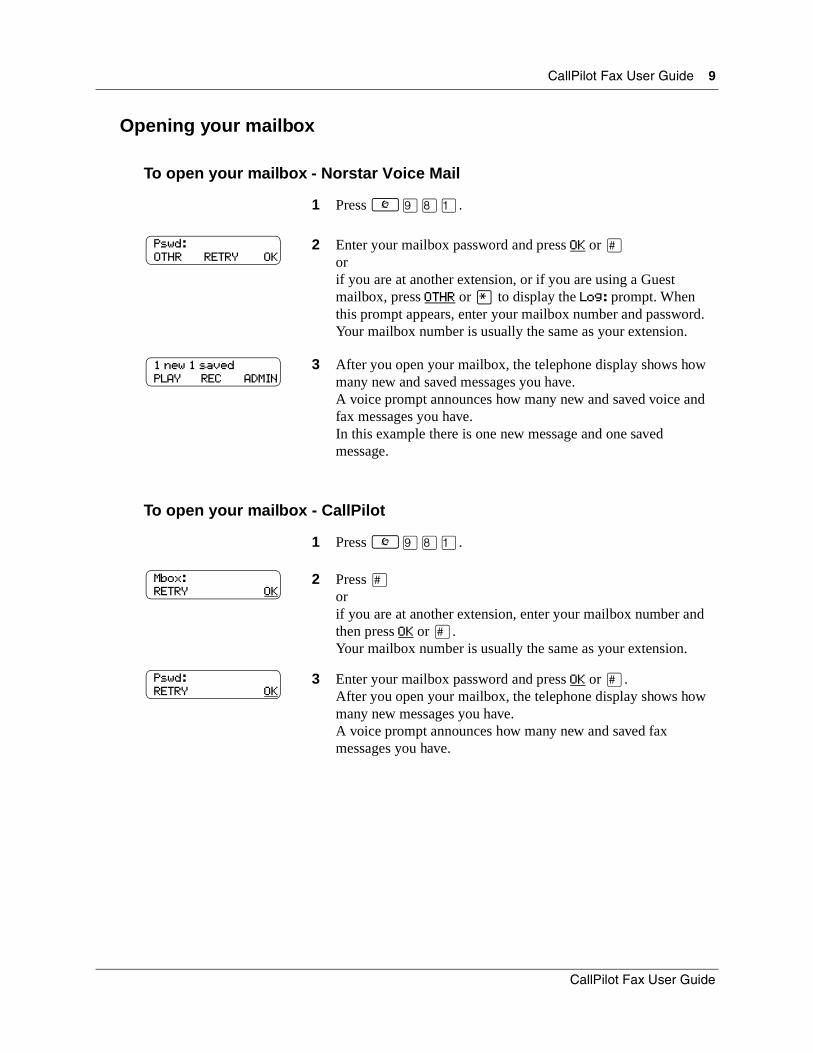
2 Enter your mailbox password and press OK or £orif you are at another extension, or if you are using a Guest mailbox, press OTHR or • to display the Log: prompt. When this prompt appears, enter your mailbox number and password. Your mailbox number is usually the same as your extension.
3 After you open your mailbox, the telephone display shows how many new and saved messages you have.A voice prompt announces how many new and saved voice and fax messages you have.In this example there is one new message and one saved message.
1 Press ≤·°⁄.
2 Press £orif you are at another extension, enter your mailbox number and then press OK or £.Your mailbox number is usually the same as your extension.
3 Enter your mailbox password and press OK or £.After you open your mailbox, the telephone display shows how many new messages you have.A voice prompt announces how many new and saved fax messages you have.
Pswd:OTHR RETRY OK
1 new 1 savedPLAY REC ADMIN
Mbox:RETRY OK
Pswd:RETRY OK
CallPilot Fax User Guide
10 CallPilot Fax User Guide
Printing fax messagesYou can print the fax messages in your mailbox on any fax machine. You can print all of your fax messages at once or individually.
An average text fax message uses 10 seconds of mailbox message time per page. A fax message that contains graphics can use as much as two minutes of mailbox message time per page. Because fax messages can be take up a lot of mailbox space, after you print or forward your fax messages, delete them from your mailbox.
If you print all your fax messages at once, you cannot listen to any voice introductions that are included with the fax messages. If you do not listen to a voice introduction, the fax message remains “new” in your mailbox and you can listen to the voice introduction later.
If you print each fax message individually, you can listen to the introduction before you print the fax message.
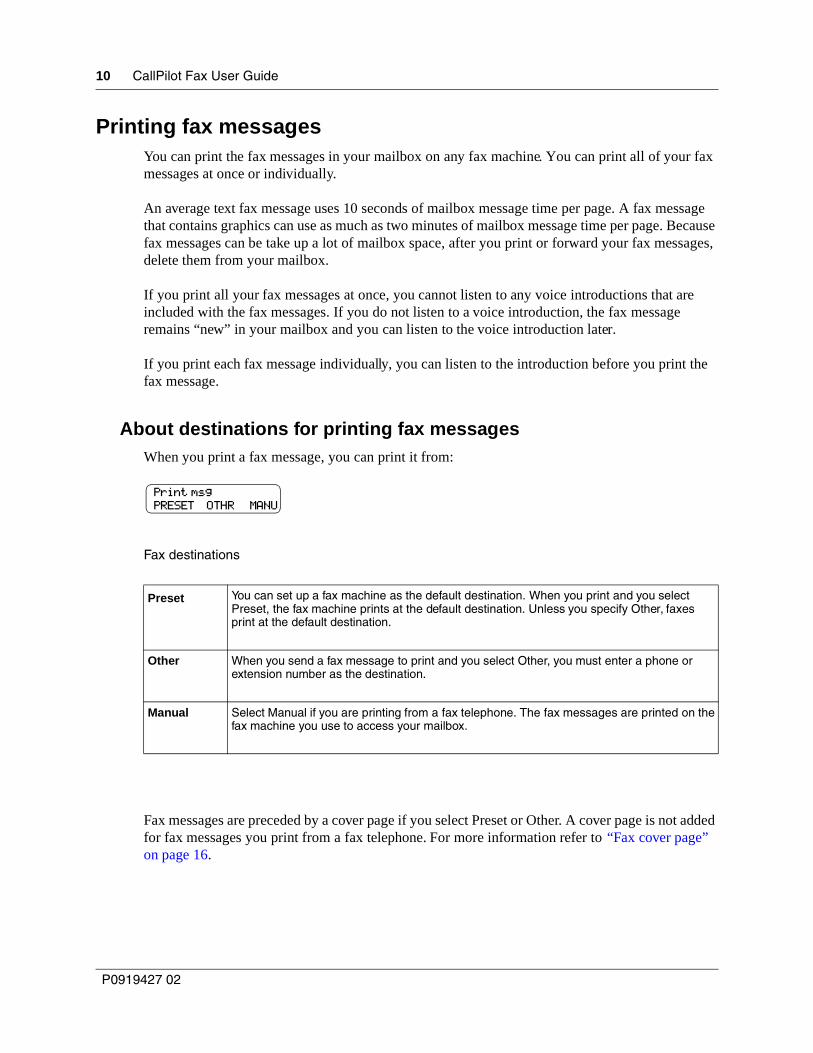
About destinations for printing fax messagesWhen you print a fax message, you can print it from:
Fax destinations
Fax messages are preceded by a cover page if you select Preset or Other. A cover page is not added for fax messages you print from a fax telephone. For more information refer to “Fax cover page” on page 16.
Preset You can set up a fax machine as the default destination. When you print and you select Preset, the fax machine prints at the default destination. Unless you specify Other, faxes print at the default destination.
Other When you send a fax message to print and you select Other, you must enter a phone or extension number as the destination.
Manual Select Manual if you are printing from a fax telephone. The fax messages are printed on the fax machine you use to access your mailbox.
Print msgPRESET OTHR MANU
P0919427 02
CallPilot Fax User Guide 11
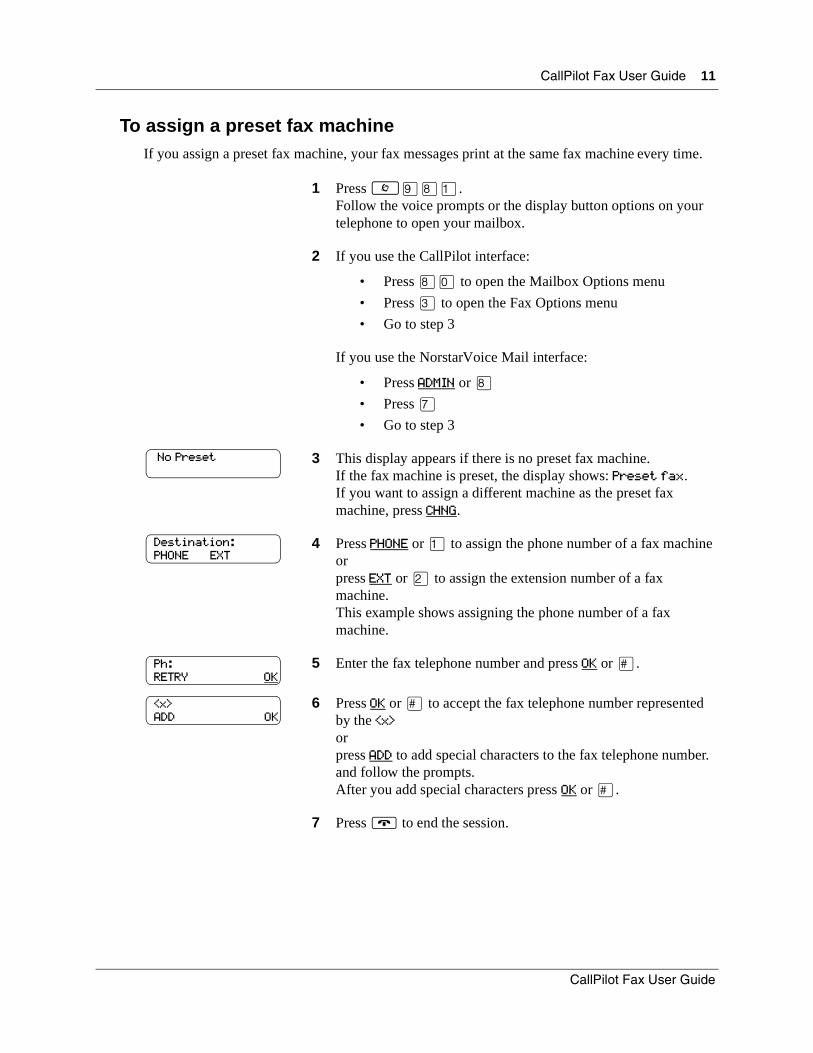
To assign a preset fax machineIf you assign a preset fax machine, your fax messages print at the same fax machine every time.
1 Press ≤·°⁄.Follow the voice prompts or the display button options on your telephone to open your mailbox.
2 If you use the CallPilot interface:
• Press °‚ to open the Mailbox Options menu
• Press ‹ to open the Fax Options menu
• Go to step 3
If you use the Norstar Voice Mail interface:
• Press ADMIN or °
• Press ‡
• Go to step 3
3 This display appears if there is no preset fax machine.If the fax machine is preset, the display shows: Preset fax.If you want to assign a different machine as the preset fax machine, press CHNG.
4 Press PHONE or ⁄ to assign the phone number of a fax machineorpress EXT or ¤ to assign the extension number of a fax machine.This example shows assigning the phone number of a fax machine.
5 Enter the fax telephone number and press OK or £.
6 Press OK or £ to accept the fax telephone number represented by the <x>orpress ADD to add special characters to the fax telephone number. and follow the prompts.After you add special characters press OK or £.
7 Press ® to end the session.
No Preset
Destination:PHONE EXT
Ph:RETRY OK
<x>ADD OK
CallPilot Fax User Guide

12 CallPilot Fax User Guide
To print all your fax messagesUse this procedure if you want to print all your new or saved messages.
If you want to print just one message, refer to “To print an individual fax message” on page 14.
1 Press ≤·°⁄.Follow the voice prompts or the display button options on your telephone to open your mailbox.
2 If you use the CallPilot interface:
• Press ‡‡ to open the Print Command menu
• Go to step 3
If you use the Norstar Voice Mail interface:
• Press ⁄
• Go to step 3
3 If you use the CallPilot interface:
• Press MSG or ⁄ to print an individual messageor
• press NEW or ¤ to print all unprinted fax messagesor
• press ALL or ‹ to print all faxes with their attachments
If you use the Norstar Voice Mail interface and you have new fax messages:
• Press NEW or ⁄ to print all your new fax messagesor
• press SAVED or ¤ to print all your saved fax messages
If you do not have any new fax messages the display in step 4 appears.
4 Press PRESET or ⁄ if you want to print on the preset fax machine and go to step 8orpress OTHR or ¤ if you want to print on a fax machine other than the preset fax machine and go to step 5.
Print msgPRESET OTHR MANU
P0919427 02
CallPilot Fax User Guide 13
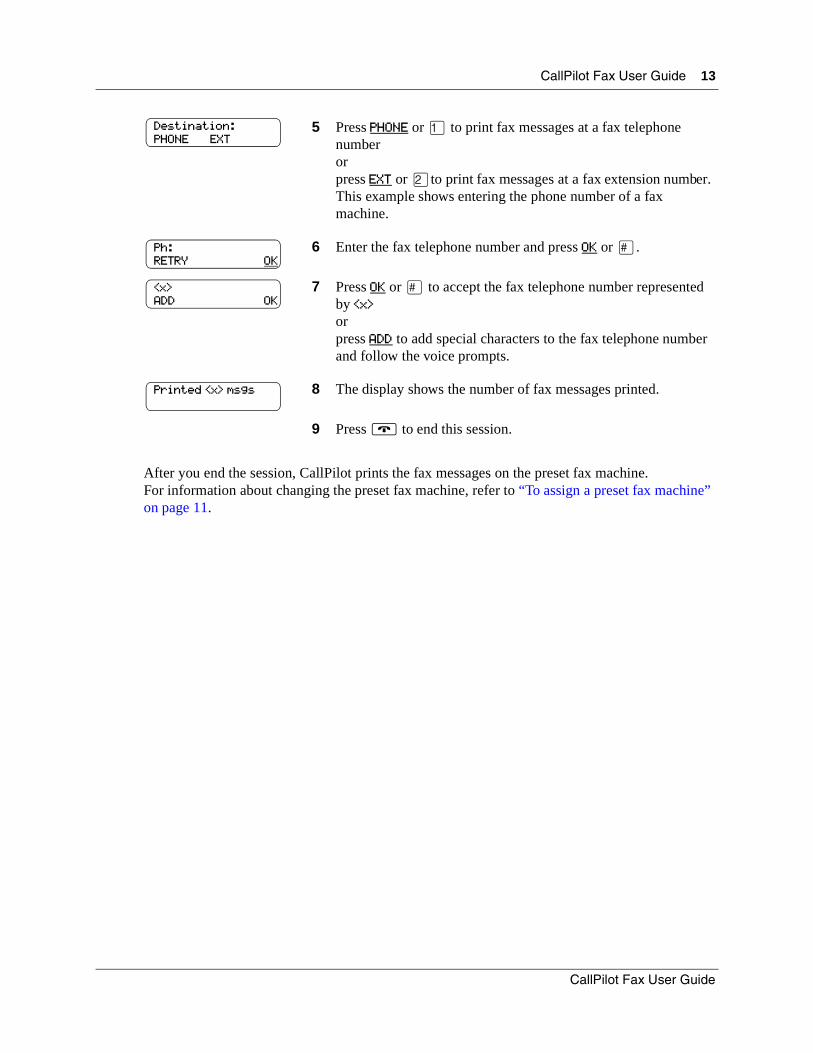
After you end the session, CallPilot prints the fax messages on the preset fax machine.For information about changing the preset fax machine, refer to “To assign a preset fax machine” on page 11.
5 Press PHONE or ⁄ to print fax messages at a fax telephone numberorpress EXT or ¤to print fax messages at a fax extension number.This example shows entering the phone number of a fax machine.
6 Enter the fax telephone number and press OK or £.
7 Press OK or £ to accept the fax telephone number represented by <x>orpress ADD to add special characters to the fax telephone number and follow the voice prompts.
8 The display shows the number of fax messages printed.
9 Press ® to end this session.
Destination:PHONE EXT
Ph:RETRY OK
<x>ADD OK
Printed <x> msgs
CallPilot Fax User Guide

14 CallPilot Fax User Guide
To print an individual fax messageUse this procedure if you want to print an individual fax message.
After you end the session, CallPilot prints the fax messages on the fax machine you specified.
1 Press ≤·°⁄.Follow the voice prompts or the display button options on your telephone to open your mailbox.
2 If you use the CallPilot interface:
• Press ‡‡ to open the Print Command menu
• Go to step 3
If you use the Norstar Voice Mail interface:
• Press fl until you locate the fax you want to print
• Go to step 3
3 Wait until the prompt announces the Fax ID number, and then press ⁄ to print the fax message.
4 Press PRESET or ⁄ to print on the preset fax machineorpress OTHR or ¤ if you want to specify another fax machine to print the message on, and then enter the number of the fax machine.
5 The display shows the message is printed.
6 Press ® to end this session.
<date> Fax:1<<< STOP >>>
Print msgPRESET OTHR MANU
Printed msg
End of messageCOPY ERASE NEXT
P0919427 02
CallPilot Fax User Guide 15
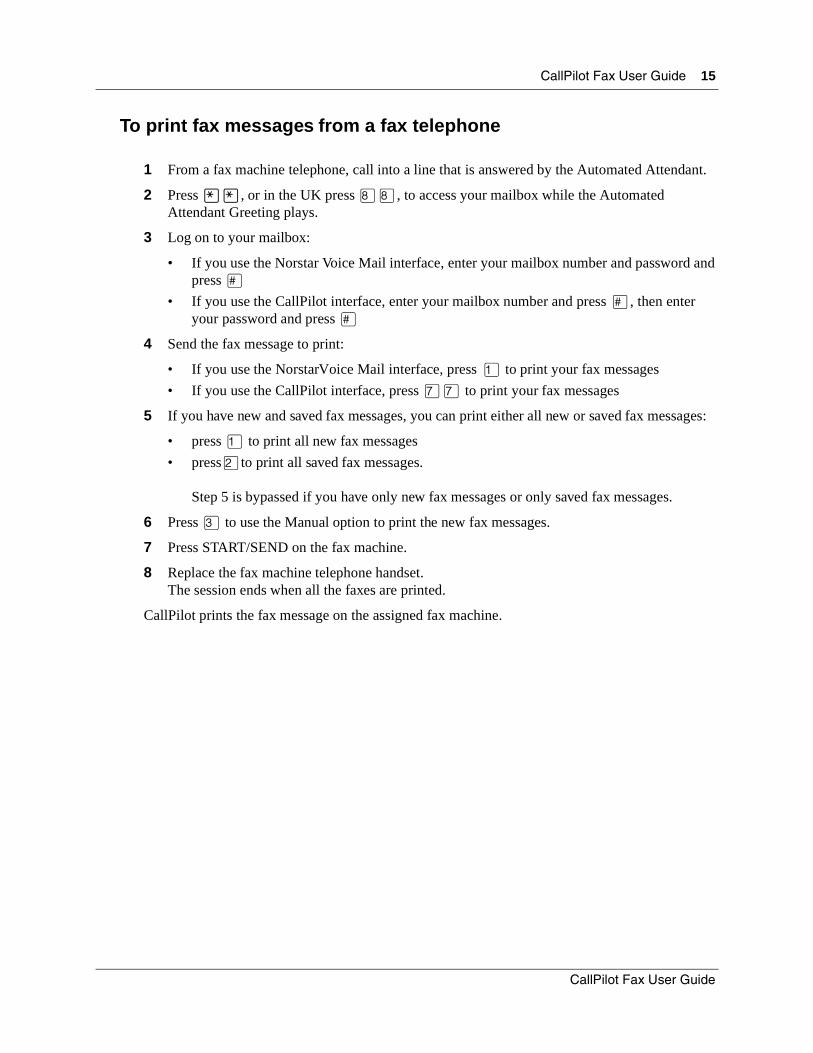
To print fax messages from a fax telephone
1 From a fax machine telephone, call into a line that is answered by the Automated Attendant.
2 Press ••, or in the UK press °°, to access your mailbox while the Automated Attendant Greeting plays.
3 Log on to your mailbox:
• If you use the Norstar Voice Mail interface, enter your mailbox number and password and press £
• If you use the CallPilot interface, enter your mailbox number and press £, then enter your password and press £
4 Send the fax message to print:
• If you use the Norstar Voice Mail interface, press ⁄ to print your fax messages
• If you use the CallPilot interface, press ‡‡ to print your fax messages
5 If you have new and saved fax messages, you can print either all new or saved fax messages:
• press ⁄ to print all new fax messages
• press¤to print all saved fax messages.
Step 5 is bypassed if you have only new fax messages or only saved fax messages.
6 Press ‹ to use the Manual option to print the new fax messages.
7 Press START/SEND on the fax machine.
8 Replace the fax machine telephone handset.The session ends when all the faxes are printed.
CallPilot prints the fax message on the assigned fax machine.
CallPilot Fax User Guide
16 CallPilot Fax User Guide
Fax cover pageA fax cover page prints with each fax message you print using the Preset and Other feature.The fax cover page shows:
• the date and time the fax prints
• the name and telephone number of the mailbox owner
• the destination fax number
• the Fax ID number (if you print a single fax message)
• the number of pages to follow
Note: A fax cover sheet is not added if you print a fax from a fax telephone.
P0919427 02
CallPilot Fax User Guide 17
Sending fax messagesTo send the fax message to a personal mailbox you must call from a fax machine telephone.You can include a voice introduction to a fax message you send to a personal mailbox. The voice introduction must be at least three seconds long. The system times out after five seconds of silence.
To send a fax message to a personal mailbox
1 Place the document that you want to send in the fax machine.
2 From the fax machine telephone dial the CallPilot telephone number of the person you want to send a fax to.
3 Wait for the mailbox greeting or let the CallPilot operator transfer you to the mailbox to leave a fax message. If the person you are calling answers their telephone, tell them to transfer you to their mailbox so you can send a fax.
4 After the mailbox greeting plays, wait for a beep and record an introduction for the fax message. Do not hang up the telephone.
5 Press START/SEND on the fax machine.
6 Replace the fax machine telephone handset. The session ends when the transmission is complete.
CallPilot Fax User Guide
18 CallPilot Fax User Guide
Forwarding fax messagesYou can forward a fax message that you have received to another mailbox and add a voice introduction. If you record a voice message if must be longer than three seconds. The system times out after five seconds of silence.
The message appears as a fax message in the recipient’s mailbox. If you cannot forward a fax message, ask your System Administrator if your mailbox is set up to allow you to forward fax messages.
You can send the same fax message to more than one person, but not to a Group List.
For information on forwarding a fax message to an external number, refer to “To forward a fax message to a mailbox - Norstar Voice Mail” on page 19.
When you forward a fax message, a new cover page is added to the original fax message, becoming part of the new message. If the fax message already has a CallPilot-generated fax forward cover page, it is replaced by a new Fax forward cover page.
Fax forward cover page
A fax forward cover page contains the same information as a fax cover page plus:
• the recipient’s name
• the Fax ID number if the fax is forwarded to an external number
P0919427 02
CallPilot Fax User Guide 19
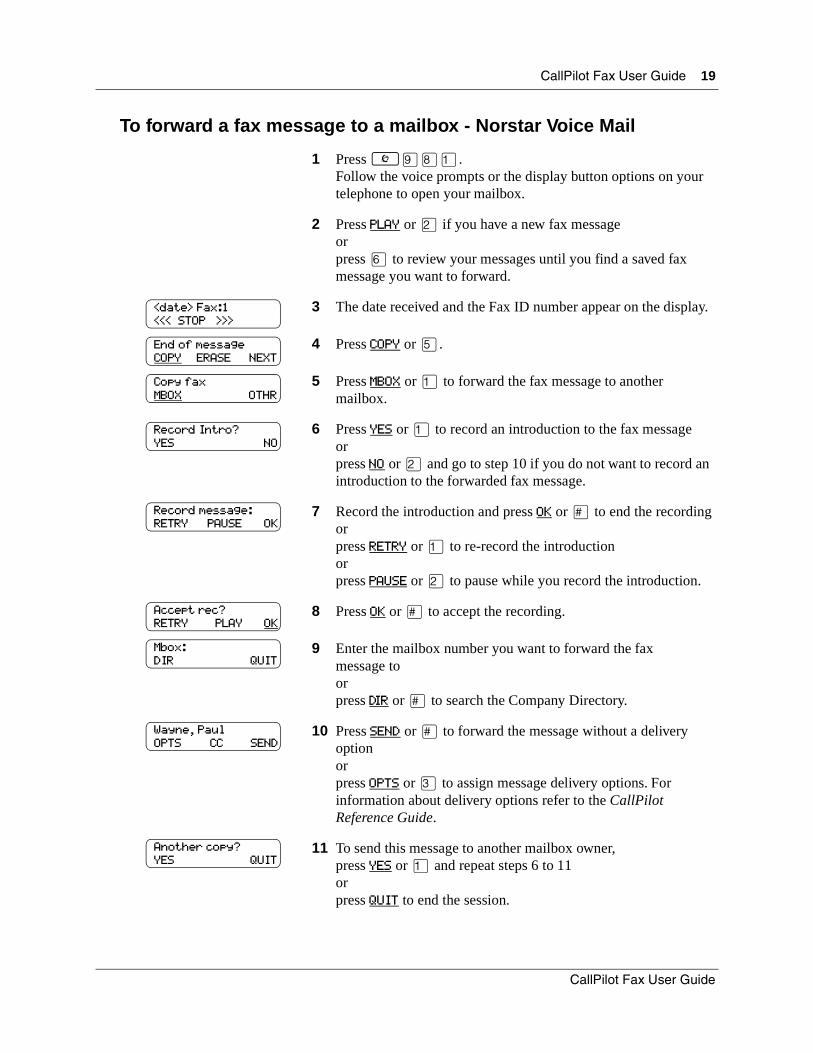
To forward a fax message to a mailbox - Norstar Voice Mail
1 Press ≤·°⁄.Follow the voice prompts or the display button options on your telephone to open your mailbox.
2 Press PLAY or ¤ if you have a new fax messageorpress fl to review your messages until you find a saved fax message you want to forward.
3 The date received and the Fax ID number appear on the display.
4 Press COPY or fi.
5 Press MBOX or ⁄ to forward the fax message to another mailbox.
6 Press YES or ⁄ to record an introduction to the fax messageorpress NO or ¤ and go to step 10 if you do not want to record an introduction to the forwarded fax message.
7 Record the introduction and press OK or £ to end the recordingorpress RETRY or ⁄ to re-record the introductionorpress PAUSE or ¤ to pause while you record the introduction.
8 Press OK or £ to accept the recording.
9 Enter the mailbox number you want to forward the faxmessage toorpress DIR or £ to search the Company Directory.
10 Press SEND or £ to forward the message without a delivery optionorpress OPTS or ‹ to assign message delivery options. For information about delivery options refer to the CallPilot Reference Guide.
11 To send this message to another mailbox owner,press YES or ⁄ and repeat steps 6 to 11orpress QUIT to end the session.
<date> Fax:1<<< STOP >>>
End of messageCOPY ERASE NEXT
Copy faxMBOX OTHR
Record Intro?YES NO
Record message:RETRY PAUSE OK
Accept rec?RETRY PLAY OK
Mbox:DIR QUIT
Wayne, PaulOPTS CC SEND
Another copy?YES QUIT
CallPilot Fax User Guide
20 CallPilot Fax User Guide
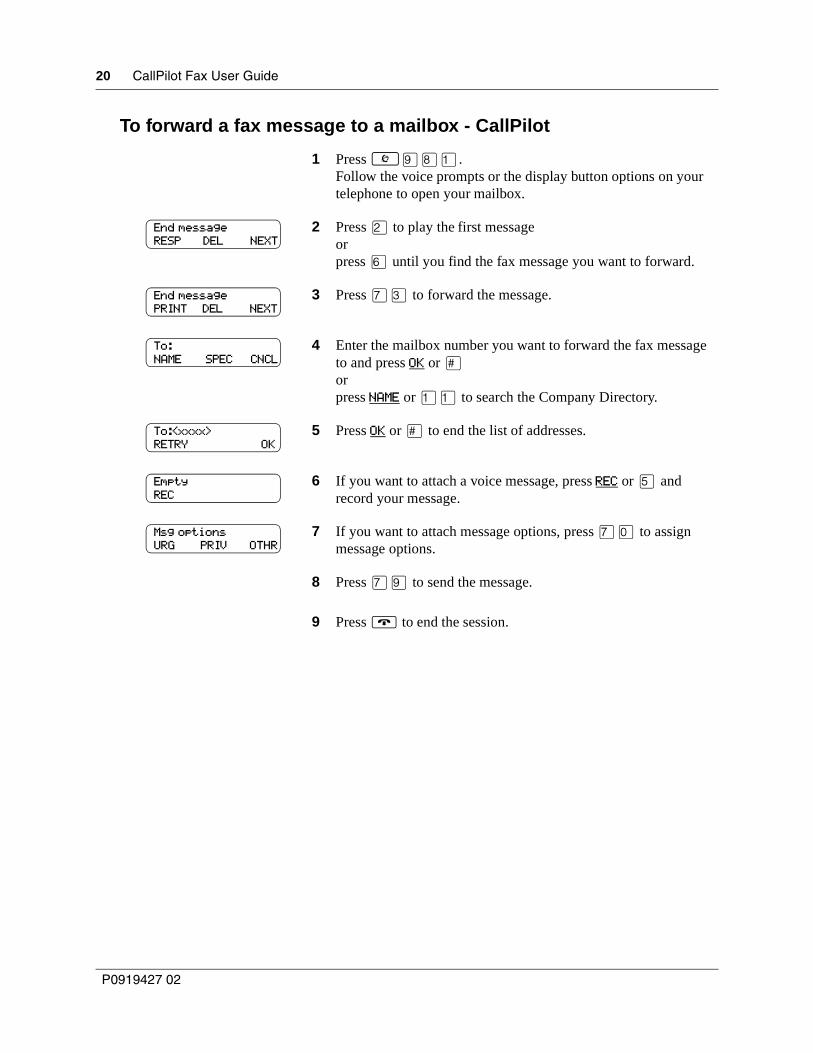
To forward a fax message to a mailbox - CallPilot
1 Press ≤·°⁄.Follow the voice prompts or the display button options on your telephone to open your mailbox.
2 Press ¤ to play the first messageorpress fl until you find the fax message you want to forward.
3 Press ‡‹ to forward the message.
4 Enter the mailbox number you want to forward the fax message to and press OK or £orpress NAME or ⁄⁄ to search the Company Directory.
5 Press OK or £ to end the list of addresses.
6 If you want to attach a voice message, press REC or fi and record your message.
7 If you want to attach message options, press ‡‚ to assign message options.
8 Press ‡· to send the message.
9 Press ® to end the session.
End messageRESP DEL NEXT
End messagePRINT DEL NEXT
To:NAME SPEC CNCL
To:<xxxx>RETRY OK
EmptyREC
Msg optionsURG PRIV OTHR
P0919427 02
CallPilot Fax User Guide 21
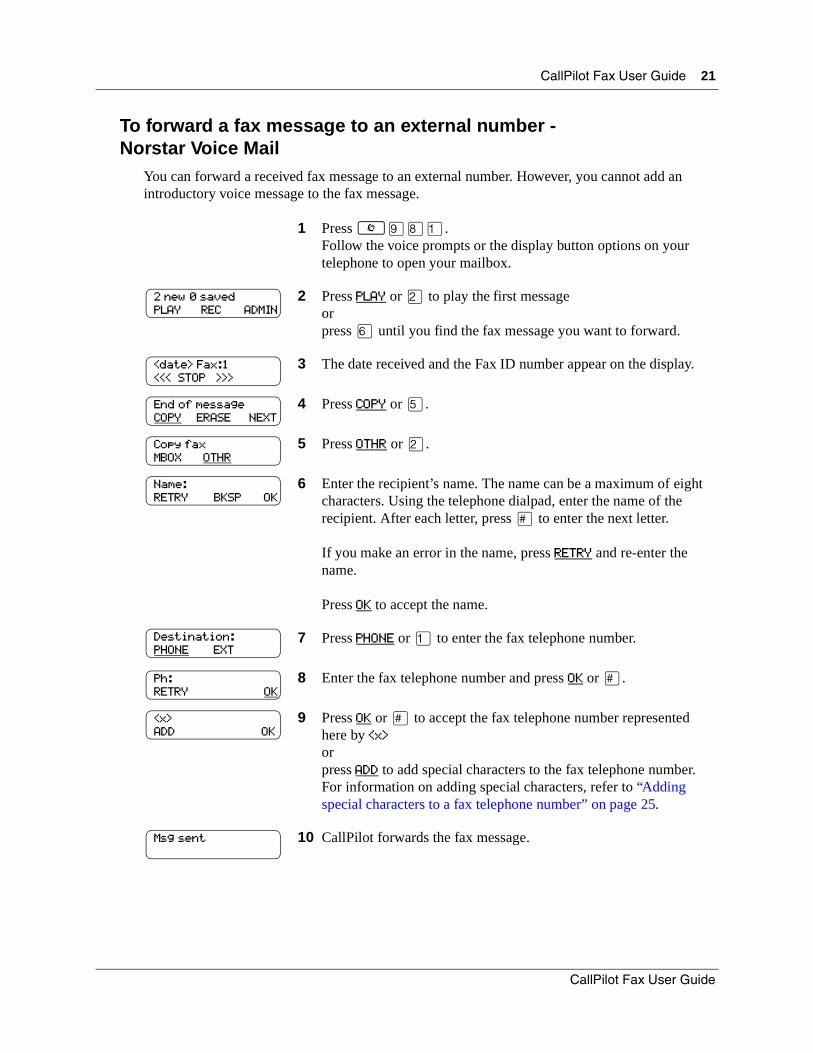
To forward a fax message to an external number -Norstar Voice Mail
You can forward a received fax message to an external number. However, you cannot add an introductory voice message to the fax message.
1 Press ≤·°⁄.Follow the voice prompts or the display button options on your telephone to open your mailbox.
2 Press PLAY or ¤ to play the first messageorpress fl until you find the fax message you want to forward.
3 The date received and the Fax ID number appear on the display.
4 Press COPY or fi.
5 Press OTHR or ¤.
6 Enter the recipient’s name. The name can be a maximum of eight characters. Using the telephone dialpad, enter the name of the recipient. After each letter, press £ to enter the next letter.
If you make an error in the name, press RETRY and re-enter the name.
Press OK to accept the name.
7 Press PHONE or ⁄ to enter the fax telephone number.
8 Enter the fax telephone number and press OK or £.
9 Press OK or £ to accept the fax telephone number represented here by <x>orpress ADD to add special characters to the fax telephone number. For information on adding special characters, refer to “Adding special characters to a fax telephone number” on page 25.
10 CallPilot forwards the fax message.
2 new 0 savedPLAY REC ADMIN
<date> Fax:1<<< STOP >>>
End of messageCOPY ERASE NEXT
Copy faxMBOX OTHR
Name:RETRY BKSP OK
Destination:PHONE EXT
Ph:RETRY OK
<x>ADD OK
Msg sent
CallPilot Fax User Guide

22 CallPilot Fax User Guide
To forward a fax message to an external number - CallPilot
11 Press YES or ⁄ and repeat steps 6 to 11 to send this message to another external numberorpress QUIT if you are done.
12 Press ® to end the session.
1 Press ≤·°⁄.Follow the voice prompts or the display button options on your telephone to open your mailbox.
2 Press ‡‡ to open the Print Command menu.
3 Press MSG or ⁄ to forward the current messageorpress NEW or ¤ to forward all your new fax messagesorpress ALL or ‹ to forward all your new and saved fax messages.
4 Press OTHR or ¤ to specify the fax machine you are forwarding the fax message to.
5 Press PHONE or ⁄.
6 Enter the phone number of the fax machine you are forwarding the fax message to.
7 Press OK or £ to accept the phone numberorpress ADD or ¤ to add special characters.
8 The display shows the message is printed.
9 Press ® to end the session.
Another copy?YES QUIT
End messageRESP DEL NEXT
PrintMSG NEW ALL
Print msgPRESET OTHR MANU
Destination:PHONE EXT
Ph:RETRY OK
<xxxx>ADD OK
Printed msg
P0919427 02
CallPilot Fax User Guide 23
About Fax Group messagesSend a Fax Group message if you want to send a group a fax message that pertains to them. Fax Group Lists are created by the System Administrator.
Fax Group Lists
If you frequently fax information to the same group of people, use a Fax Group List.A Fax Group List is a collection of fax machines at other locations. When you send a fax message to a Fax Group List, you enter only the address of the list, but each fax machine in the Fax Group List receives the fax message. Ask your System Administrator for a list of fax machines in each Fax Group List.
If you need a Fax Group List, ask your System Administrator to create one for you. When you give the System Administrator the information, include:
• the names of the recipients
• a list of the fax machine numbers
• the Fax Group List name
Before you send a Fax Group message, be sure your System Administrator has created the Fax Group List, and the list contains all the fax machines that are to receive the fax message.
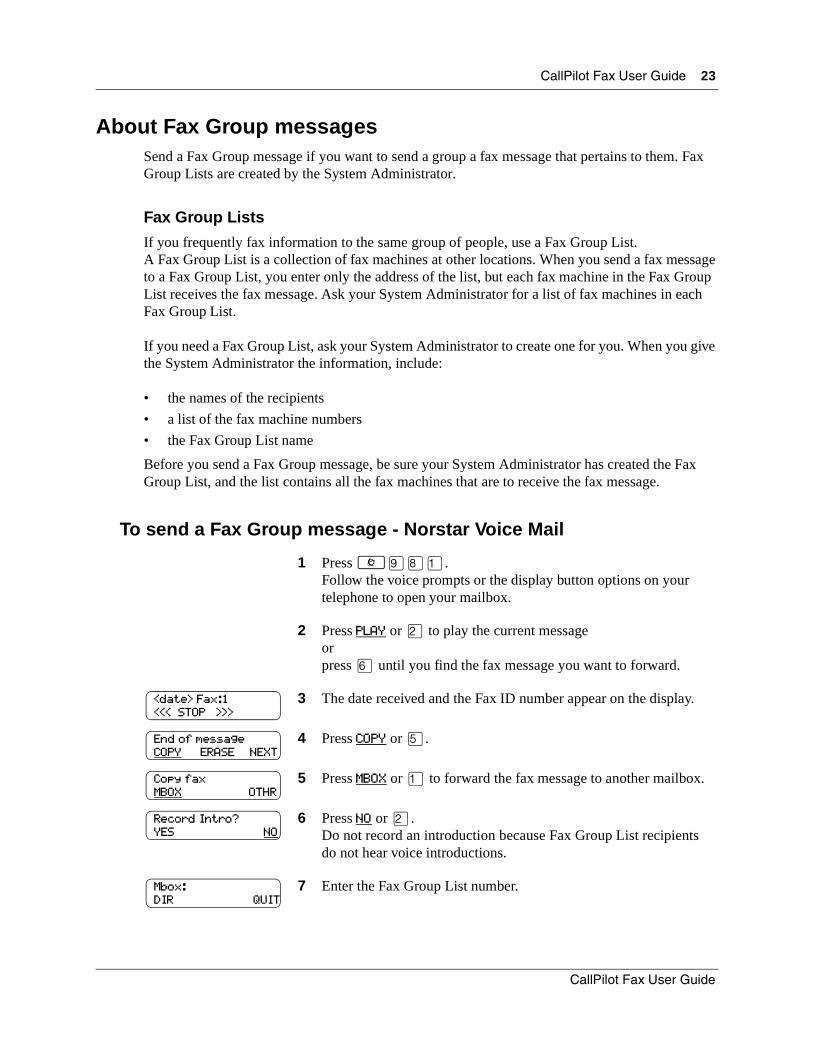
To send a Fax Group message - Norstar Voice Mail
1 Press ≤·°⁄.Follow the voice prompts or the display button options on your telephone to open your mailbox.
2 Press PLAY or ¤ to play the current messageorpress fl until you find the fax message you want to forward.
3 The date received and the Fax ID number appear on the display.
4 Press COPY or fi.
5 Press MBOX or ⁄ to forward the fax message to another mailbox.
6 Press NO or ¤.Do not record an introduction because Fax Group List recipients do not hear voice introductions.
7 Enter the Fax Group List number.
<date> Fax:1<<< STOP >>>
End of messageCOPY ERASE NEXT
Copy faxMBOX OTHR
Record Intro?YES NO
Mbox:DIR QUIT
CallPilot Fax User Guide
24 CallPilot Fax User Guide
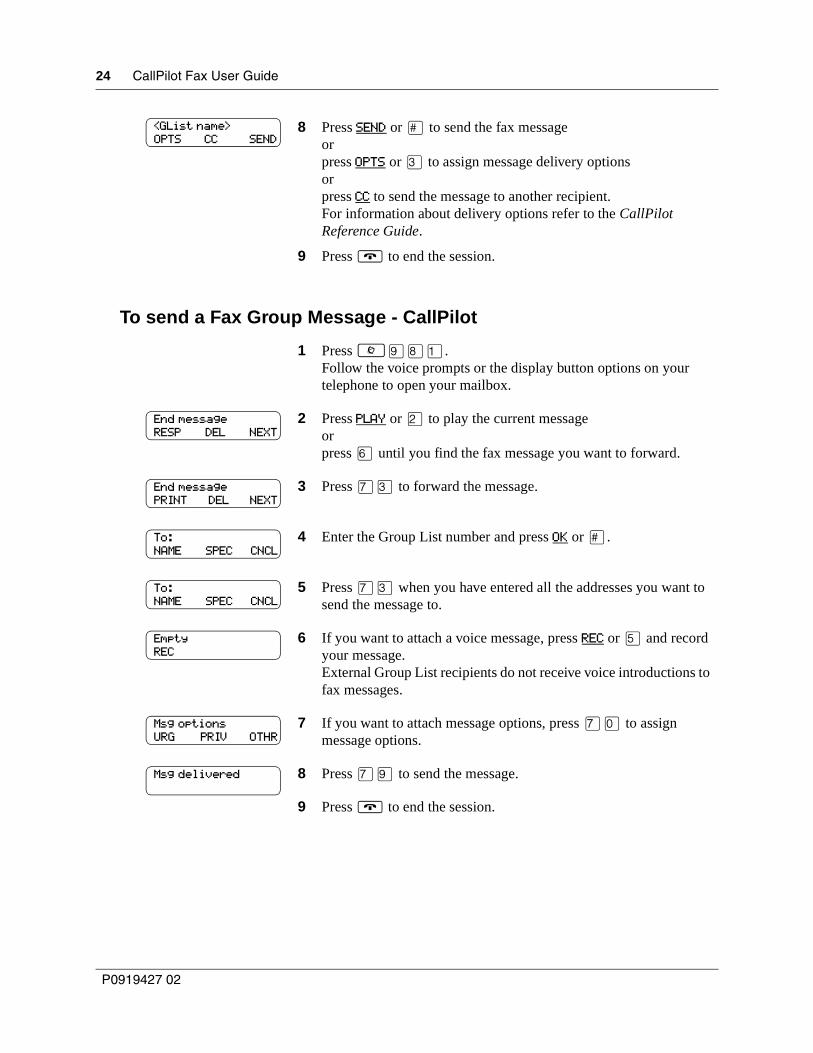
To send a Fax Group Message - CallPilot
8 Press SEND or £ to send the fax messageorpress OPTS or ‹ to assign message delivery optionsorpress CC to send the message to another recipient.For information about delivery options refer to the CallPilot Reference Guide.
9 Press ® to end the session.
1 Press ≤·°⁄.Follow the voice prompts or the display button options on your telephone to open your mailbox.
2 Press PLAY or ¤ to play the current messageorpress fl until you find the fax message you want to forward.
3 Press ‡‹ to forward the message.
4 Enter the Group List number and press OK or £.
5 Press ‡‹ when you have entered all the addresses you want to send the message to.
6 If you want to attach a voice message, press REC or fi and record your message.External Group List recipients do not receive voice introductions to fax messages.
7 If you want to attach message options, press ‡‚ to assign message options.
8 Press ‡· to send the message.
9 Press ® to end the session.
<GList name>OPTS CC SEND
End messageRESP DEL NEXT
End messagePRINT DEL NEXT
To:NAME SPEC CNCL
To:NAME SPEC CNCL
EmptyREC
Msg optionsURG PRIV OTHR
Msg delivered
P0919427 02
CallPilot Fax User Guide 25
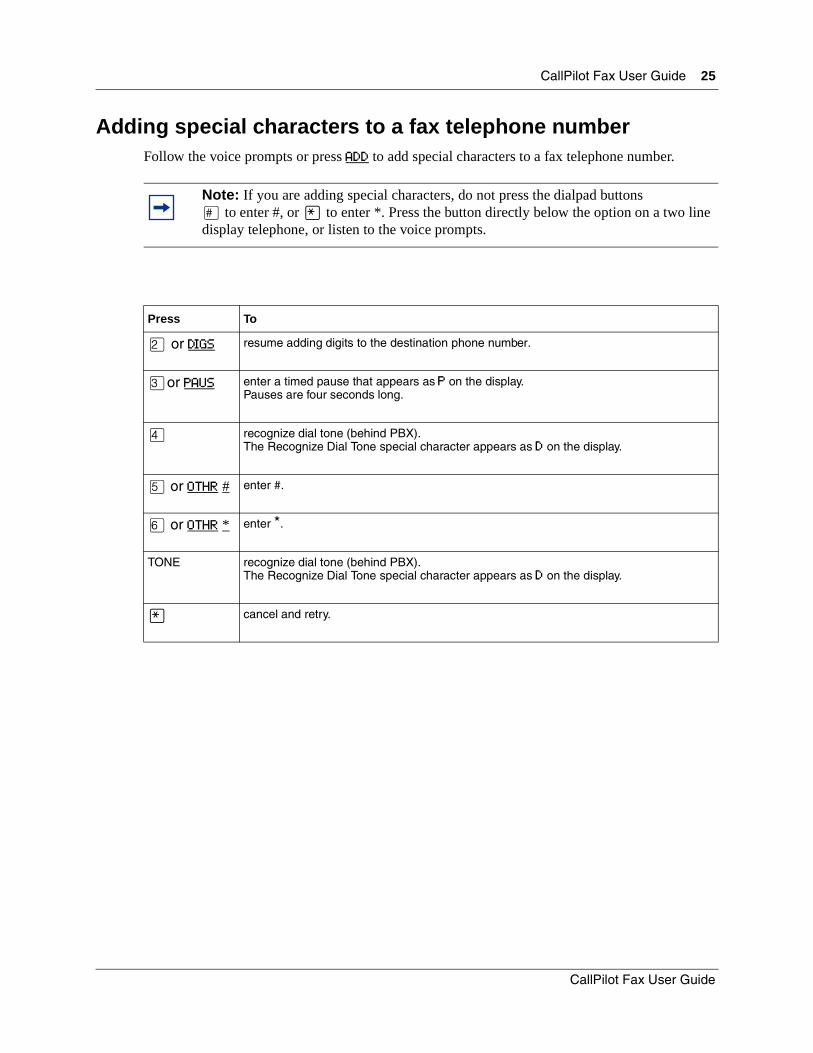
Adding special characters to a fax telephone numberFollow the voice prompts or press ADD to add special characters to a fax telephone number.
Note: If you are adding special characters, do not press the dialpad buttons£ to enter #, or • to enter *. Press the button directly below the option on a two line display telephone, or listen to the voice prompts.
Press To
¤ or DIGS resume adding digits to the destination phone number.
‹or PAUS enter a timed pause that appears as P on the display.Pauses are four seconds long.
› recognize dial tone (behind PBX).The Recognize Dial Tone special character appears as D on the display.
fi or OTHR # enter #.
fl or OTHR * enter *.
TONE recognize dial tone (behind PBX).The Recognize Dial Tone special character appears as D on the display.
• cancel and retry.
CallPilot Fax User Guide
26 CallPilot Fax User Guide
P0919427 02