CALHOUN SHOWER SYSTEM - Signature Hardware · Calhoun Shower System Installation Instructions 1 ......
16
1 Calhoun Shower System Installation Instructions CALHOUN SHOWER SYSTEM INSTALLATION INSTRUCTIONS Before you begin, review the instructions below carefully. Observe all local plumbing and building codes when installing the shower enclosure. Unpack and inspect the shower enclosure and parts for damage. If damage is found, please call customer service at 1-866-855-2284. If you need assistance while installing your shower enclosure, contact customer service. Special care should be taken when drilling walls to avoid hidden pipes or electrical cables. Signature Hardware accepts - TOOLS AND MATERIALS: Screwdriver Drill Pencil Level Tape Measure G½" G½" 1- 3 /16"-2- 3 /16" G½" 2-G½" 2-G½" 45-¼" 55- 1 / 8" ¾" G½" Finished Floor OUT HOT WATER IN COLD WATER IN OUT OUT VALVE & DIVERTER BACK
Transcript of CALHOUN SHOWER SYSTEM - Signature Hardware · Calhoun Shower System Installation Instructions 1 ......

1Calhoun Shower System Installation Instructions
CALHOUN SHOWER SYSTEM
INSTALLATION INSTRUCTIONS
Before you begin, review the instructions below carefully. Observe all local plumbing and building codes when installing the shower enclosure.
Unpack and inspect the shower enclosure and parts for damage. If damage is found, please call customer service at 1-866-855-2284. If you need assistance while installing your shower enclosure, contact customer service.
Special care should be taken when drilling walls to avoid hidden pipes or electrical cables. Signature Hardware accepts -
TOOLS AND MATERIALS:
Screwdriver DrillPencil Level Tape Measure
G½"
G½"
1-3/16"-2-3/16"G½"
2-G½"
2-G½"
45-¼" 55-1/8"
¾"
G½"
Finished Floor
OUT
HOT WATERINCOLD WATER
IN
OUTOUT
VALVE & DIVERTER BACK

2Calhoun Shower System Installation Instructions
1. Select the appropriate installation type for your application.
For stud walls, install the valve body between thestuds behind the finished wall.
For masonry walls, create a channel for valve body and pipe installation.
Rough Wall
Channel
Rough Wall
2. For stud wall installation, wrap Teflon tape around the threaded connections and attach to the valve body. For masonry wall installation, move on to step 24 (page 9).
Straight Connector
Valve BodyTeflon Tape
90° Elbow
3. Wrap Teflon tape around the threaded portion of the plugs and attach to the shower holder.
Shower Holder
Plug
4. Determine the locations of the valve body and shower head. Connect the inlet pipe to the inlet joint. Install the 90°
female elbow in the hand-shower holder location.
Keep in Line
90° Female Elbow
Keep in Line
Hot WaterInlet Cold Water
Inlet
3Calhoun Shower System Installation Instructions
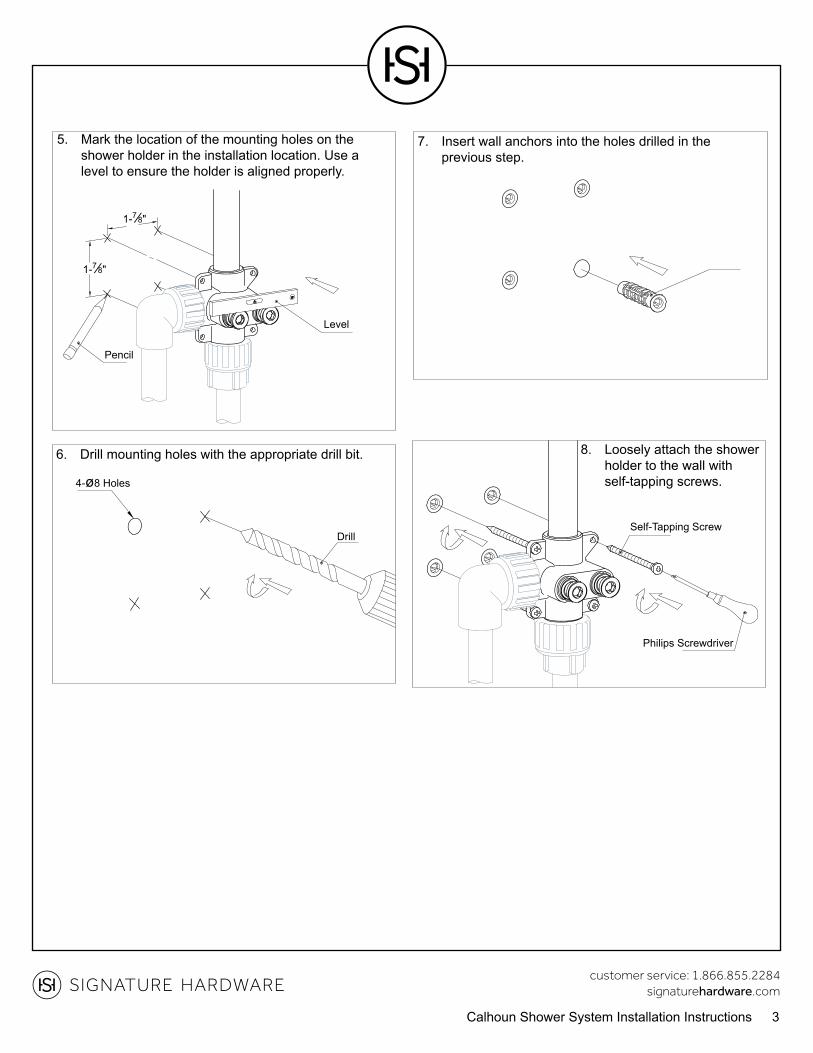
5. Mark the location of the mounting holes on the shower holder in the installation location. Use a level to ensure the holder is aligned properly.
Level
Pencil
1-7/8"
1-7/8"
6. Drill mounting holes with the appropriate drill bit.
4-ø8 Holes
Drill
7. Insert wall anchors into the holes drilled in the previous step.
8. Loosely attach the shower holder to the wall with self-tapping screws.
Self-Tapping Screw
Philips Screwdriver

4Calhoun Shower System Installation Instructions
9. Tighten the self-tapping screws after making adjustments.
Level
10. Mark the location of the mounting holes on the valve body in the installation location. Use a level to ensure the holder is aligned properly.
11. Drill mounting holes with the appropriate drill bit and insert the wall anchors.
4-ø8 Holes
12. Loosely attach the valve body.
13. Tighten the screws after making adjustments.

5Calhoun Shower System Installation Instructions
14. Turn the water on to flow water through the pipes to clear out any dirt and debris.
Hot Water Inlet
Cold Water Inlet
15. Connect the inlet pipes. Wrap Teflon tape around the threaded portion of the plug. Insert the plug into the 90° female elbow.
Plug
Hot Water Inlet Cold Water Inlet
16. Remove the protective sheath, and run water to test the pressure and ensure there are no leaks.
Cartridge Closed
Cartridge Open
Switch to divertereach step
Diverter
Cartridge
Protective Sheath

6Calhoun Shower System Installation Instructions
17. Place the protective sheath back on the valve body and shower holder.
Protective Sheath
18. Place the u-shaped bracket on the reinforcing rod and mark the location of the mounting holes.
U-shaped Bracket
Reinforcing Rod
2-ø8 Hole
19. Drill mounting holes with the appropriate drill bit.

7Calhoun Shower System Installation Instructions
20. Insert anchors into the holes drilled in the previous step.
21. Attach the bracket to the wall with self-tapping screws.
22. Install the finished wall material.
8Calhoun Shower System Installation Instructions
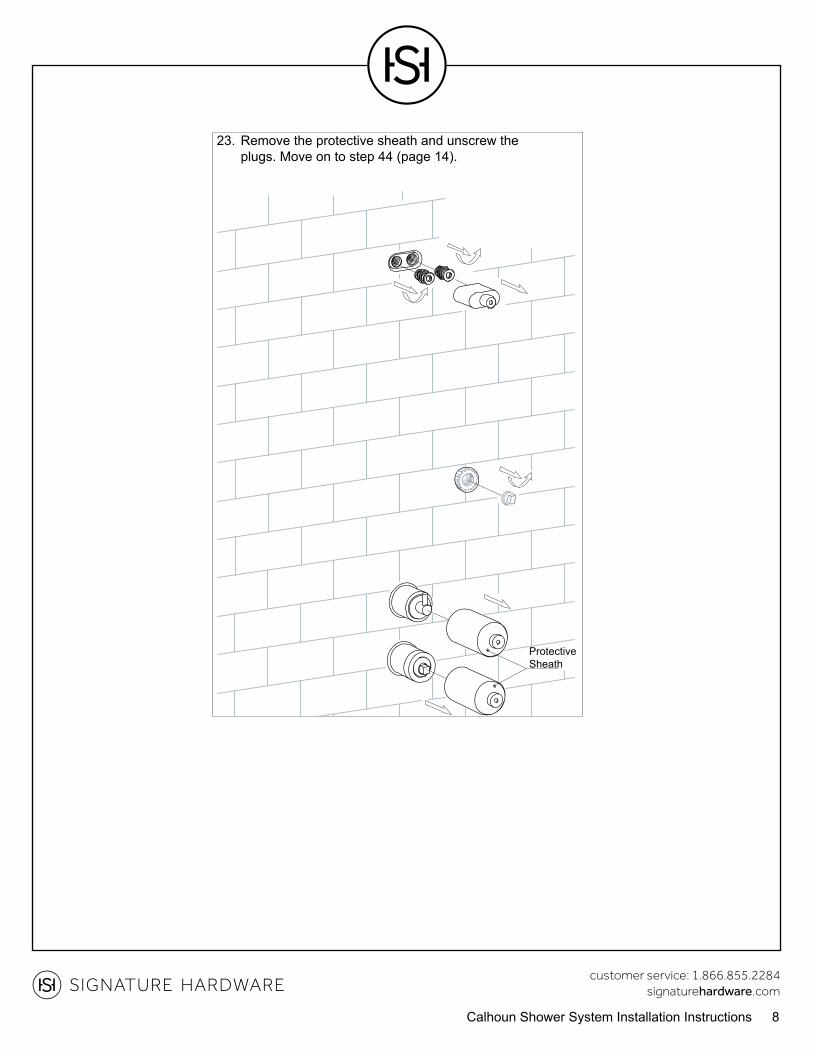
Protective Sheath
23. Remove the protective sheath and unscrew the plugs. Move on to step 44 (page 14).

9Calhoun Shower System Installation Instructions
24. For masonry wall installation, wrap Teflon tape around the threaded connections and attach to the valve body.
25. Wrap Teflon tape around the threaded connections and attach to the shower holder.
Shower Holder
Straight Connector
Teflon Tape
90° Elbow
26. Determine the locations of the valve body and shower head. Connect the inlet pipe to the inlet joint.
Install the 90° female elbow in the hand-shower holder location.
90° Female Elbow
Keep in Line
Hot WaterInlet
Cold WaterInlet
10Calhoun Shower System Installation Instructions
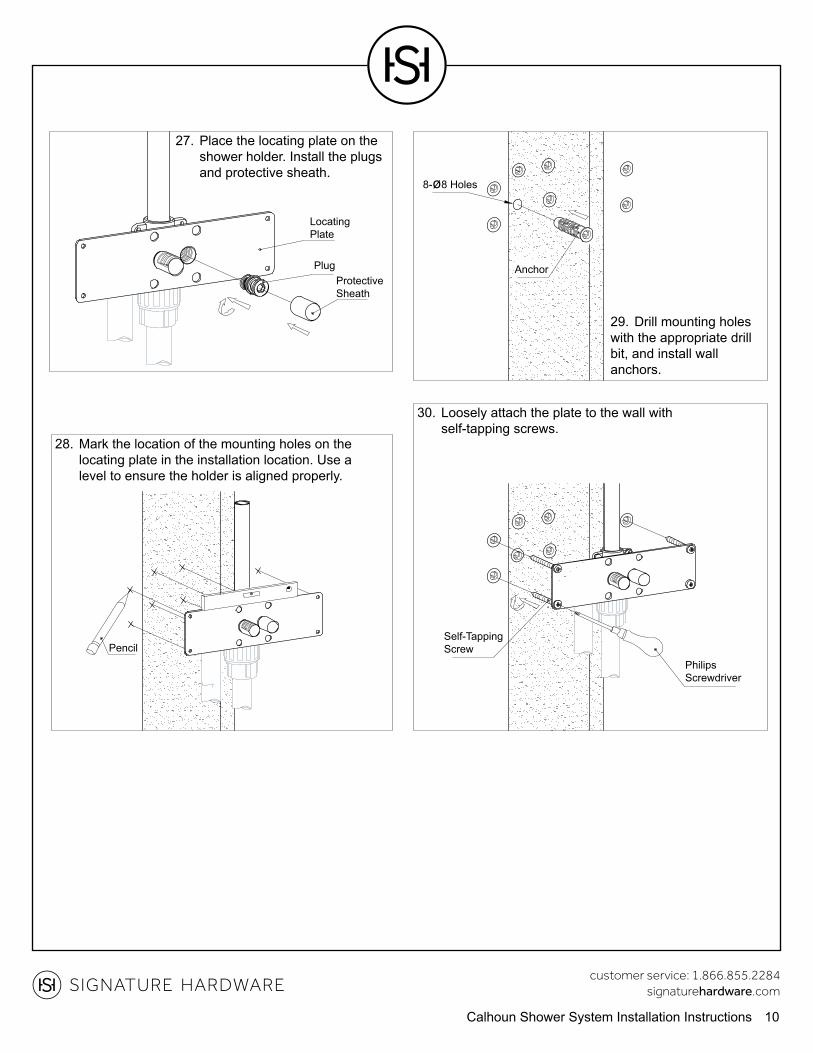
27. Place the locating plate on the shower holder. Install the plugs and protective sheath.
Locating Plate
Protective Sheath
Plug
28. Mark the location of the mounting holes on the locating plate in the installation location. Use a
level to ensure the holder is aligned properly.
Pencil
29. Drill mounting holes with the appropriate drill bit, and install wall anchors.
8-ø8 Holes
Anchor
30. Loosely attach the plate to the wall with self-tapping screws.
Self-Tapping Screw
Philips Screwdriver

11Calhoun Shower System Installation Instructions
31. Tighten the screws after making
adjustments.Level
32. Mark the location of the mounting holes on the valve body.
33. Drill mounting holes, and install wall anchors.
Channel
4-ø8 Holes
34. Loosely attach the valve body.
12Calhoun Shower System Installation Instructions
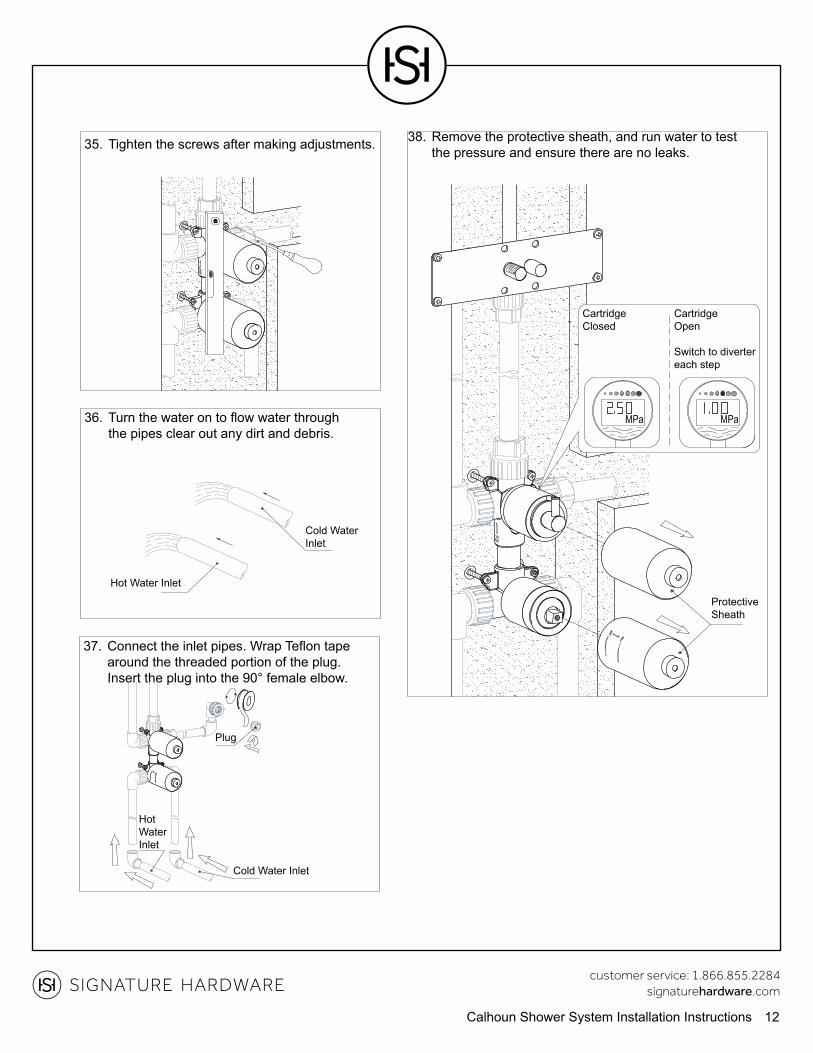
35. Tighten the screws after making adjustments.
36. Turn the water on to flow water through the pipes clear out any dirt and debris.
Hot Water Inlet
Cold Water Inlet
37. Connect the inlet pipes. Wrap Teflon tape around the threaded portion of the plug. Insert the plug into the 90° female elbow.
Plug
Hot Water Inlet
Cold Water Inlet
38. Remove the protective sheath, and run water to test the pressure and ensure there are no leaks.
Cartridge Closed
Cartridge Open
Switch to divertereach step
ProtectiveSheath

13Calhoun Shower System Installation Instructions
39. Place the u-shaped bracket on the reinforcing rod and mark the location of the mounting holes.
Reinforcing Rod
U-ShapedBracket
40. Drill mounting holes, and insert wall
anchors.
2-ø8 Holes
41. Insert screws to install bracket.
42. Place the protective sheaths over the pipe inlets, and install the
finished wall material.

14Calhoun Shower System Installation Instructions
43. Remove the protective sheath and unscrew the plugs.
44. Turn the water on to flow water through the pipes clear out any dirt and debris.
45. Wrap Teflon tape around the pipe couplings and screw them into the shower holder fittings.
Filter Net Coupling

15Calhoun Shower System Installation Instructions
Shower Head
47. Tighten the set screw to secure.
46. Connect the shower head.
48. Install the escutcheon and diverter handle.
49. Install the hand shower
50. When installation is complete turn the faucet on, check to make sure that the hot and cold supplies are working correctly. Divert the water to each shower head output, and hand shower and allow the water to flow for approximately 60 seconds.

16Calhoun Shower System Installation Instructions
T
MAINTENANCE
Debris in the filter net may result in decreased water pressure. To clean the filter, remove the shower head and couplings. Rinse the filter net thoroughly and run water through the pipes to clean out any remaining dirt and debris.
Set Screw
FilterNet
Coupling
Shower Head