
BYOD Remote Device Access - Cisco · BYOD Remote Device Access ... requirement for providing secure...
16
CHAPTER 27-1 Cisco Bring Your Own Device (BYOD) CVD 27 BYOD Remote Device Access Revised: August 7, 2013 A BYOD design should be able to accommodate devices that attempt to connect remotely to access the internal resources. The device could be a workstation, tablet, smartphone, or any other device which is allowed to connect securely to the network. In this design, the Cisco ASA is used as a VPN gateway for establishing an SSL VPN session to the remote endpoints. The ASA authenticates the user’s digital certificate. Cisco ISE then authenticates the user via an RSA SecurID token. The combination of both allows the device onto the network. Figure 27-1 shows the network components involved in remote device access. Figure 27-1 Remote Device Network Components This design assumes the following for providing remote access capability: • Devices that want to connect to the network remotely must be corporate approved devices. The corporate approved devices are the ones that have been provisioned with a digital certificate by the IT organization. To understand more about corporate approved devices, see Chapter 16, “BYOD Limited Use Case—Corporate Devices.” • Devices must be provisioned at the campus. The provisioning process consists of: – Installing the AnyConnect Client – Configuring the VPN gateway IP address Campus/ Core 292754 1. AnyConnect Installation ISE RSA AD CA WLC 2. AnyConnect Installed Internet
-
Upload
trinhxuyen -
Category
Documents
-
view
224 -
download
1
Transcript of BYOD Remote Device Access - Cisco · BYOD Remote Device Access ... requirement for providing secure...

C H A P T E R 27
BYOD Remote Device AccessRevised: August 7, 2013
A BYOD design should be able to accommodate devices that attempt to connect remotely to access the internal resources. The device could be a workstation, tablet, smartphone, or any other device which is allowed to connect securely to the network. In this design, the Cisco ASA is used as a VPN gateway for establishing an SSL VPN session to the remote endpoints. The ASA authenticates the user’s digital certificate. Cisco ISE then authenticates the user via an RSA SecurID token. The combination of both allows the device onto the network. Figure 27-1 shows the network components involved in remote device access.
Figure 27-1 Remote Device Network Components
This design assumes the following for providing remote access capability:
• Devices that want to connect to the network remotely must be corporate approved devices. The corporate approved devices are the ones that have been provisioned with a digital certificate by the IT organization. To understand more about corporate approved devices, see Chapter 16, “BYOD Limited Use Case—Corporate Devices.”
• Devices must be provisioned at the campus. The provisioning process consists of:
– Installing the AnyConnect Client
– Configuring the VPN gateway IP address
Campus/Core
2927
54
1. AnyConnect Installation
ISE
RSAAD
CA
WLC2. AnyConnect Installed
Internet
27-1Cisco Bring Your Own Device (BYOD) CVD

Chapter 27 BYOD Remote Device AccessSolution Components
– Setting up one-time-password scheme for the user.
These steps must be completed at the campus location before it can be used remotely. This design does not allow remote provisioning of the devices.
• Devices connecting remotely are subjected to two factor authentication, which means the user should provide two forms of credentials.
Solution ComponentsThe following components play a role in providing connectivity to remote clients:
• Cisco Adaptive Security Appliance (ASA)—Functions as an SSL VPN concentrator for terminating VPN sessions.
• Cisco AnyConnect—Acts as a VPN client installed on the remote device.
• Cisco Identity Services Engine (ISE)—Acts as an intermediary to an external identity source for authentication between remote endpoints and the RSA Server. The token gets forwarded from the client to the ASA, from the ASA to the ISE, and then from the ISE to the RSA.
• RSA SecurID—Acts as the authentication server for tokens generated by the client.
RSA SecurIDVPN security is only as strong as the methods used to authenticate users (and device endpoints) at the remote end of the VPN connection. Simple authentication methods based on static passwords are subject to password “cracking” attacks, eavesdropping, or even social engineering attacks. Two-factor authentication, which consists of “something you know” and “something you have”, is a minimum requirement for providing secure remote access to the corporate network. For more details, see: http://www.cisco.com/web/about/security/intelligence/05_08_SSL-VPN-Security.html.
This design includes the RSA SecurID Authentication Server 7.1, along with RSA SecurID hardware tokens, to provide two-factor authentication. The passcode that the user presents is a combination of their secret PIN and the one time password (OTP) code that is displayed on their token at that moment in time. This design utilizes both RSA SecurID (two-factor authentication) in conjunction with the deployment and use of x.509 client digital certificates. Figure 27-2 shows how RSA is used for two-factor authentication.
Figure 27-2 RSA Used for Two-Factor Authentication
2923
12
RSA ServerRSA
Identity ServicesEngine
ASA
Client Initiates VPN Session
ASA validates the certificateand forwards the two-factor
authentication request to ISEISE checks against
the RSA Identity Store
Accept/Reject Accept/Reject Accept/Reject
Internet
802.1X Client
27-2Cisco Bring Your Own Device (BYOD) CVD

Chapter 27 BYOD Remote Device AccessSolution Components
For information on configuring the RSA Secure Authentication Manager, see: http://www.emc.com/security/rsa-securid.htm.
ISE Integration with RSAThe RSA Identity Store is used primarily to authenticate remote users. The remote users are authenticated initially by their digital certificates and then they must provide a one-time password using a RSA SecurID token. To configure the RSA as an identity store, click Administration > Identify Management > External Identity Sources > RSA SecurID > Add, as shown in Figure 27-3.
Figure 27-3 RSA Server as an Identity Store for ISE
VPN Design ConsiderationsThis section discusses the primary role of the ASA for this design, which is to terminate SSL VPN connections. The following are some of the many design considerations when implementing the SSL VPN:
• How do remote users trust the VPN gateway?
• How does the VPN gateway identify remote users?
• How to organize different types of users in groups so that different kinds of services can be provided?
• What kind of mobility client solution is needed for a particular client?
• Once the right kind of VPN solution is identified, how will the mobility client be installed on the remote device?
• How to centralize the policy settings for VPN users? It is not always easy or convenient for remote users to configure a mobile device for VPN functionality.
27-3Cisco Bring Your Own Device (BYOD) CVD

Chapter 27 BYOD Remote Device AccessSolution Components
The Cisco ASA coupled with the Cisco AnyConnect client addresses the considerations mentioned above. The Cisco AnyConnect client 3.0 is used to meet the needs of wired, wireless, and remote users. The Cisco AnyConnect Secure Mobility client is the next-generation VPN client, providing remote users with secure IPsec (IKEv2) or SSL VPN connections to the Cisco 5500 Series Adaptive Security Appliance (ASA). AnyConnect provides end users with a connectivity experience that is intelligent, seamless, and always-on, with secure mobility across today’s proliferating managed and unmanaged mobile devices.
The Cisco AnyConnect Secure Mobility client integrates new modules into the AnyConnect client package:
• Network Access Manager (NAM)—Formerly called the Cisco Secure Services Client, this module provides Layer 2 device management and authentication for access to both wired and wireless networks.
• Posture Assessment—The AnyConnect Posture Module provides the AnyConnect Secure Mobility Client with the ability to identify the operating system, antivirus, antispyware, and firewall software installed on the host prior to creating a remote access connection to the ASA. Based on this pre-login evaluation, you can control which hosts are allowed to create a remote access connection to the security appliance. The Host Scan application is delivered with the posture module and is the application that gathers this information.
• Telemetry—Sends information about the origin of malicious content detected by the antivirus software to the web filtering infrastructure of the Cisco IronPort Web Security Appliance (WSA), which uses this data to provide better URL filtering rules.
• Web Security—Routes HTTP and HTTPS traffic to the ScanSafe Web Security scanning proxy server for content analysis, detection of malware, and administration of acceptable use policies.
• Diagnostic and Reporting Tool (DART)—Captures a snapshot of system logs and other diagnostic information and creates a .zip file on your desktop so you can conveniently send troubleshooting information to Cisco TAC.
• Start Before Logon (SBL)—Forces the user to connect to the enterprise infrastructure over a VPN connection before logging on to Windows by starting AnyConnect before the Windows login dialog box appears.
For more information on the Cisco AnyConnect 3.0 client, see: http://www.cisco.com/en/US/docs/security/vpn_client/anyconnect/anyconnect30/administration/guide/ac01intro.html.
Figure 27-4 shows the steps to provide VPN connectivity.
Figure 27-4 High Level Steps for Providing VPN Connectivity
2927
57
ConfigureASA to
establish theVPN session
User installsAnyConnect
client
ConfigureISE to
authenticateremote users
Accessthe
Network
27-4Cisco Bring Your Own Device (BYOD) CVD

Chapter 27 BYOD Remote Device AccessSolution Components
ASA ConfigurationThe configuration of the ASA involves many steps. Figure 27-5 shows, at a high level, the steps required to configure the ASA.
Figure 27-5 Configuration of ASA
ASA’s Identity Certificate
The ASA needs to present a digital certificate as means of authenticating itself to the clients. The remote clients validate the digital certificate and if the validation is successful, then they proceed to the next steps of establishing a VPN connection.
The digital certificate provided by the ASA must be issued by a trusted third-party like VeriSign or it could be also issued by an internal CA, which is signed by a trusted third-party. Instead, if the ASA presents a self-signed certificate, then the clients cannot validate the certificate because the signing authority (ASA for self-signed) is not in the list of trusted CAs in the client browser. Hence for greater security, it is recommended that the ASA’s digital certificate is either issued by a trusted third-party or by an internal CA which is signed by a trusted third-party. When using a Microsoft CA as internal CA, it is important to verify that the certificate properties support Server Authentication. Figure 27-6 shows the certificate that can be used for server authentication. The certificate should contain EKU of Server Authentication, as indicated in Figure 27-6.
2927
58
ASA’s IdentityCertificate
• ASA must obtain itsidentity certificatesigned by the CAserver.
ConnectionProfile
• Enable authenticationmethods for each usersuch as AD, CA server.
GroupPolicy
• Configure the CAserver location.
• Configure the Addresspool.
• Split tunnel AC.
VPN ProfileEditor
• Centralizing the policyremote users.
• For example, the policycan require remoteusers to use RSASecureID.
27-5Cisco Bring Your Own Device (BYOD) CVD

Chapter 27 BYOD Remote Device AccessSolution Components
Figure 27-6 Certificate for Server Authentication
The ASA can obtain the certificate from the CA server by using SCEP or by a manual cut-and-paste method. To obtain more information on deploying certificates on the ASA, see: http://www.cisco.com/en/US/docs/security/asa/asa80/configuration/guide/cert_cfg.html.
The following example shows the ASA configuration for certificate enrollment:
crypto ca trustpoint WIN2K-CA enrollment terminal subject-name CN=ASA-remote1 serial-number ip-address 172.26.185.195 keypair ssl no client-types crl configure
The above trust is used by ASA to obtain its own Identity Certificate from the CA server. In this design the enrollment method is terminal.
The following command shows the digital certificate issued by the CA server to the ASA:
ASA-remote1(config)# show crypto ca certificatesCertificate Status: Available Certificate Serial Number: 1594b5d9000000000213 Certificate Usage: General Purpose Public Key Type: RSA (2048 bits) Signature Algorithm: SHA1 with RSA Encryption Issuer Name: cn=secbn1-WIN-MRL23B7NQO6-CA dc=secbn1 dc=com Subject Name: cn=ASA-remote1 hostname=ASA-remote1.secbn1.com ipaddress=172.26.185.195 serialNumber=JMX1215L1KF
27-6Cisco Bring Your Own Device (BYOD) CVD
Chapter 27 BYOD Remote Device AccessSolution Components
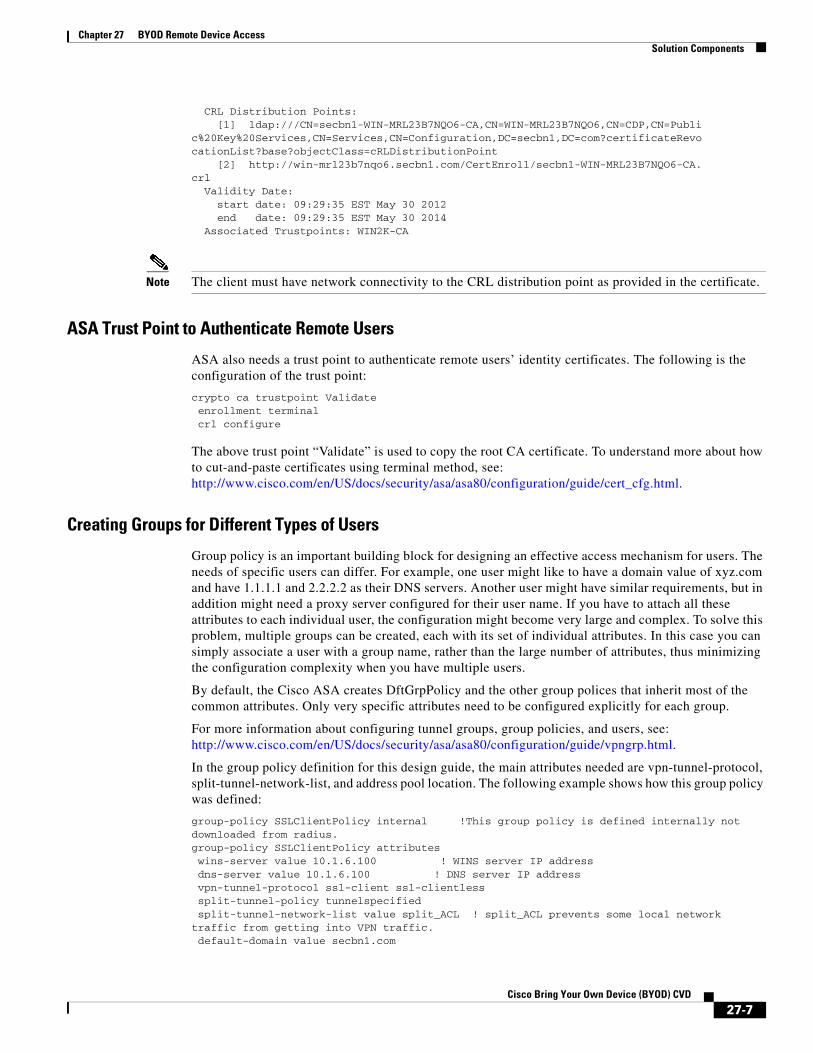
CRL Distribution Points: [1] ldap:///CN=secbn1-WIN-MRL23B7NQO6-CA,CN=WIN-MRL23B7NQO6,CN=CDP,CN=Public%20Key%20Services,CN=Services,CN=Configuration,DC=secbn1,DC=com?certificateRevocationList?base?objectClass=cRLDistributionPoint [2] http://win-mrl23b7nqo6.secbn1.com/CertEnroll/secbn1-WIN-MRL23B7NQO6-CA.crl Validity Date: start date: 09:29:35 EST May 30 2012 end date: 09:29:35 EST May 30 2014 Associated Trustpoints: WIN2K-CA
Note The client must have network connectivity to the CRL distribution point as provided in the certificate.
ASA Trust Point to Authenticate Remote Users
ASA also needs a trust point to authenticate remote users’ identity certificates. The following is the configuration of the trust point:
crypto ca trustpoint Validate enrollment terminal crl configure
The above trust point “Validate” is used to copy the root CA certificate. To understand more about how to cut-and-paste certificates using terminal method, see: http://www.cisco.com/en/US/docs/security/asa/asa80/configuration/guide/cert_cfg.html.
Creating Groups for Different Types of Users
Group policy is an important building block for designing an effective access mechanism for users. The needs of specific users can differ. For example, one user might like to have a domain value of xyz.com and have 1.1.1.1 and 2.2.2.2 as their DNS servers. Another user might have similar requirements, but in addition might need a proxy server configured for their user name. If you have to attach all these attributes to each individual user, the configuration might become very large and complex. To solve this problem, multiple groups can be created, each with its set of individual attributes. In this case you can simply associate a user with a group name, rather than the large number of attributes, thus minimizing the configuration complexity when you have multiple users.
By default, the Cisco ASA creates DftGrpPolicy and the other group polices that inherit most of the common attributes. Only very specific attributes need to be configured explicitly for each group.
For more information about configuring tunnel groups, group policies, and users, see: http://www.cisco.com/en/US/docs/security/asa/asa80/configuration/guide/vpngrp.html.
In the group policy definition for this design guide, the main attributes needed are vpn-tunnel-protocol, split-tunnel-network-list, and address pool location. The following example shows how this group policy was defined:
group-policy SSLClientPolicy internal !This group policy is defined internally not downloaded from radius.group-policy SSLClientPolicy attributes wins-server value 10.1.6.100 ! WINS server IP address dns-server value 10.1.6.100 ! DNS server IP address vpn-tunnel-protocol ssl-client ssl-clientless split-tunnel-policy tunnelspecified split-tunnel-network-list value split_ACL ! split_ACL prevents some local network traffic from getting into VPN traffic. default-domain value secbn1.com
27-7Cisco Bring Your Own Device (BYOD) CVD

Chapter 27 BYOD Remote Device AccessProvisioning a Windows Device to Remotely Connect to the Network
address-pools value testpool ! The IP address pool value.
Connection Profile Configuration
While group policies define the attributes for a group, the connection profile specifies the attributes specific to a connection. For example, a connection profile for AnyConnect specifies if the users belonging to this connection are authenticated by a RADIUS server or locally. The connection profile also points to the group profile to which it belongs. If no connection profile is defined on the system, the ASA points to a default connection profile, but to make administration simple it is better to define a specific group and connection profiles. The following example shows the ASA configuration for the AnyConnect connection profile:
tunnel-group SSLClientProfile type remote-accesstunnel-group SSLClientProfile general-attributes authentication-server-group ISE ! The remote sessions are authenticated with ISE. default-group-policy SSLClientPolicy ! The parent group policy used by this connection profile. tunnel-group SSLClientProfile webvpn-attributes authentication aaa certificate ! The remote users are authenticated by AAA and Digital Certificate. group-alias SSLVPNClient enable ! The remote users are presented with this alias name during the session. group-url https://172.26.185.195/SSLVPNClient enable group-url https://192.168.167.225/SSLVPNClient disable!
The above configuration steps illustrate how to configure SSLVPN sessions with AnyConnect. The same configuration can also be done using ASDM editor or by another management tool. To obtain more information about the configuration using other tools, refer to ASA configuration editor at: http://www.cisco.com/en/US/docs/security/asa/asa84/configuration/guide/vpn_anyconnect.html#wp1090443.
Enabling AnyConnect VPN on the ASA
After defining the group-policy and connection profile on the ASA, the last step is to enable the AnyConnect VPN feature on the ASA. After enabling AnyConnect, the administrator can also configure additional features, such as pointing to the AnyConnect image software, NAM profile, and VPN Profile. The following example shows the configuration commands to enable AnyConnect modules:
webvpnenable outside anyconnect keep-installer installed ! This forces the anyconnect to remain installed on the endpoint device, after the session is terminated. anyconnect modules none
Provisioning a Windows Device to Remotely Connect to the Network
For a corporate approved device to obtain remote access capability, the user must perform the following steps at the campus location:
27-8Cisco Bring Your Own Device (BYOD) CVD
Chapter 27 BYOD Remote Device AccessProvisioning a Windows Device to Remotely Connect to the Network
Step 1 Install the RSA SecurID application on the remote device and, with IT support, provision the software on the device.
Step 2 It is assumed that before the AnyConnect installation begins, the workstation has successfully completed the enrollment and provisioning process, which implies that the workstation has a valid digital certificate issued by the CA server.
The steps shown below are for one time installation. After the installation is completed, the user is never prompted for these steps.
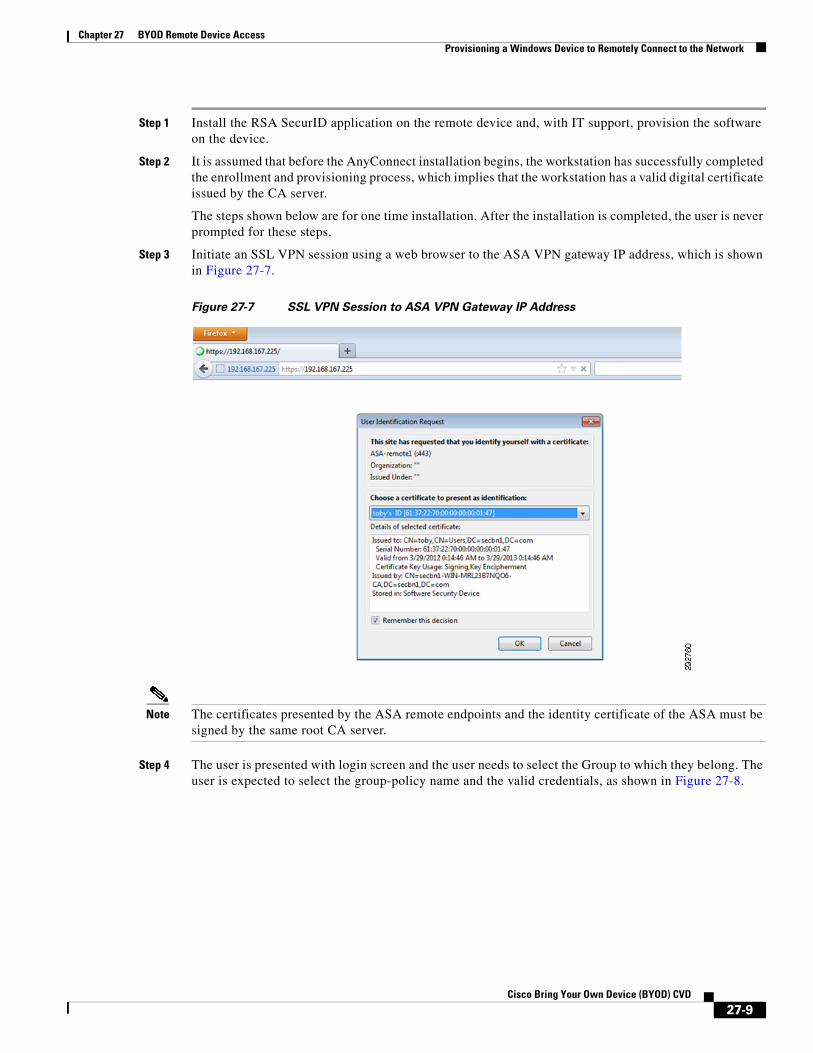
Step 3 Initiate an SSL VPN session using a web browser to the ASA VPN gateway IP address, which is shown in Figure 27-7.
Figure 27-7 SSL VPN Session to ASA VPN Gateway IP Address
Note The certificates presented by the ASA remote endpoints and the identity certificate of the ASA must be signed by the same root CA server.
Step 4 The user is presented with login screen and the user needs to select the Group to which they belong. The user is expected to select the group-policy name and the valid credentials, as shown in Figure 27-8.
27-9Cisco Bring Your Own Device (BYOD) CVD

Chapter 27 BYOD Remote Device AccessProvisioning a Windows Device to Remotely Connect to the Network
Figure 27-8 Selecting Group
Step 5 After the user credentials are validated, Cisco AnyConnect installation begins, which is depicted in Figure 27-9.
Figure 27-9 Cisco AnyConnect Installation
Figure 27-10 depicts successful installation of Cisco AnyConnect on the workstation:
27-10Cisco Bring Your Own Device (BYOD) CVD

Chapter 27 BYOD Remote Device AccessProvisioning a Windows Device to Remotely Connect to the Network
Figure 27-10 Successful Installation of Cisco AnyConnect
Figure 27-11 shows the Windows workstation establishing a session.
Figure 27-11 AnyConnect Initiates VPN Connection
As explained in the Connection Profile Configuration, when a remote worker connects to the network both ISE and the ASA authenticate the device. ASA initially validates the digital certificate of the remote user. If the certificate is valid, then the next step of authentication happens, which is through the RSA SecurID token. The remote worker is allowed to access the network if both authentications are valid.
The logic flow in Figure 27-12 shows what happens when a remote device accesses the network.
27-11Cisco Bring Your Own Device (BYOD) CVD

Chapter 27 BYOD Remote Device AccessProvisioning a Windows Device to Remotely Connect to the Network
Figure 27-12 Logic Flow for a Remote Worker Accessing the Network
Verifying What ISE Policy Rules Are AppliedAs shown in Figure 27-12, ISE validates the remote user in the following sequence:
1. Validate if the Device Type Equals ASA VPN. This is to ensure that only devices that are configured as VPN Type can initiate the communication with ISE.
2. Validate if the authentication protocol is PAP_ASCII. This is the protocol used by ASA to send the RSA Secure ID token passwords to the ISE, which the ISE sends to RSA Secure ID server for authentication.
3. In the authorization Rule, ISE validates the Source IP address of the ASA as a means to authorize the connection. In this design remote VPN users are only authenticated by ASA and ISE, and there is no authorization taking place. Figure 27-13 and Figure 27-14 detail the authentication and authorization rules in ISE.
The ISE rule shown in Figure 27-13 uses the RSA SecurID identity store for authentication.
2927
65
Remote DeviceConnects to ASA
ISE Authenticatesusing the RSAIdentity Store
AuthenticationMethod
ValidCertificate?
Device Type?
DenyAccess
DenyAccess
Permit Access
ASA VPN
AuthenticationSuccessful?
Firewall’sIP Address?
PAP_ASCII
27-12Cisco Bring Your Own Device (BYOD) CVD

Chapter 27 BYOD Remote Device AccessProvisioning a Windows Device to Remotely Connect to the Network
Figure 27-13 Authentication Rule
The ISE authorization rule shown in Figure 27-14 matched since a remote device connected and the Network Access: Device IP Address matches the ASA firewall’s address.
Figure 27-14 Authorization Rule
To verify what rules were applied on the ISE, click Monitor > Authentication, as shown in Figure 27-15.
Figure 27-15 Log Information on ISE for Successful Remote Worker Authentication
27-13Cisco Bring Your Own Device (BYOD) CVD

Chapter 27 BYOD Remote Device AccessProvisioning an Apple iOS Device to Remotely Connect to the Network
Provisioning an Apple iOS Device to Remotely Connect to the Network
Similar to workstations, an Apple iOS device that is provisioned at the campus can establish an SSL VPN connection to the campus network remotely using Cisco AnyConnect. The following steps must be completed by the user before establishing SSL VPN connectivity:
Step 1 The iOS device should already have a digital certificate installed. Figure 27-16 shows an example of a provisioned device.
Figure 27-16 Provisioned Device
Step 2 The user should install the Cisco AnyConnect from Apple’s App Store.
Step 3 Configure the profile on AnyConnect and select the certificate which is already installed in the device (Certificate Provisioning must happen before initiation remote VPN communication), as shown in Figure 27-17.
Figure 27-17 Configure Profile and Select Certificate
27-14Cisco Bring Your Own Device (BYOD) CVD

Chapter 27 BYOD Remote Device AccessProvisioning an Apple iOS Device to Remotely Connect to the Network
Step 4 Select the VPN Group, which the Network Administrator must inform the user about the right group to select, and enter the user credentials. ASA VPN authentication requires the user certificate and the user credentials. Hence the user credentials have to be entered, as shown in Figure 27-18.
Figure 27-18 User Credentials
Figure 27-19 shows a successfully connected SSL VPN session
27-15Cisco Bring Your Own Device (BYOD) CVD

Chapter 27 BYOD Remote Device AccessProvisioning an Apple iOS Device to Remotely Connect to the Network
Figure 27-19 Connected SSL VPN Session
27-16Cisco Bring Your Own Device (BYOD) CVD


