BUSINESS SYSTEM General Ledger User’s Manual · general ledger table of contents subject page no....
110
BUSINESS SYSTEM General Ledger User’s Manual OUR GOAL IS AUTOMATION EXCELLENCE (C) COPYRIGHT MID-AMERICAN CONTROL CORPORATION
Transcript of BUSINESS SYSTEM General Ledger User’s Manual · general ledger table of contents subject page no....

BUSINESS SYSTEM
General Ledger
User’s Manual
OUR GOAL IS AUTOMATION EXCELLENCE
(C) COPYRIGHT MID-AMERICAN CONTROL CORPORATION
GENERAL LEDGER
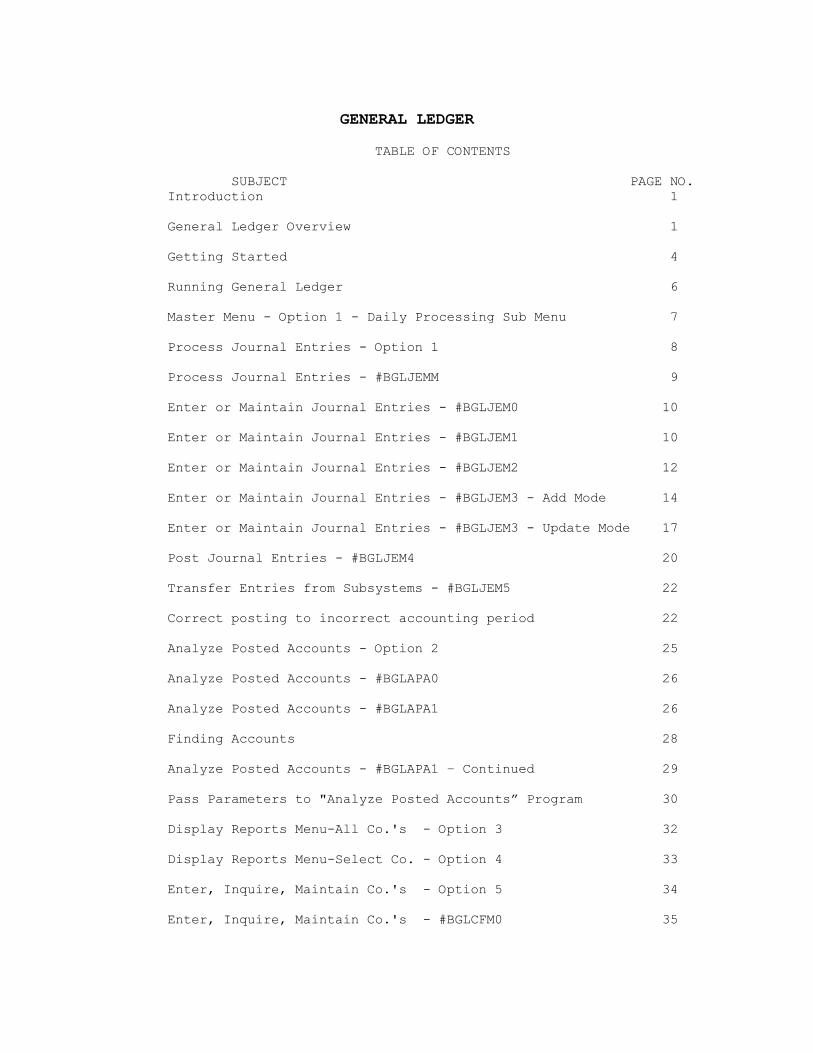
TABLE OF CONTENTS SUBJECT PAGE NO. Introduction 1 General Ledger Overview 1 Getting Started 4 Running General Ledger 6 Master Menu - Option 1 - Daily Processing Sub Menu 7 Process Journal Entries - Option 1 8 Process Journal Entries - #BGLJEMM 9 Enter or Maintain Journal Entries - #BGLJEM0 10 Enter or Maintain Journal Entries - #BGLJEM1 10 Enter or Maintain Journal Entries - #BGLJEM2 12 Enter or Maintain Journal Entries - #BGLJEM3 - Add Mode 14 Enter or Maintain Journal Entries - #BGLJEM3 - Update Mode 17 Post Journal Entries - #BGLJEM4 20 Transfer Entries from Subsystems - #BGLJEM5 22 Correct posting to incorrect accounting period 22 Analyze Posted Accounts - Option 2 25 Analyze Posted Accounts - #BGLAPA0 26 Analyze Posted Accounts - #BGLAPA1 26 Finding Accounts 28 Analyze Posted Accounts - #BGLAPA1 – Continued 29 Pass Parameters to "Analyze Posted Accounts” Program 30 Display Reports Menu-All Co.'s - Option 3 32 Display Reports Menu-Select Co. - Option 4 33 Enter, Inquire, Maintain Co.'s - Option 5 34 Enter, Inquire, Maintain Co.'s - #BGLCFM0 35

Enter, Inquire, Maintain Co.'s - 1 of 2 - #BGLCFM1 37 Enter, Inquire, Maintain Co.'s - 2 of 2 - #BGLCFM2 40 PROMPT Business System Accounting Calendar 41 Enter, Inquire, Maintain Accts. - Option 6 43 Enter, Inquire, Maintain Accts - #BGLAFM0 43 Enter, Inquire, Maintain Accts - #BGLAFM1 44 How to add a new General Ledger Account 45 Enter, Inquire, Maintain Accts – 1 of 5 - #BGLAFM2 48 Valid Account Types 49 Enter, Inquire, Maintain Accts – 2 of 5 - #BGLAFM3 52 Enter, Inquire, Maintain Accts - 3 of 5 - #BGLAFM4 54 Enter, Inquire, Maintain Accts - 4 of 5 - #BGLAFM5 55 Enter, Inquire, Maintain Accts - 5 of 5 - #BGLAFM6 56 Display Statement Print Menu - Option 7 58 Master Menu - Option 2 - Financial Statement Setup 59 Defining Financial Statements 60 Ent., Inq., Main. Formats - Option 1 - #BGLSYS0 65 Ent., Inq., Main. Formats - Option 1 - #BGLFSM0 66 Ent., Inq., Main. Formats - Option 1 - #BGLFSH0 67 Ent., Inq., Main. Formats - Option 1 - #BGLFSF0 69 Ent., Inq., Main. Formats - Option 1 - #BGLFSF1 71 Ent., Inq., Main. Formats - Option 1 - #BGLFSF2 73 Ent., Inq., Main. Formats - Option 1 - #BGLFSF3 75 Ent., Inq., Main. Formats - Option 1 - #BGLFSF4 77 Ent., Inq., Main. Lines - Option 2 - #BGLAFS2 80 Create Cross Reference File - Option 3 - #BGLXFM0 82 Statement Freeform Test Print - Option 4 - #BGLSYS0 83 Statement Freeform Test Print - Option 4 - #BGLFSX0 84
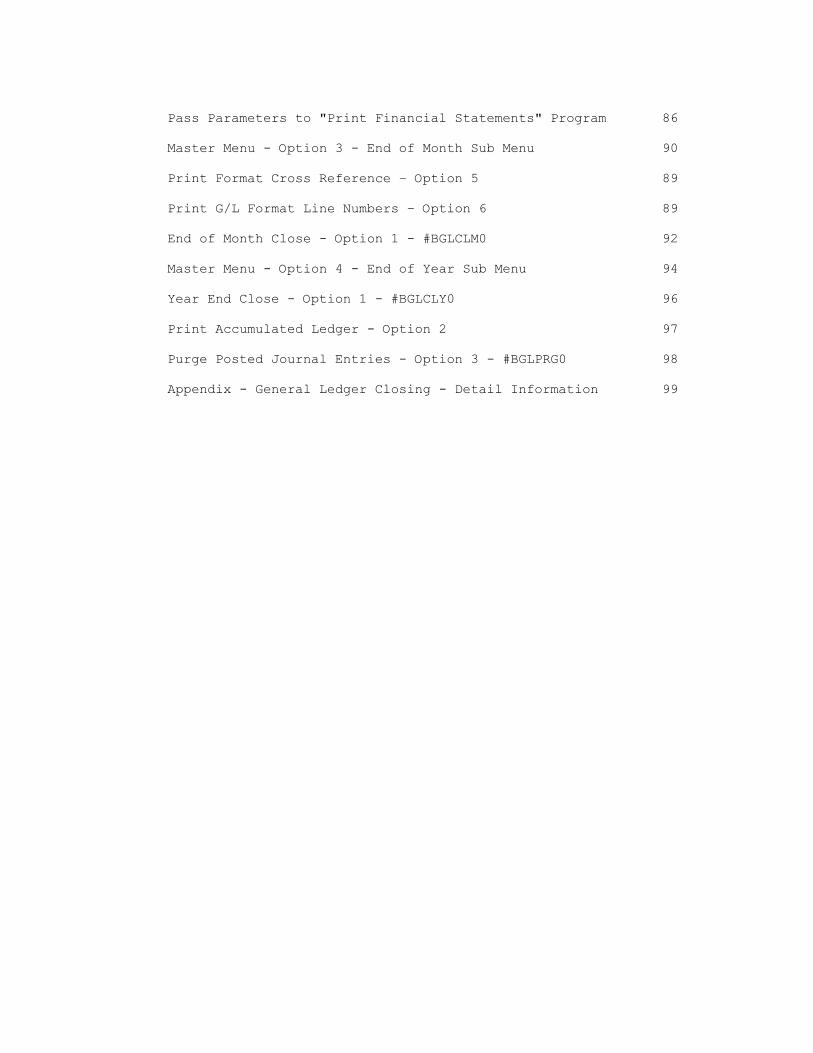
Pass Parameters to "Print Financial Statements" Program 86 Master Menu - Option 3 - End of Month Sub Menu 90 Print Format Cross Reference – Option 5 89 Print G/L Format Line Numbers – Option 6 89 End of Month Close - Option 1 - #BGLCLM0 92 Master Menu - Option 4 - End of Year Sub Menu 94 Year End Close - Option 1 - #BGLCLY0 96 Print Accumulated Ledger - Option 2 97 Purge Posted Journal Entries - Option 3 - #BGLPRG0 98 Appendix - General Ledger Closing - Detail Information 99

Use this index to locate subject matter based on the screen number for the program you are using. Screen Page No. Screen Page No. #BGLAFM0 44 #BGLFSM0 66 #BGLAFM1 44 #BGLFSX0 84 #BGLAFM2 49 #BGLJEMM 9 #BGLAFM3 52 #BGLJEM0 10 #BGLAFM4 54 #BGLJEM1 12 #BGLAFM5 55 #BGLJEM2 14 #BGLAFM6 56 #BGLJEM3 16 #BGLAFS2 80 #BGLJEM3 17 #BGLAPA0 26 #BGLJEM4 20 #BGLAPA1 26 #BGLJEM5 22 #BGLAPA1 29 #BGLPRG0 98 #BGLCFM0 35 #BGLSYS0 8 #BGLCFM1 37 #BGLXFM0 82 #BGLCFM2 40 #G/LMENU 6 #BGLCLM0 92 #GL1MENU 7 #BGLCLY0 96 #GL2MENU 90 #BGLFSF0 69 #GL3MENU 94 #BGLFSF1 71 #GL4MENU 32 #BGLFSF2 73 #GL5MENU 33 #BGLFSF3 75 #GL6MENU 58 #BGLFSF4 77 #GL7MENU 59 #BGLFSH0 67

G/L V.G USER'S MANUAL Introduction The User's Manual We are pleased that you have selected this PROMPT application. The user's manual is divided into the following sections for your ease of use: 1. Introduction to General Ledger 2. Running General Ledger This manual contains the information you need to install and use the General Ledger application. All information is presented in association with the screens that appear on your computer terminal for ease of reference and understanding. Each screen is presented in processing time segments such as daily, weekly, monthly, quarterly and annually. We believe you will find the PROMPT General Ledger System easy to use and understand. GENERAL LEDGER OVERVIEW The PROMPT General Ledger can be used in connection with other PROMPT Financial Systems modules such as Accounts Payable or Payroll. Also, the PROMPT General Ledger can be used in connection with PROMPT Business System applications such as Order Processing, Accounts Receivable, Inventory Control, or Purchasing. However, the PROMPT General Ledger System can be used without any of the other PROMPT applications. Also, it is easy to integrate other application systems with the PROMPT General Ledger System. The sole requirement is for the applications system to output journal entry records in the format of the PROMPT General Ledger Journal entry file. The General Ledger System includes the following processes: - multi-user, multi-tasking and multi-company capabilities - supports multiple companies with the same or different fiscal years - provides for multiple accounting group reporting levels with each company - any chart of accounts can be used, but we provide a standard for a guideline - allows you to hold the old year open while processing new year transactions - audit trails reflect the subsystem code, batch number and posting reference for each posted journal entry - 1 -

G/L V.G USER'S MANUAL - all entries are required to balance with account number validation before posting, thus the system is always in balance - function keys and window processing are utilized to aid data entry and screen management - automatic closing at end of year with entries generated by the system - provides for both recurring journal entries and reversing journal entries - budgeting system includes ability to set up next year budget while processing current year budget - budgeting system provides for even or uneven monthly pro-rating of annual budget amount - design your own reporting formats with vertical or horizontal per- centage comparisons and variance amount computations - video or hard copy analysis of posted entries by account number range, period posted, or all entries for the year - manual journal entry screen duplicates redundant data, thus entry is quick and easy - powerful features for multiple company accounts management include copy of accounts from one company to another and file purge of terminated company, etc. - system supports accounting for either twelve or thirteen accounting periods in a year - 2 -

G/L V.G USER'S MANUAL FILES EXPLAINED The primary data files in the General Ledger System are as follows: Company File The company file holds information relating to each company maintained in the General Ledger System. Examples are name, address, period ending dates, and some control switches. Account File The account file holds all information relating to a specific general ledger account. Examples are account number, account name, type, all amounts for the current period, previous period and budget; and financial statement format information. A current earnings account number must be set up in the chart of Accounts file with an account type of 'SU' (system's use). The posting program will accumulate the current earnings which are always posted up- to-date in this account. The year-end close program will consolidate the current earnings into the retained earnings account specified in field 13 in the company file. Current earnings are usually listed on the balance sheet below retained earnings (see section entitled Financial Statement Definition). Both the current earnings account number and the retained earnings Account number must be entered in the company file (in fields 12 & 13) for use by the G/L System. Journal Entry File The journal entry file actually is three files, all with the same format, but each with a specific purpose. Each journal entry file is: (1) Subsystem Journal Entries These records represent journal entries from foreign systems, such as the PROMPT Version 9 system and personal computer sys- tems. These records await action by the General Ledger. (2) Journal Entry Work File These records include entries transferred from each subsystem (the subsystem journal entries), manual journal entries entered directly into this work file, journal entries consolidated/transferred directly from Accounts Payable and Accounts Receivable, and recurring entries which are also generated directly into this work file. These records are available for maintenance and await posting to the general ledger at which time they will move to the posted journal entry file. - 3 -
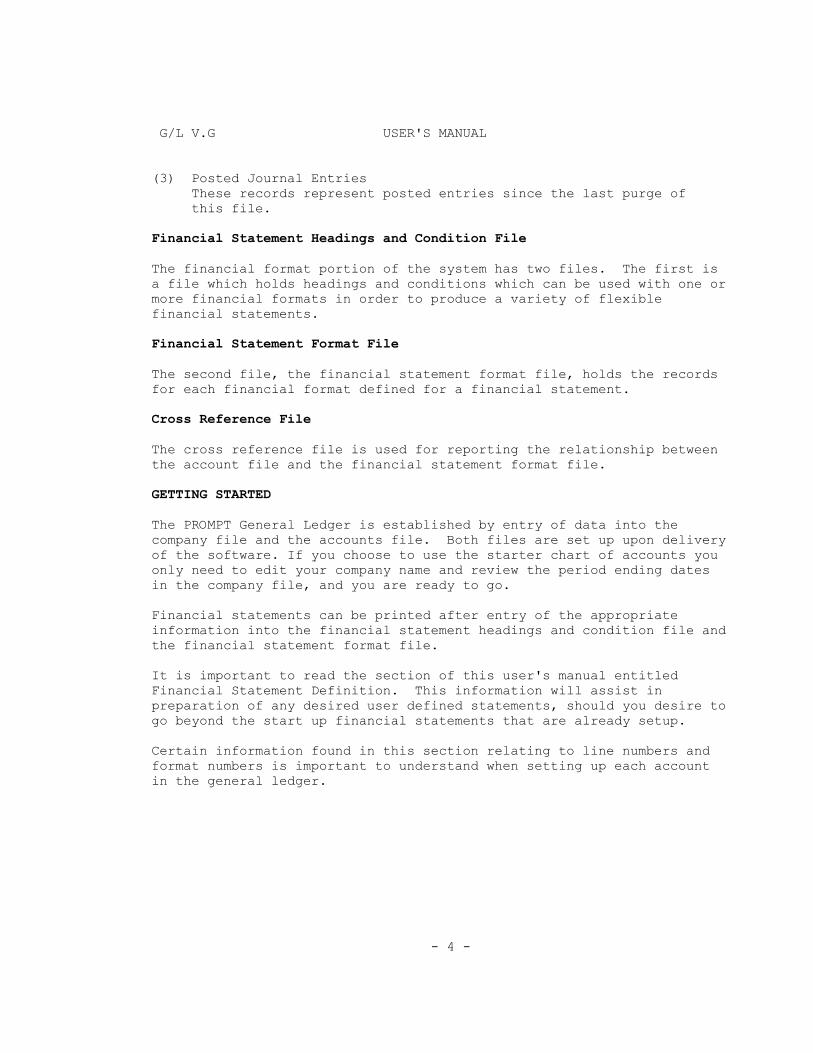
G/L V.G USER'S MANUAL (3) Posted Journal Entries These records represent posted entries since the last purge of this file. Financial Statement Headings and Condition File The financial format portion of the system has two files. The first is a file which holds headings and conditions which can be used with one or more financial formats in order to produce a variety of flexible financial statements. Financial Statement Format File The second file, the financial statement format file, holds the records for each financial format defined for a financial statement. Cross Reference File The cross reference file is used for reporting the relationship between the account file and the financial statement format file. GETTING STARTED The PROMPT General Ledger is established by entry of data into the company file and the accounts file. Both files are set up upon delivery of the software. If you choose to use the starter chart of accounts you only need to edit your company name and review the period ending dates in the company file, and you are ready to go. Financial statements can be printed after entry of the appropriate information into the financial statement headings and condition file and the financial statement format file. It is important to read the section of this user's manual entitled Financial Statement Definition. This information will assist in preparation of any desired user defined statements, should you desire to go beyond the start up financial statements that are already setup. Certain information found in this section relating to line numbers and format numbers is important to understand when setting up each account in the general ledger. - 4 -

G/L V.G USER'S MANUAL DAILY, WEEKLY, MONTHLY, and ANNUALLY PROCESSING DAILY You can enter journal entries, maintain entries, post from subsystem, perform maintenance to the company or accounts file, inquire into files, print reports and statements or revise statement formats at any time. Daily processing functions are explained beginning on page 6. WEEKLY There are no special weekly procedures. MONTHLY When a month is completed for a company you will print the general ledger, trial balance, desired statements and close the month. Month ending processing is explained beginning on page 90. ANNUALLY After the final month has been closed, you can proceed into the new year and leave the old year open for adjusting journal entries. A final close can be executed when all adjusting entries are entered. End-of- year processing is explained beginning on page 96. RUNNING GENERAL LEDGER To bring up the General Ledger Master Menu under the PROMPT Job Control Language, use the password assigned by your supervisor. - 5 -

G/L V.G USER'S MANUAL Running General Ledger +----+----+----+----+----+----+----+----+----+----+----+----+----+----+----+ + 01/01/05 PROMPT General Ledger #PJLCP:: + | Main Menu #G/LMENU | | | | | | | + 1 -- Display Daily Processing Menu 3 -- Display End of Month Menu + | | | 2 -- Display Statement Set Up Menu 4 -- Display End of Year Menu | | | | 5 -- Communications Menu | + + | | | Enter Option | | | | | + + | | | | | | | | + + | | | | | | | F0=Accept Option | | F7=Exit Screen | +----+----+----+----+----+----+----+----+----+----+----+----+----+----+----+ This is the master menu for the general ledger system. When you select an option on this menu, it takes you to another menu which offers one or more menu selections in order to accomplish the objective described by the option name. Each menu that appears when you select an option on this master menu is explained in this user manual. Prior to using the general ledger system, you should read the introduction section which explains the overview for operating the general ledger system. - 6 -

G/L V.G USER'S MANUAL Master Menu - Option 1 - Daily Processing +----+----+----+----+----+----+----+----+----+----+----+----+----+----+----+ + 01/01/05 PROMPT General Ledger #PJLCP:: + | Daily Processing Menu #GL1MENU | | | | | | 1-- Process Journal Entries 5-- Enter, Inquire, Maintain Co.'s | + + | 2-- Analyze Posted Accounts 6-- Enter, Inquire, Maintain Accts. | | | | 3-- Display Reports Menu-All Co.'s 7-- Display Statement Print Menu | | | + 4-- Display Reports Menu-Select Co.'s + | | | | | | | Enter Option: | + + | | | | | | | | + + | | | | | | | F0=Accept Option | | F7=Exit Screen | +----+----+----+----+----+----+----+----+----+----+----+----+----+----+----+ The purpose of this menu is to provide options for all functions executed on a regular basis. Each option is explained in the following pages. - 7 -
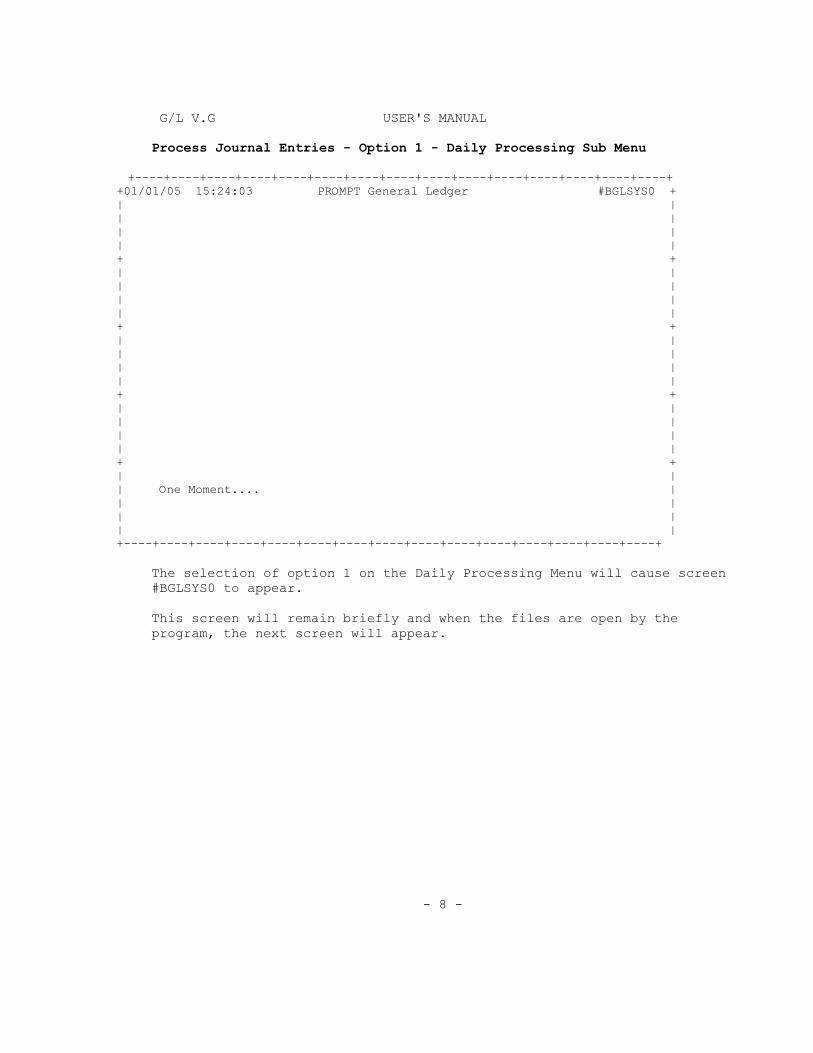
G/L V.G USER'S MANUAL Process Journal Entries - Option 1 - Daily Processing Sub Menu +----+----+----+----+----+----+----+----+----+----+----+----+----+----+----+ +01/01/05 15:24:03 PROMPT General Ledger #BGLSYS0 + | | | | | | | | + + | | | | | | | | + + | | | | | | | | + + | | | | | | | | + + | | | One Moment.... | | | | | | | +----+----+----+----+----+----+----+----+----+----+----+----+----+----+----+ The selection of option 1 on the Daily Processing Menu will cause screen #BGLSYS0 to appear. This screen will remain briefly and when the files are open by the program, the next screen will appear. - 8 -

G/L V.G USER'S MANUAL +----+----+----+----+----+----+----+----+----+----+----+----+----+----+----+ +01/01/05 15:24:03 PROMPT General Ledger #BGLJEM + | Process Journal Entries #BGLJEMM | | | | | | | + + | | | | | | | 0 = Enter or Maintain Journal Entries | + + | 1 = Post Journal Entries | | | | 2 = Transfer Entries from Subsystems | | | + + | Option ( ) | | | | | | | + + | | | | | | | | | F0=Accept Input F1= F2= F3= | + F4= F5= F6= F7=Exit Program | +----+----+----+----+----+----+----+----+----+----+----+----+----+----+----+ The purpose of this screen is to provide for the selection of the desired journal entry process. Select the desired option and press the F0=ACCEPT INPUT key to go to the appropriate screen. Press F7 to return to the Daily Processing Menu. - 9 -

G/L V.G USER'S MANUAL Option 0 = Enter or maintain Journal Entries +----+----+----+----+----+----+----+----+----+----+----+----+----+----+----+ +01/01/05 15:24:03 PROMPT General Ledger #BGLJEM + | Enter or Maintain Journal Entries #BGLJEM1 | | | | Company 1 Mid-American Control Corp R R | | Present Accounting Period: 3 S E E P | + Last Update, Batch Number: U V C L O + | B E U A S | | Enter Line Number (or Batch Number)= ( ) S R R S T | | (LEAVE ENTRY BLANK TO ADD A NEW BATCH) Y S R T E | | Acct Invl S ? ? D | + Batch# Period Cnt Act# Total DR Total CR Out-of-Bal -- - - ---- + |1 AP000010 503 18 0 126482.12 126482.12 .00 AP N N | |2 AR000293 503 10 0 69721.00 69721.00 .00 AR N N | |3 IC000167 503 30 0 243491.60 243491.60 .00 IC N N | |4 OP000261 503 18 0 50483.76 50483.76 .00 OP N N | +5 OP000262 503 12 0 29863.49 29863.49 .00 OP N N + |6 PR000412 503 16 0 18693.57 18693.57 .00 PR N Y | | | | | | | + + | | | | | | | F0=Accept Screen F1=Generic Search F2=Scroll Reverse F3=Scroll Forward | | F4=Post Batch F5=Delete Batch F6=Print Batch F7=Exit Screen | +----+----+----+----+----+----+----+----+----+----+----+----+----+----+----+ The purpose of this screen is to: 1. Create manual journal entries. 2. Locate an existing batch for purposes of add, change or delete. 3. Select a batch or batches to be deleted, printed or posted. The last updated batch number will appear on this screen once a batch has been updated during this session. - 10 -

G/L V.G USER'S MANUAL Each function key is now explained. F0=ACCEPT SCREEN If you leave the line number/batch number field blank and press this key, you will go to screen #BGLJEM2 and will be in the add mode which permits the entry of a new batch, for manual journal entries. The system will generate a new batch number for you. If you enter an existing batch number, or just enter the line number corresponding to the batch number and then press this key, you will go to screen #BGLJEM3 and will be in the update mode which permits the inquiry or change of a batch. F1=GENERIC SEARCH If no entry is made and this key is pressed, the batches will be displayed starting with the beginning of the file. If part of a batch number, for example AR, is entered, all batches beginning with that string of characters will be displayed. F2=SCROLL REVERSE Press this key to scroll through the batches in the file in reverse order one page at a time. F3=SCROLL FORWARD Press this key to scroll forward through the batches in the file one page at a time. F4=POST BATCH Press this key to go to screen #BGLJEM4. If you enter a batch number, before pressing F4, or just enter the line number corresponding to the batch number, the batch number and company number will be automatically entered on the posting screen for you. F5=DELETE BATCH Press this key to delete a batch of journal entries, based on the line number or batch numbered entered. You will be asked if you are sure. Enter a "Y" if yes and the delete will be performed. Otherwise, enter a "N" and the delete will not be performed. F6=PRINT BATCH Press this key to print a batch of journal entries, based on the line number or batch numbered entered. F7=EXIT SCREEN Press this key to exit the screen and return to screen #BGLJEM0. - 11 -

G/L V.G USER'S MANUAL Press enter on screen #BGLJEM1 to create manual journal entries +----+----+----+----+----+----+----+----+----+----+----+----+----+----+----+ +01/01/05 15:24:03 PROMPT General Ledger #BGLJEM + | *ADD MODE* Enter or Maintain Journal Entries #BGLJEM2 | | Company 1 Mid-American Control Corp | | | | | + + | Company 1 Mid-American Control Corp | | Enter New Batch Header | | | | | + + | Batch Number...........: JE0001310 | | Batch Date.............:( 01/01/05 ) 503 Posting Acct Period | | Operator Initials......:( JL ) | + Batch to be Recurring?.:( N ) + | Batch to be Reversed?..:( N ) | | | | | | | + + | | | | | | | F0=Accept Screen F1=Cancel Input F2= F3= | | F4= F5= F6= F7=Exit Screen | +----+----+----+----+----+----+----+----+----+----+----+----+----+----+----+ The process will automatically create a batch header and assign it a batch number. A batch header is a control record that is associated with a batch of journal entries. In addition to the information entered above, this record holds the number of journal entries, amount of debits and credits, and other data. Each field of information to be entered for a manual journal entry is explained below: *BATCH DATE - The system date will appear as the batch date and can be changed if desired. The corresponding accounting period will be displayed to the right of the date. If you override the batch date, the accounting period will be changed to correspond to the date entered.
*OPERATOR INITIALS - Enter operator initials to indicate who entered the batch.
*BATCH TO BE RECURRING? - Enter a "Y" if this is a batch of reoccurring entries. An "N" is defaulted but can be changed to "Y" if desired.
NOTE: If a batch of journal entries is to be recurring every accounting period, the next month entry is created automatically when the current month batch is posted. - 12 -
G/L V.G USER'S MANUAL *BATCH TO BE REVERSING? - Enter a "Y" if the batch of entries is to be automatically reversed beginning with the next accounting period. An "N" will be defaulted but can be changed to "Y" if desired. NOTE: If a batch of journal entries is to be reversed, the reversing takes place when the original batch is posted. The reversed batch of journal entries will have a sub-system code of "JR". Each function key is now explained. F0=ACCEPT SCREEN (send/enter key) Press this key when the data has been successfully entered and you desire to go to the next screen to enter journal entries. F1=CANCEL INPUT Press this key if you desire to clear the data entered on the screen in order to re-enter. F7=EXIT SCREEN Press this key to exit the screen and return to screen #BGLJEM1. - 13 -

G/L V.G USER'S MANUAL Manual journal entry lines – screen #BGLJEM3 +----+----+----+----+----+----+----+----+----+----+----+----+----+----+----+ +01/01/05 15:24:03 PROMPT General Ledger #BGLJEM + | *ADD MODE* Enter or Maintain Journal Entries #BGLJEM3 | | Company 1 Mid-American Control Corp | |Batch No.: JE0001310 | Operator Initials: JL | Total Debits.: 100.00 | |Date.....: 01/01/05 | Subsystem Code...: GL | Total Credits: 100.00 | +Acct Per.: 503 | To Be Reversed?..: N | Out-of-Bal...: 0 + |JE Count.: 2 | To Be Recurring..: N | Invalid Acct Numbers 0 | |Page.....: 1 of 1 | Last Posted......: ___ | Scroll (F3) to Line #( )| |----+---------------+--------+-----+----------+-----------------------------| |Line| Acct Number | Date | DC | Amount | Reference | Quantity | +**** *TOP OF DATA +--------+-----+----------+------------------+----------+ |0010 101 01/01/05 DR 100.00 REFUND OF DEPOSIT 00.0 | |0020 110 01/01/05 CR 100.00 REFUND OF DEPOSIT 00.0 | |0030 | |0040 *END OF DATA | + + | | | | | | | | + + |----+--------------+---------+-----+----------+------------------+----------| | UTILITY DEPOSITS | | | | F0=Accept Input F1=Cancel Input F2= F3= | | F4=Backup One Line F5= F6= F7=Exit to Update | +----+----+----+----+----+----+----+----+----+----+----+----+----+----+----+ The purpose of this screen is to provide for the entry of a batch of journal entries. This screen will appear after you enter the batch header information on screen #BGLJEM2. The upper left portion of the screen will indicate *ADD MODE*. You will remain in the "ADD MODE" during the entry of journal entries. To change an entry after it is entered, you must go to "UPDATE MODE" by using function key F7. However, you can change the line previously entered by using function key F4. Once you go into the update mode using function key F7, you cannot return to the add mode. However, you can add addition entries while in the update mode. Each field of information to be entered during the add mode is now explained. *LINE - This line number is automatically assigned by the system. *ACCT NUMBER - Enter the general ledger account number for the journal entry. - 14 -

G/L V.G USER'S MANUAL *DATE - The date will automatically be entered as the same date in the batch header as shown in the heading portion of the screen. If you want to use a different date, simply enter the desired date. The date used on the first journal entry line will automatically be repeated for each line until you enter a different date. The new date will then be duplicated on each subsequent line until it is changed. The dates on each journal entry line do not have to correspond to the date in the batch header.
DC - This field has only four acceptable entries. D or DR for debit or C or CR for credit. If a "D" is entered for debit, the program will change the entry to DR. If a "C" is entered for credit, the program will change the entry to CR. If no entry is made in this field, the previous entry will be automatically duplicated.
*AMOUNT - Enter the dollar amount for the journal entry. If no amount is entered, the amount on the previous line will be automatically duplicated.
*REFERENCE - A journal entry reference is required. If no reference is entered the reference on the previous line will be automatically duplicated.
*QUANTITY - Enter the quantity applicable to the amount if desired. If no quantity is entered, a zero is assumed, as this field is not automatically duplicated.
- 15 -
G/L V.G USER'S MANUAL The function keys for screen #BGLJEM3, which is the *ADD MODE*, are explained below. F0=ACCEPT INPUT (send/enter key) Press this key to accept a journal entry line on the screen. All data not entered will be automatically duplicated if applicable, as explained earlier for each field. When this key is pressed, the account number will be validated and the account name will appear in the message window immediately above the function keys if it is valid. Otherwise, the cursor will be positioned to enter a valid account number. F1=CANCEL INPUT Press this key to erase the journal entry line you are entering. You cannot use this key to erase the previous line entered unless you first press the F4=BACKUP ONE LINE key, then press this key. F4=BACKUP ONE LINE Press this key to re-open the previous line for deletion or change. You can only go back one line. If further maintenance is desired, use F7=EXIT TO UPDATE after all entries are entered. F7=EXIT TO UPDATE Press this key to end the *ADD MODE* and go into the *UPDATE MODE*. Once you exit the *ADD MODE* you cannot return to it. However, you can add journal entries using the update mode. - 16 -
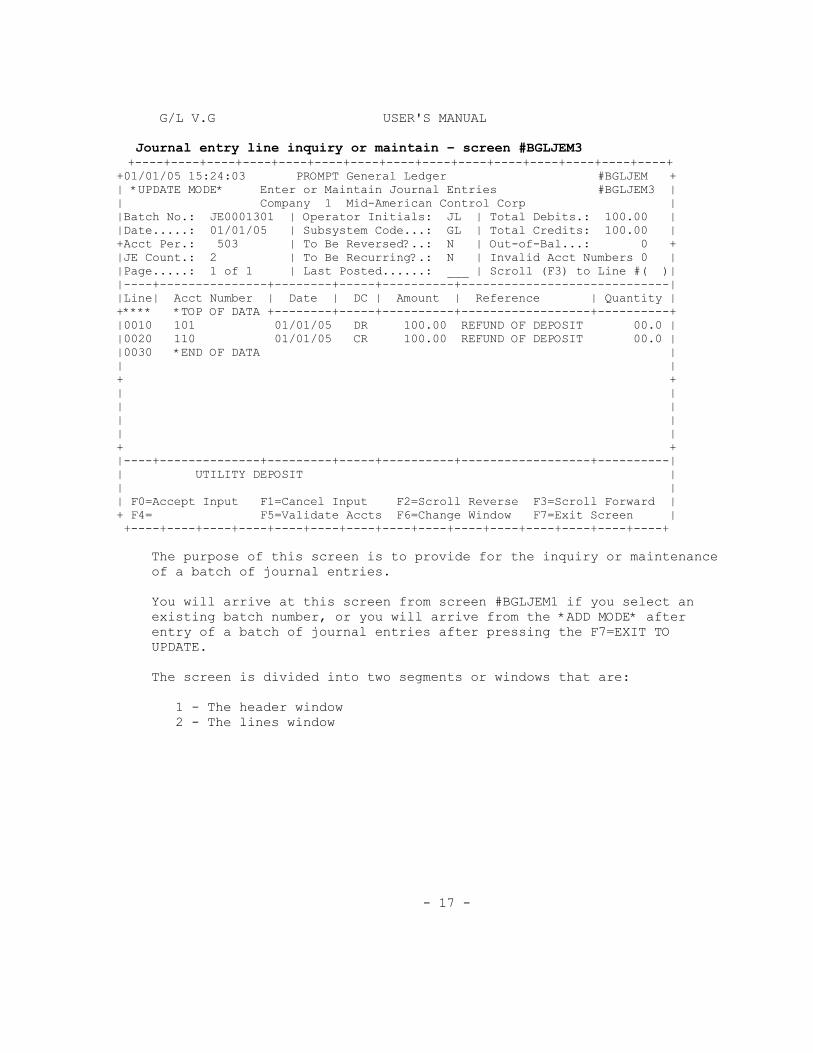
G/L V.G USER'S MANUAL Journal entry line inquiry or maintain – screen #BGLJEM3 +----+----+----+----+----+----+----+----+----+----+----+----+----+----+----+ +01/01/05 15:24:03 PROMPT General Ledger #BGLJEM + | *UPDATE MODE* Enter or Maintain Journal Entries #BGLJEM3 | | Company 1 Mid-American Control Corp | |Batch No.: JE0001301 | Operator Initials: JL | Total Debits.: 100.00 | |Date.....: 01/01/05 | Subsystem Code...: GL | Total Credits: 100.00 | +Acct Per.: 503 | To Be Reversed?..: N | Out-of-Bal...: 0 + |JE Count.: 2 | To Be Recurring?.: N | Invalid Acct Numbers 0 | |Page.....: 1 of 1 | Last Posted......: ___ | Scroll (F3) to Line #( )| |----+---------------+--------+-----+----------+-----------------------------| |Line| Acct Number | Date | DC | Amount | Reference | Quantity | +**** *TOP OF DATA +--------+-----+----------+------------------+----------+ |0010 101 01/01/05 DR 100.00 REFUND OF DEPOSIT 00.0 | |0020 110 01/01/05 CR 100.00 REFUND OF DEPOSIT 00.0 | |0030 *END OF DATA | | | + + | | | | | | | | + + |----+--------------+---------+-----+----------+------------------+----------| | UTILITY DEPOSIT | | | | F0=Accept Input F1=Cancel Input F2=Scroll Reverse F3=Scroll Forward | + F4= F5=Validate Accts F6=Change Window F7=Exit Screen | +----+----+----+----+----+----+----+----+----+----+----+----+----+----+----+ The purpose of this screen is to provide for the inquiry or maintenance of a batch of journal entries. You will arrive at this screen from screen #BGLJEM1 if you select an existing batch number, or you will arrive from the *ADD MODE* after entry of a batch of journal entries after pressing the F7=EXIT TO UPDATE. The screen is divided into two segments or windows that are: 1 - The header window 2 - The lines window - 17 -
G/L V.G USER'S MANUAL HEADER WINDOW The following fields of information can be modified in the header window. Date - Date of batch Acct Per - Accounting period Operator Initials - Who entered the batch To be Reversing? - Yes (Y) or No (N) To be Recurring? - Yes (Y) or No (N) To open the header window, press the F6=CHANGE WINDOW key and change any of the above fields. After changes have been accepted, press the F6 key again to close the header window and open the lines window. LINES WINDOW When the lines window is open, the cursor will be positioned on the first line. There are three actions you can take regarding a journal entry line. A = Add C = Change D = Delete To execute one of these functions, position the cursor on the line involved and enter the code (A, C, or D) on top of the line number. For example, if the line number involved is 0010, each of the codes would look like this when entered: A010 C010 D010 If the code is "A" for ADD, space for a new line will open just above the line number where the "A" is entered. If you want to add a journal entry at the end of data, simply type an "A" below the last journal entry and a line will be made available. When the code is entered as described above, press the F0=ACCEPT INPUT key to begin the add, change or delete process. If the line to be maintained is not displayed on the screen, you can scroll through the lines one page at a time until the line is displayed on the screen. To display the line more quickly, without having to scroll to it, position the cursor on the "SCROLL (F3) TO LINE #" field by pressing the back tab key one time. Then enter the desired line number and press F3. The screen will be filled with lines beginning with the line number entered. - 18 -

G/L V.G USER'S MANUAL LINE NUMBER When a new line is added, you must enter the line number. The number entered will determine the position of the line regardless of the cursor position. Therefore, all lines can be entered at the end of data and the line number entered will cause the line to appear in the sequence desired. AUTOMATIC DUPLICATION The automatic duplication of certain fields from the line above the one being entered works exactly the same as explained for screen #BGLJEM3 under the add mode. The function keys are now explained. F0=ACCEPT INPUT (send/enter key) Press this key to accept the input on the screen. For a journal entry line being entered, all data will be duplicated automatically, if applicable, as explained above. F1=CANCEL INPUT Press this key to erase the entry just made and return the data to the state prior to change. This key will also cancel an A, C, or D command after entry but prior to execution. F2=DISPLAY REVERSE Press this key to scroll through the journal entry lines in reverse order one page at a time. F3=DISPLAY FORWARD Press this key to scroll through the journal entry lines one page at a time. Also, use this key in conjunction with a line number entered in the "SCROLL (F3) TO LINE #" field to scroll to a specific line number. F5=VALIDATE ACCTS Press this key to validate the account number of each journal entry in The batch. If an account is invalid, the literal INVALID will appear in the quantity field. This key will also re-total the debit, credit and count totals in the batch header record. F6=CHANGE WINDOW Press this key to close the window that is open and open the window that is closed. See the previous explanation of the Header Window and Lines Window. F7=EXIT SCREEN Press this key to exit the screen and return to screen #BGLJEM1. - 19 -

G/L V.G USER'S MANUAL Post Journal entries – Screen #BGLJEM4 +----+----+----+----+----+----+----+----+----+----+----+----+----+----+----+ +01/01/05 15:24:03 PROMPT General Ledger #BGLJEM + | Post Journal Entries #BGLJEM4 | | | | | | Present Accounting Period......: ( 03 ) | + + | Post to P, N, or Y Acct Period.: ( P ) (Present, Next, or Year End) | | | | | | Enter Batch Number to Post.....: (JE0001301) ('ALL' for all Batches) | + + | Enter Subsystem Code to Post...: ( ) ('ALL' for all Subsystems) | | | | Enter Accounting Period to Post: ( ) (YYMM) | | | + Enter Number of Company to Post: ( 1 ) + | | |============================================================================| | JE's Validated: 2 | | JE's Posted...: 2 | + POSTING IN PROGRESS Total Debits..: 100.00 + | Total Credits.: 100.00 | | Out-of-Balance: 0 | | | | F0=Accept Input F1= F2= F3= | | F4= F5= F6= F7=Exit Screen | +----+----+----+----+----+----+----+----+----+----+----+----+----+----+----+ The purpose of this screen is to select a batch or batches of journal entries to be posted to the general ledger. You can also select a batch of entries to post from screen #BGLJEM1. Also, refer to menu option 8 – Batch Post JE’s For Current Period that post the current period without Print, except for error messages. This screen #BGLJEM4 is best to use to post an entire subsystem, an entire accounting period or an entire company, whereas screen #BGLJEM1 is best for selection of one batch to post at a time. You will arrive at this screen by selection of option 1 on screen #BGLJEMM. Each field of information to be entered is now explained.
*POST TO P, N, OR Y ACCT PERIOD - Enter the appropriate code to indicate the accounting period. "P" means the current period (1-13) now open. "N" means the next accounting period. "Y" means the end of the fiscal year.
The system permits posting to the current or the next month at all times. Posting to year-end is permitted only after the final month of the fiscal year has been closed. - 20 -
G/L V.G USER'S MANUAL
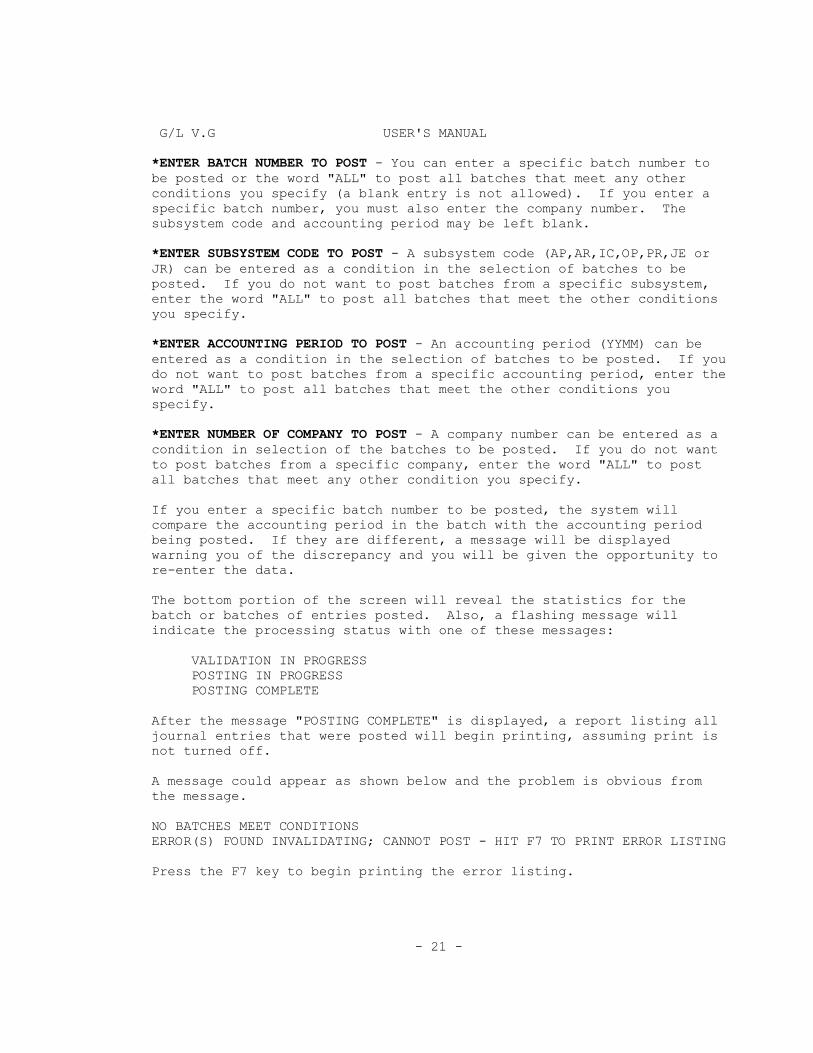
*ENTER BATCH NUMBER TO POST - You can enter a specific batch number to be posted or the word "ALL" to post all batches that meet any other conditions you specify (a blank entry is not allowed). If you enter a specific batch number, you must also enter the company number. The subsystem code and accounting period may be left blank.
*ENTER SUBSYSTEM CODE TO POST - A subsystem code (AP,AR,IC,OP,PR,JE or JR) can be entered as a condition in the selection of batches to be posted. If you do not want to post batches from a specific subsystem, enter the word "ALL" to post all batches that meet the other conditions you specify. *ENTER ACCOUNTING PERIOD TO POST - An accounting period (YYMM) can be entered as a condition in the selection of batches to be posted. If you do not want to post batches from a specific accounting period, enter the word "ALL" to post all batches that meet the other conditions you specify. *ENTER NUMBER OF COMPANY TO POST - A company number can be entered as a condition in selection of the batches to be posted. If you do not want to post batches from a specific company, enter the word "ALL" to post all batches that meet any other condition you specify. If you enter a specific batch number to be posted, the system will compare the accounting period in the batch with the accounting period being posted. If they are different, a message will be displayed warning you of the discrepancy and you will be given the opportunity to re-enter the data. The bottom portion of the screen will reveal the statistics for the batch or batches of entries posted. Also, a flashing message will indicate the processing status with one of these messages: VALIDATION IN PROGRESS POSTING IN PROGRESS POSTING COMPLETE After the message "POSTING COMPLETE" is displayed, a report listing all journal entries that were posted will begin printing, assuming print is not turned off. A message could appear as shown below and the problem is obvious from the message. NO BATCHES MEET CONDITIONS ERROR(S) FOUND INVALIDATING; CANNOT POST - HIT F7 TO PRINT ERROR LISTING Press the F7 key to begin printing the error listing. - 21 -
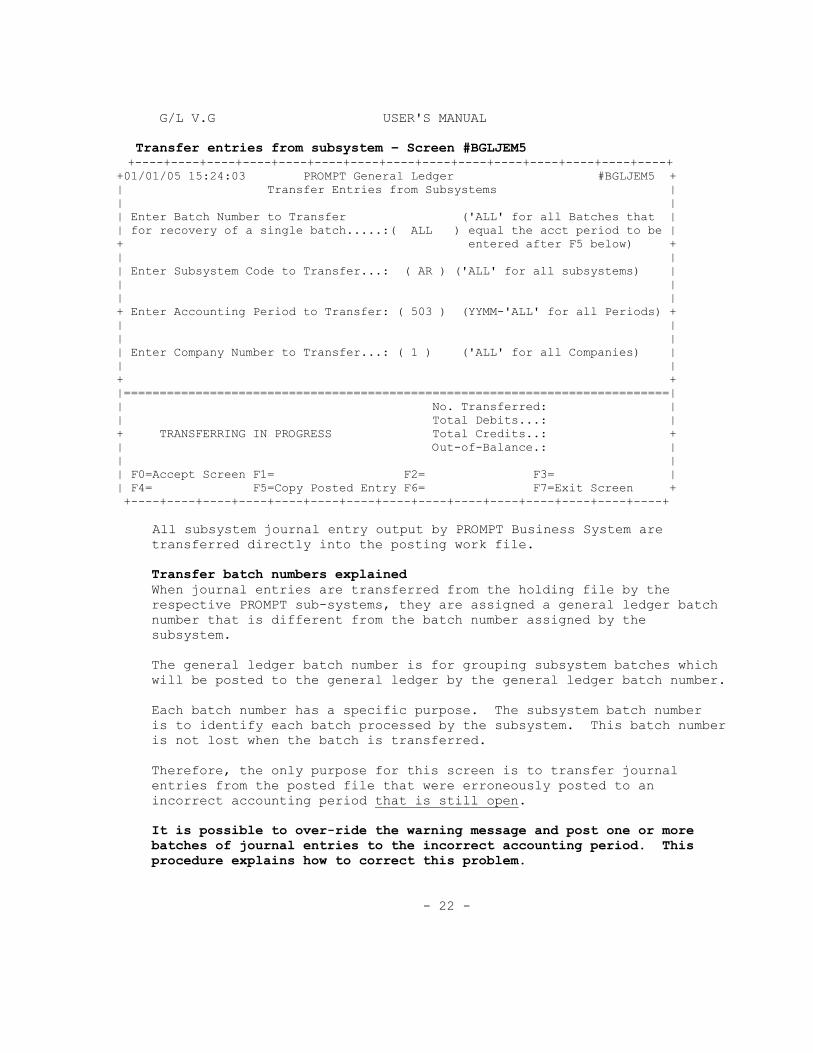
G/L V.G USER'S MANUAL Transfer entries from subsystem – Screen #BGLJEM5 +----+----+----+----+----+----+----+----+----+----+----+----+----+----+----+ +01/01/05 15:24:03 PROMPT General Ledger #BGLJEM5 + | Transfer Entries from Subsystems | | | | Enter Batch Number to Transfer ('ALL' for all Batches that | | for recovery of a single batch.....:( ALL ) equal the acct period to be | + entered after F5 below) + | | | Enter Subsystem Code to Transfer...: ( AR ) ('ALL' for all subsystems) | | | | | + Enter Accounting Period to Transfer: ( 503 ) (YYMM-'ALL' for all Periods) + | | | | | Enter Company Number to Transfer...: ( 1 ) ('ALL' for all Companies) | | | + + |============================================================================| | No. Transferred: | | Total Debits...: | + TRANSFERRING IN PROGRESS Total Credits..: + | Out-of-Balance.: | | | | F0=Accept Screen F1= F2= F3= | | F4= F5=Copy Posted Entry F6= F7=Exit Screen + +----+----+----+----+----+----+----+----+----+----+----+----+----+----+----+ All subsystem journal entry output by PROMPT Business System are transferred directly into the posting work file. Transfer batch numbers explained When journal entries are transferred from the holding file by the respective PROMPT sub-systems, they are assigned a general ledger batch number that is different from the batch number assigned by the subsystem. The general ledger batch number is for grouping subsystem batches which will be posted to the general ledger by the general ledger batch number. Each batch number has a specific purpose. The subsystem batch number is to identify each batch processed by the subsystem. This batch number is not lost when the batch is transferred. Therefore, the only purpose for this screen is to transfer journal entries from the posted file that were erroneously posted to an incorrect accounting period that is still open. It is possible to over-ride the warning message and post one or more batches of journal entries to the incorrect accounting period. This procedure explains how to correct this problem. - 22 -
G/L V.G USER'S MANUAL The original intent of this transfer menu option was to allow the recovery of a batch of entries posted to the wrong accounting period. Later the option was enhanced to allow recovery of multiple batches posted to the wrong accounting period. The following paragraphs explain how to use this feature to recover multiple batches. Enter the information on the screen as now explained to recover entries posted to the incorrect accounting period that is still open:
1. Enter the batch number as: ALL 2. Enter the subsystem code as: ALL 3. peri
incorrectly posted: 0403 (our example assumes year 04 and month 03) Enter the accounting od the batches to which the batches were
4. Enter the Company number: 1 5. Next press F5 then and do not enter an R to reverse and press enter. 6. Then enter the accounting period to which the batches should have been
posted: 0404 (our example assumes accounting year 04 and month 04)
7. At this point one large batch of journal entries will be created and these are to be posted to the correct accounting period at the appropriate time. However, now you have to create and post a reversing batch to the incorrect accounting period to cancel out the incorrect posting. Repeating steps 1 – 6 does this but in step 5 do enter the R to reverse.
It is important to understand how the program recovers the incorrectly posted journal entries in the event a balancing problem exists after using this feature.
When you press F5, and then press enter, the program asks for the “Acct per to Copy”. Then it goes to the current accounting period to copy from and examines the “Reference Date” of each posted journal entry. If this reference date falls within the date range for the accounting period to copy, the journal entry is copied either reversed or not as indicated when F5 was pressed. The only way a problem can result from this recovery procedure is if the reference date for some journal entries was outside the accounting period to which these entries belong, in which case you will have to edit these into the batch or create a separate manual batch for these entries.
- 23 -

G/L V.G USER'S MANUAL The function keys are now explained. F0=ACCEPT INPUT (send/enter key) Press this key when the desired data has been entered and you wish to initiate the transfer of entries. F5=COPY POSTED ENTRY The purpose of this key is to permit the copying of a posted batch of journal entries for future posting or to correct an erroneous posting. When you press this key, the following message will appear: ENTER "R" TO REVERSE ENTRIES: (blank to copy without reversing). Enter an "R" if you desire to have the copied batch of entries have the opposite values from the posted batch (i.e. debits will be changed to credits and credits changed to debits). Leave it blank if you desire the values to remain the same. The batch will then be copied with a new general ledger batch number assigned. NOTE: All fields must be entered for this function. When you press enter you will get the prompt: ENTER POSTED ACCT PER TO COPY (YYMM). Enter the accounting period that was posted to the incorrect accounting period. F7=EXIT SCREEN Press this key to exit the screen and return to screen #BGLJEMM. - 24 -

G/L V.G USER'S MANUAL Analyze Posted Accounts - Option 2 - Daily Processing Sub-Menu +----+----+----+----+----+----+----+----+----+----+----+----+----+----+----+ +01/01/05 15:24:03 PROMPT General Ledger #BGLSYS0 + | | | | | | | | + + | | | | | | | | + + | | | | | | | | + + | | | | | | | | + + | | | | | | | | + + | | | One Moment.... | | | | | | + +----+----+----+----+----+----+----+----+----+----+----+----+----+----+----+ The selection of option 2 on the Daily Processing Menu will cause screen #BGLSYS0 to appear. - 25 -
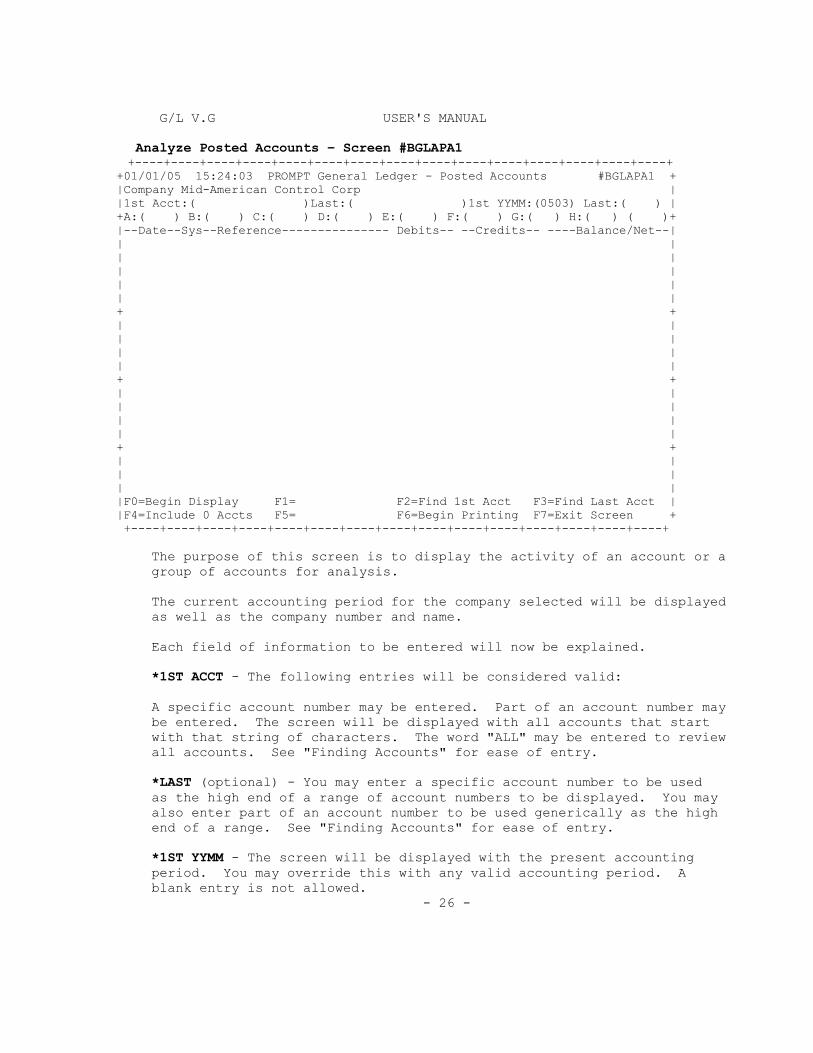
G/L V.G USER'S MANUAL Analyze Posted Accounts – Screen #BGLAPA1 +----+----+----+----+----+----+----+----+----+----+----+----+----+----+----+ +01/01/05 15:24:03 PROMPT General Ledger - Posted Accounts #BGLAPA1 + |Company Mid-American Control Corp | |1st Acct:( )Last:( )1st YYMM:(0503) Last:( ) | +A:( ) B:( ) C:( ) D:( ) E:( ) F:( ) G:( ) H:( ) ( )+ |--Date--Sys--Reference--------------- Debits-- --Credits-- ----Balance/Net--| | | | | | | | | | | + + | | | | | | | | + + | | | | | | | | + + | | | | | | |F0=Begin Display F1= F2=Find 1st Acct F3=Find Last Acct | |F4=Include 0 Accts F5= F6=Begin Printing F7=Exit Screen + +----+----+----+----+----+----+----+----+----+----+----+----+----+----+----+ The purpose of this screen is to display the activity of an account or a group of accounts for analysis. The current accounting period for the company selected will be displayed as well as the company number and name. Each field of information to be entered will now be explained. *1ST ACCT - The following entries will be considered valid: A specific account number may be entered. Part of an account number may be entered. The screen will be displayed with all accounts that start with that string of characters. The word "ALL" may be entered to review all accounts. See "Finding Accounts" for ease of entry.
*LAST (optional) - You may enter a specific account number to be used as the high end of a range of account numbers to be displayed. You may also enter part of an account number to be used generically as the high end of a range. See "Finding Accounts" for ease of entry.
*1ST YYMM - The screen will be displayed with the present accounting period. You may override this with any valid accounting period. A blank entry is not allowed. - 26 -

G/L V.G USER'S MANUAL
*LAST (optional) - An accounting period may be entered for use as the high end of a range of accounting periods to be displayed.
*A,B,C,D,E,F,G,H (optional) - These fields are available for entering group reporting codes. If any group codes are entered, only accounts with those codes will be displayed. The set of parentheses to the right of the 'H' group code will have a value of 'N' when the screen is displayed. This entry will display the net change in balance for the account (in the last column). You may override this entry with a 'B' to display the batch number associated with each transaction or a 'Q' to show the quantity associated with each transaction. After you have entered the data, press the F0 (send/enter) key. A screen of information like the example shown on the next page will be displayed according to the data you entered. This program will accumulate totals as it finds journal entries matching the conditions specified. If, for some reason, these totals are different from the totals in the general ledger files (on the disk), a message will be generated showing the difference.
- 27 -
G/L V.G USER'S MANUAL
FINDING ACCOUNTS A FIND/SEARCH feature that will allow scrolling the chart of accounts file to aid in determining the first and/or last account number to be selected for analysis. To implement the find feature, function keys F0, F2 and F3 are used for multiple functions. When this screen is first displayed, the function keys will be available as follows: SELECT MODE F0=Begin Display F2=Find 1st Account F3=Find Last Account F4=Include 0 Accounts F6=Begin Printing F7=Exit Screen By entering a character string in the field "1st Acct", and pressing F2, the screen will be filled with account numbers and descriptions matching the character string. If no character string is entered, all accounts will be displayed. While in the "Search" mode, the function keys will be available as follows: SEARCH MODE F0=Select Account=1st/Select Account=Last F1=Cancel Search F2=Display Reverse F3=Display Forward By selecting a line number and pressing F0, the corresponding account number will automatically be displayed in the field "1st Acct", and the screen will return to the "Select" mode. If the desired account number does not appear on the screen, use the scrolling keys, F2 and F3, to continue searching. If you wish to return to the "Select" mode without implementing the search feature, use F1 to cancel the search. The same concept may be used to determine the last account number by pressing F3 while in the select mode.
- 28 -
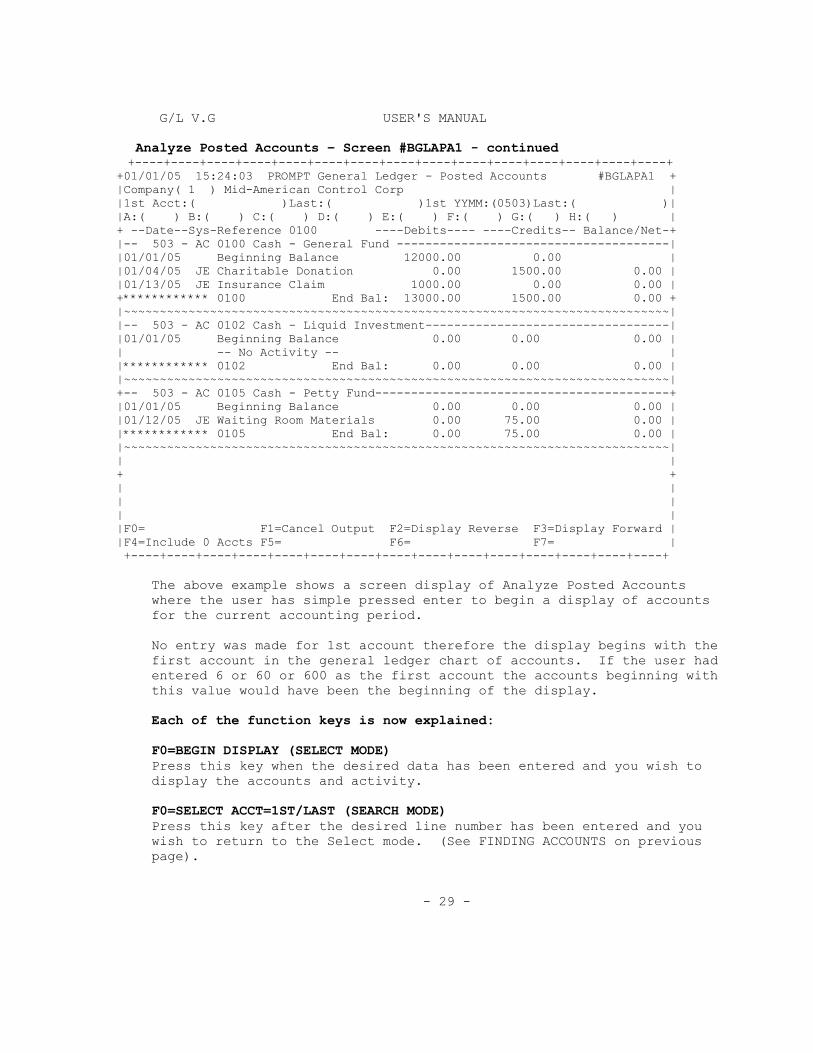
G/L V.G USER'S MANUAL Analyze Posted Accounts – Screen #BGLAPA1 - continued +----+----+----+----+----+----+----+----+----+----+----+----+----+----+----+ +01/01/05 15:24:03 PROMPT General Ledger - Posted Accounts #BGLAPA1 + |Company( 1 ) Mid-American Control Corp | |1st Acct:( )Last:( )1st YYMM:(0503)Last:( )| |A:( ) B:( ) C:( ) D:( ) E:( ) F:( ) G:( ) H:( ) | + --Date--Sys-Reference 0100 ----Debits---- ----Credits-- Balance/Net-+ |-- 503 - AC 0100 Cash - General Fund --------------------------------------| |01/01/05 Beginning Balance 12000.00 0.00 | |01/04/05 JE Charitable Donation 0.00 1500.00 0.00 | |01/13/05 JE Insurance Claim 1000.00 0.00 0.00 | +************ 0100 End Bal: 13000.00 1500.00 0.00 + |~~~~~~~~~~~~~~~~~~~~~~~~~~~~~~~~~~~~~~~~~~~~~~~~~~~~~~~~~~~~~~~~~~~~~~~~~~~~| |-- 503 - AC 0102 Cash - Liquid Investment----------------------------------| |01/01/05 Beginning Balance 0.00 0.00 0.00 | | -- No Activity -- | |************ 0102 End Bal: 0.00 0.00 0.00 | |~~~~~~~~~~~~~~~~~~~~~~~~~~~~~~~~~~~~~~~~~~~~~~~~~~~~~~~~~~~~~~~~~~~~~~~~~~~~| +-- 503 - AC 0105 Cash - Petty Fund-----------------------------------------+ |01/01/05 Beginning Balance 0.00 0.00 0.00 | |01/12/05 JE Waiting Room Materials 0.00 75.00 0.00 | |************ 0105 End Bal: 0.00 75.00 0.00 | |~~~~~~~~~~~~~~~~~~~~~~~~~~~~~~~~~~~~~~~~~~~~~~~~~~~~~~~~~~~~~~~~~~~~~~~~~~~~| | | + + | | | | | | |F0= F1=Cancel Output F2=Display Reverse F3=Display Forward | |F4=Include 0 Accts F5= F6= F7= | +----+----+----+----+----+----+----+----+----+----+----+----+----+----+----+ The above example shows a screen display of Analyze Posted Accounts where the user has simple pressed enter to begin a display of accounts for the current accounting period. No entry was made for 1st account therefore the display begins with the first account in the general ledger chart of accounts. If the user had entered 6 or 60 or 600 as the first account the accounts beginning with this value would have been the beginning of the display. Each of the function keys is now explained: F0=BEGIN DISPLAY (SELECT MODE) Press this key when the desired data has been entered and you wish to display the accounts and activity. F0=SELECT ACCT=1ST/LAST (SEARCH MODE) Press this key after the desired line number has been entered and you wish to return to the Select mode. (See FINDING ACCOUNTS on previous page). - 29 -

G/L V.G USER'S MANUAL F1=CANCEL OUTPUT/CANCEL SEARCH Press this key if you wish to interrupt the display of the information. The screen will be cleared and the cursor will return to the field "1ST ACCT". F2=FIND 1ST ACCOUNT (SELECT MODE) Press this key to display the accounts matching the character string entered in the 1st ACCT field (blank string will display all account numbers). F2=DISPLAY REVERSE (SEARCH AND DISPLAY MODES) Press this key to scroll the accounts in reverse order (SEARCH MODE) or scroll the transactions in reverse order (DISPLAY MODE). F3=FIND LAST ACCOUNT (SELECT MODE) Press this key to display the accounts matching the character string entered in the LAST ACCT field (blank will display all account numbers). F3=DISPLAY FORWARD (SEARCH AND DISPLAY MODES) Press the key to scroll forward through the accounts (SEARCH MODE) or scroll forward through the transactions (DISPLAY MODE). F4=INCLUDE 0 ACCOUNTS/SUPPRESS 0 ACCOUNTS This function key can toggle between the two functions to include or suppress accounts with no activity. The meaning of this key can only be changed while in the Select mode. However, its meaning will be displayed on the screen during the display mode for your information. F7=EXIT SCREEN Press this key to exit the screen and return to screen #BGLAPA0. Pass Parameters to "Analyze Posted Accounts" Program The Analyzed Posted Accounts program will allow parameters to be passed from the menu. Typically, you are required to enter the same fields of data on the screen each time account activity is printed. By allowing parameters to be passed from the menu, you can set up a customized menu and just run the menu step without having to enter the data fields. The following is a discussion on how to set up your customized menu. To help familiarize yourself with a menu editor, examples are provided that you can follow to create a dummy menu before you create your own. - 30 -

G/L V.G USER'S MANUAL The parameters that can be passed are: *Company number *Group codes to be printed *QBN code (quantity, batch # or net change) *Output device (to terminal or printer) NOTE: Because the number and type of parameter fields are limited, Account numbers and accounting periods cannot be passed from the menu. The default, then, is that all accounts will be printed for the present accounting period indicated in the company file. FILENAME #1 Enter reporting codes for group A in the first three positions and reporting codes for group B in the last three positions. Note that this is optional. (Example: "AAA___BBB" where "AAA" is the code associated with group level A; and "BBB" is the code associated with group level B.) FILENAME #2 Enter reporting codes for group C in the first three positions and reporting codes for group D in the last three positions. Note that this is optional. (Example: "CCC___DDD" where "CCC" is the code associated with group level C; and "DDD" is the code associated with group level D.) FILENAME #3 Enter reporting codes for group E in the first three positions and reporting codes for group F in the last three positions. Note that this is optional. (Example: "EEE___FFF" where "EEE" is the code associated with group level E; and "FFF" is the code associated with group level F.) PARAMETER #1 through PARAMETER #6 are left blank. 1ST 1-CHARACTER ALPHA Enter the QBN code. "Q" will display the quantity associated with each transaction; "B" will display the batch number associated with each transaction; "N" will display the net change in the balance for the account. 2ND 1-CHARACTER ALPHA Enter the output device. "V" will display on the terminal and "P" will print. 3RD 1-CHARACTER ALPHA Enter the "Zero Accounts" flag. "I" will include accounts with no Activity and "S" will suppress printing of accounts with no acctivity. (Example: "S".) 1ST 4-BYTE INTEGER Enter the company number for which activity is to be displayed. (Example: "1".) - 31 -

G/L V.G USER'S MANUAL Daily Processing - Option 3 - Display Reports Menu - All Companies +----+----+----+----+----+----+----+----+----+----+----+----+----+----+----+ + 01/01/05 PROMPT General Ledger #PJLCP + | Print Reports - All Co.'s #GL4MENU | | | | | | | + + | 1 -- Print Companies 4 -- Print Account Summary | | | | 2 -- Print Chart of Accounts 5 -- Print 13th Month Trial Balance | | | + 3 -- Print Trial Balance 6 -- Print 13th Month Acct Summary + | | | | | Enter Option: | | | + + | | | | | | | | + + | | | | | | | | | F0=Accept Option F7=Exit Option | +----+----+----+----+----+----+----+----+----+----+----+----+----+----+----+ The purpose of this menu is to provide for the selection of reports. Each option will print a report of all companies. In a single company setup, that is the standard release, this is the menu to use to print the above reports. When a menu option is selected the report will print. - 32 -

G/L V.G USER'S MANUAL Daily Processing - Option 4 - Display Reports Menu - Select Co. +----+----+----+----+----+----+----+----+----+----+----+----+----+----+----+ + 01/01/05 PROMPT General Ledger #PJLCP + | Print Reports - Select Co.'s #GL5MENU | | | | | | 1 -- Print Company 4 -- Print Account Summary | + + | 2 -- Print Chart of Accounts 5 -- Print 13th Month Trial Balance | | | | 3 -- Print Trial Balance 6 -- Print 13th Month Acct Summary | | | + + | Enter Option: | | | | | | | + + | | | | | | | | + + | | | | | | | | | F0=Accept Option F7=Exit Screen | +----+----+----+----+----+----+----+----+----+----+----+----+----+----+----+ The purpose of this menu is to provide for the selection of reports by company. You will arrive at this menu upon selection of Option 4 -- Display Select Reports Menu Co on the Daily Processing Menu. Each report will require the entry of a company number before printing begins. For example to print the report for company 3 you must enter a 3 when prompted for a company number. - 33 -

G/L V.G USER'S MANUAL Enter, Inquire, Maintain Companies - Option 5 - Daily Processing Sub Menu +----+----+----+----+----+----+----+----+----+----+----+----+----+----+----+ +01/01/05 15:24:03 PROMPT General Ledger #BGLSYS0 + | | | | | | | | + + | | | | | | | | + + | | | | | | | | + + | | | | | | | | + + | | | | | One Moment.... | | | | | +----+----+----+----+----+----+----+----+----+----+----+----+----+----+----+ The selection of option 5 on the Daily Processing menu will cause screen #BGLSYS0 to appear. This screen will remain briefly and when the files are opened by the program, the next screen will appear. - 34 -

G/L V.G USER'S MANUAL Enter, Inquire, Maintain Companies – Screen #BGLCFM0 +----+----+----+----+----+----+----+----+----+----+----+----+----+----+----+ +01/01/05 15:24:03 PROMPT General Ledger #BGLCFM0 + | Update Company File | | | | | | | + + | | | Company Number to Update ( 1 ) | | | | ** BEGINNING OF FILE | + 1 Mid-American Control Corporation P.O. Box 937, | | ** END OF FILE + | | | | | | | | + + | | | | | | | F0=Accept Input F1= F2=Scroll Reverse F3=Scroll Forward | | F4= F5= F6= F7=Exit Screen | +----+----+----+----+----+----+----+----+----+----+----+----+----+----+----+ The purpose of this screen is to display the companies in the company file in order to allow the selection of a company for view or maintenance. Also, all company numbers used are shown to enable identification of an unused company number. There is only one field of information to enter as explained below. *COMPANY NUMBER TO UPDATE - Enter the desired company number. If you enter an existing company number, the next screen to appear will be in the maintenance mode. If you enter a company number not in the file, you will be in the add mode on the next screen. - 35 -
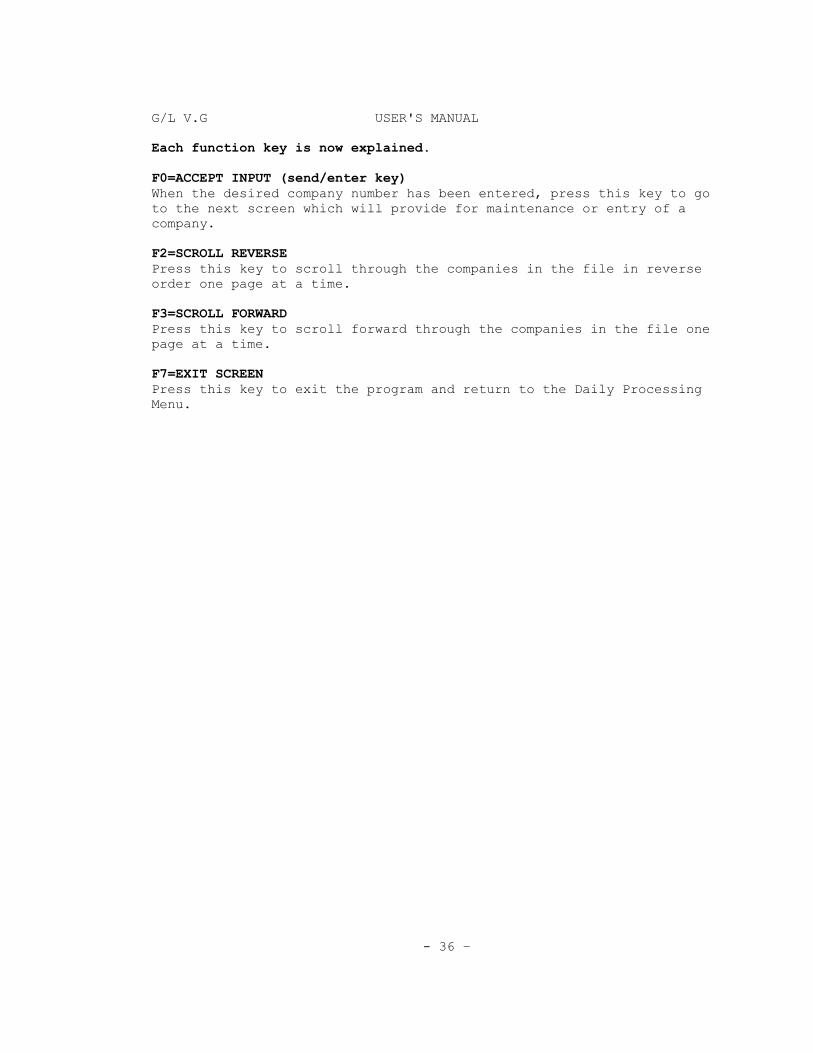
G/L V.G USER'S MANUAL Each function key is now explained. F0=ACCEPT INPUT (send/enter key) When the desired company number has been entered, press this key to go to the next screen which will provide for maintenance or entry of a company. F2=SCROLL REVERSE Press this key to scroll through the companies in the file in reverse order one page at a time. F3=SCROLL FORWARD Press this key to scroll forward through the companies in the file one page at a time. F7=EXIT SCREEN Press this key to exit the program and return to the Daily Processing Menu. - 36 –

G/L V.G USER'S MANUAL Enter, Inquire, Maintain Companies – Screen #BGLCFM1 +----+----+----+----+----+----+----+----+----+----+----+----+----+----+----+ +01/01/05 15:24:03 PROMPT General Ledger #BGLCFM1 + | *UPDATE MODE* Update Company File 1 of 2 | | | | Company Number..: 1 | | | |2. Company Name................: ( Mid-American Control Corp ) | +3. Mailing Address.............: ( P. O. Box 937 ) + |4. City, State, Zip............: ( Shelbyville, Kentucky 40066 ) | |5. Telephone Number............: ( 502-633-5700 ) | |6. Consolidating Company? (Y/N): ( N ) | | | + + | | | | | | | | + + | | | | | | | | + + | | | | | More fields | | F0=Accept Input F1=Cancel Input F2=Copy Accounts F3= | | F4=Set Cursor= F5=Delete Record F6= F7=Cancel Changes | +----+----+----+----+----+----+----+----+----+----+----+----+----+----+----+ The purpose of this screen is to enter or maintain the company name, address and phone number. Also, some very powerful functions are available to manipulate data in the accounts file such as copy and delete which are explained with the function keys. Each field of information to be entered, viewed or changed on this screen is now explained. The number proceeding the field description is the actual field number in the file. *2. COMPANY NAME - Enter the name of the company. This is not necessarily the way the company name appears on the statement as this information is entered in the financial statement heading definition file.
*3. MAILING ADDRESS - Enter the street address of the company. This is for use in identification of the company when scrolling through the company names.
*4. CITY, STATE, ZIP - Enter the remainder of the mailing address. *5. TELEPHONE NUMBER - Enter the phone number if desired. - 37 -

G/L V.G USER'S MANUAL *6. CONSOLIDATION COMPANY (Y/N) - Enter a "Y" if the company is set up solely for purposes of consolidation, otherwise enter an "N". This field is used by the financial statement print program. Each function key is now explained. F0=ACCEPT INPUT (send/enter key) Press this key to update the file with the information shown on the screen. When this key is pressed, you will automatically go to the next screen that is #BGLCFM2. F1=CANCEL INPUT Press this key when you have made changes on the screen, but have not pressed the F0=ACCEPT INPUT key, and you desire to erase the changes and return to the data as it was before modification. F2=COPY ACCOUNTS If you desire to copy an entire companies chart of accounts, press this key. The following will appear on the acreen: ENTER NUMBER OF SOURCE COMPANY: ( ) When the source company is entered, press the F2 key again and the name and address will be displayed on the screen along with the message: DUPLICATES WILL NOT BE COPIED, and you must respond to this prompt: CONTINUE WITH ACCOUNTS COPY (Y/N)?: ( ) If you wish to continue, enter a "Y" and press the F0=ACCEPT INPUT key. Otherwise, enter an "N". Essentially, the account copy function is a merge. Therefore, the message DUPLICATES WILL NOT BE COPIED means that if the same account number appears in both the source and target accounts file, it will not be duplicated in the target file. F4=SET CURSOR This is a multi-purpose key and when pressed, the following instructions will appear in the message area of the screen: ENTER FIELD NO: OR PAGE: F=1st, L=LAST, N=NEXT, P=PREVIOUS, E=END. Each of these options is now explained. ENTER FIELD NO: - Enter any field number for the company record and when the F4 key is pressed again, the cursor will go directly to this field number, even if on a different screen. PAGE: F=1st, L=LAST, N=NEXT, P=PREVIOUS, E=END - 38 -
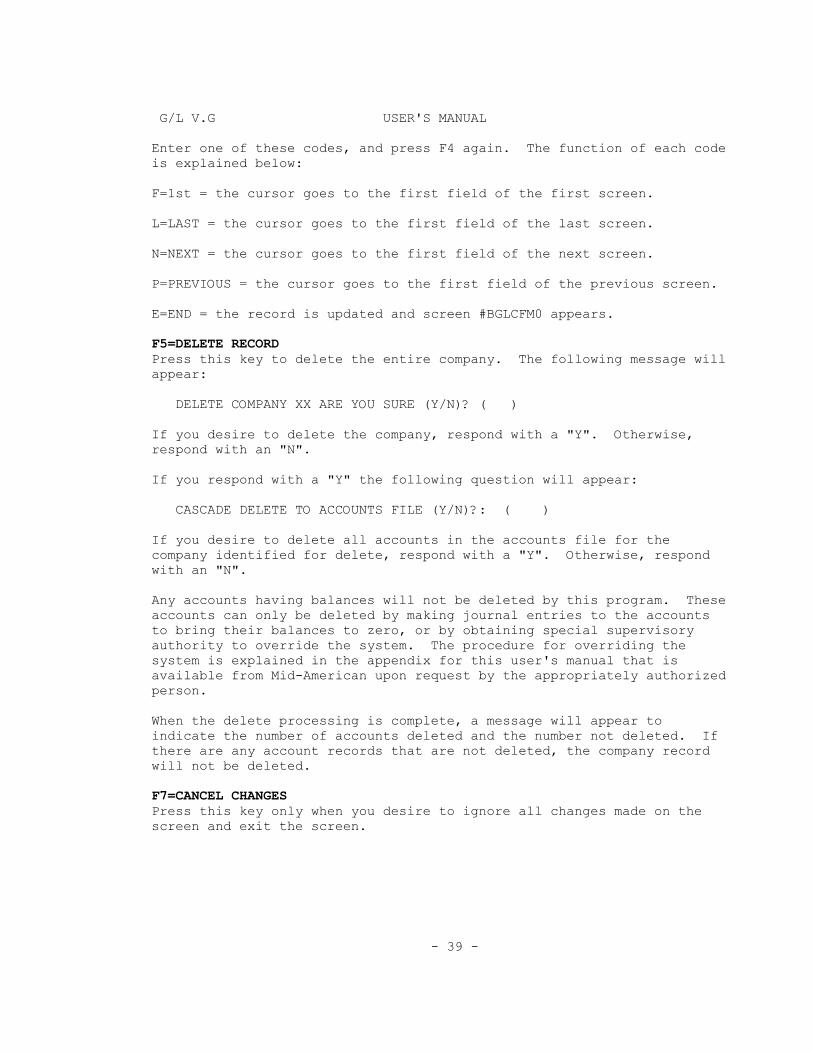
G/L V.G USER'S MANUAL Enter one of these codes, and press F4 again. The function of each code is explained below: F=1st = the cursor goes to the first field of the first screen. L=LAST = the cursor goes to the first field of the last screen. N=NEXT = the cursor goes to the first field of the next screen. P=PREVIOUS = the cursor goes to the first field of the previous screen. E=END = the record is updated and screen #BGLCFM0 appears. F5=DELETE RECORD Press this key to delete the entire company. The following message will appear: DELETE COMPANY XX ARE YOU SURE (Y/N)? ( ) If you desire to delete the company, respond with a "Y". Otherwise, respond with an "N". If you respond with a "Y" the following question will appear: CASCADE DELETE TO ACCOUNTS FILE (Y/N)?: ( ) If you desire to delete all accounts in the accounts file for the company identified for delete, respond with a "Y". Otherwise, respond with an "N". Any accounts having balances will not be deleted by this program. These accounts can only be deleted by making journal entries to the accounts to bring their balances to zero, or by obtaining special supervisory authority to override the system. The procedure for overriding the system is explained in the appendix for this user's manual that is available from Mid-American upon request by the appropriately authorized person. When the delete processing is complete, a message will appear to indicate the number of accounts deleted and the number not deleted. If there are any account records that are not deleted, the company record will not be deleted. F7=CANCEL CHANGES Press this key only when you desire to ignore all changes made on the screen and exit the screen. - 39 -

G/L V.G USER'S MANUAL Enter, Inquire, Maintain Companies – Screen #BGLCFM2 +----+----+----+----+----+----+----+----+----+----+----+----+----+----+----+ +01/01/05 15:24:03 PROMPT General Ledger 2 of 2 + |Company 1 Mid-American Control Corp #BGLCFM2 | |----------------------------------------------------------------------------| | 7. Periods in Qtr 1 ( 3 ) | 11. Prev Yr Fiscal End Date ( 10/31/04 )| | 8. Periods in Qtr 2 ( 3 ) | 12. Curr Earnings Acct No. ( 999 )| + 9. Periods in Qtr 3 ( 3 ) | 13. Retained Earn Acct No. ( 590 )+ |10. Periods in Qtr 4 ( 3 ) | Next Batch No: 1055 Current Period: 3 | |----------------------------------------------------------------------------| |14. Curr Per End Date 01 (11/30/04) | 27. Fut Per End Date 01 (11/30/05) | |15. Curr Per End Date 02 (12/31/04) | 28. Fut Per End Date 02 (12/31/05) | +16. Curr Per End Date 03 (01/31/05) | 29. Fut Per End Date 03 (01/31/06) + |17. Curr Per End Date 04 (02/29/05) | 30. Fut Per End Date 04 (02/28/06) | |18. Curr Per End Date 05 (03/31/05) | 31. Fut Per End Date 05 (03/31/06) | |19. Curr Per End Date 06 (04/30/05) | 32. Fut Per End Date 06 (04/30/06) | |20. Curr Per End Date 07 (05/31/05) | 33. Fut Per End Date 07 (05/31/06) | +21. Curr Per End Date 08 (06/30/05) | 34. Fut Per End Date 08 (06/30/06) + |22. Curr Per End Date 09 (07/31/05) | 35. Fut Per End Date 09 (07/31/06) | |23. Curr Per End Date 10 (08/31/05) | 36. Fut Per End Date 10 (08/31/06) | |24. Curr Per End Date 11 (09/30/05) | 37. Fut Per End Date 11 (09/30/06) | |25. Curr Per End Date 12 (10/31/05) | 38. Fut Per End Date 12 (10/31/06) | +26. Curr Per End Date 13 (10/31/05) | 39. Fut Per End Date 13 (10/31/06) + | | | NO MORE FIELDS | | | | F0=Accept Input F1=Cancel Input F2=Extend Curr Dates F3=Extend Fut Dates| | F4=Set Cursor= F5= F6=Change Window F7=Cancel Changes | +----+----+----+----+----+----+----+----+----+----+----+----+----+----+----+ The purpose of this screen is to allow the inquiry, entry or maintenance of additional information into the company file. There are two screens of data for each record in the company file. Each field of information to be entered or changed on this screen is now explained. The number preceding the field description is the actual field number on the file.
*7-10. PERIODS IN QTR - These optional fields are for identification of how many months go into each quarter.
*11. PREV YR FISCAL END DATE - Enter the date MM/DD/YY for the end of the previous year.
- 40 -
G/L V.G USER'S MANUAL
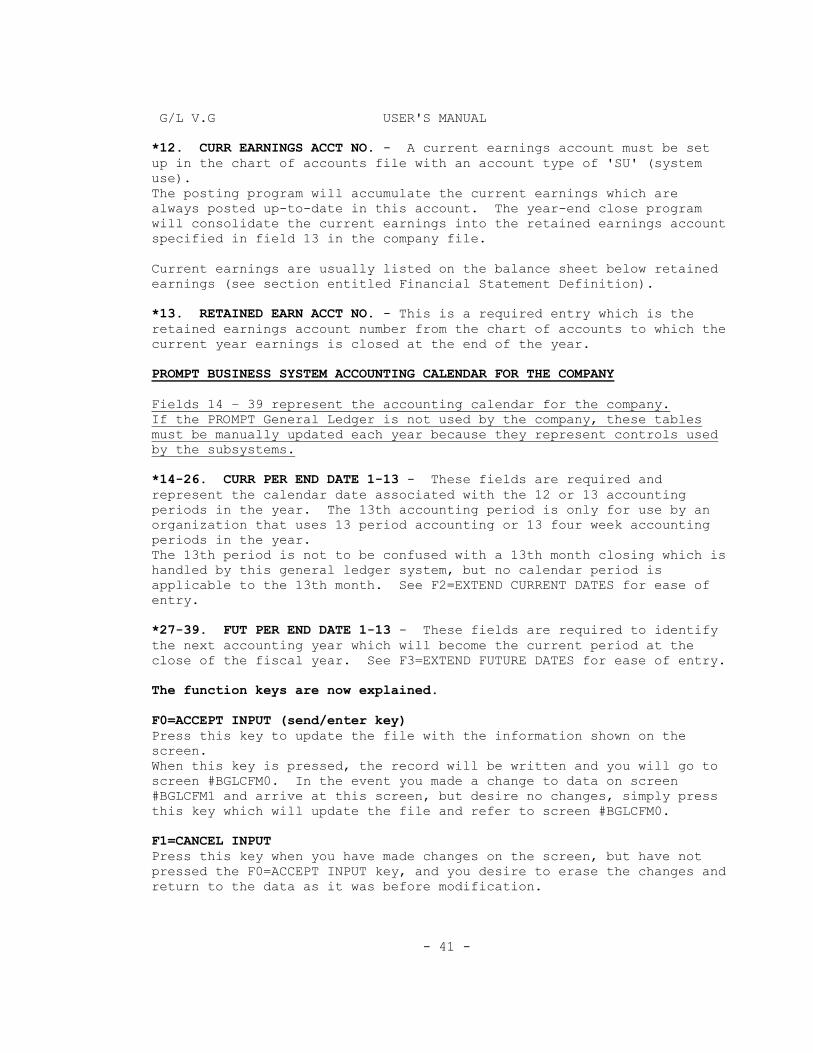
*12. CURR EARNINGS ACCT NO. - A current earnings account must be set up in the chart of accounts file with an account type of 'SU' (system use).
The posting program will accumulate the current earnings which are always posted up-to-date in this account. The year-end close program will consolidate the current earnings into the retained earnings account specified in field 13 in the company file. Current earnings are usually listed on the balance sheet below retained earnings (see section entitled Financial Statement Definition). *13. RETAINED EARN ACCT NO. - This is a required entry which is the retained earnings account number from the chart of accounts to which the current year earnings is closed at the end of the year. PROMPT BUSINESS SYSTEM ACCOUNTING CALENDAR FOR THE COMPANY Fields 14 – 39 represent the accounting calendar for the company. If the PROMPT General Ledger is not used by the company, these tables must be manually updated each year because they represent controls used by the subsystems.
*14-26. CURR PER END DATE 1-13 - These fields are required and represent the calendar date associated with the 12 or 13 accounting periods in the year. The 13th accounting period is only for use by an organization that uses 13 period accounting or 13 four week accounting periods in the year.
The 13th period is not to be confused with a 13th month closing which is handled by this general ledger system, but no calendar period is applicable to the 13th month. See F2=EXTEND CURRENT DATES for ease of entry. *27-39. FUT PER END DATE 1-13 - These fields are required to identify the next accounting year which will become the current period at the close of the fiscal year. See F3=EXTEND FUTURE DATES for ease of entry. The function keys are now explained. F0=ACCEPT INPUT (send/enter key) Press this key to update the file with the information shown on the screen. When this key is pressed, the record will be written and you will go to screen #BGLCFM0. In the event you made a change to data on screen #BGLCFM1 and arrive at this screen, but desire no changes, simply press this key which will update the file and refer to screen #BGLCFM0. F1=CANCEL INPUT Press this key when you have made changes on the screen, but have not pressed the F0=ACCEPT INPUT key, and you desire to erase the changes and return to the data as it was before modification. - 41 -

G/L V.G USER'S MANUAL F2=EXTEND CURRENT DATES Press this key after entering a valid date in field 14, "Curr Per End Date 01". The system will calculate and display the ending dates for the remaining current periods. F3=EXTEND FUTURE DATES Press this key after entering a valid date in field 27, "Fut Per End Date 01". The system will calculate and display the ending dates for the remaining future periods. F4=SET CURSOR= - This is a multi-purpose key. When pressed, the Following instructions will appear in the message area of the screen: ENTER FIELD NO: OR PAGE: F=lst, L=LAST, N=NEXT, P=PREVIOUS, E=END. Each of these options is now explained. ENTER FIELD NO: - Enter any field number for the company record and when the F4 key is pressed again, the cursor will go directly to this field number, even if on a different screen. PAGE: F=1st, L=LAST, N=NEXT, P=PREVIOUS, E=END Enter one of these codes, and press F4 again. The function of each code is explained below: F=1st = the cursor goes to the first field of the first screen. L=LAST = the cursor goes to the first field of the last screen. N=NEXT = the cursor goes to the first field of the next screen. P=PREVIOUS = the cursor goes to the first field of the previous screen. E=END = the record is updated and screen #BGLCFM0 appears. F6=CHANGE WINDOW This screen is divided into four windows which are: Window 1 - fields 7-10 Window 2 - fields 11-13 Window 3 - fields 14-26 Window 4 - fields 27-39 Press this key to close the window you are now using and open the next window with the cursor positioned on the first field in the window. F7=CANCEL CHANGES Press this key only when you desire to ignore all changes made on this screen and the previous screen and return to screen #BGLCFM0. - 42 -
G/L V.G USER'S MANUAL Enter, Inquire, Maintain Accounts - Option 6 - Daily Processing Sub Menu +----+----+----+----+----+----+----+----+----+----+----+----+----+----+----+ +01/01/05 15:24:03 PROMPT General Ledger #BGLSYS0 + | | | | | | | | + + | | | | | | | | + + | | | | | | | | + + | | | | | | | | + + | | | | | One Moment.... | | | + | +----+----+----+----+----+----+----+----+----+----+----+----+----+----+----+ The selection of option 6 on the Daily Processing Menu will cause screen #BGLSYS0 to appear. This screen will remain briefly and when the files are opened by the program, the next screen will appear. - 43 -

G/L V.G USER'S MANUAL Enter, Inquire, Maintain Accounts – screen #BGLAFM1 +----+----+----+----+----+----+----+----+----+----+----+----+----+----+----+ +01/01/05 15:24:03 PROMPT General Ledger #BGLAFM1 + | Update Accounts File | | | | Company 1 Mid-American Control Corp | | Last Update, Account: 600 Central Region Sales | | | + G/L Account Number for Update or Search: ( 60 ) + | After Search, Line Number from Below to Retrieve: ( ) | | Position Cursor on Field Number (Update Mode Only) ( ) (Optional) | | ** BEGINNING OF FILE Fields: | 6-Current $ |80-Quantities| | 1 600 Central Region Sales |52-YTD & Last YTD|94-Budgeting | + 2 601 East Region Sales + | 3 602 West Region Sales | | 4 603 North Region Sales | | 5 604 South Region Sales | | | + + | | | | | | | | + + | | | | | | | F0=Accept Screen F1=Generic Search F2=Scroll Reverse F3=Scroll Forward | | F4= F5= F6= F7=Exit Screen | +----+----+----+----+----+----+----+----+----+----+----+----+----+----+----+ The purpose of this screen is to select an account for inquiry, change or delete or to enter a new general ledger account. The last updated account number and name will appear on this screen once an account has been updated during this session. The cursor will appear next to this prompt: *G/L ACCOUNT NUMBER (OR LINE NUMBER) TO UPDATE: ( ) The use of this field is explained in connection with the function keys. An optional feature is available for existing accounts. By entering an account number and a field number, the system will display the screen associated with the field number, and will position the cursor on the field number specified for the account number specified. If the field number specified is protected, the cursor will be positioned on the "F4=SET CURSOR=" field. - 44 -
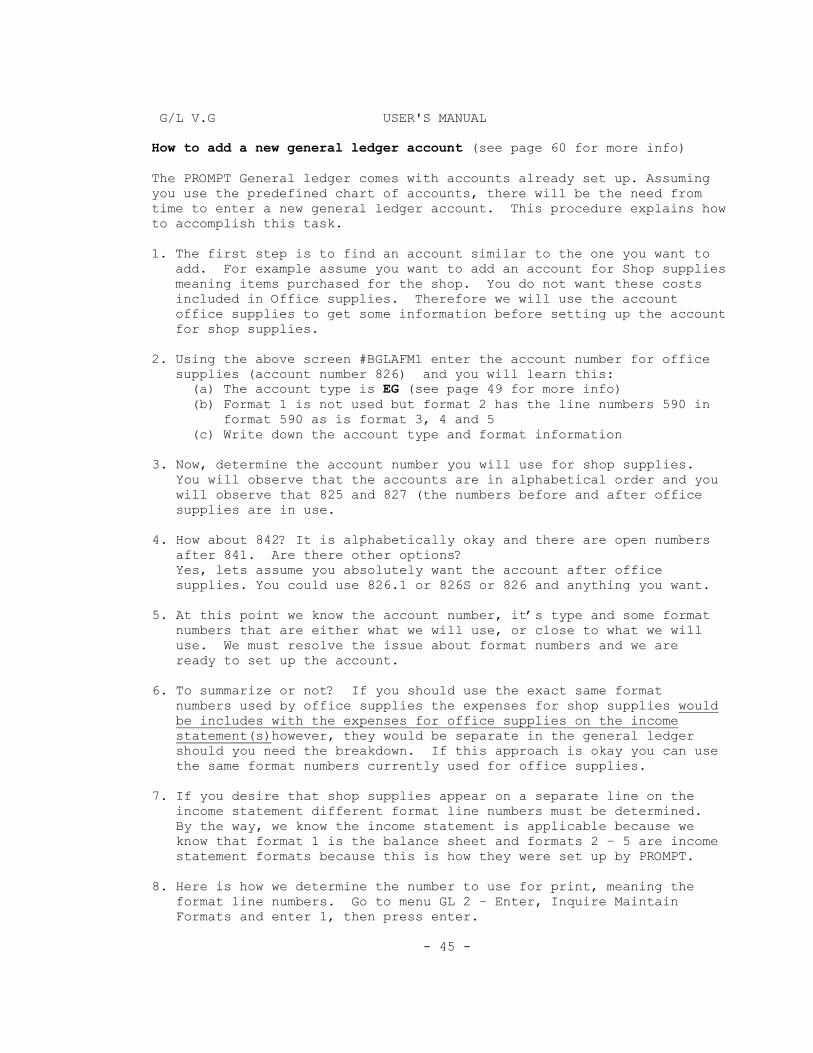
G/L V.G USER'S MANUAL How to add a new general ledger account (see page 60 for more info) The PROMPT General ledger comes with accounts already set up. Assuming you use the predefined chart of accounts, there will be the need from time to enter a new general ledger account. This procedure explains how to accomplish this task.
1. The first step is to find an account similar to the one you want to add. For example assume you want to add an account for Shop supplies meaning items purchased for the shop. You do not want these costs included in Office supplies. Therefore we will use the account office supplies to get some information before setting up the account for shop supplies.
2. Using the above screen #BGLAFM1 enter the account number for office
supplies (account number 826) and you will learn this: (a) The account type is EG (see page 49 for more info)
(b) Format 1 is not used but format 2 has the line numbers 590 in format 590 as is format 3, 4 and 5
(c) Write down the account type and format information
3. Now, determine the account number you will use for shop supplies. You will observe that the accounts are in alphabetical order and you will observe that 825 and 827 (the numbers before and after office supplies are in use.
4. How about 842? It is alphabetically okay and there are open numbers after 841. Are there other options? Yes, lets assume you absolutely want the account after office supplies. You could use 826.1 or 826S or 826 and anything you want.
5. At this point we know the account number, it’s type and some format numbers that are either what we will use, or close to what we will use. We must resolve the issue about format numbers and we are ready to set up the account.
6. To summarize or not? If you should use the exact same format
numbers used by office supplies the expenses for shop supplies would be includes with the expenses for office supplies on the income statement(s)however, they would be separate in the general ledger should you need the breakdown. If this approach is okay you can use the same format numbers currently used for office supplies.
7. If you desire that shop supplies appear on a separate line on the
income statement different format line numbers must be determined. By the way, we know the income statement is applicable because we know that format 1 is the balance sheet and formats 2 – 5 are income statement formats because this is how they were set up by PROMPT.
8. Here is how we determine the number to use for print, meaning the format line numbers. Go to menu GL 2 – Enter, Inquire Maintain Formats and enter 1, then press enter.
- 45 -
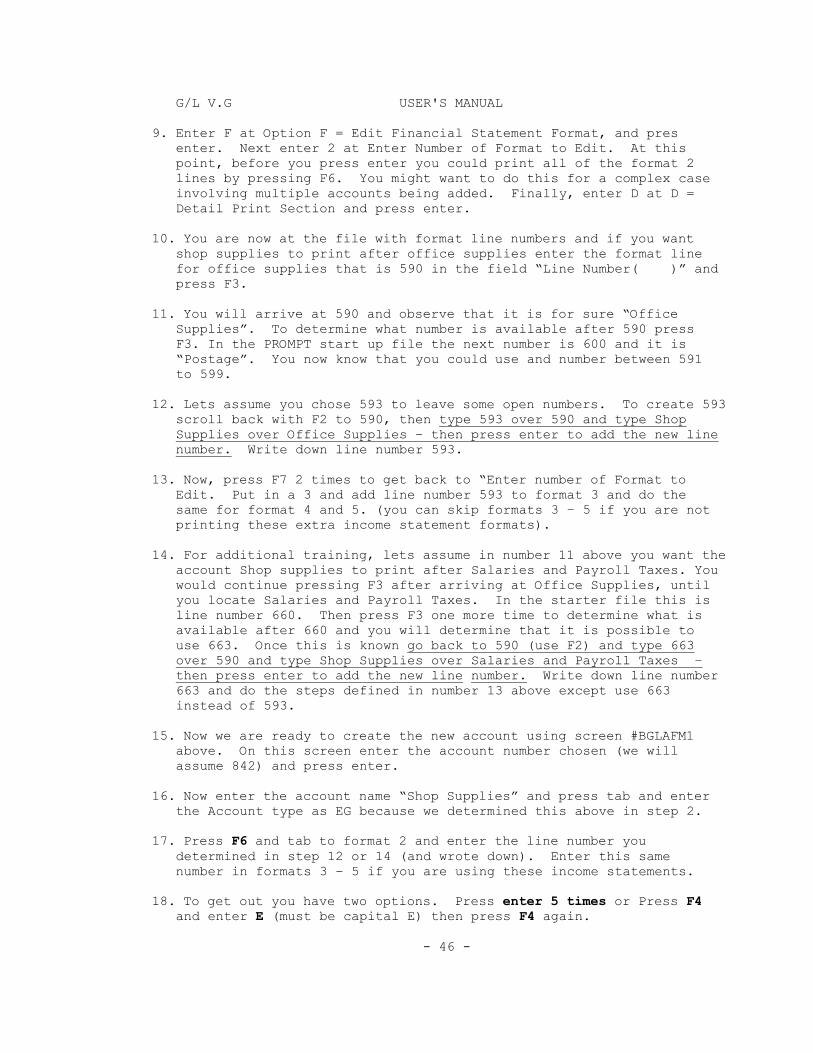
G/L V.G USER'S MANUAL 9. Enter F at Option F = Edit Financial Statement Format, and pres
enter. Next enter 2 at Enter Number of Format to Edit. At this point, before you press enter you could print all of the format 2 lines by pressing F6. You might want to do this for a complex case involving multiple accounts being added. Finally, enter D at D = Detail Print Section and press enter.
10. You are now at the file with format line numbers and if you want
shop supplies to print after office supplies enter the format line for office supplies that is 590 in the field “Line Number( )” and press F3.
11. You will arrive at 590 and observe that it is for sure “Office
Supplies”. To determine what number is available after 590 press F3. In the PROMPT start up file the next number is 600 and it is “Postage”. You now know that you could use and number between 591 to 599.
12. Lets assume you chose 593 to leave some open numbers. To create 593
scroll back with F2 to 590, then type 593 over 590 and type Shop Supplies over Office Supplies – then press enter to add the new line number. Write down line number 593.
13. Now, press F7 2 times to get back to “Enter number of Format to
Edit. Put in a 3 and add line number 593 to format 3 and do the same for format 4 and 5. (you can skip formats 3 – 5 if you are not printing these extra income statement formats).
14. For additional training, lets assume in number 11 above you want the
account Shop supplies to print after Salaries and Payroll Taxes. You would continue pressing F3 after arriving at Office Supplies, until you locate Salaries and Payroll Taxes. In the starter file this is line number 660. Then press F3 one more time to determine what is available after 660 and you will determine that it is possible to use 663. Once this is known go back to 590 (use F2) and type 663 over 590 and type Shop Supplies over Salaries and Payroll Taxes – then press enter to add the new line number. Write down line number 663 and do the steps defined in number 13 above except use 663 instead of 593.
15. Now we are ready to create the new account using screen #BGLAFM1
above. On this screen enter the account number chosen (we will assume 842) and press enter.
16. Now enter the account name “Shop Supplies” and press tab and enter
the Account type as EG because we determined this above in step 2.
17. Press F6 and tab to format 2 and enter the line number you determined in step 12 or 14 (and wrote down). Enter this same number in formats 3 – 5 if you are using these income statements.
18. To get out you have two options. Press enter 5 times or Press F4
and enter E (must be capital E) then press F4 again. - 46 -
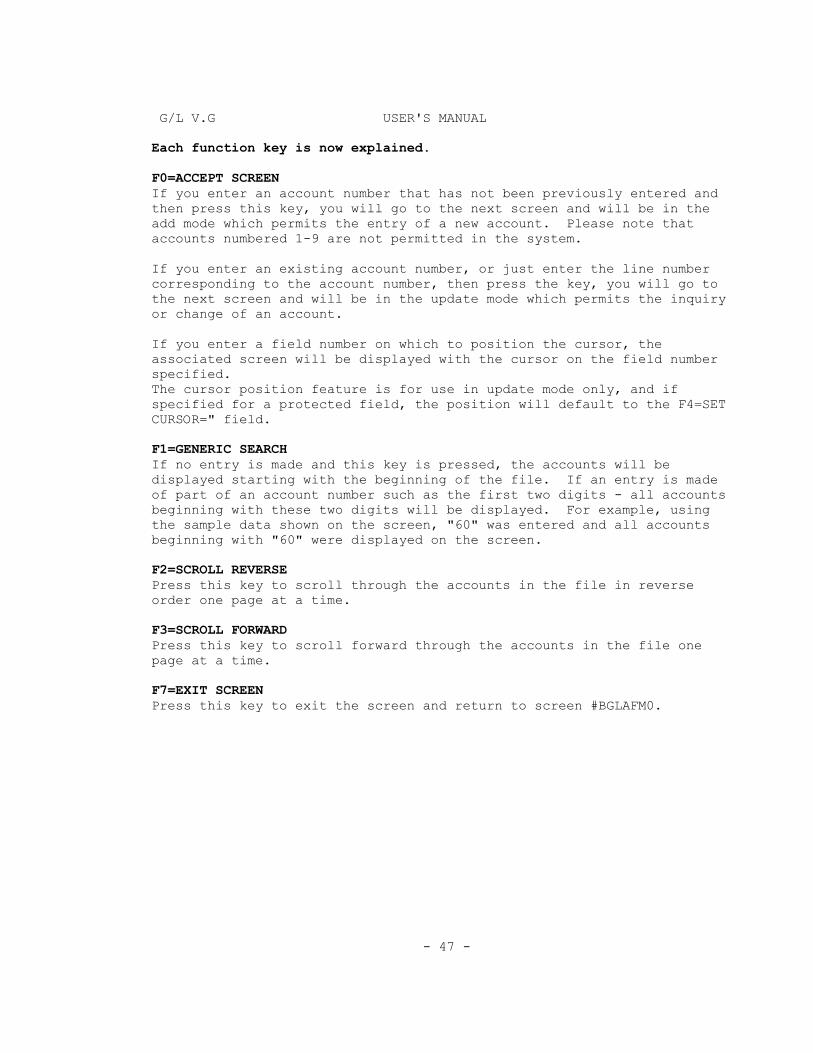
G/L V.G USER'S MANUAL Each function key is now explained. F0=ACCEPT SCREEN If you enter an account number that has not been previously entered and then press this key, you will go to the next screen and will be in the add mode which permits the entry of a new account. Please note that accounts numbered 1-9 are not permitted in the system. If you enter an existing account number, or just enter the line number corresponding to the account number, then press the key, you will go to the next screen and will be in the update mode which permits the inquiry or change of an account. If you enter a field number on which to position the cursor, the associated screen will be displayed with the cursor on the field number specified. The cursor position feature is for use in update mode only, and if specified for a protected field, the position will default to the F4=SET CURSOR=" field. F1=GENERIC SEARCH If no entry is made and this key is pressed, the accounts will be displayed starting with the beginning of the file. If an entry is made of part of an account number such as the first two digits - all accounts beginning with these two digits will be displayed. For example, using the sample data shown on the screen, "60" was entered and all accounts beginning with "60" were displayed on the screen. F2=SCROLL REVERSE Press this key to scroll through the accounts in the file in reverse order one page at a time. F3=SCROLL FORWARD Press this key to scroll forward through the accounts in the file one page at a time. F7=EXIT SCREEN Press this key to exit the screen and return to screen #BGLAFM0. - 47 -

G/L V.G USER'S MANUAL Enter, Inquire, Maintain Accounts – screen #BGLAFM2 +----+----+----+----+----+----+----+----+----+----+----+----+----+----+----+ +01/01/05 15:24:03 PROMPT General Ledger #BGLAFM2 + | *UPDATE MODE* Update Accounts File 1 of 5 | |Company 1 Mid-American Control Corp | | 3. Account Number 600 | | 4. Account Name ( Central Region Sales ) | + 5. Account Type ( RS ) + |----------------------------------------------------------------------------| | Financial Print Format Line No. | Reporting Grouping Selection Levels | | Format 01 122: ( ) | | | Format 02 123: ( 45 ) | Group A 134: ( PBS ) | + Format 03 124: ( 45 ) | Group B 135: ( GOV ) + | Format 04 125: ( 45 ) | Group C 136: ( ) | | Format 05 126: ( 45 ) | Group D 137: ( ) | | Format 06 127: ( ) | Group E 138: ( ) | | Format 07 128: ( ) | Group F 139: ( ) | + Format 08 129: ( ) | Group G 140: ( ) + | Format 09 130: ( ) | Group H 141: ( ) | | Format 10 131: ( ) | | | Format 11 132: ( ) | | | Format 12 133: ( ) | | +----------------------------------------------------------------------------+ | | | More Fields | | | | F0=Accept Screen F1=Cancel Input F2= F3= | | F4=Set Cursor= F5=Delete Account F6=Change Window F7=Cancel Changes | +----+----+----+----+----+----+----+----+----+----+----+----+----+----+----+ This is the first of five screens that provide for the entry, change, inquiry or delete of a general ledger account. In the example above the user entered or chose on screen #BLFAFM1 account 600 and pressed enter to arrive at this screen. Each field of information to be entered, viewed or changed on this screen is now explained. The number preceding the field description is the actual field number in the file.
*3. ACCOUNT NUMBER - Enter the general ledger account number which can be numeric or alphabetic or a combination of each. Up to 14 characters of information make up the account number.
*4. ACCOUNT NAME - The account name is for purposes of identification of the account. It is not necessarily the name that will appear on financial statements which is entered into the format file. The account name can be up to 40 characters in length.
*5. ACCOUNT TYPE - A valid account type must be entered. The account type is available for the user in preparation of reports using the PROMPT Report Writer. This field is also used to determine how the account should be handled during month-end and year-end closings. - 48 -

G/L V.G USER'S MANUAL Each valid account type is shown below. ACCOUNT TYPE DESCRIPTION AC Current asset AN Non-current asset AP Property, Plant & Equipment AO Other asset LC Current liabilities LN Non-current liabilities LD Deferred liability LO Liability-other OE Owners equity RS Revenue-sales RO Revenue-other CS Cost goods sold-sales CO Cost goods sold-other EG General & administrative expenses EM Marketing expenses ET Taxes NO Non-operating revenue NE Non-operating expense SU Systems use only
*FINANCIAL PRINT FORMAT LINE NO. FIELDS 122-133 - To understand the entry for these fields, please read the section of this manual for Statement Setup - which is Option 2 from the Master Menu.
A line number entered in one of these fields must correspond to a detail line number entered in the format file. The two examples shown for account number 600 are explained as follows: Format 01 122: The entry of 120 means the data in account 600 can be calculated for Format No. 1, line number 120. In the second example, Format 02 123: The data in account 600 can be calculated for Format No. 2, line number 125. Format No. 1 and Format No. 2 represent two separate financial statements which are defined and entered using the Statement Setup Menu. - 49 -
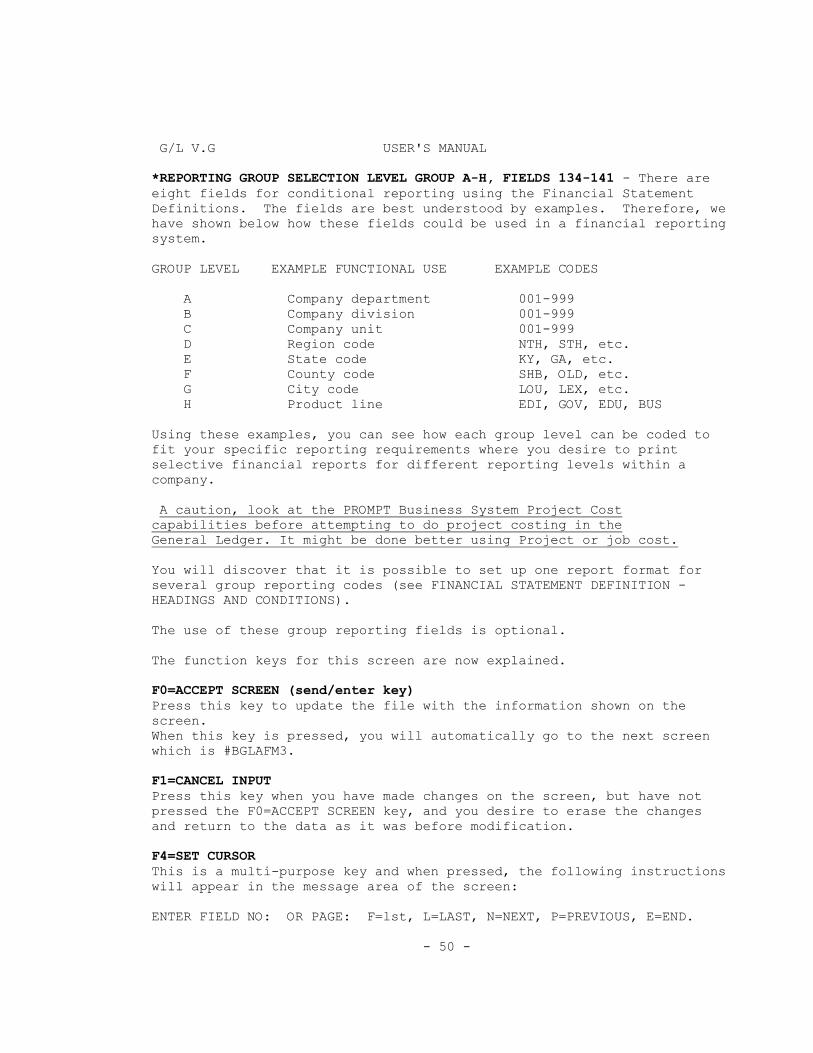
G/L V.G USER'S MANUAL *REPORTING GROUP SELECTION LEVEL GROUP A-H, FIELDS 134-141 - There are eight fields for conditional reporting using the Financial Statement Definitions. The fields are best understood by examples. Therefore, we have shown below how these fields could be used in a financial reporting system. GROUP LEVEL EXAMPLE FUNCTIONAL USE EXAMPLE CODES A Company department 001-999 B Company division 001-999 C Company unit 001-999 D Region code NTH, STH, etc. E State code KY, GA, etc. F County code SHB, OLD, etc. G City code LOU, LEX, etc. H Product line EDI, GOV, EDU, BUS Using these examples, you can see how each group level can be coded to fit your specific reporting requirements where you desire to print selective financial reports for different reporting levels within a company. A caution, look at the PROMPT Business System Project Cost capabilities before attempting to do project costing in the General Ledger. It might be done better using Project or job cost. You will discover that it is possible to set up one report format for several group reporting codes (see FINANCIAL STATEMENT DEFINITION - HEADINGS AND CONDITIONS). The use of these group reporting fields is optional. The function keys for this screen are now explained. F0=ACCEPT SCREEN (send/enter key) Press this key to update the file with the information shown on the screen. When this key is pressed, you will automatically go to the next screen which is #BGLAFM3. F1=CANCEL INPUT Press this key when you have made changes on the screen, but have not pressed the F0=ACCEPT SCREEN key, and you desire to erase the changes and return to the data as it was before modification. F4=SET CURSOR This is a multi-purpose key and when pressed, the following instructions will appear in the message area of the screen: ENTER FIELD NO: OR PAGE: F=lst, L=LAST, N=NEXT, P=PREVIOUS, E=END. - 50 -
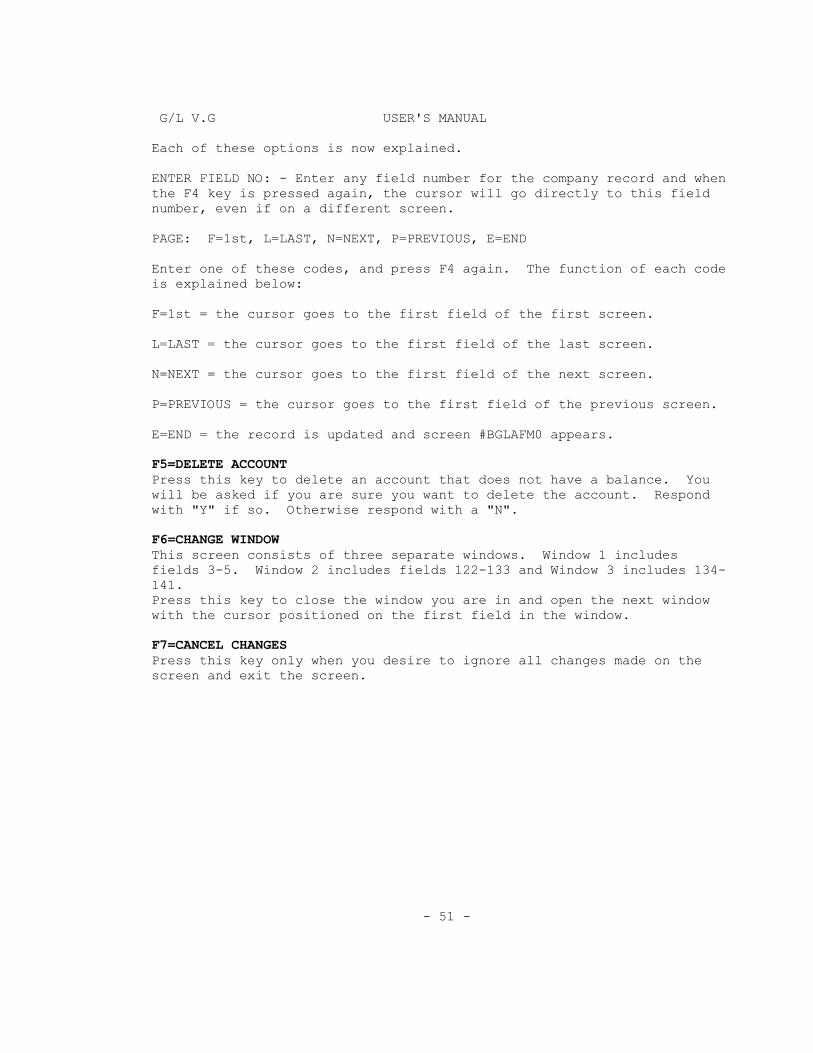
G/L V.G USER'S MANUAL Each of these options is now explained. ENTER FIELD NO: - Enter any field number for the company record and when the F4 key is pressed again, the cursor will go directly to this field number, even if on a different screen. PAGE: F=1st, L=LAST, N=NEXT, P=PREVIOUS, E=END Enter one of these codes, and press F4 again. The function of each code is explained below: F=1st = the cursor goes to the first field of the first screen. L=LAST = the cursor goes to the first field of the last screen. N=NEXT = the cursor goes to the first field of the next screen. P=PREVIOUS = the cursor goes to the first field of the previous screen. E=END = the record is updated and screen #BGLAFM0 appears. F5=DELETE ACCOUNT Press this key to delete an account that does not have a balance. You will be asked if you are sure you want to delete the account. Respond with "Y" if so. Otherwise respond with a "N". F6=CHANGE WINDOW This screen consists of three separate windows. Window 1 includes fields 3-5. Window 2 includes fields 122-133 and Window 3 includes 134- 141. Press this key to close the window you are in and open the next window with the cursor positioned on the first field in the window. F7=CANCEL CHANGES Press this key only when you desire to ignore all changes made on the screen and exit the screen. - 51 -
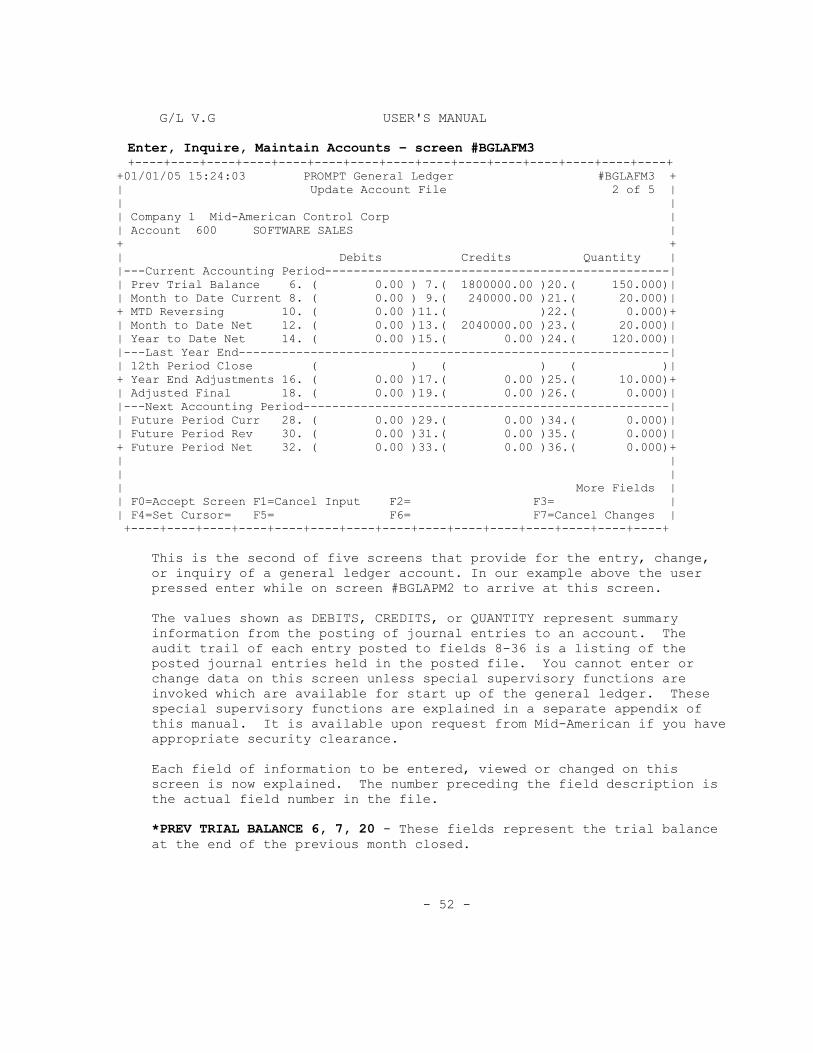
G/L V.G USER'S MANUAL Enter, Inquire, Maintain Accounts – screen #BGLAFM3 +----+----+----+----+----+----+----+----+----+----+----+----+----+----+----+ +01/01/05 15:24:03 PROMPT General Ledger #BGLAFM3 + | Update Account File 2 of 5 | | | | Company 1 Mid-American Control Corp | | Account 600 SOFTWARE SALES | + + | Debits Credits Quantity | |---Current Accounting Period------------------------------------------------| | Prev Trial Balance 6. ( 0.00 ) 7.( 1800000.00 )20.( 150.000)| | Month to Date Current 8. ( 0.00 ) 9.( 240000.00 )21.( 20.000)| + MTD Reversing 10. ( 0.00 )11.( )22.( 0.000)+ | Month to Date Net 12. ( 0.00 )13.( 2040000.00 )23.( 20.000)| | Year to Date Net 14. ( 0.00 )15.( 0.00 )24.( 120.000)| |---Last Year End------------------------------------------------------------| | 12th Period Close ( ) ( ) ( )| + Year End Adjustments 16. ( 0.00 )17.( 0.00 )25.( 10.000)+ | Adjusted Final 18. ( 0.00 )19.( 0.00 )26.( 0.000)| |---Next Accounting Period---------------------------------------------------| | Future Period Curr 28. ( 0.00 )29.( 0.00 )34.( 0.000)| | Future Period Rev 30. ( 0.00 )31.( 0.00 )35.( 0.000)| + Future Period Net 32. ( 0.00 )33.( 0.00 )36.( 0.000)+ | | | | | More Fields | | F0=Accept Screen F1=Cancel Input F2= F3= | | F4=Set Cursor= F5= F6= F7=Cancel Changes | +----+----+----+----+----+----+----+----+----+----+----+----+----+----+----+ This is the second of five screens that provide for the entry, change, or inquiry of a general ledger account. In our example above the user pressed enter while on screen #BGLAPM2 to arrive at this screen. The values shown as DEBITS, CREDITS, or QUANTITY represent summary information from the posting of journal entries to an account. The audit trail of each entry posted to fields 8-36 is a listing of the posted journal entries held in the posted file. You cannot enter or change data on this screen unless special supervisory functions are invoked which are available for start up of the general ledger. These special supervisory functions are explained in a separate appendix of this manual. It is available upon request from Mid-American if you have appropriate security clearance. Each field of information to be entered, viewed or changed on this screen is now explained. The number preceding the field description is the actual field number in the file.
*PREV TRIAL BALANCE 6, 7, 20 - These fields represent the trial balance at the end of the previous month closed.
- 52 -

G/L V.G USER'S MANUAL
*MONTH TO DATE CURRENT 8, 9, 21 - These fields represent the accumulated amounts posted to date for the current month open on the general ledger.
*MTD REVERSING 10, 11, 22 - These fields represent the accumulated entries processed as reversing entries for the current month.
*MONTH TO DATE NET 12, 13, 23 - These fields represent the net of fields 8, 9, 21 and 10, 11, 22.
*YEAR TO DATE NET 14, 15, 24 - These fields represent the year to date general ledger accumulations including the MONTH TO DATE NET fields 12, 13, 23.
*YEAR END ADJUSTMENTS 16, 17, 25 - These fields represent the adjusting entries made to a year ending balance where the final close for the year has not occurred. These fields will only be used during the periods after the 12th period of a year has been closed and before the final close occurs for the year.
*ADJUSTED FINAL 18, 19, 26 - These fields are used in connection with 13th month processing and represent the year end balances adjusted for 13th month entries.
*FUTURE PERIOD CURR 28, 29, 34 - The general ledger allows for posting to the current period and one future period which would be the next month following the month that is open (the current period). These fields reflect the accumulated entries that have been posted to the future period.
These fields do not include the reversing amounts from fields 10, 11, 22. *FUTURE PERIOD REV 30, 31, 35 - These fields represent the accumulated amount for reversing entries that have been posted to the future period.
*FUTURE PERIOD NET 32, 32, 36 - These fields represent the net of fields 28, 29, 34 and 30, 31, 35.
The function keys for screen #BGLAFM3 operate exactly as explained for these same keys on screen #BGLAFM2. - 53 -

G/L V.G USER'S MANUAL Enter, Inquire, Maintain Accounts – screen #BGLAFM4 +----+----+----+----+----+----+----+----+----+----+----+----+----+----+----+ +01/01/05 15:24:03 PROMPT General Ledger #BGLAFM4 + | Update Accounts File 3 of 5 | | Company 1 Mid-American Control Corp | | Account 600 SOFTWARE SALES | | | +----------------------------------------------------------------------------+ | | Previous Year | Current Year | % Change | |Beg Balance |52. ( .00 )|38. ( .00 )| 0% | |YTD Period 01 |53. ( 250000.00- )|39. ( 300000.00- )| +20.0% | |YTD Period 02 |54. ( 250000.00- )|40. ( 300000.00- )| +20.0% | +YTD Period 03 |55. ( 250000.00- )|41. ( 300000.00- )| +20.0% + |YTD Period 04 |56. ( 250000.00- )|42. ( 300000.00- )| +20.0% | |YTD Period 05 |57. ( 250000.00- )|43. ( 300000.00- )| +20.0% | |YTD Period 06 |58. ( 250000.00- )|44. ( 300000.00- )| 0% | |YTD Period 07 |59. ( 250000.00- )|45. ( .00 )| 0% | +YTD Period 08 |60. ( 250000.00- )|46. ( .00 )| 0% + |YTD Period 09 |61. ( 250000.00- )|47. ( .00 )| 0% | |YTD Period 10 |62. ( 250000.00- )|48. ( .00 )| 0% | |YTD Period 11 |63. ( 250000.00- )|49. ( .00 )| 0% | |YTD Period 12 |64. ( 250000.00- )|50. ( .00 )| 0% | +YTD Period 13 |65. ( .00 )|51. ( .00 )| % + | | | More Fields | | | | F0=Accept Screen F1=Cancel Input F2= F3= | | F4=Set Cursor= F5= F6= F7=Cancel Changes | +----+----+----+----+----+----+----+----+----+----+----+----+----+----+----+ This is the third of five screens that provide for the entry, change or inquiry of a general ledger account. In our example above the user would arrive at this screen by pressing enter on screen #BGLAFM3. Each field of information to be entered, viewed or changed on this screen is now explained. The number preceding the field description is the actual field number in the file. *PREVIOUS YEAR NET FIELDS 52-65 - These fields represent the net amount values for the beginning balance and each period for the previous year. Net debit values appear as positive numbers and net credit values appear as negative numbers. *CURRENT YEAR NET FIELDS 38-51 - These fields represent the net amount values of the beginning balance and each period in the current year that is closed. Net debit values appear as positive numbers and net credit values appear as negative numbers.
*% CHANGE - These percentages are for information only and represent the percent change of the current year over the previous year. The function keys for screen #BGLAFM4 operate exactly as explained for
these same keys on screen #BGLAFM2. - 54 -

G/L V.G USER'S MANUAL Enter, Inquire, Maintain Accounts – screen #BGLAFM5 +----+----+----+----+----+----+----+----+----+----+----+----+----+----+----+ +01/01/05 15:24:03 PROMPT General Ledger #BGLAFM5 + | Company 1 Mid-American Control Corp 4 of 5 | | Account 600 SOFTWARE SALES | | | | | +----------------------------------------------------------------------------+ | | Previous Year| Current Year | % CHANGE | |Beg Balance |80. ( 0.000)|66. ( 0.000)| 0% | |YTD Qty Period 01 |81. ( 200.000)|67. ( 250.000)| +25.0% | |YTD Qty Period 02 |82. ( 200.000)|68. ( 250.000)| +25.0% | +YTD Qty Period 03 |83. ( 200.000)|69. ( 250.000)| +25.0% + |YTD Qty Period 04 |84. ( 200.000)|70. ( 250.000)| +25.0% | |YTD Qty Period 05 |85. ( 200.000)|71. ( 250.000)| +25.0% | |YTD Qty Period 06 |86. ( 200.000)|72. ( 0.000)| 0% | |YTD Qty Period 07 |87. ( 200.000)|73. ( 0.000)| 0% | +YTD Qty Period 08 |88. ( 200.000)|74. ( 0.000)| 0% + |YTD Qty Period 09 |89. ( 200.000)|75. ( 0.000)| 0% | |YTD Qty Period 10 |90. ( 200.000)|76. ( 0.000)| 0% | |YTD Qty Period 11 |91. ( 200.000)|77. ( 0.000)| 0% | |YTD Qty Period 12 |92. ( 200.000)|78. ( 0.000)| 0% | +YTD Qty Period 13 |93. ( 200.000)|79. ( 0.000)| % + | | | More Fields | | | | F0=Accept Screen F1=Cancel Input F2= F3= | | F4=Set Cursor= F5= F6= F7=Cancel Changes | +----+----+----+----+----+----+----+----+----+----+----+----+----+----+----+ This is the fourth of five screens that provide for the entry, change or inquiry of a general ledger account. In our example above the user would arrive at this screen by pressing enter on screen #BGLAFM4. Each field of information to be entered, viewed or changed on this screen is now explained. The number preceding the field description is the actual field number in the file. *PREVIOUS YEAR NET QUANTITY FIELDS 80-93 - These fields represent the quantities for each period in the current year that are closed. *CURRENT YEAR NET QUANTITY FIELDS 66-79 - These fields represent the quantities for each period in the current year that are closed.
*% CHANGE - These percentages are for information only and represent the percent change of the current year over the previous year.
The function keys for screen #BGLAFM5 operate exactly as explained for these same keys on screen #BGLAFM2. - 55 -

G/L V.G USER'S MANUAL Enter, Inquire, Maintain Accounts – screen #BGLAFM6 +----+----+----+----+----+----+----+----+----+----+----+----+----+----+----+ +01/01/05 15:24:03 PROMPT General Ledger #BGLAFM6 + | Update Accounts File 5 of 5 | | Company 1 Mid-American Control Corp | | Account 600 SOFTWARE SALES | | | +----------------------------------------------------------------------------+ | | Current Year | Future Year | % CHANGE | |Annual Budget Amt | 94. ( 3300000.00) |108. ( 3900000.00) | +18.2% | |Budget Amt Period 01 | 95. ( 275000.00) |109. ( 325000.00) | +18.2% | |Budget Amt Period 02 | 96. ( 275000.00) |110. ( 325000.00) | +18.2% | +Budget Amt Period 03 | 97. ( 275000.00) |111. ( 325000.00) | +18.2% + |Budget Amt Period 04 | 98. ( 275000.00) |112. ( 325000.00) | +18.2% | |Budget Amt Period 05 | 99. ( 275000.00) |113. ( 325000.00) | +18.2% | |Budget Amt Period 06 |100. ( 275000.00) |114. ( 325000.00) | +18.2% | |Budget Amt Period 07 |101. ( 275000.00) |115. ( 325000.00) | +18.2% | +Budget Amt Period 08 |102. ( 275000.00) |116. ( 325000.00) | +18.2% + |Budget Amt Period 09 |103. ( 275000.00) |117. ( 325000.00) | +18.2% | |Budget Amt Period 10 |104. ( 275000.00) |118. ( 325000.00) | +18.2% | |Budget Amt Period 11 |105. ( 275000.00) |119. ( 325000.00) | +18.2% | |Budget Amt Period 12 |106. ( 275000.00) |120. ( 325000.00) | +18.2% | +Budget Amt Period 13 |107. ( ) |121. ( ) | % + | More Fields | | | | F0=Accept Screen F1=Cancel Input F2=% Adj=________ F3=$ Adj=________ | | F4=Set Cursor= F5=Pro-Rate Window F6=Change Window F7=Cancel Changes | +----+----+----+----+----+----+----+----+----+----+----+----+----+----+----+ This is the fifth and last of the five screens that provide for the entry of a general ledger account. In our example above the user would arrive at this screen by pressing enter on screen #BGLAFM5. Each field of information to be entered, viewed or changed on this screen in now explained. The number preceding the field description is the actual field number in the file. *CURRENT YEAR BUDGET AMOUNT FIELDS 94-107 - These fields represent the budget amount for the current year. Please read about function keys F2, F3 and F5 relating to entry of data into these fields. *FUTURE YEAR BUDGET AMOUNT FIELDS 108-121 - These fields represent the budget amount for the future year. The future year is the next year which begins when the current year is closed. This amount can be entered independently or you can enter a "CYA" and press F5 to enter the current year actual amounts. Using "CYB" will enter the current year budget and "PYA" enters the previous year actual amounts. Please read function keys F2, F3 and F5 relating to entry of data in these fields.
*% CHANGE - These percentages are for information only and represent the percent changes of the future year over the current year.
- 56 -
G/L V.G USER'S MANUAL The function keys are now explained. The following function keys for screen #BGLAFM6 operate exactly as explained for these same keys as screen #BGLAFM2. F0=Accept Screen F1=Cancel Input F4=Set Cursor= F6=Change Window F7=Cancel Changes The following function keys are unique to screen #BGLAFM6 and are explained as follows: F2=% ADJ This key is associated with annual budget amount fields 94 and 108. Window 1 is fields 94-107 and window 2 is fields 108-121. The purpose of this key is to provide a way to increase or decrease the annual budget amount by a percentage with each budget period budget period automatically adjusted by the same percentage. Position the cursor into window 1 or window 2 depending on whether you desire to modify the current year or future year budget amount. Next, tab to the F2=% ADJ key and enter a percentage plus or minus with two decimal places. For example, 10.25 for an increase or -10.25 for a decrease. Next, press the F2 key and the data in the open window will be revised using the percentage entered. The percentage entered by the F2 key will not be cleared as it is available for the next transaction. F3=$ ADJ This key works exactly like the F2 key explained above except you adjust the monthly amount for each period by the dollar amount entered beside the F3=$ ADJ key. F5=PRO-RATE WINDOW The purpose of this key is to pro-rate the annual budget amount in the open window, either window 1 or window 2, evenly through the budget periods. The company file determines whether 12 or 13 periods are in use. - 57 -
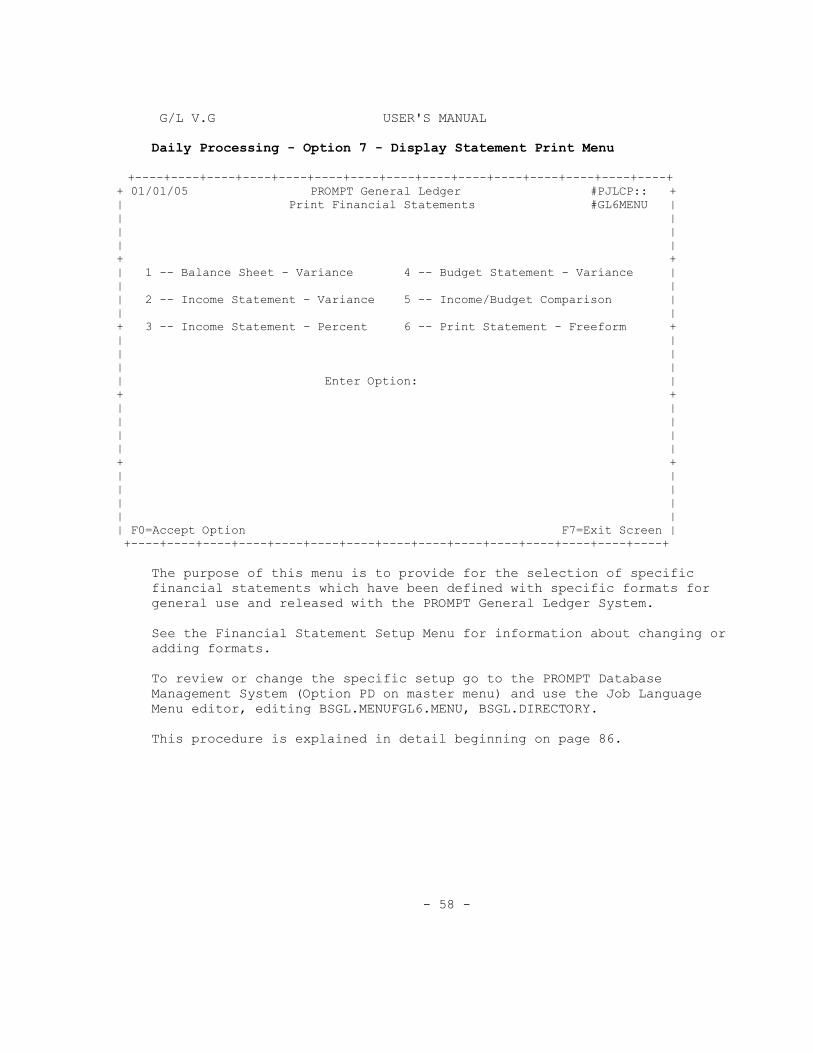
G/L V.G USER'S MANUAL Daily Processing - Option 7 - Display Statement Print Menu +----+----+----+----+----+----+----+----+----+----+----+----+----+----+----+ + 01/01/05 PROMPT General Ledger #PJLCP:: + | Print Financial Statements #GL6MENU | | | | | | | + + | 1 -- Balance Sheet - Variance 4 -- Budget Statement - Variance | | | | 2 -- Income Statement - Variance 5 -- Income/Budget Comparison | | | + 3 -- Income Statement - Percent 6 -- Print Statement - Freeform + | | | | | | | Enter Option: | + + | | | | | | | | + + | | | | | | | | | F0=Accept Option F7=Exit Screen | +----+----+----+----+----+----+----+----+----+----+----+----+----+----+----+ The purpose of this menu is to provide for the selection of specific financial statements which have been defined with specific formats for general use and released with the PROMPT General Ledger System. See the Financial Statement Setup Menu for information about changing or adding formats. To review or change the specific setup go to the PROMPT Database Management System (Option PD on master menu) and use the Job Language Menu editor, editing BSGL.MENUFGL6.MENU, BSGL.DIRECTORY. This procedure is explained in detail beginning on page 86. - 58 -

G/L V.G USER'S MANUAL Master Menu - Option 2 - Financial Statement Setup +----+----+----+----+----+----+----+----+----+----+----+----+----+----+----+ + 01/01/05 PROMPT General Ledger #PJLCP + | Financial Statement Setup #GL7MENU | | | | | | | + + | 1--Enter, Inquire, Maintain Formats 4--Statement Freeform Test Print | | | | 2--Enter, Inquire, Maintain Format Lines 5--Print Format Cross Reference | | | + 3--Create Cross Reference File 6--Print G/L Format Line Numbers + | | | | | | | Enter Option: | + + | | | | | | | | + + | | | | | | | | | F0=Accept Option F7=Exit Screen | +----+----+----+----+----+----+----+----+----+----+----+----+----+----+----+ This sub menu appears upon the selection of Option 2 on the General Ledger Master Menu. The purpose of this menu is to set up the financial statements to print as you desire following certain rules. Each option is explained on the following pages. First, however, a detailed explanation of the PROMPT General Ledger Financial Statement System will be given, with examples provided for illustration. - 59 -

G/L V.G USER'S MANUAL Defining Financial Statements The flexibility and design of the PROMPT General Ledger systems offer a wide variety of reporting formats for use in the preparation of management reports. The steps to follow in preparation of user-defined reports are as follows: 1. Layout the desired report. 2. Learn the reporting principles. 3. Enter the report headings and conditions. 4. Enter the print controls. 5. Enter the report literals, detail lines, and total lines. 6. Enter the calculations required to get the data from the general ledger chart of accounts file to the financial format file. LAYOUT THE DESIRED REPORT Four types of reports are shown in part as examples to assist in understanding how to set up user defined reports. The first is a balance sheet as shown below. PROMPT Incorporated Balance Sheet for the period ended April 30, 2005 Assets Current Year Previous Year Variance % Var Current Assets Cash 100,000.00 90,000.00 10,000.00 11.1% A/R 400,000.00 375,000.00 25,000.00 6.7% Inventory 250,000.00 300,000.00 (50,000.00) -16.7% ___________ ___________ __________ ______ Total Current 750,000.00 765,000.00 (15,000.00) -2.0% - 60 -

G/L V.G USER'S MANUAL The second is an income statement as shown below. PROMPT Incorporated Income Statement with percentage variance for the period ended April 30, 2005 Sales Current Year Previous Year Variance % Var Central Region 100,000 89,000 11,000 12.4% East Region 200,000 190,000 10,000 5.2% West Region 150,000 160,000 (10,000) 6.3% North Region 185,000 160,000 35,000 15.6% South Region 190,000 190,000 0.0% ________ ________ _______ ______ Total Sales 825,000 789,000 46,000 4.6% The third is a budget variance report as shown below. PROMPT Incorporated Budget Variance Report for the period ended April 30, 2005 Sales Actual Budgeted Variance % Var Central Region 100,000 100,000 0.0% East Region 200,000 200,000 0.0% West Region 150,000 150,000 0.0% North Region 185,000 150,000 35,000 23.3% South Region 190,000 200,000 (10,000) (5.0%) ________ ________ _________ ______ Total Sales 825,000 800,000 25,000 3.1% A review of the first three examples will reveal that they are exactly the same reporting concept in that they show year to date results compared to either prior year or budget amounts with a variance amount and variance percent which is referred to as a horizontal percentage. Also, each report reveals an account name such as Cash or East Region Sales, with three amounts and one percent column. - 61 -

G/L V.G USER'S MANUAL The fourth sample report is shown below. PROMPT Incorporated Income Statement with Percent Sales for the period ended April 30, 2005 Sales Current Year Percent Previous Year Percent Central Region 100,000 12.1% 89,000 11.3% East Region 200,000 24.2% 190,000 24.1% West Region 150,000 18.2% 160,000 20.3% North Region 185,000 22.4% 160,000 20.3% South Region 190,000 23.1% 190,000 24.0% ________ ______ ________ ______ Total Sales 825,000 100.0% 789,000 100.0% The difference between this example and the other three is that the percentage is computed as a percent of total sales, which may be referred to as a vertical percentage. In summary, there are only two types of format that are (1) percent variance or horizontal percentage, and (2) percent of base variance or vertical percentage. It is possible to mix the two on one report. For example, on the above income statement you could show percent variance using a percent variance column to reflect the horizontal percentage change between previous year and current year, in addition to the two vertical percentages shown on the report. Finally, there is not a requirement to use any percentages either vertical or horizontal in laying out a report format. The first limitation to the design is that there cannot be more than six horizontal amount columns of numbers. The second limitation is that the number of percentage columns available is also six; four of which can be percentages of base or vertical percentages and two of which can be variance or horizontal percentages. LEARN THE REPORTING PRINCIPLES The principles involved in the PROMPT General Ledger Reporting System are easy to understand once you learn how the chart of accounts file relates to the financial format file. - 62 -

G/L V.G USER'S MANUAL It is necessary to understand that the financial statement format file is used to enter the literals and total lines exactly as you have defined them in the report layout. The headings and conditions are entered in a separate file as explained later. Each line of information in the format file is referenced by a line number. There are three types of lines: "L" is a literal line, "D" is a detail line and "T" is a total line. Using the balance sheet previously described as an example, the line numbers could be as shown below. Line Line No. type 10 L Assets Cur Year Prev Year Variance % Var 20 L Current Assets 30 D Cash 100,000 90,000 10,000 11.1% 40 D A/R 400,000 375,000 25,000 6.7% 50 D Inventory 250,000 300,000 (50,000) -16.7% 60 L ________ ________ ________ ______ 70 T Total 750,000 765,000 (15,000) -2.0% When the lines are entered into the format file, you define the print positions and number of lines to space after. All of these entries are explained with the appropriate screen later. The headings and conditions are also explained later. The key to getting the amounts from the chart of accounts file to the financial format file is that each account number in the chart of accounts file has a line number which must be entered to point to a detail line in the format file. For example, in the above balance sheet, the chart of accounts record for cash would hold a line number of 30 which is used to transfer the cash account amount from the general ledger chart of accounts in order to print the amount from the format file. If you have several cash accounts and wanted all of them to be summarized into one line in the format file, you would enter the line number 30 in each cash account number in the chart of account file. You will discover that the general ledger chart of accounts file Provides for entry of 12 different line numbers, each of which are associated with a format number. - 63 -

G/L V.G USER'S MANUAL This means you can set up as many as 12 different report formats and enter the line number for each separate format into the chart of accounts file. Using the four previous examples of report layouts you would enter four separate formats, each with their respective line number. Then these line numbers would be entered into the appropriate chart of accounts records giving a separate format number for each of the four separate reports. The four remaining steps involved in preparation of user-defined reports are: 1. Enter the report headings and conditions. 2. Enter the print controls. 3. Enter the report literals, detail lines, and total lines. 4. Enter the calculations. Each of these steps is explained in connection with the associated screens on the following pages. - 64 -

G/L V.G USER'S MANUAL Enter, Inquire, Maintain Formats - Option 1 - Statement Setup Sub Menu +----+----+----+----+----+----+----+----+----+----+----+----+----+----+----+ +01/01/05 15:24:03 PROMPT General Ledger #BGLSYS0 + | | | | | | | | + + | | | | | | | | + + | | | | | | | | + + | | | | | | | | + + | | | | | One Moment.... | | | | | +----+----+----+----+----+----+----+----+----+----+----+----+----+----+----+ Upon the selection of this option, screen #BGLSYS0 will remain on the screen for a brief period while the files are opened. Then the screen will disappear and the select edit option screen will appear. - 65 -
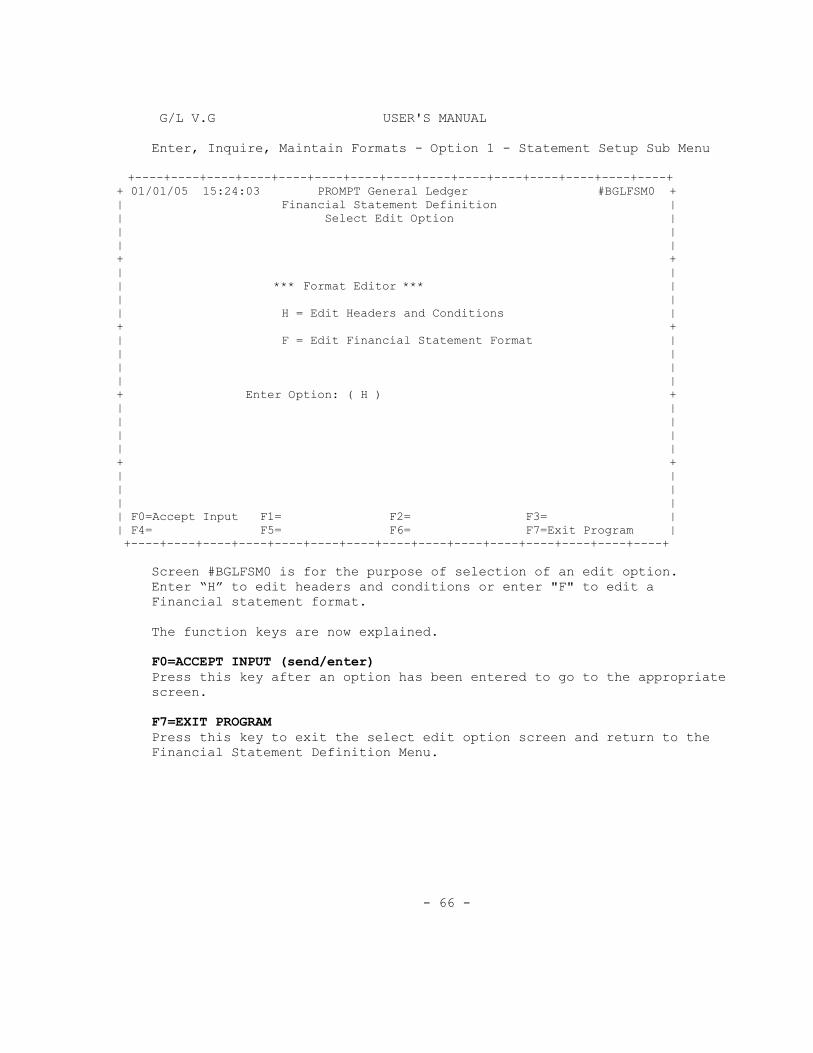
G/L V.G USER'S MANUAL Enter, Inquire, Maintain Formats - Option 1 - Statement Setup Sub Menu +----+----+----+----+----+----+----+----+----+----+----+----+----+----+----+ + 01/01/05 15:24:03 PROMPT General Ledger #BGLFSM0 + | Financial Statement Definition | | Select Edit Option | | | | | + + | | | *** Format Editor *** | | | | H = Edit Headers and Conditions | + + | F = Edit Financial Statement Format | | | | | | | + Enter Option: ( H ) + | | | | | | | | + + | | | | | | | F0=Accept Input F1= F2= F3= | | F4= F5= F6= F7=Exit Program | +----+----+----+----+----+----+----+----+----+----+----+----+----+----+----+ Screen #BGLFSM0 is for the purpose of selection of an edit option. Enter “H” to edit headers and conditions or enter "F" to edit a Financial statement format. The function keys are now explained. F0=ACCEPT INPUT (send/enter) Press this key after an option has been entered to go to the appropriate screen. F7=EXIT PROGRAM Press this key to exit the select edit option screen and return to the Financial Statement Definition Menu. - 66 -

G/L V.G USER'S MANUAL Enter, Inquire, Maintain Formats – screen #BGLFSH0 +----+----+----+----+----+----+----+----+----+----+----+----+----+----+----+ + 01/01/05 15:24:03 PROMPT General Ledger #BGLFSH0 + | Financial Statement Definition | | Define Header Lines Begin Space | | Print After | |Heading Name......( BALVARST ) Position Print | +Line 01: ( Mid-American Control Corporation ) ( 52 ) ( 1 ) + |Line 02: ( Balance Sheet ) ( 60 ) ( 1 ) | |Line 03: ( *DATE ) ( 63 ) ( 2 ) | |Line 04: ( ) ( ) ( ) | |Line 05: ( ) ( ) ( ) | +Line 06: ( ) ( ) ( ) + |Line 07: ( ) ( ) ( ) | |Line 08: ( ) ( ) ( ) | |Line 09: ( ) ( ) ( ) | |Line 10: ( ) ( ) ( ) | +NOTE: Enter *DATE on the appropriate header line for the statement date. + | | |Select conditional group values (if desired): A: ( PBS ) B: ( ) | | C: ( ) D: ( ) | | E: ( ) F: ( ) | + G: ( ) H: ( ) + | | | | | | | F0=Add Record F1=Clear Entries F2=Scroll Reverse F3=Scroll Forward | + F4=Accept Changes F5=Delete Record F6=Inquire/Print F7=Exit Screen | +----+----+----+----+----+----+----+----+----+----+----+----+----+----+----+ When option "H" is selected on screen #BGLFSM0, the above screen #BGLFSH0 will appear to allow the entry of headings and conditions if desired. If you are using the standard setup for PROMPT Business Systems all that is required is to press F3 to bring up each financial statement header, then edit your company name in place of the Demonstration Company and press F4. Each field of information to be entered on the screen is now explained. HEADING INFORMATION *HEADING NAME - Enter an 8 character name which is used to identify this heading and conditions at print time. The name used must be different from all other heading and condition names. *LINE 01 - LINE 10 - Each line is available to enter a heading line that is to be printed on the report. The date for the period being printed will print in the position identified by *PDATE. Use *5DATE for the system date and *5TIME for system time. - 67 -

G/L V.G USER'S MANUAL *BEGIN PRINT POSITION - Enter the beginning print position for each heading line entered. *SPACE AFTER PRINT - Enter the number of lines to space after printing the heading line. Zero is not a valid entry. CONDITIONS: Each account record in the general ledger chart of accounts has a group selection code or value that can be entered for the purposes of selecting reporting groups of records for printing. A heading name carries with it the conditions entered for purposes of printing a particular heading with a format type (1-12) for a selected grouping if desired. To print a selected group of accounts, enter the appropriate value for the desired grouping. For more information about condition group values, refer to the section of this user manual entitled - Enter, Inquire, Maintain Acct. The function keys are now explained. F0=ADD RECORD (send/enter) Press this key when a screen of information has been entered to be added to the file. If all data is valid, the file will be updated. Otherwise, the appropriate error message will appear. F1=CLEAR ENTRIES Press this key when you desire to clear the screen. F2=SCROLL REVERSE Press this key to go to the previous record in the file. This Information is available for reviewing or change. F3=SCROLL FORWARD Press this key to go to the next record in the file. This information is available for reviewing or change. F4=ACCEPT CHANGES Press this key when the data for a record has been changed on the screen and you are ready to update the record in the file. F5=DELETE RECORD Press this key to delete a record from the file. You will be asked "Are you sure?". If you do not wish to delete the record respond with a "N". F6=INQUIRY/PRINT Press this key when you have entered a heading name to be retrieved from the file. This will cause the screen to be filled with information from the record for view or change. If the key is pressed when the screen has data in any of the line numbers, the headings and conditions will be printed. F7=EXIT SCREEN Press this key to exit the screen and return to the select edit option screen. - 68 -
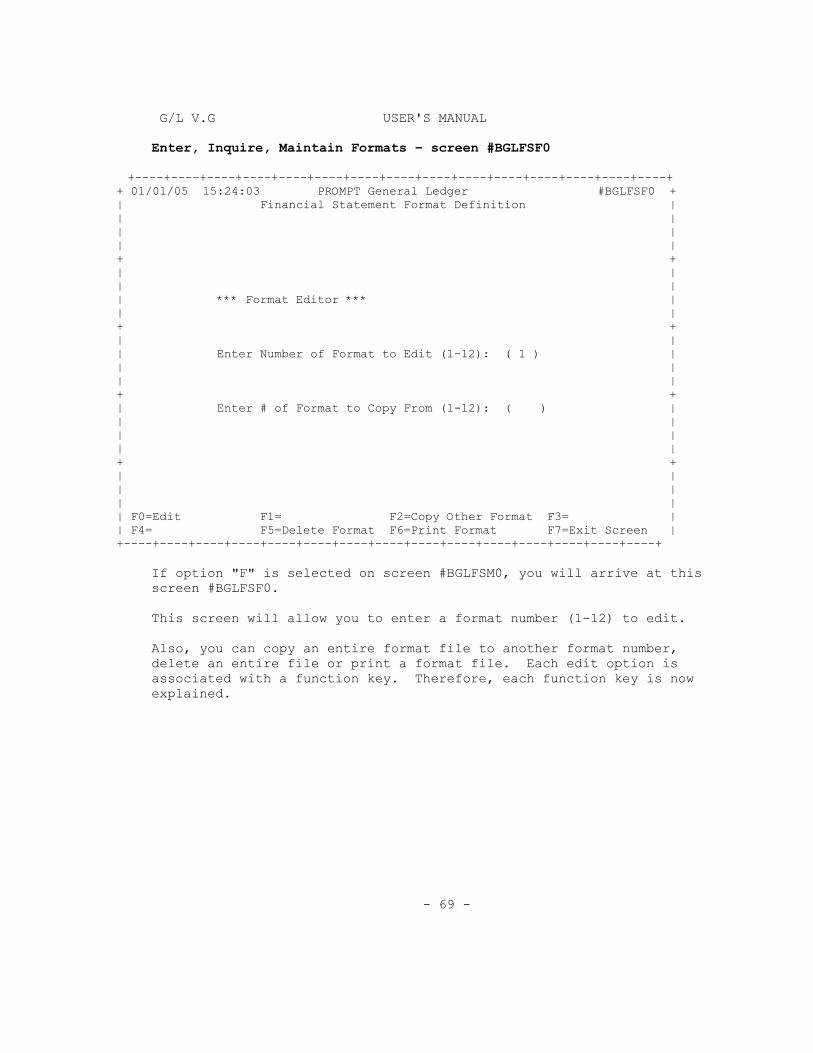
G/L V.G USER'S MANUAL Enter, Inquire, Maintain Formats – screen #BGLFSF0 +----+----+----+----+----+----+----+----+----+----+----+----+----+----+----+ + 01/01/05 15:24:03 PROMPT General Ledger #BGLFSF0 + | Financial Statement Format Definition | | | | | | | + + | | | | | *** Format Editor *** | | | + + | | | Enter Number of Format to Edit (1-12): ( 1 ) | | | | | + + | Enter # of Format to Copy From (1-12): ( ) | | | | | | | + + | | | | | | | F0=Edit F1= F2=Copy Other Format F3= | | F4= F5=Delete Format F6=Print Format F7=Exit Screen | +----+----+----+----+----+----+----+----+----+----+----+----+----+----+----+ If option "F" is selected on screen #BGLFSM0, you will arrive at this screen #BGLFSF0. This screen will allow you to enter a format number (1-12) to edit. Also, you can copy an entire format file to another format number, delete an entire file or print a format file. Each edit option is associated with a function key. Therefore, each function key is now explained. - 69 -
G/L V.G USER'S MANUAL F0=EDIT (send/enter key) When the format number has been entered, press this key to go to the select section option screen #BGLFSF1. F2=COPY OTHER FORMAT Enter the format number you desire to create (target) in the field below: ENTER NUMBER OF FORMAT TO EDIT (1-12): ( ) Enter the format number you desire to copy from (source) in the field below: ENTER # OF FORMAT TO COPY FROM (1-12): ( ) Then press the F2 key to copy the records. NOTE: This step will only copy the actual format. To copy line numbers of one format to another, see the explanation in Enter, Inquire, Maintain Lines. F5=DELETE Press this key to delete all format records associated with a format number. This will delete the print controls, calculations, and all types of detail print lines. F6=PRINT Press this key to print the format records. This will print the print controls, calculations, and all types of detail print lines. F7=EXIT SCREEN Press this key to exit the screen and return to the edit option screen. - 70 -
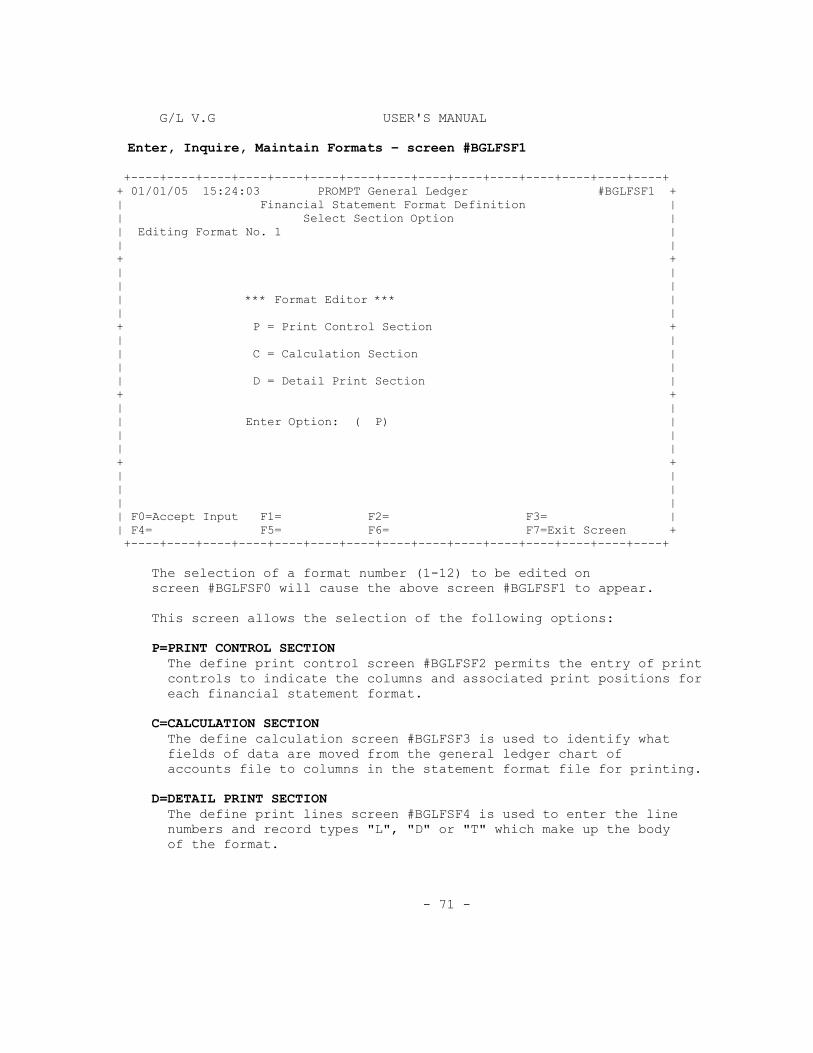
G/L V.G USER'S MANUAL Enter, Inquire, Maintain Formats – screen #BGLFSF1 +----+----+----+----+----+----+----+----+----+----+----+----+----+----+----+ + 01/01/05 15:24:03 PROMPT General Ledger #BGLFSF1 + | Financial Statement Format Definition | | Select Section Option | | Editing Format No. 1 | | | + + | | | | | *** Format Editor *** | | | + P = Print Control Section + | | | C = Calculation Section | | | | D = Detail Print Section | + + | | | Enter Option: ( P) | | | | | + + | | | | | | | F0=Accept Input F1= F2= F3= | | F4= F5= F6= F7=Exit Screen + +----+----+----+----+----+----+----+----+----+----+----+----+----+----+----+ The selection of a format number (1-12) to be edited on screen #BGLFSF0 will cause the above screen #BGLFSF1 to appear. This screen allows the selection of the following options: P=PRINT CONTROL SECTION The define print control screen #BGLFSF2 permits the entry of print controls to indicate the columns and associated print positions for each financial statement format. C=CALCULATION SECTION The define calculation screen #BGLFSF3 is used to identify what fields of data are moved from the general ledger chart of accounts file to columns in the statement format file for printing. D=DETAIL PRINT SECTION The define print lines screen #BGLFSF4 is used to enter the line numbers and record types "L", "D" or "T" which make up the body of the format. - 71 -

G/L V.G USER'S MANUAL Each of these definition sections will be discussed after explaining the use of the two function keys. F0=ACCEPT INPUT (send/enter key) Press this key when a section option has been entered and you will go to the appropriate definition screen. F7=EXIT SCREEN Press this key to exit the select option screen and return to the Financial statement format definition screen. - 72 -
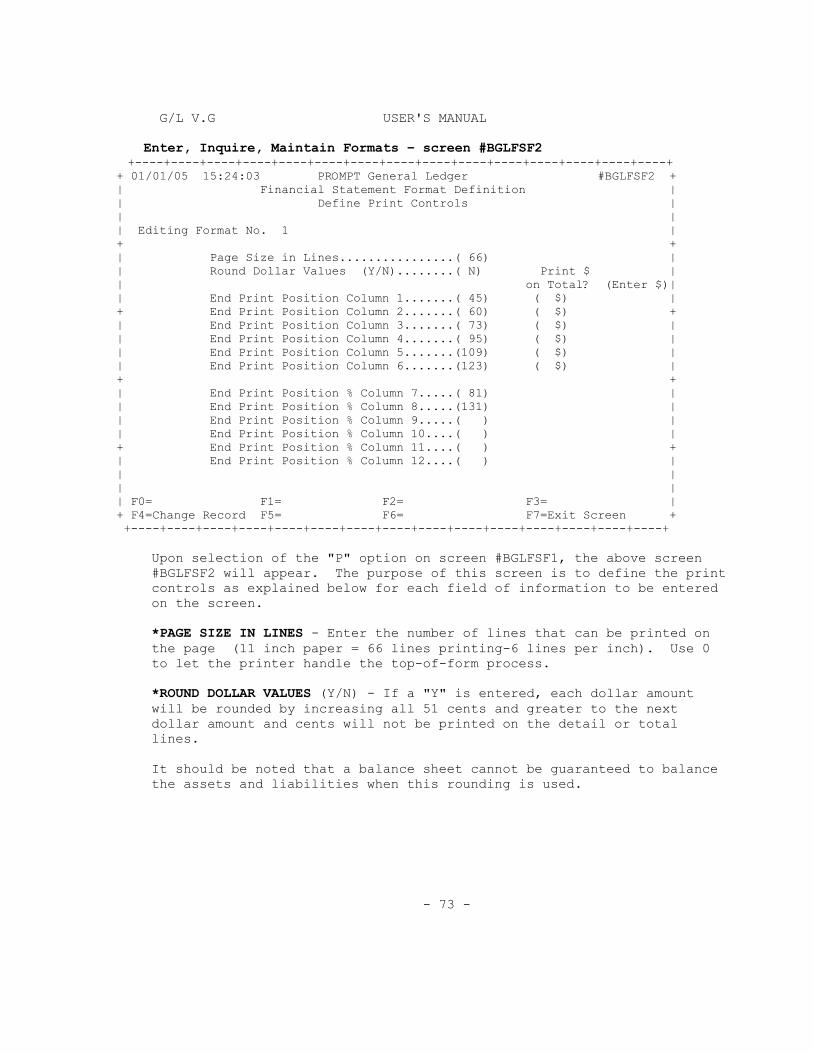
G/L V.G USER'S MANUAL Enter, Inquire, Maintain Formats – screen #BGLFSF2 +----+----+----+----+----+----+----+----+----+----+----+----+----+----+----+ + 01/01/05 15:24:03 PROMPT General Ledger #BGLFSF2 + | Financial Statement Format Definition | | Define Print Controls | | | | Editing Format No. 1 | + + | Page Size in Lines................( 66) | | Round Dollar Values (Y/N)........( N) Print $ | | on Total? (Enter $)| | End Print Position Column 1.......( 45) ( $) | + End Print Position Column 2.......( 60) ( $) + | End Print Position Column 3.......( 73) ( $) | | End Print Position Column 4.......( 95) ( $) | | End Print Position Column 5.......(109) ( $) | | End Print Position Column 6.......(123) ( $) | + + | End Print Position % Column 7.....( 81) | | End Print Position % Column 8.....(131) | | End Print Position % Column 9.....( ) | | End Print Position % Column 10....( ) | + End Print Position % Column 11....( ) + | End Print Position % Column 12....( ) | | | | | | F0= F1= F2= F3= | + F4=Change Record F5= F6= F7=Exit Screen + +----+----+----+----+----+----+----+----+----+----+----+----+----+----+----+ Upon selection of the "P" option on screen #BGLFSF1, the above screen #BGLFSF2 will appear. The purpose of this screen is to define the print controls as explained below for each field of information to be entered on the screen.
*PAGE SIZE IN LINES - Enter the number of lines that can be printed on the page (11 inch paper = 66 lines printing-6 lines per inch). Use 0 to let the printer handle the top-of-form process.
*ROUND DOLLAR VALUES (Y/N) - If a "Y" is entered, each dollar amount will be rounded by increasing all 51 cents and greater to the next dollar amount and cents will not be printed on the detail or total lines.
It should be noted that a balance sheet cannot be guaranteed to balance the assets and liabilities when this rounding is used. - 73 -

G/L V.G USER'S MANUAL COLUMNS EXPLAINED: A PROMPT Financial Report can consist of up to six amount columns, one to two horizontal percentages, and one to four vertical percentages. The following fields are used to define where to print these columns and the following section (Define Calculation) explains what data is to be printed in these columns.
*END PRINT POSITION COLUMN 1 - COLUMN 6 - Enter the end print position of each amount column to be used. If the end print position is left blank, the column will not be printed even if it holds amounts.
*PRINT $ ON TOTAL? (ENTER $) - Enter "$" if a dollar sign is desired on each total line.
*END PRINT POSITION % COLUMN 7 - COLUMN 12 - Enter the end print position of each of these columns to be used. If the end print position is left blank, the percentage column will not be printed even if it holds a percentage.
The function keys are now explained. F4=CHANGE RECORD Press this key to implement changes entered on the screen. When a print control record is being defined for the first time, all fields will be blank or zero. F7=EXIT SCREEN Press this key to exit the screen and return to the select section option screen. - 74 -

G/L V.G USER'S MANUAL Enter, Inquire, Maintain Formats – screen #BGLFSF3 +----+----+----+----+----+----+----+----+----+----+----+----+----+----+----+ + 01/01/05 15:24:03 PROMPT General Ledger #BGLFSF3 + | Financial Statement Format Definition | | Editing Format No. 1 Define Calculation | |-----G/L Amount Destination---- | ----Freeform Sources and Destinations----| |Post from G/L into Column (1-6) | Field No. Column No. Field No. Column No.| + This Year-Current Period ( 1) | ( ) to 1 ( ) TO 2 + | This Year-Year to Date.. ( 2) | ( ) TO 3 ( ) TO 4 | | Last Year-Current Period ( 3) | ( ) TO 5 ( ) TO 6 | | Last Year-Year to Date.. ( 4) | | | Budget-Current Period... ( ) | -------Variance Amount Computations----- | + Budget-Year to Date..... ( ) | Column No. + or - Column No. = Column No.+ | | ( 1) ( -) ( 3) ( 5) | | | ( 2) ( -) ( 4) ( 6) | | | ( ) ( ) ( ) ( ) | |-------------------------Percentage Computation-----------------------------| +----Horizontal Computation-------|--------Vertical Computation--------------+ |Column Divide Into = Percent | Amount Column No. Vertical % Column | |Number Column No. Column No. | ( ) 9 | | ( ) ( ) 7 | ( ) 10 | | ( ) ( ) 8 | ( ) 11 | + | ( ) 12 + | | | | | | | F0= F1= F2= F3= | + F4=Accept Changes F5= F6= F7=Exit Screen + +----+----+----+----+----+----+----+----+----+----+----+----+----+----+----+ Upon selection of option "C" on screen #BGLFSF1, the above screen #BGLFSF3 will appear. The purpose of this screen is to define the source of amounts from the general ledger chart of accounts file and to indicate the destination of these amounts into the format file for subsequent printing. Also, desired calculations of variance amounts and horizontal Percentages are defined using this menu option. Each field of information to be entered is now explained. *G/L AMOUNT DESTINATION - POST FROM G/L INTO COLUMN 1-6 - Enter the destination column numbers for amounts to be calculated from the chart of accounts file to specific columns in the format file. - 75 -
G/L V.G USER'S MANUAL
*FREEFORM SOURCES AND DESTINATIONS - Use these parameters if you desire to calculate fields from the chart of accounts file other than those fields shown under G/L AMOUNT DESTINATION. For example, you can complete some columns from the G/L AMOUNT DESTINATION and some from FREEFORM SOURCES. A good example would be the printing of quantity sales on the financial report. A freeform field must be used to obtain quantities.
Note that if the current year quantity field (66) is entered, or the prior year quantity field (80) is entered, the program will vary the field number to correspond with the current month in the general ledger. The field number that should be entered is the first field in an array of fields for a year. *VARIANCE AMOUNT COMPUTATIONS - Enter the columns to be cross footed and the appropriate plus or minus sign, as well as the result column. *HORIZONTAL COMPUTATION - Enter the column numbers to divide in order to determine the variance percent change. For example, last year YTD divided into this year YTD gives the percentage variance. If last year was $100 and this year is $120, the percentage variance will be 20%. If last year was $100 and this year is $80 the percentage variance will be -20%. *VERTICAL COMPUTATION - Enter the amount column number associated with each vertical percentage computation desired. The function keys are now explained. F4=ACCEPT CHANGES Press this key to enter changes entered on the screen. When a Calculation record is being defined for the first time, all fields will be blank or zero. F7=EXIT SCREEN Press this key to exit the screen and return to the select option screen. - 76 -

G/L V.G USER'S MANUAL Enter, Inquire, Maintain Formats – screen #BGLFSF4 +----+----+----+----+----+----+----+----+----+----+----+----+----+----+----+ + 01/01/05 15:24:03 PROMPT General Ledger #BGLFSF4 + | Financial Statement Format Definition | | Define Print Lines | | | | Editing Format No: 1 | + + | Line Number................( 120) | | Record Type (L, D, or T)..( D) | | Description Text...........(Sales - Western Division ) | | Normal Value (DR or CR)...( DR) Required on type D or T. | + Total No. (1-7)...........( ) Required on type T. + | Beginning Print Position...( 5) | | # of Lines to Space After..( 1)(T=Top of page; H=Top of page with header)| | | | | +Is this the base for percent calculation?(Y/N)....(N)(Y Must be type D or T)+ |Calculate as a Percentage of Base?(Vertical)(Y/N).(N)(Y Must be type D or T)| | | | | | | + + | | | | | | | | | F0=Add Record F1=Clear Entries F2=Scroll Reverse F3=Scroll Forward | + F4=Change Record F5=Delete Record F6=Find Record F7=Exit Screen + +----+----+----+----+----+----+----+----+----+----+----+----+----+----+----+ Upon selection of option "D" on screen #BGLFSF1, the above screen #BGLFSF4 will appear. The purpose of this screen is to define the print lines for the financial statement format number shown on the screen. Each field of information to be entered on the screen is now explained.
*LINE NUMBER - This number must be unique for the format involved and must appear in the chart of accounts file for a detail line.
The line number is not checked against the chart of accounts file when entered. Therefore, you can enter the print lines before the corresponding line numbers are entered in the chart of accounts file. *RECORD TYPE (L, D, OR T) - Enter "L" for a literal, "D" for a detail line or "T" for a total line. - 77 -
G/L V.G USER'S MANUAL *DESCRIPTION TEXT - Enter up to 50 characters of information to
describe the line. The description is applicable to all record types.
*NORMAL VALUE (DR OR CR) - This entry is required on type D or T records. It reveals the normal debit or credit value. If the value is different from the norm (positive debits and negative credits), the amount will appear within parentheses when printed.
*TOTAL NO. (1-7) - Required on type T. This number indicates the total level. A total line is cleared to zero after it is printed.
*BEGINNING PRINT POSITION - Enter the beginning print position for the print program to use when printing the line. *# OF LINES TO SPACE AFTER - Enter the number of lines to space after printing the line. Zero is an acceptable entry. An entry of "N" will suppress the printing of the line. An entry of "T" will force a top of form. An entry of "H" will force a top of form and will print the heading at the top of the page. IS THIS THE BASE FOR PERCENT CALCULATION? (Y/N) If the dollar amount of the line is to be used as the base for the vertical percentage calculation, enter a "Y". Otherwise, enter an "N". If no entry is made, an "N" is defaulted. The base for percentage line will be used to calculate the other percentages and will always total to 100%. CALCULATE AS A PERCENTAGE OF BASE? (VERTICAL) (Y/N) If the dollar amount of the line is to be calculated as a percentage of the base amount, enter a "Y". Otherwise, enter an "N". If no entry is made, an "N" is defaulted. - 78 -

G/L V.G USER'S MANUAL The function keys are now explained. F0=ADD RECORD (send/enter) Press this key when a screen of information has been entered to be added to the file. If all data is valid, the files will be updated. Otherwise, the appropriate error message will appear. F1=CLEAR ENTRIES Press this key when you desire to clear the screen. F2=SCROLL REVERSE Press this key to go to the previous record in the file. This Information is available for reviewing or change. F3=SCROLL FORWARD Press this key to go to the next record in the file. This information is available for reviewing or change. F4=CHANGE RECORD Press this key when the data for a record has been changed on the screen and you are ready to update the record in the file. F5=DELETE RECORD Press this key to delete a record from the file. You will be asked "Are you sure?". If you do not wish to delete the record respond with a "N". Otherwise, respond with a "Y". F6=FIND RECORD Press this key when you have entered a detail line number to be retrieved from the file. This will cause the screen to be completed with information from the record for viewing or change. F7=EXIT PROGRAM Press this key to exit the screen and return to the select edit option screen. - 79 -

G/L V.G USER'S MANUAL Enter, Inquire, Maintain Lines – Option 2 Statement Setup Sub Menu +----+----+----+----+----+----+----+----+----+----+----+----+----+----+----+ +01/01/05 15:24:03 PROMPT General Ledger #BGLAFS2 + | Enter Format Line Numbers and Conditions | | 2. Company Number ( 1 ) | | 3. Account Number 600 | | 4. Account Name ( Central Region Sales ) | + 5. Account Type ( RS ) + |----------------------------------------------------------------------------| | Financial Print Format Line No. | Reporting Grouping Selection Levels | | Format 01 122: ( ) | Group A 134: ( PBS ) | | Format 02 123: ( 45 ) | Group B 135: ( GOV ) | + Format 03 124: ( 45 ) | Group C 136: ( ) + | Format 04 125: ( 45 ) | Group D 137: ( ) | | Format 05 126: ( 45 ) | Group E 138: ( ) | | Format 06 127: ( ) | Group F 139: ( ) | | Format 07 128: ( ) | Group G 140: ( ) | + Format 08 129: ( ) | Group H 141: ( ) + | Format 09 130: ( ) |---------------------------------------| | Format 10 131: ( ) |Company Number to Copy: ( ) | | Format 11 132: ( ) |Source Format Number: ( ) | | Format 12 133: ( ) |Target Format Number: ( ) | + + |----------------------------------------------------------------------------| | | | No More Fields | | F0=Find Record F1=Clear Entries F2=Scroll Reverse F3=Scroll Forward | + F4=Accept Changes F5=Copy Line #'s F6=Change Window F7=End Program | +----+----+----+----+----+----+----+----+----+----+----+----+----+----+----+ The purpose of this screen is to provide a more efficient method for entering or maintaining format line numbers associated with accounts. This screen is very similar to screen #BGLAFM2 (see table of contents). One field, the company number, is included on this screen and is not on screen #BGLAFM2. Also, the window in the lower right corner of the screen is not on screen #BGLAFM2. Since the remaining fields are the same, please refer to Enter, Inquire, Maintain Accounts for a description of the field numbers. COPYING LINE NUMBERS If you have two formats that are very similar, you can use F5 to copy the line numbers of one format to another format. Press F5 to open the copy window. Enter the company number of the accounts affected. Enter the numbers of the formats to copy to and from after pressing the send key, you will be asked to verify the copy before it takes place. A count of the number of records processed will be displayed. - 80 -

G/L V.G USER'S MANUAL The function keys are now explained: F0=FIND RECORD (send/enter key) Press this key when you have entered a company number and account number to be retrieved from the file. This will cause the screen to be completed with information from the record for viewing or change. F1=CLEAR ENTRIES Press this key when you desire to clear the screen. F2=SCROLL REVERSE Press this key to go to the previous record in the file. This information is available for reviewing or change. F3=SCROLL FORWARD Press this key to go to the next record in the file. This information is available for reviewing or change. F4=ACCEPT CHANGES Press this key when the data for a record has been changed on the screen and you are ready to update the record in the file. F5=COPY LINE #'s Press this key to open the copy window for entry of copy information. See the explanation "COPYING LINE NUMBERS" on the previous page for more information. After the copy is complete, the cursor will be positioned on field number 122. F6=CHANGE WINDOW This screen consists of two separate windows. Window 1 includes fields 122-133. Window 2 includes field 134-141. Press this key to close the window you are in and open the other window with the cursor positioned on the first field in the window. F7=END PROGRAM Press this key to exit the screen and return to the Statement Setup Menu. - 81 -

G/L V.G USER'S MANUAL Create Cross-Reference File - Option 3 - Statement Setup Sub Menu +----+----+----+----+----+----+----+----+----+----+----+----+----+----+----+ + 01/01/05 15:24:03 PROMPT General Ledger #BGLXFM0 + | Create Cross Reference File | | | | | | | + + | | | *** NOTE *** | | | | | + This procedure will create a cross reference + | file between the account file and the format | | file. | | | | Any records already existing in the cross reference | + file will be deleted and the file will be recreated. + | | | If you do not wish to execute this procedure, press | | F7. | | | + + | | | | | | | F0=Accept Screen F1= F2= F3= | + F4= F5= F6= F7=Exit Screen | +----+----+----+----+----+----+----+----+----+----+----+----+----+----+----+ Upon the selection of this option, the above screen will appear. The purpose of this screen is to create a cross reference file between the chart of accounts file and the financial format file. The cross reference file will be cleared at the start of this procedure to avoid duplicate records in the file. This procedure must be executed in order to print the format cross reference report (Menu option 5). Each of the function keys is now explained. F0=ACCEPT SCREEN (send/enter) Press this key to begin creating the cross reference file. F7=EXIT SCREEN Press this key if you do not wish to run this procedure or if you are here by mistake. The system will return to the statement setup menu. - 82 -
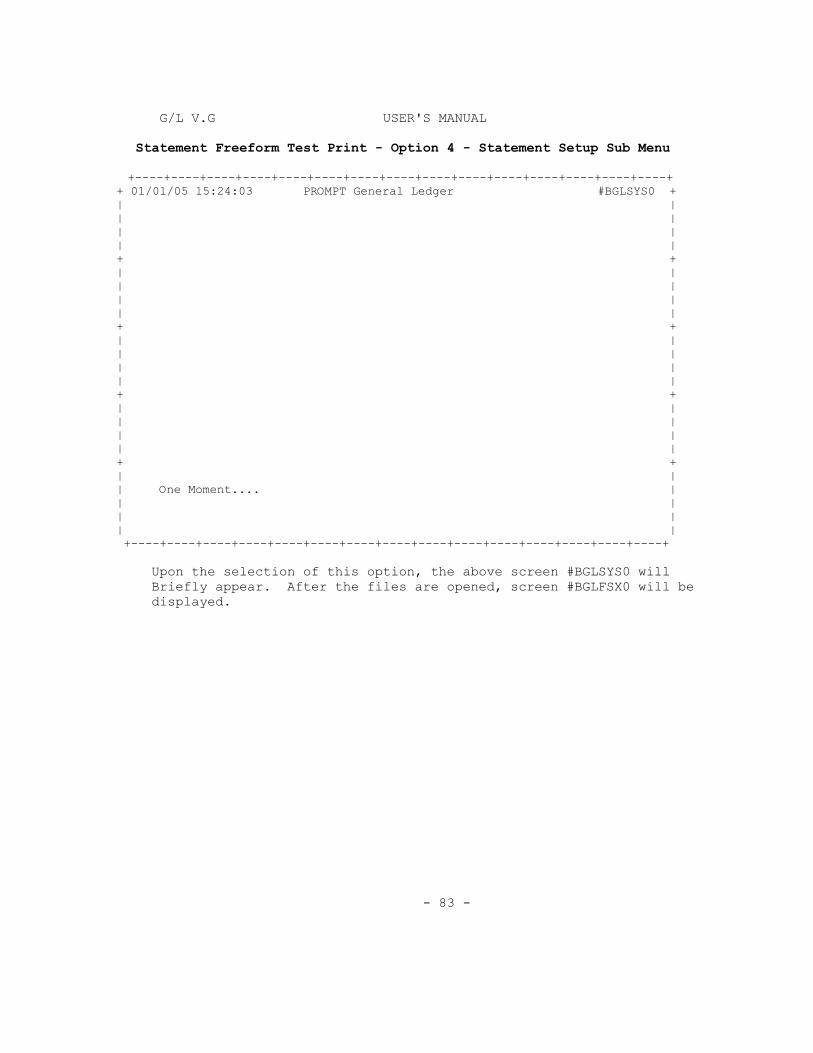
G/L V.G USER'S MANUAL Statement Freeform Test Print - Option 4 - Statement Setup Sub Menu +----+----+----+----+----+----+----+----+----+----+----+----+----+----+----+ + 01/01/05 15:24:03 PROMPT General Ledger #BGLSYS0 + | | | | | | | | + + | | | | | | | | + + | | | | | | | | + + | | | | | | | | + + | | | One Moment.... | | | | | | | +----+----+----+----+----+----+----+----+----+----+----+----+----+----+----+ Upon the selection of this option, the above screen #BGLSYS0 will Briefly appear. After the files are opened, screen #BGLFSX0 will be displayed. - 83 -
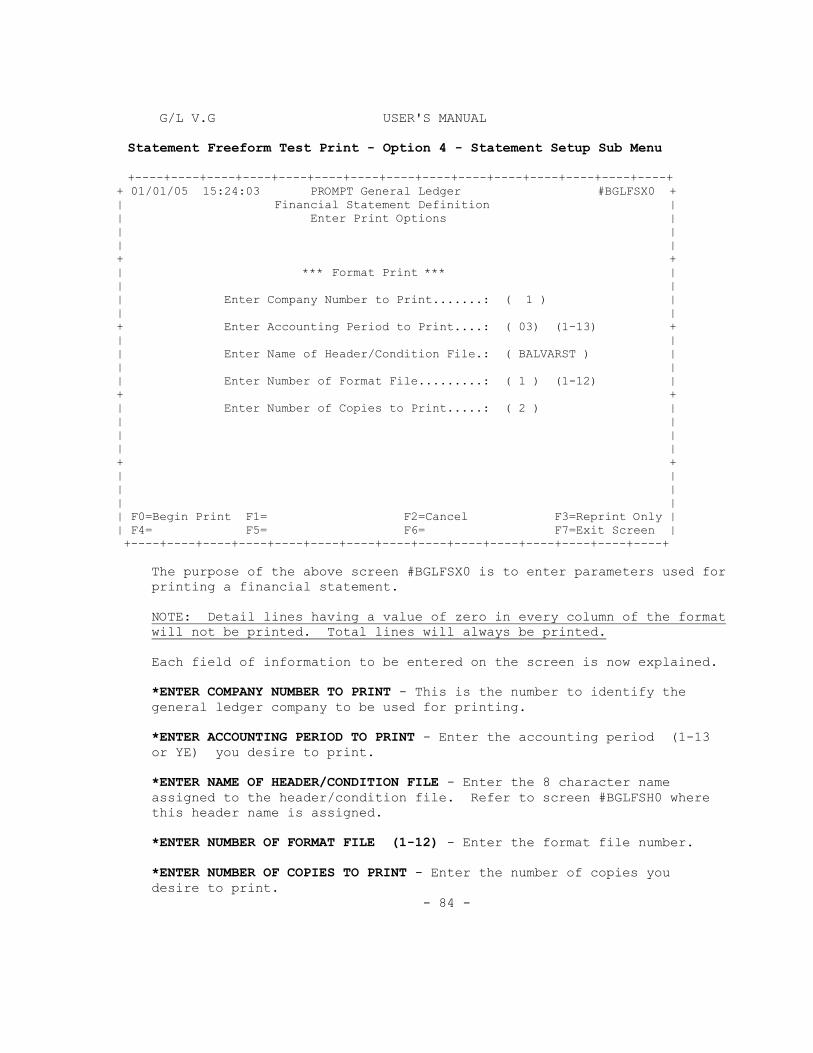
G/L V.G USER'S MANUAL Statement Freeform Test Print - Option 4 - Statement Setup Sub Menu +----+----+----+----+----+----+----+----+----+----+----+----+----+----+----+ + 01/01/05 15:24:03 PROMPT General Ledger #BGLFSX0 + | Financial Statement Definition | | Enter Print Options | | | | | + + | *** Format Print *** | | | | Enter Company Number to Print.......: ( 1 ) | | | + Enter Accounting Period to Print....: ( 03) (1-13) + | | | Enter Name of Header/Condition File.: ( BALVARST ) | | | | Enter Number of Format File.........: ( 1 ) (1-12) | + + | Enter Number of Copies to Print.....: ( 2 ) | | | | | | | + + | | | | | | | F0=Begin Print F1= F2=Cancel F3=Reprint Only | | F4= F5= F6= F7=Exit Screen | +----+----+----+----+----+----+----+----+----+----+----+----+----+----+----+ The purpose of the above screen #BGLFSX0 is to enter parameters used for printing a financial statement. NOTE: Detail lines having a value of zero in every column of the format will not be printed. Total lines will always be printed. Each field of information to be entered on the screen is now explained. *ENTER COMPANY NUMBER TO PRINT - This is the number to identify the general ledger company to be used for printing.
*ENTER ACCOUNTING PERIOD TO PRINT - Enter the accounting period (1-13 or YE) you desire to print.
*ENTER NAME OF HEADER/CONDITION FILE - Enter the 8 character name assigned to the header/condition file. Refer to screen #BGLFSH0 where this header name is assigned.
*ENTER NUMBER OF FORMAT FILE (1-12) - Enter the format file number.
*ENTER NUMBER OF COPIES TO PRINT - Enter the number of copies you desire to print. - 84 -

G/L V.G USER'S MANUAL Each function key is now explained. F0=BEGIN PRINT (send/enter) Press this key after all parameters are entered to begin the calculation and printing process. F2=CANCEL Press this key to stop printing. F3=REPRINT ONLY Press this key to print the information already calculated by the previous execution. This function saves time by not having to recalculate the statement. F7=EXIT SCREEN Press this key to return to the statement setup menu. - 85 -
G/L V.G USER'S MANUAL Pass Parameters to "Print Financial Statements" Program The "Print Financial Statements" program will allow parameters to be passed from PJL (PROMPT Job Language). Typically, you are required to enter the same fields of data on the screen each time financial statements are printed. By allowing parameters to be passed from the menu, you can set up a customized menu and run the menu step without having to enter the data fields. The following is a discussion on how to set up your customized PJL menu. Please refer to the PROMPT Database Management System User's Manual for an explanation of the menu and procedure editors. The parameters to be passed are: * Company number * Accounting period * Header/condition file name * Format number * Number of copies to print Use PROMPT to build your customized menu. PD - PROMPT Database (system functions) The PROMPT Database Management System menu will be displayed. Enter 'SI' (Screen Image Editor) to create/change your menu image. See the PROMPT Database Management System User's Manual for instructions on using the screen image editor. You can use screen #GL6MENU,GLLIB as a model. Construct your menu screen as needed. Give the screen a unique name so that when G/L release diskettes are mailed to you, they will not overwrite your customized screen. Do the same with the menu(s) and/or procedures we are about to create. When the screen image is complete, you must now create a menu that corresponds with the screen. From the PROMPT Database Management System menu choose the option 'JLM' to change/create your menu. You will choose 'C' for change a definition. You can use BSGL.MENUFGL6.MENU as a model but give the output name something unique so that it is not overwritten by later updates to the G/L system. The directory should be BSGL.DIRECTORY for both the input and output. Tab down and put your screen name in the bracket provided. Choose 'M' to change the menu definition. - 86 -

G/L V.G USER'S MANUAL The following screen appears: Def Name: BSGL.MENUFGL6.MENU Menu Name #GL6MENU,GLLIB Option ID | F/B/P/M | Proc/Pgm/Menu Name | Directory Path/Volume Name 1 | P | #BGLFSX | GLLIB 2 | P | #BGLFSX | 3 | P | #BGLFSX | 4 | P | #BGLFSX | 5 | P | #BGLFSX | 6 | P | #BGLFSX | The option ID #'s need to correspond with the option #'s on your screen created with 'SI'. If one financial statement is to be run when an option # is pressed, you may use a 'P' (program) in the column 'F/B/P/M', the program name '#BGLFSX' in the column 'Proc/Pgm/Menu Name' and 'GLLIB' in the column 'Directory Path/Volume Name'. To change an option place the cursor over the option # to be changed and press 'F4'. The following screen appears: ** Program Load ** Option ID: (1) Security Level: (0) Program Name: (#BGLFSX) Program Volume: (GLLIB) Storage Value: ( ) Default Device: ( ) Priority: ( ) Class Code: ( ) PDL Program? (Y) Default Volume ( ) Log Msg? (N) Data Sets: 1: ( ) 2: ( ) 3:( ) 4: ( ) 5: ( ) 6:( ) 7: ( ) 8: ( ) 9:( ) Default Directory Path: ( ) Parameter List: ( ) Extended Parameters (Y/N)? (Y) The above items that contain data are the only items required on this screen to print a financial statement. Press send to enter the parameters needed to specify: header/condition File name, form #, # of copies, present accounting period and company #. - 87 -

G/L V.G USER'S MANUAL The following screen appears: ** Program Load ** Extended Program Parameters 8-character alpha 1: (BALVARST) 2: ( ) 3: ( ) 1-byte integers 1-6: ( 1 ) ( 1 ) ( ) ( ) ( ) ( ) 1-character alpha 1-5: ( P ) ( ) ( ) ( ) ( ) 4-byte integers 1: ( 1 ) 2: ( ) Enter the header/condition file name in the first 8-character alpha area. Enter the format # in the first 1-byte integer bracket. Enter the # of copies in the second 1-byte integer bracket. Enter a 'P' for present period in the first 1-character alpha bracket. Enter company # in the first 4-byte integer bracket. Pressing send brings you back to the option change screen. You will need to add, change or delete options until your menu definition options match the screen created with 'SI'. In order to print several financial statements with one option #, you need to use a procedure instead of the program #BGLFSX. To do this you will have to delete the option to be changed with 'F5' and add the option back with 'F0'. The "action to be performed by the menu option" will be an 'F' for foreground procedure execution. The "option ID" is the option # being added. The "procedure name" is the name of the procedure to be created that prints the statements for this option. The procedure directory path should be BSGL.DIRECTORY. Pressing send brings you back to the option change screen. Press 'F7' to exit and save the changes by entering the option 'S'. 'F7' then ends the menu editor. - 88 -
G/L V.G USER'S MANUAL To create/change a procedure, select option 'JLP' on the PROMPT Database Management System menu. When setting up the procedure, the program load statements and the extended parameter statement will be the same as shown for the menu previously explained. Print Format Cross Reference - Option 5 - Statement Setup Sub Menu This report will print all accounts in the system that point to each line specified for each format. This report prints from the cross reference file, which must be created using the option Create Cross Reference File. This report prints in format number order. Print G/L Format Line Numbers - Option 6 - Statement Setup Sub Menu This report simply prints each line number for each format for each account. This report prints in account number order.
- 89 –

G/L V.G USER'S MANUAL Master Menu - Option 3 - End of Month +----+----+----+----+----+----+----+----+----+----+----+----+----+----+----+ + 01/01/05 PROMPT General Ledger #PJLCP:: + | End of Month Menu #GL2MENU | | | | | | | + + | 1 -- Close The Month | | | | | | | + Enter Option: + | | | | | | | | + + | | | | | | | | + + | | | | | | | | | F0=Accept Option F7=Exit Screen | +----+----+----+----+----+----+----+----+----+----+----+----+----+----+----+ This sub menu appears upon the selection of option 3 on the General Ledger Master Menu. The selection of option 1 -- Close the Month will take you to the Screens explained on the following pages. - 90 -

G/L V.G USER'S MANUAL +----+----+----+----+----+----+----+----+----+----+----+----+----+----+----+ +01/01/05 PROMPT General Ledger #BGLSYS0 + | | | | | | | | + + | | | | | | | | + + | | | | | | | | + + | | | | | | | | + + | | | | | One Moment.... | | | | | +----+----+----+----+----+----+----+----+----+----+----+----+----+----+----+ The selection of option 1 -- Close the Month on the End of Month Sub Menu will cause the above screen to appear. This screen will remain Displayed briefly and when the files are opened by the program, the next Screen #BGLCLM0 will appear. - 91 -

G/L V.G USER'S MANUAL End of month close – screen #BGCLM0 +----+----+----+----+----+----+----+----+----+----+----+----+----+----+----+ + 01/01/05 15:24:03 PROMPT General Ledger #BGLCLM0 + | End of Month Close | | | | | | | + + | | | Number of Company to Close: ( 1 ) | | | | Comp-No Name Curr-Per Address | + ** BEGINNING OF FILE * + | 1 Mid-American Control Corp 3 P. O. Box 937 | | ** END OF FILE * | | | + + | | | | | | | | + + | | | | | | | F0=Accept Input F1= F2=Display Reverse F3=Display Forward | | F4= F5= F6= F7=Exit Screen | +----+----+----+----+----+----+----+----+----+----+----+----+----+----+----+ The purpose of this screen is to select a general ledger company whose month is to be closed. Upon the entry of a valid company number, the monthly close can be initiated by pressing the F0=ACCEPT INPUT key. However, this screen can be used to determine if the prior year is closed, without running a close of the current month. To see this information press enter one time after entry of the company number and you will get this message just below the Company number: PRIOR YEAR IS XXXXXX (Where XXXXXX is either CLOSED or OPEN) At this point you will be given the option to press enter to continue or F7 to exit. Once a month has been closed it cannot be reopened. The close process updates all necessary fields in the account file and company file. When the 12th period is closed, the ledger is ready for use in the new year, but the year is not closed, only the 12th month of the year. Therefore, after the last month of the year is closed, the annual close can be postponed until year-end adjusting entries are determined, while processing can continue into the next year (actually we give you 10 months before the annual close MUST be executed). - 92 -

G/L V.G USER'S MANUAL Each function key is now explained. F0=ACCEPT INPUT (send/enter) Press this key after entry of a valid company number to close. F7=EXIT SCREEN Press this key to exit the screen and return to the end of month menu. - 93 -
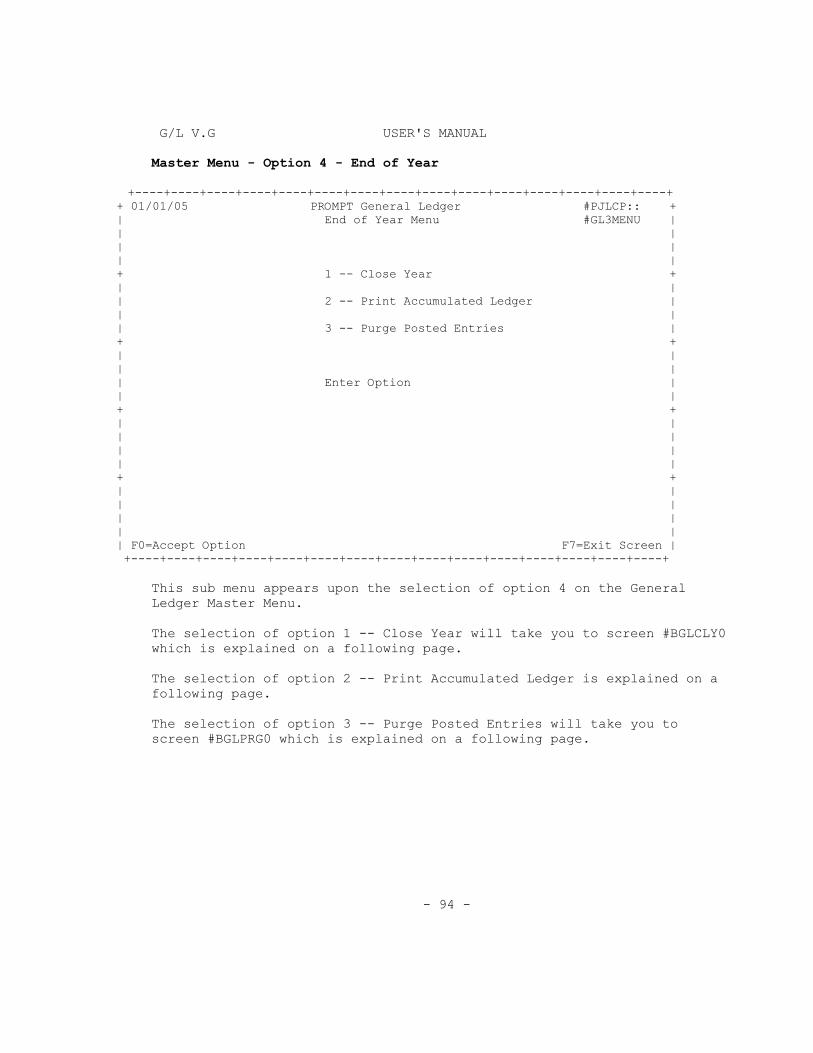
G/L V.G USER'S MANUAL Master Menu - Option 4 - End of Year +----+----+----+----+----+----+----+----+----+----+----+----+----+----+----+ + 01/01/05 PROMPT General Ledger #PJLCP:: + | End of Year Menu #GL3MENU | | | | | | | + 1 -- Close Year + | | | 2 -- Print Accumulated Ledger | | | | 3 -- Purge Posted Entries | + + | | | | | Enter Option | | | + + | | | | | | | | + + | | | | | | | | | F0=Accept Option F7=Exit Screen | +----+----+----+----+----+----+----+----+----+----+----+----+----+----+----+ This sub menu appears upon the selection of option 4 on the General Ledger Master Menu. The selection of option 1 -- Close Year will take you to screen #BGLCLY0 which is explained on a following page. The selection of option 2 -- Print Accumulated Ledger is explained on a following page. The selection of option 3 -- Purge Posted Entries will take you to screen #BGLPRG0 which is explained on a following page. - 94 -

G/L V.G USER'S MANUAL +----+----+----+----+----+----+----+----+----+----+----+----+----+----+----+ +01/01/05 PROMPT General Ledger #BGLSYS0 + | | | | | | | | + + | | | | | | | | + + | | | | | | | | + + | | | | | | | | + + | | | | | One Moment.... | | | | | +----+----+----+----+----+----+----+----+----+----+----+----+----+----+----+ The selection of option 1 -- Close Year on the End of Year Sub Menu will cause the above screen to appear. This screen will remain briefly and when the files are opened by the program, the next screen #BGLCLY0 will appear. - 95 -
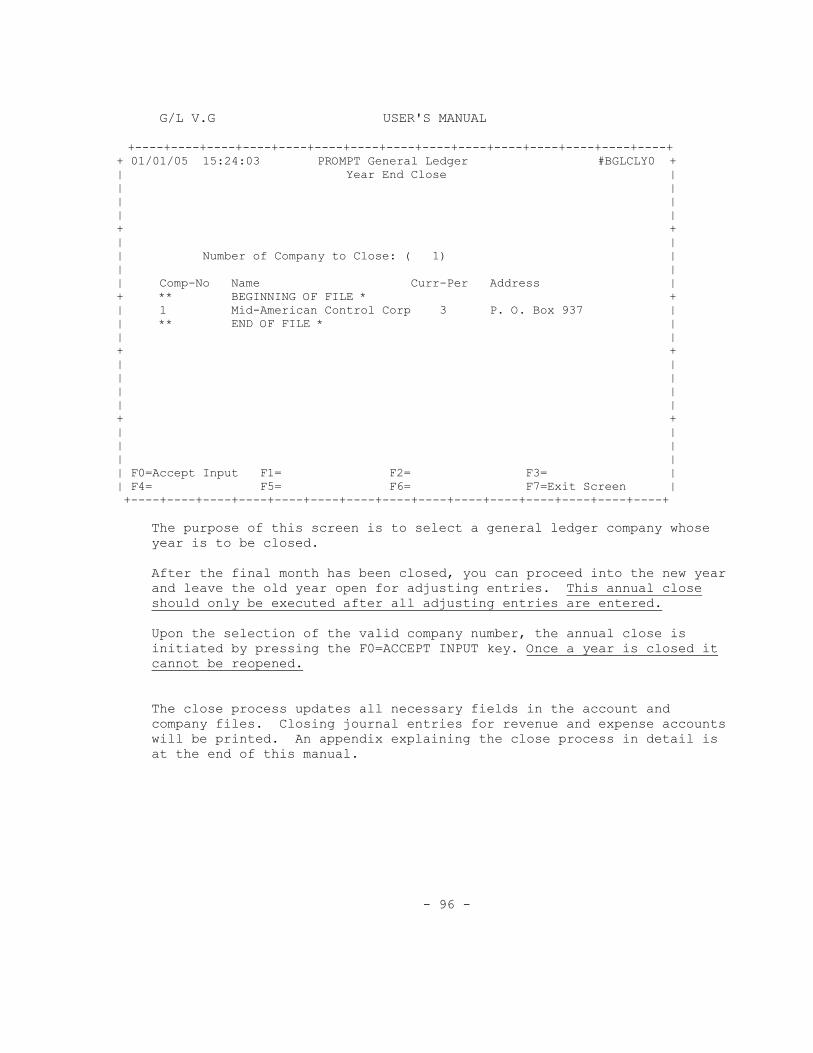
G/L V.G USER'S MANUAL +----+----+----+----+----+----+----+----+----+----+----+----+----+----+----+ + 01/01/05 15:24:03 PROMPT General Ledger #BGLCLY0 + | Year End Close | | | | | | | + + | | | Number of Company to Close: ( 1) | | | | Comp-No Name Curr-Per Address | + ** BEGINNING OF FILE * + | 1 Mid-American Control Corp 3 P. O. Box 937 | | ** END OF FILE * | | | + + | | | | | | | | + + | | | | | | | F0=Accept Input F1= F2= F3= | | F4= F5= F6= F7=Exit Screen | +----+----+----+----+----+----+----+----+----+----+----+----+----+----+----+ The purpose of this screen is to select a general ledger company whose year is to be closed. After the final month has been closed, you can proceed into the new year and leave the old year open for adjusting entries. This annual close should only be executed after all adjusting entries are entered. Upon the selection of the valid company number, the annual close is initiated by pressing the F0=ACCEPT INPUT key. Once a year is closed it cannot be reopened. The close process updates all necessary fields in the account and company files. Closing journal entries for revenue and expense accounts will be printed. An appendix explaining the close process in detail is at the end of this manual. - 96 -
G/L V.G USER'S MANUAL Each function key is now explained. F0=ACCEPT INPUT (send/enter) Press this key after entry of a company number to close. F7=EXIT SCREEN Press this key to exit the screen and return to the End of Year menu. Option 2 -- PRINT ACCUMULATED LEDGER will print a general ledger which reveals all accumulated journal entries that have not been purged from the posted journal entry file. The program #BGLAPA, Analyze Posted Accounts, can also be used to print the accumulated ledger. It can be printed from the Daily Processing menu option 2 Analyze Posted Accounts. - 97 -
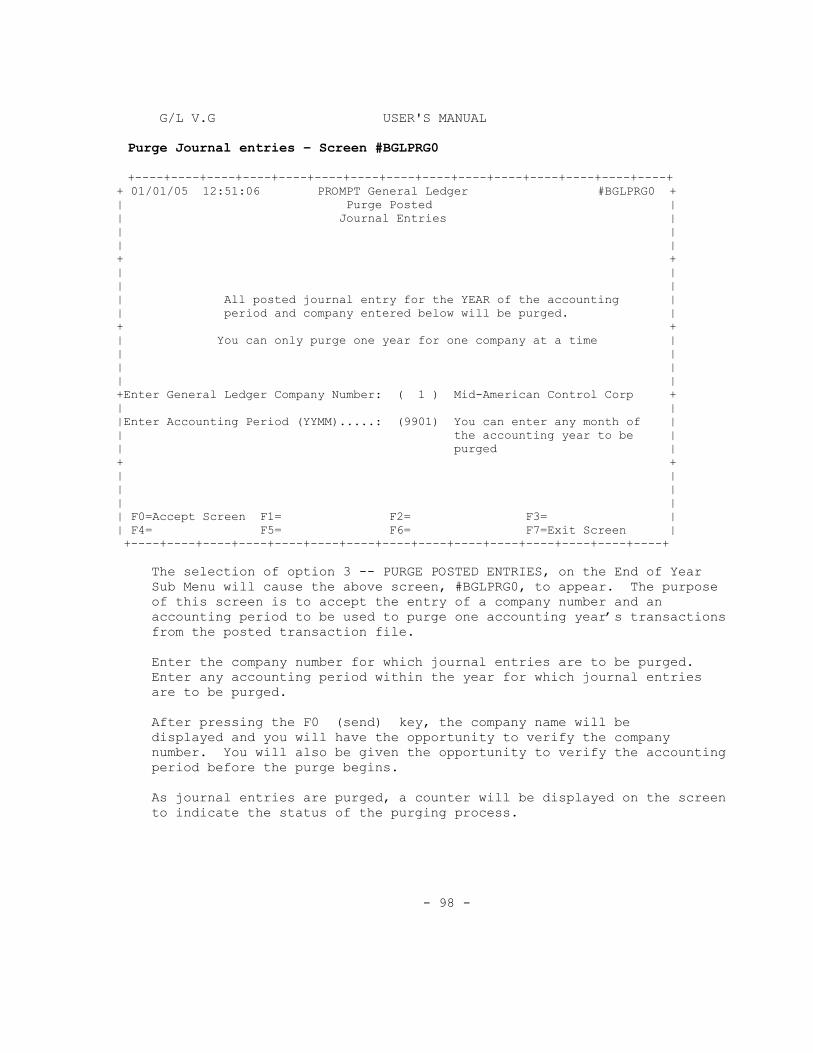
G/L V.G USER'S MANUAL Purge Journal entries – Screen #BGLPRG0 +----+----+----+----+----+----+----+----+----+----+----+----+----+----+----+ + 01/01/05 12:51:06 PROMPT General Ledger #BGLPRG0 + | Purge Posted | | Journal Entries | | | | | + + | | | | | All posted journal entry for the YEAR of the accounting | | period and company entered below will be purged. | + + | You can only purge one year for one company at a time | | | | | | | +Enter General Ledger Company Number: ( 1 ) Mid-American Control Corp + | | |Enter Accounting Period (YYMM).....: (9901) You can enter any month of | | the accounting year to be | | purged | + + | | | | | | | F0=Accept Screen F1= F2= F3= | | F4= F5= F6= F7=Exit Screen | +----+----+----+----+----+----+----+----+----+----+----+----+----+----+----+ The selection of option 3 -- PURGE POSTED ENTRIES, on the End of Year Sub Menu will cause the above screen, #BGLPRG0, to appear. The purpose of this screen is to accept the entry of a company number and an accounting period to be used to purge one accounting year’s transactions from the posted transaction file. Enter the company number for which journal entries are to be purged. Enter any accounting period within the year for which journal entries are to be purged. After pressing the F0 (send) key, the company name will be displayed and you will have the opportunity to verify the company number. You will also be given the opportunity to verify the accounting period before the purge begins. As journal entries are purged, a counter will be displayed on the screen to indicate the status of the purging process. - 98 -
G/L V.G USER'S MANUAL Each function key is now explained. F0=ACCEPT SCREEN (send/enter) Press this key to begin the purge process. F7=EXIT SCREEN Press this key to exit the screen and return to the End of the Year menu. GENERAL LEDGER CLOSING - DETAIL INFORMATION
APPENDIX
Month End Close (Months 1-11) After the last journal entries have been posted, the month must be closed. For the first eleven months of the fiscal year, the records in the chart of accounts file are updated as follows: * YTD Net fields (14, 15, 24) are moved to previous trial balance fields (6, 7, 20). * The net amount of fields 14 and 15 is moved to the corresponding current year net field (38-51); the same thing is done for YTD net quantity. * Future period current fields (28 and 29) are moved to MTD current fields (8 and 9). * Future reversing fields (30 and 31) are moved to MTD reversing fields (10 and 11). * Net amount of future fields (32 and 33) is moved to the corresponding MTD net field (12 or 13). * The three future quantity fields (34, 35, 36) are moved to the three MTD quantity fields (21, 22, 23). * Net amount of future fields (32 and 33) is added to YTD net fields (14 and 15). * The YTD net fields (14 and 15) are netted. * Future net quantity (field 36) is added to YTD net quantity (field 24). * The next (future) current year net period (one of fields 38-51) is set up using the net of fields 14 and 15. * The future fields (28-36) are reset to zero. - 99 -
G/L V.G USER'S MANUAL In the company file, the present accounting period is incremented by one. If the 11th month is being closed, the system will verify that the prior year has been closed. If it hasn't been closed, a warning message will appear asking if the user wants to continue. At this point, the user may proceed with closing the 11th month. However, the system will not allow the 12th month of the current year to be closed until the prior year has been closed. Month End Close (12th Month) When the 12th month of the fiscal year is closed, the records in the chart of accounts file are updated according to account type (balance sheets accounts versus income accounts). The company file is also updated during the 12th month closing as follows: * The present accounting period is set to one. * A flag is set, indicating that year-end posting of journal entries is allowed. * Current period ending date 12 (field 25) is moved to the previous year fiscal end date (field 11). * Future end dates 1-11 (fields 27-37) are moved to current end dates 1-11 (field 14-24). Note: The date fields for period 12 (fields 25 and 38) will not get updated until the year-end close program is run. This is done for purposes of financial statement reporting at year-end. * Future end dates 1-11 (fields 27-37) are updated by adding one to the year. Again, the 12th period date will not be updated at this time. The chart of accounts file will be updated as follows: * For All Accounts: - YTD net fields (14, 15, 24) are moved to final adjusted fields (18, 19, 26). - Current year net fields (38-49) are moved to previous year net fields (52-63). Then, fields 38-49 are reset to zero. Again, the fields for 12th and 13th months are not updated at this time. - 100 -

G/L V.G USER'S MANUAL - Current year net quantity fields (66-77) are moved to previous
- Future net quantity (field 36) is added to YTD net quantity
year net quantity fields (80-91). Then, fields 66-77 are reset to zero. Fields for the 12th and 13th months are not updated at this time. - Future budget fields (108-119) are moved to current year budget fields (94-105). Fields for the 12th and 13th months are not updated at this time. * For Balance Sheet Accounts only: - Current year net for period 12 (field 50) is moved to current year beginning balance (field 38). - Current year net for period 13 (field 51) is moved to current year net period one (field 39). - Similarly, for quantities, field 78 is moved to field 66 and and field 79 is moved to field 67. * For Income Accounts only: Closing journal entries are printed as an audit trail. Then, the YTD net fields (14, 15, 24) and the previous trial balance fields (6, 7, 20) are reset to zero. * For Balance Sheet accounts: The net amount of fields 14 and 15 is moved to the corresponding current year net field (38-51). The same thing is done for YTD net quantity. * For All Accounts: - The YTD net fields (14, 15, 24) are moved to the previous trial balance fields (6, 7, 20). - Future period current fields (32 and 33) are moved to MTD current fields (8 and 9). - Future reversing field (30 and 31) are moved to MTD reversing fields (10 and 11). - Net amount of future fields (32 and 33) is moved to the corresponding MTD net field (12 or 13 depending on DR or CR). - The three future quantity fields (34, 35, 36) are moved to the three MTD quantity fields (21, 22, 23). - Net amount of future fields (32 and 33) is added to YTD net fields (14 and 15). - The YTD fields (14 and 15) are netted.
(field 14). - 101 -

G/L V.G USER'S MANUAL
fields.
* The YTD net fields (14 and 15) are netted.
* The net amount of the year end adjustment fields (16 and 17) is added to all months of the new year up to and including the present accounting period. Example: If the present accounting period is 4, the net amount of the year end adjustments is added to each field 38-42 (beginning balance and periods 1-4).
- The net of fields (14 and 15) is moved to current year net period one (field 39). - The future fields (28-36) are reset to zero. After all of the accounts have been updated, a journal entry is created to close out the total of revenue and expense accounts to the current earnings account. Then, two more journal entries are created to close out the current earnings account to the retained earnings account. In the R/E account, the previous trial balance fields (6 and 7) and the YTD net fields (14 and 15) are incremented by the amount in the C/E account. In the C/E account, the net of the future fields (32 and 33) is moved to the current year net period one (field 39). The MTD fields (8, 9, 12, 13) and YTD fields (14 and 15) are updated by the amount of the future fields. The previous trial balance fields (6 and 7) are reset to zero. Year End Close After the 12th month has been closed and all year end adjusting journal entries have been posted, the year must be closed. The company file will be updated as follows: * Future end date for period 12 (field 38) is moved to current end date period 12 (field 25). * The future end date for period 12 (field 38) is updated by adding one to the year. * The closing flag is reset, indicating that year end posting of journal entries is no longer allowed. The chart of accounts file will be updated as follows: Balance Sheet Accounts: * Year end adjustment fields (16 and 17) are added to previous trial balance fields (6 and 7) and are also added to YTD net fields (14 and 15). The same thing is done for the quantity
* The previous trial balance fields (6 and 7) are netted.
- 102 -
G/L V.G USER'S MANUAL
* Adjusted final fields (18, 19, 26) are reset to zero.
* The same thing is done for the quantity fields. * Current year net period 12 (field 50) is moved to previous year net period 12 (field 64). Then, field 50 is reset to zero. * Current year net quantity for period 12 (field 78) is moved to previous year net quantity for period 12 (field 92). Then, field 78 is reset to zero. * Future budget period 12 (field 120) is moved to current year budget period 12 (field 106). * Year end adjustment fields (16, 17, 25) are reset to zero. * Adjusted final fields (18, 19, 26) are reset to zero. Income Accounts: * The net amount of the year end adjustment fields (16 and 17) is used to print closing journal entries for an audit trail. * Current year net period 12 (field 50) is moved to previous year net period 12 (field 64). Then, field 50 is reset to zero. * Current year net quantity for period 12 (field 78) is moved to previous year net quantity for period 12 (field 92). Then, field 78 is reset to zero. * Future budget period 12 (field 120) is moved to current year budget period 12 (field 106). * Year end adjustment fields (16, 17, 25) are reset to zero. * Adjusted final fields (18, 19, 26) are reset to zero. Current Earnings Account: * Current year net period 12 (field 50) is moved to previous year net period 12 (field 64). Then, field 50 is reset to zero. * Current year net quantity for period 12 (field 78) is moved to previous year quantity for net period 12 (field 92). Then, field 78 is reset to zero. * Future budget period 12 (field 120) is moved to current year budget period 12 (field 106). * Year end adjustment fields (16, 17, 25) are reset to zero.
- 103 -

G/L V.G USER'S MANUAL
After all of the accounts have been updated, a journal entry is created to close out the total of revenue and expense accounts to the current earnings account. Then, two more journal entries are created to close out the current earnings to the retained earnings account. In the C/E account, the previous year net period 12 (field 64) is updated by the total of revenue and expense accounts. In the R/E account, the total of revenue and expense accounts is added to each of the following: - previous trial balance field (6 or 7) - YTD net fields (14 or 15) - current year beginning balance (field 38) - current year net period 1 (field 39) Then, the previous trial balance fields (6 and 7) are netted. The YTD net fields (14 and 15) are also netted.
- 104 -