Buoyancy Compensating Devices User’s Manual
28
SECURE Weight Retention System Patent Pending Buoyancy Compensating Devices User’s Manual www.SherwoodScuba.com
Transcript of Buoyancy Compensating Devices User’s Manual

SECUREWeight Retention SystemPatent Pending
Buoyancy Compensating Devices User’s Manual
www.SherwoodScuba.com

WARNING/DISCLAIMER PAGE 2
WARNING: This manual provides some basic guidelines for certain buoyancy control techniques using your Sherwood Buoyancy Compensating Device (BCD), but it is not a substitute for training from a professional diving instructor. If you are unsure how to weight yourself in order to achieve optimum buoyancy underwater and on the surface, do not dive with your Sherwood BCD until you have obtained the necessary instruction from your diving instructor or Authorized Sherwood Scuba Dealer. Failure to weight yourself properly can create a hazardous condition that could lead to serious injury or death.
IT IS VERY IMPORTANT TO READ ALL INSTRUCTIONS AND WARNINGS PRIOR TO USING YOUR SHERWOOD BCD.
Definitions of Warnings, Cautions and Notes:
A WARNING is used before a procedure or situation that may result in serious injury or death.
A CAUTION indicates a situation or technique that will result in damage to the product.
A NOTE is used to emphasize important points.
WARNING: This manual contains important information for the proper use and care of your Sherwood buoyancy compensating device (BCD). Sherwood BCD’s are designed with many patented features that are unique from other manufacturer’s. It is therefore very important to carefully read the instructions provided in this manual in order to understand how to correctly use your BCD. Incorrect use of your BCD can result in serious injury or death.

WARNING/DISCLAIMER PAGE 2 CONTENTS
GENERAL WARNINGS & PRECAUTIONS ....................................... 4INTRODUCTION ...................................................................... 5INTENDED USE & FUNCTION OF YOUR BCD ................................. 6OVERVIEW OF STANDARD FEATURES ......................................... 7PREPARATION & SETUP ........................................................... 9INTEGRATED WEIGHT SYSTEMS ................................................11
NON-RELEASABLE WEIGHT ......................................................................12
CQR™ RELEASABLE WEIGHT SYSTEM ........................................................13
PRE-DIVE INSPECTION ............................................................16DIVING WITH YOUR SHERWOOD BCD .......................................17
RULES FOR PERSONAL WEIGHTING ...........................................................17
DIVING WITH A RELEASABLE WEIGHT SYSTEM ...........................................17
POST DIVE CARE & MAINTENANCE ...........................................21OPTIONAL ACCESSORIES & SPECIAL FEATURES .......................... 22DEALER INSPECTION & SERVICE .............................................. 23LIMITED TWO YEAR WARRANTY ............................................. 24ANNUAL SERVICE RECORD ..................................................... 27
This owner’s manual is copyrighted, all rights reserved. It may not, in whole or in part, be copied, photocopied, reproduced, translated or reduced to any electronic medium or machine readable form without prior consent in writing from Sherwood Scuba®, LLC.
© Copyright 2002 Sherwood Scuba®, LLC.BCD Owner’s Manual, P/N-MAN1001-1

PAGE 4GENERAL WARNINGS
Do not use this buoyancy compensating device (BCD) if you have not received supervised instruction and certification in SCUBA diving and buoyancy control from a recognized training agency. USE OF SCUBA EQUIPMENT BY UNCERTIFIED OR UNTRAINED PERSONS IS DANGEROUS AND CAN RESULT IN SERIOUS INJURY OR DEATH.
Before using this BCD, it is important to completely read and understand all of the instructions provided in this owner’s manual, any accompanying inserts, and labels or markings affixed to the BCD. IF YOU HAVE ANY QUESTIONS OR DO NOT COMPLETELY UNDERSTAND THESE INSTRUCTIONS, CONSULT YOUR AUTHORIZED SHERWOOD SCUBA DEALER.
Before diving with this BCD in open water, it is important to familiarize yourself with it first in confined shallow water with the assistance and supervision of an instructor or experienced buddy. DO NOT ENTER OPEN WATER UNTIL YOU HAVE WEIGHTED YOURSELF PROPERLY AND HAVE BECOME COMFORTABLE WITH USING ALL OF ITS FEATURES AND ADJUSTMENTS.
Before every dive, perform a complete pre-dive inspection following the instructions provided in this manual. Check to ensure that all valves are functioning properly and no signs of damage or leaks are present. IF ANY SIGNS OF DAMAGE OR MALFUNCTION ARE FOUND, DO NOT DIVE WITH THE BCD UNTIL IT HAS RECEIVED SERVICE FROM AN AUTHORIZED SHERWOOD SCUBA DEALER.
Before entering the water, check to ensure that you can remove and ditch your weight quickly and easily, without any obstruction or entanglement with any hoses or accessories. IN THE EVENT OF AN OUT OF AIR EMERGENCY OR UNCONTROLLED DESCENT, DO NOT HESITATE TO REMOVE AND DITCH WEIGHT.
DO NOT USE YOUR BCD TO LIFT HEAVY OBJECTS TO THE SURFACE. Doing so may cause permanent damage to the BCD, and could easily result in an uncontrolled ascent.
General Warnings & Precautions

PAGE 5 GENERAL WARNINGS
Warnings & Precautions (continued)
DO NOT overinflate your BCD or rely on using the power inflator to lift yourself toward the surface. Control all ascents. A RAPID, UNCONTROLLED ASCENT MAY CAUSE ARTERIAL GAS EMBOLISM OR DECOMPRESSION SICKNESS, AND COULD LEAD TO SERIOUS INJURY OR DEATH.
IN THE EVENT OF AN UNCONTROLLED, RAPID ASCENT, IT IS IMPORTANT TO IMMEDIATELY VENT AS MUCH AIR AS POSSIBLE FROM THE BCD TO SLOW YOUR ASCENT RATE.
DO NOT INHALE FROM YOUR ORAL INFLATOR. The BCD air cell may contain harmful contaminants or gasses, which could cause suffocation or injury.
It is important to obtain factory prescribed service for this BCD from an Authorized Sherwood Dealer at least once each year, or according to the same scheduled intervals for your regulator. Annual service consists of a complete overhaul of the power inflator, and a general airleak inspection of the air cell and valve connections.
Disassembly, repair, or lubrication must only be performed by persons who are factory trained and authorized by Sherwood Scuba. UNAUTHORIZED SERVICE WILL RENDER THE WARRANTY NULL AND VOID, AND COULD CAUSE THE BCD TO MALFUNCTION.
IntroductionThank you for choosing Sherwood Scuba. Your new BCD has been
designed, crafted, and assembled following the most exacting standards of any diving equipment manufacturer. Our design team is made up of enthusiasts like yourself who actively dive, and we take pride in creating products that will enhance your diving comfort and enjoyment.
To fully enjoy all the features of your BCD, and understand how to properly use it, it is very important to take the time to read the instructions provided in this manual. If you have any questions, please consult your Authorized Sherwood Scuba Dealer.

PAGE 6INTRODUCTION
Intended Use & Function of Your BCD
The main purpose for wearing a buoyancy compensating device is to achieve and maintain neutral buoyancy at all times while you are underwater, regardless of changes in depth or cylinder pressure. This allows you to be much more relaxed while you dive – and safer – since you wonʼt need to struggle against the forces of positive and negative buoyancy. Modern jacket and back inflation style BCDʼs provide the most effective and streamlined buoyancy control, since they are specifically designed to support the diver in a comfortably balanced, face-down position while swimming underwater. Stress and exertion can now be minimized, if not eliminated altogether.
Since the introduction of the jacket style and back inflation designs, the modern BCD has evolved into a consolidated harness and pack system that carries the cylinder and serves as a fixture point for second stage regulators, instrumentation, and accessories. For even greater convenience and comfort, many models are now available with integrated weight systems that can supplement or replace the weight belt.
Your BCD can also provide you with non-emergency flotation to help you rest on the surface, but you should never rely on it to function as a life preserver or personal flotation device (PFD). In order to meet approval by U.S. Coast Guard regulations, a PFD must be designed so that it automatically rights you to a face-up position and supports your head out of the water on the surface to prevent drowning. The design characteristics and intended function of a PFD are therefore very different from those of a BCD, since a PFD is specifically designed to function on the surface and a BCD is primarily designed to function underwater.
It is important to remember that your position in the water will also be affected by other equipment you wear in addition to your BCD, including your cylinder, exposure suit, or weight system. An empty cylinder, for instance, can create counter-buoyancy that could roll you into a face down position if you were to lose consciousness.
For this reason, Sherwood Scuba recommends that you always dive with a buddy, and remain close enough to them to be able to render assistance to each other in the event of an emergency. Do not depend on your BCD, exposure suit, or any other equipment to hold your face above the surface in the event that you are rendered unconscious in the water while diving.

PAGE 7 STANDARD FEATURES
WARNING: A buoyancy compensating device (BCD) is NOT a lifejacket! It is not designed to provide face-up flotation in all situations, and it does not meet U.S. Coast Guard regulations for a life preserver or personal flotation device (PFD). If you become unconscious in the water without a buddy present to immediately assist you, you may suffer serious injury or death from drowning.
Overview of Standard Features & Adjustments
Please take the time to acquaint yourself with your BCDʼs features, including standard inflation/deflation valves and adjustments that can be found on every model Sherwood BCD. Specific instructions for using these features will be provided throughout this manual. Additional options and special features will be explained on page 22.
Valves
Power Inflator – This assembly is actually made up of two different valves. The oral inflation valve can be used to manually inflate or deflate your BCD. The power inflation valve is connected directly to your regulatorʼs first stage, and can be used to inflate your BCD with the push of a button.
Rapid Exhaust Valve (REV) – This valve is connected to the power inflator with a cable, and can be opened to vent air by pulling the power inflator straight down. It works best while you are in a vertical, head up position, or in a face down swimming position.
Overpressure Relief / Rear Dump Valve – The primary function of this valve is to automatically release air to prevent damage to your BCD that could be caused by overinflation. When the air pressure inside the air cell reaches 2.5 pounds per square inch (psi) over ambient, the valve will automatically open, and then close again after the pressure is below this limit. Using the ball and cord, it can also be used to rapidly dump air.

PAGE 8ADJUSTMENTS
Primary Adjustment PointsShoulder StrapsThe shoulder straps of your BCD are connected with side squeeze fasteners, and can be easily adjusted by pulling upward on the buckle to loosen, or downward on the strap D-ring to tighten.Cummerbund WaistbandThe cummerbund is designed to provide a wide range of adjustment to hold your BCD snug and secure below your ribcage and above your hips. All Sherwood cummerbunds feature a high quality Velcro® touch fastener, and can be adjusted for length at the backpack. Some models feature an elastic stretch cummerbund that can compensate for the contraction of your wetsuit at depth. To fasten the cummerbund, simply pull the left side containing the loop Velcro snug across your waist, and then pull the right side snug over it and press firmly down to fasten the hook Velcro.Cylinder Band with BuckleThis mechanism attaches your BCD to your cylinder so that it is securely held at the desired height, without slipping. Some models are equipped with two cylinder bands for extra support. The nylon webbing should already be woven through the buckle(s), but instructions for re-weaving are provided in the following section, titled Preparation & Setup.Tank Locator Strap (not shown) To ensure that your BCD is set at the correct height on the cylinder, simply loop this strap over the cylinder valve and adjust it to raise or lower the BCD. Then, fasten the cylinder band(s).Sternum StrapMost models are equipped with this feature, or it can be purchased as an accessory option. Using two quarters, you can disassemble the post pins to reverse the strapʼs direction, or remove it altogether.

PAGE 9 INITIAL SETUP
Preparation & Setup
Sherwood Scuba recommends that you bring your BCD, together with your regulator, to your Authorized Sherwood Scuba Dealer for the installation of the low pressure (LP) quick disconnect inflator hose that is provided with your BCD. If it is not possible to return with your regulator to your Authorized Dealer, however, you may install the LP inflator hose by carefully performing all the steps in the following procedure.
LP Inflator Hose Installation
WARNING: DO NOT attach the low pressure inflator hose to a high pressure (HP) port (greater than 200 psi). This may cause the hose to burst when pressurized, which can result in serious injury.
The LP hose has a 3/8” male fitting that will only fit the standard LP ports found on most first stages, and is smaller than a standard (7/16) high pressure (HP) port. Some older regulators have HP and LP ports that are the same size (3/8”). All Sherwood regulators, and most provided by other manufacturers, have a high pressure port that is clearly marked “HP,” with a small restrictive orifice that is visible when the plug is removed.
If your regulator has all a” ports and you cannot decide if a port is LP or HP, bring it with the hose to your dealer for installation.
If you can identify your regulatorʼs LP ports, follow this procedure:1. To select the best LP port, mount the first stage on a cylinder valve to
determine the correct orientation and hose routing.2. Remove the port plug from a low
pressure port on the regulator using the appropriate size wrench or key.
3. Your BCD was shipped with the LP hose connected to the power inflator. Remove the inflator hose from the power inflator body by sliding the grooved sleeve back while pulling the fitting off the QD nipple.
4. Check the male end of the LP hose to ensure the O-ring is present and in good condition, and screw the threaded end of the hose into the port. Tighten to 40 inch-pounds (7kg/cm) with a 9/16” wrench.

PAGE 10CYLINDER MOUNTING
Threading the Cylinder Band & Buckle
NOTE: Sherwood BCD’s are shipped with the nylon band pre-threaded through the buckle. If rethreading is necessary, follow these steps:
1. Ensure that the metal bale of the buckle is as close to the rear of the BCD as possible. This provides the greatest range of adjustment.
2. With the buckle fully open, thread the cylinder band up the middle slot and back down through the slot closest to the metal bale. Pull the end to increase the tension in the band.
3. Loosely thread the webbing through the open slot in the end of the buckle, but do not cinch it tight at this time.
Attaching the BCD to the Cylinder
NOTE: Some models are equipped with two cylinder band assemblies.
1. First, wet the cylinder band(s) and then fit the BCD over the cylinder. Loop the tank locator strap over the cylinder valve and adjust it as needed to hold the BCD at the desired height and position.
2. While holding the cylinder secure, pull the free end of the cylinder band until there is a very tight fit between the pack and the cylinder.
3. Close the buckle halfway to hold the cylinder band taut, and thread the end of the band through the open slot in the end of the buckle.
4. Pull the cam buckle closed so that it snaps down against the cylinder. Fasten the end of the webbing securely over the loop Velcro on the cylinder band.
5. Test the tightness by vigorously pulling and shaking the BCD by the shoulder straps.
Step 1
Step 2
Step 3

PAGE 11 INTEGRATED WEIGHTS
WARNING: The cylinder band may initially stretch after it becomes wet. Always wet the band prior to attaching your BCD to the cylinder, apply enough tension to ensure that the cylinder is held completely secure. Test this connection before every dive. If the cylinder is allowed to slip free from the BCD while you are diving, you could become separated from your air supply, which could result in serious injury or death.
Use With Double Cylinders
Sherwood BCDʼs are sold with single cylinder harnesses only, and most models are not designed to accommodate twin cylinders. If yours is a back inflation design, which is more conducive for this purpose, there may be a special back plate and mounting kit available to upgrade it for use with twin cylinders. If it is available for your model, this upgrade must be purchased separately and installed by an Authorized Sherwood Scuba Dealer. Check with your dealer for more information.
The use of double cylinders can lead to potentially dangerous situations underwater, including the inability to achieve positive buoyancy due to increased weight, and exposure to decompression sickness due to expanded dive profiles. It is important to take the necessary precautions to avoid these risks, and obtain specialty training from a qualified instructor.
WARNING: Do not attempt to modify your Sherwood BCD for use with more than one cylinder. Doing so could damage the structural integrity of the BCD’s backpack and harness system, and could lead to its failure underwater. If an upgrade is available for your BCD, it must be installed by an Authorized Sherwood Scuba Dealer.
Integrated Weight SystemsSome Sherwood BCD models are equipped with built-in compartments
and pockets to hold non-releasable and/or releasable weights. Either “soft weight” (pouches filled with lead shot) or solid weight can be used, but soft weight is strongly recommended, since it will fill the weight compartment to its fullest capacity and provide maximum comfort.
If your Sherwood BCD is a weight integrated model, it is very important to read the following instructions in order to understand the difference between these two types of weight pockets and how to use them correctly.
PAGE 12INTEGRATED WEIGHTS
Non-Releasable Weight
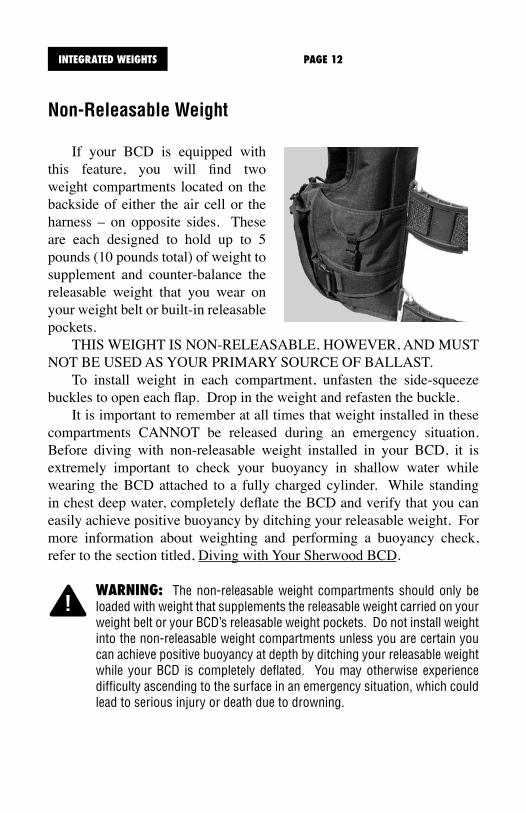
If your BCD is equipped with this feature, you will find two weight compartments located on the backside of either the air cell or the harness – on opposite sides. These are each designed to hold up to 5 pounds (10 pounds total) of weight to supplement and counter-balance the releasable weight that you wear on your weight belt or built-in releasable pockets.
THIS WEIGHT IS NON-RELEASABLE, HOWEVER, AND MUST NOT BE USED AS YOUR PRIMARY SOURCE OF BALLAST.
To install weight in each compartment, unfasten the side-squeeze buckles to open each flap. Drop in the weight and refasten the buckle.
It is important to remember at all times that weight installed in these compartments CANNOT be released during an emergency situation. Before diving with non-releasable weight installed in your BCD, it is extremely important to check your buoyancy in shallow water while wearing the BCD attached to a fully charged cylinder. While standing in chest deep water, completely deflate the BCD and verify that you can easily achieve positive buoyancy by ditching your releasable weight. For more information about weighting and performing a buoyancy check, refer to the section titled, Diving with Your Sherwood BCD.
WARNING: The non-releasable weight compartments should only be loaded with weight that supplements the releasable weight carried on your weight belt or your BCD’s releasable weight pockets. Do not install weight into the non-releasable weight compartments unless you are certain you can achieve positive buoyancy at depth by ditching your releasable weight while your BCD is completely deflated. You may otherwise experience difficulty ascending to the surface in an emergency situation, which could lead to serious injury or death due to drowning.

PAGE 13 INTEGRATED WEIGHTS
C.Q.R.™ Weight Retention System
Some Genesis BCD models are also equipped with two releasable weight pockets, located inside the front lower portions of the BCD. These pockets can be easily identified by their plastic pull handles that face toward the center of the waistband. Each releasable pocket is labeled with the maximum amount of weight that it is designed to hold. Do not exceed the maximum weight.
Filling the Weight Pockets
To fill the releasable pockets with weight, it will be necessary to first remove each one from its respective compartment by firmly pulling the release handle straight out and away from the BCD.
Open the sealed flap, and fold it back out of the way. While holding the pocket fully open, insert the weight and then close the flap. When each pocket has been loaded with weight, firmly run your hand over the flap to seal the Velcro® fastener securely in place.
When filling the releasable weight pockets, it is important to fill each pocket with the same amount of weight in order to provide optimum balance in the water. You may otherwise experience a tendency to roll to one side if one pocket is more heavily loaded than the other.

PAGE 14INTEGRATED WEIGHTS
C.Q.R.™ Releasable Weight Pocket Installation
WARNING: Before every dive, it is important to inspect the connections of the releasable weight pockets and the BCD to ensure that they are properly and securely fastened, and free of any signs of damage that may impair their function. Carefully follow the instructions provided to install the pockets correctly and ensure that their connections are securely fastened. Accidental release of the weight pockets may otherwise result in an uncontrolled ascent, which could lead to serious injury or death due to embolism or decompression sickness.
The weight pockets should be installed while the BCD is fully deflated, either before or after it is donned. It is much easier, however, to install them before donning the BCD. If the weight pockets are filled to their maximum capacity and installed into the BCD, Sherwood Scuba strongly recommends that you should seek the assistance of a buddy before attempting to don the BCD. You may otherwise risk injury, due to muscle strain or a temporary loss of balance.
To install each pocket, first ensure that it is correctly oriented outside the compartment according to the labeled instructions, so that the labeled side is facing up. Insert the male fastener into the opening of the compartment, and guide it through until it appears outside the other end. Then, insert the male fastener into the female buckle and firmly press it inward until it audibly clicks into place.
For information about using the integrated weight system and ditching weight, refer to the section titled, Diving with Your Sherwood BCD.

PAGE 15 DONNING METHOD
Donning the BCD
CAUTION: To avoid possible injury and/or damage to your equipment, Sherwood Scuba recommends that you should always don your BCD with assistance from a buddy.
1. Ensure that the side-squeeze buckles of both shoulder straps are securely fastened. Fully extend each strap to its maximum length by pulling up on the tab of the lower slide buckle, and then pulling the webbing down until the D-ring slides up near the buckle.
2. While your dive buddy holds the cylinder supported behind you, reach back to place your arms through the shoulder straps.
3. While your buddy continues to hold the cylinder, fasten the cummerbund snug around your waist (not hips). The best positioning is between your hip and rib cage. The weight of the cylinder should rest on the lumbar region (lower part) of your back.
4. After your buddy has released the cylinder and the BCD feels comfortably supported on your hips and shoulders, bend forward at the waist and adjust the shoulder straps to a comfortable length by pulling straight down on the D-rings.
NOTE: Remember, adjusting the shoulder straps too tightly will transfer the cylinder weight from the hips onto the shoulders, and may restrict your arm movement.
5. Readjust the cummerbund, if necessary, so that it is comfortably snug but not restricting, with an overlap of at least 3 inches. Fasten together the male and female side-release buckles of the outer waist strap over the cummerbund.
NOTE: If your BCD is equipped with an elastic outer waist strap, it can be adjusted inside the BCD, behind the cummerbund, so that it will snug when fastened. This will help your cummerbund to remain snug when your wetsuit becomes compressed at depth, and can also help prevent squeeze when your BCD is inflated on the surface.
6. Fasten the sternum and waist straps, if equipped, and pull the free ends until they are comfortably snug but not restricting.
WARNING: Be sure to avoid overtightening your BCD’s adjustments. Check to ensure that you can move your arms comfortably and take deep, full breaths. Overtightening can restrict your respiration and blood circulation, which can lead to serious injury or death.

PAGE 16PRE-DIVE INSPECTION
Pre-Dive InspectionBefore each use, the BCD must be visually inspected and tested.
NEVER dive with a BCD that shows any signs of damage to its air cell or valves until it has been serviced by an Authorized Sherwood Dealer.
Inspection Checklist:1. Connect the power inflator to a clean air source, via the LP
quick disconnect hose. Depress and release the inflator button intermittently to ensure that the airflow is unobstructed, and that the airflow stops completely when the button is released.
2. Ensure that the air cell does not contain any water from a previous dive or from internal rinsing. An excessive amount of water inside the air cell can reduce the BCDʼs internal air volume and lift capacity.
3. Manually operate the lower overpressure valve (OPV) by pulling on the attached ball and cord to release air from inside the BCD, and then fully inflate the BCD until the OPV valve opens. Examine the operation of the OPV valve by repeatedly inflating the BCD to ensure that it opens to relieve excess pressure, yet close immediately afterward to allow the air cell to remain fully inflated.
4. Check the function of the oral inflator button, rapid exhaust valve (REV), and OPV to ensure a rapid and unobstructed exhaust from each valve. Fully inflate the BCD once again, and disconnect the Power Inflator to listen for any leakage.
CAUTION: If any leakage can be heard, or if the air cell begins to deflate within 5-10 minutes, DO NOT attempt to use the BCD until it has received service from an Authorized Sherwood Scuba Dealer.
5. Make a final check of the cylinder bandʼs tension to ensure that it is as tight as possible and the cylinder is securely held without any noticeable slippage. Retighten if necessary.
6. Before entering the water, check the non-releasable weight compartments to ensure they are closed, and the releasable weight pockets to ensure that they are correctly installed into to the BCD. (See Setup & Installation.)
WARNING: The releasable weight pockets may fall out unexpectedly if the C.Q.R.™ connections are not securely fastened. Involuntary release of both weight pockets can cause a sudden increase in buoyancy and rapid ascent, and could lead to serious injury or death due to arterial gas embolism or decompression sickness.

PAGE 17 WEIGHTING
Diving With Your Sherwood BCDRules For Personal Weighting
Before diving with your new Sherwood BCD, it is important to establish the correct amount of weight you will need to wear to achieve neutral buoyancy, without being too heavy (negatively buoyant) or light (positively buoyant). While following the procedure you were taught in your basic or open water training course, it is important to observe some basic rules for properly weighting yourself:1. Be aware of the factors that can cause your personal buoyancy to
change, including personal weight loss or gain, the type and thickness of the exposure suit you wear, and the buoyancy characteristics of your cylinder when it is full and empty.
2. Weight yourself in chest deep water while wearing all your equipment, including exposure suit and BCD, with the cylinder you will be using while it contains no more than 500 psi.
3. Experiment with different amounts of weight until you are able to float at eye level on the surface while holding your breath, and slowly begin to sink as you exhale.
4. Conduct a personal buoyancy check whenever your body weight has changed, of if you use a different cylinder, BCD, or exposure suit.
Diving With a Releasable Weight SystemIt is important to remember that the
releasable weight pockets are connected to the BCD independently of each other, unlike a weight belt that has only one release mechanism, and must be released accordingly. This feature provides you with the advantage of being able to ditch only half your weight initially, and thereby maintain better control of your ascent rate in an emergency.
In the event of an emergency that requires you to ditch your weight, firmly pull the release handle of each weight pocket towards the opposite side of your waist. When the pocket is completely disengaged from its compartment, hold it out and away from your body before dropping it.
CAUTION: To avoid injuring other divers, always look below you before dropping weight.

PAGE 18INFLATION METHODS
WARNING: Ensure that your releasable weight is not obstructed by any straps, lines, etc. DO NOT add weight to your BCD anywhere other than the designated weight compartments, since doing so may prevent you from being able to ditch weight in an emergency. Failure to ditch weight in an emergency may lead to serious injury or death due to drowning.
Before diving with a BCD that features a releasable weight system, it is very important to explain its function and design to your dive buddy, to ensure that they are as familiar with it as you are so they can assist you in an emergency.
Inflating Your BCD
Oral InflationTo orally inflate your BCD, hold the
oral inflator mouthpiece to your mouth and depress the oral inflator button while exhaling into the mouthpiece. Release the button when done or while taking another breath, and repeat this procedure until the BCD is satisfactorily inflated.
NOTE: Oral inflation of your BCD underwater is a practiced skill that must be achieved under the supervision of your diving instructor, since it requires the removal of your second stage regulator from your mouth.
Power InflationTo connect the LP hose, grip the grooved sleeve at the connection
fitting between your thumb and forefinger, and slide the sleeve back. Place the fitting over the inflator valve QD nipple, and firmly push inward while releasing the sleeve. Check to ensure that the hose is securely attached.
To inflate your BCD, depress the power inflator button. Do not hold the inflator button depressed continuously underwater, as this could cause you to become excessively buoyant. Instead, depress the button in short bursts until you become neutrally buoyant.
WARNING: Do not rely on the power inflator as the only means for inflating your BCD. It is important to maintain proficiency in the skill of orally inflating your BCD. You may otherwise be unable to achieve positive buoyancy in an emergency situation, which could lead to serious
PowerInflation Button
Mouthpiece
OralInflation Button
QD Fitting

PAGE 19 VENTING/DUMPING
Venting & Dumping Air
Throughout the course of a dive, it will be necessary to vent or dump air from the BCD using one of the three methods described in the following instructions. Each method uses a valve that is in a different location, and is designed either to vent air or dump it very quickly. The method you should choose will depend on whether you are descending feet-first, head-first, maintaining neutral buoyancy underwater, or controlling your ascent. To release air as effectively as possible, remember to utilize the valve that is at the highest point on the BCD and nearest to the surface, depending on your position in the water.
WARNING: Whenever you ascend, whether intentionally or accidentally, you must simultaneously vent air from the BCD as needed to maintain buoyancy control. If air is allowed to expand inside the BCD unchecked, you may experience a rapid, uncontrolled ascent, which could lead to serious injury or death due to arterial gas embolism, decompression sickness, or drowning. To regain buoyancy control during an uncontrolled ascent, you must dump air from the BCD as quickly as possible until you have stopped ascending.
Venting With the Oral InflatorAir can be vented through the inflator by holding the inflator above your
head and depressing the oral inflator button. This method is recommended for making an initial feet-first descent, but is not as effective while you are in a facedown swimming position.
NOTE: Depressing the oral inflator while the BCD is empty may allow water to enter the air cell.
Venting With the REVInside the power inflatorʼs corrugated hose is a cable
that attaches the power inflator to the rapid exhaust valve at the top of the airway assembly. You can vent air from the BCD by pulling straight down on the power inflator.
This valve provides an effective and convenient way to vent air from the BCD while you are in either an upright or facedown swimming position, and is more convenient to use than the oral inflator.

PAGE 20VENTING/DUMPING
Lower OPV/ Dump ValveAll Sherwood BCDʼs have an
overpressure relief (OPV) valve that is located on the lower rear portion of the air cell. The primary function of this valve is to protect the air cell from over-pressurization by automatically venting air when the internal pressure of the air cell reaches a certain level (about 2.5 psi over ambient). It can also be opened manually to quickly dump air by pulling on the ball and cord assembly.
This valve is most useful for dumping air as quickly as possible while making a head-first descent, or swimming in a face-down position.
CAUTION: The proper function of the overpressure relief valve is essential to prevent damage to the BCD air cell . Unauthorized service or tampering may render this valve inoperable, and could cause the air cell to leak or burst. This type of damage is not repairable, and is not covered under the terms and conditions of the Sherwood Warranty.
NOTE: Most training agencies recommend that you should descend in an upright, feet-first position, in order to maintain a slower and more controlled descent. This is especially true if you experience difficulty equalizing your ears, or if you are descending in low visibility conditions.
Right Shoulder OPV/ Dump Valve (not featured on all models)
Some models may feature a redundant OPV/ Dump valve, located at the top of the right shoulder. A ball and cord assembly extends to the shoulder buckle assembly for quick dumping of air.
PAGE 21 MAINTENANCE
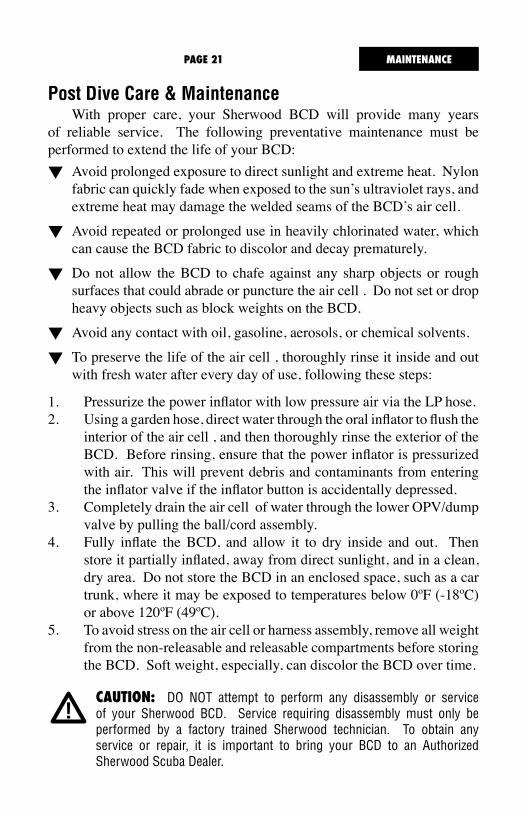
Post Dive Care & MaintenanceWith proper care, your Sherwood BCD will provide many years
of reliable service. The following preventative maintenance must be performed to extend the life of your BCD:
Avoid prolonged exposure to direct sunlight and extreme heat. Nylon fabric can quickly fade when exposed to the sunʼs ultraviolet rays, and extreme heat may damage the welded seams of the BCDʼs air cell.
Avoid repeated or prolonged use in heavily chlorinated water, which can cause the BCD fabric to discolor and decay prematurely.
Do not allow the BCD to chafe against any sharp objects or rough surfaces that could abrade or puncture the air cell . Do not set or drop heavy objects such as block weights on the BCD.
Avoid any contact with oil, gasoline, aerosols, or chemical solvents.
To preserve the life of the air cell , thoroughly rinse it inside and out with fresh water after every day of use, following these steps:
1. Pressurize the power inflator with low pressure air via the LP hose.2. Using a garden hose, direct water through the oral inflator to flush the
interior of the air cell , and then thoroughly rinse the exterior of the BCD. Before rinsing, ensure that the power inflator is pressurized with air. This will prevent debris and contaminants from entering the inflator valve if the inflator button is accidentally depressed.
3. Completely drain the air cell of water through the lower OPV/dump valve by pulling the ball/cord assembly.
4. Fully inflate the BCD, and allow it to dry inside and out. Then store it partially inflated, away from direct sunlight, and in a clean, dry area. Do not store the BCD in an enclosed space, such as a car trunk, where it may be exposed to temperatures below 0ºF (-18ºC) or above 120ºF (49ºC).
5. To avoid stress on the air cell or harness assembly, remove all weight from the non-releasable and releasable compartments before storing the BCD. Soft weight, especially, can discolor the BCD over time.
CAUTION: DO NOT attempt to perform any disassembly or service of your Sherwood BCD. Service requiring disassembly must only be performed by a factory trained Sherwood technician. To obtain any service or repair, it is important to bring your BCD to an Authorized Sherwood Scuba Dealer.

PAGE 22OPTIONAL ACCESSORIES
Optional Accessories & Special Features
You can purchase the following accessories for your new BCD from your Authorized Sherwood Scuba Dealer.
AKONA BCD Pro Kit™ This kit allows you to mount the following accessories on your BCD
to keep them within easy reach, including a small knife, halogen light with retracting lanyard, and a retracting lanyard for your instrument console.
AKONA Safety Tube™This high-vis surface signal device can be inflated to a length of 40”,
but is carried inside a compact 5.5”x2.75” nylon bag that can be clipped to your BCD.
Shadow™ OctopusTo streamline your system with less hoses and
keep your octopus where youʼll always be able to find it, youʼll want the Shadow™ – a backup second stage regulator that is worn connected with your power inflator. This option is available separately from your Authorized Sherwood Scuba Dealer, and can be added to any Sherwood BCD.
Twin Cylinder OptionIf your BCD features a back inflation style design, your Authorized
Sherwood Scuba Dealer can advise you whether it can be upgraded with a twin cylinder backplate and mounting kit. If you obtain this upgrade, however, it is very important to first compare the lift capacity of your BCD with the buoyancy specifications of the cylinders you intend to use. When fully charged and worn together as twins, some cylinders may create enough negative buoyancy to counteract the amount of lift your BCD can provide. At depth, this can lead to a dangerous situation if your wetsuit becomes compressed and you can no longer achieve positive buoyancy by jettisoning weight.
Sherwood Scuba recommends against the use of low pressure, high volume steel cylinders (2400 psi/100-120 cf) for this purpose, since they can be especially hazardous when worn as twins due to their weight and buoyancy characteristics.

PAGE 23 DEALER SERVICE
Dealer Inspection & Service
1. You should never assume that your BCD will function properly on the basis that it has received little use since it was purchased or last serviced. Remember that prolonged or improper storage can still result in internal corrosion and/or deterioration of O-ring seals and valve springs, as well as air cell seam degradation.
2. It is imperative that you obtain factory prescribed service for your BCD at least once a year from an Authorized Sherwood Scuba Dealer, including a general air leak inspection and complete overhaul of the power inflator and OPV valve. Your BCD may require this service more frequently, depending on the amount of use and quality of maintenance that it receives.
3. If the BCD is used for rental or training purposes in salt, chlorinated, or silted fresh water, it will require prescribed dealer service every three to six months. Use in chlorinated water will greatly accelerate the deterioration of most components, and require more frequent service.
4. DO NOT attempt to perform any disassembly or overhaul service of your BCD. Doing so may cause the BCD to dangerously malfunction, and will render the Sherwood Warranty null and void. All service must be performed by an Authorized Sherwood Scuba Dealer.
NOTE: A Service & Repair Log is provided in the rear of this manual.

PAGE 24WARRANTY INFORMATION
Limited Two Year WarrantySherwood BCDs are warranted to be free of defects in materials and workmanship for a period of two years following the date of original purchase. This warranty is limited and subject to the restrictions listed below. This warranty covers products purchased in the USA from an Authorized Sherwood Dealer. For warranties that may apply elsewhere, please contact your local representative.
WHAT IS COVERED
All non-wearing valve parts and the welded seams of the BCD air cell are covered under this warranty. Should any part of your Sherwood BCD be found defective, Sherwood Scuba, at its discretion, will repair or replace the component at no charge to you.
WHAT IS NOT COVERED
This warranty does not extend to abrasion, punctures, or tears of the air cell, or seam separation caused by chemical attack; including prolonged exposure to chlorine.This warranty does not extend to damages caused by improper use, improper maintenance, neglect, unauthorized repairs, modifications, accidents, fire, or casualty.Cosmetic damage, such as scratches, fraying, and nicks are not covered by this warranty.This warranty does not extend to equipment used for rental, commercial, or military purposes.
WHAT YOU NEED TO DO
Keep a copy of the original purchase receipt and subsequent inspections with this manual.Your Sherwood BCD must be inspected and serviced by an authorized Sherwood repair facility at least once a year, within 6 weeks before or after the one year anniversary date of your purchase or last servicing.Provide proof of original purchase and annual servicing by an Authorized Sherwood Scuba Dealer in the form of receipts/invoices.Keep this manual, your original purchase receipt, and subsequent inspection receipts in a safe place for future reference.

PAGE 25 WARRANTY INFORMATION
DISCLAIMERS/EXCLUSIONS
Failure to have your BCD inspected/serviced within the specified time will void the warranty.The repair facility must sign your inspection record at each annual service. Failure to do so will void the warranty.This warranty is nontransferable from the original owner. No salesperson, dealer or representative is authorized to make any modification to this warranty.
It is dangerous for untrained and uncertified persons to use the equipment covered by this warranty. Therefore, use of this equipment by an untrained person renders any and all warranties null and void. Use of SCUBA equipment by anyone who is not a trained and certified diver, or receiving training under the supervision of an instructor, could lead to serious injury or death.
This warranty gives you specific legal rights. You may have rights which vary from state to state and country to country.
SHERWOOD SCUBA DISCLAIMS AND EXCLUDES ANY LIABILITY FOR INCIDENTAL OR CONSEQUENTIAL DAMAGES. Some states in the U.S. and certain foreign countries do not allow exclusions or limitations of liability for incidental, consequential, or indirect costs, expenses, or damages incurred while using this product, so this may not apply to you.
RETURNING YOUR BCD FOR SERVICE
Whenever your BCD requires annual service or warranty repair, it is important to bring it to an Authorized Sherwood Scuba Dealer. Be sure to provide the dealer with photocopies of your original sales receipt and service records. For the location of the dealer nearest you or additional information, visit our website at:
www.SherwoodScuba.com

PAGE 26NOTES
PAGE 27 SERVICE RECORD
Purchase Date _____________ BCD Model _____________Serial No. _______________
YEAR 1
Dealer___________________________________________Date ___________________
Address ________________________________________________________________
_______________________________________________________________________
Service Technician Signature _______________________________________________
YEAR 2
Dealer __________________________________________Date ___________________
Address ________________________________________________________________
_______________________________________________________________________
Service Technician Signature _______________________________________________
YEAR 3
Dealer __________________________________________Date ___________________
Address ________________________________________________________________
_______________________________________________________________________
Service Technician Signature _______________________________________________
YEAR 4
Dealer __________________________________________Date ___________________
Address ________________________________________________________________
_______________________________________________________________________
Service Technician Signature _______________________________________________
YEAR 5
Dealer __________________________________________Date ___________________
Address ________________________________________________________________
_______________________________________________________________________
Service Technician Signature _______________________________________________

4 Chrysler • Irvine, CA 92618www.SherwoodScuba.com
WARNINGSherwood Scuba equipment is for use only by persons trained
and certified by a nationally recognized scuba training agency.
© Copyright 2003 Sherwood Scuba®, LLC.BCD Owner’s Manual, P/N-MAN1001-1