BMW Mini (R56) - KENWOOD · Installation Manual Double DIN Kit CAW 2023-06 1. BMW Mini (R56) with...
4
1 2 © 07/2009 ALL RIGHTS RESERVED. Technical changes possible. No liability for misprints. Compatible with these Kenwood double DIN devices Kenwood Navigation • BMW Mini (R56) Double DIN Kit contents • (1) Center console • (2) Mounting Bracket All installation work must be performed by a qualified professional installer only. The manufacturer / dealer is not liable for any kind of incidential or indirect damages. Installation Manual Double DIN Kit Part-No: CAW 2023-06 with automatic climate control
Transcript of BMW Mini (R56) - KENWOOD · Installation Manual Double DIN Kit CAW 2023-06 1. BMW Mini (R56) with...
1
2
© 07/2009 ALL RIGHTS RESERVED. Technical changes possible. No liability for misprints.
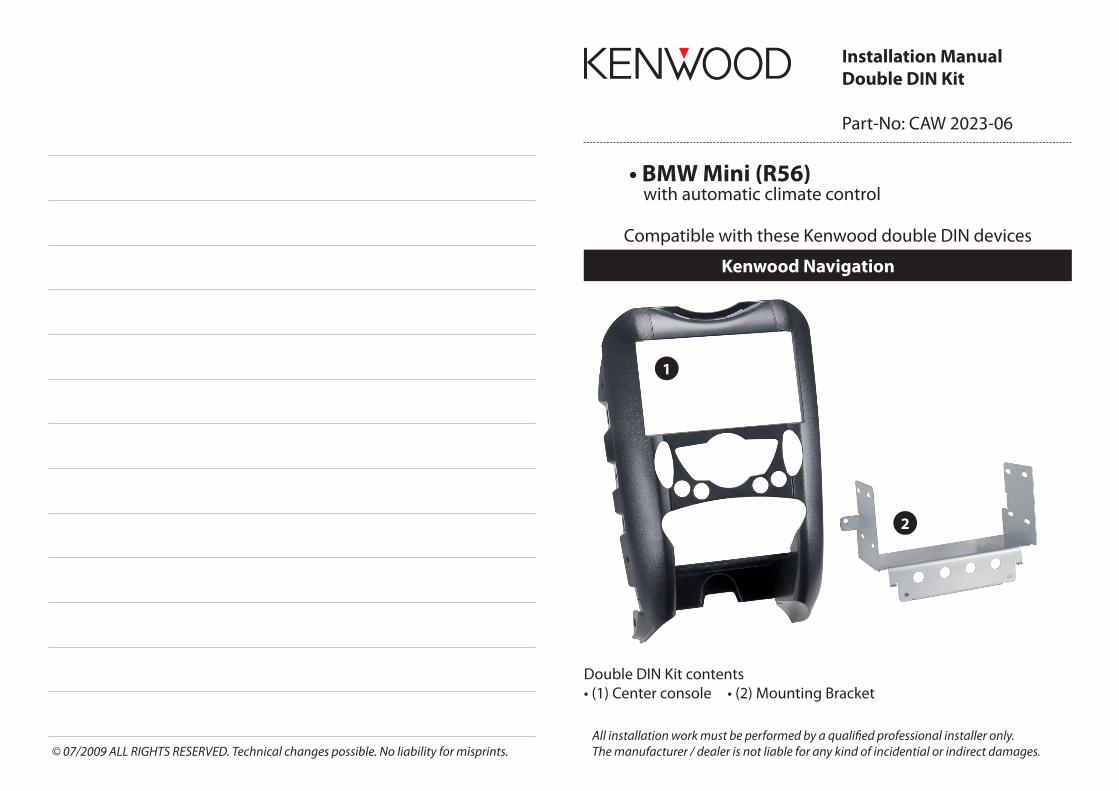
Compatible with these Kenwood double DIN devices
Kenwood Navigation
• BMW Mini (R56)
Double DIN Kit contents• (1) Center console • (2) Mounting Bracket
All installation work must be performed by a qualified professional installer only.The manufacturer / dealer is not liable for any kind of incidential or indirect damages.
Installation ManualDouble DIN Kit
Part-No: CAW 2023-06
with automatic climate control
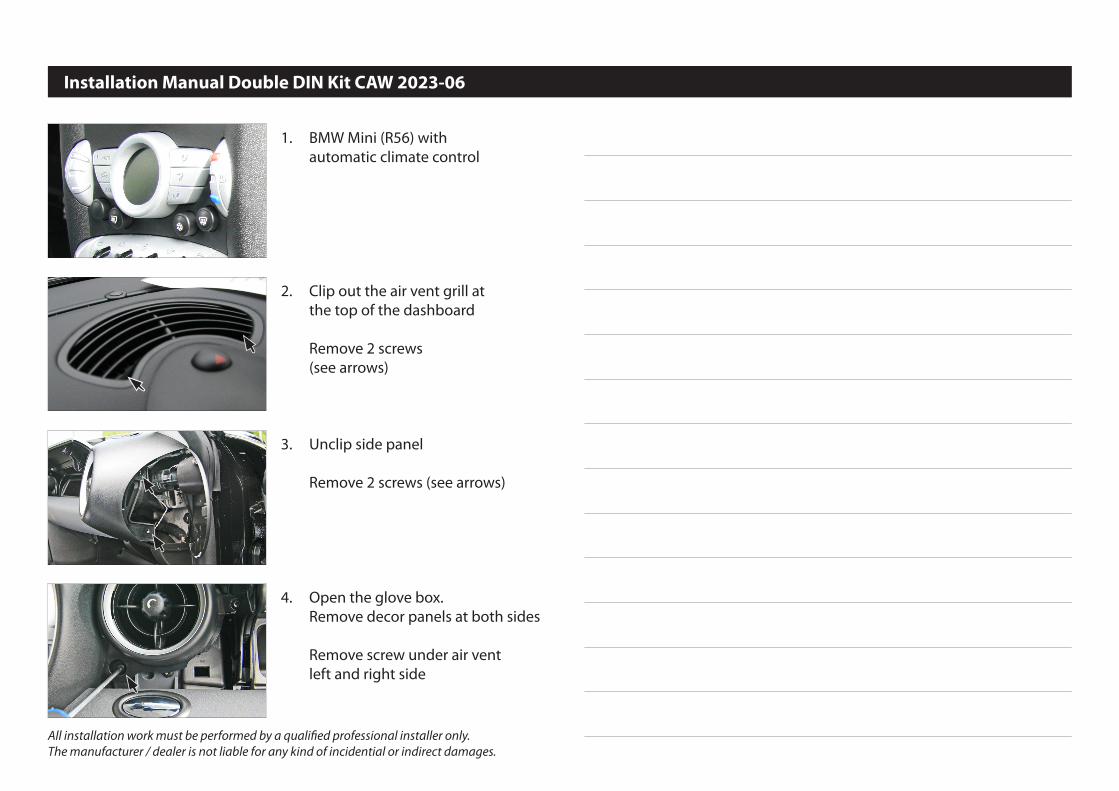
Installation Manual Double DIN Kit CAW 2023-06
1. BMW Mini (R56) with automatic climate control
All installation work must be performed by a qualified professional installer only.The manufacturer / dealer is not liable for any kind of incidential or indirect damages.
2. Clip out the air vent grill at the top of the dashboard
Remove 2 screws (see arrows)
3. Unclip side panel
Remove 2 screws (see arrows)
4. Open the glove box. Remove decor panels at both sides
Remove screw under air vent left and right side

Installation Manual Double DIN Kit CAW 2023-06
6. Remove cover of harzard light switch
5. Remove screw beside air vent
7. Remove 2 screws of the rev counter
Remove decor panel
8. Remove 4 screws of the knee protector proceed with step 9 on next page
Installation Manual Double DIN Kit CAW 2023-06
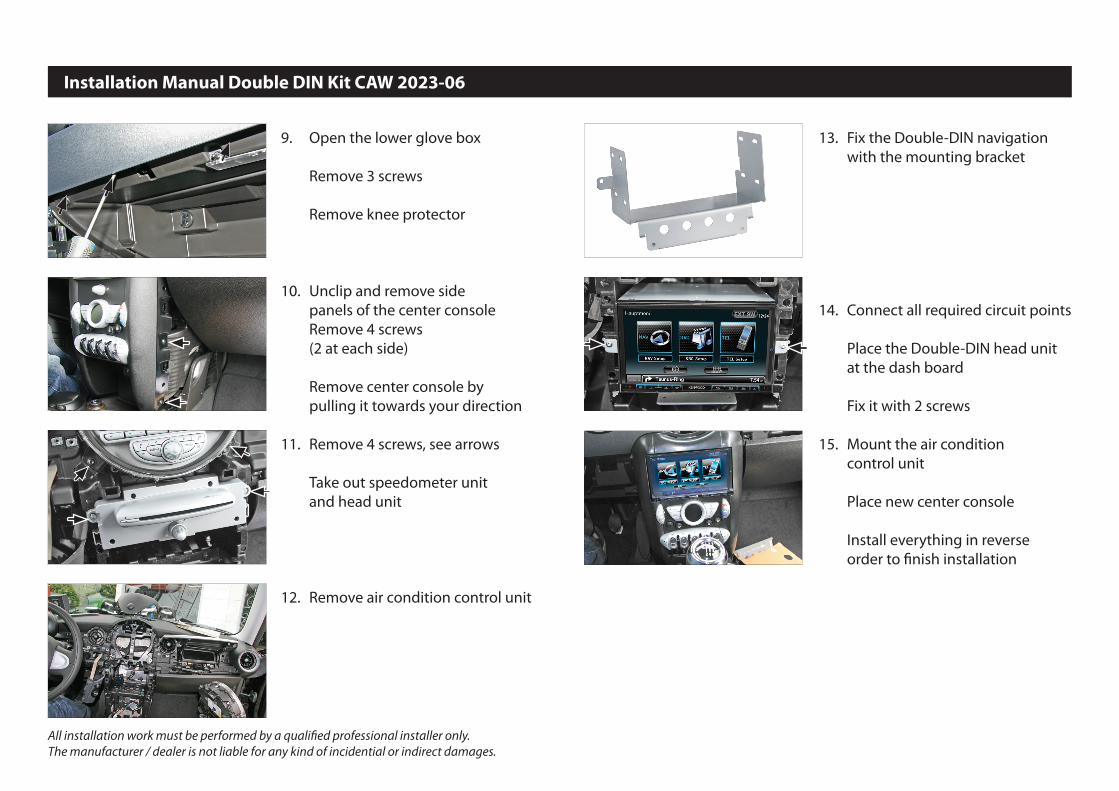
9. Open the lower glove box
Remove 3 screws
Remove knee protector
14. Connect all required circuit points
Place the Double-DIN head unit at the dash board
Fix it with 2 screws
All installation work must be performed by a qualified professional installer only.The manufacturer / dealer is not liable for any kind of incidential or indirect damages.
10. Unclip and remove side panels of the center console Remove 4 screws (2 at each side)
Remove center console by pulling it towards your direction
11. Remove 4 screws, see arrows
Take out speedometer unit and head unit
13. Fix the Double-DIN navigation with the mounting bracket
12. Remove air condition control unit
15. Mount the air condition control unit Place new center console
Install everything in reverse order to finish installation