BizTalk 2006: How UF Integrated BizTalk into their Identity ...
Upload
nguyendieuCategory
view
215download
0
BizTalk 2009 Installation and Configuration Guide - Development and Test Build v1.4
BizTalk 2009 64-bit, SQL Server 2008 SP1 64-bit, Windows 2008 R2 64-bit
Jay Kladiva
Energizer Holdings, Inc.MCSE, MCSD, MCAD .NET, MCT, MCP + Site Builder
4/14/2010
This is a complete Installation and Configuration guide for BizTalk 2009 that documents all the steps necessary from start to finish to setup a BizTalk Server environment. This was built on a Hyper-V R2 image running on a Dell Latitude D620 laptop computer that only contained one .vhd file so everything is installed on the C:\ drive. Ideally you would usually want to install BizTalk Server on one machine and SQL Server on another machine. The steps would be the same as outlined in this document except you would install SQL Server on a remote server as listed in Section 2.7. The only other considerations would be to perform the steps listed in 2.11 prior to installing SQL Server on the remote machine to ensure proper communication. All other software and configuration is done on your primary BizTalk Server. If you plan to have multiple BizTalk Server in your BizTalk Server Group, first build out your first BizTalk Server, then follow the same steps to build the next BizTalk Server excluding installing SQL Server, SQL Notifications, and setting up domain accounts. When you get to Step 2.18 on the Enterprise SSO and BizTalk Group sections select ‘Join a BizTalk Server……’ instead of ‘Create New…….’ which will have your secondary BizTalk Server join the existing BizTalk Server Group

and will allow it to pull the settings which are stored in the BizTalk databases to configure this server. The rest should be self explanatory. If you install BizTalk on more than one BizTalk Server then I recommend moving your Master Secret Server to the remote SQL Server. If BizTalk losses connectivity to the SQL Server it will fail and this eliminates the issue of having the non-primary BizTalk Servers fail due to failure of the primary BizTalk Server because it acts as the Master Secret Server as well. The secondary BizTalk Servers act as backup Master Secret Servers and cache the secret but if the servers reboot and the Master Secret Server is not available then all the secondary BizTalk Servers will be rendered useless. All software was installed using the ‘Developer Edition’ for the purposes of drafting this document, this edition has the same feature set as ‘Enterprise Edition. Finally, I recommend having separate domain accounts for Development/Test and Production. All non-Production servers should use domain accounts with the ‘_T’ appended on the end of the account name. This will keep you from locking up your production service accounts by having a BizTalk Developer fat finger a password and then deploying a BizTalk application to the Development server and then enabling the hosts.
Page 2 of 129
Table of Contents1. Document Information........................................................................................................................4
1.1. Revision History...........................................................................................................................4
1.2. Reviewers and Sign-off................................................................................................................4
1.3. References...................................................................................................................................4
2. BizTalk 2009 64-bit Installation & Configuration Guide.......................................................................5
2.1. Pre-requisites...............................................................................................................................5
2.2. Pre-Installation............................................................................................................................5
2.3. Add and Configure the Web Server (IIS) and Application Server Roles........................................6
2.4. Install 2007 Microsoft Office Suite Service Pack 2 (SP2)............................................................15
2.5. Install Visual Studio 2008...........................................................................................................15
2.6. Install Visual Studio 2008 SP1....................................................................................................22
2.7. Install SQL Server 2008 64-bit....................................................................................................25
2.8. Install SQL Server 2008 SP1 64-bit.............................................................................................48
2.9. Install SQL Notifications Services...............................................................................................55
2.10. Windows SharePoint Services 3.0 x64 with Service Pack 2....................................................66
2.11. Disable the Shared Memory Protocol, Enable TCP/IP and Named Pipes...............................83
2.12. Join the Local Administrators Group......................................................................................84
2.13. Configure the Application Event Log......................................................................................84
2.14. Enable DTC on the Local Host Server.....................................................................................85
2.15. BizTalk Server 2009 64-bit Installation...................................................................................89
2.16. Verify Your BizTalk Server 2009 Installation..........................................................................95
2.17. Setup Domain Accounts For BizTalk Server 2009...................................................................96
2.18. Configure BizTalk Server 2009...............................................................................................98
2.19. Configure BizTalk Server SQL Jobs.......................................................................................122
2.20. Backing Up Custom BizTalk Databases.................................................................................129
Page 3 of 129

1. Document Information
1.1.Revision HistoryRevision Description Revised By Revised onv0.1 Original Version Jay Kladiva 03/17/2010v1.2 Jay Kladiva 03/30/2010v1.4 Jay Kladiva 04/14/2010
1.2.Reviewers and Sign-offName Role Sign-off comments
1.3.ReferencesName of Document Link/Location
Page 4 of 129
2. BizTalk 2009 64-bit Installation & Configuration Guide
2.1.Pre-requisitesInstall the hotfixes and patches via Windows Update.
2.2.Pre-InstallationInstall the following programs to aid in installing the BizTalk platform:
Install VirtualCloneDrive, WinRAR or some program to allow you to work with DVD .iso images Control Panel, ‘Folder Options’, ‘View’, remove checkmark for ‘Hide extensions for known file
types’ Install Microsoft Office 2007
Excel InfoPath – for form submission to SharePoint, 3rd party integration, etc.
Page 5 of 129

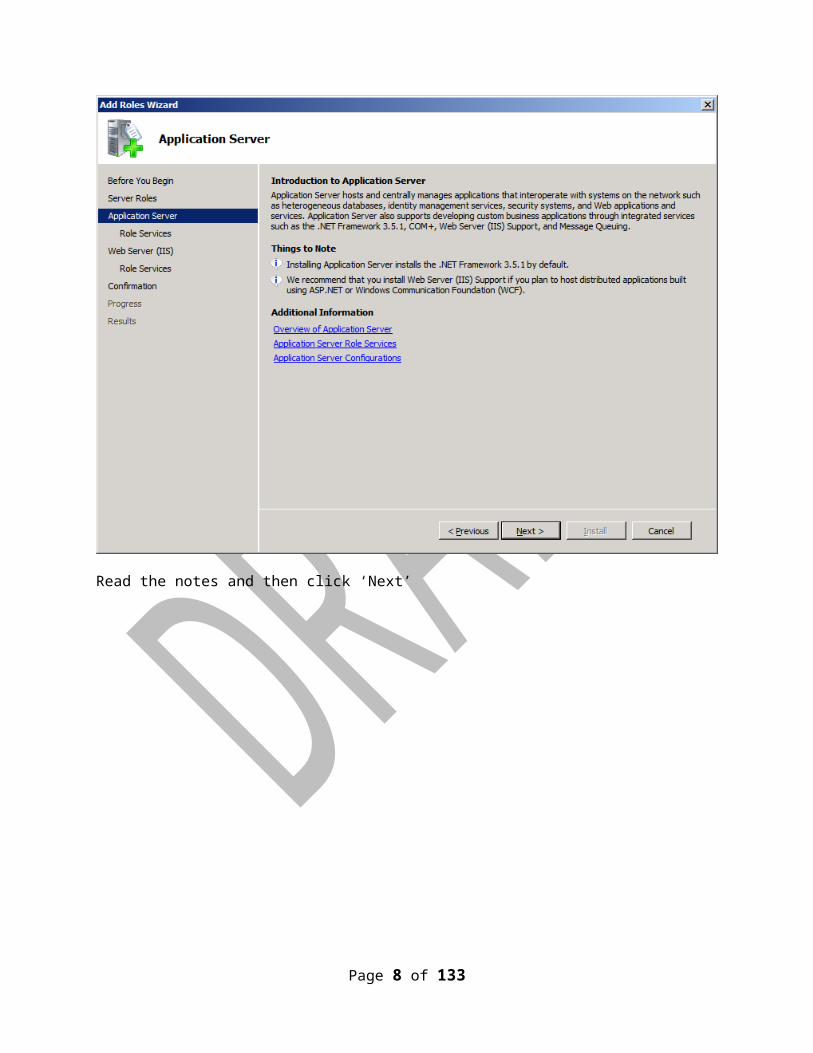
2.3.Add and Configure the Web Server (IIS) and Application Server Roles
Check the Web Server and Application Server roles and click ‘Next’
Page 6 of 129

Read the notes and then click ‘Next’
Page 7 of 129
Check the options you want and click ‘Next’.
Page 8 of 129

Select ‘Choose a certificate for SSL encryption later’ and then click ‘Next’. You can always configure WS-Atomic Transactions at a later point in time.
Page 9 of 129

Need the notes and then click ‘Next’
Page 10 of 129

Check all the options except ‘IIS Hostable Web Core’ , ‘WebDAV Publishing’, ‘ASP’, ‘CGI’, and ‘Server Side Includes’ and click ‘Next’
Page 11 of 129

Review what is being installed and any information, warning, or error messages. You should not have any error messages, if so then you need to address them. Click ‘Install’
Page 12 of 129

Installing….
Page 13 of 129

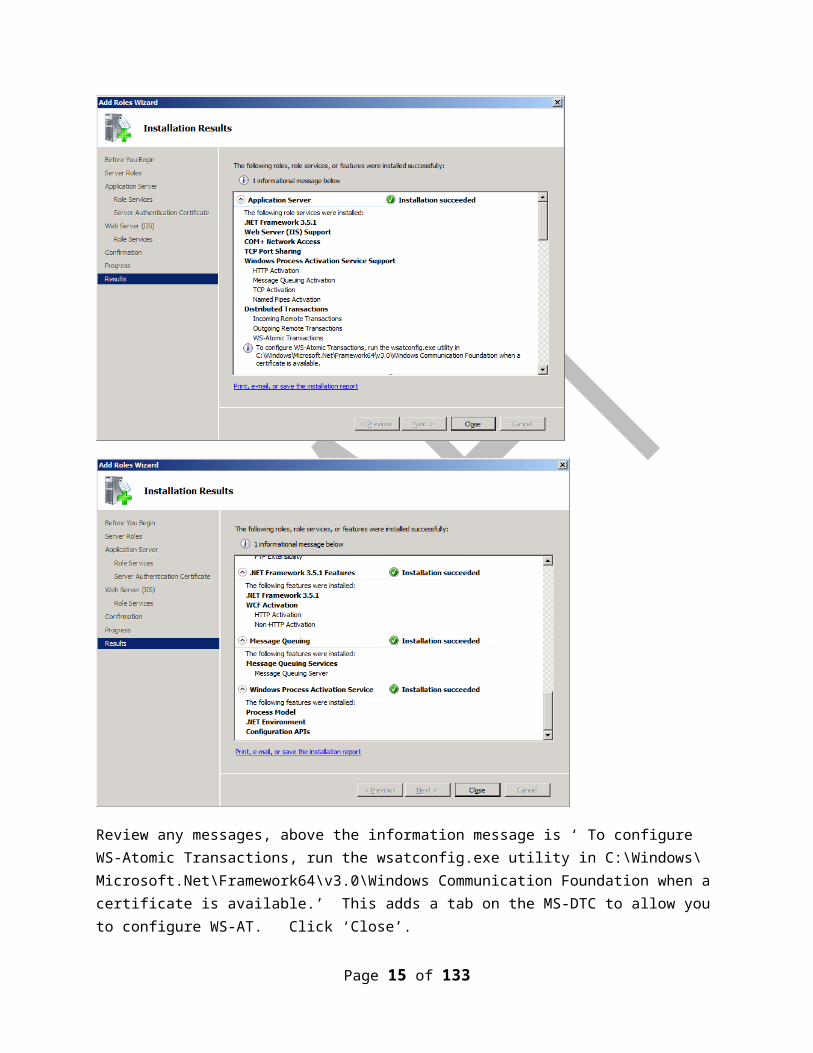
Review any messages, above the information message is ‘ To configure WS-Atomic Transactions, run the wsatconfig.exe utility in C:\Windows\Microsoft.Net\Framework64\v3.0\Windows Communication Foundation when a certificate is available.’ This adds a tab on the MS-DTC to allow you to configure WS-AT. Click ‘Close’.
Page 14 of 129
2.4.Install 2007 Microsoft Office Suite Service Pack 2 (SP2)Install 2007 Microsoft Office Suite Service Pack 2 (SP2).
Accept the terms and click ‘Continue’
Click ‘Yes’
2.5.Install Visual Studio 2008
Page 15 of 129

Click ‘Install Visual Studio 2008’.
Page 16 of 129

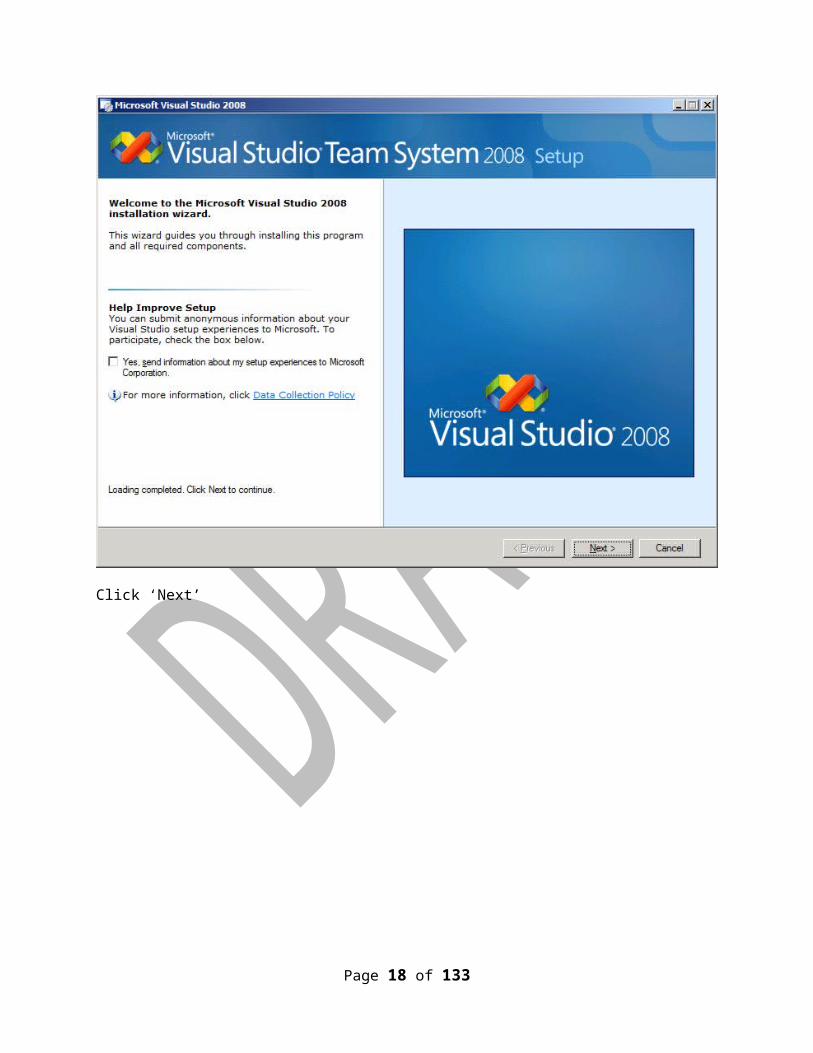
Click ‘Next’
Page 17 of 129
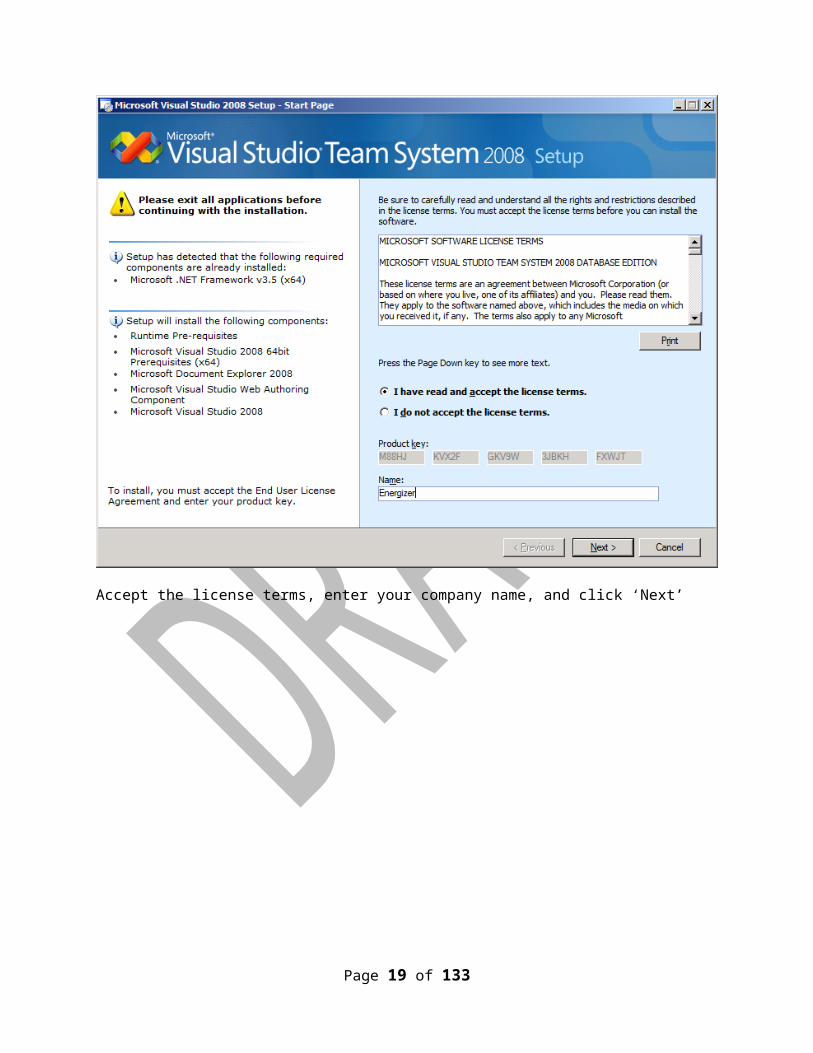
Accept the license terms, enter your company name, and click ‘Next’
Page 18 of 129
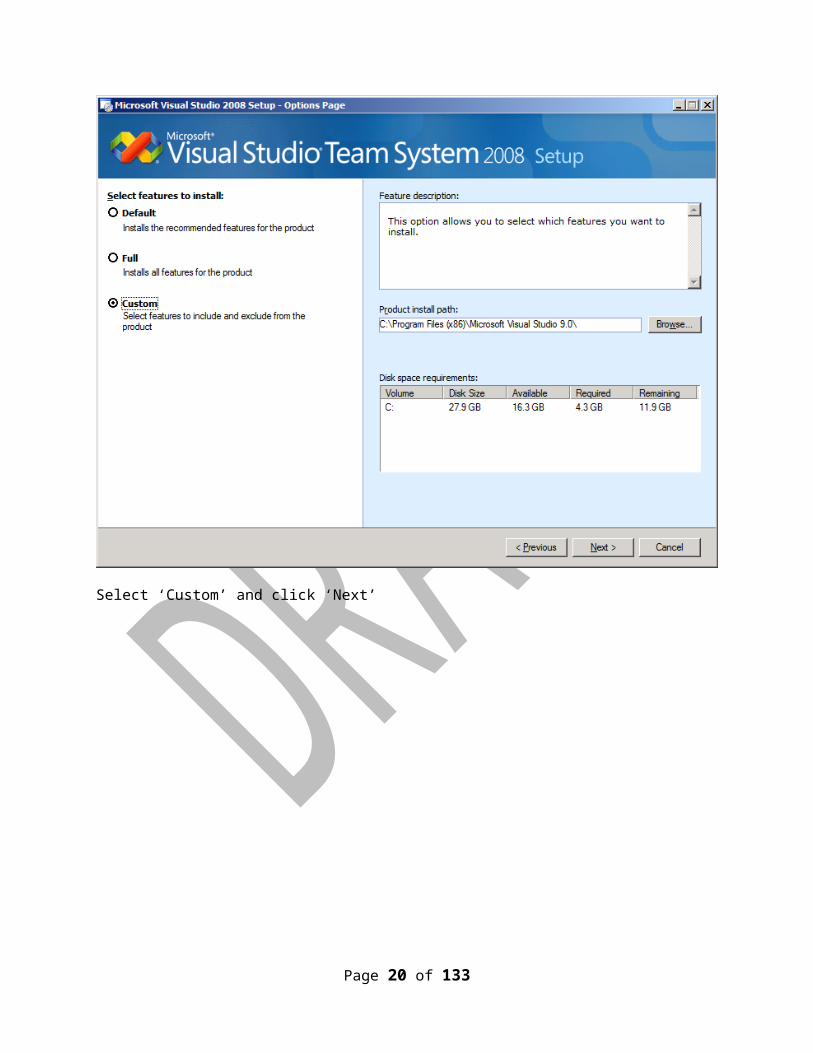
Select ‘Custom’ and click ‘Next’
Page 19 of 129
Uncheck ‘Smart Device Programmability’, ‘Visual C++’, ‘ Crystal Reports Basic’, ‘Microsoft SQL Server 2005 Express Edition’ and ‘Tools for Redistributing Applications’ and then click ‘Install’
NOTE: Installing SQL Server Express will cause the BizTalk installation to fail.
Page 20 of 129

You should see a green checkmark at the top. Click ‘Finish’.
Page 21 of 129

Click ‘Exit’
2.6.Install Visual Studio 2008 SP1Install Visual Studio 2008 SP1.
Double click the ‘VS90sp1-KB945140-ENU.exe’ file.
Page 22 of 129

Click ‘Next’
Page 23 of 129

Accept the license terms and click ‘Next’
Page 24 of 129

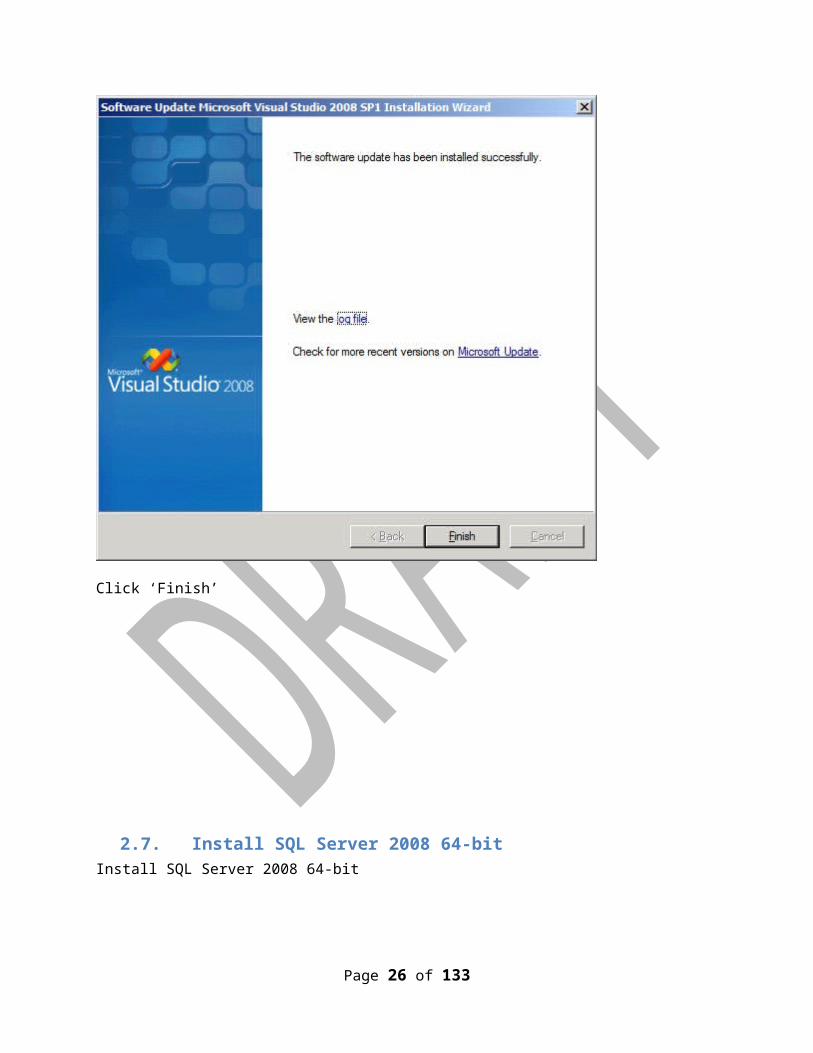
Click ‘Finish’
2.7.Install SQL Server 2008 64-bitInstall SQL Server 2008 64-bit
Page 25 of 129
Ignore this warning, SQL Server 2008 SP1 will fix this, click ‘Run program’
Click the ‘Installation’ link
Page 26 of 129
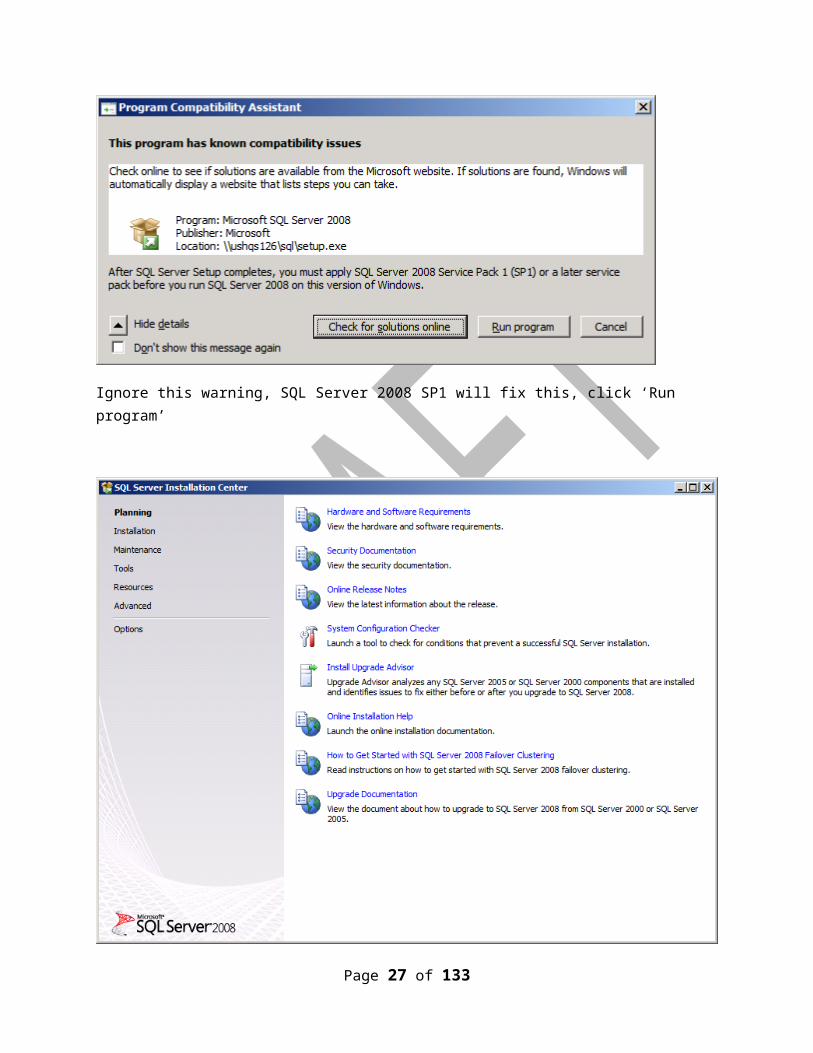
Click on ‘New SQL Server stand-alone installation or add features to an existing installation’ link
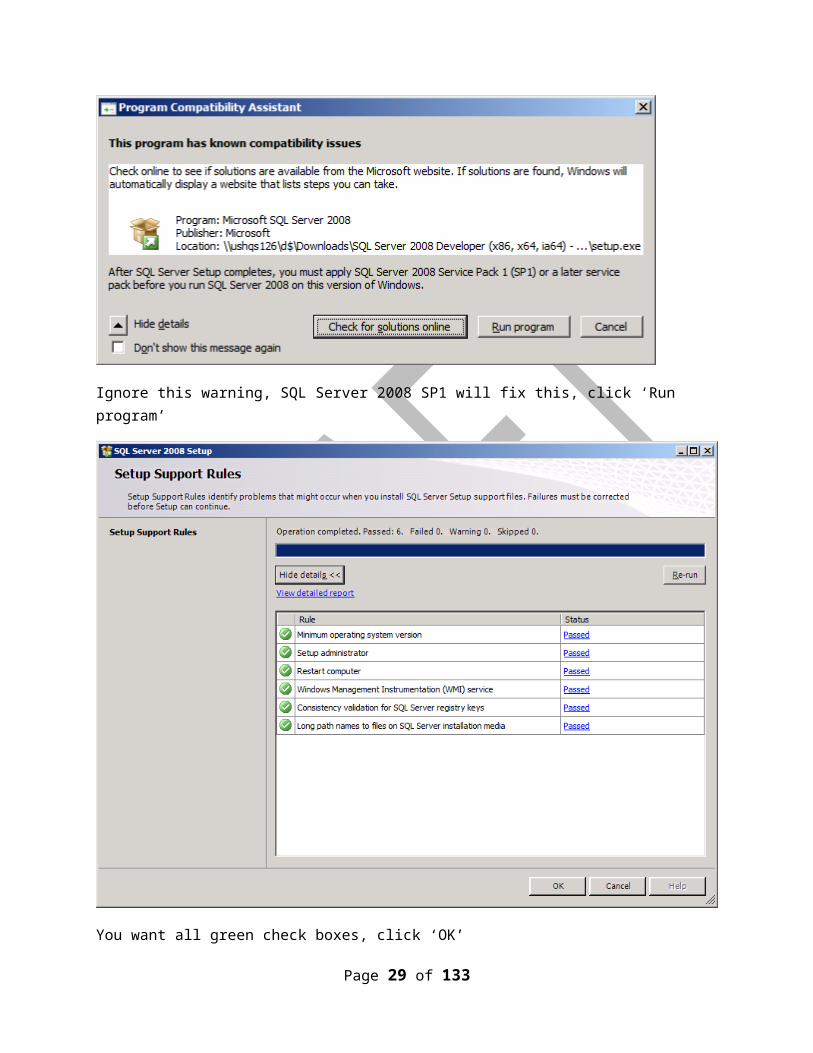
Ignore this warning, SQL Server 2008 SP1 will fix this, click ‘Run program’
Page 27 of 129

You want all green check boxes, click ‘OK’
Page 28 of 129
Enter product key and click ‘Next’
Page 29 of 129

Accept the terms and click ‘Next’
Page 30 of 129

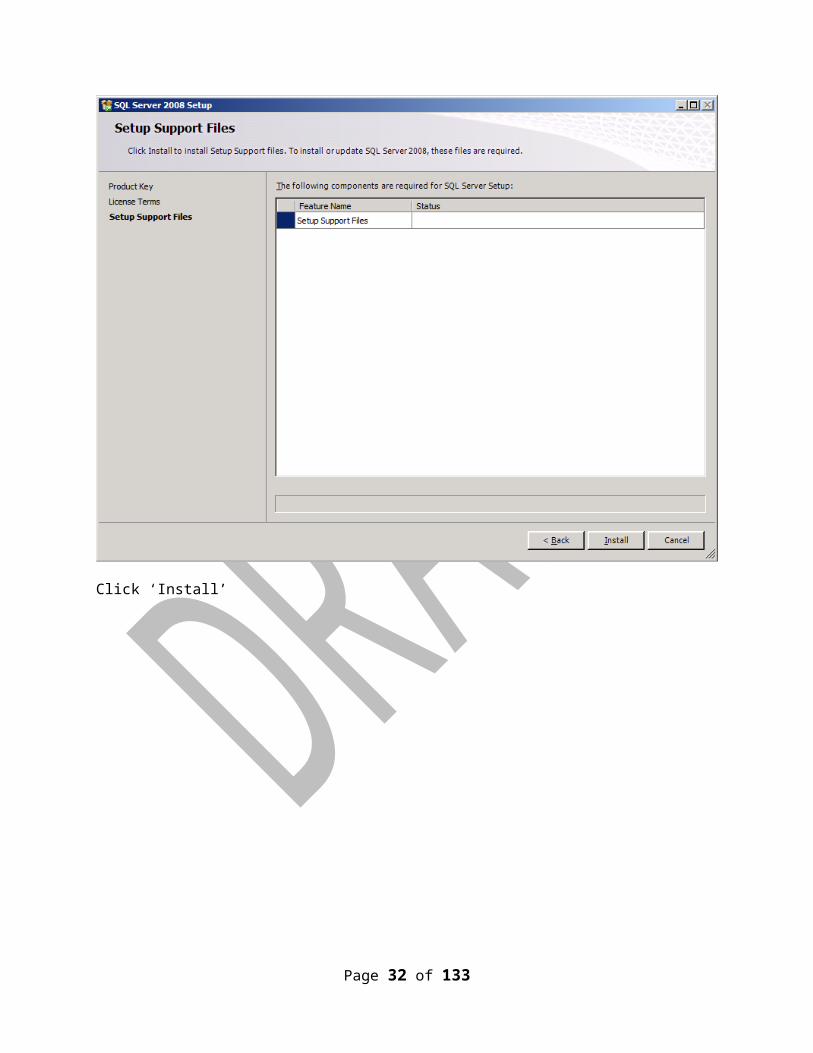
Click ‘Install’
Page 31 of 129
TODO: I added a firewall rule for SQL Server TCP port 1433 for both inbound and outbound, I don’t know if Windows Firewall blocks this communication out-of-the-box
Page 32 of 129

Click ‘Allow the connection’ and then click ‘Next’
Page 33 of 129

I’m building this image on a laptop so I selected all three above, in a Data Center you would only check ‘Domain’, click ‘Next’
Page 34 of 129

Assign a descriptive name and then click ‘Finish’, repeat the same steps to configure an ‘Outbound Rule’
Page 35 of 129

Review the results, you want all green check marks. In my case I had a warning that the computer did not have Internet access, you will not see this
Click ‘OK’ and then ‘Next’ on ‘Setup Support Rules’ window
Page 36 of 129

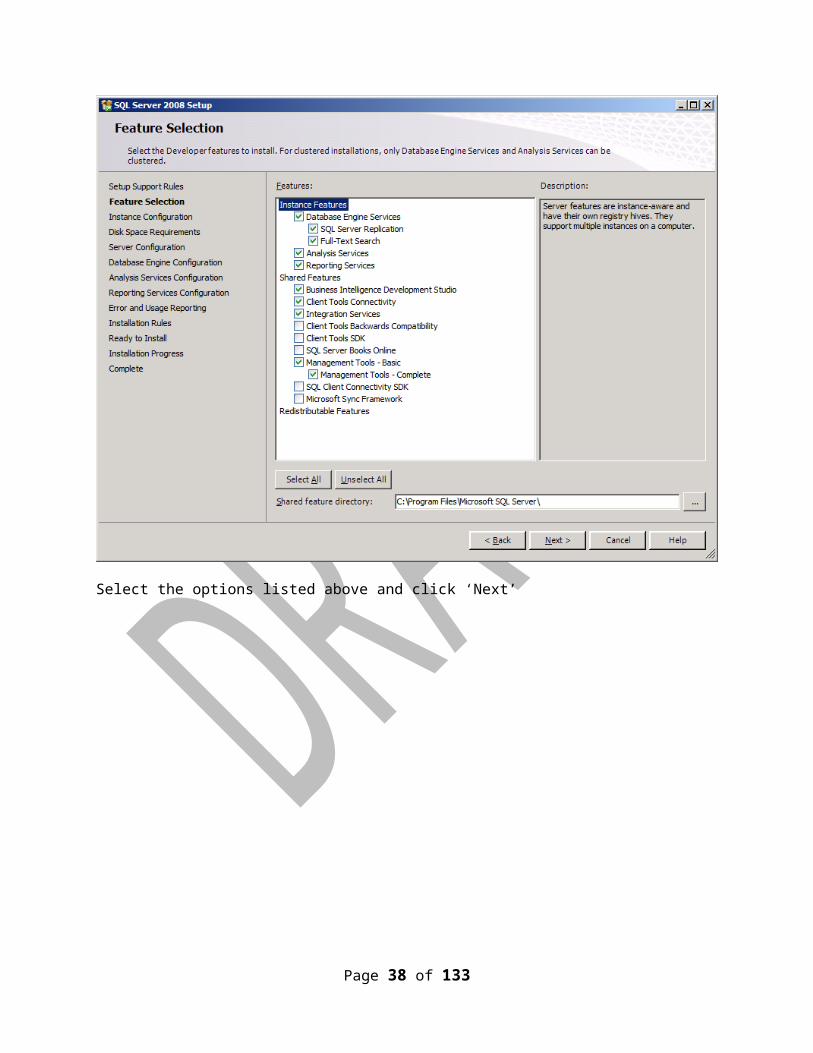
Select the options listed above and click ‘Next’
Page 37 of 129
Select ‘Default instance’ and click ‘Next’. I’m building this BizTalk environment on my laptop using Hyper-V R2, ideally you should change the ‘Instance root directory’ to the D:\ or non-system drive. Otherwise your databases or backups could fill up the C:\ drive.
Page 38 of 129

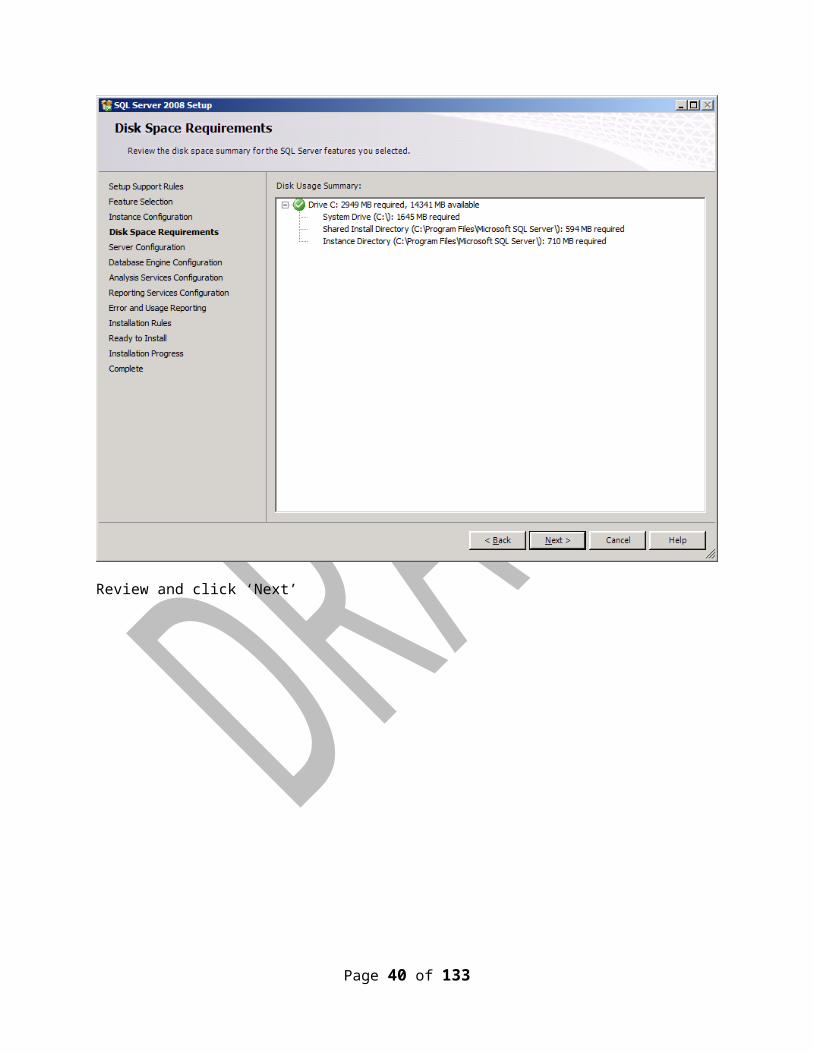
Review and click ‘Next’
Page 39 of 129
Set SQL Server Agent to ‘Automatic’, select ‘Use the same account for all SQL Server services’, and use the built-in ‘NT AUTHORITY\NETWORK SERVICE’ account for the first 5 services listed above. Review and then click ‘Next’
Page 40 of 129

Select ‘Mixed Mode’ and leave the rest to the default. Add the current user as SQL Server admin and set the ‘sa’ password. On the ‘Data Directories’ tab you might want to change the location and select a non-system drive.
Password: <PASSWORD>
Page 41 of 129

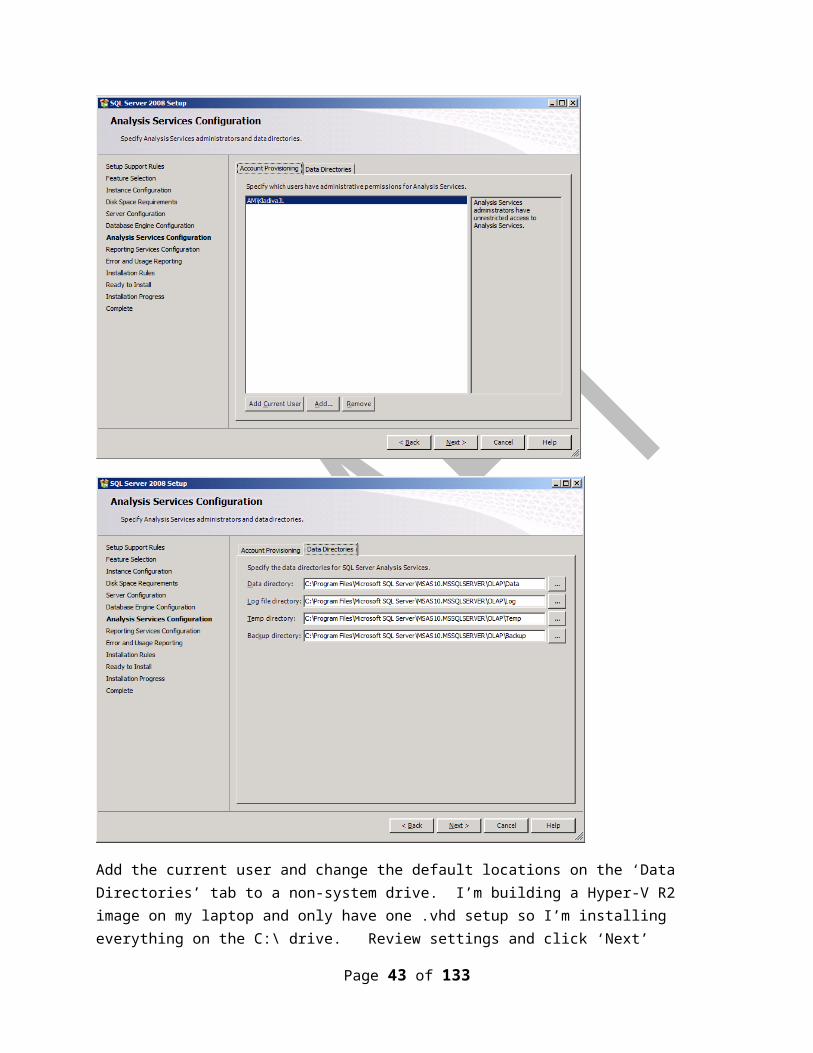
Add the current user and change the default locations on the ‘Data Directories’ tab to a non-system drive. I’m building a Hyper-V R2 image on my laptop and only have one .vhd setup so I’m installing everything on the C:\ drive. Review settings and click ‘Next’
Page 42 of 129
Select the ‘Install the native mode default configuration’ and click ‘Next’
Page 43 of 129

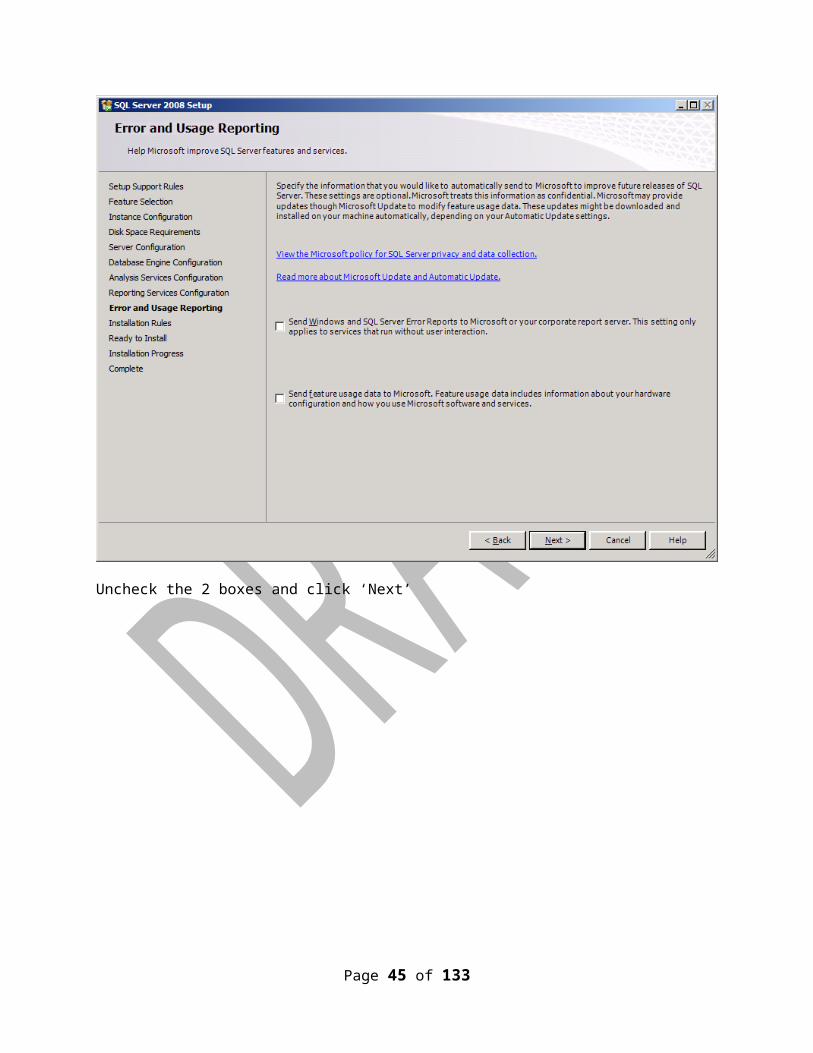
Uncheck the 2 boxes and click ‘Next’
Page 44 of 129
Review the summary, all rows should contain green check boxes, click ‘Next’
Page 45 of 129

Click ‘Install’
Page 46 of 129
Click ‘Next’
Page 47 of 129

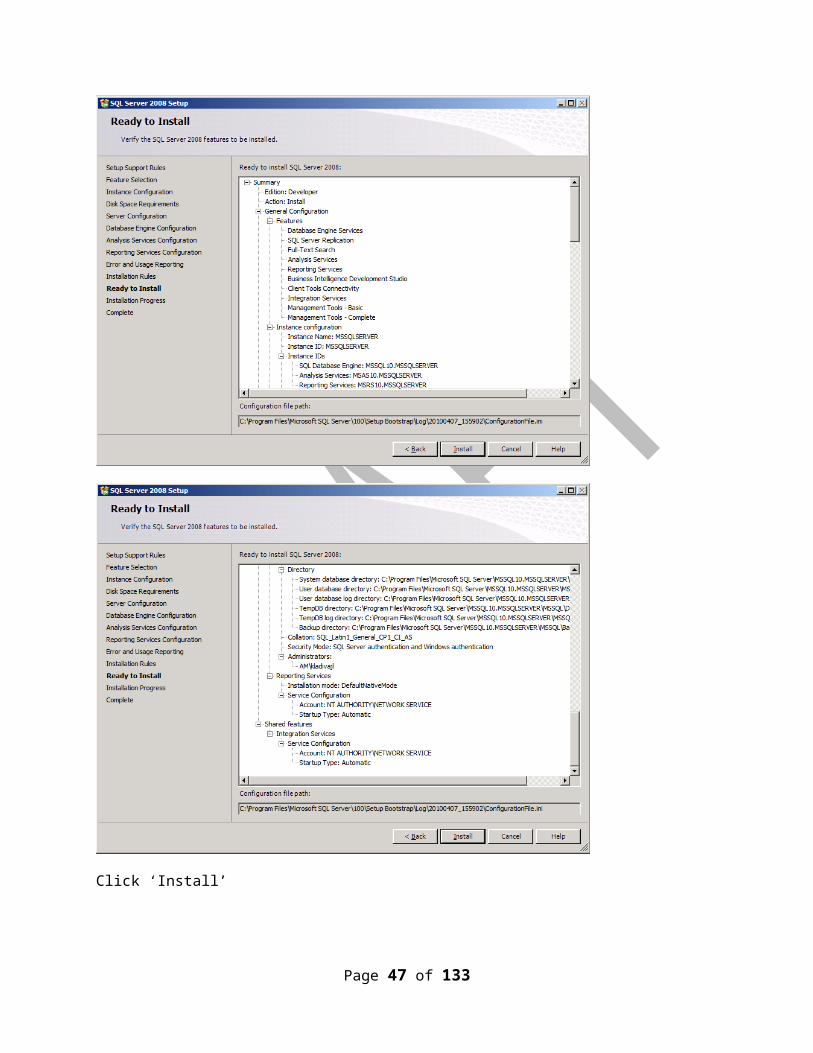
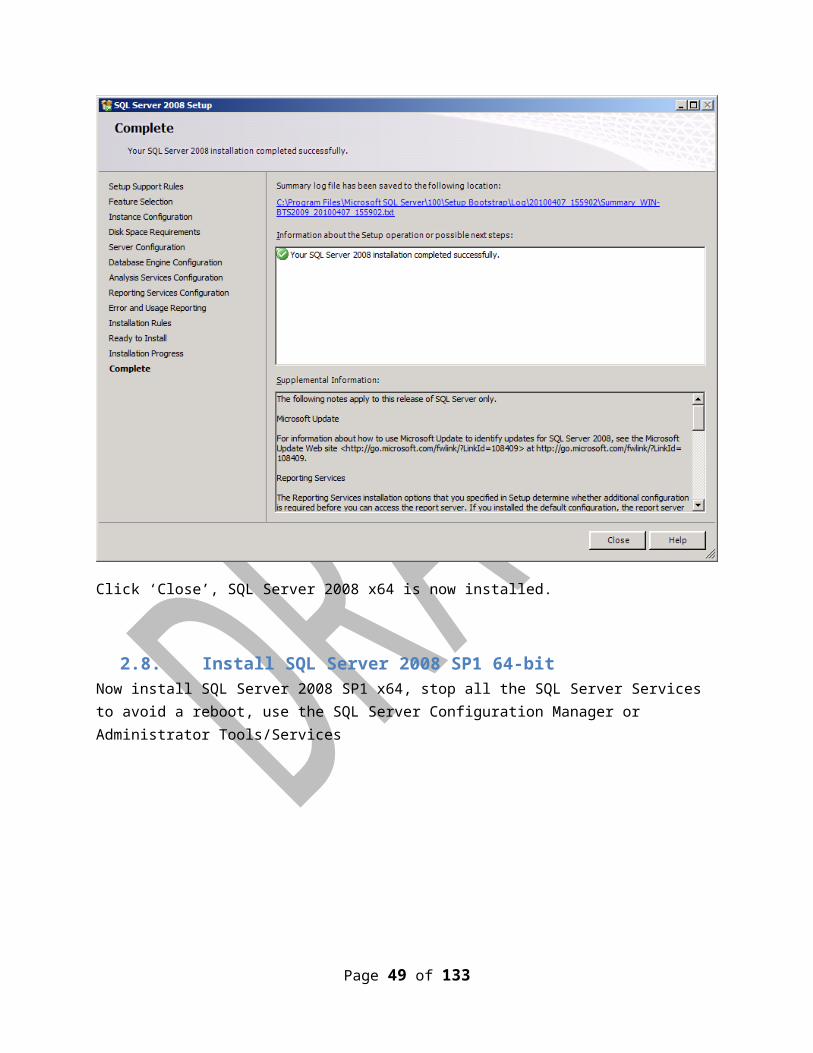
Click ‘Close’, SQL Server 2008 x64 is now installed.
2.8. Install SQL Server 2008 SP1 64-bitNow install SQL Server 2008 SP1 x64, stop all the SQL Server Services to avoid a reboot, use the SQL Server Configuration Manager or Administrator Tools/Services
Page 48 of 129
Review and click ‘Next’, you should have all green check marks
Page 49 of 129

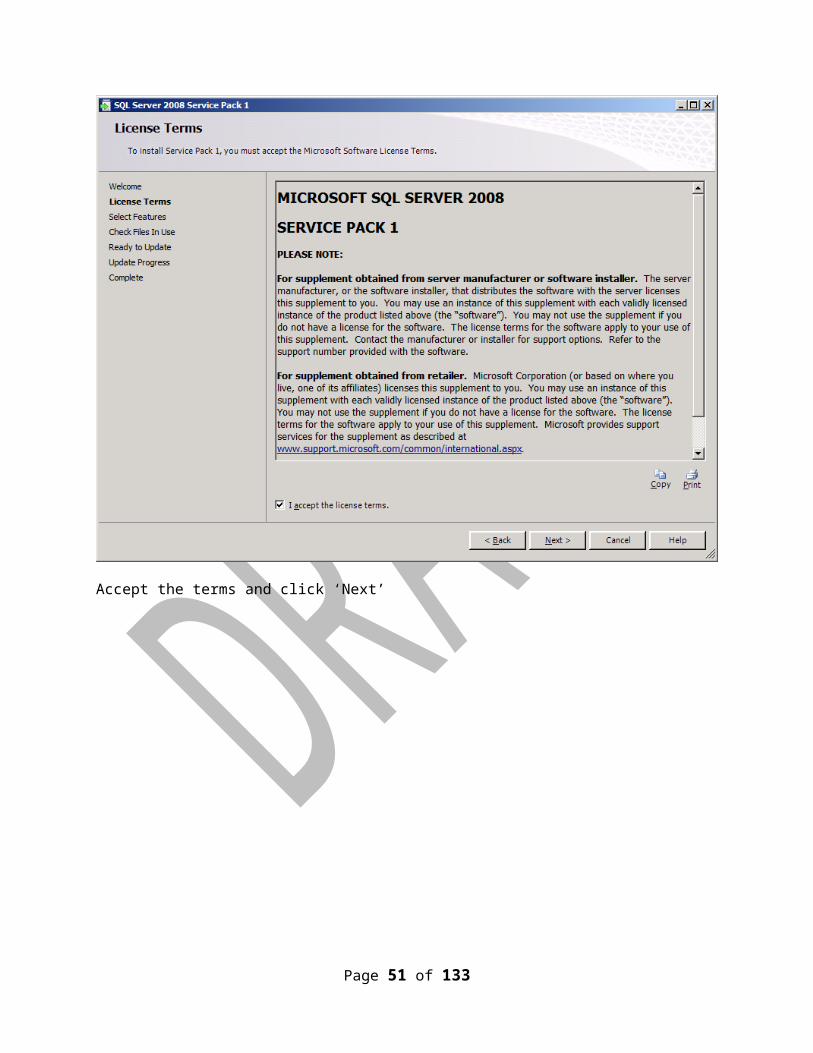
Accept the terms and click ‘Next’
Page 50 of 129
Click ‘Next’
Page 51 of 129

Click ‘Next’
Page 52 of 129

Click ‘Update’
Page 53 of 129

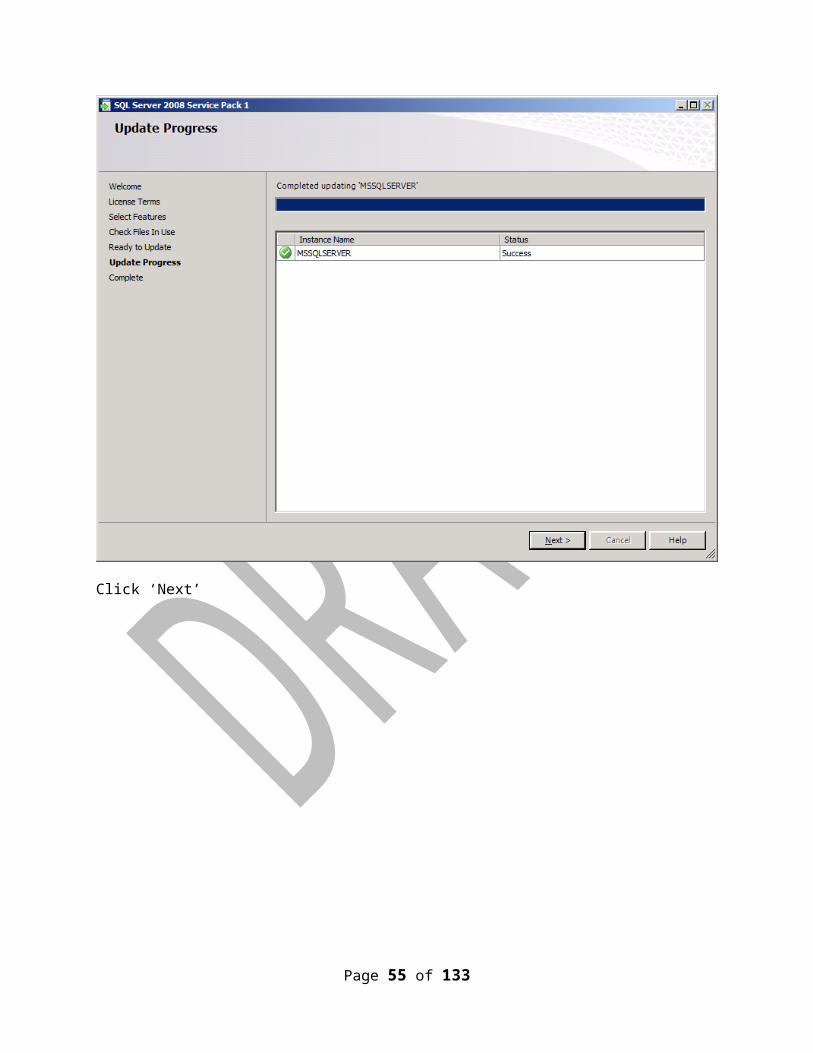
Click ‘Next’
Page 54 of 129
Installation is now complete, you should see a green check mark. Click ‘Close’.
2.9.Install SQL Notifications ServicesThis feature is required for BAM alerts. SQL Notification Services is not included in SQL Server 2008, you must download the install packages from the Microsoft Download Center listed under the ‘Feature Pack for Microsoft SQL Server 2005 – December 2008 which you can find here;
http://www.microsoft.com/downloads/details.aspx?FamilyID=536fd7d5-013f-49bc-9fc7-77dede4bb075&displaylang=en
Scroll down to the bottom of the page to the ‘Files In Download’ section and download these packages;
Microsoft SQL Server Native Client X64 Package (sqlncli_x64.msi)
Microsoft SQL Server 2005 Management Objects Collection X64 Package (SQLServer2005_XMO_x64.msi)
Microsoft SQL Server 2005 Notification Services Client Components X64 Package (SQLServer2005_NS_x64.msi)
Page 55 of 129

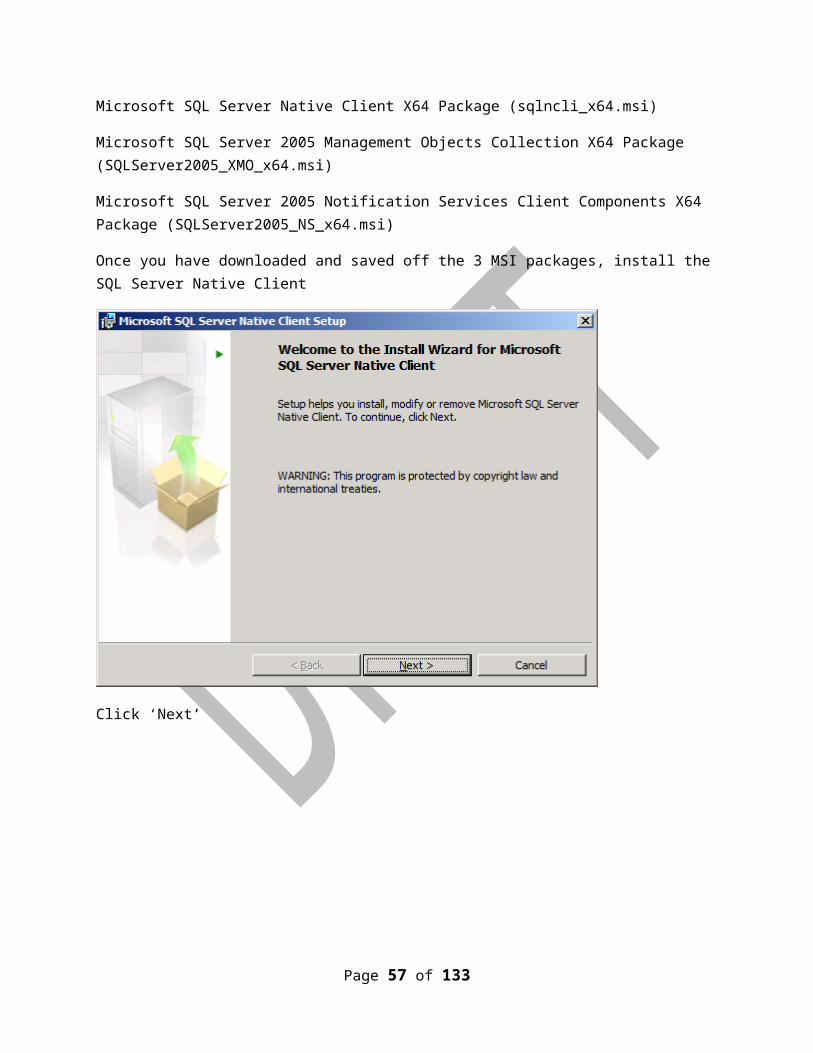
Once you have downloaded and saved off the 3 MSI packages, install the SQL Server Native Client
Click ‘Next’
Page 56 of 129
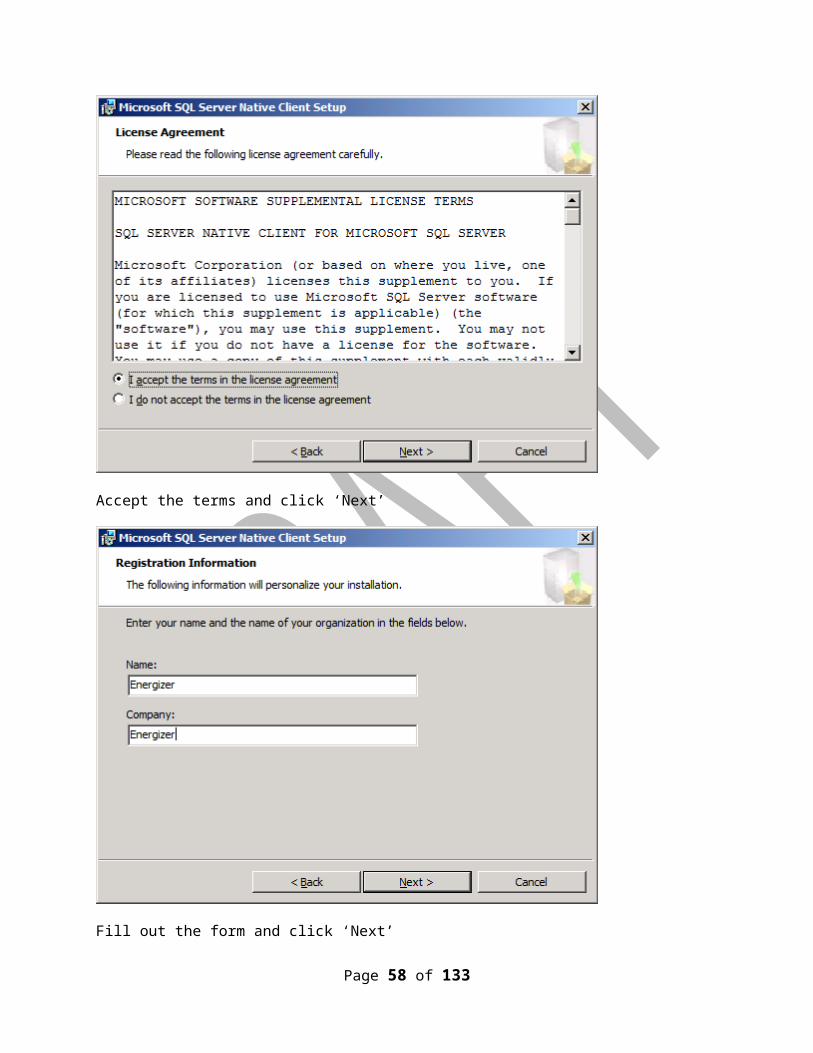
Accept the terms and click ‘Next’
Fill out the form and click ‘Next’
Page 57 of 129
Install only the ‘Client Components’ and click ‘Next’
Page 58 of 129
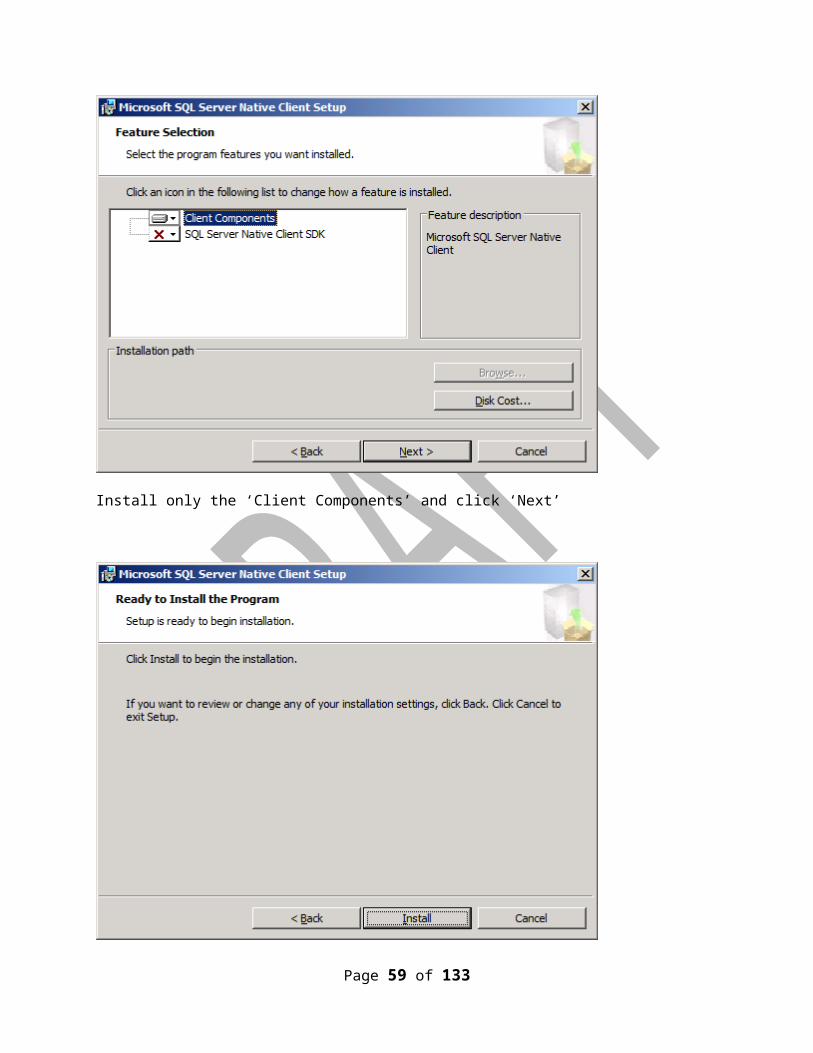
Click ‘Install’
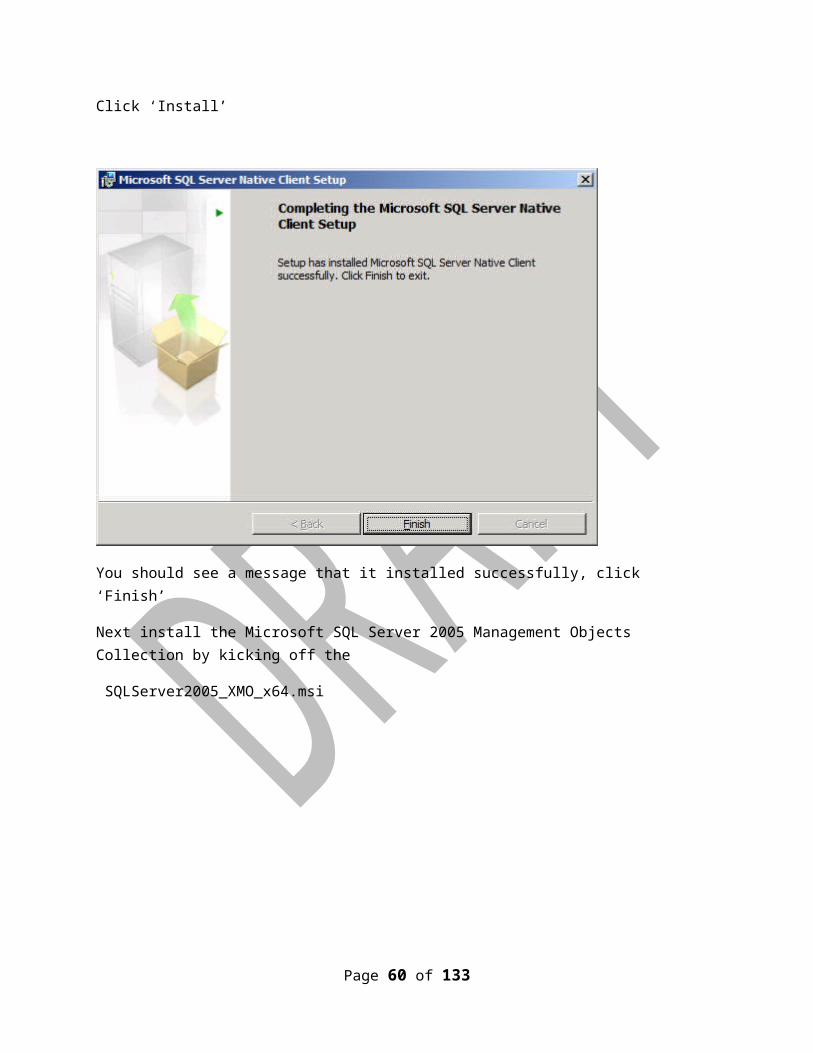
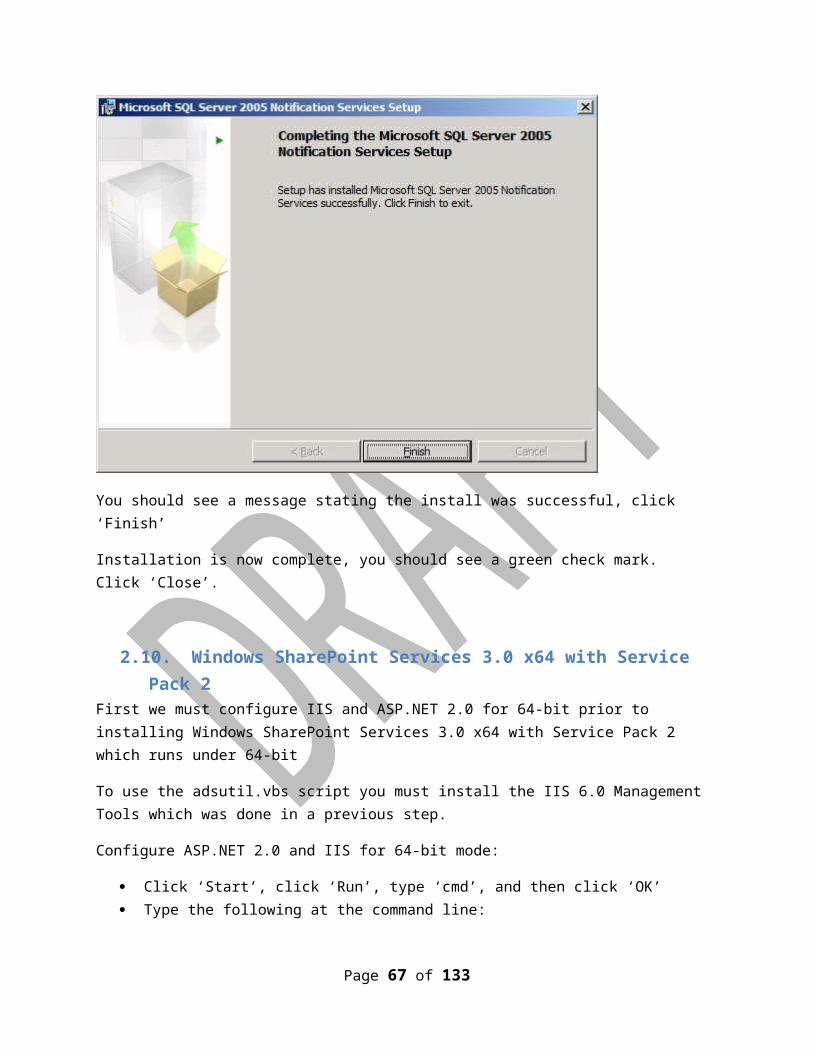
You should see a message that it installed successfully, click ‘Finish’
Next install the Microsoft SQL Server 2005 Management Objects Collection by kicking off the
SQLServer2005_XMO_x64.msi
Page 59 of 129
Click ‘Next’
Page 60 of 129

Accept the terms and click ‘Next’
Fill out the form and click ‘Next’
Page 61 of 129

Click ‘Install’
Page 62 of 129

You should see a message stating the install was successful, click ‘Finish’
Next install the Microsoft SQL Server 2005 Notification Services Client Components by kicking off the SQLServer2005_NS_x64.msi package
Click ‘Next’
Page 63 of 129

Accept the terms and click ‘Next’
Page 64 of 129

Fill out the form and click ‘Next’
Click ‘Install’
Page 65 of 129

You should see a message stating the install was successful, click ‘Finish’
Installation is now complete, you should see a green check mark. Click ‘Close’.
2.10. Windows SharePoint Services 3.0 x64 with Service Pack 2First we must configure IIS and ASP.NET 2.0 for 64-bit prior to installing Windows SharePoint Services 3.0 x64 with Service Pack 2 which runs under 64-bit
To use the adsutil.vbs script you must install the IIS 6.0 Management Tools which was done in a previous step.
Configure ASP.NET 2.0 and IIS for 64-bit mode:
Click ‘Start’, click ‘Run’, type ‘cmd’, and then click ‘OK’ Type the following at the command line:
cscript %Systemdrive%\inetpub\adminscripts\adsutil.vbs SET W3SVC/AppPools/Enable32bitAppOnWin64 0
Next install ASP.NET 2.0 (64-bit) and the script maps at the IIS root, navigate to the C:\Windows\Microsoft.NET\Framework64\v2.0.50727 directory and then type:aspnet_regiis.exe -i -enable
Page 66 of 129
Then at the command line type:Iisreset
Close the command prompt
Page 67 of 129

Verify that ASP.NET 2.0 64-bit is allowed in IIS and not ASP.NET 2.0 32-bit
Next, install Windows SharePoint Services 3.0 x64 with Service Pack 2
Page 68 of 129

Accept the terms and click ‘Continue’
Page 69 of 129

Click ‘Advanced’
Page 70 of 129

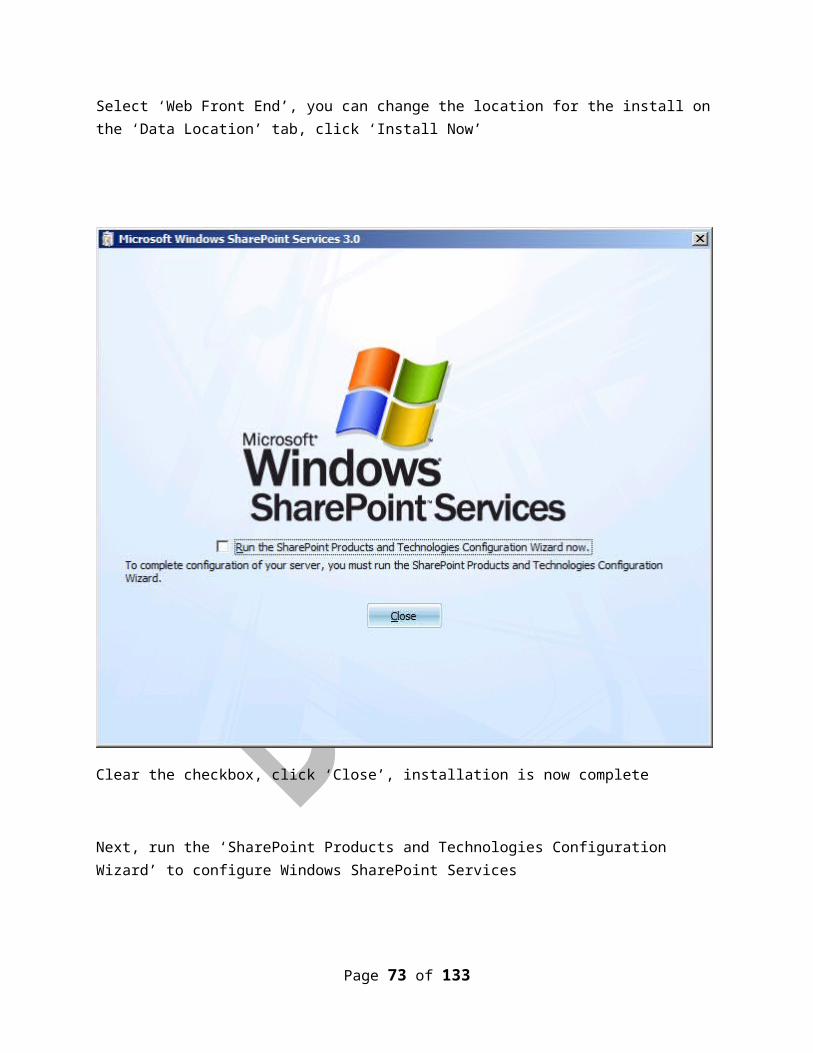
Select ‘Web Front End’, you can change the location for the install on the ‘Data Location’ tab, click ‘Install Now’
Page 71 of 129

Clear the checkbox, click ‘Close’, installation is now complete
Next, run the ‘SharePoint Products and Technologies Configuration Wizard’ to configure Windows SharePoint Services
Page 72 of 129
Click ‘Next’
Page 73 of 129

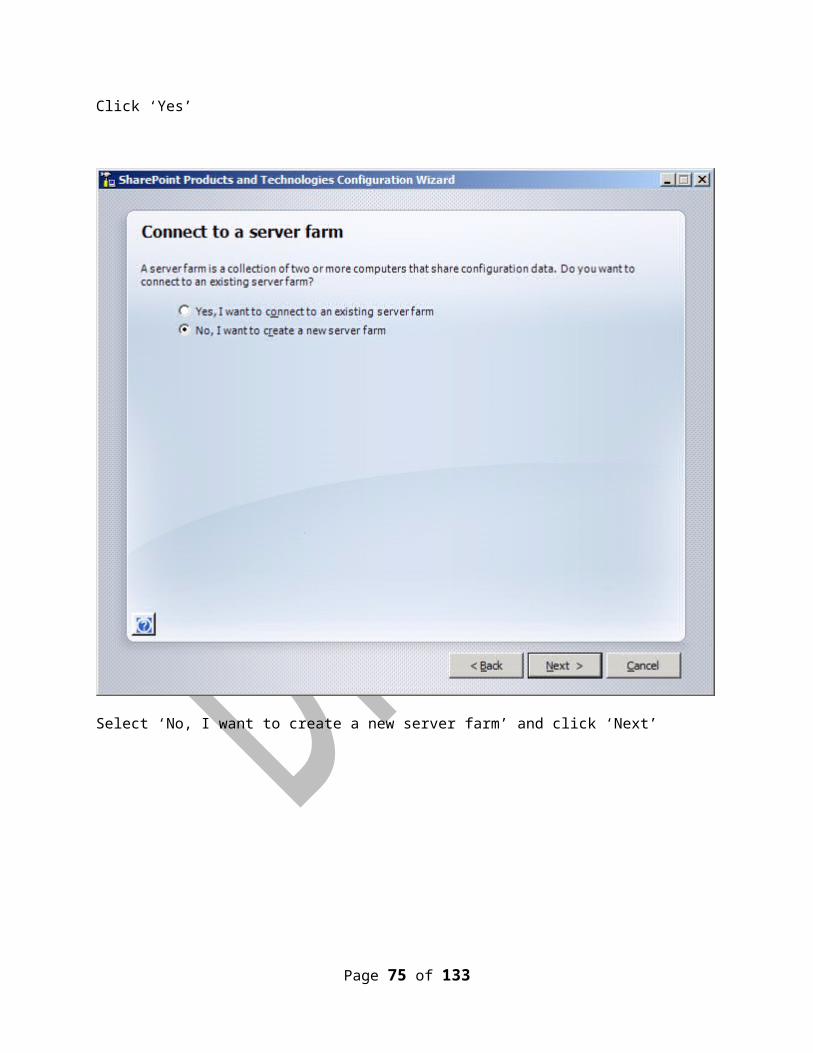
Click ‘Yes’
Select ‘No, I want to create a new server farm’ and click ‘Next’
Page 74 of 129
Accept the defaults for the Database server and Database name and enter a username and password for a domain account for WSS to run under, click ‘Next’
Page 75 of 129

Select ‘NTLM’ and accept the default port provided and click ‘Next’
Page 76 of 129

Review the settings and click ‘Next’
Page 77 of 129

You should see a message that the configuration was successful, click ‘Finish’
Next, we need to create a web application under the ‘SharePoint Central Administration’ tool. First add the SharePoint Central Administration web site to your ‘Trusted Sites’ in Internet Explorer, otherwise the pages will not function correctly on Windows 2008.
Page 78 of 129

Click ‘Tools’, Internet Options’, ‘Security’, ‘Trusted Sites’, ‘Sites’, then click ‘Add’, then ‘Close’
Page 79 of 129

Click the ‘Application Management’ link and then click ‘Create or extend Web application’
Then click ‘Create a new Web application’
Page 80 of 129

Select ‘Default Web Site’, ‘Restart IIS Manually’, ‘Network Service’, ‘Windows authentication’, rename the Database Name to something more recognizable if you want, leave the other defaults what they are, then click ‘OK’
Page 81 of 129

You should see a message ‘Application Created’, next click ‘Start’, click ‘Run’, type ‘cmd’, click ‘OK’, then type;
iisreset /noforce
Under the ‘Web Application List’ in SharePoint Central Administration you should see the ‘Default Web Site’ and ‘SharePoint Central Administration v3’ in the list
Page 82 of 129

Close the SharePoint Central Administration tool, configuration is complete
2.11. Disable the Shared Memory Protocol, Enable TCP/IP and Named Pipes
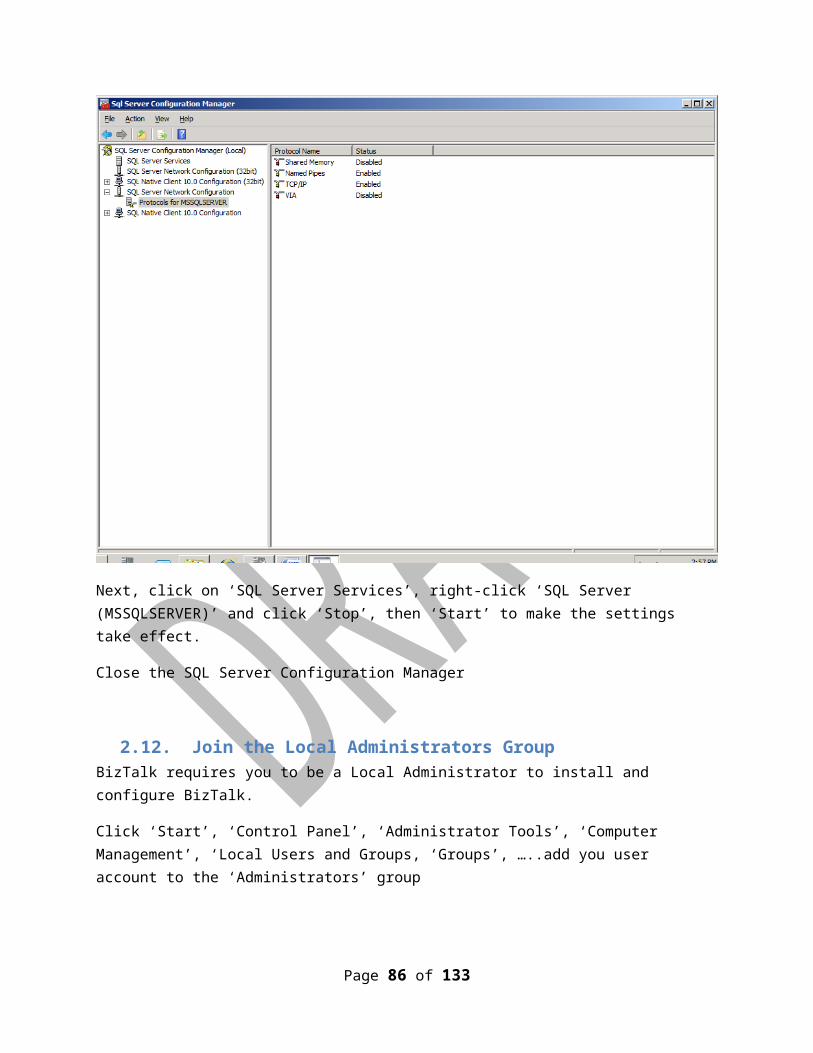
Click ‘Start’, ‘All Programs’, click ‘SQL Server 2008’, click ‘Configuration Tools’, then click ‘SQL Server Configuration Manager’
In the SQL Server Configuration Manager, click on the ‘SQL Server Network Configuration’ node and expand it, under ‘Protocols for MSSQLSERVER’ right-click the ‘Shared Memory’ protocol and disable it. Right-click the TCP/IP protocol and enable it and repeat the process for Named Pipes.
Page 83 of 129

Next, click on ‘SQL Server Services’, right-click ‘SQL Server (MSSQLSERVER)’ and click ‘Stop’, then ‘Start’ to make the settings take effect.
Close the SQL Server Configuration Manager
2.12. Join the Local Administrators GroupBizTalk requires you to be a Local Administrator to install and configure BizTalk.
Click ‘Start’, ‘Control Panel’, ‘Administrator Tools’, ‘Computer Management’, ‘Local Users and Groups, ‘Groups’, …..add you user account to the ‘Administrators’ group
2.13. Configure the Application Event LogBizTalk logs its events to the Windows Application Event Log. Depending on the features you plan to install for BizTalk and the current size of the Application Event Log your installation might fail if the log exceeds its size limit. Also in production you always want a rolling list of the latest events and do not want your Application Event Log to become massive in size
Page 84 of 129

Click ‘Start’, ‘Control Panel’, ‘Administrative Tools’, Event Viewer’, expand ‘Windows Logs’, and right-click ‘Application’, then click ‘Properties’, set the ‘Maximum log size’ to a reasonable number and select ‘Overwrite events as needed’.
Click ‘OK’ and close the Event Viewer
2.14. Enable DTC on the Local Host ServerBizTalk requires the Microsoft Distributed Transaction Coordinator (MS DTC) to be enabled
Configure MSDTC on BizTalk and SQL Servers:
Click ‘Start’, ‘Run’, type ‘dcomcnfg’, and hit the ‘Enter’ key
Page 85 of 129
Under ‘Component Services’, ‘My Computer’, ‘Distributed Transaction Coordinator’, right-click ‘Local DTC’ and select ‘Properties’, click the ‘Security’ tab.
Page 86 of 129

Ensure that the ‘Network DTC Access’, ‘Allow Inbound’, ‘Allow Outbound’, and ‘No Authentication Required’ options are selected and all others are cleared.
Click ‘OK’
Click ‘Yes’
Page 87 of 129

Click ‘OK’ and close the ‘Component Services’
Next, ensure that Windows Firewall has the ‘Distributed Transaction Coordinator’ listed on the ‘Exceptions’ tab
Click ‘OK’
Restart the Distributed Transaction Coordinator from ‘Administrative Tools’, ‘Services’, right-click ‘COM+ System Application’ and select ‘Restart’. Close the window, now you’re ready for the BizTalk installation.
Page 88 of 129

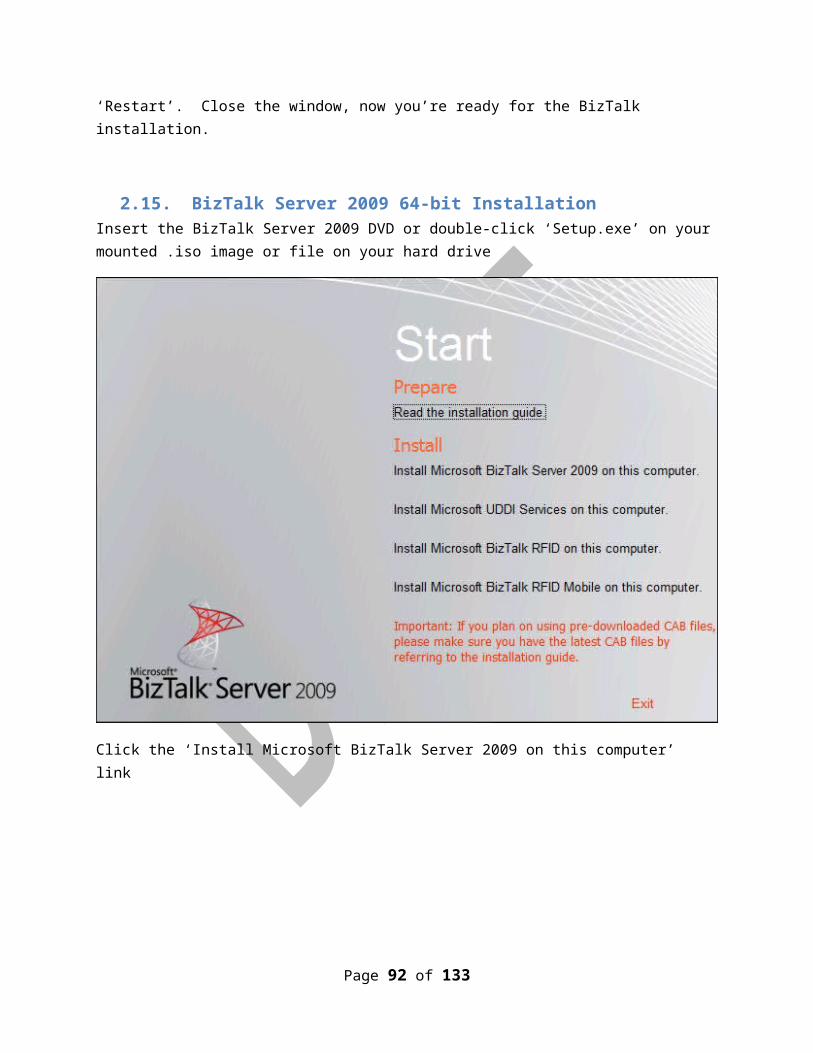
2.15. BizTalk Server 2009 64-bit InstallationInsert the BizTalk Server 2009 DVD or double-click ‘Setup.exe’ on your mounted .iso image or file on your hard drive
Click the ‘Install Microsoft BizTalk Server 2009 on this computer’ link
Page 89 of 129

Fill out the form and click ‘Next’
Page 90 of 129

Accept the terms and click ‘Next’
Page 91 of 129
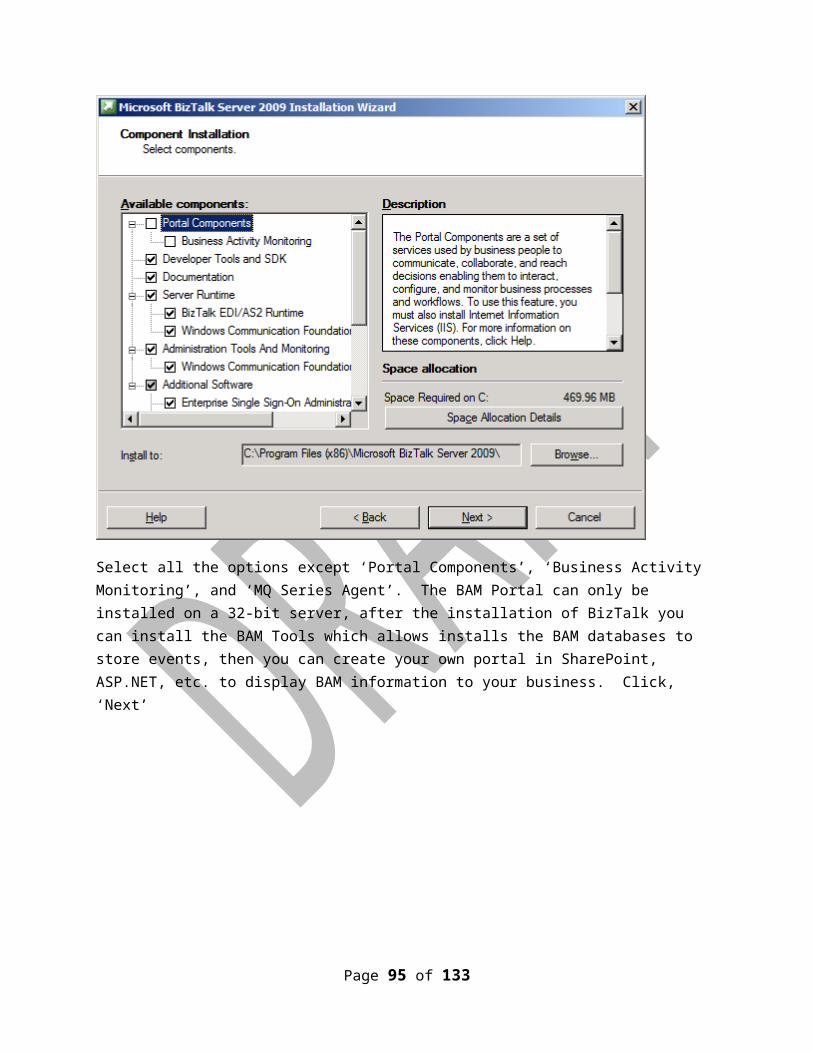
Select all the options except ‘Portal Components’, ‘Business Activity Monitoring’, and ‘MQ Series Agent’. The BAM Portal can only be installed on a 32-bit server, after the installation of BizTalk you can install the BAM Tools which allows installs the BAM databases to store events, then you can create your own portal in SharePoint, ASP.NET, etc. to display BAM information to your business. Click, ‘Next’
Page 92 of 129

Select, ‘Automatically install the redistributable prerequisites from the web’ and click ‘Next’
Page 93 of 129

Review and click ‘Install’
Page 94 of 129
You should see a message that BizTalk was installed successfully, click on the ‘Logfile’ link to review the log if any errors were encountered. Clear the check box and click ‘Finish’, BizTalk is now installed but not configured.
2.16. Verify Your BizTalk Server 2009 InstallationMicrosoft lists this step in their Installation guide.
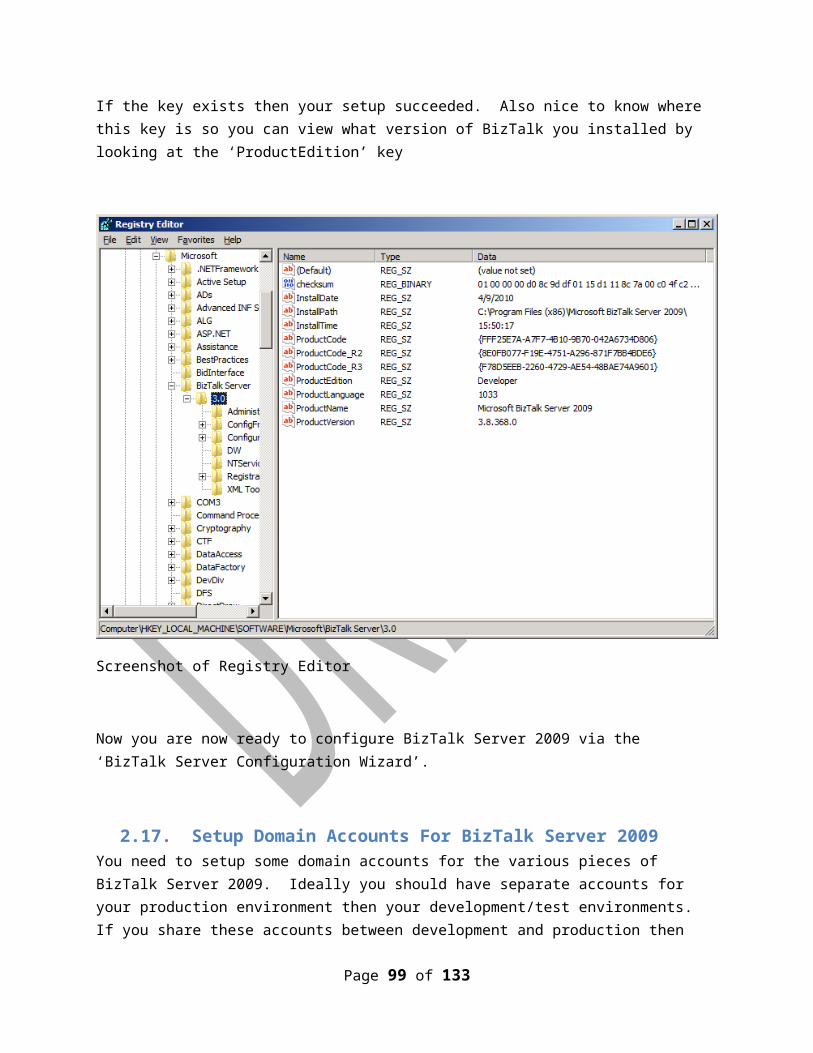
Click ‘Start’, ‘Run’, type ‘regedit’, press ‘Enter’, then browse to the HKEY_LOCAL_MACHINE\SOFTWARE\Microsoft\BizTalk Server\3.0 key
If the key exists then your setup succeeded. Also nice to know where this key is so you can view what version of BizTalk you installed by looking at the ‘ProductEdition’ key
Page 95 of 129

Screenshot of Registry Editor
Now you are now ready to configure BizTalk Server 2009 via the ‘BizTalk Server Configuration Wizard’.
2.17. Setup Domain Accounts For BizTalk Server 2009You need to setup some domain accounts for the various pieces of BizTalk Server 2009. Ideally you should have separate accounts for your production environment then your development/test environments. If you share these accounts between development and production then you could make a mistake with your password in the bindings and lock up this account in production causing a host to fail.
Production BizTalk Environment
Domain User Accounts
<DOMAIN>\BTS_Service
<DOMAIN>\SSO_Service
Page 96 of 129

<DOMAIN>\BTS_Host_Ins
<DOMAIN>\BTS_Iso_Host_Ins
Domain Group Accounts
<DOMAIN>\SSO_Admins
<DOMAIN>\BTS_Server_Admins
<DOMAIN>\BTS_Server_Oper
<DOMAIN>\BTS_App_Users
<DOMAIN>\BTS_Iso_Host_Users
<DOMAIN>\SPS_Enabled_Hosts
Dev/Test BizTalk Environment
Domain User Accounts
<DOMAIN>\BTS_Service_T
<DOMAIN>\SSO_Service_T
<DOMAIN>\BTS_Host_Ins_T
<DOMAIN>\BTS_Iso_Host_Ins_T
Domain Group Accounts
<DOMAIN>\SSO_Admins_T
<DOMAIN>\BTS_Server_Admins_T
<DOMAIN>\BTS_Server_Oper_T
<DOMAIN>\BTS_App_Users_T
<DOMAIN>\BTS_Iso_Host_Users_T
<DOMAIN>\SPS_Enabled_Hosts_T
Page 97 of 129

TODO: Need to list permissions needed for the Domain Users and Domain Groups listed above
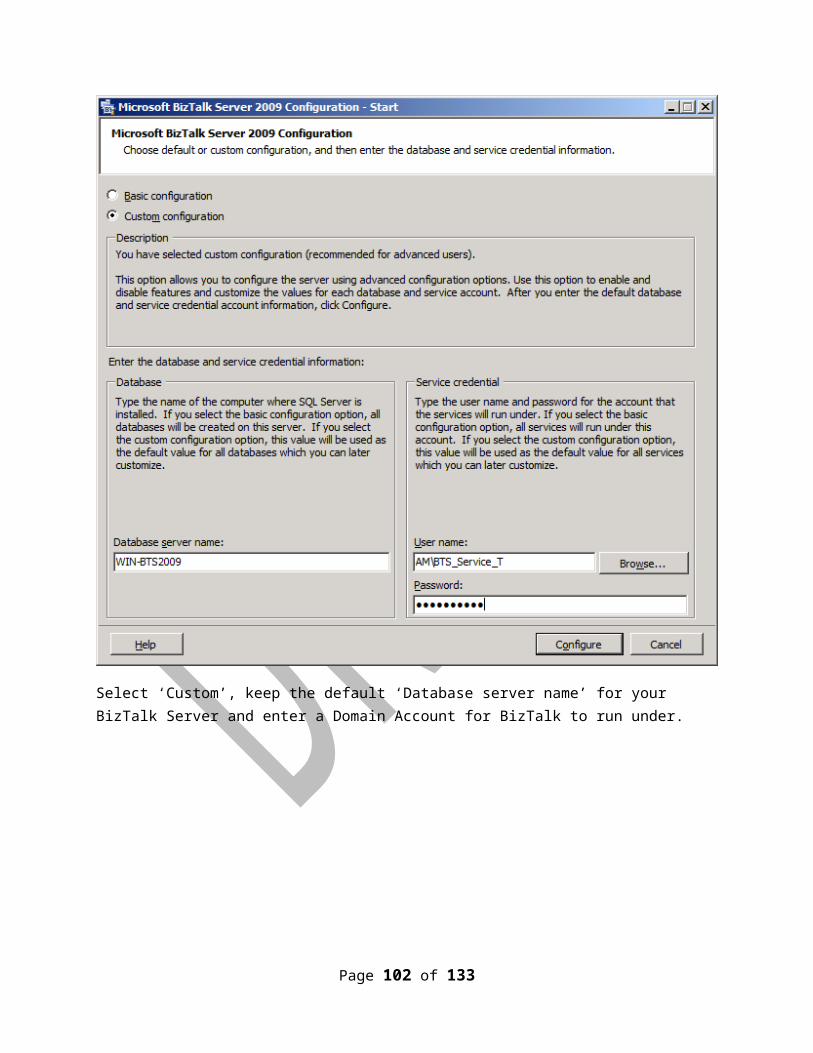
2.18. Configure BizTalk Server 2009Click ‘Start’, click ‘All Programs’ click ‘Microsoft BizTalk Server 2009’, right-click BizTalk Server Configuration and then click ‘Run as Administrator’
Select ‘Custom’, keep the default ‘Database server name’ for your BizTalk Server and enter a Domain Account for BizTalk to run under.
Page 98 of 129
Configure Enterprise SSO, select the checkbox ‘Enable Enterprise Single Sign-On on this computer’, add the required domain account and group as shown above, leave the ‘Server Name’ and ‘Database Name’ as is
Page 99 of 129

On the sub-section ‘Enterprise Single-Sign-On Secret Backup’, enter a password and a reminder, then click ‘Apply Configuration’ to configure SSO
Password: <PASSWORD>
Copy and Paste the ‘Backup file location’ path and the password you used someplace so that you know where to find them if needed
Location: C:\Program Files\Common Files\Enterprise Single Sign-On\SSO3999.bak
Page 100 of 129

Click ‘Next’
Page 101 of 129
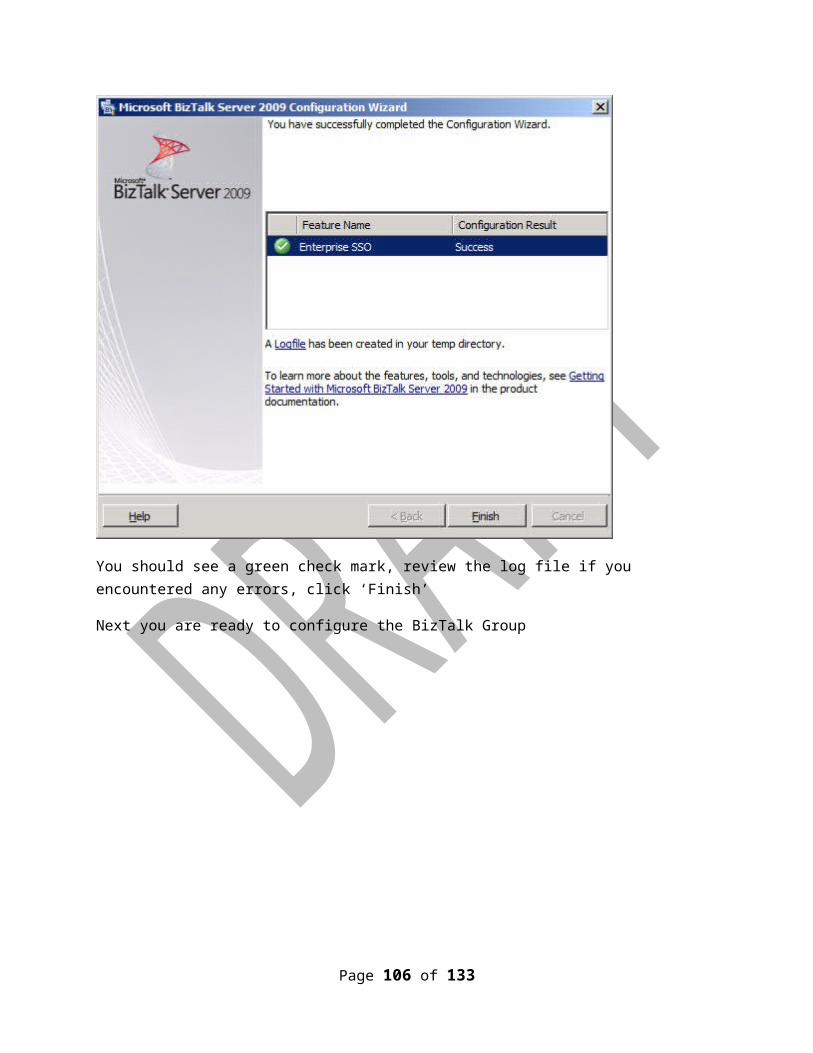
You should see a green check mark, review the log file if you encountered any errors, click ‘Finish’
Next you are ready to configure the BizTalk Group
Page 102 of 129

Click on ‘Group’, then check the ‘Enable BizTalk Server Group on this computer’ box, next select ‘Create a new BizTalk Group’ option. Configure the BizTalk Group using the accounts listed above, keep the default names for the database names
Review and click ‘Apply Configuration’
Page 103 of 129

Click ‘Next’
Page 104 of 129

You should see a green check mark, review the log file if you encountered any errors, click ‘Finish’
Next, configure the BizTalk Runtime
Page 105 of 129
Click on the ‘BizTalk Runtime’ option and then click the ‘Register the BizTalk Server runtime components’ checkbox, configure using the options shown above. If you need a 32-bit only Host you can always add one down the road if you need one for a given protocol.
Review and then click ‘Apply Configuration’
Page 106 of 129

Click ‘Next’
Page 107 of 129

You should see a green check mark, review the log file if you encountered any errors, click ‘Finish’
Next configure the Business Rules Engine
Page 108 of 129

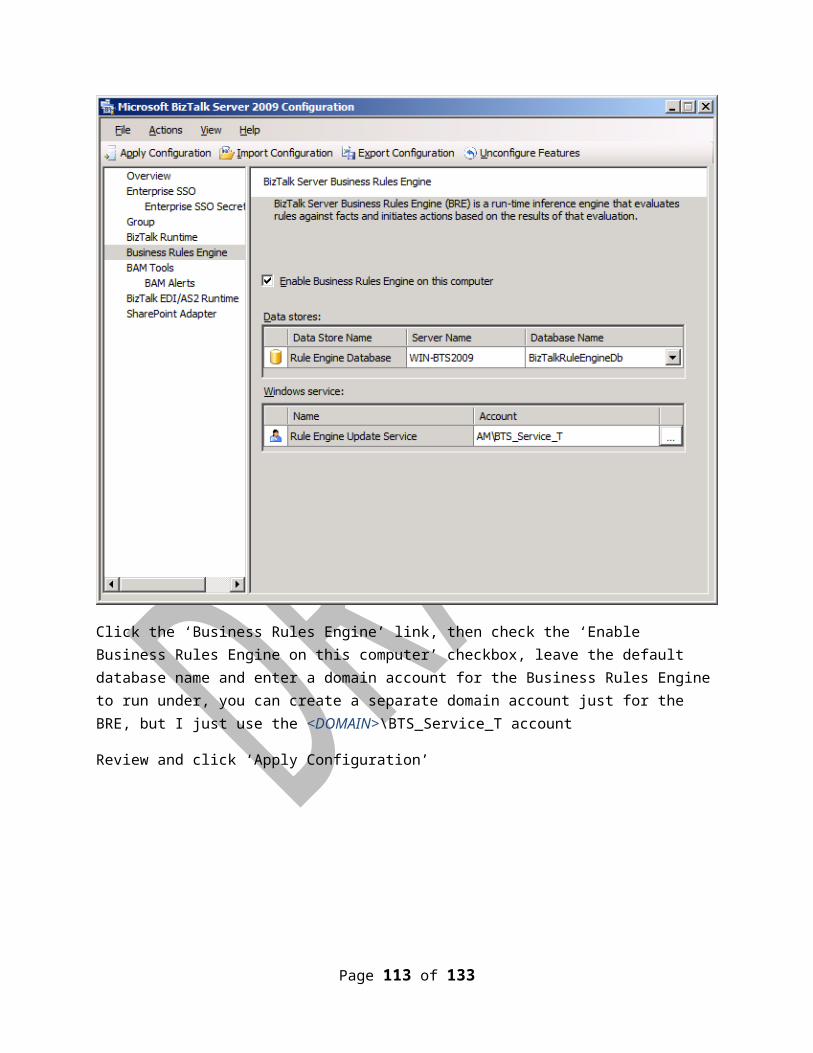
Click the ‘Business Rules Engine’ link, then check the ‘Enable Business Rules Engine on this computer’ checkbox, leave the default database name and enter a domain account for the Business Rules Engine to run under, you can create a separate domain account just for the BRE, but I just use the <DOMAIN>\BTS_Service_T account
Review and click ‘Apply Configuration’
Page 109 of 129

Click ‘Next’
Page 110 of 129

You should see a green check mark, review the log file if you encountered any errors, click ‘Finish’
Next configure the SharePoint Adapter
Page 111 of 129

Click the ‘SharePoint Adapter’ link and then select the ‘Enable Windows SharePoint Services Adapter on this computer’ checkbox. Make sure ‘Default Web Site’ is selected and then enter the <DOMAIN>\SPS_Enabled_Hosts_T account for the Adapter to run under
Review and click ‘Apply Configuration’
Page 112 of 129
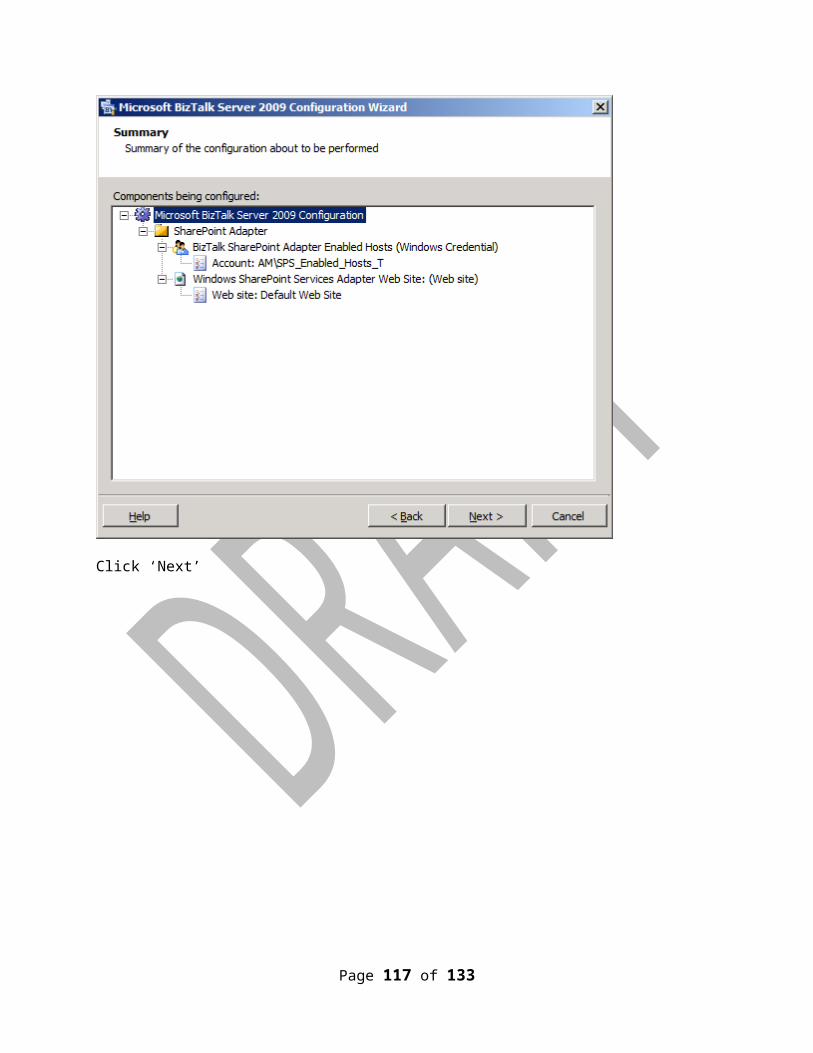
Click ‘Next’
Page 113 of 129

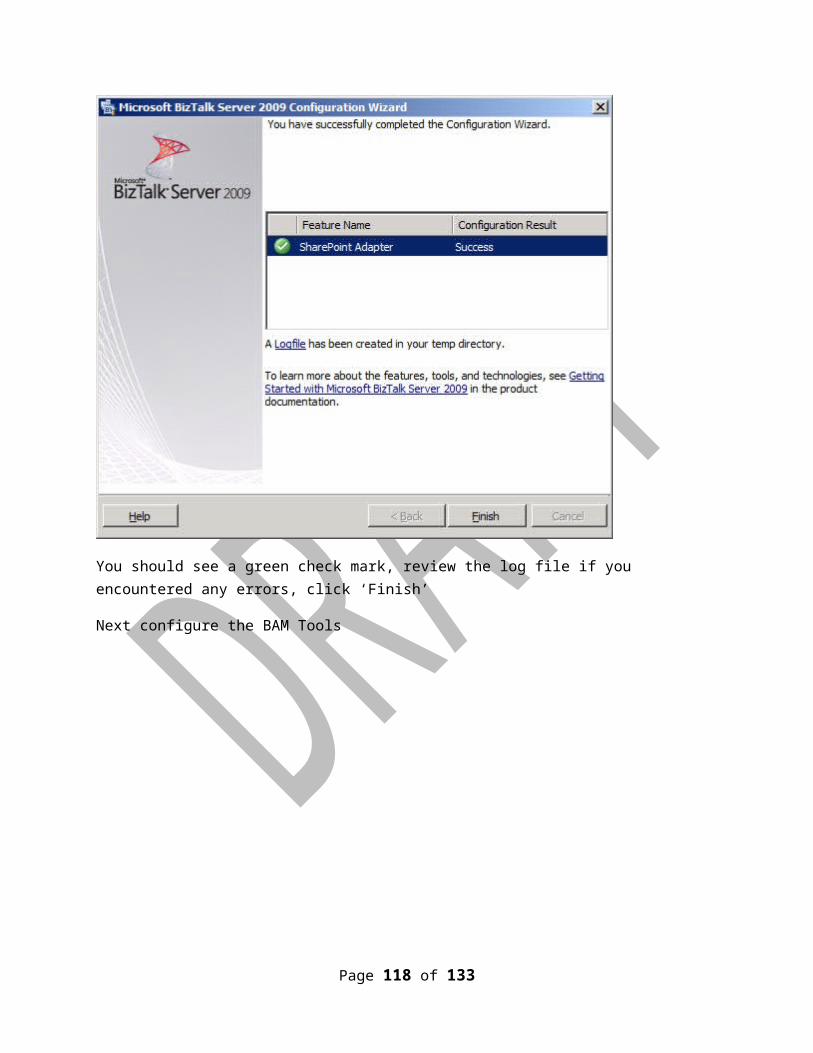
You should see a green check mark, review the log file if you encountered any errors, click ‘Finish’
Next configure the BAM Tools
Page 114 of 129

Click the ‘BAM Tools’ link and then check both checkboxes above, click on the warning icon in yellow.
You will see a warning stating the BizTalk Service needs to be restarted, leave the default database names. Add entries for the BAM Analysis Database and BAM Star Schema Database as in the screen shot above.
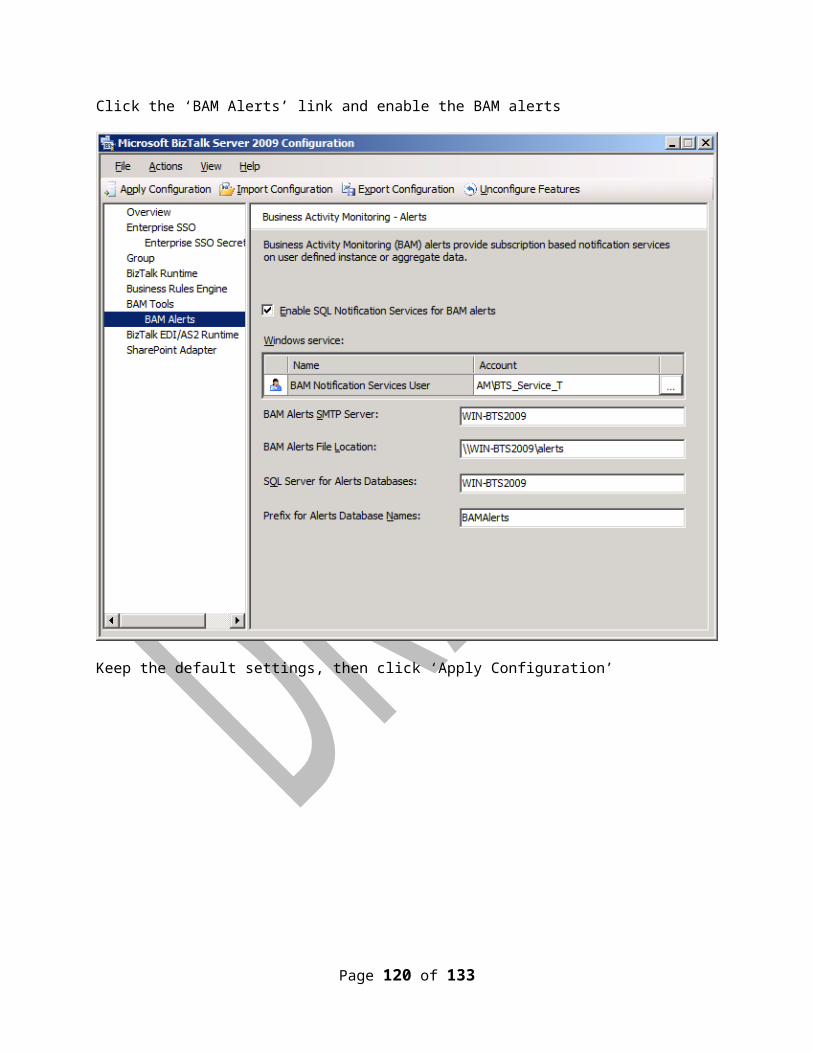
Click the ‘BAM Alerts’ link and enable the BAM alerts
Page 115 of 129

Keep the default settings, then click ‘Apply Configuration’
Page 116 of 129
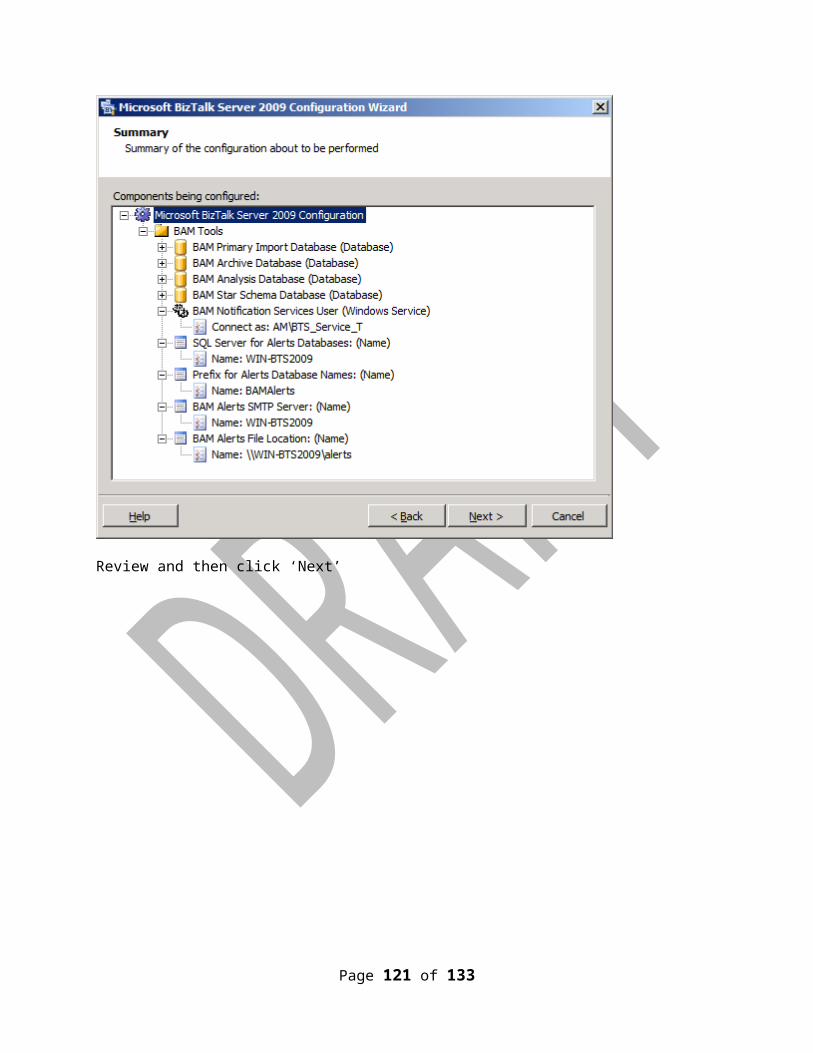
Review and then click ‘Next’
Page 117 of 129
You should see a green check mark, review the log file if you encountered any errors, click ‘Finish’
Next configure the BizTalk EDI/AS2 Runtime
Page 118 of 129

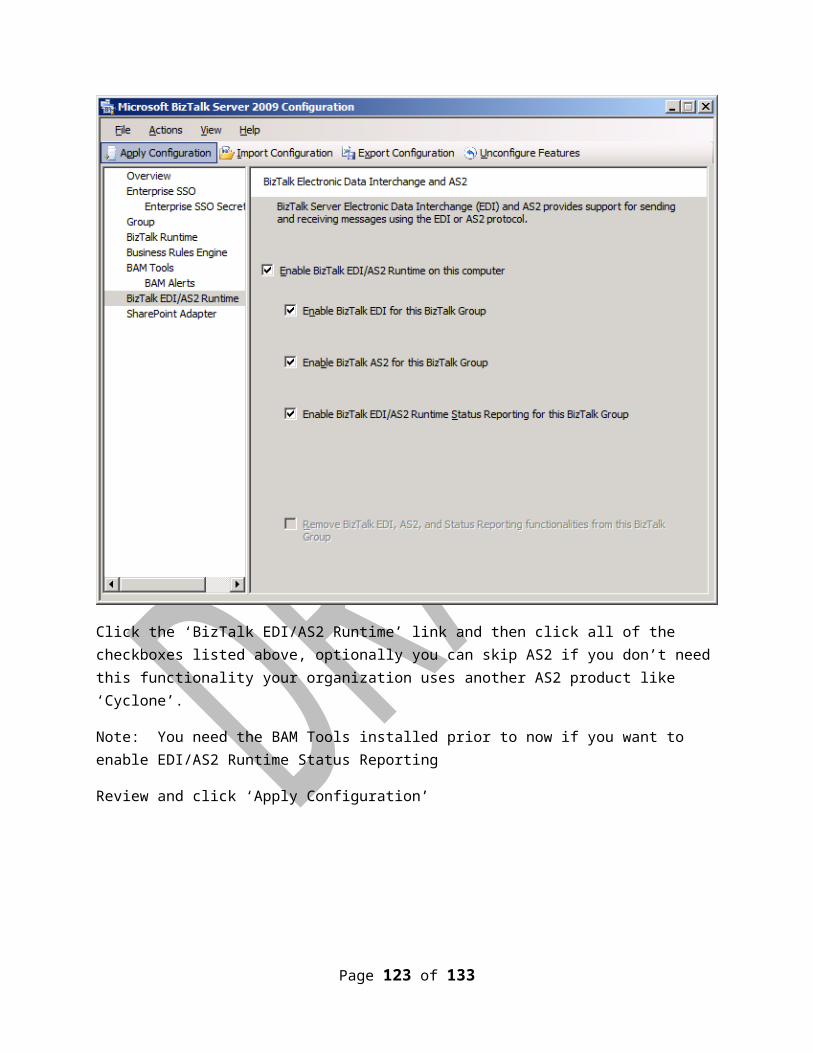
Click the ‘BizTalk EDI/AS2 Runtime’ link and then click all of the checkboxes listed above, optionally you can skip AS2 if you don’t need this functionality your organization uses another AS2 product like ‘Cyclone’.
Note: You need the BAM Tools installed prior to now if you want to enable EDI/AS2 Runtime Status Reporting
Review and click ‘Apply Configuration’
Page 119 of 129
Click ‘Next’
Page 120 of 129
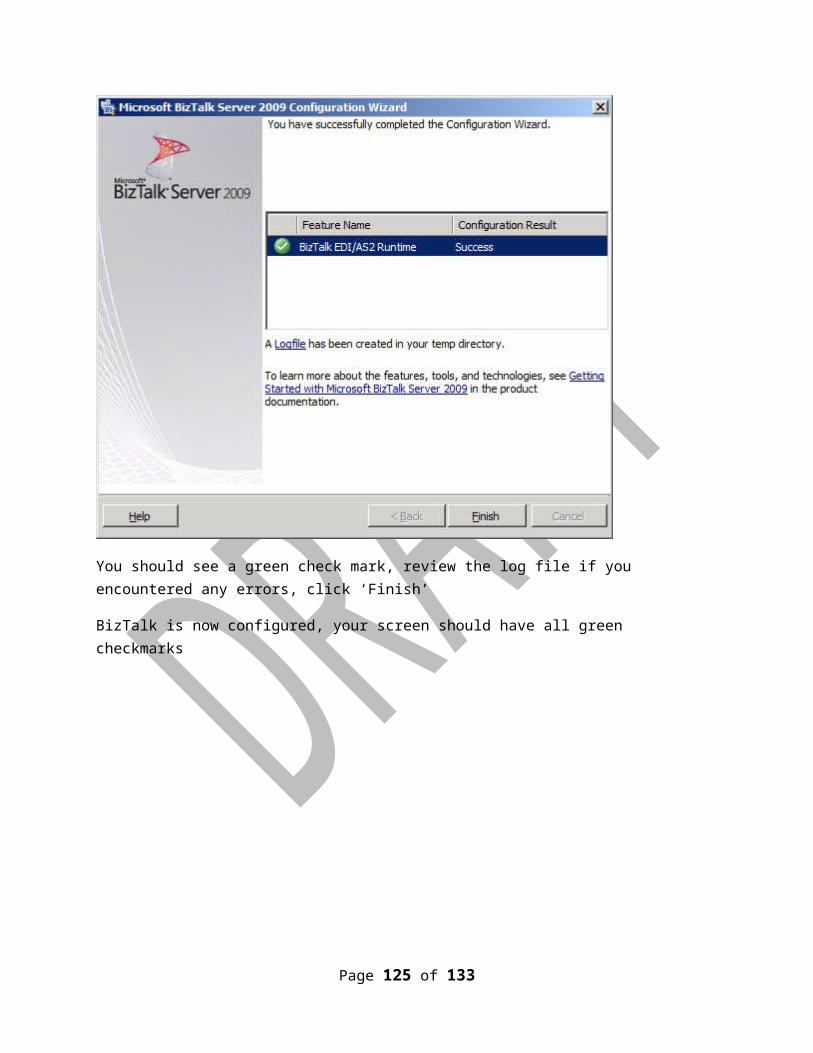
You should see a green check mark, review the log file if you encountered any errors, click ‘Finish’
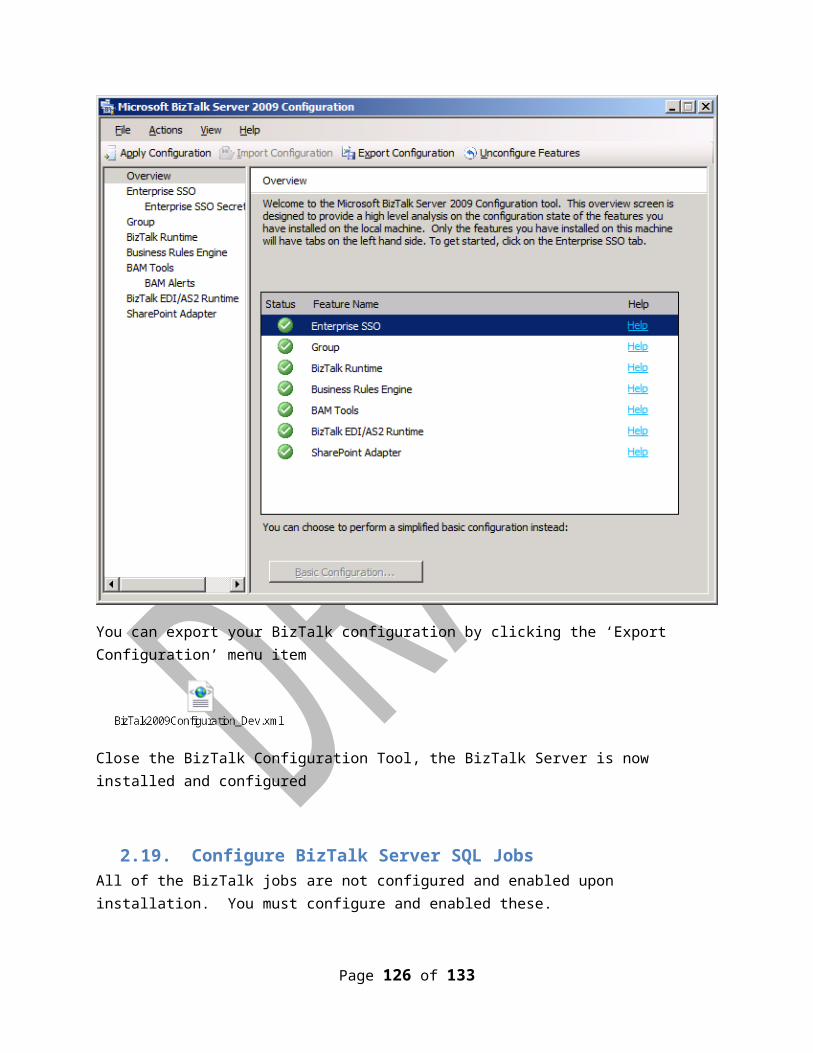
BizTalk is now configured, your screen should have all green checkmarks
Page 121 of 129

You can export your BizTalk configuration by clicking the ‘Export Configuration’ menu item
Close the BizTalk Configuration Tool, the BizTalk Server is now installed and configured
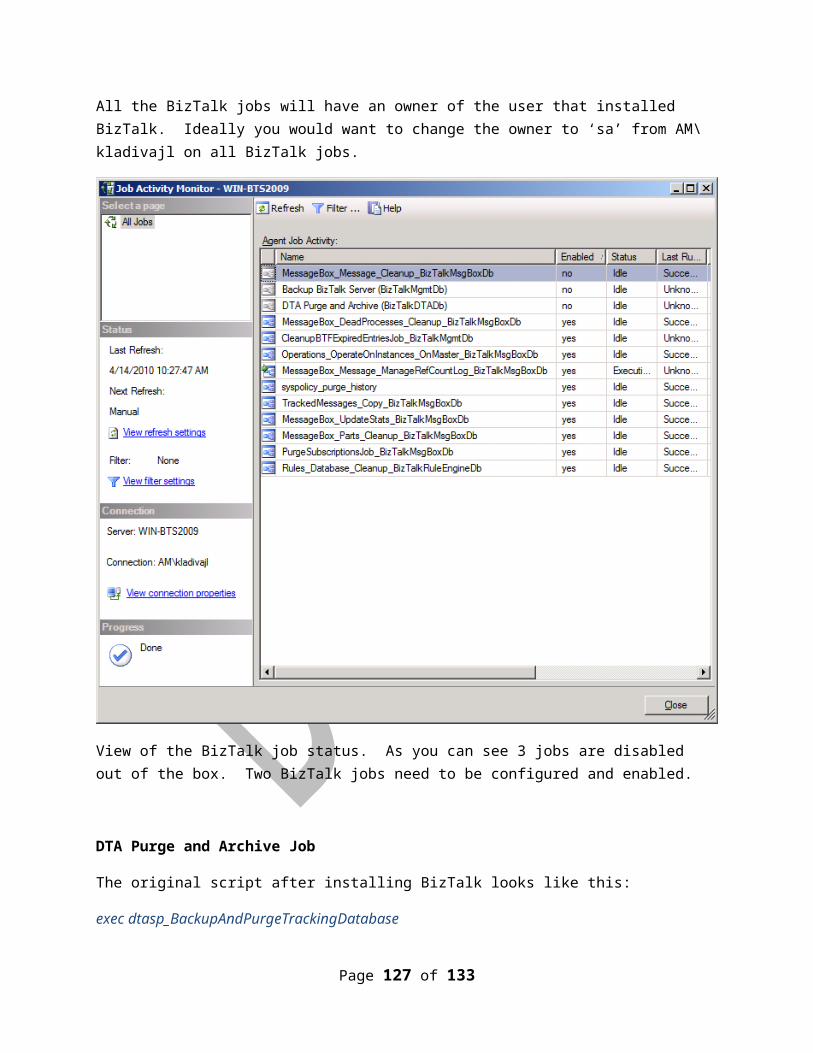
2.19. Configure BizTalk Server SQL JobsAll of the BizTalk jobs are not configured and enabled upon installation. You must configure and enabled these.
All the BizTalk jobs will have an owner of the user that installed BizTalk. Ideally you would want to change the owner to ‘sa’ from AM\kladivajl on all BizTalk jobs.
Page 122 of 129
View of the BizTalk job status. As you can see 3 jobs are disabled out of the box. Two BizTalk jobs need to be configured and enabled.
DTA Purge and Archive Job
The original script after installing BizTalk looks like this:
exec dtasp_BackupAndPurgeTrackingDatabase
0, --@nLiveHours tinyint, --Any completed instance older than the live hours +live days
1, --@nLiveDays tinyint = 0, --will be deleted along with all associated data
30, --@nHardDeleteDays tinyint = 0, --all data older than this will be deleted.
Page 123 of 129

null, --@nvcFolder nvarchar(1024) = null, --folder for backup files
null, --@nvcValidatingServer sysname = null,
0 --@fForceBackup int = 0 --
Review the parameters and change them:
declare @dtLastBackup datetime set @dtLastBackup = GetUTCDate()
exec dtasp_PurgeTrackingDatabase 0, 60, 90, @dtLastBackup
NOTE: You have two options, run the dtasp_PurgeTrackingDatabase or dtasp_BackupAndPurgeTrackingDatabase stored proc. We don’t archive to a remote SQL Server so we implemented dtasp_PurgeTrackingDatabase. If you want keep your tracking data for a period of a year, it would be best to archive this off to a remote SQL Server using the dtasp_BackupAndPurgeTrackingDatabase stored proc.
Enable the job and check the job to make sure it ran successfully after the defined interval
Backup BizTalk Server
This is a critical job that must be setup and configured. It consists of 3 parts out-of-the-box. Step 3 has been added to remove backups older than 3 days old so the backup drive does not fill up.
Step 1: BackupFull
Original script:
exec [dbo].[sp_BackupAllFull_Schedule] 'd' /* Frequency */, 'BTS' /* Name */, '<destination path>' /* location of backup files */
Change the location of the backup files to match your environment:
exec [dbo].[sp_BackupAllFull_Schedule] 'd' /* Frequency */, 'BTS' /* Name */, 'C:\Program Files\Microsoft SQL Server\MSSQL10.MSSQLSERVER\MSSQL\Backup' /* location of backup files */
Step 2: MarkAndBackupLog
Original script:
exec [dbo].[sp_MarkAll] 'BTS' /* Log mark name */, '<destination path>' /* location of backup files */
Change the location of the backup files to match your environment:
exec [dbo].[sp_MarkAll] 'BTS' /* Log mark name */, 'C:\Program Files\Microsoft SQL Server\MSSQL10.MSSQLSERVER\MSSQL\Backup' /* location of backup files */
Page 124 of 129
Step 3: Purge Backup History
NOTE: This is a custom step that has been added to remove backups older than 3 days old so the hard drive does not fill up.
Script:
pathstring = "C:\Program Files\Microsoft SQL Server\MSSQL10.MSSQLSERVER\MSSQL\Backup\"
daysBack = 2
Set fso = CreateObject("Scripting.FileSystemObject")
For Each file In fso.GetFolder(pathstring).files
If DateValue(file.datelastModified) < DateValue(Now - daysBack) Then
fso.DeleteFile file.Path
End If
Next
Set fso = nothing
Page 125 of 129
NOTE: You must grant the account NETWORK_SERVICE ‘Full Control’ to the ‘C:\Program Files\Microsoft SQL Server\MSSQL10.MSSQLSERVER\MSSQL\Backup\’ directory so it can delete files if needed, this is the account SQL Server Agent is running as.
Page 126 of 129
Step 4: Clear Backup History
Original script:
exec [dbo].[sp_DeleteBackupHistory] @DaysToKeep=14
Leave the default settings, enable the job, and run the job and make sure it is successful
Page 127 of 129

The Backup BizTalk Server job can be manually kicked off, you should see no errors.
Next review the ’Job Activity Monitor’
Page 128 of 129

You should see only 1 job not enabled, do not enable this job, it is called by another BizTalk job. The BizTalk jobs are now configured.
NOTE: If you have custom BizTalk databases then you need to perform the steps in the next section to enable BizTalk to mark these databases for point in time recovery using the same process as the BizTalk Server databases
2.20. Backing Up Custom BizTalk Databases
To back up custom BizTalk databases you need a add entries into two BizTalk tables, see link below;
http://msdn.microsoft.com/en-us/library/aa561198(BTS.10,printer).aspx
Page 129 of 129