Bench Top Router-Jointer - Lee Valley Tools make a bench top router-jointer, I suggest using MDF...
6
Bench Top Router-Jointer Woodworking Newsletter Vol. 9, Issue 3 - January 2015 1/6 www.leevalley.com To make a bench top router-jointer, I suggest using MDF because it’s flat, uniform and stable. Stack two piles of 2-3/4” x 18” strips to about 2/3 of the height of your router base plate. I also suggest using melamine strips for the tops because of their slipperiness; however, waxed MDF could also be used. With this width of board, use a 2-1/2” long 1/2” straight router bit. Set the outfeed table about 1/16” higher than the infeed table. To do so, either sandwich full cardboard strips between two of the MDF layers used for the outfeed table or use one thinner MDF strip for your infeed table. One pile at a time, stack and clamp your boards. Cut one end square and the opposite end at 60°. An appropriate length for the bench top router-jointer is 3’. Because of the rotation of all routers, the infeed table must be on the left. You need a base, a fence and four brackets. Leave room for the router between the higher center brackets. Make sure the adjoining corners of your brackets are perfectly square so that your fence will be at 90° from the base.
Transcript of Bench Top Router-Jointer - Lee Valley Tools make a bench top router-jointer, I suggest using MDF...
Bench Top Router-JointerWoodworking Newsletter
Vol. 9, Issue 3 - January 2015
1/6 www.leevalley.com
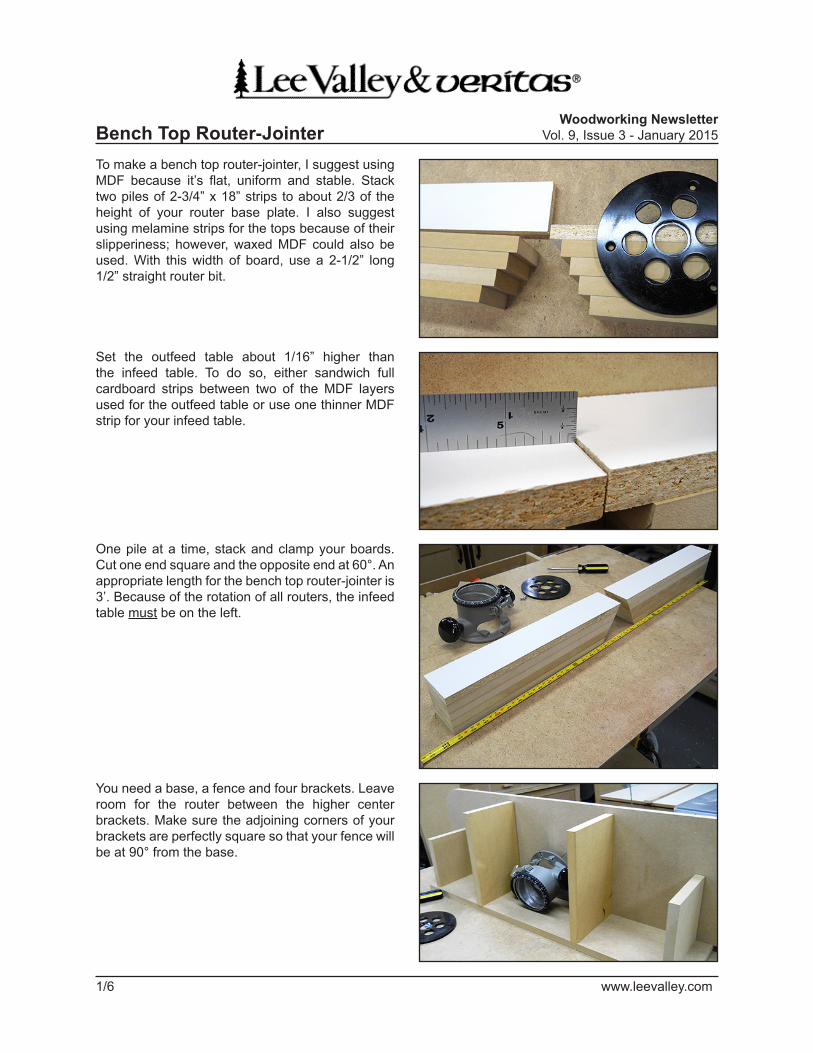
To make a bench top router-jointer, I suggest using MDF because it’s flat, uniform and stable. Stack two piles of 2-3/4” x 18” strips to about 2/3 of the height of your router base plate. I also suggest using melamine strips for the tops because of their slipperiness; however, waxed MDF could also be used. With this width of board, use a 2-1/2” long 1/2” straight router bit.
Set the outfeed table about 1/16” higher than the infeed table. To do so, either sandwich full cardboard strips between two of the MDF layers used for the outfeed table or use one thinner MDF strip for your infeed table.
One pile at a time, stack and clamp your boards. Cut one end square and the opposite end at 60°. An appropriate length for the bench top router-jointer is 3’. Because of the rotation of all routers, the infeed table must be on the left.
You need a base, a fence and four brackets. Leave room for the router between the higher center brackets. Make sure the adjoining corners of your brackets are perfectly square so that your fence will be at 90° from the base.
2/6 www.leevalley.com
Bench Top Router-JointerWoodworking Newsletter
Vol. 9, Issue 3 - January 2015
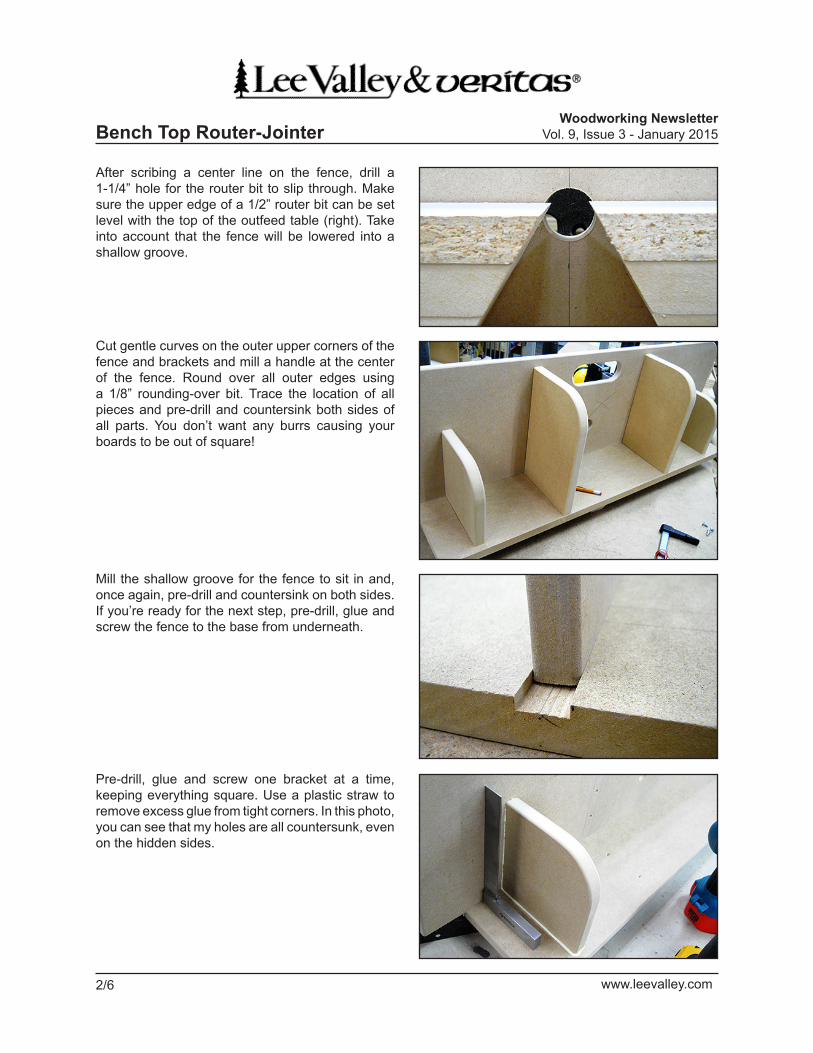
After scribing a center line on the fence, drill a 1-1/4” hole for the router bit to slip through. Make sure the upper edge of a 1/2” router bit can be set level with the top of the outfeed table (right). Take into account that the fence will be lowered into a shallow groove.
Cut gentle curves on the outer upper corners of the fence and brackets and mill a handle at the center of the fence. Round over all outer edges using a 1/8” rounding-over bit. Trace the location of all pieces and pre-drill and countersink both sides of all parts. You don’t want any burrs causing your boards to be out of square!
Mill the shallow groove for the fence to sit in and, once again, pre-drill and countersink on both sides. If you’re ready for the next step, pre-drill, glue and screw the fence to the base from underneath.
Pre-drill, glue and screw one bracket at a time, keeping everything square. Use a plastic straw to remove excess glue from tight corners. In this photo, you can see that my holes are all countersunk, even on the hidden sides.
3/6 www.leevalley.com
Bench Top Router-JointerWoodworking Newsletter
Vol. 9, Issue 3 - January 2015
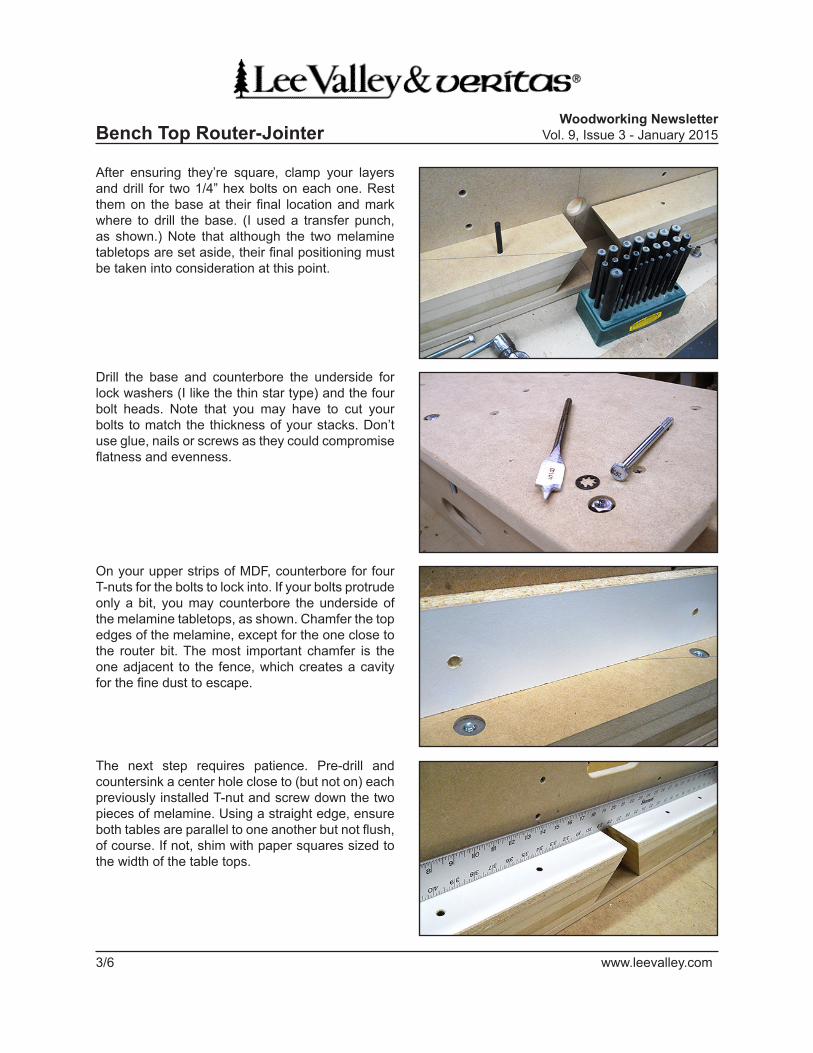
After ensuring they’re square, clamp your layers and drill for two 1/4” hex bolts on each one. Rest them on the base at their final location and mark where to drill the base. (I used a transfer punch, as shown.) Note that although the two melamine tabletops are set aside, their final positioning must be taken into consideration at this point.
Drill the base and counterbore the underside for lock washers (I like the thin star type) and the four bolt heads. Note that you may have to cut your bolts to match the thickness of your stacks. Don’t use glue, nails or screws as they could compromise flatness and evenness.
On your upper strips of MDF, counterbore for four T-nuts for the bolts to lock into. If your bolts protrude only a bit, you may counterbore the underside of the melamine tabletops, as shown. Chamfer the top edges of the melamine, except for the one close to the router bit. The most important chamfer is the one adjacent to the fence, which creates a cavity for the fine dust to escape.
The next step requires patience. Pre-drill and countersink a center hole close to (but not on) each previously installed T-nut and screw down the two pieces of melamine. Using a straight edge, ensure both tables are parallel to one another but not flush, of course. If not, shim with paper squares sized to the width of the table tops.

4/6 www.leevalley.com
Bench Top Router-JointerWoodworking Newsletter
Vol. 9, Issue 3 - January 2015
Check that your tables are square to the fence all the way down. If not, insert the appropriate amount of long narrow paper strips. I had to use two stacked 1” wide strips close to the fence on both tables.
From the back, trace the perimeter of your router base plate lined up with the 1-1/4” hole. Locate one screw hole that will allow your router to pivot up and down (not sideways) to set the router bit level to the outfeed table. Consider the location of the router handles, as well as the locking mechanism; the latter has to be accessible.
Use only one screw so that the router can pivot. To further secure the router, use toggle clamps (if room is available) or make your own hold-downs using hardwood scraps, carriage bolts and wing nuts (shown). Drill and counterbore the front side of the fence for 1/4” carriage bolts. You may have to temporarily remove one table to do so. Before setting the router bit flush with the outfeed table, secure the pivot screw as well as the two hold-downs, which should be tightened lightly. Once the bit is levelled to the top, further tighten the wing nuts securely.

Bench Top Router-JointerWoodworking Newsletter
Vol. 9, Issue 3 - January 2015
5/6 www.leevalley.com
Here’s an easy way to add a safety guard above the router bit. Pre-drill and screw an L-bracket to the front side of the infeed table so that the guard is about 1/4” above the table. From the top, slip a washer on the appropriate diameter bolt (mine is 10-24), then feed the bolt into a pre-drilled hole in your guard. (My guard is a laminated HDF floorboard scrap.) Sandwich the bracket between another two washers and lock it with two nuts, making sure the guard still spins freely.
Thread a rubber band (or a spring) into another hole and attach it to a cup hook screwed to the outfeed table. Again, make sure the guard pivots freely. It may look simple, but it’s effective!
It’s that easy to make your own router-jointer. As mentioned, I designed my tool to use a 2-1/2” long 1/2” straight bit, but only when needed. To prevent chatter, I suggest using a shorter router bit on a regular basis, according to your needs, of course.
Bench Top Router-JointerWoodworking Newsletter
Vol. 9, Issue 3 - January 2015
6/6 www.leevalley.com
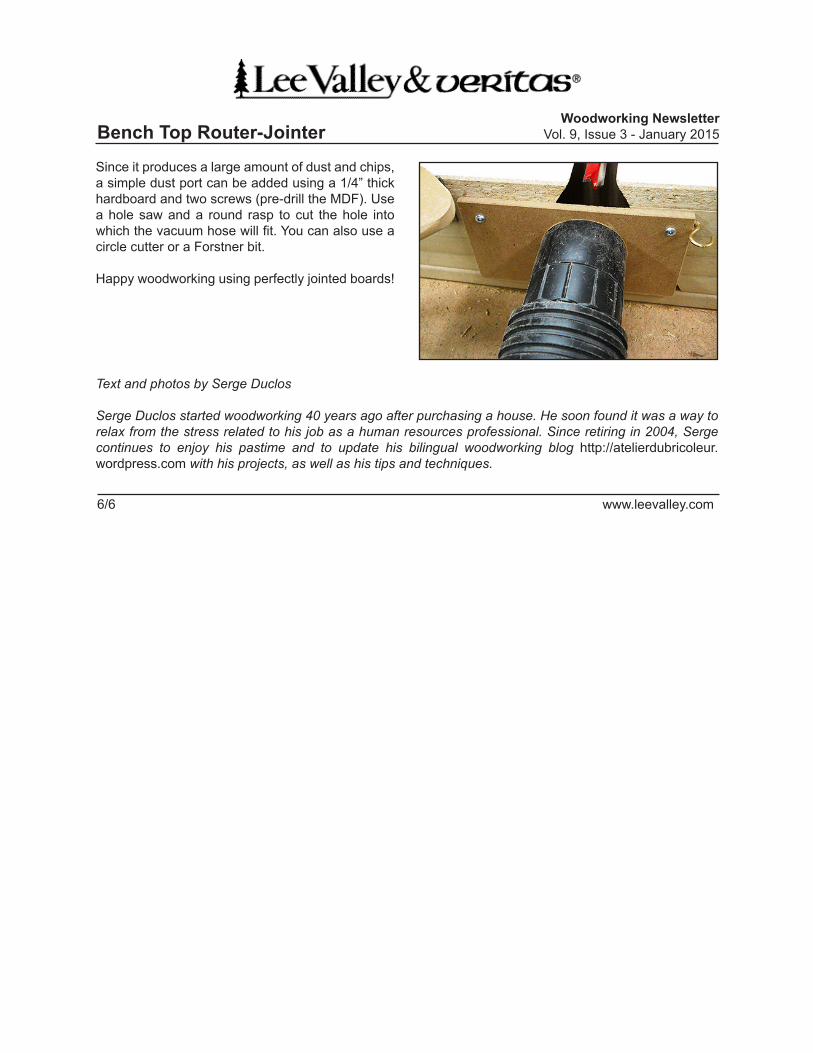
Since it produces a large amount of dust and chips, a simple dust port can be added using a 1/4” thick hardboard and two screws (pre-drill the MDF). Use a hole saw and a round rasp to cut the hole into which the vacuum hose will fit. You can also use a circle cutter or a Forstner bit.
Happy woodworking using perfectly jointed boards!
Text and photos by Serge Duclos
Serge Duclos started woodworking 40 years ago after purchasing a house. He soon found it was a way to relax from the stress related to his job as a human resources professional. Since retiring in 2004, Serge continues to enjoy his pastime and to update his bilingual woodworking blog http://atelierdubricoleur.wordpress.com with his projects, as well as his tips and techniques.