Bataan rules 7.5 - Amazon Web Services...BATAAN!:THE BATTLE FOR THE PHILIPPINES-1942 HQ Infantry...
48
Transcript of Bataan rules 7.5 - Amazon Web Services...BATAAN!:THE BATTLE FOR THE PHILIPPINES-1942 HQ Infantry...

1.0 INTRODUCTION1.1 Contacting Compass Games1.2 Help HQ2.0 GAME EQUIPMENT2.1 The Game Map2.2 The Playing Pieces2.3 Charts and Tables2.4 The Die3.0 BASIC CONCEPTS3.1 Terminology3.2 Zones of Control3.3 Stacking3.4 Efficiency and Lead Units3.5 Halving and Rounding3.6 Unit Steps3.7 Disruption4.0 STARTING THE GAME4.1 Setting Up the Game4.2 The Turn4.3 Formations and Activation5.0 THE STRATEGIC SEGMENT5.1 Reinforcements5.2 Withdrawals5.3 Reserve Status6.0 SUPPLY6.1 In Supply6.2 Supply Routes6.3 Supply Sources6.4 Supply Points6.5 General Attrition7.0 OPERATIONS7.1 Initiative7.2 Activation and Operations Sequences7.3 Combining Formations
7.4 Activation of Army Units8.0 GROUND UNIT MOVEMENT8.1 Movement Restrictions8.2 ZOC Effects on Movement8.3 Terrain Effects on Movement9.0 PRE-COMBAT ACTIONS9.1 Combat Declaration9.2 Combat Refusal9.3 No Retreat Declaration10.0 COMBAT10.1 Attack Restrictions10.2 Effects of Terrain on Combat10.3 Choosing the CRT10.4 Combat Coordination10.5 Determining Combat Odds10.6 Resolving Combat11.0 COMBAT RESULTS11.1 Reading the CRT11.2 Combat Losses11.3 Retreats11.4 No Retreat Option Applied11.5 Retreat through Enemy ZOC11.6 Advance After Combat12.0 ARTILLERY12.1 Artillery Fire Support12.2 Artillery in Defense13.0AIR UNITS13.1 Air Unit Restrictions13.2 Naval Interdiction13.3 Close Air Support14.0 FORTIFICATIONS14.1 General Characteristics14.2 Combat Effects
15.0 NAVAL OPERATIONS15.1 Naval Units15.2 Naval Phase15.3 Naval Transport15.4 Amphibious Invasion15.5 Naval Gunfire Support16.0 SPECIAL UNITS AND SITUATIONS16.1 Anti-Aircraft Units16.2 HQ Units16.3 Special US Units16.4 Special Japanese Units16.5 Replacements17.0 SPECIAL EVENTS17.1 When Special Events Apply18.0 SETTING UP A SCENARIO18.1 Finding Scenario Information18.2 Placing Scenario Markers and Units19.0 SCENARIOS19.1 Scenario #1: At the Pearly Gates: Layac19.2 Scenario #2: Abucay Line19.3 Scenario #3: Mauban Line19.4 Scenario #4: Second Bataan19.5 Scenario #5: Battling Bastards of Bataan20.0 DESIGNER’S SECTION20.1 Unit Abbreviations20.2 Suggested Reading20.3 Designer’s Notes20.4 Developer’s Notes20.5 Game CreditsARTICLESEXAMPLE OF PLAYSPECIAL NOTE ON COUNTERSINDEX
BATAAN!THE BATTLE FOR THE PHILIPPINES - 1942
Copyright © 2010, Compass Games, LLC., All Rights Reserved
1.0 INTRODUCTION“Tonight I plan to disengage my forces under cover of darkness,concentrating center of gravity of my movement toward Bataan.”- MacArthur (Manila) to Gen. Marshall (USA), 24 December 1941
BATAAN! is an operational-level game of the WWII battles on theBataan peninsula in the Philippines that took place in January throughApril 1942. The game is intended for two players. One player controlsthe Japanese forces, and his opponent controls the United States andPhilippines forces (collectively called “US”). Historically, Gen. DouglasMacArthur commanded the US forces (later, Lt. Gen. JonathanWainwright) while Lt. Gen. Masaharu Homma commanded theJapanese. The players maneuver their units across the map andconduct combat according to the rules of play.
Object of the Game: Several scenarios are provided, showing historicalengagements. In each scenario the Japanese player wins by capturing
and holding various objectives. These objectives count towards thevictory conditions of that scenario. The US player wins the game byavoiding these conditions.
1.1 Contacting Compass GamesIf any game components are missing or damaged you may contact usby email at [email protected] or by mail at Compass GamesLLC., PO Box 271, Cromwell, CT 06416, USA. Please include a SASE(self addressed and stamped envelope) if you have questions.
1.2 Help HQGeneral help or questions on game play may be posted in the gamefolder for BATAAN! on www.consimworld.com, or may be emaileddirectly to us at [email protected]. Finally, players candiscuss play and get help on www.boardgamegeek.com.
TABLE OF CONTENTS
2.0 GAME EQUIPMENTEach BATAAN! game includes:• One 22 x 34 inch map• Two countersheets (416 counters)• One Rules Booklet• Two Japanese Set Up cards• Two US Set Up cards• Eight Player Aid cards• One ten-sided die• One box and lid set
2.1 The Game MapThe map portrays portions of the Philippines where the battles tookplace. The grid of hexagons superimposed over the terrain featuresfacilitate movement and the positioning of playing pieces. Thesehexagons are hereafter called “hexes.” Each hex has a four-digitidentification number, used for game reference purposes only. Eachhex on the map represents 1.2 km (0.75 miles) of real terrain from sideto side.
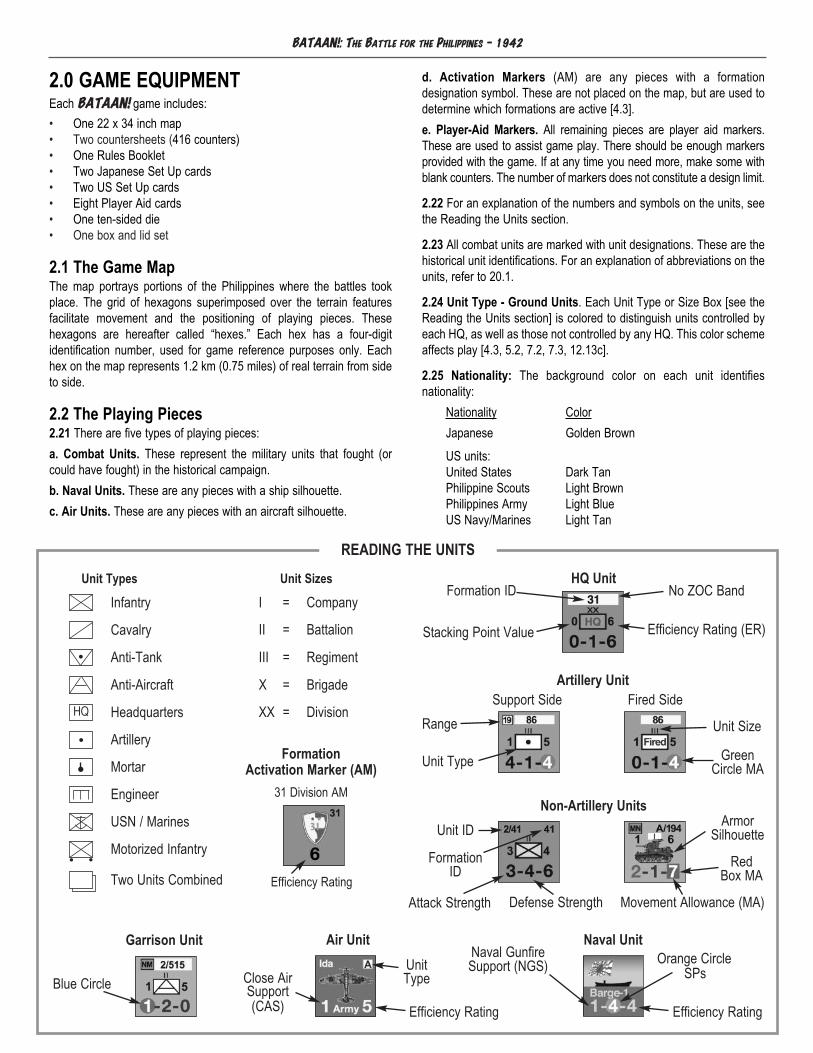
2.2 The Playing Pieces2.21 There are five types of playing pieces:a. Combat Units. These represent the military units that fought (orcould have fought) in the historical campaign.b. Naval Units. These are any pieces with a ship silhouette.c. Air Units. These are any pieces with an aircraft silhouette.
d. Activation Markers (AM) are any pieces with a formationdesignation symbol. These are not placed on the map, but are used todetermine which formations are active [4.3].e. Player-Aid Markers. All remaining pieces are player aid markers.These are used to assist game play. There should be enough markersprovided with the game. If at any time you need more, make some withblank counters. The number of markers does not constitute a design limit.
2.22 For an explanation of the numbers and symbols on the units, seethe Reading the Units section.
2.23 All combat units are marked with unit designations. These are thehistorical unit identifications. For an explanation of abbreviations on theunits, refer to 20.1.
2.24 Unit Type - Ground Units. Each Unit Type or Size Box [see theReading the Units section] is colored to distinguish units controlled byeach HQ, as well as those not controlled by any HQ. This color schemeaffects play [4.3, 5.2, 7.2, 7.3, 12.13c].
2.25 Nationality: The background color on each unit identifiesnationality:
Nationality ColorJapanese Golden BrownUS units:United States Dark TanPhilippine Scouts Light BrownPhilippines Army Light BlueUS Navy/Marines Light Tan
BATAAN!: THE BATTLE FOR THE PHILIPPINES - 1942
HQ
Infantry
Cavalry
Anti-Tank
Anti-Aircraft
Headquarters
Artillery
Mortar
Engineer
USN / Marines
Motorized Infantry
Two Units Combined
READING THE UNITSUnit Types Unit Sizes
I = Company
II = Battalion
III = Regiment
X = Brigade
XX = Division
Activation Marker (AM)31 Division AM
Efficiency Rating
HQ UnitNo ZOC Band
Efficiency Rating (ER)Stacking Point Value
Formation ID
Artillery Unit
Formation
Fired SideSupport SideRange Unit Size
Unit Type GreenCircle MA
Non-Artillery UnitsArmor
Silhouette
RedBox MA
FormationID
Unit ID
Attack Strength Movement Allowance (MA)Defense Strength
Air Unit Naval UnitGarrison Unit
Blue CircleOrange Circle
SPs
Efficiency RatingEfficiency Rating
Naval GunfireSupport (NGS)
Close AirSupport(CAS)
UnitType

2.26 Unit Type - Air Units. A code denotes the function of the air unit:Code Air Unit TypeA Ground AttackB BomberF Fighter
2.3 Charts and TablesBATAAN! includes set-up cards and various charts and tables to helpplayers set up the game, keep track of new units entering play, and aidmovement and combat functions. Some of these have been printed onthe map while others are printed separately on player aid cards. Placethese to the side of the map for easy reference.
2.4 The Die2.41 The game uses a ten-sided die. The number “0” is read as ten(10), not zero (0).
2.42 To perform many game functions, you will roll one die to determinea result. Often you will modify the actual die roll result by plus (+) orminus (-) amounts. These are called Die Roll Modifiers (DRMs).
3.0 BASIC CONCEPTS3.1 Terminology3.11 Friendly and Enemy:a. Units. If you are the Japanese player, all Japanese units are friendly;all US units are enemy units. The situation is reversed for the US player.b. Sequences and Phases. Each of the three segments of a turnconsists of sequences and phases [4.2 and 7.2]. During somesequences and phases, both players can perform activities; duringothers, only one player, called the active, or friendly player, can performactivities. Japanese sequences and phases are friendly to theJapanese player, and enemy to the US player. US sequences andphases are friendly to the US player, and enemy to the Japaneseplayer.c. Hexes, Fortifications and Supply Sources. Those last occupied orcontrolled by Japanese units are friendly to the Japanese player; thoselast occupied or controlled by US units are friendly to the US player. Afortification that is friendly to the Japanese player may be destroyed if itis occupied by Japanese units during the engineering phase [14.13].
3.12 Controlled and Contested Hexes:a. A hex is controlled by one side if:• One or more of that side’s combat units currently occupy the hex, or• One or more of that side’s combat units projects an uncontestedZone of Control [3.2] into the hex.
b. If both friendly and enemy combat units project ZOC into a vacanthex, both ZOCs co-exist and the hex is contested.
3.13 Contiguous Hexes: This is an unbroken series of connectedadjacent hexes used for movement, range, and Supply Routes.
3.14 Coastal Hexes: Any hex containing both land and sea is a coastalhex. The line(s) along which the land and sea meet in a coastal hex isthe coastline(s) for that hex.
3.15 Ground Unit Classes:a. Motorized Units. A unit with its movement allowance shown in a red-box is a motorized unit (a “red-box MA” unit).b. Artillery Units. An artillery unit with its movement allowance shownin a green-circle is an artillery movement class unit (a “green-circle MA”unit). Note: Some artillery units are red-box MA units, and are treatedas motorized.c. Non-Motorized Units. A unit with a movement allowance on a plainbackground is non-motorized.d. Immobile Garrison Units. An AA unit with its attack strength in ablue circle is an immobile garrison unit [16.14].
3.16 Armor Units: These are motorized units that have a vehiclesilhouette on the counter.
3.17 Artillery Units: Any combat unit with a range value is artillery.
3.18 Frequently Used Abbreviations: The following are usedthroughout these rules, and on the charts and tables:
AERM Attrition Efficiency Rating ModifierAM Activation MarkerCAS Close Air SupportCRT Combat Results TableDRM Die Roll ModifierER Efficiency RatingHQ Headquarters (unit)MA Movement AllowanceMP Movement PointNGS Naval Gunfire SupportOoS Out of SupplySP Supply PointTEC Terrain Effects ChartZOC Zone of Control
3.2 Zone of ControlAll combat units have Zone of Control (ZOC). The hex a combat unitoccupies and the six hexes immediately surrounding it constitute thatunit’s ZOC. Each enemy unit’s ZOC inhibits the movement of friendlyunits [8.2], inhibits the tracing of a supply route [6.2], and restricts aunit’s retreat after combat [11.3 and 11.5].
3.21 A combat unit exerts ZOC at all times. It always controls the hex itoccupies, without contest, and exerts a ZOC into the six surroundinghexes [exception: 3.23].
3.22 Air units, naval units, and player aid markers never exert ZOC.
3.23 A combat unit with a yellow band across the top, called a No ZOCband, does not exert ZOC into the six adjacent hexes. It insteadcontrols only the hex it occupies. If at least one combat unit in a hexexerts ZOC (it does not have the No ZOC band), all combat units in thathex exert ZOC into the adjacent hexes.
3.24 ZOC extends into all adjacent hexes and across all hexsides,except those specifically prohibited to movement by the Terrain EffectsChart, regardless of the movement point cost to enter the adjacentterrain, and regardless of the presence of enemy units. ZOC of unitsother than red-box MA and green-circle MA units extend across riverhexsides [3.25b, 8.35d].
© 2010 Compass Games, LLC 4
BATAAN!: THE BATTLE FOR THE PHILIPPINES - 1942
3.25 Terrain Limitations on ZOC:a. ZOC does not extend into adjacent hexes that include Jungle,Tropical Grass, Swamp, or Mountain terrain but does extend from (outof) those hexes.b. ZOC always extends into an adjacent hex if road or trail runs from thefriendly occupied hex into that adjacent hex. But trails and roads do notextend across unbridged River hexsides. Therefore, the ZOC of red-box MA and green-circle MA units do not extend across non-bridgedriver hexsides, even when road (or trail) appears to join a road (or trail)on the other side of the river hexside[8.35d].
3.26 ZOC is not affected by other units, enemy or friendly, except whiletracing a Supply Route [6.23] or during Retreat [11.35]. There is noadditional ZOC effect when more than one unit exerts ZOC into a hex.A friendly unit’s ZOC does not affect the movement of other friendlyunits.
3.3 StackingStacking refers to the placing of more than one unit in a hex. Theposition of a unit within a stack has no effect on play.
3.31 Each combat unit has a stacking point value. All other playingpieces have no stacking point value and do not affect stacking. A fewcombat units are marked with zero (0) stacking point value. These canstack without limit and can be added to stacks already containing themaximum number of stacking points [3.32].
3.32 A maximum of nine (9) stacking points of units can occupy a hexat the end of any game phase. Units currently moving or retreating canenter and pass through stacks of friendly units without regard tostacking limits. If a stack of units is found to exceed the maximum at theend of any phase, the owning player eliminates the excess immediately.
3.33 Players can freely inspect enemy stacks.
3.4 Efficiency and Lead Units3.41 The Efficiency Rating (ER) on each unit represents that unit’s levelof training, cohesion, and effectiveness in combat; the higher the ER,the better the unit. A number of game procedures require a unit (or agroup of units) to pass an ER check.Note: The ER on the reduced-step side is usually less, but some willshow an increase.
3.42 To perform an ER check for a unit, the owning player rolls one die,applies applicable DRMs, and compares the result to the unit’s ER. Ifthe result is equal to or less than the unit’s ER, the ER check issuccessful. If the modified die roll result is greater, the ER check fails.
3.43 Lead Units. Some procedures require that the results of an ERcheck apply to several units. To simplify what could otherwise be manydie rolls, a player chooses one unit to represent all of the units thatcould be affected by a given ER check [3.42]. This unit is called theLead Unit. Use its ER to decide the success or failure of the ER check.Note: Use the unit’s current ER. Its ER may be reduced for beingDisrupted [3.72b] or Out of Supply [6.14b].a. The choice of the Lead unit is always left to the owning player. Heneed not choose the unit with highest ER [although usually it will makesense to do so].
b. The Lead unit almost always takes the first step of any loss[exception: Armor Attrition; 11.23b].c. The Lead unit of the active player can only be of the currently activeFormation [4.33b], an Army unit activated with that Formation [7.4], or aunit activated by an Amphibious Invasion Reaction Activation [15.49].
3.44 A unit’s ER can be reduced by combat loss, being Disrupted, orbeing Out of Supply status. No ER can ever be reduced below one (1).
3.5 Halving and Rounding3.51 Attack strength, support strength, or movement allowance can behalved. Defense strength is never halved.Examples of halving:1. Out of Supply status [6.14c]2. Combat effects of certain terrain [10.25]3. An Artillery unit that fails Combat Coordination [10.42c]
3.52 Halving of attack or support strength is cumulative. It can happenmore than once to the same unit or group of units in a combat. Followthe sequence in 3.55.
3.53 Some units can be subject to halving while others are not. Totalthe strengths of the affected units and halve them (round down), priorto adding them to the units that are not halved.
3.54 How to Halve and Round:a. All supporting artillery units (in attack or defense) are halvedindividually (round fractions down).b. Attacking non-artillery ground combat units are all totaled and thenhalved (round down).c. Because fractions are dropped, a unit’s attack strength might bereduced to zero. If reduced to zero, it cannot attack and therefore doesnot participate in combat, even if still with units that are allowed toattack; if attacking alone, cancel that combat.
3.55 The support strengths of artillery units are halved in the followingorder:• Units that fail ER checks for Combat Coordination [10.42].• Units (attacking and defending) that support a combat taking place ina Swamp hex.
3.56 The attack strength of a non-artillery combat unit with an Out ofSupply (OoS) marker is halved.
3.57 Movement Allowances. A unit’s Movement Allowance (MA) canbe halved only once during a segment and is done individually, unit-by-unit. Retain fractions [since half a Movement Point (MP) can be spentto move along roads or trails].Examples of halving MAs:1. Out of Supply status [6.14],2. Assault Sequence [7.21b].Note: If a unit is Out of Supply its MA is not halved again for AssaultSequence movement.
3.6 Unit Steps3.61 Steps represent the durability or staying power of combat units.Combat units have either one or two steps of strength. A unit withvalues printed on both sides of the counter has two steps [exception:
© 2010 Compass Games, LLC 5
BATAAN!: THE BATTLE FOR THE PHILIPPINES - 1942
3.62]; its front side shows the unit at full strength, and its reverse siderepresents the same unit at reduced strength. A unit with values printedonly on its front has only one step of strength. Units lose steps as aresult of General Attrition [6.5] or Combat Results [11.0].
3.62 An artillery unit has only one step [exception: 16.31]. Its reverseside indicates only that it has already conducted Fire Support [12.1],and is not eligible to use its support strength again during the currentturn [10.42, 12.13d].
3.63 An anti-aircraft unit has only one step. Its reverse side indicates itsunit type has permanently changed to infantry [16.1].
3.7 DisruptionDisruption represents the impairment of a unit’s capabilities due tocertain Assault CRT results.
3.71 A Disruption result affects all the units in the stack.
3.72 Disruption Effects on a Unit:a. Reduce its MA by two (2) MPs.1. For red-box MA units, this loss of 2 MPs is cumulative aftercomputing MA halving for Out of Supply [6.14] or Assault Sequence[7.21b] (a red-box MA that is Out of Supply during an AssaultSequence is only halved once, not twice).
2. For other units, this loss of 2 MPs is cumulative with the loss of 2 MPsfor being Out of Supply [6.14] and/or computing the halving for anAssault Sequence.
3. The loss of 2 MPs for Disruption is always cumulative with any otherloss of MPs or halving of MA.
Note: A unit with MA reduced to zero by these cumulative effectscannot move.b. Reduce its ER by two (2) for all purposes [cumulative with OoS ERReduction; 6.14b]. This ER reduction does affect the General Attritionroll by a Disrupted HQ [6.53].c. It cannot attempt Combat Refusal [9.2].d. It can advance only one hex after combat [11.61b, exception].e. If it is artillery, it cannot use its Support Strength [12.13e].
3.73 Marking Disruption. Place a Disrupted Marker on top of a unit (orstack) when it becomes Disrupted. If a Disrupted unit subsequentlybecomes part of a stack containing both Disrupted and un-Disruptedunits, place the un-Disrupted units on top of the Disrupted marker andleave the Disrupted units beneath the marker.
3.74 Any additional Disruption result suffered by a unit has no additionaleffect.
3.75 Removing Disrupted Markers. Remove these during theReorganization Phase of the Reorganization Segment, as follows.a. Automatically remove Disrupted markers from all units that are not inenemy ZOC.b. Make an ER check [3.42] for each Disrupted unit in enemy ZOC (usethe lowered ER rating for Disruption or OoS). If the unit passes, removeits Disrupted Marker. If it fails, it remains Disrupted.
4.0 STARTING THE GAME4.1 Setting Up the Game4.11 Choose which scenario to play and then refer to the Set Up Cardsfor that scenario. Both players first place their units on their Set UpCards.
4.12 Both players transfer each of their At Start units from their Set UpCard to the map location listed for that unit. Reinforcements are left onthe Set Up Cards until their turn of arrival, then they are placed on themap during the Reinforcement Phase. Units that are designated toenter in Manila can alternatively be placed in Japanese Entry Areahexes 4200 and 4201.
4.13 Units begin the game at the strength level shown on the Set UpCard. Units starting at reduced strength are so indicated on the Set UpCard. Not all units are used in every scenario.
4.14 Players place markers on the appropriate Tracks and set theirstarting Activation markers aside until the Initiative Phase [7.1].
4.15 Once placement of all markers and units is complete, play begins.Play follows the Sequence of Play [4.21].
4.2 The TurnBATAAN! is played in successive turns, each composed of theSegments outlined below. Examine the Expanded Sequence of Play fora more detailed listing of the events within each phase.
4.21 Sequence of Play
A. STRATEGIC SEGMENT1. Special Events Phase2. Readiness Phase3. Reinforcement Phase4. Naval Phase5. Forage Phase6. Supply Status Phase7. Initiative Phase
B. OPERATIONS SEGMENT1. First Player Operations Sequence
a. First player randomly draws one Activation Marker *b. First player conducts any one of three possible
Operations Sequences.2. Second Player Operations Sequence
a. Second player randomly draws one Activation Marker.b. Second player conducts any one of three possible
Operations Sequences.3. Players alternate Operations Sequences until all
formations have been activated.
C. REORGANIZATION SEGMENT1. Reorganization Phase2. General Attrition Phase3. Engineering Phase4. Victory Determination Phase5. Turn Record Phase
*Note: See first turn Exception [4.33a], and General Withdrawal [5.23].
© 2010 Compass Games, LLC 6
BATAAN!: THE BATTLE FOR THE PHILIPPINES - 1942

4.22 Play proceeds according to the sequence above until the end ofthe final turn of the scenario, unless one player fulfills his scenariovictory conditions. During the Victory Determination Phase of each turn,including the last turn of a scenario, evaluate the players’ performanceaccording to the scenario victory conditions to determine the winner.Note: Depending on the scenario, some Victory Conditions areevaluated only at the end of the scenario.
4.3 Formations and ActivationIn general, each Formation represents a differenthistorical division, or grouping of units.
4.31 A “Formation” normally consists of units of various types andincludes an HQ unit. Each Formation has a different color in the unittype boxes (or unit size boxes, for units with vehicle silhouettes). Allunits belonging to the same Formation have the same color in their unittype or size boxes. Where a unit is part of a Formation that is differentthan its historical division, it is the Formation, not the historical divisionthat determines when the unit is activated.Example: The artillery regiment of the 71st Division activates as part ofthe 91st Division Formation in some scenarios.
4.32 Units with white unit type or size boxes are Army units. These canbe used, within limits, with any Formation [7.4].
4.33 Activation Markersa. Each Formation has one or more Activation Markers (AM). Wesuggest that all AMs allowed for Activation be kept in opaque cups (AMPools), one for the Japanese player and another for the US player.During the Operations Segment, players alternate drawing their AMs atrandom, one at a time, at the start of each of their OperationsSequences.Exception: The First Player [7.13], in his first Operations Sequence ofthe first turn of a scenario [7.15], can freely look through his allowedActivation Markers and choose which Formation is the first one drawn.b. When an AM is drawn, all units (regardless of location) of thatFormation activate. This Formation becomes the Active Formation; allother Formations, including others on the same side, are Non-activeFormations, and their units cannot now move. Place the AM that isdrawn on the Activated Formation Track as a reminder to check thatFormation for Attrition during the General Attrition Phase [6.5]. Do notreturn the AMs to the AM pool until the Initiative Phase. Army units canalso be activated [7.4].Note: If the Assault Sequence is chosen, units of non-activatedFormations cannot move, but might be able to participate in combat[7.21b, 9.11, and 10.11-Note].Example: It is the Japanese player’s turn to conduct an OperationsSequence. He randomly draws one AM, and sees it is for the 16thDivision. He chooses to play it, declaring either a Mobile Sequence oran Assault Sequence [7.21a or b]. (He could also choose a PassSequence, [7.21c]). The Japanese player now moves units of only the16th Division during this Operations Segment, plus any qualifying Armyunits [7.4] during this Operations Segment.
4.34 Some Formations have two AMs. If both AMs are put into aplayer’s AM Pool then that Formation will be activated twice during thesame turn.
4.35 Both players have an “Activate Any One Formation” Event [SeeSpecial Event N on the US and Japanese Special Event Charts].a. When played, this Event allows the player to activate any one of hisavailable Formations, as he chooses, including a Formation that hasalready been activated this turn.b. Army units that are still eligible to be activated this turn can beactivated by this Formation [7.4].c. A Formation currently in Reserve [5.32] can be activated only by useof this marker; if it is, its Reserve status ends immediately.d. The “Activate Any One Formation” Event cannot be used in Scenario#2 or Scenario #5 to activate the US 21st Division until GT4 or any ofthe units of the 31st Division that have not yet been released. InScenario #5 on GT3, the “Activate Any One Formation” Event is usedonly to Activate units that are listed as At Start units in Scenario #2 (i.e.units listed as being At Start in Scenario #3 or as Additional At StartUnits for Scenario #5 cannot be activated on GT3, per scenario rule19.53).
4.36 If all the units of a Formation are eliminated [or Withdrawn; 5.21]and no more will arrive as reinforcements [5.1], remove thecorresponding AM(s) from play immediately. This may require theplayer to remove the AMs from the opaque cup (or from his AM Pool)before he draws another.
4.37 Under certain circumstances, it is possible for two Formations tobe active at the same time. This is called “Combining Formations” [7.3].
4.38 Placement of Played AMsa. After each Formation is activated, place the AM marker for thatFormation on the appropriate space of the Activated Formations Track.b. If a Formation is activated for the first time using the “Activate AnyOne Formation” Event [See Special Event N on the US and JapaneseSpecial Event Charts], place this Event marker on the ActivatedFormations Track on the activated Formation’s symbol; otherwise,place this Event marker back in the Event Pool after it is played. If theAM for that Formation is drawn later, replace the Event marker with theFormation’s AM and place the Event marker back in the Event Pool.
5.0 THE STRATEGIC SEGMENT5.1 Reinforcements“I came through and I shall return.”- MacArthur, 20 March 1942
Both players receive reinforcements. Reinforcements are new unitsarriving from outside the game area. The scenario Set Up Cardsprovide specific information on turn and entry location of scheduledreinforcements (usually through a map edge). When multiple locationsare listed, the owning player determines how many units, if any, enterat each location.
5.11 US ground units cannot end movement in map edge hexes (4200and 4201) to block entry of Japanese ground unit reinforcements.
5.12 Entry Proceduresa. A reinforcement unit entering through the map edge does so duringits Movement Phase, when its Formation is activated; it cannot enter at
© 2010 Compass Games, LLC 7
BATAAN!: THE BATTLE FOR THE PHILIPPINES - 1942
any other time.b. A reinforcement unit pays the terrain entry cost for that first hex. Aunit entering along a road or trail can enter the map using theappropriate road or trail movement rate.c. Reinforcement combat units can enter the game map stackedtogether [3.3 and 8.13].
5.13 Formation Sequence and Entrya. A reinforcement unit of a Formation that is conducting a MobileSequence can use its full MA, and engage in combat, just as if it hadstarted on map.b. A reinforcement unit of a Formation that is conducting an AssaultSequence enters the map with only half its MA and can engage incombat, just as if it had started on map.
5.14 Place air and naval unit reinforcements in the appropriate ReadyBox of the Strategic Display during the Reinforcement Phase of theStrategic Segment.
5.15 Either player can, at his option, delay the arrival of any friendlyreinforcing unit (or group of units) to any later turn.
5.16 All reinforcements are automatically In Supply [6.1] during theirturn of entry.
5.17 HQ and artillery reinforcements cannot function in any manneruntil they enter the map.
5.18 Reinforcing Army units (units with white unit type or unit sizeboxes) activate automatically [7.4] in order to enter play. They enter aspart of any friendly Formation when it is activated during that turn.
5.2 Withdrawals“I’m going to the latrine…but I shall return.”- One US Marine’s response to MacArthur’s departing statement.
At various times during the game, specified units are removed fromplay. Some units may later return to play according to 5.22.
5.21 Units to withdraw are shown on the Set Up Cards. Pick them upfrom the map, regardless of location, during the Reinforcement Phaseof the required turn.
5.22 If the ground unit to withdraw has been eliminated, withdrawinstead other units of total current strength at least equal to thedesignated unit. Some units that withdraw will later return to play. Theyreturn at the strength they had when first withdrawn. If another unit(s)was substituted, then the substituted unit(s) returns instead.
5.23 General Withdrawal - Scenario #5 onlya. In Scenario #5, during any Initiative Phase starting with GT5, first theUS Player and then the Japanese player can decide to declare aGeneral Withdrawal.b. Each player can declare only one General Withdrawal per game. Ifthe US player declares General Withdrawal, the Japanese playercannot also declare General Withdrawal that turn.c. The player declaring the General Withdrawal automatically hasInitiative for that turn. Any Initiative DRMs earned by either player in theprevious turn are lost.
d. During his first Operations Sequence of a General Withdrawal turnthe player declaring a General Withdrawal looks through his allowedActivation Markers and chooses the Formation to draw first. Allremaining AM’s are then drawn randomly.e. A player declaring a General Withdrawal cannot declare any attacksduring that turn.Note: Historically, the US made a major planned withdrawal in lateJanuary and the Japanese made a major planned withdrawal in mid-February.
5.3 Reserve Status5.31 During the Reinforcement Phase, first the Japanese player andthen the US player has the option to place one or more of hisFormations in “Reserve” [however, see 5.35 below]. Remove the AMsfor each such Formation from those “available” [7.16], and place themtwo turns ahead on the Turn Record Track. A Formation can leaveReserve early only for Amphibious Invasion Reaction [15.49f] or play ofthe “Activate Any One Formation” Event [See Special Event N on theUS and Japanese Special Event Charts and 4.35].
5.32 A Formation placed in Reserve cannot be activated (no longerpossible to draw AMs for it) unless activated by the “Activate Any OneFormation” Event. Its units in play are still affected by supply status[6.14], defend normally and suffer all effects of combat, provide FireSupport to units of its own Formation (if In Supply), and can receiveCombat Air Support and Naval Gunfire Support. They cannot attack.Reserve status makes a Formation eligible to receive replacementsprovided the Formation is In Supply [16.5]. Units of formations inReserve can perform no other functions.
5.33 When the turn is reached on the Turn Record Track that containsthe AMs of the Formations in Reserve, return those AMs to thoseavailable for the player’s AM Pool, or if the owning player desires, placethem back into Reserve status.Note: Putting a Formation into Reserve is useful for increasing thechance that another Formation will be activated earlier. Units placed inReserve will be essentially out of play for two turns.
5.34 Army units can be placed in Reserve as part of a Formation andare treated as part of that Formation for all purposes while in Reserve.Example: An Army unit in Reserve can activate along with itsFormation using the “Activate Any One Formation” Event. If itsFormation activates using the “Activate Any One Formation” Event, theReserve status of any Army units placed in Reserve as part of thatFormation lose Reserve status immediately.
5.35 The US Player can never place units into Reserve if doing sowould reduce his available Formations below five Formations. If the USplayer has five or fewer available Formations, no Formation can beplaced in Reserve. However, a Formation in Reserve is not forced toleave Reserve, including Formations and units that are in Reserve dueto scenario special rules, merely because the US player is reduced toless than five available Formations either during a turn or at the end ofa turn. Also, the US player always places at least five AMs in his AMPool if possible [7.14]. However, in some scenarios, the US player maynot have five AMs available to place in his AM Pool.When the US player has fewer than five AMs available, he puts all of
© 2010 Compass Games, LLC 8
BATAAN!: THE BATTLE FOR THE PHILIPPINES - 1942
his AMs in the AM Pool, regardless if he won Initiative [7.14].Examples: In Scenario #1 the US player has only two AMs available;in Scenario #2 and in Scenario #5 on GT3 the US player only has threeAMs available; in Scenario #3 the US player has only two AMs available[see US Set-up Card #1].
6.0 SUPPLY“If something is not done to meet the general situation which isdeveloping the disastrous results will be monumental.”- MacArthur to War Department, 17 January 1942
A unit’s supply status affects its movement and combat abilities. A unitmust be in supply to move and fight without penalty.
6.1 In SupplyDuring the Supply Status Phase of each turn, the Japanese playersjudges which of his units are in supply. The US player determines whichof his units that were In Supply last turn are still In Supply. US units canbe put In Supply only by spending Supply Points [6.41, 7.2 and 15.49a].
6.11 Judging Supply Status:a. A Japanese Unit is judged to be In Supply if it can trace a SupplyRoute [6.2] through a path of contiguous hexes to a friendly SupplySource [6.3] during the Supply Status Phase.b. A US non-Army unit is judged to be In Supply if the US player spentone (1) Supply Point [6.4] the previous turn to put that unit’s FormationIn Supply and it can still trace a Supply Route [as in 6.11a]. Therefore,a US non-Army unit that was Out of Supply at the end of the previousturn cannot become In Supply during the Supply Status Phase.However, it is possible for a US non-Army unit that was In Supply at theend of the previous turn to be judged Out of Supply during the currentSupply Status Phase.c. An Army-level unit (Japanese or US) is judged to be In Supply duringthe Supply Status Phase if it is either:1. Within the four (4) hex Command Range [16.22] of a supplied friendlyHQ (Japanese) or an HQ that was supplied last turn (US), or
2. Able to trace a Supply Line of seven (7) hexes or less directly to aSupply Source [6.21].
6.12 A Japanese unit judged In Supply is In Supply for the entire turn.Remove any Emergency Supply or Out of Supply (OoS) marker fromthat unit. A Japanese unit judged Out of Supply during the SupplyStatus Phase is Out of Supply for the entire turn, even if it moves backso that it is In Supply during its movement phase. If the unit is aJapanese unit with an Emergency Supply Marker or a US unit, place anOoS marker on it. If a unit of either side already has an OoS marker,that marker remains.
6.13 Emergency Supply. US units cannot be in Emergency Supply. Ifa Japanese unit cannot trace a Supply Route during the Supply StatusPhase:a. Place an Emergency Supply marker on the unit if itdoes not already have an Emergency Supply or OoSmarker.Exception: A unit that cannot trace a supply route solely due to a
bridge being destroyed is Out of Supply [See US Special Event Q], notEmergency Supplied. If a Japanese unit can trace an alternate SupplyRoute that does not require the destroyed bridge, that unit is In Supply.b. If the unit already has an Emergency Supply marker, turn the markerover to its Out of Supply side.c. If the unit already has an OoS marker, the marker remains.d. A unit with an Emergency Supply marker is not penalized.Emergency supply cannot last for more than one turn.Design Note: Units generally maintained a small reserve of supplieswhich would last for a short time if they moved beyond their supply net.The Japanese often took this risk and supplemented with forage.
6.14 Effects on a unit that is Out of Supply duringthe Operations Segment:a. Reduce its Movement Allowance as follows:1. Red-box MA units lose half of their MA, retaining fractions.2. All other units lose 2 MPs.3. Calculate the halving before MA reduction due to Disruption [3.72a]or for moving in an Assault Sequence [7.21b]. A red-box MA unit thathas its MA halved for being Out of Supply suffers no further reductionin MA for moving in an Assault Sequence. All other units that are Outof Supply and that move during an Assault Sequence suffer either areduction of 2 MPs (for being OoS) or a loss of half their MA (formoving during an Assault Sequence), whichever is greater.Example: A red-box MA unit with MA of 7 has its MA reduced first forOut of Supply, from 7 to 3.5 MPs [8.16]. Retain the fraction. Thenreduce it 2MPs for Disruption [3.72], resulting in a modified MA of 1.5MPs. If the red-box MA unit was moving during an AssaultSequence, whether the red-Box MA unit was In Supply or Out ofSupply, its modified MA would still be 1.5 MPs, because a unit’s MAis only halved once, not twice, for being OoS and moving during anAssault Sequence.
b. Reduce its ER by one (1), cumulative with -2 ER reduction due toDisruption [3.72b] for all purposes. This ER reduction does affect theGeneral Attrition roll by an Out of Supply HQ [6.5].c. Reduce its attack strength (and for artillery, its support strength) byhalf (round fraction down).6.15 Putting US units In Supply during the Operations Segment:a. The Supply Status of a US Army-level unit that is activated during theOperations Segment is the same as the HQ that was used to activatethe unit.Exception 1: An Out of Supply Army unit is put In Supply only duringthe Operations Segment, and only if the Army unit is within the four (4)hex Command Range of the supplied HQ that activated it. This meansthat an Army unit that was judged to be Out of Supply during the SupplyStatus Phase can be put In Supply during the Operations Segment bybeing activated and being within the Command Range of a suppliedHQ. However, this also means that an Army unit judged to be In Supplyduring the Supply Status Phase will be put Out of Supply by beingactivated by an Out of Supply HQ during the Operations Segment,whether or not the unit is within the Command Range of the HQ.Exception 2: If playing with Optional Rule 16.32 [16.32c].b. US non-Army units are put In Supply during the Operations Segment
© 2010 Compass Games, LLC 9
BATAAN!: THE BATTLE FOR THE PHILIPPINES - 1942

only by satisfying the conditions of 6.41 or by being part of anAmphibious Invasion Reaction and satisfying the conditions of 15.49a.
6.16 Supply Restrictions for Artillery Units during theReorganization Phase:a. Japanese artillery units that are In Supply or In Emergency Supplyare turned over to their support strength side [12.13f].b. US artillery units of Formations that are In Supply are turned over totheir support strength side during the Reorganization Phase [12.13f].c. US Army-level artillery units that are within the Command Range (4hexes) [16.22] of a Supplied US HQ are turned over to their supportstrength side during the Reorganization Phase [12.13e].
6.17 Players can elect to leave units and whole Formations Out ofSupply [however, see 6.5].
6.2 Supply RoutesA Supply Route is any designated path of contiguous hexes that containno enemy combat units and no hex is contested or enemy controlled. ASupply Route consists of a Supply Line [6.21] traced from the unit eitherdirectly to a friendly Supply Source [6.3], or to a Supply Road [6.22] thatleads to a friendly Supply Source.
6.21 A Supply Line cannot be more than seven (7) hexes long, from theunit to a Supply Road (do not count the hex the unit occupies). A SupplyLine cannot include:• Swamp hex,• Sea or Mountain hexside,• Undestroyed Enemy Fortification
6.22 A Supply Road is any network of connected road or trail hexes freefrom enemy combat units (and no hex is contested or enemy controlled)that leads to a friendly Supply Source. The network can be of anylength.Important: Supply Roads cannot be traced across a River hexsidewithout a bridge.
6.23 A Supply Route (both Supply Lines and Supply Roads) can betraced through a hex in an enemy ZOC only if a friendly combat unitoccupies that hex.
6.3 Supply Sources6.31 Supply Sources for both players are listed in each scenario. Thosefor scenarios #4 and #5 are marked on the map. A Supply Sourcefriendly to one player can never be friendly to the other player, even ifcaptured. If captured, a Supply Source will cease to be a source ofsupply, but if recaptured by the friendly player, it will again providesupply beginning on the next friendly supply status phase.
6.32 Units available for play, but currently held off the map (on theStrategic Display), are always judged to be In Supply while off map. Anyreinforcement unit is automatically In Supply during the turn it enters themap.
6.4 Supply PointsOnly the US player uses Supply Points (SPs). Japanese units areaffected only by In Supply limitations.
6.41 Supply Point Functionsa. A US Formation requires one Supply Point to be spent to put its unitsIn Supply. The Formation HQ must trace a Supply Route [6.2] to the USSupply Source to allow the Supply Point to be spent. If that HQ isunable to trace a Supply Route, its Formation cannot be placed InSupply. Once In Supply, all units of that Formation that can trace aSupply Route to the US Supply Source are also In Supply. A US unitcannot be In Supply if its Formation is not In Supply.Note: Players may find it more convenient to place the OoS marker onthe Formation HQ rather than all the units of that Formation.b. The US player decides whether to spend a Supply Point for aFormation at the moment it is activated for a Mobile or AssaultSequence [7.21], or during the Reorganization Phase [6.41d],[Exception: Optional Rule 16.32c]. If a Formation is activated and an SPis not spent, that Formation and all its units are automatically OoS;place an OoS marker with that Formation HQ (or its units if the HQ iseliminated). Assuming a unit and its Formation HQ can trace a SupplyRoute [6.2] during the Supply Status Phase of the following turn, a unit(or Formation) that is put In Supply will continue to be In Supply withoutfurther SP expenditure until either:• It is activated during the following turn, or• The Reorganization Phase of the following turn if the unit (orformation) is not activated [6.41d].
c. Spend one SP to put a Formation In Supply if the Formation isactivated using the “Activate Any One Formation” Event [See SpecialEvent N on the US Special Event Chart] and the Formation has notbeen previously activated that turn. A second Supply Point is notrequired if this Event is used to activate the Formation a second timeafter the Formation has already been activated that same turn.d. At the beginning of the Reorganization Phase of the ReorganizationSegment, place an OoS marker on each Formation HQ that was notactivated during the Operations Segment, unless the US player nowspends one Supply Point to put the formation In Supply.
6.42 SP Availability. All SPs marked on the Turn Record Track arereceived as reinforcements. The US player records SPs received aspoints on the General Records Track on the map with his Supply Pointsmarker. He increases the number when SPs are received, and reducesthe number as SPs are used, point for point. A variable number of SPsare also received from other sources [6.43 and 6.44]. SPs cannot becaptured from the Japanese player.
6.43 The US player receives a variable number of SPs for each of thefollowing events:• Number carried on arriving Convoy or Steamer [15.37], each time itarrives.
• Number specified from Special Events [See US and JapaneseSpecial Event Charts] played during course of the game.
• Number made available from Forage Table results [6.44].• Capture Olongapo (hex 1604) after it becomes friendly to theJapanese player; he gets +6 SPs the first time, but none for futurecaptures of Olongapo.
6.44 Forage Table. Each turn beginning GT3, during the Forage phaseof the Strategic Segment the US player resolves the Forage Table.Apply applicable DRMs. The result is the additional SPs received for the
© 2010 Compass Games, LLC 10
BATAAN!: THE BATTLE FOR THE PHILIPPINES - 1942
turn. Results can be modified by certain Special Events [See US andJapanese Special Event Charts] then in effect.a. Table results cannot be reduced to less than zero (0), except forDisease result.b. Disease. This result causes the US player to choose either:1. Spend the indicated number of SPs (none are received) and placethe Disease Outbreak Contained marker on the next turn of the TurnRecord Track to indicate the US player receives a -1 DRM modifieron the Forage Table roll next turn; or
2. For each SP not spent (1, 2, or 3) one Formation, chosen at random,immediately undergoes Disease Attrition
6.45 Disease Attrition Checka. To determine the affected Formation the US player puts the AMs forall of the US Formations that are not currently in Reserve into a cup anddraws out one AM for each SP not spent. He rolls one die for eachFormation and if the die roll exceeds the modified ER of the Formation,one unit of that Formation or an army unit within 4 hexes of thatFormation’s HQ loses a step. Apply all other appropriate DRMs to theFormation’s ER, except the US General Attrition ER Modifier [6.53a]which is only used for the General Attrition check for a formation [6.5].b. Disease Attrition DRMs vary according to the turn:
GTs DRM1-21 022-26 -127-29 -2
6.46 If the US supply source becomes Japanese controlled apply thefollowing.a. All accumulated SPs are lost.b. As long as it is Japanese controlled, no SPs shown on the TurnRecord Track are received. These are lost; they do not accumulate.c. The US player still receives SPs from Forage Table results, thosearriving from Steamer or Convoy if Mariveles is friendly, and SPs fromSpecial Events [See US Special Event Chart]. He can accumulatethese.d. On Turns 1 thru 21, if the US Supply Source is controlled by theJapanese during the General Attrition Phase, the US General AERM iszero (0) for that turn. If the US Supply Source is Japanese controlledafter turn 21, there is no additional effect on the US AERM.
6.5 General AttritionGeneral Attrition is the process by which US and Japanese units sufferstep losses solely for being activated for movement or combat. TheJapanese player conducts General Attrition first for his Formations andallocates losses. Then the US player conducts General Attrition for hisFormations and allocates losses.
6.51 During the General Attrition Phase of the Reorganization Segmentof each turn, the Japanese and US player each conduct a GeneralAttrition check (this is an ER check) on each Formation that wasactivated during the Operations Segment of that turn. The AMs forthese formations will have been placed on the General Attrition ERTrack as each is activated [4.38; see exceptions: 19.14f, 19.34e3,19.44e, 19.54i and 19.54j].
6.52 For each Formation having an AM on the Activated FormationsTrack, place the AM on the General Attrition ER track at the spacecorresponding to the HQ’s base ER printed on the bottom of theFormation AM. For formations that activate twice in a turn, place justone of the two AMs on the General Attrition ER Track.
6.53 Locate the HQ for each formation on the map and determine if theHQ’s ER is modified for being Disrupted or Out of Supply. Reduce theER for a Formation if the HQ is Disrupted [3.72b] or Out of Supply[6.14b], as shown on the General Attrition ER Track.a. For US formations, the ER of each formation is modified by the USGeneral Attrition ER Modifier (US AERM) for that turn listed below theGeneral Attrition ER Track.b. For Japanese formations, conduct the Attrition check against theformation HQ’s ER as modified by the General Attrition ER Modifiers.
6.54 As each General Attrition check is conducted, the AM for thatFormation should be removed from the General Attrition ER Track. Inthis way players can keep track of which formations still need to conducta General Attrition Check.
6.55 If the HQ unit fails the General Attrition check, one unit of thatFormation loses a step. If there are any units of a formation that are Outof Supply and currently unable to trace supply, take the step from oneof these units (owning player’s choice). Otherwise, the owning playerchooses the unit of the Formation to lose a step. An unmodified die rollof 10 always results in a Formation failing its General Attrition check.
6.56 If the HQ is eliminated, the Formation automatically loses a step.
6.57 The lost step can be from an Army unit that is currently within 4hexes of the HQ unit. However, no Army unit can lose more than onestep in a given General Attrition Phase.
7.0 OPERATIONS7.1 Initiative7.11 During the Initiative Phase of the StrategicSegment, the players first determine if either sidereceives an Initiative DRM by checking the position ofthe Initiative DRM marker.
7.12 Initiative DRMsa. The Initiative DRM marker on the General Records Track on the maprecords the total DRM to be added to the initiative die roll of theindicated side each turn. Reset the marker to zero at the conclusion ofeach Initiative Phase (or when either player declares a GeneralWithdrawal; 5.23).b. A player moves the Initiative DRM marker by one space in his favorfor each combat result last turn where he conducted a complete two-hex advance after combat [11.61b] (at least one unit is two hexes fromits original attack position). If the Initiative DRM marker is on the side ofthe player making the advance, move the Initiative DRM marker up theGeneral Records Track by 1 space. If the Initiative DRM marker is onthe side of the other player, move the Initiative DRM marker down theGeneral Records Track by 1 space. If the Initiative DRM marker is atzero, the marker should be moved to the 1 space with the appropriateside showing.
© 2010 Compass Games, LLC 11
BATAAN!: THE BATTLE FOR THE PHILIPPINES - 1942

Example: If the Initiative DRM marker is on the 2 space with theJapanese side showing, if the Japanese player makes a two-hexadvance, move the Initiative DRM marker to the 3 space. If the InitiativeDRM marker is on the 2 space with the US side showing, and theJapanese player makes a two-hex advance, move the Initiative DRMmarker to the 1 space.
7.13 The player whose die roll (possibly modified by the Initiative DRM)is greater has Initiative. Turn the Initiative DRM marker to the “JapanHas Initiative” side or the “US Has Initiative” side, as appropriate. Incase of a tie, the player who had Initiative on the prior turn again hasthe Initiative. The player with Initiative becomes the First Player duringthe Operations Segment. The other player becomes the Second Player.These roles may reverse next turn, and could change every turn duringthe course of the game.
7.14 The First player places, during the Initiative Phase of the StrategicSegment, all of his available AMs [7.16] into his opaque cup (AM Pool).He cannot omit any. The Second player places up to the same number,plus one, of his allowed AMs into his opaque cup (AM Pool). If theSecond player has any excess AMs, these excess AMs will be availablenext turn. A player cannot examine those AMs his opponent did notchoose.Note: The US player must place at least five AMs in his AM Pool if theyare available [5.35], even if the Japanese player is the First Player andputs fewer AMs in his AM Pool.Examples:1. The Japanese player has Initiative and has four available AMs. All 4are allowed and must be used because he has Initiative. He places all4 AMs into his AM Pool. The US has 7 available but is allowed no morethan 5 (4 + 1 = 5); his sixth and seventh AMs, his choice of AMs, sit outthe turn.2. The US player has Initiative and has seven available AMs, includingthe AMs for formations that are out of supply. All 7 are allowed and mustbe used because he has Initiative. He puts all his AMs into his AM Pool.The Japanese has 4 available and allowed and places all 4 into his AMPool.
7.15 The First Player, in only his first Operations Sequence of the firstturn of a scenario (or during a General Withdrawal turn), can lookthrough his Activation Markers, prior to placing them in his opaque cup(AM Pool), and freely choose the first one drawn. All remaining AM’s forboth sides are placed in separate opaque cups (AM Pools) for randomdrawing.
7.16 Available AMs. For both sides, all AMs currently in play and not inReserve are available each turn.
7.2 Activation and Operations SequencesDuring the Operations Segment, both players move their units andengage in combat through the activation process. Units are firstactivated by drawing an AM in order to move and attack. Playersalternate in activating their Formations. When both players havecompleted all their activations and moved or attacked with all the unitsthey wish, the Operations Segment is concluded.
7.21 Procedure. At the beginning of his Operations Sequence, theactive player randomly draws one AM from his AM Pool [see
exceptions; 7.15, 15.49, and US and Japanese Special Event N] Henotes the activated Formation shown on the AM without revealing it tohis opponent. At this time he chooses one of the three OperationsSequences that the Formation activated by the AM must follow: Mobile,Assault, or Pass. He then verbally declares which OperationsSequence he desires and, if Mobile or Assault, reveals the AM. TheFormation thus activated becomes the Active Formation. If the USplayer chooses a Mobile Sequence or an Assault Sequence, the USplayer now decides whether to put the Active Formation in Supply[6.41].The active player then completes one of three possible followingOperations Sequences as outlined below. See the Expanded Sequenceof Play for a more detailed listing of the events in each phase.Note on Terminology: Mobile and Assault Sequences are not identicalto Mobile and Assault Combat Results Tables (CRTs). The AssaultCRT only determines combat outcomes within the Assault Sequence.The Assault or Mobile CRTs determine combat outcomes within theMobile Sequence.
a. MOBILE SEQUENCE1. Movement Phase (full MA)2. Enemy Reaction Phasea. Combat Refusalb. No Retreat
3. Combat Phase (Mobile or Assault CRT)Notes:1. All units of the Active Formation are eligible to move and attack;follow the steps shown in the Expanded Sequence of Play.2. Units of non-activated friendly Formations cannot move or attack.3. Units (or stacks) of the Active Formation can spend up to their fullMovement Allowances.4. Combat uses either the Mobile or Assault CRTs [some combatconditions require the Assault CRT; see 10.3].5. Because units can move their full MA, Combat Coordination is moredifficult for both sides. Refer to the Coordination Die Roll ModifiersTable for applicable DRMs.
b. ASSAULT SEQUENCE1. Movement Phase (half MA)2. Enemy Reaction Phasea. Combat Refusalb. No Retreat
3. Combat Phase (Assault CRT only)Notes:1. All units of the Active Formation are eligible to move and attack;follow the steps shown in the Expanded Sequence of Play.2. Units of non-active friendly Formations cannot move, but canparticipate in attacks if all other requirements are met [10.1].3. Units of the Active Formation can spend only half their MovementAllowances (retain fractions), except Japanese Armor [16.41];cumulative with MA reduction due to Disruption [3.72a]; but do not alsoapply MA halving for OoS.4. All Combat uses the Assault CRT.5. Because units move only at half their MA, Combat Coordination iseasier for both sides. Refer to the Coordination Die Roll Modifiers Tablefor applicable DRMs.
© 2010 Compass Games, LLC 12
BATAAN!: THE BATTLE FOR THE PHILIPPINES - 1942
c. PASS SEQUENCEHold AM in his Activation Pool [7.22] for later activation or possible laterattempt at Combining Formations [7.3].Notes:1. No Formation is activated.2. The active player places that AM face down (keeping it hidden fromview of his opponent) in his Activation Pool [7.22] for use during a laterSegment [or possibly, to combine Formations; 7.3].3. No ground unit can move or attack.4. A player may, conceivably, take more than one Pass during thecourse of a full turn.
7.22 Activation Pool. Each player may place one previously drawn AMface down in his ‘Activation Pool.’ If a player already has an AM in hisActivation Pool at the time he draws a new one, he chooses which AMto play. He can play either one, and keep the other one in the ActivationPool, or he can also attempt to activate both Formations simultaneously[7.3]. No more than one AM can be in his Activation Pool at the end ofany Sequence.
7.23 After the first player has completed his first Operations Sequence,the second player conducts his first Operations Sequence. Playersalternate Operations Sequences until all AMs have been drawn andplayed. Once all AMs have been drawn and played, the OperationsSegment of the turn is complete, and play proceeds to theReorganization Segment.
7.24 A player cannot select a Pass Sequence when he is down to hislast AM to play (there is only one AM in his AM pool and he has no AMin his Activation Pool or there are no AMs in the AM pool and he onlyhas an AM in his Activation Pool).Note 1: A player cannot decline to play an available AM; but he candecline to move or attack with the units of that Formation when it isactivated.Note 2: A player who draws an AM for which no units are on the mapcan still choose any Sequence even though nothing happens on thegame map. Units of that Formation may be reinforcements and he canchoose to bring them into play later.
7.25 A player who has more than one AM remaining to draw, after hisopponent has drawn all of his, will continue to draw his remaining AMsone at a time, activating his remaining formations in succession, inseparate Operations Sequences. His opponent does not take Passsequences if he has no AM to draw; he is assumed to be inactive (noactivity). A player cannot continue to hold an AM beyond the end of theturn.
7.26 Return AMs to the AM Pool during the Initiative Phase.Design Note: Activation represents command staff capability andcommunications. The order (or sequence) of Activation of Formationsrepresents battlefield chaos, or just when it is that a Formation bothreceives and acts upon orders. When there are many Formations in
friendly command radius, there will be time gaps in when they act. Ashortage of supply, for instance, certainly affects how much your unitscan do but does not necessarily affect how much they attempt to do.Good staff or good communications translate to more Activationmarkers per Formation. A player gets the Initiative to do some activity,not to do nothing. Initiative bears a relationship with Activation but onlyinsofar as it helps describe how events unfold.
7.3 Combining Formations7.31 A player who already has an AM in his Activation Pool [7.22] hasthree choices when he draws another.1. He can play the earlier AM from the Activation Pool, placing the newlydrawn AM into the Pool, or2. He can play the newly drawn AM, retaining the earlier AM in the Pool,or3. He can attempt to combine the two AMs, so that both Formations areactivated simultaneously.
7.32 Combination can be attempted only if the two AMs representdifferent Formations. If they represent the same Formation, one of theAMs is used to activate the Formation for the current OperationsSequence, with the other AM remaining in the Activation Pool.
7.33 Follow the procedure below to determine if both Formations can beactivated simultaneously.a. The active player declares that he will attempt combining.b. He turns one of the two AMs face up.c. He rolls one die.d. If the result is eight (8) or more, then both Formations are activated.Neither Formation can attack with the other [exception: AssaultSequence] or support the other, but both move and attack in anySequence desired by the owning player.e. If the result is seven (7) or less, then only the face up AM is activated;the other is not, it remains in the player’s Activation Pool, and its identityremains unknown to the opposing player.
7.34 A Formation that fails to combine can again attempt combinationduring any future friendly Operations Sequence in the same turn.Alternatively, the owning player can activate it at the beginning of anyfriendly Operations Sequence, instead of drawing another AM from hisAM Pool. A failure to combine in what would otherwise be the lastfriendly Operations Sequence (when no AMs remain in the player’s AMPool) means that the Formation is activated separately, during the nextfriendly Operations Sequence.
7.4 Activation of Army UnitsAll units with white unit type or size boxes represent Army units. Armyunits were independent support units, frequently assigned and re-assigned to different Formations during the course of a battle.
7.41 Army units are activated either by an active Formation or as partof an Amphibious Invasion Reaction Activation [15.49]. Except duringan Amphibious Invasion Reaction Activation, Army units are notactivated separately from Formation activation. An Army artillery unitprovides Fire Support for an attack only during an OperationsSequence in which the Army artillery unit is activated [12.13b].
© 2010 Compass Games, LLC 13
BATAAN!: THE BATTLE FOR THE PHILIPPINES - 1942

7.42 Red-box MA and cavalry Army units can activate (or attemptactivation) twice per turn, and thereby can potentially be active duringtwo different Operations Sequences in the same turn, as part of twodifferent formations (or the same formation twice, for formations thathave two AMs). After the first activation (or attempt), place a FirstActivation marker on the Army unit; after the second activation (orattempt), turn the marker over to its Final Activation side. Remove allFirst and Final Activation markers during the Reorganization Segment.An Army unit under a Final Activation Marker cannot be activated aspart of an Amphibious Invasion Reaction Activation [15.49] or by an“Activate Any One Formation” Event [See Special Event N on the USand Japanese Special Event Charts].Example: Since the US 1/26 unit has red-box MA, it can be activatedtwice.
7.43 All other Army units can activate (or make the attempt) only onceper turn. After being activated (or making the attempt), place a FinalActivation marker on the unit. An Army unit under a Final ActivationMarker cannot be activated as part of an Amphibious Invasion ReactionActivation [15.49] or by an “Activate Any One Formation” [See SpecialEvent N on the US and Japanese Special Event Charts].
7.44 An active Formation can activate an Army unit automatically if:a. The Army unit does not have a Final Activation marker, andb. The Army unit is within the four-hex Command Range [16.22] of anyHQ of the activated Formation before that HQ unit moves.
7.45 An active Formation can attempt to activate an Army unit outsideof Command Range of the HQ of the activated Formation, but only ifthat Army unit does not have a Final Activation marker on it and passesan ER check before the HQ unit moves. Apply applicable DRMs forDisrupted and Out of Supply status. If the Army unit fails its ER check,it is not activated, and cannot move or attack during the currentOperations Sequence. In either case place either a First or FinalActivation marker on it, as applicable.
7.46 An activated Army unit becomes part of the active Formation forthe rest of that Operations Sequence and can be a Lead unit. Placeeither a First or Final Activation marker on it at the end of the Sequence,as appropriate.
8.0 GROUND MOVEMENTDuring the Movement Phase of his Operations Sequence, a player canmove any number of his eligible units. Movement is affected by supply,terrain, enemy ZOC, and Operations Sequence. Combat Refusal [9.2],Retreat [11.3], and Advance after Combat [11.6] are not considered“movement,” and use no MPs.
8.1 Movement Restrictions8.11 Move units one at a time from hex to adjacent contiguous hex.Each unit spends Movement Points (MPs) from its MovementAllowance (MA) to enter each hex. See the Terrain Effects Chart (TEC)for the costs in MPs for the various types of terrain. A unit cannot jumpover a hex. There is no limit to the number of units that can movethrough a single hex.
8.12 During any one Movement Phase a unit can move only once. It can
never spend more MPs than its total MA, and it cannot enter a hex if itdoes not have sufficient MPs available. There is no “minimum one-hexmove,” and this may mean that on occasion, some units will be unableto move at all. Unused MPs cannot be accumulated for future turns, ortransferred to other units. A unit is never forced to move.
8.13 Units can move together as a stack. When a stack beginsmovement, the MA of the stack is that of the slowest unit in the stack,even if the slower units are later dropped off. Stacks cannot pick up oradd units while moving, but may drop off units. Once a stack hasceased moving, other units can move into its hex (within stackinglimits). Units dropped off by a stack have completed their movement forthat phase. Units in a stack that has not moved can move away fromthat stack singly, or in smaller stacks.
8.14 A moving unit can never enter a hex containing an enemy combatunit. It can enter or move through friendly occupied hexes at no limit orextra MP cost.
8.15 Some units have no MA, or zero MA. These cannot move or retreat[11.37].
8.16 Red-box MA units that are OoS lose one-half their MA, all otherunits lose 2MPs. There are no other supply effects on movement. Allunits can voluntarily move to a hex where they would be OoS.
8.2 ZOC Effects on Movement8.21 A unit spends one (1) MP in addition to terrain costs to enterenemy ZOC, regardless of the number of enemy units extending ZOCinto that hex, even if the hex is already occupied by other friendly units.If the unit does not have sufficient MPs available, it cannot enter the hexor cross the hexside.
8.22 Once a unit has entered an enemy ZOC, it ceases moving for theremainder of the movement phase, unless the unit is motorized. If it hassufficient MPs available, a motorized unit can continue moving, eveninto other adjacent hexes also in enemy ZOC but cannot use road ortrail movement rates when moving directly from one enemy ZOC toanother.
8.23 If a unit begins its movement already in an enemy ZOC:a. A motorized unit can enter an adjacent hex, also in enemy ZOC, bypaying the normal terrain (non-road, non-trail) cost plus one additionalMP, and (if sufficient MPs are available) can continue movement, eveninto other adjacent hexes also in enemy ZOC.b. All other units spend their entire MA in order to move one hexthrough enemy ZOC. They cannot keep moving after entering that hex.Their MA must be sufficient to cover the necessary MP cost to enter theone hex; otherwise, they cannot enter that hex.c. There is no MP cost to leave enemy ZOC if the unit beginning itsmovement phase in an enemy ZOC moves into a hex that is not in anenemy ZOC.
8.24 Friendly ZOC does not affect the movement of friendly units.
© 2010 Compass Games, LLC 14
BATAAN!: THE BATTLE FOR THE PHILIPPINES - 1942

8.3 Terrain Effects on Movement“I’m somewhere between Asinine and Quinine Points.”- Response by a Signal Corps sergeant, 9 February
The Terrain Effects Chart (TEC) identifies all terrain types, and lists theMP costs a unit spends to enter those terrain types.
8.31 Each hex contains one or more terrain types. Where a single hexcontains more than one type of terrain, apply the following.If the hex contains more than one type of natural terrain the whole hexis assumed to consist of the terrain that has the highest MP cost. Unitsnot moving along a road pay the highest MP cost of the terrain typeswithin the hex [exception: 8.34a]. Units moving along a trail pay 1/2 thehighest MP cost of the terrain types within a hex [exception: 8.34].Examples:1. Where a hex contains both Clear and Rough apply the Rough MPcost.2. An infantry unit, not moving on a road, would pay 2 MPs to enter ahex containing both Clear and Rough terrain, since the cost for Rough,at 2 MPs, is greater than Clear at 1 MP.3. Hex 2712 costs 4 MPs for an infantry unit to enter from hex 2713.Hex 2712 includes Rough, Hill and Mountain terrain, so the unit paysthe highest MP cost of the terrain i.e. 4 MPs for the Mountain terrain.Also, because hex 2712 has mountain terrain, Red-box and Green-circle MA units cannot enter hex 2712 [8.36a].
8.32 A unit cannot enter a hex if it does not have sufficient MPsremaining to pay the cost to cross the hexside and enter the hex.
8.33 Roads and Trails. A unit moving from one road hex directly intoanother adjacent road hex, through a hexside crossed by the roadsymbol, spends 1/2 MPs, ignoring other terrain in the hex. A unit movingfrom one trail hex directly into another adjacent trail hex, through ahexside crossed by the trail symbol, spends 1/2 the MP cost of theterrain in the hex being entered [exception: 8.34].
8.34 Jungle and Tropical Grass“Even the goddamn jungle had gone over to the Jap side.”- Quip by one US sergeant
a. Jungle or Tropical Grass terrain MP cost is always in addition to theother terrain in the hex.Examples:1. Clear plus Jungle is 1 + 1 MP = 2MP.2. Rough plus Jungle is 2 + 1 MP = 3MP.b. Ignore the effect of Jungle or Tropical Grass when moving along aroad or trail.
8.35 Rivers and Bridgesa. Rivers are located on the hexsides. A unit spends MPs to cross thesehexsides in addition to the cost of the terrain in the hex entered(regardless of direction in crossing the hexside).b. Units that cross a River on a bridge move at the road rate or trail rate(as appropriate) and do not pay the additional hexside cost.c. Do not assume there is a bridge unless it is specifically marked. Ifnot, apply the full MP cost to cross River even when a road (or trail)appears to join a road (or trail) on the other side.
d. Red-box MA and green-circle MA units cannot cross non-bridgedRiver hexsides. Therefore, the ZOC of red-box MA and green-circle MAunits do not extend across non-bridged river hexsides, even when road(or trail) appears to join a road (or trail) on the other side of the riverhexside [3.25b].
8.36 Swamp, Mountain and Jungle Hexesa. Red-box MA and green-circle units cannot enter, advance, leave, orretreat into or through a Swamp, Mountain or Jungle hex, exceptthrough a hexside crossed by a road or trail.b. All other units spend the required MPs and can continue moving.
8.37 Mountain and Mudflat Hexsidesa. Movement is prohibited across hexsides that are all Mountain terrainor all Mudflat terrain. In the case of Mudflat terrain, a hexside iscompletely covered with "all Mudflat terrain" if the entire land portion ofthe hexside is covered with Mudflat terrain, such as the hexsidebetween hexes 4016 and 4116 or between hexes 4018 and 4118.b. Movement is permitted across hexsides that are only partiallyMountain terrain or partially Mudflat terrain. In addition, no invading unitcan land where the entire coastline is bordered by Mudflat terrain[15.43d] and [15.44c].Examples:1. An infantry unit may move from hex 2716 to 2616 paying 5 MPs (4MPs for the Mountain terrain + 1 MP for the jungle terrain in 2616)because the hexside between hexes 2716 and 2616 is only partiallycovered with Mountain terrain. However, a unit in 2616 cannot move to2516, 2515, 2617 or 2615 because the hexsides between these hexesand hex 2616 are completely covered by Mountain terrain and,therefore, are impassable.2. A unit may move from hex 4017 to hex 4018 at a cost of 1 MP forthe clear terrain in hex 4018, because the hexside between hexes 4017and 4018 is only partially covered with Mudflat terrain. However, a unitin either hex 4017 or 4018 cannot move to hex 4117, because there isan all Mudflat hexside between hex 4017 and 4117 and an all Mudflathexside between 4018 and 4117. Note: Although there are severalcoastal hexes, such as 4015, 4114, 4116 and 4117 where the landportion of these hexes are completely covered in Mudflat terrain,Mudflat terrain is a hexside terrain feature or a coastline terrain featurefor game purposes. Effectively, invasions and movement are prohibitedinto such hexes, because the entire coastline and all of the landportions of such hexsides are covered by Mudflat terrain.
9.0 PRE-COMBAT ACTIONSCombat resolution is preceded by a series of actions that set the stagefor combat:• Combat Declaration• Combat Refusal• No Retreat Declaration
9.1 Combat DeclarationCombat takes place between enemy units in adjacent hexes. Attackingis always voluntary. Friendly ground units are never forced to attackenemy units. Units are not required to attack all adjacent enemy units.
© 2010 Compass Games, LLC 15
BATAAN!: THE BATTLE FOR THE PHILIPPINES - 1942
9.11 At the conclusion of his movement phase, the active playerdeclares which enemy occupied hexes his units will attack, anddesignates which friendly units will attack each adjacent enemy hex.The active player also chooses, subject to restrictions, which CRT(Assault or Mobile), will be used for each attack [10.3].• During a Mobile Sequence, only units of the active formation,including activated army units, can attack.
• During an Assault Sequence, non-active non-artillery units that arenot in Reserve and are adjacent to defending units that are beingattacked by active units can also attack. The non-active units mayinclude Army units that were not activated this activation, includingArmy units that have a final activation marker on them. Non-activeartillery units, including non-active Army artillery units, may notprovide fire support [12.13b].
• Individual units in a stack can attack different adjacent hexes.• Unoccupied hexes cannot be attacked.
9.12 No more than one enemy hex can be attacked in any singlecombat. Place Declared Attack markers on all attacking units (orstacks). If the Mobile CRT has been chosen for the attack, the Mobileside of the Declared Attack Marker should be face up, otherwise, theAssault side of the Declared Attack Marker should be face up. Positionthe arrows on each marker toward the hex that will be attacked (theDefender Hex). Enemy hexes with no adjacent Declared Attack markerpointing toward them cannot be attacked.Note: More than one Declared Attack marker can be placed in thesame hex, on top of each group of units attacking a different adjacentDefender Hex.
9.13 A Defender Hex can be attacked by as many units as can beplaced in the six adjacent hexes. The defender cannot withhold a unitin a hex under Declared Attack.
9.14 Units with attack strength of zero cannot declare or participate inattacks. Any unit (or stack) whose total attack strength has beenreduced to less than one (1) because of halving [3.54c] cannot attack.
9.15 A unit cannot declare combat into a hex, or across a hexside,through which the TEC prohibits it from attacking.Exception: Artillery can contribute its support strength to any DeclaredAttack in range, regardless of the terrain in the Defender Hex [12.18] orterrain between the Artillery unit and the defending hex including intohexes it cannot enter and across hexsides it cannot cross.
9.16 Armored units cannot attack a Swamp hex and can attack acrossa River only at a bridge.Note: In this game there are no roads in any of the Swamp hexes thatwould allow an armor unit to attack into a Swamp hex.
9.17 Once the Declared Attack markers have been placed, the attack isirrevocable. The Defender Hex must be attacked by all units that havea Declared Combat against it, unless the units in the Defender Hexleave due to Combat Refusal.
9.2 Combat Refusal9.21 After all attacks have been declared, the defending player has theoption to attempt Combat Refusal in all eligible Defender Hexes.Eligibility requirements:
• All units in the Defender Hex have red-box MA or are cavalry.• No unit in the Defender Hex is Disrupted.
9.22 Combat Refusal is not movement; it is a retreat [11.3].
9.23 Procedurea. Conduct an ER check on the Lead unit in the Defender Hex. The USplayer has a (-1) DRM for his red-box MA and cavalry type units [theyspent most of December doing exactly this]. No other DRMs areallowed.b. If the ER check fails, the stack remains in the Defender Hex, and itmust defend in combat.c. If the ER check passes, the owning player retreats the entire stacktwo hexes [11.3].d. Now the attacker has the option to advance units into the vacatedhex up to the stacking limit. Remove all Declared Attack markers fromthat attacking force. Attacking units from this declared attack cannotdeclare or participate in any other combats during this combat phase [ineffect, their combat has already been resolved].
9.24 A stack that succeeds in Combat Refusal cannot end its retreat ina hex that is under Declared Attack, although it can pass through sucha hex during its retreat.
9.25 Combat Refusal cannot occur if the retreat path must pass througha vacant hex in an enemy ZOC.
9.3 No Retreat Declaration“I call upon every soldier in Bataan to fight in hisassigned position resisting every attack.”- MacArthur, 15 January 1942
9.31 No Retreat is optional. A successful No Retreat check allows thedefender to avoid retreat after combat [11.3], but at the possible cost ofan additional step loss [11.41].
9.32 A Japanese unit must attempt No Retreat Declaration using thedefending unit with the highest ER as the Lead unit for each friendlydefending hex unless it is either:• In command range of its Formation HQ; or• In Clear terrain (no Jungle, Tropical Grass or Fortification, eventhough the Japanese do not benefit defensively from the Fortification;may contain destroyed Fortification).
A Japanese unit may attempt a No Retreat Declaration at its option inany other type of terrain [Exception: 9.33].
9.33 If the Japanese unit(s) has no possible retreat route, itautomatically conducts No Retreat, regardless of the above situations.Design Note: Japanese doctrine dictated a firm no retreat policy, a fightto the death for the terrain, unless given explicit orders to the contrary.Regardless, they would not stand in open terrain without cover.
9.34 US units can attempt a No Retreat Declaration only if:• The hex contains at least three steps of strength (exclusive of itsFormation HQ), and
• The hex contains the Formation HQ of the Lead unit; or• The hex is a Fortification, regardless of number of steps present orthe presence of its Formation HQ [14.23].
BATAAN!: THE BATTLE FOR THE PHILIPPINES - 1942
16

9.35 Procedurea. For each unit or stack of units attempting No Retreat, conduct an ERcheck on the Lead unit in the Defending Hex.b. If the ER check succeeds, place a No Retreat marker on theDefender Hex.c. If the ER check fails, conduct any retreat normally if it occurs throughcombat results.d. Those Japanese units forced into attempting No Retreat (due to thesituations specified in 9.33) always pass the ER check.
9.36 Successful No Retreat Effectsa. Apply a (+1) DRM to the Combat Die Roll.b. The defending unit (or group of units) loses one additional step ifCRT results include a retreat (“R”) result. Apply this loss to the LeadDefender unit [11.42b].c. Units in the Defender Hex do not retreat.Note: There are a number of units that have zero MA and therefore areunable to retreat. This inability does not constitute an attempt at NoRetreat; that is declared separately.
10.0 COMBATThe player who is currently conducting an Operations Sequence (andwho just placed his Declared Attack markers) is the Attacker. The otherplayer is the Defender, regardless of the overall game situation. TheAttacker completely resolves each of his declared attacks individually,in any order he desires.
10.1 Attack Restrictions10.11 No unit can attack or defend more than once per combat phase.Note: It is possible for units to attack two or more times per turn: eachtime when activated, and each time when adjacent to Defender Hexesbeing attacked by other activated friendly Formations using AssaultSequence. Likewise, it is possible for defending units to be attackedseveral times.10.12 A unit without a Declared Attack marker cannot attack. However,artillery units do not require an Attack Declaration marker to provideFire Support [12.1].
10.13 A unit cannot divide its Attack Strength among different combats,or lend it to other units.
10.14 No more than one Defender Hex can be the object of a singleDeclared Attack.
10.15 A unit cannot be attacked by only artillery, naval, or air units.
10.16 All units in a Defender Hex defend together as a combinedDefense Strength. The attacker cannot attack individual units in a stack,and the defender cannot withhold a unit in a stack from participating incombat.
10.17 The attacker designates a Lead ground unit for the attack [3.43].Then the defender designates the Lead unit in the Defender Hex for theattack. The Lead unit in the Defender Hex for the attack may bedifferent than the Lead Unit chosen for the Defender Hex for the Enemy
Reaction Phase, unless the Defender Hex is marked with a No Retreatmarker. If a Lead defending unit was successful in attempting a NoRetreat Declaration, it must be chosen as the Lead ground unit in theDefender Hex for the attack.
10.18 The attacker removes the Declared Attack markers for the attackand proceeds with the rest of the Combat Resolution Sequence for theattack.
10.2 Effects of Terrain on Combat10.21 A defending unit benefits from the terrain in the hex it occupies,and from the terrain on the hexside(s) it is being attacked through [seeTEC].
10.22 The defender receives the following cumulative DRM benefits forterrain:a. Apply only one DRM for terrain in the Defender Hex, always the most favorable DRM available, if more than one terrain type exists in the Defender Hex.b. Apply hexside terrain DRM, if all non-artillery attacking units are attacking through that type of hexside. De sign Note : All combat is presumed to take place within the defender’s hex. Hexside terrain presents an additional obstacle to entering the hex thereby also benefiting the defender.c. Apply the appropriate DRM for Fortification [14.22] in the Defender Hex in addition to the DRM for terrain from 10.22a if there is a Fortifica-tion in the Defender Hex (US Defender Only).
10.23 Terrain in hexes occupied by attacking units has no effect on combat.
10.24 Supply and terrain might halve an attacking unit’s combat strength one or more times. Any attacking unit thereby reduced to less than one (1) attack strength point cannot attack [since fractions are dropped; 3.54].
10.25 Both the Attacker and Defender’s artillery support strengths are halved when the Defender’s Hex is a Swamp hex.
10.26 Units cannot attack across hexsides they cannot move across and cannot into hexes they cannot move into.Example: A red-box MA unit cannot attack into a Swamp, Jungle, or Tropical Grass hex except along a road or trail.Exception: Units can attack from a sea hex into a coastal hex across a coastline if they are making an Amphibious Invasion [15.4].
10.3 Choosing the CRT10.31 Only one of the two Combat Results Tables (CRTs) will be used for each combat. The attacking player identifies which CRT will be used for each combat.
10.32 When the Assault CRT is mandatory:
• During an Assault Sequence• The Defender Hex contains Hill, Mountain, or Swamp terrain, or (forUS defender only) a Fortification
• All units attack across a River, regardless of the presence of anybridge.
10.33 The attacker can choose the Mobile CRT when the Assault CRT© 2010 Compass Games, LLC 17
BATAAN!: THE BATTLE FOR THE PHILIPPINES - 1942

is not mandatory. An attacker can choose to use the Mobile CRTwithout regard to whether the attacking units include a motorized unit.
10.4 Combat Coordination“Never let the Jap attack you. When the Japanese soldier has acoordinated plan of attack he works smoothly.”- MacArthur
Coordination between units is critical to the success of any attack ordefense. This game represents this by requiring coordination (ERchecks) during combat. Once pre-Combat actions [9.0] are concluded,the attacker makes up to three Combat Coordination checks percombat (the first for CAS, the second for Artillery Fire Support and thethird for non-artillery ground units). The defender will make two CombatCoordination checks per combat (the first for CAS and the second forArtillery Fire Support). As players make ER checks, refer to the CombatCoordination Table.
10.41 Close Air Support Coordinationa. Each player (attacker first) commits air units to Close Air Support(CAS) [13.3] for the Declared Attack. CAS air units are placed on theDefender Hex. Once CAS units are placed, they cannot be removedbefore that Declared Attack is resolved, nor can additional air units beadded.Optional: If both players agree, fog of war can be added to CAScommitment by having both players secretly allocating air units for eachCAS, and then simultaneously displaying the number of units each hascommitted.b. Each player designates one committed CAS air unit as his Lead airunit and makes an ER check on it, applying any DRMs for MobileSequence, tropical grass or jungle in Defender hex.c. If the ER check passes, all friendly air units provide CAS.d. If the ER check fails, none of the friendly air units contribute theirCAS points as DRMs.
10.42 Artillery Coordination“Make the maximum use of your artillery; it is your most reliable arm…”- MacArthur to Wainwright, 28 January
a. Each player (Attacker first) indicates which of his eligible artilleryunits [12.1] will attempt to provide Fire Support to the Declared Attack,and selects one artillery unit to be the Lead artillery unit. Once artilleryunits have been designated, they cannot be removed before thatcombat is resolved, nor can additional artillery units be added.b. Each player (Attacker first) then makes an ER check against his Leadartillery unit. The result applies to all friendly artillery units providing FireSupport in that Declared Attack See the Coordination Die RollModifiers Table for applicable DRMs.Exceptions: One artillery unit in the Defender Hex is always CombatCoordinated, and one attacking artillery unit adjacent to the DefenderHex is always Combat Coordinated [12.17].c. Artillery Coordination Results [see Coordination Die Roll ModifiersTable for DRMs].• If the Lead artillery unit passes its ER check, all attacking artilleryunits contribute their full support strengths.
• A modified result greater than the Lead artillery unit ER, but less than
10, halves each supporting artillery unit’s support strength (rounddown). This halving may be in addition to any halving for firing intodefender hexes in Swamp.
• A modified result of 10 (or more) means that none of the committedartillery units contribute any support strength to that combat.
d. Regardless of the result of the ER check, turn each participatingartillery unit to its Fired side after the Declared Attack is completed.e. The total Artillery Support strength added for each side in a givencombat, after Coordination, cannot exceed that side’s total modifiedground combat strength in that combat [12.13g1].Example: A Defender Hex contains combat units with total defensestrength of five. Two friendly artillery units with support strengths of 4each are within range and the Lead artillery unit passes its ER check.Even though the two artillery units have eight support points availablefor the Defender Hex, only five of those support points can becommitted because there are only five defender strength points in theDefender Hex.
10.43 Attacker Ground Unit Coordinationa. If the Assault CRT has been chosen, all of the attacking groundcombat units are of a single formation and no attacking unit isDisrupted, then the attacker’s ground combat units are automaticallyCombat Coordinated. The attacking ground combat units may belocated in different hexes. However, Coordination is required if usingthe Assault CRT and units of more than one Formation are attackingtogether in that combat [7.3, 9.11 and 10.11].b. If the Mobile CRT has been chosen, if all attacking combat units arelocated in the same hex, all of the attacking units are of a singleformation and none of them are Disrupted, they are automaticallyCombat Coordinated. No ER check is performed.c. Otherwise, meaning when (1) the Mobile CRT is being used forattackers in more than one hex, (2) a Disrupted unit is participating inthe attack, or (3) if more than one formation is attacking [9.11], theattacking player makes an ER check for his Lead ground unit.• If the unit passes the ER check, no adjustments are made to thecombat.
• If the unit fails its ER check, add a (+2) DRM to the final combat dieroll [10.63].
d. See the Coordination Die Roll Modifiers Table for applicable DRMs.
10.5 Determining Combat Odds10.51 Compute Final Strengths. The attacker and defender each totaltheir attack and defense strengths, respectively, as follows.a. Total all ground units for each side in the combat. Some attackingunits (or stacks) may have their attack strengths halved. Halving iscumulative; some units may be halved more than once [3.5].b. Add the support strength of artillery units [12.1].
10.52 Compute Combat Odds. Divide the total attacking strength bythe total defending strength to arrive at a combat odds ratio. Alwaysround off the ratio in favor of the defender, to the nearest odds columnlisted on the CRT.Examples: 8 attack strength points against 2 defense strength points is4:1 odds; 8 to 3 is 2:1 odds; 8 to 4 is 2:1 odds; 8 to 5 is 3:2 odds.
© 2010 Compass Games, LLC 18
BATAAN!: THE BATTLE FOR THE PHILIPPINES - 1942
10.53 Special Combat Oddsa. The minimum initial odds for any attack (before artillery for either sidehas been committed) are 1:4, in order to conduct the attack. Final oddsof less than 1:4 results in an automatic A2R result if using the MobileCRT, or A2Rd if using the Assault CRT.b. Final odds greater than 7:1 on the Assault CRT are resolved on the7:1 column.c. Final odds greater than 8:1 on the Mobile CRT are resolved on the8:1 column.d. The attacker can never voluntarily reduce the combat odds of anygiven attack.Example: The attacker cannot declare 2-1 odds when he has 3-1 odds.
10.6 Resolving CombatAfter all Combat Coordination and odds calculation is complete, theattacker computes the applicable DRMs for the combat, and thenresolves the combat.
10.61 Combat DRMs. Determine DRMs for:a. Terrain for both hex and hexside [see TEC].b. Fortification in Defender Hex: +1 DRM, or +2 DRM [14.22].c. ER Differential Calculation: Compare the ER of the Lead ground unitin the Lead attack hex to that of the Lead ground unit in the DefenderHex. If the ER of the defender’s Lead unit is greater than the ER of theattacker’s Lead unit (use the same Lead unit that was used in CombatCoordination), a plus (+) DRM results; if the attacker’s ER is greater, aminus (-) DRM results. The amount of the DRM is equal to thedifference between the two ER ratings. Remember to take Disruptionand OoS status into account when determining unit ERs.Example: The attacker’s Lead ground unit has an ER of 5, and thedefender’s Lead ground unit has an ER of 7. Subtract attacker (5) fromdefender (7). This results in a +2, meaning a +2 DRM. The attacker nowmust include a plus two (+2) in his DRM calculation.d. Defender Ground Unit Combat Coordination. If there are units fromtwo different formations defending in the same hex, there is a -1 DRMto the final combat die roll. Army units are not a “different formation” forthe purposes of this rule. The defender never makes a check forGround Unit Combat Coordination. He does, however, designate aLead unit (for purposes of 10.61c).e. Attacker and Defender CAS [13.3] and NGS [15.5].f. Defender Hex contains No Retreat marker [9.36]: +1 DRM.g. Failed Ground Coordination. If the attacker failed his groundcoordination ER check [10.43], apply a (+2) DRM to the combat.
10.62 Netting DRMs. Net all attacker and defender DRMs. Each (+1)DRM point offsets a (-1) DRM. The positive or negative DRM totalremaining after offsetting is the final DRM. Final DRMs are furtherlimited to not greater than +5 or less than -5; disregard final DRM valuesabove or below these limits.
10.63 Roll One Die. The attacking player rolls the die, and adjusts thedie roll by the net DRM. Cross-index the modified die roll result with thefinal odds column on the appropriate CRT. Immediately apply thecombat result to the involved units before going on to any other combat.
11.0 COMBAT RESULTS11.1 Reading the CRT11.11 Interpret the results on the CRT as follows:A = Attacker. Numerals and letters following the ‘A’ refer to attackingunits.D = Defender. Numerals and letters following the ‘D’ refer to defendingunits.R = Retreat. All units of the affected force retreat [11.3], unless undera No Retreat marker [9.36].E = Eliminated. All units of the affected force are eliminated.1,2,3 = Lose 1, 2, or 3 steps (as indicated) from the affected force. TheLead ground unit of the affected force always loses the first step.Always apply step loss results before applying retreat results. A unitthat becomes a red-box MA unit upon losing a step may not be able toretreat due to prohibited terrain.d = Disrupted. All involved units are Disrupted (attacking or defending,depending on which side incurs the result) [3.7].
11.12 Attacker artillery units not adjacent to the Defender Hex, anddefender artillery units not in the Defender Hex, never suffer adversecombat results; they do not retreat or advance; are not Disrupted; anddo not suffer step loss.
11.2 Combat Losses“Get his dog tags.”
- US term for identification badge
11.21 When called for by the CRT, the owner removes the indicatednumber of steps from his total force, not from each unit in that force.a. The process of applying each step of loss to a unit varies accordingto the number of steps a unit has.• When a one step unit takes a step loss, remove it from play.• When a two-step unit takes its first step loss, turn the unit over to itsReduced Strength side. A second step loss then removes the unitfrom play.
b. The following types of units have only one step of combat strength.• HQs• Artillery• Anti-aircraft units• Combat units with unit strengths on only one side of the counterc.When a combat result requires a unit to be eliminated, remove it fromplay. Any unit required to lose more steps of strength than it has, isremoved from play.
11.22 Lead Unit Losses. The Lead ground unit for both sides normallytakes the first step of any combat loss required by the CRT.
11.23 Armor Attritiona. Shaded boxes on both CRTs mandate armor loss if the attackingforce includes one or more armor units and one or more of the followingdefender conditions apply.• Defender Hex contains an anti-tank unit• Defender Hex contains an armor unit with red attack strength
© 2010 Compass Games, LLC 19
BATAAN!: THE BATTLE FOR THE PHILIPPINES - 1942
• The defender plays the applicable Special Event [See Special EventE on the US Special Event Chart and Event L on the JapaneseSpecial Event Chart].
b. If the conditions above are met, the first step of the attacker loss mustbe an armor step (of red attack strength) regardless of which unit wasthe Lead unit for the attack [exception to 3.43b]. If the CRT result doesnot require an attacker step loss, one attacking armor step is still lost.
11.24 No Retreat Losses. In addition to any other losses, if thedefending force has a No Retreat marker, and the combat resultindicates a Defender retreat, the defending force suffers an additionalstep loss [11.4].
11.25 Reduced loss. If one side has fewer steps available to lose thanindicated by the numerical result (and thereby is completely eliminated,with an unfulfilled loss left over), reduce any step loss incurred by theopposing side by one step. This does not negate Armor Attrition.Historical Note: The first US armored forces casualty of WWII, andlikely the first American fatality in the Philippines was also an AfricanAmerican. Pfc. Robert H. Brooks was a 26-year-old black fromSadieville, KY. Brooks was fair-skinned enough to “pass for white” (aterm used in those days) and lied about his race when he joined theNational Guard Company D, 192 Tank Battalion. He was killed by bombshrapnel during a Japanese air attack on 8 December at Clark Field.Brooks Field at Ft. Knox, KY was later named in his honor.“In death there is no grade or rank. And in this greatest democracy theworld has ever known, neither riches or poverty, neither creed or race,draws a line of demarcation in this hour of national crisis.”- Gen Jacob Devers, at the dedication ceremony
11.3 RetreatsWhen a combat result requires units to retreat, the owning playerimmediately moves the affected units individually (or as a stack) eitherone or two hexes, in any direction away from the Defender Hex. A unitunable to retreat within the restrictions given below is eliminated.
11.31 Length of Retreata. Retreats caused by the Mobile CRT must be two hexes.b. Retreats generated from the Assault CRT can be either one or twohexes, as the owning player desires.c. Retreats generated from Combat Refusal [9.2] must be two hexes.d. Regardless, no retreat can exceed two hexes.
11.32 Retreats are not movement, and do not cost MPs. A unit cannotretreat across a terrain hexside that is prohibited to its movement, offthe edge of the map, or through hexes containing enemy combat units.
11.33 Units can retreat in any direction or combination of directions.Retreats of two hexes require the retreat to end two hexes away fromthe original Defender Hex or be eliminated. Retreating stacks may splitup and retreat to different hexes [Exception: 11.56a].
11.34 A unit can retreat through a hex containing friendly units, even ifthat means a temporary violation of stacking limits. A unit cannot end itsretreat in violation of the stacking limit. If it does, the owning playereliminates retreating units until the stacking limit is reached.
11.35 A unit cannot end its retreat in an enemy ZOC, unless another
friendly unit was already in the hex. Friendly units negate enemy ZOCsfor purposes of retreat.
11.36 A unit can end its retreat in a Defender Hex where combat hasnot yet been resolved (subject to stacking restrictions). If it does, itcontributes no defense strength to the subsequent combat, and cannotact as a Lead defender unit. It is subject to any retreat result incurredby the defenders in the subsequent combat, but is not subject to anyloss result unless the defenders in that combat are completelyeliminated with an unfulfilled defender loss result remaining. In this caseall previously retreated units are eliminated.
11.37 Units with no movement allowance (or zero MA) cannot retreatafter combat since they have no movement ability, and are eliminated ifcombat results require their retreat.
11.38 Units forced to retreat into prohibited terrain, off the map orbeyond a Scenario boundary line are eliminated.
11.4 No Retreat Option Applied11.41 Units in Defender hexes with No Retreat markers [9.36] do notretreat, but suffer one additional step loss if the CRT calls for aDefender Retreat result [11.3].
11.42 Procedurea. Remove any numerical step losses mandated by the CRT, taking thefirst step loss from the Lead unit.b. The defending force now suffers one additional step loss, instead ofretreating. The defender’s Lead unit normally takes this step loss; if ithas already been eliminated, take the step loss from the unit in theDefender Hex with the highest ER (defender’s choice in case two ormore units have the highest ER).c. Remove the No Retreat marker.
11.5 Retreat Through Enemy ZOC11.51 A unit cannot retreat through an enemy ZOC, unless no alternatepath exists.
11.52 A unit can retreat through a hex occupied by one or more friendlycombat units, even if enemy combat units project a ZOC into that hex[exception to 11.51]. Units must retreat through as few enemy ZOC aspossible, whether friendly occupied or not.
11.53 A unit can end its retreat in enemy ZOC only if a friendly combatunit already occupies the hex (subject to stacking limits). A unit canretreat through one hex in an enemy ZOC and end in a friendlyoccupied hex in an enemy ZOC if it is necessary to avoid elimination.
11.54 A unit is eliminated if its only path of retreat is into or throughmore than one vacant hex in enemy ZOC.
11.55 Eligible units retreating through just one vacant hex in enemyZOC can do so, but must retreat two hexes (assuming that the secondhex of the retreat is not a vacant hex in an enemy ZOC), and may sufferone or more step losses in the process [11.56].a. Artillery units are not eligible to retreat through any vacant hex in anenemy ZOC [exception: 16.31].b. A player can choose to eliminate such artillery units, in order to makethe attempt with the remainder of the stack. These eliminated units
© 2010 Compass Games, LLC 20
BATAAN!: THE BATTLE FOR THE PHILIPPINES - 1942

would not satisfy the potential one-step loss [11.56c].
11.56 Procedurea. Conduct the two-hex retreat. Retreating stacks remain stackedtogether. The second hex of the retreat cannot be a vacant hex in anenemy ZOC.b. When the retreat is completed, the owning player conducts an ERcheck on the retreating unit. If it is a stack, he conducts an ER check onthe Lead unit of that stack.Note: Remember that the printed ER ratings are reduced if the unit isOoS or Disrupted. Also, the Lead unit of the retreating stack does nothave to have been the Defender Lead unit in the combat that causedthe retreat.c. If the ER check fails, the Lead unit takes a one step loss. If the ERcheck passes, there is no loss.
11.6 Advance After CombatWhenever the original Defender Hex has been vacated as a result ofcombat, the attacking units may be able to advance. Advance aftercombat is not movement, and does not cost MPs. A unit cannotadvance across a terrain hexside or into a hex that is prohibited to itsmovement, off the edge of the map, or through enemy combat units.
11.61 Length of Advancea.When the Assault CRT is used to resolve the combat, attacking unitsof attacker’s choice in that combat can advance only one hex (into thevacated Defender Hex).b. When the Mobile CRT is used to resolve the combat, all attackingunits can advance up to two hexes. The first hex must be the DefenderHex (the hex that was attacked), and the second can be any adjacenthex the attacker chooses that has no enemy units in it.Exception: Disrupted units can never advance more than one hex.
c. The attacker moves the Initiative DRM marker by one space in his favor for each completed two-hex advance.d. Defending units never advance after an Attacker Retreat result.
12.0 ARTILLERYArtillery units participate in combat either from adjacent hexes or fromnon-adjacent hexes. Artillery units do not have attack strength, butinstead have support strength, which is used to supplement the attackor defense strengths of other friendly units. Artillery units need not beadjacent to, but must be within range of, the Defender Hex any timethey participate in artillery Fire Support. In most cases [Exception:12.17] artillery checks Coordination [10.42] to participate in combat.
12.1 Artillery Fire Support“Hell broke loose this [morning].”- Col. Alexander S. Quintard, 3 April 1942
12.11 Declaration. During Combat Coordinationthe attacker and then the defender declare whichof their eligible artillery units will attempt tosupport that combat.
12.12 Only artillery units that meet eligibility requirements canparticipate in Fire Support. No artillery is required to contribute itssupport strength.
12.13 Eligibility Requirementsa. An artillery unit must be within range of the Defender Hex for a givencombat, in order to participate in that combat. Each artillery unit has arange, expressed in hexes. Count range as from the artillery unit’s hexto the Defender Hex; include the Defender Hex, but not the artilleryunit’s hex.b. For the attacking player, only the artillery units of the activeFormation, plus activated Army artillery units, can participate [7.41].c. For the defending player, only artillery units of the same Formationas the Lead unit in the Defender’s Hex, plus one artillery unit in theDefender’s Hex [see 12.23], plus Army artillery units within CommandRange (4 hexes) of the Lead defending unit’s Formation HQ or that nowpass an ER check can be used to provide Fire Support. Modify the ERcheck for Disruption [3.72] and Out of Supply [6.14b].d. For army artillery units, regardless of the result of the ER check, turnthe artillery unit to its Fired side [12.19]. An army artillery unit thatpasses this ER check is still subject to a separate ER check for ArtilleryCoordination and can be the Lead unit for Artillery Coordination [10.42].A defending artillery unit, including an Army artillery unit, that attemptsto provide Fire Support is not considered to have been activated andcan move later in the turn.e. An artillery unit on its Fired side (or Disrupted), at the moment whenattacker or defender Fire Support is declared, cannot use its supportstrength.f. An artillery unit on its support strength side with an Emergency Supplyor OoS marker can use its support strength. However, once turned overto its Fired side the artillery unit cannot return to its support strengthside during the Reorganization Phase unless it meets the requirementsof 6.16a (Japanese), 6.16b (US artillery units of a formation), or 6.16c(US army artillery units)g. Support Strength Limits1. In any Declared Attack, the attacker’s total artillery support strengthcannot exceed the total (modified) attack strength of his non-artillery
11.62 A player exercises the option to advance immediately, before resolving any other combats. A player is not forced to advance a unit. After advancing, units cannot attack again in that combat phase, even if their advance places them adjacent to enemy units.
11.63 Only those attacking units that participated in that combat can advance. They advance from any of the hexes from which the attack was made. Units that served only to block enemy retreat routes (those not having Declared Attack markers for that combat) cannot advance.
11.64 Artillery units cannot advance after combat.
11.65 Advancing units ignore all enemy ZOCs, regardless of advancing one or two hexes.
11.66 Units cannot violate stacking limits at the end of an advance after combat.
© 2010 Compass Games, LLC
21
BATAAN!: THE BATTLE FOR THE PHILIPPINES - 1942
© 2010 Compass Games, LLC
units, and defender’s total support strength cannot exceed the total(modified) defense strength of his non-artillery units. Excess supportstrength points are disregarded [10.42e].2. Both players are limited to no more than two artillery units conductingFire Support for any one combat situation.Design Note: For both sides artillery fire control procedures in WWIIwere rather limited by modern standards. In most cases, a givenforward observer could call for, and correct, the fire from only a singlebattery of artillery (or in some cases, one battalion). The US was notsuccessful in setting up fire control centers on Bataan (due to ashortage of proper equipment), therefore there was no way for ‘justanyone with a radio’ to call in artillery, and no way for even a properartillery forward observer to communicate with more than one artilleryunit at a time.
12.14Whenever an artillery unit is in enemy ZOC or is the Defender hexof a Declared Attack (when defending), it can provide Fire Support onlyto an adjacent enemy occupied hex (when attacking), or to its own hex(when defending).
12.15 A defending artillery unit can use its support strength or itsdefense strength in a single combat, not both. A single artillery unit canfire on only one Defender Hex during a given combat phase; it cannotsplit its strength, or lend unused points to other artillery units.
12.16 Defender artillery units that are not in the Defender Hex, andattacker artillery units not adjacent to it, never suffer adverse resultsfrom the combat they are supporting [11.12]. Artillery units in theDefender Hex are subject to all combat results, as are attacking artilleryunits that are adjacent to the Defender Hex.
12.17 One attacking artillery unit (attacker’s choice), that is providingFire Support to an attack from an adjacent hex, automatically passesCombat Coordination at full support strength (even if other artillery unitsare included in the attack, and even if they fail Combat Coordination).One defending artillery unit (defender’s choice), providing Fire Supportto an attack from within the Defender Hex, automatically passesCombat Coordination at full support strength (even if other artillery unitsare included in the attack, and even if they fail Combat Coordination)[10.42b, exceptions].
12.18 Terrain Effects. Terrain or intervening units do not block artilleryFire Support. However, both the Attacker and Defender’s artillerysupport strengths are halved when the Defender Hex is Swamp.
12.19 Turn each artillery unit (attacker or defender) over to its Fired sideafter making its Combat Coordination check [exception: US Self-Propelled Artillery; 16.31]. Fired units cannot contribute their supportstrengths for the remainder of the combat phase, even if their supportstrengths were halved or unused due to failed Coordination checks.Both players turn all artillery units judged to be In Supply back to theirsupport strength side during the Reorganization Phase of theReorganization Segment. For the US player, only artillery units of an InSupply Formation can be judged to be In Supply.Note: The Fired side has unit values because the unit might still havea remaining activation for movement or be required to defend in combatbefore it is returned to its support strength side during theReorganization Segment.
12.2 Artillery in Defense“There’s no Jap shell with MacArthur’s name on it.”- MacArthur, 10 January 1942
12.21 When an artillery unit is alone in a hex, use its defense strength,not its support strength.
12.22When two or more artillery units are the only unit type in the sameDefender Hex, use only their combined defense strengths, not theirsupport strengths.
12.23 When one artillery unit is in a Defender Hex with a non-artilleryunit, apply its support strength to the defense strength of the hex[12.17]. If two or more artillery units are present, use the supportstrength of any one of those artillery units; the remainder use theirdefense strength. All the artillery units in the defender hex are subjectto combat results. If at least one un-fired artillery unit is in a defenderhex, one of these artillery units uses its support strength if the hex isattacked.
12.24 After combat turn all artillery units in the Defender Hex to Fired(including those that did not provide Fire Support).
12.25 If a defender artillery unit begins a combat phase in enemy ZOC,or, if before the battle it is supporting is resolved, an enemy combat unitmoves (or advances) adjacent to it thereby placing a ZOC on it, then itcannot use its support strength during that combat phase, except indefense of the hex it occupies.
13.0 AIR UNITSThe air units in the game represent only the groundattack forces that participated in the battle; air-to-aircombat is not represented. Each air unit is availableeach turn according to Readiness.
13.1 Air Unit Restrictions13.11 The Japanese player keeps all his air units in the Clark Field box;the US player keeps his air unit at Mariveles. They remain in theseboxes on the Strategic Display whenever they are not on the mapperforming a mission. The capacity of each box is unlimited.
13.12 Air Readiness Procedurea. During the Readiness Phase of every Strategic Segment turn all airunits back to their aircraft silhouette side and move them from the FlownBox to the Ready Box. No die rolls are required.b. Air units unused from the prior turn remain in the Ready Box untilused on a future turn. They can remain in Ready status indefinitely.c. Airfields. As long as there is at least one friendly airfield on the map,keep the US air unit in the Mariveles Box (on Strategic Display)regardless of which airfield is friendly. If at the start of any phase noneof the five airfields marked on the game map is friendly to the US player,the US air unit is permanently removed from play.d. Air units do not require Activation and do not require supply. They arenot subject to Army unit activation or use restrictions.
13.13 Only air units in the Ready Box can be selected for missions.Each unit in the Ready Box is available to perform only one air mission
22
BATAAN!: THE BATTLE FOR THE PHILIPPINES - 1942

© 2010 Compass Games, LLC 23
in a turn. An air unit is not available to perform a mission unless it is inthe Ready Box.
13.14 Certain Special Events [See US and Japanese Special EventCharts] will cause air units not to be available for the turn.
13.15 Air units neither exert nor are affected by ZOC.
13.16 When an air unit completes its mission, place it upside-down inthe Flown Box.Note: The back of the air unit is marked “Flown” to provide an additionalgraphic device so that air unit status is not confused.
13.2 Naval Interdiction13.21 Air units placed in a sea zone during the Naval Phase that are notoffset [15.25], conduct Naval Interdiction in that sea zone. There aretwo types of Naval Interdiction: Naval Interdiction against NavalMovement [15.34] and Naval Interdiction during the Combat Phase thataffects Naval Gunfire Support [15.55].
13.22 Only Japanese “Navy” air units and US air units are allowed to beplaced in a sea zone during the naval movement phase. Japanese“Army” air units are not allowed to be placed in a sea zone.
13.3 Close Air Support Mission13.31 During the Combat Phase of each Mobile or Assault OperationalSequence, Air units can perform Close Air Support (CAS) missionsanywhere on the map, on any Defender Hex, regardless of terrain or thepresence of enemy ground units so long as an eligible, friendly, non-disrupted HQ is within four hexes of that Defender Hex.
13.32 At the beginning of each combat resolution procedure, first theattacker, then the defender, assigns available eligible air units, asdesired, from the Ready Box to CAS missions.
13.33 Air units are subject to an ER check whenever they perform CAS.Apply DRMs as listed on the Coordination Die Roll Modifiers Table.
13.34 Each player can assign up to two air units to CAS in a singlecombat.
13.35 Each air unit, except the US Fighter air unit [13.36], assigned toa combat by the attacking player provides a (–1) or (–2) DRM, asprinted on the unit. Each air unit (except the U.S. Fighter air unit)assigned by the defending player provides a (+1) or (+2) DRM, asprinted on the unit.
13.36 Restrictions on Usea. Defensive CAS is allowed for any combat unit occupying theDefender hex.b. Type A air units can conduct both offensive and defensive CASmissions.c. Type B air units can conduct only offensive air missions [not capableof defensive missions].d. Japanese “Navy” air units cannot conduct CAS with “Army” air units[command problems].e. The US Fighter air unit can be used only to offset a single “1-point”Japanese air unit used for CAS in a (ground) combat. It cannot offsetany of the Japanese “2-point” air units. If the US air unit is assigned to
a combat where no “1-point” Japanese air unit is present, the US air unithas no effect.
13.37 Air units are not affected by ground combat results and cannot betaken as losses, regardless of the combat result.
13.38 Remove air units at the end of each combat resolution. Placethem on their “Flown” side in the Flown Box.
14.0 Fortifications“I have personally selected and prepared this position, and it is strong.”- MacArthur to War Department, regarding the Main Defense Line
Fortifications represent a variety of field fortifications prepared fordefense from all directions. They include prepared fields of fire, earthbunkers, foxholes, trenches, and roadblocks. Fortifications benefit onlyUS units. Most fortifications are printed on the map, but they can be builtusing US Special Event R [See US Special Event Chart].
14.1 General Characteristics14.11 A Fortification blocks tracing a Japanese Supply Route or SupplyRoad through the hex it occupies. It must be destroyed [14.13] before aSupply Route or Supply Road can be traced through that hex.
14.12 During the friendly Movement Phase, it costs the Japanese unitone (1) MP to enter a hex containing a Fortification still friendly to theUS player, in addition to the terrain cost. Once the Fortificationbecomes friendly to the Japanese player, remaining units do not paythe extra MP cost. Japanese units can then continue moving, up to thelimit of their remaining MA.
14.13 Fortifications occupied by Japanese units during the engineeringphase are destroyed. If a US unit re-occupies the fortification beforethen, the defense benefits of that hex are immediately restored. Placea Fortification Destroyed marker on any hex where a Fortification isdestroyed (or remove the Fortification marker for a Fortification receivedby Event R). Once the Fortification is destroyed apply the combateffects of Other Terrain in the hex.Note: To make more Fortification Destroyed markers available, a line ofFortification Destroyed markers can be replaced by two Fortified LineDestroyed markers with their arrows pointing towards each other. Thetwo hexes containing the Fortified Line Destroyed markers and allFortification hexes in between are considered to contain FortificationDestroyed markers.
14.14 Fortifications do not have to be occupied by friendly units toremain in play.
14.15 A US unit repairs a fortification by spending an entire OperationsSegment in a hex containing a Fortification Destroyed marker, providingall of the following conditions are met for that Operations Segment:• The US unit is activated.• The US unit is not adjacent to a Japanese unit at any time.• If the unit is a US artillery unit, it cannot provide offensive ordefensive fire support.
• After the Japanese player has placed the Abucay Line DestroyedMarker, the Fortification is not part of the Abucay Line [14.13].
If all of the above conditions are met, place a Repairing Fort marker on
BATAAN!: THE BATTLE FOR THE PHILIPPINES - 1942
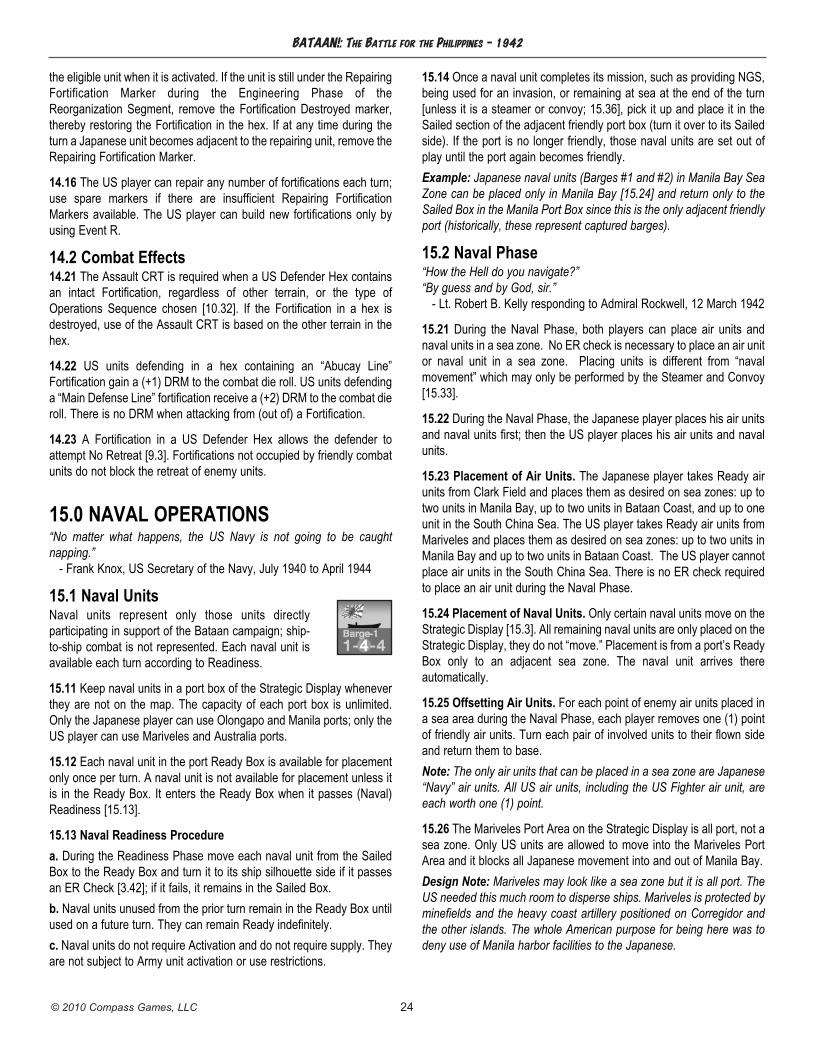
the eligible unit when it is activated. If the unit is still under the RepairingFortification Marker during the Engineering Phase of theReorganization Segment, remove the Fortification Destroyed marker,thereby restoring the Fortification in the hex. If at any time during theturn a Japanese unit becomes adjacent to the repairing unit, remove theRepairing Fortification Marker.
14.16 The US player can repair any number of fortifications each turn;use spare markers if there are insufficient Repairing FortificationMarkers available. The US player can build new fortifications only byusing Event R.
14.2 Combat Effects14.21 The Assault CRT is required when a US Defender Hex containsan intact Fortification, regardless of other terrain, or the type ofOperations Sequence chosen [10.32]. If the Fortification in a hex isdestroyed, use of the Assault CRT is based on the other terrain in thehex.
14.22 US units defending in a hex containing an “Abucay Line”Fortification gain a (+1) DRM to the combat die roll. US units defendinga “Main Defense Line” fortification receive a (+2) DRM to the combat dieroll. There is no DRM when attacking from (out of) a Fortification.
14.23 A Fortification in a US Defender Hex allows the defender toattempt No Retreat [9.3]. Fortifications not occupied by friendly combatunits do not block the retreat of enemy units.
15.0 NAVAL OPERATIONS“No matter what happens, the US Navy is not going to be caughtnapping.”- Frank Knox, US Secretary of the Navy, July 1940 to April 1944
15.1 Naval UnitsNaval units represent only those units directlyparticipating in support of the Bataan campaign; ship-to-ship combat is not represented. Each naval unit isavailable each turn according to Readiness.
15.11 Keep naval units in a port box of the Strategic Display wheneverthey are not on the map. The capacity of each port box is unlimited.Only the Japanese player can use Olongapo and Manila ports; only theUS player can use Mariveles and Australia ports.
15.12 Each naval unit in the port Ready Box is available for placementonly once per turn. A naval unit is not available for placement unless itis in the Ready Box. It enters the Ready Box when it passes (Naval)Readiness [15.13].
15.13 Naval Readiness Procedurea. During the Readiness Phase move each naval unit from the SailedBox to the Ready Box and turn it to its ship silhouette side if it passesan ER Check [3.42]; if it fails, it remains in the Sailed Box.b. Naval units unused from the prior turn remain in the Ready Box untilused on a future turn. They can remain Ready indefinitely.c. Naval units do not require Activation and do not require supply. Theyare not subject to Army unit activation or use restrictions.
15.14 Once a naval unit completes its mission, such as providing NGS,being used for an invasion, or remaining at sea at the end of the turn[unless it is a steamer or convoy; 15.36], pick it up and place it in theSailed section of the adjacent friendly port box (turn it over to its Sailedside). If the port is no longer friendly, those naval units are set out ofplay until the port again becomes friendly.Example: Japanese naval units (Barges #1 and #2) in Manila Bay SeaZone can be placed only in Manila Bay [15.24] and return only to theSailed Box in the Manila Port Box since this is the only adjacent friendlyport (historically, these represent captured barges).
15.2 Naval Phase“How the Hell do you navigate?”“By guess and by God, sir.”- Lt. Robert B. Kelly responding to Admiral Rockwell, 12 March 1942
15.21 During the Naval Phase, both players can place air units andnaval units in a sea zone. No ER check is necessary to place an air unitor naval unit in a sea zone. Placing units is different from “navalmovement” which may only be performed by the Steamer and Convoy[15.33].
15.22 During the Naval Phase, the Japanese player places his air unitsand naval units first; then the US player places his air units and navalunits.
15.23 Placement of Air Units. The Japanese player takes Ready airunits from Clark Field and places them as desired on sea zones: up totwo units in Manila Bay, up to two units in Bataan Coast, and up to oneunit in the South China Sea. The US player takes Ready air units fromMariveles and places them as desired on sea zones: up to two units inManila Bay and up to two units in Bataan Coast. The US player cannotplace air units in the South China Sea. There is no ER check requiredto place an air unit during the Naval Phase.
15.24 Placement of Naval Units. Only certain naval units move on theStrategic Display [15.3]. All remaining naval units are only placed on theStrategic Display, they do not “move.” Placement is from a port’s ReadyBox only to an adjacent sea zone. The naval unit arrives thereautomatically.
15.25 Offsetting Air Units. For each point of enemy air units placed ina sea area during the Naval Phase, each player removes one (1) pointof friendly air units. Turn each pair of involved units to their flown sideand return them to base.Note: The only air units that can be placed in a sea zone are Japanese“Navy” air units. All US air units, including the US Fighter air unit, areeach worth one (1) point.
15.26 The Mariveles Port Area on the Strategic Display is all port, not asea zone. Only US units are allowed to move into the Mariveles PortArea and it blocks all Japanese movement into and out of Manila Bay.Design Note: Mariveles may look like a sea zone but it is all port. TheUS needed this much room to disperse ships. Mariveles is protected byminefields and the heavy coast artillery positioned on Corregidor andthe other islands. The whole American purpose for being here was todeny use of Manila harbor facilities to the Japanese.
© 2010 Compass Games, LLC 24
BATAAN!: THE BATTLE FOR THE PHILIPPINES - 1942

15.3 Naval Transport“The good ship Lollipop”- one sailor’s quip
15.31 Only the US Steamer and Convoy naval units can conduct NavalTransport. They carry only Supply Points, not (ground) combat units[evacuations are not allowed].
15.32 Both the Steamer and Convoy start in Australia Port Box. Theyautomatically refill with SPs (3 SP for the Steamer, 40 SP for theConvoy, marked in an orange circle on each counter) upon placementthere. They are never subject to Readiness.
15.33 After resolving all naval and air unit placement in sea zones, theSteamer (or Convoy) moves from the sea zone it occupies to anadjacent sea zone or to the Mariveles Port Area.
15.34 Each move is allowed by passing an ER check each time theywish to move into another sea zone on the Strategic Display. If theSteamer (or Convoy) passes its ER check, it can move to that zone orthe Mariveles Port Area. If it fails, it cannot make that move, it remainsin the original zone, and ends all movement for the turn. This ER checkis modified by a +1 DRM if a Japanese air unit is conducting NavalInterdiction in the sea zone into which the Steamer (or Convoy) unit isattempting to move.
15.35 The Steamer (or Convoy) moves only one sea zone per turn. Ittherefore will take at least three (3) turns for the Steamer (or Convoy)to move from Australia to the Mariveles Port Area, but may take moreturns due to failing to pass one or more ER checks. The route is:1. Australia to Southern Islands Sea Zone, then2. Southern Island Sea Zone to South China Sea Zone, then3. South China Sea Zone to Mariveles Port Area.
15.36 The Steamer and Convoy can remain in a sea zone indefinitely.They are never forced to move. Both can occupy the same sea zone atthe same time. There is no limit to the number of naval units that canmove into or through a sea zone.
15.37 When the Steamer (or Convoy) moves into the Mariveles PortArea, add the SPs it is carrying to the US supply point total. Remove theconvoy unit from the map and return the Convoy Event Marker to thePool after the Convoy arrives in the Mariveles Port Area [See SpecialEvent M on the US Special Event Chart]. Remove the steamer unitfrom the map once it arrives at the Mariveles Port Area and place itback in Australia.
15.38 The Convoy naval unit is available for play only through play ofits Special Event Marker [See Special Event M on the US Special EventChart].
15.4 Amphibious InvasionAny time the Japanese player chooses an Assault Sequence for anactive Formation, eligible Japanese units [15.41] can conductinvasions. Only the Japanese player has this capability. US forces inthe Philippines had no equipment for even minor-scale operations.
15.41 Any Japanese infantry, engineer, or HQ unit can conductAmphibious Invasion. It begins the turn in either at Olongapo (hex 1604)or in the Manila Box. Conduct Amphibious Invasion during the
movement phase of an Assault Sequence after movement has beenconducted for all non-invading units. For formations with twoactivations, an Amphibious Invasion can take place during eitheractivation. An Amphibious Invasion can even take place using the“Activate Any One Formation” Event [See Special Event N on theJapanese Special Event Chart].
15.42 A maximum of either four (4), or five (5), stacking points of(ground) combat units can make an Amphibious Invasion during asingle turn from a single barge naval unit; the actual number isdesignated by the barge unit. Barge naval units are necessary to makethe Invasion because they carry the invading units. The Japaneseplayer designates the units and the barges to make each specificInvasion.Note: It may appear that barges conduct Naval Transport to move unitsto a Landing Hex [15.44] but they cannot remain at sea. They eithermake the Invasion or return to port.
15.43 The Japanese player designates an eligible coastal hex, called alanding hex, for each invading unit where the invading unit will attemptto land. The invading units attempt to land in the same or differenthexes. Restrictions on designated landing hexes:a. For units in Olongapo, any coastal hex bordering on the BataanCoast Sea Zone can be a designated landing hex.b. For units starting in Manila, the coastal hex must border the ManilaBay Sea Zone.c. No unit can choose a landing hex within the Mariveles Port Area.d. No unit can choose a designated landing hex where the entirecoastline is bordered by Mudflat terrain.Examples: Hexes 4118 and 4120 can be invaded but hexes 4018 and4221 cannot.e. Hexes 4019, 4119 and 4020 on the Puerto Rivas Inlet cannot be adesignated landing hex if hex 4118 or hex 4119 is US occupied.
15.44 Amphibious Invasion Table. Invading units are subject toAmphibious Invasion Table results.a. As indicated in the table, if the actual landing hex changes eithernorth or south from the designated landing hex, the number of hexes istraced along the coastal hexes including the inlets of the coast. In somecases this may result in a temporary “southward” direction as the coastis followed, or a “northward” direction due to the unevenness of thecoast.Examples:1. If a unit is invading at hex 1419 and the table result is “2 hexes southalong the coast” landing location is 1519, not 1520 (one hex south alongcoast to hex 1420 and then a second hex “south” to 1519, which isslightly north of hex 1420).2. A unit that has hex 1620 as its designated landing hex that is directed“1 hex north along the coast” would land at hex 1520 which is slightlysouth of hex 1620.Do not count hexes 4019 and 4020 when moving along the East Coastof Bataan. If a unit attempting to land in hex 4019 or 4020 movesnorthward, the first hex is hex 4118. If a unit attempting to land in hex4019 or 4020 is moved southward, the first hex is hex 4119.b. If an invading unit is forced to land on a hex containing a US ground
© 2010 Compass Games, LLC 25
BATAAN!: THE BATTLE FOR THE PHILIPPINES - 1942

unit the invading unit conducts combat from the sea hex against the USheld hex and must advance to occupy that land hex; otherwise, theinvading unit is eliminated.c. If the entire coastline of the landing hex is bordered by Mudflat, theinvading unit instead continues to displace one hex farther in thedirection indicated by the Amphibious Landing Table until the unitreaches a hex allowed for invasion.d. If forced into the Mariveles Port Area the invading unit automaticallyaborts [15.45].e. If the result of the Amphibious Invasion Table is “Abort,” then thecombat unit returns (automatically) to the port it came from. Place theunit at that port; the unit’s movement is finished for this activation.
15.45 ProcedureAfter the movement of all non-invading units of the Active formation hasbeen conducted:a. Match the invading units with a barge unit (in Ready Box for that port)up to the barge capacity.b. Pick the desired coastal hex for each invading unit to invade. Adifferent coastal hex can be chosen for each invading unit. During thismovement phase the Japanese player rolls one die for each invadingunit and consults the Amphibious Invasion Table to see where theinvading unit lands The hex indicated by the Amphibious InvasionTable become the Landing Hex for that invading unit. Place theinvading unit "at sea" in a sea hex or on the edge of the map adjacentto the Landing Hex. Place Disrupted marker on Invading unit. Place an"Invading Unit" marker on the unit with the arrow of the marker pointingat the Landing Hex. The invading unit can attempt to remove theDisrupted marker during the Reorganization Phase of the Invasion Turn[3.75].c. Any invading unit that is unopposed now moves onto its landing hexand ends its move for the turn. The just landed invading units canparticipate in Declared Attacks against adjacent US units, even to assistother invading units attacking from sea against US units occupying aLanding Hex.d. If the invading unit(s) for a given Landing Hex cannot land due to aUS unit occupying the Landing Hex, the invading unit(s)conducts/conduct regular combat from the sea across the coastlineagainst the Landing Hex. There is no DRM for attacking across thecoastline. If a US artillery unit is in the Defender Hex, it doubles its(defensive) Fire Support. If the Japanese unit wins its combat [i.e., itcauses the US unit in the Landing Hex to vacate the hex], theJapanese unit(s) lands/land in the Landing Hex and ends its/their turn.If the Landing Hex is not vacated, the Japanese unit(s) is/areeliminated.e. Units which land by Amphibious Invasion cannot activate againduring the turn of invasion. Place an “Invading Unit” marker on eachinvading unit as reminder that the invading units cannot activate againthis turn.
15.46 Units that conducted Amphibious Invasion will later depend onregular supply sources, just as any other unit. Unlike other Japaneseunits, the invading units are not eligible for Emergency Supply until theyhave become In Supply for at least one turn after their invasion.Therefore, units that invade will be Out of Supply during the turn after
they invade and all subsequent turns until they can trace a Supply routeduring a Supply status phase. Once an invading unit traces a Supplyroute, the unit is no longer an “invading unit” and no longer suffers thespecial Out of Supply Effects of 15.47 and 15.48. Place the Out ofSupply marker under the “Invading Unit” marker on the unit. Once theinvading unit establishes a Supply Route, remove both the InvadingUnit and Out of Supply markers.
15.47 An invading unit that is Out of Supply can be activated only onceper turn. Place a Final Activation marker on the invading unit after it isactivated its first time.
15.48 Invasion Attrition. If an invading unit is already marked with anOut of Supply marker at the beginning of a Supply status phase, the unitimmediately makes an Invasion Attrition Check against its ER, modifiedfor any possible DRMs including the -1 DRM for being Out of Supply. Ifthe unit fails its ER check, the Japanese unit loses a step. A Japaneseunit does not have to roll for attrition the turn after invading, because theunit will not already have an Out of Supply marker on it the turn after itinvades.
15.49 Invasion Reaction Activation. During the Operations Sequenceimmediately following a Japanese Amphibious Invasion, the U.S. playercan conduct an Invasion Reaction Activation instead of drawing anActivation marker (even if there are no more AMs in the US Pool).a. During an Invasion Reaction Activation, the US player spends one (1)SP to activate any US units within 6 hexes of a Landing Hex that iscurrently occupied by an Invading Japanese unit; if the US player doesnot have one (1) SP no Invasion Reaction Activation can be made. Theactivated US units can be in Reserve, but cannot be Army units undera Final Activation Marker [7.4]. Currently Out of Supply units that are soactivated, whether or not they actually move or have combat, areconsidered to be In Supply for this turn only, provided they can trace a7 hex Supply Route when they are activated and regardless of whetheror not each of their respective formations are put In Supply by spendingan SP. Be sure to mark any Out of Supply US units within 6 hexes ofthe Invading unit(s) with an Out of Supply marker, because any US unitwithin 6 hexes of the Invading unit(s) without an Out Supply Marker onit is In Supply for the rest of the Invasion turn. Should a unit of an Outof Supply Formation move or retreat within 6 hexes of the Invadingunit(s), mark that unit with an Out of Supply marker. Units that areactivated during an Invasion Reaction Activation are not subject toGeneral Attrition merely for activating as part of an Invasion ReactionActivation. If units that are part of an Invasion Reaction Activation arealso part of an activated Formation that suffers General Attrition [6.51],the lost step can be taken from such units.b. Invasion Reaction Activation requires a Mobile Sequence.c. After the Invasion Reaction Activation, the Japanese Player has thenext Operations Sequence and Operations Sequences alternate for therest of the turn.d. US units activated during an Invasion Reaction Activation do notsuffer General Attrition, unless the formation to which they belong isalso activated during the turn [6.51].e. US units activated during an Invasion Reaction Activation can beactivated regularly when their Formation is activated, either before orafter the Invasion Reaction Activation.
© 2010 Compass Games, LLC 26
BATAAN!: THE BATTLE FOR THE PHILIPPINES - 1942
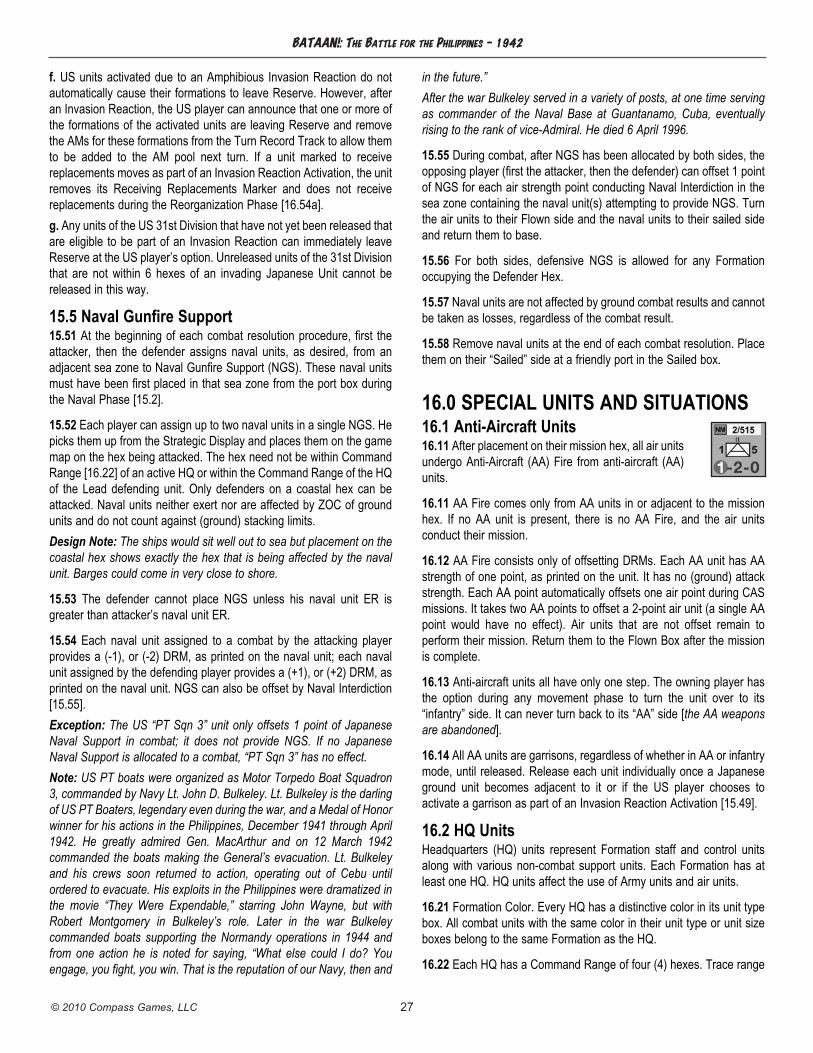
f. US units activated due to an Amphibious Invasion Reaction do notautomatically cause their formations to leave Reserve. However, afteran Invasion Reaction, the US player can announce that one or more ofthe formations of the activated units are leaving Reserve and removethe AMs for these formations from the Turn Record Track to allow themto be added to the AM pool next turn. If a unit marked to receivereplacements moves as part of an Invasion Reaction Activation, the unitremoves its Receiving Replacements Marker and does not receivereplacements during the Reorganization Phase [16.54a].g. Any units of the US 31st Division that have not yet been released thatare eligible to be part of an Invasion Reaction can immediately leaveReserve at the US player’s option. Unreleased units of the 31st Divisionthat are not within 6 hexes of an invading Japanese Unit cannot bereleased in this way.
15.5 Naval Gunfire Support15.51 At the beginning of each combat resolution procedure, first theattacker, then the defender assigns naval units, as desired, from anadjacent sea zone to Naval Gunfire Support (NGS). These naval unitsmust have been first placed in that sea zone from the port box duringthe Naval Phase [15.2].
15.52 Each player can assign up to two naval units in a single NGS. Hepicks them up from the Strategic Display and places them on the gamemap on the hex being attacked. The hex need not be within CommandRange [16.22] of an active HQ or within the Command Range of the HQof the Lead defending unit. Only defenders on a coastal hex can beattacked. Naval units neither exert nor are affected by ZOC of groundunits and do not count against (ground) stacking limits.Design Note: The ships would sit well out to sea but placement on thecoastal hex shows exactly the hex that is being affected by the navalunit. Barges could come in very close to shore.
15.53 The defender cannot place NGS unless his naval unit ER isgreater than attacker’s naval unit ER.
15.54 Each naval unit assigned to a combat by the attacking playerprovides a (-1), or (-2) DRM, as printed on the naval unit; each navalunit assigned by the defending player provides a (+1), or (+2) DRM, asprinted on the naval unit. NGS can also be offset by Naval Interdiction[15.55].Exception: The US “PT Sqn 3” unit only offsets 1 point of JapaneseNaval Support in combat; it does not provide NGS. If no JapaneseNaval Support is allocated to a combat, “PT Sqn 3” has no effect.Note: US PT boats were organized as Motor Torpedo Boat Squadron3, commanded by Navy Lt. John D. Bulkeley. Lt. Bulkeley is the darlingof US PT Boaters, legendary even during the war, and a Medal of Honorwinner for his actions in the Philippines, December 1941 through April1942. He greatly admired Gen. MacArthur and on 12 March 1942commanded the boats making the General’s evacuation. Lt. Bulkeleyand his crews soon returned to action, operating out of Cebu untilordered to evacuate. His exploits in the Philippines were dramatized inthe movie “They Were Expendable,” starring John Wayne, but withRobert Montgomery in Bulkeley’s role. Later in the war Bulkeleycommanded boats supporting the Normandy operations in 1944 andfrom one action he is noted for saying, “What else could I do? Youengage, you fight, you win. That is the reputation of our Navy, then and
in the future.”After the war Bulkeley served in a variety of posts, at one time servingas commander of the Naval Base at Guantanamo, Cuba, eventuallyrising to the rank of vice-Admiral. He died 6 April 1996.
15.55 During combat, after NGS has been allocated by both sides, theopposing player (first the attacker, then the defender) can offset 1 pointof NGS for each air strength point conducting Naval Interdiction in thesea zone containing the naval unit(s) attempting to provide NGS. Turnthe air units to their Flown side and the naval units to their sailed sideand return them to base.
15.56 For both sides, defensive NGS is allowed for any Formationoccupying the Defender Hex.
15.57 Naval units are not affected by ground combat results and cannotbe taken as losses, regardless of the combat result.
15.58 Remove naval units at the end of each combat resolution. Placethem on their “Sailed” side at a friendly port in the Sailed box.
16.0 SPECIAL UNITS AND SITUATIONS16.1 Anti-Aircraft Units16.11 After placement on their mission hex, all air unitsundergo Anti-Aircraft (AA) Fire from anti-aircraft (AA)units.
16.11 AA Fire comes only from AA units in or adjacent to the missionhex. If no AA unit is present, there is no AA Fire, and the air unitsconduct their mission.
16.12 AA Fire consists only of offsetting DRMs. Each AA unit has AAstrength of one point, as printed on the unit. It has no (ground) attackstrength. Each AA point automatically offsets one air point during CASmissions. It takes two AA points to offset a 2-point air unit (a single AApoint would have no effect). Air units that are not offset remain toperform their mission. Return them to the Flown Box after the missionis complete.
16.13 Anti-aircraft units all have only one step. The owning player hasthe option during any movement phase to turn the unit over to its“infantry” side. It can never turn back to its “AA” side [the AA weaponsare abandoned].
16.14 All AA units are garrisons, regardless of whether in AA or infantrymode, until released. Release each unit individually once a Japaneseground unit becomes adjacent to it or if the US player chooses toactivate a garrison as part of an Invasion Reaction Activation [15.49].
16.2 HQ UnitsHeadquarters (HQ) units represent Formation staff and control unitsalong with various non-combat support units. Each Formation has atleast one HQ. HQ units affect the use of Army units and air units.
16.21 Formation Color. Every HQ has a distinctive color in its unit typebox. All combat units with the same color in their unit type or unit sizeboxes belong to the same Formation as the HQ.
16.22 Each HQ has a Command Range of four (4) hexes. Trace range
© 2010 Compass Games, LLC 27
BATAAN!: THE BATTLE FOR THE PHILIPPINES - 1942

without regard to terrain, enemy units, or enemy ZOC. When countingrange, do not count the hex occupied by the HQ, but do include the hexoccupied by a unit to which the Command Range is traced. For CAS tobe applied on attack or defense, the Command Range need only betraced to the Lead defending unit (disregard range to non-Lead units) iftwo or more hexes are being attacked.
16.23 An HQ unit cannot be the Lead unit in a Defender Hex, unlessalone in that hex or stacked only with other HQ units.
16.24 Disrupted HQs cannot activate any Army unit and cannot be usedto allow CAS missions.
16.25 Summary of HQ Functions:• Activate Army units [7.44b]• Japanese No Retreat Option [9.32]• US No Retreat eligibility [9.34]• Allow Combat Air Support [13.31]• Allow Replacements procedure [16.57c]
16.26 If an HQ unit is eliminated, the HQ may be rebuilt two turns later.Put eliminated HQ unit ahead two turns on the Turn Record Track toindicate when it can return to play at the beginning of the ReinforcementPhase. When the HQ unit returns to play, place the HQ on a unit of itsformation. There is no cost in replacement points to rebuild an HQ andunits may be rebuilt on an HQ unit on the turn that an HQ unit returnsto play [16.57c]. If all of the units of an HQ unit on the Turn RecordTrack are also eliminated, the HQ is also permanently eliminated. TheJapanese Regimental HQ units 122/65 and 9/16 must be placed on aunit of their regiment.
16.3 Special US Units16.31 US Self-Propelled Artillery. These two unitshave no Fired status, and therefore, no Fired side. Thereverse side is instead a reduced strength side (theyare two-step units). They are also allowed Advance After Combat [11.6]and are eligible for retreat through enemy ZOC [11.55]. They canprovide Fire Support as often as desired during a turn (since they haveno Fired status). However, a self-propelled artillery unit must be activeto provide fire support for attacking units [12.13b].
16.32. (Optional Rule) Philippine Scouts. The Philippine Scouts werea highly professional formation, excellent on defense, and at the timewere considered the only US attack-capable division. Yet it neverfought as a whole. To better simulate how the Philippine Scouts wereused in the Bataan Campaign, make the following rules modifications:a. The Philippine Scouts units are treated as if they were Army units forthe purposes of activation i.e. the Philippine Scouts units can beactivated only when another formation activates [as described in 7.4].b. In order for the units of the Philippine Scouts to be activated, thePhilippine Scouts AM must be put into the AM pool.c. The first time that a Philippine Scouts unit is activated as part ofanother formation, the US player decides whether or not to spend aSupply Point to put the Philippine Scouts formation In Supply as if thePhilippine Scouts had activated as a formation [6.41].d. If the Philippine Scouts formation is not in Reserve, the PhilippineScouts unit does count as one of the US player’s available formations[5.35].
e. When the US player draws the Philippine Scouts AM from the AMpool, the US player may reveal he has drawn the Philippine Scouts AM,place the Philippine Scouts AM on the Activated Formations Track, anddraw another AM. Alternatively, when the US player draws thePhilippine Scouts AM, the US player may choose to hold the PhilippineScouts and conduct a Pass Sequence [7.21c]. If the US player isholding the Philippine Scouts AM but wants to conduct a PassSequence for an AM he has just drawn, he can reveal the heldPhilippine Scouts AM, place the Philippine Scouts AM on the ActivatedFormations Track, and hold the newly drawn AM.f. Because the units of the Philippine Scouts activate as if they wereArmy Units, the Philippine Scouts formation may not be one of the twoformations of a combined formation activation [7.3].g. Although the Philippine Scouts activate as if they were Army units,the Philippine Scouts units are still subject to the -1 DRM penalty if theyare defending in a stack with units from another formation [10.61d].h. When a Philippine Scouts unit is activated as part of anotherFormation, the Philippine Scouts unit can be a Lead unit for an attack[3.4], however, the Philippine Scouts unit can receive artillery supportfrom only Philippine Scouts artillery units or Army artillery units withinrange of the activated Headquarters.i. The Philippine Scouts artillery unit can be used to support an attackor defense only if:1. At least one of the units is a Philippine Scouts and the PhilippineScouts units is the lead unit, and2. The Philippine Scouts artillery unit is within range of the ActivatedFormation’s Headquarters Unit.j. The Philippine Scouts formation cannot be activated using the“Activate Any One Formation” Event [See Special Event N on the USSpecial Event Chart].k. The Philippine Scouts formation can be put in Reserve, in which caseall units of the Philippine Scouts formation are in Reserve [5.32], andcan receive replacements [16.51].Note: Because the number of Final Activation markers in the countermix is based only on the number of Army units that are typicallyactivated in a turn, players may need to make extra Final Activationmarkers to keep track of the Philippine Scouts units that have activated.
16.4 Special Japanese Units16.41 Japanese Armor. Do not reduce the MA of these units for thechoice of an Assault Sequence.Design Note: By doctrine Japanese armor was so integrated intoinfantry support that its movement allowance has already beenreduced.
16.42 Japanese 48th Divisiona. After use in Scenario 1, units of the Japanese 48th Division remainin the Manila Box on the Strategic Display until either they return to playby use of Special Events play [See Special Event I on the JapaneseSpecial Event Chart] or until permanently withdrawn from play on GT12.These units are treated as in Reserve and the two 48th Division AMsare unavailable until “Keep 48th Division” Special Event is played [SeeJapanese Special Event I].b. The “Garrison” designated units of the 48th Division always remain
© 2010 Compass Games, LLC 28
BATAAN!: THE BATTLE FOR THE PHILIPPINES - 1942

in the Manila Box until used for an Amphibious Invasion [15.4] or untilplaced on the game map in Japanese Entry Area hexes 4200 and 4201by the Japanese player. Any battalion size unit (or combination of twounits) of the Garrison qualifies for certain Japanese Special Events.c. The entry (or return) of all units of 48th Division can be delayed byUS play of the “Manila Unrest” Special Events marker [See SpecialEvent J on the US Special Event Chart].Design Note: Gen. Homma historically requested this division for usein Bataan but Tokyo needed it for the conquest of Java (Indonesia). Forgame play the “Garrison” units need a controlling formation; the 48thHQ provides a convenient mechanism. They were not actually part ofthat division.
16.5 Replacements“A $10,000 pilot shot to hell in the infantry.”- Lt. Ray Sloan; died 12 February 1942
As units fight, their strength may be reduced by combat results (orAttrition). Replacement procedure enables them to recover theirstrength fully or partially. Each replacements point represents the menand equipment necessary for a unit to recover one step.
16.51 Combat units are rebuilt or restored to full strength by usingReplacements Points (RPs). RPs are received during thereinforcements phase. See the Set Up Cards to determine the numberreceived, if any. Players record their new RPs by using theirReplacements Points markers on the General Records Track. RPs canbe saved, without limit, for use during a future turn.
16.52 No unit can recover more than one step of strength per turn. Onlyone RP is required per step restored.
16.53 Only infantry, engineer unit types can recover steps or be rebuiltthrough replacements. Note: there is a special procedure that costs noreplacement points for rebuilding eliminated HQ units [16.26]
16.54 The status of a unit affects whether it is qualified to receivereplacements.a. A unit that is at reduced strength qualifies if it:• Is not Disrupted• Is not in enemy ZOC• Does not move if its formation is activated by the “Activate Any OneFormation” Event [See Special Event N on the US and JapaneseSpecial Event Charts] or if the unit is eligible to move as part of anAmphibious Invasion Reaction Activation [15.49f]
b. Its Formation must be in Reserve (Army units can be placed inReserve as part of a formation).c. Its Formation must be In Supply during the Supply Status phase[6.11].
16.55 Replacements ProcedureDuring the Reinforcement Phase after both sides have had anopportunity to place formations in Reserve, Japanese units are markedto receive replacements (or are restored) and then US units are markedto receive replacements (or are restored).
16.56 Procedure for receiving replacements:a. The appropriate player puts a Receiving Replacements marker on
the qualifying unit during the reinforcements phase. If there areinsufficient Receiving Replacement markers for all of the qualifyingunits, use any other marker to indicate that the appropriate units arereceiving replacements.b. If at any time during the turn a unit with a Receiving Replacementsmarker does not qualify, remove the Receiving Replacements marker.That unit will not receive replacements during this turn.c. If the unit to receive replacements still has the ReceivingReplacements marker during the Reorganization phase, it completesthe replacements procedure. Reduce the RPs marker on the GeneralRecords Track on the map by one point. Now remove the ReceivingReplacements marker and turn the unit over to its full strength side.
16.57 Procedure for rebuilding a unit from the eliminated boxa. The unit’s Formation must be in Reserve (Army units can be placedin Reserve as part of a formation).b. Reduce the RPs marker by one point to rebuild a two-step unit fromeliminated to reduced strength, or a one-step unit to full strength.c. Place the rebuilt unit on its Formation HQ during the ReinforcementPhase, obeying stacking limits. An Army unit can be rebuilt on anyFormation HQ. If the HQ is not in play then rebuilt units cannot bereceived. All units returned to the map receive a Disrupted Marker uponplacement. Japanese Regimental HQ units 122/65 and 9/16 cannot beused to build replacements. If using Optional Rule 5.36, the Japaneseplayer can rebuild units adjacent to a Formation HQ.
16.58 RPs can be used on units without regard to Efficiency Rating orthe general strength increase.
16.59 All US Replacements Points are only for Filipino units, whichincludes Philippine Scouts units, unless otherwise indicated. If the USreplacement pool includes the US RP from GT18, turn the US RPmarker to the “+ US RP” side. Otherwise, the US RP should be on theFilipino RPs side.
17.0 SPECIAL EVENTS17.1 When Special Events Apply17.11 Each turn beginning GT3 during the Special Events Phase bothplayers randomly draw one Special Event Marker from the Event Pool(we suggest use of an opaque cup). The player who has Initiative lastturn will draw first this turn. Each Special Event represents a newcondition that applies to game play. There is no cost to drawing aSpecial Event Marker; a player need not draw one. All conditions areoptional. A player need not use the Special Events marker he draws.Except for the “Activate Any One Formation” Event [See Special EventN on the US and Japanese Special Event Charts], return the EventMarker to the Event Pool after its use is complete. The use is completewhen its effect is complete.Example: The US plays Event L, Air Raid. TheJapanese player withdraws two air units. The SpecialEvents marker is also set aside (with those units) untilthey return to play two turns later. Only then is theevent complete. Now return that Special Event Markerto the Pool.When Event N, “Activate Any One Formation,” is played, that Event
© 2010 Compass Games, LLC 29
BATAAN!: THE BATTLE FOR THE PHILIPPINES - 1942

marker may need to be placed on the Activated Formations Track[4.38b] to keep track of which Formation was activated by the Event.
17.12 Once drawn the player holds the Special Events marker until heplays it. Conceivably, this could be through the entire game. He keepsthe identity of the marker hidden from view by his opponent.
17.13 The US player cannot hold more than five un-played events atany one time; the Japanese player cannot hold more than eight un-played events at any one time. If a player exceeds his limit of held EventMarkers, either due to receiving the “Activate Any One Formation”marker from his opponent [See Special Event N on the US andJapanese Special Event Charts] or by drawing a new Event Markerduring the Special Events Phase, the player immediately places anEvent marker back in the Event Pool so that he holds no more than hislimit.
17.14 A player can play as many Special Events markers as desired, atany time, and as allowed (by Sequence of Play). When both playerswish to play events at the same time the currently active player playshis first. During phases such as the Reinforcement Phase where thereis no active player, the Japanese player plays any Special Event hewishes to play first and then the US player plays any Special Events hewishes to play. Some events are played only during the StrategicSegment [See explanation of each Special Event on the US andJapanese Special Event Charts], but generally an event should beplayed at the time it is supposed to take place. A Special Event affectinga particular combat [such as providing a DRM] is played before thecombat die roll of that combat [Examples: US Events D and F, andJapanese Events C and F].Exception: See Japanese Event A.
17.15 Each Special Events marker has a letter that refers to a fullexplanation of that Event [See US and Japanese Special Event Charts].The Event being played is the one for the player playing that marker; donot apply his opponent’s event.Example: The US player draws and plays the “D” Event Marker. TheUS Event “D” now occurs, not the Japanese “D” Event. The Japanese“D” Event does not occur. The Japanese player may later draw thatmarker and only then can he use his “D” Event (and the US player doesnot get a repeat of his “D” Event).
17.16 Certain Special Events are not available during certain turns. Analternative outcome will be listed with that event for those other turns.Other Events are available for play only once during the course of agame. Once such an event occurs use the alternative outcome forsubsequent drawings from the Pool. The remaining Events can takeplace more than once.
18.0 SETTING UP A SCENARIO“They jabber some more but finally decide that the crazy Americans cansurrender without sabers.”- Maj. Achille Tisdelle, writing in 1947
18.1 Finding Scenario Information18.11 Refer to the desired scenario [19.0] and locate the required gamecomponents.
18.12 Set Up and align the map, Scenario Set Up cards, and any othercards that should lie flat.
18.13 The rules section on each scenario contains the special rules forthat scenario. Also consult Set-Up Cards.
18.2 Placing Scenario Markers and Units18.21 Place Initiative DRM marker on the General Records Track at thezero position at the start of the scenario.
18.22 Place the Turn marker on the Turn Record Track in the boxspecified for the beginning turn of the scenario being played.
18.23 Place all air, naval, and ground units for both sides on theScenario Set Up Cards, on their respective unit facsimiles. Some unitfacsimiles have a black triangle in the top right corner. This indicatesthat the unit begins play on its reverse side, because it is already atreduced strength.
18.24 Place all At Start air and naval units for both sides in theirindicated boxes on the Strategic Display. The Strategic Display is usedin all scenarios.
18.25 Place all At Start ground units on their indicated map hexes. TheUS player always places his units first. All reinforcement units for bothsides remain on their respective scenario Set Up cards.
18.26 Each scenario includes special rules applying only to thatscenario, or exceptions to the standard rules. Take time to familiarizeyourself with these before beginning play.
18.27 How to Win. Each scenario also includes a section on how towin, called Victory Conditions. Conditions change with each scenario.
19.0 Scenarios19.1 Scenario #1: At the Pearly Gates: Layac“We are the peepul who are not afraid to die by boolets.”- Japanese taunt, January 1942
19.11 Scenario Length. There are two turns, GTs 1 and 2.
19.12 Scenario Area. Use the area north of hexes ending in xx12.
19.13 Set Up: Cards One Front
19.14 Scenario Special Rulesa. The Japanese player has the Initiative automatically, for both turns.b. Both sides are restricted to just one activation for GT2.c. The Japanese 1st Artillery (Army unit) has a support factor of only 3for GT1 only [historically, only half the unit is present].d. Treat the US “71” artillery unit as part of 71st Division for thisscenario i.e. make sure to use the “pink version” of the “71” artilleryunit.e. Do not use Special Events.f. Ignore Rule 6.11(b) i.e. the US player does not need to spend Supplypoints to put US units In Supply and does not use the Forage Table[6.44]. The US and Japanese Formations do not have to roll for GeneralAttrition [6.51].
© 2010 Compass Games, LLC 30
BATAAN!: THE BATTLE FOR THE PHILIPPINES - 1942

© 2010 Compass Games, LLC 31
BATAAN!: THE BATTLE FOR THE PHILIPPINES - 1942
g. Place VP markers on their US side in hexes 3504 and 3604. Turn theVP markers to their Japanese Side when the Japanese player gainscontrol of these hexes.
19.15 Victory Conditionsa. The Japanese player wins if at the end of the scenario all three of thefollowing apply:1. He controls hexes 3504 and 3604.2. The US player has lost at least 3 steps of units.3. The Japanese player has not lost more steps of units than the USplayer has lost.b. The US player wins if he avoids Japanese victory conditions.
19.2 Scenario #2: Abucay Line“If this is an organized military force I’d like to see what a rabble lookslike.”- Capt. Ralph Hibbs, 24 January 1942
19.21 Scenario Length. There are six turns, GTs 3 through 8.
19.22 Scenario Area. Use area east of hexrow 2600 and north ofhexes ending in xx30. However, see 19.24 for special rules for the 31stdivision. (To aid in delineating the Scenario Area, players may wish toplace unused markers in hexrow 2600 and in hexes ending in xx30).
19.23 Set Up: Cards One Front.
19.24 Scenario Special Rulesa. The Japanese player has Initiative automatically for GTs 3 and 4.b. Both players (Japanese player first) will draw from a Special EventsPool consisting of eight Events markers: E, F, G, L, N, P, S, and T.Ignore the rest of the Events markers.c. The US 21st Division is in Reserve At Start.d. Supply1. US Supply Source is hex 4230.2. Japanese Supply Source is 4200.3. Ignore Rule 6.11b; the US player does not need to spend Supplypoints to put US units In Supply and does not use the Forage Table[6.44]. However, each Japanese and US formation activated is stillsubject to General Attrition [6.51].Optional Rule: For added realism, the Japanese player rolls forGeneral Attrition each turn with a -2 die roll modifier for each activatedformation. This modifier reflects the fact that the normal GeneralAttrition rates are for the full formation. However, although most of 65thBrigade and the 16th Division are present in this scenario, parts of bothof these formations are fighting on the West Coast of Bataan.Therefore, the General Attrition rate should be reduced accordingly.e. The US 31st Division sets up outside of the scenario area along aroad in Reserve. As these units become available do to leavingReserve, they move east along this road and enter the play area at hex2722 having spent the appropriate number of movement points to reach2722. Once these units enter the scenario area, they are eliminated ifthey are forced to retreat outside the play area. If a Japanese unitoccupies hex 2722, these units cannot enter play until hex 2722 is nolonger occupied by a Japanese unit.
f. Place VP markers on their US side in hexes 3315 (Abucay Hacienda),3717, 3915 (Abucay) to indicate US control. Turn the VP markers totheir Japanese Side when the Japanese player gains control of thesehexes.
19.25 Victory Conditionsa. The Japanese player wins if any one of the following three conditionsare met:1. There are Fortification Destroyed markers on six of the eight AbucayLine hexes during the Victory Determination Phase of any turn (note,Fortifications may be repaired, see [14.15]), or2. Any three of the following hexes: 3315 (Abucay Hacienda), 3717,3915 (Abucay), and 3919 (Balanga) are friendly during the VictoryDetermination Phase of any turn; or3. Has not lost more than 16 steps due to combat and the US playerhas lost at least 32 steps due to combat at the end of scenario. Stepslost due to attrition do not count.b. The US player wins by avoiding Japanese victory conditions.
19.3 Scenario #3: Mauban Line“Goddamn it, General, get down or you’ll get your damn head shot off.”- Sgt. Hubert “Tex” Carroll to Gen. Wainwright, 21 January 1942
19.31 Scenario Length. There are five turns, GTs 4 through 8.
19.32 Scenario Area. Use only the area west of hexrow 2700 and northof hexes ending in xx24. (To aid in delineating the Scenario Area,players may wish to place unused markers in hexrow 2700 and in hexesending in xx24).
19.33 Set Up: Cards One Front.
19.34 Scenario Special Rulesa. The Japanese player has Initiative automatically for GT4.b. Treat the US “71” artillery unit as part of 91 Division for all purposesi.e. there are 2 US “71” artillery units, make sure to use the “purpleversion” of the “71” artillery unit.c. For this scenario only the Japanese player At Start holds SpecialEvent A; the US holds no special events. Event A is discarded afterbeing used by the Japanese player and is not put back in the SpecialEvents Pool.d. Each player draws a special event each turn. Both players (Japaneseplayer first) will draw from a Special Events Pool consisting of eightEvents markers: E, F, G, L, N, P, S, and T. Ignore the rest of the Eventsmarkers.e. Supply1. The US Supply Source is hex 2223.2. The Japanese Supply Source is hex 1604.3. Ignore Rule 6.11(b) i.e. the US player does not need to spend Supplypoints to put US units In Supply and does not roll on the Forage Table[6.44]. However, each US formation activated must still roll for GeneralAttrition [6.51]. The Japanese formations do not have to roll for GeneralAttrition.Optional Rule: For added realism, the Japanese player rolls forGeneral Attrition each turn with a -3 die roll modifier for each activated

formation. This modifier reflects the fact that the normal GeneralAttrition rates are for the full formation. However, only a portion of the65th Brigade and the 16th Division are present in this scenario.Therefore, the General Attrition rate should be reduced accordingly.
19.35 Victory Conditionsa. The Japanese player wins if any three of the following hexes: 1216(Morong), 1619, 2019, and 2223 are simultaneously friendly during theVictory Determination Phase of any turn.b. The US player wins by avoiding Japanese victory conditions.
19.4 Scenario #4: Second Bataan“Bataan has fallen. The Philippine-American troops on this war-ravagedand blood-stained peninsula have laid down their arms.”- Lt. Norman Rees, in Voice of Freedom broadcast, 9 April 1942, from
Corregidor
19.41 Scenario Length. There are seven turns, GTs 23 through 29.
19.42 Scenario Area. Use the full map.
19.43 Set Up: Cards One-Back for the Japanese; One-Back for the US.There are no reinforcements for either side.
19.44 Scenario Special Rulesa. The Japanese player has Initiative automatically for the wholescenario.b. At Start the Japanese player holds Special Event N, the “ActivateAny One Formation” Event, and draws one more; the US player drawstwo randomly. Special Event M is not available for either side (removeit from the Pool).c. Before the game begins, the US player can place any three (3)formations In Supply. All other formations and units are Out of Supply.d. Supply Sources1. US: Hex 3140.2. Japanese: Hexes 1604 and 4200.e. The Japanese 21st Regiment only rolls for attrition against itsFormation’s ER of 6 every even turn that it is activated (ie., turns 14, 16,18, etc.).
19.45 Victory Conditionsa. The Japanese player wins by making all 17 towns on the map friendlyat the same time.b. The US player wins if he has avoided Japanese victory conditions bythe end of the scenario.Design Note: The Japanese player won when the US surrendered onTurn 25.
19.5 Scenario #5: Battling Bastards of Bataan“We’re the battling bastards of Bataan,No mama, no papa, no Uncle Sam,No aunts, no uncles, no cousins, no nieces,No pills, no planes, no artillery pieces,…And nobody gives a damn.”
- Frank Hewlett, United Press, 1942
19.51 Scenario Length. There are 23 turns, GTs 3 through 25. Thegame is extended until the end of GT29 if either of the following occur:a. The US player plays his Special Event A on GT3, orb. A US “Convoy” (obtained only by Special Event M) arrives in Bataan.
19.52 Scenario Area. Players begin on GT3 on a limited part of thegame map [see 19.22]: all map area east of hexrow 2600. Thenbeginning GT4 the area expands to include the full game map.
19.53 Set Upa. For GT3 use the US and Japanese At Start units and locations asfound in Scenario #2, including the units of the 31st Division that startin Reserve. Beginning GT4 add the units and locations found inScenario #3 plus all At Start units and locations shown on Set-up CardTwo-Front. Only units found in the Scenario #2 At Start units take steplosses due to General Attrition on GT3.b. Place the 13 Victory Point Markers on the 12 VP town spaces andthe “In range of hex 3444” space of the Victory Point Chart. Place the“48th Division VP Reduction” Marker on “48th Division HQ Not in Play”space of the Victory Point Chart. Place the x1 VP and x10 VP markersat 0 on the General Records Track.
19.54 Scenario Special Rulesa. The Japanese player has Initiative automatically for GTs 3 and 4.b. Both players draw Special Events. The Special Events Pool includesall of the Event Markers.c. On GT3 the US player can choose Special Event A instead of makinga random draw He draws randomly beginning GT4.d. Beginning GT25 the US player cannot draw any more SpecialEvents, but he can continue to play events still held from previous turns.e. Treat the US “71” artillery unit as part of 91st Division for all purposesi.e. make sure to use the “purple version” of the “71” artillery unit.f. The US has only three AMs on GT3. In order for a US formation to beIn Supply at the beginning of GT4, the US player must spend a supplypoint during GT3 either when the formation is activated or at thebeginning of the Reorganization Phase.g. The US 31st Division sets up with all of its units in Reserve. On theturns indicated, the respective units of the 31st Division are releasedfrom Reserve. When the 31st Division’s HQ is added to the AM pool,only those units of the 31st Division that have been released fromReserve can be activated.Exception: 31st Division units can be released from Reserve forInvasion Reaction Activation [15.49g].h. During the Initiative phase each turn starting GT18, the US playerhas the option to surrender the Initiative this turn to the Japaneseplayer. The Japanese player now must accept Initiative; there is noInitiative die roll.Note: This gives the US player some chance at limiting the number ofFormations that will be subjected to General Attrition.i. After turn 11, the Japanese 48th Division, if activated, rolls for attritionagainst its Formation’s ER of 6 on every even turn (ie., turns 12, 14, 18,etc.) that it is activated and any of its units are not in the Manila Box (the48th Division HQ is never in play after Turn 11); any attrition loss mustbe taken from units not in the Manila Box.
© 2010 Compass Games, LLC 32
BATAAN!: THE BATTLE FOR THE PHILIPPINES - 1942

j. The Japanese 21st Regiment only rolls for attrition against itsFormation’s ER of 6 every even turn that it is activated (ie., turns 14, 16,18, etc.).k. During any Initiative Phase starting with GT5, first the US player andthen the Japanese player can decide to declare a General Withdrawal[5.23].
19.55 Optional Rule. To more faithfully replicate the historicalcampaign, allow each Japanese Formation to enter Reserve only onceduring the game. When playing with this rule, the Victory Conditions arerevised as indicated in 19.56e. Also, the Japanese player can rebuildReplacements either in the same hex or adjacent to an HQ of theappropriate formation.Note: In the historical campaign, the Japanese 16th Division and 65thBrigade had virtually ceased to exist as effective fighting forces by mid-February and, were allowed to withdraw by higher command. Afterthese forces withdrew, in game terms, they were kept in Reserve forabout 10 turns to recuperate, receive replacements, and retrain until thefinal Japanese assault in April. The 4th Division upon arriving in theBataan peninsula spent three weeks training before being deployed forthe final assault.To avoid having a game where players do virtually nothing for 10 turnsand to give the Japanese player more strategic flexibility, the Japaneseare allowed to put formations in Reserve multiple times.In game terms, , using this rule will probably force the Japanese toabandon one or more VP towns that they historically held duringFebruary and March. Historically, the US was not fully aware of howvulnerable the Japanese were to a counterattack during this period.Accordingly, if the Japanese are limited to putting their forces inReserve just once as they did historically, each of the Victory Levels in19.56 should be reduced by 10 VPs for the US and Japanese [19.56f].For example, in a game ending on GT25, a Japanese Marginal Victoryshould only require 121 VPs.
19.56 Victory ConditionsThe Japanese Marginal Victory Level is based on the number of VPsthe Japanese probably would have earned in game terms had thecampaign ended on April 12th at the end of turn 25. Historically, the USsurrendered the forces on Bataan on April 9th.a. Each player wins by winning a level of victory (All VPs referred to JPVPs earned):Victory Level ConditionsJapaneseSignificant 141 VPs or more by end of GT25 (or 161 VPs or
more by end of GT29, per rule 19.51).
JapaneseMarginal 131 VPs or more by end of GT25 (or 151 VPs orless by end of GT29, per rule 19.51).
US Marginal 130 VPs or less by end of GT25 (or 150 VPs orless by end of GT29, per rule 19.51).
US Significant 120 VPs or less by the end of GT25 (or 140 VPsor less GT29, per rule 19.51).
b. There are twelve towns on the game map initially controlled by theUS. Each turn during Victory Determination Phase the Japanese playerearns: 1 VP per town for controlling the following five towns: Morong
(1216), Mabatan (3914), Abucay (3915), Balanga (3919) and Pilar(4021); 2VPs per town for controlling the following two towns: Bagac(2225) and Orion (4125); and 3VPs per town for controlling the followingfive towns: Daan-Pare (4127), Limay (4231), Lamao (4235), Cabcaben(4040) and Mariveles (2940). The Japanese player accumulates pointsfor each town for each turn that the Japanese player controls the town.The Japanese player keeps a running total of VPs he has earned,adding the VPs he earns each turn to his previous total on the GeneralRecords Track. By placing the Japanese/US and Japanese VP markersfor the appropriate towns from the Victory Point Chart on their JapaneseVP side in the towns controlled by the Japanese player, the emptynumbered spaces on the Victory Point Chart can be used to determinethe VPs earned by the Japanese player each turn. If the Japaneseplayer earns more than 100 VP, turn the x10 VP marker over to its 100+ 10x VP side.c. There are five towns on the game map initially controlled byJapanese. Each turn during the Victory Determination Phase, theJapanese player loses 1 VP apiece for each of these that are currentlyoccupied by the American player. Having been the last player to movethrough these towns is not sufficient for the US player. These five townsare: Olongapo (1604), Dinalupihan (3501), Layac (3603), Hermosa(3806) and Orani (4009). If the Japanese VP total becomes negative,flip over the x1 VP marker to its x(-1)VP side.d. If the Japanese player places at least sixteen (16) artillery supportpoints within range of Corregidor (which for game purposes, is ahypothetical off-map hex 3847), he earns a bonus of 3 VPs each turnas long as he satisfies this condition. These bonus VPs are cumulative.Move the VP marker from the “In range of Corregidor 3847” space tothe Corregidor Under Siege space of the Victory Point Chart to revealthe 3 VPs earned. Since Corregidor is actually off the game map countthe extra three hexes, as described below, from hex 3844. TheJapanese player loses these bonus VPs if at any time he does notsatisfy this condition.Example: The Japanese player places his 1 Hvy (+), 8 Hvy, and 9(+)units (ranges 12, 15, and 17 respectively) for a total of 16 support pointsin hexes 3835, 3822, and 3830 respectively. They count 9, 12, and 15hexes (respectively) to reach hex 3844 (and still have a three-range leftover to satisfy the remaining distance to the hypothetical off-map hex3847 i.e. Corregidor). The Japanese earns 3 bonus VPs as long asthese artillery units are so placed.e. If the Japanese play Event I (Keep 48th Division), the number of VPsearned by the Japanese player may be reduced by 2VP for every turnthat the 48th Division is in play from GTs 3 through 11 [See JapaneseSpecial Events Chart]f. If using Optional Rule 19.55 each of the Japanese and US VictoryRequirements should be reduced by 10 victory points.Design Note: The game absolutely ends by April 29th, the day of theEmperor’s birthday (President Roosevelt’s birthday is 30 January), astrong symbolic date on the Japanese calendar. Japanese commandalso planned this date as the conclusion of operations. If US troops arestill holding out, the Japanese would likely have changed commandersand brought yet another division over from China to finish the job. A USplayer holding out this long has won, essentially, a significant victory ofhonor because his army has gone down fighting.
© 2010 Compass Games, LLC 33
BATAAN!: THE BATTLE FOR THE PHILIPPINES - 1942
20.0 DESIGNER’S SECTION20.1 Unit AbbreviationsJapaneseF Formosa (Taiwan)G GarrisonHvy Heavy artilleryKondo Kondo DetachmentMtn Mountain artilleryRcn Reconnaissance
USA,B,C Company designationsC Philippine ConstabularyFA Field ArtilleryMar MarinesPur PursuitP Philippines DivisionPAAC Philippine Army Air CorpsProv ProvisionalPT Sqn PT (Patrol Torpedo) Boat SquadronUSN United States Navy
20.2 Suggested ReadingThere is an extensive body of literature available covering WW II inthe Philippines. The following books provide an overview of the 1942Bataan campaign.
1. Belote, James H. and William M. Corregidor, the Saga of aFortress, New York, Harper & Row, 1967.2. Edmonds, Walter D. They fought with What They Had, Boston:Little, Brown, 1951.3. Mallonee, Col. Richard C. Battle for Bataan, New York: Simon &Schuster (ibooks), 2003.4. Mellnik, Brig.Gen. Steve, Philippine Diary/1939-1945, New York:Van Nostrand Reinhold, 1969.5. Morton, Louis The Fall of the Philippines, Washington, DC: USArmy, 1953 (also available in full text on the web).6. Ramsey, Edwin Price and Stephen J. Rivele Lieutenant Ramsey’sWar, Washington: Potomac Books Inc, 2005 (reprint).7. Rottman, Gordon L., Japanese Army in World War II, Conquest ofthe Pacific 1941-42, Osprey Publishing, 2005.8. Toland, John But Not in Shame, New York, (Ballantine Booksedition: 1974).9. Wainwright, Gen. Jonathan M. General Wainwright’s Story,Westport, CN: Greenwood Press, 1970 (reprint).10. White, W.L. They Were Expendable, New York: Harcourt Brace,1942.11. Whitman, John W. Bataan: Our Last Ditch, New York: HippocreneBooks, 1990.12. Young, Donald J. The Battle of Bataan, Jefferson, NC: McFarlandand Company, 1992.
Many websites also provide information on the campaign and its
aftermath. These are some of interest (as of January 2006):www.army.mil/cmb-pg/brochures/pi/piwww.battlingbastardsbataan.comwww.corregidor.orgwww.ibiblio.org/hyperwar/USA/USA-p-pi/indexwww.prisonerofwar.com/bataanwww.philippine-scouts.orgwww.bataandiary.comwww.militarymuseum.org/bataan
20.3 Designer’s Notes“Have I served with MacArthur? Why I studied acting with him for atime.”- Eisenhower
Probably the first challenge in any game design process is buildinga good game map. While the US official history provides a good map ofBataan, the rugged nature of the terrain requires use of maps of greaterdetail. Luckily, these are available. The game map was drawn using1:50,000 scale topographical maps published in 1977 by (Philippines)National Mapping & Resource Information Authority (NAMRIA).Because of the publication date some period data was lost, particularlythe precise positioning of jungle cover (much logging took place soonafter the war) but many trails are still evident. In 1942 these began asfootpaths but many grew to handle vehicular traffic complete withgrading, culverts, and bridges. Much was built while still covered byjungle canopy and thereby out of Japanese observation. While thesetrail improvements did not exist at the start of the Bataan campaign,they can be assumed present by the time the players need them.
The next need was for an appropriate game mechanics model thatexplains how a numerically inferior force could successfully defeat thelarger. The basis came from GMT’s Roads to Leningrad game, itselfa development from earlier systems and one presenting the rightscaling and design approach. The need to adjust for early 1942conditions called for further modeling and this was synthesized fromformation activation mechanics. Formation activation presents the mostprominent game mechanic featured here. Combined with supplyrestraints it accounts for how the attacking Japanese were soformidable. Briefly, players should consider that the operations segmentof the turn represents the command decision cycle. Generally, oneside’s cycle will not equal the other, no matter how it is executed.Uneven cycles create a tension between players and on this basis wecan create a game of bluff and necessity.
The cycles are uneven because Japanese doctrine, training, andexperience allow the flexibility of multiple move-attack sequences thatthe numerically superior but sluggish US-led forces could not match.The Americans had the theory and much of the doctrine but their forceshad little training in even the basics of combat and lacked the means aswell.
Since this is not a game about armored divisions and Blitzkrieg,several rules sections were dropped (such as Reaction movement).Easily rejected were rules about bridge demolition; this is not a gameabout bridges; and since the historical campaign took place during theDry Season (December through May), we also dropped weatherconsiderations.
Supply issues form the second half of the design challenge. The
© 2010 Compass Games, LLC 34
BATAAN!: THE BATTLE FOR THE PHILIPPINES - 1942
US lost the campaign directly because of the lack of fresh supply. USforces were tasked with holding out, essentially on their own, for sixmonths, by which time relief was expected to arrive direct from theUnited States. They held on Luzon and Bataan for four months, and yetanother month on Corregidor (plus another month if including the timefor protracted surrender proceedings), but no help came. This muchtime creates the need to account for the flow of US supplies, sincesupplies alone determine whether a military force can fight for anextended time. Japanese forces also suffered considerably from supplydifficulties but with their strategic supply lines assured they were notgoing to lose this campaign solely through lack of supply. That thenremoves any requirement to track Supply Points for them. The US unitsare not allowed to be on Emergency Supply due to the fact that they arealready on half rations.
Some choices were also made about the mix of combat units. Atbattalion level there are not enough Japanese units and at companylevel there are too many. The best bet was the Solomonic approach,split the battalion in half. Fortunately, the Japanese operated this wayoften enough (such as in amphibious operations) and we can allocateregimental level direct-fire artillery without having to show theseseparately. This approach encouraged similar consolidation in the UScounter mix. For instance, many Army Air Force ground personnel wereorganized as infantry units corresponding to their squadronorganization. While they did operate as squadrons they tended to pairup in defense sectors and this allowed us to keep the number of theseunits under control. In emergencies other US units, such as AA units,could abandon their heavy weapons and fight as infantry. For once wealso get to include the proverbial “cooks and bakers” unit. Such a unitdid in fact organize as combat infantry and helped fight nearbyJapanese. Finally, let us note that the engineers in this game, on bothsides, were mostly labor troops, not assault troops as found with mostwestern-style armies.
The Cost of SurrenderBy Vance von BorriesPrisoners of war shall be treated with a spirit of goodwill and shallnever be subject to cruelties or humiliation.- Japanese Army Regulations for Handling Prisoners of War, dated
February 1904, Chapter 1, Article 2.
You may wonder about the fate of the Bataan defenders. Of theoriginal 80,000 defenders about 2000 were killed during the threemonths of fighting, leaving 78,000 to surrender on 9 April 1942, or about12,000 Americans and 66,000 Filipinos. Of these about 1500Americans and 2500 Filipinos remained wounded or sick in Bataan’sfield hospitals after the Surrender. Only a few hundred Americans andabout 1700 Filipinos escaped to Corregidor, joining the beach defensesthere. The Japanese kept a few others for work details on Bataan afterthe Surrender. The remaining personnel, about 10,000 Americans and60,000 Filipinos were forced into what is commonly called the “DeathMarch.” While many Japanese are not “barbarians,” those who proddedthe surrendered Filipino-American Army to Camp O’Donnell, 65 milesto the north, arguably were. Of their charges, anywhere from 600 to2300 Americans and 5000 to 10,000 Filipinos (no one has exactnumbers) died or were executed along the way. Nearly all sufferedunspeakable abuse. It is estimated that about 400 Americans and
Filipinos escaped into the jungles during the March. The 15,000defenders of Corregidor, who were surrendered about a month later,were first paraded through Manila’s streets before going to the POWcamps. During just the first 40 days in Camp O’Donnell over 1500Americans and perhaps 25,000 Filipinos died; all the direct result ofmalnutrition on Bataan, disease, and atrocities committed by theJapanese. Thousands more would die later.
While again reported numbers vary considerably from source tosource, of some 25,000 Americans captured by the Japanese duringthe entire war about 38-40% died while in Japanese captivity,compared to about 1.2% (of 96,614 POWs) in German and Italiancamps. Later, the majority of POWs were shipped to the JapaneseHome Islands. Of 58 known “Hell Ships” taking 68,000 British andAmerican POWs from Singapore and Manila, 22,000 perished at sea,mostly by “friendly fire.” Almost 1800 Americans died in one ship alone.And Filipino civilians suffered greatly as well. Of a pre-war population ofabout 18,434,000 over 1 million died as a direct result of the war (fromall causes). After the war, former POWs were uniformly deniedcompensation from Japan for their labor performed under the whipwhile in Japanese mines and factories.
At the conclusion of the war, General Homma was arrested andcharged with war crimes, primarily for his role in the Death March. In aquick showcase trial in Manila late in 1945 he was found guilty alongwith some surviving members of his staff and sentenced to death byfiring squad. Sentence was carried out in April 1946 at Los Banos,south of Manila (staff personnel were hanged).
Armor on BataanBy Vance von Borries
Bataan is not generally cited as the scene of armor in action andrightly so. Very little armor combat took place there, yet both sidesemployed armor in noticeable numbers.
The primary US armored fighting vehicle on Bataan was rated asa “light” tank, the early model M3 “Stuart” tank of 13-14 tons (rivetedconstruction) which mounted a 37mm main gun and, originally, fivemachine guns (hull, turret, two in forward facing hull mounted sponson,and one outside in AA role) with 44mm equivalent of frontal hull armor.Shortly after their arrival in the Philippines one of the sponson mountedMGs was removed to provide space for a radio. These tanks werefreshly issued, speedy, and reliable although somewhat underpowered,with limited range and inexperienced crews. A major problem was thelack of spare parts. Initially, 108 tanks in two battalions deployed on theLuzon Central Plain against the Japanese drive on Manila. By the timethey pulled back to Bataan, their numbers had dwindled to about 80 butnow the crews knew their job. Interestingly, US command wanted tomove a few Stuarts to Corregidor but found barge transport to beunsuitable. Their absence was later sorely regretted.
The main support for the Stuarts was the 75mm Gun MotorCarriage M3 (or “Self-Propelled Mount”), an M3 halftrack fitted with aformer French M1897A 75mm gun on pedestal mount firing forward.Originally, 75 helped oppose the Japanese but only 58 made it back toBataan. In the US they were declared Tank Destroyers and wereintended to battle German panzers, but when MacArthur requestedmore anti-tank guns he was sent these, part of the first production
© 2010 Compass Games, LLC 35
BATAAN!: THE BATTLE FOR THE PHILIPPINES - 1942
batch. In the Philippines they were thought of as best employed as fieldartillery, but since no fire control equipment came with them, they wereused instead mainly in a direct fire role. These were reliable andpowerful weapons but they suffered from poor crew protection and ahigh profile, and were unstable as an artillery platform. About 46halftracks, M2 and M3, without the 75mm gun but usually with .30 and.50 caliber machine guns were also available for transport and securityin the two armor battalions.
Unexpectedly available to US forces were 60 British Bren carriers,without weapons, arriving at Manila eight days after the start of the war.They were to go to Canadian troops at Hong Kong, but all shipmentsthere were cut off due to the Japanese blockade. US ordinanceworkshops soon mounted a .30 caliber machinegun on many of these,and a 37mm anti-tank gun on the remainder. Also available were fiveobsolescent White M2 scouts cars with the Philippine Scouts cavalry.
Scheduled for deployment to Bataan were two battalions of“medium” tanks, the M3 “Grant” tank, a comparative monster of 30 tonswith both 75mm and 37mm guns and four machine guns, more than amatch for any Japanese tank. These were in full production in August1941. They were not on the “Pensacola” Convoy (en route at the startof war), but one battalion was ready in California for loading beginning9 December and presumably the second would have sailed with anearly 1942 convoy. Along with the light tank battalions they were to formthe nucleus of a new armored division.
Against these the Japanese fielded two similar sized armorformations on the Luzon Central Plain, one “heavy” the other “light.”Only the “heavy” formation saw action in Bataan. The main Japanesebattle tank employed in the Philippines was the Type 89B Chi-Ro (oftenmisidentified as Type 94), a “medium” tank of 13.6 tons mounting a57mm gun Type 90 and two 6.5mm Type 91 machine guns (hull andturret rear) but with armor and speed well inferior to the US Stuart(having about 17mm frontal hull armor). The gun may have been largerbut it had less hitting power and could not penetrate the Stuart’s frontalarmor. It was intended instead for destroying enemy machine gunnests.
Before the war with the US the Japanese realized the need toreplace the Type 89. To this end they built the Type 97 Shinhoto Chi-Ha, a medium tank of 15 tons, superior in many categories to the Type89B. The first production models continued to use the same 57mm gunbut this was later replaced by a high velocity 47mm gun. This new guncould indeed penetrate the Stuart’s armor, as actually happened in thefirst US-Japanese armor engagement near the beaches of northernLuzon, but the Philippine battles were over before the Shinhoto Chi-Hacould engage in any real numbers against the Stuart. Only two of thesetanks were used in the Philippines in 1942. They later were landed onCorregidor and broke US defenses there.
Along with these tanks some lighter tanks could be found, notablythe widely used Type 95 Ha-Go light tank of 7.4 tons with a 37mm Type94 gun and two 7.7mm Type 97 machine guns (hull and turret rear). Itcould manage a speed of about 30 mph. Its mobility made it popularwith its crews but with only 12mm of hull armor it was poorly protectedas well as poorly armed.
With the infantry divisions you could often find the Type 94, atankette of about 3.5 tons armed only with a single machine gun in itsturret. With only 6-12mm of armor and a speed of 25 mph, it was not
really superior even to the Italian CV3/35 tankettes of 1940 North Africainfamy. It later was relegated primary to the role of a supply wagontractor. Its introduction in the early 1930s yielded, however, the benefitof introducing the Japanese soldier to the concept of armor. Even so,by the statistics Japanese armor would not win a toe-to-toe fight withAmerican armor.
With such clear armor superiority it may fairly be asked why UScommanders failed to exploit this. The primary culprit seems to bemediocre leadership combined with poor tank warfare doctrine. USdoctrine at the time was neatly summed by the Tank Destroyer motto,“Seek, Strike, Destroy.” Nothing here includes combined arms oracknowledgement of anyone else on the same battlefield. Almost tounderscore the point, US tanks carried only armor piercing shot, muchas did the British outside of Tobruk in North Africa a month earlier andwith the same model of tanks, and with the same unsatisfactory result,a poor performance when opposing “soft” targets (infantry, artillery, andtrucks). A Stuart tank depends on speed, maneuverability, andfirepower for its protection. The lack of High Explosive ammunitionmade them vulnerable to any Japanese soldier with an anti-tank gun.Later, some HE shells were made available but only through fieldmodification of existing ammo stocks.
American tanks on Bataan were all controlled directly by thehighest command authority, MacArthur’s staff, not by the localcommander. While this peculiar arrangement did not allow the fritteringaway of irreplaceable tanks, it made cumbersome any requests for theiruse. All such requests were made through the Tank Group commanderwho sometimes acquiesced to requests for missions he or hissubordinates judged unsuitable.
Generally, US command was reluctant to commit tanks to battle,often declaring the terrain to be “not suitable.” When they did commit,they sent very small teams and even these would break off the attackthe moment they encountered any sort of enemy anti-tank weapon. Tobe fair, the terrain was closed with very thick jungle, thereby greatlylimiting maneuver and allowing Japanese infantry to creep up on thetank’s blind spots and defeat them in detail. This happened untilUS/Filipino infantry got the knack of closely working with tanks.Surprisingly, Filipino Igorots, a tribe of headhunters only a few monthsbefore, became particularly adept at this. Additionally, the Stuart tankshad visibility problems. In the end, US high command wanted to savethe armor for the big breakout from Bataan and this caused many tanksto end up doing coast watch duty waiting for that big day.
US reluctance to fight would seem to leave the battlefield to theJapanese but they had no real tank doctrine to fill it. To them the tankwas hardly more than an infantry support weapon. Japanese tankswere not allowed independent action and were closely tied to infantryunits in much the same manner as found in French tank doctrine of thetime. This may make sense from the viewpoint that Japan’s mainenemy for decades had been China and China had no armor and hardlyany anti-tank weapons. Japanese armor of most any type could giveconsiderable shock value to any infantry assault. There was noexperience suggesting the need for anything more substantive, otherthan a brief very unpleasant episode in 1939 along the Mongolia-Manchuria border at the hands of the Russians. US forces in Bataanlikewise were short on anti-tank weapons so Japanese armor supportedattacks could make good progress. Indeed, once the Japanese got justa mere three tanks (one of these was a captured Stuart!) ashore on
© 2010 Compass Games, LLC 36
BATAAN!: THE BATTLE FOR THE PHILIPPINES - 1942

Corregidor, the whole island defense went to pieces. After the battle,the Japanese realized they would need heavier tanks yet to deal withthe Americans (as well as the Russians too) but they were already wellinto the war and resources for change would be hard to find.
Could the Americans Have Held Longer?By Vance von Borries“War’s objective is victory – not prolonged indecision. In war there isno substitute for victory.”- MacArthur
Many military historians treat the battle for Bataan with an unstatedfatalism, as though events would bring down the brave defendersregardless of what they could have done. Certainly there is nocontention that the defenders could have held out the nearly two and ahalf years MacArthur took to return to the Philippines (at Leyte), butmight they have held for a few more months in some sublime epic ofcourage like Thermopylae or the Alamo? The most attainable goalwould be to hold until the rainy season and force the Japanese tobesiege them through that too, gaining perhaps another six months.Sadly, barring major changes of circumstance, the Bataan defenderslikely held just about as long as they were going to hold. At the end theJapanese revised their plans to allow for the fighting to continue untilabout the end of April. This was calculated about right.
What constitutes a military victory for the US? For the most partthe solution is found in denying the Japanese a rapid victory. Japanesewar strategy centered on seizing as many resources as possible andexpanding the empire defense perimeter as much as possible to be inthe best position to parry the West’s inevitable counter-offensive.Denying the Japanese the use of Manila Bay kept the lid on the bestharbor of the East, the true “Pearl” of the Orient. Further, an armedgarrison in their rear would necessarily occupy Japanese troops andmaterials needed for conquests elsewhere. For instance, had theJapanese 48th Division become embroiled in Bataan fighting it couldnot have been used in the conquest of Java where it was sorely neededto help defeat an Allied force similar in size to that in all the Philippines.American victory then becomes defined as one of occupying as manyJapanese as possible for as long as possible.
Was the means to resist available to the US? More locallyavailable materials certainly were available but through his indecisionMacArthur lost the opportunity to collect more. A lot of supply andmaterial is necessary to obtain the means and perhaps the extra thatcould have been available would not have been decisive. But, howmuch was wasted?
The first US loss was its offensive capability. All relied upon airpower and this relied upon a small B-17 bomber force that had justarrived. Together with a large submarine force the bombers were toattack any Japanese landing attempt, defeating them at sea before theyever got ashore. Things worked out just the opposite. In a fiasco ofmissed signals, confusion of when to fly, lack of dispersion, andinadequate planning, Japanese aircraft caught the US on the ground atClark Field in a series of attacks that destroyed half of the availablemodern US aircraft in the opening day of the war. MacArthur even hadsome of the Japanese signal intercepts. Yet had US aircraft not beencaught on the ground, it is questionable about how much 36 B-17scould have accomplished. The hundreds of Japanese aircraft on
Formosa were expecting an attack and US fighters did not have therange to accompany the bombers to Formosa. Even the back-up planof B-17 attacks on convoys would have proved unrealistic as later warevents demonstrated the real difficulties of high level pin-point bombing.Two days later, Japanese air attacks destroyed the US naval base atCavite (near Manila). This effectively ended the US submarine threat.
Even though the US now lost its offensive capability, MacArthurwas reluctant (probably for political reasons) to shelve the idea of beachdefense. He realized from 8 December that he had to do so but did notshift back to the pre-war WPO-3 Plan until 23 December, the day afterthe main Japanese landings in Lingayen Gulf. This lost two criticalweeks. The WPO-3 Plan called for the abandonment of the whole ofLuzon, and much of the Philippines, but for the Bataan Peninsula. Inthis redoubt the US was to hold until relieved, assumed by pre-warplanners to be six months later.
Because of the late decision to withdraw, shortages of all sortsoccurred. It is generally agreed that the most critical shortage was thatof food and that this lost the battle. Given the decision to pull back intoBataan the first requirement is to secure adequate food for a long siege.Ample food was available at Cabanatuan, well north of Bataan, butthese stocks could not be released due to food distribution laws. Oncethe Japanese landed at Lingayen Gulf there was not enough time to getthese stocks moved even if released. And this was not the only foodreserve abandoned in the haste of retreat. Given the emergencysituation authorities failed to control who could seek shelter in Bataan.The WPO-3 Plan called for the evacuation of all civilians from Bataan.Instead, 26,000 civilians managed to flee into Bataan, many as a resultof Japanese prodding. Humanitarian needs required that they be fedbut the only food available was the same limited food stock reserved forthe military. Finally, after all the sorting out of personnel, the fooddistribution system remained so chaotic that front line troops were notgetting their fair share of the ration. Too much was hijacked along theway. The army on Bataan was on half rations from the start. Had allproblems been administratively corrected earlier, greater rations couldhave been issued with a resultant improvement in efficiency. But nomatter how actual stocks were distributed, existing food was destined torun out about when it did. At the time of surrender only a two-day stockremained.
Ammunition stocks presented the next big hurdle. Actually inBataan were substantial amounts and for some weapons there were noshortages. Artillery ammunition, however, was rationed from the start aswell as anti-aircraft ammunition. In fact the trickle of supplies that didarrive included AA ammo. Should US forces hold on until the start ofrainy season likely all ammunition would have been severely rationed.
The US-Filipino army was not well motorized but fuel too wouldhave been exhausted before rainy season if the Japanese continuedtheir attacks. Everyone recognized the importance of fuel and hoardedit so much so that it was rationed almost right away. Despite this anoticeable shortage developed by the end of January and a fuel crisishad developed by March. If no fuel was available the precious 155mmguns could not have been moved, let alone the tanks.
Medical supplies began short and by mid-February wereexhausted. As a result three-quarters of personnel were on sick call wellbefore the actual surrender, let alone make it to rainy season. This likelyhad as much to do with poor hygiene as the poor diet. Hygiene
© 2010 Compass Games, LLC 37
BATAAN!: THE BATTLE FOR THE PHILIPPINES - 1942

problems could have been corrected but in emergency conditions thiswas not a priority item.
Could US forces somehow have stood off the Japanese militarily?Here too the solutions are few. Later, all would hinge on an effectivewithdrawal of men and supplies into Bataan and sufficient time toevacuate everything. US command achieved an outstanding success inpulling military units back into Bataan relatively intact. An earlierwithdrawal would have hardly achieved more in terms of personnel butmight have provided more communications gear and engineeringequipment and certainly more food. All this was essential for better anddeeper fortifications as the army would also be better fed. The Aprilposition was strong and even admired by the Japanese but it lackeddepth. No switch lines or reserve positions existed beyond the tacticallevel. Had these existed, and with a good communications net, reservesmight have arrived in time to seal off the Japanese April breakthrough.Facing a whole new fortified line the Japanese likely would havestopped to reorganize for yet another set-piece operation.
Some ideas would not have worked. An earlier withdraw intoBataan would likely have drawn in more troops from out-lying islands,since the WPO-3 Plan requested them. Given their poor level oftraining, this would only have resulted in more mouths to feed, offsettingany gain from exclusion of civilians. Once the initial Japanese offensivedied out, US command discussed marching north to reoccupy old linesand maybe reoccupy Manila. The assessment of this discussionconcluded, correctly, that this would have strung out US units creatinga situation ripe for Japanese counterattack. Despite the morale lift itwould have likely accelerated the drain on resources deemed essentialfor holding Bataan.
Then there was the final folly. When MacArthur left he placedWainwright in command of only Bataan and Corregidor. ThenWashington interfered and in some spasm of political nervousnessmade Wainwright commander of all the Philippines. Had Washingtonnot done this, the Japanese would have had to reduce each islandseparately, a very time consuming process, and guerilla war wouldhave been intense. This likely would have caused the Japanese toabandon more islands and thereby just perhaps have allowed the US toreturn earlier.
20.4 Developer’s NotesAttrition: A key feature in Bataan! is the attrition system. The
Bataan campaign was the relatively rare campaign in World War II inwhich attrition due to lack of supplies and disease significantly affectedboth sides. Although the dire supply situation that faced Filamericanforces is well-known, the Japanese also suffered major losses due todisease. For example, by February 15th when the Japanese begantheir retreat northward to defensive positions, Japanese losses due tobattle casualties and disease were so great, that the Japanese “14thArmy had ceased to exist as a fighting force” (see Whitman, Bataan:Our Last Ditch, p. 377). After much tinkering during playtesting, Ibelieve that Bataan!’s attrition system captures both the situation facedby the Japanese in mid-February when they could no longer attackeffectively and the situation faced by the Filamericans in April that ledto the surrender of the Allied army on Bataan.
For players who are concerned that the attrition system seems to
hurt the Japanese more than the Filamericans early in the game, keepin mind that several other rules besides attrition show the effects ofdisease and lack of supply: (1) the inability of the Filamericans toactivate all of their divisions most turns and (2) the fact that Filamericandivisions usually only activate once per turn. In addition, at least initially,the Filamerican army is considerably larger than the Japanese armyand is on the defensive, so losses due to attrition do not impair itsabilities as quickly as the Japanese.
Invasions: The invasion rules are designed to make it difficult tosuccessfully invade defended beaches. Historically, the Japanese hadto conduct their invasions at night with little geographical informationabout the places they were invading. As a result, their invasions wereplagued with confusion and forces could be landed many miles fromwhere they were supposed to land. For example on theevening/morning of January 22/23, “One group of 300 men landed atLongoskawayan Point, ten miles south of the intended landing point,”(see Whitman, Bataan: Our Last Ditch, p. 254). Once ashore, the smalland ill-prepared invasion forces were quickly bottled up by thedefending Filamericans. As long as the Filamericans divert forces todefend the beaches, it will be difficult for the Japanese to make asuccessful invasion.
Emergency Supply: Another issue that I felt needed to beaddressed in Bataan! is that each of the players, and in particular, theUS player, has much more information about each other forces than thehistorical commanders did. Consider that at least initially, UScommanders believed that their forces were actually outnumbered bythe Japanese Army. However, a US player just taking a quick glance atthe map, can see that the situation is actually the reverse. Also, the USplayer can, as the historical US commanders could not, see preciselywhere the Japanese supply line is not garrisoned. In addition, due to theactivation chit mechanism used in Bataan!, the US player will oftenhave one activation at the end of the turn to which the Japanese playercannot respond.
Therefore, to prevent the US player from making major ahistoricaladvances into the Japanese rear for the sole purpose of cutting supplylines, I suggested to Vance that we add the emergency supply rules forthe Japanese. Although the US player can still try to cut the Japanesesupply line if he commits to a significant northward advance, at least theJapanese player will have a turn to try to re-open the supply line beforefeeling the effects of being out of supply.
During playtesting, the question was raised about why naval andair units are treated differently. Here is the gist of the idea.
Naval units: Readiness for naval units represents the need torefuel, re-arm, etc, which could take some time. But naval units arelargely unaffected by weather, the terrain of the defending hex, etc. Ifthe naval unit was fueled and armed, a commander could pretty muchdepend on it conducting an amphibious invasion, shooting its guns at aparticular time, etc.
Therefore, naval units rolling for readiness at the beginning of theturn represents whether they were able to refuel, re-arm, etc. If a navalunits is successful in becoming “ready” for operations, the commanderwill generally know at that time whether it is available.
Air units: Compared to most naval units, air units require fewerresources and less time make “ready”. They could even make multipleruns during the day. However, compared to naval units, the availability
© 2010 Compass Games, LLC 38
BATAAN!: THE BATTLE FOR THE PHILIPPINES - 1942

of air units where and when ground forces need them is moreproblematic. Weather can ground air units, air units may not be able tofind an enemy that has moved from a previously reported position, canthey find the enemy, do they attack at an appropriate time of thebattle?). For the above reason, air units are always made ready duringthe Readiness Phase, but require an ER check to determine whetherthey will affect a given combat as Close Air Support.
For naval interdiction missions by air units, no ER check isnecessary to place air units, because, they are just scouting the oceanfor enemy ships (i.e. they are not trying to coordinate with ground forcesand there is no terrain). Furthermore, because this is a several dayactivity, the effect of weather at a particular day or hour (as would bethe case with respect to an air unit supporting a ground attack) is less.
As a result, with relatively simple rules, the “differences in feel” ofnaval support and air support (and artillery support) are hopefullypreserved as shown on the attached Combat Resolution Sequence ofthe Mobile CRT (an identical sequence is on the Assault CRT).
I will admit that the fact that Vance’s games have been so well-received in the past makes it somewhat intimidating to be the developerof one of his games: I live in fear that I will mess up a game that had awell thought out game system and rules when I first saw them. Myoverall goal as a developer has been to make sure that Bataan!systems, such as Attrition, reflect the important factors that made theBataan campaign different from other historical campaigns in WorldWar II, while not slowing down play significantly. To this end, duringplaytesting, if I found players, including myself, were constantly lookingup a particular rule, the rule in summarized form, was added to thecharts or Expanded Sequence of Play. With the exception of looking upthe special event descriptions, most of the time, players should be ableto play Bataan! using just the Expanded Sequence of Play and thecharts without looking up rules in the rulebook.
20.5 Game CreditsDesigner: Vance von BorriesDeveloper: Mark GuttagGame Graphics: Tim SchleifBox Design: Brien Miller, Tim SchleifResearch: Vance von Borries, Gene Dickens, Mark PitcavageContributors: Alan Rothberg, Steve ZollnerIndexing: Robert J. WrightPlaytesting: Robert Gamble, Peter Landry, John Vasilakos,
Eric Guttag, Richard Diem, Scott Firestone, RandyLein, Tom Meier, Dave Peashock, Leigh Toms,Sean Turner, Bob Woodson
Produced by: Ken Dingley and Bill Thomas for CompassGames, LLC.
Special Thanks: To Vance von Borries for putting his trust in us.
EXTENDED EXAMPLE OF PLAYThis extended example of play shows the first turn (Game Turn 3) of asample game of Scenario #2. The Japanese Player, having learnedfrom the historical failure of the frontal assault on the Abucay Line, theJapanese player decides to instead focus his initial attacks on theWestern flank of the Filamerican forces.Refer to the Set-up instructions for Scenario #2 on Japanese Set-UpCard #1 and US Set-Up Cards #1, as well as in Section 19.2 of theRules. As indicated in Rules 19.24f, VP markers are placed on their USside in hexes 3315 (Abucay Hacienda), 3717, 3915 (Abucay) to indicateUS control.Note: There is no need for the US forces to guard the coast in thisscenario, because there are no ground units in Manila, either at start oras reinforcements, so there can be no invasion on the East Coast. TheJapanese barge units are included in this scenario, because they canstill potentially provide NGS against coastal hexes.
Game Turn 3 - January 11-14, 1942A. Strategic Segment1. Special Events Phase: Japanese Player secretly draws Event F(Banzai Charge). US Player secretly draws Event N (Activate AnyOne Formation).
2. Readiness Phase: No air units need to be moved to Ready Box. Nonaval units need to pass ER Check to move to Ready
3. Reinforcement Phase: No reinforcements for either side. No USSupply Points in this scenario. US 21st Division and 31st Divisionare already In Reserve. No other units placed in Reserve.
4. Naval Phase: US has no naval units. Japanese Player chooses toplace no naval units.
5. Forage Phase: Forage Phase ignored in this scenario.6. Supply Status Phase: All units for both sides are In Supply.7. Initiative Phase:a. The Japanese Player automatically has the Initiative on GameTurn 3. The Initiative DRM marker is currently set to zero (0) onthe General Records Track (not shown). The Initiative DRMmarker should be on its Japan Has the Initiative Side.
b. The Japanese Player chooses the 16th Division to activate firstand sets aside the AM for this Formation aside. He places theremaining 16th Division AM and the two 65th Brigade AMs in hisopaque cup (AM pool). The US player places the AMs for the41st Division, 51st Division and Philippine Scouts (all of his AMs)in his opaque cup (AM pool).
B. Operations Segment1ST JAPANESE OPERATIONS SEQUENCEThe Japanese Player is the First Player and activates the 16th Divisionfor a Mobile sequence to maximize its movement. Japanese Playerplaces 16th Division AM on its space on the Activated Formations Track.
1. Movement Phasea. Movement1+2/9, 1(-9) and 6+7/9 spend 8 MPs to move to 3214 (2 MPs for4 trail hexes in clear terrain, 4 MPs for 4 hexes in clear terrain, +1MP for crossing river hexside 3212/3213 and +1 MP for the jungle
© 2010 Compass Games, LLC 39
BATAAN!: THE BATTLE FOR THE PHILIPPINES - 1942
in 3214). There is no +1 for entering a ZOC in hex 3214, becauseZOC do not extend into jungle hexes.9/16 HQ spends 4 MPs to move to 3211 (3 MPs for 3 clear terrainhexes +1 MP for crossing river hexside 3409/3410). The 9/16 iswithin command range (4 hexes) of the 48th Mtn to allow thisartillery unit to be potentially activated by the 9/16 HQ later in theturn.II(-9), 11+12/9 and III(-)9 spends 8 MPs to move to 3313 (5 MPsfor 5 clear terrain hexes, +1 MP for crossing river hexside3509/3410, +1 MP for crossing river hexside 3311/3312 and +1MP for the jungle in 3313). There is no +1 for entering a ZOC inhex 3214, because ZOC do not extend into jungle hexes.16 (Eng) spends 6 MPs to move to 3412 (4 MPs for 4 clear terrainhexes, +1 MP for crossing river hexside 3610/3510 and +1 MP forcrossing river hexside 3411/3412).
b. Combat DeclarationThe Japanese units in hexes 3214 and 3313 declare combat onthe US units in hex 3314. The Japanese must choose the AssaultCRT, because the defending units are in a fortification hex. Sothe Declared Attack markers are placed on their Assault side withthe arrows of each marker pointing to 3314 (the Defending Hex).
2. Enemy Reaction PhaseThe US units in 3314 are in a fortification hex, and, therefore, mayattempt a No Retreat Declaration even though their hex does notcontain their HQ [9.34]. Because the US player doesn’t want to giveup the fortification hex, he attempts a No Retreat Declaration. usingthe 3/51 as the Lead unit. He rolls a 6, exceeding the ER of the Leadunit, so the No Retreat Declaration attempt is unsuccessful. Had theNo Retreat Declaration be successful, the Combat Die Roll wouldhave received a +1 DRM, but any R result would have resulted in astep loss for the Lead ground unit [9.36].
3. Combat PhaseAttack on Hex 3314a. The Japanese player designates 11+12/9 (ER 6) as the Leadattacking ground unit for the attack. The US player designatesthe 3/51 (ER 4) as the Lead defending ground unit for the attack.The Declared Attack markers are removed for this attack.
b. No NGS is available to either side.c. The Japanese player chooses not to attempt CAS with his airunits. The US player has no air units he can use for CAS.
d. There are no artillery units of the Active Formation within range ofthe 16th HQ, so the Japanese player does not designate anartillery unit for support. (Although he 48th Mtn is an Armyartillery unit within the command range of the 16th HQ, thisartillery unit may not be used for artillery support for attackingunits, because this artillery unit was not activated this activation).The US player chooses to use the 51(+) Art unit in hex 3314 assupporting artillery, so its support strength of 2 will be usedinstead of its defense strength of 1. The 51(+) is automaticallycombat coordinated, because the artillery is in the DefendingHex. The US player also chooses to use the 86 Art unit. . The 86Art unit is within 4 hex command range of the 51st HQ and iswithin range of the defending hex, so the 51st HQ can command
this Army artillery unit.e. No artillery coordination roll for Japanese player since he is notusing artillery for this attack. The US player rolls a 5 on theArtillery Coordination Check. This roll is modified by +1 for thecombat occurring in Mobile Sequence and +1 for the tropicalgrass terrain in 3314 for a net roll of 7, which is greater than theER of the artillery unit but less than 10. So 2 support strengthpoints, half of the artillery unit’s support strength of 4, may beadded to the defense strength of the defending units. However,because the defense strength of the defending ground units is 3(because 51(+) Art is using its support strength, not its defensestrength), it is already receiving 2 support points from the 51(+)Art, the 86th can only contribute 1 support strength points of thepossible 2 support strength points it could contribute, because thetotal amount of support strength from artillery cannot exceed the(modified) defense strength of the defending units [12.13g]. Boththe 51(+) Art and 86 Art are flipped to their fired side.
f. The Assault CRT is being used and all of the attacking units areof the same formation, so the ground units are automaticallycombat coordinated [10.43a].
g. The total attack strength is 30, the total defense strength is 6 (3 forground unit defense strength +3 for support strength from 51(+) Artand 86 Art), so the combat odds are 30:6, reduced to 5-1.
h. The Japanese Player announces that he is using the BanzaiCharge Event F, which is allowed because the Assault CRT isbeing used. The Banzai Charge Event gives the attack anadditional -3 DRM, because a Philippine unit (as opposed to a tanUnited States unit) is the Lead defending unit. The DRMs are: +1for the Abucay Line fortification terrain in the defending hex, +1for attacking across a river hexside, -2 for the difference betweenthe Lead defending unit’s ER of 4 and the Lead attacking unit’sER of 6, -3 for the Banzai Charge Event. So the net DRM is -3.Note: The play of the Banzai Charge Event immediately beforethe DRMs are calculated for the combat illustrates a general ruleof thumb when playing an Event i.e. it can usually be playedimmediately before the portion of the movement phase, combatphase, etc. that it effects. However, an Event which affectscombat cannot be played to change the result of the combat afterthe fact. For example, in this combat, the Japanese player couldnot have waited to see if there would be an unfavorable combatresult before playing the Banzai Charge Event.
i. The Japanese player rolls on the 5-1 column of the Assault CRTwith a -3 DRM, and rolls a 7, modified to a 4 for a result of D1R,a result that only affects the defending units.
j. The 3/51 takes a step loss to satisfy the “1” portion of the combatresult and flips to its reduced strength side. Both the 3/51 and51(+1) choose to retreat only 1 hex to 3315.
k. Japanese units 1+2/9, 6+7/9 and II(-)9 advance into the vacateddefender hex. Only a 1 hex advance is allowed, because theAssault CRT was used for this combat.
The Japanese player returns Event F to the Event Pool. This finishesthe 1st Japanese Operations Sequence. Play passes to the US player.
© 2010 Compass Games, LLC 40
BATAAN!: THE BATTLE FOR THE PHILIPPINES - 1942

1ST US OPERATIONS SEQUENCEThe US Player draws the Philippine Scouts AM from the AM Pool. TheUS Player chooses to Activate the Philippine Scouts using a Mobilesequence. US Player places Philippine Scouts AM on its space on theActivated Formations Track.
1. Movement Phasea. MovementThe 2 Prov Art, the 21(-) Art, A/194 and B/194 are within the 4hex command range of the Philippine Scouts HQ in 3919 and areautomatically activated for movement. Had any of these unitsbeen outside the command range of the Philippine Scouts HQ,each of these Army units could have attempted to activate bypassing an ER check3/57 spends 4.5 MPs to move to 3216 (0.5 MP for one road hexin clear terrain, 3 MPs for 6 trail hexes in clear terrain and 1 MPfor trail hex in rough terrain in 3316). Note that the jungle terrainin hexes 3716, 3516 and 3417 are ignored because the unit ismoving along a trail.2/57 spends 4.5 MPs to move to 3315 (1 MP for one clear terrainhex, 1 MP for trail hex in rough terrain in 3616, 1.5 for 3 trail hexesin clear terrain and +1 MP for entering ZOC in 3315). Note thatthe tropical grass terrain in hex 3416 is ignored, because the unitis moving along a trail.2 Prov spends 3 MPs to move to 3416 (2 MPs for 4 trail hexes inclear terrain and 1 MP for trail in rough terrain in 3616). The 2Prov is marked with a First Activation marker, because it is a redbox MP Army unit and is eligible to be activated a second time.1/31 spends 5.5 Mps to move to 3415 ( 1 MP for 2 road hexes,1.5 MPs for 3 trail hexes in clear terrain, 1 MP for trail in roughterrain in 3616, 1 MP clear terrain, and +1 for the jungle terrain inhex 3415. Because ZOC do not extend into the jungle terrain inhex 3415, there no additional cost to move adjacent to theJapanese units in hex 3314.1/57 spends 3.5 MPs to move to hex 3414 (2.5 MPs for 5 trailhexes in clear terrain and +1 MP for entering ZOC in 3414).3/31 spends 6 MPs to move to hex 3316 (2 MPs for 4 road hexes,3MPs for 6 trail hexes in clear terrain and 1 MP for trail hex inrough terrain in hex 3316).2/31 spends 5 MPs to move to hex 3513 (2.5 MPs for 5 roadhexes, 1.5 MPs for 3 trail hexes in clear terrain and 1 MP for clearterrain hex).1/45 spends 5.5 MPs to move to 3814 (5 MPs for 10 road hexesand 0.5 MP for 1 trail hex in clear terrain).2/45 spends 5.5 MPs to move to 3914 (5.5 MPs for 11 roadhexes).3/45 spends 6 MPs to move to 3914 (6 MPs for 12 road hexes).24/P Art spends 2.5 MPs to move to 3517 (0.5 MP for 1 road hexand 2 MPs for 4 trail hexes in clear terrain).Philippine Scouts HQ spends 3 MPs to move to 3517 (1 MP for 2road hexes and 2 MPs for 4 trail hexes in clear terrain).21(-) Art spends 5 MPs to move to 3316 (1.5 MP for 3 road hexes,
2.5 MPs for 5 trail hexes in clear terrain and 1 MP for trail hex inrough terrain in hex 3316). 21(-) Art is marked with a FinalActivation Marker.A/194 spends 7 MPs to move to 3616 (1 MP for 1 clear hex, 4MPs for 8 road hexes, 1 MP for 2 trail hexes in clear terrain and1 MP for 1 trail hex in rough terrain). A/194 is marked with FirstActivation Marker.B/194 spends 7 MPs to move to 3713 (1 MP for 1 clear hex, 4.5MPs for 9 road hexes, 0.5 MP for 1 trail hex in clear terrain and 1MP for clear terrain hex). B/194 is marked with First ActivationMarker.
b. Combat Declaration.No combat declarations by Activated Formation.
2. Enemy Reaction PhaseBecause there are no combat declarations, no enemy reactions arepossible.
3. Combat PhaseNo attacks by Activated Formation.
This finishes the 1st US Operations sequence. Play passes to theJapanese Player.
2ND JAPANESE OPERATIONS SEQUENCEThe Japanese Player draws the 65th Brigade AM from the AM Pool andactivates the 65th Brigade for a Mobile sequence to maximize itsmovement. Japanese Player places 65th Brigade AM on its space onthe Activated Formations Track.
1. Movement Phasea. MovementThe 65th HQ is used to automatically activate 1/7 Arm, 2/7 Arm,3/7 Arm and 4/7 Arm and 1 Art in 3503, 15 Mtn Art in 3504 and9(+) AT in hex 3806 which are all within the 4 hex commandrange of 65th HQ in 3806.1+2/141, 3+4/141 and 5+6/141 spend 8MPs to move to hex 2913(5 MPs for 12 trail hexes in clear terrain, 1 MP for 1 trail hex inrough and 1 MP for 1 trail hex in hill terrain in hex 2913).7+8/141spends 5.5 MP to move to 3511 (2.5 MP for 5 trail hexesin clear terrain, 2 MPs for 2 clear terrain hexes and +1 MP forcrossing river hexside 3509/3510).1+2/142, 3+4/142 and 5+6/142 spend 7.5 MPs to move to 2912(0.5 MP for 1 road hex, 6 MPs for 12 trail hexes in clear terrainand 1 trail in rough).7+8/142 spends 2 MPs to move to 3811 (1 MP for two road hexesand 1 MP for two trail hexes in clear terrain).65 Eng spends 1.5 MPs to move to 4012 (1.5 MPs for 3 roadhexes) .9(+) AT spends 3.5 MPs to move to 4012 (3.5 MPs for 7 roadhexes). 9(+) AT is marked with a Final Activation Marker.1/7 Arm, 2/7 Arm and 3/7 Arm spend 4 MPs move to 4007 (4 MPsfor 8 road hexes). 1/7 Arm, 2/7 Arm and 3/7 Arm are marked witha First Activation marker.
© 2010 Compass Games, LLC 41
BATAAN!: THE BATTLE FOR THE PHILIPPINES - 1942

4/7 Arm spends 5 MPs to move to 3809 (4 MPs for 8 road hexes,1 MP for two trail hexes in clear terrain). 4/7 Arm is marked witha First Activation marker.1 Art spends 5 MPs to move to 3609 (1 MP for 2 road hexes, 4MPs for 4 clear terrain hexes). 1 Art is marked with a FinalActivation marker.15 Mtn Art spends 7 MPs to move to 3109 (0.5 MP for 1 roadhexes, 2.5 MPs for 5 trail hexes in clear terrain and 4 MPs for 4clear terrain hexes). 15 Mtn Art is marked with a First Activationmarker.65 HQ spends 2 MPs to move to 3607 to allow it to activate theArmy Artillery units in hex 3603 during the 65th Brigade’s 2ndactivation (2 MPs for 2 clear terrain hexes).
b. Combat DeclarationNo combat declarations by Activated Formation.
2. Enemy Reaction PhaseBecause there are no combat declarations, no enemy reactions arepossible.
3. Combat PhaseNo attacks by Activated Formation.
This finishes the 2nd Japanese Operations Sequence. Play passes tothe US Player.
2ND US OPERATIONS SEQUENCEThe US Player draws the 41st Division AM from the AM Pool. The USPlayer chooses a Pass Sequence for this Formation. US Player places41st Division AM face down in his Activation Pool [7.22] for lateractivation or possible later attempt at combining formations [7.3].This finishes the 2nd US Operations Sequence. Play passes to theJapanese Player.
3RD JAPANESE OPERATIONS SEQUENCEThe Japanese Player draws the second 16th Division AM from the AMPool and activates the 16th Division for a Mobile sequence to allow oneattack to be made on the Mobile CRT. Unlike on the Assault CRT, anyretreat result on the Mobile CRT must be two hexes in length. TheJapanese Player hopes to open a two hex deep gap in the US line.Japanese Player places second 16th Division AM on its space on theActivated Formations Track.
1. Movement Phasea. Movement48th Mtn Art, which is within 4 hex command range of 9/16 HQ,is activated, but does not move. Final Activation marker placedon 48th Mtn Art.11+12/9 and III(-)9 spend 2 MPs to move to 3214 (1 MP for 1 hexof clear terrain and +1 MP for jungle terrain).16 Eng spends 3 MP to move to 3313 (2 MP for 2 hexes of clearterrain and +1 MP for jungle terrain).
b. Combat DeclarationAll of the units in 3214 declare an Attack on hex 3215 using theAssault CRT (mandatory because the Defender Hex is a
fortification) and an Assault Declared Attack Marker is placed onthese attacking units with the arrows pointing at 3215.All of the units in 3314 declare an Attack on hex 3415 using theMobile CRT (permitted because this is a Mobile Sequence andthe Assault CRT is not mandatory ) and a Mobile Declared AttackMarker is placed on these attacking units with the arrows pointingat 3415.
2. Enemy Reaction PhaseThe US unit in 3215 is in a fortification hex, and, therefore, mayattempt a No Retreat Declaration even though their hex does notcontain its HQ [9.34]. Because the US player doesn’t want to giveup the fortification hex, he attempts a No Retreat Declaration usingthe 2/53 (the only unit in the hex) as the Lead unit. He rolls a 4,matching the ER of the Lead unit, so the No Retreat Declarationattempt is successful. A No Retreat marker is placed on thedefending unit.The US unit in 3415 does not meet the requirements to eitherattempt a No Retreat Declaration or a Combat Refusal.
3. Combat PhaseAttack on Hex 3215a. The Japanese player designates 11+12/9 (ER 6)as the Leadattacking ground unit for the attack. The US player designatesthe 2/53 (ER 4) as the Lead defending ground unit for the attack.The Declared Attack marker is removed for this attack.
b. No NGS is available to either side.c. The Japanese Player commits the two Japanese Air units in theReady Box at Clark Field to CAS. The US player has no air unitshe can use for CAS. The Japanese player chooses Ida Unit asthe Lead air unit and performs an ER check. The die roll is a 5,which is modified by +1 DRM for the combat occurring in a MobileSequence for a net die roll of 6, which exceeds the Lead air unit’sER of 5. Therefore, no CAS is available and both air units areflipped to their Flown sides and placed in the Flown Box at ClarkField.
d. The Japanese designates the 48th Mtn Art (which activated aspart of the 16th Division this Activation) as supporting artillery.Then the US designates the 21(-) Art for defensive fire support.Even though the 21(-) Art is on its Final Activation side, it has notyet fired this turn and is within the 4 hex command range of the51 HQ. The defending hex is also within the 2 hex range of the21(-) Art, so this artillery unit is available to provide Fire Supportto the unit defending in hex 3215.
e. The Japanese player rolls a 6 on the Artillery Coordination Check.This roll is modified by +1 for the combat occurring in MobileSequence for a net roll of 7, which is greater than the 6 ER of the48th Mtn Art but less than 10. So 2 strength points, half of theartillery units support strength of 4, may be added to the attackstrength of the attacking units. The US Player rolls a 7 on theArtillery Coordination Check. This roll is modified by +1 for thecombat occurring in Mobile Sequence for a net roll of 8, which isgreater than the 5 ER of the 21(-) Art but less than 10. So 1strength point, half of the artillery units support strength of 2, maybe added to the attack strength of the attacking units. Both the 48
© 2010 Compass Games, LLC 42
BATAAN!: THE BATTLE FOR THE PHILIPPINES - 1942

Mtn Art and 21(-) Art are flipped to their fired side.f. The Assault CRT is being used and all of the attacking units areof the same formation, so the ground units are automaticallycombat coordinated [10.43a].
g. The total attack strength is 17 (15 for ground unit strength + 2 forsupport strength). The total defense strength is 4 (3 for groundunit defense strength +1 for support strength), so the combatodds are 17:4 reduced to. 4-1.
h. The DRMs are: +1 for the Abucay Line fortification, +1 for NoRetreat Marker, +1 for rough terrain in defender’s hex, +1 forattacking across a river hexside, -2 for the difference between theLead defending unit’s ER of 4 and the Lead attacking unit’s ER of6. So the net DRM is +2.
i. The Japanese player rolls on the 4-1 column of the Assault CRTwith a +2 DRM, and rolls a 4, modified to a 6 for a result of DR, aresult that only affects the defending unit. No attacking armorunits are involved in the attack and the defending units do notmeet any of the armor attrition eligibility requirements [11.23], sothere is no armor attrition, even though this is a shaded boxresult.
j. Because of the No Retreat Marker, the retreat result is convertedinto a step loss on the 2/53 unit which remains in place on itsreduced side. The No Retreat Marker is removed from thedefending unit.
k. Because there is no retreat by the defending unit, there is noadvance after combat.
Attack on Hex 3415a. The Japanese player designates 1+2/9 (ER 6) as the Leadattacking ground unit for the attack. The US player designatesthe 1/31(ER 6) as the Lead defending ground unit for the attack.The Declared Attack marker is removed for this attack.
b. No NGS is available to either side.c. No air units are available for CAS support for either side.d. There are no artillery units within range of the Japanese 65 HQthat were activated this activation, so the Japanese Player doesnot designate artillery support. Then the US designates the 24/PArt and the 1 Prov for fire support and can use the 24/P Art withan ER of as the Lead artillery unit. The 1 Prov Art is within the 4hex command range of the Philippine Scouts HQ in 3517, andhex 3415 is within the 1 hex range of 1 Prov.
e. The US Player rolls a 3 on the Artillery Coordination Check. Thisroll is modified by +1 for the combat occurring in MobileSequence and +2 for the jungle terrain in the defending hex for anet roll of 6, which is less than the 7 ER of 24/P Art, so the artilleryunits pass their combat coordination check and contribute theirfull support strength of 5 (3 support points from 24/P Art and 2support points from 2 Prov Art). 24/P is flipped to its Fired side.2 Prov Art is not flipped, because it is a self-propelled artillery unit[16.31].
f. The Mobile CRT is being used and all of the attacking units are ofthe same formation and are in the same hex, so the ground unitsare automatically combat coordinated [10.43b].
g. The total attack strength is 15 (all ground unit strength). The totaldefense strength is 10 (5 for ground unit defense strength +5 forsupport strength), so the combat odds are 15:10 reduced to 3-2.
h. The DRMs are: +1 for jungle terrain in defender’s hex, +0 for thedifference between the Lead defending unit’s ER of 6 and theLead attacking unit’s ER of 6. So the net DRM is +1.
i. The Japanese player rolls on the 3-2 column of the Mobile CRTwith a +1 DRM, and rolls a 6, modified to a 7 for a result of A2/D1.
j. The 1/31 satisfies the D1 result by losing a step. As the Leadattacking unit, 1+2/9 must lose the 1st step of the Japanese A2result. 6+7/9 loses the 2nd step of the A2 result.
k. Because there is no retreat by the defending unit, there is noadvance after combat.
This finishes the 3rd Japanese Operations sequence. Play passes tothe US Player.
3RD US OPERATIONS SEQUENCE(PLAY OF ACTIVATE ANY ONE FORMATION EVENT N)Instead of drawing an AM from the AM pool, The US Player plays EvenN “Activate Any One Formation” and chooses to activate the PhilippineScouts using a Mobile sequence. The US Player passes Event N to theJapanese Player. The Japanese Player cannot use Event N until thenext turn.
1. Movement Phasea. Movement88 Art automatically activates (because it is within 4 hexcommand range of Philippine Scouts HQ) and spends 2 MP tomove to 3619 (2 MPs for 4 trail hexes in clear terrain) 88 Art ismarked with Final Activation Marker.2 Prov Art automatically activated (because it is within 4 hexcommand range of Philippine Scouts HQ) and spends 1.5 MP tomove to 3315 (0.5 MPs for 1 trail hex in clear terrain and +1 forentering ZOC). Final Activation marker placed on 2 Prov Art.3/57 spends 3 MPs to move to 3215 (2 MP for rough terrain + 1MP for moving into enemy ZOC).2/57 stays in 3315.1/31 stays in 3415.1/57 spends 2 MPs to move to 3415 (1 MP for one clear terrainhex and +1 MP for jungle).3/31 spends 3.5 MP to move to 3215 (0.5 MP for road in clearterrain , 2 MP for rough hex and +1 MP for entering ZOC).2/31 spends 2 MPs to move to 3414 (1 MP for one clear terrainhex, +1 MP for entering ZOC).1/45 spends 3.5 MPs to move to 3415 (1.5 MPs for 3 trail hexesin clear terrain, 1 MP for 1 clear hex and +1 MP for jungle).2/45 stays in 3914.3/45 stays in 3914.24/P stays in 3517.Philippine Scouts HQ stays in 3517.
© 2010 Compass Games, LLC 43
BATAAN!: THE BATTLE FOR THE PHILIPPINES - 1942
b. Combat Declaration3/31 and 3/57 in 3215; 2/57 in 3315; 1/31, 1/45 and 1/57 in 3415;and 2/31 in 3414 Declare Attack on hex 3314 using Mobile CRT(which is allowed because Japanese units do not benefit fromfortification in their hex). A Mobile Declared Attack Marker isplaced on each stack of units with the arrows pointing at 3314.
2. Enemy Reaction PhaseThe units defending in hex 3314 are Japanese Units and the hex is not a clear hex, but the Japanese units were not required to attempt Retreat Declaration, because the Lead Unit is within range of its formation HQ in hex 3211 (see 9.32).
3. Combat PhaseAttack on Hex 3314a. US player designates 1/57 (ER 7) as the Lead attacking ground unit for the attack. The Japanese player must designate II(-)/9 (ER 6) as the Lead defending ground unit for the attack, because it succeeded in its No Retreat Declaration in the Enemy Reaction Phase. The Declared Attack markers are removed for this attack.
b. No NGS is available to either side.c. No air units are available for CAS support for either side.d. The US designates 2 Prov Art as artillery support for the attacking units. The Japanese designates the 15th Mtn Art and 1 Art as Artillery Support for the defending units. The Japanese Player chooses the 15 Mtn Art as the Lead artillery unit. Both army artillery units are with 4 hexes of the 9/16 HQ and are within range of the Defender Hex.
e. The US 2 Prov Art artillery unit is automatically combat coordinated, because it is in one of the hexes from which the attack originates. The Japanese Player rolls for Artillery combat coordination and rolls an 8. The Artillery combat coordination die roll modifiers are +1 for the combat occurring in a Mobile Sequence and +1 for the Defender Hex containing tropical grass terrain for a net DRM of +2. So the modified Artillery combat coordination die roll is 10, so no artillery support strength is added to the Defender’s combat strength. However, both the 15th Mtn and 1 Art are flipped to their fired sides.
f. Because the attacking units are not in the same hex, they must roll for ground unit Combat Coordination. The ground unit combat coordination modifier is +1 for the attack occurring during a Mobile Sequence. The ground unit Combat Coordination die roll is a 6 which is modified to a 7, which is equal to the 7 ER of the Lead Attacking unit, 1/57, so the attacking units pass their ground unit combat coordination check.
g. The total attack strength is 31 (29 points of combat strength + 2 points of artillery support). The total defense strength is 12, so the combat odds are 29:12 reduced to 2-1.
h. The DRMs are: +1 for No Retreat Marker, -1 for the difference between the Lead defending unit’s ER of 6 and the Lead attacking unit’s ER of 7 (the Japanese do not receive a defensive benefit from the fortification in the hex). So the net DRM is 0.
i. The US player rolls on the 2-1 column of the Mobile CRT with a 0DRM, and rolls a 5, which is not modified, for a result of DR.
j. The DR result is converted into a step loss due to the No Retreatmarker, causing the Lead defending unit, II(-)/9, to lose a step.The No Retreat Marker on the Defending Hex is now removed.
k. Because the Defender Hex is not vacated, there is no advanceafter combat.
This finishes the 3rd US Operations Sequence. Play passes to theJapanese Player.
4TH JAPANESE OPERATIONS SEQUENCEThe Japanese Player draws the second 65th Brigade AM from the AMPool and activates the 65th Brigade for a Mobile sequence to maximizeits movement. Japanese Player places the second 65th Brigade AMon its space on the Activated Formations Track.
1. Movement Phasea. MovementThe 65th HQ is used to automatically activate 9(+) Art and 8 HvyArt in 3603, 1/7 Arm, 2/7 Arm and 3/7 Arm in 4009 and 4/7 Armin 3809.9(+) Art and 8 Hvy Art spend 3.5 MPs to move to 3707 (3 MPsfor 6 road hexes and 0.5 MP for 1 trail hex in clear terrain). 9(+)Art and 8 Hvy Art are each marked with a Final Activation marker.1/7 Arm, 2/7 Arm and 3/7 Arm spend 1.5 MPs move to 4012 (1.5MPs for 3 road hexes). 1/7 Arm, 2/7 Arm and 3/7 Arm are markedwith a Final Activation marker.4/7 Arm spends 2 MPs to move to 3811 (2 MPs for 2 clear hexes).4/7 Arm is marked with a First Activation marker.1+2/141, 3+4/141 and 5+6/141 spend 4MPs to move to hex 3015(2 MPs for 2 trail hexes in rough terrain, +1MP for crossing riverhexside 2913/3014 and +1 MP for crossing river hexside3014/3015; only bridges negate cost for crossing river hexside[8.35c]).7+8/141 stays in 3511.1+2/142, 3+4/142 and 5+6/142 spends 5 MPs to move to 3114 (1MP for 1 trail hex in hill terrain ,1 MP for 1 trail hex in rough terrain,+1MP for crossing river hexside 2913/3014, 1 MP for 1 clear hexand +1 for jungle terrain).7+8/142 stays in 381165 Eng stays in 4012 .65 HQ spends 2 MPs to moves to 3609 (2 MPs for 2 clear terrainhexes).
b. Combat DeclarationAll of the units in 3015 and 3114 declare an Attack on hex 3115using the Assault CRT (mandatory because the Defender Hex isacross river hexside from all attackers) and an Assault CombatDeclaration Marker is placed on each stack of attacking units withthe arrows pointing at 3115.
2. Enemy Reaction PhaseThe defending unit in 3115 does not meet the requirements to either
© 2010 Compass Games, LLC 44
BATAAN!: THE BATTLE FOR THE PHILIPPINES - 1942
attempt a No Retreat Declaration or a Combat Refusal.
3. Combat PhaseAttack on Hex 3115a. The Japanese player designates 5+6/141(ER 7) as the Leadattacking ground unit for the attack. The US player designatesthe 1/53(ER 4) as the Lead defending ground unit for the attack.The Declared Attack marker is removed for this attack.
b. No NGS is available to either side.c. No air units are available for CAS support for either side.d. The Japanese designates the 9(+) Art and 8 Hvy Art (whichactivated as part of the 65th Brigade this Activation) as supportingartillery. The Japanese player chooses the 9(+) Art (ER 6) as theLead artillery unit. Then the US designates the 88 Art (ER 5)(which is within the 4 hex command range of the 51 HQ) fordefensive fire support.
e. The Japanese player rolls a 2 on the Artillery Coordination Check.This roll is modified by +1 for the combat occurring in MobileSequence, +2 for Jungle terrain in the defending hex, for a net rollof 5, which is less than the 6 ER of the 9(+) Art. So 8 points ofsupport (4 for each artillery unit) can be added to the combat.The US Player rolls a 4 on the Artillery Coordination Check. Thisroll is modified by +1 for the combat occurring in MobileSequence, +2 for Jungle terrain in the defending hex, for a net rollof 7, which is greater than the 5 ER of the 88 Art but less than 10.So 1 strength point, half of the artillery units support strength of2 may be added to the defense strength of the defending units.The, 9(+) Art, 8 Hvy Art and 88 Art are flipped to their fired sides.
f. The Assault CRT is being used and all of the attacking units areof the same formation, so the ground units are automaticallycombat coordinated [10.43a].
g. The total attack strength is 30 (22 for ground unit strength + 8 forsupport strength). The total defense strength is 4 (3 for groundunit defense strength +1 for support strength), so the combatodds are 30:4 reduced to 7-1.
h. The DRMs are: +1 for rough terrain in defender’s hex, +1 forattacking across a river hexside, -3 for the difference between theLead defending unit’s ER of 4 and the Lead attacking unit’s ER of7. So the net DRM is -1.
i. The Japanese player rolls on the 7-1 column of the Assault CRTwith a -1 DRM, and rolls a 5, modified to a 4 for a result ofA1/D3R.
j. The 1/53 loses 2 steps and is eliminated. Because the defenderhas fewer steps available to lose (2) than the result (3), theattacker’s loses are reduced by 1 step to a 0 step loss [see11.25].
k. Because the defender hex is vacated and the combat wasconducted on the Assault CRT, the attacking units are allowed toadvance 1 hex. 1+2/141, 3+4/141 and 5+6/141 choose advanceinto 3115.
This finishes the 4th Japanese Operations Sequence. Play passes tothe US Player.
4TH US OPERATIONS SEQUENCEUS Player draws last AM from AM Pool (51st Division AM) and choosesto activate the 51st Division for an Assault Sequence. US Player placesthe 51st Division AM on its space on the Activated Formations Track.The Assault Sequence will allow units from non-active formations toattack hexes also attacked by units of the 51st Division. However, themovement allowance of all units of the 51st Division are halved.
1. Movement Phasea. MovementA/194 is automatically activated (because it is within 4 hexcommand range of 51 HQ ) and spends 2.5 MP to move to 3315(1.5 MPs for 3 trail hexes in clear terrain and +1 for enteringZOC). Final Activation marker placed on A/194.51FA spends 3 MPs to move to 3116 (2 MP for rough hex and +1MP for jungle terrain)2/53 spends 2 MPs to move to 3216 (1 MP for 1 clear hex +1MPfor entering ZOC).51(+) Art spends 2 MP to move to 3316 (2 MP for 1 rough hex).51 HQ spends 2.5 MPs to move to 3517 (1 MP for clear hex, +1MP for jungle terrain and 0.5 MP for one trail hex in clear terrain).1/51 and 2/51 stay in 3414.3/51 stays in 3315.1/52 spends 3 MPs to move to 3718 (1 MP for 1 clear hex, 1 MPfor two road hexes and 1 MP for 2 trail hexes).2/52 spends 3 MPs to move to 3919 (1 MP for 1clear hex and 2MPs for 4 road hexes).3/52 spends 3 MPs to move to 4123 (3 MPs for 6 road hexes).
b. Combat DeclarationBecause this is an Assault Sequence, non-active non-artilleryunits, including Army units that are adjacent to defending unitsthat are being attacked by active units can also attack. 1/51, 2/51and 3/51 declare an attack on the defending units in 3314. Thisallows 3/31 and 3/57 in 3215; 2/57and A/194 in 3315; 1/31, 1/45and 1/57 in 3415 and 2/31 in 3414 to also declare an attackagainst 3314.Because this is an Assault Sequence, the combat must beresolved on the Assault CRT, so an Assault Declaration Marker isplaced on each of stacks of attacking units with the arrowspointing at 3314.
2. Enemy Reaction PhaseBecause the units defending in hex 3314 are Japanese Units andthe hex is not is a clear hex, the Japanese units must attempt a NoRetreat Declaration using the defending unit with the highest ER asthe Lead Unit. In this case, all of the defending units have an ER of6, so the Japanese uses II(-)/9 as the Lead Unit. II(-)/9 rolls a 3 forits No Retreat Declaration, so a No Retreat marker is placed on thestack of defending units.
3. Combat PhaseAttack on Hex 3314a. US player designates A/194 (ER6) as the Lead attacking groundunit for the attack. The US is allowed to use this Army unit as the
© 2010 Compass Games, LLC 45
BATAAN!: THE BATTLE FOR THE PHILIPPINES - 1942
Lead ground unit, because A/194 was activated. Had A/194 notbeen activated, one of the attacking units from the 51st Divisionwould have had to have been chosen as the Lead ground unit.The Japanese player must designate II(-)/9 (ER 6) as the Leaddefending ground unit for the attack, because it succeeded in itsNo Retreat Declaration in the Enemy Reaction Phase. TheDeclared Attack markers are removed for this attack.
b. No NGS is available to either side.c. No air units are available for CAS support for either side.d. Neither side has available artillery units to provide fire support.Even the 2 Prov Art in 3315 cannot be used to provide firesupport, because the 2 Prov Art was not activated this turn.
e. Because neither side has fire support, neither side rolls forartillery coordination
f. Because the attacking units are different formation, they must rollfor ground unit Combat Coordination. The ground unit combatcoordination modifier is -1 for the attack occurring during anAssault Sequence. The ground unit Combat Coordination die rollis an 8 which is modified to a 7, which is more than the 6 ER ofthe Lead Attacking unit, A/194, so the attacking units fail theirground unit combat coordination check.
g. The total attack strength is 38. The total defense strength is 9, sothe combat odds are 38:9 reduced to 4-1.
h. The DRMs are: +2 for Failed Ground unit Coordination +1 for NoRetreat Marker, +0 for the difference between the Leaddefending unit’s ER of 6 and the Lead attacking unit’s ER of 6 (theJapanese do not receive a defensive benefit from the fortificationin the hex). So the net DRM is +3.
i. The US player rolls on the 4-1 column of the Assault CRT with a+3 DRM, and rolls a 1 modified to a 4 for a result of DRd.
j. The DR result is converted into a step loss due to the No Retreatmarker, causing the Lead defending unit, II(-)/9, to lose a step andbe eliminated. The remaining defending units are marked with aDisrupted marker. The No Retreat Marker on the Defending Hexis now removed.
k. Because the Defender Hex not vacated, there is no advance aftercombat.
This finishes the 4th US Operations Sequence. Because the Japaneseplayer has played all of his AMs and because he cannot play theActivate Any One Formation Event until the next turn, the US Playerconducts the next Operations Sequence.
5TH US OPERATIONS SEQUENCEFor his final Operations Sequence, the US Player must choose the 41stDivision AM from the Activation Pool. The US player chooses toactivate the 41st Division for a Mobile Sequence and places the 41stDivision AM on its space on the Activated Formations Track.
1. Movement Phasea. MovementB/194 is automatically activated (because it is within 4 hexcommand range of 41 HQ) and spends 1 MP to move to 3814. (1MP for 1 clear hex). Final Activation marker placed on B/194.
1/41 and 3/41 stays in 3814.2/41 spends 2 MPs to move to 3513 (2 MPs for 2 clear hexes).1/42 stays in 3713.2/42 and 3/42 stay in 3613.1/43 spends 2 MPs to move to 3713 (2 MPs for 2 clear hexes).2/43 spends 1.5 MPs to move to 3713 (0.5 MP for 1 trail hex inclear terrain and 1 MP for 1 clear hex).3/43 stays in 3513.41 Art spends 1 MP to move to 3714 (1 MP for 2 trail hexes inclear terrain).41 HQ stays in 3615.
b. Combat DeclarationNo combat declarations by Activated Formation.
2. Enemy Reaction PhaseBecause there are no combat declarations, no enemy reactions arepossible.
3. Combat PhaseNo attacks by Activated Formation.
This finishes the 5th Operations Sequence. Because neither side hasany unplayed AMs, this ends the Operations Segment.
C. Reorganization Segment1. Reorganization Phasea. Remove all First Activation and Final Activation markers.b. Supply points are not used in this scenario, so the HQs of the 21stDivision and the 31st Division which did not activate are notmarked as being Out of Supply.
c. Because the disrupted Japanese units 1+2/9 and 6+7/9 are in anEnemy ZOC, they do not automatically recover from beingDisrupted. 1+2/9 rolls a 6 against its modified ER of 4 (normal ERof 6, -2 for being disrupted) [3.75], thereby failing its ER check.So 1+2/9 remains Disrupted. 6+7/9 rolls a 2 against its modifiedER of 4 (normal ER of 6, -2 for being disrupted) , thereby passingits ER check the Disrupted marker is removed from 6+7/9.
d. All Fired Japanese artillery units are In Supply, and, therefore, areflipped to their fired sides. All Fired US artillery units are eitherpart of Supplied US Formations or are Army artillery units within4 hexes of a supplied HQ, so all of the Fired US artillery units areflipped to support strength sides.
e. No units from either side receive replacements.2. General Attrition PhaseThe Japanese player places the 16th Division AMs and one of the65th Brigade AMs on the 5 space of the Attrition Track. The USplayer places the 41st Division and 51st Division AMs on the 9 spaceand the Philippine Scouts AM on the 10 space of the GeneralAttrition Track. The General Attrition Check ER of each formation ismodified by +4, the General Attrition ER Modifier for US Formationson Turns 1-4.
© 2010 Compass Games, LLC 46
BATAAN!: THE BATTLE FOR THE PHILIPPINES - 1942

The Japanese player rolls a 5 and a 7 for the General Attrition ERchecks for the 16th Division and 65th Brigade, respectively. So the65th Brigade must take a step loss, because the ER check die rollwas higher than its ER of 5. The Japanese player chooses toremove the 65 Eng to satisfy this step loss.The US rolls a 6, a 10 and a 4 for the General Attrition ER checks forthe 41st Division, 51st Division and Philippine Scouts, respectively.So the 51st Division must take a step loss. The US player choosesto flip 1/52 to its reduced side to satisfy this step loss.
3. Engineering PhaseThe fortification in 3314 is destroyed because it is Japaneseoccupied. The Japanese Player places a Fortification Destroyedmarker in the hex.
4. Victory Determination PhaseThe Japanese player determines he has destroyed 1 of the 6Fortification Destroyed markers necessary to fulfill Victory Condition19.25a1.
5. Turn Record PhaseThe Turn marker is moved to Game Turn 4 on the Turn RecordTrack and play proceeds to the next turn.
“Dugout Doug MacArthur lies a shaking on the RockSafe from all the bombers and from any sudden shockDugout Doug is eating of the best food on BataanAnd his troops go starving on.
Chorus:Dugout Doug, come out from hidingDugout Doug, come out from hidingSend to Franklin the glad tidingsThat his troops go starving on!”
Widely circulated vicious parody with many verses; to the tune ofthe “Battle Hymn of the Republic”
SPECIAL NOTE ON COUNTERSWell, we did out best but we found a problem with the counters afterthey were printed. There are 3 counters with the wrong unit type color.Here are the 3 counters in question:
We have provided stickers in the box as a way of correcting thisproblem. The unit type boxes are the wrong color - they are yellowinstead of orange, like the other units of the 31st division. There areenough stickers to place on the counters and the setup cards that thoseunits appear upon (Allied card 1 Back and Allied Card 2 Front).
INDEX-A-
Abbreviations: 3.18, 20.1Activation: 4.3Activation of Army Units: 7.4Activation Markers: 4.33Activation Pool: 7.22Activation Sequences: 7.2Active Player: 7.21Advance After Combat: 11.6Air Fields, U.S.: 13.12cAir Units: 13.0, 15.21 - 15.23, 15.25Air Units, Offsetting: 15.25Air Unit Restrictions: 13.1, 15.23, 15.25 NoteAmphibious Invasion: 15.4Amphibious Invasion Attrition: 15.48Amphibious Invasion Reaction Activation: 15.49Amphibious Invasion Supply: 15.46Anti-Aircraft Units: 16.1Armor Attrition: 11.23Army Units: 7.4Artillery: 12.0Artillery Coordination: 10.42Artillery Defense: 12.2Artillery Fire Support: 10.42, 12.1Artillery, U.S. Self Propelled: 16.31Attack Restrictions: 10.1Attacker Ground Unit Coordination: 10.43Attrition, General: 6.5
-B-Bridges: 8.35Bridge Markers: 8.35c
-C-Choosing the CRT: 10.3Close Air Support Coordination: 10.41Close Air Support Mission: 13.3Close Air Support Restrictions: 13.36Combat: 10.0Combat Coordination: 10.4Combat Declaration: 9.1Combat DRMs: 10.6Combat Losses: 11.2Combat Refusal: 9.2Combat Results: 11.0Combining Formations: 7.3Control and Contested Hexes: 3.12Convoy: 15.3
-D-Declared Attack Markers: 9.12Determining Combat Odds: 10.5Disease: 6.44bDisease Attrition Check: 6.45Disruption: 3.7Disruption Marking: 3.73
© 2010 Compass Games, LLC 47
BATAAN!: THE BATTLE FOR THE PHILIPPINES - 1942

-E-Efficiency: 3.4, 16.58Emergency Supply: 6.12 - 6.13
-F-First Player: 7.13 - 7.15First/Final Activation Markers: 7.42Forage Table: 6.44Formations: 4.3, 5.1 - 5.35, 7.3Formations, Color of: 16.21Fortifications: 14.0Fortifications, Combat Effects: 14.2Fortifications, General Characteristics: 14.1Fortifications, Repairing: 14.15 - 14.16
-G-Garrison Units: 3.15d, 16.14Ground Movement: 8.0
-H-Halving and Rounding: 3.5Headquarters: 16.2Headquarters, Command Range: 16.22Headquarters Functions, Summary of: 16.25Headquarters, Replacement of: 16.26How To Win: 18.27
-I-Initiative: 7.1
-J-Jungle: 8.34, 8.36
-L-Lead Units: 3.43Lead Unit Losses: 3.43b, 11.22
-M-Mariveles Port Area: 15.26Mountain: 6.21, 8.36Movement Allowances: 3.57, 7.21 NotesMovement Restrictions: 8.1
-N-Naval Gunfire Support: 15.5Naval Interdiction: 13.2Naval Units: 15.1Naval Transport: 15.3Naval Unit Placement: 15.24No Retreat Declaration: 9.3No Retreat Losses: 11.24No Retreat Option Applied: 11.4No ZOC Band: 3.23
-O-Operations: 7.0Operations Sequences: 7.2Out of Supply: 6.13 - 6.17
-P-Philippine Scouts: 16.32Pre-Combat Actions: 9.0
-R-Reduced Loss: 11.25Reinforcements: 5.1Replacements: 5.32, 15.49f, 16.5, 19.55Replacements Procedure: 16.55 -16.56Replacements, Japanese: 19.55Replacements, Philippine: 16.32k, 16.59Replacements, U.S.: 16.59Reserve Status: 5.3Resolving Combat: 10.6Retreats: 8.15, 8.36, 11.3Retreat through Enemy ZOC: 3.2, 8.2, 11.35, 11.5Rivers: 8.35Roads: 8.33
-S-Scenarios: 18.0, 19.0Scenarios, Setting Up: 18.0Sequence of Play: 4.21Special Combat Odds: 10.53Special Events: 17.0Special Situations: 16.0Special Units: 16.0Special Units, U.S.: 16.3Special Units, Japanese: 16.4Stacking: 3.3Stacking during Retreats: 3.32Steamer: 15.3Steps: 3.6Strategic Segment: 5.0Supply: 6.0Supply Effects on Combat: 10.24Supply Line: 6.21Supply Points: 6.4Supply Point Availability: 6.42Supply Point Functions: 6.41Supply Restrictions for Artillery Units: 6.16Supply Road: 6.22Supply Routes: 6.2Supply Sources: 6.3Supply Status, Judging: 6.11Swamp: 6.21, 8.36, 10.25 - 10.26
-T-Terminology: 3.1Terrain Effects on Artillery Support: 12.18Terrain Effects on Combat: 10.2Terrain Effects on Movement: 8.3Terrain Effects on Retreats: 8.36, 11.12Trails: 8.33Tropical Grass: 8.34
-V-Victory Conditions: 18.27
-W-Withdrawals: 5.2
-Z-Zone of Control: 3.2ZOC Effects on Movement: 8.2, 11.65
© 2010 Compass Games, LLC 48
BATAAN!: THE BATTLE FOR THE PHILIPPINES - 1942