Basic Avenza PDF maps instructions
25
Avenza PDF Maps 1
-
Upload
kelli-williams -
Category
Technology
-
view
100 -
download
1
Transcript of Basic Avenza PDF maps instructions
1
Avenza PDF Maps

2
Importing Maps into PDF Maps
3
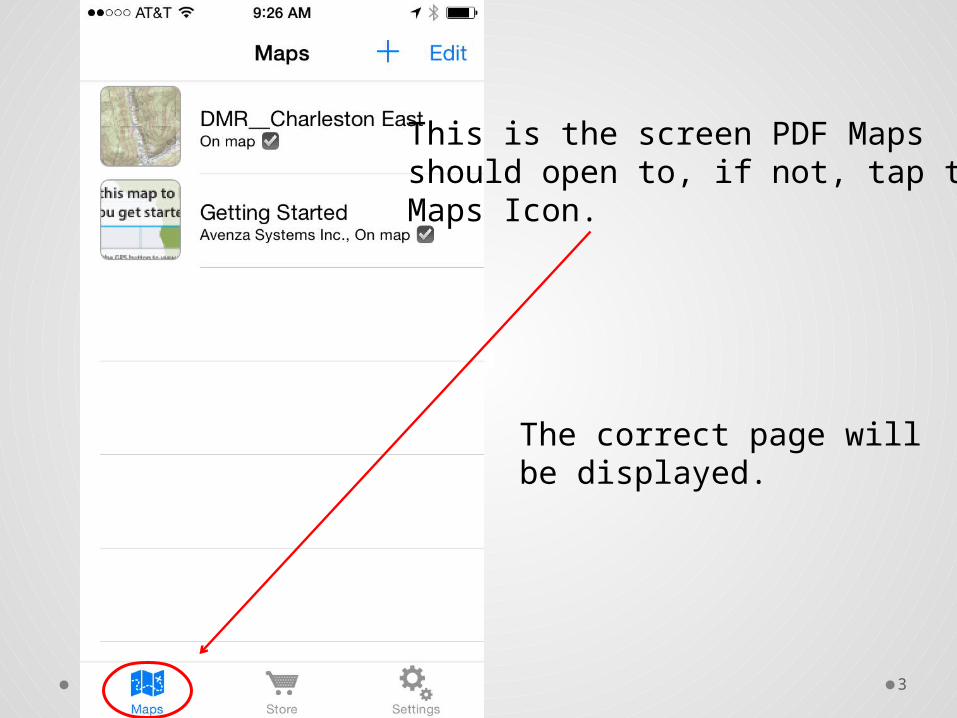
This is the screen PDF Maps should open to, if not, tap the Maps Icon.
The correct page will be displayed.

4
To add a map, tap the plus sign on the top right if youhave the map on your device, in Dropbox, ITunes, or know the webpage to access them.

5
OR, click the Store button located at the bottom center.

6
Tapping the Topographicpage will take you to your location on a map (if you have the location enabled*)Then you can find a list of the topos close to you.
Most maps are available here for purchase and some free.
*To use the app you must have your location enabled ‘Always’ for Avenza PDF Maps.

7

8
Using PDF Maps

9
The blue dot tells you where you are located on the map.
To center the map to the current location, tap the arrow in the bottom left.

10
Tapping the arrow twice will show you the direction you are facing on the map. The reason these maps look upside down.

11
To add a place mark, make sure the map is centered on the current location.
Tap the pin icon on the bottom left and the pin will pop up.
Tap on the symbol by the placemarks pop up to access the attributes for this pin.

12
Here the placemark name,description, photos, etc…can be changed or added.
To view and/or add data, tap the arrows at the right end of the attributes.
Tap the X at the end of the placemark name to change it.

13
Once the Photos box has been tapped, tap the arrow at the top right to add a picture.
The first time you use PDFMaps, it will ask, “PDF Mapswould like access to your Photos” tap OK.

14
You can select a photo from your ‘Photo Library’ if you have already taken one, or select ‘Camera’ to take a new one.
Tapping the ‘Placemarks’ name at the top left will return to the placemark screen.

15
A description for the site can be added here, and it can be done using voice recognition by tapping the microphone at the bottom.
If using voice recognition, speaking clearly will producebetter results.
16
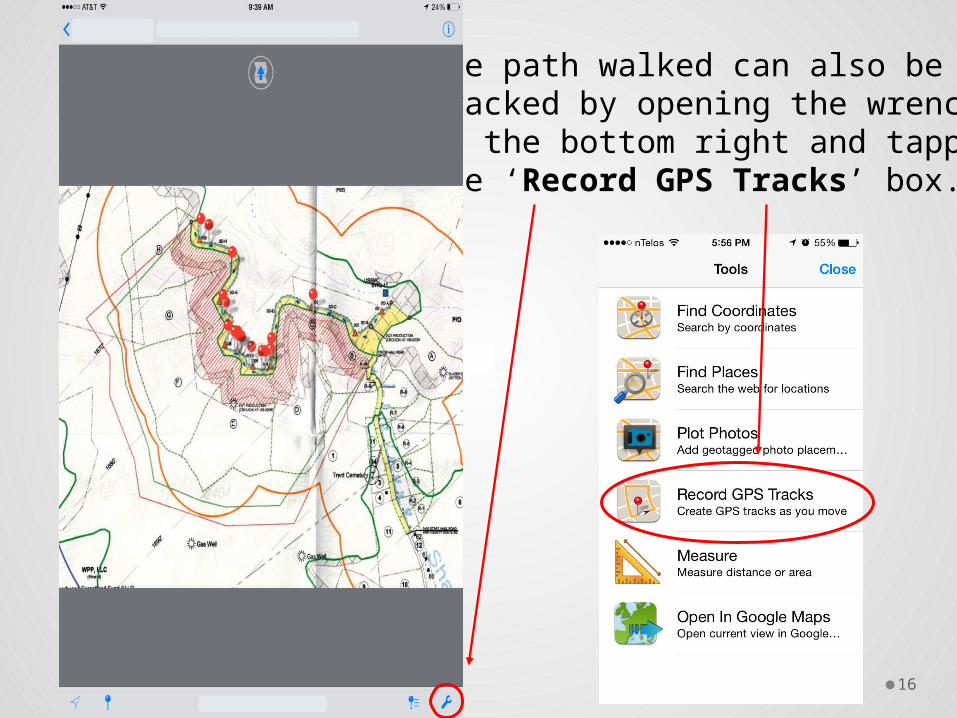
The path walked can also be tracked by opening the wrench at the bottom right and tappingthe ‘Record GPS Tracks’ box.

17
Tapping ‘Start’ will track the path until you tap ‘Stop’

18
Exporting Photos and Data

19
When finished and ready to send the data, tap the pin onthe bottom right.

20
When the necessary datais ready, tap ‘Export’.

21
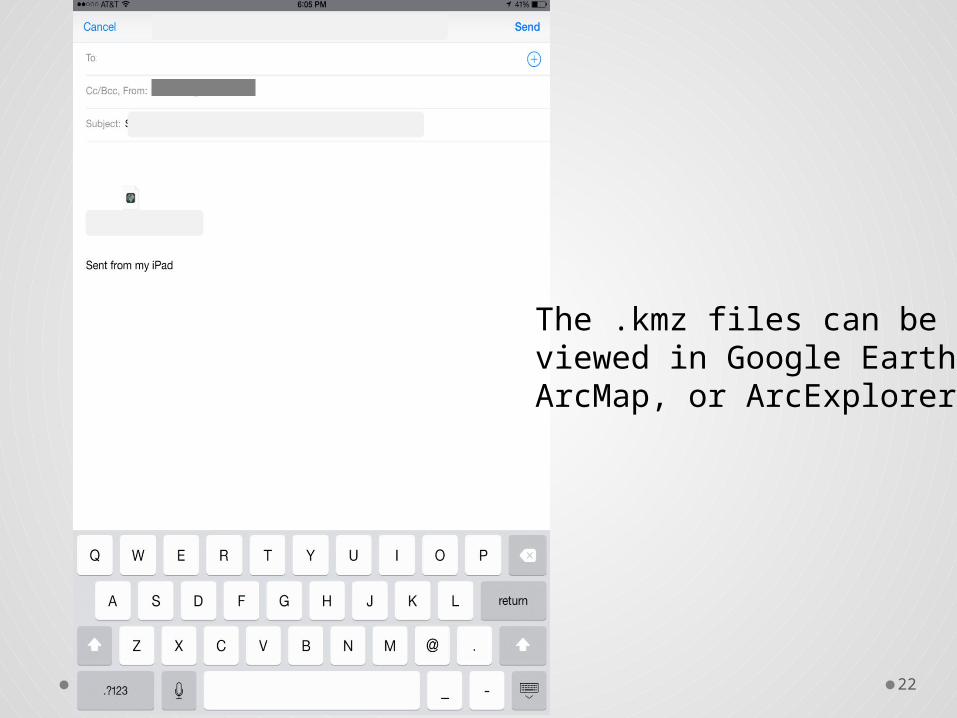
Data can be sent to your email as KML files that can be viewed in Google Earth, GPX files that can be brought into ArcMap, or CSV files for use in Excel or ArcMap.
Photos are exported as part of the KML file.
22
The .kmz files can be viewed in Google Earth,ArcMap, or ArcExplorer.

23
Notes and Tips

24
To zoom in on the screen, pinch out from the center;To zoom out, pinch in from the sides of the screen.
The default view for the map will be North, tapping once willcenter the map, a second tap will show you the direction youare facing, a third tap takes you back to the default view of North.
When you return to a computer, plug in the device and move the pictures to your storage device or computer so you have the originals.
The email will say .kmz file, which is the zipped version of KML.
25
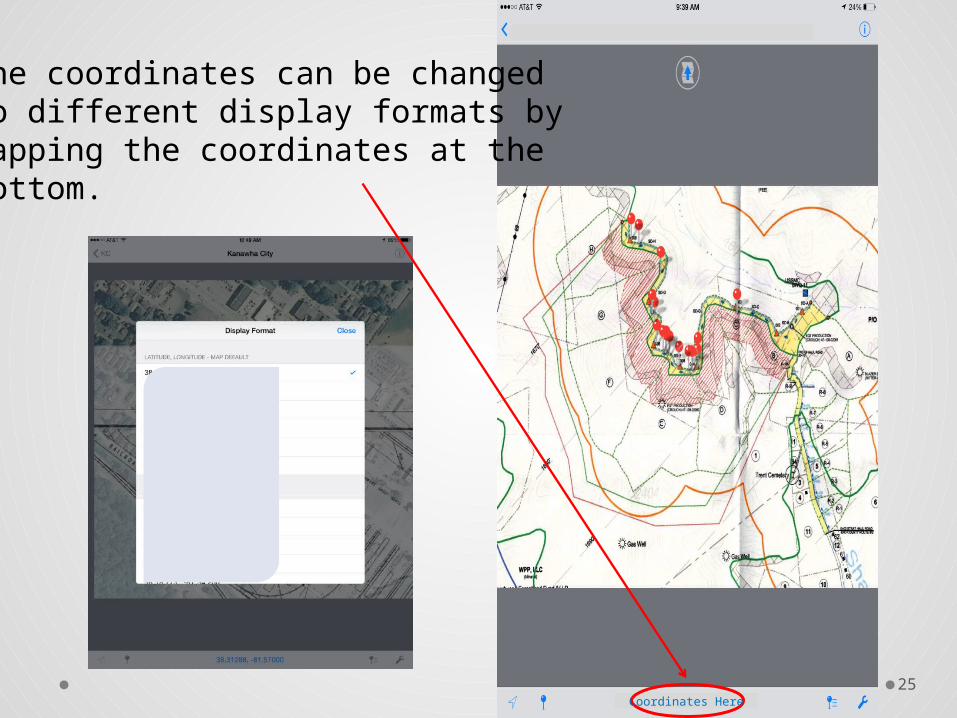
The coordinates can be changed to different display formats bytapping the coordinates at the bottom.
Coordinates Here