Backbone.Marionette.js: A Gentle Introduction - Leanpub
60
Transcript of Backbone.Marionette.js: A Gentle Introduction - Leanpub

Backbone.Marionette.js: A GentleIntroductionBuild a Marionette.js app, one step at a time
David Sulc
This book is for sale at http://leanpub.com/marionette-gentle-introduction
This version was published on 2016-06-10
This is a Leanpub book. Leanpub empowers authors and publishers with the Lean Publishingprocess. Lean Publishing is the act of publishing an in-progress ebook using lightweight tools andmany iterations to get reader feedback, pivot until you have the right book and build traction onceyou do.
© 2013 - 2016 David Sulc

Also By David SulcStructuring Backbone Code with RequireJS and Marionette Modules
Backbone.Marionette.js: A Serious Progression
Marionette.js: Testing and Refactoring

Contents
Foreword from Derick Bailey . . . . . . . . . . . . . . . . . . . . . . . . . . . . . . . . . . i
Cover Credits . . . . . . . . . . . . . . . . . . . . . . . . . . . . . . . . . . . . . . . . . . . ii
Who This Book is For . . . . . . . . . . . . . . . . . . . . . . . . . . . . . . . . . . . . . . . iii
Following Along with Git . . . . . . . . . . . . . . . . . . . . . . . . . . . . . . . . . . . . ivJumping in for Advanced Readers . . . . . . . . . . . . . . . . . . . . . . . . . . . . . . v
Setting Up . . . . . . . . . . . . . . . . . . . . . . . . . . . . . . . . . . . . . . . . . . . . . 1Asset Organization . . . . . . . . . . . . . . . . . . . . . . . . . . . . . . . . . . . . . . 1Getting Our Assets . . . . . . . . . . . . . . . . . . . . . . . . . . . . . . . . . . . . . . . 2
Displaying a Static View . . . . . . . . . . . . . . . . . . . . . . . . . . . . . . . . . . . . . 5Dynamically Specifying a View Template . . . . . . . . . . . . . . . . . . . . . . . . . . 10Specifying Other View Attributes . . . . . . . . . . . . . . . . . . . . . . . . . . . . . . . 12Implementing Region Management . . . . . . . . . . . . . . . . . . . . . . . . . . . . . . 13
Displaying a Model . . . . . . . . . . . . . . . . . . . . . . . . . . . . . . . . . . . . . . . . 16Using Model Defaults . . . . . . . . . . . . . . . . . . . . . . . . . . . . . . . . . . . . . 19Introducing Events . . . . . . . . . . . . . . . . . . . . . . . . . . . . . . . . . . . . . . . 20Exercise . . . . . . . . . . . . . . . . . . . . . . . . . . . . . . . . . . . . . . . . . . . . . 21
Displaying a Collection of Models . . . . . . . . . . . . . . . . . . . . . . . . . . . . . . . . 22Introducing the CollectionView . . . . . . . . . . . . . . . . . . . . . . . . . . . . . . . . 22Listing our Contacts with a CollectionView . . . . . . . . . . . . . . . . . . . . . . . . . 23Sorting a Collection . . . . . . . . . . . . . . . . . . . . . . . . . . . . . . . . . . . . . . 30Exercise . . . . . . . . . . . . . . . . . . . . . . . . . . . . . . . . . . . . . . . . . . . . . 31
Chapters not in Sample . . . . . . . . . . . . . . . . . . . . . . . . . . . . . . . . . . . . . . 33
Implementing Routing . . . . . . . . . . . . . . . . . . . . . . . . . . . . . . . . . . . . . . 34How to Think About Routing . . . . . . . . . . . . . . . . . . . . . . . . . . . . . . . . . 34Adding a Router to ContactsApp . . . . . . . . . . . . . . . . . . . . . . . . . . . . . . . 35Routing Helpers . . . . . . . . . . . . . . . . . . . . . . . . . . . . . . . . . . . . . . . . 38DRYing up Routing with Events . . . . . . . . . . . . . . . . . . . . . . . . . . . . . . . 40

CONTENTS
Adding a Show Route . . . . . . . . . . . . . . . . . . . . . . . . . . . . . . . . . . . . . 42Exercise . . . . . . . . . . . . . . . . . . . . . . . . . . . . . . . . . . . . . . . . . . . . . 47
Chapters not in Sample . . . . . . . . . . . . . . . . . . . . . . . . . . . . . . . . . . . . . . 49
About this Sample . . . . . . . . . . . . . . . . . . . . . . . . . . . . . . . . . . . . . . . . . 50
Foreword from Derick BaileyThe open and flexible nature of Marionette allows it to be used in more ways than can be imagined.I’ve seen applications that I would never have dreamed of, built with it: games, financial reportingtools, search engines, mobile applications, ticket sales and e-commerce, database managementsystems, and more. The down side of this flexibility, though, is documentation. Creating acomprehensive suite of documents that show all of the different ways that the parts can be combinedis an overwhelming task.
Plenty of introductory articles, blog posts and videos exist out there on the web. But, very little of thisinformation moved beyond the simple patterns of “replace this Backbone code with this Marionettecode”. Putting the pieces together requires a new level of abstraction and thinking, and a new setof patterns to work with. And this documentation simply did not exist, even if some applicationdevelopers other than myself were using these higher level patterns.
It wasn’t until Brian Mann started producing his BackboneRails.com¹ screencasts, and David Sulcstarted writing this book, that the Marionette community began to see all of the patterns ofimplementation that I was advocating, in one place. And I’m so very happy to see David writingthis book and Brian producing those screencasts. The community needs this information. Thedocumentation gap is finally being closed.
This is the book that I wanted to write, but never had time to write. It is a complete and thoroughintroduction to building scalable applications with Marionette.js. Better still, it advocates anddemonstrates the same patterns and principles that I use in my own applications. You owe it toyourself to work through all of the exercises in this book, even if you are a seasoned Backbone andMarionette developer. David has done a wonderful job of breaking down the architecture of largeMarionette applications, lighting the path for each step of the journey.
– Derick Bailey, creator of Marionette.js²
¹http://BackboneRails.com²http://marionettejs.com
i

Cover CreditsThe cover image depicts a “theatrical appliance” designed to help ventriloquists by having a partnervoice their puppet. The image is from patent application 1,197,543 filed in 1914, which you can viewhere³.
³http://patentimages.storage.googleapis.com/pdfs/US1197543.pdf
ii

Who This Book is ForThis book is for web developers who want to build highly interactive javascript applications. Thisbook will cover using Backbone.Marionette.js to achieve that goal, and will empower you to buildyour own applications by understanding how Marionette apps are built.
All you’ll need to follow along is a basic understanding of javascript and the DOM (DocumentObject Model), such as being able to manipulate elements on the page using a jQuery selector. Inother words, if you’ve used a few jQuery libraries here and there, you should be able to follow alongjust fine.
iii
Following Along with GitThis book is a step by step guide to building a complete Marionette.js application. As such, it’saccompanied by source code in a Git repository hosted at https://github.com/davidsulc/marionette-gentle-introduction⁴.
The book and referenced Git commits all use Marionette 2.3.2. Should you needto use an earlier version of Marionette, refer to the marionette-pre-v2 branch:https://github.com/davidsulc/marionette-gentle-introduction/tree/marionette-pre-v2⁵. The book accompanying the older Marionette version is provided within thesupplementary files with this book.
Throughout the book, as we code our app, we’ll refer to commit references within the git repositorylike this:
Git commit with our scaffold code:
219a8a7ed385f668f6a23b9a4de829b88da44b01⁶
This will allow you to follow along and see exactly how the codebase has changed: you can eitherlook at that particular commit in your local copy of the git repository, or click on the link to see anonline display of the code differences.
Any change in the code will affect all the following commit references, so the links inyour version of the book might become desynchronized. If that’s the case, make sure youupdate your copy of the book to get the new links. At any time, you can also see the fulllist of commits here⁷, which should enable you to locate the commit you’re looking for (thecommit names match their descriptions in the book).
Even if you haven’t used Git yet, you should be able to get up and running quite easily using onlineresources such as the Git Book⁸. This chapter is by no means a comprehensive introduction to Git,but the following should get you started:
• Set up Git with Github’s instructions⁹• To get a copy of the source code repository on your computer, open a command line and run
⁴https://github.com/davidsulc/marionette-gentle-introduction⁵https://github.com/davidsulc/marionette-gentle-introduction/tree/marionette-pre-v2⁶https://github.com/davidsulc/marionette-gentle-introduction/commit/219a8a7ed385f668f6a23b9a4de829b88da44b01⁷https://github.com/davidsulc/marionette-gentle-introduction/commits/master⁸http://git-scm.com/book⁹https://help.github.com/articles/set-up-git
iv

Following Along with Git v
git clone git://github.com/davidsulc/marionette-gentle-introduction.git
• From the command line move into the marionette-gentle-introduction folder that Gitcreated in the step above, and execute
git show 219a8a7ed385f668f6a23b9a4de829b88da44b01
to show the code differences implemented by that commit:
• ’-‘ lines were removed• ’+’ lines were added
You can also use Git to view the code at different stages as it evolves within the book:
• To extract the code as it was during a given commit, execute
git checkout 219a8a7ed385f668f6a23b9a4de829b88da44b01
• Look around in the files, they’ll be in the exact state they were in at that point in time withinthe book
• Once you’re done looking around and wish to go back to the current state of the codebase,run
git checkout master
What if I don’t want to use Git, and only wantthe latest version of the code?You can download a zipped copy of the repository¹⁰. This will contain the full Git commithistory, in case you change your mind about following along.
The code for the previous Marionette version is athttps://github.com/davidsulc/marionette-gentle-introduction/archive/marionette-pre-v2.zip¹¹.
Jumping in for Advanced Readers
My goal with this book is to get you comfortable enough to tackle your own Marionette projects, soit assumes very little knowledge. Although you’ll learn the most by following along with the code,you can simply skim the content and checkout the Git commit corresponding to the point in thebook where you wish to join in.
¹⁰https://github.com/davidsulc/marionette-gentle-introduction/archive/master.zip¹¹https://github.com/davidsulc/marionette-gentle-introduction/archive/marionette-pre-v2.zip

Setting Up
This book uses Marionette 2.3.2. If you wish to learn an earlier version of Marionette (e.g.you’ve inherited a project with an older version), refer to the code using Marionette 1.7.4available on Github in the marionnette-pre-v2 branch¹².
In this book, we’re going to build an application step by step. The finished application can be seenat http://davidsulc.github.io/marionette-gentle-introduction¹³.
The first order of business before we can start programming our application, is setting up our“scaffold”. We’ll be using pretty basic stuff:
• Bootstrap 2 CSS and their starter template¹⁴• Marionette.js and dependencies
Easy, right?
Asset Organization
Before we get in the thick of things, let’s quickly consider how we’ll organize the various files (CSS,JS, etc.) that we’ll be using in this project. In order to maintain our sanity as the files increase innumber, we’ll need some sort of system to keep the files tidy so we don’t spend our time looking forthings:
• project folder– index.html– assets
* css* img* js
· vendor
Within the js folder, we’ll use a vendor subfolder to contain the javascript files that are providedready-to-use (e.g. Marionette.js, jQuery, etc.). The javascript code that we will produce as we buildour application will go within the js folder.
¹²https://github.com/davidsulc/marionette-gentle-introduction/tree/marionette-pre-v2¹³http://davidsulc.github.io/marionette-gentle-introduction¹⁴http://getbootstrap.com/2.3.2/examples/starter-template.html
1

Setting Up 2
Getting Our Assets
The URLs provided below link to library versions used to develop the application in thebook, which probably aren’t the latest. Links to the respective project pages are providedin parentheses.
Let’s start by getting the various javascript libraries we’ll need, saving them in assets/js/vendor:
• jquery¹⁵ (latest version¹⁶)• json2¹⁷ (latest version¹⁸)• underscore¹⁹ (latest version²⁰)• backbone²¹ (latest version²²)• backbone.marionette²³ (latest version²⁴)
You’ll notice we’ll be using the development (uncompressed) versions, mainly for theconvenience of having error messages that make sense. Besides, most modern webframeworks provide means to minify/obfuscate javascript when going into production.
Next, let’s get the Bootstrap CSS: download and extract the zip file²⁵, then move css/bootstrap.cssto your project folder in assets/css/bootstrap.css. In addition, move the images Bootstrap uses fromimg to your project folder in assets/img.
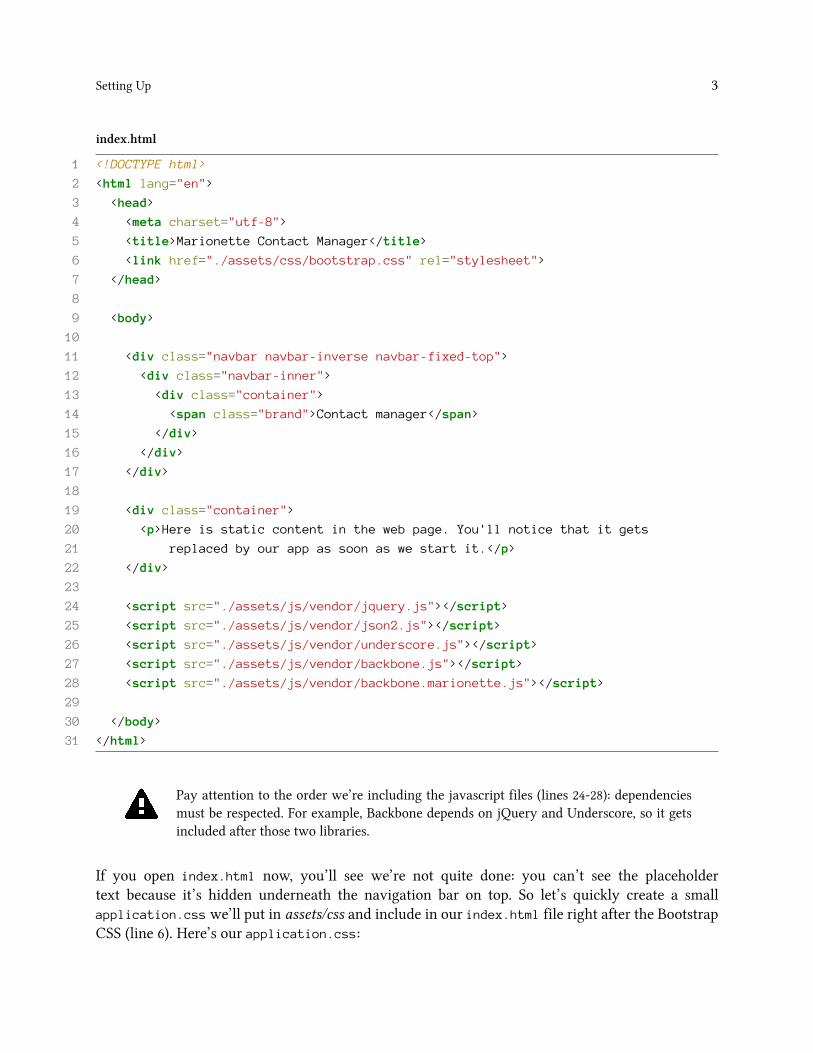
So now that we’ve got the javascript libraries and CSS we’ll be needing, let’s go ahead and createour HTML, based on the Bootstrap starter template²⁶. We’ll modify it slightly, so we don’t havenon-functional things in our page (e.g. menu items that don’t work), and we’ll also need to includethe various javascript files we’ve just obtained. Here’s what we’ll start with:
¹⁵https://raw.githubusercontent.com/davidsulc/marionette-gentle-introduction/master/assets/js/vendor/jquery.js¹⁶http://jquery.com/¹⁷https://github.com/davidsulc/marionette-gentle-introduction/raw/master/assets/js/vendor/json2.js¹⁸https://github.com/douglascrockford/JSON-js¹⁹https://github.com/davidsulc/marionette-gentle-introduction/raw/master/assets/js/vendor/underscore.js²⁰http://underscorejs.org/underscore.js²¹https://github.com/davidsulc/marionette-gentle-introduction/raw/master/assets/js/vendor/backbone.js²²backbonejs.org/backbone.js²³https://github.com/davidsulc/marionette-gentle-introduction/raw/master/assets/js/vendor/backbone.marionette.js²⁴http://marionettejs.com²⁵http://getbootstrap.com/2.3.2/assets/bootstrap.zip²⁶http://getbootstrap.com/2.3.2/examples/starter-template.html
Setting Up 3
index.html
1 <!DOCTYPE html>
2 <html lang="en">
3 <head>
4 <meta charset="utf-8">
5 <title>Marionette Contact Manager</title>
6 <link href="./assets/css/bootstrap.css" rel="stylesheet">
7 </head>
8
9 <body>
10
11 <div class="navbar navbar-inverse navbar-fixed-top">
12 <div class="navbar-inner">
13 <div class="container">
14 <span class="brand">Contact manager</span>
15 </div>
16 </div>
17 </div>
18
19 <div class="container">
20 <p>Here is static content in the web page. You'll notice that it gets
21 replaced by our app as soon as we start it.</p>
22 </div>
23
24 <script src="./assets/js/vendor/jquery.js"></script>
25 <script src="./assets/js/vendor/json2.js"></script>
26 <script src="./assets/js/vendor/underscore.js"></script>
27 <script src="./assets/js/vendor/backbone.js"></script>
28 <script src="./assets/js/vendor/backbone.marionette.js"></script>
29
30 </body>
31 </html>
Pay attention to the order we’re including the javascript files (lines 24-28): dependenciesmust be respected. For example, Backbone depends on jQuery and Underscore, so it getsincluded after those two libraries.
If you open index.html now, you’ll see we’re not quite done: you can’t see the placeholdertext because it’s hidden underneath the navigation bar on top. So let’s quickly create a smallapplication.css we’ll put in assets/css and include in our index.html file right after the BootstrapCSS (line 6). Here’s our application.css:

Setting Up 4
application.css
1 body {
2 /* 60px to move the container down and
3 * make room for the navigation bar */
4 padding-top: 60px;
5 }
Git commit with our scaffold code:
219a8a7ed385f668f6a23b9a4de829b88da44b01²⁷
We can now get started with our app! We’ll develop a “contact manager” application, which willstore contact information on people (like a phone book). We’re going to develop it step by step,explaining at each stage how the different Marionette components work together, and why we’rerefactoring code.
²⁷https://github.com/davidsulc/marionette-gentle-introduction/commit/219a8a7ed385f668f6a23b9a4de829b88da44b01

Displaying a Static ViewNow that we have the basics set up, let’s use Marionette to display content in our index.html.We’ll start by putting everything within the HTML file. But as you can guess, this approach isn’tadvisable for anything beyond a trivial application: you’d lose yourmind. Sowe’ll quickly get aroundto refactoring our simple application into something more robust.
Let’s start by adding some javascript code at the bottom of our index.html:
1 <script type="text/javascript">
2 var ContactManager = new Marionette.Application();
3
4 ContactManager.start();
5 </script>
What did we do? Nothing really exciting: we simply declared a new Marionette application, thenstarted it. If you refresh the index.html page in your browser, you’ll see absolutely nothing haschanged… This isn’t surprising: our application doesn’t do anything yet.
Let’s now make our app display a message to the console once it has started:
1 <script type="text/javascript">
2 var ContactManager = new Marionette.Application();
3
4 ContactManager.on("start", function(){
5 console.log("ContactManager has started!");
6 });
7
8 ContactManager.start();
9 </script>
Note we’ve defined the start handler code before we start the application.
If you refresh the page with (e.g.) Firebug’s console open, you’ll see the message we’ve just added.How about we make the app do something a little more useful (and visual) by displaying some staticcontent?
Before we can have our app do that, we need to fulfill a few preconditions:
5
Displaying a Static View 6
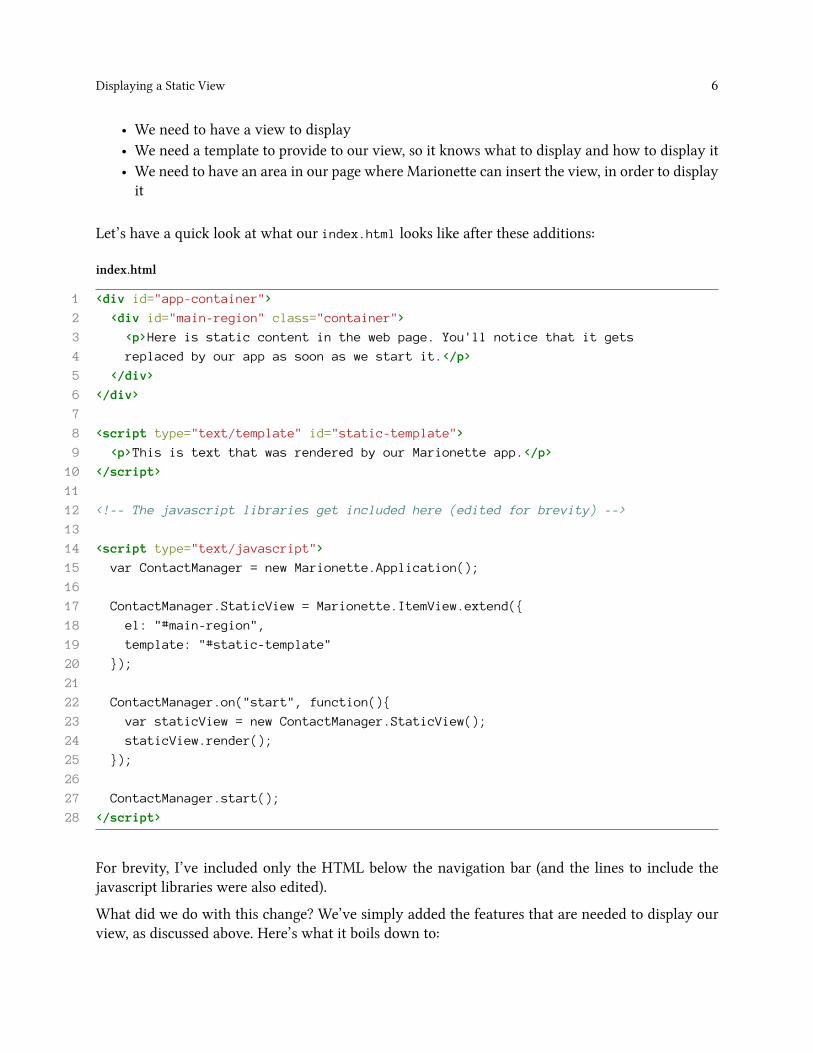
• We need to have a view to display• We need a template to provide to our view, so it knows what to display and how to display it• We need to have an area in our page where Marionette can insert the view, in order to displayit
Let’s have a quick look at what our index.html looks like after these additions:
index.html
1 <div id="app-container">
2 <div id="main-region" class="container">
3 <p>Here is static content in the web page. You'll notice that it gets
4 replaced by our app as soon as we start it.</p>
5 </div>
6 </div>
7
8 <script type="text/template" id="static-template">
9 <p>This is text that was rendered by our Marionette app.</p>
10 </script>
11
12 <!-- The javascript libraries get included here (edited for brevity) -->
13
14 <script type="text/javascript">
15 var ContactManager = new Marionette.Application();
16
17 ContactManager.StaticView = Marionette.ItemView.extend({
18 el: "#main-region",
19 template: "#static-template"
20 });
21
22 ContactManager.on("start", function(){
23 var staticView = new ContactManager.StaticView();
24 staticView.render();
25 });
26
27 ContactManager.start();
28 </script>
For brevity, I’ve included only the HTML below the navigation bar (and the lines to include thejavascript libraries were also edited).
What did we do with this change? We’ve simply added the features that are needed to display ourview, as discussed above. Here’s what it boils down to:

Displaying a Static View 7
• We define a “main-region” on lines 2-5 (within an “app-container” div) in which we’ll wantto display our view
• We define a template for our view on lines 8-10• We define a view to display on lines 17-20 specifying:
– the DOM element in which the view should be displayed (line 18)– the template to use (line 19)
With all of the preparation work done, all that’s left to do when our app starts is to create a newview instance (line 23) and tell it to render itself (line 24). Here’s what our app looks like:
Displaying a static view
Instead of constantly declaring global variables to store things like our view definition (andthereby polluting the global namespace), we’re attaching them to our app (as attributes)with (e.g.) ContactManager.StaticView.
Let’s take a moment to explain a few aspects in more detail. In Marionette (and Backbone ingeneral), views need to be provided with a template to display. This is because they have differentresponsibilities:
• templates– are basically HTML– govern “how things should be displayed” (what HTML should be in the view, CSS styles,
where data should be displayed, etc.)• views
– are javascript objects– take care of “reacting to things that happen” (clicks, keeping track of a model, etc.)
This can be somewhat confusing if you’re used to working with an MVC web framework such asRails. In these, the template and view are typically mixed in the “view” part of the MVC: they getdata from the model instances provided by the controller, then generate some HTML that is sent tothe browser. What you must keep in mind is that once the HTML is rendered by these frameworks,it never gets modified: a new view may get created by the same controller (e.g. on refresh), but thisparticular instance will never be modified.

Displaying a Static View 8
In Marionette apps, however, a view gets instantiated and the user will usually interact with it (clickthings, modify data somewhere else, etc.). Since we’re not refreshing the page each time the userclicks, we need to manage user interactions (clicks, e.g.) within the view. But in addition, if theuser changes some data, the views displaying that data must update immediately (and remember:there won’t be any server interaction, or page refresh). In other words, if a user modifies a contact’sphone number within a popup window, all the views displaying that contact must be refreshed whenthe data is saved. But how can we refresh the data without the server, and how can we know thecontact’s information has changed? This is the view’s responsibility in Marionette: it monitors themodels it’s displaying, and if those models change, the view renders itself again (using the sametemplate). And to follow the “separation of concerns” pattern²⁸, the “views” functionality has beenseparated into templates (how to display information) and views (how to react to changes in theenvironment).
As you see more Marionette code, you’ll notice that models, views, etc. get instantiated byproviding a javascript object containing key-value properties. In javascript, var myModel
= { myAttribute: "myValue" } declares a valid object, and myModel.myAttribute willreturn “myValue”. To learn more about javascript objects, see Working with Objects²⁹ bythe Mozilla Developer Network.
Our template is defined within a script tag, with type attribute of text/template. This is simplyto trick the browser:
• it’s not HTML, so the browser won’t try to display it• it’s not javascript, so the browser won’t try to execute it
However, we can conveniently set an id attribute to the script tag, allowing us to select it withjQuery. And that’s exactly what’s happening: on line 19, we’re indicating which template to use bygiving our view a jQuery selector and Marionette does the rest for us.
What about the el declaration on line 18? Well, as we mentioned above, Marionette will needsomewhere within our page to display our view, so we’ve simply provided a jQuery selector tothe DOM element that will contain our view (notice we’ve got an id attribute in the tag on line 2).Of course, we’ll see that there’s a much better way to manage views in Marionette (especially witha more complex interface), but that’s for later in this chapter…
Now, instead of displaying a simple message in the console, we instantiate a new view when ourapplication has started and display it within a pre-defined DOM element.
With our latest modifications, our index.html now looks like this:
²⁸http://en.wikipedia.org/wiki/Separation_of_concerns²⁹https://developer.mozilla.org/en/docs/JavaScript/Guide/Working_with_objects
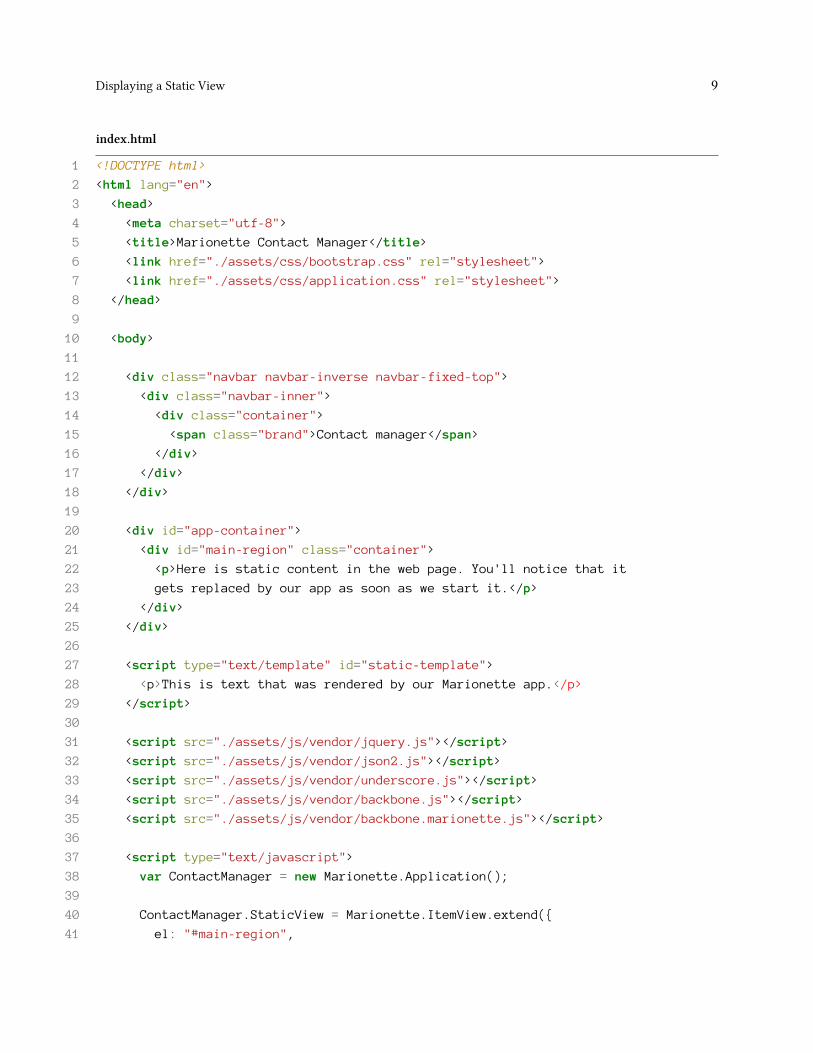
Displaying a Static View 9
index.html
1 <!DOCTYPE html>
2 <html lang="en">
3 <head>
4 <meta charset="utf-8">
5 <title>Marionette Contact Manager</title>
6 <link href="./assets/css/bootstrap.css" rel="stylesheet">
7 <link href="./assets/css/application.css" rel="stylesheet">
8 </head>
9
10 <body>
11
12 <div class="navbar navbar-inverse navbar-fixed-top">
13 <div class="navbar-inner">
14 <div class="container">
15 <span class="brand">Contact manager</span>
16 </div>
17 </div>
18 </div>
19
20 <div id="app-container">
21 <div id="main-region" class="container">
22 <p>Here is static content in the web page. You'll notice that it
23 gets replaced by our app as soon as we start it.</p>
24 </div>
25 </div>
26
27 <script type="text/template" id="static-template">
28 <p>This is text that was rendered by our Marionette app.</p>
29 </script>
30
31 <script src="./assets/js/vendor/jquery.js"></script>
32 <script src="./assets/js/vendor/json2.js"></script>
33 <script src="./assets/js/vendor/underscore.js"></script>
34 <script src="./assets/js/vendor/backbone.js"></script>
35 <script src="./assets/js/vendor/backbone.marionette.js"></script>
36
37 <script type="text/javascript">
38 var ContactManager = new Marionette.Application();
39
40 ContactManager.StaticView = Marionette.ItemView.extend({
41 el: "#main-region",
Displaying a Static View 10
42 template: "#static-template"
43 });
44
45 ContactManager.on("start", function(){
46 var staticView = new ContactManager.StaticView();
47 staticView.render();
48 });
49
50 ContactManager.start();
51 </script>
52 </body>
53 </html>
We’ll see more of Marionette’s ItemView later on, but if you’re in a hurry you can refer to thedocumentation³⁰.
Git commit to display our static view:
856d38b63bfc559a954515ede477310ca8239210³¹
Dynamically Specifying a View Template
In the code above, we’ve specified the template as a permanent attribute on our view because we’realways going to want to use the same template in this case. But it’s also possible to dynamicallyprovide templates to views, so let’s see how that’s done. We already have our app working to displaya static view that is “hard-coded” within our view definition. So let’s override it at runtime with adifferent template.
First, we need to define a new template to use, which we’ll include right below our existing template:
1 <script type="text/template" id="different-static-template">
2 <p>Text from a different template...</p>
3 </script>
Nothing special going on here, we’ve simply got different text to demonstrate the different templatebeing used. Next, we need to provide the template to the view when we instantiate it, like so:
³⁰https://github.com/marionettejs/backbone.marionette/blob/master/docs/marionette.itemview.md³¹https://github.com/davidsulc/marionette-gentle-introduction/commit/856d38b63bfc559a954515ede477310ca8239210

Displaying a Static View 11
1 var staticView = new ContactManager.StaticView({
2 template: "#different-static-template"
3 });
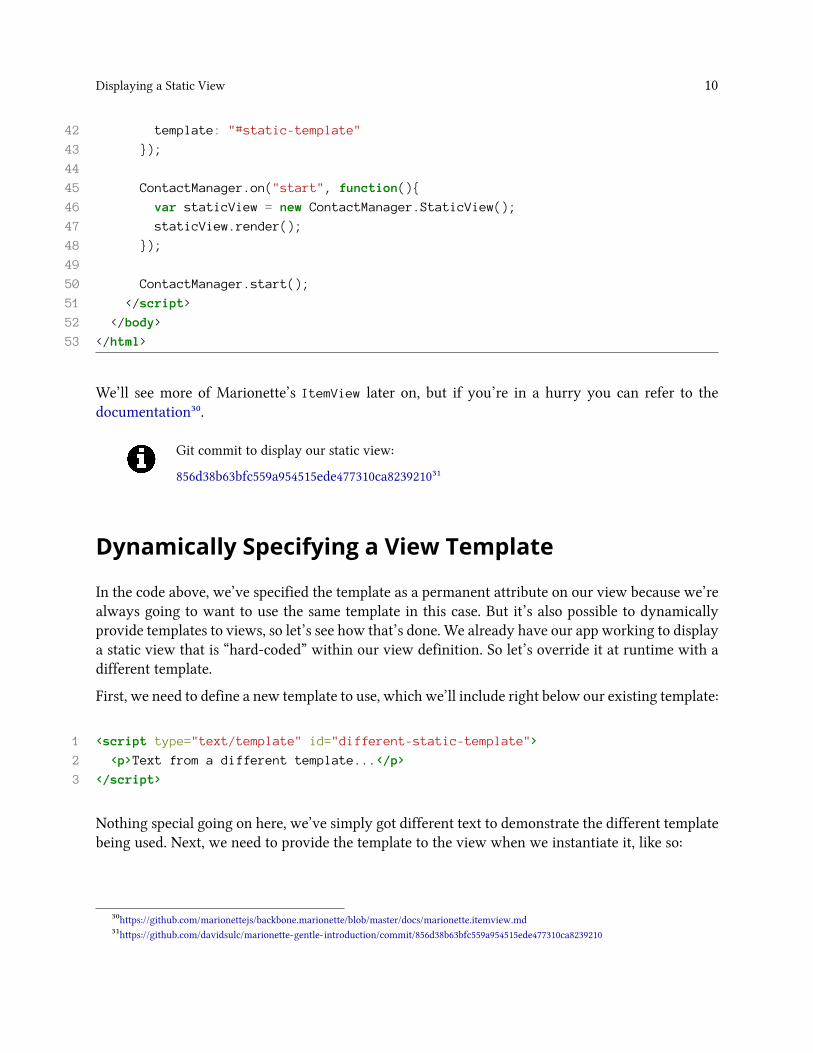
And there we have it! When this view is displayed in our main region, the new text will be displayed.Here’s our index.html with a dynamically provided template:
index.html
1 <!DOCTYPE html>
2 <html lang="en">
3 <head>
4 <meta charset="utf-8">
5 <title>Marionette Contact Manager</title>
6 <link href="./assets/css/bootstrap.css" rel="stylesheet">
7 <link href="./assets/css/application.css" rel="stylesheet">
8 </head>
9
10 <body>
11
12 <div class="navbar navbar-inverse navbar-fixed-top">
13 <div class="navbar-inner">
14 <div class="container">
15 <span class="brand">Contact manager</span>
16 </div>
17 </div>
18 </div>
19
20 <div id="app-container">
21 <div id="main-region" class="container">
22 <p>Here is static content in the web page. You'll notice that it
23 gets replaced by our app as soon as we start it.</p>
24 </div>
25 </div>
26
27 <script type="text/template" id="static-template">
28 <p>This is text that was rendered by our Marionette app.</p>
29 </script>
30
31 <script type="text/template" id="different-static-template">
32 <p>Text from a different template...</p>
33 </script>
34

Displaying a Static View 12
35 <script src="./assets/js/vendor/jquery.js"></script>
36 <script src="./assets/js/vendor/json2.js"></script>
37 <script src="./assets/js/vendor/underscore.js"></script>
38 <script src="./assets/js/vendor/backbone.js"></script>
39 <script src="./assets/js/vendor/backbone.marionette.js"></script>
40
41 <script type="text/javascript">
42 var ContactManager = new Marionette.Application();
43
44 ContactManager.StaticView = Marionette.ItemView.extend({
45 el: "#main-region",
46 template: "#static-template"
47 });
48
49 ContactManager.on("start", function(){
50 var staticView = new ContactManager.StaticView({
51 template: "#different-static-template"
52 });
53 staticView.render();
54 });
55
56 ContactManager.start();
57 </script>
58 </body>
59 </html>
Specifying Other View Attributes
Let’s see how you can provide options that are passed to the view, enabling you to specify the HTMLtag that is used to render your view, add an id and class, etc.
If you take a look at the source code (with Firebug or a comparable developer tool³²) after Marionettehas rendered our view, you’ll see it is contained within a div tag:
1 <div>
2 <p>This is text that was rendered by our Marionette app.</p>
3 </div>
This is because Marionette needs an element to contain the view being inserted within the DOM,and by default, it’s a div. However, you can specify various attributes in your view, for example:
³²To inspect the source code, you’ll need a developer tool such as Firebug, or similar for your browser (some browsers have tools built-in). This isbecause if you use the browser’s “View source code” menu entry, it will display the HTML it received originally. But since we’ve modified it heavilywith javascript and we’re interested in viewing the current state, we need to display the source using developer tools.
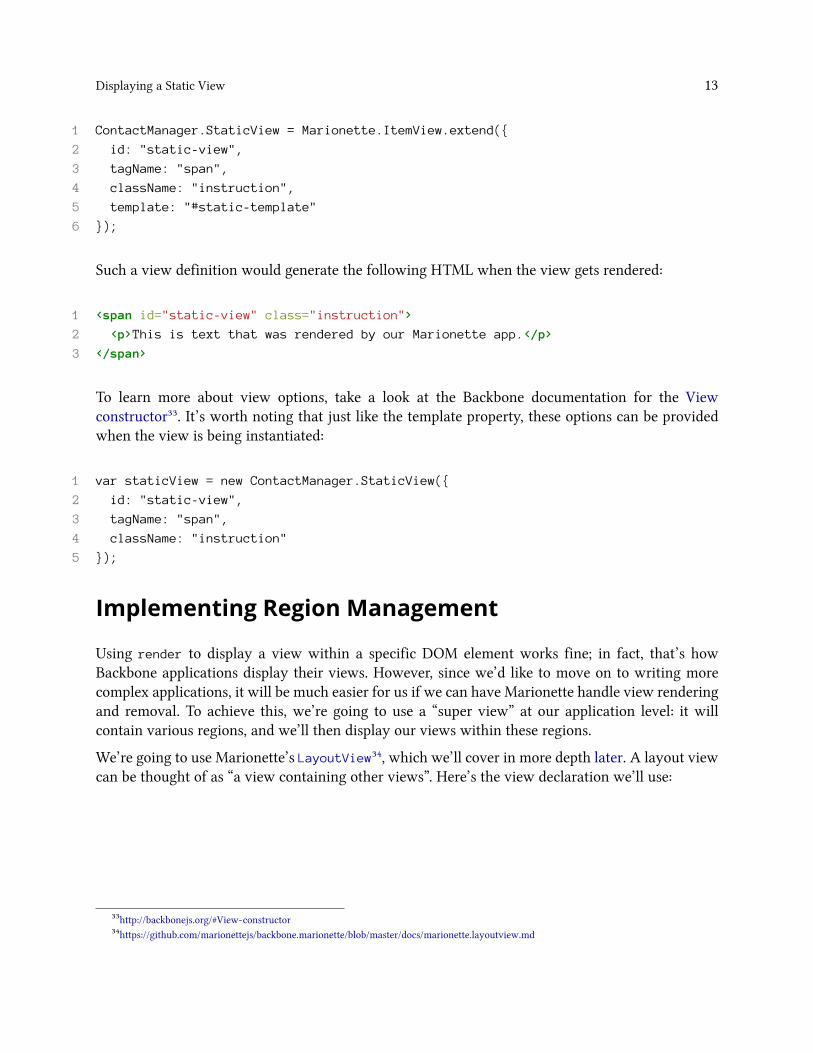
Displaying a Static View 13
1 ContactManager.StaticView = Marionette.ItemView.extend({
2 id: "static-view",
3 tagName: "span",
4 className: "instruction",
5 template: "#static-template"
6 });
Such a view definition would generate the following HTML when the view gets rendered:
1 <span id="static-view" class="instruction">
2 <p>This is text that was rendered by our Marionette app.</p>
3 </span>
To learn more about view options, take a look at the Backbone documentation for the Viewconstructor³³. It’s worth noting that just like the template property, these options can be providedwhen the view is being instantiated:
1 var staticView = new ContactManager.StaticView({
2 id: "static-view",
3 tagName: "span",
4 className: "instruction"
5 });
Implementing Region Management
Using render to display a view within a specific DOM element works fine; in fact, that’s howBackbone applications display their views. However, since we’d like to move on to writing morecomplex applications, it will be much easier for us if we can have Marionette handle view renderingand removal. To achieve this, we’re going to use a “super view” at our application level: it willcontain various regions, and we’ll then display our views within these regions.
We’re going to use Marionette’s LayoutView³⁴, which we’ll cover in more depth later. A layout viewcan be thought of as “a view containing other views”. Here’s the view declaration we’ll use:
³³http://backbonejs.org/#View-constructor³⁴https://github.com/marionettejs/backbone.marionette/blob/master/docs/marionette.layoutview.md
Displaying a Static View 14
var RegionContainer = Marionette.LayoutView.extend({
el: "#app-container",
regions: {
main: "#main-region"
}
});
For reference, here’s the relevant portion of index.html:
<div id="app-container">
<div id="main-region" class="container">
<p>Here is static content in the web page. You'll notice that it
gets replaced by our app as soon as we start it.</p>
</div>
</div>
We’re declaring that our RegionContainer should render itself in the “app-container” element, andthat it should use DOM element “main-region” as a region in which to display views. As you’venoticed, we’ve once again used jQuery DOM selectors to indicate which DOM elements we meanto use.
Once we’ve got the top-level region manager definition, we naturally need to attach an instance tothe main application so we can later use it to display views. Here’s what the code looks like:
index.html
1 <script type="text/javascript">
2 var ContactManager = new Marionette.Application();
3
4 ContactManager.StaticView = Marionette.ItemView.extend({
5 template: "#static-template"
6 });
7
8 ContactManager.on("before:start", function(){
9 var RegionContainer = Marionette.LayoutView.extend({
10 el: "#app-container",
11
12 regions: {
13 main: "#main-region"
14 }
15 });
16
Displaying a Static View 15
17 ContactManager.regions = new RegionContainer();
18 });
19
20 ContactManager.on("start", function(){
21 var staticView = new ContactManager.StaticView();
22 ContactManager.regions.main.show(staticView);
23 });
24
25 ContactManager.start();
26 </script>
As you can see, before our app starts, we instanciate a region container to hold our views (lines 8-18)and assign it to ContactManager.regions for easy access. Then, we simply show our view withinthe main region: the regions we declare in the view (lines 12-14) are automatically accessible throughour ContactManager.regions view instance. If this isn’t quite clear to you, don’t worry: we’ll coverusing layout views later and by that time you’ll be much more comfortable.
But why use a layout view to display our views instead of rendering them directly? Becauseusing a layout view will help us avoid memory leaks and boiler plate code. Any time wecall the show method, views currently displayed will be automatically closed and removedfor us.

Displaying a ModelNow that we’ve covered displaying static content, let’s move on to displaying content containingdata from a model. As you may know, one of Backbone’s selling points is the possibility to structurejavascript applications with a Model-View-Controller³⁵ (MVC) pattern. In this pattern, we use so-calledmodels to interact with our data, passing them onto views for rendering the information theycontain. You can learn more about models in Backbone’s documentation³⁶.
So let’s declare a model within our javascript block, above our view declaration:
ContactManager.Contact = Backbone.Model.extend({});
That wasn’t very hard. What did we do? We simply declared a model named Contact and attachedit to our ContactManager app. As you can see, this model extends Backbone’s model definition andinherits various methods from it. When we extend Backbone’s base model like this, we provide ajavascript object (which is empty in our case) that can contain additional information pertaining toour model (we’ll get back to that later).
Same as before, we’ll need a template and a view definition before we can display anything in thebrowser. Let’s replace our previous template and StaticView with the following:
1 <script type="text/template" id="contact-template">
2 <p><%- firstName %> <%- lastName %></p>
3 </script>
4
5 ContactManager.ContactView = Marionette.ItemView.extend({
6 template: "#contact-template"
7 });
The template will be included within the HTML body, but outside of the script blockcontaining our application code. Refer to the full index.html included below if you’reunsure where this code gets inserted.
You’ll notice that we’ve got some special <%- %> tags in there. These serve the same purpose asin many templating languages (ERB in Rails, PHP, JSP, etc.): they allow the templating engineto interpret them and include the resulting output within the rendered result (while escaping the
³⁵http://en.wikipedia.org/wiki/Model%E2%80%93view%E2%80%93controller³⁶http://backbonejs.org/#Model
16

Displaying a Model 17
contained HTML). By default, Marionette uses Underscore’s templating engine³⁷ where <%- %>
means output will be displayed (and escaped), and <% %> tags which allow arbitrary javascript to beexecuted (such as an if condition), and <%= %> which displays the data after interpreting (withoutescaping any HTML). Since the model is serialized and passed on to the view template, writing <%-
firstName %>means the model’s firstName attribute will be displayed. For security reasons,whenin doubt, use the <%- %> alternative.
So how do we display our view with model information? With our definitions written, we still needto create instances of a model and view, then display the view. All of this will happen within thestart handler:
1 ContactManager.on("start", function(){
2 var alice = new ContactManager.Contact({
3 firstName: "Alice",
4 lastName: "Arten",
5 phoneNumber: "555-0184"
6 });
7
8 var aliceView = new ContactManager.ContactView({
9 model: alice
10 });
11
12 ContactManager.regions.main.show(aliceView);
13 });
First, we create a model instance with data on lines 2-6: you’ll notice we specify various modelattributes and their respective values within a javascript object. Then, we create a new view instanceand provide the model instance as an attribute on lines 8-10.
Remember how we discussed passing options to the view when it gets instantiated? That’sexactly what we’re doing here: when we use the contact view, we’ll always be using thesame template (and have indicated it in the view definition for convenience), but the modelwe’ll want to display will change. Therefore, we leave the model attribute out of the view’sdefinition, andwe specifywhichmodel to use each timewe instantiate a new view instance.
And all that’s left to do after that is to display the view within the region (line 12), same as before.
Here’s what our index.html looks like at this stage:
³⁷http://underscorejs.org/#template

Displaying a Model 18
1 <div id="main-region" class="container">
2 <p>Here is static content in the web page. You'll notice that it gets
3 replaced by our app as soon as we start it.</p>
4 </div>
5
6 <script type="text/template" id="contact-template">
7 <p><%- firstName %> <%- lastName %></p>
8 </script>
9
10 <!-- The javascript includes are here -->
11
12 <script type="text/javascript">
13 var ContactManager = new Marionette.Application();
14
15 ContactManager.Contact = Backbone.Model.extend({});
16
17 ContactManager.ContactView = Marionette.ItemView.extend({
18 template: "#contact-template"
19 });
20
21 ContactManager.on("before:start", function(){
22 var RegionContainer = Marionette.LayoutView.extend({
23 el: "#app-container",
24
25 regions: {
26 main: "#main-region"
27 }
28 });
29
30 ContactManager.regions = new RegionContainer();
31 });
32
33 ContactManager.on("start", function(){
34 var alice = new ContactManager.Contact({
35 firstName: "Alice",
36 lastName: "Arten",
37 phoneNumber: "555-0184"
38 });
39
40 var aliceView = new ContactManager.ContactView({
41 model: alice
42 });

Displaying a Model 19
43
44 ContactManager.regions.main.show(aliceView);
45 });
46
47 ContactManager.start();
48 </script>
And the visual result:
Displaying a model
Git commit to display our basic model view:
a5a36d3ffc6e3a71c29bee95082ba0269b70927e³⁸
Using Model Defaults
What if our contact didn’t have a first name? We don’t want our app to break if the firstName
attribute is missing: the template would be trying to retrieve an attribute that doesn’t exist on themodel. How canwemanage this case? The functionality we’re looking for is default values for modelattributes.
To declare default attribute values, simply add a defaults object to the main object provided to ourmodel definition:
1 ContactManager.Contact = Backbone.Model.extend({
2 defaults: {
3 firstName: ""
4 }
5 });
If we now declare the following model instance
³⁸https://github.com/davidsulc/marionette-gentle-introduction/commit/a5a36d3ffc6e3a71c29bee95082ba0269b70927e
Displaying a Model 20
1 var contact = new ContactManager.Contact({
2 lastName: "Arten",
3 phoneNumber: "555-0184"
4 });
and we try to display the missing firstName attribute, the empty string we defined as the defaultvalue will be shown instead.
Note that this code is included only to demonstrate default model attributes. It will not bepart of our application’s code: later on, we will add model validations to manage missingattribute values.
Introducing Events
Let’s enrich our view slightly: we’ve got a phone number for Alice, so let’s display it in an alertwhen her name is clicked.
Marionette views inherit all of Backbone’s functionality, among which the ability to define eventsand their associated handlers. Here’s what they look like:
1 events: {
2 "click p": "alertPhoneNumber"
3 }
This event translates as “when the user clicks the p tag that can be found in this view, call thealertPhoneNumber function”. If you’ve used jQuery, you’ll recognize it’s essentialy an event namefollowed by a selector (which could contain class names, etc.). Let’s use this feature in our view todisplay Alice’s phone number, by modifying our view declaration:
1 ContactManager.ContactView = Marionette.ItemView.extend({
2 template: "#contact-template",
3
4 events: {
5 "click p": "alertPhoneNumber"
6 },
7
8 alertPhoneNumber: function(){
9 alert(this.model.escape("phoneNumber"));
10 }
11 });

Displaying a Model 21
Backbone models’ escape³⁹ works the same way as get⁴⁰: they both return the value of theattribute provided as an argument, but escape will escape HTML content, protecting youfrom XSS attacks if you’re displaying user-provided data within the HTML.
If you now refresh the page and click on Alice’s name, you’ll see her phone number displayed. Prettystraightforward, right? You’ll notice that since we’re in the view definition when we’re writing ouralertPhoneNumber function, we have access to the view’s model instance via this.model, eventhough which model instance will be used isn’t known yet (it’s provided when we instantiate theview, remember?).
Displaying an alert when clicking a contact
This code is not going to be included in our app, so you won’t see it going forward.
Exercise
Displaying a Contact With No Phone NumberAdd a default phone number of “No phone number!”. Then create a new model withouta phone number, and click on it. Make sure that “No phone number!” is displayed in thealert. You can see the exercise solution at the end of the book.
³⁹http://backbonejs.org/#Model-escape⁴⁰http://backbonejs.org/#Model-get
Displaying a Collection of ModelsMore often than not, we’ll be dealing with several instances of a given model (e.g. a list of contacts).Backbone has built-in functionality for this purpose, named collections (you can learn more aboutthem in Backbone’s documentation⁴¹). These collections have many interesting features we’ll lookinto later, but for now we’ll focus on the functionality Marionette provides to display them.
Collections are very straightforward to define, for example:
1 var MyModel = Backbone.Model.extend({});
2
3 var MyCollection = Backbone.Collection.extend({
4 model: MyModel
5 });
As you can see, collections define which type of models they contain. Don’t worry, we’ll see apractical example in a few moments with our ContactManager app.
Introducing the CollectionView
Let’s take a minute to think about what is required to display a list of multiple model instances.We’d need:
1. a collection to hold all the models2. a mechanism to render the same view type for each model instance3. somewhere to display all of these views
Fortunately, Marionette does all of this for us with a CollectionView that looks like this (from thedocumentation⁴²):
⁴¹http://backbonejs.org/#Collection⁴²https://github.com/marionettejs/backbone.marionette/blob/master/docs/marionette.collectionview.md
22

Displaying a Collection of Models 23
1 var MyItemView = Marionette.ItemView.extend({});
2
3 Marionette.CollectionView.extend({
4 childView: MyItemView
5 });
This code covers points 2 and 3 above: our CollectionView will render an instance of MyItemViewfor each model in the collection, and we can then show our CollectionView instance within ourregion to display all of these views at once. But where’s our collection? As you can guess, it isn’tdefined anywhere as we’ll most likely provide different collection configurations to our views: itcould be a completely different list of models (e.g. a filtered list), or the same list sorted differently.Therefore, we’ll simply pass the collection as an option when the view is instantiated, as we saw inthe previous chapter.
Listing our Contacts with a CollectionView
So how do we implement this in our app? Let’s display a collection of contacts as an unorderedlist (i.e. within a ul element). This is how our javascript data will be transformed into HTML, via aCollectionView:
Correspondence between javascript data and rendered HTML, using a CollectionView
First, we’ll need a template and view to display each model:

Displaying a Collection of Models 24
1 <script type="text/template" id="contact-list-item">
2 <li><%- firstName %> <%- lastName %></li>
3 </script>
4
5 ContactManager.ContactItemView = Marionette.ItemView.extend({
6 template: "#contact-list-item"
7 });
Don’t forget: templates go in the HTML section, while our views (being javascript) needto go within our application’s script tag.
Now let’s add a CollectionView:
1 ContactManager.ContactsView = Marionette.CollectionView.extend({
2 tagName: "ul",
3 childView: ContactManager.ContactItemView
4 });
Why are we using the tagName attribute? It will make our view get wrapped within a ul
element instead of the default div. Then, once we get our li elements rendered within thecollection view (which is now a ul element), we’ll have the list we want to be displayed.
We already have a contact model from last chapter, so let’s create a collection:
1 ContactManager.ContactCollection = Backbone.Collection.extend({
2 model: ContactManager.Contact
3 });
Now, all we need is to start everything up within our start handler:

Displaying a Collection of Models 25
1 ContactManager.on("start", function(){
2 var contacts = new ContactManager.ContactCollection([
3 {
4 firstName: "Bob",
5 lastName: "Brigham",
6 phoneNumber: "555-0163"
7 },
8 {
9 firstName: "Alice",
10 lastName: "Arten",
11 phoneNumber: "555-0184"
12 },
13 {
14 firstName: "Charlie",
15 lastName: "Campbell",
16 phoneNumber: "555-0129"
17 }
18 ]);
19
20 var contactsListView = new ContactManager.ContactsView({
21 collection: contacts
22 });
23
24 ContactManager.regions.main.show(contactsListView);
25 });
It can be hard to see, but to create our collection instance we’re providing an array ofobjects: note the [] characters on lines 2 and 18. The collection initializer will then createmodel instances for each element in the array.
Just to make sure, our code should now look like this:
index.html
1 <div id="main-region" class="container">
2 <p>Here is static content in the web page. You'll notice that it gets
3 replaced by our app as soon as we start it.</p>
4 </div>
5
6 <script type="text/template" id="contact-list-item">
7 <li><%- firstName %> <%- lastName %></li>
8 </script>

Displaying a Collection of Models 26
9
10 <!-- The javascript includes are here -->
11
12 <script type="text/javascript">
13 var ContactManager = new Marionette.Application();
14
15 ContactManager.Contact = Backbone.Model.extend({});
16
17 ContactManager.ContactCollection = Backbone.Collection.extend({
18 model: ContactManager.Contact
19 });
20
21 ContactManager.ContactItemView = Marionette.ItemView.extend({
22 template: "#contact-list-item"
23 });
24
25 ContactManager.ContactsView = Marionette.CollectionView.extend({
26 tagName: "ul",
27 childView: ContactManager.ContactItemView
28 });
29
30 ContactManager.on("before:start", function(){
31 var RegionContainer = Marionette.LayoutView.extend({
32 el: "#app-container",
33
34 regions: {
35 main: "#main-region"
36 }
37 });
38
39 ContactManager.regions = new RegionContainer();
40 });
41
42 ContactManager.on("start", function(){
43 var contacts = new ContactManager.ContactCollection([
44 {
45 firstName: "Bob",
46 lastName: "Brigham",
47 phoneNumber: "555-0163"
48 },
49 {
50 firstName: "Alice",

Displaying a Collection of Models 27
51 lastName: "Arten",
52 phoneNumber: "555-0184"
53 },
54 {
55 firstName: "Charlie",
56 lastName: "Campbell",
57 phoneNumber: "555-0129"
58 }
59 ]);
60
61 var contactsListView = new ContactManager.ContactsView({
62 collection: contacts
63 });
64
65 ContactManager.regions.main.show(contactsListView);
66 });
67
68 ContactManager.start();
69 </script>
Now, if we take a look at the result, it’ll probably look ok. But that’s only because modern browsersare really good at interpreting invalid/broken HTML markup. Let’s inspect the source code to seewhat’s been rendered:
1 <ul>
2 <div>
3 <li>Bob Brigham</li>
4 </div>
5 <div>
6 <li>Alice Arten</li>
7 </div>
8 <div>
9 <li>Charlie Campbell</li>
10 </div>
11 </ul>
What’s going on there? Well, if you recall, we’ve mentioned that Backbone will use a div to wrapviews by default. Since we didn’t specify a tagName for our item view, it was rendered within a div.But we don’t want that extra tag, so what can we do? It’s easy if you think about it: we want ourcontact’s item view to be rendered within an li tag without any wrapping div tags, so we’ll needto specify a tagName of li. But now that our ItemView will be using an li tag, there’s no need for itin the template:

Displaying a Collection of Models 28
1 <script type="text/template" id="contact-list-item">
2 <%- firstName %> <%- lastName %>
3 </script>
4
5 ContactManager.ContactItemView = Marionette.ItemView.extend({
6 tagName: "li",
7 template: "#contact-list-item"
8 });
And now, when we refresh the page, we’ll have our list properly rendered:
1 <ul>
2 <li>Bob Brigham</li>
3 <li>Alice Arten</li>
4 <li>Charlie Campbell</li>
5 </ul>
Here’s what our HTML now looks like:
Displaying a collection in an unordered list
Our corrected code now looks like this:
index.html
1 <div id="main-region" class="container">
2 <p>Here is static content in the web page. You'll notice that it gets
3 replaced by our app as soon as we start it.</p>
4 </div>
5
6 <script type="text/template" id="contact-list-item">
7 <%- firstName %> <%- lastName %>
8 </script>
9
10 <!-- The javascript includes are here -->
11
Displaying a Collection of Models 29
12 <script type="text/javascript">
13 var ContactManager = new Marionette.Application();
14
15 ContactManager.Contact = Backbone.Model.extend({});
16
17 ContactManager.ContactCollection = Backbone.Collection.extend({
18 model: ContactManager.Contact
19 });
20
21 ContactManager.ContactItemView = Marionette.ItemView.extend({
22 tagName: "li",
23 template: "#contact-list-item"
24 });
25
26 ContactManager.ContactsView = Marionette.CollectionView.extend({
27 tagName: "ul",
28 childView: ContactManager.ContactItemView
29 });
30
31 ContactManager.on("before:start", function(){
32 var RegionContainer = Marionette.LayoutView.extend({
33 el: "#app-container",
34
35 regions: {
36 main: "#main-region"
37 }
38 });
39
40 ContactManager.regions = new RegionContainer();
41 });
42
43 ContactManager.on("start", function(){
44 var contacts = new ContactManager.ContactCollection([
45 {
46 firstName: "Bob",
47 lastName: "Brigham",
48 phoneNumber: "555-0163"
49 },
50 {
51 firstName: "Alice",
52 lastName: "Arten",
53 phoneNumber: "555-0184"
Displaying a Collection of Models 30
54 },
55 {
56 firstName: "Charlie",
57 lastName: "Campbell",
58 phoneNumber: "555-0129"
59 }
60 ]);
61
62 var contactsListView = new ContactManager.ContactsView({
63 collection: contacts
64 });
65
66 ContactManager.regions.main.show(contactsListView);
67 });
68
69 ContactManager.start();
70 </script>
Git commit to display contacts within an unordered list:
a7723dfd04ea5b4523fc0a44b33da2bde553ed5b⁴³
Sorting a Collection
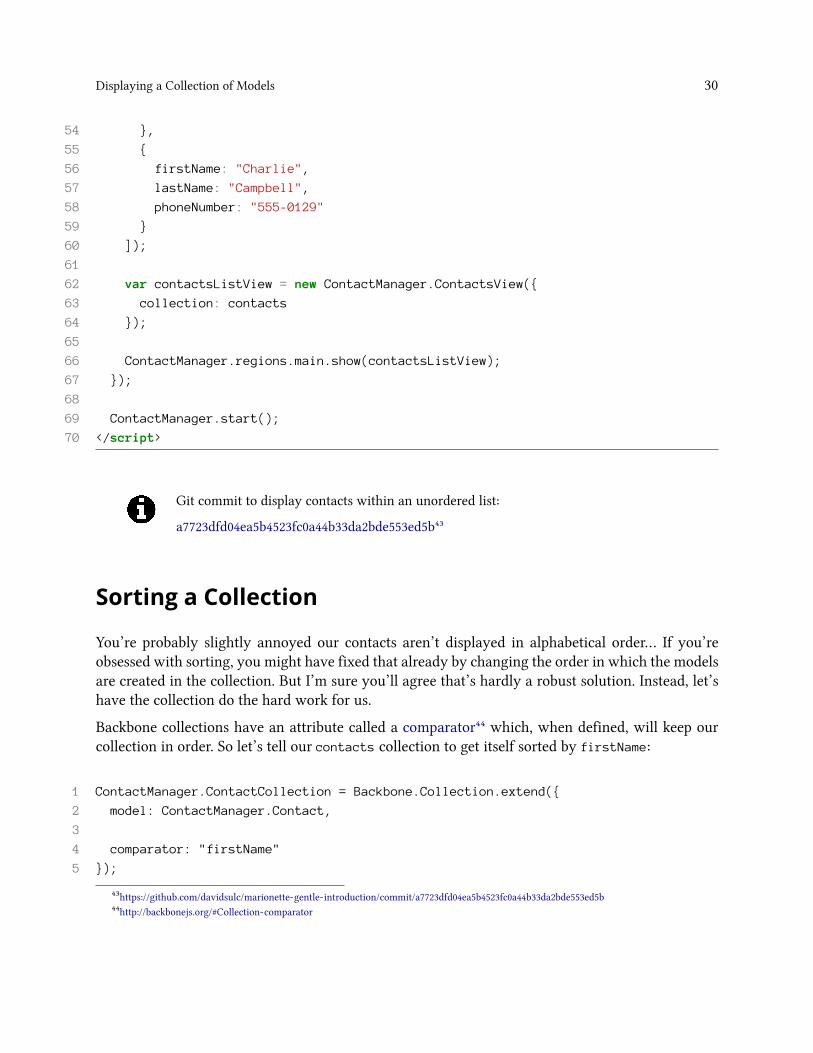
You’re probably slightly annoyed our contacts aren’t displayed in alphabetical order… If you’reobsessed with sorting, you might have fixed that already by changing the order in which the modelsare created in the collection. But I’m sure you’ll agree that’s hardly a robust solution. Instead, let’shave the collection do the hard work for us.
Backbone collections have an attribute called a comparator⁴⁴ which, when defined, will keep ourcollection in order. So let’s tell our contacts collection to get itself sorted by firstName:
1 ContactManager.ContactCollection = Backbone.Collection.extend({
2 model: ContactManager.Contact,
3
4 comparator: "firstName"
5 });
⁴³https://github.com/davidsulc/marionette-gentle-introduction/commit/a7723dfd04ea5b4523fc0a44b33da2bde553ed5b⁴⁴http://backbonejs.org/#Collection-comparator

Displaying a Collection of Models 31
Displaying our collection after implementing a comparator
Git commit adding a comparator to our contacts collection:
a8d83dd8e854300db7e9e9827dfad7c343c00152⁴⁵
For more complex sorting needs, you can define functions to determine sorting order (seeBackbone’s documentation⁴⁶ and the solution to the exercise that follows).
Exercise
Sorting a Collection with a Function
Let’s say we have the following collection:
1 var contacts = new ContactManager.ContactCollection([
2 {
3 firstName: "Alice",
4 lastName: "Tampen"
5 },
6 {
7 firstName: "Bob",
8 lastName: "Brigham"
9 },
10 {
11 firstName: "Alice",
12 lastName: "Artsy"
⁴⁵https://github.com/davidsulc/marionette-gentle-introduction/commit/a8d83dd8e854300db7e9e9827dfad7c343c00152⁴⁶http://backbonejs.org/#Collection-comparator

Displaying a Collection of Models 32
13 },
14 {
15 firstName: "Alice",
16 lastName: "Arten"
17 },
18 {
19 firstName: "Charlie",
20 lastName: "Campbell"
21 },
22 {
23 firstName: "Alice",
24 lastName: "Smith"
25 },
26 ]);
If you refresh the page, you’ll see the contacts in the following order:
• Alice Tampen• Alice Artsy• Alice Arten• Alice Smith• Bob Brigham• Charlie Campbell
What we’d like in this case, is to have them sorted by first name, then by last name in case of equality.Look at the documentation⁴⁷ and see if you can figure out how to define a comparator function thatwill display our collection in the following order:
• Alice Arten• Alice Artsy• Alice Smith• Alice Tampen• Bob Brigham• Charlie Campbell
You can see the exercise’s solutions at the end of the book.
⁴⁷http://backbonejs.org/#Collection-comparator

Chapters not in SampleThis is a sample of the book, several chapters are absent.
You can get the complete book at https://leanpub.com/marionette-gentle-introduction/⁴⁸.
⁴⁸https://leanpub.com/marionette-gentle-introduction/
33

Implementing RoutingOur ContactManager app now lets users navigate from the contacts index to a page displaying acontact. But once the user gets to the contact’s page, he’s stuck: the browser’s “back” button doesn’twork. In addition, users can’t bookmark a contact’s display page: the URL saved by the browserwould be the index page. Later, when the user loads the bookmark again, the user will end up seeingthe contact list view instead of the contact’s display page he expected. To address these issues, we’llimplement routing in our application.
How to Think About Routing
It’s important that we define the router’s role, in order to design our app properly. All a router doesis
• execute controller actions corresponding to the URL with which the user first “entered” ourMarionette app. It’s important to note that the route-handling code should get fired only whena user enters the application by a URL, not each time the URL changes. Put another way, oncea user is within our Marionette app, the route-handling shouldn’t be executed again, evenwhen the user navigates around;
• update the URL in the address bar as the user navigates within the app (i.e. keep the displayedURL in sync with the application state). That way, a user could potentially use the same URL(by bookmarking it, emailing it to a friend, etc.) to “restore” the app’s current confguration(i.e. which views are displayed, etc.). Keeping the URL up to date also enables the browser’s“back” and “forward” buttons to function properly.
It’s very important to differentiate triggering routing events from updating the URL. Intraditional web frameworks, actions are triggered by hitting their corresponding URLs.This isn’t true for javascript web applications: our ContactManager has been working justfine (even “changing pages”) without ever caring about the current URL.
And now that we have a basic app functioning as we want it to, we’ll add in a router to manage theURL-related functionality. Our router will only get triggered by the first URL it recognizes, resultingin our app getting “initialized” to the correct state (i.e. showing the proper data in the proper views).After that initialization step has fired once, the router only keeps the URL up to date as the usernavigates our app: changing the displayed content will be handled by our controllers, as it has beenup to now.
34

Implementing Routing 35
Adding a Router to ContactsApp
Now that we have a better idea of how routing should be used, let’s add a router to our ContactsAppby creating a new file:
Adding a router to our ContactsApp (assets/js/apps/contacts/contacts_app.js)
1 ContactManager.module("ContactsApp", function(ContactsApp, ContactManager,
2 Backbone, Marionette, $, _){
3 ContactsApp.Router = Marionette.AppRouter.extend({
4 appRoutes: {
5 "contacts": "listContacts"
6 }
7 });
8
9 var API = {
10 listContacts: function(){
11 console.log("route to list contacts was triggered");
12 }
13 };
14
15 ContactsApp.on("start", function(){
16 new ContactsApp.Router({
17 controller: API
18 });
19 });
20 });
As you can tell from the module callback on line 1, we’re defining the router within the ContactsAppmodule because it will handle the routes for all the sub-modules attached to ContactsApp (such asList, Show, etc.). On line 3, we attach a Router instance containing an appRoutes⁴⁹ object associatingthe URL fragments on the left with callback methods on the right.
Next, we define public methods within an API object on lines 9-13, which is provided to the routerduring instantiation on line 17. Note that the callback function (e.g. listContacts) specified in theappRoutes object above must exist in the router’s controller. In other words, all the callbacks usedin the appRoutes object must be located in our API object.
Finally, we instantiate a new router instance in the “start” event handler: the provided function willbe executed as soon as the containing module (in this case, ContactsApp) starts.
Don’t forget to add the sub-application file to our includes in index.html:
⁴⁹https://github.com/marionettejs/backbone.marionette/blob/master/docs/marionette.approuter.md#configure-routes

Implementing Routing 36
index.html
1 <script src="./assets/js/app.js"></script>
2 <script src="./assets/js/entities/contact.js"></script>
3
4 <script src="./assets/js/apps/contacts/contacts_app.js"></script>
5 <script src="./assets/js/apps/contacts/list/list_view.js"></script>
6 <script src="./assets/js/apps/contacts/list/list_controller.js"></script>
7 <script src="./assets/js/apps/contacts/show/show_view.js"></script>
8 <script src="./assets/js/apps/contacts/show/show_controller.js"></script>
When we enter “index.html#contacts” in our browser’s address bar and hit enter, we expect to see“route to list contacts was triggered” in the console but nothing happens. That is because the URLmanagement is delegated to Backbone’s history⁵⁰, which we haven’t started. So let’s add the codefor starting Backbone’s history in our app’s initializer:
Starting Backbone’s history in assets/js/app.js
1 ContactManager.on("start", function(){
2 if(Backbone.history){
3 Backbone.history.start();
4 }
5 });
Note that we can only start Backbone’s routing (via the history attribute) once allrouters have been instantiated, to ensure the routing controllers are ready to respond torouting events. Otherwise, Backbone’s routing would be started, triggering routing eventsaccording to the URL fragments, but these routing events wouldn’t be acted on by theapplication because the routing controllers haven’t been defined yet! Luckily for us, whena module starts, it will start all of its sub-modules first. Therefore, our sub-modules willhave their routers initialized and listening for routing events by the time the main appstarts.
If we now hit the “index.html#contacts” URL as an entry point, we’ll see the expected output in ourconsole. We’ve got history working!
But you’ll also see that our app no longer lists our contacts: we’ve removed the line that called ourlistContacts action in the app initializer code, namely:
⁵⁰http://backbonejs.org/#History
Implementing Routing 37
ContactManager.ContactsApp.List.Controller.listContacts();
We need to trigger this controller action from our ContactsApp routing controller:
Adding a router to our ContactsApp (assets/js/apps/contacts/contacts_app.js)
1 ContactManager.module("ContactsApp", function(ContactsApp, ContactManager,
2 Backbone, Marionette, $, _){
3 ContactsApp.Router = Marionette.AppRouter.extend({
4 appRoutes: {
5 "contacts": "listContacts"
6 }
7 });
8
9 var API = {
10 listContacts: function(){
11 ContactsApp.List.Controller.listContacts();
12 }
13 };
14
15 ContactsApp.on("start", function(){
16 new ContactsApp.Router({
17 controller: API
18 });
19 });
20 });
We simply needed to change line 11 to execute the proper controller action, and we’re in business:entering “index.html#contacts” in the browser’s address bar displays our contacts, as expected. Butif we go to “index.html”, nothing happens. Why is that?
It’s pretty simple, really: we’ve started managing our app’s initial state with routes, but have noroute registered for the root URL.

Implementing Routing 38
What about pushState?Backbone allows you to leverage HTML5’s pushState⁵¹ functionality by changing yourhistory starting code to Backbone.history.start({pushState: true}); (see documen-tation⁵²).
When using pushState, URL fragments look like the usual “/contacts/3” instead of “#con-tacts/3”. This allows you to serve an enhanced, javascript-heavy version of the page tousers with javascript-enabled browsers, while serving the basic HTML experience to clientswithout javascript (e.g. search engine crawlers). Be aware, however, that to use pushStatein your application your server has to respond to that URL. This is a frequent errorwhen trying out pushState.
You’re free to have your server systematically respond with your index.html pageregardless of the requested URL, but something needs to be sent to the client when theURL is requested (e.g. when loading a bookmark). When sending index.html to all clientrequests, you’re bascially delegating the URL resolution to your Marionette app: when thebrowser will load index.html, the app will start along with the route-handling code, whichwill load the correct application state (since the route corresponding to the URL requestedby the client will get triggered).
Another strategy is to progressively enhance your application, as Derick Bailey introducedin a blog post⁵³.
A great resource to read up on HTML5’s History API is Dive Into HTML5⁵⁴, and the linksprovided in its “Further Reading” paragraph at the end.
Routing Helpers
Here’s what we want to do: if the user comes to our app at the root URL, let’s redirect him to“#contacts”. The basic way of accomplishing this would be:
⁵¹http://www.whatwg.org/specs/web-apps/current-work/multipage/history.html#history⁵²http://backbonejs.org/#History-start⁵³http://lostechies.com/derickbailey/2011/09/26/seo-and-accessibility-with-html5-pushstate-part-1-introducing-pushstate/⁵⁴http://diveintohtml5.info/history.html
Implementing Routing 39
Redirecting to the root URL (assets/js/app.js)
1 ContactManager.on("start", function(){
2 if(Backbone.history){
3 Backbone.history.start();
4
5 if(Backbone.history.fragment === ""){
6 Backbone.history.navigate("contacts");
7 ContactManager.ContactsApp.List.Controller.listContacts();
8 }
9 }
10 });
On line 5, we check the URL fragment (i.e. the string that comes after “index.html” in the URL,ignoring the “#” character): if it’s empty, we need to redirect the user. Except that in javascript webapps, “redirecting” is a bit of a misnomer: we’re not redirecting anything (as we would be with aserver), we are just
• updating the URL with the proper fragment (line 6)• executing the proper controller action (line 7), which will display the desired views
You can achieve the same result by putting Backbone.history.navigate("contacts",
{trigger: true}); on line 6, and removing line 7. You will sometimes see this donein various places on the web, but it encourages bad app design and it is stronglyrecommended you don’t pass trigger:true to Backbone.history.navigate. DerickBailey (Marionette’s creator) even wrote a blog post⁵⁵ on the subject.
Triggering routes to execute desired behavior is a natural reflex when you’re comingfrom typical stateless web development, because that’s how it works: the user hits a URLendpoint, and the corresponding actions are performed. And although triggering the routelooks better at first glance (less code), it will expose you to design problems: if you’reunable to get your app to behave as expected using controller methods, you’ve got issuesthat should be addressed. Keeping the {trigger: false} default when navigating willencourage the proper separation of app behavior and URLmanagement, as discussed above.
Note that navigate doesn’t just change the URL fragment, it also adds the new URL to the browser’shistory. This, in turn, makes the browser’s “back” and “forward” buttons behave as expected.
Let’s get back to our code and refactor: checking the current URL fragment and keeping it up to dateare things we’ll be doing quite frequently as we develop our app. Let’s extract them into functionsattached to our app:
⁵⁵http://lostechies.com/derickbailey/2011/08/28/dont-execute-a-backbone-js-route-handler-from-your-code/

Implementing Routing 40
Redirecting to the root URL (assets/js/app.js)
1 var ContactManager = new Marionette.Application();
2
3 ContactManager.navigate = function(route, options){
4 options || (options = {});
5 Backbone.history.navigate(route, options);
6 };
7
8 ContactManager.getCurrentRoute = function(){
9 return Backbone.history.fragment
10 };
11
12 ContactManager.on("before:start", function(){
13 // setup region container (edited for brevity)
14 });
15
16 ContactManager.on("start", function(){
17 if(Backbone.history){
18 Backbone.history.start();
19
20 if(this.getCurrentRoute() === ""){
21 this.navigate("contacts");
22 ContactManager.ContactsApp.List.Controller.listContacts();
23 }
24 }
25 });
We’ve simply declared helper functions on lines 3 and 8, and we then use them on lines 20-21. Notethat line 4 essentially sets options to {} if none are provided (i.e. it sets a default value).
If you think about it, these helper functions aren’t really specific to our application: they’recloser to extensions of theMarionette framework. For simplicity’s sake, we’ve kept the codeabove in the main app, but refer to the Extending Marionette chapter to see how this canbe accomplished to clean up our code further.
DRYing up Routing with Events
Right now, our app is manually changing the URL and calling a controller action if the URL containsno fragement. But that isn’t very DRY⁵⁶: we’ll end up setting route fragements and calling controller
⁵⁶http://en.wikipedia.org/wiki/Don%27t_repeat_yourself
Implementing Routing 41
methods everywhere, and it will be a nightmare to maintain.
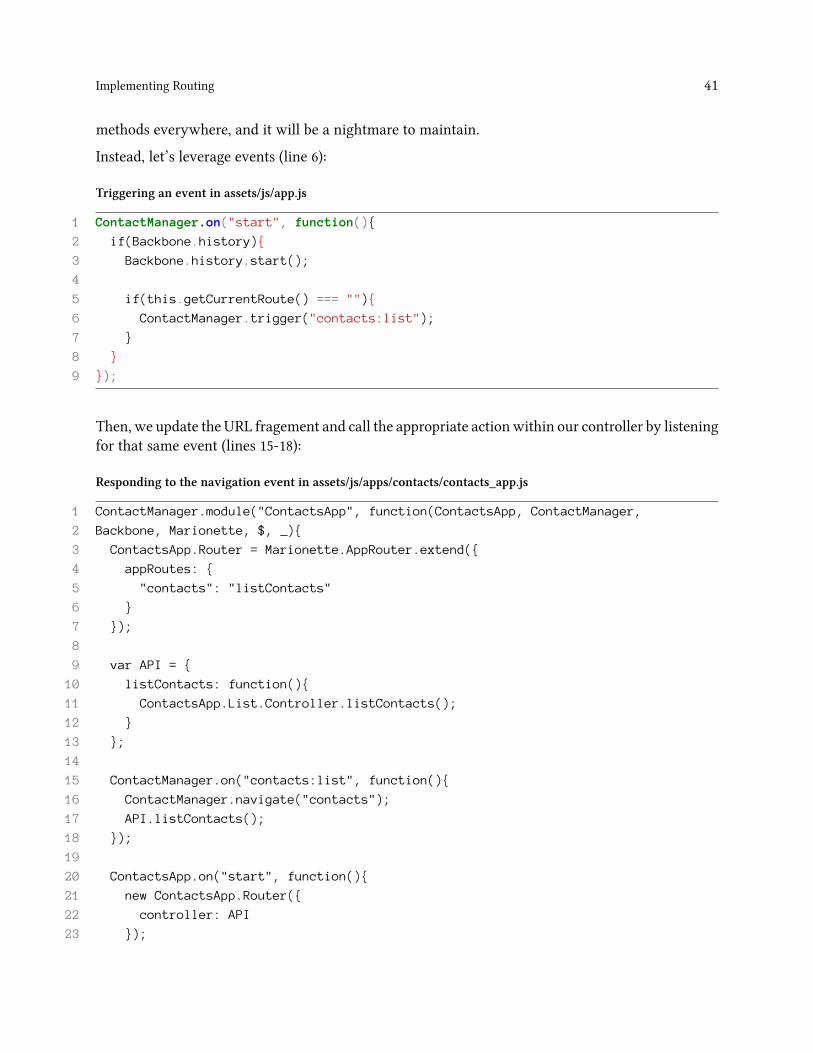
Instead, let’s leverage events (line 6):
Triggering an event in assets/js/app.js
1 ContactManager.on("start", function(){
2 if(Backbone.history){
3 Backbone.history.start();
4
5 if(this.getCurrentRoute() === ""){
6 ContactManager.trigger("contacts:list");
7 }
8 }
9 });
Then, we update the URL fragement and call the appropriate actionwithin our controller by listeningfor that same event (lines 15-18):
Responding to the navigation event in assets/js/apps/contacts/contacts_app.js
1 ContactManager.module("ContactsApp", function(ContactsApp, ContactManager,
2 Backbone, Marionette, $, _){
3 ContactsApp.Router = Marionette.AppRouter.extend({
4 appRoutes: {
5 "contacts": "listContacts"
6 }
7 });
8
9 var API = {
10 listContacts: function(){
11 ContactsApp.List.Controller.listContacts();
12 }
13 };
14
15 ContactManager.on("contacts:list", function(){
16 ContactManager.navigate("contacts");
17 API.listContacts();
18 });
19
20 ContactsApp.on("start", function(){
21 new ContactsApp.Router({
22 controller: API
23 });
Implementing Routing 42
24 });
25 });
Much better! We now have proper URL handling without needing to trigger routes. This will bevery useful as the app grows: we can simply trigger the appropriate events for our sub-applicationsto respond and update the displayed information.
Git commit implementing our first route:
ab6e215ec778cc99d842c2ebe73ea8673ec5e570⁵⁷
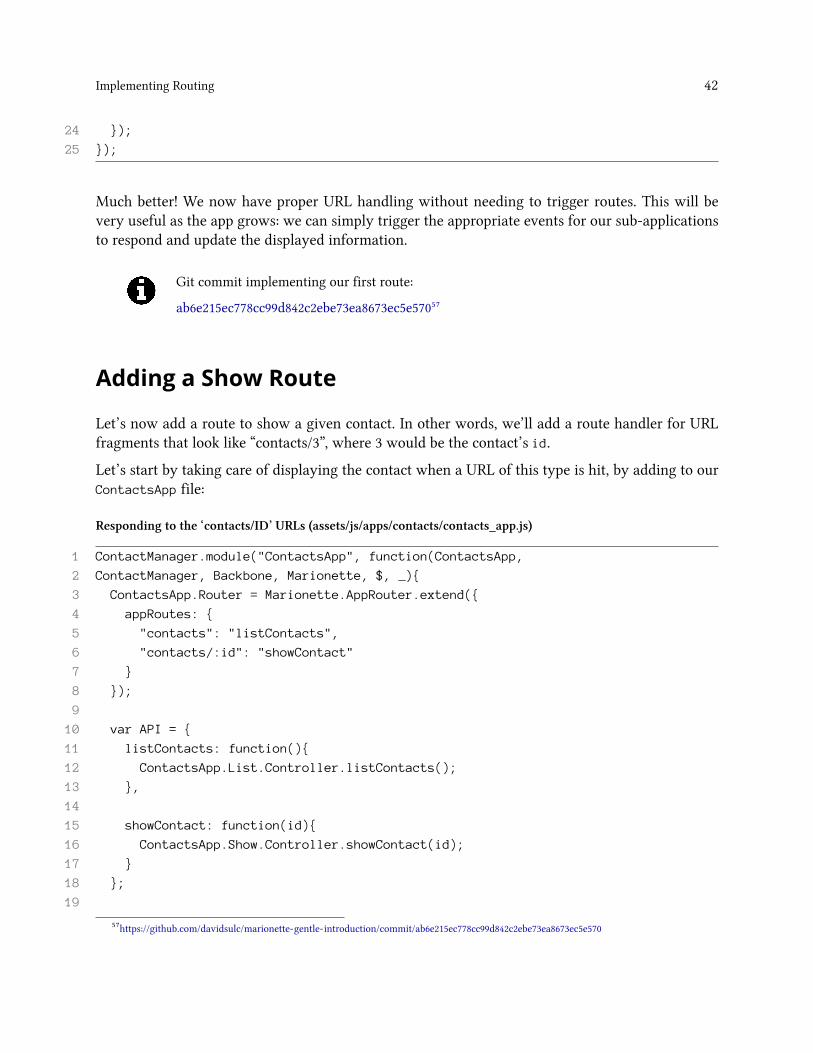
Adding a Show Route
Let’s now add a route to show a given contact. In other words, we’ll add a route handler for URLfragments that look like “contacts/3”, where 3 would be the contact’s id.
Let’s start by taking care of displaying the contact when a URL of this type is hit, by adding to ourContactsApp file:
Responding to the ‘contacts/ID’ URLs (assets/js/apps/contacts/contacts_app.js)
1 ContactManager.module("ContactsApp", function(ContactsApp,
2 ContactManager, Backbone, Marionette, $, _){
3 ContactsApp.Router = Marionette.AppRouter.extend({
4 appRoutes: {
5 "contacts": "listContacts",
6 "contacts/:id": "showContact"
7 }
8 });
9
10 var API = {
11 listContacts: function(){
12 ContactsApp.List.Controller.listContacts();
13 },
14
15 showContact: function(id){
16 ContactsApp.Show.Controller.showContact(id);
17 }
18 };
19
⁵⁷https://github.com/davidsulc/marionette-gentle-introduction/commit/ab6e215ec778cc99d842c2ebe73ea8673ec5e570
Implementing Routing 43
20 ContactManager.on("contacts:list", function(){
21 ContactManager.navigate("contacts");
22 API.listContacts();
23 });
24
25 ContactsApp.on("start", function(){
26 new ContactsApp.Router({
27 controller: API
28 });
29 });
30 });
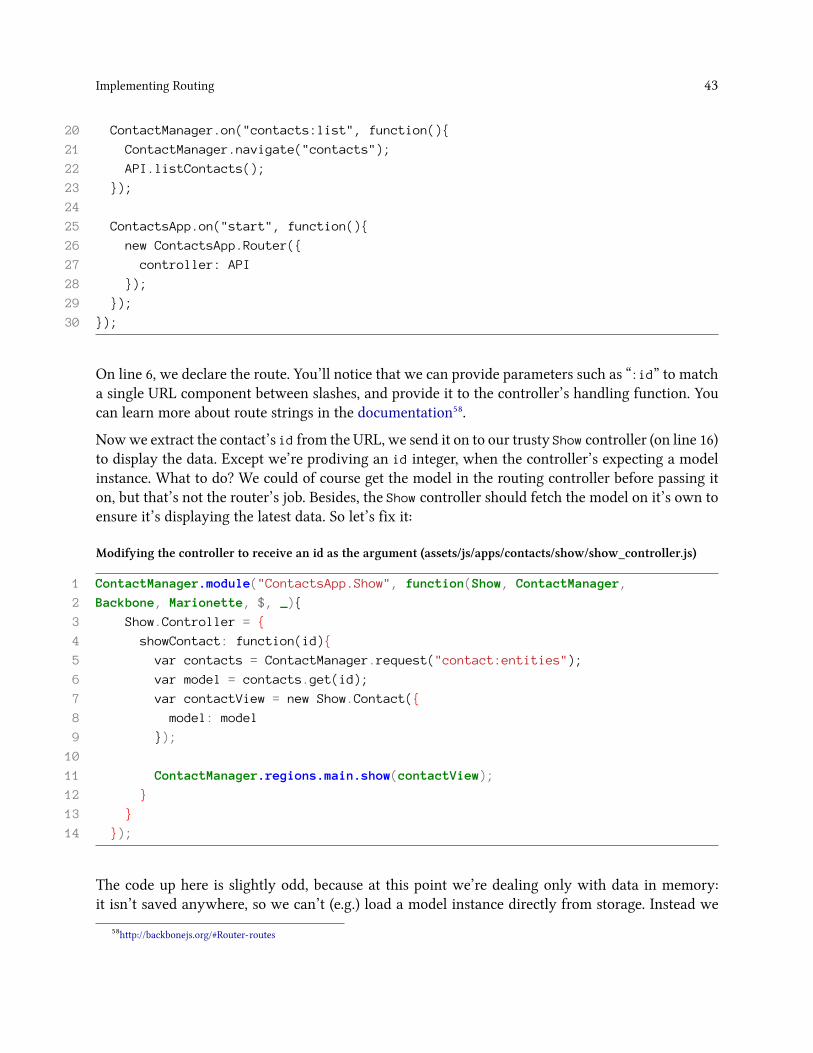
On line 6, we declare the route. You’ll notice that we can provide parameters such as “:id” to matcha single URL component between slashes, and provide it to the controller’s handling function. Youcan learn more about route strings in the documentation⁵⁸.
Nowwe extract the contact’s id from the URL, we send it on to our trusty Show controller (on line 16)to display the data. Except we’re prodiving an id integer, when the controller’s expecting a modelinstance. What to do? We could of course get the model in the routing controller before passing iton, but that’s not the router’s job. Besides, the Show controller should fetch the model on it’s own toensure it’s displaying the latest data. So let’s fix it:
Modifying the controller to receive an id as the argument (assets/js/apps/contacts/show/show_controller.js)
1 ContactManager.module("ContactsApp.Show", function(Show, ContactManager,
2 Backbone, Marionette, $, _){
3 Show.Controller = {
4 showContact: function(id){
5 var contacts = ContactManager.request("contact:entities");
6 var model = contacts.get(id);
7 var contactView = new Show.Contact({
8 model: model
9 });
10
11 ContactManager.regions.main.show(contactView);
12 }
13 }
14 });
The code up here is slightly odd, because at this point we’re dealing only with data in memory:it isn’t saved anywhere, so we can’t (e.g.) load a model instance directly from storage. Instead we
⁵⁸http://backbonejs.org/#Router-routes

Implementing Routing 44
retrieve the model instance from the collection with get⁵⁹ on line 6, which means we need to get areference to our contacts collection first (line 5). Don’t worry, this code will be refactored when weimplement data storage. As our old friend Ned Stark would say, “persistence is coming”…
Let’s refresh our page to load our app’s new version, and manually type in the “#contacts/2” URLfragement in the address bar. When we hit enter, the appropriate contact is displayed. If we thenenter “#contacts/3”, another contact is displayed, as expected. In addition, pressing the browser’s“back” button works properly. Fabulous!
But what if we enter “#contacts” in the address bar, then click the “show” button for the secondcontact? The proper contact is displayed, but the address bar still indicates “#contacts” instead ofthe correct “#contacts/2”: we haven’t updated the URL as we’ve navigated in our application. Wecould just update the fragment in our List controller by adding line :
Updating the URL fragment on display change (assets/js/apps/contacts/list/list_controller.js)
1 contactsListView.on("childview:contact:show", function(childView, model){
2 ContactManager.navigate("contacts/" + model.get("id"));
3 ContactManager.ContactsApp.Show.Controller.showContact(model);
4 });
But that would mean duplicating the call to the controller action, and the navigate function fromevery place in our app where we’d want to display a contact. Not very DRY…
Instead, let’s centralize that functionality within the routing controller, and simply trigger an eventthat the routing controller will react to:
Triggering an event to display a contact (assets/js/apps/contacts/list/list_controller.js)
1 contactsListView.on("childview:contact:show", function(childView, model){
2 ContactManager.trigger("contact:show", model.get("id"));
3 });
Now, let’s adapt our routing controller code:
⁵⁹http://backbonejs.org/#Collection-get
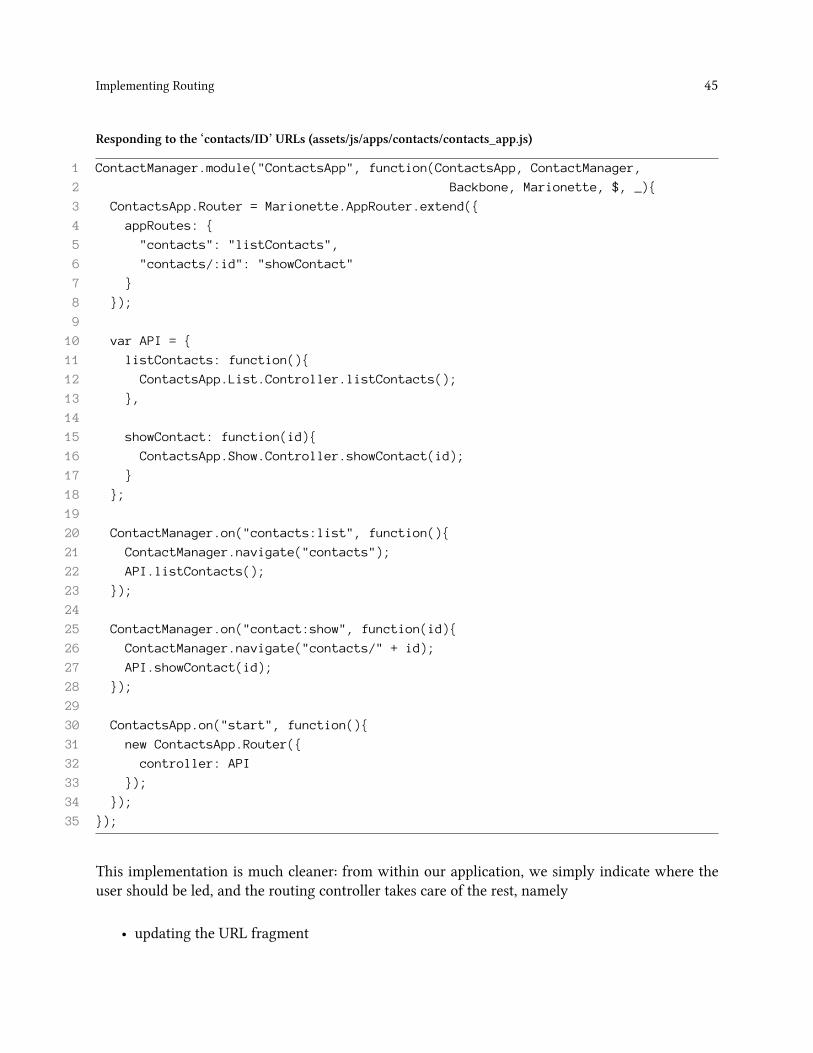
Implementing Routing 45
Responding to the ‘contacts/ID’ URLs (assets/js/apps/contacts/contacts_app.js)
1 ContactManager.module("ContactsApp", function(ContactsApp, ContactManager,
2 Backbone, Marionette, $, _){
3 ContactsApp.Router = Marionette.AppRouter.extend({
4 appRoutes: {
5 "contacts": "listContacts",
6 "contacts/:id": "showContact"
7 }
8 });
9
10 var API = {
11 listContacts: function(){
12 ContactsApp.List.Controller.listContacts();
13 },
14
15 showContact: function(id){
16 ContactsApp.Show.Controller.showContact(id);
17 }
18 };
19
20 ContactManager.on("contacts:list", function(){
21 ContactManager.navigate("contacts");
22 API.listContacts();
23 });
24
25 ContactManager.on("contact:show", function(id){
26 ContactManager.navigate("contacts/" + id);
27 API.showContact(id);
28 });
29
30 ContactsApp.on("start", function(){
31 new ContactsApp.Router({
32 controller: API
33 });
34 });
35 });
This implementation is much cleaner: from within our application, we simply indicate where theuser should be led, and the routing controller takes care of the rest, namely
• updating the URL fragment

Implementing Routing 46
• executing the appropriate controller action
It’s also possible to scope events to a sub-application by using (e.g.)ContactManager.ContactsApp.trigger(...)
One last thing, before we consider ourselves done: let’s add the proper link to the show button, sousers can do things like opening the link in a new tab, copying the link location, etc. We need tomodify our template in index.html:
Adding the proper link value in our contact-list-item template (index.html)
1 <script type="text/template" id="contact-list-item">
2 <td><%- firstName %></td>
3 <td><%- lastName %></td>
4 <td>
5 <a href="#contacts/<%- id %>" class="btn btn-small js-show">
6 <i class="icon-eye-open"></i>
7 Show
8 </a>
9 <button class="btn btn-small js-delete">
10 <i class="icon-remove"></i>
11 Delete
12 </button>
13 </td>
14 </script>
Git commit implementing the show route:
6b57c4b7f32626501c79fab0c622ae5bb49aeca1⁶⁰
⁶⁰https://github.com/davidsulc/marionette-gentle-introduction/commit/6b57c4b7f32626501c79fab0c622ae5bb49aeca1

Implementing Routing 47
Why don’t we make a route for delete?The main reason: we have direct access to the model within our app, so there’s no need fora route. This is a stark contrast to traditional server-side MVC, where you’d need a deletionroute to determine the model to destroy.
Additionally, calling navigate with a deletion route would add it to the browser’s history.This, in turn, will make you enter a world of pain as the user presses the “back” button andhits a URL meant to delete a model that no longer exists.
All in all, your experience with routing will be a much happier one if you bear in mind 2guiding concepts:
• avoid at all costs passing “trigger: true” to navigate;• if the user shouldn’t be able to “save” (i.e. bookmark) an application’s state, itshouldn’t have a URL. In other words, nowhere in you app should you have definedroutes for this action, nor should you call navigate for it.
To illustrate the last point, think about (e.g.) creating a new contact:
• the user should be able to bookmark the page with the creation form, so it gets aroute, and gets navigated to;
• the user should not be able to bookmark the place in the application where a newmodel is instantiated and saved, so there’s no associated route and we don’t navigateto it: the action simply gets executed within the application.
Derick Bailey has a great blog post⁶¹ on the issue.
Exercise
Getting Back to the Contacts List
When the user is on a contact’s display page (e.g. “#contacts/2”), there’s no way for him to returnto the page listing all contacts (i.e. “#contacts”). Add a simple link to the contact page template(#contact-view) that will take the user to the page listing all contacts.
You can see the exercise solution at the end of the book.
⁶¹http://lostechies.com/derickbailey/2011/08/03/stop-using-backbone-as-if-it-were-a-stateless-web-server/

Implementing Routing 48
Note we’re not including this “feature” within the main code, because we’re going toimplement a full-featured menu later. With the navigation header in place, there will beno need for this link on a contact’s page.

Chapters not in SampleThis is a sample of the book, several chapters are absent.
You can get the complete book at https://leanpub.com/marionette-gentle-introduction/⁶².
⁶²https://leanpub.com/marionette-gentle-introduction/
49

About this SampleYou’re currently viewing a sample of the book’s content, containing mainly basic information, witha more advanced chapter on routing. It is intended to give you a feel for how the book is written:introducing concepts gradually, so you fully understand the Marionette framework and how best toleverage it in your own projects. Hopefully, you’ve still learned a thing or two along the way.
Please note that the table of contents included here is NOT the full contents of the book. To see thefull (intended) contents, please refer to the book’s landing page at https://leanpub.com/marionette-gentle-introduction⁶³.
The book itself contains much more content written in the same “step by step” style, along with thesolutions to the various exercises. I’ve worked hard to make this book a great resource for learningMarionette, and I hope this sample will have convinced you.
Thanks for reading!
⁶³https://leanpub.com/marionette-gentle-introduction
50