Avaya 9508 Series Digital Deskphone User Guide · Avaya 9508 Series Digital Deskphone - User Guide...
122
Avaya 9508 Series Digital Deskphone - User Guide for Integral 5 16-603553 Issue 1 March 2011
Transcript of Avaya 9508 Series Digital Deskphone User Guide · Avaya 9508 Series Digital Deskphone - User Guide...

Avaya 9508 Series Digital Deskphone -User Guide for Integral 5
16-603553Issue 1
March 2011
© 2011 Avaya Inc.
All Rights Reserved.
Notice
While reasonable efforts have been made to ensure that theinformation in this document is complete and accurate at the time ofprinting, Avaya assumes no liability for any errors. Avaya reserves theright to make changes and corrections to the information in thisdocument without the obligation to notify any person or organization ofsuch changes.
Full legal page information
For full support, please see the complete document, Avaya SupportNotices for Hardware Documentation, document number 03–600759.
To locate this document on our Web site, simply go to http://www.avaya.com/support and search for the document number in thesearch box.
Note
Using a cell, mobile, or GSM phone, or a two-way radio in closeproximity to an Avaya IP telephone might cause interference.
Documentation disclaimer
“Documentation” means information published by Avaya in varyingmediums which may include product information, operating instructionsand performance specifications that Avaya generally makes availableto users of its products. Documentation does not include marketingmaterials. Avaya shall not be responsible for any modifications,additions, or deletions to the original published version ofdocumentation unless such modifications, additions, or deletions wereperformed by Avaya. End User agrees to indemnify and hold harmlessAvaya, Avaya's agents, servants and employees against all claims,lawsuits, demands and judgments arising out of, or in connection with,subsequent modifications, additions or deletions to this documentation,to the extent made by End User.
Link disclaimer
Avaya is not responsible for the contents or reliability of any linked Websites referenced within this site or documentation provided by Avaya.Avaya is not responsible for the accuracy of any information, statementor content provided on these sites and does not necessarily endorsethe products, services, or information described or offered within them.Avaya does not guarantee that these links will work all the time and hasno control over the availability of the linked pages.
Warranty
Avaya provides a limited warranty on its Hardware and Software(“Product(s)”). Refer to your sales agreement to establish the terms ofthe limited warranty. In addition, Avaya’s standard warranty language,as well as information regarding support for this Product while underwarranty is available to Avaya customers and other parties through theAvaya Support Web site: http://support.avaya.com. Please note that ifyou acquired the Product(s) from an authorized Avaya reseller outsideof the United States and Canada, the warranty is provided to you bysaid Avaya reseller and not by Avaya.
Licenses
THE SOFTWARE LICENSE TERMS AVAILABLE ON THE AVAYAWEBSITE, HTTP://SUPPORT.AVAYA.COM/LICENSEINFO/ AREAPPLICABLE TO ANYONE WHO DOWNLOADS, USES AND/ORINSTALLS AVAYA SOFTWARE, PURCHASED FROM AVAYA INC.,ANY AVAYA AFFILIATE, OR AN AUTHORIZED AVAYA RESELLER(AS APPLICABLE) UNDER A COMMERCIAL AGREEMENT WITHAVAYA OR AN AUTHORIZED AVAYA RESELLER. UNLESSOTHERWISE AGREED TO BY AVAYA IN WRITING, AVAYA DOESNOT EXTEND THIS LICENSE IF THE SOFTWARE WAS OBTAINEDFROM ANYONE OTHER THAN AVAYA, AN AVAYA AFFILIATE OR ANAVAYA AUTHORIZED RESELLER; AVAYA RESERVES THE RIGHT
TO TAKE LEGAL ACTION AGAINST YOU AND ANYONE ELSEUSING OR SELLING THE SOFTWARE WITHOUT A LICENSE. BYINSTALLING, DOWNLOADING OR USING THE SOFTWARE, ORAUTHORIZING OTHERS TO DO SO, YOU, ON BEHALF OFYOURSELF AND THE ENTITY FOR WHOM YOU ARE INSTALLING,DOWNLOADING OR USING THE SOFTWARE (HEREINAFTERREFERRED TO INTERCHANGEABLY AS “YOU” AND “END USER”),AGREE TO THESE TERMS AND CONDITIONS AND CREATE ABINDING CONTRACT BETWEEN YOU AND AVAYA INC. OR THEAPPLICABLE AVAYA AFFILIATE ( “AVAYA”).
Avaya grants End User a license within the scope of the license typesdescribed below. The applicable number of licenses and units ofcapacity for which the license is granted will be one (1), unless adifferent number of licenses or units of capacity is specified in theDocumentation or other materials available to End User. “DesignatedProcessor” means a single stand-alone computing device. “Server”means a Designated Processor that hosts a software application to beaccessed by multiple users. “Software” means the computer programsin object code, originally licensed by Avaya and ultimately utilized byEnd User, whether as stand-alone Products or pre-installed onHardware. “Hardware” means the standard hardware originally sold byAvaya and ultimately utilized by End User.
License types
Designated System(s) License (DS). End User may install and useeach copy of the Software on only one Designated Processor, unlessa different number of Designated Processors is indicated in theDocumentation or other materials available to End User. Avaya mayrequire the Designated Processor(s) to be identified by type, serialnumber, feature key, location or other specific designation, or to beprovided by End User to Avaya through electronic means establishedby Avaya specifically for this purpose.
Shrinkwrap License (SR). Customer may install and use the Softwarein accordance with the terms and conditions of the applicable licenseagreements, such as “shrinkwrap” or “clickthrough” licenseaccompanying or applicable to the Software (“Shrinkwrap License”).(see “Third-party Components” for more information).
Copyright
Except where expressly stated otherwise, no use should be made ofmaterials on this site, the Documentation, Software, or Hardwareprovided by Avaya. All content on this site, the documentation and theProduct provided by Avaya including the selection, arrangement anddesign of the content is owned either by Avaya or its licensors and isprotected by copyright and other intellectual property laws including thesui generis rights relating to the protection of databases. You may notmodify, copy, reproduce, republish, upload, post, transmit or distributein any way any content, in whole or in part, including any code andsoftware unless expressly authorized by Avaya. Unauthorizedreproduction, transmission, dissemination, storage, and or use withoutthe express written consent of Avaya can be a criminal, as well as acivil offense under the applicable law.
Third-party components
Certain software programs or portions thereof included in the Productmay contain software distributed under third party agreements (“ThirdParty Components”), which may contain terms that expand or limitrights to use certain portions of the Product (“Third Party Terms”).Information regarding distributed Linux OS source code (for thoseProducts that have distributed the Linux OS source code), andidentifying the copyright holders of the Third Party Components and theThird Party Terms that apply to them is available on the Avaya SupportWeb site: http://support.avaya.com/Copyright.
Preventing Toll Fraud
“Toll fraud” is the unauthorized use of your telecommunications systemby an unauthorized party (for example, a person who is not a corporateemployee, agent, subcontractor, or is not working on your company'sbehalf). Be aware that there can be a risk of Toll Fraud associated with
2 Avaya 9508 Series Digital Deskphone User Guide March 2011

your system and that, if Toll Fraud occurs, it can result in substantialadditional charges for your telecommunications services.
Avaya Toll Fraud Intervention
If you suspect that you are being victimized by Toll Fraud and you needtechnical assistance or support, call Technical Service Center TollFraud Intervention Hotline at +1-800-643-2353 for the United Statesand Canada. For additional support telephone numbers, see the AvayaSupport Web site: http://support.avaya.com. Suspected securityvulnerabilities with Avaya products should be reported to Avaya bysending mail to: [email protected].
Trademarks
All non-Avaya trademarks are the property of their respective owners,and “Linux” is a registered trademark of Linus Torvalds.
Downloading Documentation
For the most current versions of Documentation, see the AvayaSupport Web site: http://support.avaya.com.
Contact Avaya Support
Avaya provides a telephone number for you to use to report problemsor to ask questions about your Product. The support telephone numberis 1-800-242-2121 in the United States. For additional supporttelephone numbers, see the Avaya Web site: http://support.avaya.com.
Avaya 9508 Series Digital Deskphone User Guide March 2011 3

4 Avaya 9508 Series Digital Deskphone User Guide March 2011

Contents
Chapter 1: Overview..................................................................................................................9Introduction to the Avaya 9508 Digital Telephone.............................................................................................9Buttons and features of the Avaya 9508 telephone........................................................................................10Basic menu overview......................................................................................................................................12About LEDs.....................................................................................................................................................14About this manual...........................................................................................................................................15
Chapter 2: Making calls..........................................................................................................17Introduction to making calls.............................................................................................................................17Calling an internal number..............................................................................................................................17Calling an external number.............................................................................................................................18Calling with a destination key..........................................................................................................................18Making a call using call history........................................................................................................................18Making a call using a phone book entry..........................................................................................................19Calling partners...............................................................................................................................................19Calling using the speakerphone......................................................................................................................19Requesting automatic callback.......................................................................................................................20Redialing a called number...............................................................................................................................20Requesting automatic redialing.......................................................................................................................21Joining another call (cut-in)*............................................................................................................................21Presenting yourself with specified call numbers *...........................................................................................22Making an announcement...............................................................................................................................23Making an individual announcement...............................................................................................................23Replying to an announcement........................................................................................................................23Calling as an anonymous user........................................................................................................................24
Chapter 3: Handling calls.......................................................................................................25Introduction to handling calls...........................................................................................................................25Answering a call..............................................................................................................................................25Answering a call ringing at another phone (pick-up).......................................................................................25Answering a call for a partner.........................................................................................................................26Forwarding calls to forwarding stations...........................................................................................................26Placing a call on hold......................................................................................................................................26Muting a call....................................................................................................................................................27Making a consultation call...............................................................................................................................27Alternating between two calls..........................................................................................................................28Transferring a call............................................................................................................................................28Answering an additional call............................................................................................................................28
Chapter 4: Diverting incoming calls......................................................................................31Introduction to call diversion............................................................................................................................31Diverting calls from your telephone to another................................................................................................31Diverting calls to your telephone.....................................................................................................................32Diverting calls for another telephone *............................................................................................................33Signaling calls on two telephones (twinning)..................................................................................................34Diverting bundles *..........................................................................................................................................35
Chapter 5: Three-party conference call.................................................................................37Introduction to conference calls......................................................................................................................37
Avaya 9508 Series Digital Deskphone User Guide March 2011 5

Making a conference call................................................................................................................................37Expanding the conference call to include other participants...........................................................................37Connecting conference participants................................................................................................................38Ending the conference call..............................................................................................................................38
Chapter 6: Using the Conference bridge...............................................................................39Introduction to conference bridge....................................................................................................................39Dialing into conference bridge.........................................................................................................................39Moderating calls on the conference bridge.....................................................................................................40Reserving the conference bridge for a one-time usage..................................................................................41Reserving the conference bridge for recurring usage.....................................................................................42Reserving a conference bridge for others.......................................................................................................43Checking and deleting reservations................................................................................................................43
Chapter 7: Managing the call history.....................................................................................45Introduction to the Call History feature............................................................................................................45Symbols used in the call history records.........................................................................................................45Viewing call history..........................................................................................................................................46Removing an entry from call history................................................................................................................46Deleting call history entries automatically.......................................................................................................47Adding an entry from the call history to the phone book.................................................................................47Adding additional entries to the call history.....................................................................................................48
Chapter 8: Managing the phone book...................................................................................51Introduction to the phone book........................................................................................................................51Creating a new entry in the phone book.........................................................................................................51Editing an entry in the phone book..................................................................................................................52Deleting an entry.............................................................................................................................................53
Chapter 9: Managing text messages.....................................................................................55Introduction to messaging...............................................................................................................................55Viewing and deleting received text messages................................................................................................55Writing and sending text messages................................................................................................................55Sending a standard text..................................................................................................................................56Setting up a text message for internal callers.................................................................................................56
Chapter 10: Managed Mobility Access for mobile system subscribers.............................59Introduction to MMA........................................................................................................................................59Dialing in to your system.................................................................................................................................59Dialing in to your system using the callback feature.......................................................................................60Calling using your system...............................................................................................................................60
Placing a call using the MMA.................................................................................................................60Referring back using the MMA...............................................................................................................61Starting a conference call using MMA....................................................................................................61Ending a call...........................................................................................................................................61Modifying the twinning and call diversion number..................................................................................62Deactivating twinning and call diversion.................................................................................................62
Calling code dialing destinations.....................................................................................................................62
Chapter 11: Using the Call Charges feature..........................................................................65Call Charges...................................................................................................................................................65
Introduction to call charges.....................................................................................................................65
6 Avaya 9508 Series Digital Deskphone User Guide March 2011
Viewing the charge display.....................................................................................................................65Viewing charges for lines or subscribers................................................................................................66Deleting call charges..............................................................................................................................66
Locking the telephone.....................................................................................................................................67Telephone lock........................................................................................................................................67Changing the PIN...................................................................................................................................67Locking the telephone............................................................................................................................67Unlocking the telephone.........................................................................................................................68
Managing appointments..................................................................................................................................68Appointments and reminders..................................................................................................................68Entering an appointment for today.........................................................................................................69Entering a one-time appointment...........................................................................................................69Entering a recurring appointment...........................................................................................................70Acknowledging an appointment..............................................................................................................70Deleting an appointment.........................................................................................................................71Setting appointments for others..............................................................................................................71
Chapter 12: Customizing your telephone.............................................................................73Setting parameters for your telephone............................................................................................................73
Changing the acoustic signaling.............................................................................................................73Setting the ringing tone melody..............................................................................................................74Applying special ring tone melodies.......................................................................................................74Setting the contrast.................................................................................................................................75Setting the language...............................................................................................................................76Adjusting the setting for handsfree operation.........................................................................................76
Deactivating the ringing tone temporarily........................................................................................................77Activating Night service...................................................................................................................................78Activating automatic handsfree after dialing...................................................................................................78Seizing exchange line automatically...............................................................................................................79Seizing external line automatically when going off-hook.................................................................................79Setting the number of redials..........................................................................................................................80Setting the redial interval.................................................................................................................................81Setting the number to show to the external subscribers.................................................................................81Accepting calls automatically using the Handsfree answer back feature........................................................82Turning direct dialing on or off.........................................................................................................................83Deactivating a second call..............................................................................................................................84Assigning code numbers *..............................................................................................................................84Extending call display......................................................................................................................................85Deactivating VIP call signaling *......................................................................................................................85Removing the telephone from hunt groups.....................................................................................................86Removing the telephone from general call......................................................................................................86Activating remote headset...............................................................................................................................87Function, destination, line, and partner keys...................................................................................................88
Introduction to Function keys..................................................................................................................88Assigning functions to keys....................................................................................................................88Assigning destinations to keys...............................................................................................................89Assigning lines to keys...........................................................................................................................89Assigning partners to keys.....................................................................................................................90Deleting destination key assignments....................................................................................................91
Conference bridge settings.............................................................................................................................91Setting up the conference bridge *.........................................................................................................91
Avaya 9508 Series Digital Deskphone User Guide March 2011 7

Setting up reservation permissions........................................................................................................92Changing the access PIN.......................................................................................................................92Setting up standard access *..................................................................................................................93Changing the standard PIN *..................................................................................................................94
Managed Mobility Access settings..................................................................................................................94Introduction to MMA settings..................................................................................................................94Adding dial-in authorized numbers *.......................................................................................................95Changing dial-in authorized numbers *..................................................................................................96Deleting dial-in authorized numbers *.....................................................................................................97
Using a call filter..............................................................................................................................................97Deleting entries from the call filter...................................................................................................................98
Chapter 13: Settings for your telephone system................................................................101Introduction...................................................................................................................................................101Assigning operators for day service *............................................................................................................101Assigning operators for night service *..........................................................................................................102Assigning call forwarding destinations *........................................................................................................103Setting up Second Call Barring *...................................................................................................................104Setting the date and time..............................................................................................................................105Setting customer password *........................................................................................................................105Showing traffic statistics *..............................................................................................................................106
Chapter 14: Auxiliary devices..............................................................................................107Button module BM12.....................................................................................................................................107Using a headset............................................................................................................................................109
Chapter 15: Hotel functions..................................................................................................111Introduction....................................................................................................................................................111Layout of the hotel functions on the BM12 button module *..........................................................................111Checking in *.................................................................................................................................................112Checking out *...............................................................................................................................................112Querying call charges *.................................................................................................................................113Listening to messages *................................................................................................................................114Messaging to guest: message at reception *.................................................................................................114Setting direct dial to rooms *..........................................................................................................................115Setting guest-to-guest connection *...............................................................................................................115Determining the charge limit *.......................................................................................................................115Waking up the guests *..................................................................................................................................116
Appendix A: Remote features..............................................................................................117Changing call diversion remotely *................................................................................................................117
Index.......................................................................................................................................119
8 Avaya 9508 Series Digital Deskphone User Guide March 2011

Chapter 1: Overview
Introduction to the Avaya 9508 Digital TelephoneThis user guide is written for the Avaya 9508 telephone.
The Avaya 9508 telephone is a multiline four wire digital telephone for use with the Integral 5switch.
These telephones put convenient features and capabilities at your fingertips, including adisplay to view and manage your calls, a contacts list, call history, a menu of options andsettings to customize your telephone, and access to your voice mail.
All features described in this user guide may not be available on your telephone. If you findthat a feature is not available, contact your system administrator.
Note:
Descriptions of the optional features are marked with an asterisk (*) symbol in the title.
Avaya 9508 Series Digital Deskphone User Guide March 2011 9
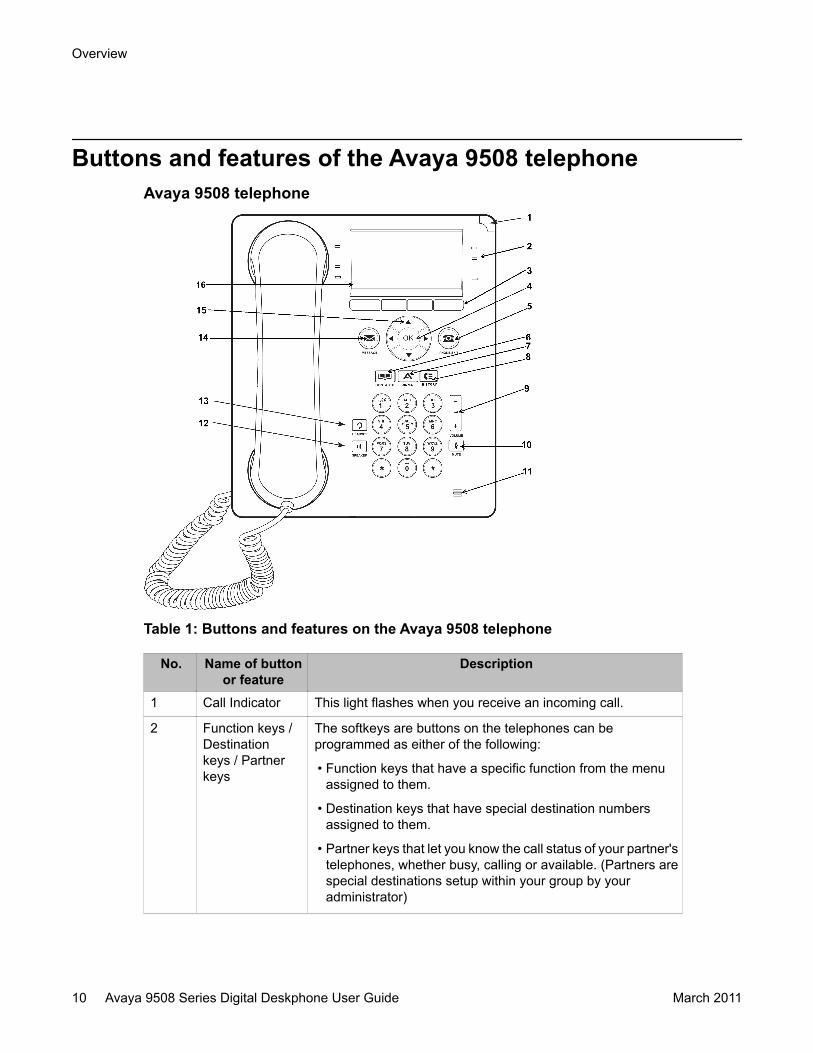
Buttons and features of the Avaya 9508 telephoneAvaya 9508 telephone
Table 1: Buttons and features on the Avaya 9508 telephone
No. Name of buttonor feature
Description
1 Call Indicator This light flashes when you receive an incoming call.
2 Function keys /Destinationkeys / Partnerkeys
The softkeys are buttons on the telephones can beprogrammed as either of the following:
• Function keys that have a specific function from the menuassigned to them.
• Destination keys that have special destination numbersassigned to them.
• Partner keys that let you know the call status of your partner'stelephones, whether busy, calling or available. (Partners arespecial destinations setup within your group by youradministrator)
Overview
10 Avaya 9508 Series Digital Deskphone User Guide March 2011

No. Name of buttonor feature
Description
There are eight softkeys on the telephone that can beprogrammed as either function keys, destination keys orpartner keys.Press a Destination Key or a Partner key to make or answer acall or resume a call on hold. When you program a call numberon a key, you can simply press the key to dial the destination.Press a labeled function key to enable or disable that function.The function keys provide access to the Avaya callmanagement system features that have been administered foryour extension. The green LED next to each function key buttonindicates if the feature is currently on or off. If the light is on, thefeature is on.
3 Softkeys Press the softkeys to select the softkey labels. The softkeylabels indicate the action that each softkey produces. Thelabels and the actions vary depending on the object that youselect.
4 OK Press the OK button for a shortcut to an action. For example,select an entry from your call history and press OK to dial thenumber.
5 Phone/Exit Press the Phone/Exit button to view and manage your calls.For example, if you are viewing a menu, pressing the Phone/Exit button takes the telephone display back to the homescreen.
6 Contacts Press the Contacts button to view the entries in your Contactslist.
7 Avaya Home Press the Home button to gain access to the Avaya menu. TheAvaya menu provides options that you can use to customizetelephone settings, configure call logging, select the displaylanguage, and verify the telephone operation.
8 History Press the History button to view a list of your missed calls. Theicon on the History button lights up when you have missedcalls.
9 Volume Press + or - on the Volume button while active on the handset,headset or speaker to adjust the volume of the speaker orringer.
10 Mute Press the Mute button to mute a call in progress or reactivatea muted call.
11 Microphone The omnidirectional microphone sends and receives signalsfrom all directions.
12 Speaker Press the Speaker button to use the speakerphone. To take acall off speakerphone, lift the handset.
Buttons and features of the Avaya 9508 telephone
Avaya 9508 Series Digital Deskphone User Guide March 2011 11

No. Name of buttonor feature
Description
13 Headset Press the Headset button to use the headset if it is connected.For wired headsets, only HIC headset cords are compatiblewith your Avaya 9508 telephone.
14 Message Press the Message button to connect directly to your voicemailsystem.
15 NavigationArrows
Press the up and down navigation arrows to scroll through lists.Press the right and left navigation arrows to navigate betweendifferent views of an application, to move the cursor during textinput, or to turn an option on or off.
16 TelephoneDisplay
There are eight rows in the telephone display.The top row shows the extension number, user name and thetime and date.The middle six rows in the display provide application-specificinformation, an inverted title line that shows the current menu.The bottom line displays the softkey labels.
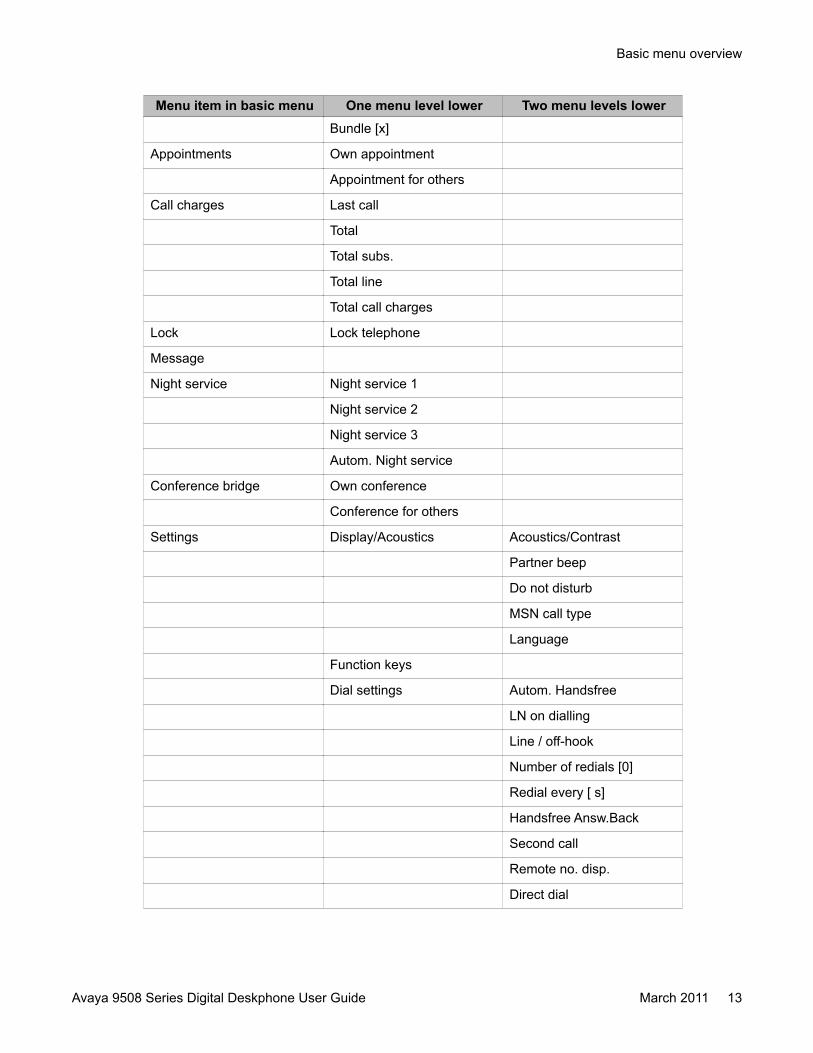
Basic menu overviewThe following table contains an overview of the basic menu structure of the Avaya 9508telephone connected to the Integral 5 system. The table shows the first three menu levels. Themenu structure shown here may differ from the actual menu structure on your telephone.Deviations from the menu shown here may arise due to the features used and the accessoriesin use.
The telephone displays the additional menu options only if the Service department or theadministrator enables access for you to program the corresponding functions.
The functions available are subscriber names, substitute terms, classes of service, systemtimes, call bar groups, call bar numbers, software lock, auto. Night service, forwarding variants,gate stations, assignment control, call charge functions, paper format, call charge display, callcharge threshold, call charge factor, and second call barring.
Table 2: Options available in the menu
Menu item in basic menu One menu level lower Two menu levels lowerCall pickup
Call diversion Divert to
Divert from
Divert for
Overview
12 Avaya 9508 Series Digital Deskphone User Guide March 2011
Menu item in basic menu One menu level lower Two menu levels lowerBundle [x]
Appointments Own appointment
Appointment for others
Call charges Last call
Total
Total subs.
Total line
Total call charges
Lock Lock telephone
Message
Night service Night service 1
Night service 2
Night service 3
Autom. Night service
Conference bridge Own conference
Conference for others
Settings Display/Acoustics Acoustics/Contrast
Partner beep
Do not disturb
MSN call type
Language
Function keys
Dial settings Autom. Handsfree
LN on dialling
Line / off-hook
Number of redials [0]
Redial every [ s]
Handsfree Answ.Back
Second call
Remote no. disp.
Direct dial
Basic menu overview
Avaya 9508 Series Digital Deskphone User Guide March 2011 13

Menu item in basic menu One menu level lower Two menu levels lowerCode [0000]
Applications Call history
Call filter
Mobility
Conference bridge
Remote Headset
General call
Hunt group
VIP call
Self-assignment
Call display A->B
Serial Call
System functions Individual destinations
General speed dial
Day service
Night service 1 (2, 3)
Call forwarding
Date/time
Customer pswd … *)
Traffic statistics
About LEDsEach function, partner, or destination key has two light-emitting diodes (LEDs), a green and ared, to indicate the status of the function or partner. The status is identified by whether the LEDis on, off, or blinking, as described in the following tables.
Note:The LEDs for the keys that are assigned to destinations are always off.
Overview
14 Avaya 9508 Series Digital Deskphone User Guide March 2011
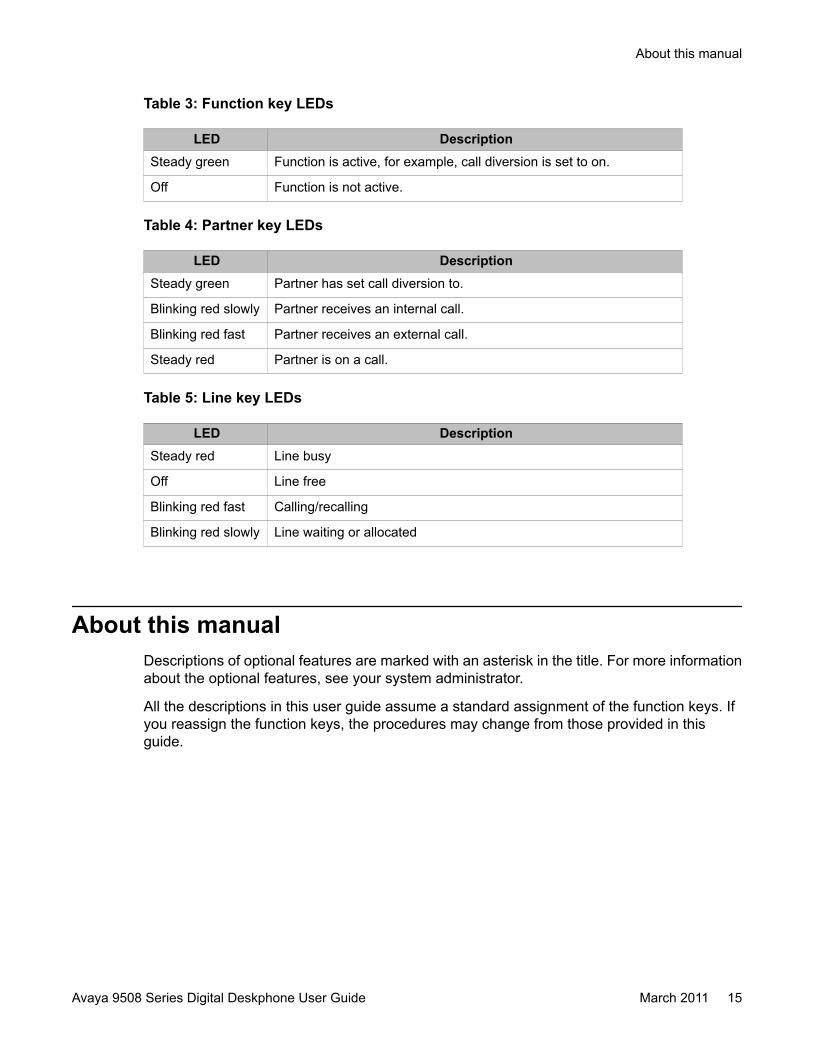
Table 3: Function key LEDs
LED DescriptionSteady green Function is active, for example, call diversion is set to on.
Off Function is not active.
Table 4: Partner key LEDs
LED DescriptionSteady green Partner has set call diversion to.
Blinking red slowly Partner receives an internal call.
Blinking red fast Partner receives an external call.
Steady red Partner is on a call.
Table 5: Line key LEDs
LED DescriptionSteady red Line busy
Off Line free
Blinking red fast Calling/recalling
Blinking red slowly Line waiting or allocated
About this manualDescriptions of optional features are marked with an asterisk in the title. For more informationabout the optional features, see your system administrator.
All the descriptions in this user guide assume a standard assignment of the function keys. Ifyou reassign the function keys, the procedures may change from those provided in thisguide.
About this manual
Avaya 9508 Series Digital Deskphone User Guide March 2011 15

Overview
16 Avaya 9508 Series Digital Deskphone User Guide March 2011
Chapter 2: Making calls
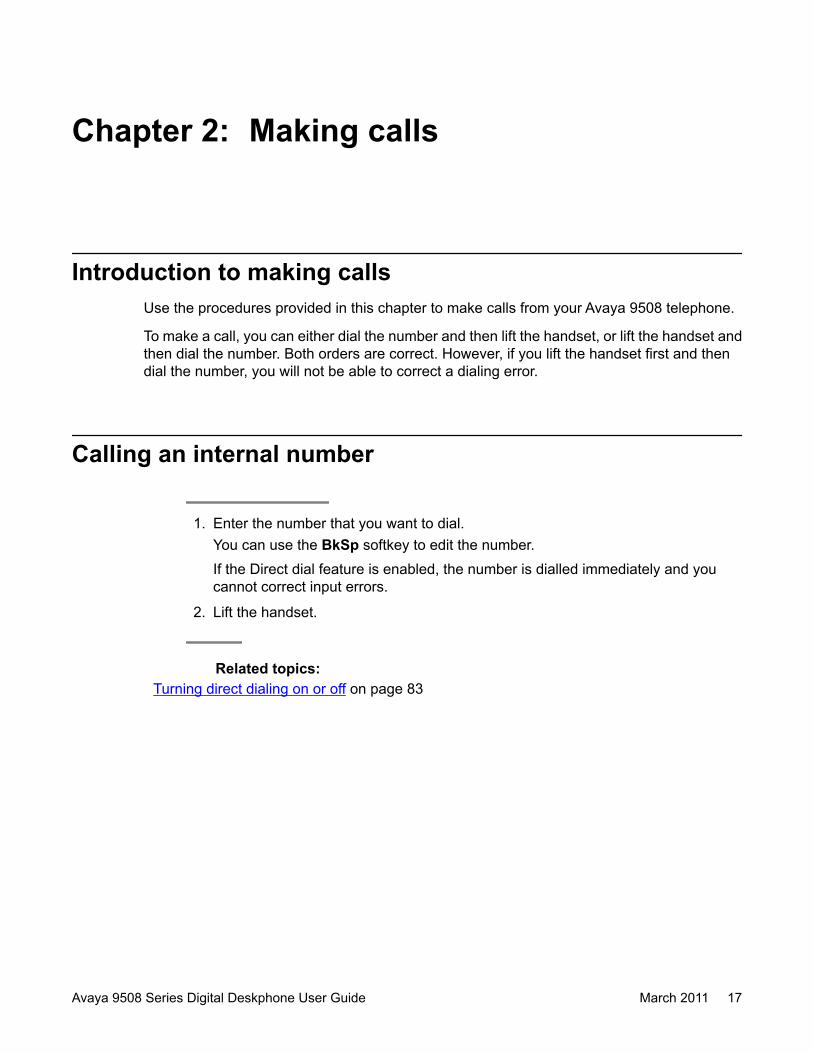
Introduction to making callsUse the procedures provided in this chapter to make calls from your Avaya 9508 telephone.
To make a call, you can either dial the number and then lift the handset, or lift the handset andthen dial the number. Both orders are correct. However, if you lift the handset first and thendial the number, you will not be able to correct a dialing error.
Calling an internal number
1. Enter the number that you want to dial.You can use the BkSp softkey to edit the number.If the Direct dial feature is enabled, the number is dialled immediately and youcannot correct input errors.
2. Lift the handset.
Related topics:Turning direct dialing on or off on page 83
Avaya 9508 Series Digital Deskphone User Guide March 2011 17

Calling an external number
1. Enter the external line code. For example, 0.
2. Enter the number you want to call.
3. Lift the handset.
Related topics:Seizing exchange line automatically on page 79
Calling with a destination key
1. Press the destination key for the desired subscriber.
2. Lift the handset.
Related topics:Introduction to Function keys on page 88
Making a call using call history
1. Press the History button.
2. To select the appropriate list, press the left or right arrow button as required.
3. Select the number that you want to dial.
4. Lift the handset.
Making calls
18 Avaya 9508 Series Digital Deskphone User Guide March 2011

Related topics:Introduction to the Call History feature on page 45
Making a call using a phone book entry
1. Press the Phone book/Contacts button.
2. Select the entry you want to dial.
Note:To reach the entry more quickly, you can also enter one or more of the first lettersof the name.
3. Lift the handset.
Related topics:Introduction to the phone book on page 51
Calling partners
1. Press the appropriate partner key.
2. Talk using the speakerphone, or lift the handset.
Calling using the speakerphoneUsing the Handsfree feature, you can hear the person you are talking to on the loudspeaker.Using the Handsfree feature, you can speak through the built-in microphone of the telephonein place of the handset.
You can use the Speaker button to activate the Handsfree feature.
Making a call using a phone book entry
Avaya 9508 Series Digital Deskphone User Guide March 2011 19

1. Enter the number you want to call.
2. Press the Speaker button.
3. To adjust the volume, press + or - on the Volume button.
4. To continue the call using the handset, lift the handset. To activate the speakeradditionally (Monitoring), press the Speaker button. To activate Handsfree pressthe Speaker button once more.
5. To end the call, press the Speaker button.
Requesting automatic callbackIf an internal telephone number you dialed is busy or unanswered, use this procedure torequest automatic callback. Your telephone system can call you back when the number is nolonger busy.
In case of external calls, the automatic callback option is only available if the network providerand the system connection support it.
1. Press the Callback softkey.
2. Replace the handset.Your telephone system calls you back as soon as the called number is free.
3. Lift the handset at the ringing tone.Your telephone system calls the dialled call number again.
4. To deactivate the automatic callback again:
a. Press the Status softkey.
b. Select status information Callback act.
c. Press the OK button.
d. Press the Delete softkey.
Redialing a called numberYou can redial one of the last numbers called.
Making calls
20 Avaya 9508 Series Digital Deskphone User Guide March 2011

If you selected a special number to present to the call recipient, the telephone can also usethis to redial.
1. Press the Redial softkey.
2. Select the number you want to call.
3. Lift the handset.
Requesting automatic redialingIf the telephone number you dialed is busy, you can select the Auto redial menu option to dialthe busy number automatically every 30 seconds.
Note:The Auto redial menu item is offered when the external number you dialed returns a busytone.
You can specify the number of automatic redial attempts and the time between two attemptsin the Dial settings.
You can only use Auto redial if you are calling on a digital exchange line.
1. Select Auto redial.
2. Press the OK button.
3. Replace the handset, if you have lifted it.Automatic redial stops if you press any button or lift the handset.
Related topics:Setting the number of redials on page 80
Joining another call (cut-in)*When you make a call to an internal extension and find that the user is already on another call,you can use this feature to join the call.
Requesting automatic redialing
Avaya 9508 Series Digital Deskphone User Guide March 2011 21

This feature may not be available. Your system administrator must configure it for yourextension as well as for the extension of the other person. Contact your system administratorfor more information.
1. Select Cut-In.
2. Press the OK button.Each person on the call will hear a cut-in tone. You are now included in the call.
3. To disconnect from the call, press the Drop softkey, or replace the handset.
Presenting yourself with specified call numbers *Every time you make an external call, the called person sees your calling number. An additionalfeature on the Avaya 9508 telephone enables you to select the number that the called personsees. This can be a different number each time. For example, the number may be of yourservice, head office, workshop, or any other. You can assign the numbers with which you wantto present yourself to the function keys, and select the number you want to use before you liftthe handset to make the external call.
You can assign the numbers with which you want to present yourself to the function keys. Ifyou press one of these function keys before lifting the handset when making an external call,the number selected will be presented to the party called.
Note:This is an additional feature that you can request your system administrator to configure foryour extension. For more information, contact your system administrator.
If you deactivate the number display feature for external calls, you cannot use this feature.
1. Enter the external telephone number you want to call.
2. Select the group number or name you want to present to the call recipient. Forexample, dial with 9850881431.
3. Lift the handset.The call recipient sees your selected number.
Making calls
22 Avaya 9508 Series Digital Deskphone User Guide March 2011

Making an announcementUsing the Avaya 9508 telephone, you can make announcements to subscribers in yourtelephone system through the loudspeakers fitted in the telephones. You can addressindividual subscribers, a selected group, or all subscribers in your telephone system.
1. Lift the handset.
2. Press the Options softkey.
3. Select Announce.To make an announcement to all subscribers, press the Announce function keyand make your announcement.
4. Press the OK button.
5. To make an announcement to a selected group, select the predefined group. Forexample, Announcement to Group 1.
6. Press OK to confirm selection, and make your announcement.
Making an individual announcementUse this procedure to make a announcement to a subscriber you just called and while thesubscriber telephone rings.
1. Select Announce.
2. Press the OK button.Make your announcement.
3. To answer, the called subscriber can lift the handset during the announcement.
Replying to an announcementUse this procedure to reply to a general or group announcement on your telephone.
Making an announcement
Avaya 9508 Series Digital Deskphone User Guide March 2011 23

1. Lift the handset.
2. Select Answer announcement.
3. Press the OK button.The telephone system connects you to the caller who made the announcement.
Calling as an anonymous userYour network provider must support the anonymous calling feature.
1. Enter the telephone number you want to call.
2. Select the Anonymous call option.
3. Press the OK button.The telephone does not display your number to the recipient of the next externalcall you make.
4. Lift the handset.
Making calls
24 Avaya 9508 Series Digital Deskphone User Guide March 2011

Chapter 3: Handling calls
Introduction to handling callsWhen you receive an incoming call, your telephone rings, the Call LED flashes, and the call isindicated in the display.
You will be shown the number or name the caller dialled. For example, when you receive adiverted call.
You can lift the handset or use the Speaker button and talk with the handset on-hook. You arealso able to answer an incoming call ringing at another telephone in your telephone system,or put an incoming call on hold until you are able to answer the call.
Internal, external, message, and VIP calls have different ringing tones.
Related topics:Setting the ringing tone melody on page 74
Answering a call
To answer a call, lift the handset or press the Speaker button to use thespeakerphone.
Answering a call ringing at another phone (pick-up)If you hear another telephone ringing, you can answer that call using your own deskphone.
1. Press the Avaya Home button.
2. Select Call Pickup.
Avaya 9508 Series Digital Deskphone User Guide March 2011 25

The display screen shows a list of incoming calls.
3. Press the OK button.
4. Lift the handset.
Answering a call for a partnerWhen the telephone of a partner rings, the corresponding LED on your telephone flashes. Youcan pick up that call and answer as deputy.
1. Press the Partner key and wait until the call reaches your own telephone.
2. Lift the handset.
Forwarding calls to forwarding stationsYou receive an external call and wish to divert the call to the call forwarding stations.
Note:You must set up the call forwarding stations in the telephone system to use this feature.
1. Select Forward call.2. Press the OK button.
The call is forwarded to the call forwarding stations.
Related topics:Assigning call forwarding destinations * on page 103
Placing a call on holdYou can put an active call on hold or an incoming call that you have not yet answered. Whenyou put an incoming call on hold, the ringing tone is turned off and the call LED continues to
Handling calls
26 Avaya 9508 Series Digital Deskphone User Guide March 2011
flash. Putting an incoming call on hold is useful when you are performing another task, suchas editing a phone book entry that you want to complete before you answer the call.
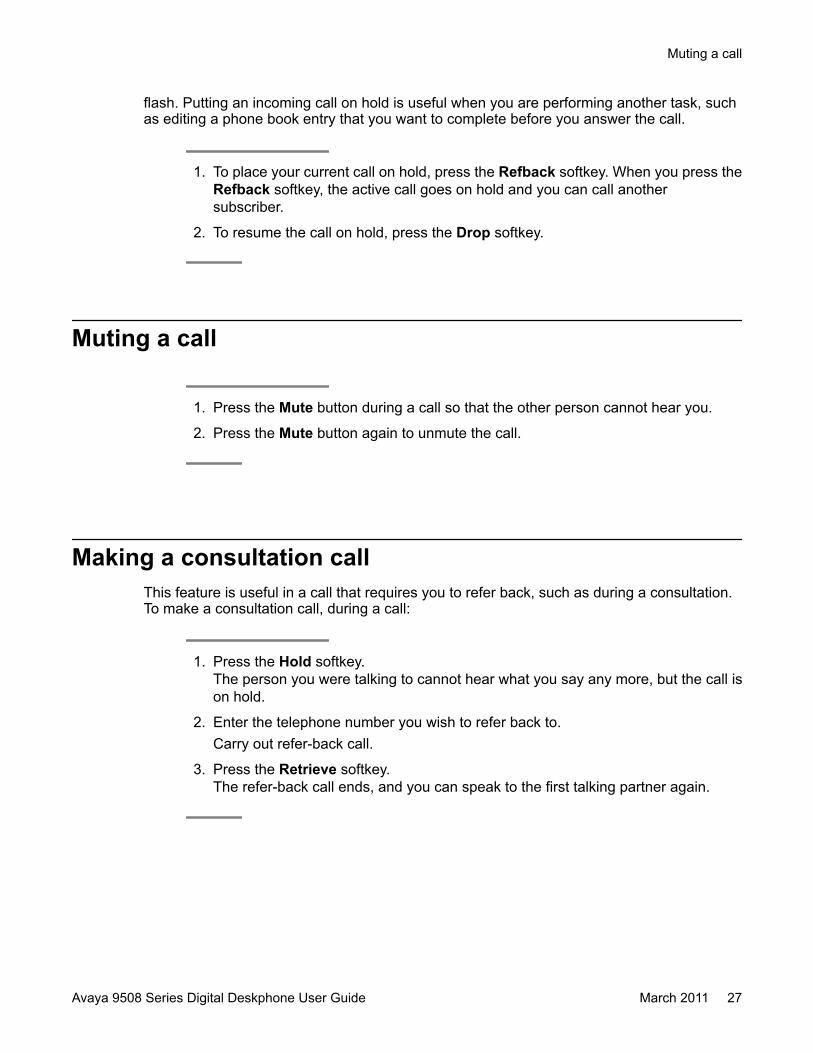
1. To place your current call on hold, press the Refback softkey. When you press theRefback softkey, the active call goes on hold and you can call anothersubscriber.
2. To resume the call on hold, press the Drop softkey.
Muting a call
1. Press the Mute button during a call so that the other person cannot hear you.
2. Press the Mute button again to unmute the call.
Making a consultation callThis feature is useful in a call that requires you to refer back, such as during a consultation.To make a consultation call, during a call:
1. Press the Hold softkey.The person you were talking to cannot hear what you say any more, but the call ison hold.
2. Enter the telephone number you wish to refer back to.Carry out refer-back call.
3. Press the Retrieve softkey.The refer-back call ends, and you can speak to the first talking partner again.
Muting a call
Avaya 9508 Series Digital Deskphone User Guide March 2011 27
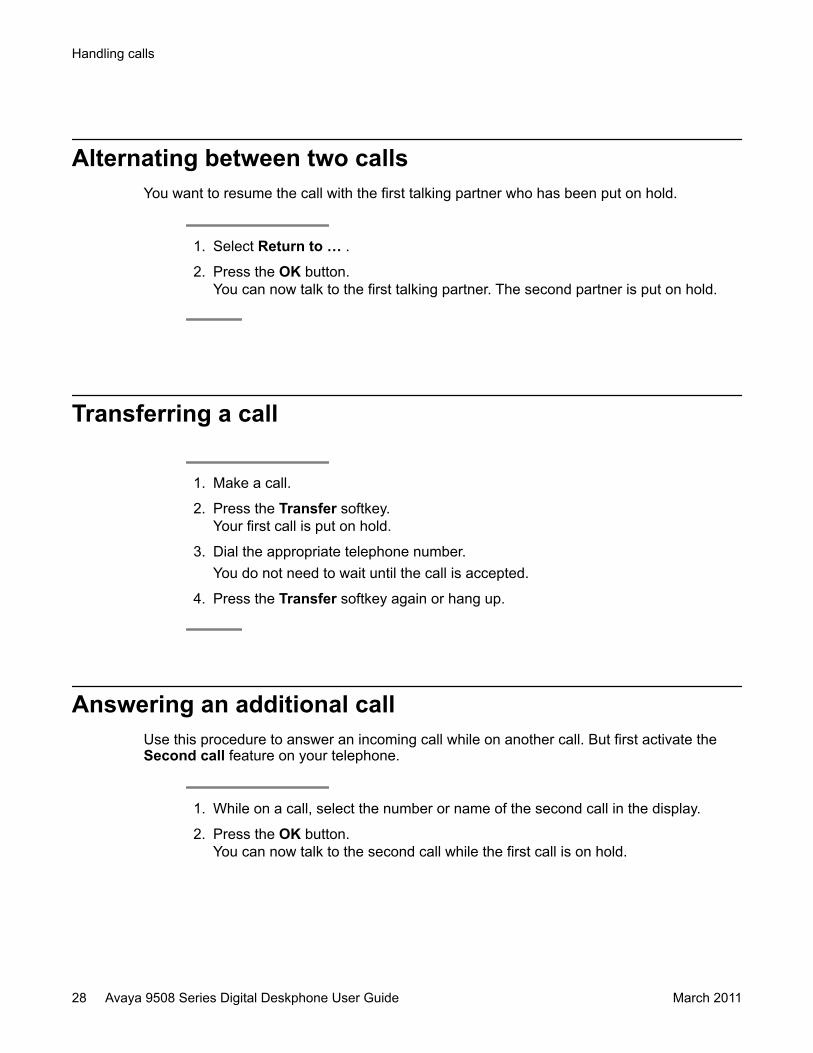
Alternating between two callsYou want to resume the call with the first talking partner who has been put on hold.
1. Select Return to … .
2. Press the OK button.You can now talk to the first talking partner. The second partner is put on hold.
Transferring a call
1. Make a call.
2. Press the Transfer softkey.Your first call is put on hold.
3. Dial the appropriate telephone number.You do not need to wait until the call is accepted.
4. Press the Transfer softkey again or hang up.
Answering an additional callUse this procedure to answer an incoming call while on another call. But first activate theSecond call feature on your telephone.
1. While on a call, select the number or name of the second call in the display.
2. Press the OK button.You can now talk to the second call while the first call is on hold.
Handling calls
28 Avaya 9508 Series Digital Deskphone User Guide March 2011
Note:To end the second call instead of placing it on hold, press the Drop softkey.
Answering an additional call
Avaya 9508 Series Digital Deskphone User Guide March 2011 29

Handling calls
30 Avaya 9508 Series Digital Deskphone User Guide March 2011

Chapter 4: Diverting incoming calls
Introduction to call diversionYou can divert incoming calls to another extension. You can set this up both for your own andother telephones. You can also divert calls to your telephone. In all these variants, you canchoose:
• Happen always
• Only if the telephone is busy
• Only if a call is not answered within a specified time period.
• You can arrange to have calls signalled on both your own phone and another externaltelephone, for example your GSM mobile. This feature is called twinning.
Additionally, you can set up as well as change all call diverts from outside the telephonesystem.
Related topics:Changing call diversion remotely * on page 117
Diverting calls from your telephone to anotherTo activate the call diversion feature on your telephone:
1. Press the Avaya Home button.
2. Select Call diversion.
3. Press the OK button.
4. Select Divert to.
5. Enter the telephone number to which you want to divert calls from your telephone.Remember to prefix an additional line code, such as 0, when you enter an externalnumber.Press an appropriate destination or partner key instead of entering the number, ifyou administered this feature beforehand.
Avaya 9508 Series Digital Deskphone User Guide March 2011 31

If dial-in authorized call numbers are registered for you for Managed Mobility Access(MMA), they are shown. You can select these destinations directly.
6. Select one of the following:
• immediately
• after time
• on busy
• twinning
7. Press the OK button.The telephone display shows Divert to.. . Enter the number you want to divert callsto.
For call diversion to happen after a specified time, the telephone display shows aclock symbol.
For call diversion only if the telephone is busy, the symbol on display is B.
8. To deactivate the call diversion feature on your deskphone:
a. Press the Status softkey.
b. Select the appropriate status information.
c. Press the OK button.
d. Press the Delete softkey.
You can set up call numbers for which your telephone rings, even when you haveactivated Call diversion to, immediately.
Related topics:Adding dial-in authorized numbers * on page 95Using a call filter on page 97
Diverting calls to your telephone
1. Press the Avaya Home button.
2. Select Call diversion.
3. Press the OK button.
4. Select Divert from.
Diverting incoming calls
32 Avaya 9508 Series Digital Deskphone User Guide March 2011
thakur3
Cross-Out
5. Enter the internal telephone number from which you want to divert calls to yourtelephone. Alternatively, you can press an appropriate destination or partner key.
6. Select one of the following:
• immediately
• after time
• on busy
• twinning
7. Press the OK button.The telephone display shows Divert from.. . Enter the number you want to divertcalls to.
For call diversion to happen after a specified time, the telephone display shows aclock symbol.
For call diversion only if the telephone is busy, the symbol on display is B.
8. To deactivate call diversion:
a. Press the Status softkey.
b. Select the appropriate status information.
c. Press the OK button.
d. Press the Delete softkey.
ResultWhen you receive a diverted call, you will also be shown the number that the caller hasdialled.
Diverting calls for another telephone *
1. Press the Avaya Home button.
2. Select Call diversion.
3. Press the OK button.
4. Select Divert for.
5. Enter the internal number of the telephone for whom you want to set up calldiversion.
Diverting calls for another telephone *
Avaya 9508 Series Digital Deskphone User Guide March 2011 33
You can also press an appropriate destination or partner key instead of entering thenumber.If a call diversion has already been set up, it is displayed. To delete an existing calldiversion, press Delete softkey.The system deletes the earlier setting if it is not possible to continue with both calldiversions.
6. Press the New softkey.
7. Enter the internal or external number of the telephone to which you want to divertcalls. Remember to prefix an additional line code, such as 0, to the externalnumber.If dial-in authorized call numbers are registered for you for Managed Mobility Access(MMA), they are shown. You can select these destinations directly.
8. Select one of the following:
• immediately
• after time
• on busy
9. Press the OK button.Both subscribers get the respective status information Divert from .. or Divert to. .The telephone display shows a clock symbol for call diversion after a specified timeor B for call diversion when busy.
Related topics:Introduction to MMA on page 59
Signaling calls on two telephones (twinning)You can set twinning and after time call diversion features to your voicemailsimultaneously.
1. Press the Avaya Home button.
2. Select Call diversion.
3. Press the OK button.
4. Select Divert to.
5. Enter the external line code, such as 0, and the external number of the telephoneyou want to divert calls to.
Diverting incoming calls
34 Avaya 9508 Series Digital Deskphone User Guide March 2011

6. Select twinning.
7. Press the OK button.The status information twinning … appears in the display.
8. To deactivate twinning:
a. Press the Status softkey.
b. Select the appropriate status information.
c. Press the OK button.
d. Press the Delete softkey.
Diverting bundles *Call diversion can be set up to take place at the public exchange. Internal users can telephonewithout hindrance.
The cost of the diverted call is allocated to the subscriber who activated the diversion. Thecaller only pays the costs up to the public exchange. The call units for the diversion are notlogged in your telephone system.
1. Press the Avaya Home button.
2. Select Call diversion.
3. Press the OK button.
4. Select Bundle 1 (2, 3, …).
5. Press the OK button.
6. Enter the external telephone number to which you want to divert all calls throughthis bundle.
7. Press the OK button.
8. Press the OK button.The telephone display shows the status information Bundle 1, Bundle 2 asapplicable.
Diverting bundles *
Avaya 9508 Series Digital Deskphone User Guide March 2011 35

Diverting incoming calls
36 Avaya 9508 Series Digital Deskphone User Guide March 2011

Chapter 5: Three-party conference call
Introduction to conference callsYou can use a three-party conference call to speak with two people at different locations onthe same call.
A conference between a call waiting (second call) and the first talking party is not possible.
Making a conference call
1. While active on a call, press the Conference with ... softkey.
2. Enter the telephone number of the additional participant or use the phone book/destination key.
3. When the additional participant answers, start the conference.
4. If the additional participant does not answer, press the Drop softkey to return to thefirst call.
Note:If you use the Hold softkey to put the first call on hold instead and then call theadditional participant, you can first talk to the participant privately while the firstcaller is on hold. Then select Conference with … to connect all participants.
Expanding the conference call to include otherparticipants
You can expand the conference to include up to 9 participants. However, for conferences withexternal participants, the limit is up to three participants.
Avaya 9508 Series Digital Deskphone User Guide March 2011 37
If you set up a Conference bridge in your system, up to 9 different subscribers can join theconference bridge. With a conference bridge set up additional conferences with more thanthree participants are no longer possible.
1. While you are in a multi-party conference press the Conference softkey to add moreparticipants.
2. Enter the telephone number of the new participant.When you connect to the number, all the parties can talk to each other.
Connecting conference participantsIf you are on a three-party conference call and want to connect all participants, press theTransfer softkey or replace the handset.
Ending the conference callTo end a conference call:
Press the Drop softkey.
Three-party conference call
38 Avaya 9508 Series Digital Deskphone User Guide March 2011

Chapter 6: Using the Conference bridge
Introduction to conference bridgeYour system provides you with a virtual conference room (bridge). All conference participantswhich have dialed into the bridge are connected to one another.
The conference bridge has the following features:
• Depending on the structure of your system, up to 9 internal and external subscribers candial into the conference bridge.
• For secure dialing to the conference bridge, use access PINs. During non-reservedconference times, you can also use the Standard PIN.
• Reservations can only be made in a preset 15 minute pattern. There must be a gap of atleast 15 minutes between two reservations.
• You may not require a moderator on a conference call, or you may designate one callerto act as one. The moderator can perform functions such as muting participants asrequired or selecting a participant as a single speaker at other times.
Dialing into conference bridgeYou can dial into the conference bridge from any internal or external telephone.
You can use a non-reserved conference bridge at any time if the conference has been setupusing the standard PIN set by the administrator.
1. Dial the number of the conference room from an internal or an external telephone.Wait for a dial tone.
2. Enter your access PIN number.All conference subscribers hear a brief alert tone. You are now part of theconference.
If you are alone in the conference bridge, you hear on-hold music.
3. To leave the conference, replace the handset.
Avaya 9508 Series Digital Deskphone User Guide March 2011 39
Note:
If another conference is scheduled on the conference bridge immediately after yoursat a 15-minute interval, an alert tone warns you that the conference is approachingits end. The connection ends 10 minutes before the beginning of the nextconference.
Moderating calls on the conference bridgeThe one who initiates the conference call and invites participants to join is called the moderator.The moderator has specific managing rights in a conference bridge, such as:
• Activating the lecture mode. The moderator can assign speaking rights to one participantand mute all others.
• Dropping participants. The moderator can drop participants from the conference call asper need.
In the absence of a moderator, all participants have the rights of a moderator. Each participantcan see all participants currently in the conference on their display screens.
The status of each member is indicated by an:• M, when muted or being listener in lecture mode• S, when being the speaker in lecture mode
1. To start the lecture mode, select the designated speaker.
2. Press the OK button.
3. Select Speaker.
4. Press the OK button.The telephone system denotes the new speaker with an S and the new speakerappears on the top of the displayed conference participants. All other participantsare muted.
5. To change the speaker, select the new participant and repeat Step 2 to Step 4.
6. To turn off the lecture mode, select the current speaker and press OK.
7. Select End lecture mode.
8. Press the OK button.All participants can talk to each other again.
9. To disconnect one conference participant specifically, first select the participant thatyou want to disconnect.
Using the Conference bridge
40 Avaya 9508 Series Digital Deskphone User Guide March 2011

10. Press the OK button.
11. Select Clear connection.
12. Press the OK button.The selected participant is dropped from the conference.
Reserving the conference bridge for a one-time usageYou must have permission to reserve a conference room. The default access PIN must beactivated or amended. The administrator can activate the default access PIN and grant youthe rights to reserve the room.
1. Press the Avaya Home button.
2. Select Conference bridge.
3. Press the OK button.
4. Select My conference.
5. Press the OK button.
6. Press the New softkey.The telephone display shows a calendar list of the next 90 days with prior bookingsindicated by a cross for the dates not available to you.
7. Select the date you want from the dates available on the calendar.
8. Press the OK button.
9. Select the start time that you want.Appointments which are already reserved are marked with a cross. They cannot bereserved.
10. Press the OK button.A line appears next to the start time to show your selection.
11. Select the time to end the conference.
12. Press the OK button.The telephone display shows the date and time of your reservation.
13. Press the OK button.
Reserving the conference bridge for a one-time usage
Avaya 9508 Series Digital Deskphone User Guide March 2011 41
The reservation of the conference appointment is complete. You can communicatethe date and time of the conference call, the number of the conference bridge, andthe access PIN to all participants expected to attend the conference.
Reserving the conference bridge for recurring usageYou can reserve the conference bridge for recurring appointments. For example, schedule aweekly group meeting on every Friday at 9:00.
1. Press the Avaya Home button.
2. Select Conference bridge.
3. Press the OK button.
4. Select My conference.
5. Press the OK button.
6. Press the New softkey.
7. Press the Series softkey.
8. Select the day of the week you want to schedule the recurrent call.
9. Press the OK button.
10. Select the time for the conference to start.The LCD screen shows timestamps of 15 minutes duration starting at the currenttime. It also shows the appointments which are already reserved with a cross. Youcannot reserve them.
11. Press the OK button.A line appears next to the start time to show your selection.
12. Select the expected end time.
13. Press the OK button.On the telephone display screen, you can see the date and time of yourreservation.
14. Press the OK button.The reservation of the conference appointment is complete. You can communicatethe day and time of the recurring conference call, the number of the conferencebridge, and the access PIN to all participants expected to attend the conference.
Using the Conference bridge
42 Avaya 9508 Series Digital Deskphone User Guide March 2011
Reserving a conference bridge for othersIf you have the permission, you can reserve a conference bridge for others. The subscribersof that call can dial in to the conference bridge with the secure access PIN you generate forthem.
1. Press the Avaya Home button.
2. Select Conference bridge.
3. Press the OK button.
4. Select Conference for others.
5. Press the OK button.
6. Enter the telephone number of the subscriber for whom you want to reserve theconference bridge.
7. Press the OK button.
8. Press the New softkey.
Checking and deleting reservationsYou can check your conference bridge reservations and change or delete these at any time.
1. Press the Avaya Home button.
2. Select Conference bridge.
3. Select My conference.On the telephone display screen, you can see a list of all reservations on theconference bridge. Each entry includes the date and time period of the reservationand the name of the person who made the reservation or for whom the reservationwas made.
4. Select the reservation you want to delete from the list.
5. If applicable, press the Delete softkey to delete the reservation.
6. To confirm, press the Delete softkey again.
Reserving a conference bridge for others
Avaya 9508 Series Digital Deskphone User Guide March 2011 43

Using the Conference bridge
44 Avaya 9508 Series Digital Deskphone User Guide March 2011

Chapter 7: Managing the call history
Introduction to the Call History featureUse the Call History feature to keep track of the calls made, received, or missed on thephone.
With the Call History feature, you can:
• Find out the number of the external caller when you miss a call. The information is storedin the call history together with the time and date of the call.
• Make additional entries in the call log, such as internal calls or conversations with externalcallers.
• Find out the most recent call received on your telephone. The most recent entry is at thetop of the call history list.
• Selectively retrieve individual numbers and, if necessary, dial them.
• Transfer a telephone number from Call History into your telephone book.
• Set entries to be deleted after a predefined time.
The following table outlines the icons used for displaying call history and the maximum numberof entries allowed under each category:
Related topics:Making a call using call history on page 18
Symbols used in the call history records
Symbol Description! New
Missed call
Answered call
Avaya 9508 Series Digital Deskphone User Guide March 2011 45

Symbol DescriptionCall answered by voice mailMessage waiting in voice mailbox
Diverted call, showing calling number and originally called number
Viewing call history
1. Press the History button.
2. Select the entry for which you want to see the details.
3. Press the OK button.The display shows the details of the entry.
Removing an entry from call historyIf you call back an entry from the call history and a connection is established, the entry in thecall history will be deleted automatically. Use the following procedure to delete entriesselectively.
1. Press the History button.
2. Select the telephone number that you want to delete.
3. Press the Delete softkey.
4. Press one of the following softkeys:
• Entry. To delete the shown entry.
• All. To delete all entries in the list.
Managing the call history
46 Avaya 9508 Series Digital Deskphone User Guide March 2011

Deleting call history entries automaticallyYou can specify a certain time period after which Call History entries are deletedautomatically.
Select the following intervals: 10 minutes, 1 hour, 1 day, 1 week, or 1 month. You can alsoprotect individual entries from being deleted by selecting Off.
Note:The new setting impacts new call history entries only and does not modify existing entries.
1. Press the Avaya Home button.
2. Select Settings.
3. Press the OK button.
4. Select Applications.
5. Press the OK button.
6. Select History.
7. Press the OK button.
8. Select deleted after ….The right window margin shows the time after which new call entries will beautomatically deleted.
9. To select the time you want to set, press the Modify softkey several times until theLED screen displays the specific time.
10. Press the Back softkey.
Adding an entry from the call history to the phone book
1. Press the History button or the Redial button.
2. Select the telephone number in the Call History list that you want to add to yourphone book.
3. Press the OK button.
Deleting call history entries automatically
Avaya 9508 Series Digital Deskphone User Guide March 2011 47
4. Press the +Contact softkey.
5. Press one of the following softkeys:
• Pers, To make an entry in your personal phone book
• Common, To make an entry in the common phone book
6. Enter the name.
7. Press the Save softkey.
Note:If you enter a number without a name, you can edit the entry later and save itunder a name.
Adding additional entries to the call historyYou can administer the Call History feature to include additional entries.
1. Press the Avaya Home button.
2. Select Settings.
3. Press the OK button.
4. Select Applications.
5. Press the OK button.
6. Select Call list.
7. Press the OK button.
8. Change the following settings as applicable:
• Int. call list (on). Shows missed internal calls
• Call list (on). Shows conversations you have had with external callers.
• Call list diversion (A+B, A, B). Manages diverted call lists of specificparticipants:
- (A) the call list of the called participant
- (B) the call list of the participant the call was diverted to
- (A+B) in both of these call lists
Managing the call history
48 Avaya 9508 Series Digital Deskphone User Guide March 2011

9. Select Back.
10. Change Call display A→ B (on) to show the number that the caller dialed.
Adding additional entries to the call history
Avaya 9508 Series Digital Deskphone User Guide March 2011 49

Managing the call history
50 Avaya 9508 Series Digital Deskphone User Guide March 2011
Chapter 8: Managing the phone book
Introduction to the phone bookYour telephone has a personal phone book. You can store up to 100 individual numbers withnames which will only be available on your telephone.
You can dial phone book numbers quickly and easily, and modify the phone book entriesyourself.
Up to 800 numbers and names can be stored in the central phone book; these are availableto all users. You can also enter and change these entries if you have appropriate accessrights.
Related topics:Making a call using a phone book entry on page 19
Creating a new entry in the phone book
1. Press the Phone book/Contacts button.
2. Press the New softkey.
3. Press one of the following softkeys:
Note:The options displayed depend on your rights and on the number of entries alreadyin the respective phone book.
• Pers., To make an entry in your personal phone book.
• Common, To make an entry in the general phone book.
4. Enter the telephone number.It may be necessary to enter an external line code and a dial pause before anexternal number. You can obtain more information from your telephone systemadministrator.
Avaya 9508 Series Digital Deskphone User Guide March 2011 51
To enter an internal number, you have to press Option > internal call numberbefore making the entry.
5. Enter the name.
6. Press the Save softkey.
ResultThe entries in your personal phone book correspond to the code dial destinations starting fromnumber 900.
You can also dial code dialing destinations 900 to 904 through Managed Mobility Access(MMA).
Related topics:Assigning function keys specifically (changing code dialing destinations)Calling code dialing destinations on page 62
Editing an entry in the phone book
1. Press the Phone book/Contacts button.
2. Select the entry you want to edit.
Note:To reach the entry more quickly, you can enter one or more of the first letters ofthe name.
3. Press the Bksp or the Delete softkey.
4. Edit the entry.
5. Press the OK button.
Managing the phone book
52 Avaya 9508 Series Digital Deskphone User Guide March 2011

Deleting an entry
1. Press the Phone book/Contacts button.
2. Select the entry you want to delete.
3. Press the Delete softkey.
Deleting an entry
Avaya 9508 Series Digital Deskphone User Guide March 2011 53

Managing the phone book
54 Avaya 9508 Series Digital Deskphone User Guide March 2011

Chapter 9: Managing text messages
Introduction to messagingYou can send a text message to subscribers in your system. For example, when the callerdoes not answer or the called telephone is busy. The messages can consist of standard textsprepared by your system administrator or your own text.
The telephone can accept a maximum of 10 messages. To accommodate the eleventhmessage, the earliest message is deleted automatically.
Viewing and deleting received text messagesYou hear an alert tone when a message arrives.
1. Select the received text message. For example, Miller: Coffee.The LCD screen shows the name of the sender and the message text.
2. Press the Delete softkey.
Writing and sending text messages
1. Press the Avaya Home button.
2. Select Message.
3. Enter the text message you want to send.
4. Press the OK button.
5. Enter the internal telephone number.
Avaya 9508 Series Digital Deskphone User Guide March 2011 55
The telephone system sends the text message to the recipient immediately.
Sending a standard textEnter a list of standard text messages into your telephone system. To select from the list andsend a standard text message:
1. Press the Avaya Home button.
2. Select Message.
3. Press the Message button.
4. Select the standard text that you want to send.
5. Press the OK button.
6. Change or add to the message. For example, include another name or a newtime.
7. Press the OK button.
8. Do one of the following:
• To send the message to a single recipient, enter the internal telephone numberyou want to send the message to.
• To send the message to all subscribers, select Message to all. The telephonesystem sends the text message immediately.
The text message is sent immediately.
Setting up a text message for internal callersYou can set up a text message that the internal callers to your phone will see when they dialyour number.
For example, you can set a text message to indicate your status when you are busy or away.When a caller calls, the LCD screen of the telephone shows the text message of the caller.
Managing text messages
56 Avaya 9508 Series Digital Deskphone User Guide March 2011
1. Press the Avaya Home button.
2. Select Message.
3. Press the Message button.
4. Select the standard text you want to send.
5. Press the OK button.
6. Change or add to the message. For example, to include a name or time.
7. Press the OK button.
8. Select Message to caller.
9. Press the OK button.The system saves the text, and the LCD screen shows the status information. Anyinternal caller who tries to call you can see the same message on the LCDscreen.
Setting up a text message for internal callers
Avaya 9508 Series Digital Deskphone User Guide March 2011 57

Managing text messages
58 Avaya 9508 Series Digital Deskphone User Guide March 2011
Chapter 10: Managed Mobility Access formobile system subscribers
Introduction to MMAUsing the Managed Mobility Access (MMA), you can dial into your system remotely and thenmake a call as if you were using your company telephone. To be able to do this, the numberof the telephone making the call must be registered and it should support DTMF dialling. Youcan easily set up registered numbers as twinning or diversion destinations, or change themand perform the function from your company telephone or remotely.
With MMA, you can use the Callback feature. Your system automatically calls back after youdial in. This is a non-chargeable service.
Additionally, the person you call can see your internal telephone number on the LCD screenand cannot tell whether you are calling from the office or using an external telephone.
Related topics:Diverting calls for another telephone * on page 33Introduction to MMA settings on page 94
Dialing in to your systemTo dial in to your office telephone system from a remote location, ask your system administratorfor the dial-in number of your system.
1. Dial the dial-in number for your system from a registered external telephone.
2. The telephone system picks up the call. Wait for a dial tone.You can now make calls as if you are an internal subscriber.
Avaya 9508 Series Digital Deskphone User Guide March 2011 59

Dialing in to your system using the callback featureTo dial in to your office telephone system from a remote location using the callback feature,ask your system administrator to set up this feature.
1. Dial the dial-in number for your system from a registered external telephone withthe callback setting activated.Wait for a ring back tone. After a short time, the telephone system disconnects. Youwill hear the busy tone.
2. Replace the handset and wait for your system to ring you back after a fewseconds.Your system will ring you back after about 10 seconds.
3. Answer the Callback.When you hear the dial tone, you can make calls like an internal subscriber. Yoursystem bears all call charges incurred.
Calling using your system
Placing a call using the MMAYou have established a connection to your system from a registered telephone. You hear thedial tone.
Note:The first five entries recorded in your personal phone book can easily be accessed as codedialing destinations by pressing #1...#5 (relates to entries 900 to 904).
1. Enter the telephone number you want to call.
2. Carry out the call.
Managed Mobility Access for mobile system subscribers
60 Avaya 9508 Series Digital Deskphone User Guide March 2011

Referring back using the MMAYou can use the refer back feature when you are in a conversation with a subscriber from aremote location.
1. Press * 7 on the telephone keypad.The first talking partner is placed on hold and cannot hear what you say.
2. Enter the number you want to consult.Carry out the refer-back call.
3. Press * 7 on the telephone keypad again.The refer-back call ends and you can speak again with your first talking partner.
Starting a conference call using MMAYou are in a conversation and want to start a conference and include another partner in theconference.
1. Press * 5 on the telephone keypad.The first talking partner is waiting and cannot hear what you say.
2. Enter the number of the second conference partner. Wait until he has accepted thecall.
3. Press * 5 on the telephone keypad again.All the partners on the call can now speak with each other.
Ending a call
Press * 8 on the telephone keypad.The current call ends. When you hear the dial tone, you can place a new call acrossthe system.
Calling using your system
Avaya 9508 Series Digital Deskphone User Guide March 2011 61

Modifying the twinning and call diversion numberYou have established a connection to your system from a registered telephone. The telephonefrom which you are calling must have caller display activated.
1. Press the (#) key when you hear the dial tone.
2. Press the (*) key .Twinning and call diversion is now activated on the telephone you are currentlycalling. The telephone settings for each registered number defines if you turned ontwinning and call diversion.
Deactivating twinning and call diversionYou have established a connection to your system from a registered telephone.The telephonefrom which you are calling must have caller display activated.
You hear the dial tone.
1. Press the (#) key.
2. Press the (0) key.Twinning and call diversion is switched off. Whether you switched off twinning andcall diversion is defined in the settings for each number registered.
Calling code dialing destinationsYou can note your code dialing destinations on a card which you can keep with you at alltimes.
You have established a connection to your system from a registered telephone. You hear thedial tone.
1. Press the (#) key on the telephone keypad followed by the code number of the codedialing destination you want to call. For example, 2 for ”902”.
Managed Mobility Access for mobile system subscribers
62 Avaya 9508 Series Digital Deskphone User Guide March 2011

The code dialing destinations correspond to the first entries in your personal phonebook.Assign codes to code dialing destinations:
• Code dialing destination 900 -> Code number 1
• Code dialing destination 901 -> Code number 2
• Code dialing destination 902 -> Code number 3
• Code dialing destination 903 -> Code number 4
• Code dialing destination 904 -> Code number 5
2. Carry out the call.
Related topics:Assigning function keys specifically (changing code dialing destinations)Creating a new entry in the phone book on page 51
Calling code dialing destinations
Avaya 9508 Series Digital Deskphone User Guide March 2011 63
Managed Mobility Access for mobile system subscribers
64 Avaya 9508 Series Digital Deskphone User Guide March 2011

Chapter 11: Using the Call Charges feature
Call Charges
Introduction to call chargesThe Avaya 9508 Series telephone records, stores, and displays charges incurred for each call.You can access call charge details for:
• The current call
• The last call made from the telephone
• All calls since the last reset
• Each subscriber and each line separately
• Single projects or private calls separately
All call charges incurred since the last reset are stored and totaled in your telephonesystem.
Viewing the charge display
1. Press the Avaya Home button.
2. Select Charges.
3. Press the OK button.The LCD screen displays the charges for the last four calls.
4. To view the charges for one of the last four calls, select the appropriate line.
5. To view the total charges, select Total.
Avaya 9508 Series Digital Deskphone User Guide March 2011 65
Viewing charges for lines or subscribers
1. Press the Avaya Home button.
2. Select Charges.
3. Press the OK button.
4. Select one of the following:
• Total subs., Shows the charges for a specific subscriber.
• Total line, Shows the charges for a specific line.
5. Enter the extension or line number. For example, 01 for line 1.Instead of entering a line number, you can simply press the corresponding linekey.
Deleting call charges
1. Press the Avaya Home button.
2. Select Charges.
3. Press the OK button.
4. Select the charge display you want to clear.
Note:If you want to clear the totals for all calls, you must have this function enabled byyour system administrator.
5. Press the OK button.
6. Press the Delete softkey.
Using the Call Charges feature
66 Avaya 9508 Series Digital Deskphone User Guide March 2011
Locking the telephone
Telephone lockYou can lock your telephone to prevent unauthorized use during your absence. To unlock yourtelephone, your Personal Identification Number (PIN) is required.
The following functions are still available in a locked telephone:
• Answering calls
• Dialing internal call numbers
Changing the PINYou need a PIN (Personal Identification Number) to lock your telephone against unauthorizedusers and to unlock it again.
The default setting for the PIN is "0000".
In case you have forgotten your PIN, please contact your system administrator.
1. Press the Avaya Home button.
2. Press the Lock function key.
3. Press the PIN softkey.
4. Enter the current PIN (default setting: 0000).If you make a mistake when entering your PIN, press the Back softkey and startagain from the beginning.
5. Press the OK button.
6. Enter the new PIN.
Locking the telephoneUse this procedure to lock your telephone.
Locking the telephone
Avaya 9508 Series Digital Deskphone User Guide March 2011 67

1. Press the Avaya Home button.
2. Press the Lock function key.
3. Press the OK button.The LCD screen displays the messagePhone locked.
Unlocking the telephone
1. Open the Status menu.
2. Select Phone locked.
3. Press the OK button.
4. Enter the current PIN.
Managing appointments
Appointments and remindersYou can set your telephone to remind you of important appointments. You can administer yourtelephone to act as a reminder for important appointments. You can enter up to threeappointments and specify whether you wish to be reminded once, on several days, or everyday.
At the time of the appointment, you hear a signal tone and see the message you entered forthe appointment on the LCD screen. You can selectively delete the appointments youentered.
Using the Call Charges feature
68 Avaya 9508 Series Digital Deskphone User Guide March 2011

Entering an appointment for today
1. Press the Avaya Home button.
2. Select Appointments, and if necessary select Own appointm.The display shows all the set appointments.
3. Select an appointment, which is marked empty. For example, Appt. 1.
4. Press the OK button.
5. Press the Today softkey.
6. Enter the time in the hours and minutes format. For example, 1050 for 10:50 hrs.
7. Select a standard text if required.To be able to select from standard texts, these must first have been entered into thesystem.
8. Enter or add any text.At the specified time, you hear a signal tone and see the text you entered on theLCD screen.
9. Press the OK button.
Entering a one-time appointment
1. Press the Avaya Home button.
2. Select Appointments, and if necessary select Own appointm.All set appointments will be shown.
3. Select an appointment, which is marked empty. For example, Appt. 1.
4. Press the OK button.
5. Enter the date and time in the day, month, hours and minutes format. For example,04081150 for 4 August at 11:50 hrs.
6. Select a standard text if required.To be able to select from standard texts, these must first have been entered into thesystem.
Managing appointments
Avaya 9508 Series Digital Deskphone User Guide March 2011 69
7. Enter or add any text.
8. Press the OK button.
ResultAt the specified time, a signal tone sounds and the text you have entered is displayed.
Entering a recurring appointment
1. Press the Avaya Home button.
2. Select Appointments, and, if necessary, select Own appointm.The telephone LCD screen displays the set appointments.
3. Select an appointment, which is marked empty. For example, Appt. 1.
4. Press the OK button.
5. Press the Series softkey.The LCD screen displays all the days of the week in abbreviated form for which therecurring appointment applies. Appointment reminders are enabled for Monday toFriday by default.
6. Select day of the week if you need to change the standard setting.
7. Press the Modify softkey.The setting for the selected day changes and the initial letter of the correspondingday appears or disappears.
8. Enter the date and time in the hours and minutes format. For example, 1150 for11:50 hrs.
9. Select a standard text if required.You must first enter the standard texts into the system so that you are able to selectthe standard text that you want.
10. Enter or add any text.
11. Press the OK button.
Acknowledging an appointmentUse this procedure to acknowledge an appointment. At the specified time, a signal tone soundsand the entered appointment message appears in the display.
Using the Call Charges feature
70 Avaya 9508 Series Digital Deskphone User Guide March 2011

Press the OK button.The signal tone stops and the system deletes the appointment reminder from the LCDscreen.
Deleting an appointment
1. Press the Avaya Home button.
2. Select Appointments, and if necessary select Own appointment.
3. Select the appointment you want to delete.
4. Press the OK button.
5. Press the Delete softkey.
Setting appointments for others
1. Press the Avaya Home button.
2. Select Appointments.
3. Press the OK button.
4. Select Appointment for others.
5. Press the OK button.The LCD screen on the telephone displays all the existing appointments for thesubscriber.
6. Now enter the new appointment just as you set your own appointments.
Managing appointments
Avaya 9508 Series Digital Deskphone User Guide March 2011 71

Using the Call Charges feature
72 Avaya 9508 Series Digital Deskphone User Guide March 2011

Chapter 12: Customizing your telephone
Setting parameters for your telephone
Changing the acoustic signalingUse this procedure to change the volume of several tones.
Note:
You can change the individual settings during a call by pressing + or - on the Volume button.You can also change any setting by pressing the numeric key of the setting that you want orby pressing the right or left navigation arrows.
1. Press the Avaya Home button.
2. Select Settings.
3. Press the OK button.
4. Select Display/Acoustics.
5. Press the OK button.
6. Select Acoustics/Contrast.
7. Press the OK button.
8. Select one of the following:
• Ringing tone
• Monitor
• Handset
• Headset
9. Increase or reduce the volume by pressing the right or left navigation button.
Avaya 9508 Series Digital Deskphone User Guide March 2011 73

The new setting rings immediately so that you can verify it.
10. Press the Back softkey.
Setting the ringing tone melody
You can assign different melodies to each call type:
• Internal call: Call from inside your telecommunications system
• External call: Call from outside your telecommunications system
• Message call: When a message is received
• VIP ringtone: Call from an entry in the call filter list
1. Press the Avaya Home button.
2. Select Settings.
3. Press the OK button.
4. Select Display/Acoustics.
5. Press the OK button.
6. Select Acoustics/Contrast.
7. Press the OK button.
8. Select the call type you want to change.
9. The system plays the new ringing melody for you to familiarize.
10. Press the Back softkey.
Note:
You can change the melody playback speed using the Set melody option.
Applying special ring tone melodiesYour system administrator can assign unique ring tones for all the numbers on your telephonesystem. You can easily recognize the calls from Service, Head office, or Workshop from thespecial ring tone assigned to each. You can apply these ring tones to your telephone.
The setting can be applied only to external calls and VIP calls.
Customizing your telephone
74 Avaya 9508 Series Digital Deskphone User Guide March 2011
1. Press the Avaya Home button.
2. Select Settings.
3. Press the OK button.
4. Select Display/Acoustics.
5. Press the OK button.
6. Select MSN call type (off).
7. Press the Modify softkey.
8. If you wish to hear your personal ring tones again, change the setting back to(off).
9. Press the Back softkey.
Setting the contrastYou can change the contrast and the brightness of the display on the telephone to improve thevisibility in different light conditions.
1. Press the Avaya Home button.You can access the Display/Acoustics menu directly using the Volume buttonwhen the phone is in a idle state.
2. Select Settings.
3. Press the OK button.
4. Select Display/Acoustics.
5. Press the OK button.
6. Select Acoustics/Contrast.
Note:To reset the Acoustics/Contrast settings to the default status, select Defaultsetting. Press OK to confirm.
7. Press the OK button.
8. Increase or reduce the contrast with the right or left navigation button.
9. Press the Save softkey.
Setting parameters for your telephone
Avaya 9508 Series Digital Deskphone User Guide March 2011 75
Setting the languageYou can change the language on your phone display to suit the geographical location.
1. Press the Avaya Home button.
2. Select Settings.
3. Press the OK button.
4. Select Display/Acoustics.
5. Press the OK button.
6. Select Language.
7. Press the OK button.
8. From the list of languages that are displayed, select the language that you want touse.
9. Press the OK button.Your telephone reboots to display all text in the selected language.
Adjusting the setting for handsfree operationYou can adjust the handsfree settings for the conditions prevailing in your office andsurroundings.
1. Press the Avaya Home button.
2. Select Settings.
3. Press the OK button.
4. Select Display/Acoustics.
5. Press the OK button.
6. Select Set handsfree.
7. Select Acoustics/Contrast.
8. Press the OK button.
9. Select Handsfree.
10. You can change the following settings with the right or left navigation button.
Customizing your telephone
76 Avaya 9508 Series Digital Deskphone User Guide March 2011

• Handsfree setting 1: Normal connection (medium volume)
• Handsfree setting 2: Quiet or long-distance connection
• Handsfree setting 3: Loud connection, purely digital, or an internal connection.This is normally the best setting if you use the built-in loudspeaker on yourtelephone.
• Handsfree setting 4: Suitable for use when you connect an additionalloudspeaker to your telephone.
11. Press the Back softkey.
Deactivating the ringing tone temporarilyIf you do not wish to be disturbed, you can activate the Do not disturb feature by temporarilydeactivating the ring tone. You can continue to make internal and external calls without anyrestriction.
You can still make internal and external calls yourself without any restrictions even when youhave activated the Do not disturb feature.
Note:You can set your telephone to accept calls from telephone numbers you consider importanteven when it is in the Do not disturb mode. Use the Call filter feature to select numbersthat will not be impacted by the Do not disturb mode.
1. Press the Avaya Home button.
2. Select Settings.
3. Press the OK button.
4. Select Display/Acoustics.
5. Press the OK button.
6. Select Do not disturb.
7. Press the OK button to switch on and off.When you activate the Do not disturb feature, the caller hears an announcementto that effect or the busy tone.
Related topics:Using a call filter on page 97
Deactivating the ringing tone temporarily
Avaya 9508 Series Digital Deskphone User Guide March 2011 77
Activating Night serviceA telephone system is often required to handle calls differently at night than during the day.Accordingly, you can set up specific operators for the night service.
The system administrator programs your telephone to include the Night service. You canactivate the Night service feature you want at any time, or the system can activate the Nightservice feature automatically at times set by your system administrator. To set the callingstations for the Night service in the menu, click Settings > System functions.
1. Press the Avaya Home button.
2. Select Night service.
3. Press the OK button.
4. Select Night service 1 (or 2, 3, Autom. Night service).To use pre-programmed times, select Autom. Night service.
5. Press the Modify softkey.The system activates the Night service immediately.
Note:In each case, only the last activated Night service is applicable. The systemdeactivates all night services that were previously activated.
Related topics:Assigning operators for night service * on page 102
Activating automatic handsfree after dialingTo set your telephone to handsfree mode automatically when you call an external subscriber:
1. Press the Avaya Home button.
2. Select Settings.
3. Press the OK button.
4. Select Dial settings.
5. Press the OK button.
Customizing your telephone
78 Avaya 9508 Series Digital Deskphone User Guide March 2011

6. Select Autom. handsfree (off).
7. Press the Modify softkey.
8. Press the Back softkey.The system saves the new setting.
Seizing exchange line automaticallyYou can automatically seize an exchange line every time you dial with the handset on hook.You need not dial the external line code in this case.
1. Press the Avaya Home button.
2. Select Settings.
3. Press the OK button.
4. Select Dial settings.
5. Press the OK button.
6. Select LN on dialing (off).
7. Press the Modify softkey.
8. Press the Back softkey.The system saves the new setting.
ResultIf LN on dialing is turned on, you must first press the Hold softkey to make an internal call.
Related topics:Calling an external number on page 18
Seizing external line automatically when going off-hookYou can automatically seize an external line whenever you lift the handset. You then neverhave to dial the external line code.
Seizing exchange line automatically
Avaya 9508 Series Digital Deskphone User Guide March 2011 79
1. Press the Avaya Home button.
2. Select Settings.
3. Press the OK button.
4. Select Dial settings.
5. Press the OK button.
6. Select Line/Off-hook (off).
7. Press the Modify softkey.
8. Press the Back softkey.The system saves the new setting.
ResultIf Line/Off-hook is turned on, you must first press the Hold softkey to make an internal call.
Setting the number of redialsWhen you activate the automatic redial feature, use this procedure to specify the number oftimes the system must repeat dialing automatically.
The options are 0, 3, 5 or 10 redials.
1. Press the Avaya Home button.
2. Select Settings.
3. Press the OK button.
4. Select Dial settings.
5. Press the OK button.
6. Select Number of redials.
7. Press the Modify softkey several times until the LCD screen shows the number ofredials you want.If the setting is 0, the LCD screen on the telephone does not show the Auto. redialmenu item while calling external numbers.
8. Press the Back softkey.The system saves the new setting.
Customizing your telephone
80 Avaya 9508 Series Digital Deskphone User Guide March 2011

Related topics:Requesting automatic redialing on page 21
Setting the redial intervalWhen you activate the automatic redial feature, use this procedure to set the time that elapsesbetween two automatic redials.
The options are 15, 30, 60, 90 or 120 seconds.
1. Press the Avaya Home button.
2. Select Settings.
3. Press the OK button.
4. Select Dial settings.
5. Press the OK button.
6. Select Redial every … s.
7. Press the Modify softkey several times until you see the time interval you want.
8. Press the Back softkey.The system saves the new setting.
Setting the number to show to the external subscribersFor external calls, you can administer your telephone settings regarding the telephone numberthat the external caller can see. You can specify whether the number on display is your internalextension number or only the company telephone number.
This feature must be supported by your network provider.
Note:You can also use the Anonymous calling feature to prevent display of any calling numberfor a specific call you make.
1. Press the Avaya Home button.
2. Select Settings.
Setting the redial interval
Avaya 9508 Series Digital Deskphone User Guide March 2011 81
3. Press the OK button.
4. Select Dial settings.
5. Press the OK button.
6. Select Remote no. disp.
7. Press the Modify softkey several times until you see the setting you want. Theoptions to select from are:
• Off, Turns off the number display off completely,
• Own, Sends your internal extension number (e.g. 7505-12)
• Master, Sends only your company telephone number (e.g. 7505-0).
8. Press the Back softkey.The system saves the new setting.
ResultDepending on the administration of your telephone system, the system presents a list of thenumbers you can use to present yourself to the person you dial.
Accepting calls automatically using the Handsfree answerback feature
You can set up your telephone to automatically accept incoming internal calls. If you receivea call, you will hear a short signal tone and the microphone and loudspeaker of your telephoneare activated immediately.
1. Press the Avaya Home button.
2. Select Settings.
3. Press the OK button.
4. Select Applications/Partner.
5. Select Dial settings.
6. Press the OK button.
7. Select Handsfree AB... which is off by default.
8. Press the OK button.
9. Press the Back softkey.
Customizing your telephone
82 Avaya 9508 Series Digital Deskphone User Guide March 2011

The system saves the new setting.
ResultThe display shows the status information as Handsfree answer back.
Note:If you want to turn off Handsfree answer back again, set the function to Handsfree answerback (on) again.
Turning direct dialing on or offDialing begins as soon as you press the first digit or a destination key if the Direct dial featureis enabled.
However, you can turn this setting off and type all the digits of a telephone number before youdial the number as a block. You can then check the telephone number again and correct it, ifnecessary.
1. Press the Avaya Home button.
2. Select Settings.
3. Press the OK button.
4. Select Dial settings.
5. Press the OK button.
6. Select Direct dial (on).
7. Press the OK button.
8. Press the Back softkey.The system saves the new setting.
9. Press the softkey.
10. To reactivate direct dialing, turn the function to Direct dial (On) again.
Related topics:Calling an internal number on page 17
Turning direct dialing on or off
Avaya 9508 Series Digital Deskphone User Guide March 2011 83
Deactivating a second callIf you are on a call and a second call comes on the line that you do not want to attend to, youcan deactivate the second call.
1. Press the Avaya Home button.
2. Select Settings.
3. Press the OK button.
4. Select Dial settings.
5. Press the OK button.
6. Select Second call (on).
7. Press the Modify softkey.
8. Press the Back softkey.The system saves the new setting.
ResultIf you are on a call that you do not want to interrupt and you turn off the second call, the callerof the second call hears the busy signal.
Assigning code numbers *On your Avaya 9508 Series telephone, you can assign a code number to each outgoing andincoming call. With this feature, you can assign that call to a project or client number, asneeded. You can also modify the code number during the call.
1. Press the Avaya Home button.
2. Select Settings.
3. Press the OK button.
4. Select Dial settings.
5. Press the OK button.
6. Select Code:.
Customizing your telephone
84 Avaya 9508 Series Digital Deskphone User Guide March 2011

If you have already set up a code, the system displays the current code number onthe LED screen.
7. Press the OK button.
8. You can perform the following functions as applicable:
• To change the code, enter the new code number.
• To deactivate the code, press OK button,
• To delete the code, select Delete and press OK button.
9. Press the Back softkey.The system saves the new setting.
Extending call displayYou can set your telephone to display additional information besides the number and name ofthe caller. For example, the number the caller dialed. This tells you whether the caller wantsto speak to you or another unit, such as Service or Workshop.
1. Press the Avaya Home button.
2. Select Settings.
3. Press the OK button.
4. Select Applications.
5. Press the OK button.
6. Select Call display A > B (off).
7. Press the Modify softkey.
8. Press the Back softkey.The system saves the new setting.
Deactivating VIP call signaling *You can use this procedure to temporarily remove calls from the VIP call signaling, if a VIP callor pager has been set up for your telephone. After you deactivate signaling, the system doesnot signal to a pager or log calls.
Extending call display
Avaya 9508 Series Digital Deskphone User Guide March 2011 85

1. Press the Avaya Home button.
2. Select Settings.
3. Press the OK button.
4. Select Applications.
5. Press the OK button.
6. Select VIP call (on).
7. Press the Modify softkey.
8. Press the Back softkey.The system saves the new setting.
Removing the telephone from hunt groupsIf your telephone is assigned to one or more hunt groups you can use this procedure totemporarily remove your telephone from these hunt groups.
1. Press the Avaya Home button.
2. Select Settings.
3. Press the OK button.
4. Select Applications.
5. Press the OK button.
6. Select Hunt group (on).
7. Press the Modify softkey.
8. Press the Back softkey.The system saves the new setting.
Removing the telephone from general callAn incoming external call goes to an answering station as a general call from where the systemredirects it appropriately.
Customizing your telephone
86 Avaya 9508 Series Digital Deskphone User Guide March 2011
In the absence of an answering station, the call signals on all the telephones connected to thesystem. You can administer your telephone so that it does not ring in the case of a generalcall.
1. Press the Avaya Home button.
2. Select Settings.
3. Press the OK button.
4. Select Applications.
5. Press the OK button.
6. Select General call (on).
7. Press the Modify softkey.
8. Press the Back softkey.The system saves the new setting.
Activating remote headsetUse this procedure to activate the use of a cordless convenience headset.
1. Press the Avaya Home button.
2. Select Settings.
3. Press the OK button.
4. Select Applications.
5. Press the OK button.
6. Select Remote headset (off).
7. Press the Modify softkey.
8. Press the Back softkey.The system saves the new setting.
Activating remote headset
Avaya 9508 Series Digital Deskphone User Guide March 2011 87

Function, destination, line, and partner keys
Introduction to Function keysYou can assign functions, call numbers, partners, or lines that you use frequently to freelyprogrammable function keys. You can then execute the functions, seize the line, or dial the callnumbers simply by pressing the key.
A partner can be any internal subscriber to your telephone system. If you place a partner onthe function key, then you can view the corresponding LED to know the telephone status ofthe partner.
Note:All the procedures described in this user manual assume a standard assignment of thefunction keys.
Reassigning function keys may change the operating procedures. Functions that areassigned to keys no longer appear in the menu.
Related topics:Calling with a destination key on page 18
Assigning functions to keysProgrammable function keys let you assign functions which you use frequently. You can thenexecute these functions simply by pressing the appropriate keys.
1. Press the Avaya Home button.
2. Select Settings.
3. Press the OK button.
4. Select Function keys.
5. Press the OK button.The description and current assignment of all keys will be displayed.
6. Select the key you want to change or assign.
7. Press the Delete softkey if necessary.
8. Select the function that you want to assign to the key.
Customizing your telephone
88 Avaya 9508 Series Digital Deskphone User Guide March 2011
9. Press the OK button.
10. Press the OK button.
Assigning destinations to keys
1. Press the Avaya Home button.
2. Select Settings.
3. Press the OK button.
4. Select Function keys.
5. Press the OK button.The description and current assignment of all keys will be displayed.
6. Select the key you want to change or assign.
7. Press the OK button.
8. Select Destination key.
9. Press the OK button.The call numbers or names stored in your individual phone book are displayed.
10. Select the destination you want to assign to this key.
11. Press the OK button.
12. Press the OK button.You can now call the destination with this key.
Assigning lines to keys
1. Press the Avaya Home button.
2. Select Settings.
3. Press the OK button.
4. Select Function keys.
5. Press the OK button.The description and current assignment of all keys will be displayed.
Function, destination, line, and partner keys
Avaya 9508 Series Digital Deskphone User Guide March 2011 89
6. Select the key you want to change or assign.
7. Press the OK button.
8. Select Line.
9. Press the OK button.
10. Select the line you want to assign to this key. For example, Line 2.
11. Press the OK button.
12. Press the OK button.You can now seize Line 2 with this key.
Assigning partners to keys
1. Press the Avaya Home button.
2. Select Settings.
3. Press the OK button.
4. Select Function keys.
5. Press the OK button.The description and current assignment of all keys will be displayed.
6. Select the key you want to change or assign.
7. Press the OK button.
8. Select Partner.
9. Press the OK button.The LCD screen shows a list of all the internal subscribers.
10. Select the subscriber you want to assign to this key.
11. Press the OK button.
12. Press the OK button.The subscriber is now set up as a partner and is accessible directly through thiskey. The corresponding LED for the key lets you view the partner's telephonestatus.
Customizing your telephone
90 Avaya 9508 Series Digital Deskphone User Guide March 2011
Deleting destination key assignmentsYou can delete the destinations and functions that are assigned to the keys.
1. Press the Avaya Home button.
2. Select Settings.
3. Press the OK button.
4. Select Function keys.
5. Press the OK button.The description and current assignment of all keys will be displayed.
6. Select Set Destination key.
7.
8. Press the destination key.You can now see the function or call number previously assigned to the key.
9. Select Modify.
10. Press the Back softkey.The key is now free for use.
Conference bridge settings
Setting up the conference bridge *Only authorized subscribers can reserve the conference bridge. Each of these subscribers canchange the access PIN themselves.
You can also set up a standard PIN for a conference bridge. Any subscriber can dial into theconference bridge providing it is not reserved.
Conference bridge settings
Avaya 9508 Series Digital Deskphone User Guide March 2011 91
Setting up reservation permissionsIf you have the right to set up reservation permissions, you can give individual subscribers theoption of reserving the conference bridge.
1. Press the Avaya Home button.
2. Select Settings.
3. Press the OK button.
4. Select Applications.
5. Press the OK button.
6. Select Conference bridge.
7. Press the OK button.
8. Select Permission for ….
9. Enter the number of the subscriber for whom you want to enable reservationpermissions.On the display, you can see the access PIN and whether the subscriber can reservethe conference bridge. For example, PIN: 0000 Not active.
10. Select Activate.
11. Press the OK button.The subscriber can now reserve the conference bridge using the access PIN set.
Changing the access PINYou can change your access PIN for the conference bridge at any time. The changed accessPIN applies immediately even for conferences reserved in advance.
If you have permission, you can also change the access PIN for other subscribers.
1. Press the Avaya Home button.
2. Select Settings.
3. Press the OK button.
4. Select Applications.
5. Press the OK button.
Customizing your telephone
92 Avaya 9508 Series Digital Deskphone User Guide March 2011

6. Select Conference bridge.
7. Press the OK button.
8. Select PIN: 0000.
9. Press the OK button.
10. Enter the new 4-digit access PIN.Different conferences can have the same access PIN.You have changed the access PIN.
Setting up standard access *You can use the standard PIN to log into the conference bridge when it is not reserved.
1. Press the Avaya Home button.
2. Select Settings.
3. Press the OK button.
4. Select Applications.
5. Press the OK button.
6. Select Conference bridge.
7. Press the OK button.
8. Select Standard PIN.
9. Press the OK button.You are shown that the standard PIN cannot be used, e.g. PIN: 0000 Not active.
10. Select Activate.
11. Press the OK button.
12. Press the Back softkey.You can now access the conference room using the standard PIN.
Next stepsTo block access to the conference using the standard PIN:
1. Enter the Standard PIN menu.
2. Select Deactivate.
3. Confirm by pressing the OK button.
Conference bridge settings
Avaya 9508 Series Digital Deskphone User Guide March 2011 93

The standard PIN is marked Not Active again.
Changing the standard PIN *
1. Press the Avaya Home button.
2. Select Settings.
3. Press the OK button.
4. Select Applications.
5. Press the OK button.
6. Select Conference bridge.
7. Press the OK button.
8. Select Standard PIN.
9. Press the OK button.
10. Select PIN: 0000 Not active
11. Press the OK button.
12. Enter the new 4-digit standard PIN.
13. Press the Back softkey.You can now use the changed default PIN.
Managed Mobility Access settings
Introduction to MMA settingsYou can register up to 50 external numbers on your system for use with the Managed MobilityAccess (MMA) feature.
The number you register is assigned to a fixed internal subscriber. An internal subscriber canbe assigned to more than one external number.
The option of using callback and editing the numbers can be given to the internalsubscribers.
Customizing your telephone
94 Avaya 9508 Series Digital Deskphone User Guide March 2011

By default, a normal call diversion can be activated to telephones with registered numbers.For each registered number, you can configure that twinning is activated instead of calldiversion.
Related topics:Introduction to MMA on page 59
Adding dial-in authorized numbers *If you have permission, you can register for any internal subscribers new numbers which areauthorized to dial in.
1. Press the Avaya Home button.
2. Select Settings.
3. Press the OK button.
4. Select Applications.
5. Press the OK button.
6. Select Mobility.
7. Press the OK button.
8. Enter the telephone number of the internal subscriber for whom you want to registera new number.The LCD screen shows a list of all the external numbers already registered.
9. Press the New softkey.
10. Select a number you want to register from the list or enter the external number withthe dialing code. For example, 0696 50512.The number list contains all the external numbers on the call log of the internalsubscriber.
Note:This saves a lot of effort in keying in all the digits of a number. For example, youcan simply call your extension using the mobile whose number you want toregister. The number appears in your call log and you can easily add it as aregistered number.
11. If necessary, press the Options softkey and select and modify one or several of thefollowing settings:
• Callback (off): To allow callback option, change setting to (on).
• Editable (off): To allow editing option, change setting to (on).
• Twinning (off): To set twinning instead of call diversion, change setting to(on).
Managed Mobility Access settings
Avaya 9508 Series Digital Deskphone User Guide March 2011 95
12. If necessary, press the Back softkey to quit the Options menu.
13. Press the OK button.The number is registered and list of registered numbers shows the new number.
ResultThe Call diversion > Divert to menu shows the all registered numbers as twinning or calldiversion destinations.
Related topics:Diverting calls from your telephone to another on page 31
Changing dial-in authorized numbers *If you have permission, you can change the telephones or registered numbers that can dial into your telephone system.
1. Press the Avaya Home button.
2. Select Settings.
3. Press the OK button.
4. Select Applications.
5. Press the OK button.
6. Select Mobility.
7. Press the OK button.The LCD screen shows a list of all the external numbers registered.
8. Select the number whose settings you want to change.
9. Press the OK button.
10. Change the external number.
11. If necessary, press the Options softkey and select and modify one or several of thefollowing settings:
• Callback (off): To allow callback option, change setting to (on).
• Editable (off): To allow editing option, change setting to (on).
• Twinning (off): To set twinning instead of call diversion, change setting to(on).
12. If necessary, press the Back softkey to quit the Options menu.
13. Press the OK button.
Customizing your telephone
96 Avaya 9508 Series Digital Deskphone User Guide March 2011
The amended number is registered.
Deleting dial-in authorized numbers *You can delete the registered numbers as required.
1. Press the Avaya Home button.
2. Select Settings.
3. Press the OK button.
4. Select Applications.
5. Press the OK button.
6. Select Mobility.
7. Press the OK button.
8. Enter the phone number of the internal subscriber for whom you want to delete aregistered number.The LCD screen shows a list of all the external numbers registered.
9. Select the number you want to delete.
10. Press the Delete softkey.
11. Press one of the following softkeys:
• Entry. To delete the shown entry.
• All. To delete all entries in the list.
Using a call filterThe call filter list contains up to 10 directory entries. You can still receive signals of calls fromsubscribers in the call filter list even after you set up Do not disturb.
You can set up a special ring tone for calls from numbers on the call filter list.
Note:You can also use the call filter to prevent call diversion for selected numbers. If in additionto Call divert to, immediate, you also set up Do not disturb, then only your telephone ringswhen a call arrives from entries in the call filter list. The system diverts all other calls
Using a call filter
Avaya 9508 Series Digital Deskphone User Guide March 2011 97

immediately. You can also mark certain entries in order to reject or ignore calls from thosenumbers.
1. Press the Avaya Home button.
2. Select Settings.
3. Press the OK button.
4. Select Applications.
5. Press the OK button.
6. Select Call filter.
7. Press the OK button.
8. Press the New softkey.The LCD screen shows a list is of all entries in the general directory and yourpersonal directory.
9. Enter one or more initial letters of the name until you see the subscriber youwant.Instead of entering the initial letters, you can scroll through the telephone book tothe entry you want.
10. Press the OK button.The subscriber is added to the call filter list.
11. Press the Back softkey.You can also configure the feature Call Reject. A call coming in from such a numberis treated as if Do not disturb was activated.
a. Select an entry from the list and press OK.
b. Then select the option Reject.
Related topics:Diverting calls from your telephone to another on page 31Deactivating the ringing tone temporarily on page 77
Deleting entries from the call filter
1. Press the Avaya Home button.
2. Select Settings.
Customizing your telephone
98 Avaya 9508 Series Digital Deskphone User Guide March 2011

3. Press the OK button.
4. Select Applications.
5. Press the OK button.
6. Select Call filter.You can see all the call filter entries.
7. Select the entry you want to delete.
8. Press the Delete softkey.
9. Press one of the following softkeys:
• Entry. To delete the shown entry.
• All. To delete all entries in the list.
10. Press the Back softkey.
Deleting entries from the call filter
Avaya 9508 Series Digital Deskphone User Guide March 2011 99

Customizing your telephone
100 Avaya 9508 Series Digital Deskphone User Guide March 2011
Chapter 13: Settings for your telephonesystem
IntroductionYou can modify many of the settings for your telephone system from your Avaya 9508 SeriesDeskphones.
The settings apply to all the telephones in your system.
• External callers can use various telephone numbers to reach your company. Thesetelephone numbers serve as the operator for the company. You can link a number to aspecific telephone or telephones in the company so that when a call comes on thattelephone number, only the linked telephones ring.
The settings serve normal daytime operations, three different nighttime variations from 1to 3, and call forwarding after a time delay.
• If you want to operate several calls alone, you can issue a "busy" signal to every newcaller as soon as you are in a call. This is called second call barring.
• You can change the date and time globally for the whole system.
• You can determine a customer password. For example, you can manage your telephonesystem with the ICT tool.
• You can obtain statistical information for your telephone, such as traffic statistics.
Assigning operators for day service *External callers can use various telephone numbers to reach your company. These telephonenumbers serve as the operator for the company. A single telephone can become the soleoperator for all exchange lines. Alternatively, in the absence of an operator, a call goes to alltelephones as a general call. You can assign an operator for each external line or link up tofive telephones to one operator.
Avaya 9508 Series Digital Deskphone User Guide March 2011 101
1. Press the Avaya Home button.
2. Select Settings.
3. Press the OK button.
4. Select System functions.
5. Press the OK button.
6. Select Day service.
7. Press the OK button.
8. Enter the two-digit number of the line for which you want to set up operators.Press the corresponding line key instead of entering the line number.
9. Select the number for which you want to set up an operator.
10. Press the OK button.
11. Enter the internal number of the telephone which is to be set up as an operator. Forexample, 13.
12. You can enter four other internal telephone numbers that you want to set up asoperators also.
13. If necessary, select Next line and set up operators for this line.
14. Press the Back softkey.The system saves the new setting.
15. To change existing answering stations, simply enter the new operators.
Assigning operators for night service *A telephone system handles calls at all times. At night, the operation is different from thedaytime operations and includes three options. You can administer specific operators for nightservice and program different classes of service for that time. See the Integral 5 system manualfor more details on activating night service.
1. Press the Avaya Home button.
2. Select Settings.
3. Press the OK button.
4. Select System functions.
5. Press the OK button.
Settings for your telephone system
102 Avaya 9508 Series Digital Deskphone User Guide March 2011

6. Select Night service.
7. Press the OK button.
8. Enter the two-digit number of the line for which you want to set up operators.Press the corresponding line key instead of entering the line number.
9. Select the number for which you want to set up an operator.
10. Press the OK button.
11. Enter the internal number of the telephone which is to be set up as an operator. Forexample, 13.
12. If necessary, enter four further internal numbers of telephones which are also to beset up as operators for this night service.
13. If necessary, select Next line and set up operators for this line.
14. Press the Back softkey.The system saves the new setting.
15. To change existing answering stations, simply enter the new operators.
Related topics:Activating Night service on page 78
Assigning call forwarding destinations *You can assign up to five call forwarding destinations for each exchange line. Call forwardingtakes place after a set time when a operator is called through the exchange line. The timebefore the call is forwarded can be set globally for the system between 0 and 300 seconds.
If you set up call forwarding for the operator but do not specify a forwarding destination, thesystem forwards the call as a general call.
1. Press the Avaya Home button.
2. Select Settings.
3. Press the OK button.
4. Select System functions.
5. Press the OK button.
6. Select Call forwarding.
7. Press the OK button.
8. Enter the two-digit number of the line for which you want to set up operators.
Assigning call forwarding destinations *
Avaya 9508 Series Digital Deskphone User Guide March 2011 103

Press the corresponding line key instead of entering the line number.
9. Select the number for which you want to set up an operator.
10. Press the OK button.
11. Enter the internal number of the telephone which is to be set up as an call forwardingdestination. For example, 13.
12. If necessary, enter four further internal numbers of telephones to which the callshould be forwarded.
13. If necessary, select Next line and set up operators for this line.
14. Press the Back softkey.The system saves the new setting.
15. To change operators you have already set up simply enter the new operators.
Related topics:Forwarding calls to forwarding stations on page 26
Setting up Second Call Barring *You must have authorization to set up Second Call Barring. The administrator approves thetelephone numbers for setting up Second Call Barring.
1. Press the Avaya Home button.
2. Select Settings.
3. Press the OK button.
4. Select System functions.
5. Press the OK button.
6. Select Second Call Barring.
7. Press the OK button.The LCD screen shows a list of numbers for which Second Call Barring can beset up.
8. Select the number for which you want to change Second Call Barring.
9. Press the OK button.
10. If necessary, select other numbers for which you want to change the setting.
Settings for your telephone system
104 Avaya 9508 Series Digital Deskphone User Guide March 2011

11. After you have selected the other numbers, press the OK button.
12. Press the Phone/Exit button.The new setting is saved.
ResultIf you are in a call, another external caller receives a busy tone even if other telephones in thecall distribution are free.
Setting the date and time
1. Press the Avaya Home button.
2. Select Settings.
3. Press the OK button.
4. Select System functions.
5. Press the OK button.
6. Select Date/ time.
7. Press the OK button.
8. Enter the date in the day, month, and year format. For example, 050110 for January5th 2010.
9. Enter time in hours and minutes format. For example, 1051 for 10:51 am.The day of the week is set automatically.
10. Press the Back softkey.The system saves the new setting.
Setting customer password *You can setup a customer password that you can use when you manage the telephone systemwith the Integral Customer Tool (ICT). The password can consist of letters and digits.
Setting the date and time
Avaya 9508 Series Digital Deskphone User Guide March 2011 105
1. Press the Avaya Home button.
2. Select Settings.
3. Press the OK button.
4. Select System functions.
5. Press the OK button.
6. Select Customer pswd.
7. Press the OK button.
8. Enter the old password if you assigned one already.
9. Enter the new four-digit customer password or PIN.
10. Press the Back softkey.The system saves the new setting.
Showing traffic statistics *You can retrieve statistical information for your telephone.
1. Press the Avaya Home button.
2. Select Traffic statistics.
3. Press the OK button.You can see all the information about calls since you last deleted the data.
4. To reset the counter, select Delete.The system begins recording data anew from the current date.
Settings for your telephone system
106 Avaya 9508 Series Digital Deskphone User Guide March 2011

Chapter 14: Auxiliary devices
Button module BM12A BM12 button module provides 12 physical buttons that you can use over two screens toprogram 24 function/partner keys. You can connect three BM12 modules to your Avaya 9508Series telephone.
Your system administrator can assign the buttons according to your preferences. The followingoptions are available to you:
• Telephone numbers or call numbers of your partners
• Individual destinations or frequently used call numbers
• Functions such as door opener, call diversion or hotel functions
Avaya 9508 Series Digital Deskphone User Guide March 2011 107
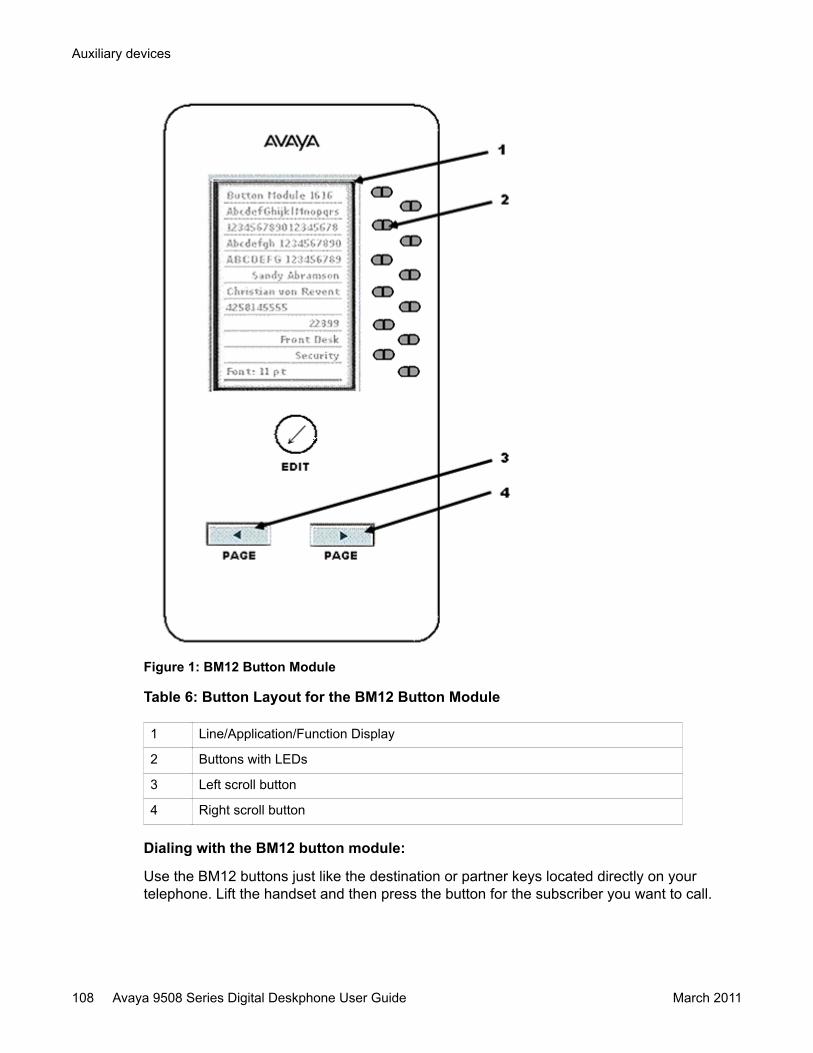
Figure 1: BM12 Button Module
Table 6: Button Layout for the BM12 Button Module
1 Line/Application/Function Display
2 Buttons with LEDs
3 Left scroll button
4 Right scroll button
Dialing with the BM12 button module:
Use the BM12 buttons just like the destination or partner keys located directly on yourtelephone. Lift the handset and then press the button for the subscriber you want to call.
Auxiliary devices
108 Avaya 9508 Series Digital Deskphone User Guide March 2011

Using a headsetYou can connect a headset to your telephone. To use a cordless headset, first activate it.
Caution:Prolonged usage of a headset and listening to loud sounds can impair your hearing. Usethe Volume button to maintain the headset volume at a pleasant level.
Answering calls:
To answer a call, press the Headset button.
Continuing a headset call with the handset:
To continue a headset call, lift the handset and continue the conversation as normal.
Continuing a handset call with the headset:
To continue a handset call using the headset, press the Headset button. You will be speakingto the other party through the headset. The LED on the button lights up.
Continuing a handset call with the headset:
To continue a handset call using the headset, press the Headset button. You can speak to theother party through the headset. The LED on the button lights up.
Ending a headset call and disconnecting:
To end a headset call, press the Headset button and replace the handset if necessary.
Starting a call:
To start a call, enter the telephone number or the internal call number and press the Headsetbutton.
Activating monitoring:
To activate monitoring on the telephone while you are on a call with the headset, press theSpeaker button. The LED on the button lights up.
Using a headset
Avaya 9508 Series Digital Deskphone User Guide March 2011 109

Auxiliary devices
110 Avaya 9508 Series Digital Deskphone User Guide March 2011
Chapter 15: Hotel functions
IntroductionThe hotel functions of the Avaya 9508 Series telephones are most suitable for use in small-sized to medium-sized hotels and guest houses. Your system administrator can connect up tothree BM12 modules to the telephone for executing these functions.
The following hotel functions are available
• Checking in and checking out guests
• Viewing guest charges
• Disabling direct inward dialing to rooms
• Waking up guests
You can also connect a printer to the telephone system for printing charge reports and wake-up requests.
Layout of the hotel functions on the BM12 button module *The following table contains some sample functions that the administrator can be program onthe BM12 button module for use in a hotel.
Table 7: Sample Hotel Functions for the BM12 button module
Name DescriptionCheck-in / Check-out For checking guests in and out.
DDD (Disable DirectDial)
An external caller cannot directly connect to the room of the guest.The switchboard routes all calls.
Message The switchboard can send a message to a room telephone.
Disable guest-to-guest Hotel guests cannot make calls to each other directly from theirroom telephones. The switchboard routes all calls.
Charge limit External calls are chargeable. The guest can only incur chargesup to a specific amount.
Avaya 9508 Series Digital Deskphone User Guide March 2011 111
Name DescriptionExit For ending an operating procedure. You can use this to end an
operating procedure. The BM12 module returns to displaying thecalling status of the room telephones.
Other keys Destination keys for guests.
Checking in *
1. Press the Check-in button.
2. Press the button for the room you want to allocate.
3. Select the language that you want.You can select from the several languages that the menu displays on the guesttelephone.
4. Press the OK button.The guest is checked in. The button of the room booked lights up to indicate theguest is checked in.
ResultThe room guest obtains the full, nonrestricted class of service upon check-in as evident by themenu on display on the guest telephone. Voice announcements of a voice mail box, if any, arein the selected language. The system deletes all details pertaining to the previous guest.
Checking out *
1. Press the Check-out button.
2. Press the button of the room you want to check out.
• If the key light goes off: There are no charges for that room guest, and thereare no unheard messages on the voice mail box of the guest.
Check-out is complete.
Hotel functions
112 Avaya 9508 Series Digital Deskphone User Guide March 2011
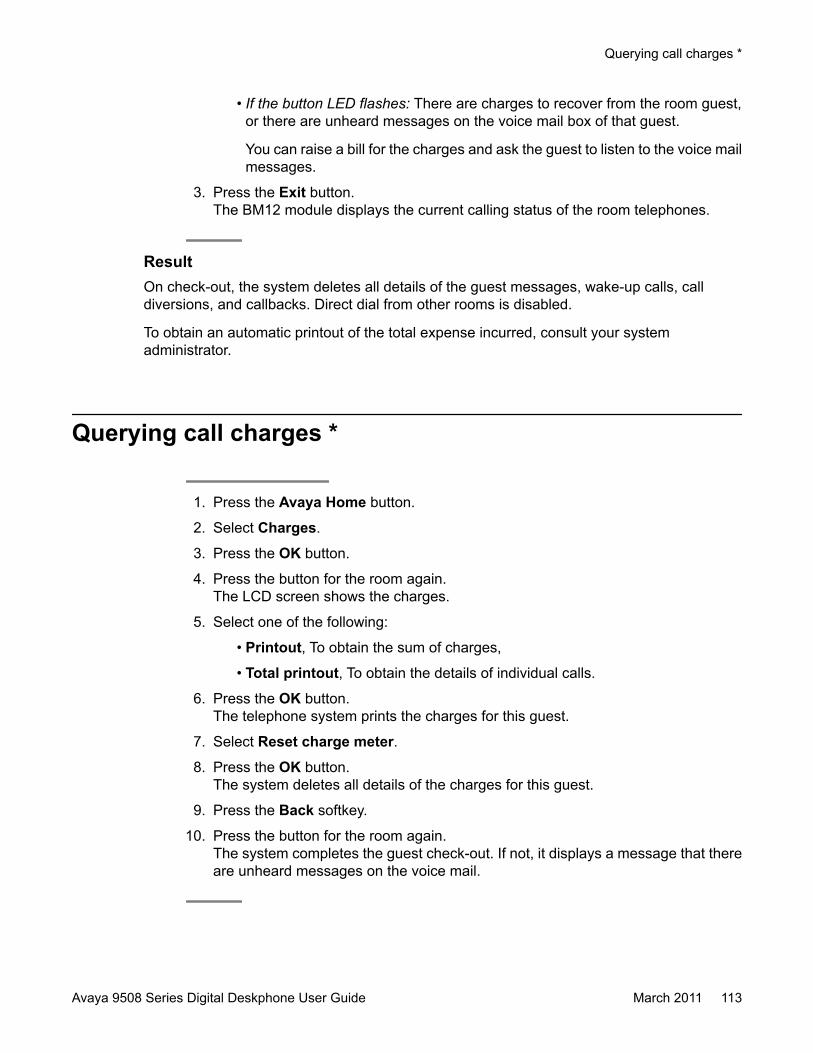
• If the button LED flashes: There are charges to recover from the room guest,or there are unheard messages on the voice mail box of that guest.
You can raise a bill for the charges and ask the guest to listen to the voice mailmessages.
3. Press the Exit button.The BM12 module displays the current calling status of the room telephones.
ResultOn check-out, the system deletes all details of the guest messages, wake-up calls, calldiversions, and callbacks. Direct dial from other rooms is disabled.
To obtain an automatic printout of the total expense incurred, consult your systemadministrator.
Querying call charges *
1. Press the Avaya Home button.
2. Select Charges.
3. Press the OK button.
4. Press the button for the room again.The LCD screen shows the charges.
5. Select one of the following:
• Printout, To obtain the sum of charges,
• Total printout, To obtain the details of individual calls.
6. Press the OK button.The telephone system prints the charges for this guest.
7. Select Reset charge meter.
8. Press the OK button.The system deletes all details of the charges for this guest.
9. Press the Back softkey.
10. Press the button for the room again.The system completes the guest check-out. If not, it displays a message that thereare unheard messages on the voice mail.
Querying call charges *
Avaya 9508 Series Digital Deskphone User Guide March 2011 113

Listening to messages *A menu lists the unheard messages on the voice mail box of the room guest.
1. From the menu, select the relevant entry. For example, 101: New messages (2).
2. To open the voice mail box, call the voice mail server.
3. Enter the room number.
4. Press the OK button.The system establishes a connection to the voice mail box of the guest.
You can transfer the voice mail box to another telephone where the room guest canlisten to the voice mail messages by pressing the star (*) key. There, the customercan listen to the messages on his voice mail box on pressing the (* ) key.
5. Press the button for the room again.The guest check-out is complete, and all unheard messages are deleted.
Messaging to guest: message at reception *
1. Press the Message button.
2. Press the button for the desired room.
3. Press the Exit button.The BM12 module displays the calling status of the room telephones.
On the display screen of the room telephone, you can see Message. If the roomtelephone does not have a display screen, the LED for signaling a call lights up.
If the guest rings back, the Message indication is canceled or the LED turns off.
4. To delete the message, press the key for the room again.
Hotel functions
114 Avaya 9508 Series Digital Deskphone User Guide March 2011

Setting direct dial to rooms *If direct inward dial to a room is disabled, an external caller cannot reach this guest directlybut must use the switchboard to connect.
1. Press the DDD (Disable Direct inward Dial) button.The LEDs on the buttons of all rooms which cannot be called directly light up.
2. Press the button for the room you want to enable direct dial.The button LED lights up which means that Direct Dial is enabled for the room.
If you want to disable Direct dial for a room, ensure that the LED for thecorresponding room is switched off.
3. Press the Exit button.
Setting guest-to-guest connection *If a guest-to-guest connection is disabled, one guest cannot directly call another guest butmust use the switchboard to connect.
1. Press the Disable guest-to-guest button.The LEDs for the buttons of all rooms that cannot directly call other room telephoneslight up.
2. Press the button for the room you want to disable guest-to-guest dialing.The LED for the corresponding button lights up or goes out, depending on the newguest-to-guest connection status of the room.
3. Press the Exit button.
Determining the charge limit *When you activate the charge limit for a room, the room guest can only incur charges up tothe specified limit. A signal tone indicates that the charge limit is reached. If the room guest ison a call, the call continues uninterrupted but the system bars other external calls. The
Setting direct dial to rooms *
Avaya 9508 Series Digital Deskphone User Guide March 2011 115

reception telephone displays a message that the guest has exceeded the charge limit. Thecharge limit is the same for all guests.
1. Press the Charge limit button.The LEDs for buttons of all the rooms with an activated charge limit light up.
2. Press the button for the room you want to set a charge limit.The corresponding LED for the button lights up or goes out, depending of the newcharge limit status of the room.
3. Press the Exit button.
Waking up the guests *With the wake-up call, you can send your own text or one prepared by your systemadministrator. You can change that text or compose one yourself.
If the guest does not react to the wake-up call, a message to that effect appears on thereception telephone.
Using the printer, you can maintain a log of the time of entering the wake-up call and makingthe wake-up call and whether the guest acknowledged the call or not.
The guest can set the wake-up times by using the telephone. Voice-controlled operation isdescribed in the manual for the voice mail box.
1. Press the Avaya Home button.
2. Select Appointments.
3. Press the OK button.
4. Select Appointments for others.
5. Press the OK button.
6. Press the button for the desired room.
7. Press the OK button.The LCD display shows all existing appointments for that room.
8. Now enter the time you want for the wake-up call just as you would for your ownappointments.
9. To delete one of the appointments, select the appointment and press Delete.
Hotel functions
116 Avaya 9508 Series Digital Deskphone User Guide March 2011
Appendix A: Remote features
Changing call diversion remotely *You can call your telephone system from an external telephone to set up or change a calldiversion for your telephone or for other telephones.
You can do this from any telephone with DTMF suffix dialing. In many cases, you can use onlycertain preset telephones for this feature. For more information, contact your systemadministrator.
Your system administrator can enable the Changing call diversion remotely feature on yourtelephone. To know the remote control access number and PIN and also the codes foractivating and deactivating call diversion, contact your system administrator.
1. Dial the remote control access number from the external telephone.
2. Enter your internal number.
3. Enter your PIN.
4. Enter the Codes for Activate Call diversion.
5. Enter the diversion target number.
6. To deactivate the diversion, enter the appropriate code.
7. To set up or to change the call diversion, enter the code for Activate follow-mebeginning with an asterisk (*).
8. Enter the external line code of the system and the new destination to which youwant to divert the calls. An acknowledgement tone sounds after a short time.
9. To deactivate the call diversion, enter the code for Deactivate follow-me.
Related topics:Introduction to call diversion on page 31
Avaya 9508 Series Digital Deskphone User Guide March 2011 117

Remote features
118 Avaya 9508 Series Digital Deskphone User Guide March 2011
Index
A
acknowledgingappointment .........................................................70
adjustinghandsfree operation .............................................76
alternatingbetween calls .......................................................28
announcementreplying ................................................................23
anonymous calling ......................................................24answered calls ............................................................18answering
calls ......................................................................25on hold .................................................................26pick-up .................................................................25second call ...........................................................28
answering calls for ......................................................26answering stations ............................................101, 102appointment ..........................................................68–71
delete ...................................................................71for today ...............................................................69one-time ...............................................................69
automatic handsfreeafter dialing ..........................................................78
B
BM12 .................................................................107, 111hotel functions ....................................................111
brightness ...................................................................75brokering ....................................................................28bundles .......................................................................35button module ...........................................................107
C
call charges ................................................................65call display
extending .............................................................85call diversion .......................................................31, 117
changing remotly ................................................117call filter .................................................................97, 98
deleting entries .....................................................98call forwarding
destinations ........................................................103
call history ..................................................................45call history entries automatically .................................47call history lists ...........................................................18call lhistory ..................................................................46call log
additional entries ..................................................48entry in phone book .............................................47symbols ................................................................45
call numberspresenting different ..............................................81presenting specified .............................................22
callbackautomatic .............................................................20
callinganonymous ..........................................................24external ................................................................18internal number ....................................................17partners ................................................................19phone book entry .................................................19speakerphone ......................................................19with a destination key ...........................................18
calls ............................................................................17charge limitl
hotel ....................................................................115charges ..........................................................65, 66, 113
last calls ...............................................................65lines ......................................................................66subscribers ...........................................................66total ......................................................................65
Checking in ...............................................................112Checking out .............................................................112code dialing
MMA .....................................................................62Code number ..............................................................84conference
expanding ............................................................37conference bridge ......................................39–42, 91–94
access PIN ...........................................................92changing standard PIN ........................................94dial into .................................................................39managing calls .....................................................40releasing reservation permission .........................92releasing standard access ...................................93reserving one-time ...............................................41reserving recurring ...............................................42set up ...................................................................91
conference call ......................................................37, 38
Avaya 9508 Series Digital Deskphone User Guide March 2011 119

making .................................................................37three-party ............................................................37
conference room ........................................................39connecting participants ...............................................38consultation call ..........................................................27contrast .......................................................................75customer password ..................................................105cut-in ...........................................................................21
D
date ...........................................................................105day service ...............................................................101deleting .................................................................47, 71
appointment .........................................................71destination key
LEDs ....................................................................14destination keys ..........................................................89destinations
assigning keys .....................................................88on keys .................................................................89
direct dialhotel rooms .........................................................115
direct dialing ...............................................................83discrimination code ...................................................117diverting ...........................................................31–33, 35
after time ........................................................31–33bundles ................................................................35for another telephone ...........................................33from ......................................................................32on busy ...........................................................31–33to ..........................................................................31unconditional ..................................................31–33
Do not disturb .............................................................77double call ..................................................................31DTMF suffix dialling ..................................................117
E
editingphone book entry .................................................52
ending .........................................................................38external line
seizing when off-hook ..........................................79external number .........................................................18
F
follow-me ..................................................................117forwarding calls ..........................................................26function key
LEDs ....................................................................14functions
assigning keys .....................................................88
G
general call .................................................................86guest-to-guest connectionl
hotel ....................................................................115
H
handlingcalls ......................................................................25
handsfree ...................................................................19handsfree answer back ..............................................82handsfree operation
setting ..................................................................76handsfreeautomatic after dialing ................................78headset ...............................................................87, 109
activating ..............................................................87remote headset ....................................................87
hotel ...................................................................112–116call charges ........................................................113charge limit .........................................................115checking in .........................................................112checking out .......................................................112direct dial ............................................................115guest-to-guest connection ..................................115messages ...........................................................114waking guests .....................................................116
hotel functions ...........................................................111BM12 ..................................................................111
hotel reception ..........................................................114hunt groups ................................................................86
I
internal call .................................................................17
J
joininganother call ..........................................................21
K
keysassigning functions ..............................................88
120 Avaya 9508 Series Digital Deskphone User Guide March 2011

assigning numbers ...............................................88
L
language .....................................................................76lecture mode ...............................................................40LEDs
on keys .................................................................14legal notices .................................................................2line keys .....................................................................89lines
assigning keys .....................................................88on keys .................................................................89
LN on dialing ..............................................................79locking ........................................................................67
telephone .............................................................67
M
making a call .........................................................17, 18Managed Mobility Access .....................................59, 94
settings .................................................................94menu
,Items ...................................................................12overview ...............................................................12
messagedeleting ................................................................55own ......................................................................55sending standard texts .........................................56to caller ................................................................56viewing .................................................................55writing ...................................................................55
messages ............................................................55, 114missed calls ..........................................................18, 46MMA ..........................................................59–62, 94–97
call diversion ........................................................62callback ................................................................60change registered numbers .................................96code dialing destinations ......................................62conference call .....................................................61deleting registered numbers ................................97dial system ...........................................................59end call .................................................................61modify call diversion number ...............................62modify twinning number .......................................62place call ..............................................................60refer-back call ......................................................61register numbers ..................................................95settings .................................................................94
monitoring ...................................................................19muting .........................................................................27
N
night service ........................................................78, 102activating ..............................................................78
O
on holdplacing ..................................................................26
outgoing calls .............................................................18
P
pager ..........................................................................85partner ..................................................................26, 88
assigning keys .....................................................88partner key
LEDs ....................................................................14partner keys ................................................................90partners
calling ...................................................................19on keys .................................................................90
permissionconference bridge reservation .............................92
phone book ................................................19, 47, 51–53calling entry ..........................................................19deleting entry .......................................................53editing entry .........................................................52new entry .............................................................51
pick-up ........................................................................25PIN ..................................................................67, 92, 94
conference bridge ...........................................92, 94
R
receptionmessages ...........................................................114
redialinterval .................................................................81repetition time ......................................................81
redial list .....................................................................47redialing ................................................................20, 21
automatic .............................................................21redials
number of .............................................................80referring back .............................................................27reminder .....................................................................68remote
changing call diversion .......................................117removing .....................................................................46replying
Avaya 9508 Series Digital Deskphone User Guide March 2011 121

announcement .....................................................23requesting
automatic callback ...............................................20automatic redialing ...............................................21
ring tonemelodies ...............................................................74
S
second calldeactivating ..........................................................84
second call barring ...................................................104setting .........................................................................75settings
telephone system ...............................................101signaling calls
on two telephones ................................................34source discrimination code .......................................117speakerphone .............................................................19symbols
call log ..................................................................45
T
telephone system
settings ...............................................................101time ...........................................................................105traffic statistics ..........................................................106transferring
call ........................................................................28on hold .................................................................28
twinning ......................................................................34
U
unlockingtelephone .............................................................68
V
VIP call .......................................................................85
W
waking guests ...........................................................116
122 Avaya 9508 Series Digital Deskphone User Guide March 2011