Audi B6/B7 S4 DIY: Valve Cover Gaskets - a modern polymath
61
Audi B6/B7 S4 DIY: Valve Cover Gaskets Register Help Remember Me? Forum Today's Posts FAQ Calendar Community Forum Actions Quick Links Classifieds Garage EA Advertisers Clubs Store What's New? Gallery Groups Premium Membership Advanced Search Forum Audi S4/RS4 B6/B7 Platform B6/B7 S4 DIY & How-to Section Audi B6/B7 S4 DIY: Valve Cover Gaskets 1. If this is your first visit, be sure to check out the FAQ by clicking the link above. You may have to register before you can post: click the register link above to proceed. To start viewing messages, select the forum that you want to visit from the selection below. + Reply to Thread
Transcript of Audi B6/B7 S4 DIY: Valve Cover Gaskets - a modern polymath
Audi B6/B7 S4 DIY: Valve Cover Gaskets
RegisterHelp
Remember Me?
ForumToday's PostsFAQCalendarCommunityForum ActionsQuick Links
ClassifiedsGarageEA AdvertisersClubsStoreWhat's New?
GalleryGroupsPremium Membership
Advanced Search
ForumAudiS4/RS4B6/B7 PlatformB6/B7 S4 DIY & How-to SectionAudi B6/B7 S4 DIY: Valve Cover Gaskets
1. If this is your first visit, be sure to check out the FAQ by clicking the link above. You may have toregister before you can post: click the register link above to proceed. To start viewing messages,select the forum that you want to visit from the selection below.
+ Reply to Thread
Page 1 of 2 1 2 LastResults 1 to 40 of 74
1Likes
Thread: Audi B6/B7 S4 DIY: Valve Cover Gaskets
LinkBack
Thread Tools
Display
1. 11-04-2009 09:47 PM #1Joey
THE STIG
Join DateNov 2009
LocationNJ
Posts7,137Garage
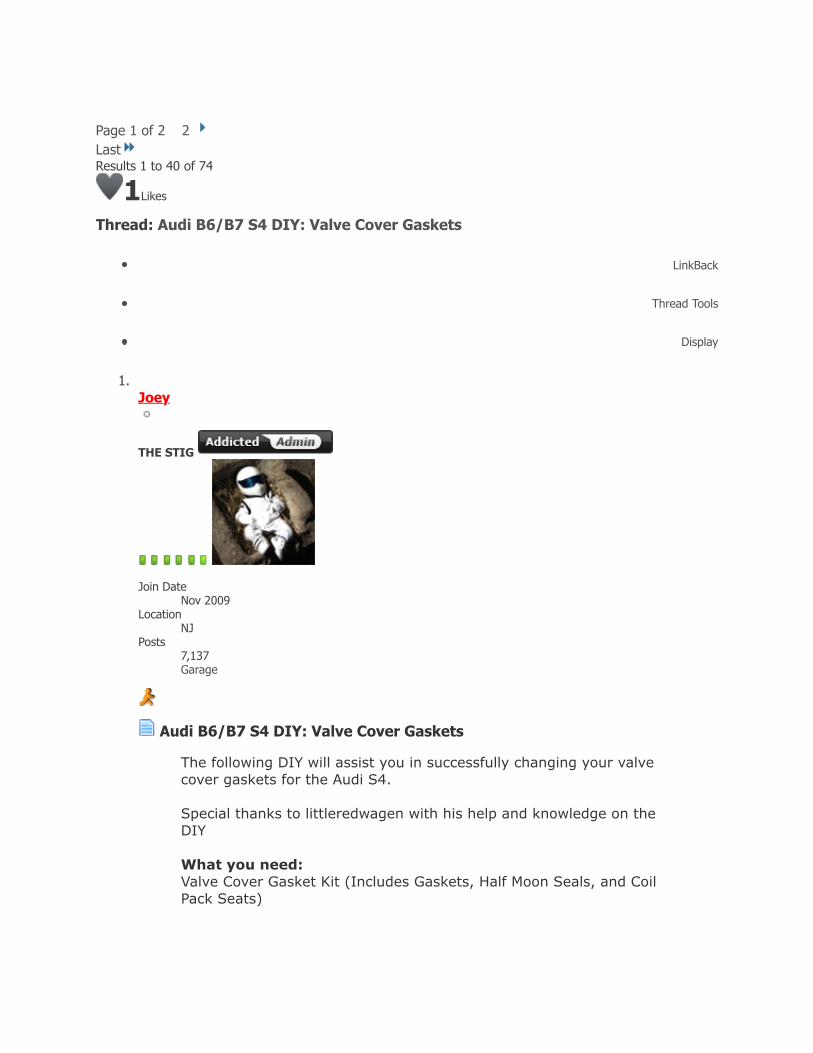
Audi B6/B7 S4 DIY: Valve Cover Gaskets
The following DIY will assist you in successfully changing your valvecover gaskets for the Audi S4.
Special thanks to littleredwagen with his help and knowledge on theDIY
What you need:Valve Cover Gasket Kit (Includes Gaskets, Half Moon Seals, and CoilPack Seats)
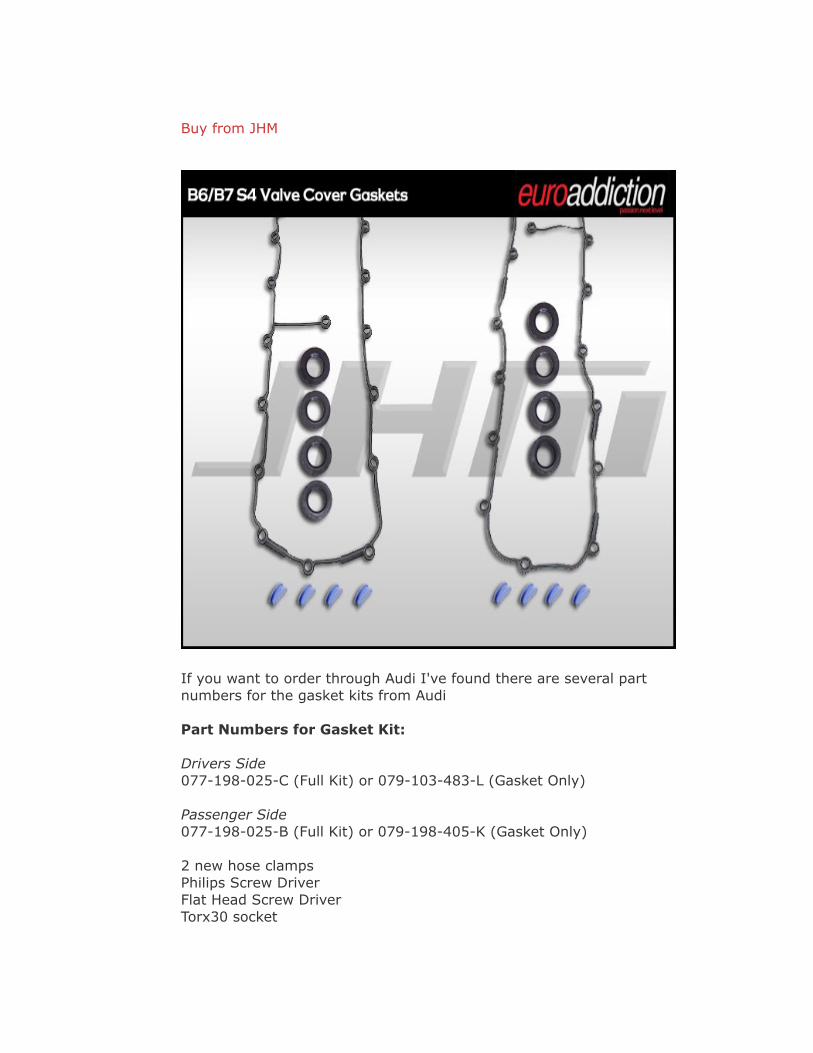
Buy from JHM
If you want to order through Audi I've found there are several partnumbers for the gasket kits from Audi
Part Numbers for Gasket Kit:
Drivers Side077-198-025-C (Full Kit) or 079-103-483-L (Gasket Only)
Passenger Side077-198-025-B (Full Kit) or 079-198-405-K (Gasket Only)
2 new hose clampsPhilips Screw DriverFlat Head Screw DriverTorx30 socket

Torx25 socket3/8 or 1/4 drive Ratchet Swivels (3/8 or 1/4)Extensons (3/8 or 1/4)Coil Pack Remover (Optional)Vise GripsPatience
*Special Tool*
Many have trouble with the lower-rear bolt on the valve cover. Hereare two tool kits that i use. I have successfully loosened the rear bolton many occasions with both tools. I highly recommend the Blue Pointwrench and bit as they are very strong and there are a lot of ratchetteeth to make the slightest turn ratchet. Click the picture to find it onSnap-On's site.
Order here!TORX30 Bit
The second is called the Super Deluxe Mini-Ratchet Tool Set made byWFMC Inc.
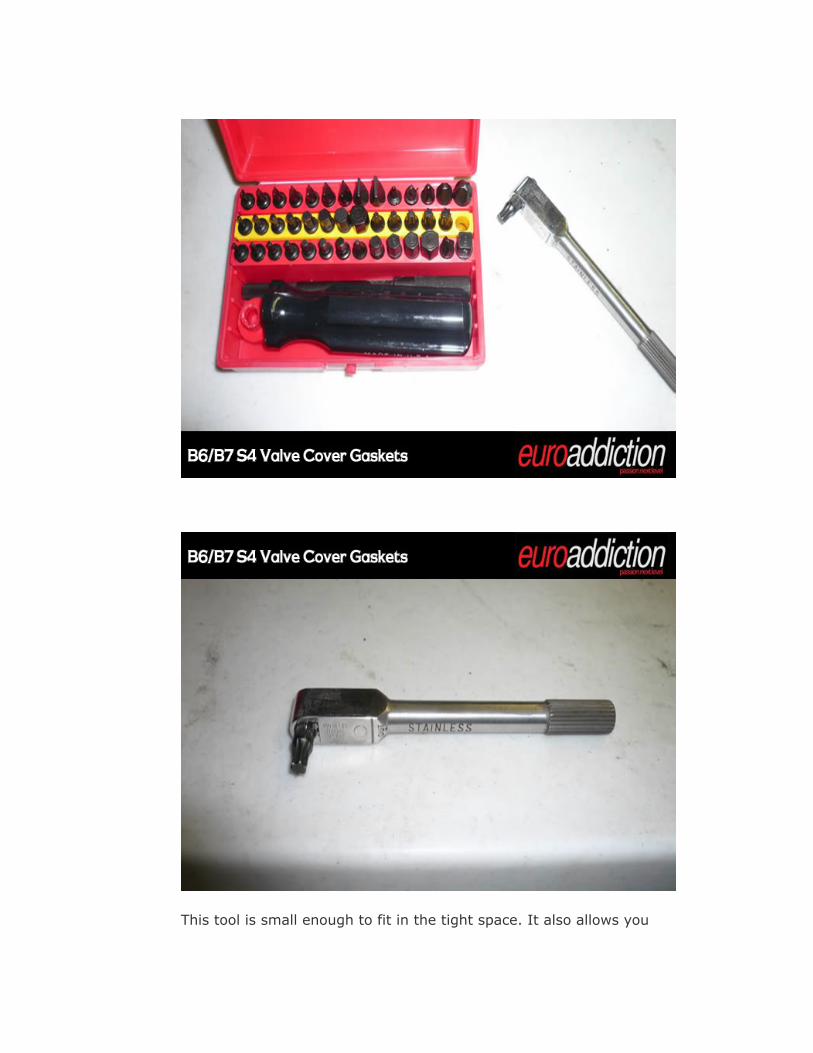
This tool is small enough to fit in the tight space. It also allows you
enough room to wrench the bolt out. I highly recommend this tool orelse a 1/4" TORX30 bit.
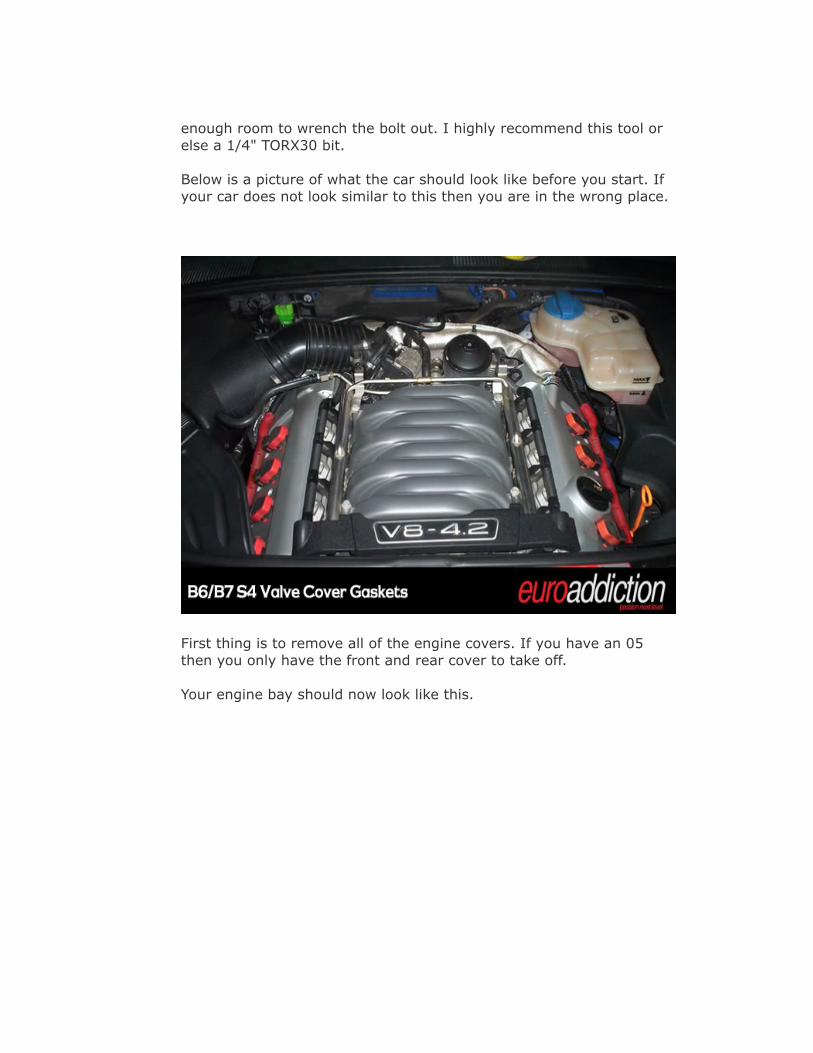
Below is a picture of what the car should look like before you start. Ifyour car does not look similar to this then you are in the wrong place.
First thing is to remove all of the engine covers. If you have an 05then you only have the front and rear cover to take off.
Your engine bay should now look like this.
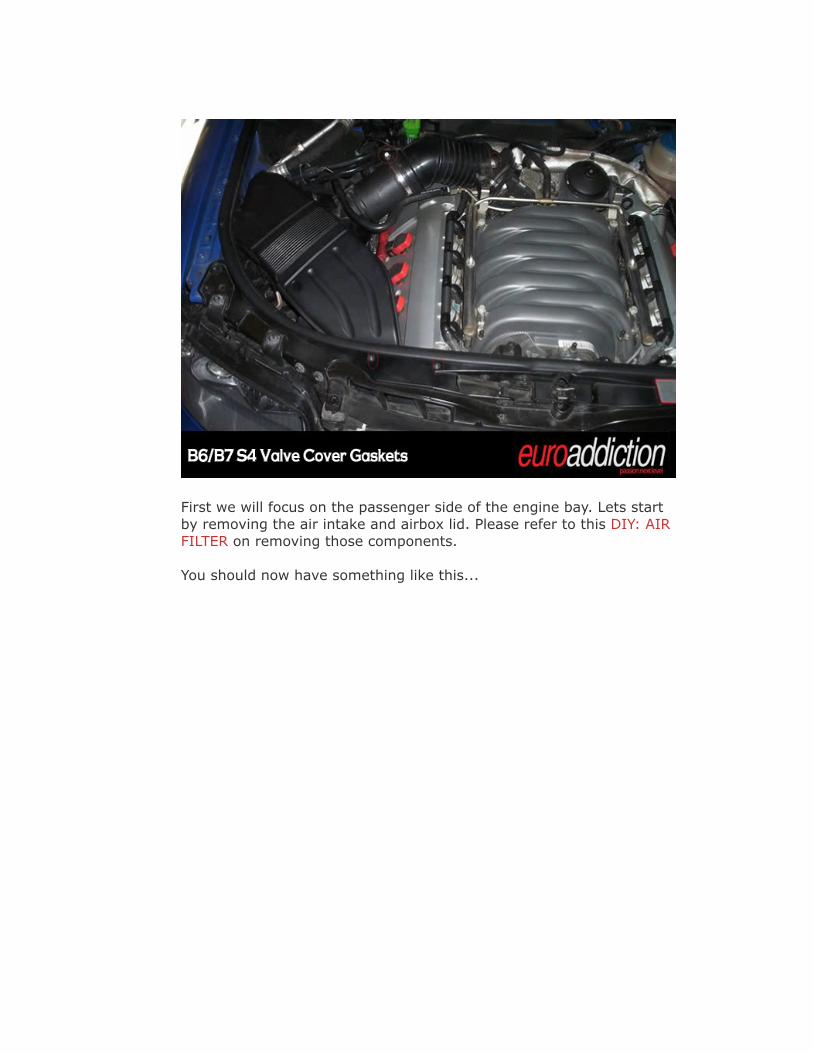
First we will focus on the passenger side of the engine bay. Lets startby removing the air intake and airbox lid. Please refer to this DIY: AIRFILTER on removing those components.
You should now have something like this...
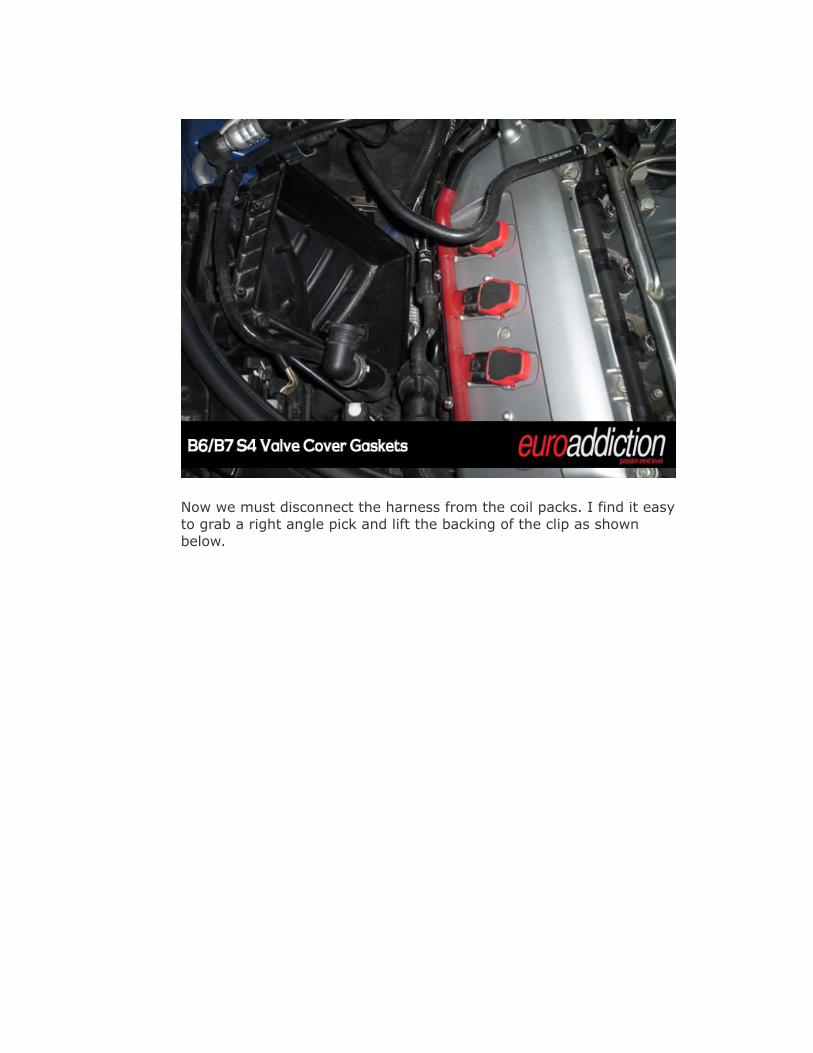
Now we must disconnect the harness from the coil packs. I find it easyto grab a right angle pick and lift the backing of the clip as shownbelow.

You will hear a "click". Once you hear a "click" pull the connectordownward to disconnect it from the coil pack. Once you do this with allfour connectors the coil pack harness will come free.
The harness does not need to be disconnected from the car, it cansimply be moved out of the way.

Next we remove the coil packs. I would suggest using a coil packremoval tool ($10 part from audi). It makes this very simple. If you donot have access to one you will just need to wiggle them out.
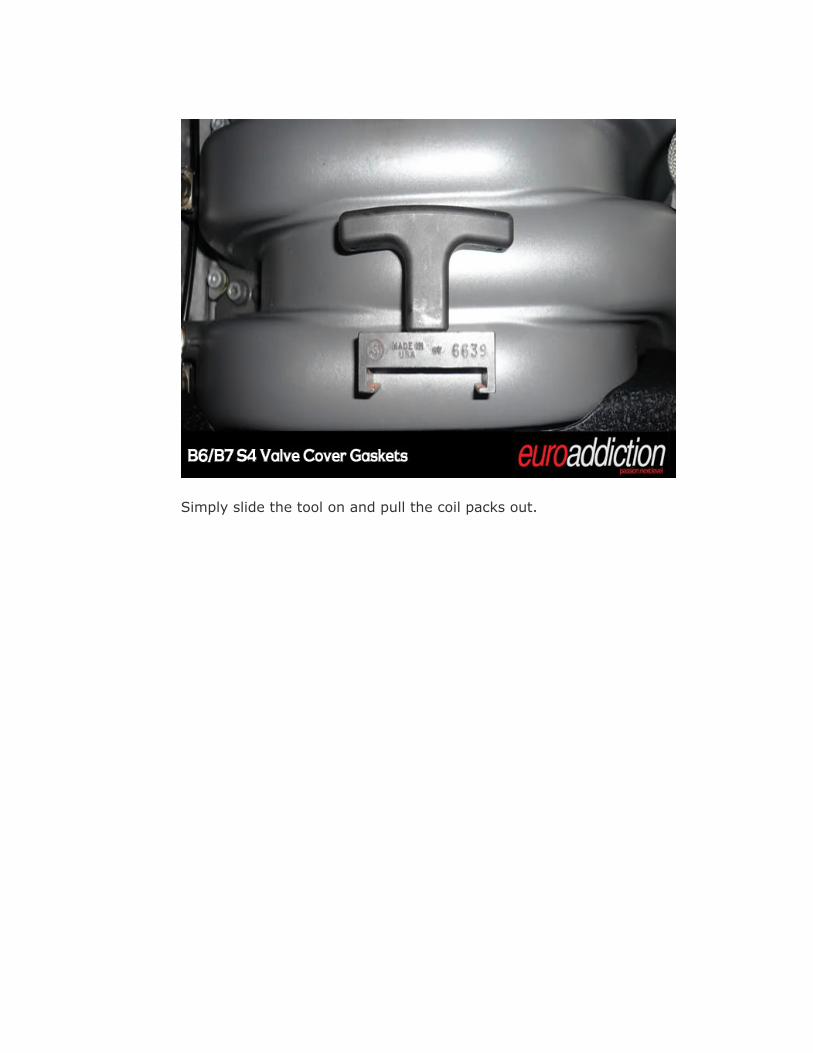
Simply slide the tool on and pull the coil packs out.
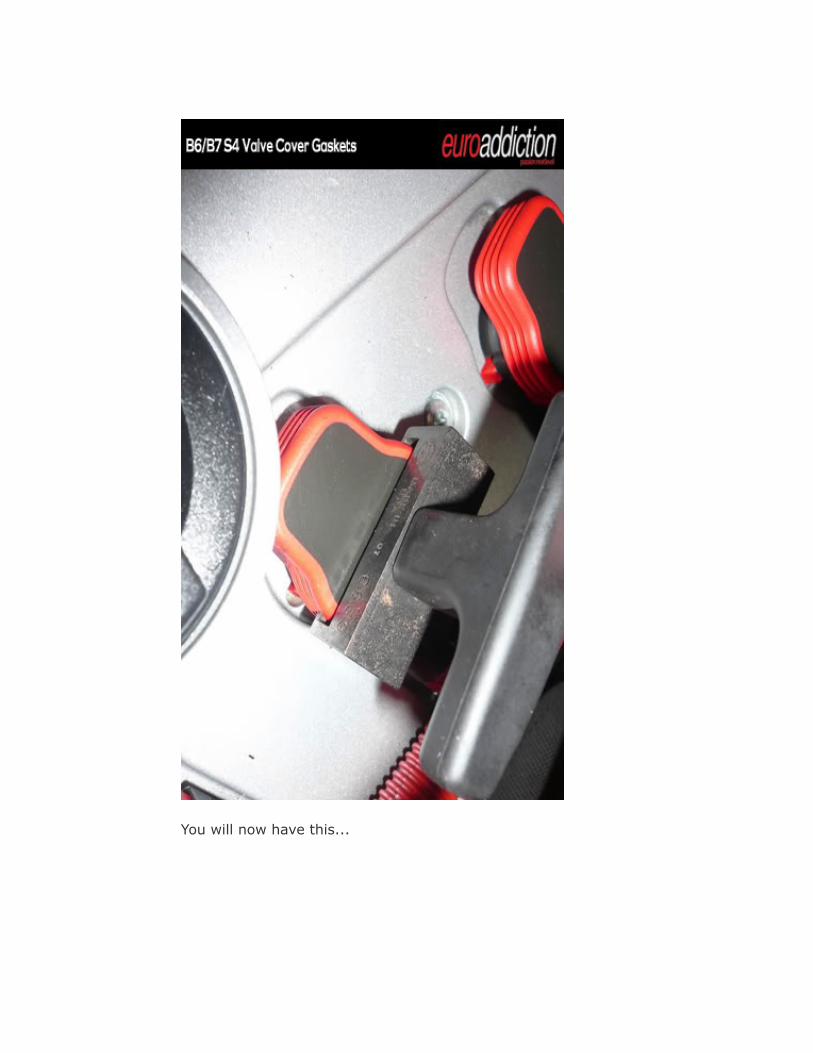
You will now have this...
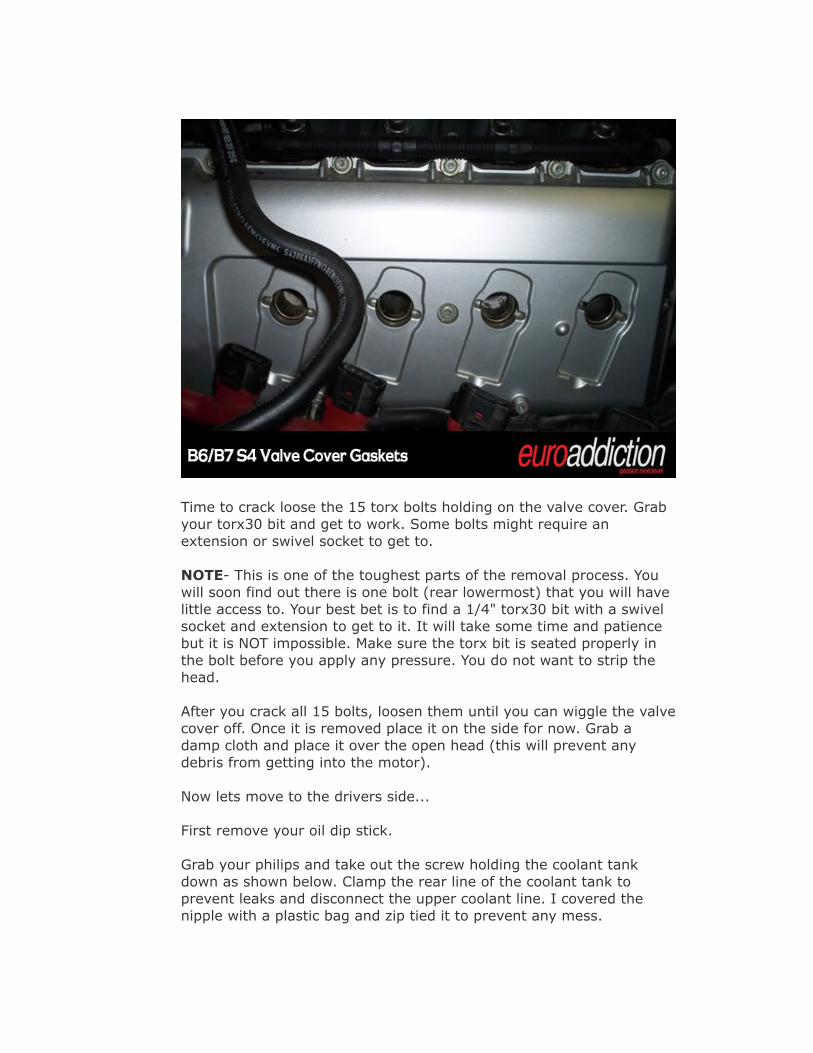
Time to crack loose the 15 torx bolts holding on the valve cover. Grabyour torx30 bit and get to work. Some bolts might require anextension or swivel socket to get to.
NOTE- This is one of the toughest parts of the removal process. Youwill soon find out there is one bolt (rear lowermost) that you will havelittle access to. Your best bet is to find a 1/4" torx30 bit with a swivelsocket and extension to get to it. It will take some time and patiencebut it is NOT impossible. Make sure the torx bit is seated properly inthe bolt before you apply any pressure. You do not want to strip thehead.
After you crack all 15 bolts, loosen them until you can wiggle the valvecover off. Once it is removed place it on the side for now. Grab adamp cloth and place it over the open head (this will prevent anydebris from getting into the motor).
Now lets move to the drivers side...
First remove your oil dip stick.
Grab your philips and take out the screw holding the coolant tankdown as shown below. Clamp the rear line of the coolant tank toprevent leaks and disconnect the upper coolant line. I covered thenipple with a plastic bag and zip tied it to prevent any mess.
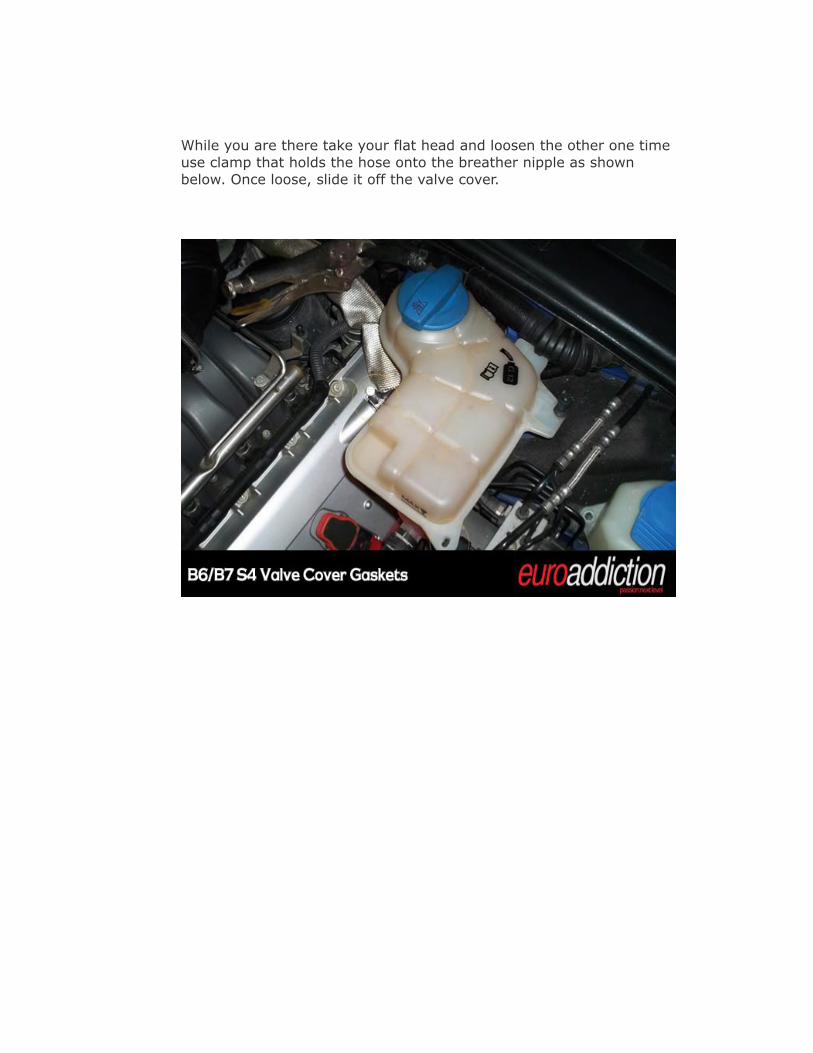
While you are there take your flat head and loosen the other one timeuse clamp that holds the hose onto the breather nipple as shownbelow. Once loose, slide it off the valve cover.
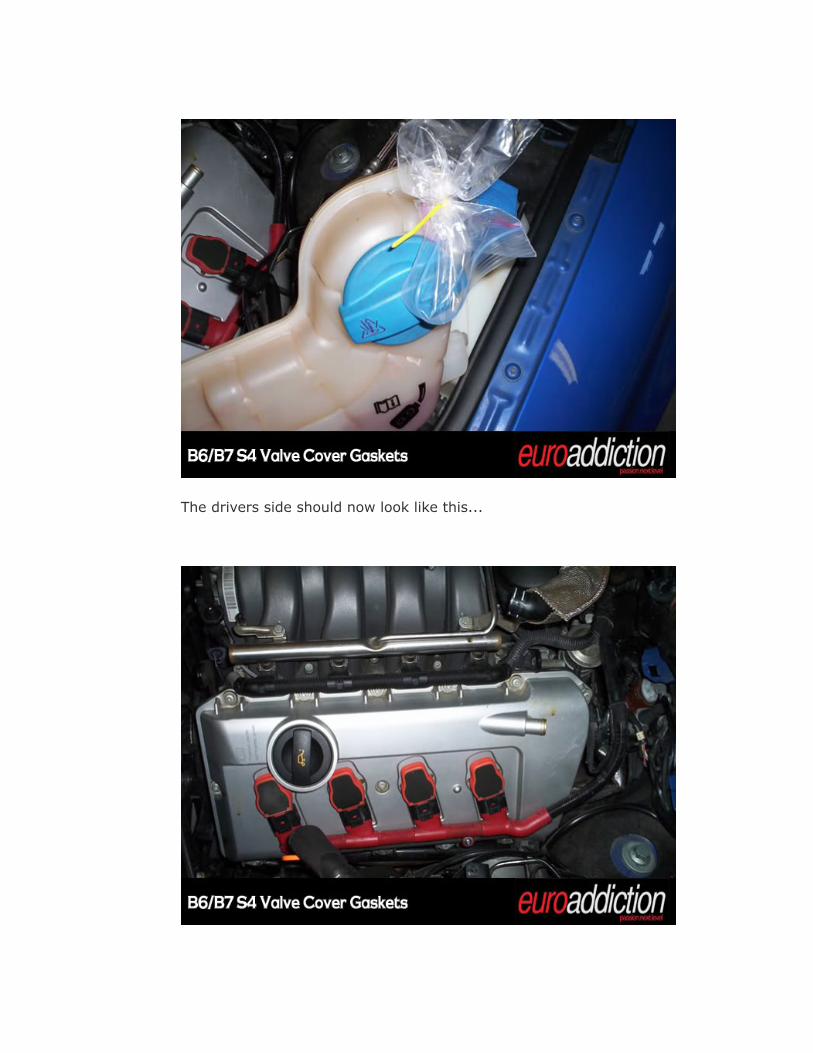
The drivers side should now look like this...
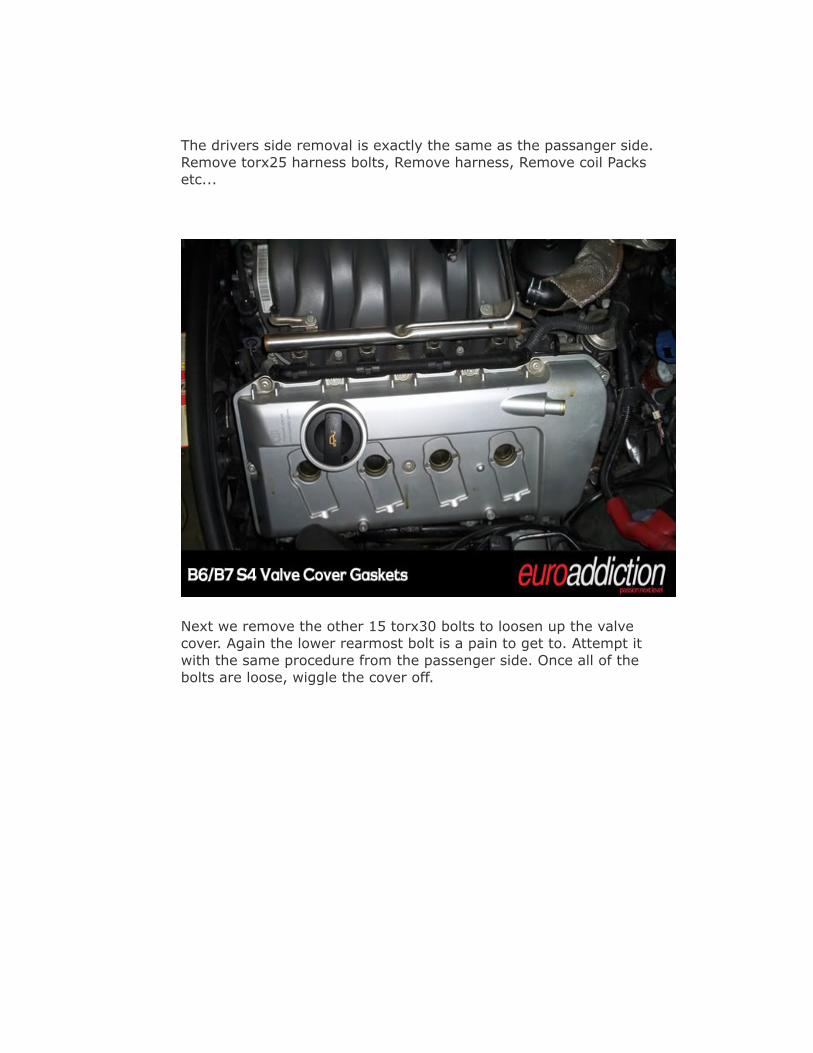
The drivers side removal is exactly the same as the passanger side. Remove torx25 harness bolts, Remove harness, Remove coil Packsetc...
Next we remove the other 15 torx30 bolts to loosen up the valvecover. Again the lower rearmost bolt is a pain to get to. Attempt itwith the same procedure from the passenger side. Once all of thebolts are loose, wiggle the cover off.
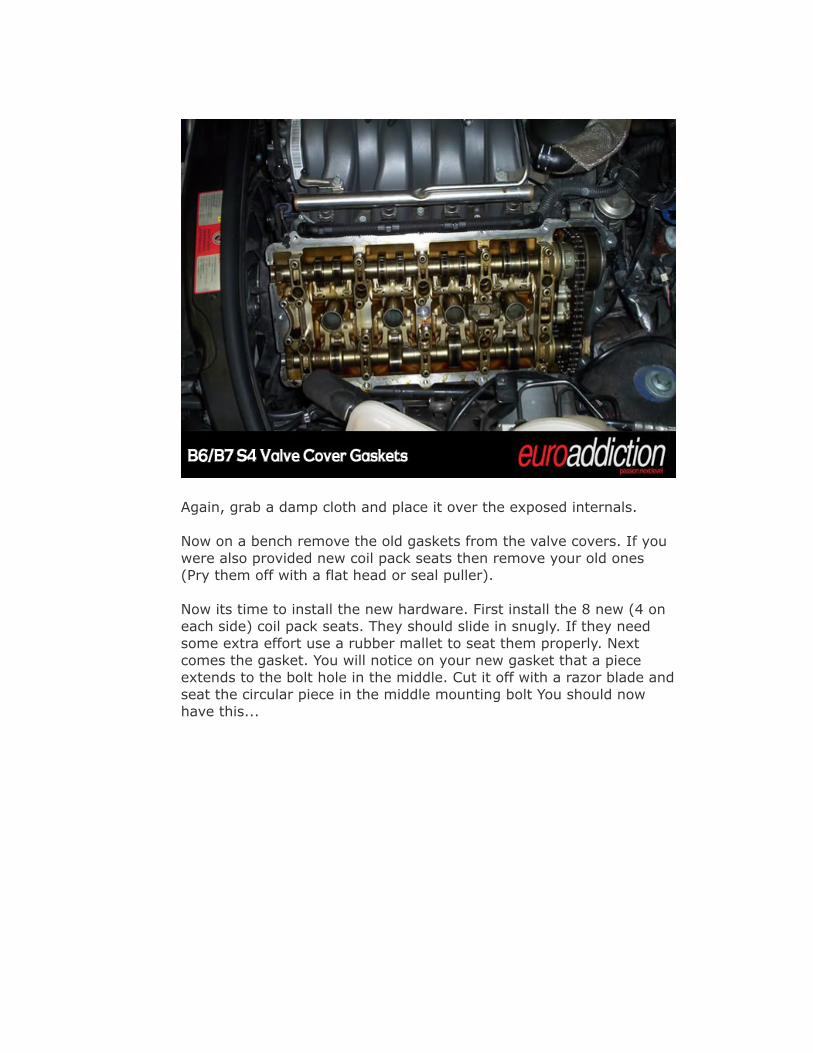
Again, grab a damp cloth and place it over the exposed internals.
Now on a bench remove the old gaskets from the valve covers. If youwere also provided new coil pack seats then remove your old ones(Pry them off with a flat head or seal puller).
Now its time to install the new hardware. First install the 8 new (4 oneach side) coil pack seats. They should slide in snugly. If they needsome extra effort use a rubber mallet to seat them properly. Nextcomes the gasket. You will notice on your new gasket that a pieceextends to the bolt hole in the middle. Cut it off with a razor blade andseat the circular piece in the middle mounting bolt You should nowhave this...
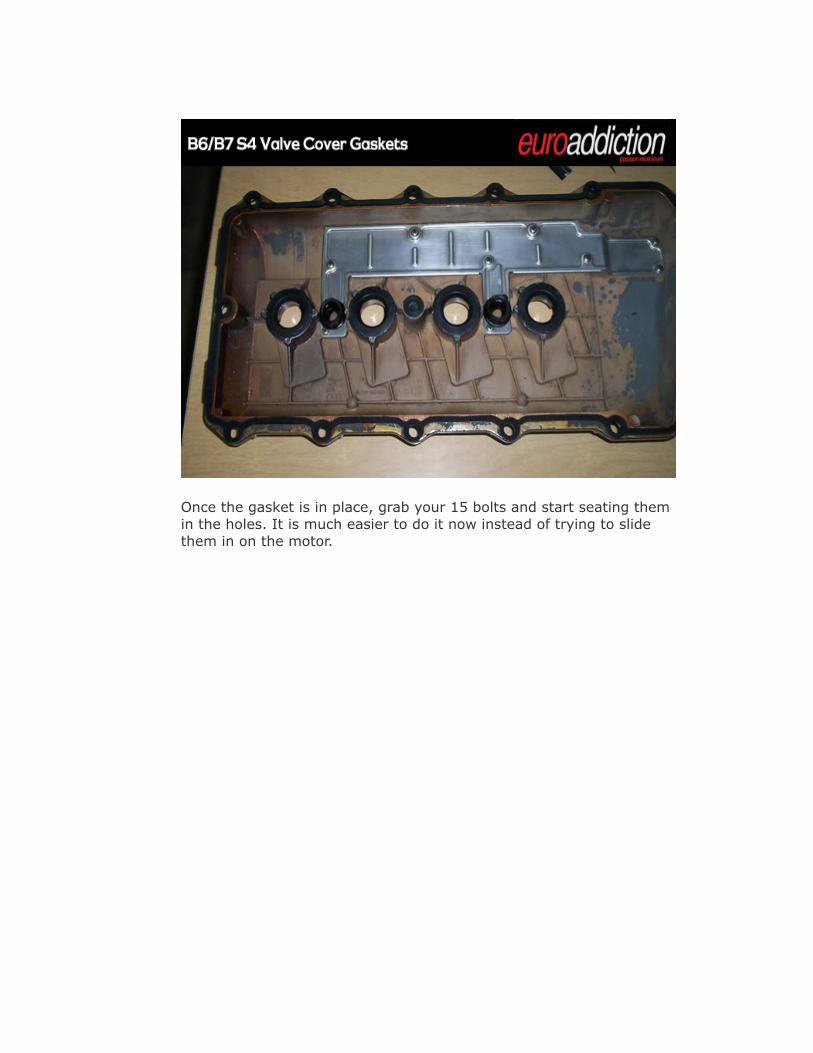
Once the gasket is in place, grab your 15 bolts and start seating themin the holes. It is much easier to do it now instead of trying to slidethem in on the motor.
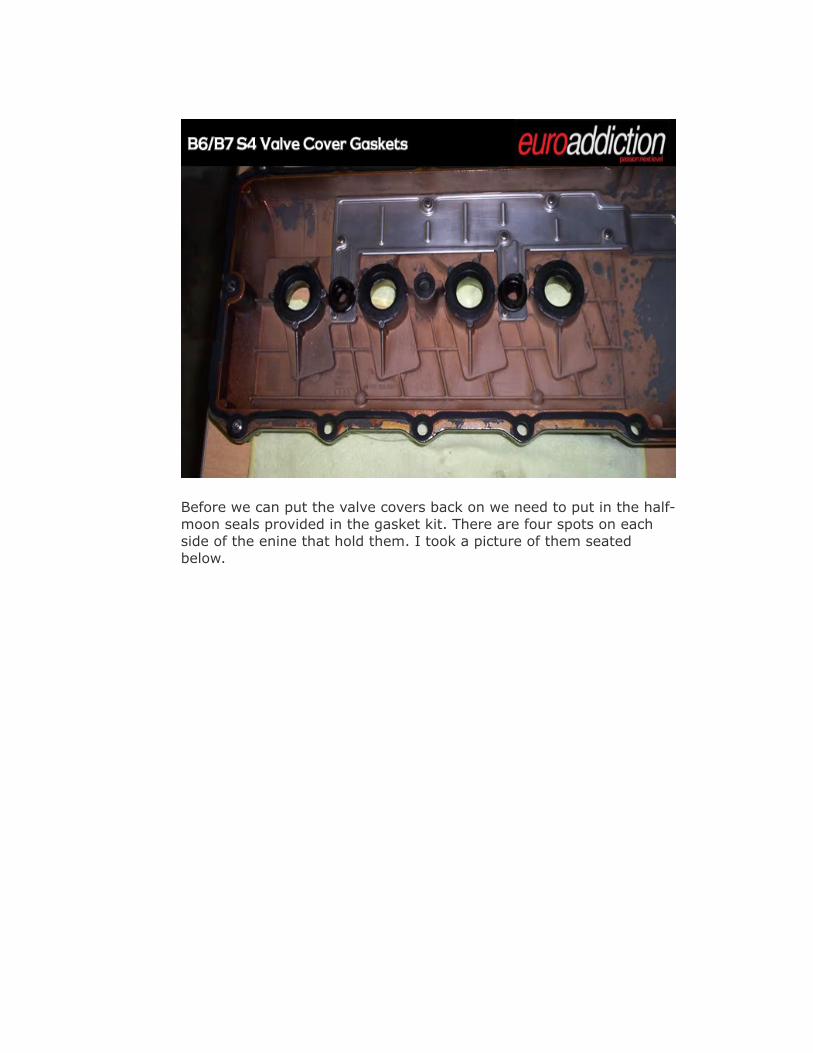
Before we can put the valve covers back on we need to put in the half-moon seals provided in the gasket kit. There are four spots on eachside of the enine that hold them. I took a picture of them seatedbelow.
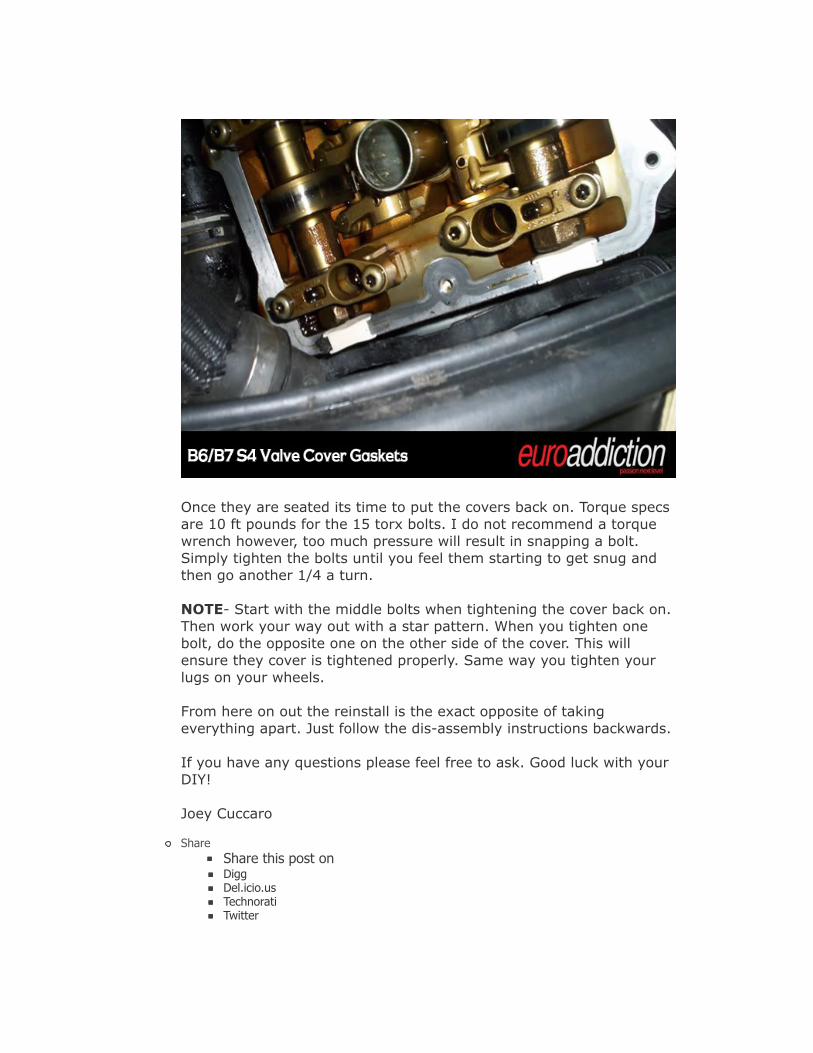
Once they are seated its time to put the covers back on. Torque specsare 10 ft pounds for the 15 torx bolts. I do not recommend a torquewrench however, too much pressure will result in snapping a bolt.Simply tighten the bolts until you feel them starting to get snug andthen go another 1/4 a turn.
NOTE- Start with the middle bolts when tightening the cover back on.Then work your way out with a star pattern. When you tighten onebolt, do the opposite one on the other side of the cover. This willensure they cover is tightened properly. Same way you tighten yourlugs on your wheels.
From here on out the reinstall is the exact opposite of takingeverything apart. Just follow the dis-assembly instructions backwards.
If you have any questions please feel free to ask. Good luck with yourDIY!
Joey Cuccaro
ShareShare this post onDiggDel.icio.usTechnoratiTwitter

jongothewhite likes this. Reply With Quote
2. 3. 02-10-2010 05:19 PM #2
kinnan12
New Member
Join DateJan 2010
Posts1
Great writeup, just about to tackle this on my 04 S4. Quick question,in the parts needed section, you state 2 new hose clamps are needed.Any particular size? thanks!
ShareShare this post onDiggDel.icio.usTechnoratiTwitter
Reply With Quote4. 02-10-2010 05:27 PM #3
Joey
THE STIG
Join DateNov 2009
LocationNJ
Posts7,137Garage

Originally Posted by kinnan12 Great writeup, just about to tackle this on my 04 S4. Quick question, in the partsneeded section, you state 2 new hose clamps are needed. Any particular size?thanks!Medium sized ones. Pop your hood and eye-ball the size of the clampson the breather tubes on the back of both valve covers.
ShareShare this post onDiggDel.icio.usTechnoratiTwitter
Joey Cuccaro
Arnold Palmer Club Member #1
Reply With Quote5. 02-10-2010 05:44 PM #4
tyler
Enthusiast
Join DateNov 2009
Locationnw
Posts
348
one thing to add, and i got this from handyvorb: put a little black rtvaround the half moons to make sure they don't leak
ShareShare this post onDiggDel.icio.usTechnoratiTwitter
Reply With Quote6. 02-13-2010 04:59 PM #5
Blakt Out
EA Member
Join DateJan 2010
Posts63
Originally Posted by joeycuccaro Below is a picture of what the car should look like before you start. If your cardoes not look similar to this then you are in the wrong place.

This part (that I've quoted) is hilarious.
I really appreciate this, Joey. So much.
In the next week, I'm changing the valve cover gaskets (per thisthread), the serp belt & snub mount (per another DIY of yours), de-catting my dps (per a DIY), replacing the rear diff mount, installingintake spacers, and installing a 4:1 center diff.
I've always worked on 911s, so I'm kinda used to having NO ROOM towork. But this car really takes the cake.
Thank you so much.
ShareShare this post onDiggDel.icio.usTechnoratiTwitter
Reply With Quote7. 02-13-2010 05:00 PM #6
Blakt Out
EA Member
Join DateJan 2010
Posts63
Looks like you painted them while off. I plan to do the same. Mine areall crinkly in areas. Weird.
Suggestion on paint? Yours look perfect.
ShareShare this post onDiggDel.icio.usTechnoratiTwitter
Reply With Quote8. 02-13-2010 07:37 PM #7
Joey
THE STIG
Join DateNov 2009
LocationNJ
Posts7,137Garage
Originally Posted by Blakt Out
This part (that I've quoted) is hilarious.
I really appreciate this, Joey. So much.
In the next week, I'm changing the valve cover gaskets (per this thread), theserp belt & snub mount (per another DIY of yours), de-catting my dps (per aDIY), replacing the rear diff mount, installing intake spacers, and installing a 4:1center diff.
I've always worked on 911s, so I'm kinda used to having NO ROOM to work. Butthis car really takes the cake.
Thank you so much.No problem man that is what i am here for. Shoot me a PM before yougut the DP's.
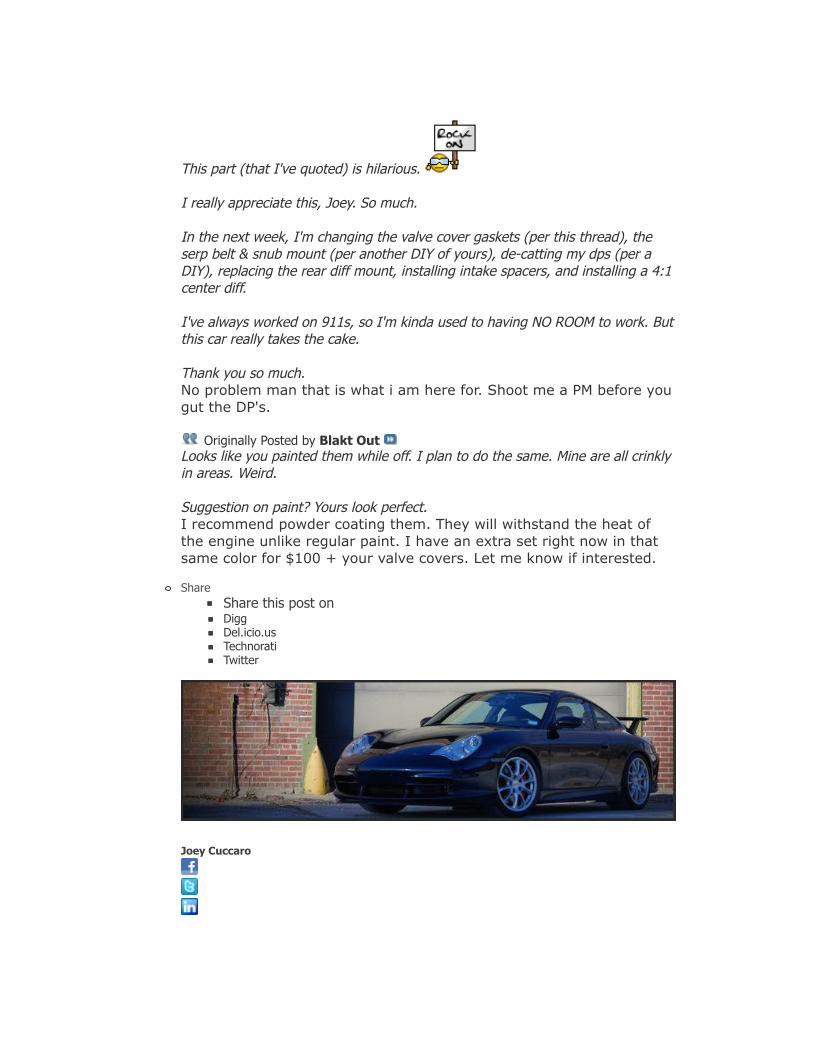
Originally Posted by Blakt Out Looks like you painted them while off. I plan to do the same. Mine are all crinklyin areas. Weird.
Suggestion on paint? Yours look perfect.I recommend powder coating them. They will withstand the heat ofthe engine unlike regular paint. I have an extra set right now in thatsame color for $100 + your valve covers. Let me know if interested.
ShareShare this post onDiggDel.icio.usTechnoratiTwitter
Joey Cuccaro
Arnold Palmer Club Member #1
Reply With Quote9. 02-13-2010 08:41 PM #8
Fitzs4
Enthusiast
Join DateDec 2009
Locationwestchester NY
Posts344
do you need a sealent on the half moons?
ShareShare this post onDiggDel.icio.usTechnoratiTwitter
Reply With Quote10. 02-13-2010 09:16 PM #9
Joey
THE STIG
Join DateNov 2009
LocationNJ
Posts
7,137Garage
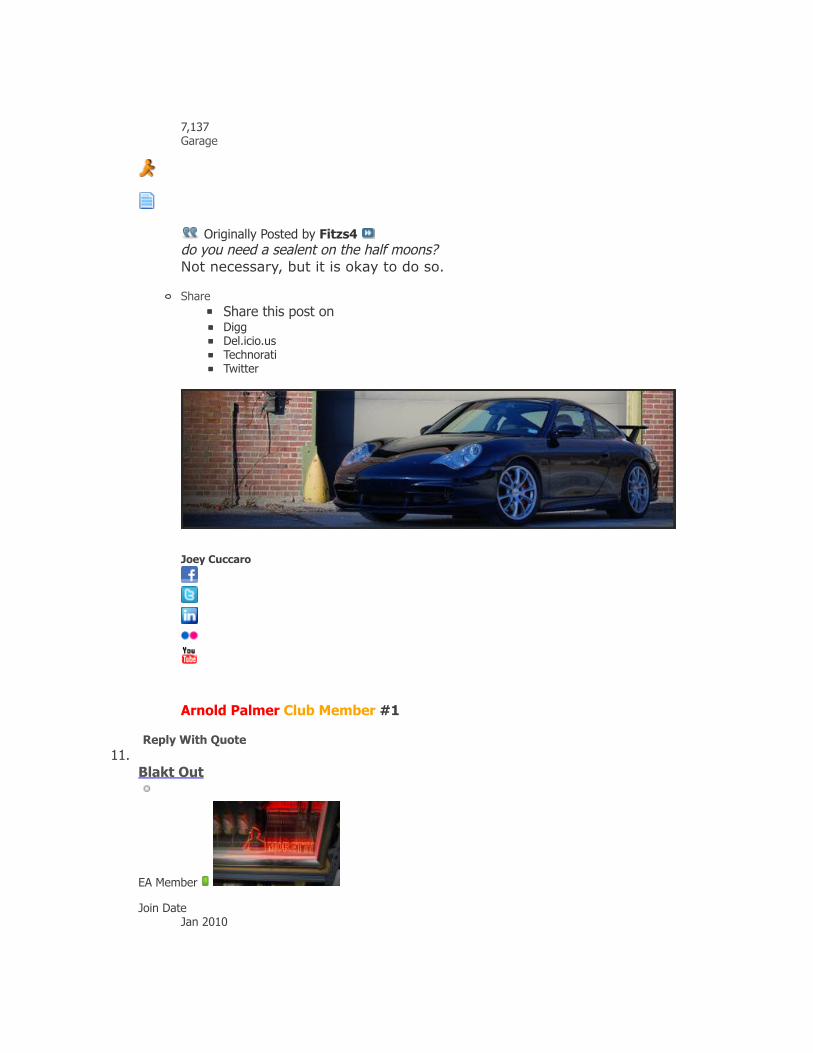
Originally Posted by Fitzs4 do you need a sealent on the half moons?Not necessary, but it is okay to do so.
ShareShare this post onDiggDel.icio.usTechnoratiTwitter
Joey Cuccaro
Arnold Palmer Club Member #1
Reply With Quote11. 02-14-2010 02:37 PM #10
Blakt Out
EA Member
Join DateJan 2010
Posts63
On the Mini-Ratchet - I found it at www.toolkitsuperstore.com for$56.63. Amazon is $75 and some change. The reviews on Amazonreinforced that this thing is totally worth the money though.
ShareShare this post onDiggDel.icio.usTechnoratiTwitter
Reply With Quote12. 03-19-2010 06:51 AM #11
lagadula
Enthusiast
Join DateMar 2010
LocationPoland
Posts167
Pasenger's side done yeasterday. Somone should be shot to dead forthat one bolt in rear
ShareShare this post onDiggDel.icio.usTechnoratiTwitter
Brilliant black S4 B6 Avant
Reply With Quote13. 03-19-2010 09:06 AM #12
Joey
THE STIG
Join DateNov 2009
LocationNJ
Posts7,137Garage
Originally Posted by lagadula Pasenger's side done yeasterday. Somone should be shot to dead for that onebolt in rear Pain in the ass isn't it! :bang:
ShareShare this post onDiggDel.icio.usTechnoratiTwitter
Joey Cuccaro
Arnold Palmer Club Member #1
Reply With Quote14. 03-21-2010 06:45 PM #13
Patches
EA Member
Join DateFeb 2010
LocationCleveland
Posts94
Is this Permatex Black RTV Silicone Sealant?
ShareShare this post onDiggDel.icio.usTechnoratiTwitter
Reply With Quote15. 03-22-2010 01:46 PM #14
Veereihen6
EA Member
Join DateMar 2010
LocationLong Island
Posts17
I want to add that dealers are sometimes replacing the valve coversas well when doing the gasket replacement because of excessiveflaking of the internal coating of the covers. they are replacing themwith plastic (hi-temp of course) valve covers.
ShareShare this post onDigg

Del.icio.usTechnoratiTwitter
2004 B6 S4 Avant 6MT Moro Blue - mostly stock for now1998 VW GTi-VR6 - mmmmm....listen to that VR6 growl! -sold-
Reply With Quote16. 03-22-2010 06:41 PM #15
lagadula
Enthusiast
Join DateMar 2010
LocationPoland
Posts167
My advise: remove coolant line from the radiator , next to pasengersside front light. Some coolant will leak, but it will make easier toremove v/c from the car, and place it with new gasket.
Last edited by lagadula; 03-23-2010 at 10:56 AM.
ShareShare this post onDiggDel.icio.usTechnoratiTwitter
Brilliant black S4 B6 Avant
Reply With Quote17. 03-27-2010 05:27 AM #16
lagadula
Enthusiast
Join Date
Mar 2010Location
PolandPosts
167
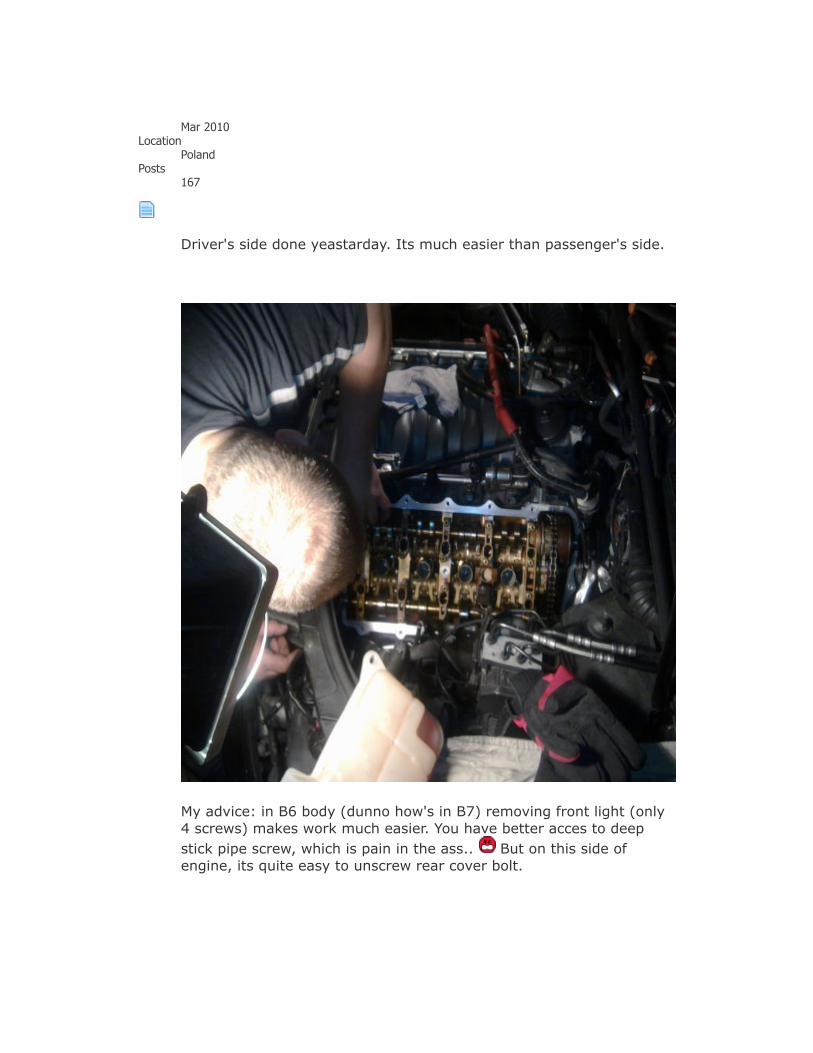
Driver's side done yeastarday. Its much easier than passenger's side.
My advice: in B6 body (dunno how's in B7) removing front light (only4 screws) makes work much easier. You have better acces to deepstick pipe screw, which is pain in the ass.. But on this side ofengine, its quite easy to unscrew rear cover bolt.
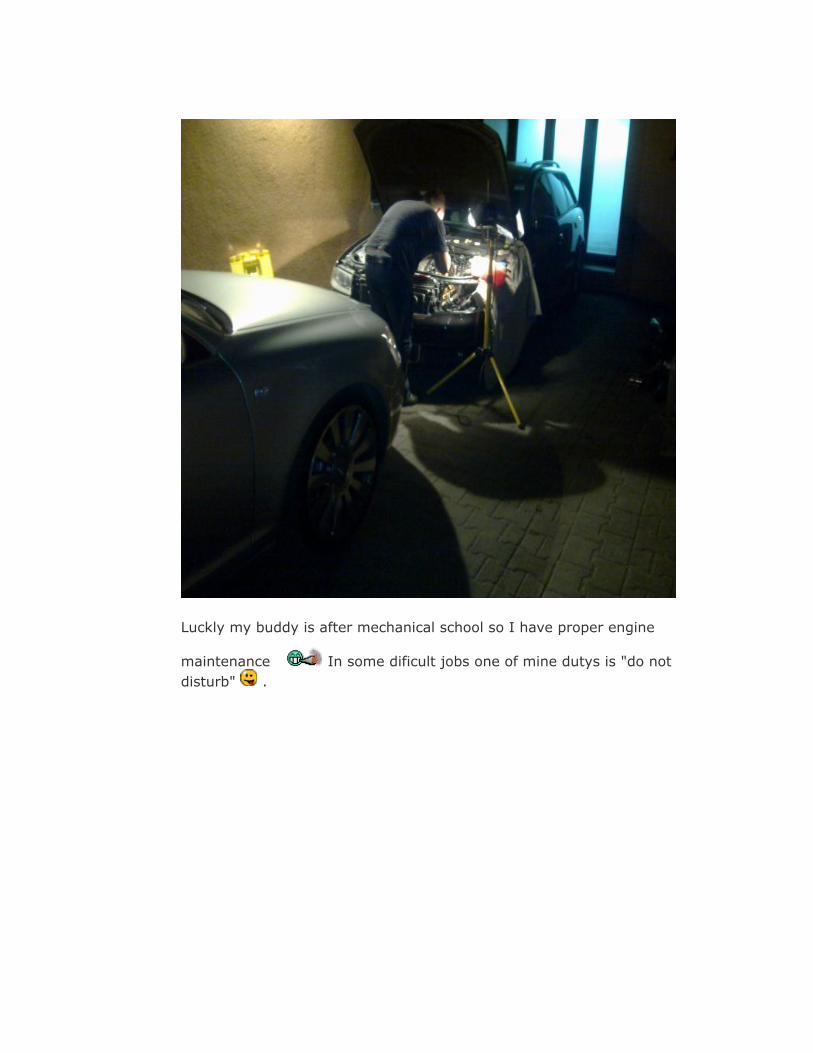
Luckly my buddy is after mechanical school so I have proper engine
maintenance In some dificult jobs one of mine dutys is "do notdisturb" .
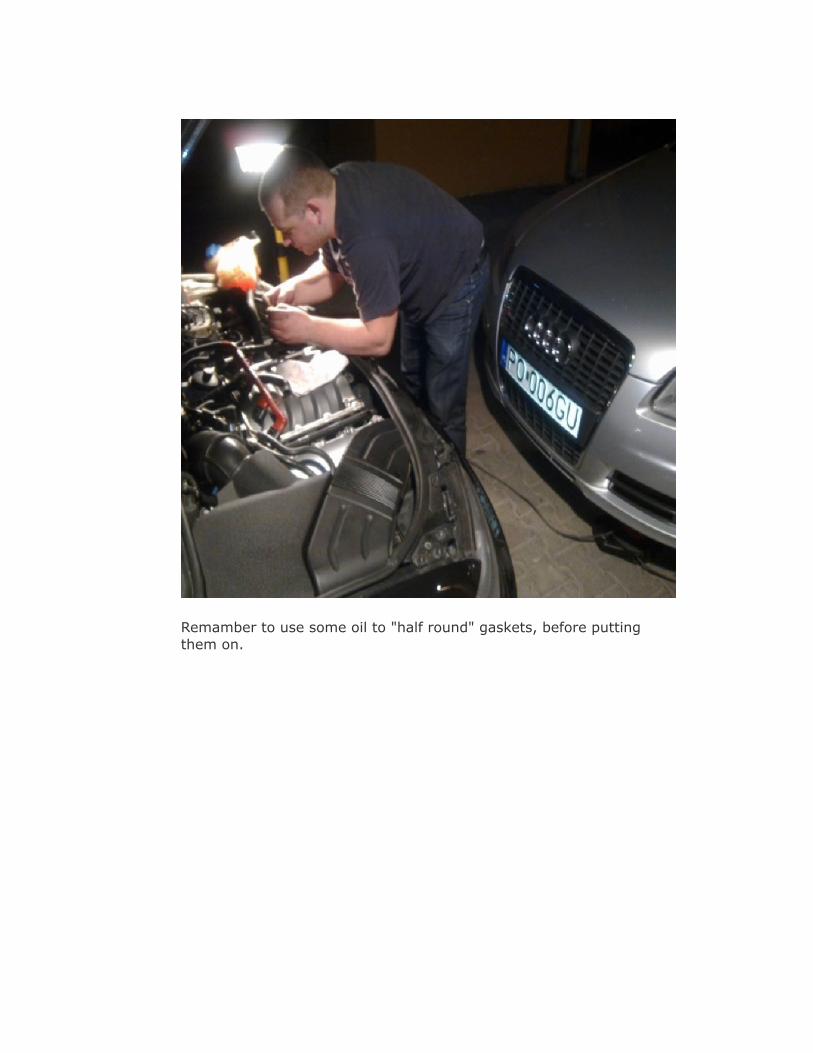
Remamber to use some oil to "half round" gaskets, before puttingthem on.
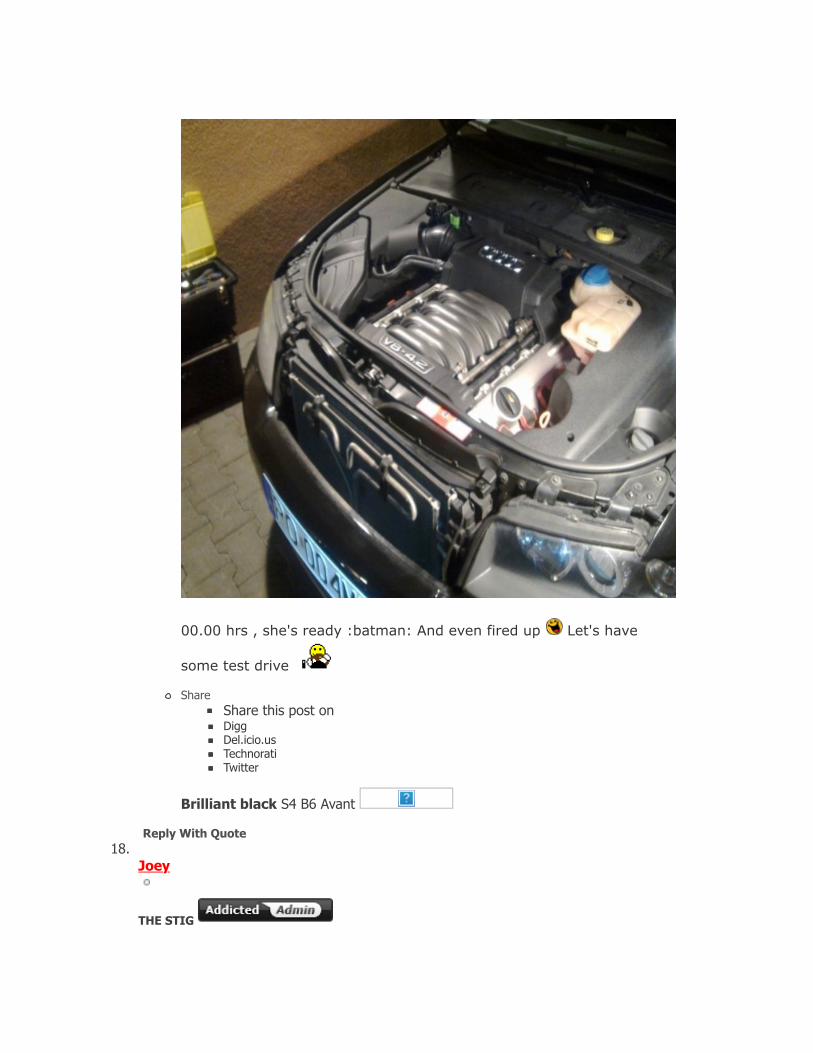
00.00 hrs , she's ready :batman: And even fired up Let's have
some test drive
ShareShare this post onDiggDel.icio.usTechnoratiTwitter
Brilliant black S4 B6 Avant
Reply With Quote18. 03-27-2010 11:05 AM #17
Joey
THE STIG

Join DateNov 2009
LocationNJ
Posts7,137Garage
Good job! Glad it went smoothly for you.
ShareShare this post onDiggDel.icio.usTechnoratiTwitter
Joey Cuccaro
Arnold Palmer Club Member #1
Reply With Quote19. 06-03-2010 03:18 AM #18

McLovin
New Member
Join DateJun 2010
Posts2
Any tips for an extremely stuck drivers side cover? I can only pry on itso much and its not wanting to pop off at all. Your write up indicatesthat you should just wiggle it loose and pull it off. Not the case for me.Its thoroughly stuck. I've tried everything I can think of. Got any tips?
ShareShare this post onDiggDel.icio.usTechnoratiTwitter
Reply With Quote20. 06-03-2010 08:01 AM #19
Joey
THE STIG
Join DateNov 2009
LocationNJ
Posts7,137Garage
Originally Posted by McLovin Any tips for an extremely stuck drivers side cover? I can only pry on it so much
and its not wanting to pop off at all. Your write up indicates that you should justwiggle it loose and pull it off. Not the case for me. Its thoroughly stuck. I've triedeverything I can think of. Got any tips?I dont see how it can be stuck as it is only held on by all of thosebolts. Are you sure you have them loosened all of the way? If not thecover wont lift.
If you are certain all of the bolts are loosened then get a pry bay andeasily lift from the top of the cover (under the black injector conduit).See if that helps.
ShareShare this post onDiggDel.icio.usTechnoratiTwitter
Joey Cuccaro
Arnold Palmer Club Member #1
Reply With Quote21. 06-03-2010 12:11 PM #20
McLovin
New Member
Join DateJun 2010
Posts

2
Got it, thanks! Probably should have tried to loosen the center boltbefore posting...Didn't even notice it.
ShareShare this post onDiggDel.icio.usTechnoratiTwitter
Reply With Quote22. 06-03-2010 12:46 PM #21
Joey
THE STIG
Join DateNov 2009
LocationNJ
Posts7,137Garage
Originally Posted by McLovin Got it, thanks! Probably should have tried to loosen the center bolt beforeposting...Didn't even notice it.Funny as that was exactly what i was thinking before posting. I didn'twant to insult your intelligence though if you had already loosened it
ShareShare this post onDiggDel.icio.usTechnoratiTwitter
Joey Cuccaro
Arnold Palmer Club Member #1
Reply With Quote23. 06-08-2010 04:12 AM #22
beemercer
DrinkAndBeMerryBitches
Join DateNov 2009
LocationWorcester, MA
Posts6,615Garage
That fucking bolt in the back was making me yell 'who dropped thechicken!?!'
Share
Share this post onDiggDel.icio.usTechnoratiTwitter
Arnold Palmer Club Member #7 - -Scott's Ho Dropped The Chicken- -
The Fat-Body FourPointTwo Reply With Quote
24. 06-08-2010 10:55 AM #23Joey
THE STIG
Join DateNov 2009
LocationNJ
Posts7,137Garage
Originally Posted by beemercer That fucking bolt in the back was making me yell 'who dropped the chicken!?!'Yeah man, it is a pita. I got some special tools from snap-on / bluepoint to make it a little bit easier.
ShareShare this post onDigg
Del.icio.usTechnoratiTwitter
Joey Cuccaro
Arnold Palmer Club Member #1
Reply With Quote25. 06-08-2010 07:59 PM #24
S4King
EA Member
Join DateMay 2010
Posts31
I will be doing this soon.
ShareShare this post onDiggDel.icio.usTechnoratiTwitter
Reply With Quote
26. 07-17-2010 01:25 PM #25alfontaine
New Member
Join DateJan 2010
Posts3
So, hypothetically... Let's say that some idiot decided to not take
Joey's excellent advice and stripped that f***ing back bolt. Wouldhe be screwed? Would there be any way to get it out without pullingthe entire motor? TIA.
ShareShare this post onDiggDel.icio.usTechnoratiTwitter
Reply With Quote27. 07-18-2010 08:27 PM #26
Joey
THE STIG
Join DateNov 2009
LocationNJ
Posts7,137Garage
Yes, there is a way to get it out.
First off, what type of tool were you using? It is possible that you maystill be able to save the bolt and crack it loosen if you get a reallygood bit.
If not, take it to someone who can weld. Un-do the motor mount onthe side that is stripped. With the motor mount un-done, jack thatside of the motor up so you get a little more space. Weld a TORX30socket onto the bolt and crack it loose.
ShareShare this post onDiggDel.icio.usTechnoratiTwitter
Joey Cuccaro
Arnold Palmer Club Member #1
Reply With Quote28. 07-18-2010 08:30 PM #27
rasean42
New Member
Join Date
Jul 2010Location
njPosts
2
hi i am new to this i just. got a6 4.2 need help with stuff
ShareShare this post onDiggDel.icio.usTechnoratiTwitter
Reply With Quote29. 07-19-2010 01:30 AM #28
alfontaine
New Member
Join DateJan 2010
Posts3
Originally Posted by joeycuccaro Yes, there is a way to get it out.
First off, what type of tool were you using? It is possible that you may still beable to save the bolt and crack it loosen if you get a really good bit.
If not, take it to someone who can weld. Un-do the motor mount on the sidethat is stripped. With the motor mount un-done, jack that side of the motor upso you get a little more space. Weld a TORX30 socket onto the bolt and crack itloose.Thanks for the ideas, I really do appreciate it.
The tool I was using was a GearWrench MicroDriver Set (picturedbelow). I had it, it was small and would fit in that ridiculously smallspace, and I've used it successfully in the past to get to tight spots. Iknew it wasn't the greatest tool ever, but I thought it would work. Nope. Obviously, I don't recommend it for this job and I will most
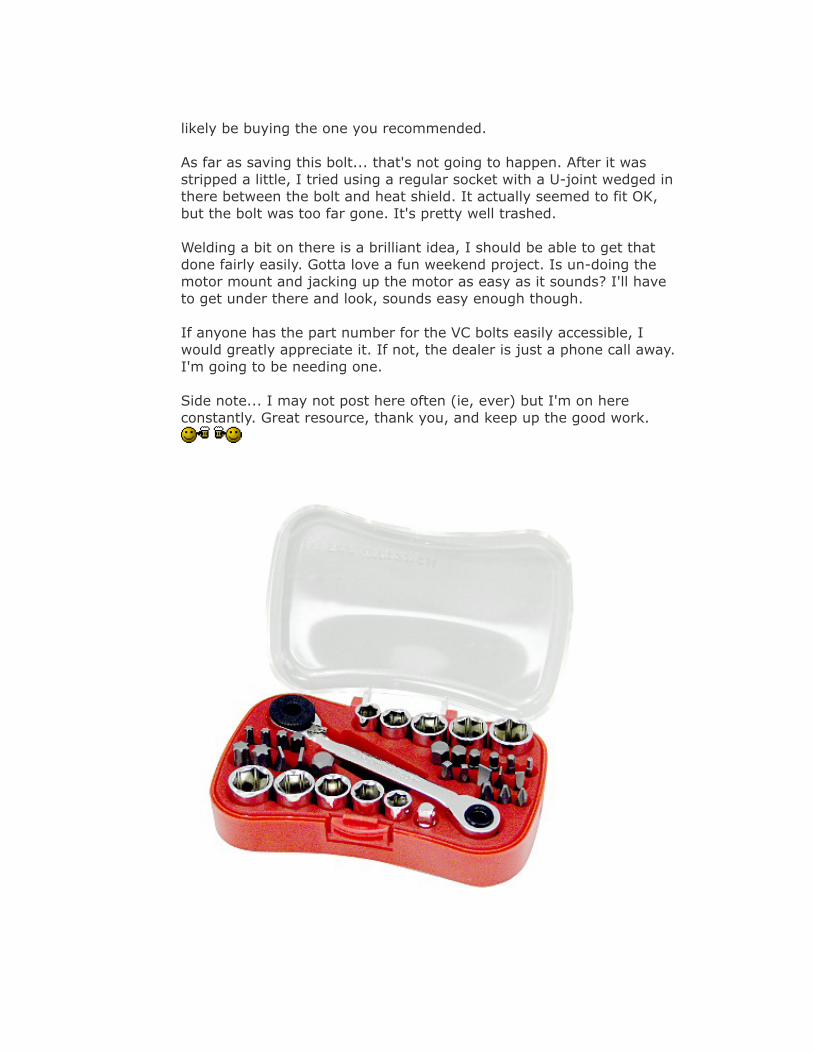
likely be buying the one you recommended.
As far as saving this bolt... that's not going to happen. After it wasstripped a little, I tried using a regular socket with a U-joint wedged inthere between the bolt and heat shield. It actually seemed to fit OK,but the bolt was too far gone. It's pretty well trashed.
Welding a bit on there is a brilliant idea, I should be able to get thatdone fairly easily. Gotta love a fun weekend project. Is un-doing themotor mount and jacking up the motor as easy as it sounds? I'll haveto get under there and look, sounds easy enough though.
If anyone has the part number for the VC bolts easily accessible, Iwould greatly appreciate it. If not, the dealer is just a phone call away.I'm going to be needing one.
Side note... I may not post here often (ie, ever) but I'm on hereconstantly. Great resource, thank you, and keep up the good work.

ShareShare this post onDiggDel.icio.usTechnoratiTwitter
Reply With Quote30. 07-19-2010 10:44 AM #29
Joey
THE STIG
Join DateNov 2009
LocationNJ
Posts7,137Garage
Originally Posted by rasean42 hi i am new to this i just. got a6 4.2 need help with stuffHey Rasean! We have an A6 section just for you guys! Post up thereand we will be glad to help you
ShareShare this post onDiggDel.icio.usTechnoratiTwitter
Joey Cuccaro
Arnold Palmer Club Member #1
Reply With Quote31. 09-03-2010 04:57 PM #30
Alwaysaudi
New Member
Join DateSep 2010
Posts2
Thank you so much! Made a quick job of something I had never triedbefore. I did use the Microdriver pictured above becuase I had it onhand...no problems. Now I just hope this fixes my oil consumptionproblem. Thanks again, great write up.
ShareShare this post onDiggDel.icio.usTechnoratiTwitter
Reply With Quote32. 09-09-2010 10:38 AM #31
Joey
THE STIG
Join DateNov 2009
LocationNJ
Posts7,137Garage
Glad it helped!
ShareShare this post onDiggDel.icio.usTechnoratiTwitter
Joey Cuccaro
Arnold Palmer Club Member #1
Reply With Quote33. 10-23-2010 06:24 PM #32
ninertriplezero
Enthusiast
Join DateOct 2010
LocationWestchester, NY
Posts429Garage
More stripped screws
Nice write up! I tried this today after doing an oil change and acompression test. I thought I could go three for three, but no.
I thought the screws in the back would be the hardest. Nope. Theypopped no problem with a mini socket wrench and a 1/4" stubby stylet30. No, I managed to strip two screws, the one next to the dipstickand strangely, the same one in the other side. I tried cutting a lineinto one of them with a dremel and using a flat head, no dice. Theyhad lots of oil on them, and it almost felt tike they were softer. Butthere were definitely more oil-caked ones than them. As soon as Istarted turning them they just started stripping. Depressing.
Right now they have penetrating fluid soaking in.
The welding solution seems great, especially since they are right upfront.
Any other suggestions?
Last edited by ninertriplezero; 10-23-2010 at 06:32 PM. Reason: Email subscribe
ShareShare this post onDiggDel.icio.usTechnoratiTwitter
Reply With Quote34. 11-03-2010 09:37 PM #33
Type_Audi
Enthusiast
Join DateJul 2010
LocationCT
Posts306Garage
Thanks for this writeup, I'm smelling and seeing a bit of oil around mygaskets (06' with 43.5k miles). One thing I didn't seen in this DIY arethe mileages at which the gaskets are being replaced.
I'm headed for new plugs so I might as well do everything at once.
ShareShare this post onDiggDel.icio.usTechnoratiTwitter
06' B7 S4, Blue, White Interior, Premium Package, Bose, Carbon Accents, 52kmiles, DIY's Performed to date: spark plugs, fuel/air filter, valve cover gaskets.
04' B6 A4 1.8T Quattro 123k miles, DIY's Performed to date: TimingBelt/Waterpump, Window Guide (x2), HID Capsules, Auto Transmission Fluid,entire suspension, MAF, Rear Brakes/Rotors, O2 Sensor, PS fluid flush, rearcoolant flange, fuel door (?).
Past: 86' 944 Turbo (still my fav), 05' Boxster
Reply With Quote35. 11-03-2010 09:40 PM #34
Joey
THE STIG
Join DateNov 2009
LocationNJ
Posts7,137Garage
There is no set time when to replace your gaskets. It is basically case
by case whenever you see that you're leaking.
ShareShare this post onDiggDel.icio.usTechnoratiTwitter
Joey Cuccaro
Arnold Palmer Club Member #1
Reply With Quote36. 11-25-2010 04:55 PM #35
Type_Audi
Enthusiast
Join DateJul 2010
LocationCT
Posts306Garage
I used this DIY today and had little trouble along the way. I did havethe special tools mentioned in the DIY (they are f'n awesome tools tohave handy).
My biggest trouble was getting the passenger side valve cover out ofthe engine bay even after everything was loose. I found that removingthe fuel line from the engine side helped tremendously.
Whoever put that dam oil dipstick tube there...
Thanks for the DIY
ShareShare this post onDiggDel.icio.usTechnoratiTwitter
06' B7 S4, Blue, White Interior, Premium Package, Bose, Carbon Accents, 52kmiles, DIY's Performed to date: spark plugs, fuel/air filter, valve cover gaskets.
04' B6 A4 1.8T Quattro 123k miles, DIY's Performed to date: TimingBelt/Waterpump, Window Guide (x2), HID Capsules, Auto Transmission Fluid,entire suspension, MAF, Rear Brakes/Rotors, O2 Sensor, PS fluid flush, rearcoolant flange, fuel door (?).
Past: 86' 944 Turbo (still my fav), 05' Boxster
Reply With Quote37. 11-25-2010 05:27 PM #36
DuncanC
Imola S4 Rally Driver
Join DateDec 2009
LocationEdmonton, AB
Posts866
You talking passenger side or driver side? Driver has the dipstick, itseasy, there is a bolt holding the tube in place you can remove. Thepassenger side has a hard coolant line that is just about in the way.
Just force it and wiggle and it will go. Disconnecting the fuel line andgetting it and the intake tube out of the way is a must.
ShareShare this post onDiggDel.icio.usTechnoratiTwitter
JHM Headers, FI non-res Catback, JHM Intake Manifold with tapered spacers, JHMLWCP, JHM LWFW, JHM Stg 4 Clutch, BMC Filter, JHM Tuned
JHM Short Shifter Trio, Stern street density motor mounts, Apikol snub mount, 034transmission mount, Apikol differential mount
Gunmetal Forgestar F14's wrapped in PS2s / Stock BBS wheels with Wintersport3Ds, Black Optics RS4 Grill, Blackout Window Trim, LED DRLs, LED Tail lights, HID
Fogs, Escort 9500xi hardwired
Reply With Quote38. 11-25-2010 06:13 PM #37
0396
EA Member
Join DateNov 2009
Posts51
Joey,
As usual, GREAT write up.. I too need to perform this on my 03 45kS/4.
Thanks again!
ShareShare this post onDiggDel.icio.usTechnoratiTwitter
Reply With Quote39. 11-29-2010 12:29 PM #38
Angelo

Enthusiast
Join DateOct 2010
LocationQueens, NY
Posts136Garage
i used this yesterday. great write-up. for those of you that are worriedabout doing this yourself, it is not that bad. The right tools make allthe difference. for the passenger side bottom bolt, make sure yoiuhave a 1/4" T30 socket on a universal joint. All I had was a 3/8" andcouldnt get it done with that. I had to get creative and made ithappen.
Thanks for the writeup
ShareShare this post onDiggDel.icio.usTechnoratiTwitter
Reply With Quote40. 12-31-2010 04:26 PM #39
norcal
El Duderino
Join DateDec 2009
LocationATX
Posts1,466Garage

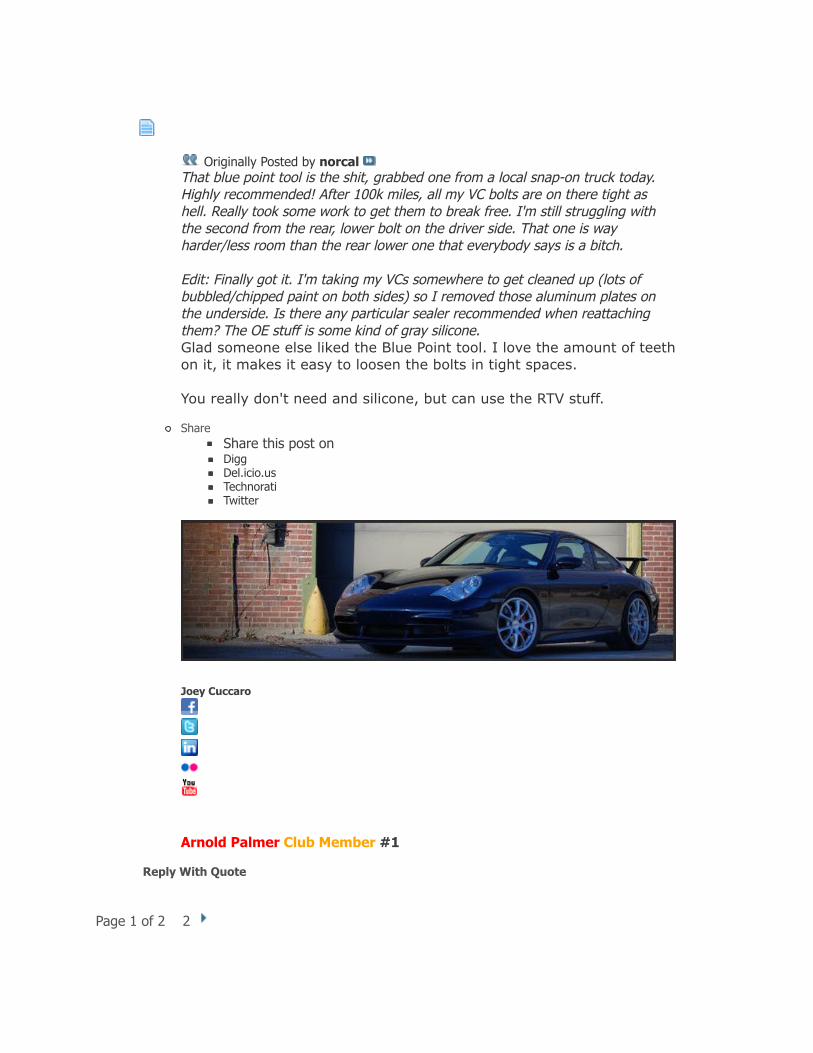
That blue point tool is the shit, grabbed one from a local snap-on trucktoday. Highly recommended! After 100k miles, all my VC bolts are onthere tight as hell. Really took some work to get them to break free.I'm still struggling with the second from the rear, lower bolt on thedriver side. That one is way harder/less room than the rear lower onethat everybody says is a bitch.
Edit: Finally got it. I'm taking my VCs somewhere to get cleaned up(lots of bubbled/chipped paint on both sides) so I removed thosealuminum plates on the underside. Is there any particular sealerrecommended when reattaching them? The OE stuff is some kind ofgray silicone.
Last edited by norcal; 12-31-2010 at 05:13 PM.
ShareShare this post onDiggDel.icio.usTechnoratiTwitter
-justin
B6 S4 MT Avant and a '61 15-window
Reply With Quote41. 12-31-2010 06:15 PM #40
Joey
THE STIG
Join DateNov 2009
LocationNJ
Posts7,137Garage
Originally Posted by norcal That blue point tool is the shit, grabbed one from a local snap-on truck today.Highly recommended! After 100k miles, all my VC bolts are on there tight ashell. Really took some work to get them to break free. I'm still struggling withthe second from the rear, lower bolt on the driver side. That one is wayharder/less room than the rear lower one that everybody says is a bitch.
Edit: Finally got it. I'm taking my VCs somewhere to get cleaned up (lots ofbubbled/chipped paint on both sides) so I removed those aluminum plates onthe underside. Is there any particular sealer recommended when reattachingthem? The OE stuff is some kind of gray silicone.Glad someone else liked the Blue Point tool. I love the amount of teethon it, it makes it easy to loosen the bolts in tight spaces.
You really don't need and silicone, but can use the RTV stuff.
ShareShare this post onDiggDel.icio.usTechnoratiTwitter
Joey Cuccaro
Arnold Palmer Club Member #1
Reply With Quote
+ Reply to ThreadPage 1 of 2 1 2
Last« Previous Thread | Next Thread »
LinkBacks (?)
1. Oil leak of some kind, w/ Pics
Refback This thread09-09-2012, 05:46 PM
2. VWVortex.com - So I went against advise of 'the financial lounge' and got me ahigh mileage B6 S4 (no warranty for the kicker)
Refback This thread07-12-2012, 01:37 AM
3. quattroworld.com Forums: Valve Cover Gasket DIY.
Refback This thread03-01-2012, 10:30 AM
4. RS246.com Forum :: The World's #1 Audi R, S and RS Enthusiast Website• View topic - Oil Leak
Refback This thread11-25-2011, 06:54 AM
5. Valve Cover Gaskets
Refback This thread11-08-2011, 04:03 PM
6. valve covers peeling
Refback This thread10-27-2011, 01:27 AM
7. Leaky VC Gaskets...
Refback This thread07-05-2011, 03:09 PM
8. Valve Cover Gasket Replacement - B6 - AudiForums.com
Refback This thread04-14-2011, 01:21 PM
9. Changing valve cover gaskets as we speak
Refback This thread03-24-2011, 09:00 AM
10. Valve Cover Gasket Replacement
Refback This thread03-20-2011, 04:30 PM
11. AudiSRS.com :: Servicing - Coolant
Refback This thread03-17-2011, 05:38 PM
Tags for this Thread
joey cuccaro
View Tag Cloud
Bookmarks
Digg
Posting Permissions
You may not post new threadsYou may not post repliesYou may not post attachmentsYou may not edit your posts
BB code is OnSmilies are On[IMG] code is OnHTML code is OffTrackbacks are OnPingbacks are OnRefbacks are On
Forum Rules
Contact UsEuro Addiction
ArchiveTop
All times are GMT -5. The time now is 12:51 PM.Powered by vBulletin® Version 4.1.5
Copyright © 2013 vBulletin Solutions, Inc. All rights reserved. Content Relevant URLs by vBSEO 3.6.0
Garage Plus, Clubs, Vendor Tools vBulletin Plugins by Drive Thru Online, Inc.Image resizer by SevenSkins
Extra Tabs by vBulletin Hispano