ATLAS façade maintenance and renovation
24
ATLAS fa çade maintenance and renovation
Transcript of ATLAS façade maintenance and renovation

ATLASfaçade maintenance and renovation

2

3
Introduction
ETICS durability
Examination of the technical condition of ETICS
Maintenance of ETICS – recommendations
Recommendations for on-going repairs of ETIC
Recommendations concerning major repairs of ETICS
Closing Remarks
1
2
3
4
5
6
7
table ofcontents

4

5
Building façades are exposed to various types of damage occurring as a result of standard use, natural process of weathering and degradation of construc-tion materials throughout the entire building lifespan. The intensity of these processes depends on numerous factors: object location, quality of con-struction works and appropriate object maintenance.
ATLAS/AVAL insulation systems are durable and can be safely operated for many years provided they are periodically inspected, maintained and repaired. According to European Technical Approvals the durabil-ity of ETICS should be minimum 25 years provided only system ele-ments are used, and the application is carried out in accordance to Manufacturer’s requirements. According to ETAG 004 (the guide-lines to European Technical Approvals), on-going maintenance of the finishing layer is essential in order to ensure proper durability of all system elements.
Keeping technical parameters and unchanged aesthetics of a facade intact for a long time requires both: maintenance and renovation work. This instruction contains the most important recommendations for proper execution of both with special regards to external wall rendering coats.
We sincerely believe that information gathered in this book will facilitate maintenance and renovation works so the user enjoys unchanged appearance of facade for many years.
Karolina JaneczkoTechnical Advisor for Foreign Markets
ATLAS Export Department
1 | introduction

6
7
2 | Maintenance of ETICS - recommendations
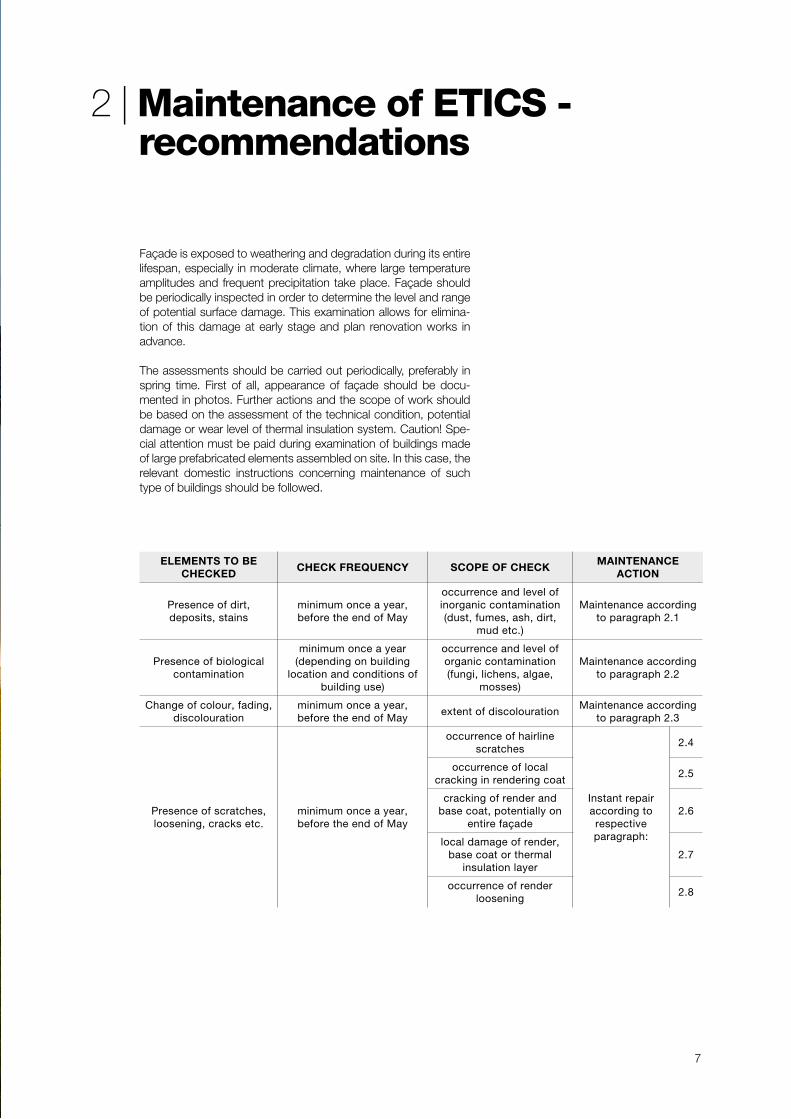
Façade is exposed to weathering and degradation during its entire lifespan, especially in moderate climate, where large temperature amplitudes and frequent precipitation take place. Façade should be periodically inspected in order to determine the level and range of potential surface damage. This examination allows for elimina-tion of this damage at early stage and plan renovation works in advance.
The assessments should be carried out periodically, preferably in spring time. First of all, appearance of façade should be docu-mented in photos. Further actions and the scope of work should be based on the assessment of the technical condition, potential damage or wear level of thermal insulation system. Caution! Spe-cial attention must be paid during examination of buildings made of large prefabricated elements assembled on site. In this case, the relevant domestic instructions concerning maintenance of such type of buildings should be followed.
ELEMENTS TO BE CHECKED
CHECK FREQUENCY SCOPE OF CHECKMAINTENANCE
ACTION
Presence of dirt, deposits, stains
minimum once a year, before the end of May
occurrence and level of inorganic contamination (dust, fumes, ash, dirt,
mud etc.)
Maintenance according to paragraph 2.1
Presence of biological contamination
minimum once a year (depending on building
location and conditions of building use)
occurrence and level of organic contamination (fungi, lichens, algae,
mosses)
Maintenance according to paragraph 2.2
Change of colour, fading, discolouration
minimum once a year, before the end of May
extent of discolourationMaintenance according
to paragraph 2.3
Presence of scratches, loosening, cracks etc.
minimum once a year, before the end of May
occurrence of hairline scratches
Instant repair according to respective paragraph:
2.4
occurrence of local cracking in rendering coat
2.5
cracking of render and base coat, potentially on
entire façade2.6
local damage of render, base coat or thermal
insulation layer2.7
occurrence of render loosening
2.8

8
2.1 | Cleaning of inorganic dirt
Instruction for the façade cleaning
Wash the surface with pressure washers with adjustable pres-sure and a nozzle with flattened end. If needed, use special cleaning agents.
Caution! The pressure and type of detergent/cleaner should be selected on the basis of sample application carried out in-dividually for each substrate.
DEFECTS Presence of dirt or stains on render or paint coats
CAUSES Subsidence of dust, dirt, fumes and other contaminants on a façade
RECOMMENDATIONS Clean the surface with water under pressure, in case of graffiti, surface should be cleaned with dedicated cleaning agents
9
2.2 | Cleaning of organic dirt (biological contamination)
Instruction for the façade cleaning
Step 1. Basic examinationExamine the wall, identify and remove any potential sources of dampness at the area of biological contamination. If necessary, re-place flashings, seal or replace gutters and downspouts, carry out additional securing works.
Step 2. Removal of biological contaminationBefore tarnish is removed, the surface should be initially washed with water and cleaning agent. Technology of cleaning (manual or machine cleaning – with pressure washer) should be adjusted to the current conditions, i.e. location and level of contamination. If the contamination is very strong, it needs to be removed mechanically. When the tarnish is slight, the contamination can be removed with wet brush and dedusted.ATLAS MYKOS PLUS is recommended for removal of a biological contamination. This product should be applied evenly and abun-dantly until the whole surface is moistened and left for 6-12 hours. Product can be applied with brush, painting roller or sponge. Con-tamination soaked with ATLAS MYKOS PLUS should be removed mechanically with e.g. wet brush or water under pressure. Biological contamination may be in various stages of development (easy to remove vegetative mycelium and more persistent spores), it is rec-ommended to apply the product three times. Keep breaks from 12 up to 24 hours between subsequent applications.
Step 3. Surface protectionSurfaces cleaned with ATLAS MYKOS PLUS can be painted at least 48 hours after product application. It is recommended to use the silicone paints ATLAS SALTA, ATLAS SALTA N lub ATLAS SALTA N PLUS. Painting coat should be applied in accordance with the instructions described in section 2.3.
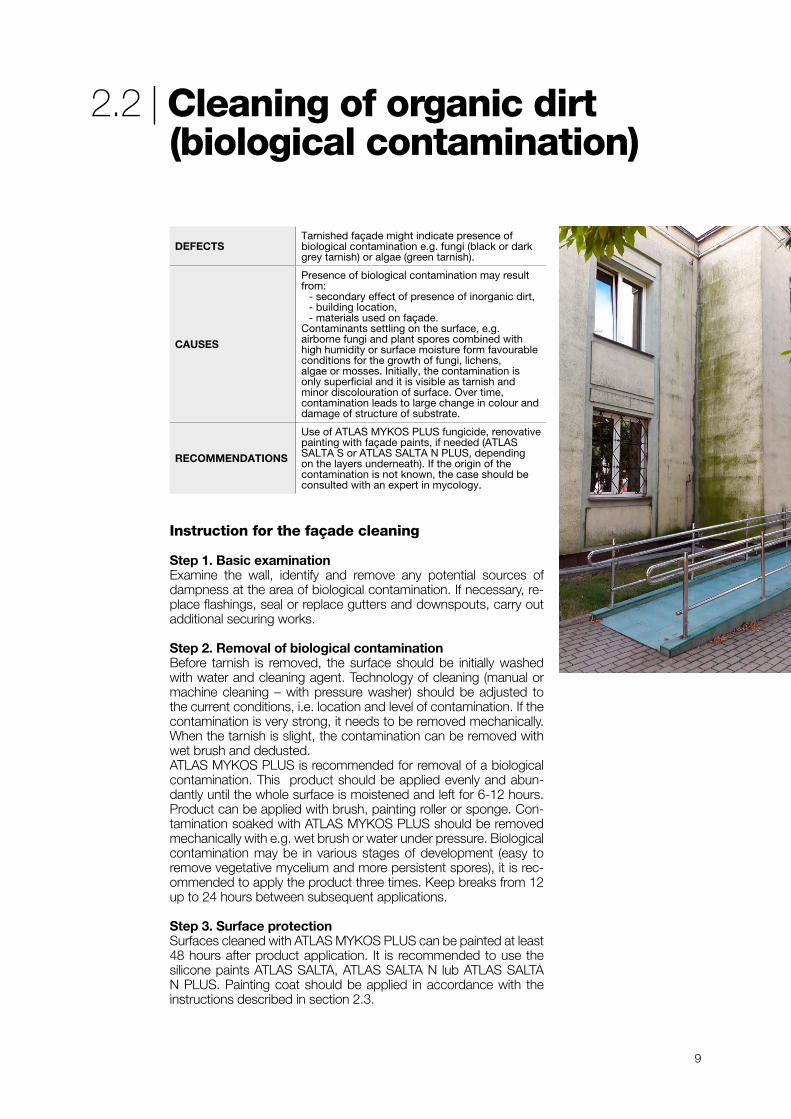
DEFECTSTarnished façade might indicate presence of biological contamination e.g. fungi (black or dark grey tarnish) or algae (green tarnish).
CAUSES
Presence of biological contamination may result from:
- secondary effect of presence of inorganic dirt,- building location,- materials used on façade.
Contaminants settling on the surface, e.g. airborne fungi and plant spores combined with high humidity or surface moisture form favourable conditions for the growth of fungi, lichens, algae or mosses. Initially, the contamination is only superficial and it is visible as tarnish and minor discolouration of surface. Over time, contamination leads to large change in colour and damage of structure of substrate.
RECOMMENDATIONS
Use of ATLAS MYKOS PLUS fungicide, renovative painting with façade paints, if needed (ATLAS SALTA S or ATLAS SALTA N PLUS, depending on the layers underneath). If the origin of the contamination is not known, the case should be consulted with an expert in mycology.
10
2.3 | Renovation painting
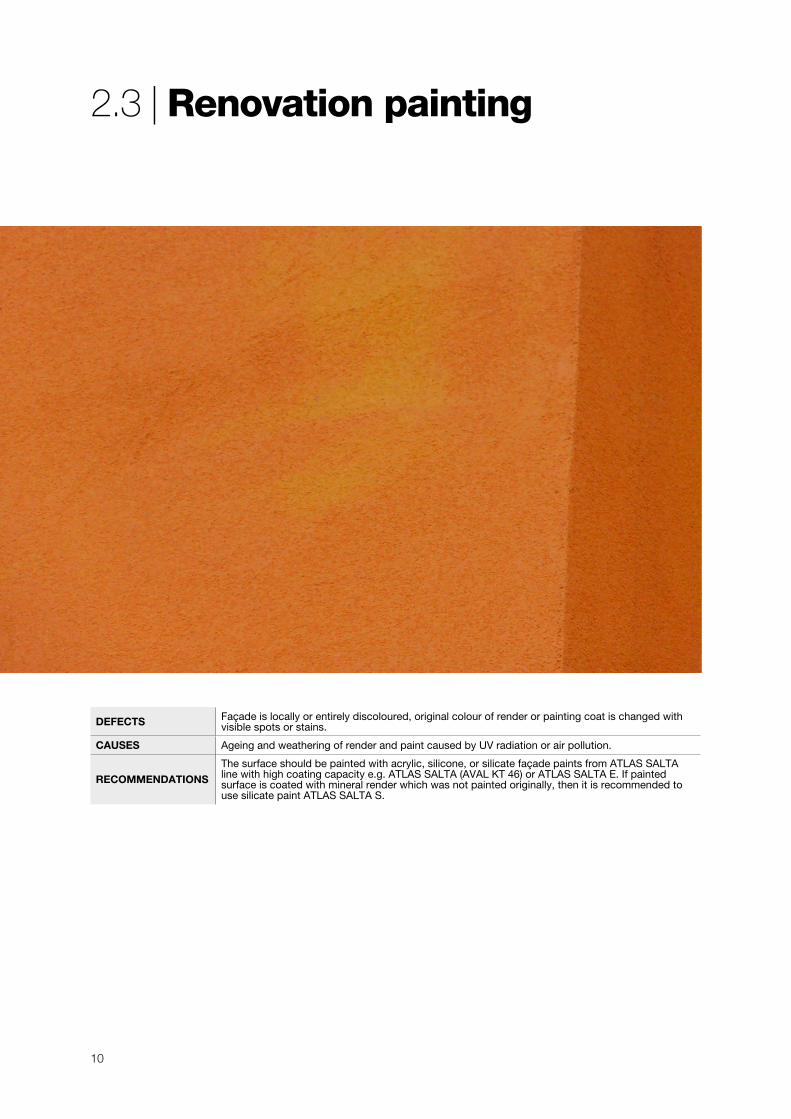
DEFECTS Façade is locally or entirely discoloured, original colour of render or painting coat is changed with visible spots or stains.
CAUSES Ageing and weathering of render and paint caused by UV radiation or air pollution.
RECOMMENDATIONS
The surface should be painted with acrylic, silicone, or silicate façade paints from ATLAS SALTA line with high coating capacity e.g. ATLAS SALTA (AVAL KT 46) or ATLAS SALTA E. If painted surface is coated with mineral render which was not painted originally, then it is recommended to use silicate paint ATLAS SALTA S.

11
Instruction for the renovation painting
Step 1. Basic examination and substrate prepa-rationBefore painting, type and condition of render should be determined and if the surface was painted. Con-tamination of the render surface may reduce bond-ing of paint, make painting difficult and increase paint consumption.
Step 2. Selection of paint typeIn case of renovative painting, it is very important to match the type of paint with the existing substrate. The selection should be in accordance with Table 2.
Step 3. PaintingPaints can be applied with a roller, brush or spray-ing unit, in one or two layers depending on substrate structure and absorption rate. Technological breaks have to be planned in advance, e.g. in the corners and angles of the building, under downspouts or joints between two colours. Application must be done
continuously, with no breaks in work. Subsequent lay-er has to be applied when the previous one is com-pletely dry, crosswise to the first one. Keep the same direction of application for single coating. Protect the painted surface against direct sunlight, wind and pre-cipitation during application and paint drying. Time of drying depends on substrate type, temperature and relative humidity.
Caution! In order to avoid differences in colour shades, apply paint of the same production date upon each individual surface. As a result of painting, one may notice slight natural smoothening of the substrate texture. Painting of surfaces of different structure and technical parameters can result in various shades of the same paint colour.
Substrate type
Type and name of paint
acrylic silicate silicone
ATLASSALTA E
ATLASSALTA S
ATLASSALTA
ATLAS CERMIT mineral render, not painted X XXX XX
ATLAS CERMIT mineral render, painted with acrylic or silicone paints XX 0 XXX
ATLAS CERMIT mineral render, painted with silicate paints X XXX XXX
ATLAS Acrylic-silicone render XXX 0 XX
ATLAS Silicate render X XXX XX
ATLAS Silicone render XX 0 XXX
ATLAS Silicone-silicate render XX 0 XXX
XXX – especially recommended
0 – not recommended
Table 2. Type of paint for renovation painting, depending on a type of substrate

12
2.4 | Repairing of thin, hairline cracks on the façade
Instruction for repairing of surface
Step 1. Basic examinationIn this case, the examination consists visual inspec-tion of the façade, in order to confirm cracks width and check if the render is properly bonded to the sub-strate. If the cracks are wider than 0.2 mm, proceed in accordance with paragraph 2.5.
DEFECTS Irregularly distributed thin microcracks.
CAUSES
- installation errors, e.g. lack of diagonal mesh,- atmospheric conditions,- too dark render colour,- rendering carried out in unfavourable ambient conditions, etc.
RECOMMENDATIONS Painting with SALTA N PLUS - paint with ability for bridging cracks up to 500 µm.
Step 2. Substrate preparationThe façade surface must be thoroughly washed, de-greased, and left to dry.
Step 3. Renovative paintingRenovative painting should be carried out in accord-ance with the principles described in paragraph 2.3.
13
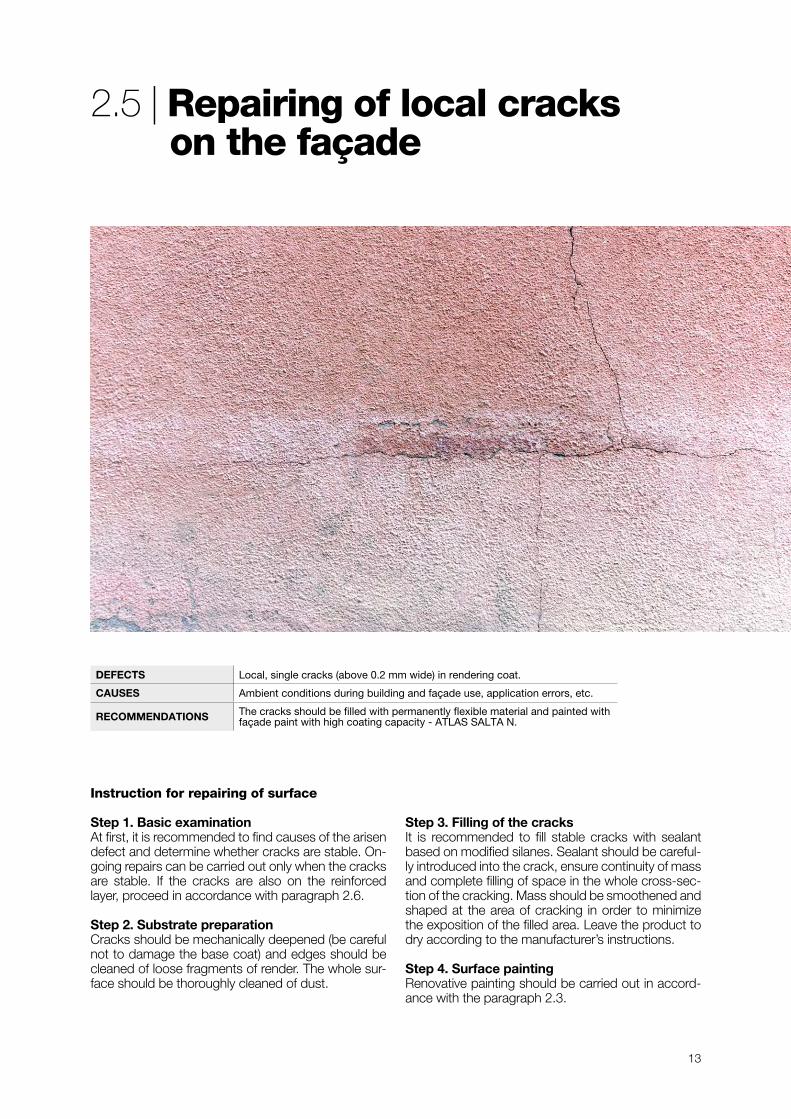
2.5 | Repairing of local cracks on the façade
Instruction for repairing of surface
Step 1. Basic examinationAt first, it is recommended to find causes of the arisen defect and determine whether cracks are stable. On-going repairs can be carried out only when the cracks are stable. If the cracks are also on the reinforced layer, proceed in accordance with paragraph 2.6.
Step 2. Substrate preparationCracks should be mechanically deepened (be careful not to damage the base coat) and edges should be cleaned of loose fragments of render. The whole sur-face should be thoroughly cleaned of dust.
DEFECTS Local, single cracks (above 0.2 mm wide) in rendering coat.
CAUSES Ambient conditions during building and façade use, application errors, etc.
RECOMMENDATIONS The cracks should be filled with permanently flexible material and painted with façade paint with high coating capacity - ATLAS SALTA N.
Step 3. Filling of the cracksIt is recommended to fill stable cracks with sealant based on modified silanes. Sealant should be careful-ly introduced into the crack, ensure continuity of mass and complete filling of space in the whole cross-sec-tion of the cracking. Mass should be smoothened and shaped at the area of cracking in order to minimize the exposition of the filled area. Leave the product to dry according to the manufacturer’s instructions.
Step 4. Surface paintingRenovative painting should be carried out in accord-ance with the paragraph 2.3.

14
2.6 | Repairing of damaged render and base coat
Instruction for repairing of surface
Step 1. Basic examinationFirst of all, it is recommended to find causes of the arisen defect and determine the scale of damage or loosening of the render around the cracks. If the cracks are regularly distributed and overlap the ar-rangement of thermal insulation boards or joints be-tween consequent reinforcing mesh strips, they may indicate incorrect application of thermal insulation system.Cracks of irregular pattern, located in random areas of the façade require individual examination. Special attention must be paid during examination of the buildings made of large prefabricated concrete com-ponents assembled on site.
Step 2. Substrate preparationIf the base coat is damaged without breaking the con-tinuity of the reinforcing mesh, the substrate prepara-tion comes down to washing and degreasing of the surface and removing of loose fragments of render. If the mesh is damaged, it is necessary to remove the render around the cracks (by grinding), reveal mesh and apply additional ATLAS 165 mesh strips with a width of approx. 30 cm, embedded in the adhesive
DEFECTS Cracks of render and base coat with regular or irregular shape, numerous randomly distributed cracks in render.
CAUSES- too thin base coat layer, - lack of overlapping of subsequent mesh strips, - type of reinforcing mesh (vulnerable to alkali), etc.
RECOMMENDATIONS Application of new layer of base coat and thin-coat render
mortar ATLAS STOPTER K-100, ATLAS STOPTER K-50, ATLAS STOPTER K-20, ATLAS Hoter U/AVAL KT 55 or ATLAS Roker U.
Step 3. Application of reinforced layerAdhesive mortar should be evenly distributed on the surface, covering the texture of the existing render. Next, the strips of mesh should be embedded in the adhesive. The strips of mesh should be embedded vertically, from the top towards the bottom, with at least 10 cm wide overlap. Properly embedded mesh should be placed inside of the adhesive layer not deeper than in half of its thickness, it must be visible through the adhesive and cannot be in direct con-tact with the substrate underneath the base coat. For repairing of the cracks it is recommended to use a mesh of increased density, i.e. ATLAS 165 reinforcing mesh.
Step 4. Application of rendering coatRender can be applied when the base coat is prop-erly dried i.e. after approx. 2-3 days. It is necessary to use an appropriate priming mass for the given render.
15
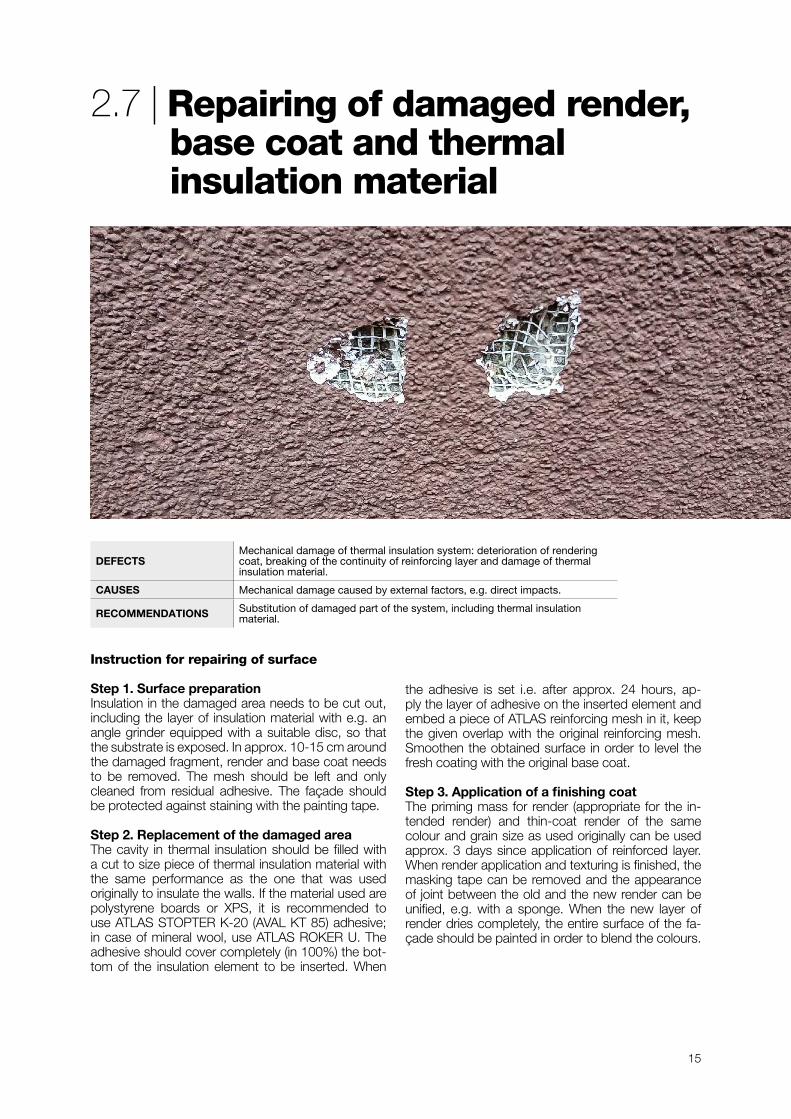
2.7 | Repairing of damaged render, base coat and thermal insulation material
Instruction for repairing of surface
Step 1. Surface preparationInsulation in the damaged area needs to be cut out, including the layer of insulation material with e.g. an angle grinder equipped with a suitable disc, so that the substrate is exposed. In approx. 10-15 cm around the damaged fragment, render and base coat needs to be removed. The mesh should be left and only cleaned from residual adhesive. The façade should be protected against staining with the painting tape.
Step 2. Replacement of the damaged areaThe cavity in thermal insulation should be filled with a cut to size piece of thermal insulation material with the same performance as the one that was used originally to insulate the walls. If the material used are polystyrene boards or XPS, it is recommended to use ATLAS STOPTER K-20 (AVAL KT 85) adhesive; in case of mineral wool, use ATLAS ROKER U. The adhesive should cover completely (in 100%) the bot-tom of the insulation element to be inserted. When
DEFECTSMechanical damage of thermal insulation system: deterioration of rendering coat, breaking of the continuity of reinforcing layer and damage of thermal insulation material.
CAUSES Mechanical damage caused by external factors, e.g. direct impacts.
RECOMMENDATIONS Substitution of damaged part of the system, including thermal insulation material.
the adhesive is set i.e. after approx. 24 hours, ap-ply the layer of adhesive on the inserted element and embed a piece of ATLAS reinforcing mesh in it, keep the given overlap with the original reinforcing mesh. Smoothen the obtained surface in order to level the fresh coating with the original base coat.
Step 3. Application of a finishing coatThe priming mass for render (appropriate for the in-tended render) and thin-coat render of the same colour and grain size as used originally can be used approx. 3 days since application of reinforced layer. When render application and texturing is finished, the masking tape can be removed and the appearance of joint between the old and the new render can be unified, e.g. with a sponge. When the new layer of render dries completely, the entire surface of the fa-çade should be painted in order to blend the colours.

16
2.8 | Repairing of loosened rendering coat
Instruction for repairing of surface
Step 1. Basic examinationExamine the façade carefully, find all the places where the render is detached from the substrate. Determine what type of render was originally used on the façade, and what is the aggregate size.
Step 2. Substrate preparationRemove loose fragments of render, grind render poor-ly bonded to the substrate. Be careful not to damage the reinforced layer. The façade surface should be thoroughly washed, degreased and left to dry.
Step 3. RepairingIn case of local repairs, apply the priming mass upon the area of loosened render and leave it to dry. Apply
DEFECTS Loosening of the rendering coat, peeling from the substrate.
CAUSES Execution errors, lack of primer underneath the render, etc.
RECOMMENDATIONS
The procedure depends on the extent of damage:- in case of local loosening, apply the render in the area of loosening and
paint entire surface to blend colours- in case of loosening on the large area, apply new base coat and render.
thin-coat render of the same type and thickness as the one used originally on the façade. The render tex-ture should be unified between the old and the new rendering coat. Finally, the façade should be painted in order to merge the colours – the painting should be carried out in accordance with section 2.3.
In case of many random spots with loosened render, it is recommended to remove loose fragments, ap-ply base coat on the entire façade and apply of new rendering coat. The work should be carried out in ac-cordance with section 2.6.

17
3 | Recommendations concerning major repairs of ETICS
This instruction does not cover the technology of major repairs of ETICS related to the replacement of insulation material and application of an additional layer of insulation material. These types of repairs require an individual procedure for a given build-ing, based on the assessment of its technical condition and col-lecting any relevant information. Only then the appropriate instal-lation technology can be implemented.
Caution! Installation of external wall insulation in case of poor technical condition of the existing one or adjustment to up-to-date requirements on thermal insulation require installation of new EWI layers and is not covered with this document. For more details on insulation of the existing insulation check ATLAS RENOTER system data.

18
4 | Closing remarks and product recommendation
Instruction includes basic principles regarding maintenance or repair works related to ATLAS / AVAL ETICS. Each time when such works are planned, applicable legal regulations must be followed. Works must be carried out according to engineering principles and OHS regulations. Detailed information on the technology of application of individual products can be found in up-to-dateProduct Data Sheets available on www.atlas.com.pl/en.
Recommended products for façade maintenance and renovation
ATLAS CERPLAST/AVAL KT 16
priming mass for renders
• ensures perfect bonding of render• reduces absorption rate and
strengthens substrate• facilitates render application and
texture forming• unifies substrate colour• available in several colours
ATLAS 165 REINFORCING MESH
reinforcing fibreglass mesh
• resistant to alkali• durable• elastic
ATLAS STOPTER K-100
highly flexible, cement-free, dispersive adhesive mass for application of base coat in thermal insulation systems
• resistant to thermal and mechanical load
• forms thermal insulation of impact resistance of 140 J
• crack bridging• reinforced with microfibres• highly hydrophobic• does not require priming prior to
application of rendering coats• for application of new façades and
renovation of old ones
ATLAS UNI GRUNT/AVAL KT 17
quick drying priming emulsion
• reinforces absorptive substrates of any type
• high yield, quick-drying• decreases and unifies substrate
absorption rate• for application in temperature up to +30°C• improves bonding to the substrate• beneath floors and screeds• beneath adhesives, plasters, top finishes,
paints
ATLAS STOPTER K-50
white general use adhesive for external wall insulation
• white• no priming mass required• for mineral wool and polystyrene• for boards and base coat installation• also for graphite polystyrene
Atlas HOTER U/AVAL KT 55
2 in 1 - adhesive mortar for polystyrene and XPS and for mesh embedding
• improved bonding• good water vapour permeability• rapid strength build-up• on ceramic, concrete and silicate
elements
ATLAS MYKOS PLUS
concentrated agent for elimination of algae, fungi and lichen
• cleans façades, terraces and roofs• protects against secondary biological
corrosion• safe for cleaned surfaces
Atlas STOPTER K-20
2 in 1 - adhesive mortar for polystyrene and XPS and for mesh embedding
• very good bonding• reinforced with microfibres • resistant to cracks and scratches• can be used in low temperature (even
from 0°C)• also for graphite polystyrene
ATLAS ROKER U
adhesive mortar for mineral wool boards fixing and for mesh embedding
• very high bonding to difficult substrates
• perfect workability• water vapour permeability• reinforced with fibres• improved resistance to cracking and
scores

19
ATLAS/AVAL SILICONE RENDER
• water vapour permeable• low water absorptiveness• very high resistance to soiling• very good bonding to substrates
ATLAS SILICONE-SILICATE RENDER
• very high water vapour permeability• low water absorptiveness• resistant to soiling• very good bonding to substrates
ATLAS SALTA N
façade silicone paint
• long term durability and façade protection
• outstanding colour durability• self-cleaning ability• early resistance to rain• highly resistant to algae and lichens• no primer required
AVAL ACRYLIC - SILICONE RENDER
• vapour permeable• very low water absorption rate• highly resistant to dirt• high adhesion to the substrate
ATLAS SILICATE RENDER
• long term durability and façade protection
• highly alkaline and naturally resistant to mould, algae and lichen
• perfect water vapour and CO2 permeability
• hydrophobic, highly resistant to atmospheric factors and UV radiation
• outstanding colour durability
ATLAS SALTA N PLUS
façade silicone paint
• outstanding self-cleaning ability• pearl effect• long term durability and façade
protection• outstanding colours durability• coats microcracking and shrinkage
cracks• greatly resistant to algae and lichen• extremely low absorptiveness• perfect water vapour permeability
ATLAS/AVAL ACRYLIC RENDER
• low water absorptiveness• resistant to soiling• very good bonding to substrates• easy texture forming• improved resistance to mechanical
damage
ATLAS SALTA
hybrid silicone paint
• outstanding colour durability• well coating• highly resistant to soiling• no primer required• low absorptiveness
ATLAS SALTA E
façade acrylic paint
• outstanding colour durability• perfectly coating and efficient• highly resistant to algae contamination• self–cleaning ability
ATLAS SALTA S
façade silicate paint
• highly alkaline, resistant to fungi, algae, lichen
• perfect water vapour permeability• long term durability and façade
protection• for painting fresh mineral renders
BESTSELLER

20
thermal insulation systems ATLAS

21
thermal insulation systems ATLAS
SAFETY
EASY APPLICATION
ENERGY SAVING
CARE FOR ENVIRONMENT
USE IN VARIOUS WEATHER CONDITIONS
DURABILITY
HYDROPHOBISATION
IMPROVED IMPACT RESISTANCE
SELF-CLEANING ABILITY
BIOCIDE CAPSULES
RESISTANCE TO UV
AESTHETICS
INSPIRATION
WIDE RANGE OF TEXTURES
PATTERNS
INTENSIVE COLOURS
FREEDOM OF COMPOSITION

22
NOTES

23

24
www.atlas.com.pl/en