Astro- Imaging Projects for Amateur Astronomers...American column, The Amateur Scientist ....
26
Jim Chung Astro- Imaging Projects for Amateur Astronomers The Patrick Moore A Maker’s Guide
Transcript of Astro- Imaging Projects for Amateur Astronomers...American column, The Amateur Scientist ....

Jim Chung
Astro-
Imaging
Projects for
Amateur
Astronomers
The Patrick Moore
A Maker’s Guide

The Patrick Moore Practical Astronomy Series
More information about this series at http://www.springer.com/series/3192

Astro-ImagingProjects for
Amateur Astronomers
A Maker’s Guide
Jim Chung

ISSN 1431-9756 ISSN 2197-6562 (electronic) The Patrick Moore Practical Astronomy Series ISBN 978-3-319-18545-3 ISBN 978-3-319-18546-0 (eBook) DOI 10.1007/978-3-319-18546-0
Library of Congress Control Number: 2015943501
Springer Cham Heidelberg New York Dordrecht London © Springer International Publishing Switzerland 2015 This work is subject to copyright. All rights are reserved by the Publisher, whether the whole or part of the material is concerned, specifi cally the rights of translation, reprinting, reuse of illustrations, recitation, broadcasting, reproduction on microfi lms or in any other physical way, and transmission or information storage and retrieval, electronic adaptation, computer software, or by similar or dissimilar methodology now known or hereafter developed. The use of general descriptive names, registered names, trademarks, service marks, etc. in this publication does not imply, even in the absence of a specifi c statement, that such names are exempt from the relevant protective laws and regulations and therefore free for general use. The publisher, the authors and the editors are safe to assume that the advice and information in this book are believed to be true and accurate at the date of publication. Neither the publisher nor the authors or the editors give a warranty, express or implied, with respect to the material contained herein or for any errors or omissions that may have been made.
Printed on acid-free paper
Springer International Publishing AG Switzerland is part of Springer Science+Business Media (www.springer.com)
Jim Chung Toronto , ON , Canada

For Denise, who gave me my first telescope one Christmas and has regretted it ever since!

vii
Foreword
Amateur astronomers are make-do folks. Not in the sense that they settle for some-thing inferior or expedient in the pursuit of their passion… rather, they tend to become makers in the process of doing what they do. Making was once an activity borne of necessity. In the mid-twentieth century, astronomical instruments were not readily found on store shelves. If you found yourself bitten by the bug to learn the night sky, you were more likely to search out plans for a 6″ Newtonian than to find a ready-made scope in a box. Today we can buy advanced instruments and accessories for all types of astronomical observation in a staggering array of choices from manufacturers around the world. Even with this convenience, there is more interest in making than ever before. Amateur astronomers are still fashioning and adapting instruments to observe the night sky and to record the wonders of the universe. We might assume that the reason one hacks apart a camera to modify its sensor is about being cheap. Surely thriftiness is a factor, but there is more to it than that.
Making is to discovery what cooking is to eating. Why would one struggle to take photos of distant galaxies when we have the Hubble Space Telescope to do it for us, in a depth and resolution far beyond our reach from earth. Why take photos of Saturn when the Cassini probe is darting through the ring system, snapping amazing images and sharing them with us from its Facebook page? Perhaps because doing it yourself, with the inevitable pain and frustration of failed efforts, opens the mind and spirit in a way that consumption of prepared information cannot.
I’ve never met Jim Chung, though I have known him for years. We live on oppo-site sides of a Great Lake, where the conditions for astronomy adventures are about as bad as they get. We have a few dozen nights a year when the skies open up to show Saturn’s rings and less than a third of these offer air stable enough to see them clearly. We both have families, which assures that on most of these clear steady
viii
nights, our presence will be required elsewhere than in front of our telescopes. We both use a Macintosh, beautiful and intuitive computers with a sorry paucity of astronomy software. And we both enjoy the struggle to see how much we can accomplish within a few feet of our back door.
Like the pathway of discovery itself, the structure of this book is not a straight line. The projects, which can be enjoyed as stories in themselves, are intermingled with short essays on a variety of people and places, connected only by Jim’s think-ing process and the rambling that takes place naturally when we work to solve problems. Some hit surprising close to home. Alan Gee, who appears in an essay afternote, was a Buffalonian—a friend to my local astronomy club and a generous contributor of designs and instruments to the solar observatory at the Buffalo Museum of Science, where I volunteer as a research associate. Others—reflections on Ernst Abbé and his ideas on social reform and a discussion on how light pollu-tion might interact negatively with human health—are fascinating walks that insert an enjoyable divergence from the detailed descriptions of Jim’s maker projects.
The connection between making and doing has never been hotter than it is today. With the Internet always in our pocket, our neighborhood is the world. Tools and information are more accessible and affordable today than ever before. I’ve used my phone to photograph the moon through a 32 in. telescope on a mountaintop observatory and then used the same phone to record myself doing it, sharing both views a moment later with friends an ocean away. In his Maker’s Guide , Jim shows us that full immersion in our projects can take trial and error, make a big mess, and can also lead to deeper appreciation and satisfaction than watching from the sidelines. Perhaps it’s like taking a selfie where you wind up seeing deeper through inserting yourself in the picture taking. As every kid knows when demand-ing, “ I want to do it myself !” in the doing is the joy. Roll up the sleeves, lay down some newspaper, and grab a screwdriver.
Buffalo, NY Alan Friedman February 2015
Foreword
ix
Introd uction
I was born more than a decade too late to experience and be inspired by the launch-ing of Sputnik and the Moon Race and hence came to astronomy rather late in my life. I’m more of a child from the dawn of the Digital Age, a time when Apple was a real computer company and not a maker of consumer electronic gadgets. I learned all about writing software, the gamer world, and the world of dial up BBS (bulletin board service) from my Apple][+. My other foot is firmly planted in a past era of hand manufactured goods engineered to last a lifetime, a time when people built their own telescopes if they couldn’t afford to buy them. A lot of these same people were inspired by the projects that routinely appeared in the long running Scientific American column, The Amateur Scientist . Fortunately, the early columns which were devoted to amateur telescope making have been preserved in a thoroughly reedited three volume edition and in its entirety on CD. I’d like to think this book pays homage to The Amateur Scientist with my series of innovative projects, out of the box thinking but always on a budget and with materials and equipment easily at hand.
Consequently, this is a book for everyone at any level of amateur astronomy. I’m a busy dad, husband, and health care professional limited in both time and budget for what is to me a hobby. I’m not a retired tradesman with a fully stocked and equipped machine tooling workshop, just a regular guy with some hand tools and a cheap mini table saw, drill press, and sander working out of a garage stuffed to the rafters with hanging bicycles, strollers, and gardening tools. For three quar-ters of the year, I get the luxury of working on the driveway. Nothing gives me more satisfaction than the repurposing of found household items but at the same time the esthetic is not ignored. Even if you are not a builder, I think you will experience a lot of vicarious satisfaction from just the reading of each project as it develops to completion.

x
Many of these projects have an astrophotography flavor to them and that’s because my primary interest in astronomy is imaging the cosmos, be it solar, plane-tary, or deep space. There are chapters devoted to technique and insider secrets. To provide relief from too much project building detail I’ve interspersed a few astronomy themed essays, which I hope leave you enlightened and informed.
Jim Chung Toronto, 2014
Introduction
xi
Contents
1 DSLR Astro Imaging ................................................................................ 1 Widefi eld Astro Imaging with Micro 4/3rds Cameras ................................ 1 The Untold Secrets of Making Your Own Monochrome DSLR ................. 8 Planetary Imaging with DSLRs .................................................................. 18 Making a Fine Camera Lens Focuser and Finding New Life with Old Film Lenses .................................................................................. 21 Making a Thermal Electrically Cooled True Monochrome DSLR for Less Than $300! .................................................. 33
2 Advanced Astro Imaging .......................................................................... 45 Current Concepts in Planetary Imaging ...................................................... 45 How to Image Like the Pro’s for Under $1000 ........................................... 54 Make Your Own On-Axis Guider ............................................................... 65 Guide Free, Diffraction Limited Imaging with EMccds ............................. 71
3 Public Outreach Applications .................................................................. 79 Supersize Your PST and Easy, Inexpensive Ca-K Line Imaging ................ 79 The Digital Schmidt Camera ...................................................................... 86 How to Throw a Proper Planetary Eyepiece Shootout Party (and Make an Eyepiece Turret) ................................................................... 88 Real Time Narrowband Visual Viewing with Image Intensifi ers................ 105
4 Amateur Telescope Making ...................................................................... 117 An Ultraportable, Open and Folded 8.5″ Refractor .................................... 117 A Tale of Two Dobsonians .......................................................................... 131 No Requiem for a Classical Cassegrain ...................................................... 140
xii
Garage Sale Finds ....................................................................................... 158 Electroplating in Your Kitchen ................................................................... 163 Making a Sub 0.7 Å Hydrogen Alpha Solarscope ...................................... 173
5 Astronomical Projects for Supporting Applications .............................. 179 Making an Affordable Atmospheric Dispersion Corrector ......................... 179 Making an Electrically Powered, Variable Height Pier for Less ................ 186 A Simple, Portable Geodesic Dome Observatory ....................................... 188 Build Your Own Advanced CT (Cassegrain Telescope) Laser Collimator ......................................................................................... 203 Affordable Spectroscopy for Amateur Astronomers ................................... 209 A Direct Drive Telescope Mount ................................................................ 217 A Motorized Base for Giant Dobs .............................................................. 231
6 Conclusion ................................................................................................. 243
Index ................................................................................................................. 245
Contents
1© Springer International Publishing Switzerland 2015J. Chung, Astro-Imaging Projects for Amateur Astronomers, The Patrick MoorePractical Astronomy Series, DOI 10.1007/978-3-319-18546-0_1
DSLR Astro Imaging
Digital single lens reflex cameras (DSLR) were first used for astro imaging (as differentiated from photography which is terrestrial, stationary and short expo-sure) in 2003 with the introduction of the first sub $1000 DSLR, the Canon Rebel 300D. Second hand units only a few years old can be very inexpensive and lightly used as determined by reading the shutter actuation count in any exchangeable image file format (EXIF) header. DSLRs are such a staple commodity of any modern household that it’s a natural entryway for beginners. They also represent a self contained total imaging system convenient for field use and capable of stunning professional results when wielded by advanced users. This chapter discusses DSLR topics that are rarely, if ever, broached in other astro imaging resources.
Widefield Astro Imaging with Micro 4/3rds Cameras
As a parent I find solace in the belief that exposing your young children to a wide variety of life experiences will somehow pay dividends down the road. At least it was true for me because although I had but a passing interest in astronomy, the images of Voyager 1’s Jupiter flyby and those of the repaired Hubble Space Telescope left such a lasting impression that it fueled a personal addiction for astronomical imaging that started a decade ago. One of my first successes with deep space imaging occurred during a family vacation at a resort in Ontario’s cot-tage country (one of Shania Twain’s earliest professional gigs). Being located some 2 h north of Toronto, the skies were unbelievably dark … and at the same time startlingly bright from the now visible dense star fields of the summer Milky Way. I was set up on the beach with my IR modified Canon 20D and AP Traveler
Chapter 1
2
refractor and Vixen GPDX mount and 12 V lead acid car battery and scattered empty carrying cases … and sweating from multiple trips to the parking lot. There had to be a better way.
Back in 2010, I was amongst the early adopters of a new class of digital cameras introduced by Olympus and Panasonic (Lumix) known as micro four thirds (μ43). Naming derives from the archaic notion of expressing the size of a solid state sensor in equivalent sized vacuum camera tubes expressed in inches. The sensor has a diagonal dimension of 22 mm, which is approximately the same as the active area of a 4/3″ vacuum tube. The nomenclature also refers to the aspect ratio of the sensor being 4:3, which is closer to what is seen by human vision (not 16:9 contrary to popular belief) than the standard 3:2 ratio of a full format 35 mm film sized sensor. What made these cameras exciting was that they represented a fresh digital centric redesign rather than merely modified film camera construction.
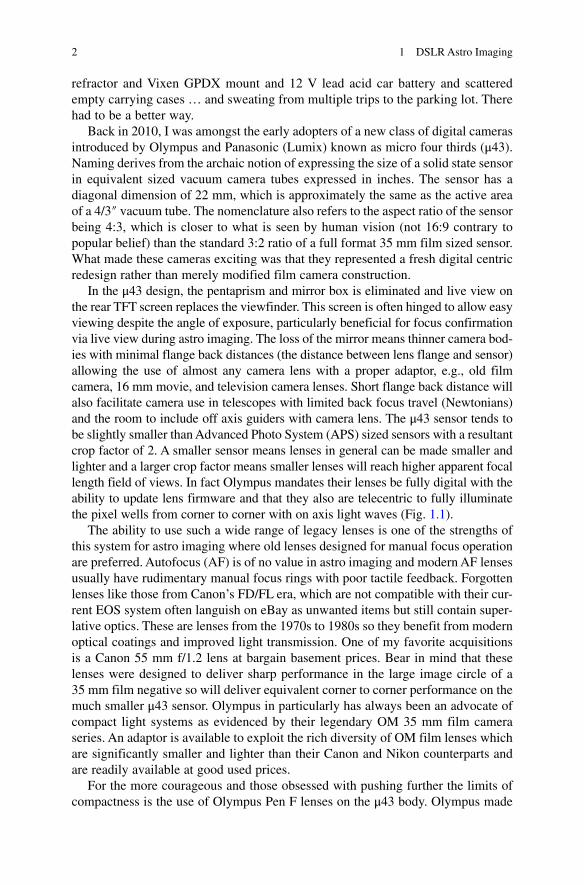
In the μ43 design, the pentaprism and mirror box is eliminated and live view on the rear TFT screen replaces the viewfinder. This screen is often hinged to allow easy viewing despite the angle of exposure, particularly beneficial for focus confirmation via live view during astro imaging. The loss of the mirror means thinner camera bod-ies with minimal flange back distances (the distance between lens flange and sensor) allowing the use of almost any camera lens with a proper adaptor, e.g., old film camera, 16 mm movie, and television camera lenses. Short flange back distance will also facilitate camera use in telescopes with limited back focus travel (Newtonians) and the room to include off axis guiders with camera lens. The μ43 sensor tends to be slightly smaller than Advanced Photo System (APS) sized sensors with a resultant crop factor of 2. A smaller sensor means lenses in general can be made smaller and lighter and a larger crop factor means smaller lenses will reach higher apparent focal length field of views. In fact Olympus mandates their lenses be fully digital with the ability to update lens firmware and that they also are telecentric to fully illuminate the pixel wells from corner to corner with on axis light waves (Fig. 1.1).
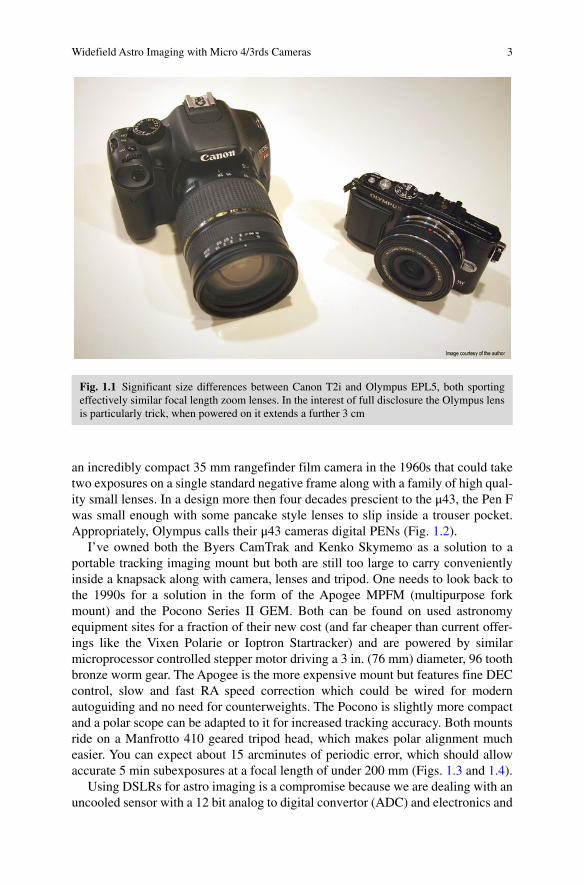
The ability to use such a wide range of legacy lenses is one of the strengths of this system for astro imaging where old lenses designed for manual focus operation are preferred. Autofocus (AF) is of no value in astro imaging and modern AF lenses usually have rudimentary manual focus rings with poor tactile feedback. Forgotten lenses like those from Canon’s FD/FL era, which are not compatible with their cur-rent EOS system often languish on eBay as unwanted items but still contain super-lative optics. These are lenses from the 1970s to 1980s so they benefit from modern optical coatings and improved light transmission. One of my favorite acquisitions is a Canon 55 mm f/1.2 lens at bargain basement prices. Bear in mind that these lenses were designed to deliver sharp performance in the large image circle of a 35 mm film negative so will deliver equivalent corner to corner performance on the much smaller μ43 sensor. Olympus in particularly has always been an advocate of compact light systems as evidenced by their legendary OM 35 mm film camera series. An adaptor is available to exploit the rich diversity of OM film lenses which are significantly smaller and lighter than their Canon and Nikon counterparts and are readily available at good used prices.
For the more courageous and those obsessed with pushing further the limits of compactness is the use of Olympus Pen F lenses on the μ43 body. Olympus made
1 DSLR Astro Imaging
3
an incredibly compact 35 mm rangefinder film camera in the 1960s that could take two exposures on a single standard negative frame along with a family of high qual-ity small lenses. In a design more then four decades prescient to the μ43, the Pen F was small enough with some pancake style lenses to slip inside a trouser pocket. Appropriately, Olympus calls their μ43 cameras digital PENs (Fig. 1.2).
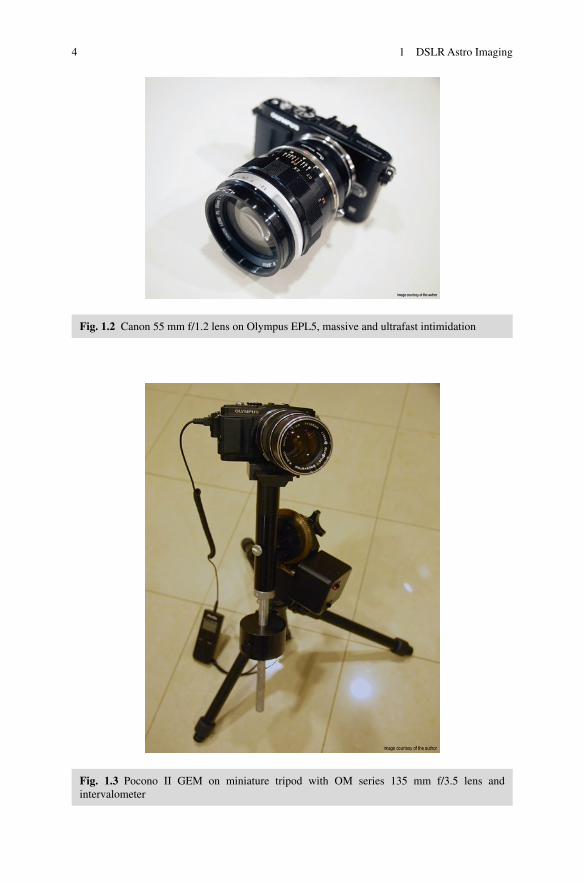
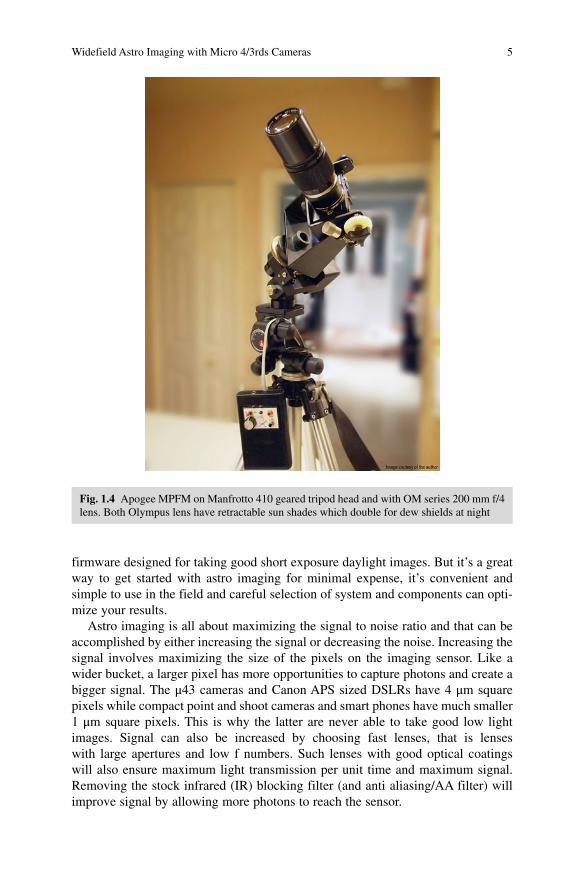
I’ve owned both the Byers CamTrak and Kenko Skymemo as a solution to a portable tracking imaging mount but both are still too large to carry conveniently inside a knapsack along with camera, lenses and tripod. One needs to look back to the 1990s for a solution in the form of the Apogee MPFM (multipurpose fork mount) and the Pocono Series II GEM. Both can be found on used astronomy equipment sites for a fraction of their new cost (and far cheaper than current offer-ings like the Vixen Polarie or Ioptron Startracker) and are powered by similar microprocessor controlled stepper motor driving a 3 in. (76 mm) diameter, 96 tooth bronze worm gear. The Apogee is the more expensive mount but features fine DEC control, slow and fast RA speed correction which could be wired for modern autoguiding and no need for counterweights. The Pocono is slightly more compact and a polar scope can be adapted to it for increased tracking accuracy. Both mounts ride on a Manfrotto 410 geared tripod head, which makes polar alignment much easier. You can expect about 15 arcminutes of periodic error, which should allow accurate 5 min subexposures at a focal length of under 200 mm (Figs. 1.3 and 1.4).
Using DSLRs for astro imaging is a compromise because we are dealing with an uncooled sensor with a 12 bit analog to digital convertor (ADC) and electronics and
Fig. 1.1 Significant size differences between Canon T2i and Olympus EPL5, both sporting effectively similar focal length zoom lenses. In the interest of full disclosure the Olympus lens is particularly trick, when powered on it extends a further 3 cm
Widefield Astro Imaging with Micro 4/3rds Cameras
4
Fig. 1.2 Canon 55 mm f/1.2 lens on Olympus EPL5, massive and ultrafast intimidation
Fig. 1.3 Pocono II GEM on miniature tripod with OM series 135 mm f/3.5 lens and intervalometer
1 DSLR Astro Imaging
5
firmware designed for taking good short exposure daylight images. But it’s a great way to get started with astro imaging for minimal expense, it’s convenient and simple to use in the field and careful selection of system and components can opti-mize your results.
Astro imaging is all about maximizing the signal to noise ratio and that can be accomplished by either increasing the signal or decreasing the noise. Increasing the signal involves maximizing the size of the pixels on the imaging sensor. Like a wider bucket, a larger pixel has more opportunities to capture photons and create a bigger signal. The μ43 cameras and Canon APS sized DSLRs have 4 μm square pixels while compact point and shoot cameras and smart phones have much smaller 1 μm square pixels. This is why the latter are never able to take good low light images. Signal can also be increased by choosing fast lenses, that is lenses with large apertures and low f numbers. Such lenses with good optical coatings will also ensure maximum light transmission per unit time and maximum signal. Removing the stock infrared (IR) blocking filter (and anti aliasing/AA filter) will improve signal by allowing more photons to reach the sensor.
Fig. 1.4 Apogee MPFM on Manfrotto 410 geared tripod head and with OM series 200 mm f/4 lens. Both Olympus lens have retractable sun shades which double for dew shields at night
Widefield Astro Imaging with Micro 4/3rds Cameras
6
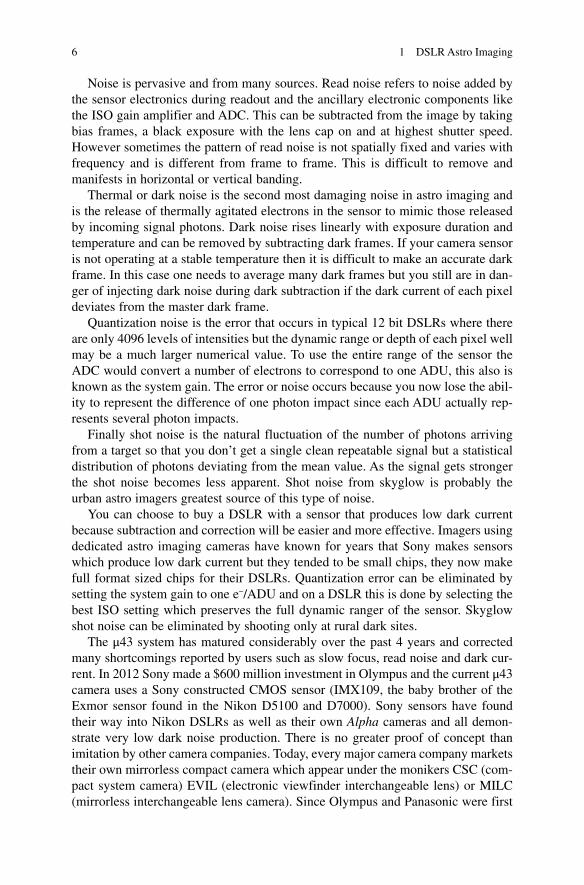
Noise is pervasive and from many sources. Read noise refers to noise added by the sensor electronics during readout and the ancillary electronic components like the ISO gain amplifier and ADC. This can be subtracted from the image by taking bias frames, a black exposure with the lens cap on and at highest shutter speed. However sometimes the pattern of read noise is not spatially fixed and varies with frequency and is different from frame to frame. This is difficult to remove and manifests in horizontal or vertical banding.
Thermal or dark noise is the second most damaging noise in astro imaging and is the release of thermally agitated electrons in the sensor to mimic those released by incoming signal photons. Dark noise rises linearly with exposure duration and temperature and can be removed by subtracting dark frames. If your camera sensor is not operating at a stable temperature then it is difficult to make an accurate dark frame. In this case one needs to average many dark frames but you still are in dan-ger of injecting dark noise during dark subtraction if the dark current of each pixel deviates from the master dark frame.
Quantization noise is the error that occurs in typical 12 bit DSLRs where there are only 4096 levels of intensities but the dynamic range or depth of each pixel well may be a much larger numerical value. To use the entire range of the sensor the ADC would convert a number of electrons to correspond to one ADU, this also is known as the system gain. The error or noise occurs because you now lose the abil-ity to represent the difference of one photon impact since each ADU actually rep-resents several photon impacts.
Finally shot noise is the natural fluctuation of the number of photons arriving from a target so that you don’t get a single clean repeatable signal but a statistical distribution of photons deviating from the mean value. As the signal gets stronger the shot noise becomes less apparent. Shot noise from skyglow is probably the urban astro imagers greatest source of this type of noise.
You can choose to buy a DSLR with a sensor that produces low dark current because subtraction and correction will be easier and more effective. Imagers using dedicated astro imaging cameras have known for years that Sony makes sensors which produce low dark current but they tended to be small chips, they now make full format sized chips for their DSLRs. Quantization error can be eliminated by setting the system gain to one e−/ADU and on a DSLR this is done by selecting the best ISO setting which preserves the full dynamic ranger of the sensor. Skyglow shot noise can be eliminated by shooting only at rural dark sites.
The μ43 system has matured considerably over the past 4 years and corrected many shortcomings reported by users such as slow focus, read noise and dark cur-rent. In 2012 Sony made a $600 million investment in Olympus and the current μ43 camera uses a Sony constructed CMOS sensor (IMX109, the baby brother of the Exmor sensor found in the Nikon D5100 and D7000). Sony sensors have found their way into Nikon DSLRs as well as their own Alpha cameras and all demon-strate very low dark noise production. There is no greater proof of concept than imitation by other camera companies. Today, every major camera company markets their own mirrorless compact camera which appear under the monikers CSC (com-pact system camera) EVIL (electronic viewfinder interchangeable lens) or MILC (mirrorless interchangeable lens camera). Since Olympus and Panasonic were first
1 DSLR Astro Imaging
7
to market, their system remains the most desired because they offer the widest range of lenses (over 30) with many third party manufacturers like Schneider- Kreuznach, Leica, Kowa, Mitakon, SLR Magic, Tamron, Rokinon, Sigma, Samyang and Voigländer-Cosina adopting the platform. Some of these lenses feature very high grade optics and every enthusiast knows that camera bodies come and go but lenses last a lifetime and are what the serious user invests in. Rather like eyepieces!
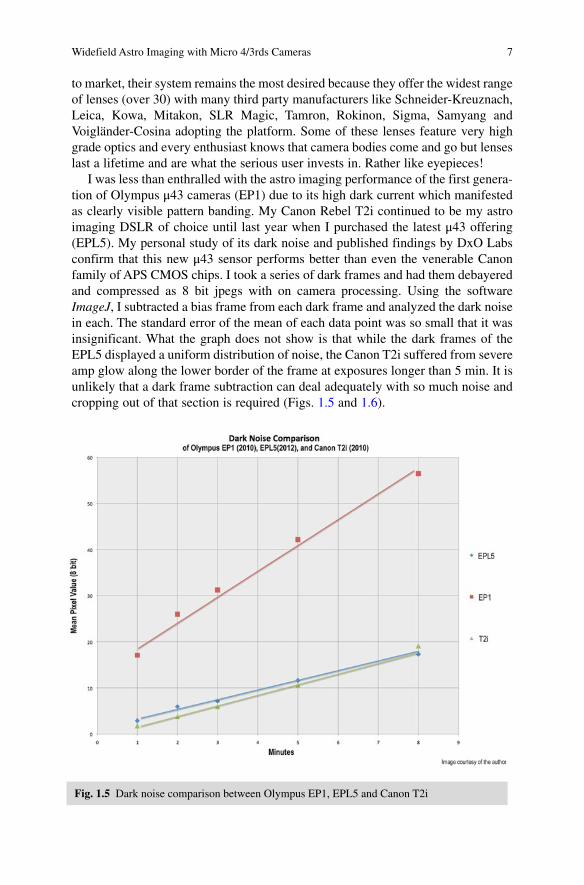
I was less than enthralled with the astro imaging performance of the first genera-tion of Olympus μ43 cameras (EP1) due to its high dark current which manifested as clearly visible pattern banding. My Canon Rebel T2i continued to be my astro imaging DSLR of choice until last year when I purchased the latest μ43 offering (EPL5). My personal study of its dark noise and published findings by DxO Labs confirm that this new μ43 sensor performs better than even the venerable Canon family of APS CMOS chips. I took a series of dark frames and had them debayered and compressed as 8 bit jpegs with on camera processing. Using the software ImageJ, I subtracted a bias frame from each dark frame and analyzed the dark noise in each. The standard error of the mean of each data point was so small that it was insignificant. What the graph does not show is that while the dark frames of the EPL5 displayed a uniform distribution of noise, the Canon T2i suffered from severe amp glow along the lower border of the frame at exposures longer than 5 min. It is unlikely that a dark frame subtraction can deal adequately with so much noise and cropping out of that section is required (Figs. 1.5 and 1.6).
Fig. 1.5 Dark noise comparison between Olympus EP1, EPL5 and Canon T2i
Widefield Astro Imaging with Micro 4/3rds Cameras

8
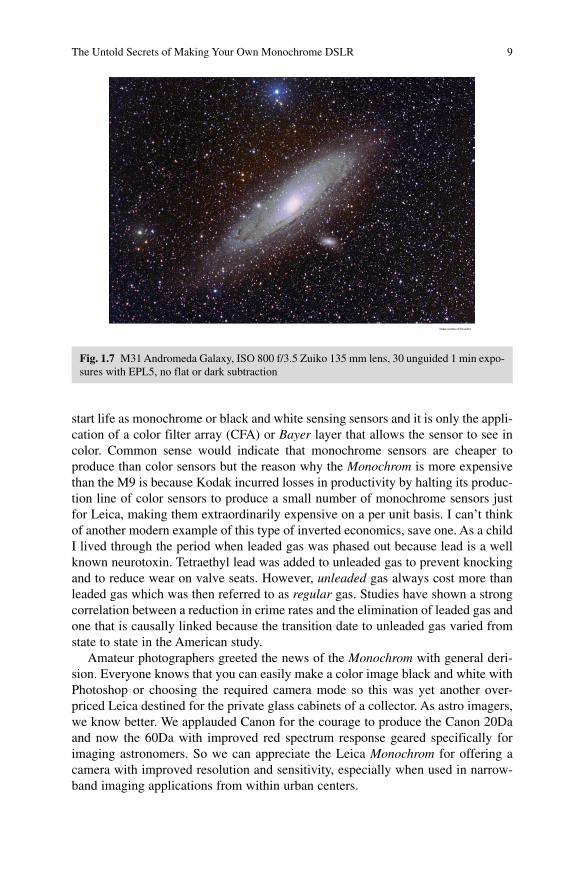
Like any other camera, the IR blocking filter and AA filter can be removed and replaced with clear glass to preserve autofocus and improve hydrogen alpha (Hα) response and resolution. It is a little more challenging to work within the tight confines of the μ43 body as compared to a full sized DSLR but it can be personally accomplished. Perhaps the greatest but not readily evident advantage is the compact size of the total imaging package of a μ43 system. Like telescopes, the most con-venient and readily deployable camera is the one used most often and when paired with some compact motorized German equatorial mounts can be easily transported as an entire system in a small knapsack. The just released EPL6 features a new low ISO 100 setting and a built in intervalometer for time lapse photography although the longest shutter speed is still 60 s. Definitely airline friendly but more impor-tantly travel friendly (Fig. 1.7).
The Untold Secrets of Making Your Own Monochrome DSLR
A couple of Christmas’ ago I asked Santa if he would bring me the new $8000 Leica Monochrom digital camera in consideration of the fact that he never brought me anything that I asked for as a child. But Santa really does know all his children well because the unbroken tradition of denial only made me even more determined to make my own! The Monochrom comes with the 18 megapixel (MP) full frame Kodak KAF-18500 monochrome sensor and a $1500 price premium over the conventional color Leica M9 camera on which it is based. Now all imaging sensors
Fig. 1.6 Dynamic range performance of Olympus EP1, EPL5 and Canon 70D
1 DSLR Astro Imaging
9
start life as monochrome or black and white sensing sensors and it is only the appli-cation of a color filter array (CFA) or Bayer layer that allows the sensor to see in color. Common sense would indicate that monochrome sensors are cheaper to produce than color sensors but the reason why the Monochrom is more expensive than the M9 is because Kodak incurred losses in productivity by halting its produc-tion line of color sensors to produce a small number of monochrome sensors just for Leica, making them extraordinarily expensive on a per unit basis. I can’t think of another modern example of this type of inverted economics, save one. As a child I lived through the period when leaded gas was phased out because lead is a well known neurotoxin. Tetraethyl lead was added to unleaded gas to prevent knocking and to reduce wear on valve seats. However, unleaded gas always cost more than leaded gas which was then referred to as regular gas. Studies have shown a strong correlation between a reduction in crime rates and the elimination of leaded gas and one that is causally linked because the transition date to unleaded gas varied from state to state in the American study.
Amateur photographers greeted the news of the Monochrom with general deri-sion. Everyone knows that you can easily make a color image black and white with Photoshop or choosing the required camera mode so this was yet another over-priced Leica destined for the private glass cabinets of a collector. As astro imagers, we know better. We applauded Canon for the courage to produce the Canon 20Da and now the 60Da with improved red spectrum response geared specifically for imaging astronomers. So we can appreciate the Leica Monochrom for offering a camera with improved resolution and sensitivity, especially when used in narrow-band imaging applications from within urban centers.
Fig. 1.7 M31 Andromeda Galaxy, ISO 800 f/3.5 Zuiko 135 mm lens, 30 unguided 1 min expo-sures with EPL5, no flat or dark subtraction
The Untold Secrets of Making Your Own Monochrome DSLR
10
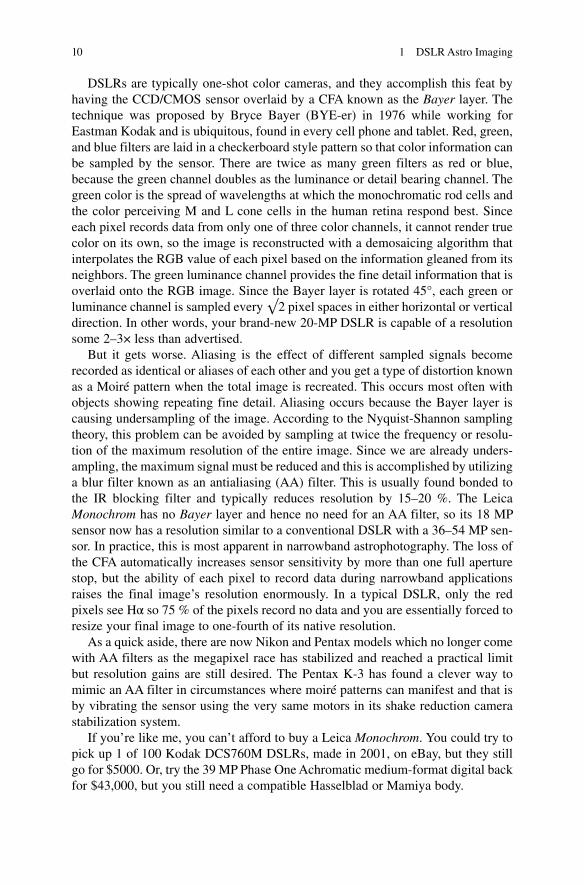
DSLRs are typically one-shot color cameras, and they accomplish this feat by having the CCD/CMOS sensor overlaid by a CFA known as the Bayer layer. The technique was proposed by Bryce Bayer (BYE-er) in 1976 while working for Eastman Kodak and is ubiquitous, found in every cell phone and tablet. Red, green, and blue filters are laid in a checkerboard style pattern so that color information can be sampled by the sensor. There are twice as many green filters as red or blue, because the green channel doubles as the luminance or detail bearing channel. The green color is the spread of wavelengths at which the monochromatic rod cells and the color perceiving M and L cone cells in the human retina respond best. Since each pixel records data from only one of three color channels, it cannot render true color on its own, so the image is reconstructed with a demosaicing algorithm that interpolates the RGB value of each pixel based on the information gleaned from its neighbors. The green luminance channel provides the fine detail information that is overlaid onto the RGB image. Since the Bayer layer is rotated 45°, each green or luminance channel is sampled every √2 pixel spaces in either horizontal or vertical direction. In other words, your brand-new 20-MP DSLR is capable of a resolution some 2–3× less than advertised.
But it gets worse. Aliasing is the effect of different sampled signals become recorded as identical or aliases of each other and you get a type of distortion known as a Moiré pattern when the total image is recreated. This occurs most often with objects showing repeating fine detail. Aliasing occurs because the Bayer layer is causing undersampling of the image. According to the Nyquist-Shannon sampling theory, this problem can be avoided by sampling at twice the frequency or resolu-tion of the maximum resolution of the entire image. Since we are already unders-ampling, the maximum signal must be reduced and this is accomplished by utilizing a blur filter known as an antialiasing (AA) filter. This is usually found bonded to the IR blocking filter and typically reduces resolution by 15–20 %. The Leica Monochrom has no Bayer layer and hence no need for an AA filter, so its 18 MP sensor now has a resolution similar to a conventional DSLR with a 36–54 MP sen-sor. In practice, this is most apparent in narrowband astrophotography. The loss of the CFA automatically increases sensor sensitivity by more than one full aperture stop, but the ability of each pixel to record data during narrowband applications raises the final image’s resolution enormously. In a typical DSLR, only the red pixels see Hα so 75 % of the pixels record no data and you are essentially forced to resize your final image to one-fourth of its native resolution.
As a quick aside, there are now Nikon and Pentax models which no longer come with AA filters as the megapixel race has stabilized and reached a practical limit but resolution gains are still desired. The Pentax K-3 has found a clever way to mimic an AA filter in circumstances where moiré patterns can manifest and that is by vibrating the sensor using the very same motors in its shake reduction camera stabilization system.
If you’re like me, you can’t afford to buy a Leica Monochrom. You could try to pick up 1 of 100 Kodak DCS760M DSLRs, made in 2001, on eBay, but they still go for $5000. Or, try the 39 MP Phase One Achromatic medium-format digital back for $43,000, but you still need a compatible Hasselblad or Mamiya body.
1 DSLR Astro Imaging
11
A company based in New Jersey (www.maxmax.com) has been offering monochrome conversions of Canon DSLRs for the past 4 years. The procedure is not for the faint of heart and requires a clean room. Success is still variable enough that the company will not convert your camera for fear of destroying your sensor but rather sells preconverted units. The final thin sensor cover glass is removed and a 5-μm surface layer of the sensor removed with a proprietary process (likely physical) to strip both the microlens and CFA. A monochrome converted Canon T3i goes for $2000 and a Canon 5D Mk 3 for $6500.
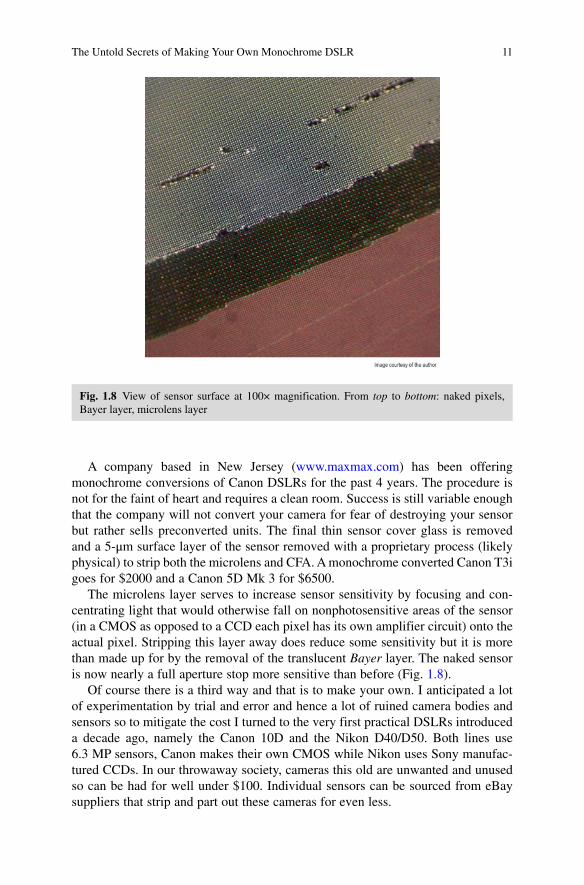
The microlens layer serves to increase sensor sensitivity by focusing and con-centrating light that would otherwise fall on nonphotosensitive areas of the sensor (in a CMOS as opposed to a CCD each pixel has its own amplifier circuit) onto the actual pixel. Stripping this layer away does reduce some sensitivity but it is more than made up for by the removal of the translucent Bayer layer. The naked sensor is now nearly a full aperture stop more sensitive than before (Fig. 1.8).
Of course there is a third way and that is to make your own. I anticipated a lot of experimentation by trial and error and hence a lot of ruined camera bodies and sensors so to mitigate the cost I turned to the very first practical DSLRs introduced a decade ago, namely the Canon 10D and the Nikon D40/D50. Both lines use 6.3 MP sensors, Canon makes their own CMOS while Nikon uses Sony manufac-tured CCDs. In our throwaway society, cameras this old are unwanted and unused so can be had for well under $100. Individual sensors can be sourced from eBay suppliers that strip and part out these cameras for even less.
Fig. 1.8 View of sensor surface at 100× magnification. From top to bottom: naked pixels, Bayer layer, microlens layer
The Untold Secrets of Making Your Own Monochrome DSLR
12
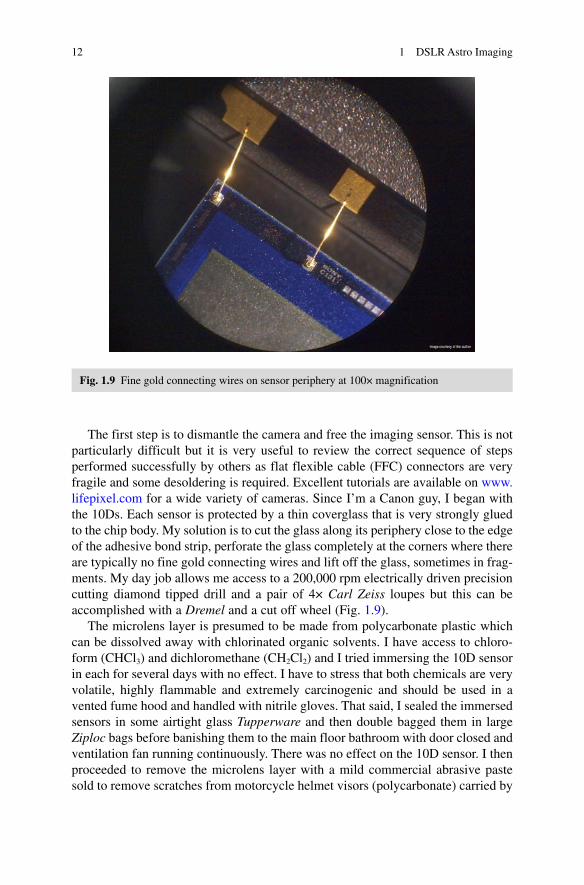
The first step is to dismantle the camera and free the imaging sensor. This is not particularly difficult but it is very useful to review the correct sequence of steps performed successfully by others as flat flexible cable (FFC) connectors are very fragile and some desoldering is required. Excellent tutorials are available on www.lifepixel.com for a wide variety of cameras. Since I’m a Canon guy, I began with the 10Ds. Each sensor is protected by a thin coverglass that is very strongly glued to the chip body. My solution is to cut the glass along its periphery close to the edge of the adhesive bond strip, perforate the glass completely at the corners where there are typically no fine gold connecting wires and lift off the glass, sometimes in frag-ments. My day job allows me access to a 200,000 rpm electrically driven precision cutting diamond tipped drill and a pair of 4× Carl Zeiss loupes but this can be accomplished with a Dremel and a cut off wheel (Fig. 1.9).
The microlens layer is presumed to be made from polycarbonate plastic which can be dissolved away with chlorinated organic solvents. I have access to chloro-form (CHCl3) and dichloromethane (CH2Cl2) and I tried immersing the 10D sensor in each for several days with no effect. I have to stress that both chemicals are very volatile, highly flammable and extremely carcinogenic and should be used in a vented fume hood and handled with nitrile gloves. That said, I sealed the immersed sensors in some airtight glass Tupperware and then double bagged them in large Ziploc bags before banishing them to the main floor bathroom with door closed and ventilation fan running continuously. There was no effect on the 10D sensor. I then proceeded to remove the microlens layer with a mild commercial abrasive paste sold to remove scratches from motorcycle helmet visors (polycarbonate) carried by
Fig. 1.9 Fine gold connecting wires on sensor periphery at 100× magnification
1 DSLR Astro Imaging

13
a slow spinning rubber cup. I was able to see layers being slowly ground away but there was no method to control ablation depth and no sensors returned any data when reinstalled. The same outcome was encountered when using less abrasive automotive clearcoat polishers, a razor blade and diamond impregnated silicone polishing points.
Having exhausted my supply of 10D sensors (some half dozen) I turned to the Nikon D40 and immersed them in the solvent bath overnight. The Sony made SuperHAD CCDs showed promise when the microlens layer was transformed to a viscous sludge that could be teased off with micro brushes and the underlying Bayer layer also gently rubbed off with cotton tipped applicators like Q-Tips. Nikon attaches their CCD chips to their ceramic chip bodies with a single center spot of adhesive, which becomes severely weakened after a solvent bath. This requires the chip be stabilized with the injection of flowable light cured bis-GMA dental resin along the edge of the chip and in available areas between the gold connecting wires. Complete microlens and Bayer layer removal was confirmed with a microscope and I was delighted to see the modified sensor produce an image (Figs. 1.10, 1.11, and 1.12).
The data from the raw Nikon files must be converted to a .tiff image file without undergoing demosaicing. This is conveniently done by using an open source pro-gram called dcraw, which is able to convert almost any camera raw file format in existence, including legacy models long unsupported by even their manufacturers, by reverse engineering the myriad of encryption methods. The author has spent thousands of hours over the past decade to keep his list of supported camera models current and even Adobe Photoshop’s raw plugin uses his code—all for free!
Fig. 1.10 First successful monochrome conversion of D40 sensor
The Untold Secrets of Making Your Own Monochrome DSLR