Assembly Instructions Encore Bookcase with Cabinet PAGE 1 ...
10
PAGE 1 OF 10 PRODUCT INFO The Original Storage and Organization Store ® Assembly Instructions Encore Bookcase with Cabinet
Transcript of Assembly Instructions Encore Bookcase with Cabinet PAGE 1 ...
PAGE 1 OF 10PRODUCT INFO
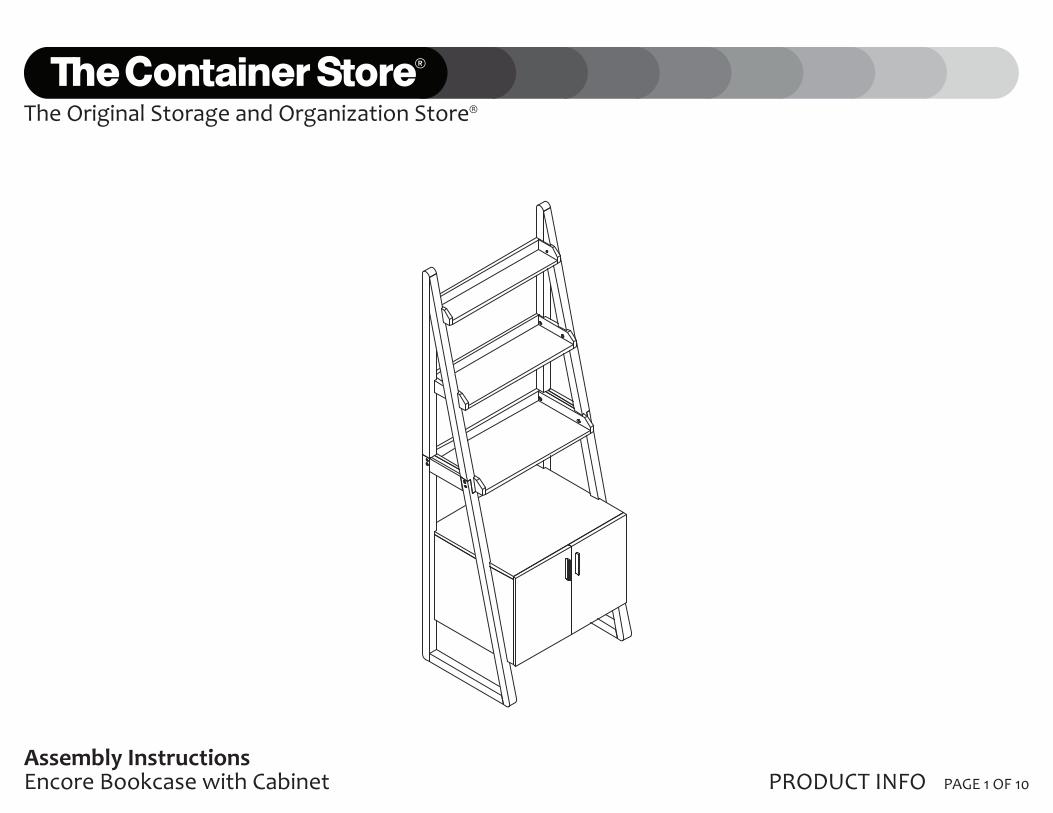
The Original Storage and Organization Store®
Assembly InstructionsEncore Bookcase with Cabinet
PAGE 2 OF 10PAGE 2 OF 10
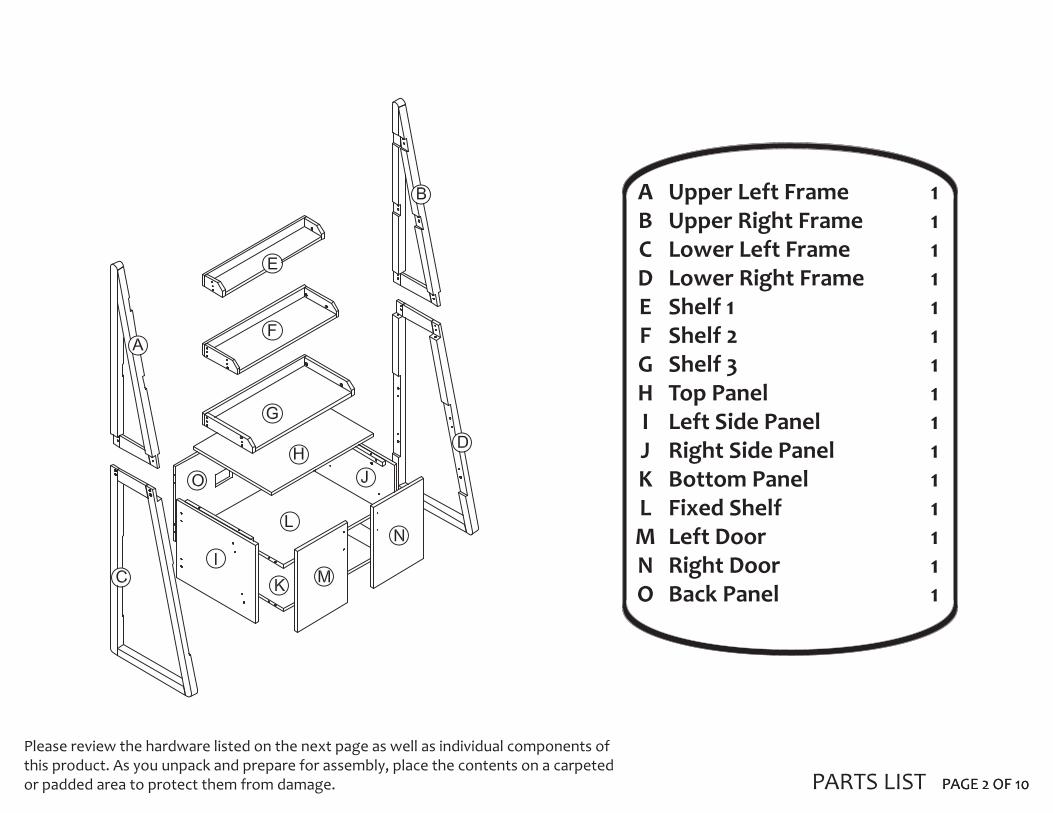
ABCDEFGHIJKLMNO
111111111111111
Upper Left FrameUpper Right FrameLower Left FrameLower Right FrameShelf 1Shelf 2Shelf 3Top PanelLeft Side PanelRight Side PanelBottom PanelFixed ShelfLeft DoorRight DoorBack Panel
PARTS LIST
Please review the hardware listed on the next page as well as individual components of this product. As you unpack and prepare for assembly, place the contents on a carpeted or padded area to protect them from damage.
PAGE 3 OF 10HARDWARE & TOOLS
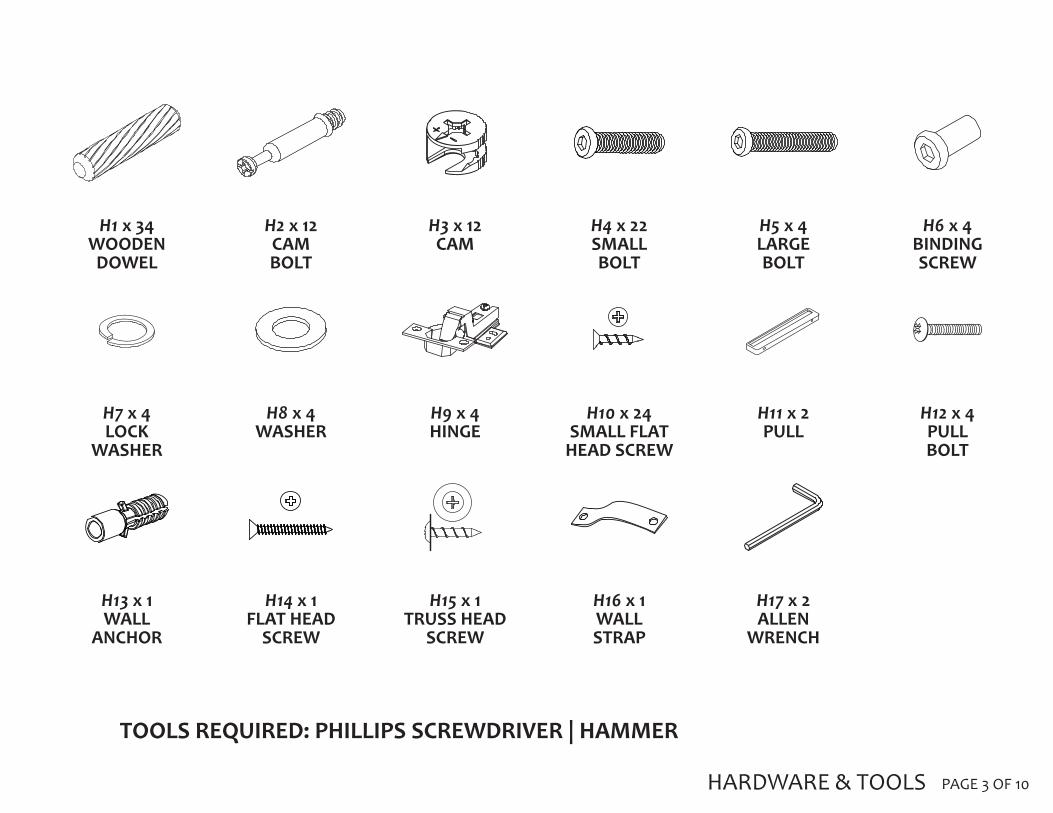
H1 x 34WOODEN
DOWEL
H7 x 4LOCK
WASHER
H13 x 1WALL
ANCHOR
H6 x 4BINDINGSCREW
H2 x 12CAM BOLT
H3 x 12CAM
H4 x 22SMALL BOLT
H5 x 4LARGE BOLT
H11 x 2PULL
H17 x 2ALLEN
WRENCH
H8 x 4WASHER
H14 x 1FLAT HEAD
SCREW
H12 x 4PULLBOLT
H9 x 4HINGE
H15 x 1TRUSS HEAD
SCREW
H10 x 24SMALL FLAT
HEAD SCREW
H16 x 1WALL STRAP
TOOLS REQUIRED: PHILLIPS SCREWDRIVER | HAMMER
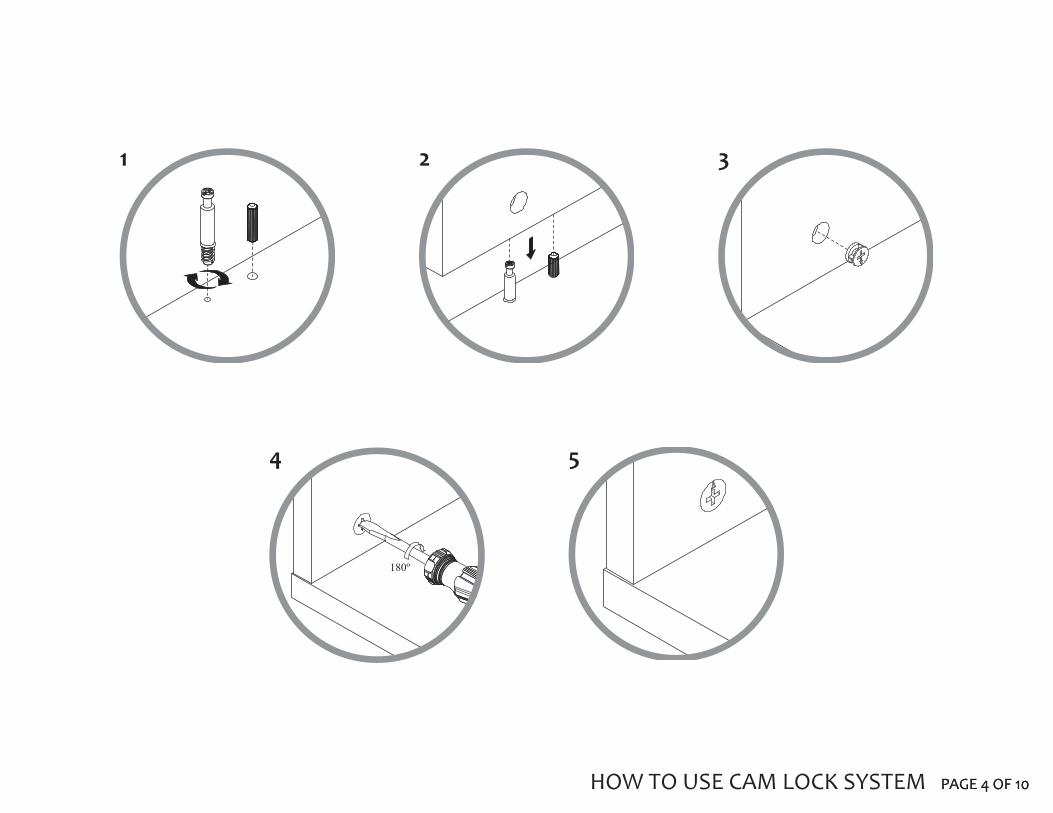
PAGE 4 OF 10PAGE 4 OF 10HOW TO USE CAM LOCK SYSTEM
180º
1 2 3
4 5
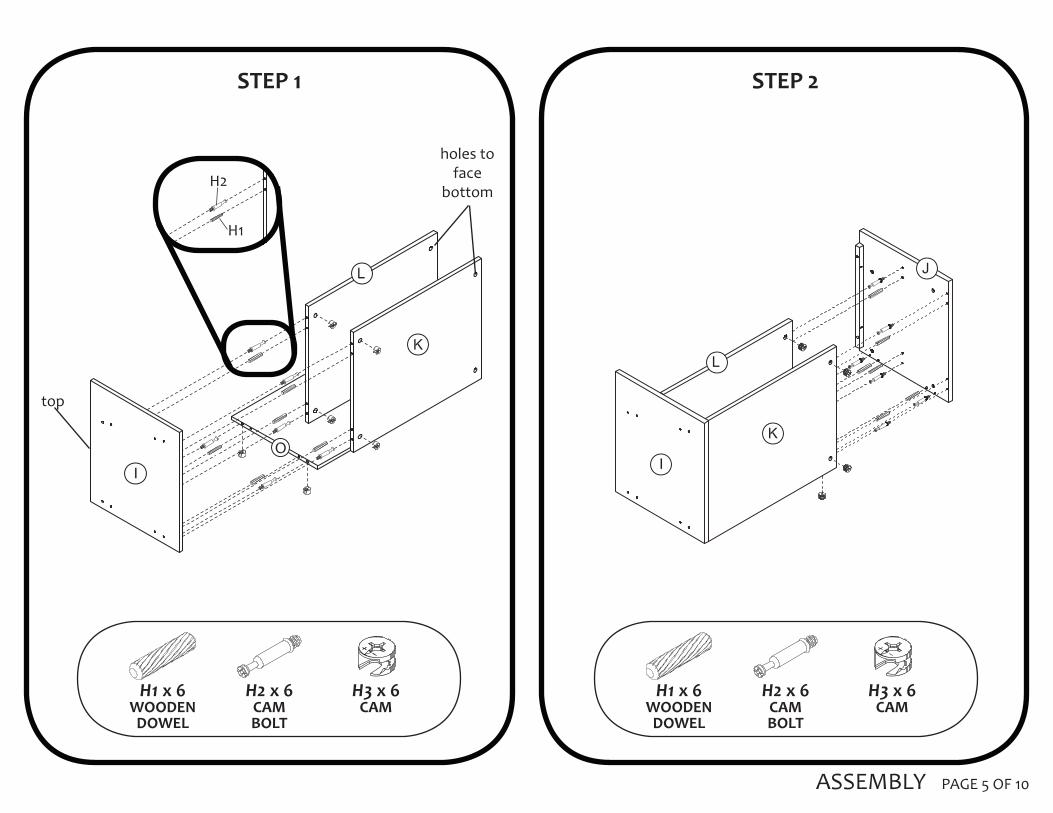
PAGE 5 OF 10
STEP 1 STEP 2
ASSEMBLY
H1 x 6WOODEN
DOWEL
H2 x 6CAM BOLT
H3 x 6CAM
H2
H1
H1 x 6WOODEN
DOWEL
H2 x 6CAM BOLT
H3 x 6CAM
top
holes to face
bottom
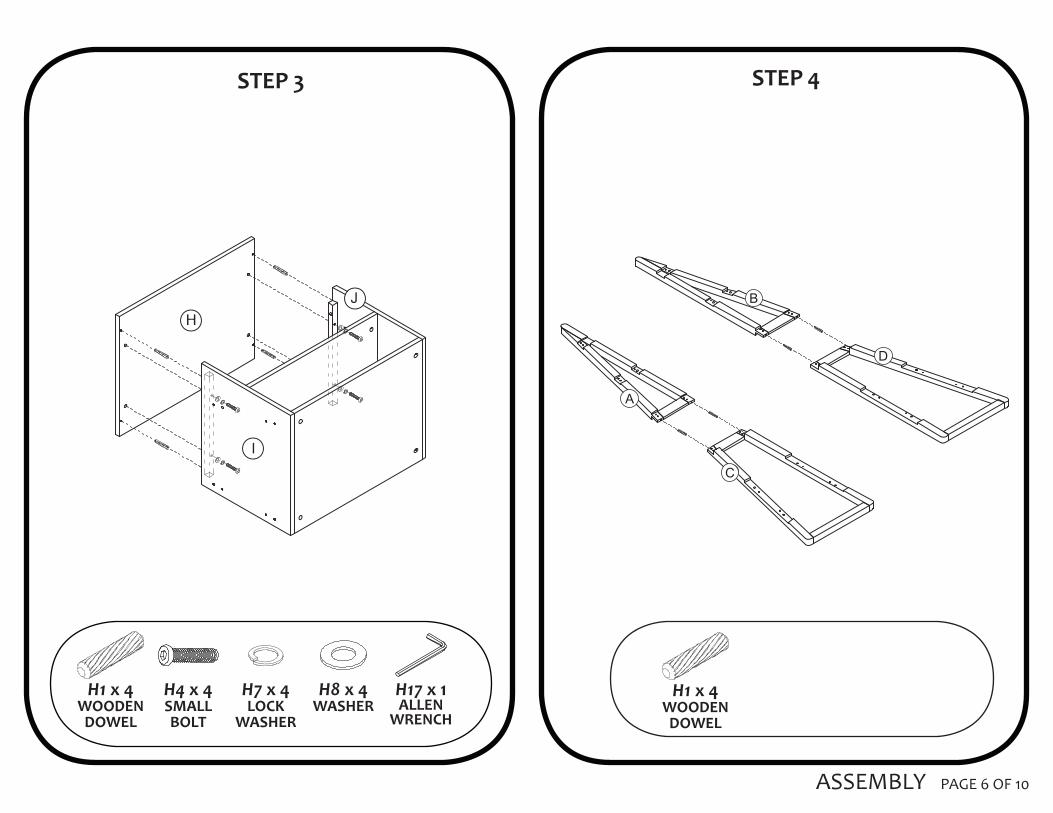
PAGE 6 OF 10
STEP 3 STEP 4
ASSEMBLY
H1 x 4WOODEN
DOWEL
H1 x 4WOODEN
DOWEL
H4 x 4SMALLBOLT
H7 x 4 LOCK
WASHER
H8 x 4 WASHER
H17 x 1 ALLEN
WRENCH
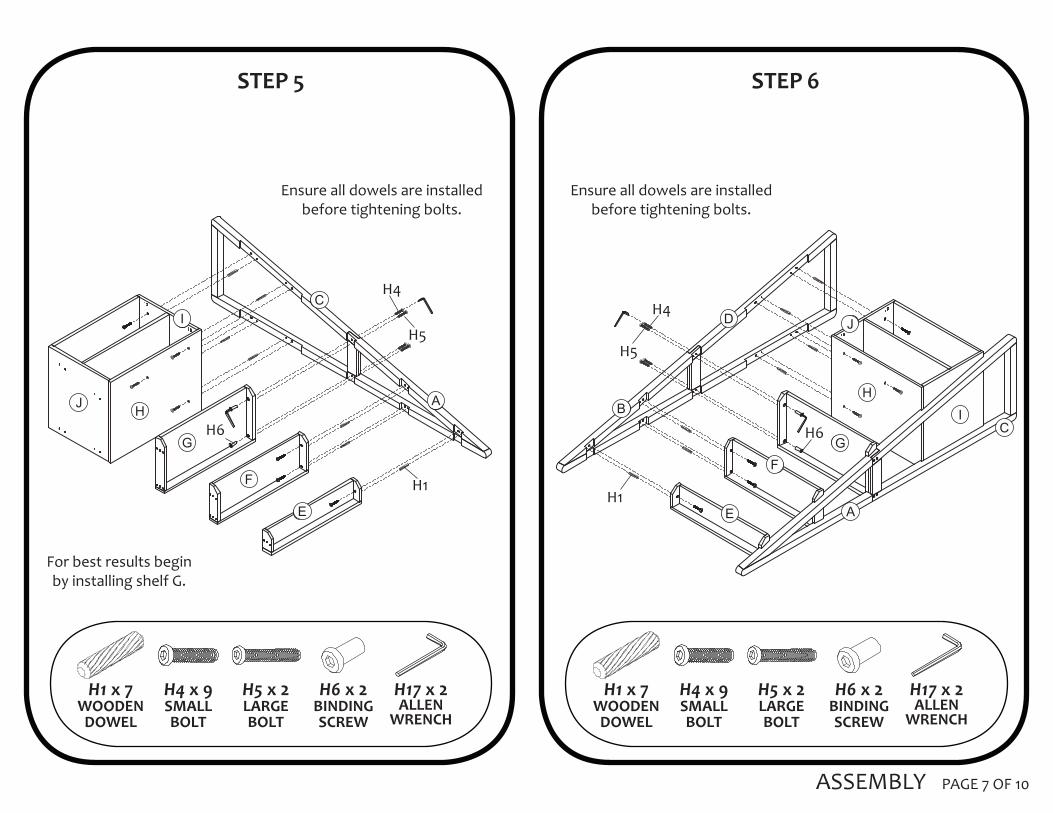
PAGE 7 OF 10
STEP 5 STEP 6
ASSEMBLY
H1 x 7WOODEN
DOWEL
H4 x 9SMALLBOLT
H5 x 2 LARGE BOLT
H6 x 2 BINDINGSCREW
H17 x 2 ALLEN
WRENCH
H4
H6
H5
H1
H1 x 7WOODEN
DOWEL
H4 x 9SMALLBOLT
H5 x 2 LARGE BOLT
H6 x 2 BINDINGSCREW
H17 x 2 ALLEN
WRENCH
H4
H5
H1
H6
Ensure all dowels are installed before tightening bolts.
For best results begin by installing shelf G.
Ensure all dowels are installed before tightening bolts.
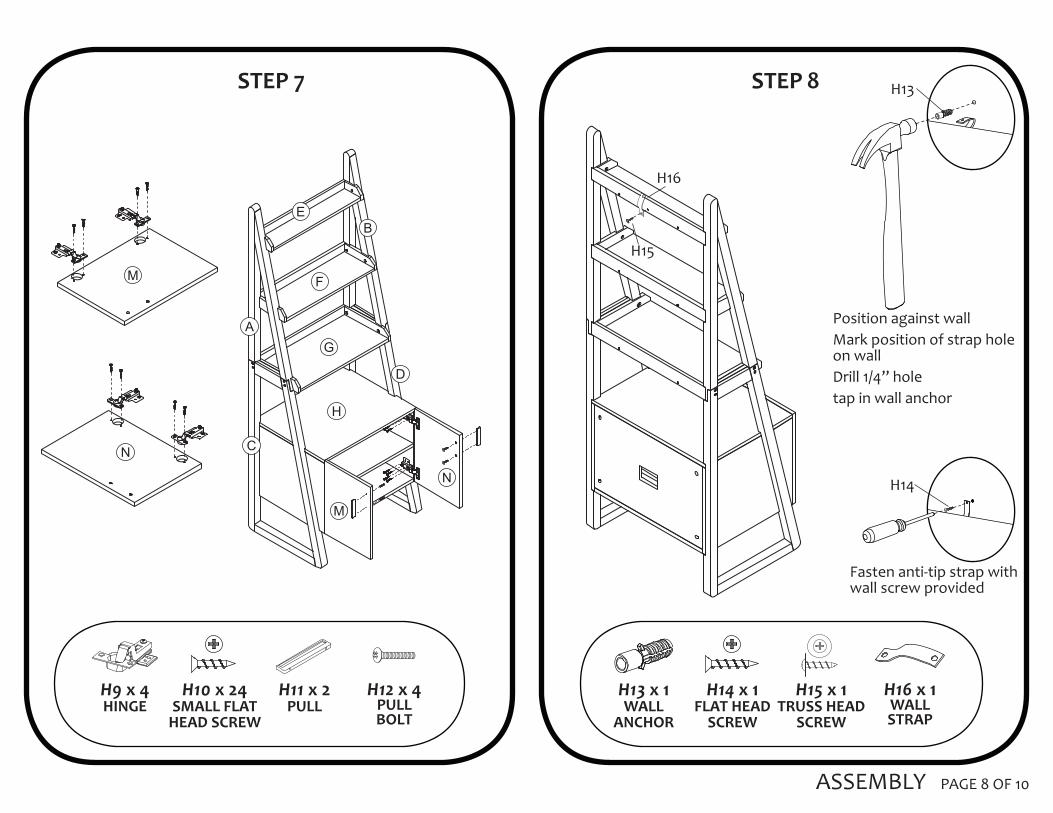
PAGE 8 OF 10
STEP 7
ASSEMBLY
H13 x 1WALL
ANCHOR
H14 x 1FLAT HEAD
SCREW
H15 x 1 TRUSS HEAD
SCREW
H16 x 1 WALL STRAP
Position against wallMark position of strap hole on wallDrill 1/4’’ holetap in wall anchor
Fasten anti-tip strap with wall screw provided
H13
H16
H15
H14
H9 x 4HINGE
H10 x 24SMALL FLAT
HEAD SCREW
H11 x 2 PULL
H12 x 4 PULLBOLT
STEP 8

PAGE 9 OF 10ASSEMBLY
DOOR ADJUSTMENT
Adjustment 2: side-to-side adjustment
Adjustment 1: depth adjustment
Adjustment 3:height adjustment
PAGE 10 OF 10CARE INSTRUCTIONSThe Original Storage and Organization Store®
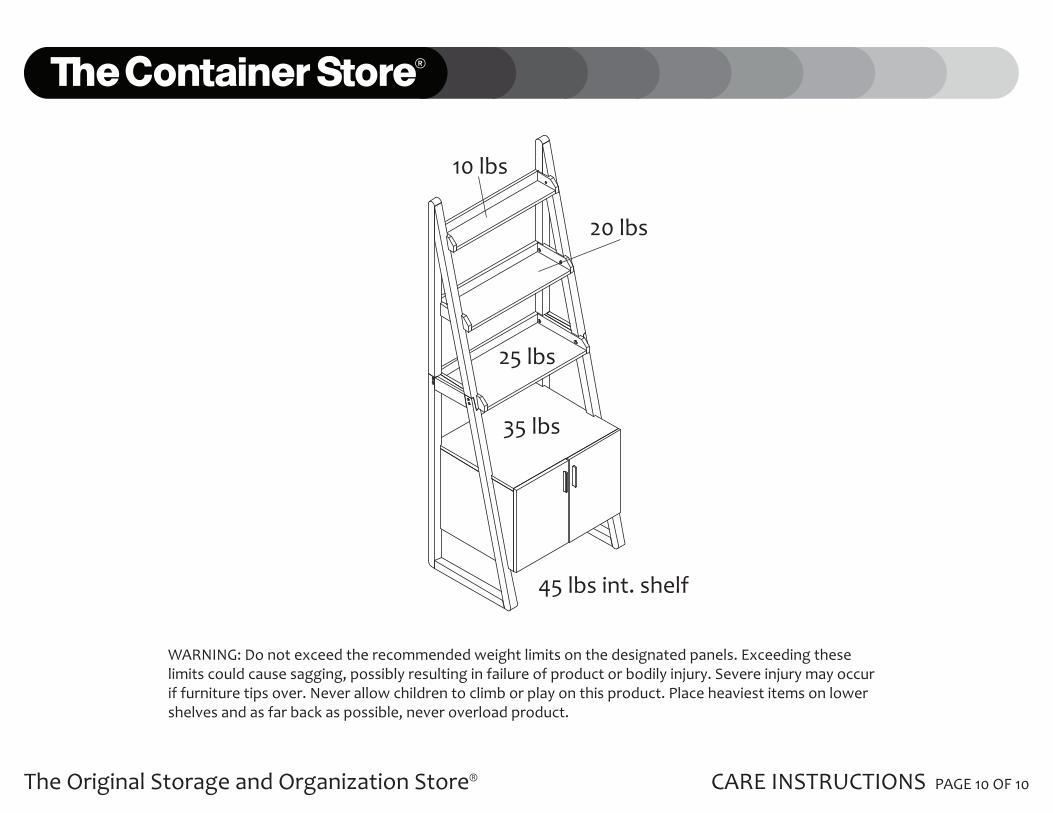
WARNING: Do not exceed the recommended weight limits on the designated panels. Exceeding these limits could cause sagging, possibly resulting in failure of product or bodily injury. Severe injury may occur if furniture tips over. Never allow children to climb or play on this product. Place heaviest items on lower shelves and as far back as possible, never overload product.
10 lbs
20 lbs
25 lbs
35 lbs
45 lbs int. shelf