Artweaver 6 Help · Artweaver 6 Help 1. Introduction 1.1 About Artweaver Artweaver is a painting...
104
Artweaver 6 Help Artweaver 6 Help © 2002-2017 Boris Eyrich Software. All rights reserved. Page 1 of 104
Transcript of Artweaver 6 Help · Artweaver 6 Help 1. Introduction 1.1 About Artweaver Artweaver is a painting...

Artweaver 6 Help
Artweaver 6 Help
© 2002-2017 Boris Eyrich Software. All rights reserved. Page 1 of 104

Artweaver 6 Help
1. Introduction
1.1 About Artweaver
Artweaver is a painting program which lets you paint creatively with the help of a huge range of tools. You can create sketches from photos or just experiment with colors.
For professional users, Artweaver offers layers, layer groups, selection tools and support for various file formats.
Artweaver is available in two versions: The Free version as freeware and an the Plus version with costs which has more features than the free version. Please see here for a feature comparison between both versions.
Advantages of Artweaver
• Support of many different digital brushes e.g. chalk, charcoal, pencils...• A wide variety of adjustment settings to customize the default brushes or to create new
brushes• Industry standard image editing tools like gradient, crop, fill and selection tools• Event saving and playback • Native 64 bit support * • Free rotable and dragable canvas * • Working simultaneously on the same document over the Internet • Support for the most common file formats like AWD (Artweaver), BMP, GIF, JPEG, PCX,
TGA, TIFF, PNG, and PSD• Transparency, layer and layer group support• Effect filters like sharpen, blur, emboss, mosaic ...• Editable text layers• Pen Tablet support for a realistic painting feeling• History function to undo/redo last editing steps• Use of multiple CPU cores * • Customizable keyboard shortcuts * • Extendible through plug-in modules• Support for many languages through language files• And much more ...
* Only available in Plus version
1.2 Version Differences
Artweaver is available in two versions: The Free version as freeware and an the Plus version with costs which has more features than the free version.
© 2002-2017 Boris Eyrich Software. All rights reserved. Page 2 of 104

Artweaver 6 Help
Version differences
FeatureArtweaver Free
Artweaver Plus
Many predefined digital brushes like chalk, charcoal, pencils, ...
New creation and adjusting of existing digital brushes
Detailed configuration of digital brushes through brush editor
Standard image editing tools like gradient, crop, fill and selectiontools
Saving and replaying of event files
Protection for saved event files
Working together in a team
Support for events in the Artweaver Document file format (AWD)
Tabbed document interface
Individual arrangement and docking of palettes
Free resizable palettes (docked and stand-alone)
Support for custom palettes
Customizable shortcuts for menus and tools
Real-time preview for filters directly on the document
Support for common file formats like AWD (Artweaver), BMP, GIF,JPEG, PCX, TGA, TIFF, PNG and PSD
Extended support of the PSD file format (e.g. Layer groups,selections, …)
Basic brush types like Circular, Airbrush, Imagestamp, …
Additional brush types like Hairy brush, Pixel brush, …
Basic brush methods like Cover, Buildup, Eraser, …
Additional brush methods like Colorize and Warp
© 2002-2017 Boris Eyrich Software. All rights reserved. Page 3 of 104

Artweaver 6 Help
Maximum supported document sizes (in pixels) 9999x9999 24999x24999
Maximum supported brush size (in pixels) 250 999
Basic support for pen tablets through the Wintab interface
Extended support for pen tablets (Pen erasers and Tool-ID)
Common image and effect filters
Additional image and effect filters like Channel mixer, Deskew,Filter gallery, Remove red eyes, …
Preset loading and saving support for many filters
Free rotable and dragable canvas
Virtual memory management with scratch disk support
Individual configuration of virtual memory management
Support for EXIF meta data in many file formats
Support for multiple CPU cores
Free transformation of selections
Native 64 bit support
Import of images from scanners and digital cameras through theWIA interface
Assisted capturing of Imagestamp presets
Configurable view of preset selectors (thumbnail or list)
Mirror painting
Color themes for the user interface
8 Bits/Channel support
16 Bits/Channel support
© 2002-2017 Boris Eyrich Software. All rights reserved. Page 4 of 104

Artweaver 6 Help
1.3 Support
If you need help, choose Main Window menu -> Help -> Support to get more details about getting support for Artweaver or visit the Artweaver Support Forum which can be found on www.artweaver.de .
General information about new versions, additional Plug-Ins and other extensions are available at www.artweaver.de. If you have suggestions for this help or Artweaver, please contact us at www.artweaver.de.
1.4 Install Artweaver
System requirements
• Windows 7, Windows 8 or Windows 10 (each with latest service pack) • Pentium II compatible processor, 1000 MHz or greater (1500 MHz recommended) • 512 MB RAM (1024 MB recommended) • 100 MB of available hard disk space • 1024x768 pixels or greater monitor resolution • A Pen tablet is recommended
Installation Notes
The setup program shows several input dialogs. It is recommended to leave all settings at default except there is a strong reason to change them. You can accept the default settings by clicking on Ok, Yes or Next .
The setup installs always the 64 bit version of Artweaver Plus on every 64 bit Windows
starting from version 7.
You can always download the latest setup program at www.artweaver.de.
1.5 License Artweaver
You need a license key to unlock all features of Artweaver. Without entering a license key Artweaver will run as a time limited test version where some features are no longer available after the test period has expired. If you do not have a license key, please visit www.artweaver.de to buy a license key or upgrade an older license key to the latest version.
This is only valid for the Plus version.
© 2002-2017 Boris Eyrich Software. All rights reserved. Page 5 of 104

Artweaver 6 Help
To enter a license key
• Start Artweaver• Choose Enter Artweaver Plus License Key in the Enter License Key dialog • Enter your Name and License Key from the registration email and click Next • Enable the option Exit Artweaver Plus and continue to quit Artweaver• Start Artweaver to enable the entered license key
It is important that you enter your Name and License Key exactly as written in the
registration email as they depend on each other.
1.6 Remove Artweaver
If you really want to remove Artweaver, you can do this with the following steps:
Go to the System Control and double-click onAdd/Remove Software . Now search for the entryArtweaver and click on it. The uninstall program will be executed and removes Artweaver from your system.
1.7 Update Artweaver
Artweaver has a built-in update function which regularly checks for new program versions during application startup. Available updates will be automatically downloaded and installed on next application startup.
A Internet connection is required to check for updates and to install them.
To update Artweaver manually
• Choose Help -> Check for updates • Follow the instructions shown by the Online Update wizard
To install updates administrative user rights are required which will be automatically
requested by the Artweaver updater if not already available.
1.8 License and Usage Conditions
1. Copyright
The program, all documentation and images are protected by copyright.
Copyright © 2002-2017 Boris Eyrich Software
© 2002-2017 Boris Eyrich Software. All rights reserved. Page 6 of 104

Artweaver 6 Help
All rights reserved.
Contact: [email protected]: http://www.b-e-soft.com
2. Terms of usage for the free version
You have the right to use the free version of the software without limitations and free of charge. Merely usage of the free version for profit or any other non-trivial purpose is explicit not allowed! The test version may be distributed free of charge and you are encouraged to do this. However, please note that the program must be distributed in its entirety. It is not permitted to make any changes to the program or data contained therein, including the documentation. No charge may be made for distributing the program beyond a small copying fee.
3. Terms of usage for the test version
You have the right to test this test version free of charge. In order to obtain the right to use the program for profit or any other non-trivial purpose you must pay the registration fee in full. It is not permitted to make any changes to the program or data contained therein, including the documentation.
4.Terms of usage for the registered, full version
You have the right to install and use a registered, full version of the software on two computers (e.g. desktop PC and notebook) belonging to ONE person. The software may be sold or given away, but only on condition that it is passed on in its entirety, i.e. with all programs and files pertaining to it including any copies which have been made. Any other kind of disposal is not permissible. It is not permitted to alter or develop the program in its range of functions, nor to decompile or disassemble it. The license number issued for the purpose of activating the full version may NOT be passed on to third parties except as detailed above.
5. Updates and upgrades
At Boris Eyrich Software's sole discretion, Boris Eyrich Software may provide you with updates and upgrades to the software and retains the right to provide upgrades for a fee. "Upgrade" means a new release version of a Boris Eyrich Software product that includes significant new features and/or functionality and is designated by an increase in the version number to the left of the decimal point. Upon installation of the update or upgrade, you shall not transfer the previous version
© 2002-2017 Boris Eyrich Software. All rights reserved. Page 7 of 104

Artweaver 6 Help
to a third party. Unless Boris Eyrich Software provides other terms and conditions with an update or upgrade, the terms and conditions of this licensing contract shall continue to apply.
6. End of Life policy
Boris Eyrich Software reserves the right to discontinue software products or specific software versions for a variety of reasons, including products/versions that become obsolete or are replaced by new products/software versions. Additionally, Boris Eyrich Software reserves the right to discontinue support for obsolete operating systems and/or specific platform support for its products.
7. Exclusion of warranties and liabilities
The software has been developed and tested by its author with care. The program is made available to users as-is. The author draws express attention to the fact that at the present state of the art it is not possible to guarantee absolutely error-free operation for any software program above a certain degree of complexity. The author makes no guarantee that the software is suitable for any particular implementation or for any particular configuration. The author takes no responsibility and shall not be liable for errors in the software nor for errors or damages arising from the use of the software or from the inability to use the software. This exclusion of liability includes non-liability for loss of profit, interruption of business processes, loss of data as well as any other material or immaterial losses and still applies even in cases where the author has specifically been made aware of the possibility of such damages. The author shall also not be liable for loss or damage of any kind resulting from viruses or other injurious software which are disseminated via the software.
By using the software you declare that you are in agreement with the above Licensing and Usage Conditions as well as with the exclusion of warranties and liabilities. Should individual items within these conditions prove to be null and void, inoperative or contestable, this shall have no detrimental effect on the effectiveness of the remaining conditions or agreements. The absolute maximum degree of financial liability shall be equivalent to the amount of the registration fee which you have paid for the use of the software.
© 2002-2017 Boris Eyrich Software. All rights reserved. Page 8 of 104

Artweaver 6 Help
2. The Workspace
2.1 Main Window
The Main Window has been designed to give you easy access to tools, effects, commands, and features. It is organized across a series of menus and interactive palettes.
Overview
• Main window • Document tab • Property bar • Tools palette • Brush palette • Color palette • Layers palette
There are more palettes in Artweaver available which are hidden by default but can be shown at every time.
© 2002-2017 Boris Eyrich Software. All rights reserved. Page 9 of 104

Artweaver 6 Help
More Palettes
• Preview palette • History palette • Selections palette • Info palette • Color Set palette • Team palette • Text palette
2.2 Working with Documents
The first step in creating an image in Artweaver is opening a document. You can open a blank canvas by creating a new document, work with an existing image by opening a file already created, or acquire an image from a scanner or digital camera.
© 2002-2017 Boris Eyrich Software. All rights reserved. Page 10 of 104

Artweaver 6 Help
Creating and Opening Documents
The Main Window menu -> File -> New command creates a blank, untitled document based on the specifications you set in the New dialog box. Image Size shows the RAM requirement for creating the document at the specified width, height, and resolution. This number does not reflect the file size for the saved document. A saved Artweaver file is usually 25% to 50% of the size of the working document, depending on the number of colors it contains.
You can also open documents from other graphics applications and use Artweaver to add brush strokes, tints, or paper textures. Or, you can clone a document to re-create it in a different medium.
To create a new document
• Choose Main Window menu -> File -> New • In the New dialog box, enter values for the following:
• Width and Height determine the dimensions of the canvas. You can change the unit of measurement by using the menu. Choose from pixels (the default), inches, centimeters (cm) and millimeters (mm)
• Resolution is the number of pixels per inch that make up an image • Choose the document's background color in the Color menu
• Click OK
To open an existing document
• Choose Main Window menu -> File -> Open • In the Open dialog box, use the controls to locate the file you want to open • Click Open
The File menu also offers you a shortcut to previously opened documents. Before
choosing Open in the File menu, see if the file you want is in the recently opened files list under the Open Recent menu.
Zooming
By default, Artweaver opens a document at a zoom level to fit the screen, but you can change the level of magnification by zooming. You can zoom in and out using the Zoom tool or zoom to fit the screen. You can even zoom in and out while working with other tools.
© 2002-2017 Boris Eyrich Software. All rights reserved. Page 11 of 104

Artweaver 6 Help
You can zoom in and out using the Zoom tool.
To zoom in
• Do one of the following:• On the Tools palette, click the Zoom tool and on the Property Bar click the
Zoom in button •
• Click or drag in the document window
When you drag, Artweaver chooses the zoom level that most closely conforms to the
selected area and centers the screen view on that area.
The document’s zoom level appears in the document tab.
To zoom out
• Do one of the following:• On the Tools palette, click the Zoom tool and on the Property Bar click the
Zoom out button •
• Click in the document window
You can also zoom in or out by typing a value in the Scale box at the bottom of the image
© 2002-2017 Boris Eyrich Software. All rights reserved. Page 12 of 104

Artweaver 6 Help
window.
To reset magnification to 100%
• Choose Main Window menu -> View -> Actual Pixels
To zoom to fit the screen
• Choose Main Window menu -> View -> Fit on Screen
Repositioning Documents
The Hand tool allows you to reposition a document in Artweaver workspace and view different areas of an image.
To use the Hand tool
• Activate the Hand tool by doing one of the following:• click the Hand tool •
• Drag in the document window to scroll through your image
Rotating Documents
The Rotate View tool lets you rotate an image on the screen to accommodate the way you draw naturally.
This feature is only available in Plus version.
© 2002-2017 Boris Eyrich Software. All rights reserved. Page 13 of 104

Artweaver 6 Help
You can rotate an image on the screen to accommodate the way you draw naturally.
To rotate the view
• Activate the Rotate View tool by doing one of the following:• Rotate View tool •
• Drag in the document window to rotate the image
You can also rotate an image by typing a rotation angle in the Angle box on the Property
Bar .
To return an image to its original orientation
• On the Tools palette click the Rotate View tool • On the Property Bar click the Reset button
Saving Files
You have several options for saving files. You can save a file in its current format or to a different format. You can also save iterations of the same file. Whenever you perform an iterative save, a new version of the file is saved with a number added to the file name, and for each subsequent save, the number added to the file name increments by 1. In addition,
© 2002-2017 Boris Eyrich Software. All rights reserved. Page 14 of 104

Artweaver 6 Help
Artweaver remembers the location of the last file you saved.
To save a file in its current format
• Choose Main Window menu -> File -> Save
To save a file with a different name or format
• Choose Main Window menu -> File -> Save As • In the Save Image As dialog box, use the controls to specify a location, file name, and
format
To perform an iterative save
• Choose Main Window menu -> File -> Iterative Save
Closing Documents
You can close documents using menu commands or the Close button of the current document tab.
To close a document
• Do one of the following:• Click the active window’s Close button • Choose Main Window menu -> File -> Close
2.3 Importing images from scanners and cameras
To import scanned images, either open TIFF files saved from separate scanning software, or use the WIA interface directly in Artweaver. In either case, make sure to install the software necessary for your scanner or camera. For installation instructions, see the documentation provided by the device manufacturer.
Device drivers are supported by the manufacturer only. If you have problems with
scanning, make sure that you are using the latest version of the device driver and software.
© 2002-2017 Boris Eyrich Software. All rights reserved. Page 15 of 104

Artweaver 6 Help
To import images using the WIA interface
• Choose File -> Import -> Your device name • Click Scan
To import images from a separate scanning application
• Start the scanning software, and set options as desired• Save scanned images in TIFF format• Open the saved TIFF files in Artweaver
2.4 Guides and Grids
The document window features guides and grid that help you position and size images and image elements.
Guides
Guides are non printing lines that appear over the image in the document window. They are very helpful in aligning image elements. You can place guides at any position in the document window and easily reposition and remove them. Guides can also be locked so that they can't be dragged.
To display or hide guides
• Choose Main Window menu -> View -> Show Guides or Hide Guides
To create a guide
• Show the guides• Choose Main Window menu -> View -> New Guide • Specify in the New Guide dialog box the orientation and position for the new guide
© 2002-2017 Boris Eyrich Software. All rights reserved. Page 16 of 104

Artweaver 6 Help
The document tab shows a horizontal and vertical guide.
To reposition a guide
• In the Tools palette, click the Move tool • Drag the guide to any point in the document
To remove all guides
• Choose Main Window menu -> View -> Clear Guides
The Grid
Artweaver provides a grid to help you in laying down brush strokes or creating shapes. You can set the size and color of the grid.
© 2002-2017 Boris Eyrich Software. All rights reserved. Page 17 of 104

Artweaver 6 Help
Preferences Guides & grid.
To display or hide the grid
• Choose Main Window menu -> View -> Show Grid or Hide Grid
To set grid options
• Choose Main Window menu -> Edit -> Preferences • Choose in the Preferences dialog box Guides & grid • Click the Grid color field to set the color of the grid lines • Enter a value for the Grid size
The Perspective Grid
A perspective grid helps you to create three-dimensional images. Perspective grid is a non printing array of lines that converge at a single vanishing point. You can set the type, line color, and spacing of the perspective grid. You can also modify the location of the vertical plane and horizon line by using the Perspective Grid tool. Any perspective grid that you create or modify can also be opened for use in another drawing.
© 2002-2017 Boris Eyrich Software. All rights reserved. Page 18 of 104

Artweaver 6 Help
Use perspective grid lines to help you create 3D images.
To display or hide the default perspective grid
• With an image open, click the following form the Main Window menu: View -> Show Perspective Grid or Hide Perspective Grid
To create a new perspective grid
• In the Tools palette, click the Perspective Grid tool • On the property bar , enable the check boxes corresponding the grids you want to see• Choose a color for the horizontal and vertical grid lines in the Horizontal Grid Color box
and Vertical Grid Color box• Enter a value in the Spacing box• On the property bar, click the Save Grid button• In the Save Grid dialog box, enter a name in the Name box
To open a perspective grid
• In the Tools palette, click the Perspective Grid tool • On the property bar, choose a grid from the Presets box
© 2002-2017 Boris Eyrich Software. All rights reserved. Page 19 of 104

Artweaver 6 Help
To remove a grid preset
• In the Tools palette, click the Perspective Grid tool • On the property bar, choose a grid from the Presets box• Click on the Delete Grid button
To adjust the perspective grid lines
• Choose Main Window menu -> View -> Show Perspective Grid • In the Tools palette, click the Perspective Grid tool • To move the horizontal plane grid, hold the cursor over the nearest edge of the horizontal
grid. The cursor becomes a double-pointed arrow• Drag to move the horizontal plane grid up or down• To move the vertical plane grid, hold the cursor over the nearest edge of the vertical grid.
The cursor becomes a double-pointed arrow• Drag to move the vertical plane grid left or right
2.5 Plug-Ins
Plug-Ins are software modules that extend the capabilities of Artweaver. Many Plug-Ins come with Artweaver. Other Plug-Ins are available from third-party software developers.
Artweaver uses the following types of Plug-Ins
• Effects filters offer special effects for raster images. You can access available filters from the Filters menu
• File format Plug-Ins extend the support for opening and/or saving different image formats• Import Plug-Ins support acquisition of images through external devices (such as
scanners and digital cameras) and file formats not built into the application• Export Plug-Ins export image data and support special output devices
Installing Plug-Ins
All Plug-Ins must reside in the Artweaver Plug-In folder.
To install new Plug-Ins
• Follow the installation instructions provided by the Plug-In manufacturer• If you installed the Plug-In in the Artweaver Plug-In folder, Artweaver automatically loads
the Plug-In during startup
© 2002-2017 Boris Eyrich Software. All rights reserved. Page 20 of 104

Artweaver 6 Help
• If Artweaver is running, restart it to activate the new Plug-In
Working with Third-party Plug-ins
Artweaver supports besides the own format additionally Plug-Ins in the Photoshop© format which are offered by many third-party software developers.
This feature is only available in Plus version.
Preferences Plug-Ins.
To use Photoshop© compatible Plug-Ins
• Follow the installation instructions provided by the Plug-In manufacturer• Choose Edit menu -> Preferences -> Plug-Ins • Click on the ... button besides the Folder field• In the Search folder dialog box, choose a drive / folder• Click on OK • Restart Artweaver to activate the new Plug-Ins
2.6 Pen Tablet Support
Artweaver supports Pen Tablets, incl. pressure sensitive pens through the Wintab interface.
© 2002-2017 Boris Eyrich Software. All rights reserved. Page 21 of 104

Artweaver 6 Help
Pen Calibration
You can individually adjust the pressure of your pen to your own needs.
Preferences Pen Calibration.
To adjust pen pressure to your own needs
• Choose Main Window menu -> Edit -> Preferences • Choose in the Preferences dialog box Pen calibration • Enter a value for the Maximum pressure and Minimum pressure for the pen• Enter a value for the Pressure distribution for the pen
Expression
Settings you make in the tab Advanced of the Brush palette allow you to tie brush features like Opacity, Grain, Angle, Size, Jitter, Feature, Stamp and Flow to pen data, such as Speed, Direction and Pressure.
Using Multiple Pens (only Wacom® Intuos)
All Intuos pens feature ToolID, which allows you to configure and work with multiple pens during an Artweaver session.
© 2002-2017 Boris Eyrich Software. All rights reserved. Page 22 of 104

Artweaver 6 Help
This feature is only available in Plus version.
2.7 Customize Keyboard Shortcuts
Artweaver lets you assign commands to keys on your keyboard. This saves you time by giving you immediate keyboard access to your favorite commands. Along with character, numeric, function, and modifier keys, you can also use Tab, Backspace, Windows, Delete, Insert, Home, End, Page Up, Page Down, Up Arrow, Down Arrow, Left Arrow, Right Arrow, and Spacebar.
You can also create a collection of keyboard shortcuts, or shortcut sets, based on changes to the default shortcut set. For easy reference, you can generate an HTML summary of a shortcut set.
This feature is only available in Plus version.
Keyboard Shortcuts Dialog.
© 2002-2017 Boris Eyrich Software. All rights reserved. Page 23 of 104

Artweaver 6 Help
To assign commands to keys
• Choose Edit menu -> Keyboard Shortcuts • Choose one of the following from the Shortcuts for menu:
• Application menus to create or modify menu bar command shortcuts• Tools to create or modify tools shortcuts• Misc to create or modify non-menu or non-tool command shortcuts
• Choose a command from the list, and type the shortcut keys you want to assign
If the shortcut you assigned is already in use, a message appears below the commands
list.
To revert keyboard shortcuts
• Choose a command from the list• Click on the Delete shortcut button
To create a custom shortcut set
• Click on the Save set button• In the Save Set dialog box, type a name for the shortcut set• Click on OK
To create an HTML summary of active shortcuts
• Click on the Export button• In the Save Keyboard Shortcuts dialog box, type a name for the summary• Click on Save
2.8 Customize Performance
Memory Preferences
You can change the percentage of memory usage dedicated to Artweaver, which is set to 75% by default. You can dedicate as much as 100% of memory to Artweaver. The lowest percentage you can choose is 10%. You can also choose the scratch disk that Artweaver uses to store its temporary file and to access virtual memory.
This feature is only available in Plus version.
© 2002-2017 Boris Eyrich Software. All rights reserved. Page 24 of 104

Artweaver 6 Help
Preferences Performance.
To set memory usage
• Choose Edit menu -> Preferences -> Performance • Type a number in the Memory usage box
To choose a scratch disk
• Choose Edit menu -> Preferences -> Performance • Click on the ... button besides the Temp directory field • In the Search folder dialog box, choose a drive / folder • Click on OK
Undo Preferences
Multiple Undo allows you to undo and redo up to 100 levels of changes. Artweaver sets 20 levels as the default.
Multiple Undo can use a significant amount of memory. If you perform multiple operations on the entire image, the whole image must be saved for each Undo step.
© 2002-2017 Boris Eyrich Software. All rights reserved. Page 25 of 104

Artweaver 6 Help
To set Undo levels
• Choose Edit menu -> Preferences -> Performance • Enter a number between 1 and 100 in the History states box
2.9 Manage Languages
Artweaver contains an extensive localization systems which allows to translate the whole application interface and all preset names into a specific language. Those translations are provided through single language files for each language which can be easily activated in the Artweaver preferences.
Preferences Language.
Artweaver includes only a few languages in the default setup but more translations can be downloaded from the Artweaver website.
All translations except of English and German are created by Artweaver users. Boris
Eyrich Software does not guarantee for completeness, actually and quality of those translations.
To change the current application language
• Choose Edit menu -> Preferences -> Language • Select the desired language• Click on Apply
© 2002-2017 Boris Eyrich Software. All rights reserved. Page 26 of 104

Artweaver 6 Help
You need to restart Artweaver to use the selected language.
To install a new language files
• Copy the new language file into the Artweaver language files folder• Start Artweaver and choose Edit menu -> Preferences -> Language • Select the copied language• Click on Apply • Restart Artweaver to use the selected language
The Artweaver language files folder is located inside the Artweaver application folder (for
example C:\Program Files\Artweaver Plus 6\Languages\ or C:\Program Files (x86)\Artweaver Plus 6\Languages\).
2.10 Palettes
The interactive palettes in Artweaver let you access commands, controls, and settings.
You can set up the palette layout in Artweaver to best suit your working style. Palettes can be arranged in the application window to give you easy access to the tools and controls you use most often, and to maximize screen space. You can also group and reposition palettes according to your preferences, and you can dock them to the edges of the application window.
Showing and Hiding Palettes
You can show or hide a palette by choosing its name from the Window menu or by using the key combination shown on the Window menu.
To show or hide a palette
• Choose Window menu, and choose either Show [Palette name] or Hide [Palette name]
Use the keyboard shortcut shown in the Window menu for the palette you want to show or
hide.
You can also hide a palette by clicking the close box on the palette title bar.
© 2002-2017 Boris Eyrich Software. All rights reserved. Page 27 of 104

Artweaver 6 Help
To show or hide all palettes
• Choose Window menu > Show Palettes, or Hide Palettes
Using Palette Menus
Most palettes in Artweaver contain menus from which you can access a series of palette-specific commands.
To access the commands on a palette menu
• Click the palette menu symbol
Docking Palettes
If you need some room on your screen, but don’t want to hide or group palettes, you can save valuable screen space by docking palettes. This handy feature of Artweaver lets them be docked close to the left or right edge of the application window. In addition to tidying up your workspace, this feature can help keep a palette from being covered up by another palette.
To dock a palette
• Drag the tab of the palette you want to dock to the left or right edge of the application window. The moved palette will snap into place
To undock a palette
• Drag the tab of the palette you want to undock to another location in the workspace
Saving and Restoring Palette Layout
You can drag a palette to any location that’s convenient for your work. Artweaver saves palette arrangements so that the next time you start the program, the workspace appears as you left it.
© 2002-2017 Boris Eyrich Software. All rights reserved. Page 28 of 104

Artweaver 6 Help
You can save several different palette layouts for future use, and you can later delete layouts. You can also return the palette layout to the Artweaver default.
To save a layout
• Arrange your palettes the way you want them saved• Choose Window menu -> Arrange Palettes -> Save Layout • In the Palette Layout dialog box, type a name in the Name box
To use a saved layout
• Choose Window menu -> Arrange Palettes -> [Name of Layout]
To delete a saved layout
• Choose Window menu -> Arrange Palettes -> Delete Layout • From the list, in the Delete Palette Layout dialog box, select the layout you want to delete• Click Delete
To return to the default palette layout
• Choose Window menu -> Arrange Palettes -> Default
2.11 Custom Palettes
To give you the freedom to work in your own style, Artweaver lets you create custom palettes that contain exactly the features you want. Because the features on a custom palette are immediately available, you can choose them with a single click. You can place brush variants, any tool and any menu command to a custom palette. You may want to create special palettes for a particular project or workflow that you use frequently. You can create a whole series of palettes and switch between them as you change projects or workflows. There is no limit on the number of custom palettes you can create. Artweaver saves them from session to session, so you can access the necessary tools immediately whenever you sit down to work.
Items that appear on a custom palette are references (aliases or shortcuts) to the original. This means that if you change the original — for example, by modifying and saving a brush variant — the custom palette button loads the newest version. However, if you delete the original, Artweaver won’t be able to find the item again to load on the custom palette. Custom palettes behave like the standard palettes.
© 2002-2017 Boris Eyrich Software. All rights reserved. Page 29 of 104

Artweaver 6 Help
This feature is only available in Plus version.
The Create Custom Palette Dialog.
To create a custom palette
• Choose Window menu -> Manage Custom Palettes • Click New • In the Custom Palette dialog box, choose a command for the custom palette• Click OK
To rename a custom palette
• Choose Palette Menu -> Rename palette • In the Rename Custom Palette dialog box, type a new name in the Name box
© 2002-2017 Boris Eyrich Software. All rights reserved. Page 30 of 104

Artweaver 6 Help
To add commands to a custom palette
• Choose Palette Menu -> Add command • In the Add Command dialog box, choose a new command for the custom palette• Click OK
To delete a command from a custom palette
• Choose Palette Menu -> Delete command
To delete a custom palette
• Choose Palette Menu -> Delete palette
You can add a brush variant to a custom palette with a double click on their symbol too.
3. Paper Textures
3.1 Paper Textures
In the real world, a marking tool has different results when applied to surfaces with different textures. Artweaver allows you to control the texture of the canvas to achieve the results you’d expect from natural media on a given surface..
You can use paper textures in many ways. Brushes interact with paper texture, just as natural tools react with the texture of the surfaces beneath them.
© 2002-2017 Boris Eyrich Software. All rights reserved. Page 31 of 104

Artweaver 6 Help
Most of the brushes interact with the current paper texture.
Choosing Paper Textures
The Paper palette is where all paper textures are stored. In addition to using it to select papers, you can use this palette to invert, resize and control brightness and contrast.
© 2002-2017 Boris Eyrich Software. All rights reserved. Page 32 of 104

Artweaver 6 Help
Paper palette.
To choose a paper texture
• Click the arrow next the paper texture preview . The Paper palette is expanded• Choose a paper texture from the Paper palette
Artweaver tiles the paper texture to cover as much canvas as needed.
Artweaver uses the currently selected texture. You can make a few strokes, and then
change the paper and make a few more strokes to get different results.
To capture paper texture
• Open or create an image• Select all or a piece of your image• Click the arrow next the paper texture preview . The Paper palette is expanded• Click the palette menu arrow , and choose Capture Paper • Type the name of your new texture, and click OK
© 2002-2017 Boris Eyrich Software. All rights reserved. Page 33 of 104

Artweaver 6 Help
To import paper texture
• Click the arrow next the paper texture preview . The Paper palette is expanded• Click the palette menu arrow , and choose Import Paper • Choose the file you want to import, and click on OK
To edit paper texture
• Click the arrow next the paper texture preview . The Paper palette is expanded• Click the palette menu arrow , and choose Edit Paper • Modify the image• Select all of your image• On the Paper palette, click the palette menu arrow , and choose Capture Paper • Type the name of your new texture, and click OK
Controlling Brightness and Contrast of Paper Texture
Brightness can be thought of as controlling the depth of the paper texture. Paper that is less bright acts as if the texture is shallow.
Contrast can be thought of as controlling the steepness of the paper texture. The texture in higher-contrast paper changes from high to low more quickly and with fewer intermediate levels than the texture in lower-contrast paper.
To change paper texture brightness
• Click the arrow next the paper texture preview . The Paper palette is expanded• Adjust the Brightness slider to modify the brightness of the paper texture
To change paper texture contrast
• Click the arrow next the paper texture preview . The Paper palette is expanded• Adjust the Contrast slider to modify the contrast of the paper texture
© 2002-2017 Boris Eyrich Software. All rights reserved. Page 34 of 104

Artweaver 6 Help
Inverting and Scaling Paper Textures
Think of paper texture as a three-dimensional landscape. Usually, brushes react to paper texture by coloring peaks and ignoring valleys. You can enable the Invert Paper option to make color fill the valleys instead of the peaks. You can also adjust the paper texture scale to resize the paper texture. Scaling texture affects how the texture appears in brush strokes and images.
To invert paper texture
• Click the arrow next the paper texture preview . The Paper palette is expanded• Activate the option Invert Paper
Two brush strokes overlapping. The blue one was painted with the texture inverted.
To change paper texture scale
• Click the arrow next the paper texture preview . The Paper palette is expanded• Use the Scale slider to resize the paper texture
Scaling large textures can use a great deal of RAM. Most textures are from 50 to 400
pixels square at 100% scaling.
Brush strokes on paper textures with different scale values.
© 2002-2017 Boris Eyrich Software. All rights reserved. Page 35 of 104

Artweaver 6 Help
4. Color
4.1 Color
You can select colors in several ways. You can use:
• The color squares on the Color palette• The Dropper tool , which samples color from the image• The Use Clone Color setting , which pulls color from a source• The Color Sets palette
The Color palette.
Changing the Paper Color
You can change a document’s paper color, thus the color of the background canvas, at any time. This color appears when you delete a filled area or use a brush from the Erasers category to remove color.
© 2002-2017 Boris Eyrich Software. All rights reserved. Page 36 of 104

Artweaver 6 Help
An example of changing the paper color.
To display the Color palette
• Choose Main Window menu -> Window -> Show Color
To change the existing paper color
• Choose a foreground color from the Color palette• Choose Main Window menu -> Image -> Set Paper Color • To expose the new paper color, do one of the following:
• Make a selection, and cut or delete it• Use a brush from the Erasers category and erase part of your image
Using the Color Palette
The Color palette displays the Hue Ring and the Saturation/Value Triangle.
© 2002-2017 Boris Eyrich Software. All rights reserved. Page 37 of 104
Artweaver 6 Help
Hue Ring and Saturation/Value Triangle.
• Values span the triangle from top to bottom, with the top of the triangle being the highest value (white) and the bottom being the lowest value (black)
• Saturation levels go from left to right. Dragging or clicking to the right produces the purest color within the predominant hue. Dragging or clicking to the left reduces the level of color saturation, producing “muddier” or grayer colors
To choose a hue and color from the Color palette
• Drag the circle on the Hue Ring to select the predominant hue. The Saturation/Value Triangle displays all available colors within that selected hue
• Select a color on the Saturation/Value Triangle by dragging the circle or by clicking the color you want
You can also select a hue by clicking once anywhere on the Hue Ring.
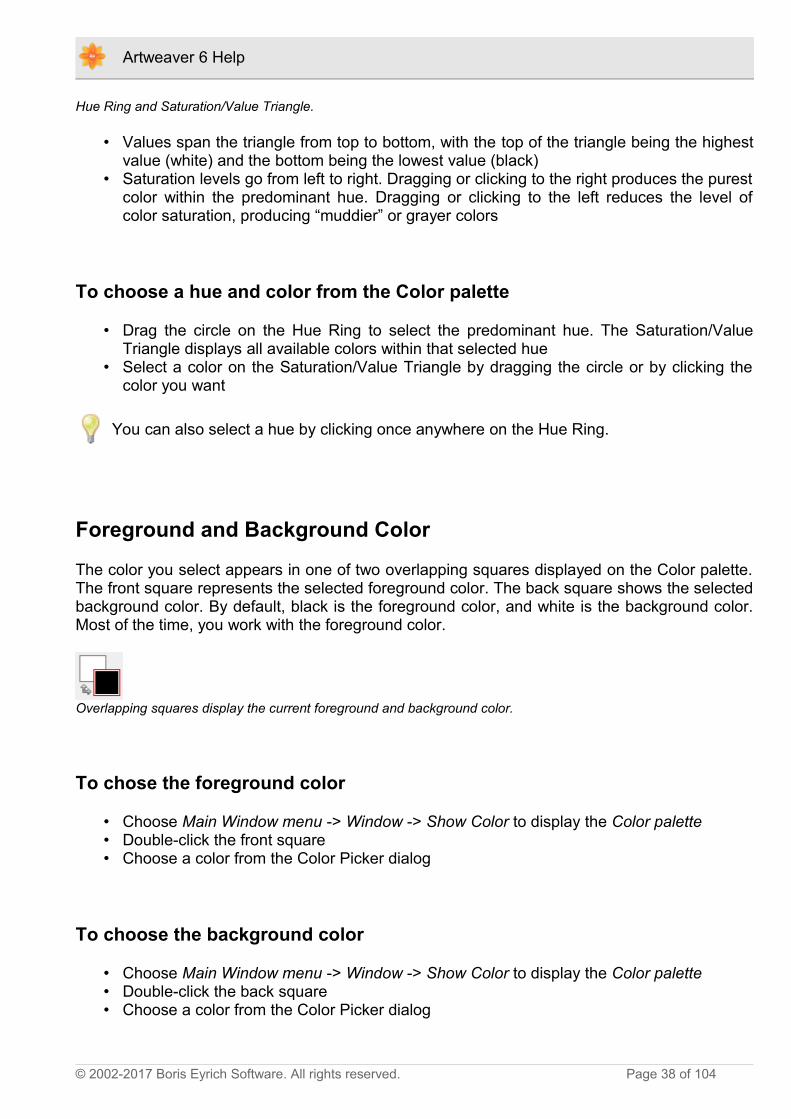
Foreground and Background Color
The color you select appears in one of two overlapping squares displayed on the Color palette. The front square represents the selected foreground color. The back square shows the selected background color. By default, black is the foreground color, and white is the background color. Most of the time, you work with the foreground color.
Overlapping squares display the current foreground and background color.
To chose the foreground color
• Choose Main Window menu -> Window -> Show Color to display the Color palette • Double-click the front square• Choose a color from the Color Picker dialog
To choose the background color
• Choose Main Window menu -> Window -> Show Color to display the Color palette • Double-click the back square• Choose a color from the Color Picker dialog
© 2002-2017 Boris Eyrich Software. All rights reserved. Page 38 of 104

Artweaver 6 Help
To swap foreground and background colors
• Click the Color Swap Icon
on the keyboard.
Sampling Colors from Images
In addition to choosing colors on the Color palette, you can use the Dropper tool to select, or pick up a color from an existing image.
To use the Dropper Tool
• Click the front or back square to select a foreground or background color• In the Tools palette, click the Dropper tool • Move the cursor to the cursor you want to pick up, and click it
The Dropper tool picks up visible color only; it cannot be used to select a hidden color.
You can quickly access the Dropper tool on the keyboard.
To access the Dropper tool from other tools
• on the keyboard
Cloning Color
The Clone Color option offers another way to choose color. This feature lets the brush pick up dabs of color from an original (source) image. This produces realistic results.
To set up a clone source
• Choose Main Window menu -> File -> Open , and choose the file you want to use as a clone source
© 2002-2017 Boris Eyrich Software. All rights reserved. Page 39 of 104

Artweaver 6 Help
• Choose Main Window menu -> File -> Clone • Choose Main Window menu -> Select -> All on the keyboard• Now you can work in the new file, taking data from the original source file
To use clone colors
• Set up a clone source. If you don't set a file, the first opened file is used• Choose a brush from the Brush Selector• Choose Main Window menu -> Window -> Show Color to display the Color palette• Click the Clone Color button on the Color palette• When you paint in the clone file, the colors from the clone source image are used
Enabling the Clone Color option disables the Color palette. This is a reminder that your
color information is coming from the clone source.
4.2 Color Sets
You can organize groups of colors in the Color Set palette and choose one by clicking a color. Only one color set can be open at a time, but you can easily load a different set.
The Color Set Palette.
To display the Color Set palette
• Choose Main Window menu -> Window -> Show Color Set
© 2002-2017 Boris Eyrich Software. All rights reserved. Page 40 of 104

Artweaver 6 Help
To choose a color from a color set
• On the Color Set palette, click a color
To open a color set
• On the Color Set palette, click the palette menu arrow and choose one of the following:
• Load Color Set add new colors to the current Color Set. Select a Color Set you want to use, and click Open
• Replace Color Set replaces the current Color Set with a new Color Set. Select a Color Set you want to use, and click Open
• Click a Color Set file and choose if the current Color Set should be replaced or new colors should be added
To save a color set
• On the Color Set palette, click the palette menu arrow and choose Save Color Set • Enter a name for the Color Set in the Filename box • Click Save.
You can save a Color Set everywhere. If you save a Color Set in the Artweaver
Standard\Color Sets directory, Artweaver loads all Color Sets in this directory and show their names in the Color Set palette.
To revert to the default color set
• On the Color Set palette, click the palette menu arrow and choose Reset Color Set • Click Yes.
Customize Color Set Layouts
You can determine the size of color swatches into three different sizes.
To adjust color swatch size
• On the Color Set palette, click the palette menu arrow and choose Palette Options
© 2002-2017 Boris Eyrich Software. All rights reserved. Page 41 of 104

Artweaver 6 Help
• Choose a color swatch size and click OK
Creating Color Sets
You can create your own color sets to control the colors in particular projects or to create groups of favorite painting colors.
You can create color sets from:
• An Image• A selection on an image• A layer
Before you create a new color set, you may be prompted to save the current color set.
To create a color set form an image, selection, or layer
• On the Color Set palette, click the palette menu arrow and choose one of the following:
• New Color Set from Image is available only if you have an image open. A color set appears, containing all the colors in the image
• New Color Set from Layer is available only if an active layer is selected in your image. A color set appears, containing all the colors in the active layer
• New Color Set from Selection is active only if you have an active selection on your image. A color set appears, containing all the colors in the selected area of the image
Editing Color Sets
You can customize color sets by adding, or deleting colors. You can also append colors to a color set.
To add a color
• Choose the color you want to add from the Color palette, a color set, or an existing image• On the Color Set palette, click the Add Color button • Repeat this procedure for all colors you want to add
© 2002-2017 Boris Eyrich Software. All rights reserved. Page 42 of 104

Artweaver 6 Help
To delete a color
• Choose Main Window menu -> Window -> Show Color Set • On the Color Set palette, click the Delete Color button • The last color will be deleted in the current color set
To append colors to a color set
• On the Color Set palette, click the palette menu arrow and choose Load Color Set • Select the Color Set you want to use, and click Open
4.3 Color Variability
Color variability allows you to create brush strokes of more than one color. Variability can be used to enhance the Natural-Media appearance of your work. Color variability can be set for HSL or RGB mode, and it can be based on the current gradient or color set.
Color Variability.
To display the option Color Variability
• Choose Main Window menu -> Window -> Show Brush • On the Brush palette, click the tab Advanced
To set color variability in HSL mode
• On the Color palette, choose a foreground color • Display the option Color Variability • Choose in the Color Variability box In HSL • Adjust the Hue (±H), Saturation (±S), and Luminance (±L) sliders to control hue,
saturation, and luminance ranges for color variability • Moving the Hue (±H) slider to the right increases the number of hues in the
resulting brush stroke. These colors are the ones adjacent to the selected color on the color wheel
• Moving the Saturation (±S) slider to the right increases variability in the color intensity of the brush stroke
• Moving the Luminance (±L) slider to the right increases variability in the brightness
© 2002-2017 Boris Eyrich Software. All rights reserved. Page 43 of 104

Artweaver 6 Help
of the brush stroke
When you save a brush variant, the current color variability setting is also saved.
To set color variability in RGB mode
• On the Color palette, choose a foreground color• Display the option Color Variability• Choose in the Color Variability box In RGB • Move the ±R (Red), ±G (Green), and ±B (Blue) sliders to control color variability of red,
green, and blue values
To set color variability based on the current color set
• On the Color palette, choose a foreground color• Display the option Color Variability• Choose in the Color Variability box From Color Set • Color variability is now based on random colors from the current color set
To set color variability based on the current gradient
• On the Color palette, choose a foreground color• Display the option Color Variability• Choose in the Color Variability box From Gradient • Color variability is now based on random colors from the current gradient
4.4 Gradients
A gradient is a gradual transformation from one color into another. Sometimes gradients are called blends or fountains. Artweaver provides several different types of gradients: linear, radial, square, bilinear, spiral, and conical.
Left to right: linear, radial, square, bilinear, spiral, and conical gradients.
© 2002-2017 Boris Eyrich Software. All rights reserved. Page 44 of 104

Artweaver 6 Help
You can use gradients to:
• Fill an image or layer• Express the gradient in an existing image by mapping gradient colors to image luminance• Paint with gradient in conjunction with Color Variability
The Gradient palette.
To select a gradient
• Click the arrow next the gradient preview . The Gradient palette is expanded• Choose a gradient from the Gradient Palette• Click one of the gradient types on the top of the Gradient palette: Linear Gradient, Radial
Gradient, Square Gradient, Bilinear Gradient, Spiral Gradient, and Conical Gradient• The Gradient Preview Window shows how current settings affect a selected gradient
To change gradient angle
• Click the arrow next the gradient preview . The Gradient palette is expanded• Drag the red ball in the Gradient Angle Ring, or click once anywhere on the ring to
change the gradient angle• A corresponding numeric value appears below the Gradient Preview Window
Creating and Editing Gradients
You can create very simple to very complex gradients. For a simple two-point gradient, you only need to choose a foreground and an background color. For more complex gradients, you can use the Edit Gradient dialog box or capture gradients from existing artwork. Color Segments in
© 2002-2017 Boris Eyrich Software. All rights reserved. Page 45 of 104

Artweaver 6 Help
the Edit Gradient dialog box specify the point at which a new gradient starts.
Edit Gradient dialog box.
To create a two-point gradient
• Choose Main Window menu -> Window -> Show Color • On the Color palette, click the Foreground Color square, and choose a foreground color• Click the Background Color square, and choose a background color• Click the arrow next the gradient preview . The Gradient palette is expanded• Choose Two-Point gradient.
To edit or create a complex gradient
• Click the arrow next the gradient preview . The Gradient palette is expanded• Click the palette menu arrow , and choose Edit Gradient • The color ramp bar across the top of the Edit Gradient dialog box displays the current
gradient. The colored squares along the bottom of the color ramp bar are color segments. You can position these segments to change the color of the blend at individual gradient points
• Click a color segment to select it • Click the Segment Color square, and choose a segment color• Repeat both prior steps for each color segment you want to edit
To add color segments
• Click the arrow next the gradient preview . The Gradient palette is expanded• Click the palette menu arrow , and choose Edit Gradient
© 2002-2017 Boris Eyrich Software. All rights reserved. Page 46 of 104

Artweaver 6 Help
• In the Edit Gradient dialog box, click anywhere below the color ramp bar. The color segment is added
• Click the new color segment to select it• Click the Segment Color square, and choose a segment color
To delete color segments
• Click the arrow next the gradient preview . The Gradient palette is expanded• Click the palette menu arrow , and choose Edit Gradient • Click a color segment to select it• on the keyboard to delete the color segment
For a two-point gradient, you set a color for the right color segment and then set a color for
the left color segment.
To save a gradient
• Click the arrow next the gradient preview . The Gradient palette is expanded• Click the palette menu arrow , and choose Save Gradient • In the Save Gradient dialog box, enter a name for the gradient
Changing Gradient Color Hue
Color hue is represented in the Edit Gradient dialog box by circles located at the midpoints between the adjacent color segments. They allow you to change the hue of the blend within that segment.
To change the color hue
• Click the arrow next the gradient preview . The Gradient palette is expanded• Click the palette menu arrow , and choose Edit Gradient • Drag one of the circles below the color ramp bar to change the color hue
Capturing a Gradient from an Image
You can use any existing image as a source for creating new gradients.
© 2002-2017 Boris Eyrich Software. All rights reserved. Page 47 of 104

Artweaver 6 Help
To capture a gradient
• Select a area, making the selection as narrow as possible. Artweaver uses the first row starting at the upper left for the gradient
• Click the arrow next the gradient preview . The Gradient palette is expanded• Click the palette menu arrow , and choose Capture Gradient • In the Save Gradient dialog box, type a name for the gradient
Mapping a Gradient to Luminance in a Image
You can map a gradient to an existing image, replacing an image’s colors with those of the gradient. This effect applies gradient colors to the pixels of the image, based on their luminance values.
Map Gradient.
To map a gradient in an image
• Open the image you want to use• Click the arrow next the gradient preview . The Gradient palette is expanded• Click the palette menu arrow , and choose Map Gradient
5. Painting
5.1 Painting
Artweaver lets you draw and paint as you might with real artist’s tools and media. Thereby an infinite variety of marks are possible.
The Brush tool offers users a wide range of preset painting and drawing tools called brush variants. Brush variants are organized into categories, such as Airbrushes, Calligraphy and
© 2002-2017 Boris Eyrich Software. All rights reserved. Page 48 of 104

Artweaver 6 Help
Pencils. They are designed with real media in mind, so you can select a tool with an expectation of how it will behave. The Brush palette lets you choose a category and brush variant quickly and easily.
The Brush palette lets you choose a brush variant from a category quickly and easily.
You can use the brush variants as they are, or you can adjust them to suit your purposes. If you want to make more extensive modifications to a brush or create a totally new brush variant, you can do just that by using the Brush palette.
Most brushes apply color to an image. Some brushes, however, do not apply color. Instead, they make changes to color already in the image. For example, the Smear brush variant (in the Smear brush category) smudges existing colors in the image with smooth strokes. Using one of these brushes on a blank area of the canvas has no effect.
Selecting a Brush
On the Brush palette, you can choose from brush variants that are arranged in recognizable categories. Those brushes are built to emulate Natural-Media tools, which lets you select a tool with a reasonable expectation of how it will behave.
© 2002-2017 Boris Eyrich Software. All rights reserved. Page 49 of 104

Artweaver 6 Help
Brush selector.
To display the Brush palette
• Choose Main Window menu -> Window -> Show Brush
To choose a brush
• Choose Main Window menu -> Window -> Show Brush to display the Brush palette • Click the arrow next the brush preview . The Brush selector is expanded• Choose a brush category and variant from the Brush selector
You can also choose a brush on the property bar of the Brush tool
© 2002-2017 Boris Eyrich Software. All rights reserved. Page 50 of 104

Artweaver 6 Help
Choosing Brush Settings
Basic brush controls for size, opacity, and grain are located on the property bar. The property bar may also contain additional controls for the selected brush category, such as resaturation, bleed, and jitter .
When a brush is selected and positioned over the canvas, the cursor changes, by default, into a ghost of the brush (mirroring size and shape) so you can see the area that you’re about to paint. This ghost brush provides a handy way to see if a change in size is required.
The Brush palette contains other controls, depending on the selected variant. The Brush palette offers more sophisticated controls for resizing and shaping brushes, including a Minimum Size setting. When a brush takes advantage of the Minimum Size setting, you’ll see strokes taper and widen as pen pressure or direction is varied.
To set brush size
• In the Tools palette, click the Brush tool • Choose a brush from the Brush palette• On the property bar, type a value in the Size box, or adjust the slider
To use the resize shortcut
• Hold down on the keyboard• With the Brush tool, drag in the image window• A circle representing the brush size is displayed beside the pointer. When the circle is the
size you want, release the mouse button
Adjusting Opacity and Grain
The Opacity slider controls the degree to which a stroke covers or builds up on the underlying pixels.
© 2002-2017 Boris Eyrich Software. All rights reserved. Page 51 of 104

Artweaver 6 Help
100 % opacity (top) and 30 % opacity (bottom).
The Grain slider controls how much color penetrates into the paper texture. Lower settings show less of the paper texture.
30 % grain (top) and 100 % grain (bottom).
To set opacity
• In the Tools palette, click the Brush tool • Choose a brush from the Brush palette• On the property bar, type a percentage in the Opacity box, or adjust the slider
When Opacity setting is low, the applied color is thin, allowing you to see through to the
underlying colors. When the setting is high, the applied color covers underlying pixels more completely.
To set grain
• On the property bar, type a percentage in the Grain box, or adjust the slider• Move the slider to the right to reduce penetration and reveal more paper texture. Move it
to the left to increase penetration and reveal less paper texture
For Imagestamp brushes, Grain controls the mixture with the background color. For other
brushes, such as airbrushes, the Grain slider is not available.
© 2002-2017 Boris Eyrich Software. All rights reserved. Page 52 of 104

Artweaver 6 Help
5.2 Exploring Painting
You can paint on the canvas or on a layer above the canvas. When you select a layer on the Layer palette, that layer becomes the target for your brush strokes. When you have an active selection, painting is confined to the selection.
You mark the canvas by selecting the Brush tool and dragging in the document window with a brush variant that applies colors or images. Each time you drag, you create a brush stroke.
When you use complex brush variants, you may see a delay before the mark appears. When you experience a delay, you can queue up strokes, without losing any stroke data.
Freehand Drawing
You can draw freehand lines by using the Brush tool. The Brush tool can be selected in the Tools palette.
With the Brush tool, you drag to create strokes.
To draw freehand lines
• In the Tools palette, click the Brush tool • Choose a brush from the Brush palette• Drag on the canvas
to choose the Brush tool.
Undoing Strokes
If you apply a stroke, but want it to be less opaque or faded. You can use the Undo command to remove it. You can repeat the command to remove previous strokes.
© 2002-2017 Boris Eyrich Software. All rights reserved. Page 53 of 104

Artweaver 6 Help
To undo a stroke
• Choose Main Window menu -> Edit -> Undo
on the keyboard.
Letting Color Pool
The Brush tool allow color to build up or pool when you move a brush slowly. Pooling creates very realistic strokes, especially with airbrushes. You can also cause media to pool by simply touching and pausing with the selected brush. You can enable this feature in the Brush Palette.
To enable color pooling
• Choose Main Window menu -> Window -> Show Brush • On the Brush palette, click the tab General • Enable the Continuous Time Deposition check box
When the Continuous Time Deposition check box is disabled, you must move the brush
(even just slightly) to cause color to be deposited.
With an airbrush, paint pools when you pause a stroke for 4 seconds (left), 2 seconds (middle), and 1 second (right).
5.3 Mirror Painting
In Artweaver, you can create a symmetrical painting by using the Mirror Painting mode. When you enable the Mirror Painting mode, a plane appears in the drawing window that lets you paint one half of an object while Artweaver automatically replicates a mirror image of the opposing side of the object by reproducing the brushstrokes. For example, if you want to paint a symmetrical face, simply paint one half of the face and Artweaver automatically completes the other half.
When using the Mirror Painting mode, the brushstrokes that you apply on one side of the plane
© 2002-2017 Boris Eyrich Software. All rights reserved. Page 54 of 104

Artweaver 6 Help
may occasionally look different in the opposite plane. For example, if you start the Mirror Painting on a canvas that contains previously applied brushstrokes, the mirrored brushstrokes blend with the colors that are already on the canvas. In addition, if you’re applying randomized brushstrokes, such as a Imagestamp, the mirrored brushstrokes are also randomly applied.
The green line that displays in the middle of the document window represents the mirror plane.
You can display the mirror plane vertically, horizontally, or display both at the same time. You can also control the placement of the mirror plane in the drawing window by moving the plane.
This feature is only available in Plus version.
To create a mirror painting
• In the Tools palette, click the Mirror Painting tool • On the property bar, enable the Enabled check box• On the property bar, click any of the following buttons:
• Mirror vertical — positions the mirror plane vertically in the drawing window• Mirror horizontal — positions the mirror plane horizontally in the drawing
window
© 2002-2017 Boris Eyrich Software. All rights reserved. Page 55 of 104

Artweaver 6 Help
• Mirror vertical and horizontal — positions the mirror plane vertically and horizontally in the drawing window
• On the Brush Palette, choose a brush from the Brush selector • Apply a brushstroke on either side of the mirror plane
The Brush tool is the only tool that you can use to create mirror paintings. Other tools,
such as the Shape tool, are not supported.
To disable mirror painting mode
• In the Tools palette, click the Mirror Painting tool • On the property bar, disable the Enabled check box
To change the plane position
• In the Tools palette, click the Mirror Painting tool • Hover over the center point of the plane until the cursor changes into a four-headed
arrow, and then drag the plane to a new location in the drawing window
5.4 Working with Fill
Artweaver gives you many options for filling images with media. You can use a gradient, or color to fill an area of an image. You can also use the Paint Bucket tool to fill image areas based on pixel color.
To fill an area of an image
• Do one of the following: • If you want to fill only part of an image, select the area of the image you want to fill • If you want to fill the entire image, make sure there are no selections
• Choose Main Window menu -> Image -> Fill on the keyboard • In the Fill dialog box, enable one of the following filling options:
• Paper Color • Foreground Color • Background Color • Black • 50% Gray • White • Gradient
• Adjust the Opacity slider
© 2002-2017 Boris Eyrich Software. All rights reserved. Page 56 of 104

Artweaver 6 Help
Artweaver uses a color, or the current gradient. Before filling, choose the media you want
from the corresponding selector in the Brush palette.
Filling Images Based on Color
You can use the Paint Bucket tool to fill image areas based on pixel color. The areas are filled based on color boundaries and the current Tolerance setting.
Tolerance sets the amount of variance allowed from the color of the pixel you choose. With a low Tolerance setting, the Paint Bucket fills only pixels that are very close to your chosen pixel color. With a high Tolerance setting, the Paint Bucket fills a greater range of colors.
To fill an image based on color
• In the Tools palette, click the Paint Bucket tool • On the property bar, chose one of the following options form the Fill box:
• Paper Color , which fills with the paper color• Foreground Color, which fills with the current foreground color• Background Color, which fills with the current background color• Gradient , which fills with the current gradient
• Type a value in the Tolerance box, or adjust the slider, to specify the range of colors to be filled
• Click the area of the image you want to fill
If the result is not what you want, undo the fill, change the settings, and try again.
6. Brushes
6.1 Brush Palette
The Brush palette makes it easy to create brush variants. You can adjust brushes in many different ways. In fact, the default brush variants in the Brush Selector on the Brush palette are built with the same set of controls used to build every other variant. They have just been adjusted until the results emulate a real-life drawing tool.
Although these default brushes do excellent work, you will probably want to adapt them to your particular needs, refining them to fit your own style of working. You can change their Size, Shape, Angle, Spacing , and much more.
Changes you make to brush variants, including basic controls like Size and Opacity, are saved
© 2002-2017 Boris Eyrich Software. All rights reserved. Page 57 of 104

Artweaver 6 Help
until the Restore Default Variant command is selected.
When Artweaver starts, it references the folder Brushes in the user folder. Any
customizations made to brushes are saved to this folder and are referenced by Artweaver in place of the original default brushes and settings stored in the application folder.
Brush palette with active tab General (left), Brush palette with active tab Advanced (center) and Brush palette with active tab Impasto (right).
To display the Brush palette
• Choose Main Window menu -> Window -> Show Brush
To save current settings as a custom variant
• On the Brush palette, click the palette menu arrow and choose Save Variant • In the Save Variant dialog box, type a name for the new variant• Click OK
To save current settings as a default variant
• On the Brush palette, click the palette menu arrow and choose Set Default Variant
© 2002-2017 Boris Eyrich Software. All rights reserved. Page 58 of 104

Artweaver 6 Help
To return the current brush variant to default settings
• On the Brush palette, click the palette menu arrow and choose Restore Default Variant
To return all brush variants to default settings
• On the Brush palette, click the palette menu arrow and choose Restore All Default Variants
Please note, that with the command Restore All Default Variants all custom brush settings
are lost.
6.2 Adjusting and Editing Brushes
You can access settings and controls on the Brush palette to modify and customize brush variants.
Brush Types
Brush Types are methods of media application.
To choose a brush type
• Choose Main Window menu -> Window -> Show Brush to display the Brush palette• On the Brush palette, click the tab General • Choose a brush from the Brush palette
Type Description
Circular Dabs are controlled by the sliders Size and Angle and have a circular look.
AirbrushCreates brushes that act like airbrushes. The Feature slider on the property bar controls the size of the individual droplets of media.
Pixel Airbrush Creates brushes that work like airbrushes. Brushes that use Pixel Airbrush cannot use the Feature slider to control the size of individual droplets of media.
Captured Shapes that you create and capture.
© 2002-2017 Boris Eyrich Software. All rights reserved. Page 59 of 104
Artweaver 6 Help
Imagestamp Uses one or more images as dab.
Pixel * Dabs are controlled by the slider Size and have a square look.
Hairy Brush * Creates brushes that act like hairy brushes. The Feature slider on the property bar controls the amount of the individual bristles.
* Only available in Plus version.
Methods and Categories
The brush method defines the most basic level of brush behavior and is the foundation on which all other brush variables build.
Because the method sets a brush variant’s most basic behavior, you can alter a variant’s behavior by changing its method.
Each method can have several variations, called method categories. These categories further refine the brush behavior. The following terms are used in describing most method categories:
• Soft methods produce strokes with feathered edges• Flat methods produce hard, aliased strokes with pixelated edges• Hard methods produce smooth strokes• Grainy methods produce brush strokes that react to paper texture
Combining a method with a method category results in a specific brush style that you can assign to a given brush.
To choose a method and category
• Choose Main Window menu -> Window -> Show Brush to display the Brush palette• On the Brush palette, click the tab General • Choose a method from the Method box• Choose a category from the Category box
Method Description
CoverThe Cover method produce brush strokes that cover underlying and the own strokes.
Soft Cover The Soft Cover method produce brush strokes that cover underlying strokes.
Buildup The Buildup method produce brush strokes that build toward black as you
© 2002-2017 Boris Eyrich Software. All rights reserved. Page 60 of 104

Artweaver 6 Help
overlay them.
EraserThe Eraser method erase the underlying colors, or replace the underlying colors by the paper color.
Smear The Smear method interact with the underlying colors to distort the image.
CloneThe Clone method take images from a clone source and re-create them in another location.
Colorize *The Colorize method produce brush strokes that are bounded by underlying colors.
Warp * The Warp method interact with the underlying colors to warp the image.
Other The Other method lighten, or darken the underlying colors, or apply effect filter.
* Only available in Plus version.
Size Controls
The Size slider determines the width of the brush stroke. The Minimum Size slider determines the minimum width of the brush stroke. You can use the Expressions settings to link Size to pen or mouse data.
The Brush Preview Window shows how your changes affect the brush.
To set brush size
• Choose Main Window menu -> Window -> Show Brush to display the Brush palette• On the Brush palette, click the tab General • Move the Size slider to the right to increase brush size, or to the left to reduce brush size
You can also set the brush size on the property bar.
To use the resize shortcut
• Hold down on the keyboard• With the Brush tool, drag in the image window• A circle representing the brush size is displayed beside the pointer. When the circle is the
size you want, release the mouse button
© 2002-2017 Boris Eyrich Software. All rights reserved. Page 61 of 104

Artweaver 6 Help
To set minimum size
• Choose Main Window menu -> Window -> Show Brush to display the Brush palette• On the Brush palette, click the tab General • Move the Minimum Size slider to the right to increase the minimum width of the brush
stroke. Move it to the left to reduce the minimum width
Opacity and Grain
The Opacity slider determines how the density of the media should be applied. It sets the maximum opacity of the selected brush. You can use the Expressions settings to link Opacity to pen or mouse data.
The Grain slider determines the maximum amount of paper texture that should reveal in a brush stroke. You can use the Expressions settings to link Grain to pen or mouse data. You can also use the paper’s brightness and contrast settings to control Grain interaction.
To set brush opacity
• Choose Main Window menu -> Window -> Show Brush to display the Brush palette • On the Brush palette, click the tab General • Move the Opacity slider to the left to reduce opacity, or to the right to increase opacity
To set brush grain
• Choose Main Window menu -> Window -> Show Property Bar to display the Property Bar • Move the Grain slider to the left to increase the penetration into the paper texture. Move it
to the right to reduce the penetration
Adjusting Paper Texture behavior
When you use a brush that interacts with paper texture, the results appear with each stroke. If you have a stylus and tablet, you can adjust paper texture by changing the stroke of the stylus on a pressure-sensitive tablet. In most cases, a light stroke colors only the peaks and ridges of the texture. A heavy stroke fills color deep into the pockets and valleys. You can also affect the brush interaction with paper texture by changing the brush grain settings.
By default, paper texture is fixed, which means that the texture is in the same position each time you apply a brushstroke. You can change this setting if you want texture to be applied
© 2002-2017 Boris Eyrich Software. All rights reserved. Page 62 of 104

Artweaver 6 Help
randomly.
This feature is only available in Plus version.
To randomize paper texture
• Choose Main Window menu -> Window -> Show Brush to display the Brush palette• On the Brush palette, click the palette menu arrow and choose Edit Brush • Choose in the Edit Brush dialog Grain • Enable the Randomize texture check box
Brush Tip Profiles
The brush tip, or profile, shows a cross-section of density distribution across the diameter of the dab.
Different media have different density distributions. Changes in the density distribution produce different marking qualities in a brush stroke.
The following brush tip profiles are available:
Medium Profile Has a wide area of greater density at the center, with rapid falloff to the edge.
Dull Profile Provides maximum density at the center, with high density weighting to the edge.
Linear Profile Provides maximum density at the center, with even falloff to the edge.
Watercolor Profile
Provides maximum density at the outer edge in a ringlike fashion, with medium internal density.
1-Pixel Edge 1-Pixel Edge provides maximum density throughout, with rapid falloff at the edge, producing a 1-pixel, anti-aliased edge.
Soft profile Provides maximum density at the center, with soft falloff to the edge.
Anti-aliasing
Artweaver can draw dabs in an anti-aliased fashion. This anti-aliasing gives brushes a smooth edge, as opposed to the jagged edges without anti-aliasing.
© 2002-2017 Boris Eyrich Software. All rights reserved. Page 63 of 104

Artweaver 6 Help
To enable drawing dabs in an anti-aliased fashion
• Choose Main Window menu -> Window -> Show Brush • On the Brush palette, click the tab General • Enable the Anti-aliased check box
Spacing Controls
When a brush is used, the stroke consists of a series of dabs. By adjusting the spacing between those dabs, you can control the continuity of the brush stroke.
The Spacing slider controls the distance between brush dabs in a stroke. Each dot or dash represents one brush dab.
Continuous Time Deposition controls whether you must move a brush before a medium is applied. With Continuous Time Deposition enabled, the medium begins flowing at the first touch.
When the Continuous Time Deposition check box is disabled, you must move the brush
(even just slightly) to cause color to be deposited.
To set brush spacing
• Choose Main Window menu -> Window -> Show Brush to display the Brush palette• On the Brush palette, click the tab General • Do one of the following:
• To increase the spacing between dabs, move the Spacing slider to the right bringing it closer to the size of the dab itself
• To decrease the distance between dabs, move the Spacing slider to the left until the dabs begin to overlap
To set Continuous Time Deposition
• Choose Main Window menu -> Window -> Show Brush to display the Brush palette• On the Brush palette, click the tab General • Enable the Continuous Time Deposition check box
© 2002-2017 Boris Eyrich Software. All rights reserved. Page 64 of 104

Artweaver 6 Help
Stroke Controls
The Smoothing slider allows you to soften the appearance of brushstrokes by adding additional points into dab paths which are used to replot brushstrokes.
You can also apply a merge mode to a brush variant to control how brushstrokes interact with the underlying colors within the currently selected layer or the canvas. This technique allows you to produce similar results to applying blend method to layers. In addition, it allows you to control where the effect is applied.
This feature is only available in Plus version.
To set smooth strokes
• Choose Main Window menu -> Window -> Show Brush to display the Brush palette• On the Brush palette, click the palette menu arrow and choose Edit Brush • Choose in the Edit Brush dialog Stroke • Move the Smoothing slider to the right to add points and even out jagged strokes. Move it
to the left to decrease the number of additional points
To apply a merge mode
• Choose Main Window menu -> Window -> Show Brush to display the Brush palette• On the Brush palette, click the palette menu arrow and choose Edit Brush • Choose in the Edit Brush dialog Stroke • From the Merge Mode list box, choose one of the merge modes• Move the Stroke Opacity slider
Merge Mode Description
Normal Edits or paints each pixel to make it the result color.
DarkenLooks at the color information in each channel and selects the base or blend color—whichever is darker—as the result color.
Multiply Looks at the color information in each channel and multiplies the base color by the blend color. The result color is always a darker color.
LightenLooks at the color information in each channel and selects the base or blend color—whichever is lighter—as the result color.
ScreenLooks at each channel’s color information and multiplies the inverse of the blend and base colors. The result color is always a lighter color.
Difference Looks at the color information in each channel and subtracts either the blend color
© 2002-2017 Boris Eyrich Software. All rights reserved. Page 65 of 104

Artweaver 6 Help
from the base color or the base color from the blend color, depending on which has the greater brightness value.
Exclusion Creates an effect similar to but lower in contrast than the Difference mode.
Color burn Looks at the color information in each channel and darkens the base color to reflect the blend color by increasing the contrast between the two.
Linear burn Looks at the color information in each channel and darkens the base color to reflect the blend color by decreasing the brightness.
Color dodge Looks at the color information in each channel and brightens the base color to reflect the blend color by decreasing contrast between the two.
Hard light Multiplies or screens the colors, depending on the blend color.
Soft light Darkens or lightens the colors, depending on the blend color.
Average Applies the Normal mode with 50% opacity.
Overlay Multiplies or screens the colors, depending on the base color.
Angle Controls
The Angle slider controls the angle of an elliptical brush and the length of the ellipse. You can use the Expressions settings to link Angle to pen or mouse data.
The Shape slider controls the shape of the brush. Squeezing a brush changes it from round to elliptical.
You can use the Angle and Shape controls with Circular, Captured and Imagestamp brush types.
This feature is only available in Plus version.
To set brush shape
• Choose Main Window menu -> Window -> Show Brush to display the Brush palette• On the Brush palette, click the palette menu arrow and choose Edit Brush • Choose in the Edit Brush dialog Size • Move the Shape slider to the left to make the brush more elliptical. Move it to the right to
make it rounder
© 2002-2017 Boris Eyrich Software. All rights reserved. Page 66 of 104

Artweaver 6 Help
To set angle for a elliptical brush
• Choose Main Window menu -> Window -> Show Brush to display the Brush palette• On the Brush palette, click the palette menu arrow and choose Edit Brush • Choose in the Edit Brush dialog Size • Move the Angle slider to the right to rotate the brush counterclockwise. Move the slider to
the left to rotate the brush clockwise
Color Controls
The Color controls determine how a brush conveys its medium (color) to the paper. You can choose from several preset to suit your needs.
Whether you are painting with a single color or blending two or more colors on a layer, the Pickup color from underlying layers option can help you produce brushstrokes without white fringes.
The Resaturation, Bleed, and Dryout controls work together to determine how much color a brush has at the start and finish of a stroke.
The Resaturation slider controls the amount of color that is replenished in a stroke. If it is set at zero, the brush does not produce any color.
The Bleed slider controls how much the brush colors smear underlying colors, including the paper color.
The Dryout control determines how quickly a brush runs out of medium. Dryout is measured in pixels.
To set resaturation
• Choose Main Window menu -> Window -> Show Property Bar to display the Property Bar • Move the Resaturation slider to the left to reduce the amount of color replenished in
stroke. Move it to the right to increase the amount of color
To set color bleed
• Choose Main Window menu -> Window -> Show Property Bar to display the Property Bar • Move the Bleed slider to the left to reduce the amount of interaction with underlying
pixels. Move it to the right to increase the interaction
© 2002-2017 Boris Eyrich Software. All rights reserved. Page 67 of 104

Artweaver 6 Help
To set brush dryout
• Choose Main Window menu -> Window -> Show Brush to display the Brush palette• On the Brush palette, click the tab Advanced • Move the Dryout slider to the left to shorten the distance the brush can move before it
dries out. Move it to the right to lengthen the distance
To choose pickup color from underlying layers
• Choose Main Window menu -> Window -> Show Brush to display the Brush palette• On the Brush palette, click the tab General • Enable the Pickup color from underlying layers check box
Color Variability Controls
Color Variability allows you to create brush strokes of more than one color. Variability can be used to enhance the Natural-Media appearance of your work For more information, see Color Variability .
Random Controls
The Jitter control introduces a randomized jitter to the brush stroke. Instead of appearing directly along the stroke, dabs appear randomly outside the brush stroke path.
To set brush Jitter
• Choose Main Window menu -> Window -> Show Property Bar to display the Property Bar • Move the Jitter slider to the left to decrease deviation from the stroke path, or to the right
to increase the deviation
Airbrush Controls
The Airbrush controls allow you to adjust the amount and the displacement of the media that is applied by an airbrush.
© 2002-2017 Boris Eyrich Software. All rights reserved. Page 68 of 104
Artweaver 6 Help
Feature lets you set the size of individual paint droplets.
Flow controls how much media is applied by an airbrush stroke. The Flow control acts like the needle control on a real airbrush. Because the airbrush dab types deposit many small dabs to create their spray-paint look, you might need to cut down on the flow to speed up the airbrush.
Pressure controls how fast the medium flows when Continuous Time Deposition is enabled.
You can also link an Expression setting to both the Flow and Feature controls. This lets you link the controls to a stylus or mouse movement.
To set Airbrush feature
• Choose Main Window menu -> Window -> Show Brush to display the Brush palette• On the Brush palette, click the tab General • Move the Feature slider to the left to reduce the size of individual paint droplets, or to the
right to increase it
To set ink flow
• Choose Main Window menu -> Window -> Show Brush to display the Brush palette• On the Brush palette, click the palette menu arrow and choose Edit Brush • Choose in the Edit Brush dialog Airbrush • Move the Flow slider to the left to reduce the smallest amount of media applied with a
stroke, or to the right to increase it
To set Airbrush pressure
• Choose Main Window menu -> Window -> Show Brush to display the Brush palette• On the Brush palette, click the palette menu arrow and choose Edit Brush • Choose in the Edit Brush dialog Airbrush • Move the Pressure slider to the left to reduce the smallest amount of media applied by
Continuous Time Deposition, or to the right to increase it
Continuous Time Deposition must be enabled to apply this option.
Expression Settings
You can control brush effects along the stroke based on a number of real-time input factors. You can use the Expression settings on the Brush palette to vary these effects.
© 2002-2017 Boris Eyrich Software. All rights reserved. Page 69 of 104

Artweaver 6 Help
To choose a Expression setting
• Choose Main Window menu -> Window -> Show Brush to display the Brush palette• On the Brush palette, click the tab Advanced • Choose a option from the Expression menu
Expression Description
None Applies no adjustment to the brush feature.
PressureAdjusts the brush feature based on pen pressure. Greater pressure increases the setting for that brush feature.
Random Adjusts the brush feature on a random basis.
Direction Adjusts the selected brush feature based on the direction of the stroke.
Sequential Increases the brush feature to maximum to begin again at minimum.
SpeedAdjusts the brush feature based on the dragging speed. Dragging quickly minimizes the setting; dragging more slowly increases it.
Growing Increases the brush feature to maximum.
Shrinking Decreases the brush feature to minimum.
6.3 Managing Brushes
After you have customized a variant, you can use it immediately. In fact, adjusting brushes as you paint is something you will probably do often. Changes you make to brush variants are saved until the Restore Default Variant command is selected.
Saving Brush Variants
If you want to keep a customized version of a brush variant, you can save it as a new variant.
To save current settings as a custom variant
• Choose Main Window menu -> Window -> Show Brush to display the Brush palette • On the Brush palette, click the palette menu arrow and choose Save Variant • In the Save Variant dialog box, type a name for the new variant • Click OK.
© 2002-2017 Boris Eyrich Software. All rights reserved. Page 70 of 104

Artweaver 6 Help
If you save a new brush variant, a new XML file is created in the Brushes folder.
To return the current brush variant to default settings
• Choose a brush variant from the Brush palette • On the Brush palette, click the palette menu arrow and choose Restore Default
Variant
To delete a brush variant
• Choose a brush variant from the Brush palette • On the Brush palette, click the palette menu arrow and choose Delete Variant • Click Yes to delete the variant
The variant’s related XML file is deleted from the Brushes folder.
Capturing Brushes
You can create your own brush shapes. Any shape is possible.
When you have created a shape you like, select and capture it.
© 2002-2017 Boris Eyrich Software. All rights reserved. Page 71 of 104

Artweaver 6 Help
To capture a brush shape
• On a white background, draw a brush shape in black. Use shades of gray to define what you wish to be partially transparent areas of the brush
• Select the brush shape • On the Brush palette, click the palette menu arrow and choose Capture Brush • Type a new name for the captured brush and click OK
You can paint with a captured brush just as you would with other brushes.
7. Impasto
7.1 Impasto
Impasto is the classic technique of applying thick paint on a canvas to create depth. In Artweaver, Impasto refers to the brush feature that allows brushes to paint with the illusion of depth. You can use different brushes to simulate different types of natural media, such as thick oil paint or chalk with texture.
To display or hide the Impasto Effect
• Choose Main Window menu -> View -> Show Impasto or Hide Impasto
To create an Impasto Effect
• Choose Main Window menu -> View -> Show Impasto • Choose Main Window menu -> Window -> Show Brush to display the Brush palette• On the Brush palette, click the tab Impasto • Choose a drawing method from the Draw To pop-up menu• Choose an application method from the Method pop-up menu• Adjust the Depth slider to set how much depth the brush applies• Adjust the Smoothing slider to set the transitions in the texture• Paint on the canvas or layer
The Smoothing slider controls how much a stroke interacts with other Impasto brush
strokes. When a stroke with a high Smoothing value encounters another Impasto stroke, it keeps the depth of the existing stroke. A low Smoothing value against replaces the depth of the existing stroke.
© 2002-2017 Boris Eyrich Software. All rights reserved. Page 72 of 104

Artweaver 6 Help
To adjust Draw To and Application Method
• Impasto has three methods for Draw To :• Color applies only color. You can set the color on the Color palette• Depth applies only depth to the image• Color and Depth applies both color and depth to the image
• You can choose from three depth methods:• Uniform applies depth evenly. Strokes have little texture• Erase levels the depth. If you’ve created texture strokes that you don’t like, you
can use this setting to remove them• Paper uses the current paper texture to control depth
Erase applies only to depth, not to color. With the Color and Depth Draw To method, the
Erase method removes depth while applying color. The amount of depth removed depends on the value of the Depth slider. If you want to remove the entire Impasto stroke, set Depth to 100.
To invert a Depth Method
• You can invert the depth method by using the Invert option. When a method is inverted, the negative of the source is used in the stroke
7.2 Adjusting Impasto Effect
Adjusting Surface Lighting
Lighting can be a big part of the overall depth effect that Impasto creates. Just as the right lighting can bring out the deep-textured look of a stroke, the wrong lighting can wash out the effect altogether. The Surface Lighting controls let you set up the position and attributes of the light source that shine on your Impasto brush strokes. These controls are global — they affect all the Impasto brush strokes.
Setting Light Position
The lighting sphere shows all of the possible surface angles. The light indicator on the sphere shows the current position of the light source.
The lighting sphere.
© 2002-2017 Boris Eyrich Software. All rights reserved. Page 73 of 104

Artweaver 6 Help
Setting Light Properties
• The Exposure slider globally adjusts the overall lighting amount from darkest to brightest
Adjusting Depth
You can control the appearance of depth using the Amount and Shine settings. At any time, you can change these settings to produce different texture effects.
Adjustments affect the entire document. To change the depth of individual brush strokes, you can vary stylus settings or build up media.
• The Amount setting affects the thickness of the entire document. It does not affect individual brush strokes, nor does it affect other Impasto strokes
• The Shine setting controls how much highlight appears on the surface of strokes
8. Cloning
8.1 Cloning Images
Painting with a clone brush is similar to painting with any tool, except that clone brush variants take their color information from a clone source instead of from the Color palette.
Painting in the Clone
When you paint with a clone brush, it picks up color from the clone source while you control the size and direction of brush strokes.
A sample of painting with clone brush variants.
© 2002-2017 Boris Eyrich Software. All rights reserved. Page 74 of 104

Artweaver 6 Help
To paint with clone brushes
• Create a clone of the document you wish to paint• With the clone selected, choose Main Window menu -> Select -> All • on the keyboard to clear the entire canvas• Choose Main Window menu -> Select -> Deselect • Choose a clone brush variant from the Brush palette• Paint in the image
If you don’t set a clone source, clone brushes paint with imagery from the first opened
image.
To set a clone source
• Choose Main Window menu -> File -> Clone Source , and choose the image you want to reference
To change to a crosshair cursor
• Choose Main Window menu -> Edit -> Preferences • Choose in the Preferences dialog box Painting • Enable the Indicate Clone Source with Crosshairs while Cloning option
The crosshairs indicate which area of the original image you are cloning as you paint.
8.2 Turning Brushes into Cloners
Artweaver offers two ways to use other brushes as Cloners:
• The Clone Color button• The Clone Method
Using Clone Color
You can turn almost any brush into a cloner with the Clone Color button. The Clone Color button causes a brush to pick up color from the source image while staying true to its own stroke nature.
© 2002-2017 Boris Eyrich Software. All rights reserved. Page 75 of 104

Artweaver 6 Help
To use Clone Color
• Choose Main Window menu -> Window -> Show Color to display the Color palette• Click the Clone Color button on the Color palette
If you change brushes while cloning images, you must click the Clone Color button
again.
Choosing a Clone Method
You can turn almost any brush into a clone variant by setting its method to Clone on the Brush palette and choosing the Clone method category appropriate to the intended media style.
Because the clone methods use a full set of pixels from the original document for each brush, you get a truer copy of the original than you might by using the Clone Color option. Unlike the Clone Color option, the clone methods preserve the original image texture in the clone.
To choose a clone method
• Choose Main Window menu -> Window -> Show Brush to display the Brush palette• On the Brush palette, click the tab General • Choose from the Method box Clone • Choose from the Category box a category appropriate to the intended media style
9. Selections
9.1 Selections
A variety of tools and commands for creating selection in a document are available. Each time you create a new selection, the old one is deactivated.
You can use selections in several ways:
• To constrain brush strokes • To isolate an area of the canvas for applying an image effect • To choose the area of the canvas you want to cut or copy
You can save and reload selections. Loading a selection reactivates it on the canvas.
© 2002-2017 Boris Eyrich Software. All rights reserved. Page 76 of 104

Artweaver 6 Help
Artweaver uses Pixel-based selections which are defined at the pixel level. Pixel-based selections provide 256 levels of protection to the canvas. Each pixel in the selection sets a level of protection for its corresponding color pixel in the RGB image. Opaque areas of the selection provide 100% protection and prevent brush strokes and effects from marking the canvas. Clear areas of the selection provide no protection and allow brush strokes and effects to mark the canvas. Where the selection is shaded, or semitransparent, brush strokes and effects are partially applied. This lets you paint and apply effects with varying levels of intensity within a selection.
Turning Selections Off
To turn off a selection
• Choose Main Window menu -> Select -> Deselect
Inverting Selections
Inverting a selection switches the selected and nonselected areas.
To invert a selection
• Choose Main Window menu -> Select -> Inverse
Softening the edges of selections
You can soften the edges of a selection by anti-aliasing or feathering. Anti-aliasing smooths the edges of a selection by modifying the color transition between the pixels. Feathering, on the other hand, softens the edges by gradually increasing the transparency of the pixels along the edge of the selection.
To create a selection with anti-aliasing
• In the Tools palette, select one of the selection tools• On the property bar, enable the Anti-aliased check box
© 2002-2017 Boris Eyrich Software. All rights reserved. Page 77 of 104

Artweaver 6 Help
• Create a selection
To feather the edge of a selection
• Choose Main Window menu -> Select -> Feather • In the Feather dialog box, specify the number of pixels that you want to feather
Expanding or contracting selections
You can expand or contract a selection by a set number of pixels.
To expand or contract a selection
• Choose Main Window menu -> Select -> Modify • In the Modify dialog box, adjust any of the following settings:
• Command to expand or contract a selection• Modify by to specify the number of pixels
• Click OK
9.2 Creating Selections
Creating Shaped Selections
You can create rectangular selections, oval selections, or freehand selections and you can also select the entire canvas.
To select an area
To select Do the following
An oval area Choose the Shape Selection tool from the Tools palette and set the Shape to Oval . Drag in the document window to select an area.
A rectangular area
Choose the Shape Selection tool from the Tools palette and set the Shape to Rectangular . Drag in the document window to select an area.
© 2002-2017 Boris Eyrich Software. All rights reserved. Page 78 of 104

Artweaver 6 Help
A freehand area Choose the Lasso tool from the Tools palette. Draw a freehand border around the area you want to select in the document window.
The entire canvas
Choose Main Window menu -> Select -> All.
When working with the Shape Selection tool, you can constrain your selection to a square
or a circle by holding down on the keyboard while making your selection.
If you draw an open path with the Lasso tool, Artweaver connects the endpoints with a
straight line before creating the selection.
Creating Selections Automatically
The Magic Wand tool lets you create selections automatically. Groups of pixels are selected based on color. You can adjust settings to control the range of colors, and you can choose to include contiguous or noncontiguous pixels.
You can also use the Color Range command to create a noncontiguous selection based on a range of colors.
To select an area using the Magic Wand tool
• In the Tools palette, click the Magic Wand tool • On the property bar, adjust any of the following settings:
• Tolerance controls the amount of variance allowed from the selected color. Higher values create a larger range of colors
• Contiguous , when enabled, selects contiguous pixels • On the property bar , click on the following buttons:
• New Selection • Add to Selection • Subtract from Selection • Intersect with Selection
• In the document window, click to select the color to make the selection
You can restore the default settings by clicking the tool symbol on the property bar and
choose Reset Tool .
© 2002-2017 Boris Eyrich Software. All rights reserved. Page 79 of 104

Artweaver 6 Help
To create a selection with the Color Range command
• Choose Main Window menu -> Select -> Color Range • In the Color Range dialog box, click on the Preview window to select a color• Adjust the Tolerance slider to control the color range• Down the Preview window, enable the Selection box to show the selected area. Enable
the Image box to show the source image
Creating Selections from Layers
You can create a selection from a layer. The new selection outlines the contents of the layer, without modifying the layer.
To create a selection from a layer
• On the Layers palette, select a layer• Choose Main Window menu -> Select -> Layer Content
10. Layers
10.1 Layers
When you open a new document and create an image, your work appears on a Background layer. You can add additional layers to a document, which allows you to manipulate the visual elements in the image independently of the Background layer.
Think of layers as several clear slides laminated one above the other. Areas of a layer that don’t contain images remain transparent and under laying layers seem through. You can change the structure of an image, by changing the arrangement and properties of layers.
© 2002-2017 Boris Eyrich Software. All rights reserved. Page 80 of 104

Artweaver 6 Help
Functionality of layers.
The Layers Palette
All layers in a document are listed on the Layers palette. The Layers palette manages the hierarchy of layers and includes controls for selecting, hiding, locking, deleting, and grouping layers.
The Layers palette.
© 2002-2017 Boris Eyrich Software. All rights reserved. Page 81 of 104

Artweaver 6 Help
You can access many layer functions and commands using the buttons at the bottom of the palette, and the palette menu (accessed by clicking the palette menu arrow in the upper-right corner of the palette).
The Layers palette displays icons next to each layer to indicate the layer’s characteristics. The following table lists the icons that appear in the Layers palette:
Grouped layer
Expanded group
Visible layer
Hidden layer
Locked layer
On the Layers palette, you can set layer opacity and choose a blend method.
To display the Layers palette
• Choose Main Window menu -> Window -> Show Layers
10.2 Editing Layers
Creating Layers
You can create new layers directly from the Layers palette and also duplicate layers. When you create a layer, the new layer is placed directly above the selected layer. If the selected layer belongs to a group, the new layer is added to the group.
To create a new layer
• Click on the New Layer button at the bottom of the Layers palette
You can also create a new layer by clicking the palette menu arrow and choosing New
Layer .
To duplicate a layer
• On the Layers palette, select a layer you want to duplicate
© 2002-2017 Boris Eyrich Software. All rights reserved. Page 82 of 104

Artweaver 6 Help
• Click the palette menu arrow , and choose Duplicate Layer
Naming Layers
When you create a layer or group, a default name is assigned. As you add more layers and groups to a document, it can become difficult to remember which image data each layer contains. By assigning descriptive names to layers and groups, you can easily keep track of the separate pieces of an image.
To name a layer or group
• On the Layers palette, select a layer or group• Click the palette menu arrow , and choose Layer Properties • In the Layer Properties dialog box. type a new name in the Name box
You cannot change the name of the Background layer.
Deleting Layers
You can delete layers from the Layers palette, but you cannot delete the Background layer.
To delete a layer
• On the Layers palette, select a layer• Click the palette menu arrow , and choose Delete Layer
You can also delete a layer by clicking on the Delete Layer button at the bottom of the
Layers palette.
Merge Layers with the Background Layer
Merging a layer or group flattens its contents with the Background layer. Once you merge a layer, you can no longer access the layer’s content separately.
© 2002-2017 Boris Eyrich Software. All rights reserved. Page 83 of 104

Artweaver 6 Help
To merge Layers with the Background Layer
• On the Layers palette, click the palette menu arrow , and choose Flatten Image
Changing Layer Size
When you create a layer, the new layer has always the same size and position as the Background layer. If the layer position is changed or the layer is transformed, the layer size is not equal to the Background layer anymore. While working on this layer, not editable areas can appear.
To change Layer Size to Background Layer size
• On the Layers palette, click the palette menu arrow , and choose Expand Layer
10.3 Managing Layers
To manage layers in a document, you can select, lock, view, or hide them, or change their position in the hierarchy.
Selecting Layers
Selecting a layer lets you make changes to it. If no layers are selected, any changes you make apply to the Background layer. The Auto Select Layer option changes your ability how to select and move layers with the Move tool.
To select a layer
• Do one of the following:• Click a layer on the Layers palette• Choose the Move tool from the property bar and click anywhere in a layer's
content. If the option Auto Select Layer on the property bar is enabled, the corresponding layer under the cursor is selected automatically
on the keyboard to activate the Move tool .
© 2002-2017 Boris Eyrich Software. All rights reserved. Page 84 of 104

Artweaver 6 Help
Moving Layers
When a layer is selected, you can move its content anywhere in the document to create a new image layout.
To move a layer
• On the Layers palette, select a layer or group• In the Tools palette, click the Move tool , and drag the selected layer in the document
window
Locking Layers
You can lock layers to avoid accidentally changing them. Different properties in a layer can be locked.
To lock or unlock a layer
• On the Layers palette, select a layer• On the Layers palette, click one of the following buttons to lock or unlock the layer:
• Position locks the ability to move a layer• Transparency locks the ability to modify the transparency information of a layer• All locks the ability to move a layer and to modify the transparency information
of a layer
The Locked Layer icon appears next to a locked layer on the Layers palette.
Viewing Layers
You can control your view of an image in the document window by changing layer visibility settings.
To show or hide a layer or the Background layer
• On the Layers palette, click the eye icon next to the layer name or the background layer
© 2002-2017 Boris Eyrich Software. All rights reserved. Page 85 of 104

Artweaver 6 Help
When the eye is shut , the layer is hidden in the document window. When the eye is
open , the layer is visible in the document window.
Changing Layer Hierarchy
The hierarchy of layers determines how the layers in a document interact. When you create a new layer, it appears on top of the existing layers. Depending on its transparency, and blend characteristics, the layer will obscure or otherwise affect the underlying layers.
A document’s layer hierarchy is reflected on the Layers palette. The bottom layer is always the Background layer.
Change the hierarchy of layers to create different effects.
To change a layer's position in the hierarchy
• On the Layers palette, select the layer you want to reposition in the hierarchy• From the Main Window menu, choose Layer, and one of the following:
• Send To Back• Bring To Front• Send Backward• Bring Forward
You can also reposition a layer by clicking the Send Backward , or Bring Forward
buttons on the Layers palette.
© 2002-2017 Boris Eyrich Software. All rights reserved. Page 86 of 104

Artweaver 6 Help
Blending layers by using blend methods
Blend methods control how layers interact with the underlying image. You can change blend methods to create special effects without changing the actual images that make up a document.
To change a layer’s blend method
• On the Layers palette, select a layer• On the Layers palette, choose a blend method from the Blend Method list box
Blend Method
Description
Normal Allows the layer to cover and hide the underlying image.
DarkenLooks at the color information in each channel and selects the base or blend color—whichever is darker—as the result color.
Multiply Looks at the color information in each channel and multiplies the base color by the blend color. The result color is always a darker color.
LightenLooks at the color information in each channel and selects the base or blend color—whichever is lighter—as the result color.
ScreenLooks at each channel’s color information and multiplies the inverse of the blend and base colors. The result color is always a lighter color.
Difference Looks at the color information in each channel and subtracts either the blend color from the base color or the base color from the blend color, depending on which has the greater brightness value.
Exclusion Creates an effect similar to but lower in contrast than the Difference mode.
Color burn Looks at the color information in each channel and darkens the base color to reflect the blend color by increasing the contrast between the two.
Linear burn Looks at the color information in each channel and darkens the base color to reflect the blend color by decreasing the brightness.
Color dodge Looks at the color information in each channel and brightens the base color to reflect the blend color by decreasing contrast between the two.
Hard light Multiplies or screens the colors, depending on the blend color.
Soft light Darkens or lightens the colors, depending on the blend color.
© 2002-2017 Boris Eyrich Software. All rights reserved. Page 87 of 104

Artweaver 6 Help
Color Creates a new color by combining the luminance of the image color with the hue and saturation of the layer color. This method is the opposite of Luminosity .
Hue Creates a color by combining the luminance and saturation of the image color with the hue of the layer color.
Saturation Creates a color by combining the luminance and hue of the image color with the saturation of the layer color.
Luminosity Creates a new color from the hue and saturation of the image color and the luminance of the layer color. This method is the opposite of Color .
Average Applies the Normal mode with 50% opacity.
Overlay Multiplies or screens the colors, depending on the base color.
11. Imagestamp
11.1 Imagestamp
With the Imagestamp you can instead of painting with color, paint with images, not just one or two at a stroke, but a variety of changing images. The images change thereby while painting the stroke.
To use the Imagestamp, you must first load it with images. The images are kept in special Imagestamp files. A Imagestamp file can contain any number of images. Usually, the images are similar and form a logical series.
© 2002-2017 Boris Eyrich Software. All rights reserved. Page 88 of 104

Artweaver 6 Help
Content of a Imagestamp file with different images.
The images in a Imagestamp file are indexed, e.g. when you paint with the Imagestamp, you can request specific images from the Imagestamp index. You can select images from the Imagestamp index sequentially, randomized, by pen pressure, by stroke direction, or dragging speed.
The Imagestamp palette allows you to select and manage Imagestamps.
The Imagestamp palette.
To select a image and use the Imagestamp
• In the Tools palette, click the Brush tool • On the Brush palette, choose the Imagestamp from the Brush Type selector• Click the arrow next the Imagestamp preview . The Imagestamp palette is expanded• Choose a image from the Imagestamp palette• Make a brush stroke on the canvas
11.2 Adjusting and Editing
You can change the Opacity, Size, and Spacing of Imagestamp images and determine the placement of images in the stroke. In addition, brush expression settings let you use different pen attributes, such as pressure, and direction to change the size of images on the fly.
© 2002-2017 Boris Eyrich Software. All rights reserved. Page 89 of 104

Artweaver 6 Help
Adjusting Opacity, Size, and Color
You can use the property bar to adjust the Opacity and Size of Imagestamp images or to mix them with the background color.
The Opacity slider allows you to make Imagestamp images semitransparent. If you move the slider all the way to the left, the images become invisible.
The Size slider lets you control the size of image elements delivered by the Imagestamp. If you move the slider all the way to right, the images become very huge.
The Grain slider allows you to mix the background color with the Imagestamp images. As you move the slider to the left, more of the background color appears in the images.
Spacing Images
You control the space between images with the Spacing settings on the Brush palette. Moving the Spacing slider to the right increases the spacing between image elements.
Placing Images (Indexing)
When you paint with the Imagestamp, the Imagestamp images are requested by rules. This operation is called indexing and controls, how particular images from the many images in a Imagestamp file are selected.
Left: Indexing with the rule Sequential. Right: Indexing with the rule Random.
To choose Indexing Rules
• Choose Main Window menu -> Window -> Show Brush to display the Brush palette• On the Brush palette, click the tab Advanced • Choose an Indexing rule for the expression Imagestamp
Expression Description
None Returns one element only; the first in the rank.
© 2002-2017 Boris Eyrich Software. All rights reserved. Page 90 of 104

Artweaver 6 Help
PressureIndexes images based on pen pressure. Greater pressure selects images from later in the rank.
Random Selects images from the rank at random.
Direction Indexes images from the rank based on the direction of the stroke.
SequentialIndexes images in the order they appear in the rank; moving left to right, and top to bottom.
SpeedIndexes images from the rank based on the speed of the stroke. A faster stroke delivers elements from later in the rank.
Growing Indexes images once from moving left to right, and top to bottom.
Shrinking Indexes images once from moving right to left, and bottom to top.
12. Captured
12.1 Captured Brushes
You can create your own brush shapes. Any shape is possible. All custom brush shapes are stored as captured brushes and can be reused.
Choosing Captured Brushes
All captured brushes are store in the Captured palette. The Captured palette allows you to select and manage captured brushes.
© 2002-2017 Boris Eyrich Software. All rights reserved. Page 91 of 104

Artweaver 6 Help
Captured palette.
To choose captured brushes
• Choose Main Window menu -> Window -> Show Brush to display the Brush palette• Click the arrow next the captured preview . The Captured palette is expanded• Choose a captured brush from the Captured palette
To import captured brushes
• Click the arrow next the captured preview . The Captured palette is expanded• On the Captured palette, click the palette menu arrow , and choose Import Captured • Choose the file you want to import, and click on OK
To edit captured brushes
• Click the arrow next the captured preview . The Captured palette is expanded• On the Captured palette, click the palette menu arrow , and choose Edit Captured • Modify the image• Select all of your image• On the Captured palette, click the palette menu arrow , and choose Capture Brush • Type a new name for the captured brush and click OK
© 2002-2017 Boris Eyrich Software. All rights reserved. Page 92 of 104

Artweaver 6 Help
Capturing Brush Shapes
You can create your own brush shapes from any shape.
When you have created a shape you like, select and capture it.
To capture a brush shape
• On a white background, draw a brush shape in black. Use shades of gray to define what you wish to be partially transparent areas of the brush
• Select the brush shape. Artweaver uses the selected area to map brush size• Choose Main Window menu -> Window -> Show Brush to display the Brush palette• Click the palette menu arrow and choose Capture Brush • Type a new name for the captured brush and click OK
You can paint with a captured brush just as you would with other brushes.
Generating Captured Brushes
You can automatically create captured brushes. With different options you can specify how the captured brushes should look like.
© 2002-2017 Boris Eyrich Software. All rights reserved. Page 93 of 104

Artweaver 6 Help
Generate Captured dialog box.
To generate a captured brush
• Click the arrow next the captured preview . The Captured palette is expanded• On the Captured palette, click the palette menu arrow , and choose Generate
Captured • Adjust the settings to modify the captured brush• Type a new name for the captured brush and click OK
© 2002-2017 Boris Eyrich Software. All rights reserved. Page 94 of 104

Artweaver 6 Help
13. Working with Text
13.1 Text Layers
A text layer holds a single text block. When you create a new text layer with the Text tool, that layer becomes visible on the Layers palette, and is represented by a icon. With the text on a separate layer, you can work with your image without changing any text attributes. You can select the text layer and edit it at any time.
Creating Text
The Text tool property bar contains all controls for setting text appearance. You can change the font, size, and color of the text.
To add text to an image
• In the Tools palette, click the Text tool • Click anywhere in the document window, and type• Confirm the text input to create the text layer
Changing the Font, Size, and Color of Text
You can change the font and size of text by selecting a text layer on the Layers palette and then setting options on the property bar.
To change the font, size, and color of text
• In the Tools palette, click the Text tool • On the Layers palette, select a text layer• Do one of the following:
• Choose a font : On the property bar, choose a font from the Font menu• Choose a size: On the property bar, choose or type a size in the Size box• Choose a color : On the property bar, choose a color from the Color square
© 2002-2017 Boris Eyrich Software. All rights reserved. Page 95 of 104

Artweaver 6 Help
Rasterize Text Layers
You can convert text layers into normal layers so that you can apply effects, and gradations.
To rasterize text layers
• On the Layers palette, select a text layer• Click the palette menu arrow and choose Rasterize Layer
When a text layer is rasterized, you cannot convert it back to a text layer.
13.2 Text Palette
You can change any text attributes of selected text layers in the Text palette.
The Text palette.
This feature is only available in Plus version.
To display the Text palette
• Choose Main Window menu -> Window -> Show Text
Adjusting text tracking and leading
You can fine-tune the spacing between letters by adjusting the tracking. You can also adjust the amount of space between lines of text by adjusting the leading. You may want to change the leading from the default setting which is set at 100%.
© 2002-2017 Boris Eyrich Software. All rights reserved. Page 96 of 104

Artweaver 6 Help
To adjust tracking
• On the Layers palette, select a text layer • On the Text palette, adjust the Tracking slider
To adjust leading
• On the Layers palette, select a text layer• On the Text palette, adjust the Leading slider
Anti-aliasing text
Anti-aliasing produces smooth-edged type by partially filling the edge pixels. As a result, the edges of the type blend into the background.
To enable anti-aliasing
• On the Layers palette, select a text layer• On the Text palette, enable the Anti-aliased button
Underline or strike through text
You can place a line under text. You can also place a line through text.
The line is always the same color as the text color.
To underline or strike through text
• On the Layers palette, select a text layer• On the Text palette, enable any of the following buttons:
• Strikethrough • Underline
© 2002-2017 Boris Eyrich Software. All rights reserved. Page 97 of 104

Artweaver 6 Help
KerningKerning is the process of adding or subtracting space between specific pairs of characters. Kerning uses kern pairs, which are included with most fonts. Kern pairs contain information about the spacing of specific pairs of letters. Some of these are: LA, P., To, Tr, Ta, Tu, Te, Ty, Wa, WA, We, Wo, Ya, and Yo.
To enable kerning• On the Layers palette, select a text layer• On the Text palette, enable the Kerning button
Apply all caps
You can enter or format text as uppercase characters.
To enable all caps
• On the Layers palette, select a text layer• On the Text palette, enable the All Caps button
Aligning text
You can align a text block to the left, right, or center. The text baseline origin is used as the reference point for the text alignment.
To align text
• On the Layers palette, select a text layer • On the Text palette, enable one of the following buttons:
• Align Left • Align Center • Align Right
14. Preset Manager
14.1 Preset Manager
You can use the Preset Manager to manage all Artweaver materials. Following materials can be
© 2002-2017 Boris Eyrich Software. All rights reserved. Page 98 of 104

Artweaver 6 Help
managed: Brushes, Paper Textures, Imagestamps, Captured Brushes, Gradients, and Color Sets. You can name, delete, rearrange, import, and export materials.
For brushes, you can additional move brush variants into several brush categories. And you can also create new brush categories and rearrange them.
The Preset Manager.
To name materials
• Choose Main Window menu -> Edit -> Preset Manager to display the Preset Manager• Choose a material from the Preset box• Select a material and click the Rename button• Type a new name for the material and click OK
© 2002-2017 Boris Eyrich Software. All rights reserved. Page 99 of 104

Artweaver 6 Help
When you choose the Brushes preset, you can expand the brush category selector and
select a brush category by clicking the arrow next the brush category preview .
To delete materials
• Choose Main Window menu -> Edit -> Preset Manager to display the Preset Manager• Choose a material from the Preset box• Select a material and click the Delete button
To rearrange materials
• Choose Main Window menu -> Edit -> Preset Manager to display the Preset Manager• Choose a material from the Preset box• Select a material• Click the arrow buttons to move the material one up or one down
This feature is only available in Plus version.
To import materials
• Choose Main Window menu -> Edit -> Preset Manager to display the Preset Manager• Choose a material from the Preset box• Click the Import button• Choose the file you want to import, and click on OK
To export materials
• Choose Main Window menu -> Edit -> Preset Manager to display the Preset Manager• Choose a material from the Preset box• Select a material and click the Export button• Enter a name for the material in the Filename box, and click OK
It is not possible to use the export command in any material category. In such categories
the Export button is disabled.
© 2002-2017 Boris Eyrich Software. All rights reserved. Page 100 of 104

Artweaver 6 Help
To move brush variants
• Choose Main Window menu -> Edit -> Preset Manager to display the Preset Manager• Choose Brushes from the Preset box• Select a brush variant and click the Move button• Choose a brush category in the Destination box and click OK
To move a brush variants into a new brush category
• Choose Main Window menu -> Edit -> Preset Manager to display the Preset Manager• Choose Brushes from the Preset box• Select a brush variant and click the Move button• Choose Create new Category in the Destination box and enter a name for the new
category in the New Category box• Click OK to create the new category
You can only create new brush categories by moving existing brush variants. Creating a
brush category without brush variants is not possible.
To rearrange brush categories
• Choose Main Window menu -> Edit -> Preset Manager to display the Preset Manager• Choose Brushes from the Preset box• Expand the Brushes palette by clicking the arrow next the brush category preview • Click the arrow buttons to move the category one up or one down
This feature is only available in Plus version.
15. Team
15.1 Team
Artweaver Team allows you to work together on a document with your friends at the same time. Connect with Artweaver to a team over LAN/internet and work together on a document simultaneously.
You can create a team directly in Artweaver.
© 2002-2017 Boris Eyrich Software. All rights reserved. Page 101 of 104

Artweaver 6 Help
The built-in chat feature on the Team palette allows you to communicate with your friends while working together on the same document. You also get all important team status information over the Team palette to be informed.
The Team Palette.
To display the Team palette
• Choose Main Window menu -> Window -> Show Team
15.2 Managing Team
Connect to a Team
You can establish a connection to a team and manage it in the Team palette. Furthermore messages can be sent to all connected people and read.
To establish a team connection
• On the Team palette, click the palette menu arrow and choose Connect to Team • Enter a Server address and a Username • Click Connect
© 2002-2017 Boris Eyrich Software. All rights reserved. Page 102 of 104

Artweaver 6 Help
A password is only needed if the server requires it. Mostly this field can be left blank.
No other opened documents are allowed when establishing a team connection.
To send a chat message
• Enter a text in the input box on the Team palette • Press on the keyboard
To work while connectedYou can directly apply any tool or filter when connected. There is no need to lock the team.
Only when another connected user is changing the document the team will be locked until he has finished. While the team is locked the whole application interface is disabled except some fundamental commands like disconnecting from the team or exiting Artweaver.
To show team connection details
• On the Team palette, click the palette menu arrow and choose Status
To close a team connection
• On the Team palette, click the palette menu arrow and choose Close Connection
Create a team
You can also create a new team in the Team palette where other people can connect to.
Adjustments to the network configuration might be needed that other people can connect.
To create a team
• On the Team palette, click the palette menu arrow and choose Start Team • In the Artweaver Team dialog box, enter values for the following:
• Name of the team
© 2002-2017 Boris Eyrich Software. All rights reserved. Page 103 of 104

Artweaver 6 Help
• Width and Height determine the dimensions of the canvas• Resolution is the number of pixels per inch that make up an image
• Click Start
Team status
The Team palette shows the status of the team connection with some symbols for an easier understanding. The symbols change their appearance depending of the current status.
No team connection established.
A team connection is established.
Team connection is busy (e.g sending or receiving data).
Team connection is establishing.
All team events are synchronizing.
Team is unlocked.
Team is locked.
Team lock is invalid.
Number of connected user.
© 2002-2017 Boris Eyrich Software. All rights reserved. Page 104 of 104