ART’S & CRAFTS SESSION 3D ROYAL EVENT HAT
9
Trudy Gera ART STUDIO www.trudygera.com …………………………………. ART’S & CRAFTS SESSION 3D ROYAL EVENT HAT A step by step guide
Transcript of ART’S & CRAFTS SESSION 3D ROYAL EVENT HAT
Trudy Gera ART STUDIO www.trudygera.com
………………………………….
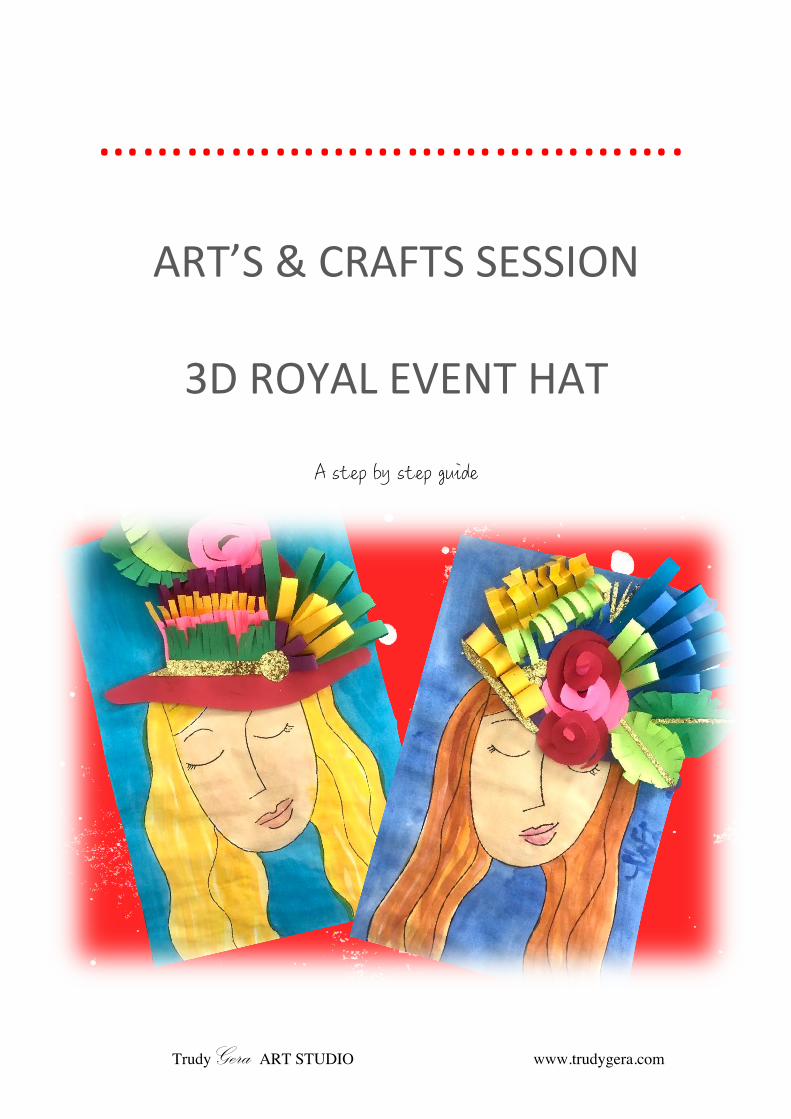
ART’S & CRAFTS SESSION
3D ROYAL EVENT HAT
A step by step guide
Trudy Gera ART STUDIO www.trudygera.com
- 2 -
D E E P S P A C E S P A R K L E & T H E S P A R K L E R S C L U B !2
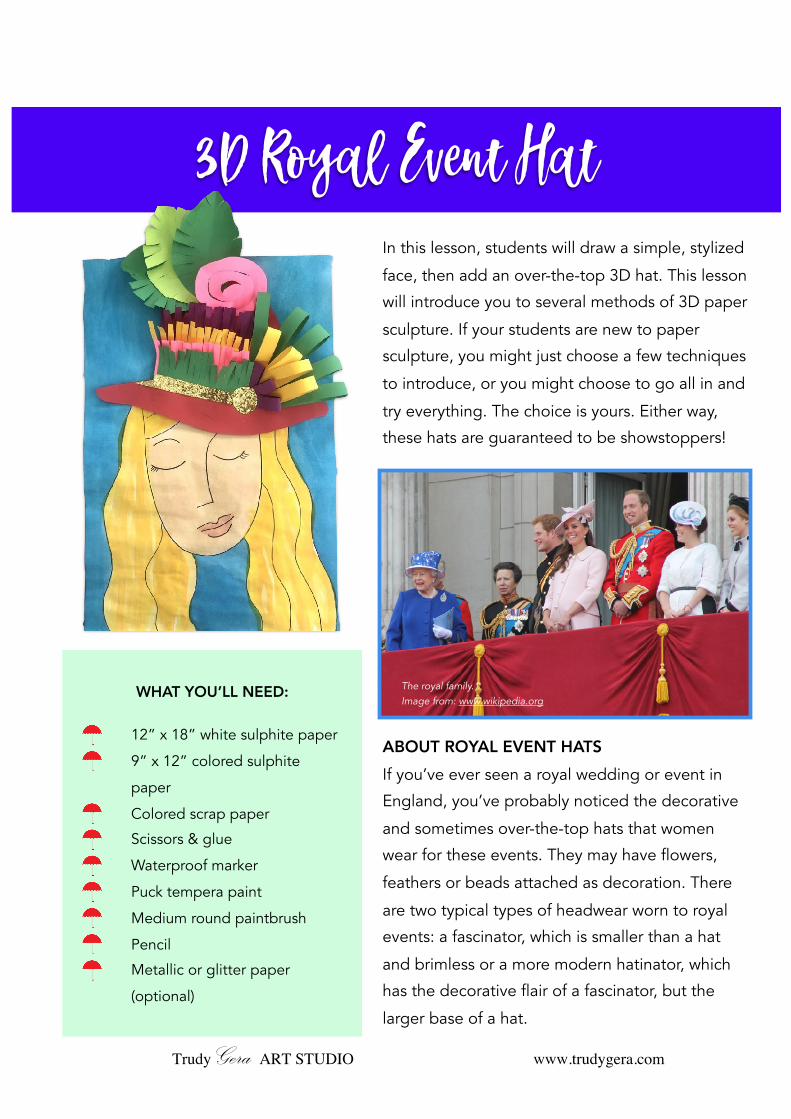
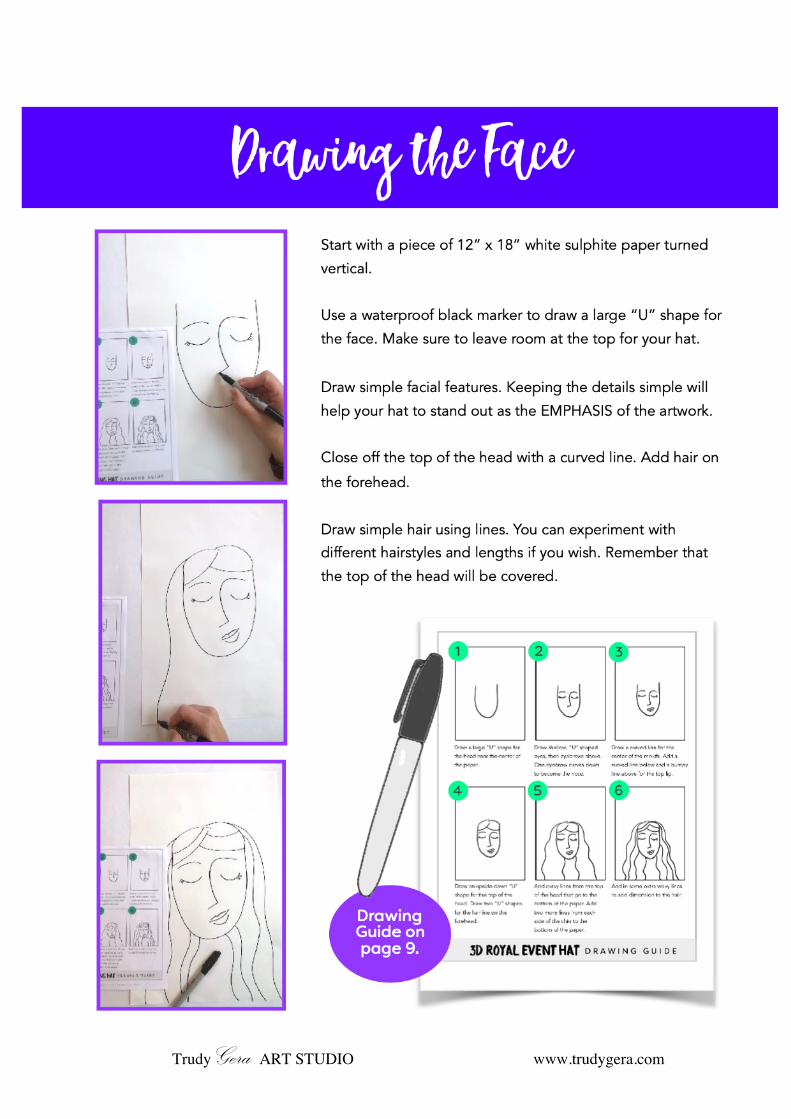
In this lesson, students will draw a simple, stylized
face, then add an over-the-top 3D hat. This lesson
will introduce you to several methods of 3D paper
sculpture. If your students are new to paper
sculpture, you might just choose a few techniques
to introduce, or you might choose to go all in and
try everything. The choice is yours. Either way,
these hats are guaranteed to be showstoppers!
ABOUT ROYAL EVENT HATS If you’ve ever seen a royal wedding or event in
England, you’ve probably noticed the decorative
and sometimes over-the-top hats that women
wear for these events. They may have flowers,
feathers or beads attached as decoration. There
are two typical types of headwear worn to royal
events: a fascinator, which is smaller than a hat
and brimless or a more modern hatinator, which
has the decorative flair of a fascinator, but the
larger base of a hat.
WHAT YOU’LL NEED:
12” x 18” white sulphite paper
9” x 12” colored sulphite
paper
Colored scrap paper
Scissors & glue
Waterproof marker
Puck tempera paint
Medium round paintbrush
Pencil
Metallic or glitter paper
(optional)
3D Royal Event Hat
The royal family. Image from: www.wikipedia.org
Trudy Gera ART STUDIO www.trudygera.com

Trudy Gera ART STUDIO www.trudygera.com
D E E P S P A C E S P A R K L E & T H E S P A R K L E R S C L U B !4
Use cake tempera paint to paint the face, hair
and background. Pan watercolor would also
work for this step.
For the face, you can mix several NEUTRAL
colors to get the right skin tone for your face.
I like to mix the colors in the lid of my paint
palette.
To add DIMENSION in the hair, choose one
color and paint lines, leaving a little space in-
between them. For straight hair, paint straight
lines, for curly hair, paint curved lines. Choose
a second color and continue to add lines to
fill in the white space.
Once the skin color is dry, you can add a light
WASH of pink over the lips to add some color.
You can achieve a light wash by using lots of
water and just a little pink paint.
Paint your background a solid color.
Painting the Face & Background
Trudy Gera ART STUDIO www.trudygera.com
D E E P S P A C E S P A R K L E & T H E S P A R K L E R S C L U B !5
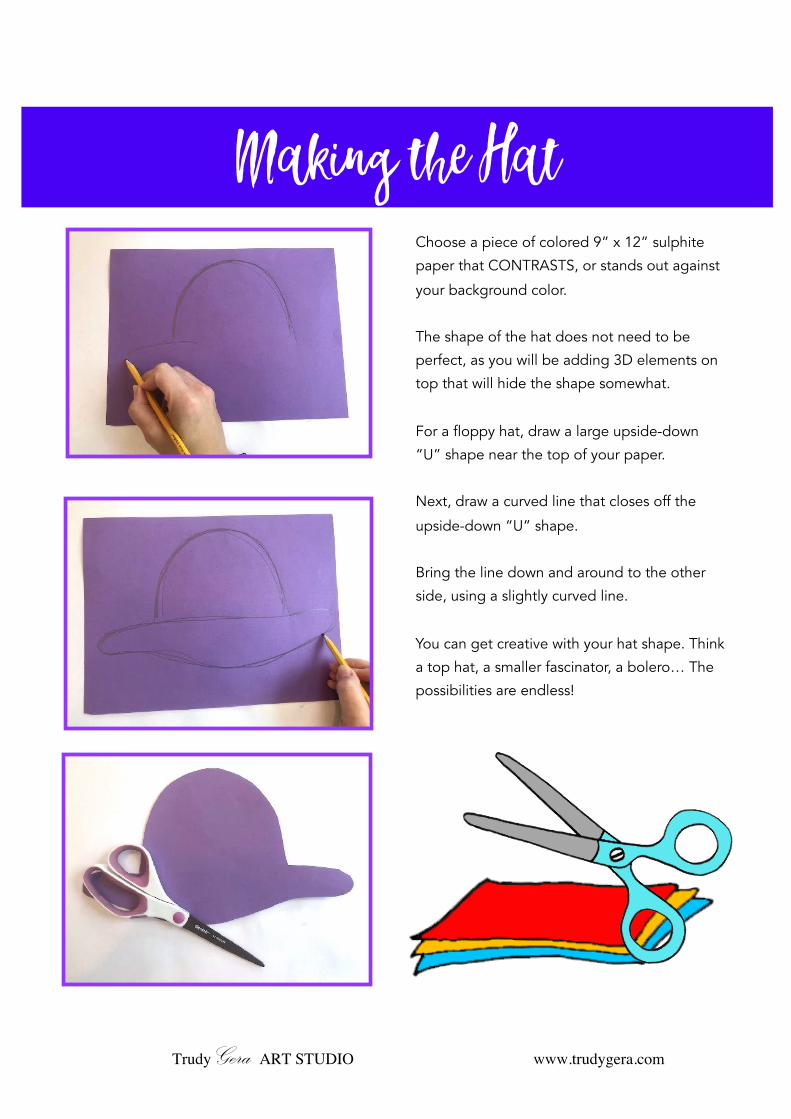
Choose a piece of colored 9” x 12” sulphite
paper that CONTRASTS, or stands out against
your background color.
The shape of the hat does not need to be
perfect, as you will be adding 3D elements on
top that will hide the shape somewhat.
For a floppy hat, draw a large upside-down
“U” shape near the top of your paper.
Next, draw a curved line that closes off the
upside-down “U” shape.
Bring the line down and around to the other
side, using a slightly curved line.
You can get creative with your hat shape. Think
a top hat, a smaller fascinator, a bolero… The
possibilities are endless!
Making the Hat
Trudy Gera ART STUDIO www.trudygera.com
D E E P S P A C E S P A R K L E & T H E S P A R K L E R S C L U B !6
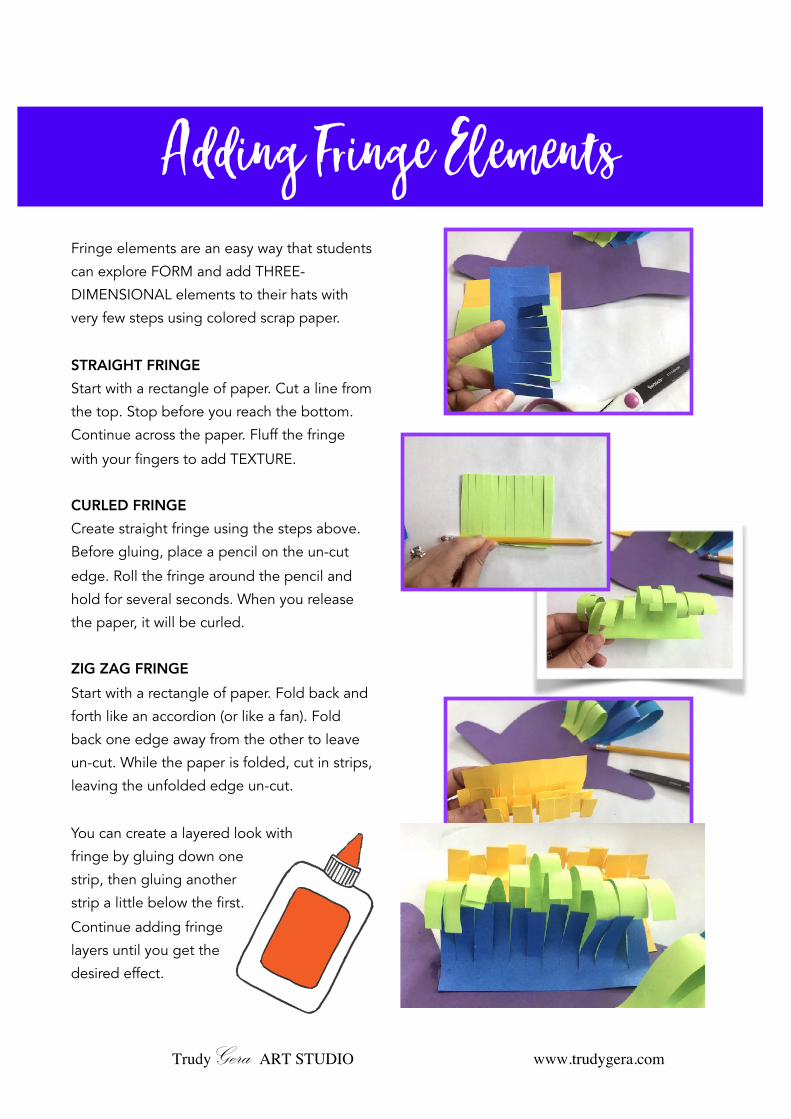
Fringe elements are an easy way that students
can explore FORM and add THREE-
DIMENSIONAL elements to their hats with
very few steps using colored scrap paper.
STRAIGHT FRINGE Start with a rectangle of paper. Cut a line from
the top. Stop before you reach the bottom.
Continue across the paper. Fluff the fringe
with your fingers to add TEXTURE.
CURLED FRINGE Create straight fringe using the steps above.
Before gluing, place a pencil on the un-cut
edge. Roll the fringe around the pencil and
hold for several seconds. When you release
the paper, it will be curled.
ZIG ZAG FRINGE Start with a rectangle of paper. Fold back and
forth like an accordion (or like a fan). Fold
back one edge away from the other to leave
un-cut. While the paper is folded, cut in strips,
leaving the unfolded edge un-cut.
You can create a layered look with
fringe by gluing down one
strip, then gluing another
strip a little below the first.
Continue adding fringe
layers until you get the
desired effect.
Adding Fringe Elements
Trudy Gera ART STUDIO www.trudygera.com D E E P S P A C E S P A R K L E & T H E S P A R K L E R S C L U B !7
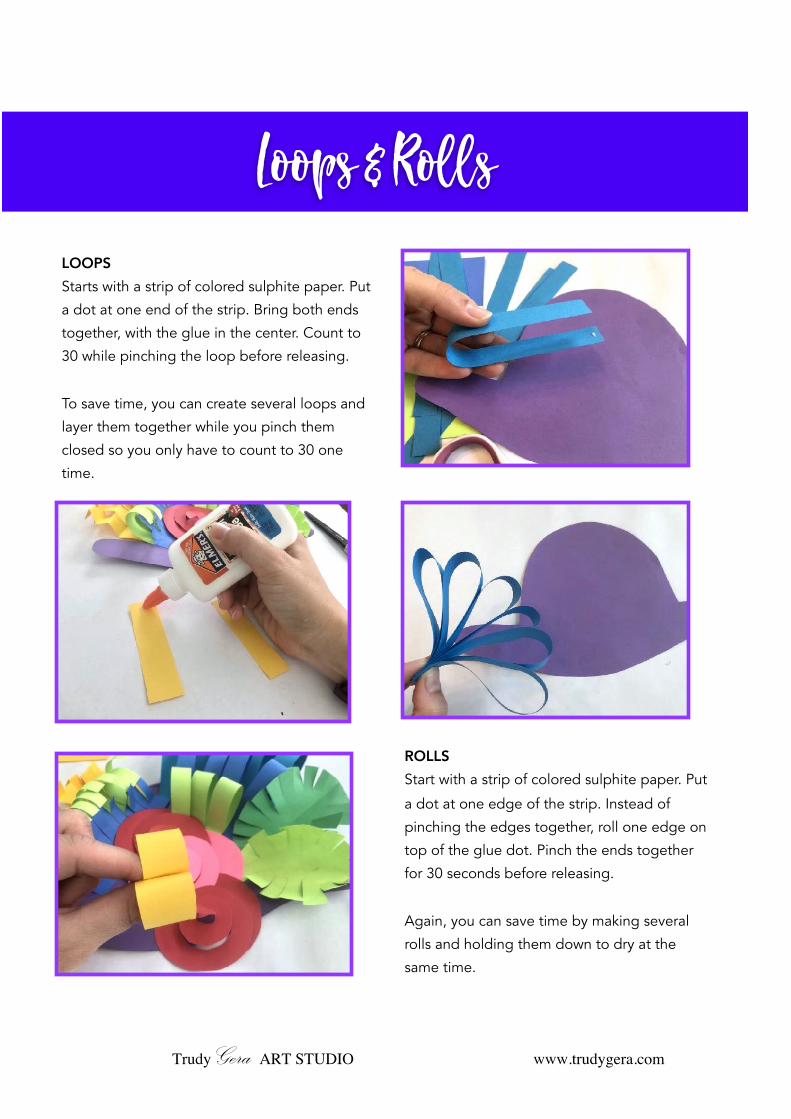
LOOPS Starts with a strip of colored sulphite paper. Put
a dot at one end of the strip. Bring both ends
together, with the glue in the center. Count to
30 while pinching the loop before releasing.
To save time, you can create several loops and
layer them together while you pinch them
closed so you only have to count to 30 one
time.
Loops & Rolls
ROLLS Start with a strip of colored sulphite paper. Put
a dot at one edge of the strip. Instead of
pinching the edges together, roll one edge on
top of the glue dot. Pinch the ends together
for 30 seconds before releasing.
Again, you can save time by making several
rolls and holding them down to dry at the
same time.
Trudy Gera ART STUDIO www.trudygera.com
D E E P S P A C E S P A R K L E & T H E S P A R K L E R S C L U B !8
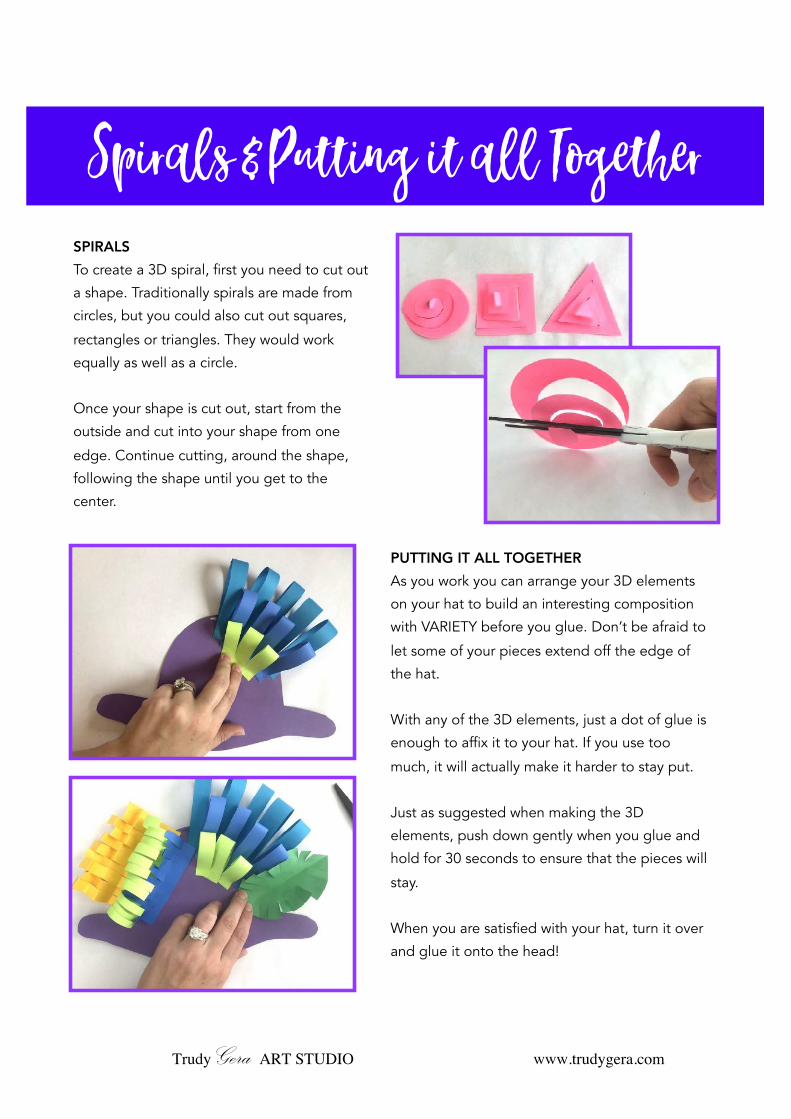
SPIRALS To create a 3D spiral, first you need to cut out
a shape. Traditionally spirals are made from
circles, but you could also cut out squares,
rectangles or triangles. They would work
equally as well as a circle.
Once your shape is cut out, start from the
outside and cut into your shape from one
edge. Continue cutting, around the shape,
following the shape until you get to the
center.
Spirals & Putting it all Together
PUTTING IT ALL TOGETHER
As you work you can arrange your 3D elements
on your hat to build an interesting composition
with VARIETY before you glue. Don’t be afraid to
let some of your pieces extend off the edge of
the hat.
With any of the 3D elements, just a dot of glue is
enough to affix it to your hat. If you use too
much, it will actually make it harder to stay put.
Just as suggested when making the 3D
elements, push down gently when you glue and
hold for 30 seconds to ensure that the pieces will
stay.
When you are satisfied with your hat, turn it over
and glue it onto the head!
Trudy Gera ART STUDIO www.trudygera.com
D E E P S P A C E S P A R K L E & T H E S P A R K L E R S C L U B !9
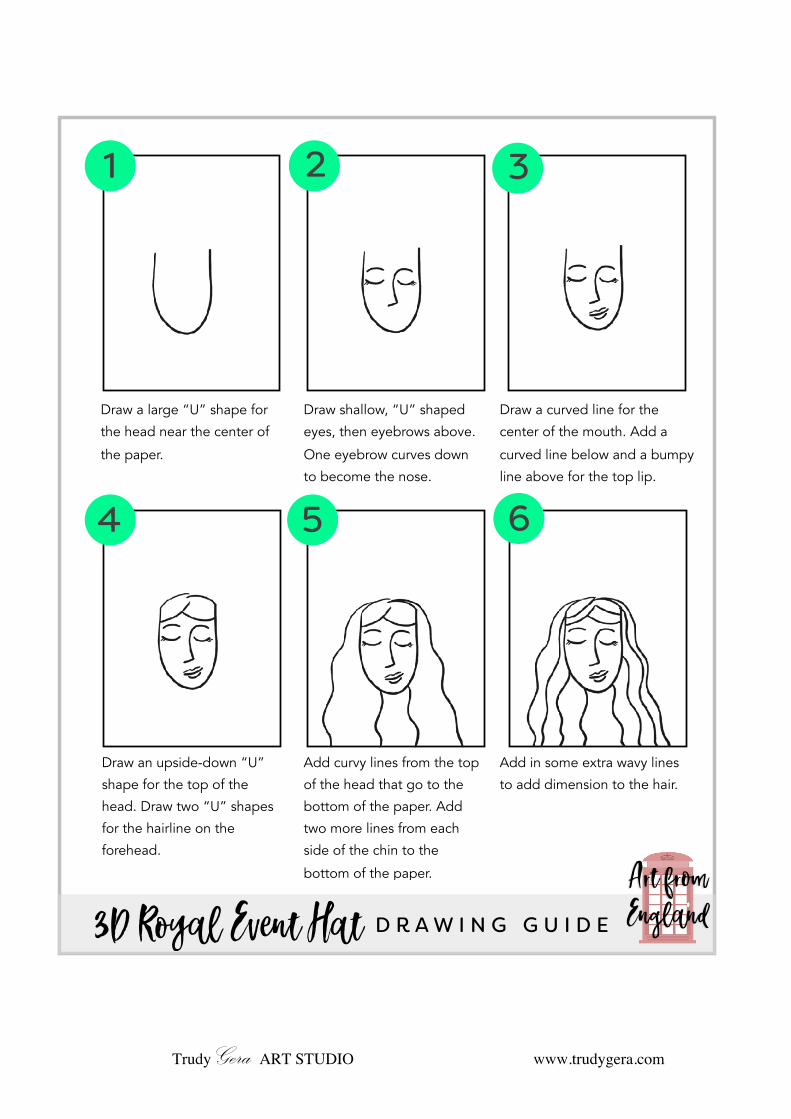
3D Royal Event Hat
Draw a large “U” shape for
the head near the center of
the paper.
Draw shallow, “U” shaped
eyes, then eyebrows above.
One eyebrow curves down
to become the nose.
Draw a curved line for the
center of the mouth. Add a
curved line below and a bumpy
line above for the top lip.
Draw an upside-down “U”
shape for the top of the
head. Draw two “U” shapes
for the hairline on the
forehead.
Add curvy lines from the top
of the head that go to the
bottom of the paper. Add
two more lines from each
side of the chin to the
bottom of the paper.
Add in some extra wavy lines
to add dimension to the hair.
2 3
4 5 6
1
D R A W I N G G U I D E
Art from England