Artesian Gold 2000 - Spa Service Help · PDF file4 ,03257$176$)(7
16
1 Built by May Manufacturing Inc. Victorville, California Owners Guide
Transcript of Artesian Gold 2000 - Spa Service Help · PDF file4 ,03257$176$)(7

1
Built by May Manufacturing Inc. Victorville, California
Owners Guide

2
Safety Warnings 2
Model & Serial Number Locations 3
Safety Instructions 4
Spa Configurations & Water Capacities 5
Electrical Requirements & Installation 6
Spa Start-Up 7
Warranty 16
TABLE OF CONTENTS
Spa Controls 9
Programming 11
Maintaining Your Spa 13
PLEASE READ THESE WARNINGS!
WARNING: PEOPLE USING MEDICATION AND/OR HAVING AN ADVERSE MEDICAL HISTORY SHOULD CONSULT A PHYSICIAN BEFORE USING A SPA OR HOT TUB.
WARNING: PEOPLE WITH INFECTIOUS DISEASES SHOULD NOT USE A SPA OR HOT TUB.
WARNING: TO AVOID INJURY EXERCISE CARE WHEN ENTERING OR EXITING THE SPA OR HOT TUB.
WARNING: DO NOT USE DRUGS OR ALCOHOL BEFORE OR DURING THE USE OF A SPA OR HOT TUB TO AVOID UNCONSCIOUSNESS AND POSSIBLE DROWNING.
WARNING: PREGNANT OR POSSIBLY PREGNANT WOMEN SHOULD CONSULT A PHYSICIAN BEFORE USING A SPA OR HOT TUB.
WARNING: WATER TEMPERATURE IN EXCESS OF 100o F (38o C) MAY BE INJURIOUS TO YOUR HEALTH.
WARNING: BEFORE ENTERING THE SPA OR HOT TUB MEASURE THE WATER TEMPERATURE WITH AN ACCU-RATE THERMOMETER.
WARNING: DO NOT USE A SPA OR HOT TUB IMMEDIATELY FOLLOWING STRENUOUS EXERCISE.
WARNING: PROLONGED IMMERSION IN A SPA OR HOT TUB MAY BE INJURIOUS TO YOUR HEALTH.
WARNING: DO NOT PERMIT ELECTRIC APPLIANCES (SUCH AS A LIGHT, TELEPHONE, RADIO OR TELEVISION) WITHIN 5 FEET (1.5 M) OF THIS SPA OR HOT TUB.
CAUTION: MAINTAIN WATER CHEMISTRY IN ACCORDANCE WITH MANUFACTURER’S INSTRUCTIONS.
AVERTISSEMENT: LES PERSONNES QUI PRENNET DES MEDICAMENT OU ONT DES PROBLEMES DE SANTE DEVRAIENT CONSULTER UN MEDECIN AVANT E’UTILISER UNE CUVE DE RELAXATION.
AVERTISSEMENT: LES PERSONNES ATTEINTES DE MALADIES INFECTIEUSES NE DEVRAIENT PAS UTILISER UNE CUVE DE RELAXATION.
AVERTISSEMENT: POUR EVITER DES BLESSURES. USER DE PRUDENCE EN ENTRANT DANS UNE CUVE DE RE-LAXATION ET EN SORTANT.
AVERTISSEMENT: POUR EVITER L EVANOUISSEMENT ET LA NOYADE EVENTUELLE, NE PRENDRE NI DROGUE NI ALCOOL AVANT D’ UTILISER UNE CUVE DE RELAXATION NI QUAND ON S’Y TROUVE.

3
AVERTISSEMENT: LES FEMMES ENCEINTES, QUE LEUR GROSSESSE SOIT CONFIRMEE OU NON, DEVRAIENT CONSULTER UN MEDECIN AVANT D’UTILISER UNE CUVE DE RELAXATION.
AVERTISSEMENT: IL PEUT ETRE DANGEREUX POUR LA SANTE DE SE PLONGER SANS DE L’EAU A PLUS DE 100o F (38o C).
AVERTISSEMENT: AVANT D’ UTILISER UNE CUVE DE RELAXATION MESURER LA TEMPERATURE DE L EAU A L’AIDE D’ UN THERMOMETRE PRECIS.
AVERTISSEMENT: NE PAS UTILISER UNE CUVE DE RELAXATION IMMEDIATEMENT APRES UN EXERCICE FATI-GANT.
AVERTISSEMENT: L’UTILISATION PROLONGEE D’UNE CUVE DE RELAXATION PEUT ETRE DANGEREUSE POUR LA SANTE.
AVERTISSEMENT: NE PAS PLACER D APPAREIL ELECTRIQUE (LUMINAIRE, TELEPHONE, RADIO, TELEVISEUR, ETC) A MOINS DE 1.5 M DE CETTE CUVE DE RELAXATION.
ATTENTION: LA TENEUR DE L’EAU EN MATIERES DISSOUTES DOIT ETRE CONFORME AUX DIRECTIVES DU FABRICANT.
Congratulations on the purchase of your new Artesian Gold Class portable spa. With proper care, your spa will provide years of enjoyment and therapy for your family and friends. Please take some time to read and understand all of the instructions provided before you install your Artesian spa. This owners manual is meant as a supplement to the training you should receive from your dealer when you purchase and start up your spa for the first time. Please remember, your spa is a powerful piece of electrical equipment. It is extremely important that you have it properly installed to insure safe use. This manual explains safety precautions, installation instructions and operating and maintenance procedures. If you have any questions regarding this manual, please call your Artesian spa dealer. He will be happy to assist you. For your future reference and convenience, please record the Serial and Model numbers along with the Installation Date in the spaces provided. Also, you should store this manual where you can easily find it when you need it. The Serial and Model numbers are mounted on the base of the equipment enclosure area, as shown below. Spa Serial Number
Spa Model Number
Installation Date
Serial and Model Number Location

4
,03257$17�6$)(7<�,16758&7,216
When installing and using this spa, always adhere to basic safety precautions, including the following: Make sure that these emergency telephone numbers are listed at the telephone nearest the spa: 1. physician 2. hospital 3. ambulance 4. police Have at least one family member learn CPR (cardiopulmonary resuscitation). It could save a life! WARNING To reduce the risk of injury you should always review these instructions with first time or occasional users of your spa. Remember, they may not be aware of the possible risks associated with the spa water temperature. RISK OF ACCIDENTAL DROWNING Extreme caution must be exercised to prevent unauthorized access by children. To avoid accidents, ensure that children cannot use this spa unless they are accompanied by an adult at all times. ALCOHOL, DRUGS, AND SPAS The use of alcohol, drugs, or medication before or during spa use may lead to unconsciousness with the possibility of drowning. Persons using medication should consult a physician before using a spa, since some medications may induce drowsiness while other medications may affect heart rate, blood pressure, and circulation. RISK OF HAIR OR BODY ENTRAPMENT The suction fittings in this spa are sized to match the specific water flow created by the pump. Should the need arise to replace the suction fittings of the pump, be sure that the flow rates are compatible. Never operate your spa if the suction fittings are broken or missing. Never replace a suction fitting with one rated less than the flow rate marked on the original fitting. HIGH BLOOD PRESSURE, OBESITY, AND HEART CONDITIONS Persons suffering from obesity or with a medical history of heart disease, low or high blood pressure, circulatory system problems, or diabetes should consult a physician before using a spa. RISK OF ELECTRICAL SHOCK Do not permit any electrical appliance, such as a light, telephone, radio, or television, within 5 feet (1.5m) of a spa. RISK OF SCALDING The water in a spa should never exceed 104 degrees F (40 degrees C). Water temperatures between 100 degrees F (38 degrees C) and 104 degrees F (40 degrees C) are considered safe for a healthy adult. Lower water temperatures are recommended for extended adult use (exceeding 10 to 15 minutes) and for young children. See section regarding "Adjusting spa temperature." RISK OF HYPERTHERMIA AND DROWNING Do not use your spa alone. Long exposure may cause HYPERTHERMIA (elevated body temperature). Hyperthermia occurs when the internal temperature of the body reaches several degrees above normal (98.6 degrees F). Symptoms include dizziness, fainting, drowsiness, and lethargy. The effects of hyperthermia include:

5
The use of alcohol, drugs, or medication can greatly increase the risk of fatal hyperthermia in spas. RISK TO PREGNANT WOMEN Excessive water temperatures have a high potential for causing fetal damage during the early months of pregnancy. Pregnant or possibly pregnant women should limit spa water temperatures to 100 degrees F (38 degrees C). To insure absolute safety, the user should measure the water temperature with an accurate thermometer (such as a medical thermometer) before entering the spa. Do not rely on the temperature regulating device provided with your spa for exact temperature measurement, as the tolerance of these regulating devices varies.
1. unawareness of impending hazard 4. physical inability to exit the spa
2. failure to perceive heat 5. fetal damage in pregnant women
3. failure to recognize the need to exit the spa 6. unconsciousness, resulting in danger of drowning
63$�&21),*85$7,216����:$7(5�&$3$&,7,(6��
Your Artesian Gold Class spa uses an M-Series Topside Control System and, if applicable to your spa model, has an auxiliary topside control. Your spa equipment compartment has many components, and you should become familiar with each item and its location for future convenience. Your Artesian dealer can assist you with any questions you may have concerning your spa equipment and its functions.
NOTE: This is a view of a generic Gold Class spa with the front access panel removed. The location of some of the components may be different depending on the model of spa that you purchased.
EMERALD 485 GALLONS / 1833 LITERS
SAPPHIRE 475 GALLONS / 1795 LITERS
ONYX 475 GALLONS / 1795 LITERS
OPAL 400 GALLONS / 1512 LITERS
DIAMOND 380 GALLONS / 1463 LITERS
RUBY 325 GALLONS / 1228 LITERS
WATER CAPACITY CHART

6
(/(&75,&$/�5(48,5(0(176�$1'�,167$//$7,21� WARNING
The following information is provided for hooking up electrical supply to the spa. This work must be performed by a qualified licensed electrician. Failure to have this done can result in termination of all warranty coverage and also create an extremely dangerous bathing environment. RECOMMENDATIONS
Your Artesian spa is programmed at the factory to be hooked up in a 240-Volt, high-current configuration, and we recommend that it be hooked up as such. Gold Class SS and DS spas require a 30-Amp breaker on low current and a 50-Amp breaker on high current.
Please refer to the National Electrical Code for the appropriate wire size suited to your specific GFCI breaker and equipment system. 240-VOLT INSTALLATION PROCEDURE 1. The correctly sized GFCI circuit breaker must be installed at the main electrical service panel. In addition, a
properly suited shut-off switch must also be installed in plain view of the spa. This is in compliance with section 422-20 of the National Electrical Code, ANSI/NFPA 70-1987. The electrical service panel must be readily accessible to the spa occupant but must not be within 5 feet of the spa.
2. Use only non-metallic conduit and fittings when installing power to the spa. 3. After spa has been positioned, route line through knockout on the left or right front of spa cabinet. 4. Route line inside cabinet to the hole provided under or behind control box through hole provided. 5. Attach wires to the terminal block inside control box. Refer to the 240V wiring diagram inside the front face plate of
the control box and adjacent to terminal block for final connection instructions. 6. Complete wire connections at main service panel GFCI breaker. 7. Do not turn power on until instructed to do so in the "SPA STARTUP" section. NOTE: Several bonding lugs are provided on the control box and other components located inside the equipment compartment of the spa. Connect a No.8 AWG (8.4mm) solid copper conductor to these lugs and any metal object within 5 feet (1.5m) of the spa.

7
63$�67$57�83
SPA LOCATION
In preparation for installing your new Artesian spa, you should ensure that your chosen location meets some minimum guidelines. 1. Place your spa on a surface large enough for the bottom of the spa to rest, so that the entire bottom of the spa is
supported. 2. The spa should be located on a flat, level, and hard surface, such as a deck or patio. Do not place your spa directly
on the ground. 3. To avoid potential water damage to your spa’s cabinet, your spa should be placed on a site where it will not be in the
way of lawn sprinkler heads or dripping water. FILLING THE SPA WITH WATER CAUTION: Do not fill your spa with hot water straight out of your water heater or tap. This water may be as hot as 180 degrees F and will damage the surface of the spa and void your warranty.
1. Insert your garden hose into the spa. 2. Fill the spa with water until the level is at the middle of the skimmer opening. WATER PREPARATION NOTE: Before putting your new spa into operation, understand that preparing your new water is an important part of maintenance. Failure to properly prepare your water can result in substantially decreasing the life of the components and may void your warranty in severe cases. Your spa dealer should have a startup and maintenance kit available for you when you receive your spa. Your kit may contain the following: 1. PH (alkalinity) test kit
2. Bromine or Chlorine test kit
3. Metal Sequestrant (this is used after filling spa with new water to remove metal deposits found in most water supply)
4. Sodium Bicarbonate (raises the PH of your spa water)
5. Sodium Bisulfate (lowers the PH of your spa water)
6. Bromine or Chlorine tablets or granules (these are used to sanitize your spa water)
7. Enzyme type mineral inhibitor (keeps your spa water clean and clear)
WATER PREPARATION PROCEDURE NOTE: Before adding chemicals to your spa, please refer to the water capacity chart on Page 5 to determine the amount of water that your spa holds. 1. Add the Metal Sequestrant to the water. Follow the directions provided with your kit and refer to the water capacity
chart shown in this manual.
2. Test the PH balance of the spa water using the PH test kit provided with your maintenance kit.
3. Adjust the PH balance of the water to between 7.4 and 7.8. Add either the Sodium Bicarbonate or the Sodium Bisulfate for adjustment.
4. Test the Bromine or Chlorine level of the water using the test kit provided with your maintenance kit.
5. Adjust the Bromine or Chlorine level of the water to between 2.0 and 3.0 ppm.
6. Replace the filters by reversing the steps listed above.
7. Turn the power on at the electrical service panel.
NOTE: Clean the spa filter after 2 hours of circulation. This will remove any metal deposited on the filters from the Metal Sequestrant. Clean your filters by removing the filter lids. After you have removed the lids, remove the filter

8
cartridges from the canisters by turning each cartridge counterclockwise until free from its thread. Clean the cartridges by simply spraying them with your garden hose until the cartridges appear to be white. This should also be done approximately once every month depending on the usage of your spa. NOTE: Filters can also be cleaned in a cartridge cleaning solution or your automatic dishwasher. These are extremely hard on your cartridge and should only be used when your cartridge no longer comes clean with the procedure explained in step 6. Ask you Artesian dealer for more tips on extending the life of your filter cartridge. When your cartridge no longer comes clean, it's time to replace it. Your dealer should have a complete line of replacement filter cartridges for your convenience. TEST THE GFCI BREAKER
NOTE: The electrical service panel for your spa should be equipped with a GFCI breaker. To avoid the risk of electrical shock, perform the following safety test before each use of your spa: 1. Make sure the power is turned on at the electrical service panel. 2. Turn on the GFCI breaker. If the breaker stays on, it is functioning properly.
DANGER: RISK OF ELECTRICAL SHOCK If the GFCI breaker fails to operate as described, there is a possibility of an electric shock if the spa is used. Shut off the power at the main electrical service panel until the source of the problem has been identified and corrected by a licensed electrician or qualified spa technician. NOTE: When power is turned on, your spa is automatically programmed to start circulating water through the circulation pump. Each pump and/or blower will come on consecutively for approximately 1 minute to automatically purge the system. Adjust your temperature by pressing the up button on your touchpad until the desired temperature is displayed. This setting will allow your spa to heat to the set temperature. CAUTION: If water is not noticeably coming from your spa jets during the automatic purge, turn on the high speed pump (refer to the section titled "Gold Class Digital Control System"). If water is still not coming from the jets, the pump needs to be manually primed, following the steps below. PRIMING THE PUMP 1. Turn off power at electrical service panel. 2. Locate and loosen one of the pump compression fittings on each pump by turning it counterclockwise one half of one turn. Refer to the diagram located in the section titled "SPA CONFIGURATIONS" for location and identification. 3. Allow air to escape from fittings. When a steady stream of water flows from the compression fitting, close it by turning it clockwise until tight. 4. Turn on power at electrical service panel. 5. Check once more to make sure that water is flowing from the jets during auto purge. If so, continue. If no water is coming from your spa jets, please call your Artesian dealer for further assistance. CAUTION: Running your spa without water flow will damage your pump(s) and void your warranty. NOTE: If the water coming from the jets is surging or pulsating, re-check the water level. If the water level is lower than half way up the skimmer opening, add water. If the water level is correct, check to make sure that the skimmer door is not stuck in the closed position. If the door is operating properly and the jets are still surging or pulsating, please call your spa dealer for assistance at this point.

9
*2/'�&/$66�',*,7$/�&21752/�6<67(0� The Artesian Gold Class touchpad gives you complete control over the functions of your spa. The following section contains detailed descriptions of each of the various spa features and control buttons. Please Note: Depending on which spa you selected, you may or may not have all of the functions described below.
+RZ�7R��
6WDUW�3XPS���Press the Pump 1 key to turn the Pump on. Press again to turn the Pump off. A built-in timer will shut the
Pump off 20 minutes after it has been started, unless you turn it off manually first.
The Pump 1 On icon will appear on the display when Pump 1 is running.
6WDUW�3XPS���The Pump 2 key will turn Pump 2 on and off. A built-in timer will shut Pump 2 off 20 minutes after it has been started, unless you turn it off manually first.
The Pump 2 On icon will appear on the display when Pump 2 is running.
6WDUW�WKH�$LU�The Air key will turn the Turbo-Aromatherapy on and off. A built-in timer will shut the Air off 20 minutes after it has been started, unless you turn it off manually first.
The Air On icon will appear on the display when the Turbo-Aromatherapy is running.
8VH�WKH�/LJKW Press on the Light key to turn the light on at its high intensity. A second press will change the light intensity to medium. A third press will change the light intensity to low, and a fourth press will turn the light off. If not turned off, the light will automatically shut off after two hours.
The Light On icon will appear when the light is on at its high intensity. The icon will flash when the light is on at its medium or low intensity.
10
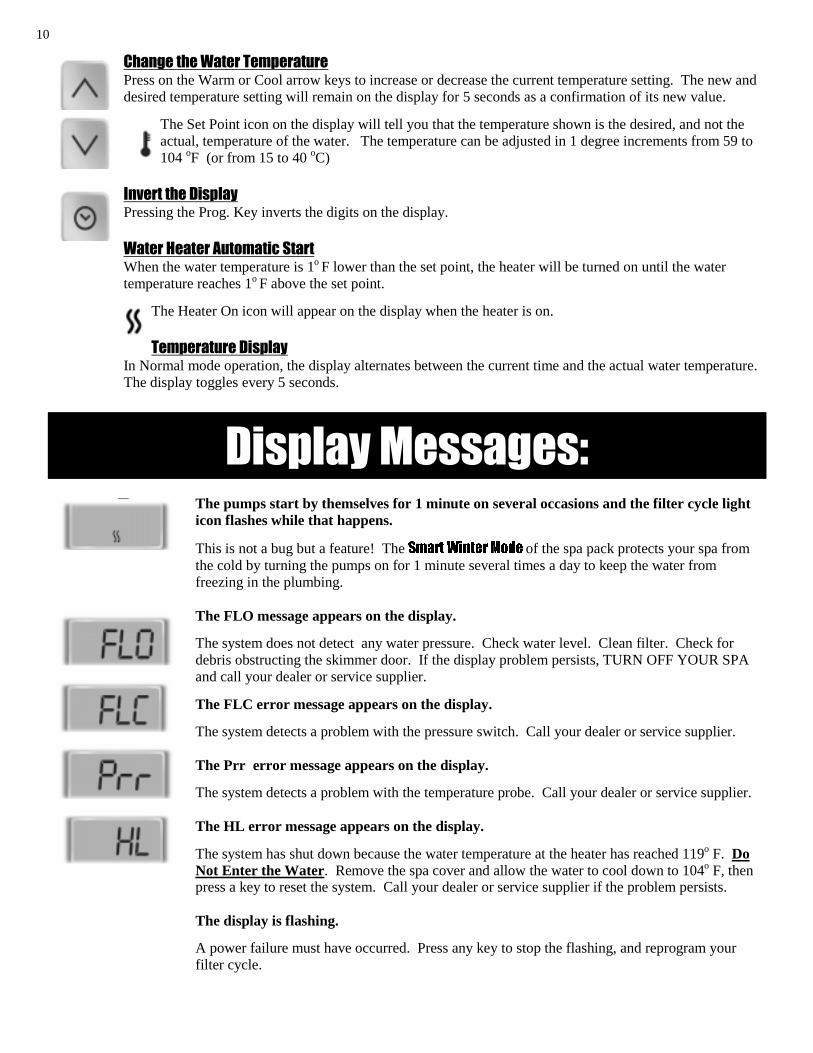
&KDQJH�WKH�:DWHU�7HPSHUDWXUH Press on the Warm or Cool arrow keys to increase or decrease the current temperature setting. The new and desired temperature setting will remain on the display for 5 seconds as a confirmation of its new value.
The Set Point icon on the display will tell you that the temperature shown is the desired, and not the actual, temperature of the water. The temperature can be adjusted in 1 degree increments from 59 to 104 oF (or from 15 to 40 oC)
,QYHUW�WKH�'LVSOD\�Pressing the Prog. Key inverts the digits on the display. :DWHU�+HDWHU�$XWRPDWLF�6WDUW�When the water temperature is 1o F lower than the set point, the heater will be turned on until the water temperature reaches 1o F above the set point.
The Heater On icon will appear on the display when the heater is on. 7HPSHUDWXUH�'LVSOD\
In Normal mode operation, the display alternates between the current time and the actual water temperature. The display toggles every 5 seconds.
'LVSOD\�0HVVDJHV��The pumps start by themselves for 1 minute on several occasions and the filter cycle light icon flashes while that happens.
This is not a bug but a feature! The 6PDUW:LQWHU0RGH of the spa pack protects your spa from the cold by turning the pumps on for 1 minute several times a day to keep the water from freezing in the plumbing. The FLO message appears on the display.
The system does not detect any water pressure. Check water level. Clean filter. Check for debris obstructing the skimmer door. If the display problem persists, TURN OFF YOUR SPA and call your dealer or service supplier.
The FLC error message appears on the display.
The system detects a problem with the pressure switch. Call your dealer or service supplier. The Prr error message appears on the display.
The system detects a problem with the temperature probe. Call your dealer or service supplier. The HL error message appears on the display.
The system has shut down because the water temperature at the heater has reached 119o F. Do Not Enter the Water. Remove the spa cover and allow the water to cool down to 104o F, then press a key to reset the system. Call your dealer or service supplier if the problem persists. The display is flashing.
A power failure must have occurred. Press any key to stop the flashing, and reprogram your filter cycle.

11
(FRQRP\�0RGH��To Start the Economy Mode: Press on the Mode key to switch from Normal Mode to Economy Mode. To save energy, the Economy Mode set point will be at 20o F below the Normal Mode desired water temperature.
The Economy icon will appear on the display when the spa is in Economy Mode.
Economy Mode Start Time and Duration: There are three available operating modes: noEC: No Economy Mode EC1: Economy Mode always on EC2: Normal Mode on between 4 PM and 9 PM. Economy Mode on after 9 PM and before 4 PM To Select the Desired Economy Mode: 1. Press on the Mode key. 2. The display will show the current mode (noEC, EC1, or EC2). 3. Keep pressing the key until the desired mode is displayed. After 5 seconds, the new setting will be saved, and the system will return to the appropriate mode.
��6WHS�3URJUDPPLQJ�6HTXHQFH��
1st Step Time of day 2nd Step Purge cycle starting time
3rd Step Ozone cycle duration
4th Step Temperature units
5th Step Panel lock
6th Step Storage of settings in memory and return to normal mode
����7LPH�RI�'D\�The following procedure is used to set or modify the time of day.
1. Start the programming mode by pressing the Prog. Key for 2 seconds. 2. The display will show the current time of day. 3. Use the Warm or Cool arrow keys to adjust the current time.
Lock Icon
Mode Key
Filter Cycle Icon
Program Mode Icon
Economy Mode
Temperature Units
O
O
O
OOO
Warm & Cool Arrow Keys
O
O
Program Key
O
12
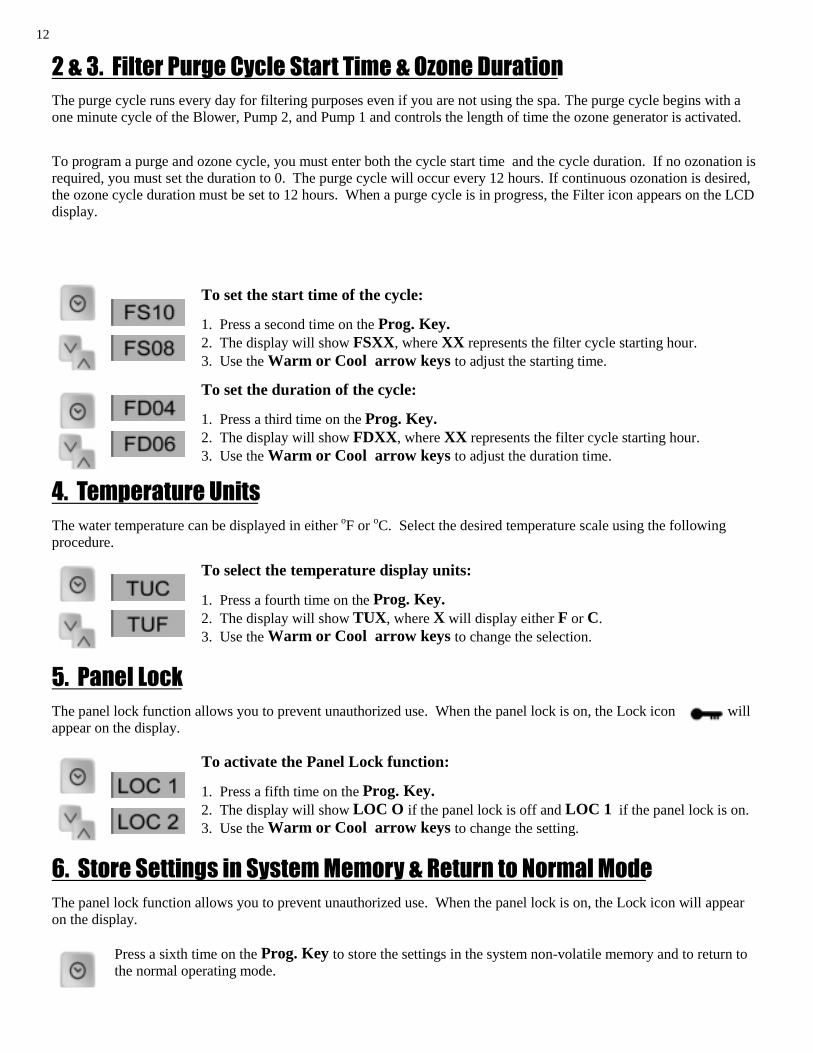
�������)LOWHU�3XUJH�&\FOH�6WDUW�7LPH��2]RQH�'XUDWLRQ
The purge cycle runs every day for filtering purposes even if you are not using the spa. The purge cycle begins with a one minute cycle of the Blower, Pump 2, and Pump 1 and controls the length of time the ozone generator is activated.
To program a purge and ozone cycle, you must enter both the cycle start time and the cycle duration. If no ozonation is required, you must set the duration to 0. The purge cycle will occur every 12 hours. If continuous ozonation is desired, the ozone cycle duration must be set to 12 hours. When a purge cycle is in progress, the Filter icon appears on the LCD display.
To set the start time of the cycle:
1. Press a second time on the Prog. Key. 2. The display will show FSXX, where XX represents the filter cycle starting hour. 3. Use the Warm or Cool arrow keys to adjust the starting time.
To set the duration of the cycle:
1. Press a third time on the Prog. Key. 2. The display will show FDXX , where XX represents the filter cycle starting hour. 3. Use the Warm or Cool arrow keys to adjust the duration time.
����7HPSHUDWXUH�8QLWV�
The water temperature can be displayed in either oF or oC. Select the desired temperature scale using the following procedure.
To select the temperature display units:
1. Press a fourth time on the Prog. Key. 2. The display will show TUX , where X will display either F or C. 3. Use the Warm or Cool arrow keys to change the selection.
����3DQHO�/RFN�
The panel lock function allows you to prevent unauthorized use. When the panel lock is on, the Lock icon will appear on the display.
To activate the Panel Lock function:
1. Press a fifth time on the Prog. Key. 2. The display will show LOC O if the panel lock is off and LOC 1 if the panel lock is on. 3. Use the Warm or Cool arrow keys to change the setting.
����6WRUH�6HWWLQJV�LQ�6\VWHP�0HPRU\��5HWXUQ�WR�1RUPDO�0RGH�
The panel lock function allows you to prevent unauthorized use. When the panel lock is on, the Lock icon will appear on the display.
Press a sixth time on the Prog. Key to store the settings in the system non-volatile memory and to return to the normal operating mode.

13
3DQHO�8QORFN�
When the keypad has been locked in the programming mode, you must follow this procedure to unlock it.
1. Press the Prog. Key. The message LOC will appear on the display. 2. Press (in this order): • the Warm arrow key
• the Pump key #1
• the Light key
The lock icon will disappear from the display. The unit will then resume normal mode. If the unlock process takes more than 15 seconds, the unit will return to the normal mode, and the keypad will remain locked.
$XWRPDWLF�5HWXUQ�WR�1RUPDO�0RGH�
At any time during programming, if you do not touch the keypad for more than 10 seconds, the system will automatically go back to the normal mode. Any changes done to that point will be saved.
When the system is in programming mode, the only keys working are:
Prog. Key Warm Key Cool Key
3URJUDPPLQJ�6XPPDU\
FSXX Purge cycle starting time FDXX Ozone cycle duration TUX Temperature display units (C or F) LOC 0 Panel lock off LOC 1 Panel lock on
0$,17$,1,1*�<285�63$� WHY YOU NEED TO CHEMICALLY TREAT YOUR WATER Water from your tap is fine for showers, bathing, and drinking. However, in a contained re-circulating system such as in a spa, water must be treated with chemicals. The main purpose of chemical treatment is to keep the water sanitary and to maintain a specific balance. Proper balance insures that the water will not cause irritation to the users or harm the spa's components. Chemical treatment does have its limitations. When water evaporates, chemical residuals are left behind. As the levels of these residuals combine with residuals of other types, such as body oils and detergents, your water be-comes increasingly difficult to maintain. Because of this residual effect, at some point it becomes easier and more cost effective to drain, clean, and refill your spa with new water. We recommend that water be changed at least every six months. If your spa has a frequent and/or heavy bather load, it may be necessary to drain and fill your spa more often. Refer to the section titled "DRAINING YOUR SPA" for instructions.
14
OZONE GENERATORS An ozone generator is designed for the purpose of supplementing the chemicals used for water maintenance. It helps to kill water born bacteria and viruses. It also destroys matter which might discolor the spa's water. Unlike other types of chemical additives, the ozone generator will not affect the pH level of your spa's water and has little or no chemical odor. CAUTION: If you have an ozone generator installed, never use a chemical type mineral inhibitor in your spa. There are polymers in most chemical inhibitors that will react with the ozone generator and cloud your water. Always use a natural enzyme product to keep your spa clear. NOTE: If your spa is not equipped with an ozone generator, call your Artesian dealer to ask about the benefits of ozone. Your spa, even if not equipped with ozone, is ozone ready. This means no complicated plumbing or electrical changes would be needed. The ozone generator can simply be purchased off the shelf from your spa dealer. DRAINING YOUR SPA Your spa needs to be drained, cleaned, waxed, and refilled about every six months. More frequent water changes may be necessary if bather load is heavy. A hose bib has been provided below the left side of your front access panel. NOTE: It is not recommended to drain your spa completely during freezing conditions. See the section titled "WINTERIZING YOUR SPA" for instructions on how to completely drain your spa if freezing conditions exist. 1. Turn off the power to your spa. 2. Attach your garden hose to the hose bib provided. 3. Place the other end of your garden hose in an area that will accept the capacity of your spa. Draining should take
about 3 to 4 hours. CAUTION: The chemical content and temperature of the water may cause damage to certain vegetation. We do not recommend that you drain your spa onto plants or lawns. If you choose to do this, please remove your spa cover and allow spa to cool for a minimum of 24 hours with your heat adjusted to the minimum setting before draining.
4. Open the hose bib by turning the valve knob counterclockwise to the full stop position. 5. Check the garden hose end to see if water is flowing. If water is not flowing, check the hose for kinks. Also check to
see if valve knob is in the full open position. 6. When spa is empty, clean and wax as instructed in the section titled "CLEANING AND WAXING YOUR SPA." 7. Re-start your spa by following the instructions provided in the section titled "SPA START-UP." WAXING AND CLEANING YOUR SPA SHELL While your spa is empty, clean and wax it thoroughly with a cleaner/wax to keep your spa shell looking like new. Your Artesian dealer can recommend a product for you. If there are small scratches in your shell, use an automotive polishing compound to rub out the scratches. If your spa has more serious scratches, consult your dealer for assistance. WINTERIZING YOUR SPA There may be times when you choose to deactivate your spa for an extended length of time. The following are directions to safely and completely drain your spa. CAUTION: We recommend that you do not drain your spa completely if freezing conditions exist. If you choose to do so, please contact you Artesian dealer. He can assist you in safely winterizing your spa. Improper winterization can cause severe damage to your spa. Freeze damage is not covered by your warranty. 1. Drain your spa. Refer to the section titled "DRAINING YOUR SPA." 2. Make sure all water is out of your spa. Use a small plastic bucket and sponges to insure that no water is left in the
spa. 3. Turn the power back on at the main electrical service. 4. If your spa is equipped with a blower, turn the blower on by pressing the blower button on the topside control.
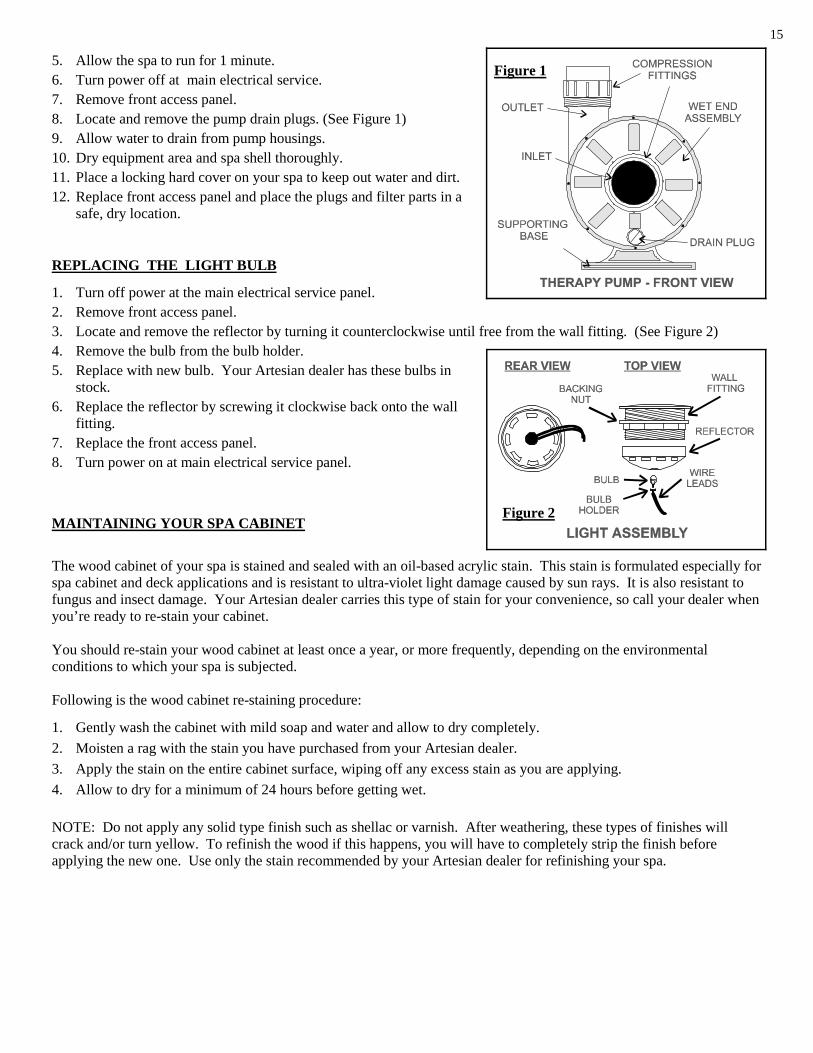
15
5. Allow the spa to run for 1 minute. 6. Turn power off at main electrical service. 7. Remove front access panel. 8. Locate and remove the pump drain plugs. (See Figure 1) 9. Allow water to drain from pump housings. 10. Dry equipment area and spa shell thoroughly. 11. Place a locking hard cover on your spa to keep out water and dirt. 12. Replace front access panel and place the plugs and filter parts in a
safe, dry location.
REPLACING THE LIGHT BULB 1. Turn off power at the main electrical service panel. 2. Remove front access panel. 3. Locate and remove the reflector by turning it counterclockwise until free from the wall fitting. (See Figure 2) 4. Remove the bulb from the bulb holder. 5. Replace with new bulb. Your Artesian dealer has these bulbs in
stock. 6. Replace the reflector by screwing it clockwise back onto the wall
fitting. 7. Replace the front access panel. 8. Turn power on at main electrical service panel.
MAINTAINING YOUR SPA CABINET
The wood cabinet of your spa is stained and sealed with an oil-based acrylic stain. This stain is formulated especially for spa cabinet and deck applications and is resistant to ultra-violet light damage caused by sun rays. It is also resistant to fungus and insect damage. Your Artesian dealer carries this type of stain for your convenience, so call your dealer when you’re ready to re-stain your cabinet. You should re-stain your wood cabinet at least once a year, or more frequently, depending on the environmental conditions to which your spa is subjected. Following is the wood cabinet re-staining procedure:
1. Gently wash the cabinet with mild soap and water and allow to dry completely.
2. Moisten a rag with the stain you have purchased from your Artesian dealer.
3. Apply the stain on the entire cabinet surface, wiping off any excess stain as you are applying.
4. Allow to dry for a minimum of 24 hours before getting wet.
NOTE: Do not apply any solid type finish such as shellac or varnish. After weathering, these types of finishes will crack and/or turn yellow. To refinish the wood if this happens, you will have to completely strip the finish before applying the new one. Use only the stain recommended by your Artesian dealer for refinishing your spa.
Figure 2
Figure 1

16
ARTESIAN GOLD CLASS SPA LIMITED WARRANTY May Manufacturing, Inc., extends this warranty solely to the original owner of any Artesian Gold Class Spa made after February 1, 2001, and installed within the United States.
LIFETIME STRUCTURE May Manufacturing, Inc., warrants the spa against loss of water due to a defect in the spa shell to the original owner for the life of the spa shell. In the event of a defect in the material and/or workmanship, the spa shell will be repaired or replaced at the option of the manufacturer. When submitting a claim under this warranty, you must provide us with proof of purchase, such as a copy of the invoice from the retailer where the purchase was made. You must also send us two (2) photographs of the damaged or defective areas in question accompanied with a written explanation of the problem. This information must be sent to us at the following address for review and resolution: May Manufacturing, Inc., 13198 Mustang Street, Victorville, California 92394, Attention: Customer Service.
FIVE YEAR SURFACE May Manufacturing, Inc., warrants the interior surface of the spa against blistering, cracking, or delamination for five years from the original date of purchase. In the event of a defect in the spa surface within said period, the spa shell will be repaired or replaced at the option of the manufacturer. When submitting a claim under this warranty, you must provide us with proof of purchase, such as a copy of the invoice from the retailer where the purchase was made. You must also send us two (2) photographs of the damaged or defective areas in question accompanied with a written explanation of the problem. This information must be sent to us at the following address for review and resolution: May Manufacturing, Inc., 13198 Mustang Street, Victorville, California 92394, Attention: Customer Service.
FIVE YEAR COMPONENTS May Manufacturing, Inc., warrants the controls and mechanical equipment against defects in material and/or workmanship for five years from the original date of purchase, and the plumbing for five years from the same date. The filter cartridge, spa pillows, and light bulbs are not included in this warranty, but are warranted to be free from defects at the time of delivery. Also, the spa cover, ozone generator, stereo components, speakers and related parts, and fiberoptics are not included in this warranty but are covered under separate warranty from their original manufacturers. Ask your dealer for warranty details on these spa components. Warranty on any moving parts in hydrotherapy jets will be voided if the jets are allowed to be adversely affected by poor water chemistry.
TWO YEAR PERMAWOOD / ONE YEAR WOOD May Manufacturing, Inc., warrants its PermaWood cabinet for a period of two years from the original date of purchase and its wood cabinet for one year from original purchase date. Wood staining is excluded from coverage. Wood products require care and maintenance by the consumer. In the event of a defect, the damaged wood will be repaired or replaced at the option of the manufacturer. PERFORMANCE: In the event of any defect covered by this LIMITED Warranty, a May Manufacturing, Inc., authorized agent will correct such defect within the terms and conditions contained herein. There will be no charge for parts or labor to repair within the above terms. However, travel charges are not covered if you live outside a normal service area of the agent. If it is determined by May Manufacturing, Inc., that repair of the product is not feasible, a replacement spa equal to the value of the original purchase price will be provided. Costs for removal of the defective spa and delivery and installation of the replacement spa is the responsibility of the spa owner and will not under any circumstances be covered by May Manufacturing. LIMITATIONS: This warranty is void if this Artesian spa has been subjected to alteration, misuse or abuse or if any repairs have been attempted by anyone other than an authorized agent of May Manufacturing, Inc. Misuse or abuse is defined as: Use of the spa in a non-residential situation, water temperatures outside the range of 32 to 110 degrees, damage caused by clogged or dirty filter cartridges, damage to the spa from absence of a hard cover, damage to the components from improper pH, use of any type of acid, or from chemical imbalance. DISCLAIMER: May Manufacturing, Inc., or its agents shall not be liable for any injury, loss, cost or other damage, whether incidental or consequential, arising out of any defect covered by the LIMITED WARRANTY. The liability of May Manufacturing, Inc., under this LIMITED WARRANTY shall not exceed the original amount paid for the spa. LEGAL REMEDIES: This LIMITED WARRANTY gives you specific rights, and you may have other rights which vary from state to state.