Architectural Model Making Using a Laser Cutter
12
Architectural Model Making Using A Laser Cutter 7 Followers 4 Author: kickice82003
description
Dung cat laze
Transcript of Architectural Model Making Using a Laser Cutter
Architectural Model Making Using A Laser Cutter
7Followers
4
Author: kickice82003

i
Many things can be designed in three dimensions with the aid of 3D modeling software such as Google
Sketchup, a free 3D modeling program utilized by architecture students everywhere. With the aid of such
programs, architecture students can design detailed buildings in three dimensions at full scale.
Despite the ability of powerful rendering programs (such as V-Ray) which turn these virtual models into
realistically rendered images, it is often desirable to have a physical model to show prospective clients or
professors. Using software such as Autodesk AutoCAD, these models can be brought into the physical world
at any desired scale.
This instructable documents the creation of a physical model for a project I completed for architecture school.
The design was developed using traditional drawing media in the very early stages, further designed in
AutoCad, and fully realized in 3D using Sketchup. Once the design was completed, stylized renderings were
created using V-Ray, a Sketchup plugin to give some realism to the design. However, it was still a requirement
to build a physical model.
By measuring the dimensions of the virtual surfaces inside Sketchup and then drawing these surfaces in 2D
using AutoCAD, I was able to create a physical object/model from a virtual one using a laser cutter.
Each component of the model (each roof plane, exterior walls, ground plane, columns, beams, etc.) is cut out
and becomes like a “puzzle piece.” Each puzzle piece is then assembled and glued to form the final model.
This is technique used by many architects and architecture students to speed up the model making process.
Using a laser cutter, several hundred pieces of any shape can be cut at any scale in a matter of minutes.

I see this instructable as an introduction to how physical models can be made from 3D models that can benifit
newer architecture students who may be unfamilar with or new to laser cutting, as well as the curious
individual interested how us architecture types make models these days. The degree of precision that can be
achieved is really quite remarkable.
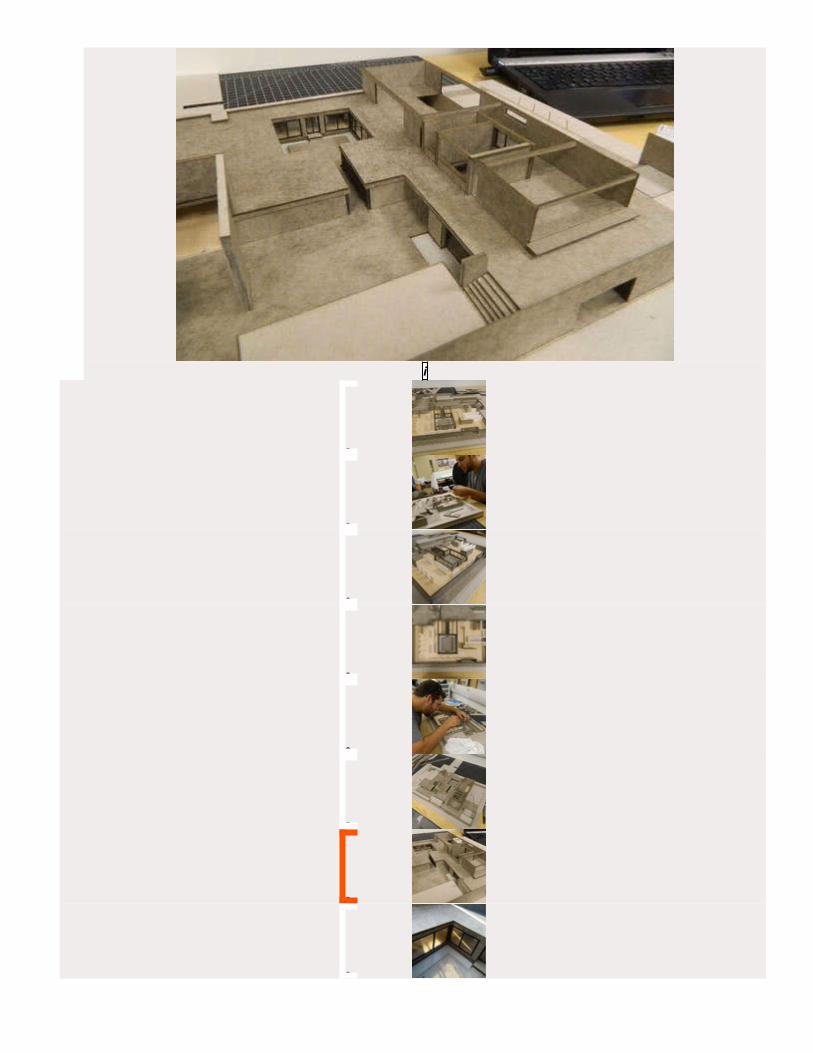
These images are of the Final Physical Model 3/32" scale. Dimensions are apprx. 28" Long x 18" wide
x 4" highStep 1
i
Note: This instructable assumes that an audience familiar with 3D Modeling using Google Sketchup and 2D
drawing using Autodesk AutoCAD.
It is not feasible to go into how this was actually modeled in 3D, as this is an entire series of instructables
focusing on the use of a single program. Many tutorials can be found online. Just type in Google Sketchup
Tutorials and you'll be on your way. It is a very easy program to learn.
This instructable simply documents the process of turning the completed 3D model into a set of 2D
drawings and the resulting physical model.
These images are of the 3D model inside of Sketchup, as well as some rendered images created using V-Ray
and Photoshop. As nice as these virtual images may be, I still need a model for people to look at and hold in

their hands.
I always model and draw at FULL SCALE. That is to say, when I model a wall that in reality would be 8' high if
were ever to be made in real life, I draw the wall at 8' in the program. Even if the model is going to be at 1/8"
scale, where 1/8" represents 1'.
This way, when I have the drawings at full scale, I can then print/cut the model at any scale I want by changing
the plot scale. Step 2 Measuring Model Surfaces
i
Once the 3D model is complete, 2D drawings need to be created of each surface in AutoCAD. Each
component of the model that will be seen by the eye needs to be measured at full scale.
Each roof plane, exterior wall, ground plane, columns, beams, etc. becomes like a “puzzle piece.” Each puzzle
piece is then assembled and glued to form the final model.
We need to make each puzzle piece. To do so, the edges of each surface are measured using the tape
measure tool or dimension tool in Sketchup.

These images show how I measured one of the roof planes. It has many sides/edges and so I thought it would
be a good example. It is necessary to find the exact lengths of each edge. This way, the physical model will
look exactly like the 3D model and all the pieces will match up.
Again, I am using one of the roof planes as an example and have colored the surface red for clarity.
Depending on the piece you are measuring, you can change to a specific view in the program. This is the top
view since we can see the whole component. The piece we are measuring is in RED, but the rest of the
model can be seen as well. In the final image of this set I hid the other model components for clarity.Using the dimension tool you can quickly determine the lengths of each piece.
Step 3 2D Drawing in AutoCAD
i
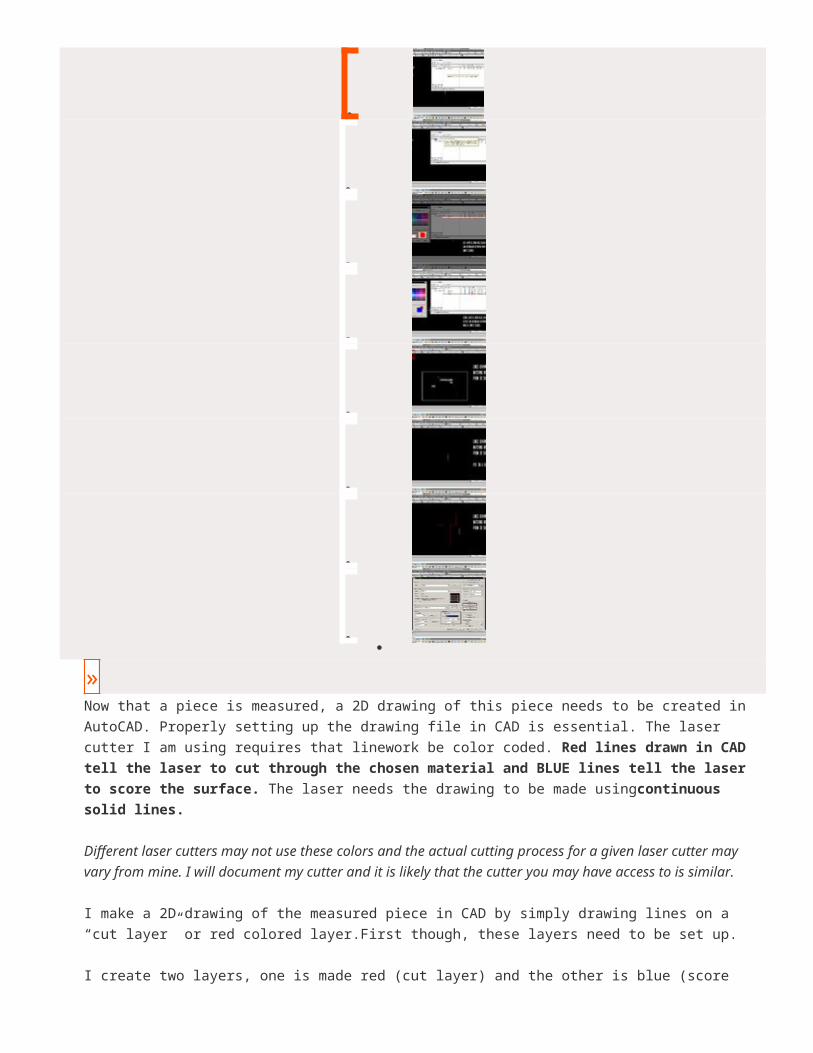
»Now that a piece is measured, a 2D drawing of this piece needs to be created in AutoCAD. Properly setting up
the drawing file in CAD is essential. The laser cutter I am using requires that linework be color coded. Red
lines drawn in CAD tell the laser to cut through the chosen material and BLUE lines tell the laser to
score the surface. The laser needs the drawing to be made usingcontinuous solid lines.
Different laser cutters may not use these colors and the actual cutting process for a given laser cutter may
vary from mine. I will document my cutter and it is likely that the cutter you may have access to is similar.
I make a 2D drawing of the measured piece in CAD by simply drawing lines on a “cut layer” or red colored
layer.First though, these layers need to be set up.
I create two layers, one is made red (cut layer) and the other is blue (score layer). The pictures are annotated
to show the steps once in the layer properties manager in CAD.
The roof plane that we measured needs to be drawn on the cut layer, since it will be cut out of my material. I
simply draw lines to match the roof piece from the 3D model.Once plotted to the laser cutter, the piece will be perfect at whatever scale I set the plotter (cutter) too. You can set the scale you want to cut at in the properties of the plotter as shown in the final image. Since the drawing was made at full scale, the plot scale can be made to whatever the user desires.
Note: it is important to turn of “plot with plot styles” and “plot object lineweights” or your cut will be wrong.
Step 4 Additional Model Pieces

i
Here you can see a screen shot of some of the other pieces that have been drawn in 2D, after I measured them in Sketchup.
The last image is of my “base”. This is a piece that I use as a template for where the walls, columns, etc. go. Basically, the floor plan of the design in drawn in CAD in blue so it scores lightly into my material. I then use the floor plan as a layout for where the pieces go. Since I do this, I do not have to measure where each wall goes in the physical model, since it is all placed using the computer. This saves so much time.
In the “base” you can see the entire site for the model. You can also see some interior walls, the exterior walls, the outline of the parking stripes in the parking lot (on the right side there) and also where the exterior stairs will go.
Step 5 Making The Physical Model
i
»These pictures pick up after the ground layers and exterior walls have been glued into place and the interior floor has been laid down. The white interior walls were not laser cut, but done by hand. The images progress from the first level to the second level of the building.
Using a small triangle to make sure pieces are aligned vertically helps ensure the walls will be straight and at 90 degrees. By

using super glue gel, which sets up quickly without running, one can quickly place several pieces a minute.
It takes some time to figure out where each piece goes if you don't cut them in some kind of order. However, if you get stuck you can look at your 3D model.
The last two images shows good the roof plane we measured.
Step 6 The Completed Physical Model
i
These images are of the final, complete physical model. The material used for the model is gray chipboard
to which I applied a single coat of refined Linseed Oil.

You'll notice a black metallic looking component not in the original 3D model. Those were cut by hand and are
actually painted/textured basswood. Acetate was used fro the windows which were hand cut, and painted
basswood was used for the mullions. Those too were cut by hand.Step 7 Section Model
i
In conclusion, I have included some pictures for your enjoyment of the section model I made for this design project. It too is a physical model made with the laser cutter. It is about 18" long x 8" wide x 6" high. The material is white PVC Foam, called Sintra Board, bonded together using Weld-On. I then spray the entire model with white satin paint.
This model doesn't have any pictures of its construction, but it was made in the same way. I took the same 3D model and made some section planes. I then measured the resulting pieces and drew them in 2D, just like the final completed model.
6 comments
Add Comment

Mar 11, 2012. 12:00 PMsitearm says:
@Kickice82003; tweeted Cheers! SiteReply
1
Mar 11, 2012. 10:56 AMKlappstuhl says:
This would also rock for making playfields for Warhammer-type games! :DReply
Mar 7, 2012. 10:15 AMNabil says:
Nice work, you can save a lot of time and trouble using the "Flight of ideas" plugin for sketchUp that exports faces to
vector drawings, theres a instructable of the process here http://www.instructables.com/id/SketchUp-Inkscape-and-
Ponoko-Laser-Cutting/Reply
4
Mar 7, 2012. 1:05 PM kickice82003 (author) says:
Thanks for the compliment!
I have a lot of other models which are much better, but this is the only one where I have pictures of the construction
process.
One reason for going piece by piece is beacuase I am accounting for the physical material's thickness. For
example: In some cases I do not need to measure the top of a beam or a face of a thick wall, since other faces
when glued together will make up the thickness.
I will defenitly check out that plugin! Thanks for the heads up.Reply
Mar 7, 2012. 1:47 PMNabil says:
Well, one of the nice things about the plugin is that u select the faces to export so u can still take decide if u need to
export it :)Reply
4
Mar 7, 2012. 2:24 PM kickice82003 (author) says:
Oh even better. Thanks!